The Cameo Camper Renovation: Progress
Hey y’all – with everything going on, Nick and I thought now would be the perfect time to check in with y’all on our progress so far, taking a look at where our renovation is today vs. when we started. If you’ve been following from the beginning you know we’ve done a lot in the last 23 months. If you haven’t, maybe missed something along the way or are just looking for a refresher, you can check out all of the work that’s gotten us to this point so far. (We also link to any tutorials specific to each area as we go below so you can shop while you read too.)
Alright, enough babbling – let’s take a look at some photos!

The exterior
The outside has seen some major improvements since day one. More than 128 holes and gashes were plugged to make the exterior watertight. We’ve patched, primed, painted and waterproofed with J-trim.
The paint job
Originally a mix of faded white and oxidized aluminum with a dingy gold stripe, the new navy and off-white paint is the most noticeable change on the outside. To paint, we removed the two Cameo logos from the exterior. We’ve digitally recreated them, we just need to get them made and applied to the outside!

The Cameo’s exterior – before

The Cameo’s exterior – before

The Cameo’s exterior – before

The Cameo’s exterior – currently

The Cameo’s exterior – currently

The Cameo’s exterior – currently
Details:
Paint Type: Sher-Cryl HPA High Performance Acrylic + DTM Acrylic Primer/Finish
Paint colors: Sherwin Williams In the Navy + Greek Villa
View the full exterior prep + paint tutorial here.
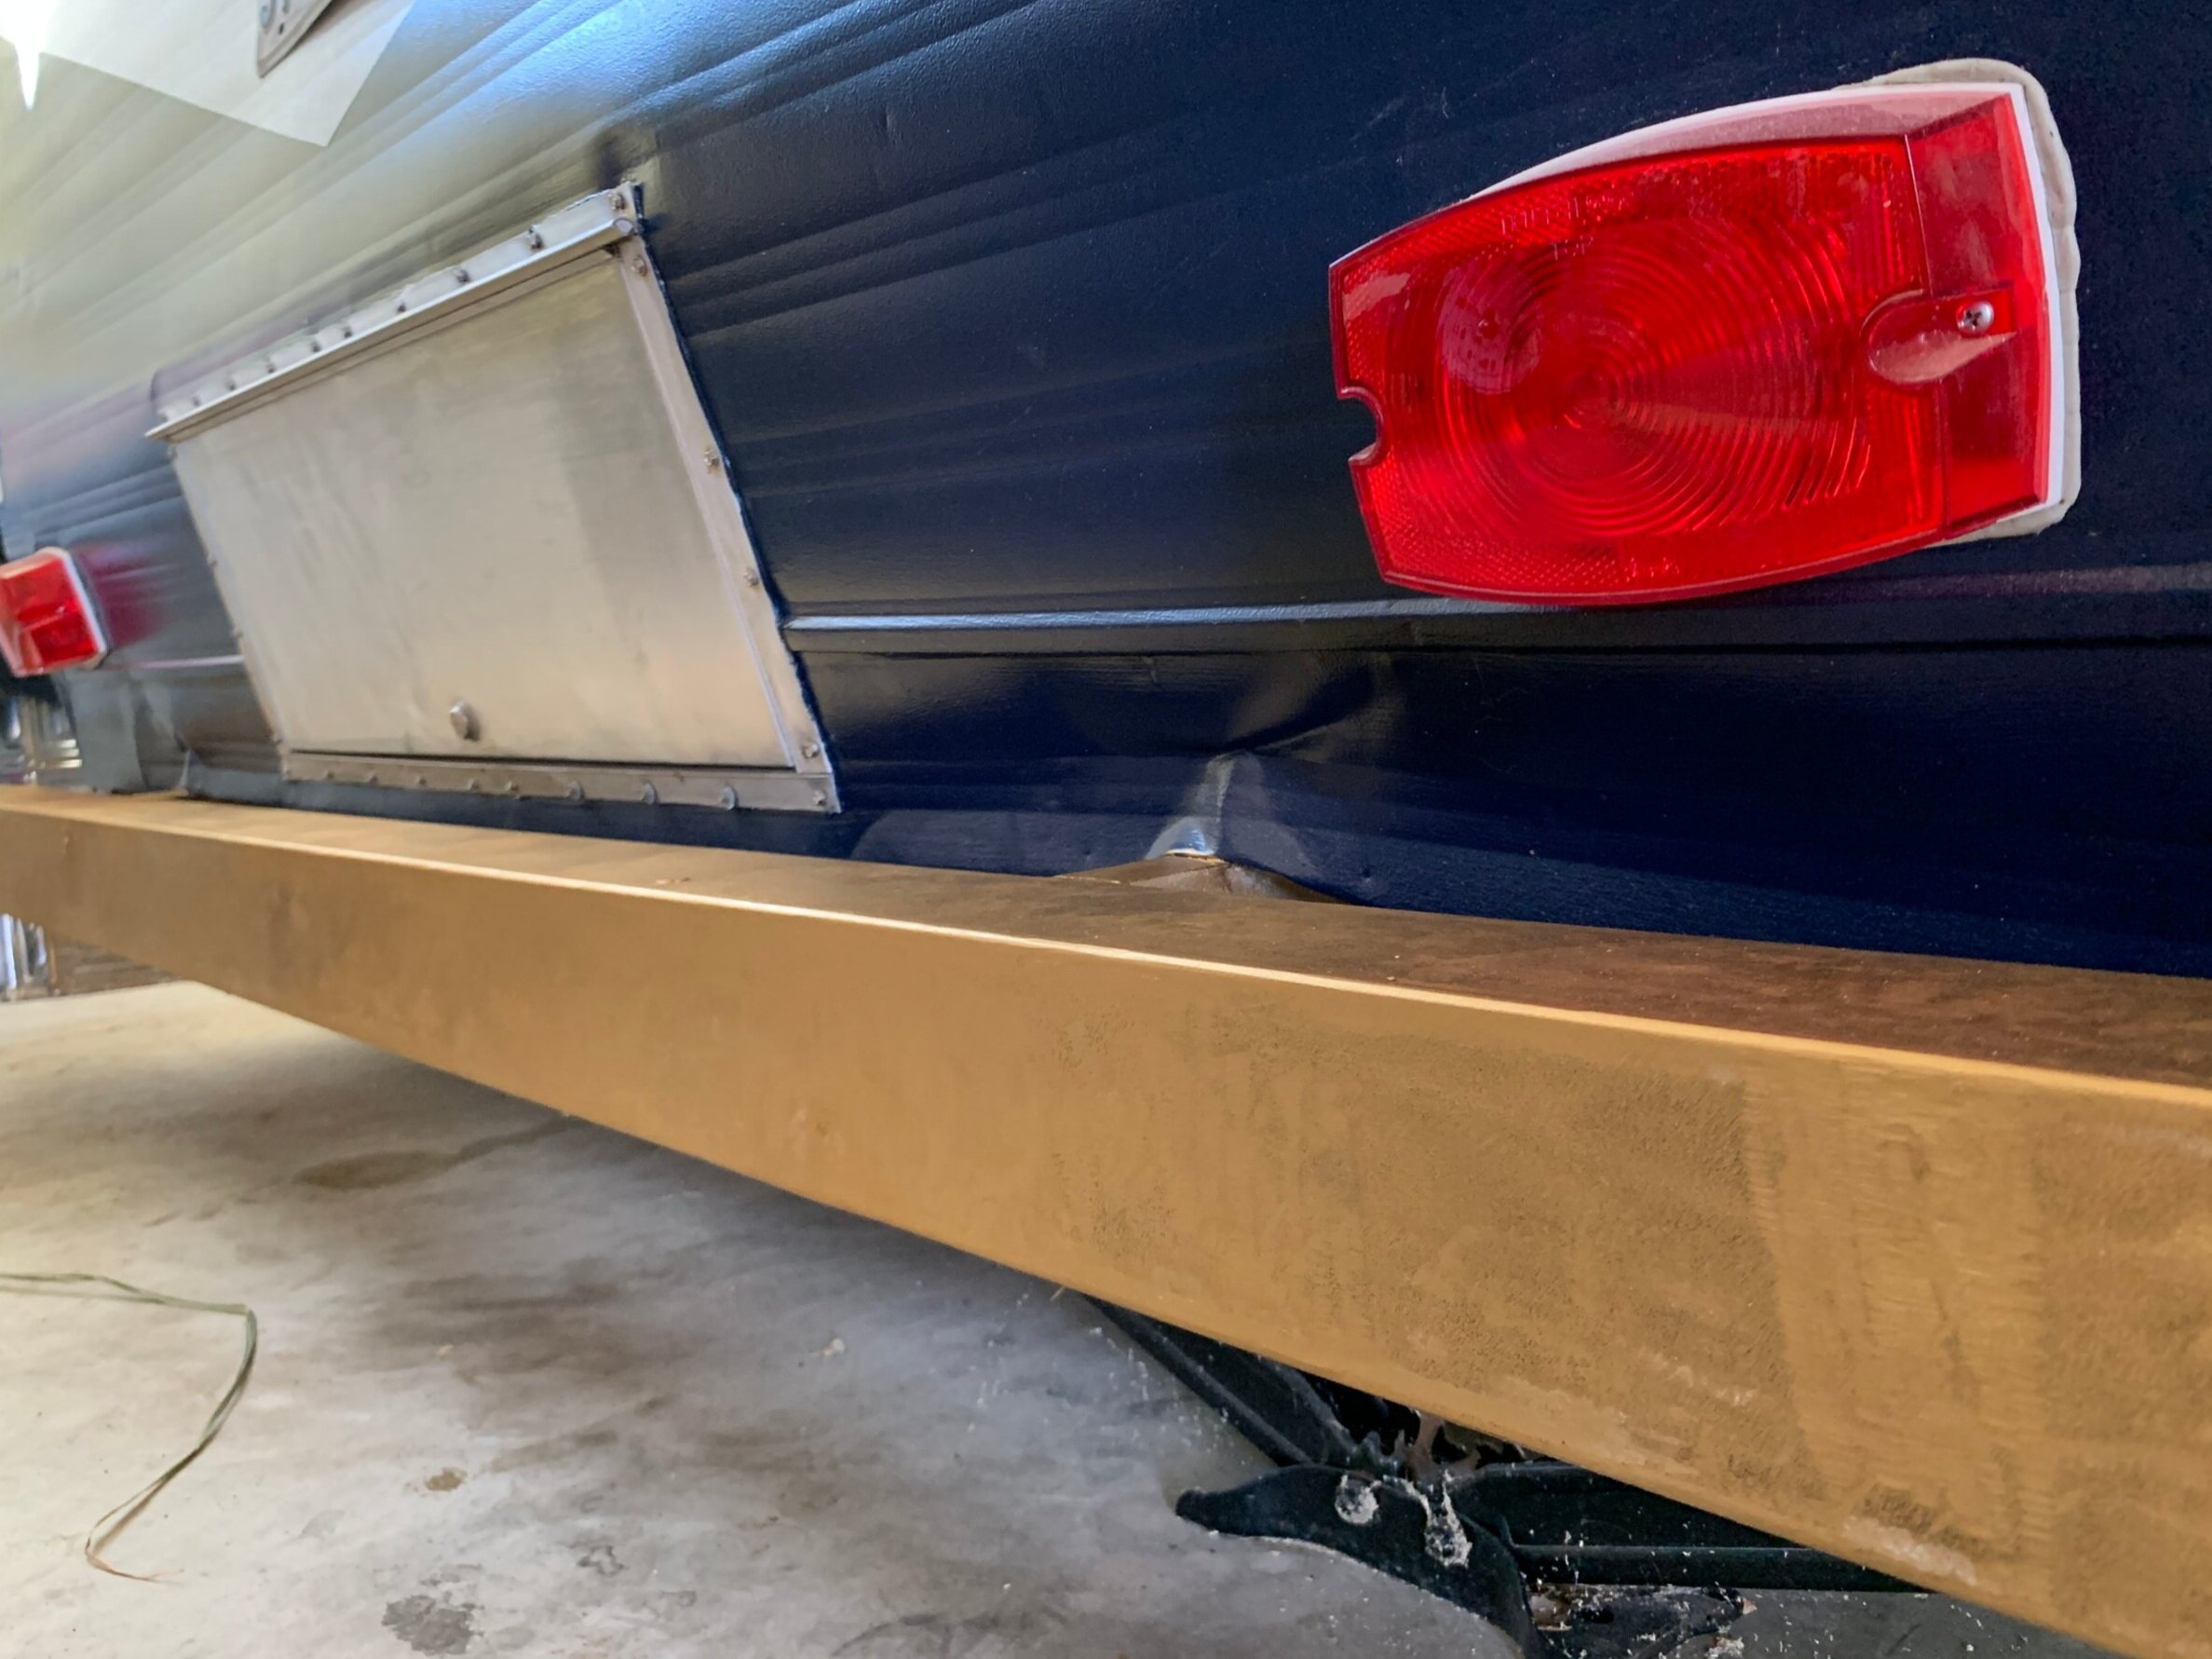
The bumper
The original bumper was mostly rusted bare metal with some white paint flakes. After Nick used a grinder with a metal wheel to clean off the rust, it took us about 20 minutes (and only $20) to give it a gold makeover.

The Cameo’s bumper – before
The Cameo’s bumper – after
Details:
View the full bumper makeover tutorial here.
Windows
In addition to being oxidized and dirty (not a big deal), originally the windows were sloppily covered in silicone, caulk and miscellaneous adhesives (we think for an attempt at waterproofing). We completely removed each window, ground off all of the old crumbling adhesive, cleaned and secured each window slat and shined up the aluminum before we added new wooden framing, butyl putty tape and stainless screws. After painting, we further waterproofed the window seams with clear paintable silicone and Captain Tolley’s Creeping Crack Cure for triple-protection.
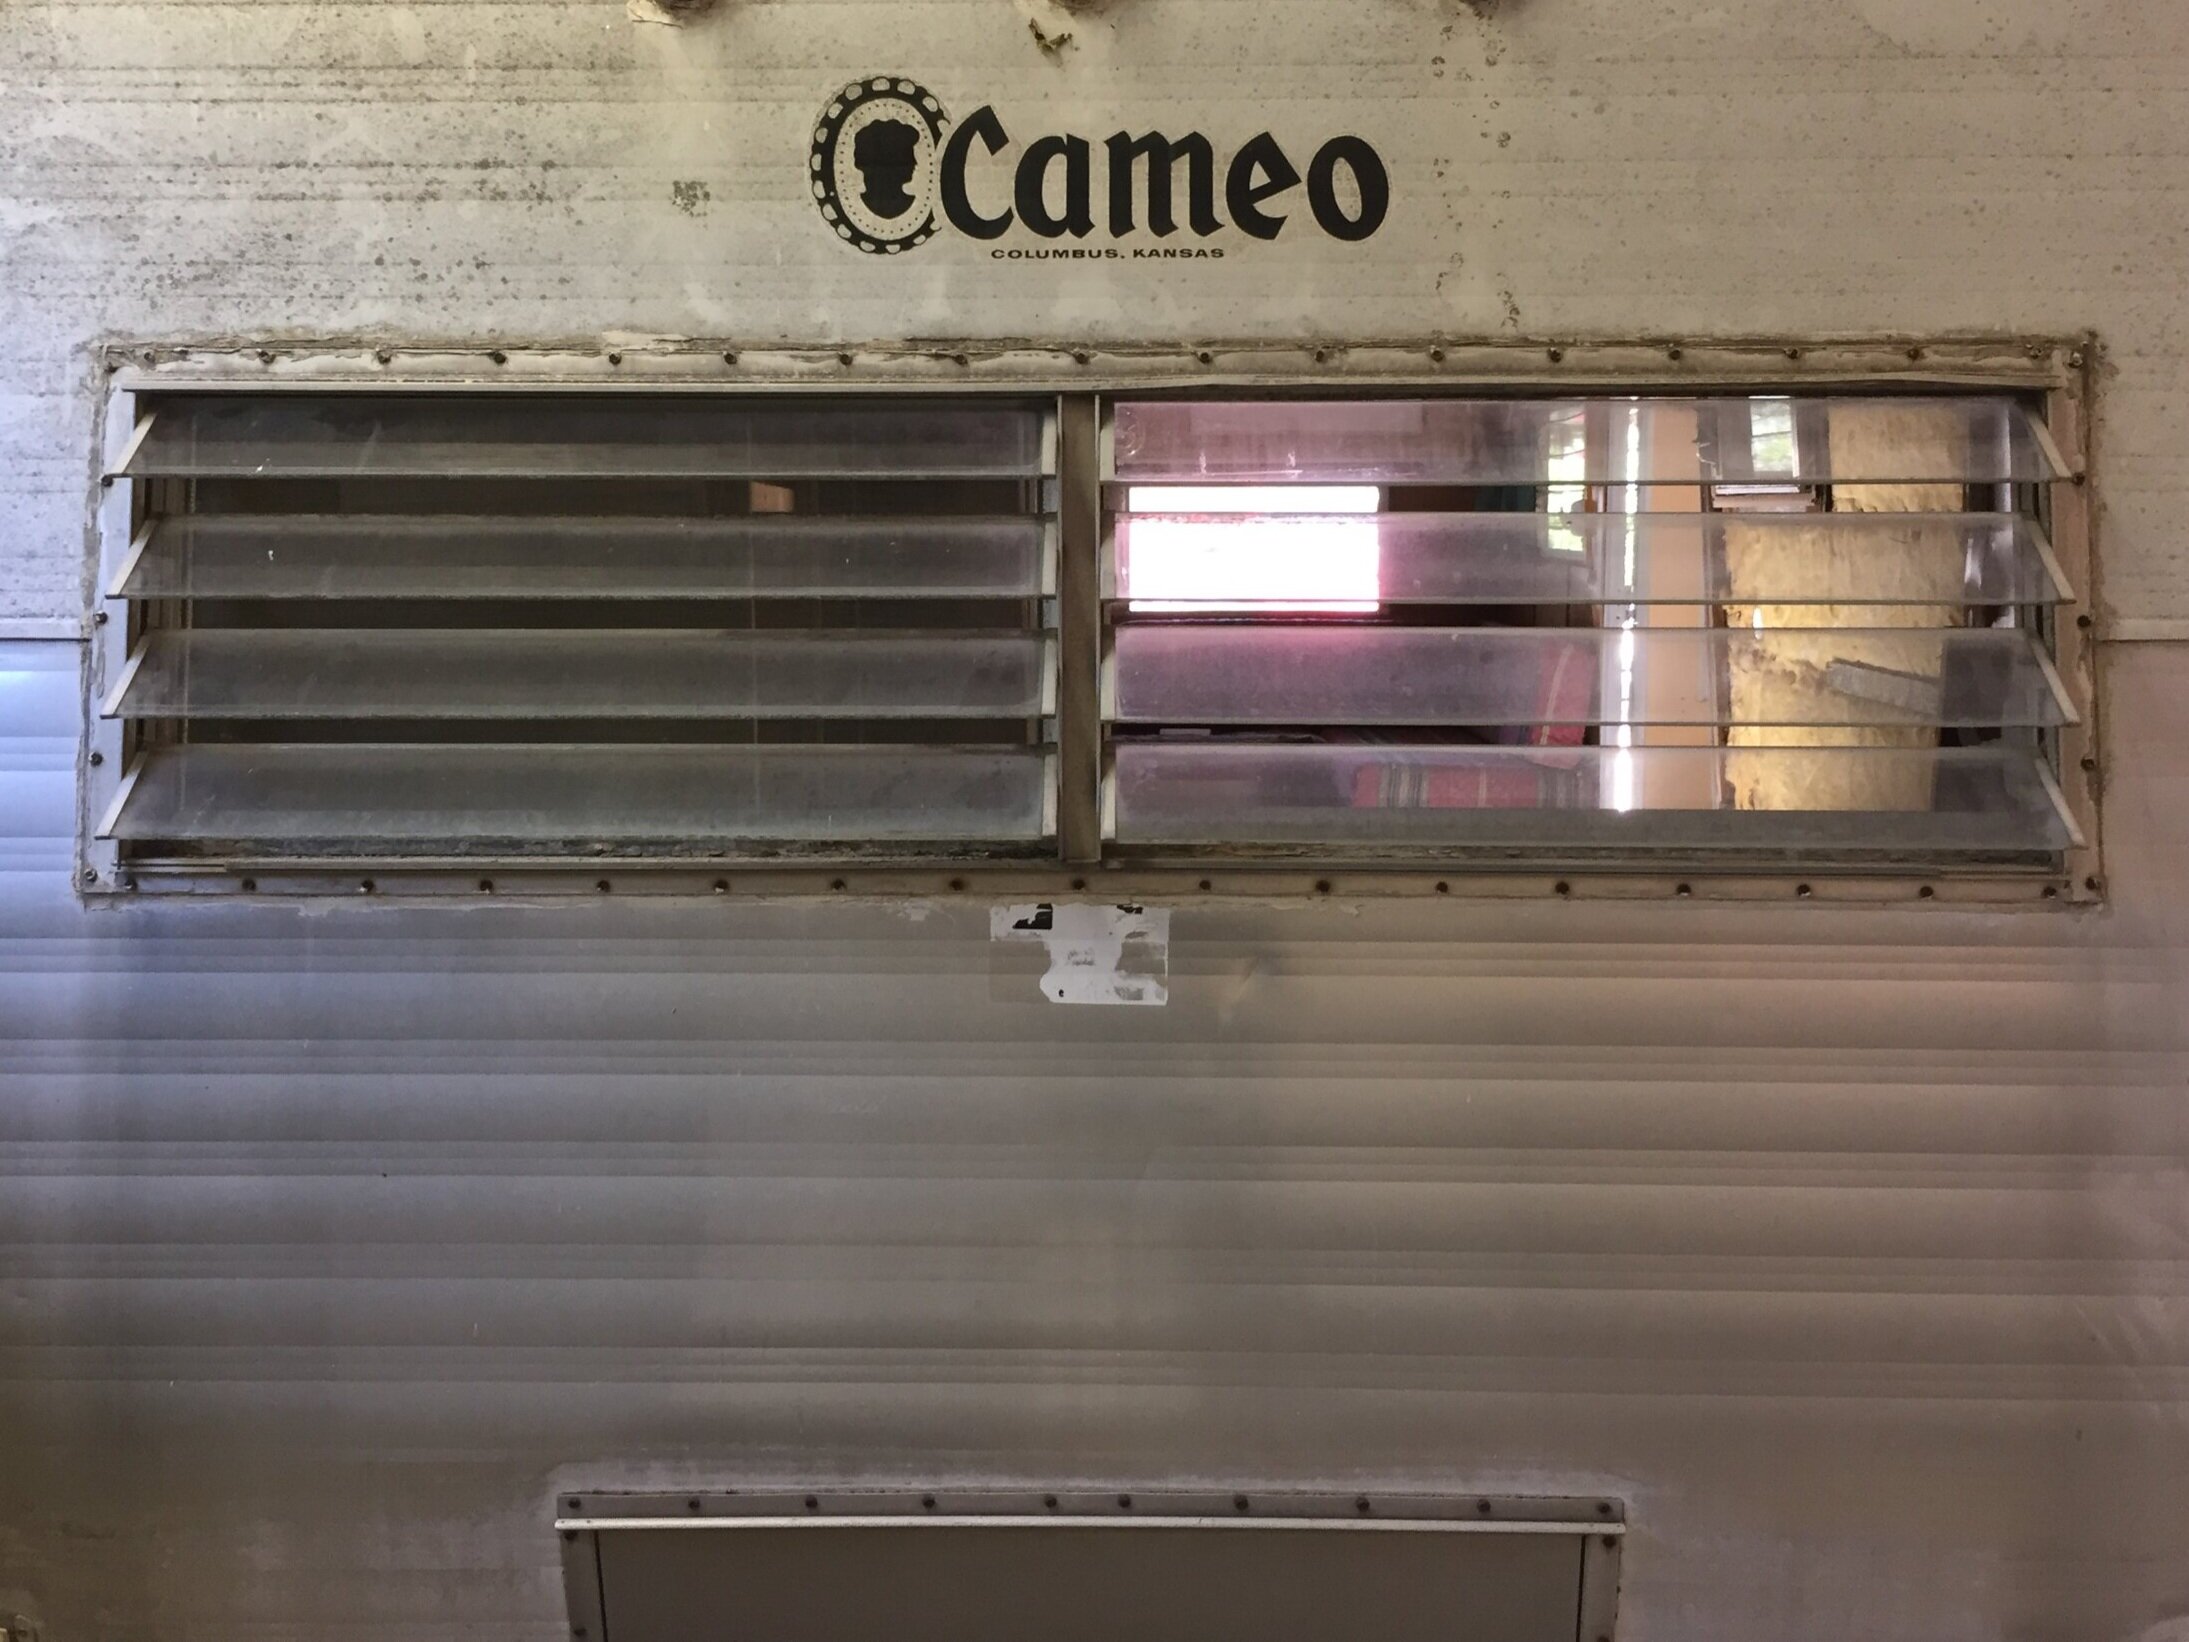
The Cameo’s rear window – before
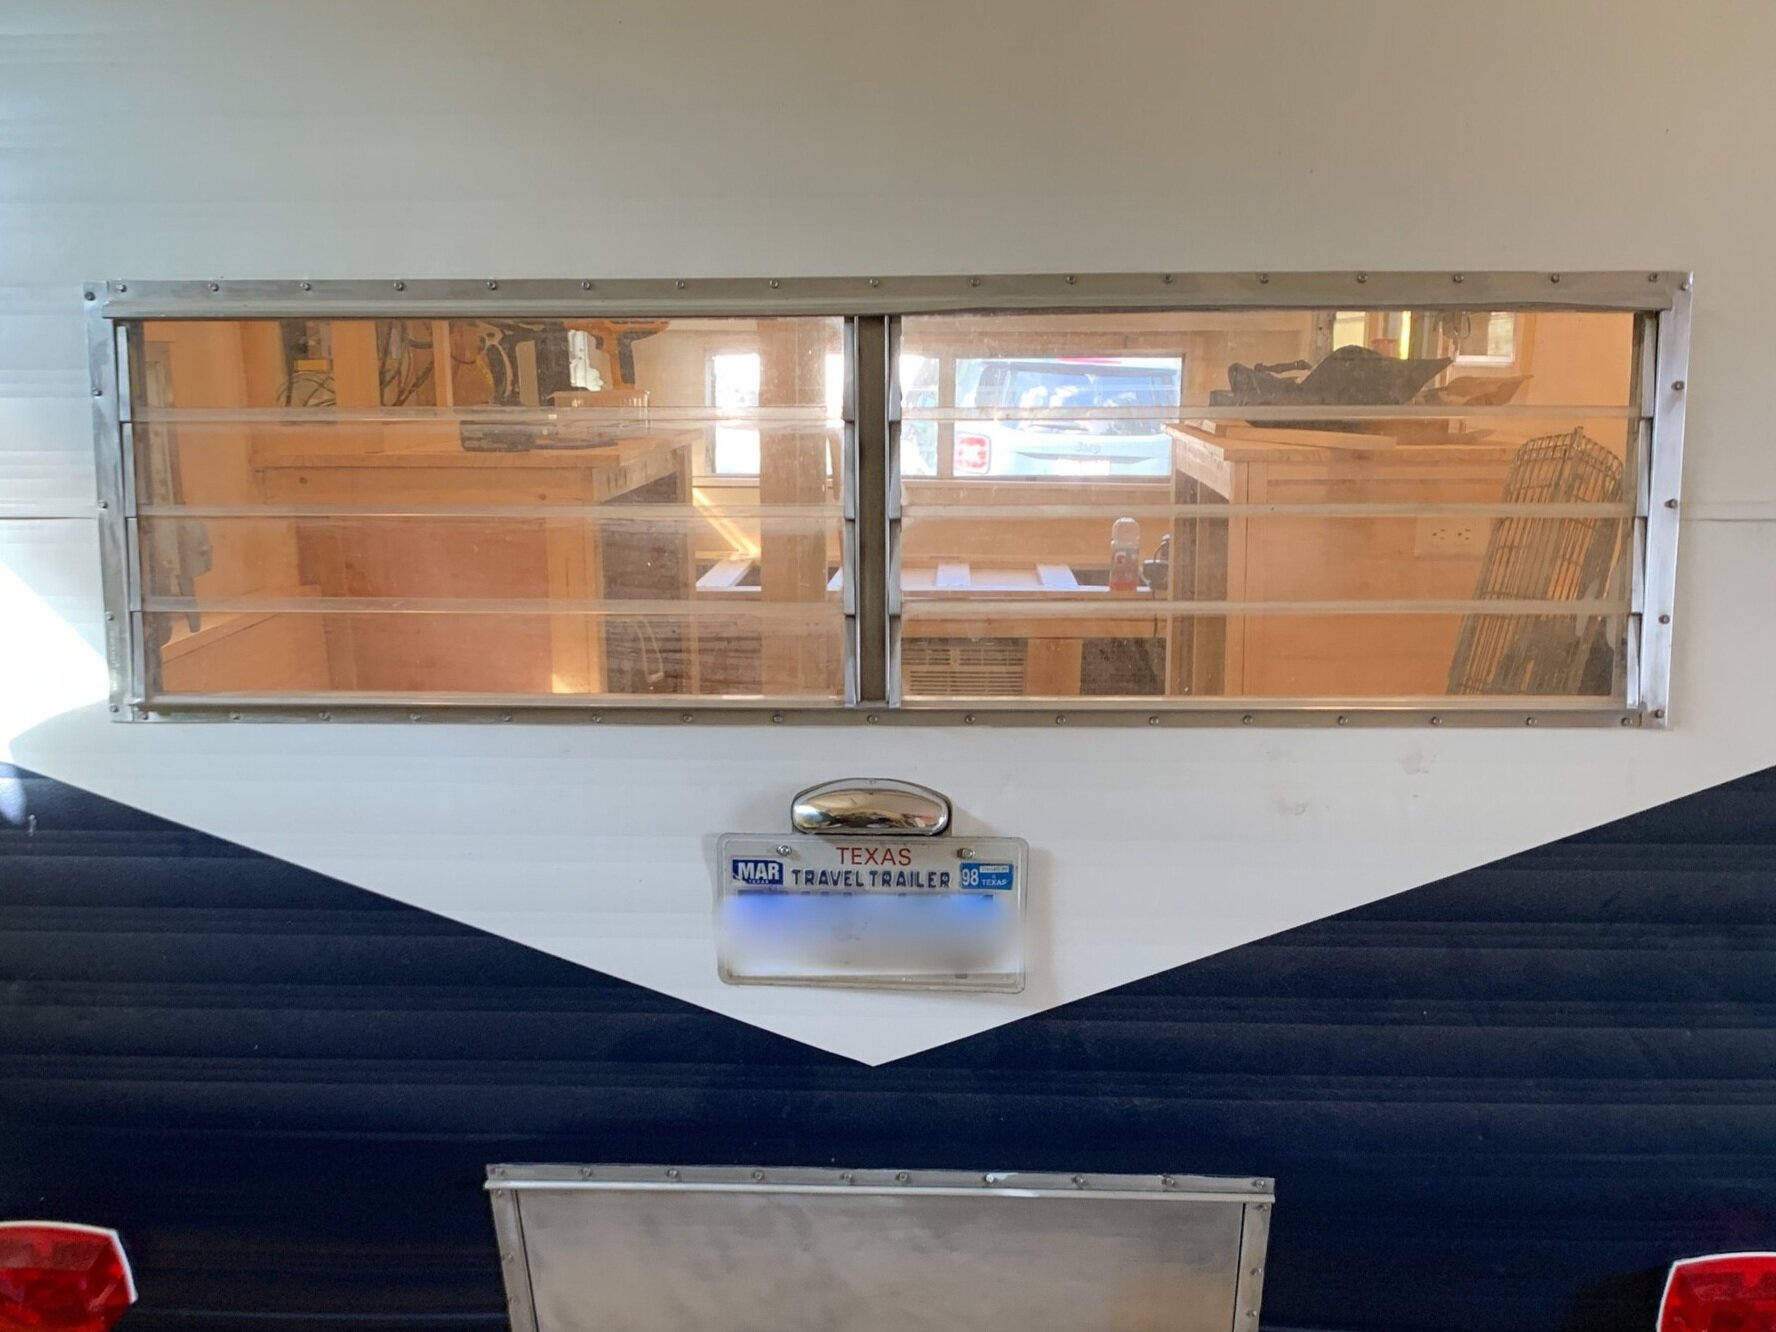
The Cameo’s rear window – currently
View the full window rehab tutorial here.
View the full waterproofing tutorial here.
Porch light
Originally our 1969 Cameo Travel Trailer didn’t have a porch light, but we thought it would be great to have while camping, so we added a vintage reproduction light that operates on a switch inside the camper.
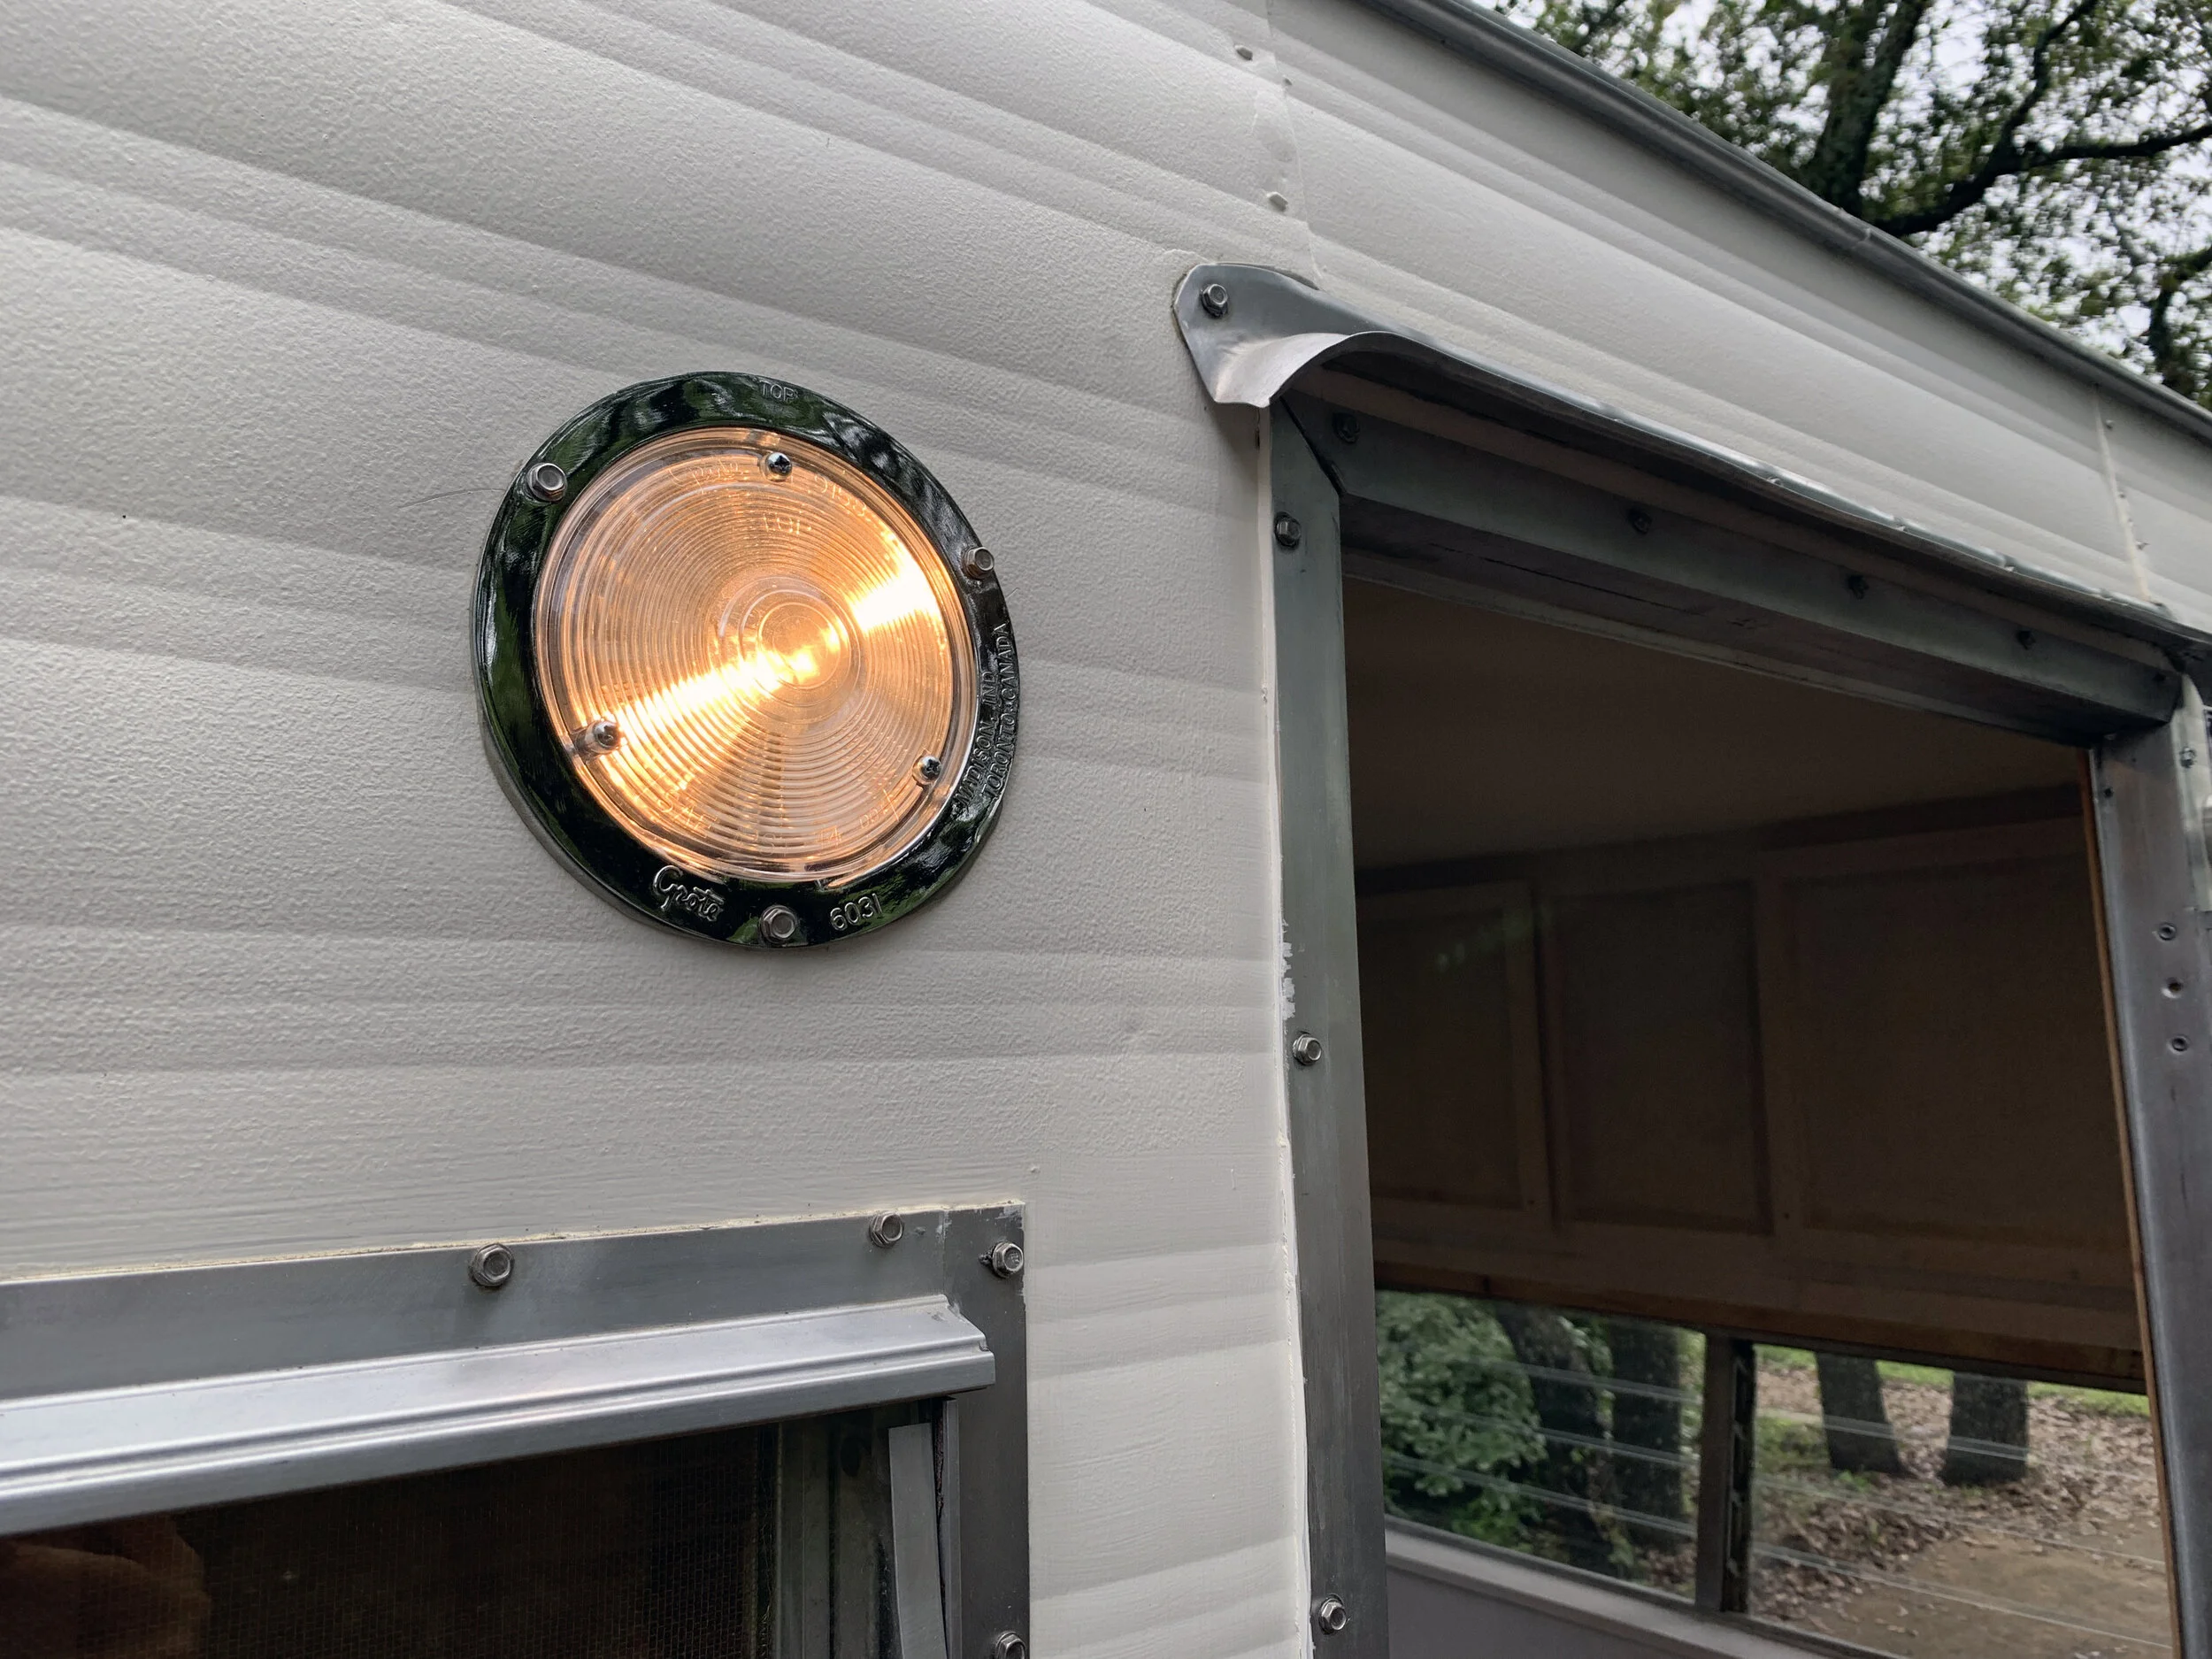
The Cameo’s porch light – currently
Running + tail lights
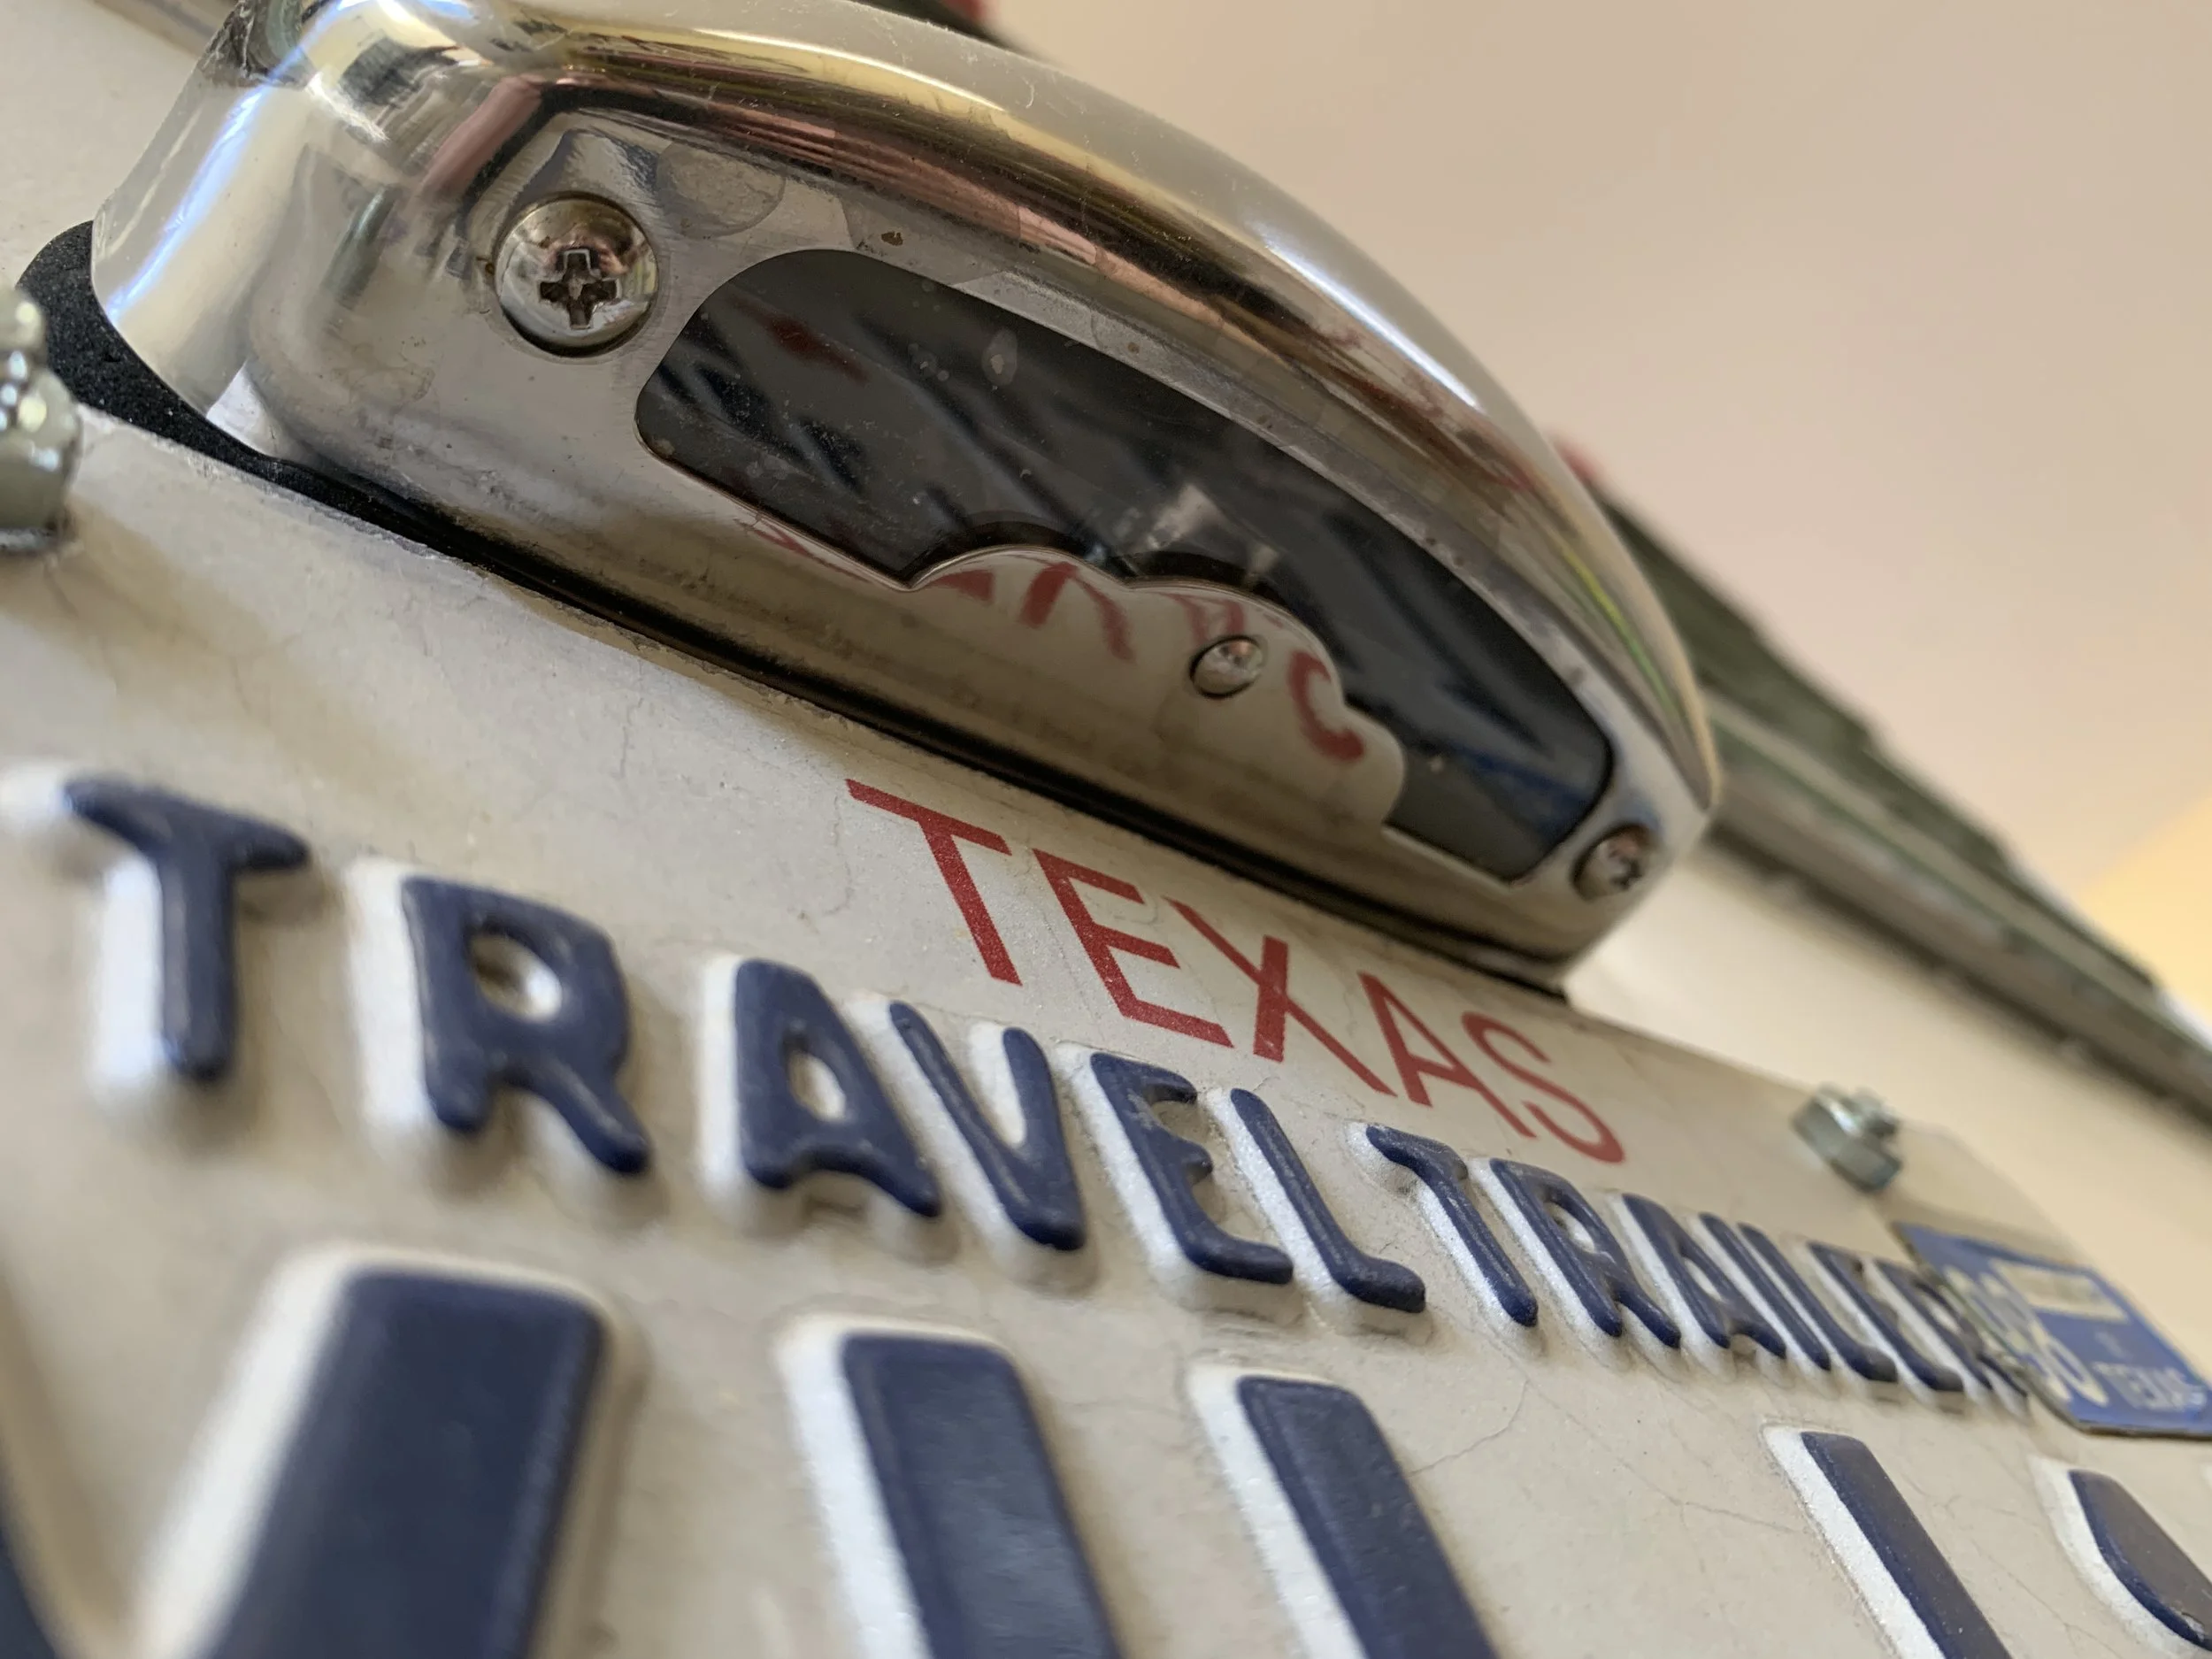
When we first picked up The Cameo, the external running lights didn’t work and we had to use temporary tail lights on the back bumper to get her home safely. Since then, we’ve replaced all of the electrical – inside and out – including installing 14 new vintage-style LED clearance lights and new vintage-reproduction tail lights. We also added a license plate holder with a light so we didn’t have to prop it up in the rear window.

The Cameo’s exterior lights – before

The Cameo’s tail lights – currently

The Cameo’s rear clearance lights – currently

The Cameo’s front clearance lights – currently

The Cameo’s license plate light – currently
View the full exterior light install here. (Includes clearance lights, tail lights and new license plate light install.)
View the full electrical system install here.
After many attempts and wasted hours, we had a trailer company install our running/exterior lighting. After working on our interior electrical setup months later, we figured out we just had a bad ground. View how we grounded our camper post here. This is super important if you want (safe) electricity!!!
Wireless backup camera
The Cameo didn’t have a backup camera originally, but we thought for safety and ease of backing into places we’d add one. It’s wireless and displays on a screen inside the truck.

The Cameo’s backup camera – currently
View the wireless backup camera install here.
Electrical ports
After filling and waterproofing all of the holes in the metal exterior, we decided to add a few back in for our electrical ports. We mostly think we’ll be using this for camping and tailgating, so exterior electrical is important. We added incoming and outgoing coax ports for any TV watching that can’t be done with a Roku stick, plus an incoming 30 Amp shore power inlet and a 120V outlet so we can watch football games outside of the camper while we grill out on game days.

The Cameo’s 30 Amp inlet and coax port – currently

The Cameo’s 120V power outlet and coax port – currently
View the exterior electrical port install tutorial here. (This includes coax – which isn’t technically electrical – but is electrical-adjacent, plus the incoming 30 Amp shore power port and outgoing 120V outlet.)
Diamond plate rock guard
Originally the camper’s front bottom panel was hole-ridden, torn and beat up pretty badly. Instead of ordering a new custom piece, we opted to patch the original piece of aluminum and add an additional layer of durable diamond plate to add extra strength and protection for less.

The Cameo’s diamond plate rock guard – currently
View the diamond plate install here.
The interior
The interior has definitely seen some things and looks (and feels) completely different today. For starters, all the walls are attached to each other and the floor now and the whole thing doesn’t shake when you step inside like it used to. Before we can appreciate the current photos we need to see some before photos. Man do these bring us back. Sometimes it’s still hard to remember it used to look like this. (And don’t worry, we’ve also included some side-by-sides of each area below because I love a good side-by-side/before-and-after.)
Before

The Cameo’s interior, panoramic view from the door – before
When we first picked her up, The Cameo was dark and dingy. There were signs of water damage all over the place and various areas of the camper were in different stages of demo.

The Cameo’s interior, shower and cabinet across from the door – before

The Cameo’s interior, panoramic view from the back corner – before

The Cameo’s interior, view of the rear of the camper from the door – before
Gnarly lookin’ right? I can confirm it was as crumbly as it looks in these photos (and even worse when we started removing the furniture layers) and it had a certain musty aroma to it – the smell of neglect.
Okay, you get the idea – now to the good stuff!
Floor plan
We’ve mostly kept the interior layout the same, with the most dramatic change being swapping the front and rear areas. This allows us to have more space where we wanted it (eating/entertaining) while keeping the weigh distribution more or less the same – plus it works well with our windows and lets us keep a shower/toilet/wet bath, without giving everyone a peep show. We’ve also reshaped the size and orientation of the shower/toilet area to be a little bit bigger and made our electrical cabinet a little shallower (up top) to let the small space feel bigger.


View more about our floor plan changes here.
The stuff you can’t see
We’re talking about the insulation and ceiling/walls, which I guess technically you can see, but it kind of takes a backseat to everything else at this point and we still get frequent questions about what we used for it. Originally we had just about every problem you could think of with the interior walls – they were warped, peeling and in some cases completely missing, exposing the studs and insulation. Now it’s all brand new, super smooth and painted a fresh white.
(Oh, and if you’ve ever wondered what that little tiny black dot in the middle of the rear wall is – it’s not a bug or missing spot in the paint. It’s the button we use to pair our wireless backup camera to the monitor in the truck.)

The Cameo’s interior walls – before

The Cameo’s interior walls – currently
View the insulation + ceiling + walls install here.
Flooring
We LOVE the new floors. The original pebbled sheet linoleum was still in decent shape when we removed it (considering it was 50 years old), but the crumbling, soft subfloor underneath was definitely not. Now we’ve got a solid subfloor and a modern, attractive luxury vinyl plank floor that’s 100% waterproof, super durable and has a great texture and feel underfoot.

The Cameo’s linoleum floor – before
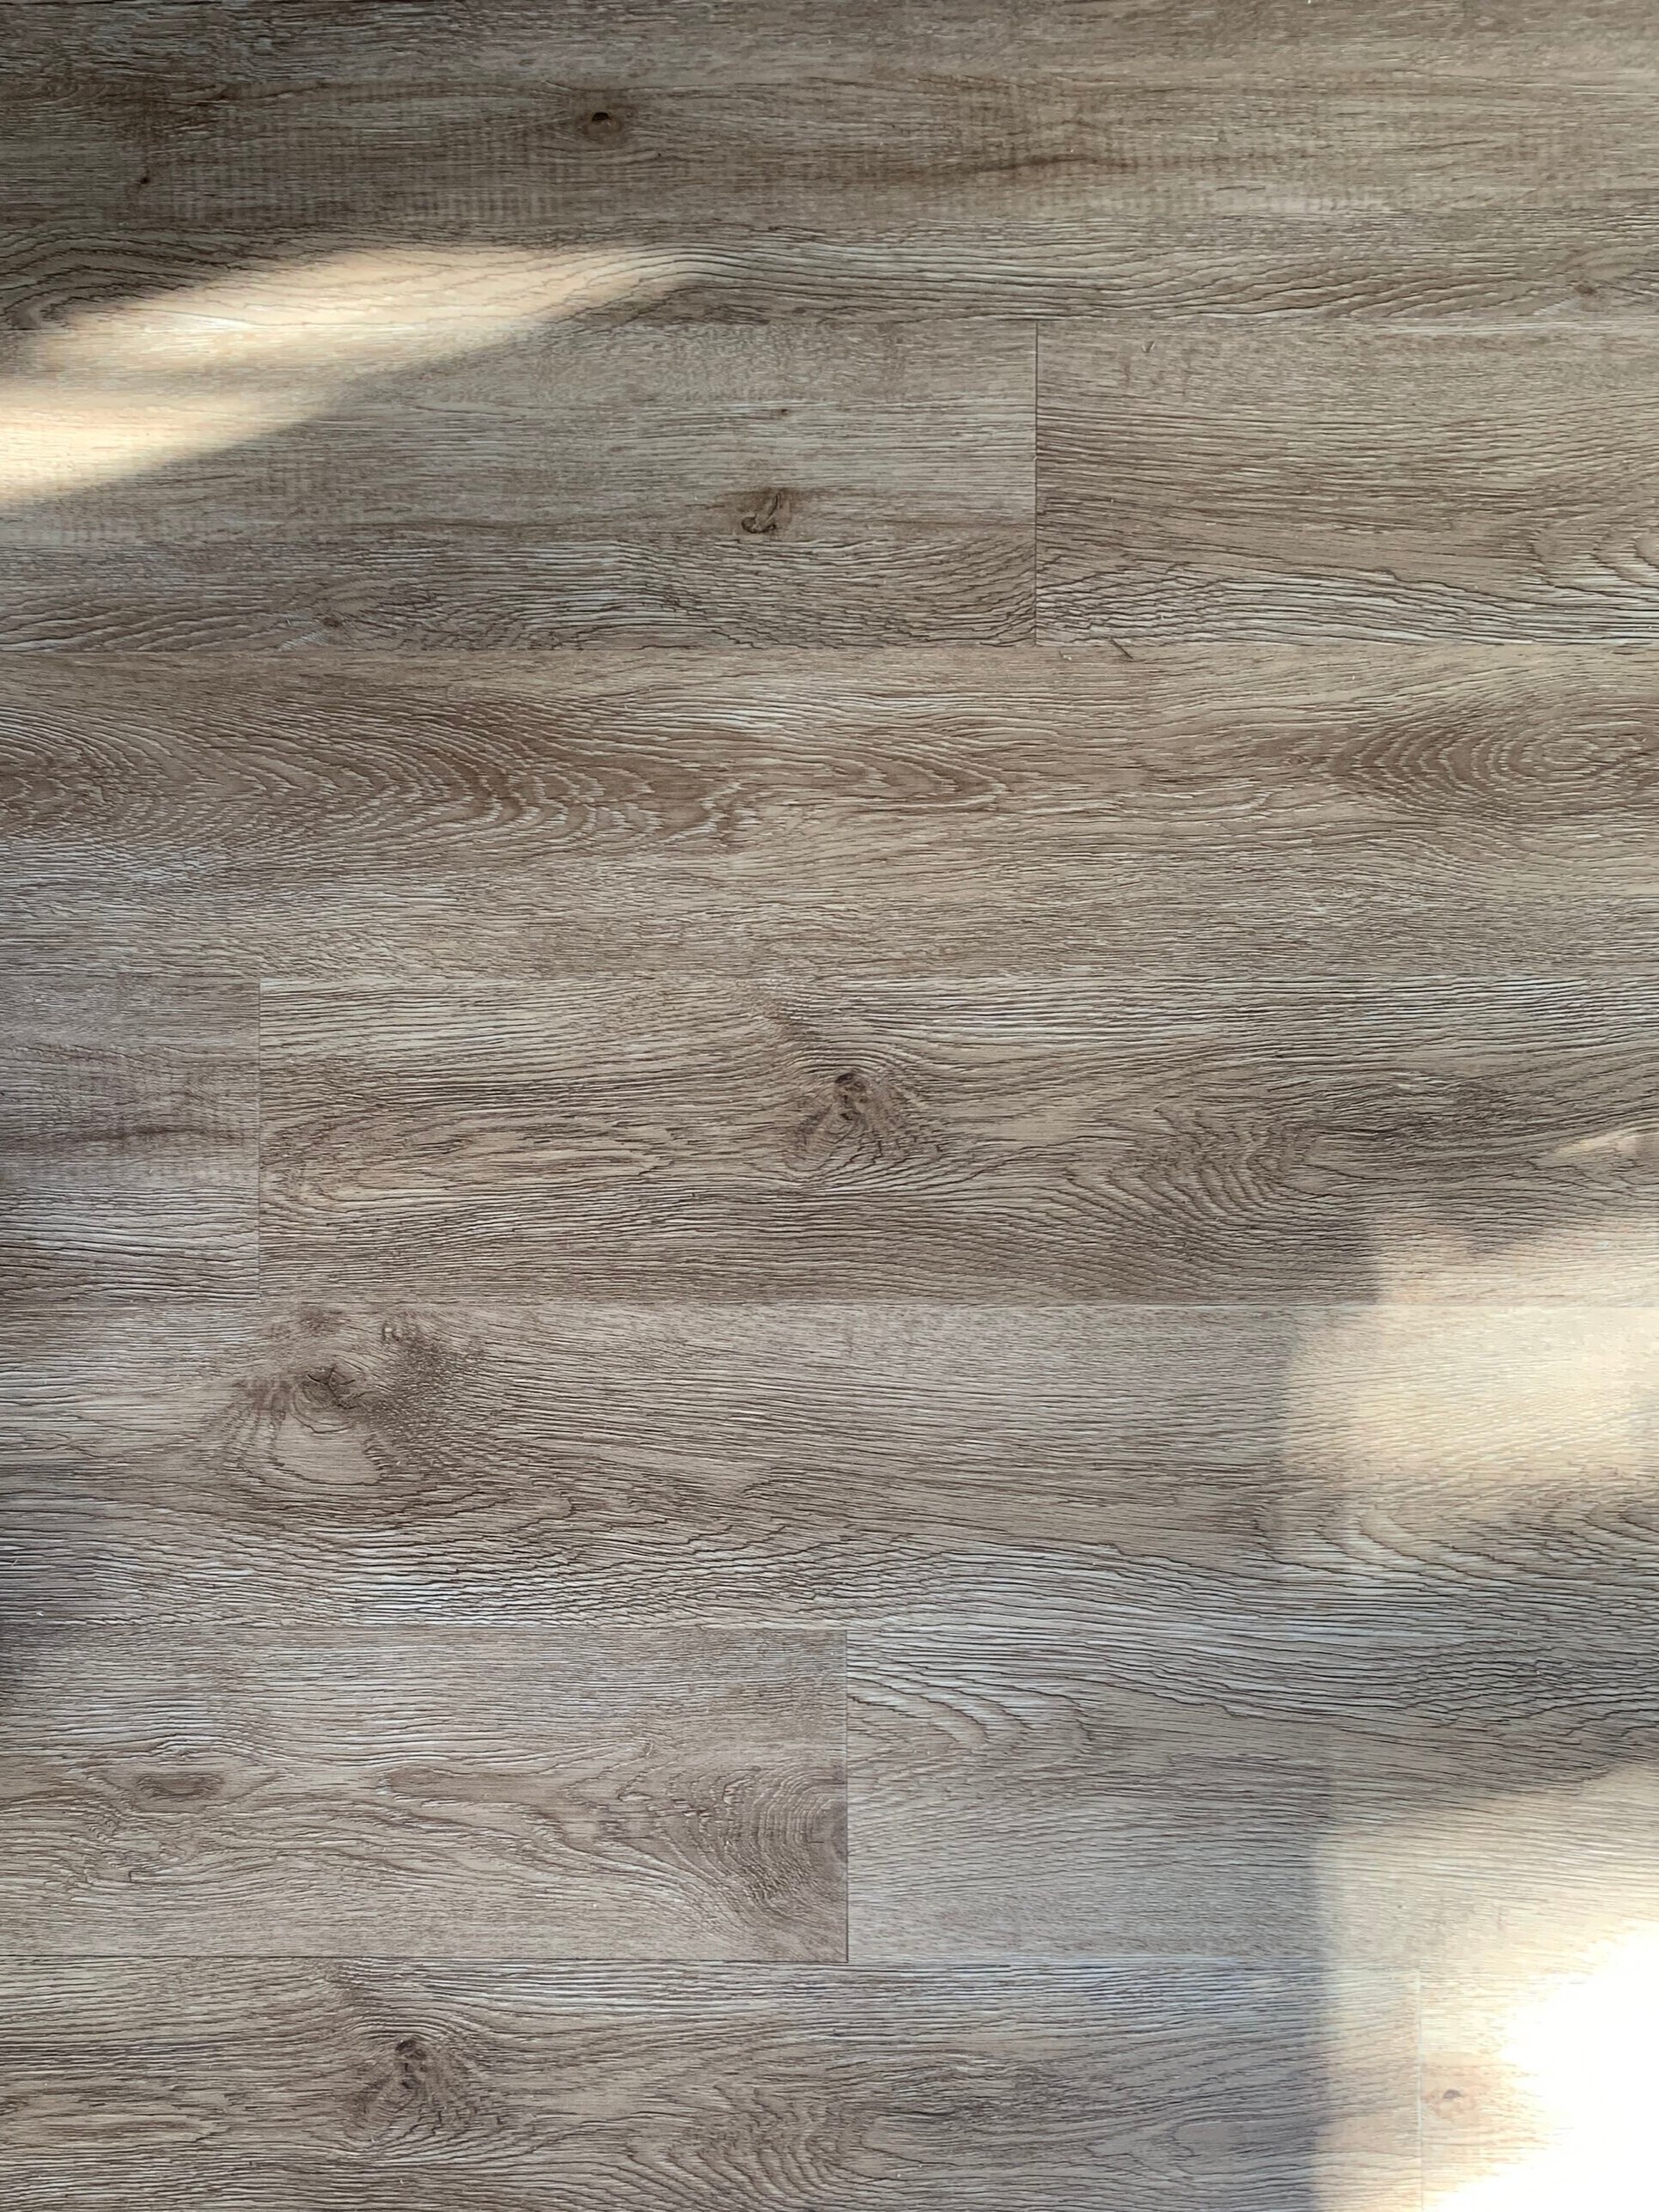
The Cameo’s luxury vinyl plank floor – after
View the plywood subfloor install here.
View the vinyl plank flooring install here.
Roof vent
This thing was a hot mess from the beginning. We could tell it was newly installed (fresh wood framing inside plus a shiny new plastic dome), but we also could immediately tell it was installed incorrectly. The ceiling pieces the vent was screwed into were “floating” in space, not connected to any other ceiling attachment or extending to the wall. In addition to that, the wood supports were cracked and there were signs of water leaks inside around each of the screws, causing the brand new wood to start to rot. We replaced it early on with a metal version both for aesthetics and long-term durability, and turned it the other way so the hinge-side would be to the front of the camper.
(Please forgive how dirty the roof is in the current photo – it’s oak pollen season and those nasty little yellow-brown pollen strings are everywhere.)

The Cameo’s roof vent, exterior – before

The Cameo’s roof vent, interior – before

The Cameo’s roof vent, exterior – currently

The Cameo’s roof vent, interior – currently
View the roof vent removal and replacement here.
Lighting
Originally, The Cameo was pretty dark. Hard to say if it was from basically everything inside being brown, or because there weren’t more than a few lights installed in the whole thing, or that the electrical system wasn’t even working anyway to power any of the lights that were installed (ha!). Probably the last one, but if there was working electrical when we picked her up, we can pretty much guarantee it would still be a dark little cave because of the other two reasons. Since then, we’ve installed nine out of 11 lights (eight 12V ceiling puck lights and one of the two 120V accent wall sconces) so now it’s nice and bright in here. We still need to install our second accent wall sconce and our bathroom lighting.

The Cameo’s interior, front of the camper lighting – before

The Cameo’s interior, 12V puck lights – after

The Cameo’s interior, 120V accent wall sconce – after
View the 12V overhead puck light + light switch install here.
We still need to share our mint green 120V accent light install with you (and will share it soon!) but check out the one that is installed, above!
Wet bath/shower
This area still has the most work left to do of any in the camper. It’s currently all framed out and we’ve got big plans for lighting and creating the interior shower structure, we just haven’t done it quite yet. The plumbing is next on our list, and like most things this tiny room will be a mix of plumbing + electrical + carpentry all mixed and matched and overlapped and layered to get the job done.
One of the things I’ve been most looking forward to in this renovation is this room, and specifically what we’ve got planned for lighting and interior materials for the wet bath. Originally, there was an exposed overhead light fixture that seemed kind of sketchy for an area that’s supposed to have water in it … so needless to say we won’t be adding that light back in when the time comes.

The Cameo’s interior, wet bath– before

The Cameo’s interior, wet bath– currently
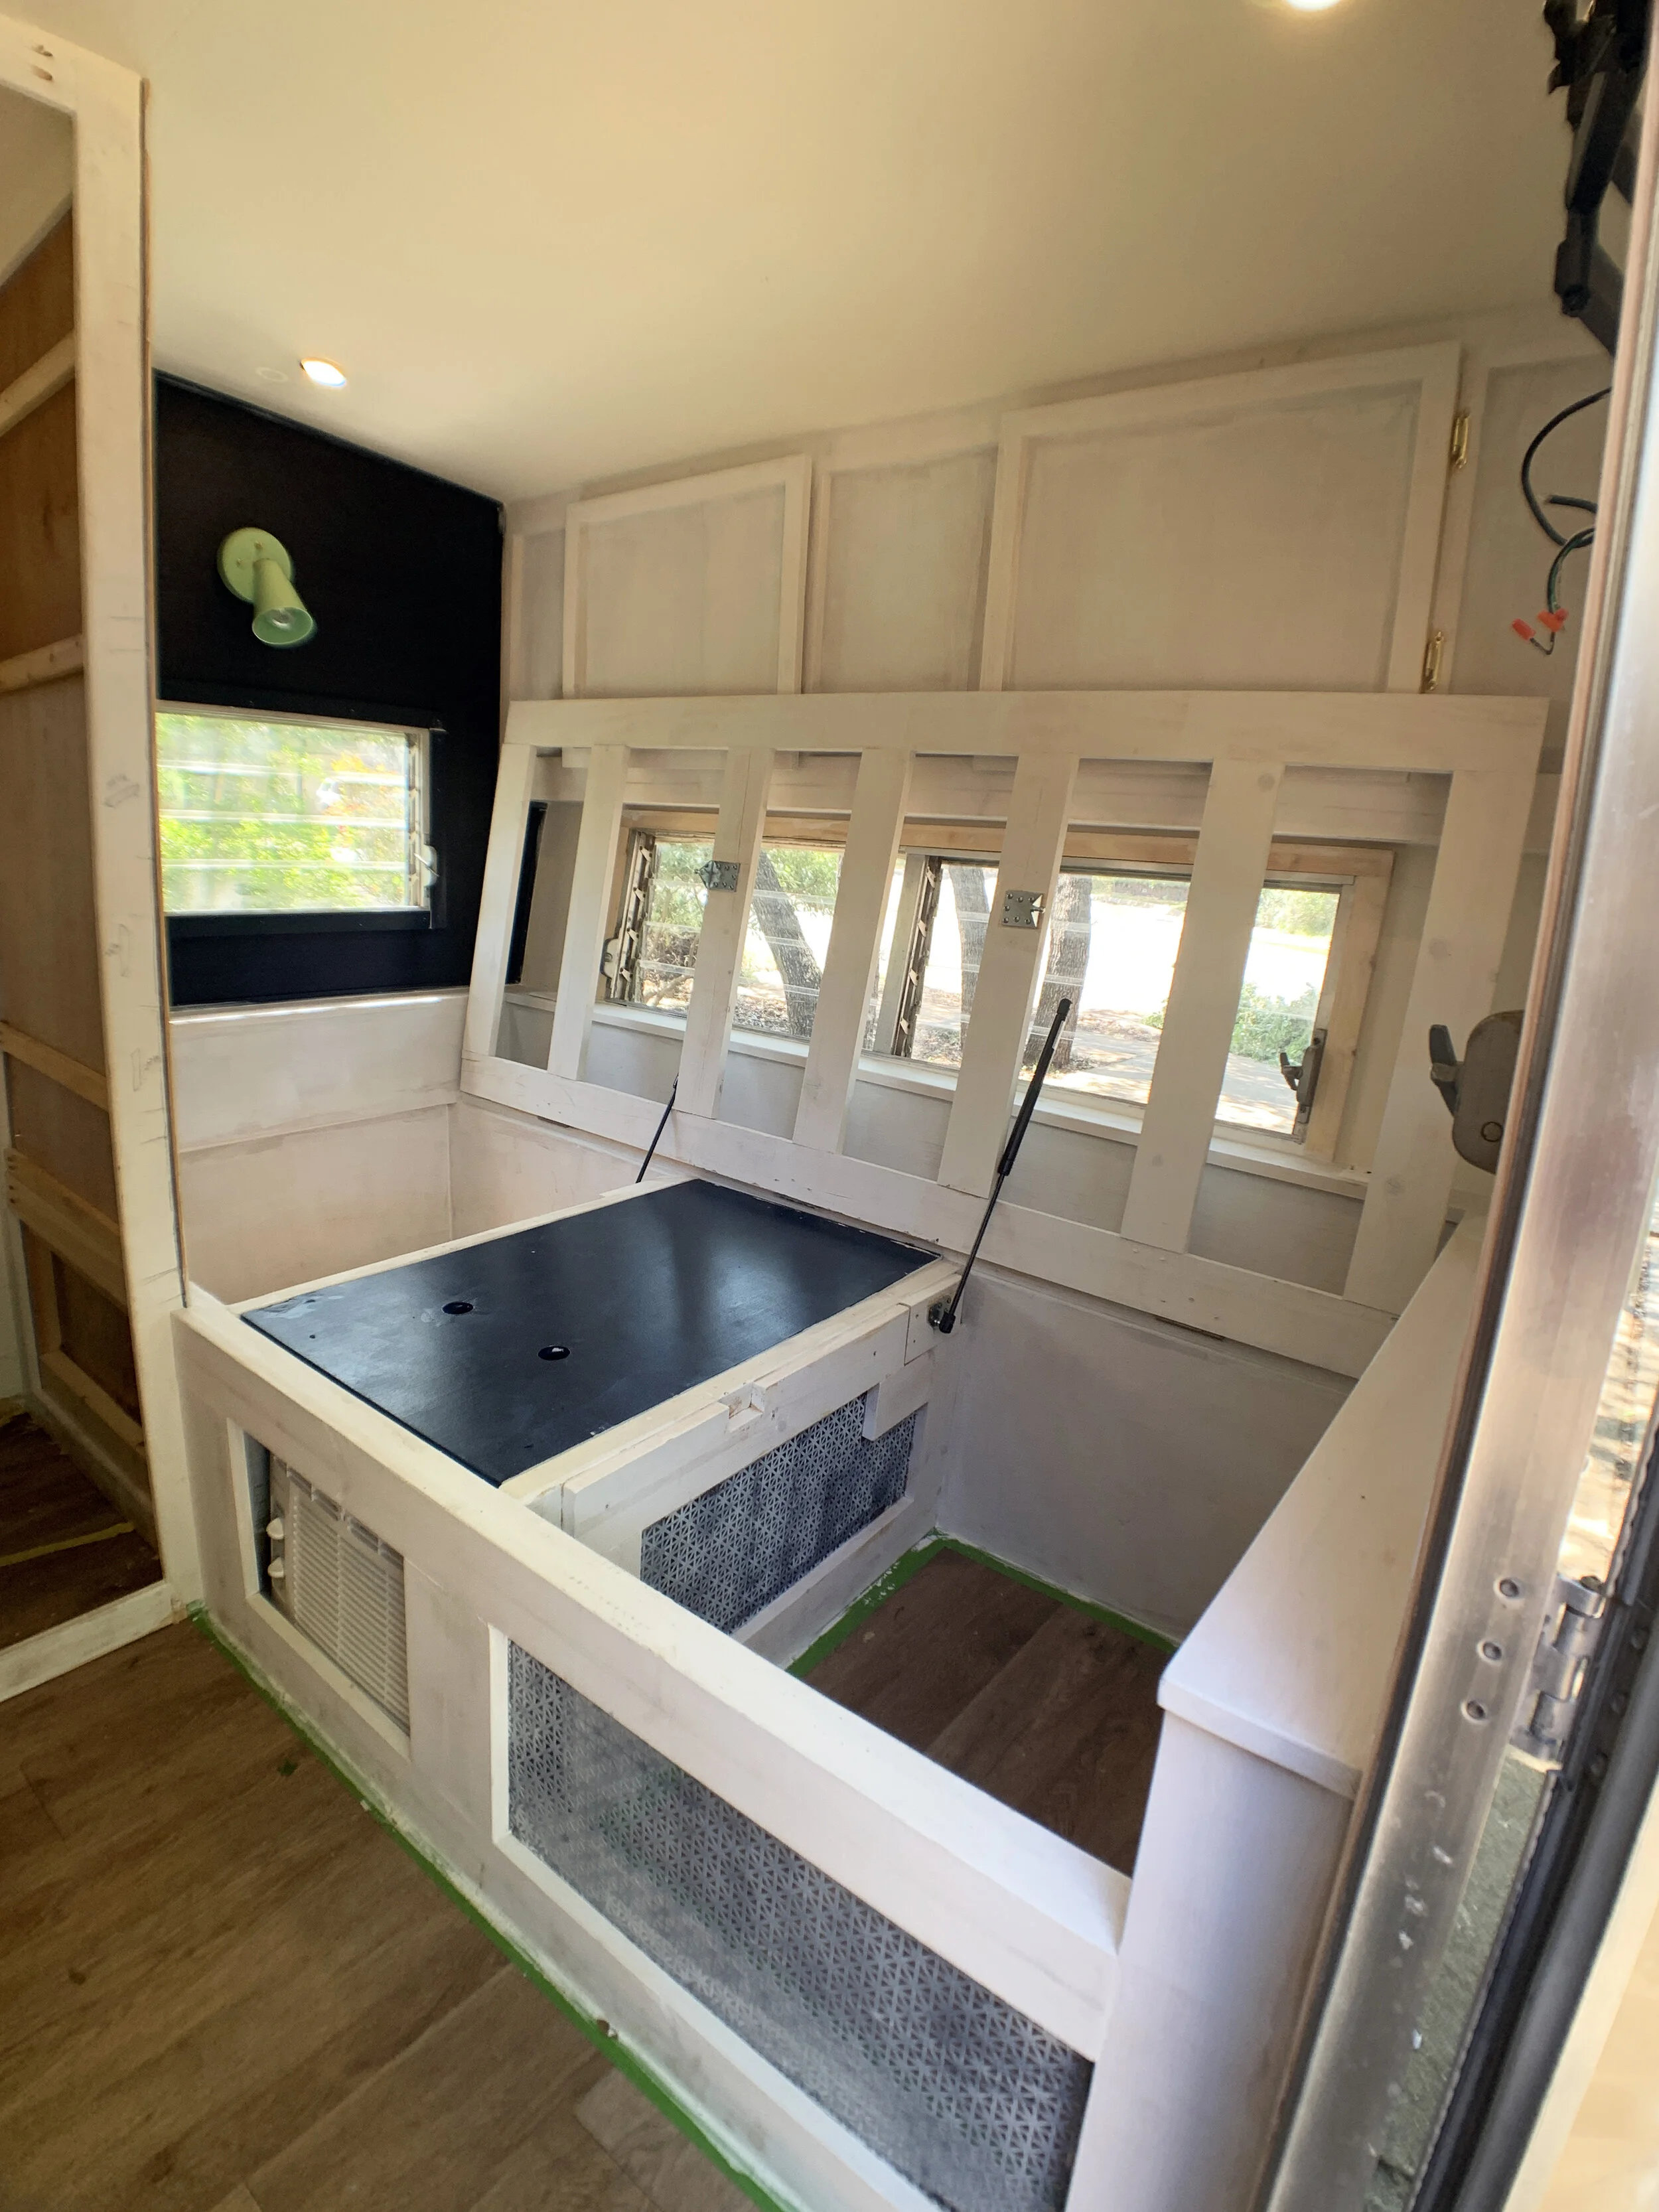
Front/twin bed area (previously the dinette)
This area we’ve swapped with the rear area so we’d have more space to “entertain” and relax when we’re not sleeping. Starting as a small, cramped convertible U-shaped dinette-to-bed area, we’ve remade this front space as a permanent twin-sized daybed, complete with air conditioner and top-accessible storage areas underneath, plus 12V USB outlets sunk into the backrests for charging phones, etc. So far, this area has been built and primed, but not painted. The hydraulic hinges have been installed, but not snapped in yet since they need the weight/pressure of the mattress to be able to raise and lower properly – we’ll snap them in once we get there so we’re not stuck with the lid open while we are still working.
The Cameo’s interior, dinette area (without table) at camper front – before

The Cameo’s interior, permanent twin-sized daybed at camper front – currently

The Cameo’s interior, converted dinette bed at camper front – before
The Cameo’s interior, permanent twin-sized daybed at camper front – currently
View part one of the air conditioner install here. (Includes how we handled condensation + vented our A/C’s exhaust.)
View part two of the air conditioner install here. (Includes the daybed build + how to get the A/C good air intake + wiring 12V USB outlets into the daybed.)
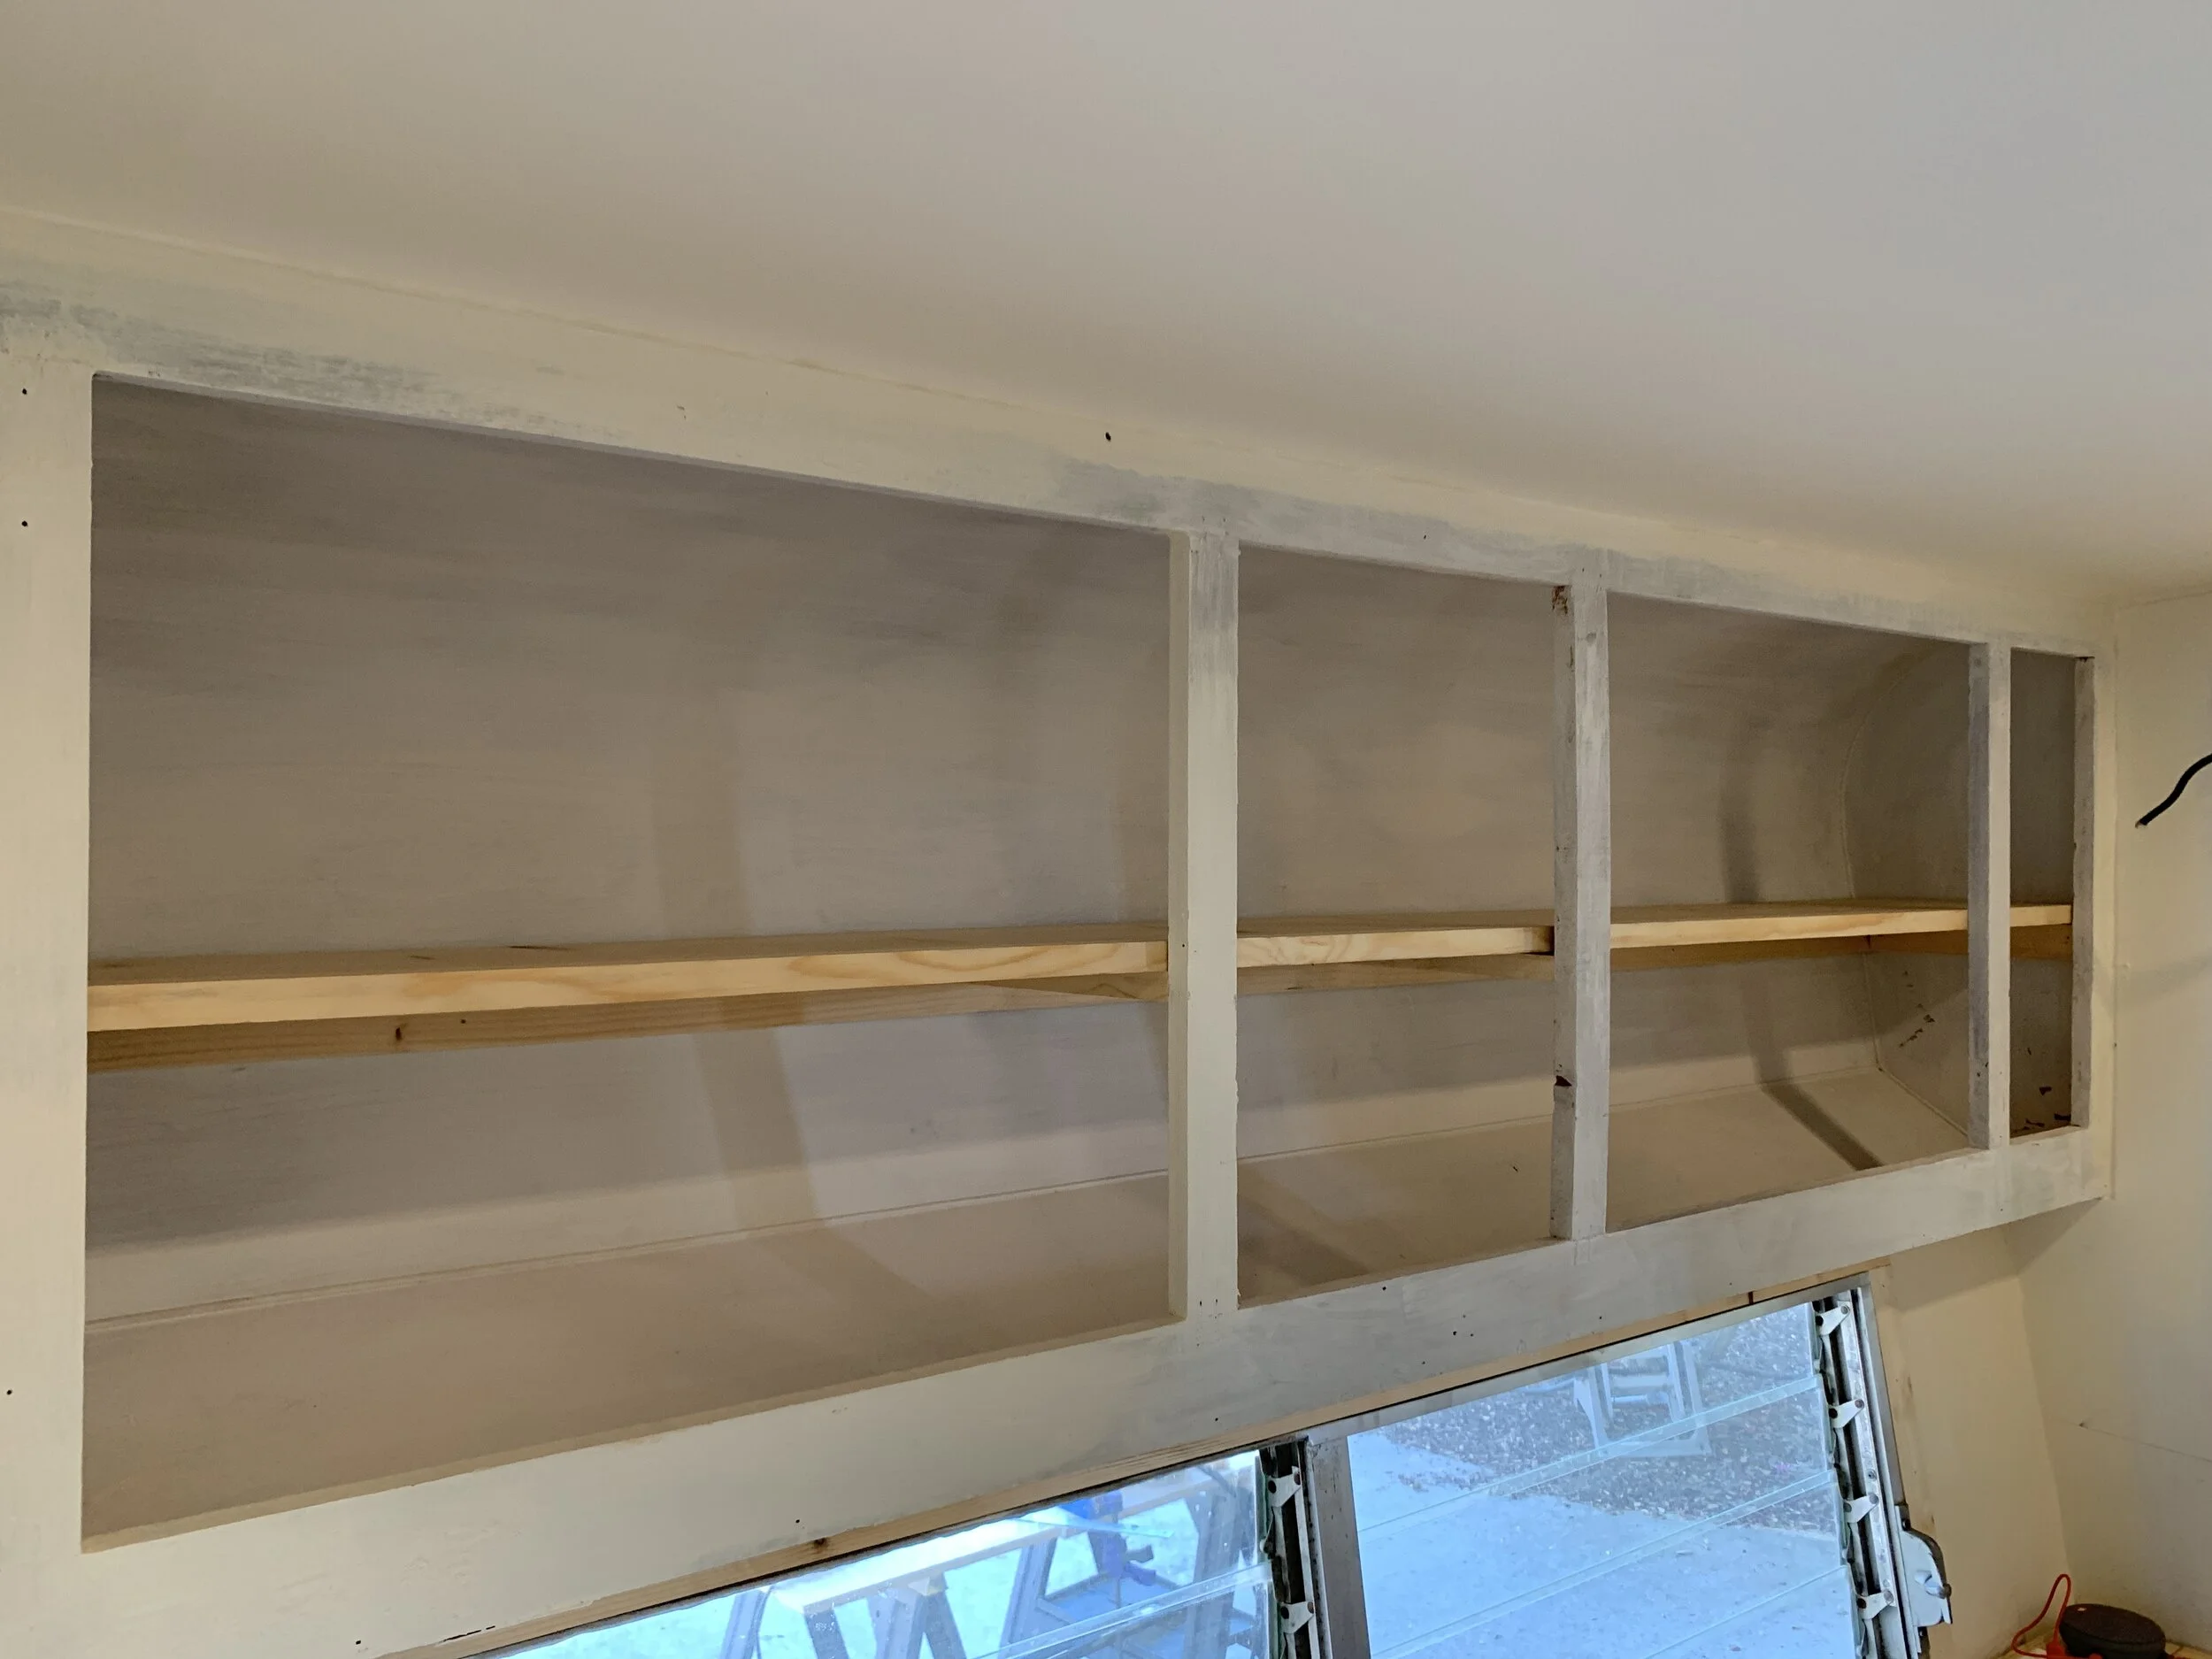
View the overhead cabinet build here.
View the navy grasscloth wallpaper “headboard” install here.
Kitchen
One of my favorite areas in the camper, this space was originally non-existent. The kitchen cabinet and counter had already been removed by the time we bought The Cameo and the wall wasn’t attached to the floor. (This is the infamous flappy wall area from our very first post.) Now it’s got some of my favorite things in the camper so far – the under-mount sink with a an optional lid to give us more counter space when not in use, navy cabinets, wooden counters and the 3D panel wall.

The Cameo’s interior, view from the front of the camper – before

The Cameo’s interior, view of the kitchen area – before

The Cameo’s interior, view from the front of the camper – currently

The Cameo’s interior, view of the kitchen area – currently
View the kitchen cabinet build multi-part series here: Cabinet base build | Countertop install
View the sink and stove install here.
We still need to install the faucet (after we paint the 3D wall) when we work on plumbing, and finish our cabinet paint job – and of course we’ll share it all with you when we get there.
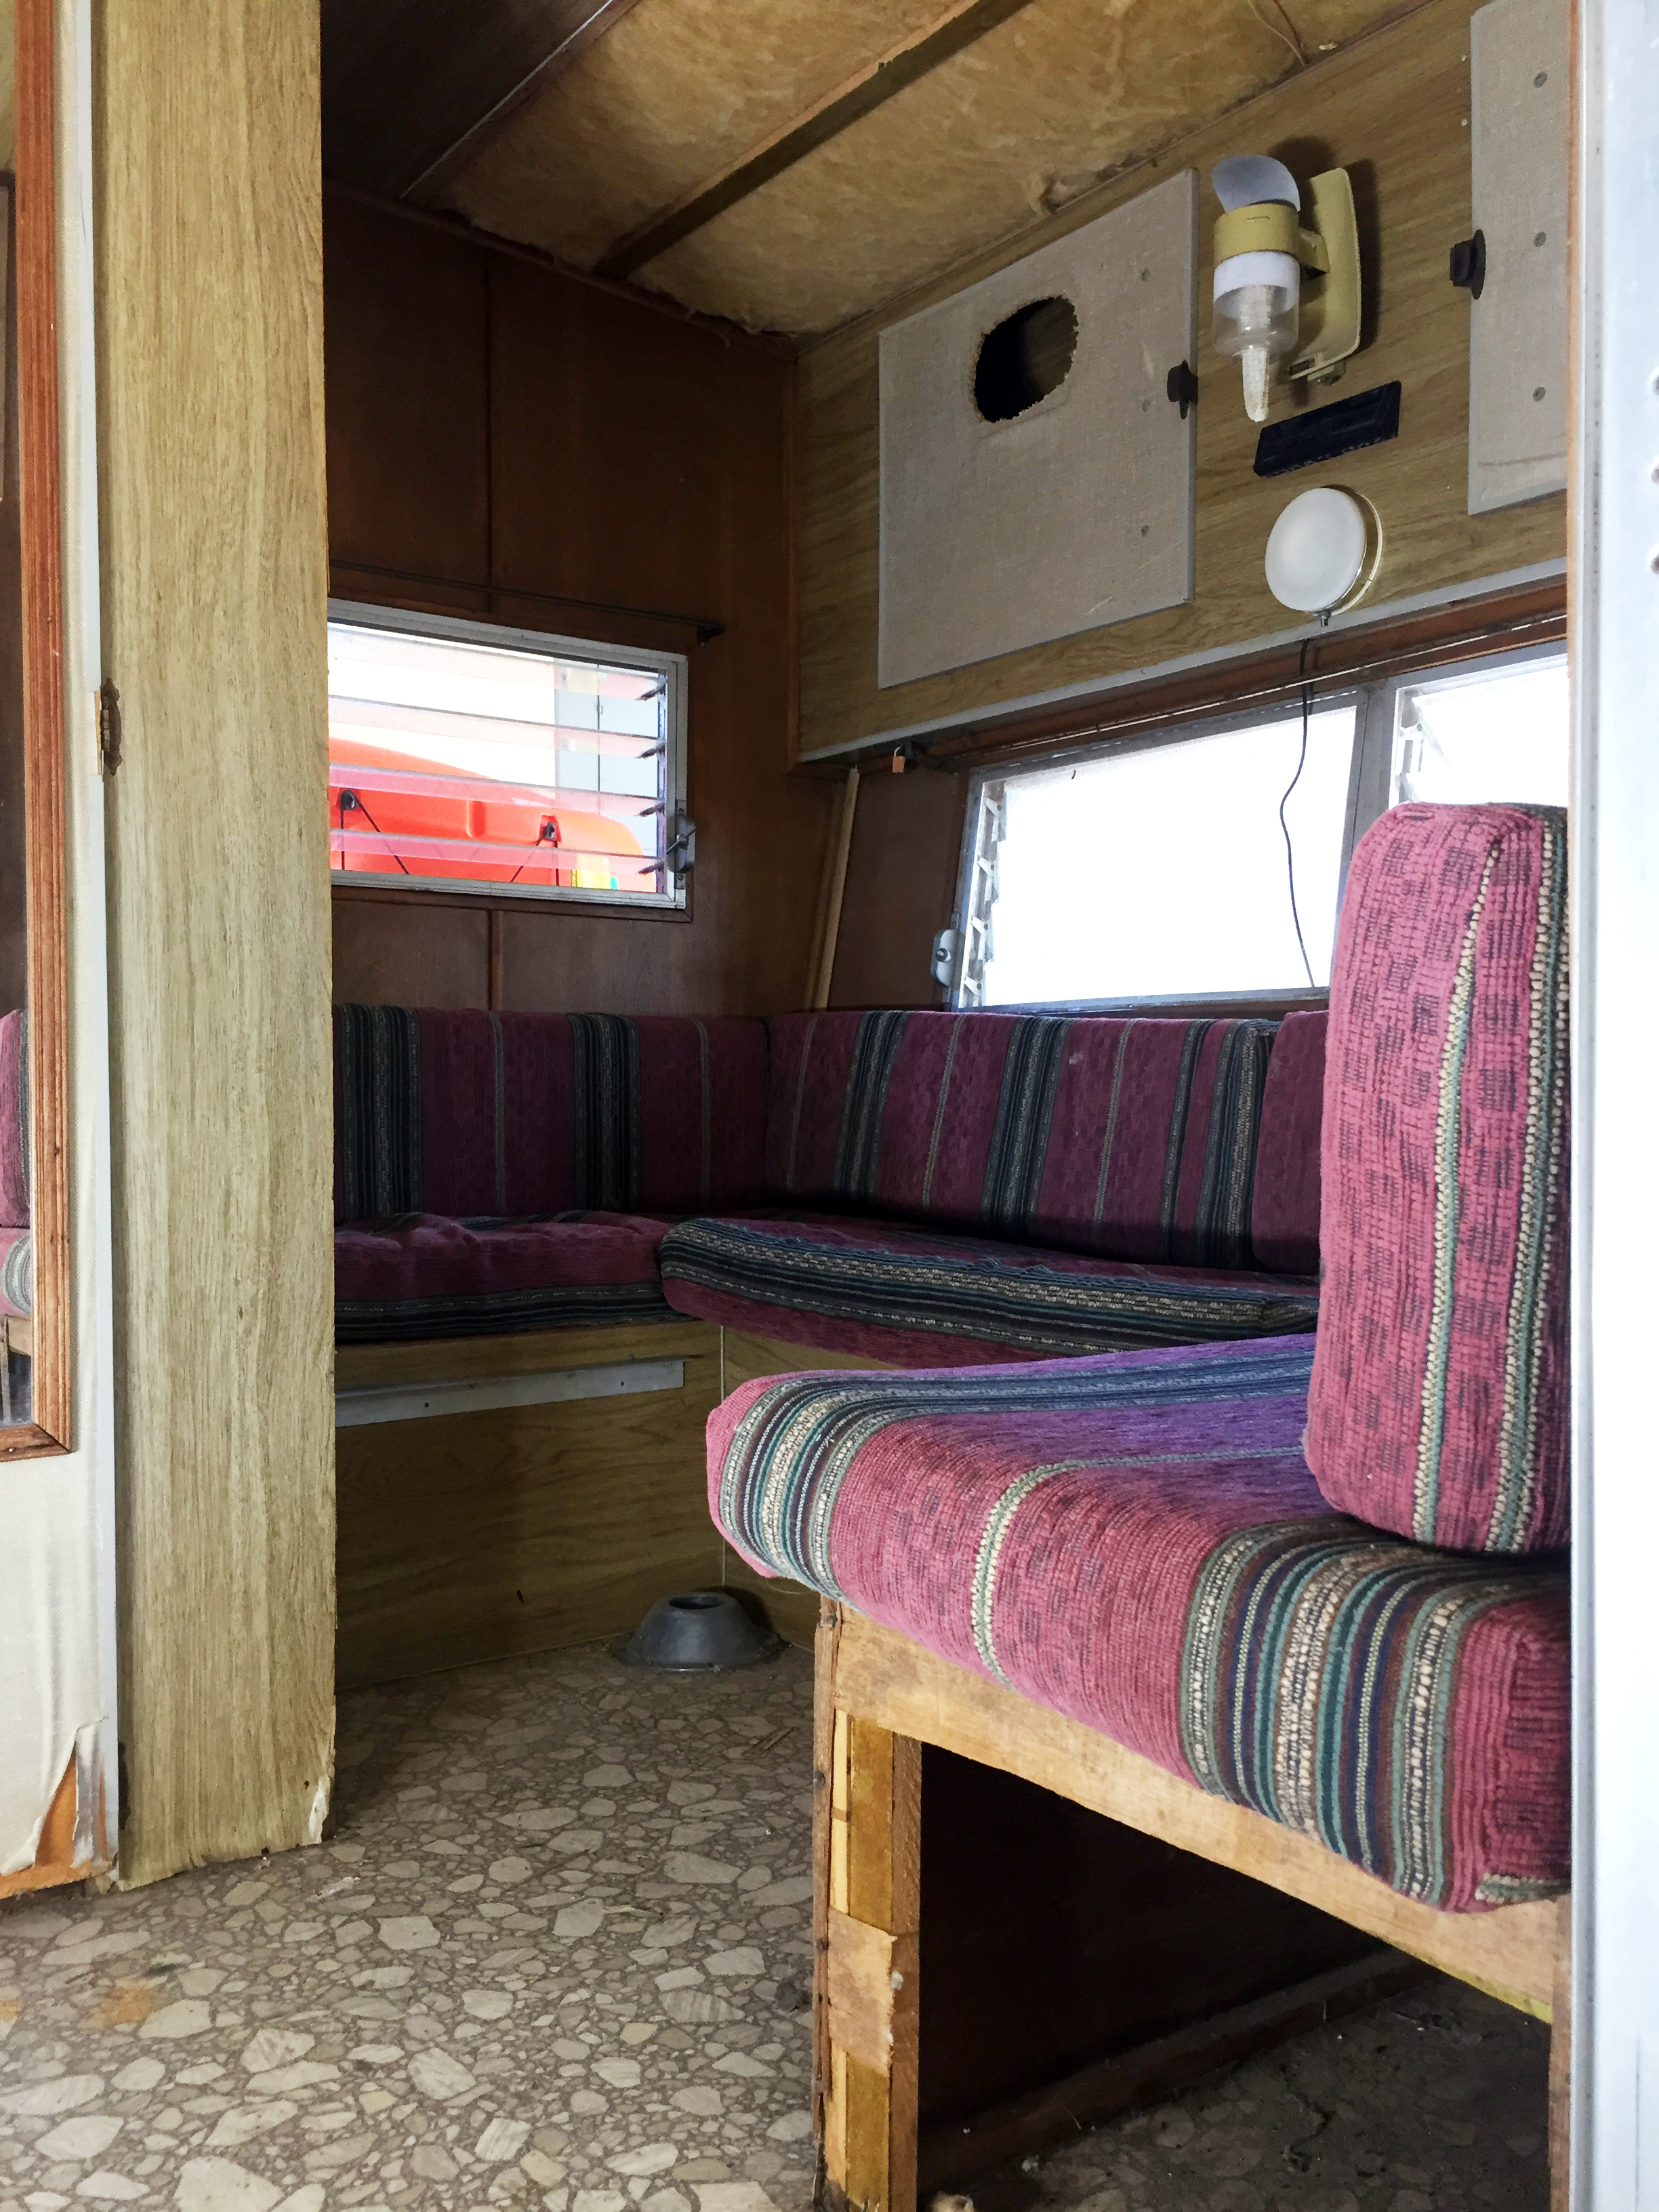
Rear/dinette area (previously the gaucho bed)
This area has really come a long way. To start, it’s no longer filled with rotten wood and mouse poop. Today it’s super sturdy and houses a larger convertible U-shaped dinette bench than was originally located in the front of the camper. It turns into a bed about the size of a double and has top-accessible storage inside. One compartment will store our fresh water tank, the center will hold our spare tire and tools, and the last is free storage for anything else we need.
We’ve upgraded the patchwork tabletop to a new solid wood minty number complete with gold accents. We’re currently in the process of painting multiple coats of navy on our dinette seating, sanding lightly between coats.

The Cameo’s interior, view of the rear gaucho bed area – before

The Cameo’s interior, view of the rear dinette area with table removed – currently

The Cameo’s interior, view of the rear dinette area with table in place – currently
View the U-shaped dinette bench build here.
View the multi-part dining table build here: Dining table top | Dining table base
View the dinette-to-bed transition here.
Electrical storage
This area was a complete disaster and was partially gutted when we bought the camper 23 months ago. Through a ton of research and work, we rewired the electrical from scratch and built an all-new, split-level electrical cabinet that’s attractive, allows for a more open feel and is still supportive to the structure of the camper. We just rebuilt the lower cabinet doors yesterday since the first ones were admittedly janky (the reason why they’re missing in the photos below), and still need to finish caulking, priming and painting out this cabinet, build a little tray/lip to keep the battery in lower cabinet from shifting in transit, and organize and secure the wiring in the upper portion to be cleaner looking.

The Cameo’s interior, view of the electrical storage cabinet area – before

The Cameo’s interior, view of the full electrical storage cabinet area – currently

The Cameo’s interior, view of the upper electrical storage cabinet area – currently

The Cameo’s interior, view of the electrical cabinet – before

The Cameo’s interior, view of the full electrical storage cabinet area – currently
View the full electrical system install here.
View the grounding your camper post here. This is super important if you want (safe) electricity!!!
View the vented electrical cabinet build here.
3D panel wall
One of my most favorite things ever, we love the modern look this wall gives the interior – and without adding much weight! We still need to prime and paint it, but are loving the look so far.

The Cameo’s interior 3D panel wall – currently
View part one of the 3D panel install here.
We’ll follow up with part two once we’re done finishing the seams, priming and painting it all out.
So, that’s it for now. She’s undergone a little bit of a change in the last 23 months. As much progress as we’ve made, we still have plenty to do – finish painting cabinets and start priming and painting our 3D wall; all of the plumbing including installing the three tanks, running PEX water lines, installing a water heater and water pump in addition to installing our sink faucet; start and finish the wet bath area including installing safe electrical, waterproofing the interior shower walls and floor and properly draining it all, plus fully installing and plumbing the toilet. We’ll have more paint touchups and light installs along the way, as well as a makeover to the interior door (which compared to everything else is pretty minor) and will share our finished dinette bench cushions with you once they’re done being upholstered (thank you Nick’s mom)!
What do you think of the progress so far? Do you have a favorite part? We’d love to hear from you in the comments below.