The Cameo Camper Renovation: Building the Vented Electrical Cabinet
Hey y’all! I hope you all had a fabulous holiday and were able to enjoy some time off. If you’re like us it was much needed, even if (like us) you didn’t actually go on vacation. With the holidays and my being sick off and on for about 6 weeks we’ve taken a little break on actual camper work as of late, but that’s okay because we’re still playing catchup here on the ol’ blog! (We hope you don’t mind.)

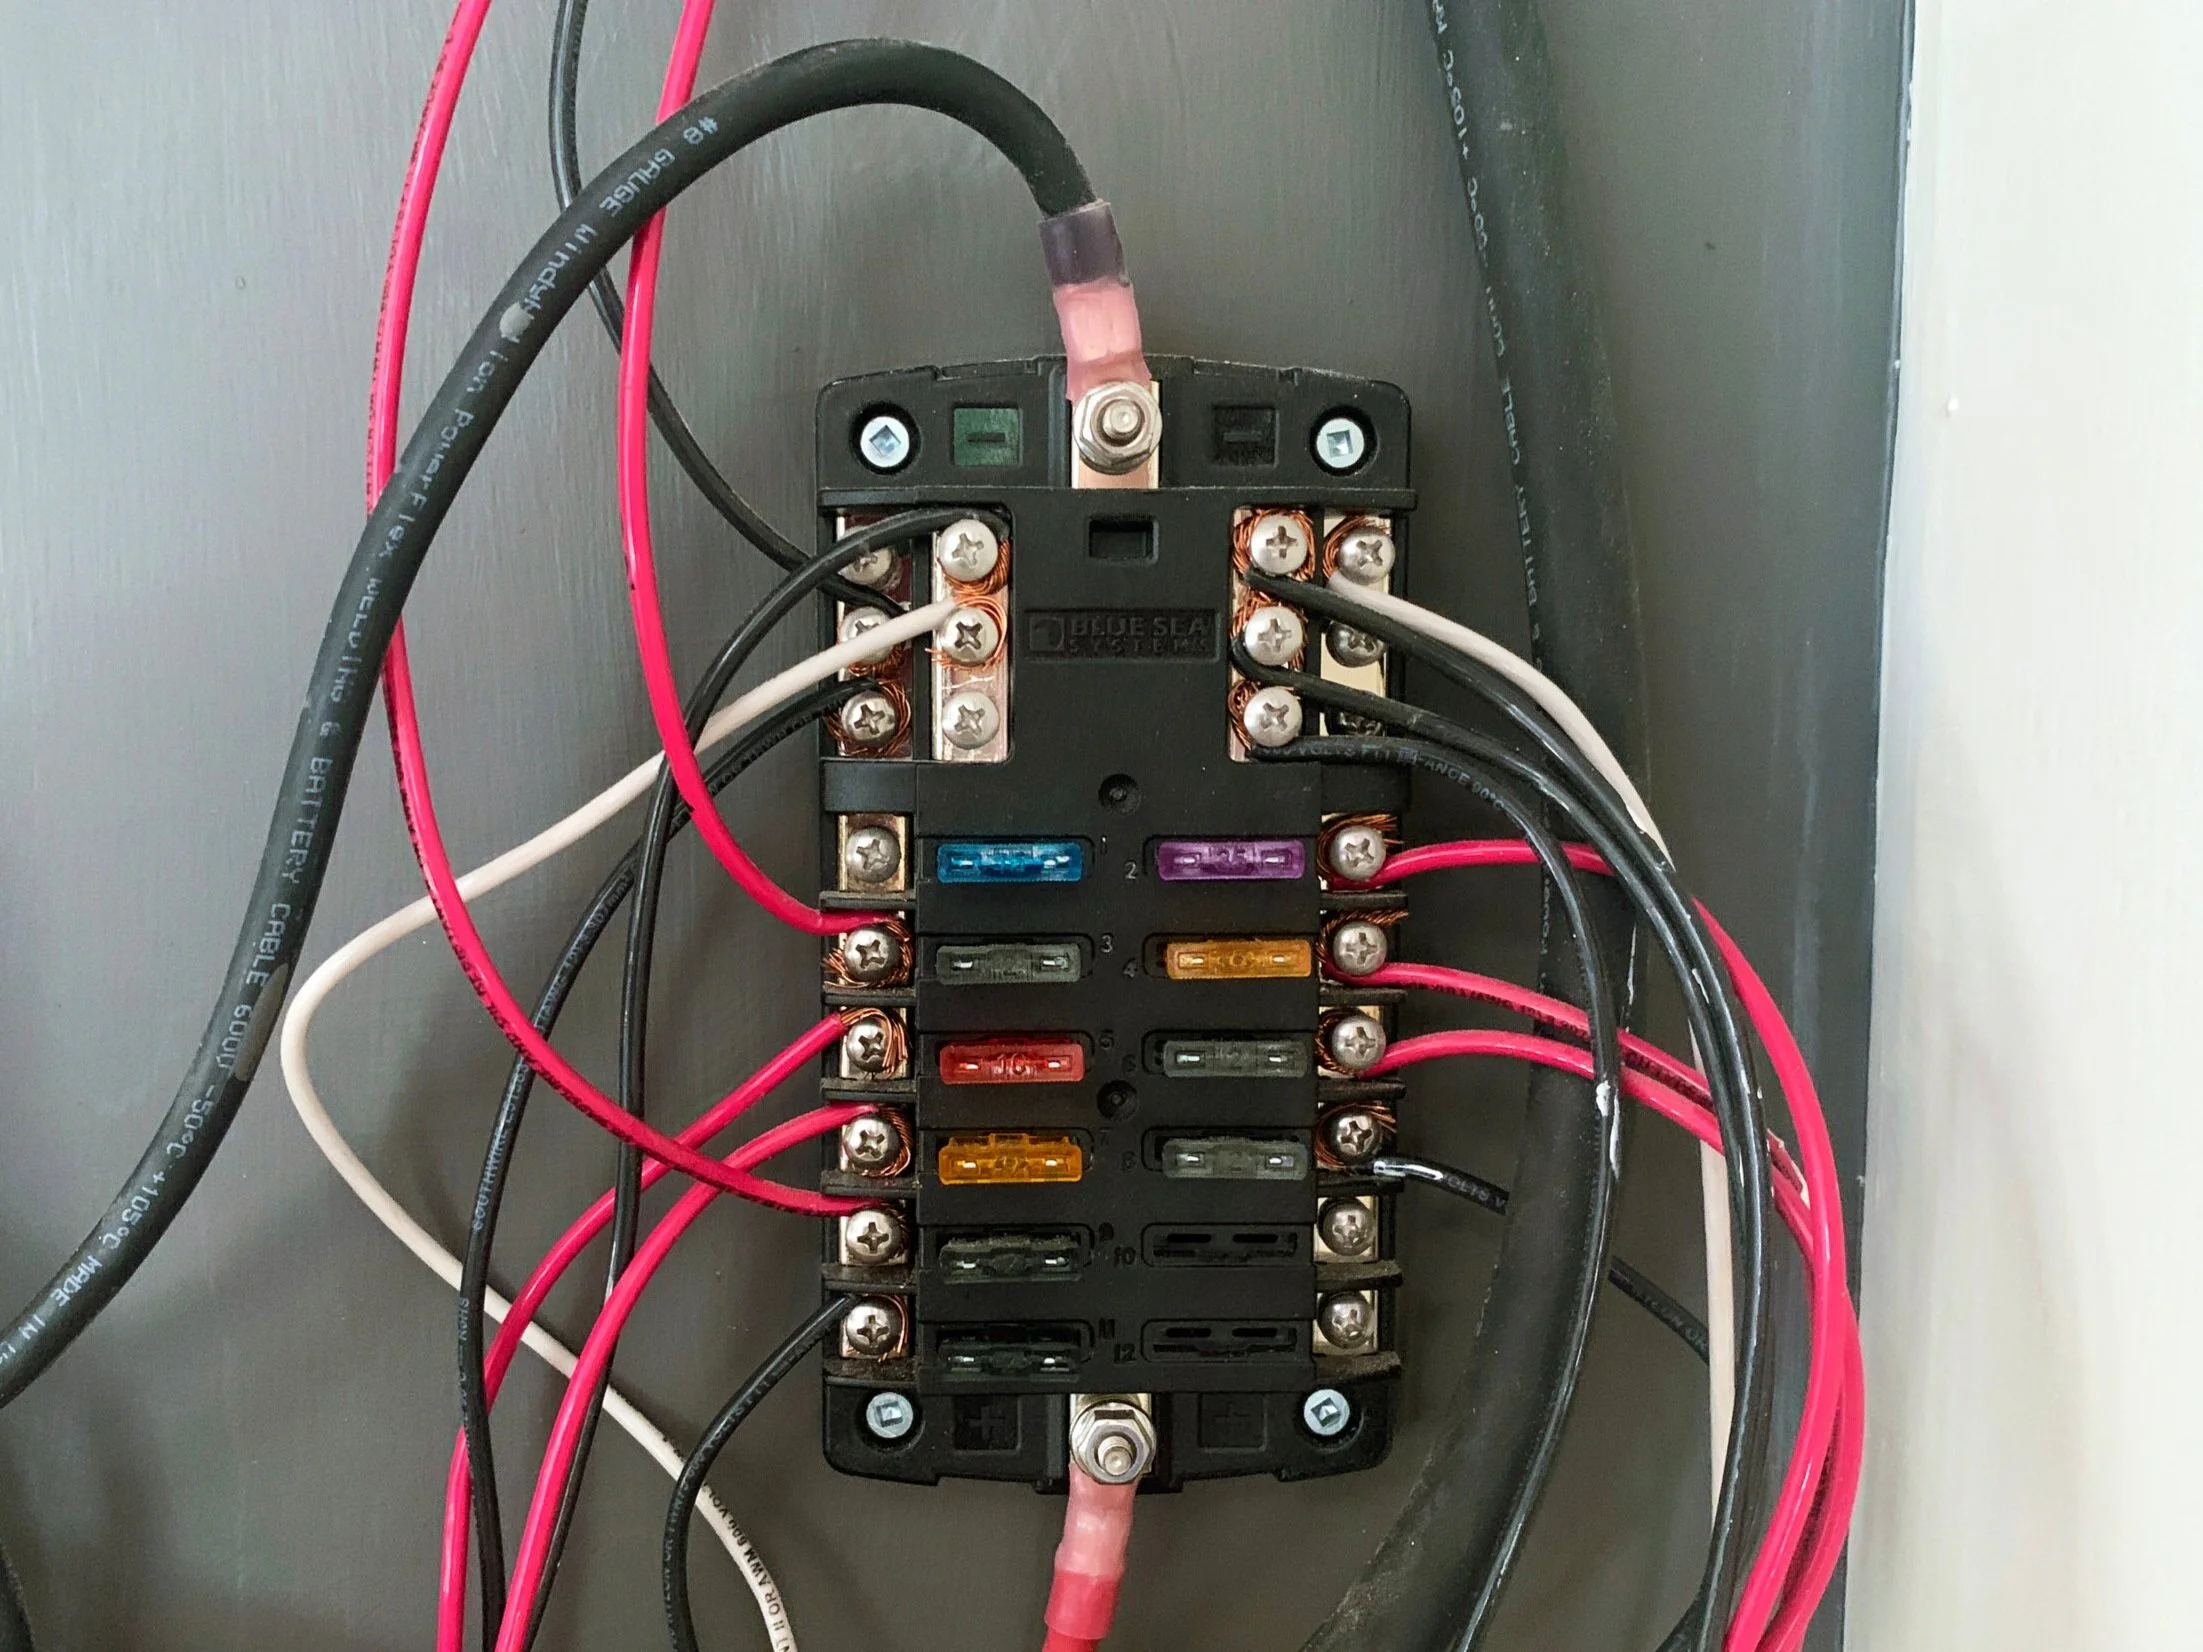
Today we’re covering our build out of the vented upper cabinet that houses all of our electrical camper “stuff”. “Stuff” meaning everything we covered here that takes this thing from a glorified tent to a home away from home. And if you’ve missed the first two parts of our cabinet series (as I just now am unofficially calling it) so far, you can check them out below, since we literally are building off of them for today’s post:
So, why go with screen doors instead of solid upper cabinets?
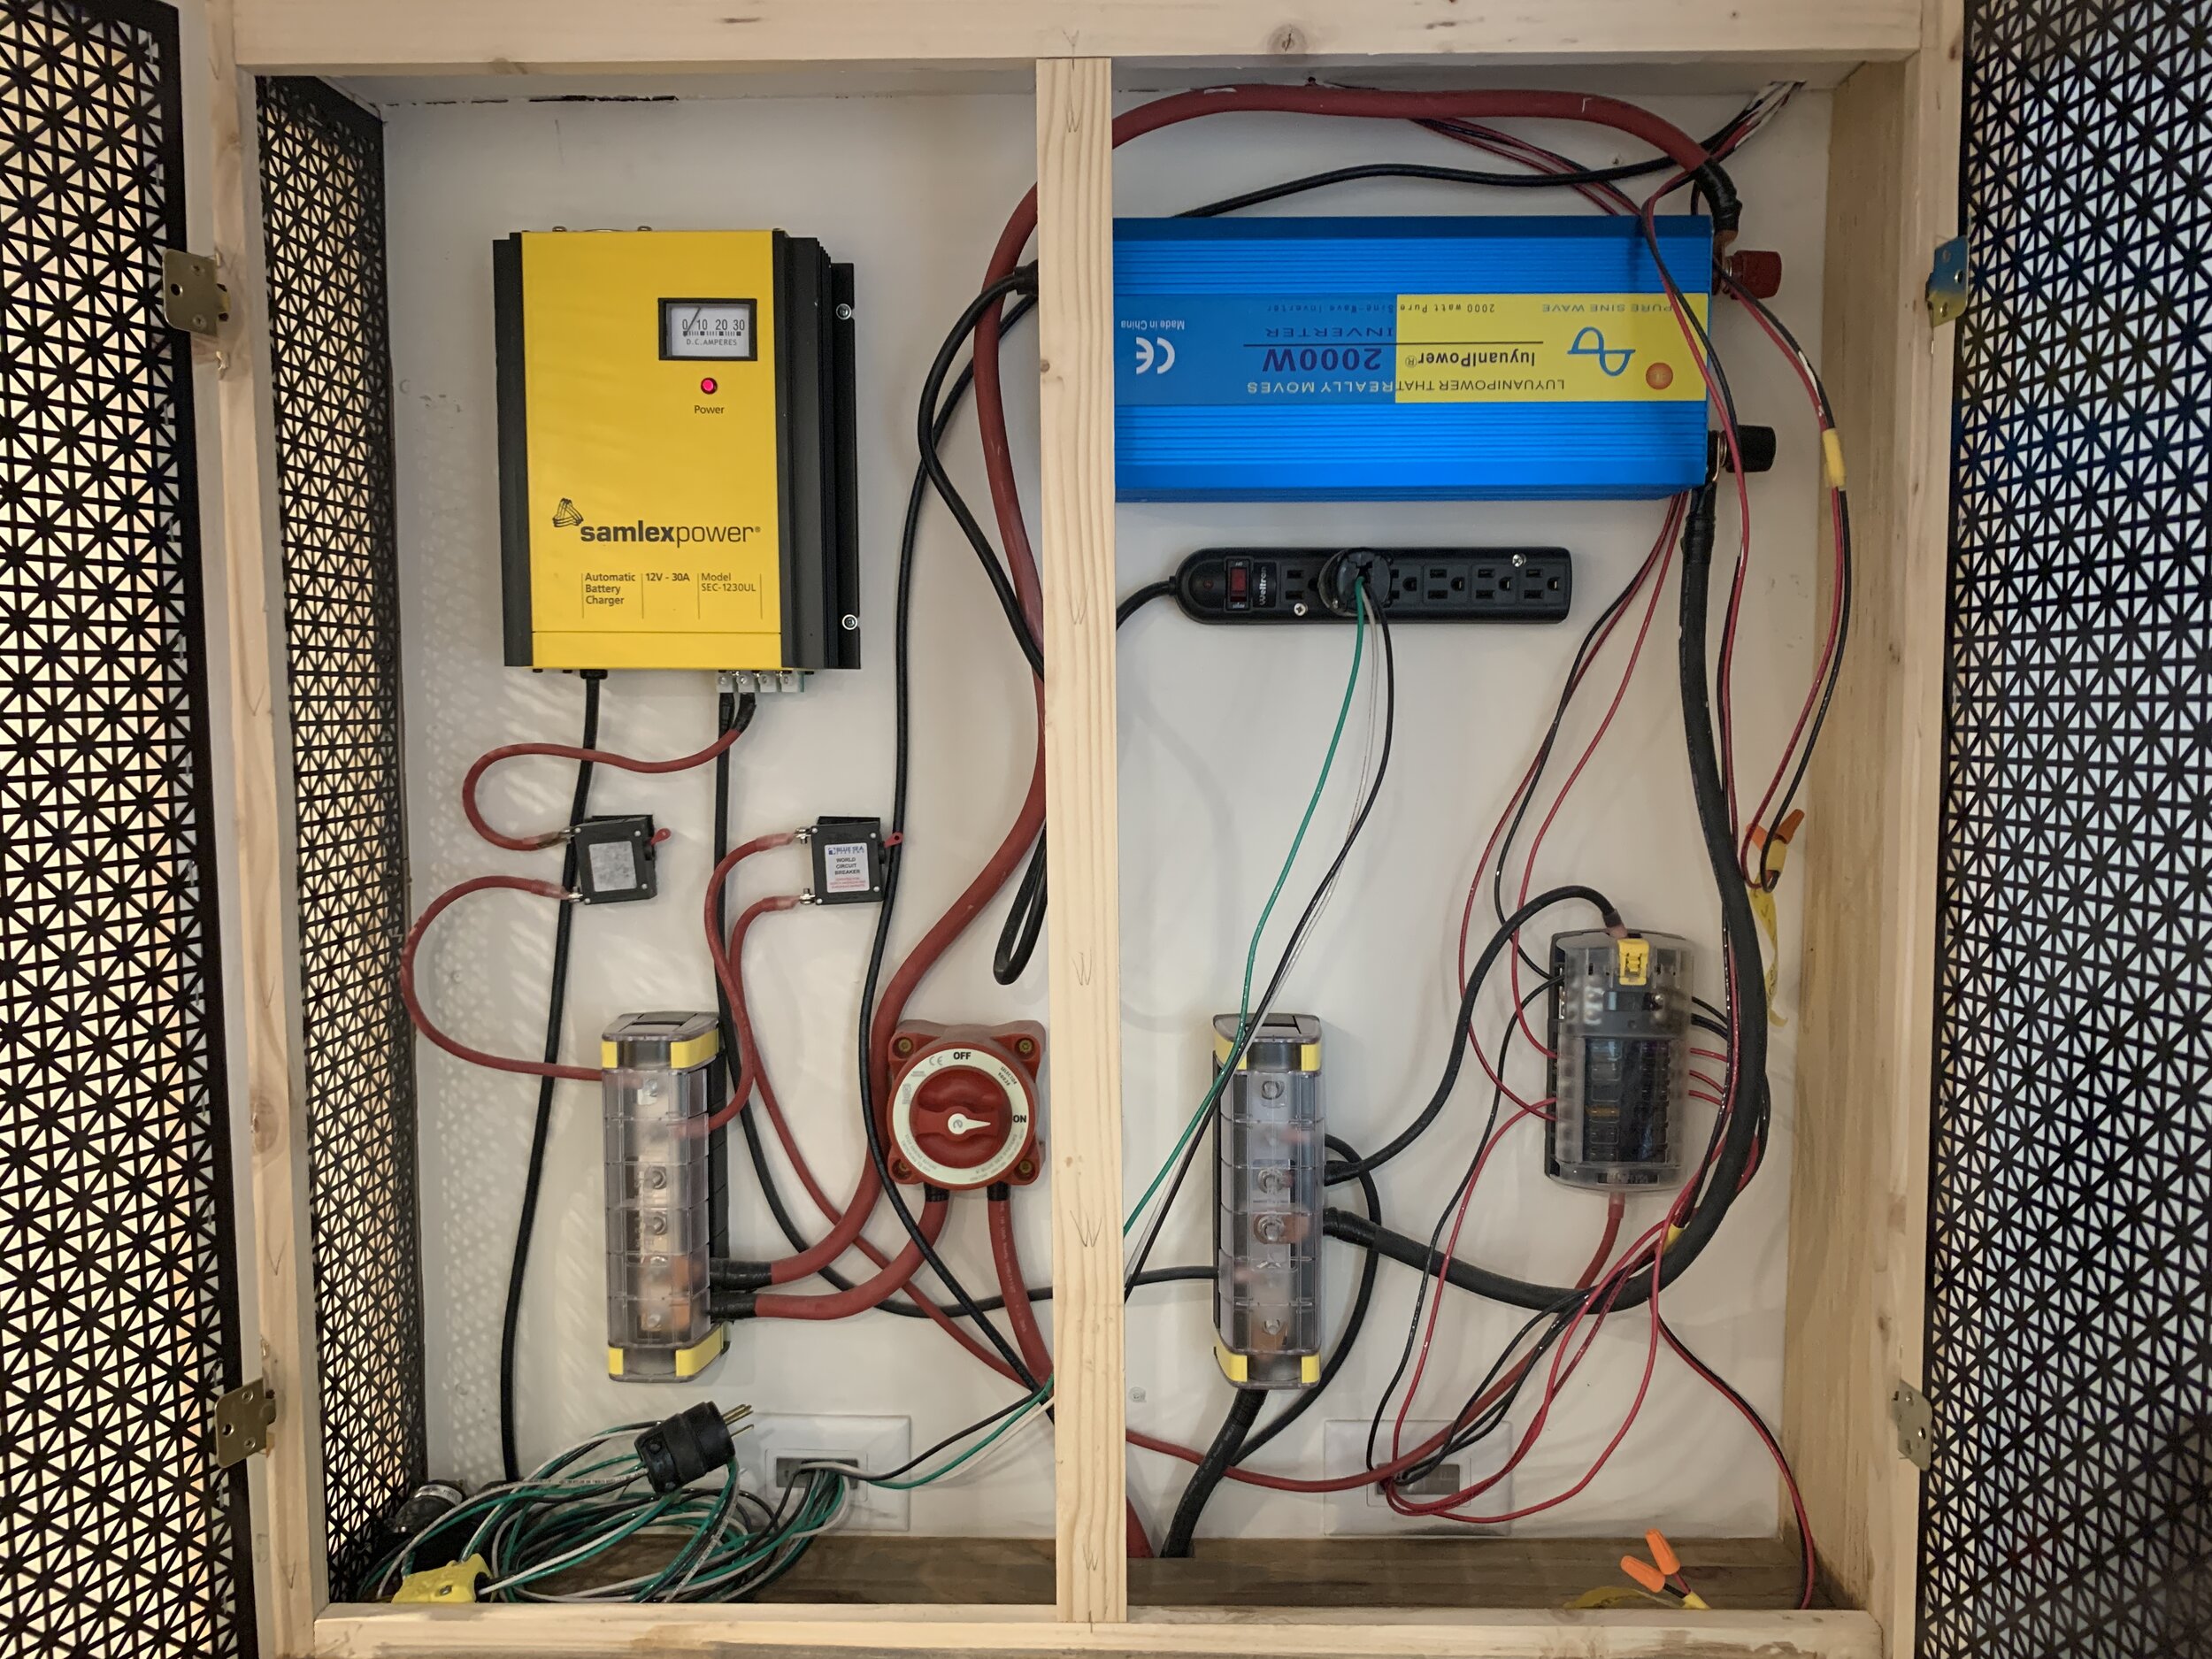
Good question. In the ongoing battle of form vs. function, we decided to come up with another attractive solution for a functional issue (kind of like we did with the air conditioning unit/furniture surround here). When it all gets going, our electrical equipment can really put off some heat. So in an effort to keep it all from, say, getting too hot and maybe melting (!!), we wanted to come up with a simple, cost-effective solution to help let it all breathe and not work as hard to do its thing. It may all be unnecessary, but we’d rather prevent any accidental melting/explosion catastrophes than do nothing, hope for the best and then maybe deal with the ramifications of it later – from both cost and safety standpoints.
Our vented cabinet shopping list
1x2s in “appearance board” grade for cabinet frame + cabinet doors – (we used a lot of 6’ lengths because the 8’ lengths in stock looked a little questionable and with it being only a half-height cabinet, we didn’t need long boards).
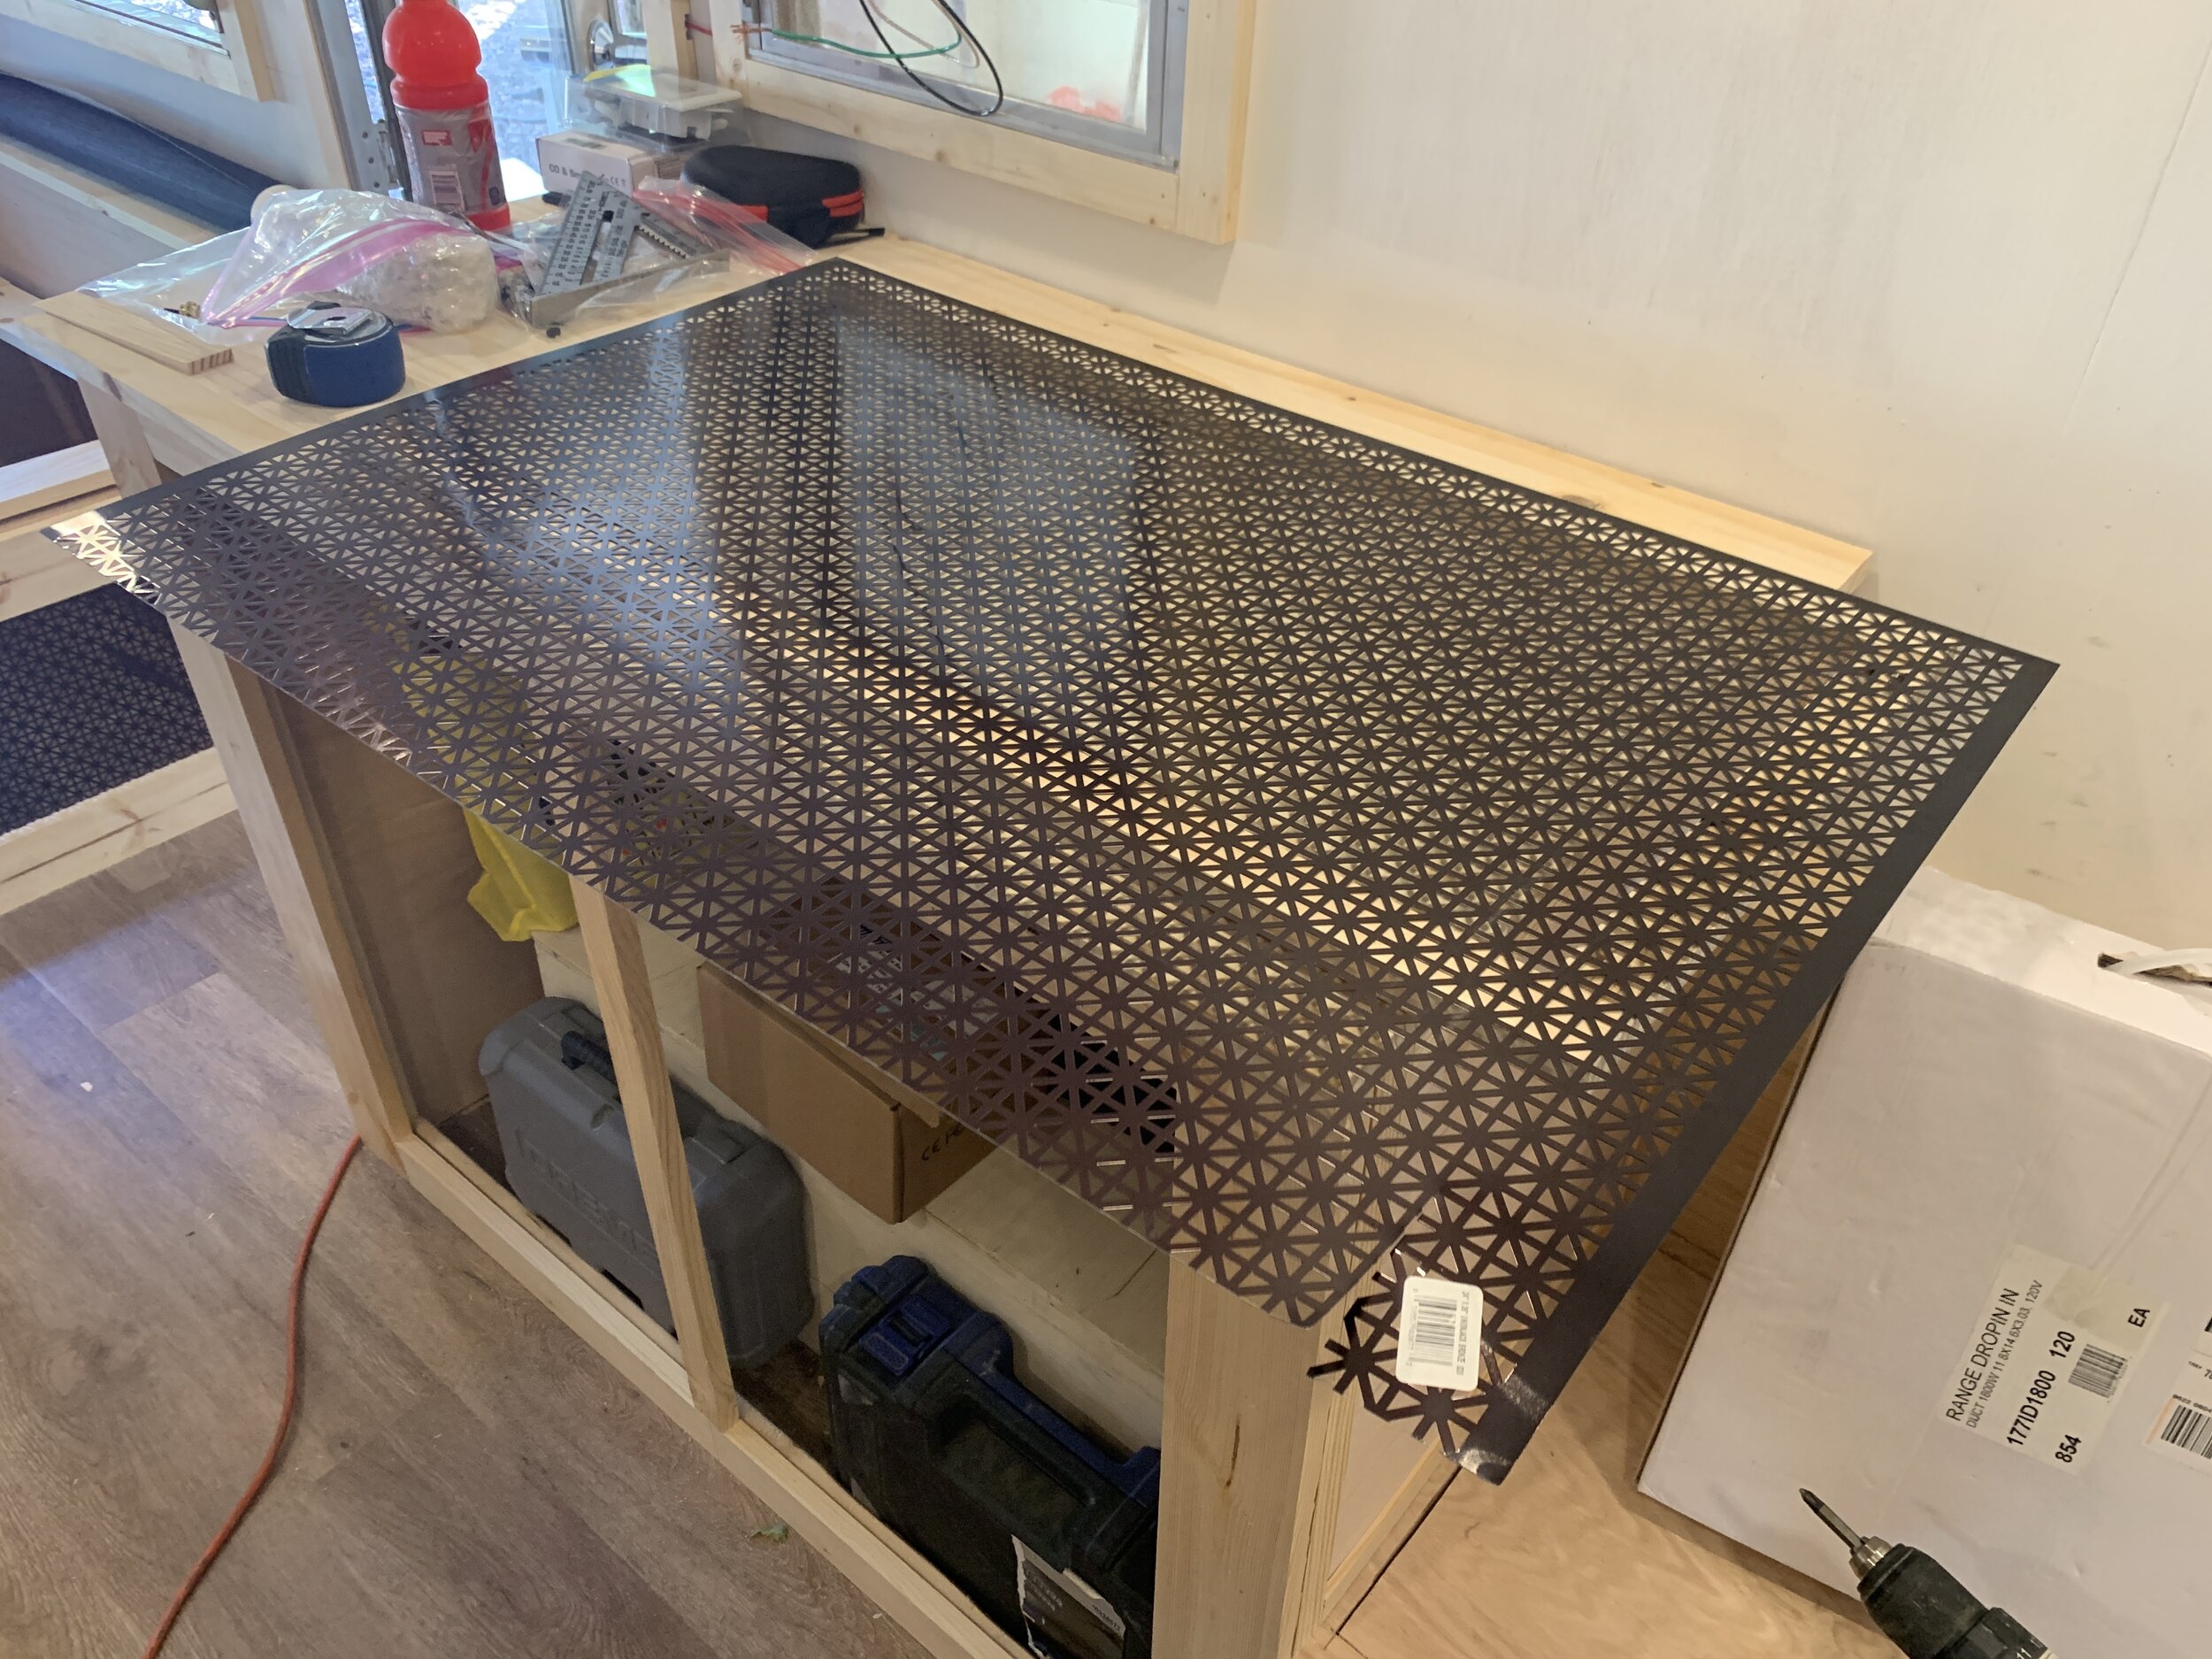
24x36” decorative sheet metal – this stuff is awesome and comes in different patterns, colors and sizes. We chose the same Union Jack pattern we used for the twin bed air conditioner install because aside from coordinating, we like how the geometric pattern plays on our exterior paint design as well as what we have planned for one of our interior walls. (We were planning on getting it in silver, but they were all sold out and because we’re impatient we bought the oil rubbed bronze color instead – not a big deal since we’d be painting over it anyway.)
Kreg jig + Kreg screws
Tape measure + speed square + pencil + level
Miter saw
Irwin + Kreg clamps
Finish nailer + nails
Gloves – to protect your hands while cutting metal screen
Tin snips or strong scissors
Electric staple gun – you might be able to do this with a manual staple gun, but ouch. Your poor hands.
3/8” staples – or staples shorter than 3/4”
Rubber mallet/hammer – just in case you need to carefully hammer in any of your staples
The vented cabinet build
Again for both form and function, we decided to build this upper cabinet at a shallower depth than the base cabinet it rests on. We knew we wanted to keep the 98-square-foot space as open and “large” as possible – without sacrificing the structural integrity that cabinetry is meant to provide to travel trailers – while also adding an additional counter space. Apparently we love challenges and extra work. To give us the both of both worlds, our cabinet top rests on the countertop, extends all the way to the ceiling and doesn’t block the sight line through the camper (mostly a concern when inside the dinette area and looking from the door to the back of the camper). This way, you can see each corner from the door, making it feel larger inside.

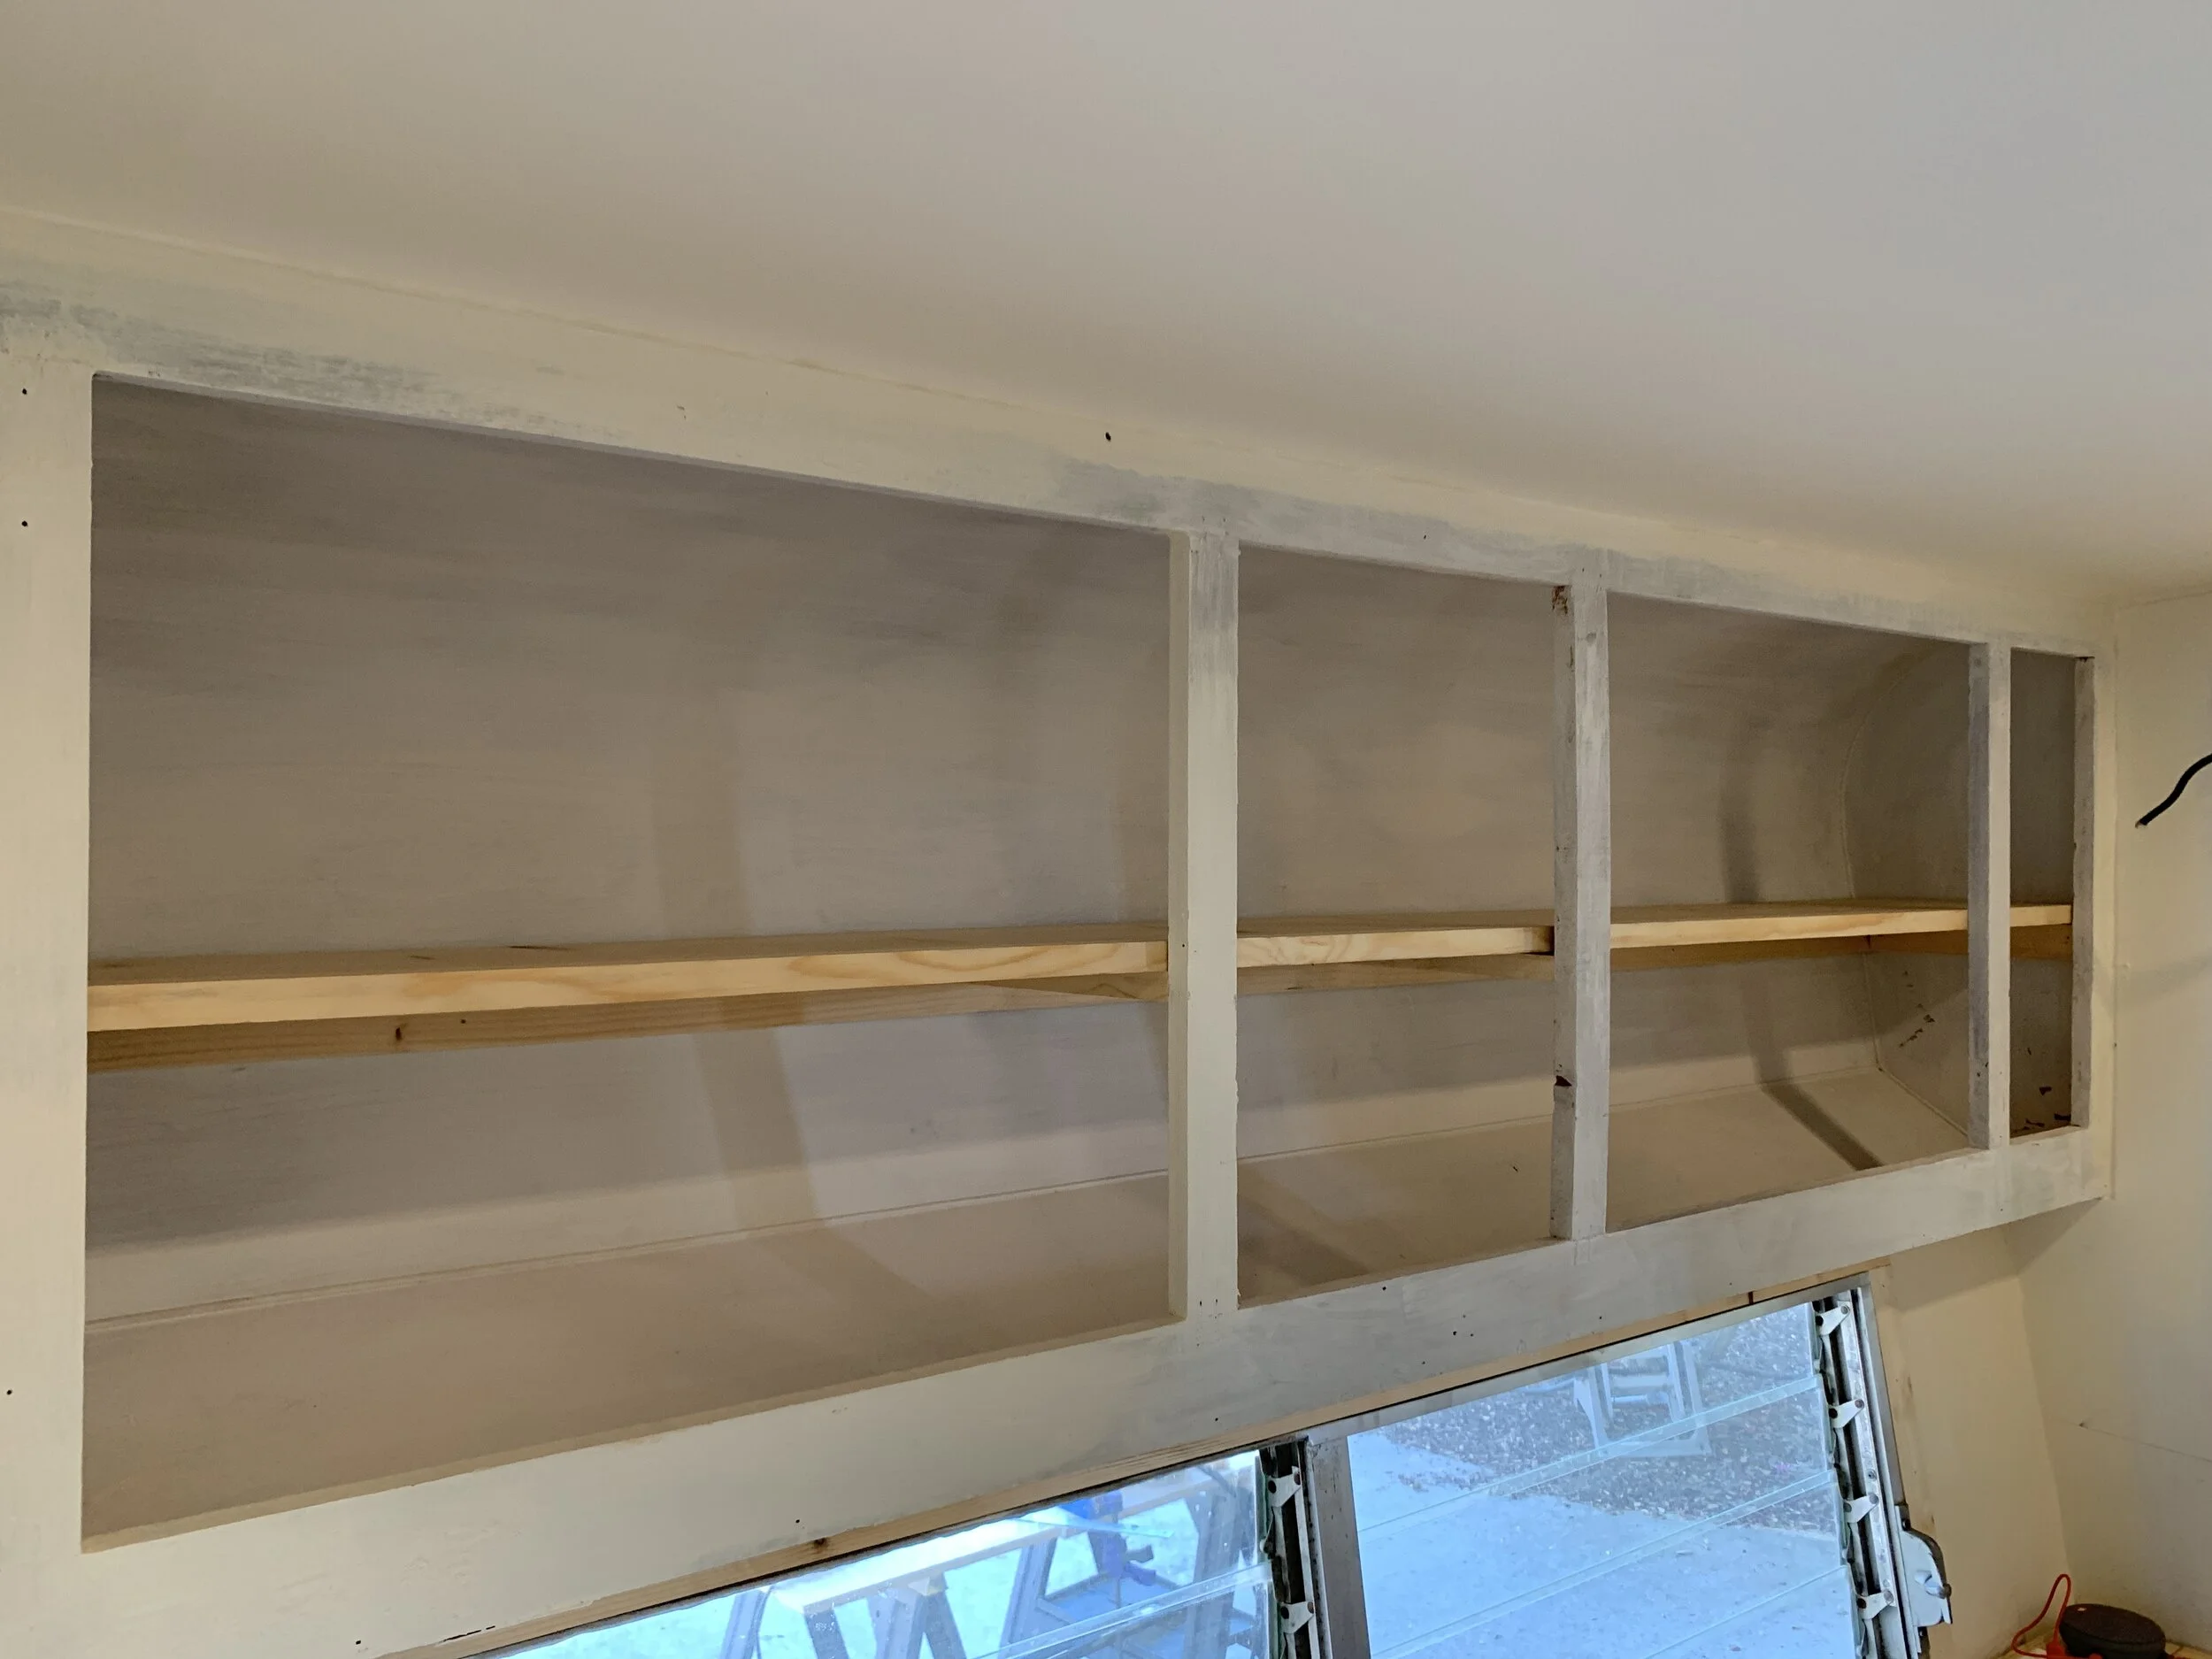
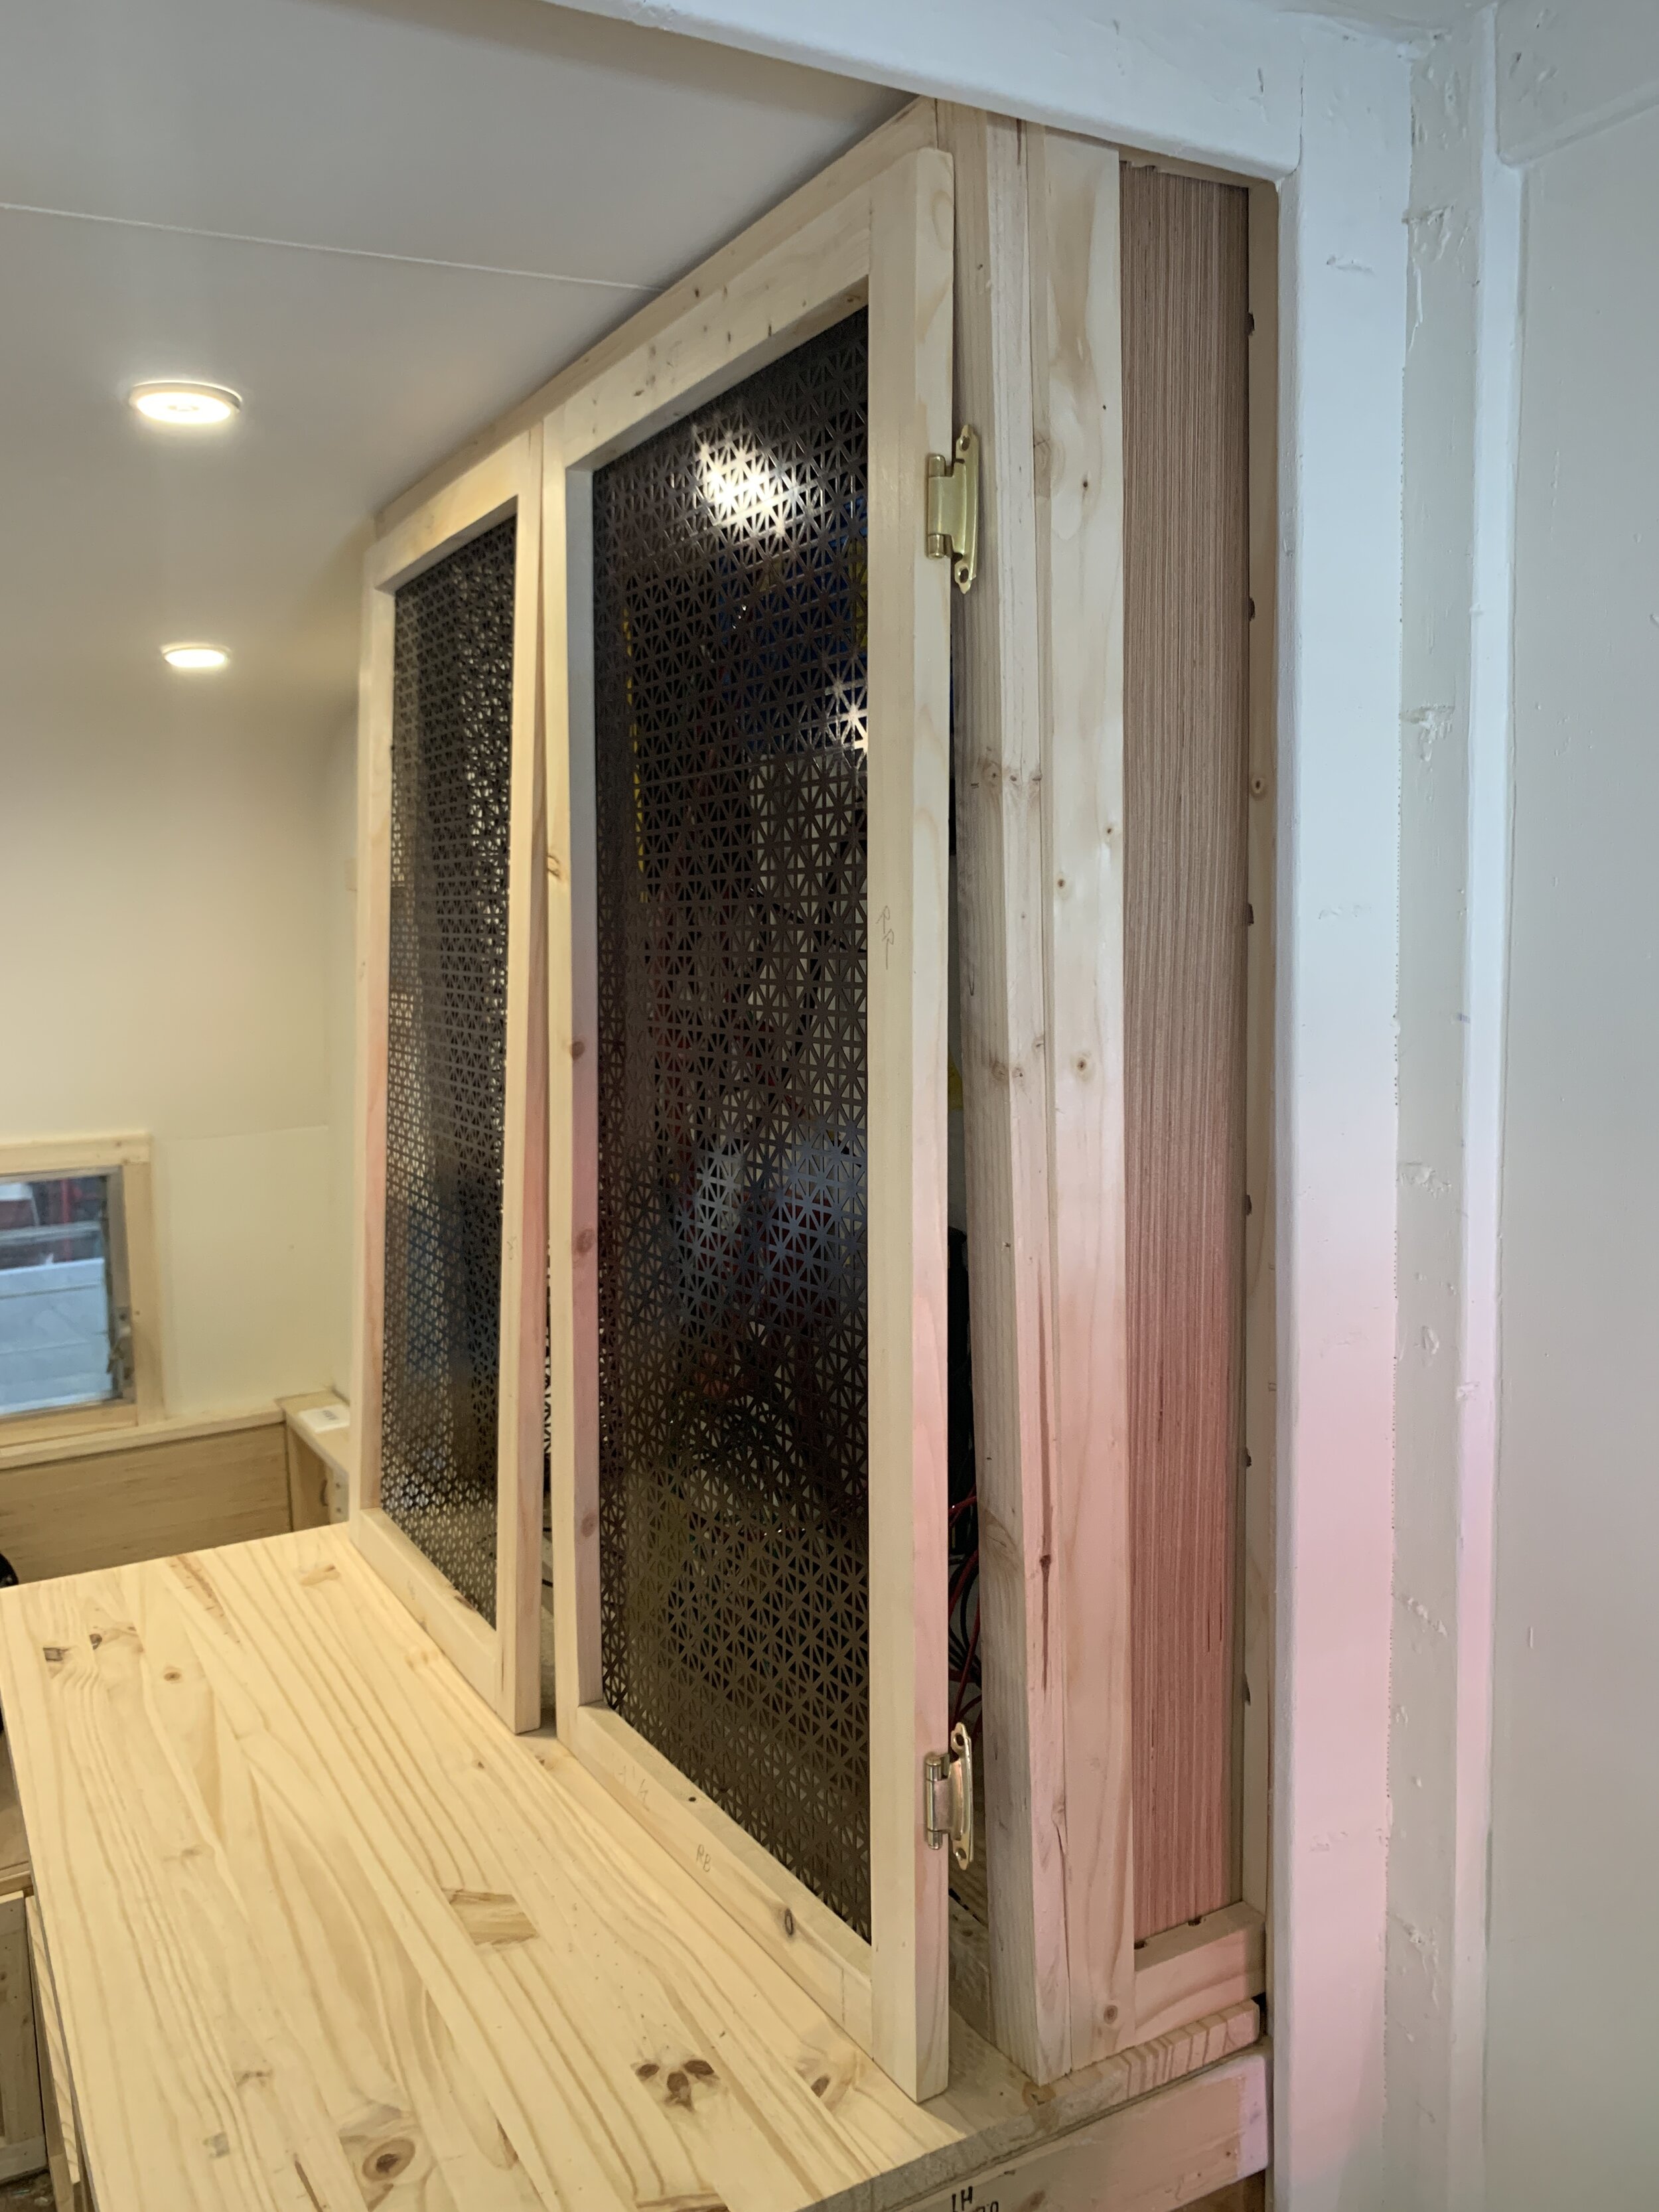
Mid-build view of the left side of the electrical cabinet, as seen from the dinette area in the back of the camper.
We started this cabinet build similarly to our base cabinet build, building the cabinet frame first. This time, we used cabinet-grade lumber with nice crisp square edges, since we would be adding only one layer of perforated metal screen to the insides of the cabinet (vs. all the layering we did for the solid, electrical wiring-filled base cabinets).
Apologies for not having photos of each step in this process – I’ll try to describe as best as I can in the order everything was constructed.
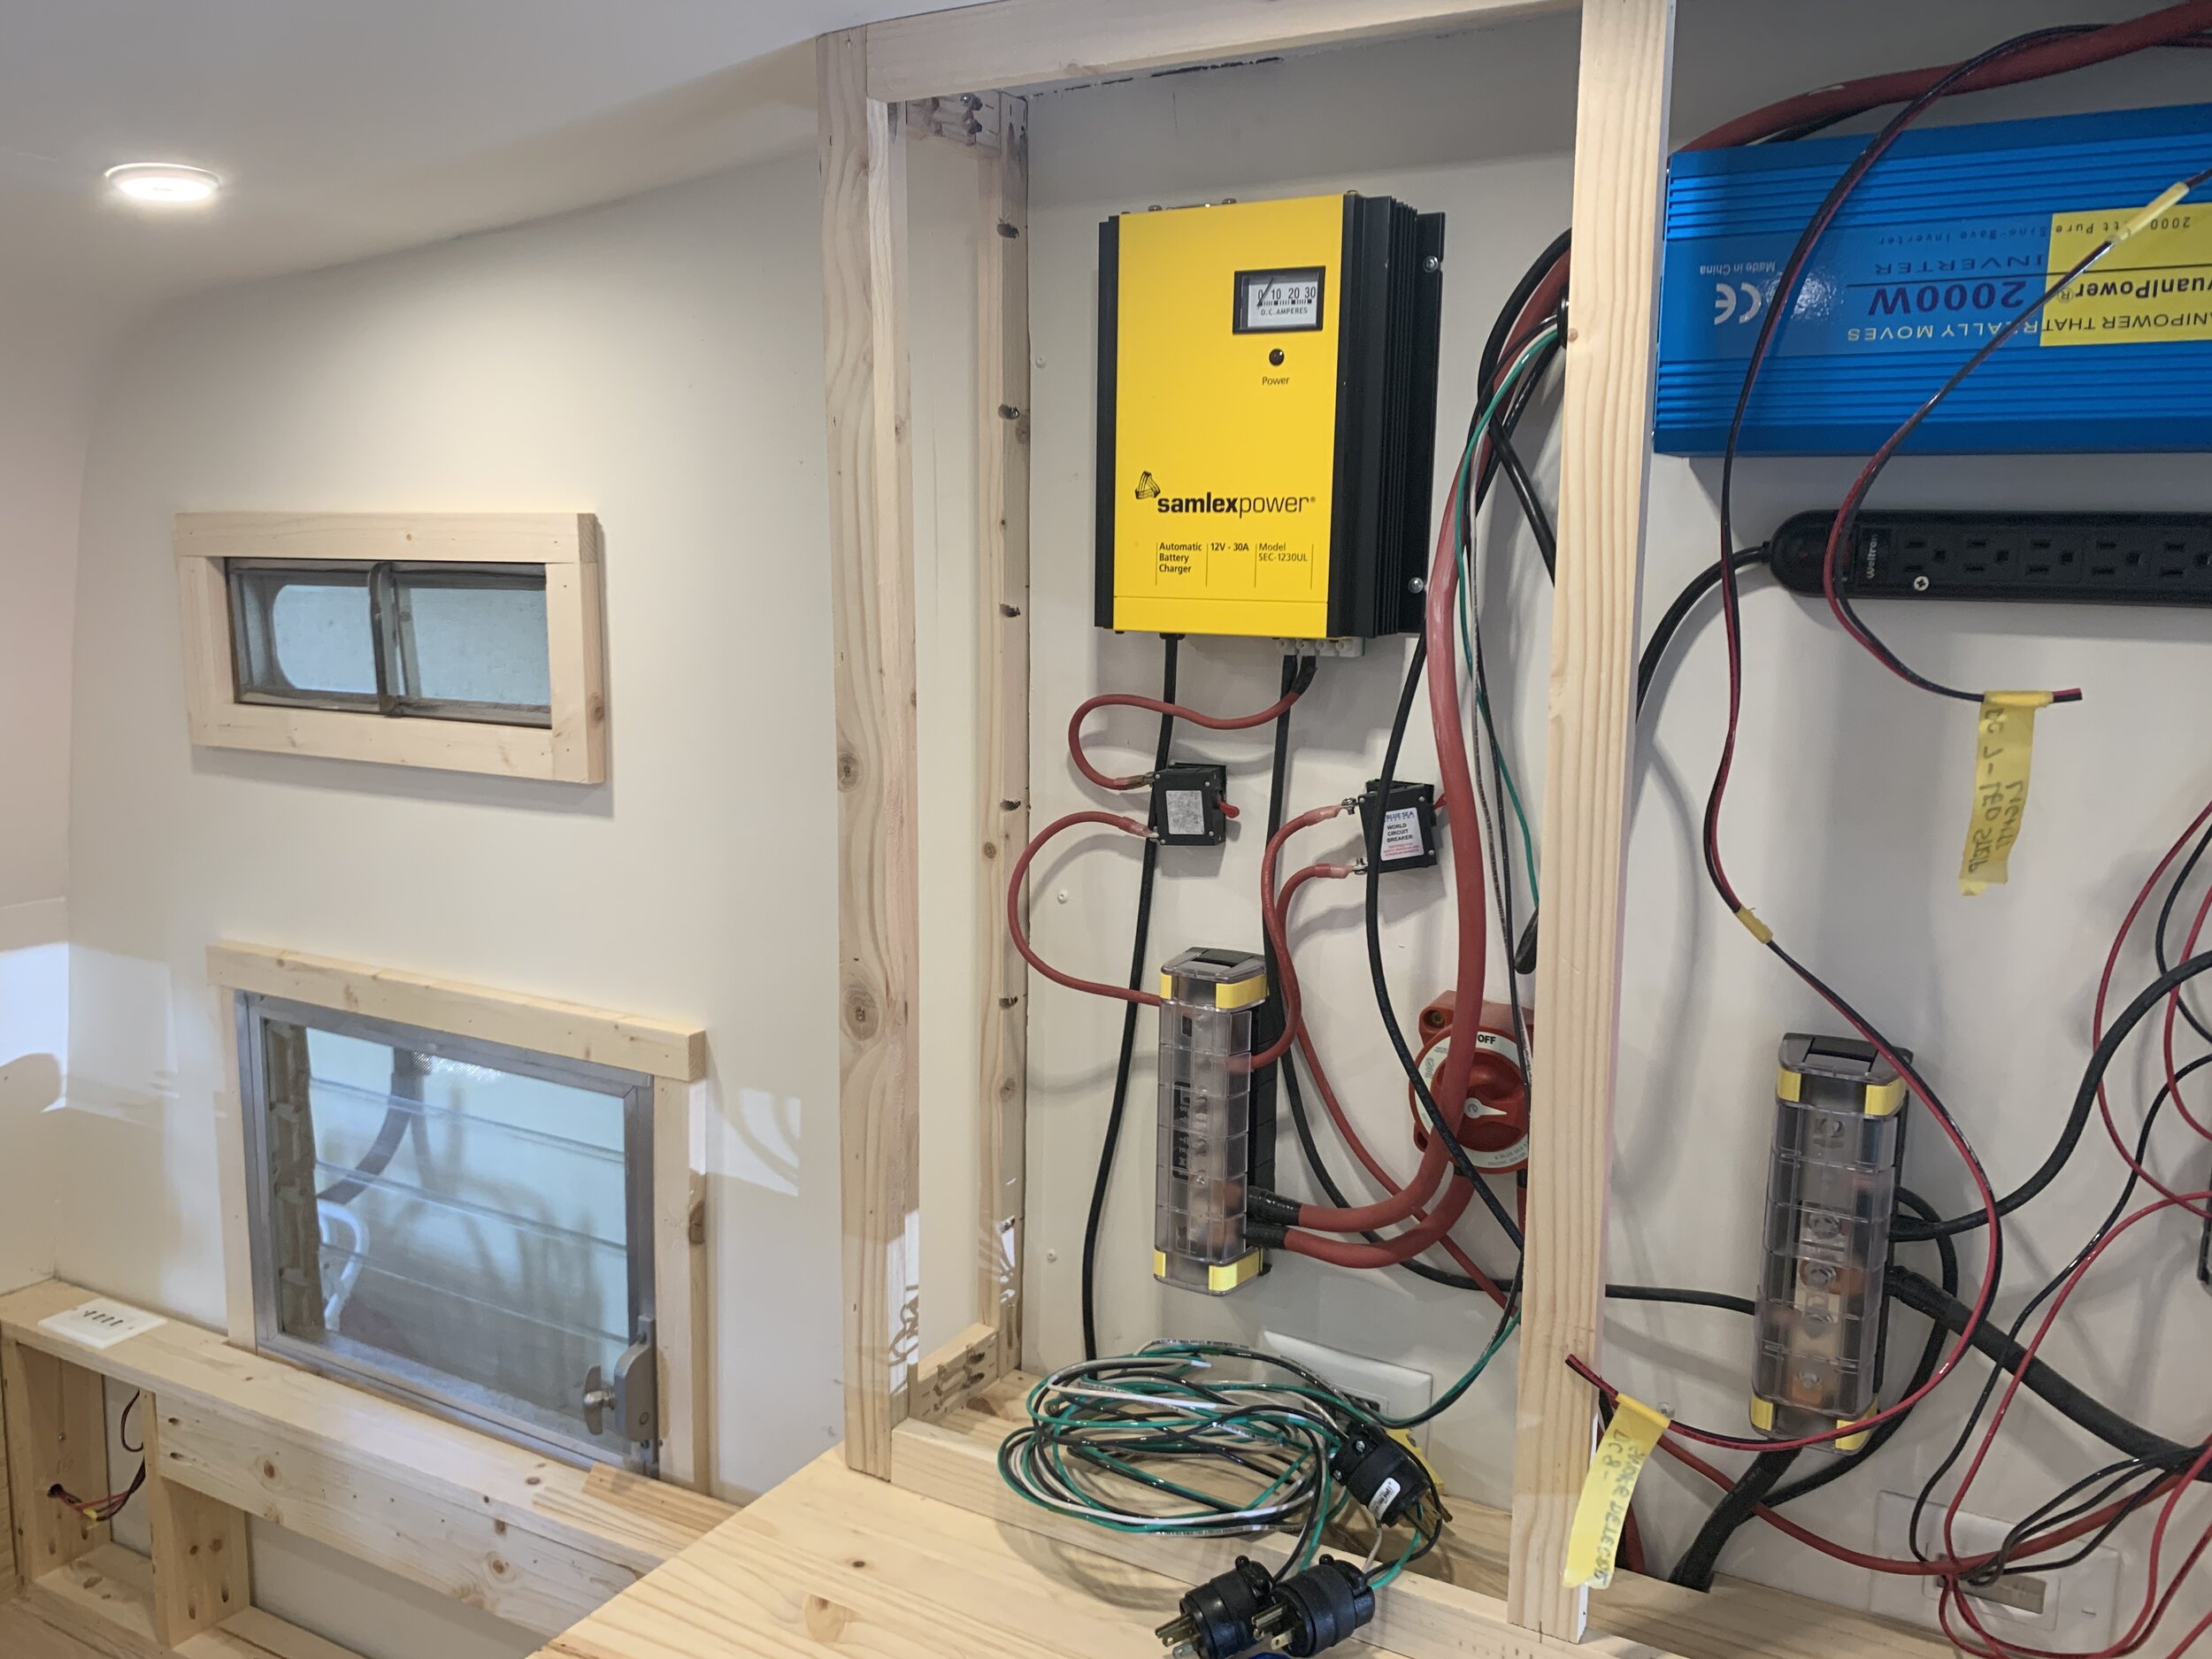
On the far left of the cabinet (next to the big yellow box), you can see the pocket holes and how the wall-side vertical support is Kregged into the wall/interior stud for added support.
First, we built the sides of the cabinet to help set the overall width and depth, keeping the placement of the front parallel to the front edge of the countertop. We started with the vertical side pieces, Kregging in the top and bottom short horizontal side pieces into the vertical support closest to the counter edge before we secured it to the ceiling and countertop. This was important to do first since the electrical cabinet depth was too shallow to fit the drill + long Kreg bit + screw into the front vertical piece (where the drill bit would face away from the wall during install). Once the front vertical side piece and short top and bottom side pieces were connected (to form kind of a “C” shape), we connected the top and bottom side pieces to the wall-mounted vertical side support, forming a stable rectangular cabinet side. All pocket holes are secured on the inside of the cabinet since they’re covered by the screen.

After the sides of the cabinet were in place, we nailed in vertical 1x2s to form the left and right sides of the front of the cabinet, clamping them in place to keep a nice flush corner as we nailed them in. Then we connected the cabinet face verticals to each other from the inside with the long horizontal 1x2s seen on the top and bottom. We marked out the center of the cabinet face and Kregged in a centered vertical support.
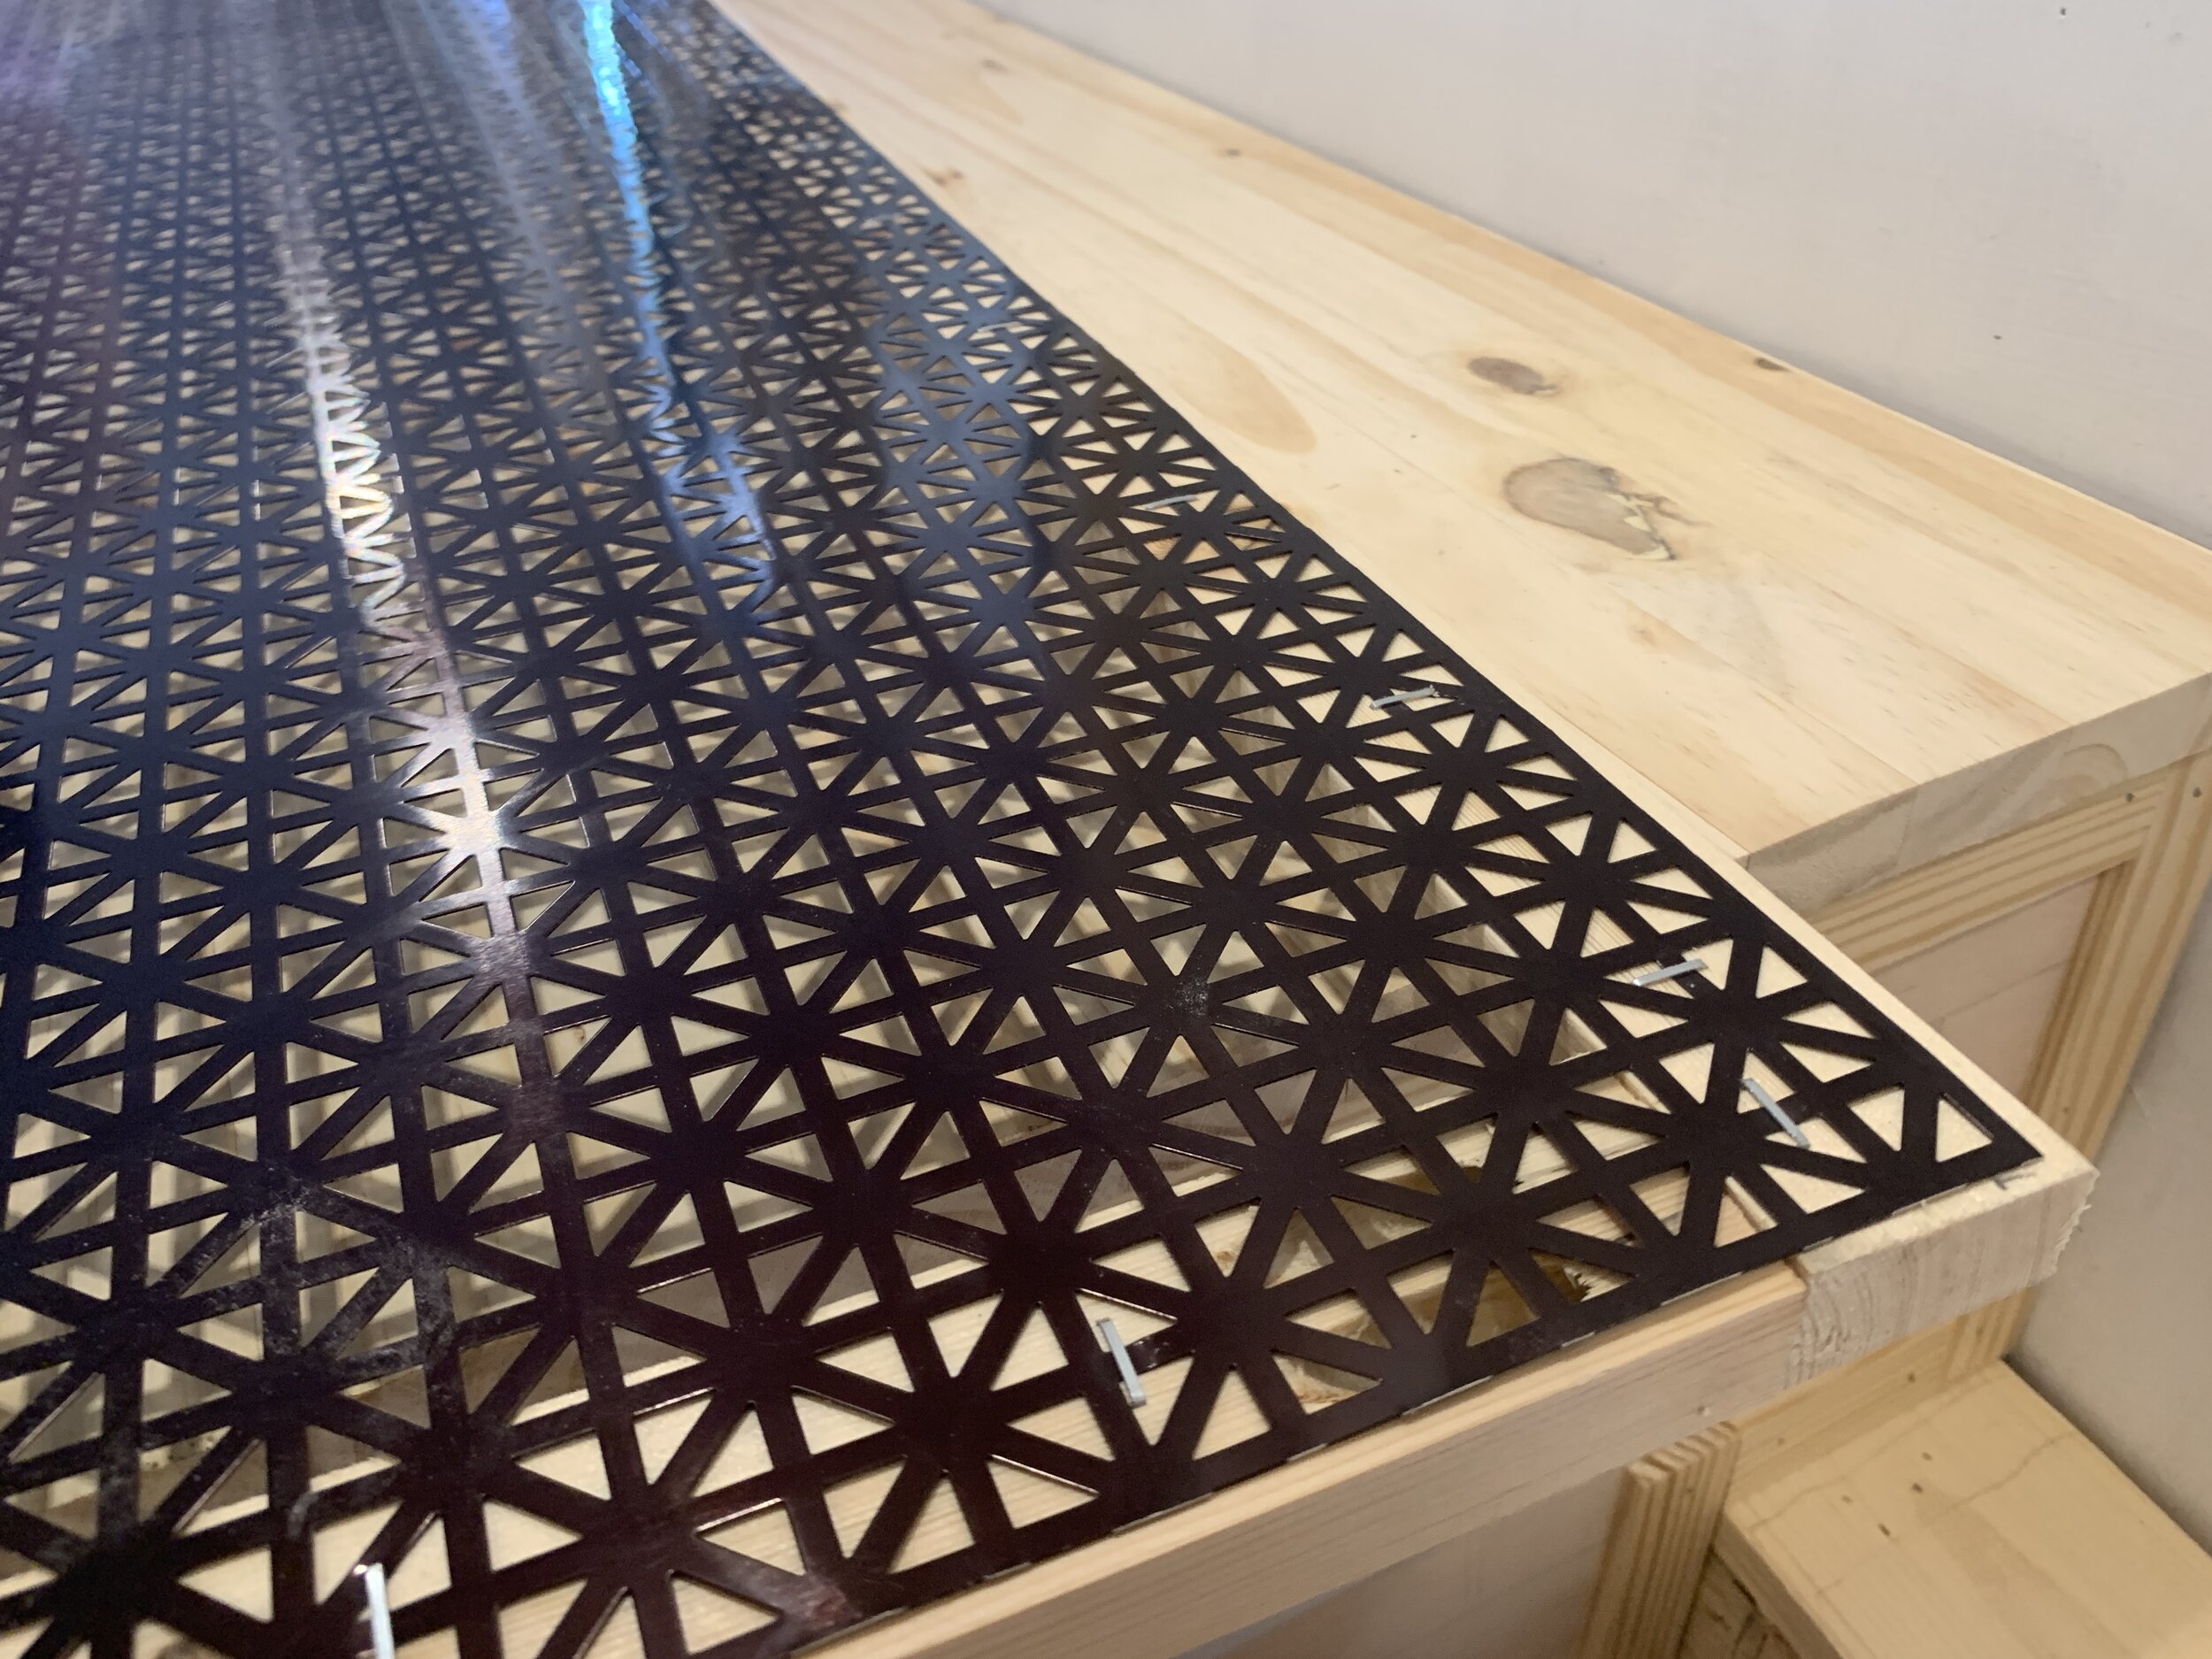
Before we built and attached the doors of the cabinet, we used the staple gun to secure a piece of metal screen cut to size to the left side from the inside of the cabinet. Instead of decorative metal screen, we closed in the right side of the cabinet with 1/4” plywood since it will join up with a solid shower wall and didn’t need venting capabilities to nowhere.
Building the vented cabinet doors

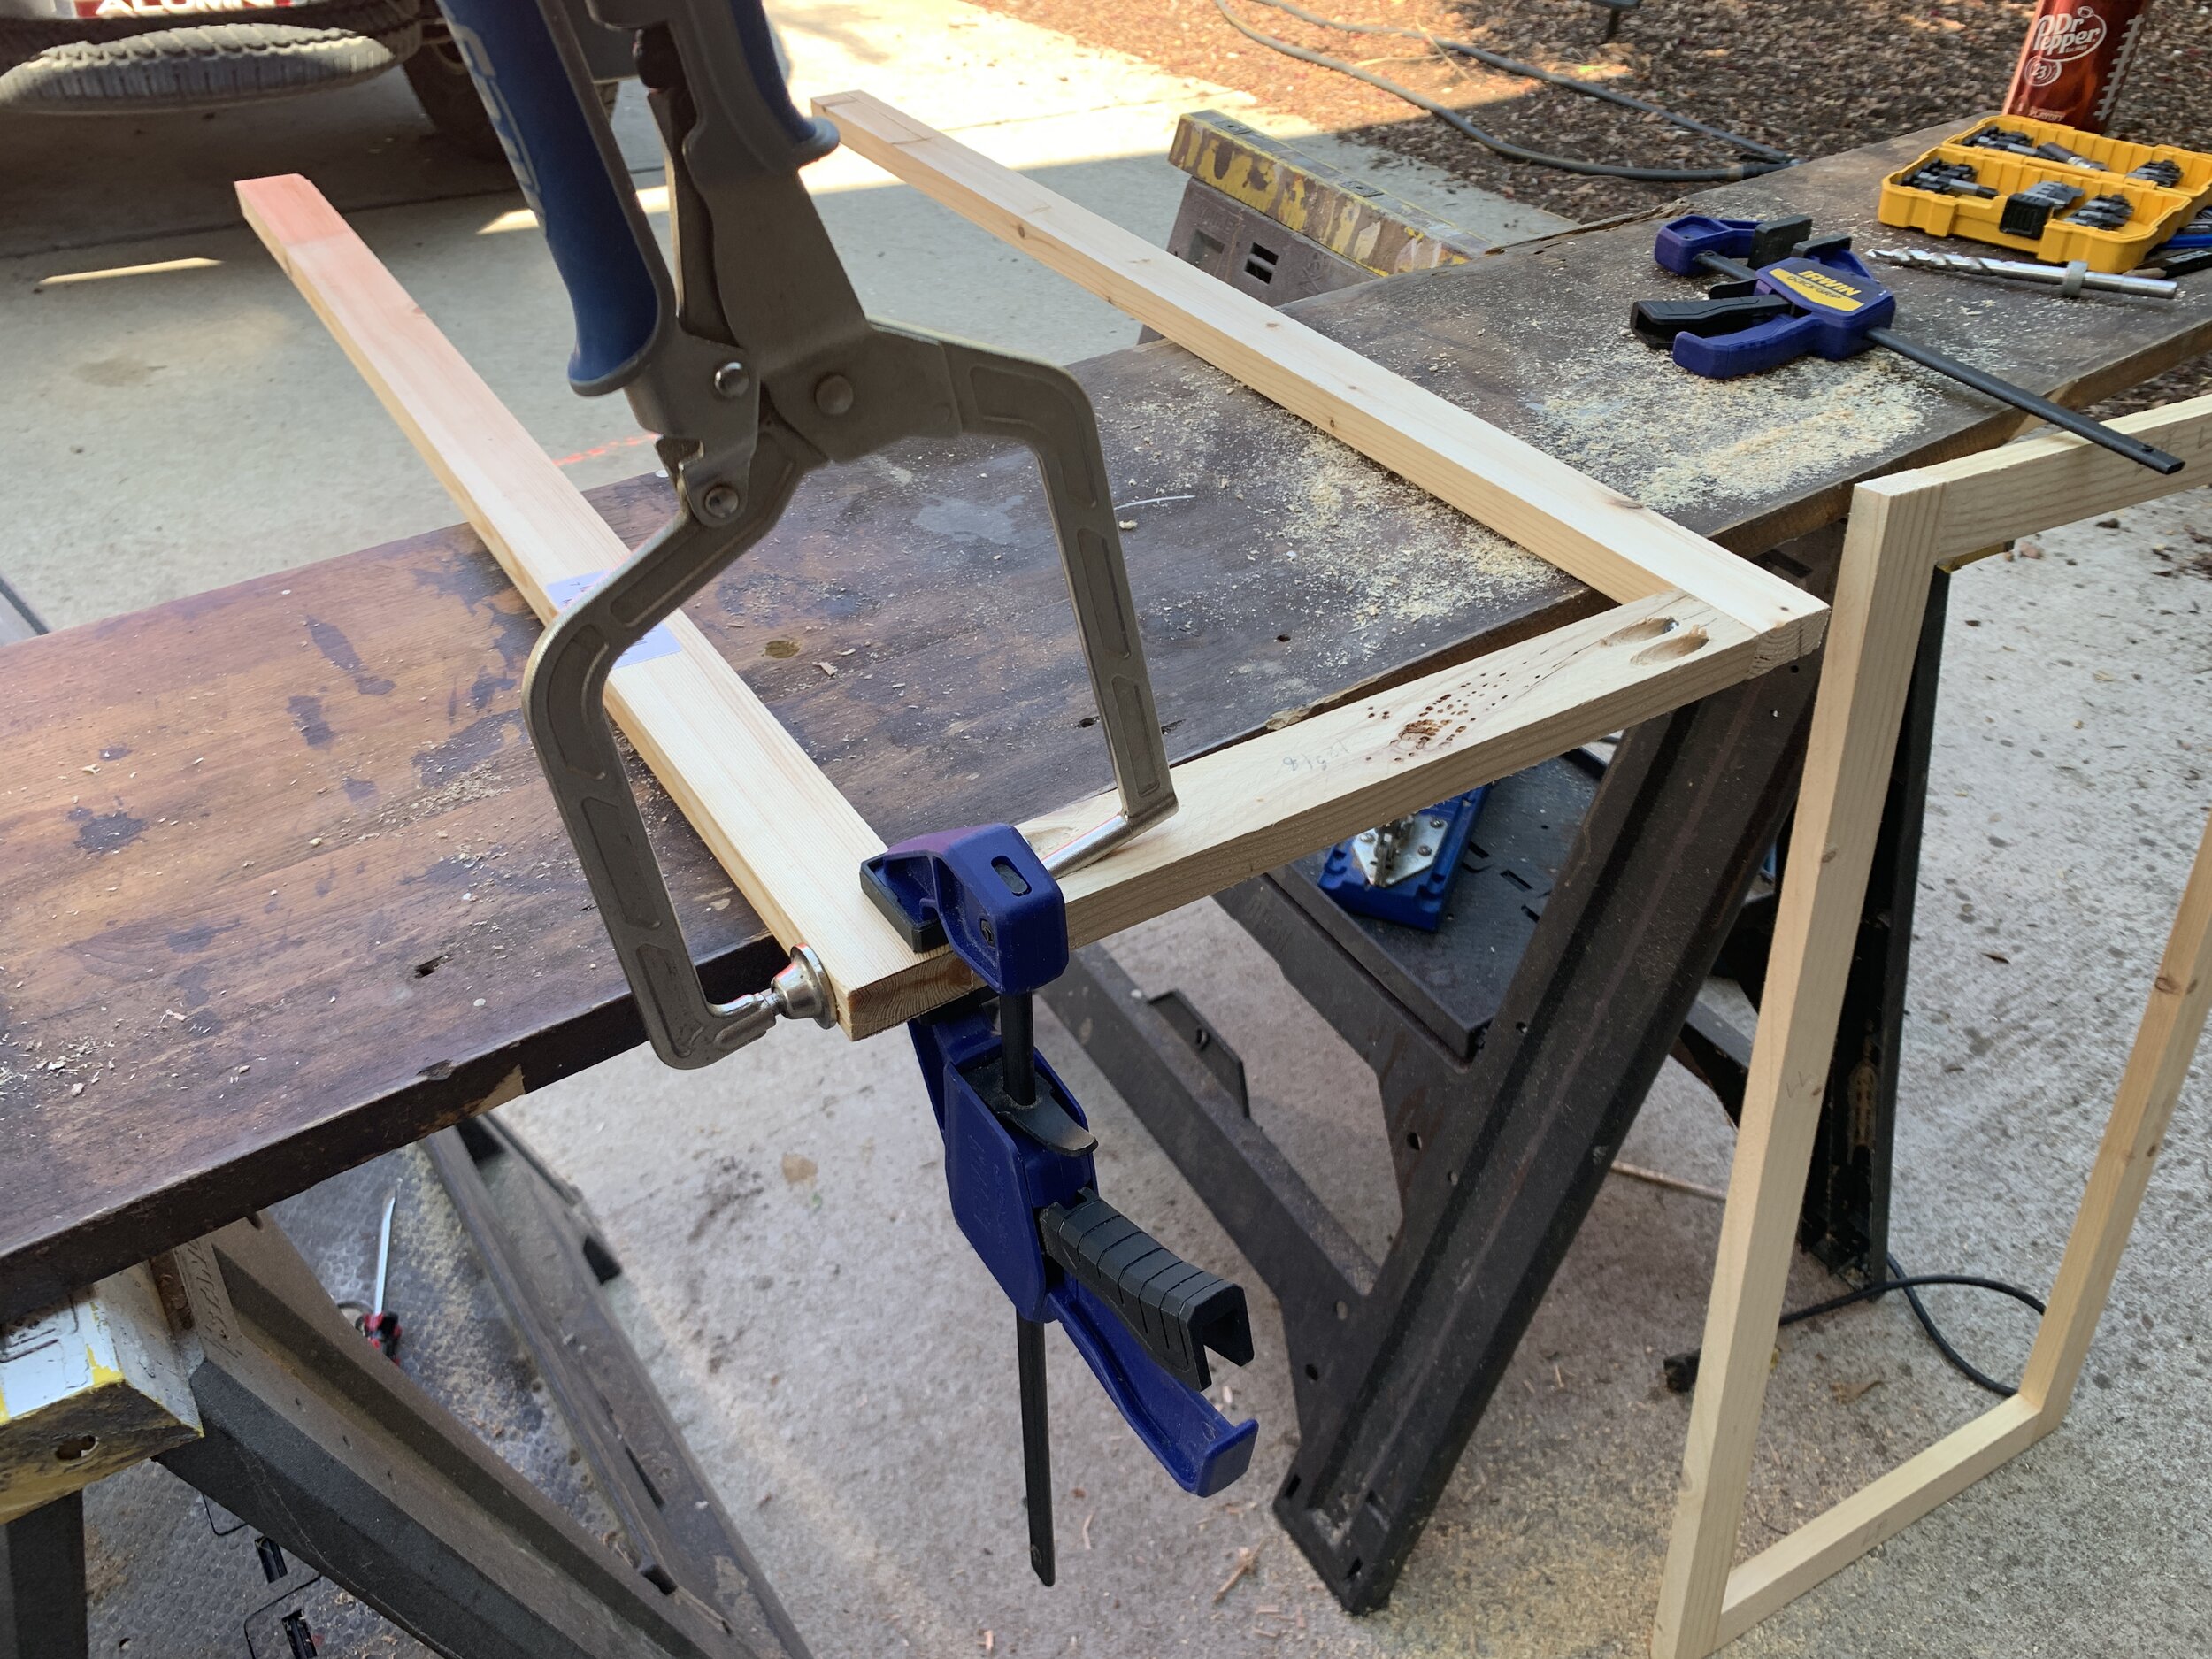
Determining door width – clamping our door verticals to the cabinet face allowed us to get measurements for the top and bottom horizontal door pieces.
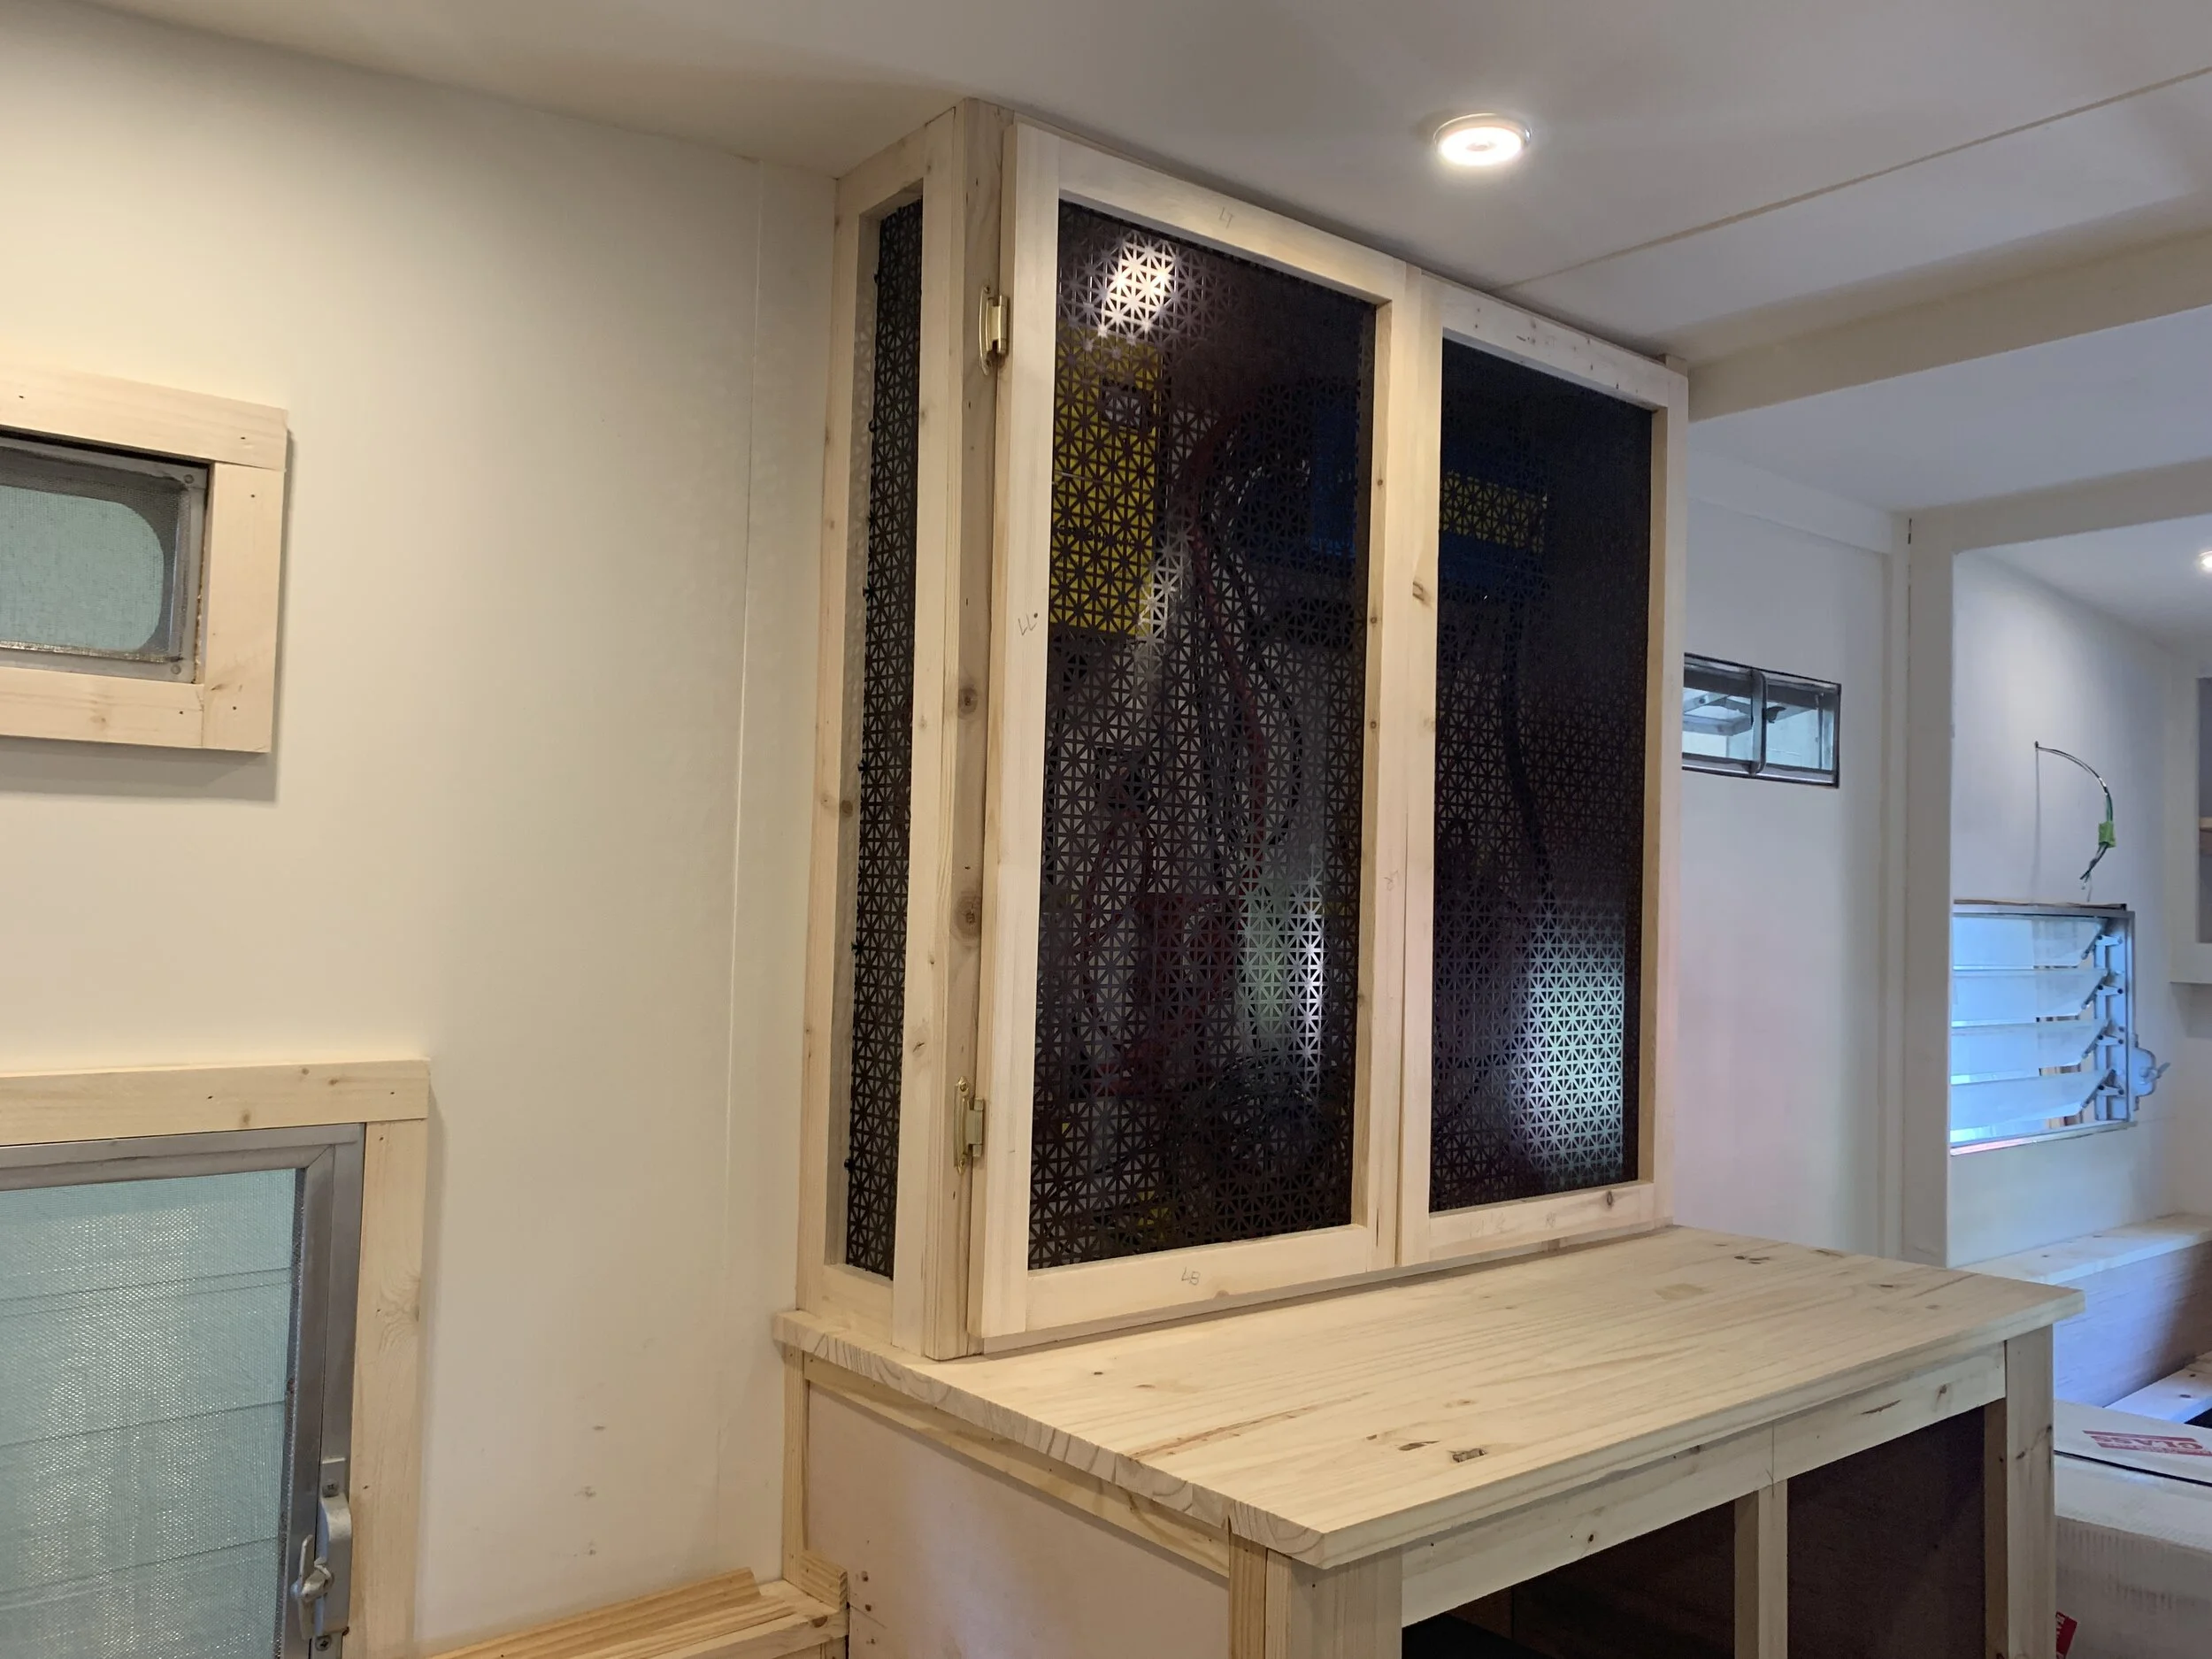
Using the top and bottom, sides and center support on the cabinet face we determined the size and placement of each cabinet door. We used the same method we shared in our other cabinet post to construct the cabinet door frames. Instead of nailing in plywood to the backs, we stapled metal screen making sure to square up the gridded design with the door frame for a clean look.

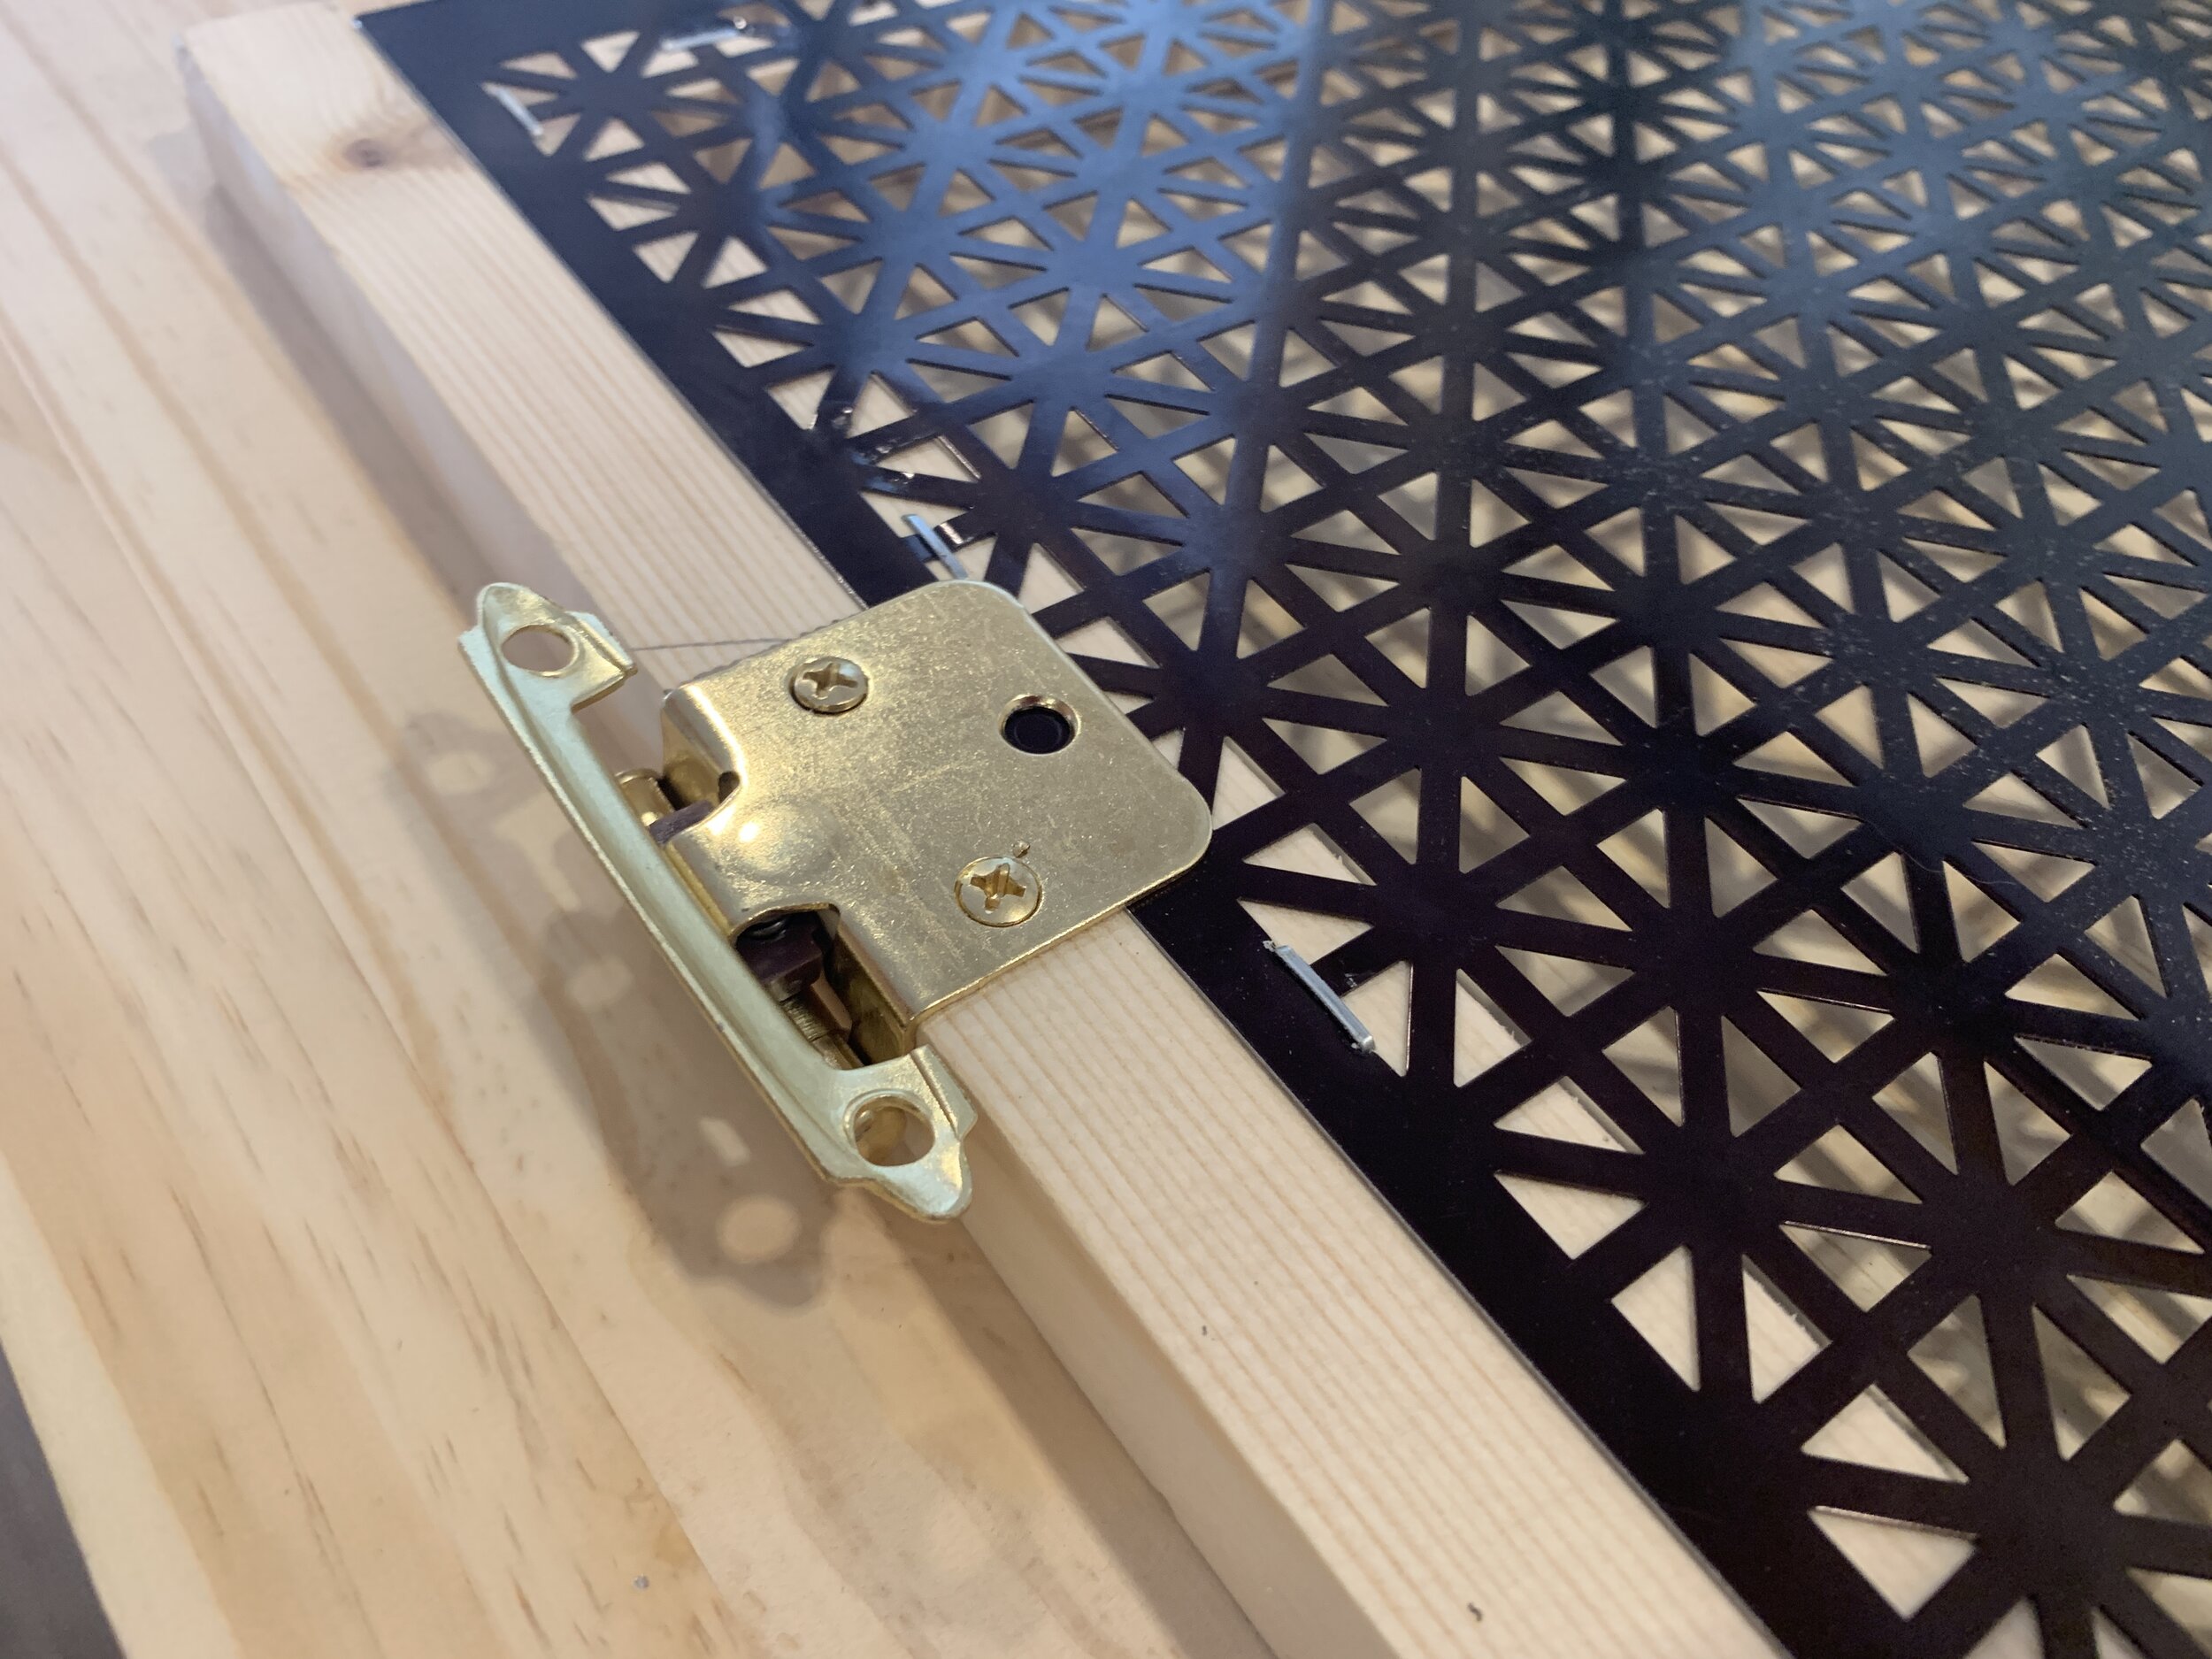
Lastly, we installed our hinges just like we did with the base cabinets, placing them 5” in from the top and bottom edges of each door. We added the same magnetic cabinet latches as with our base cabinets to help keep the doors shut during travel.

Update: The finished top cabinet is 8” deep and roughly 36” tall.
Next up for The Cameo
Work-wise we still need to fill gaps, seams and imperfections, prime, paint and finish installing the handles on our cabinets. Ahead on the blog we’ll be covering how we installed the under mount sink and inset glass induction stovetop, as well as how we built our convertible dinette-to-bed area (which at this point you’ve probably caught glimpses of in the backgrounds of some of our more recent photos on the blog, or the whole enchilada if you follow us on Instagram).
So what do you think about the vented cabinet? Yay or nay? We’d love to hear your thoughts below.