The Cameo Camper Renovation: Air Conditioner Install Part Two
Updates since this post:
Check out the new and improved lid + how we installed bedlifts here.
See how well out A/C is working so far here.
This is part two of a two-part series. Don’t forget to check out part one.
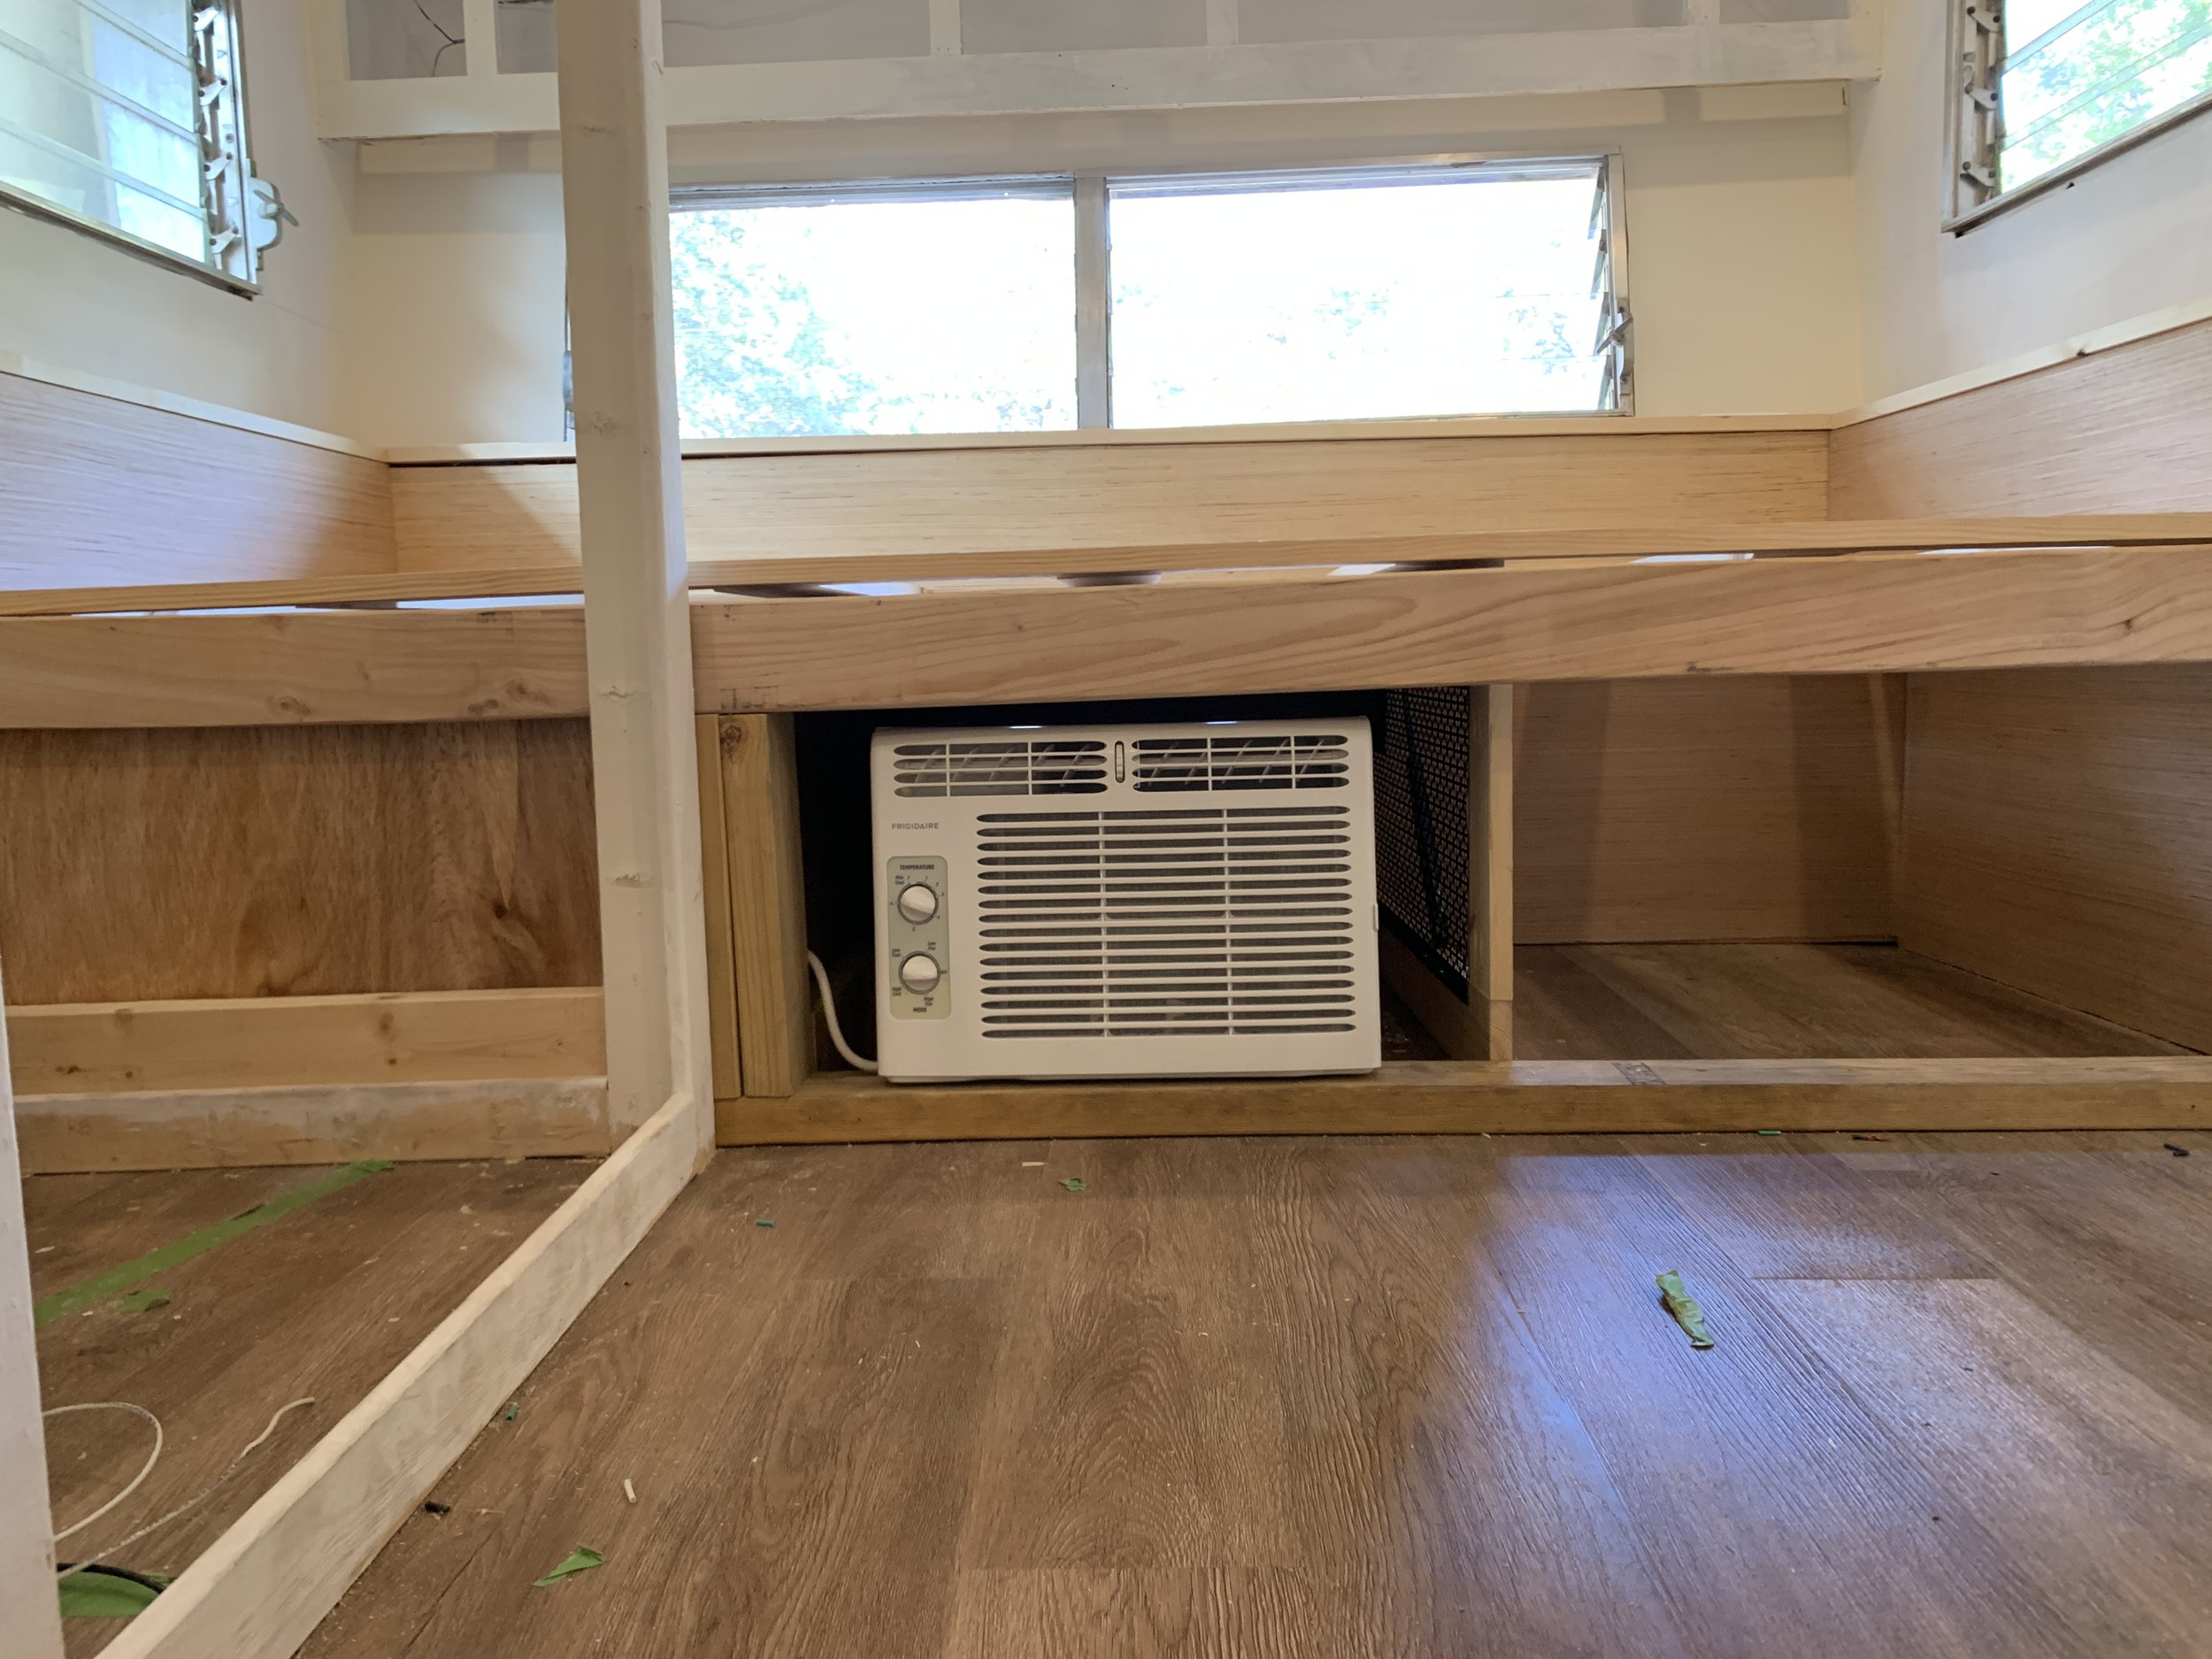
Today we’ll be covering how we built the furniture around the window unit air conditioner we previously installed – including how we built our twin daybed with areas to charge electronics, top-accessible storage underneath and airflow to the modified A/C. If you missed the first part where we shared all the details for the installing a window unit not in a window and how we secretly vented the exhaust, you can check it out here. And like most things as of late, this project is a mix of woodwork and electrical, woodwork and electrical with a dash of “okay, what’s plan B, or C.. or D…”. So many layers.
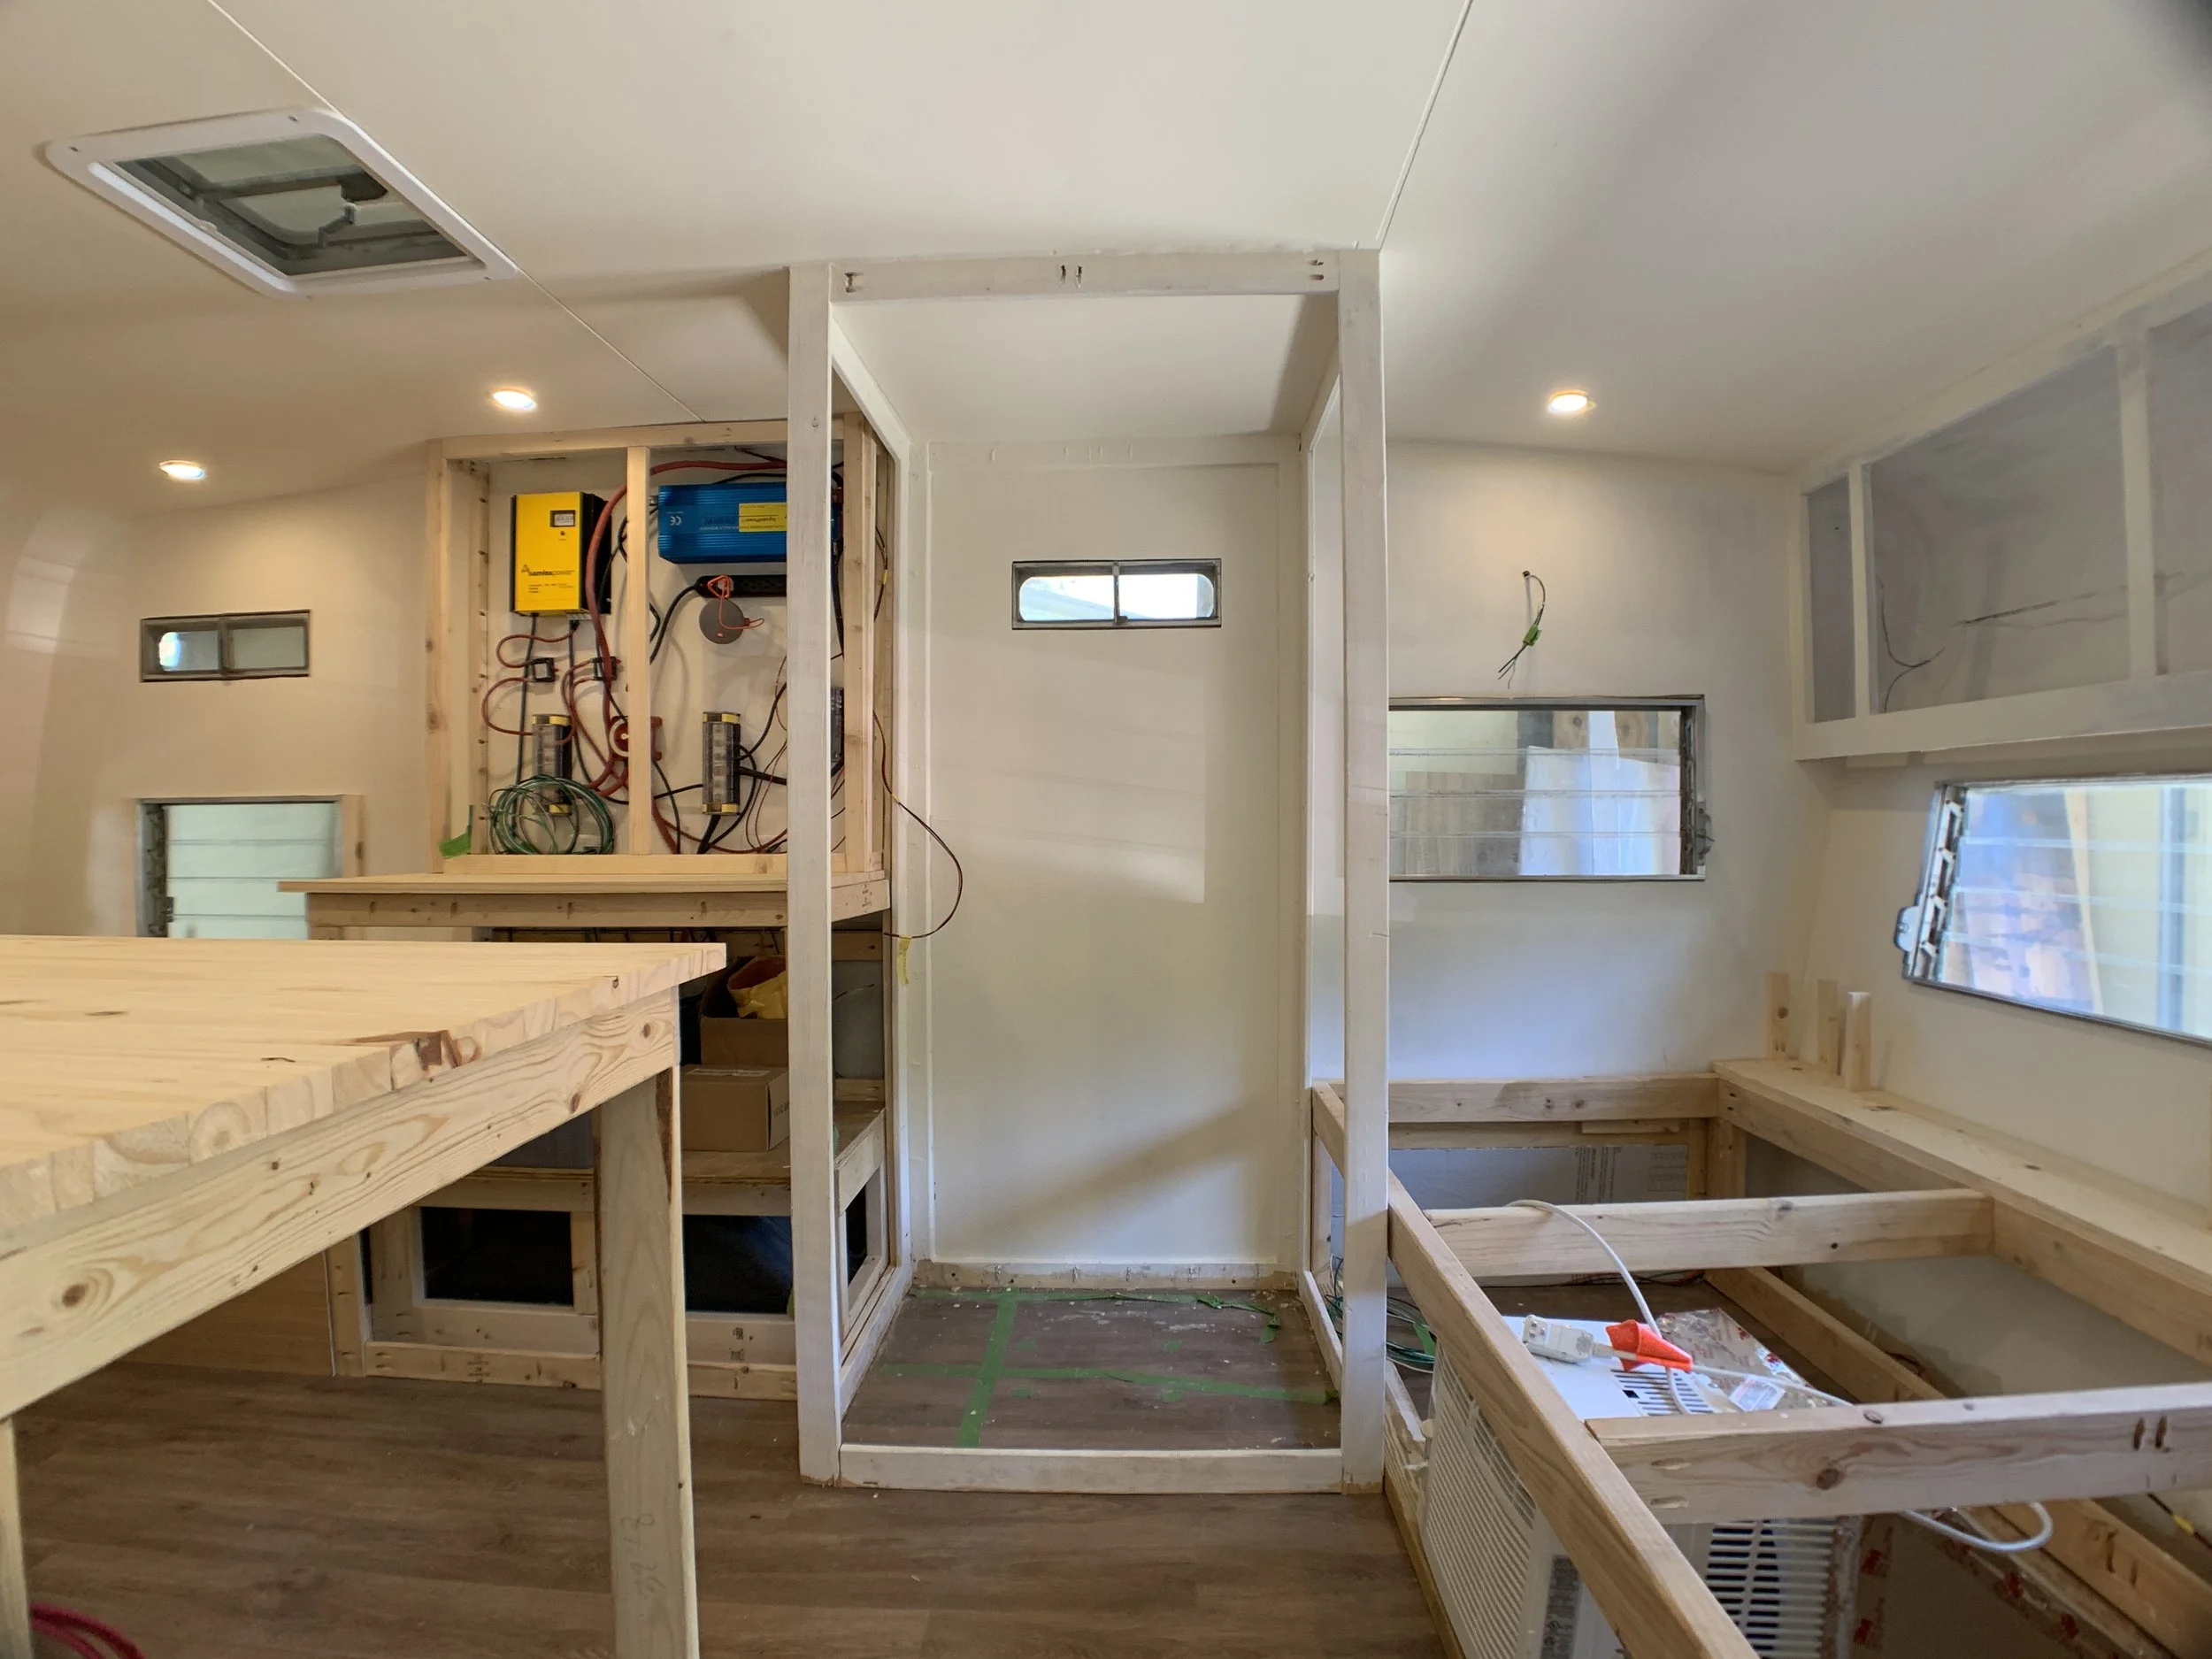
Why we built in this order
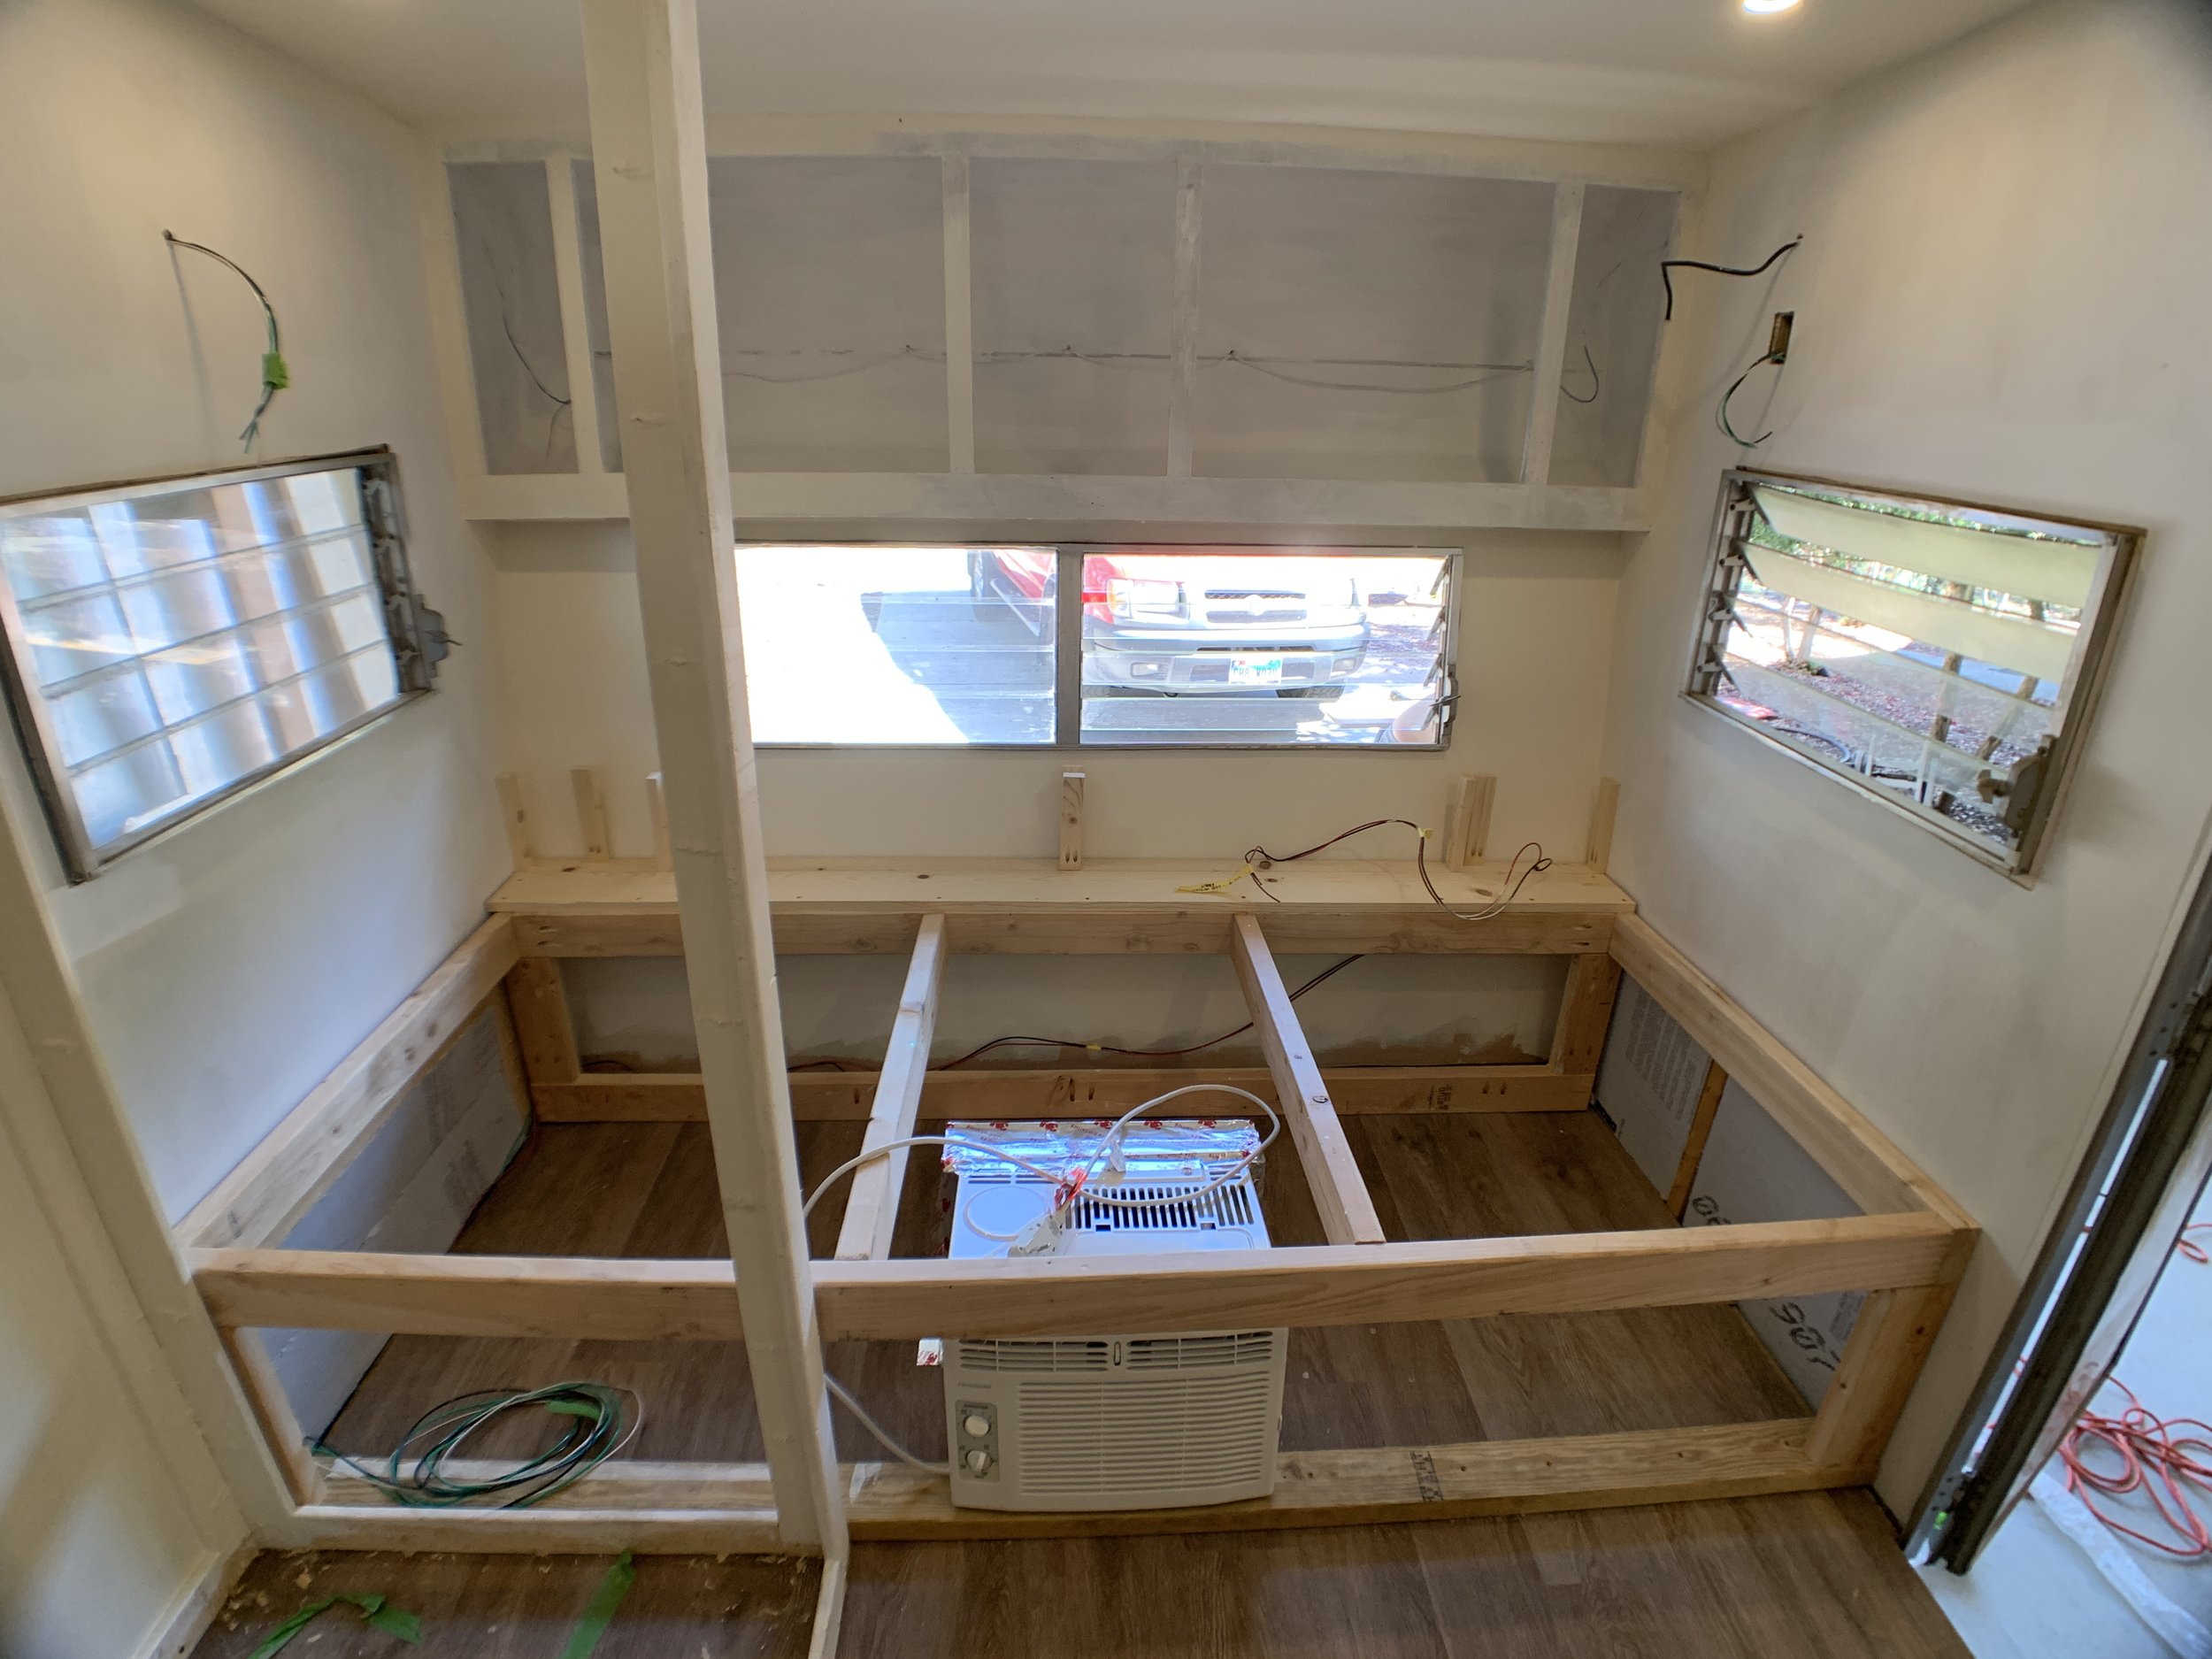
Having had the wet bath (shower/toilet) area roughly framed out for a long time now, it helped defined the space we had to work with. (When we first space planned, we set the wet bath’s location depth knowing we would be putting a twin bed in the front area of the camper.) At one point, we built the main frame for the twin area thinking we’d find a window unit and set it in there, and then realized all of our A/C options were taller than would work for the standard-height bed we’d already built. (Keep in mind for a build like this the finish seat height is the wood furniture height + roughly 5 inches for a mattress) so after we removed the top portion of the first bed frame we built, we opted to install the A/C and exhaust duct first so we could let it dictate the height of the bed.
Building the twin bed (the second time)
The main frame
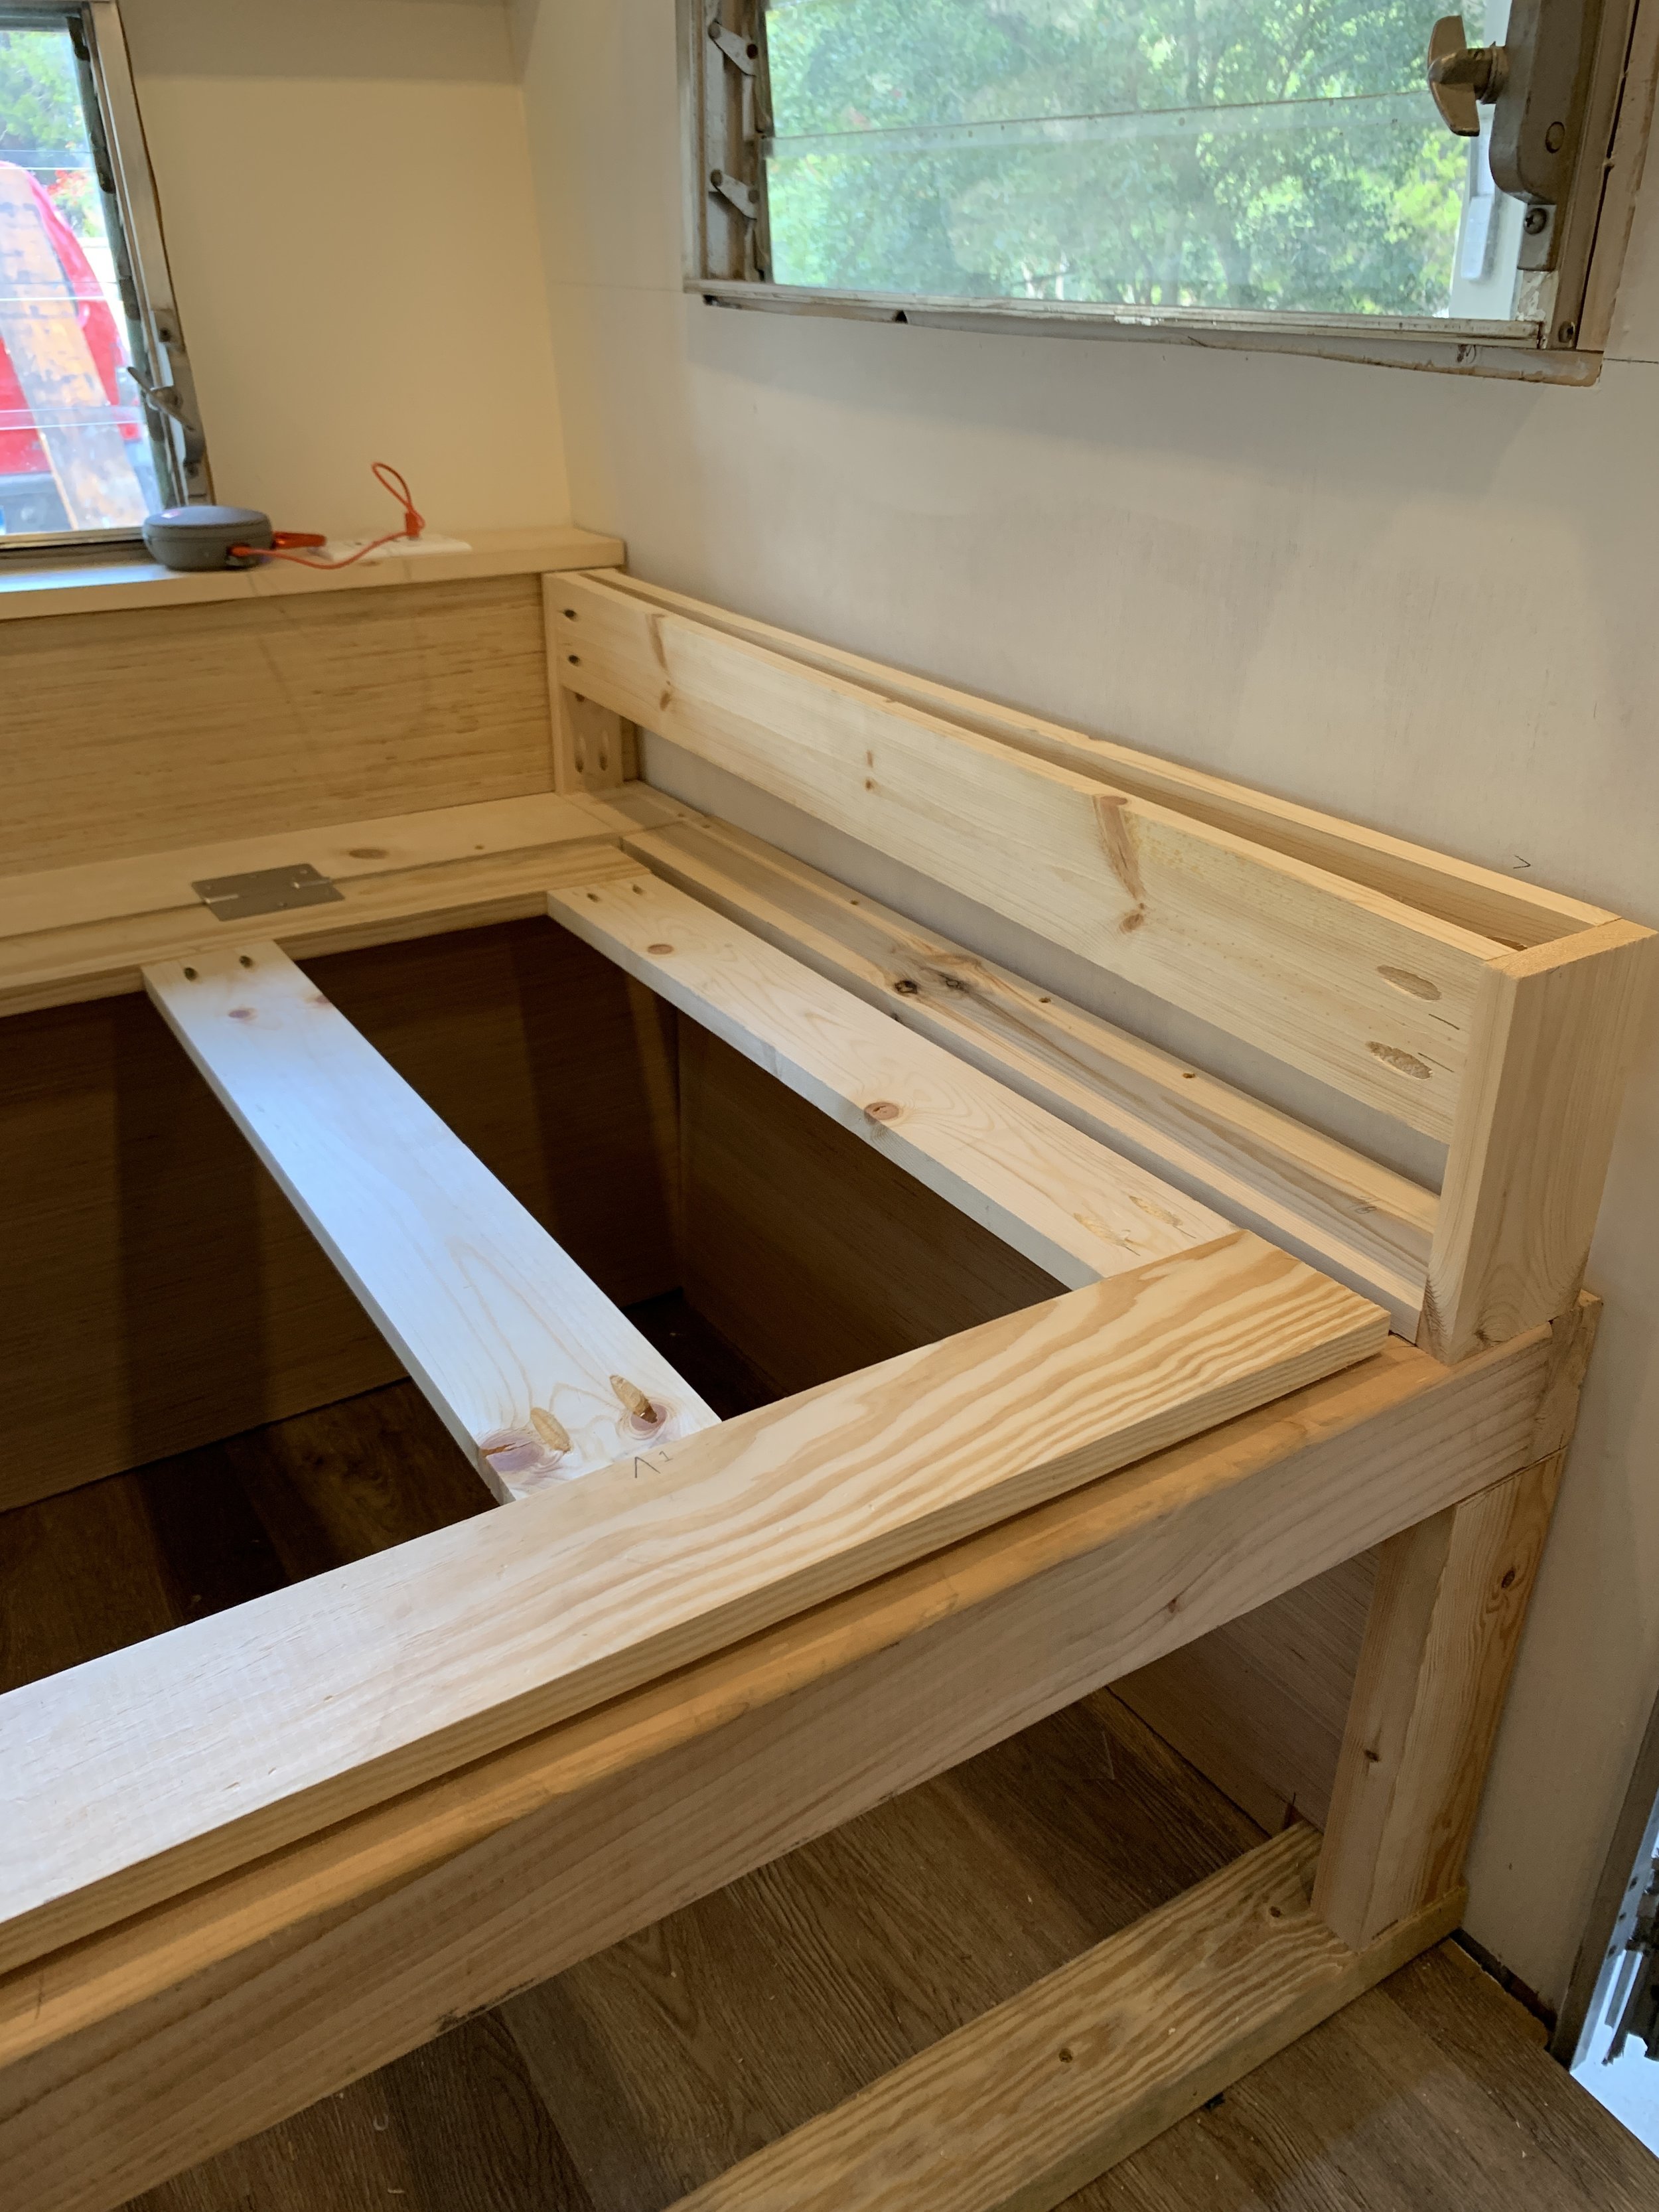
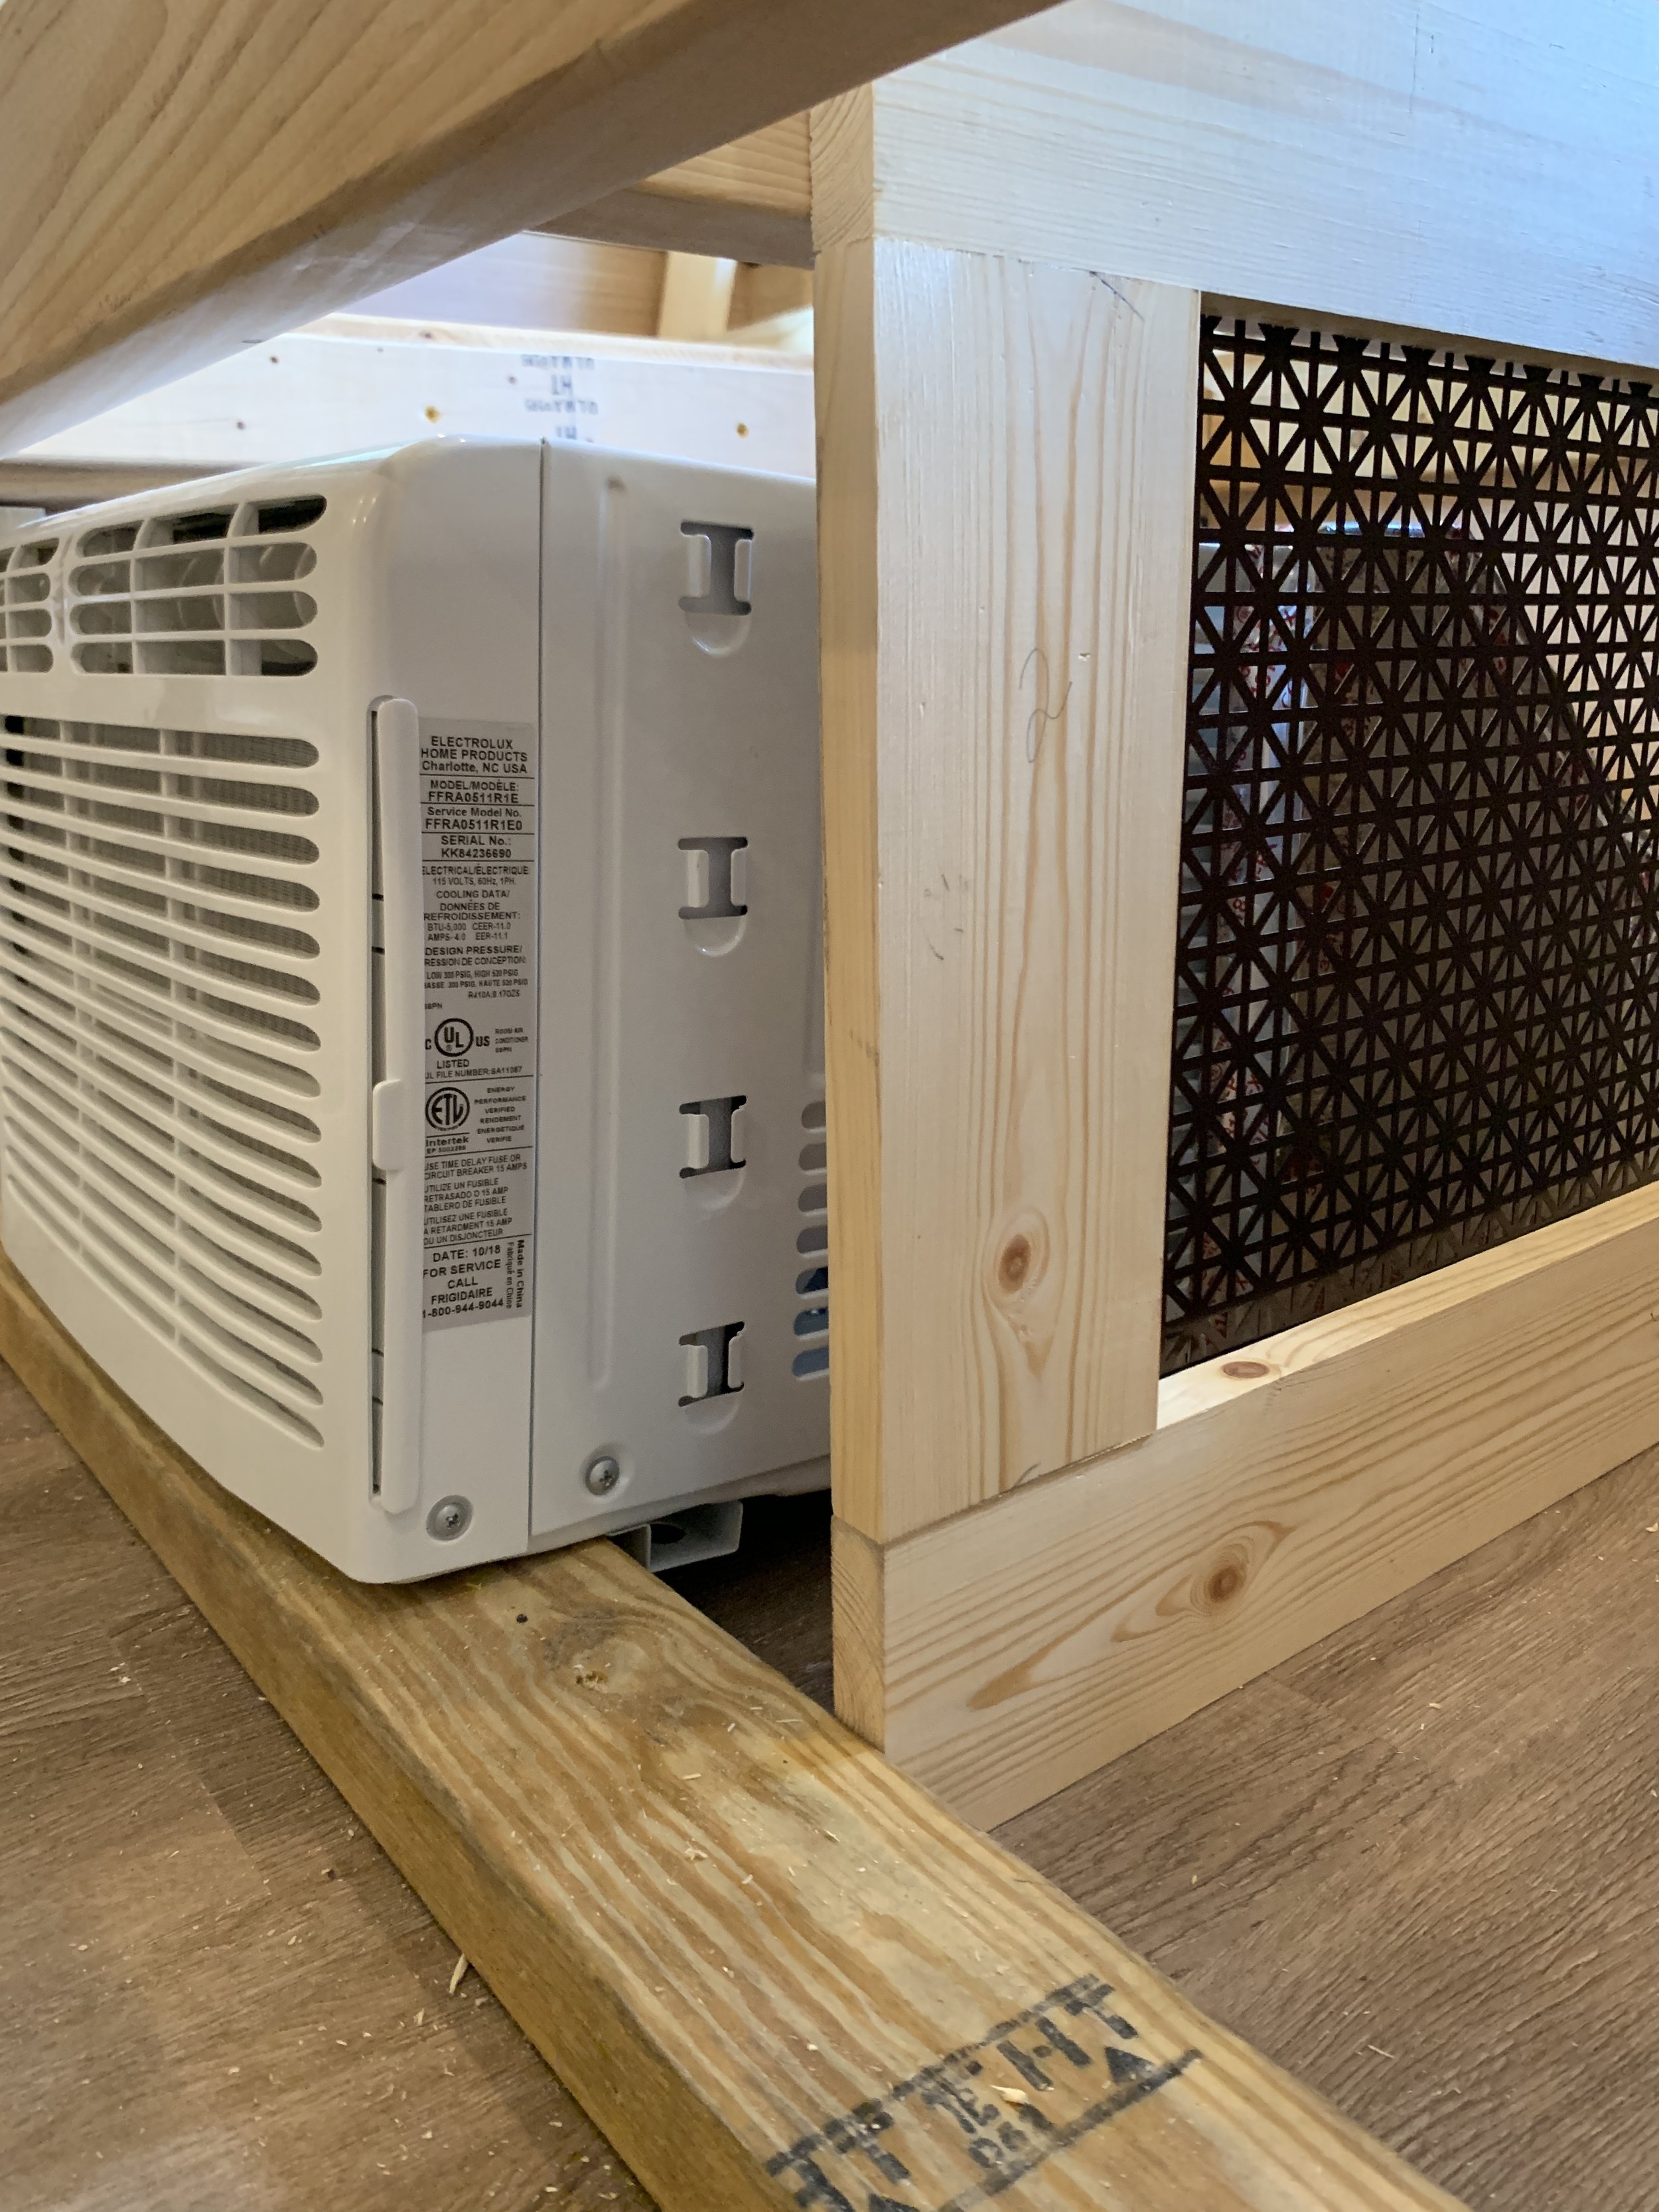
If you remember from last time, we used a 2x4 at the bottom front of what would be the front of twin bed. We installed it for a couple reasons - 1) it propped up our A/C unit to help the condensation always roll into the included reservoir, and 2) it gave us a toe board to build the rest of our bed structure on. After we installed the A/C, we used 2x4s and our trusty Kreg jig to build the main structure of the bed, making sure to connect our boards so that we rested each piece of wood on top of the board we were connecting to, relying on the down force of the board it was resting on plus a strong pocket screw connection, vs. relying solely on the pocket screws to provide support if we were to have made the connection from the side. For example, the top joint to make a capital letter T created a stronger joint than does the side connections of an F. Our two center supports connect in an “F” way, but we added two vertical pieces in the back and one in the front to help provide more down support for the long span of the bed.
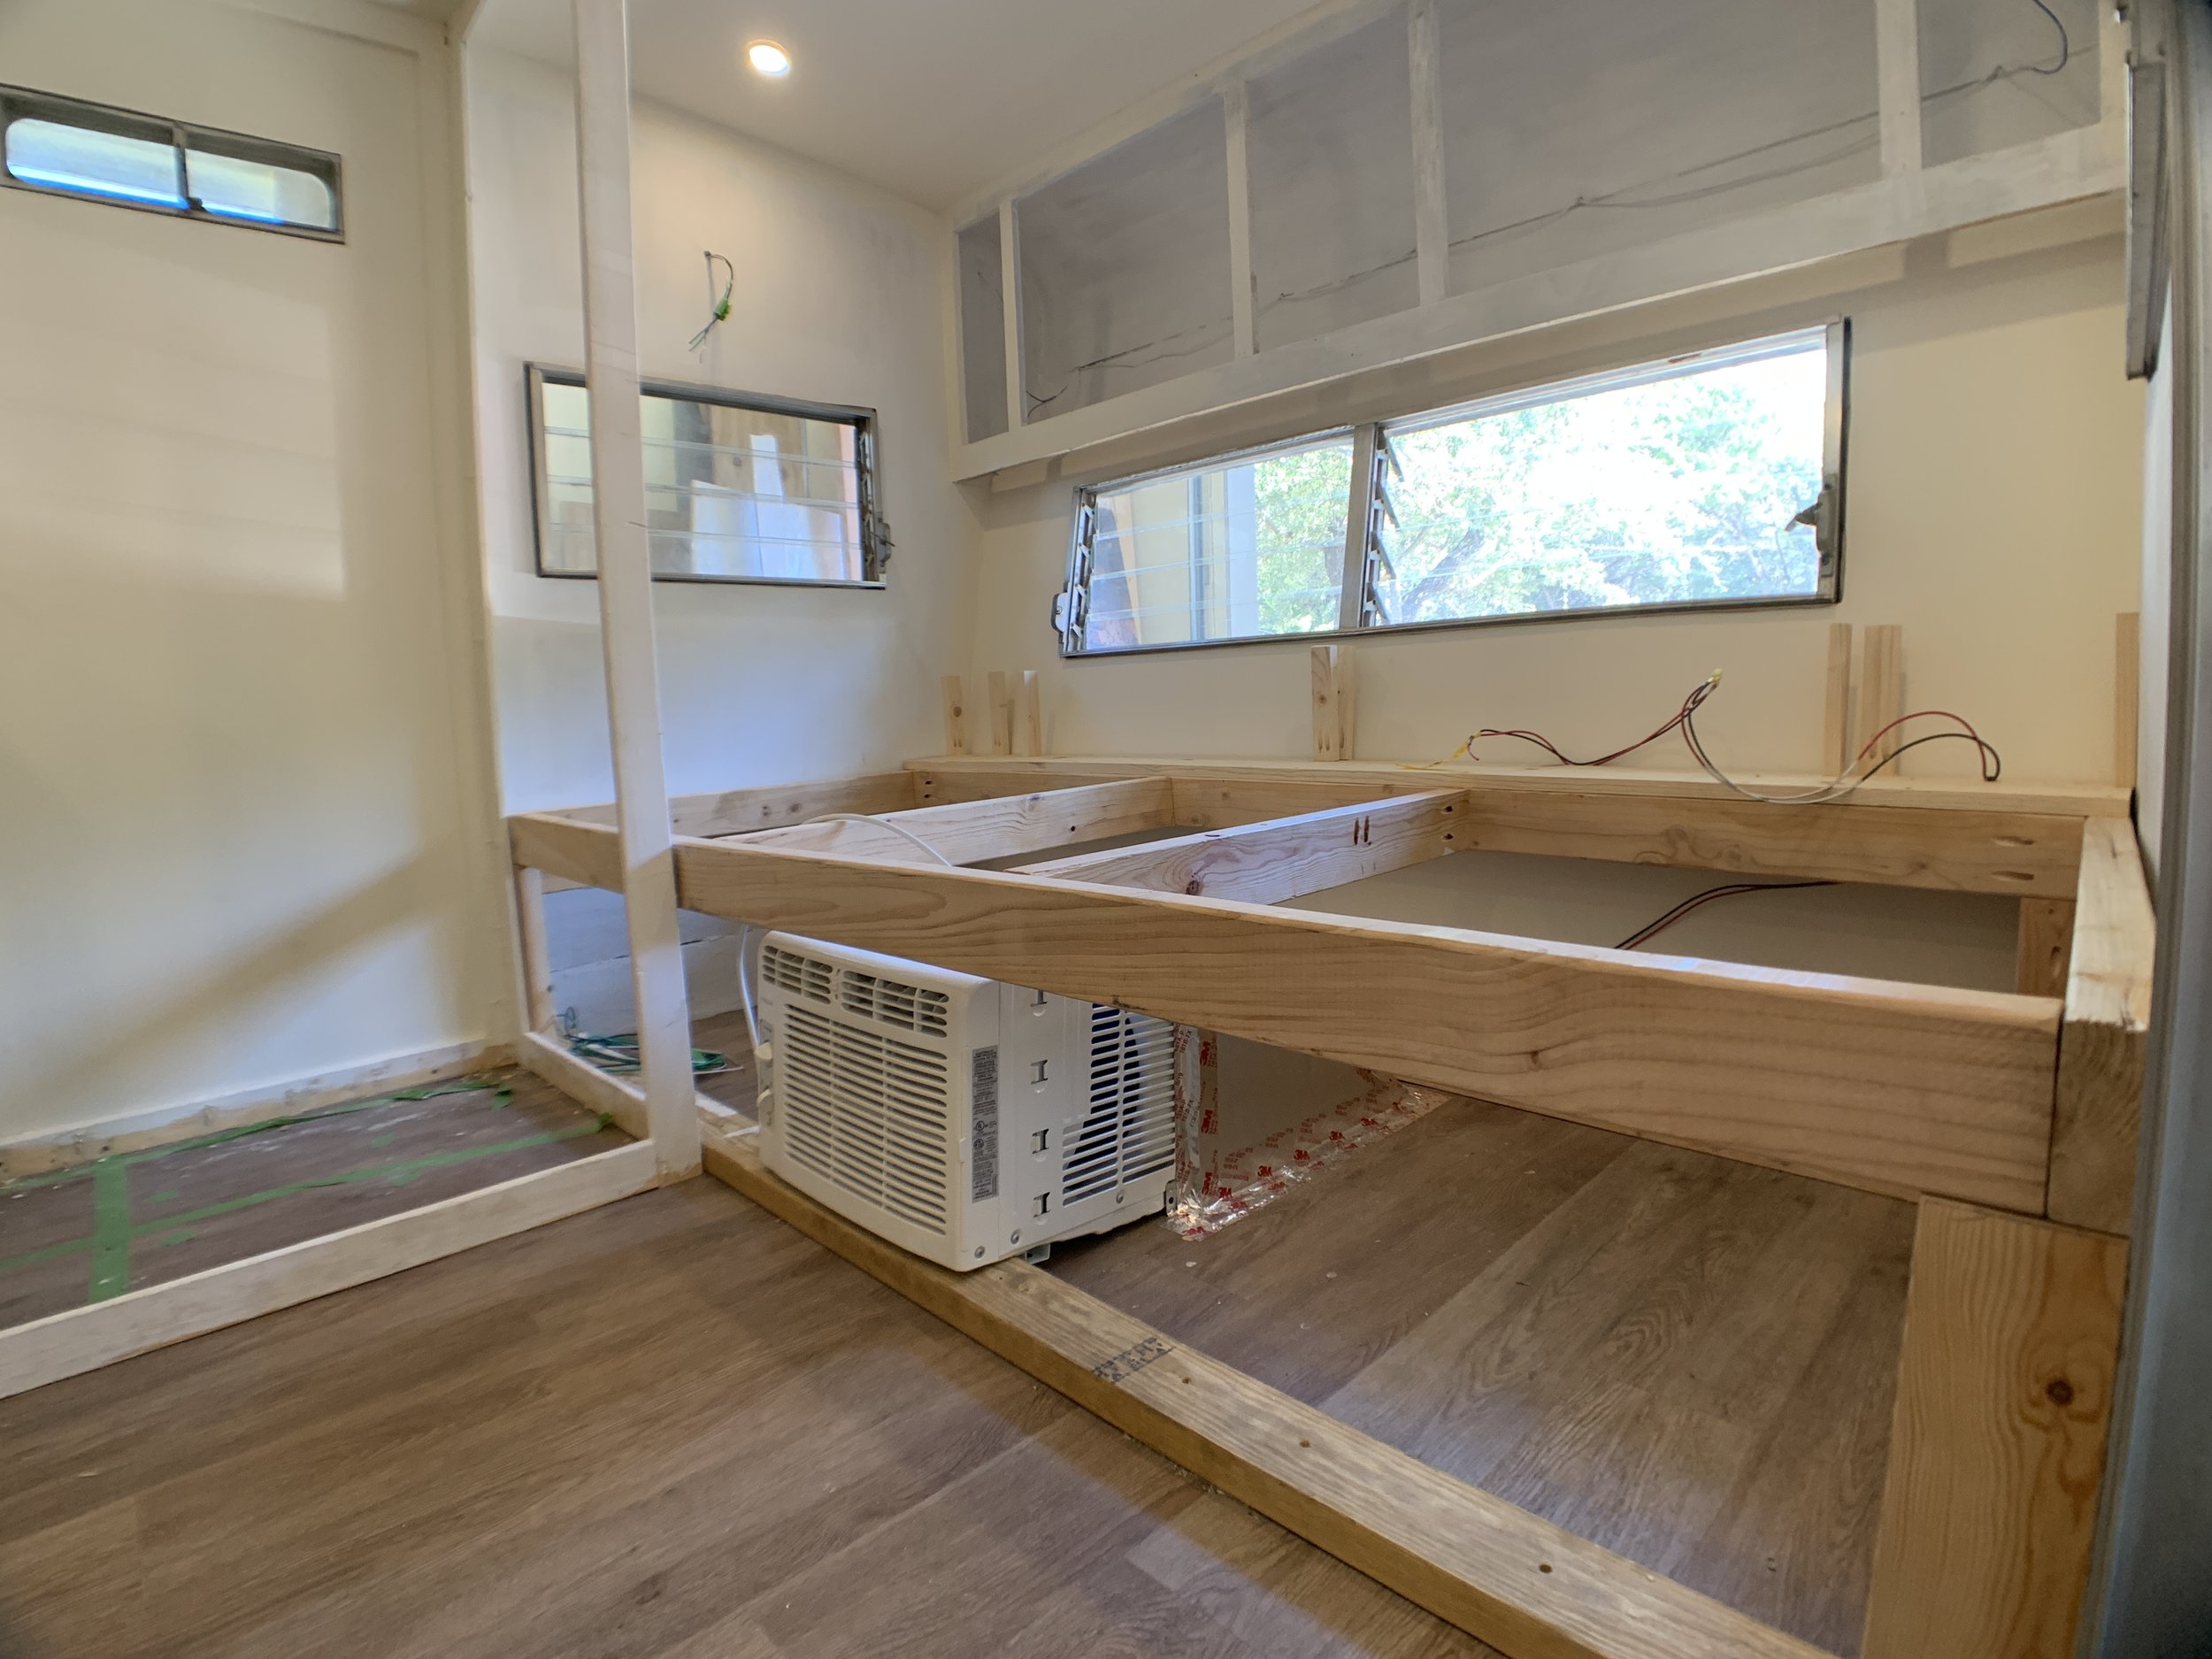


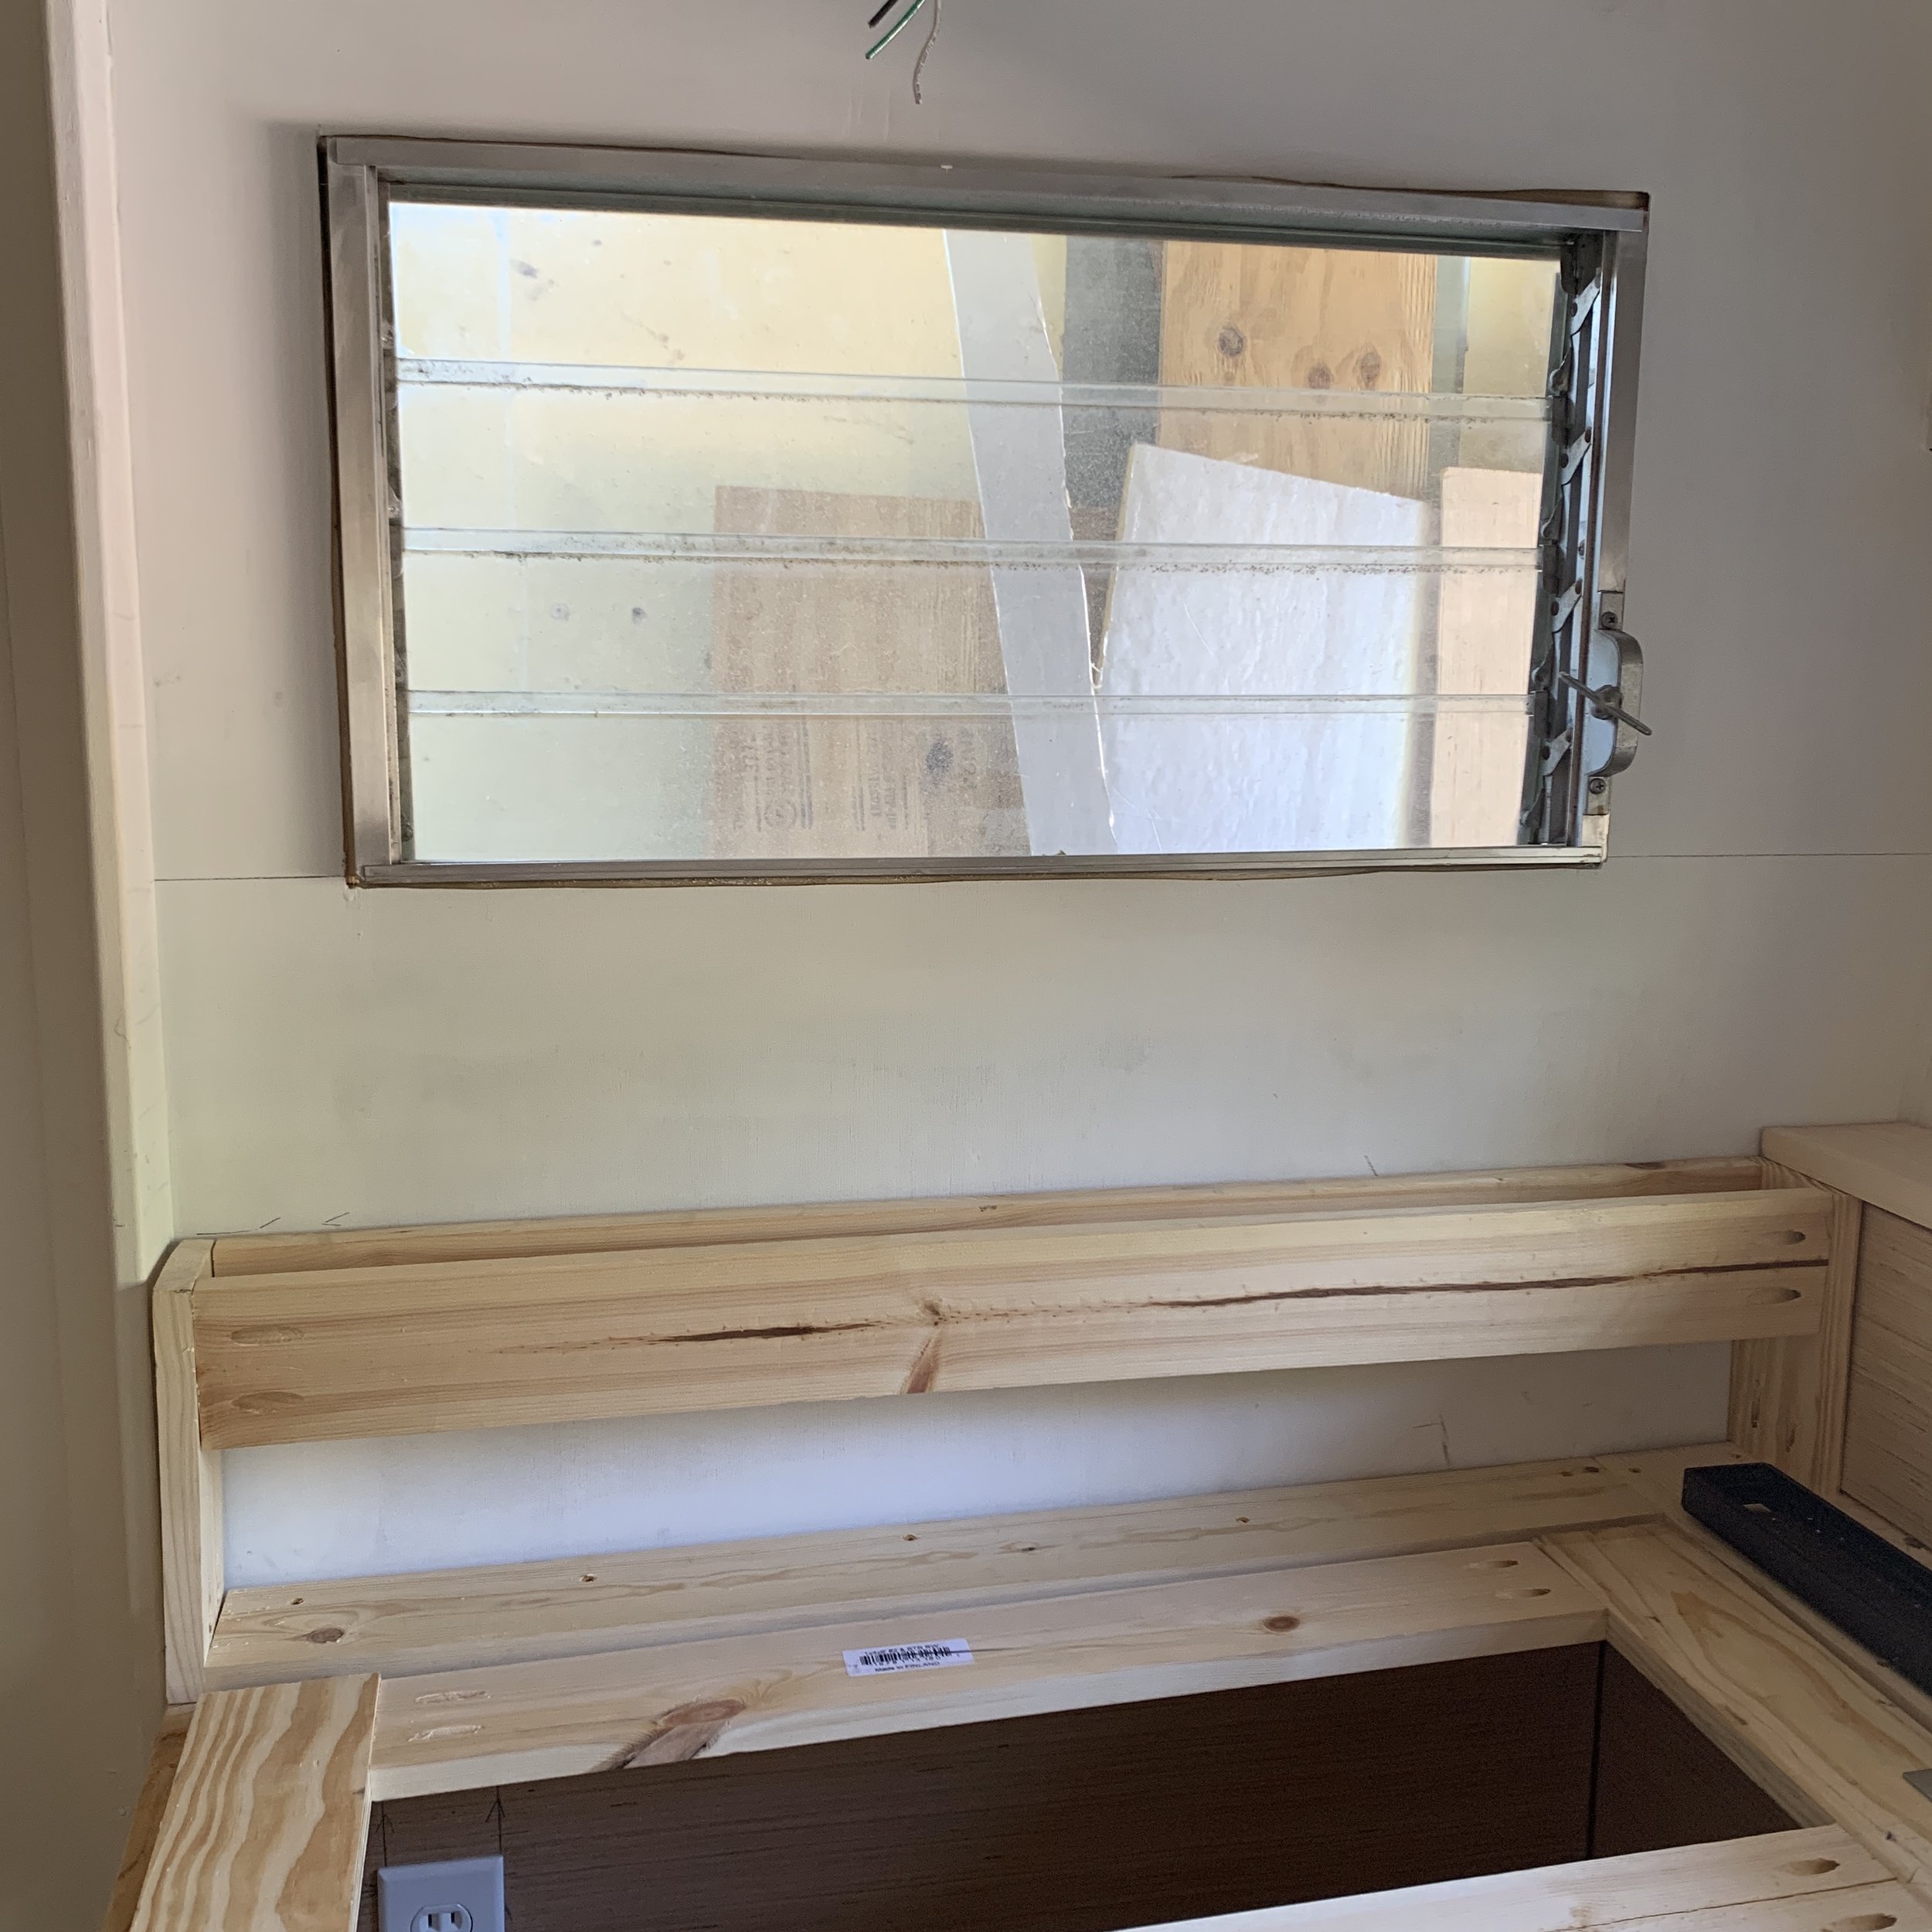
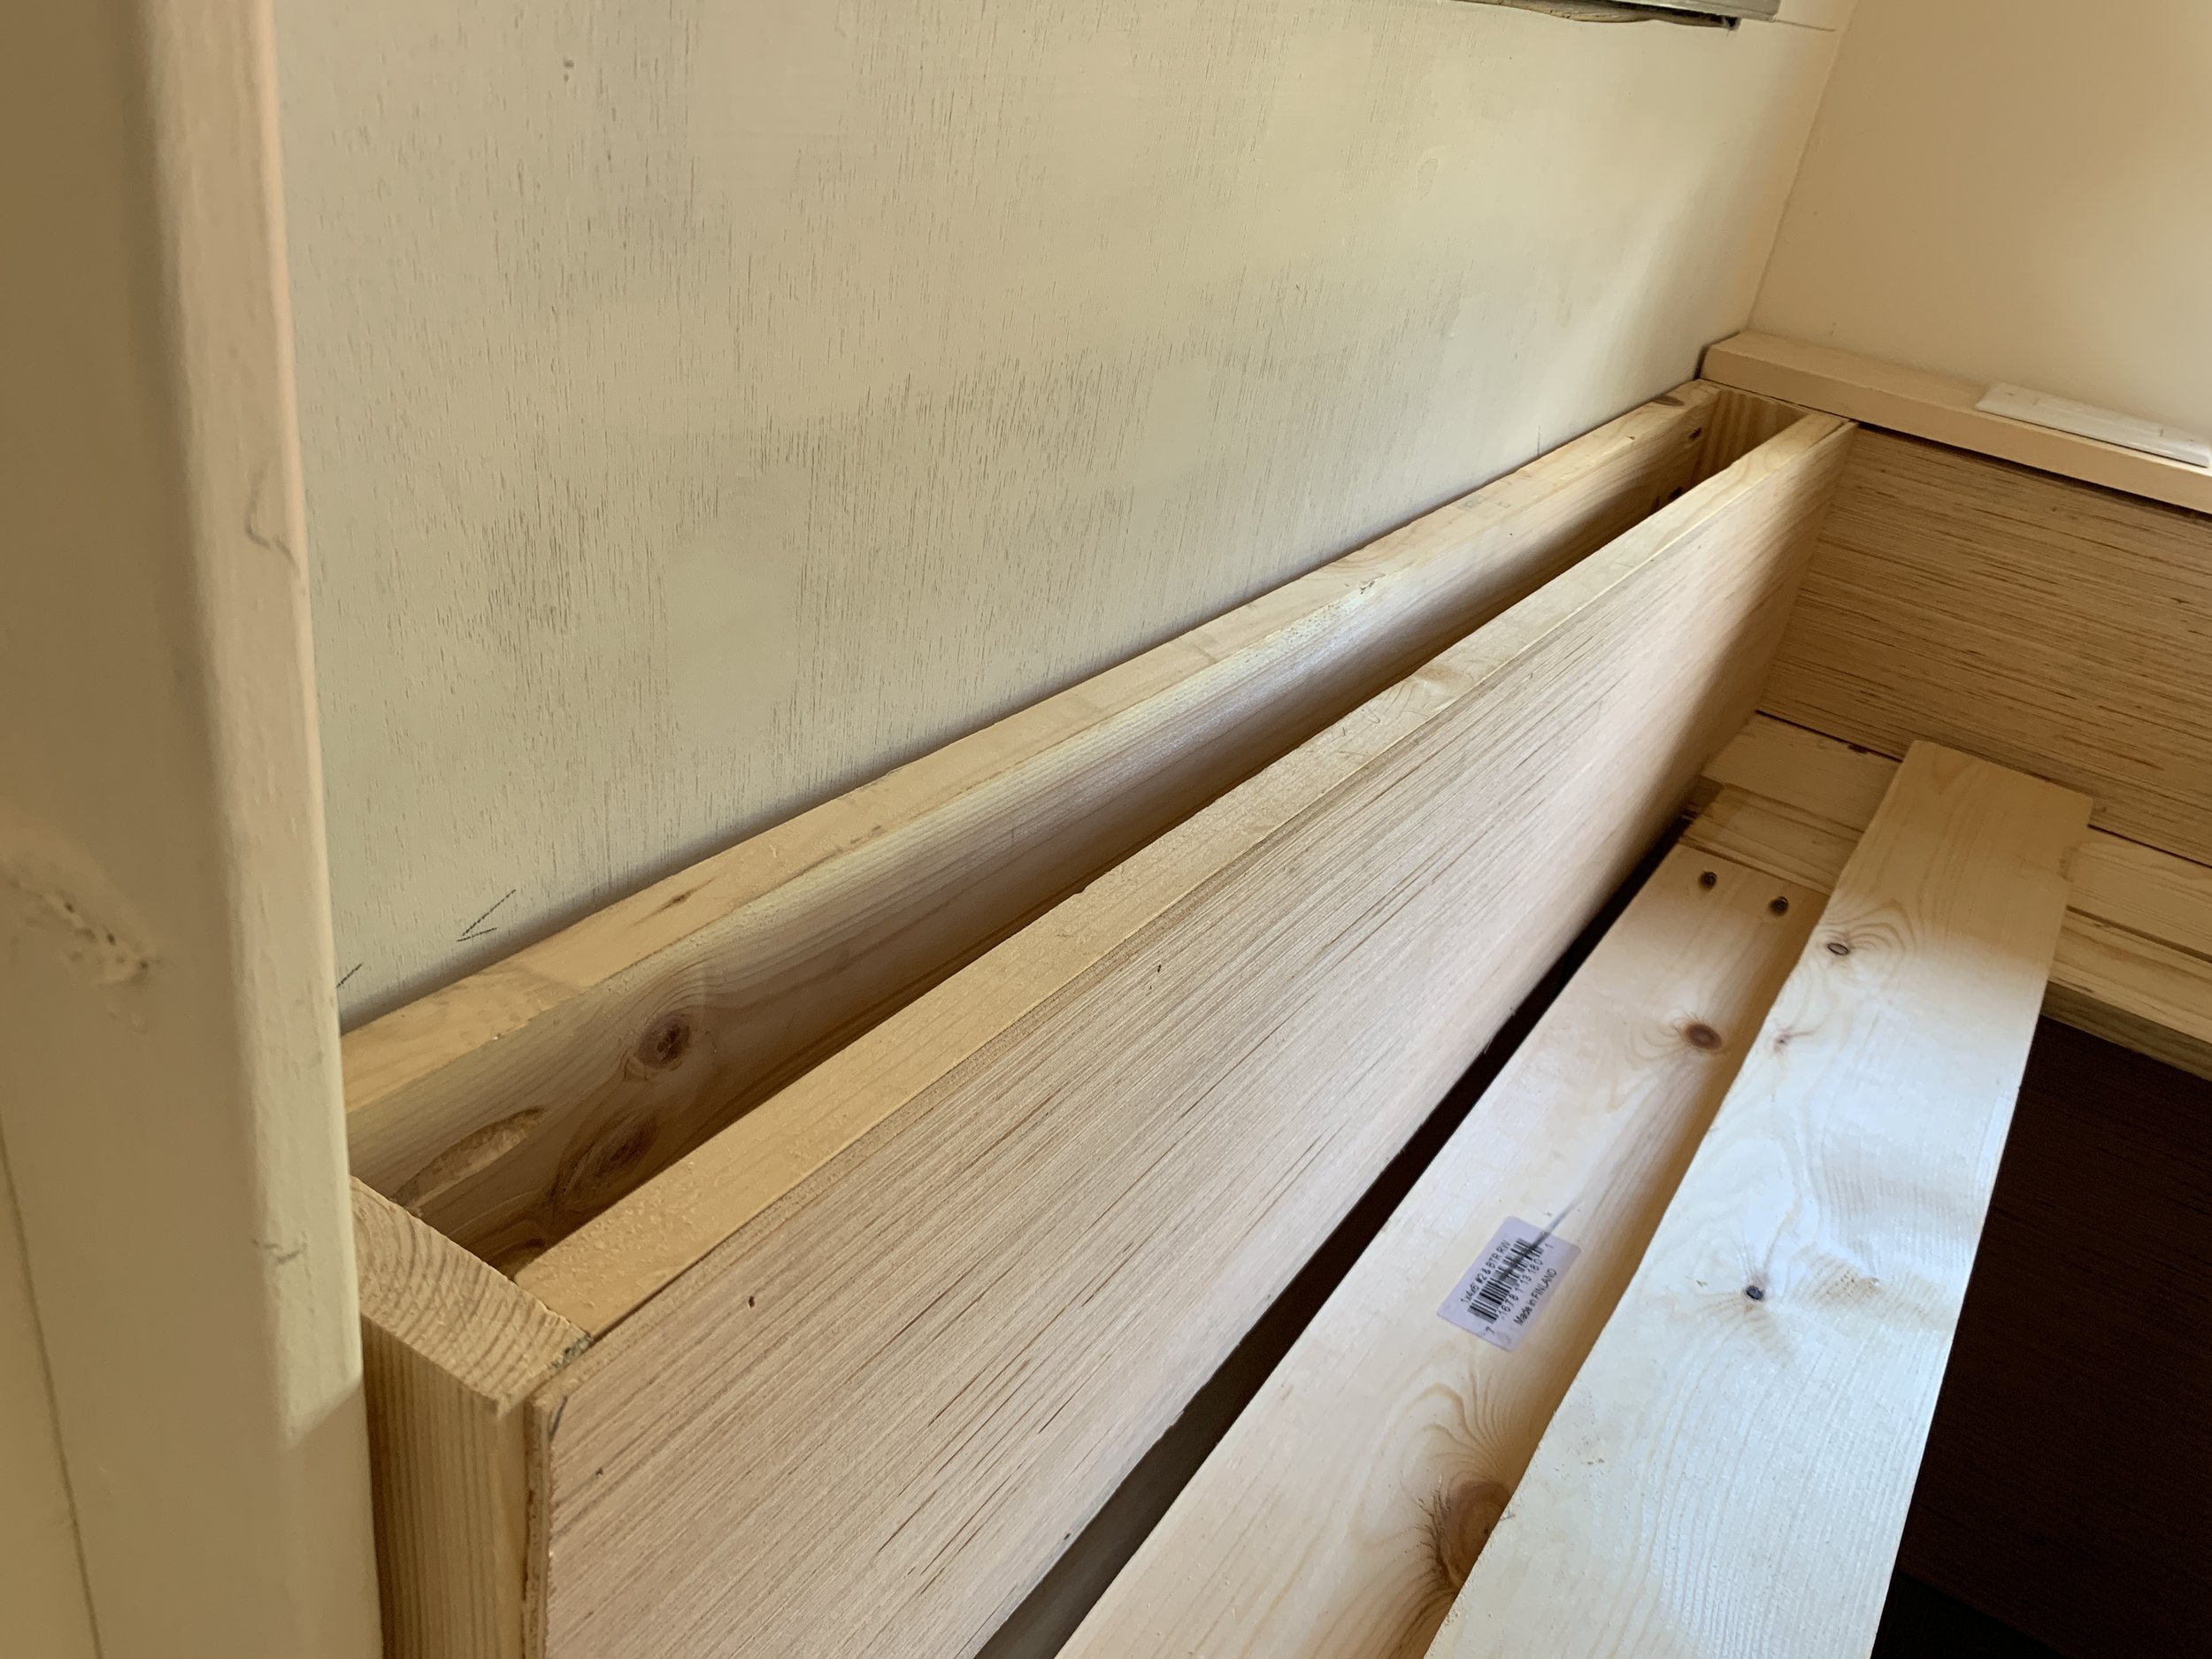
The main back rest
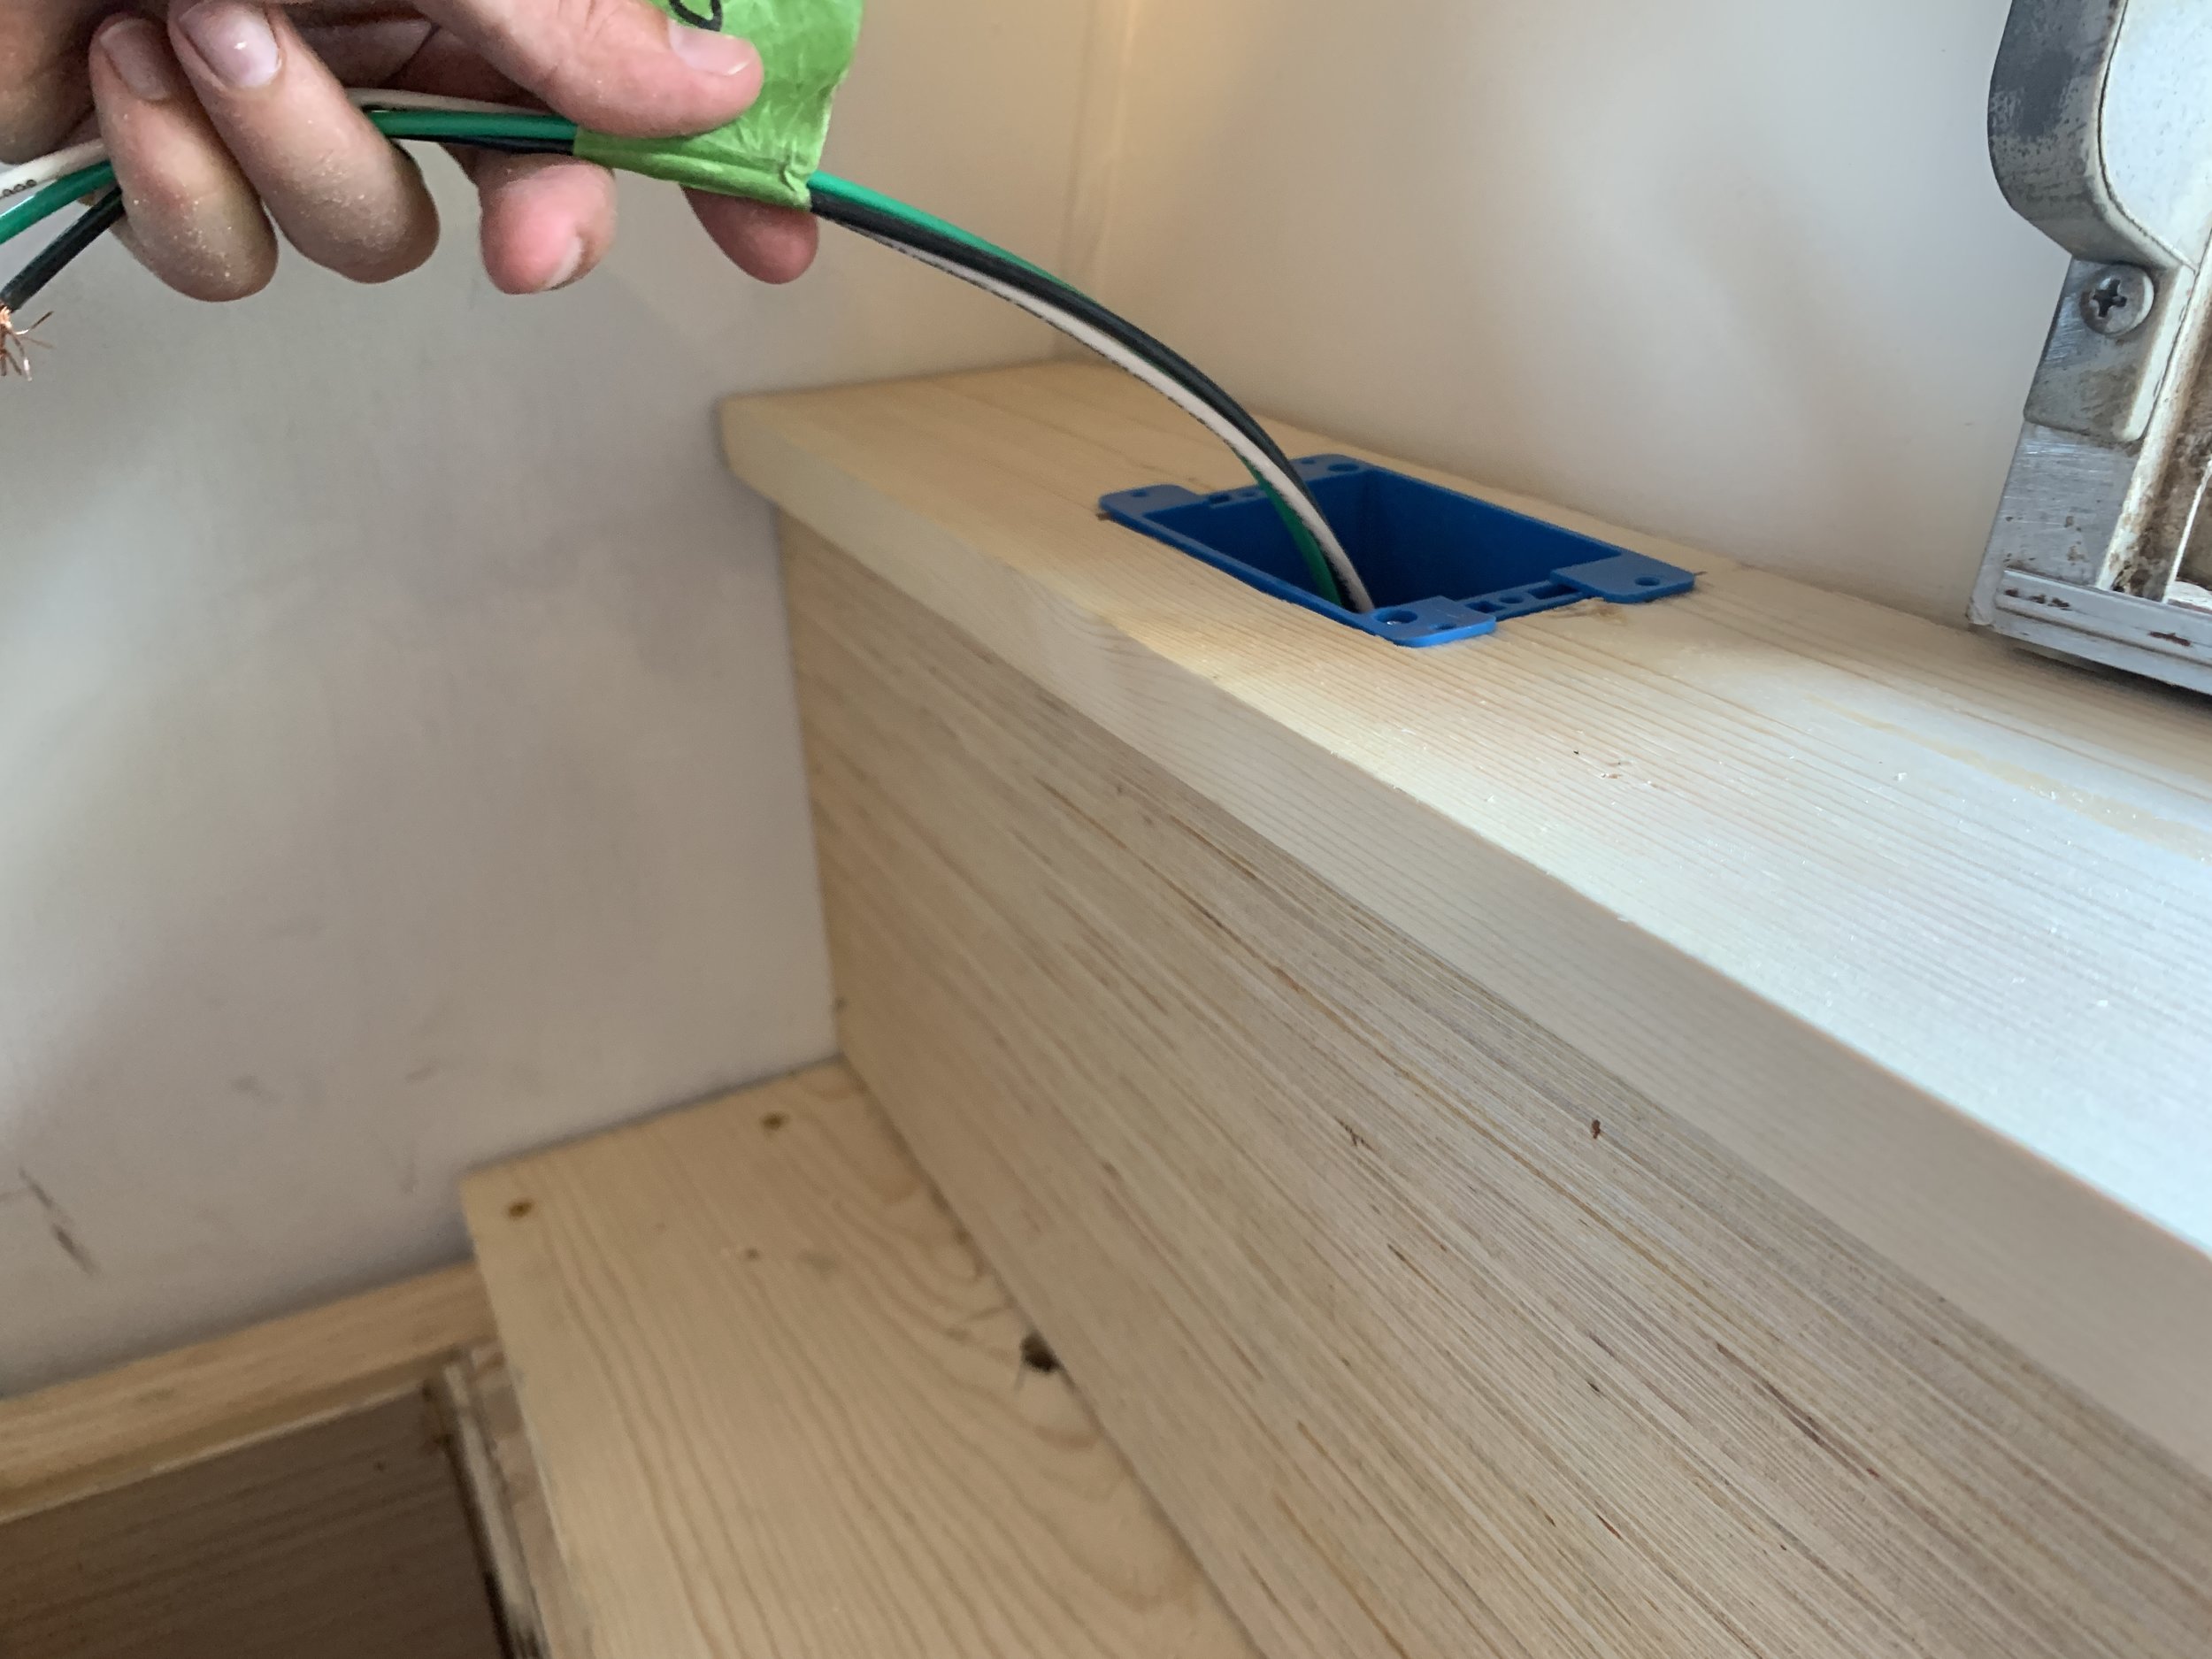
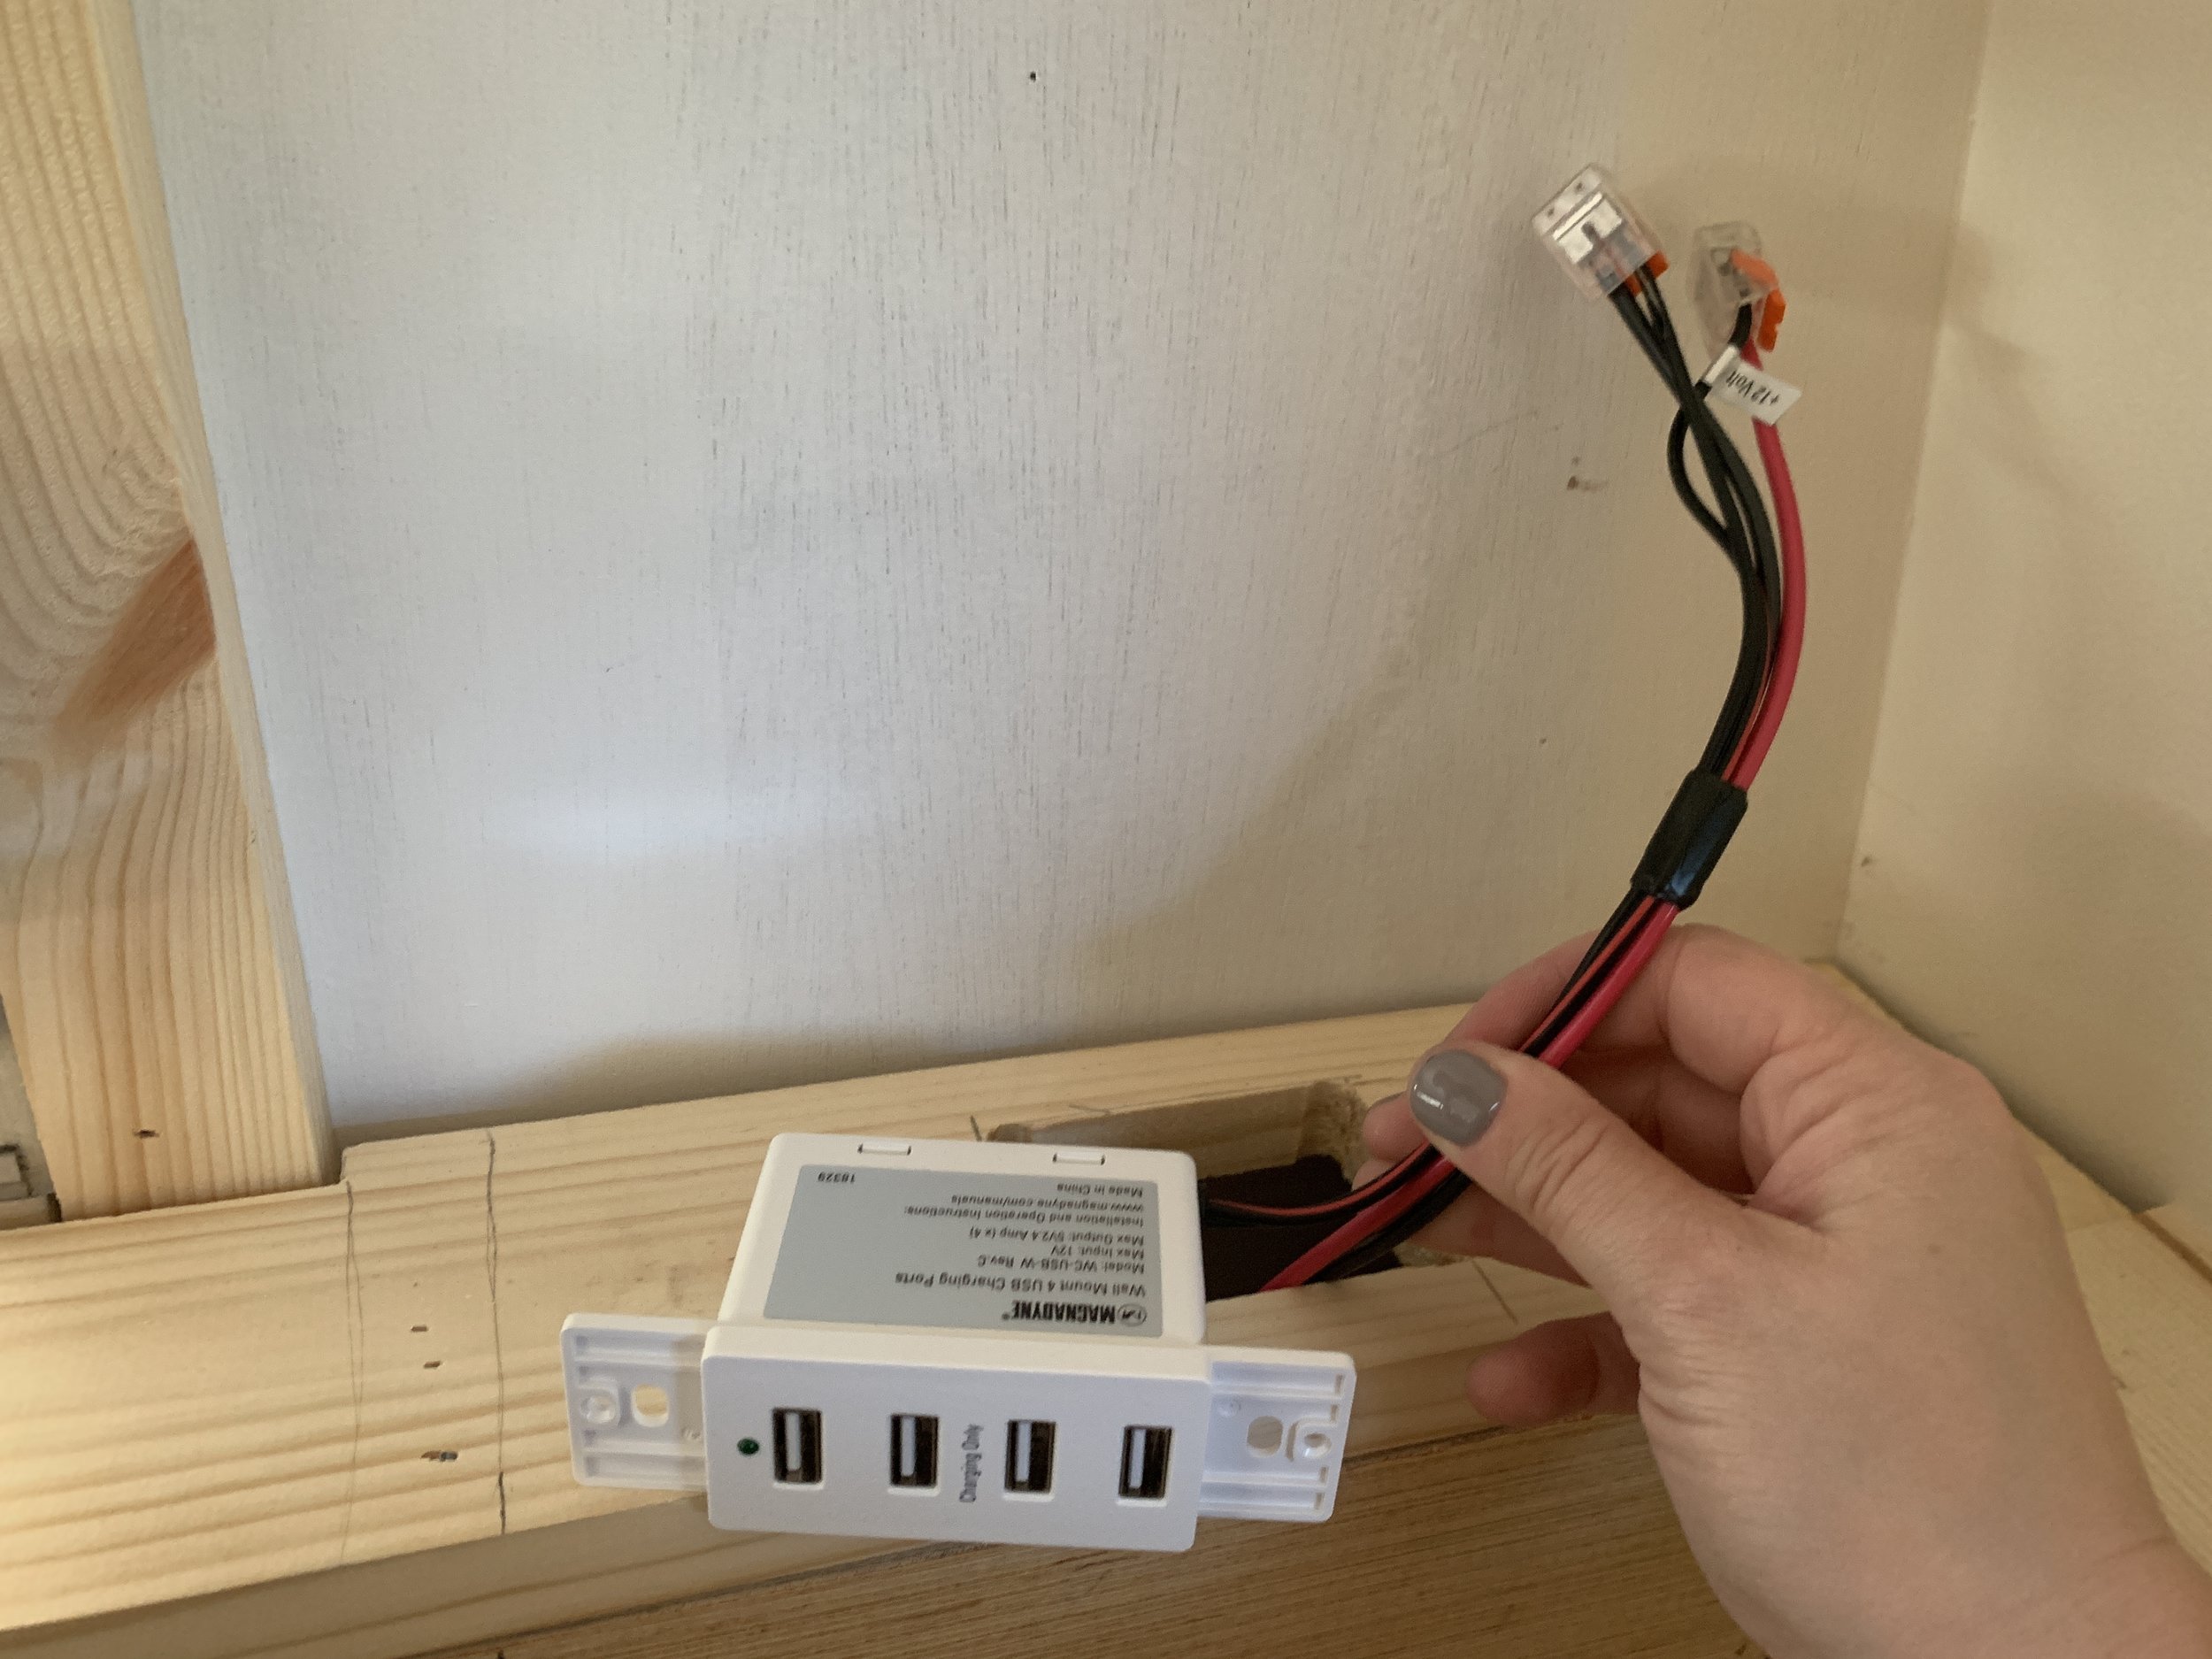
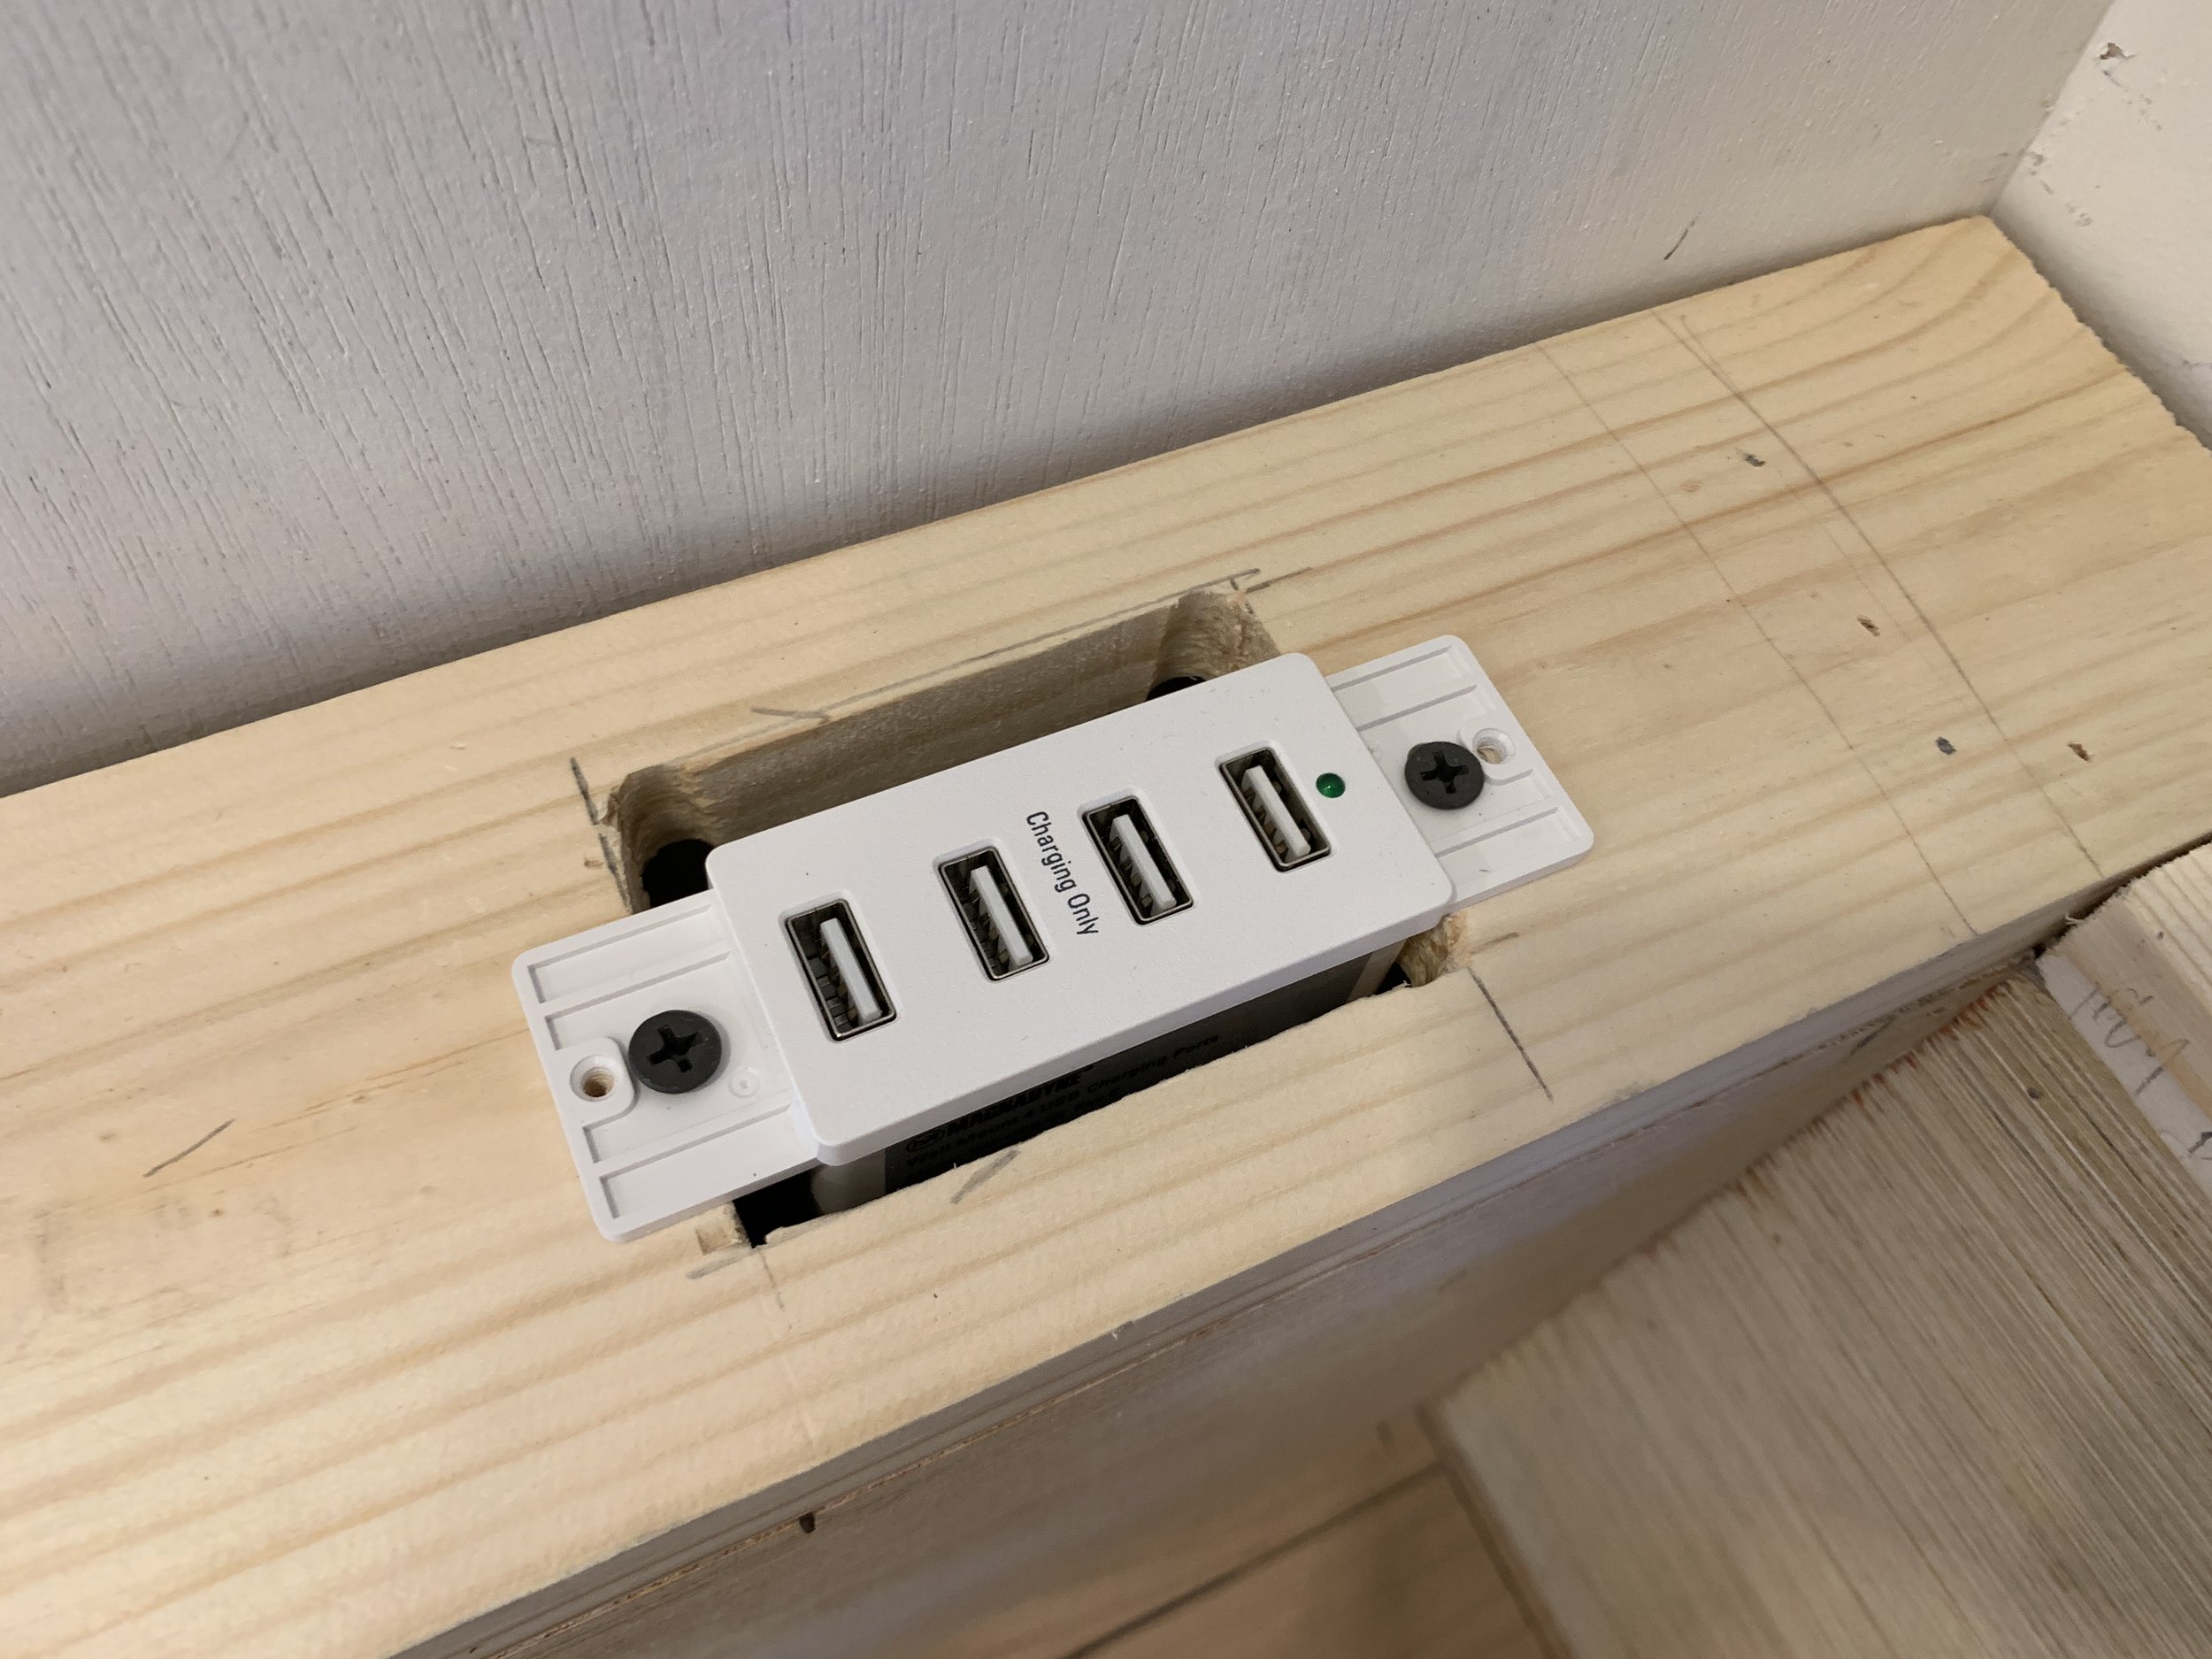
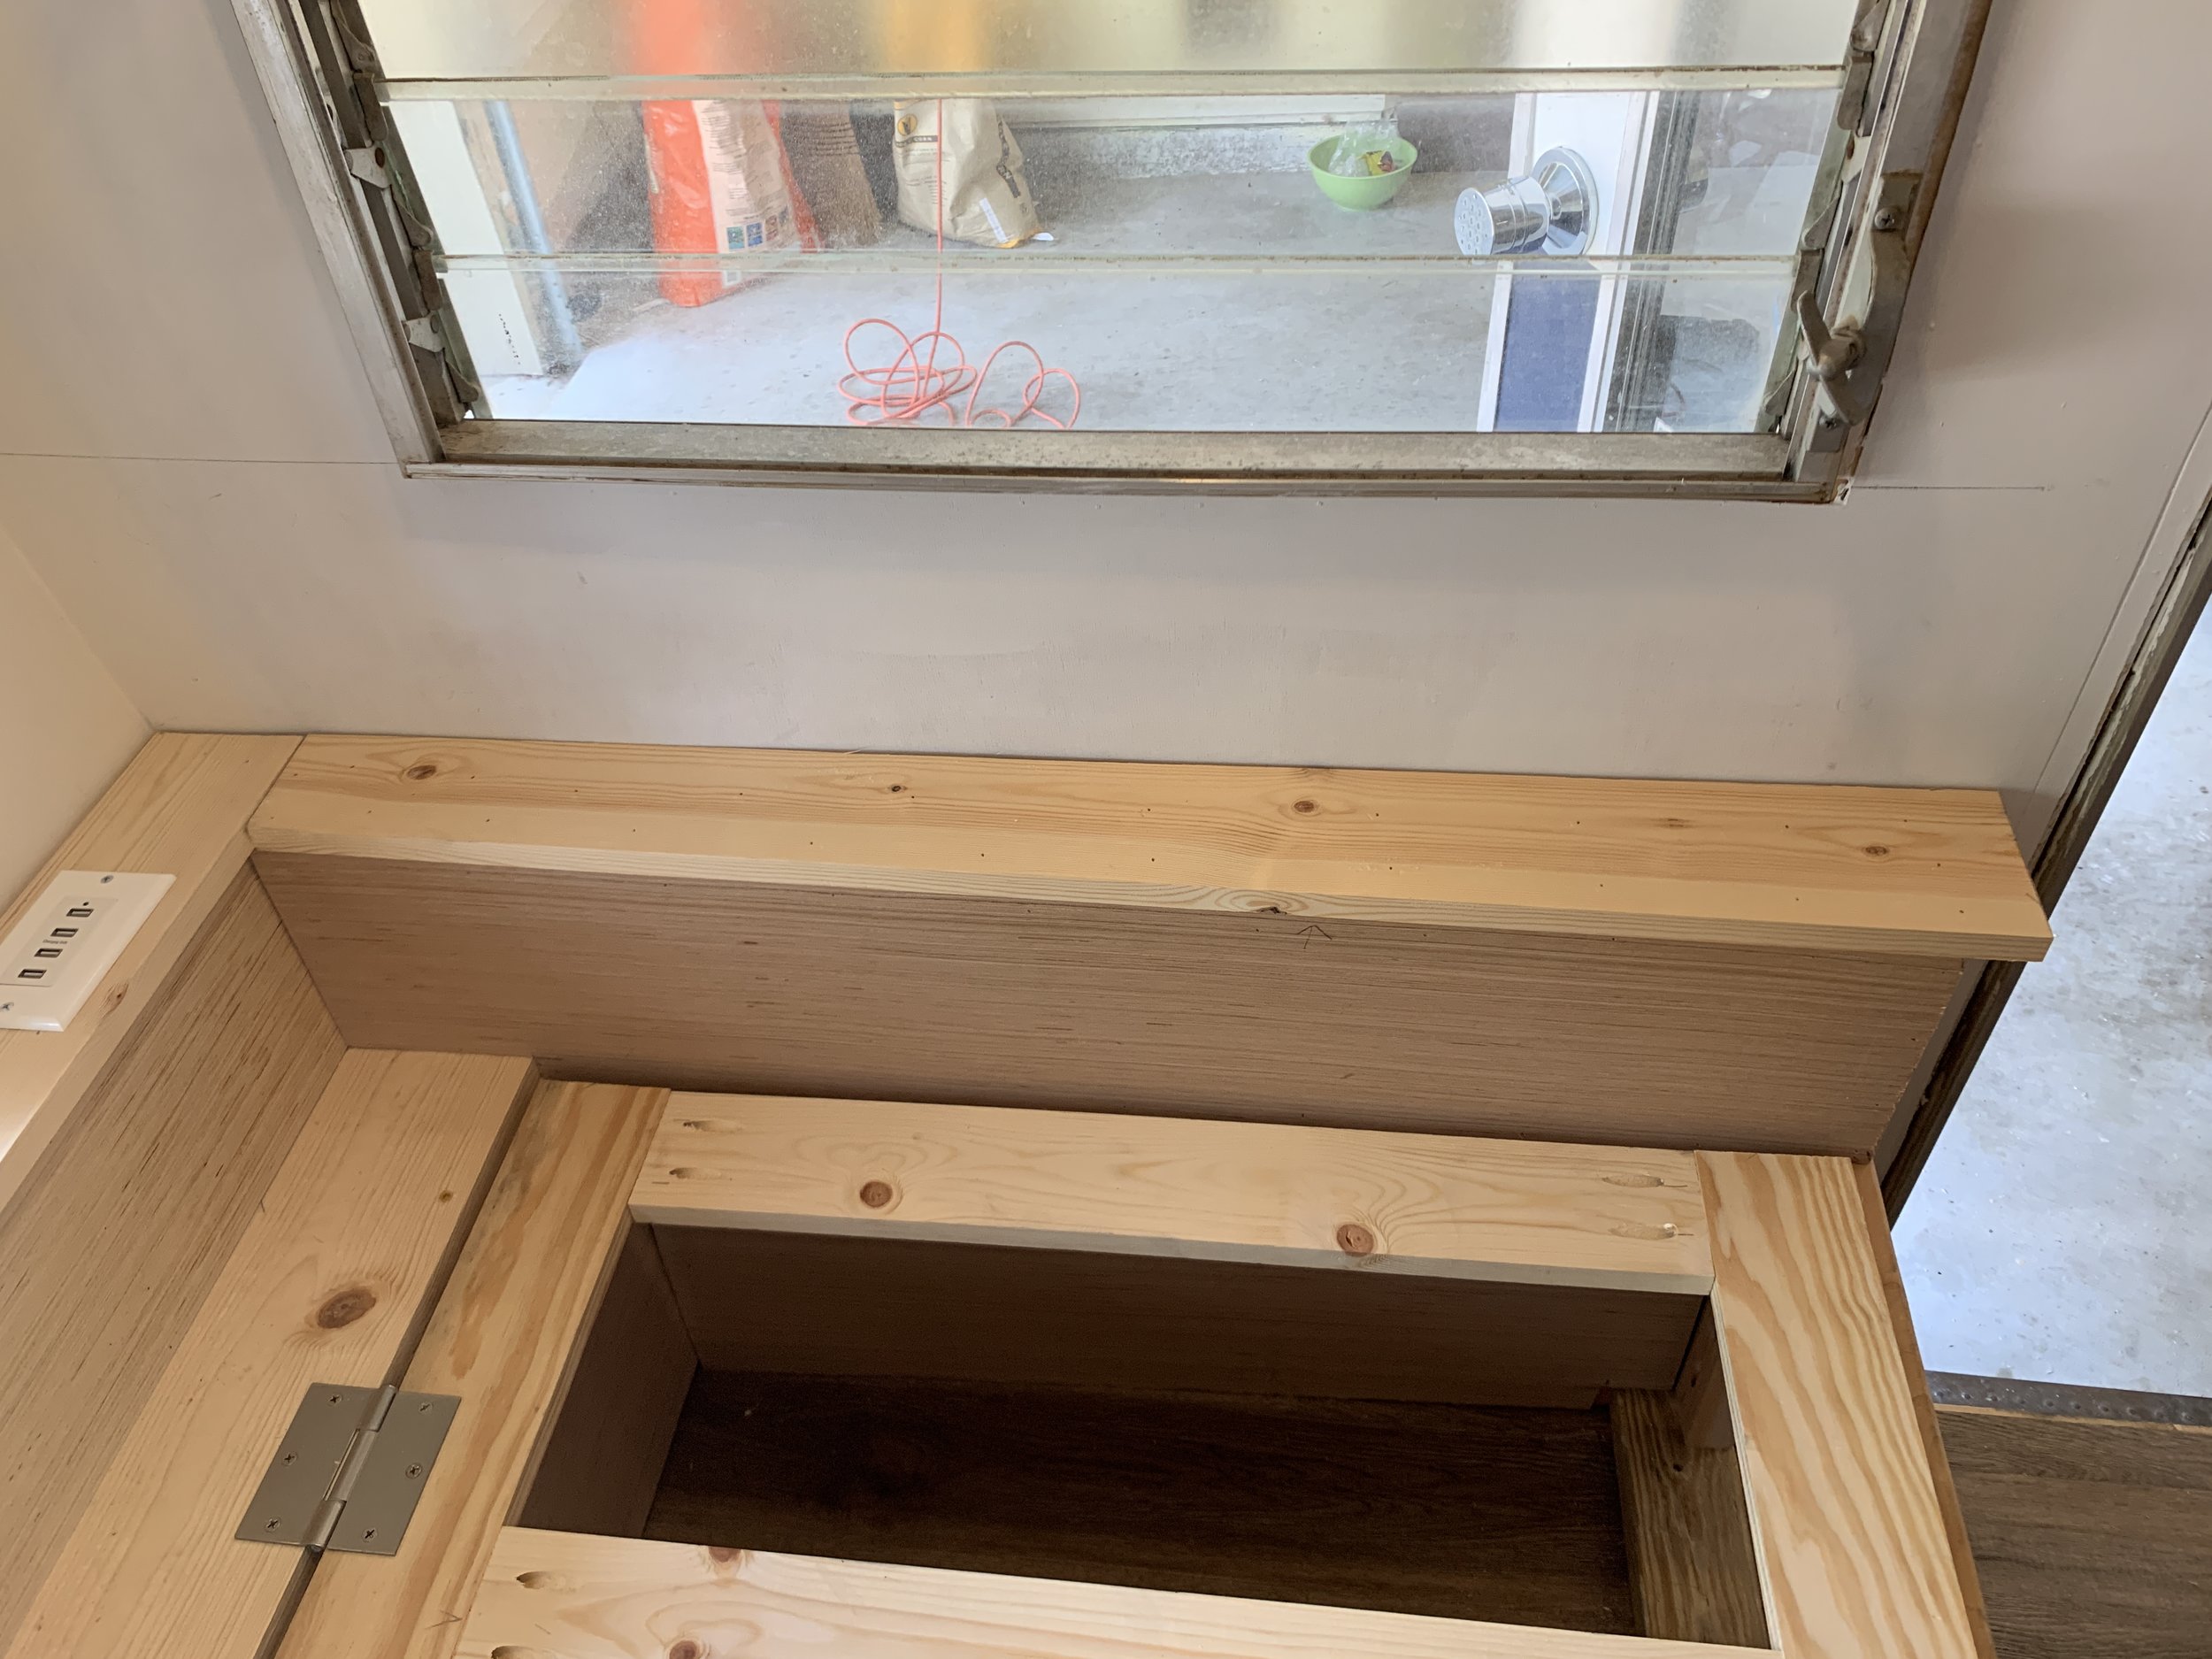
After our main 2x4 support base was made, we used a 1x6 along the long edge against the wall to make a base for our back rest, then started building up from there. We chose our dimensions knowing we wanted the top of our finished back rest to go up to the bottom of the long front window, the depth to be deep enough to set a glass of water/phone on, and outlets to be sunk into the top, while making sure to also give enough depth for a twin bed to fit on the bed platform. Not pictured, we added a combination of vertical and horizontal supports for the back rest’s internal structure and so we had something for our plywood and top to nail into. Before we closed in the back rest, we drilled holes into the the 1x6 base and ran electrical wiring on each side of the window – one 110V AC outlet and one 12V DC USB outlet. Then we used 1/4” plywood and our nail gun to secure the front of the back rest to the inner structural supports and cut a 1x6 to length and ripped down to the right width to have the perfect amount of minimal overhang. In theory, one could use a piece of wood and just cut to length, but our ledge was just a little deeper than a 1x4 (really 3.5”) which meant we had to cut down a 1x6, and nothing – I repeat NOTHING – in this camper is square, so we used the jig saw to cut the wall-side of our piece to follow the front wall nicely.
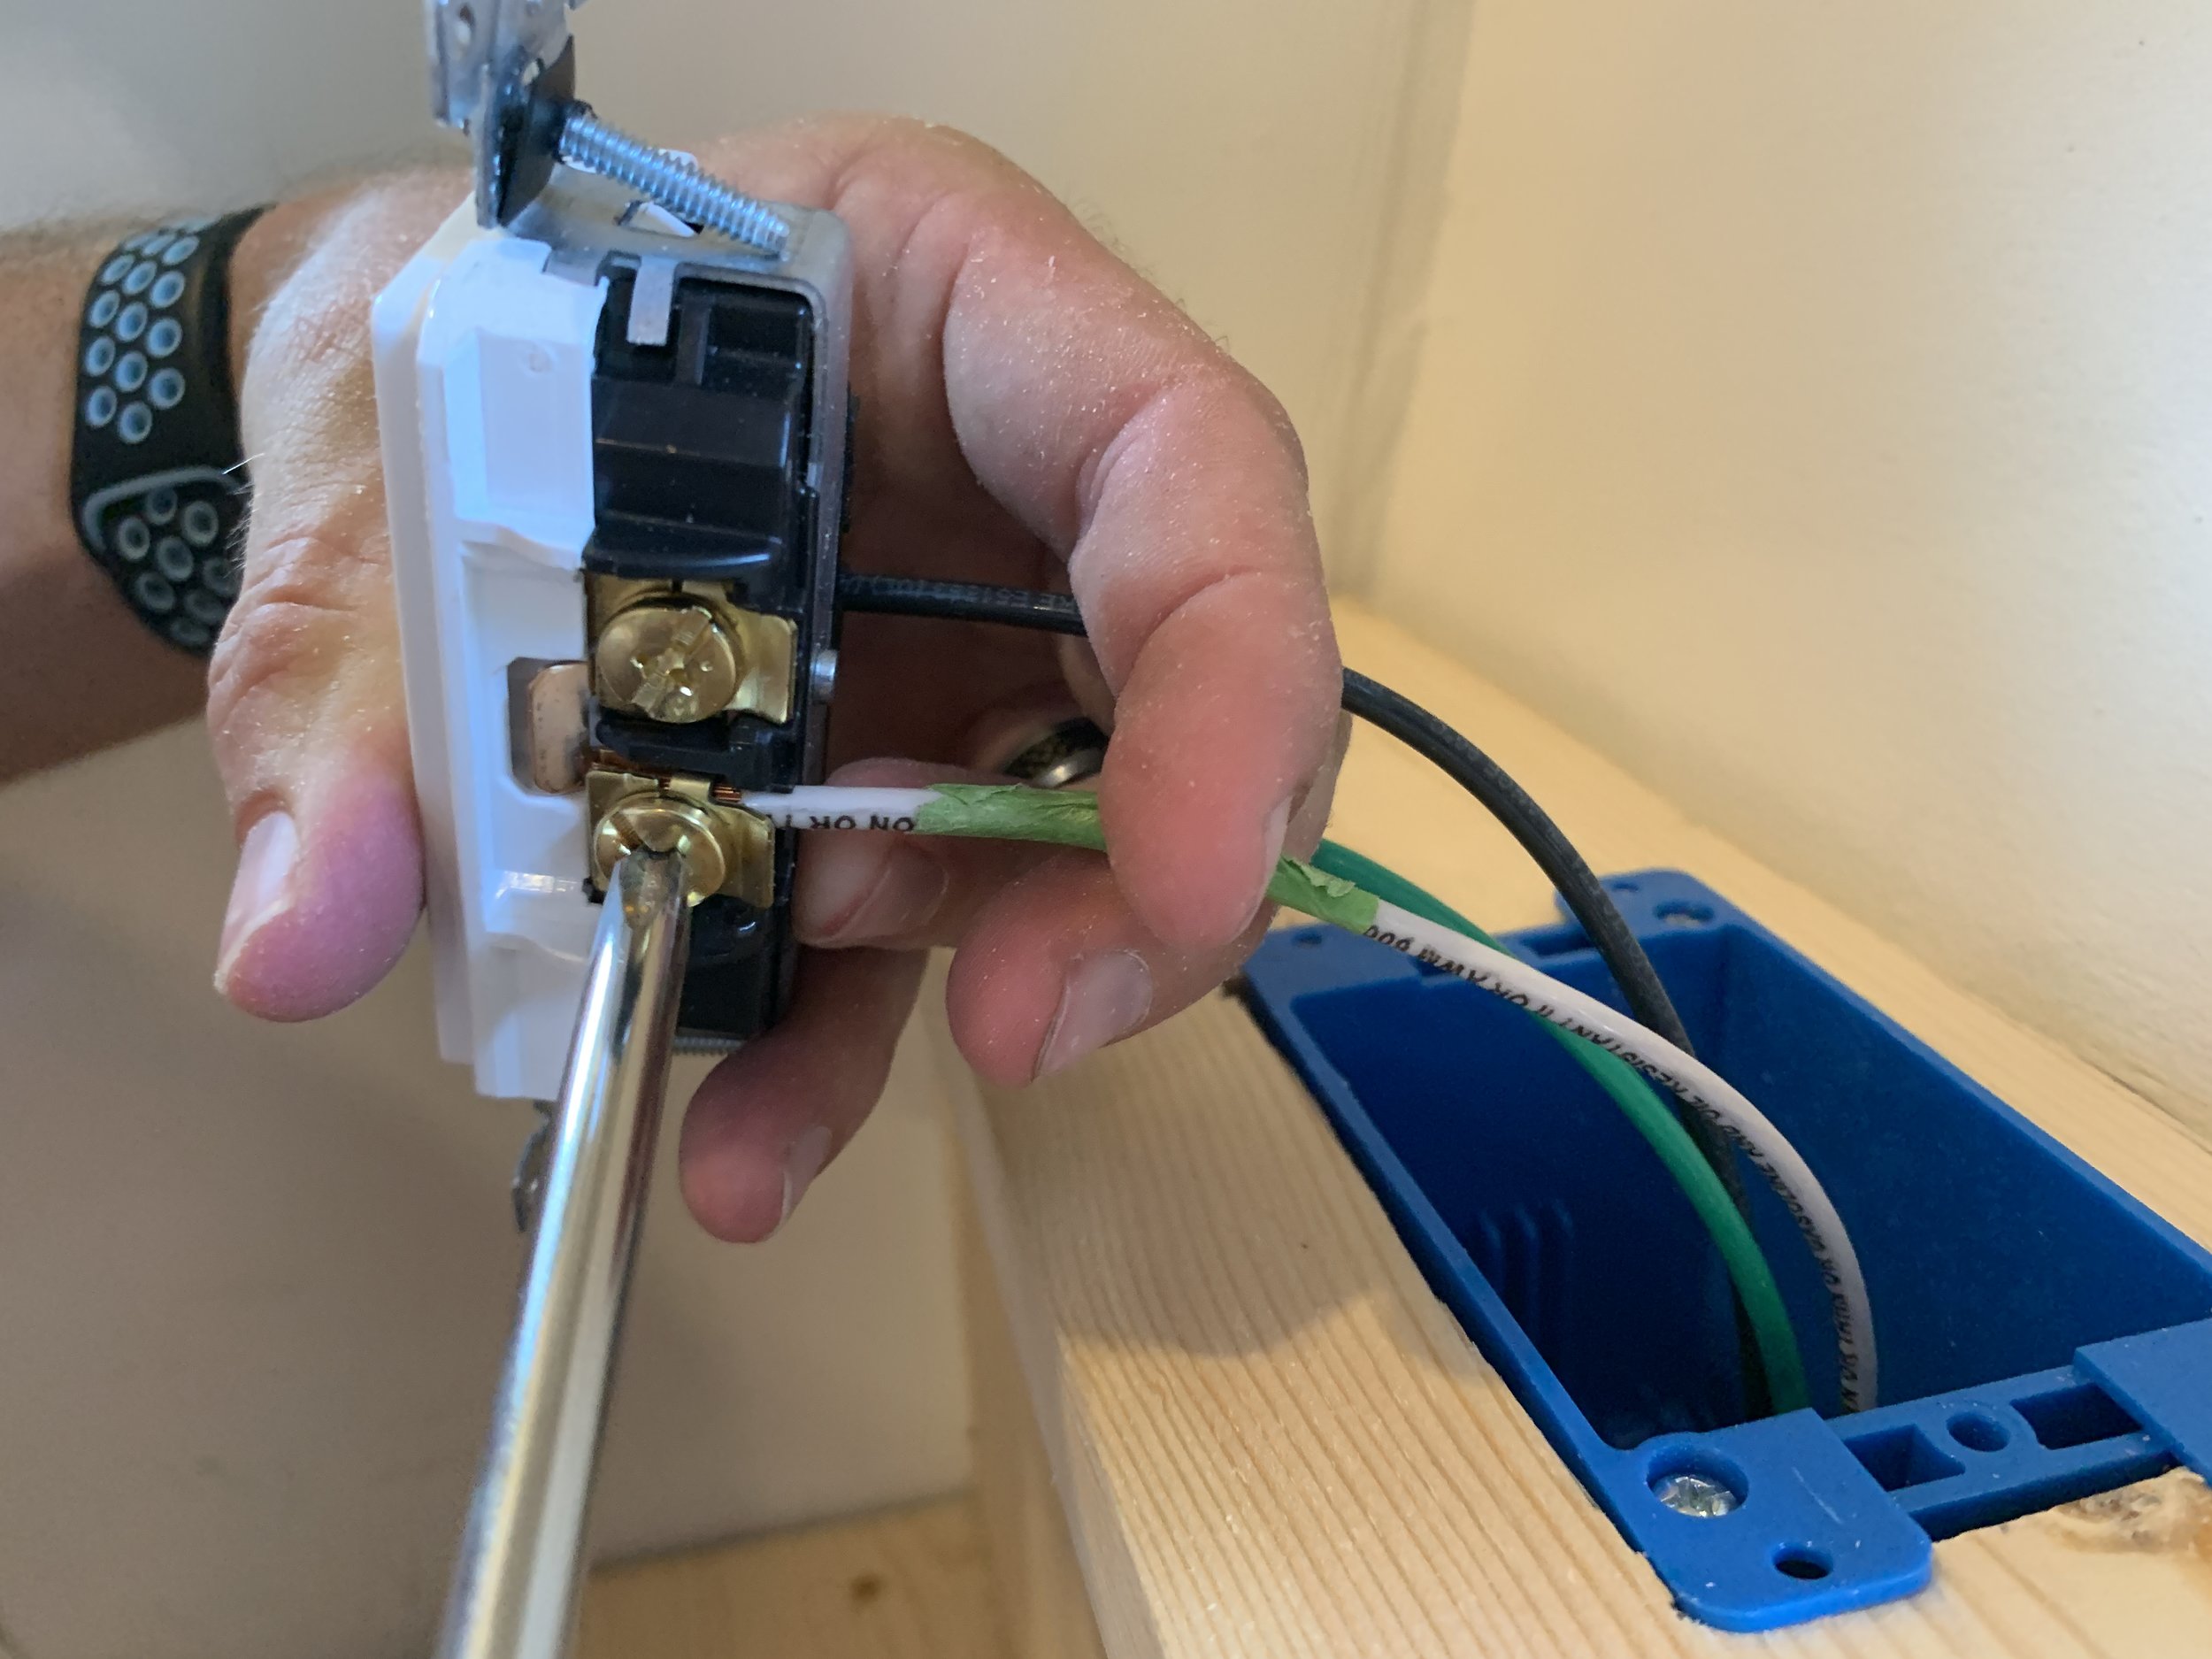
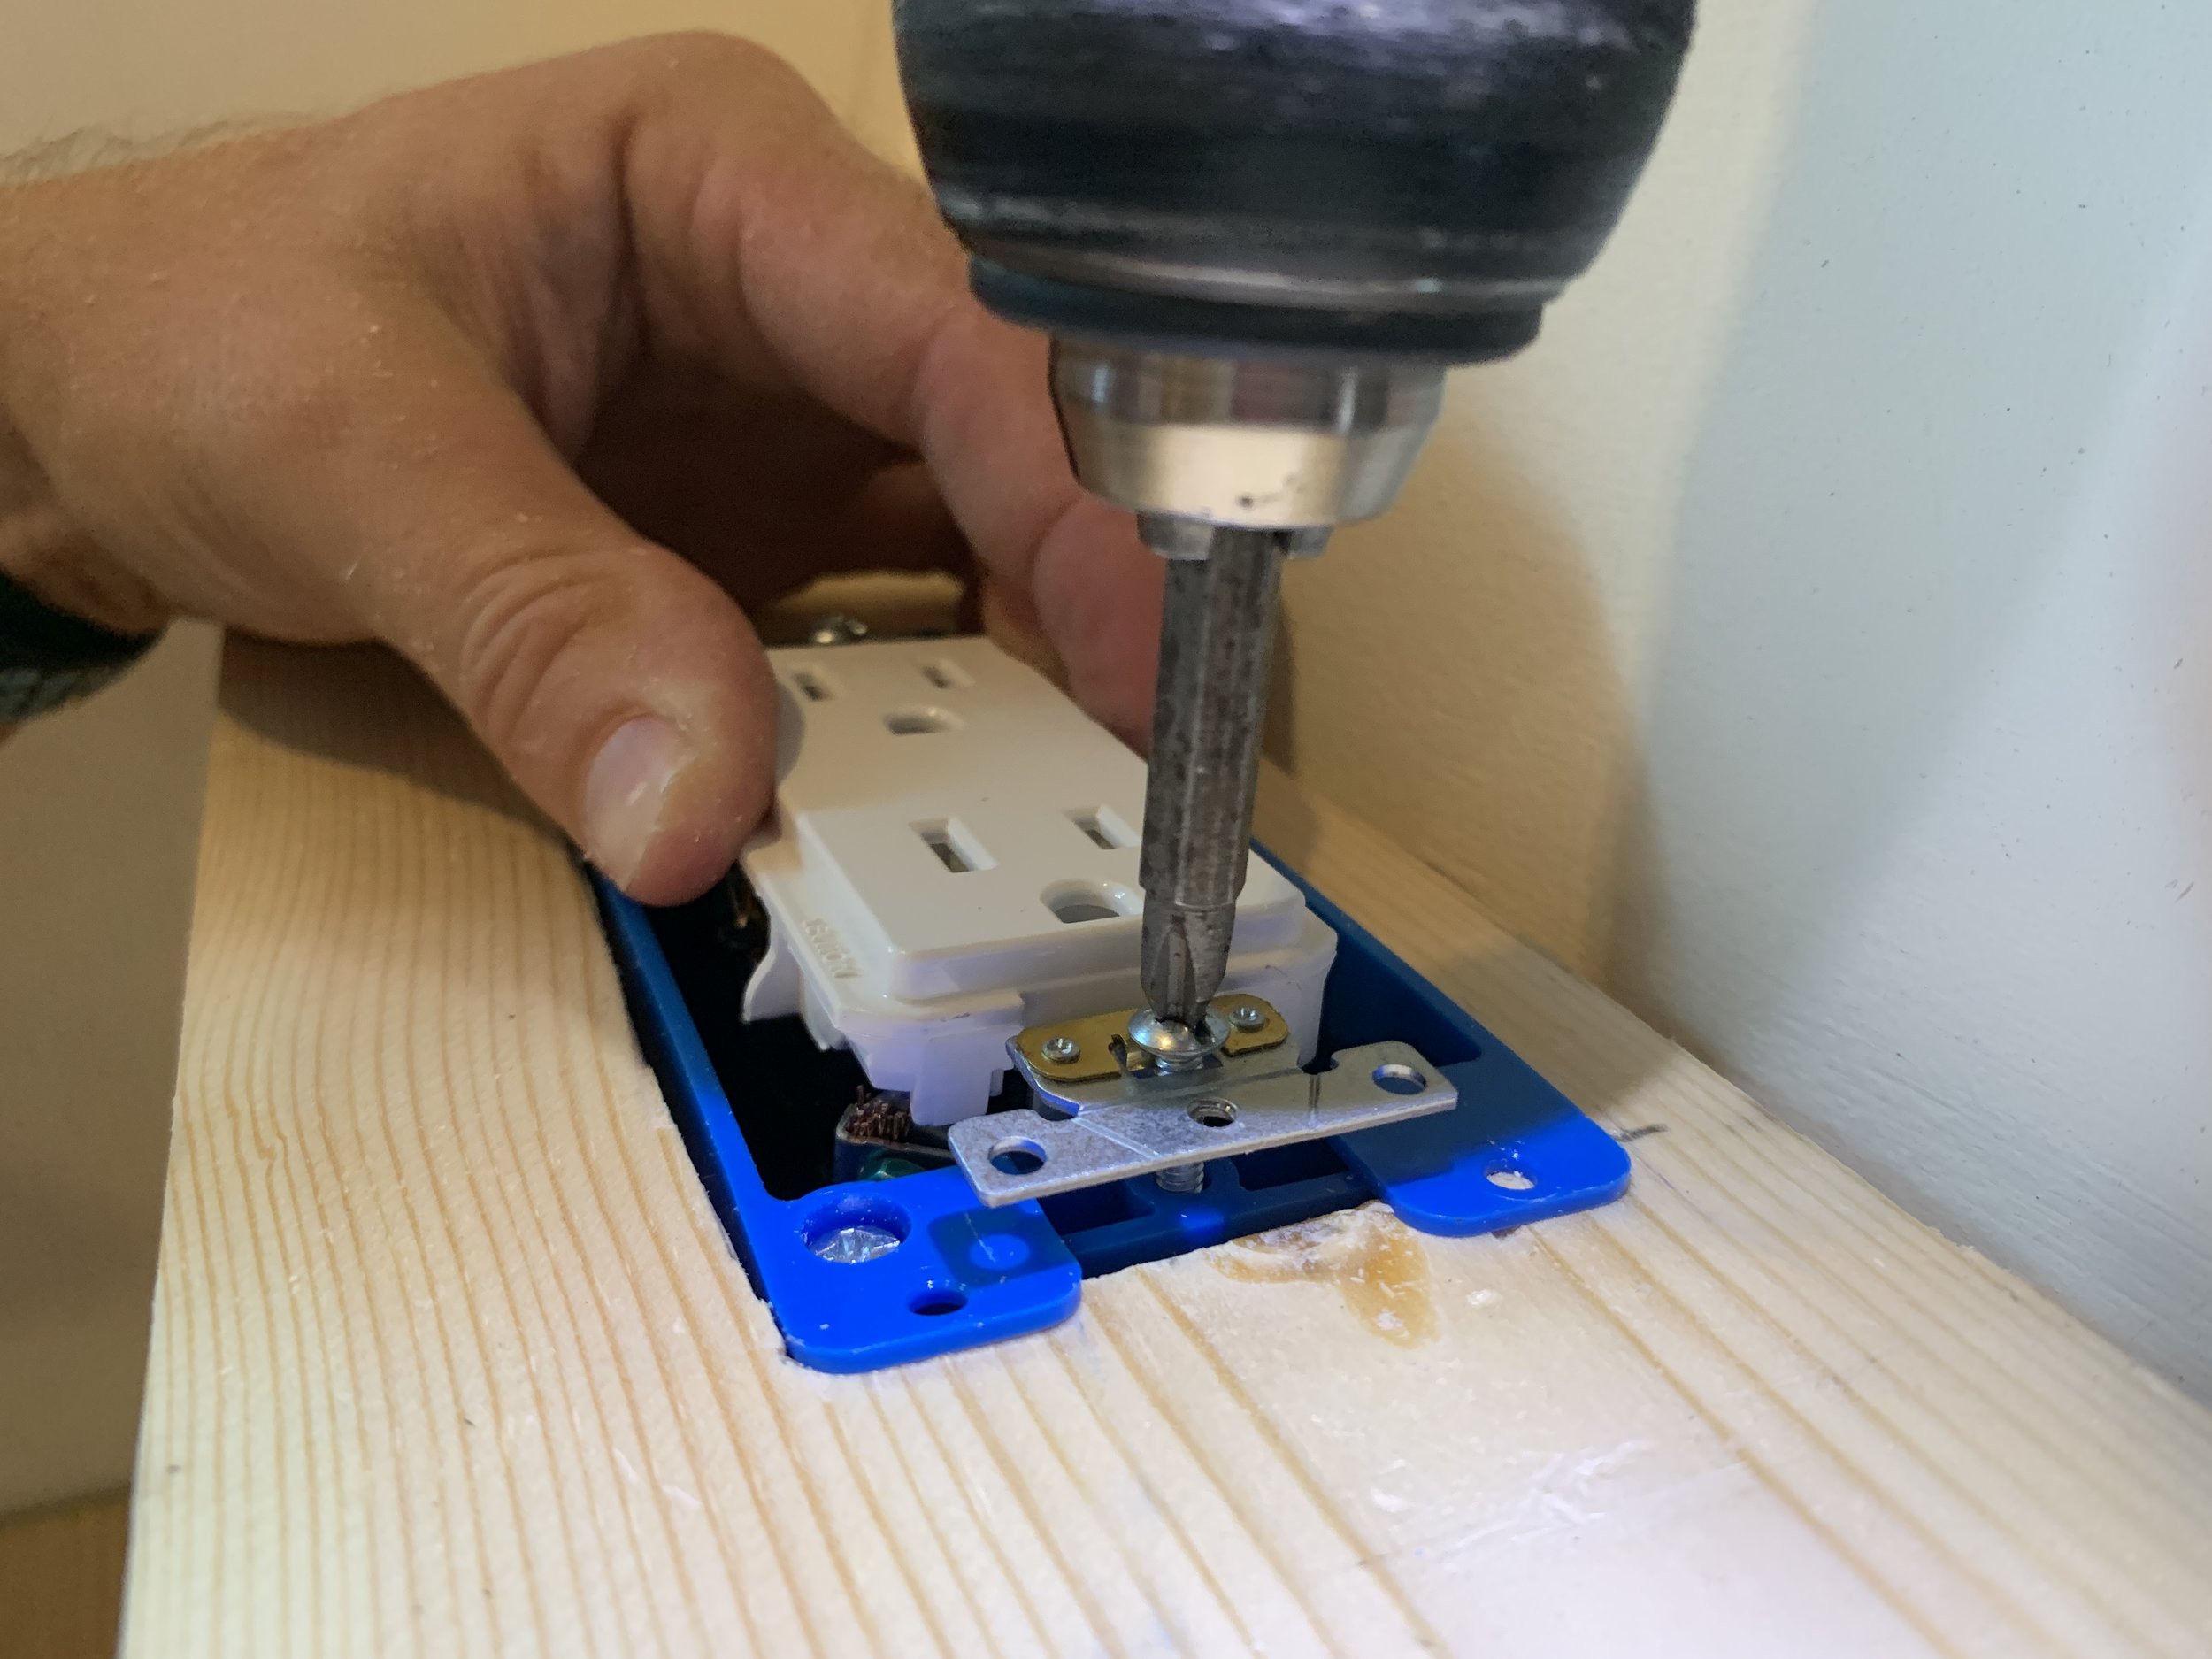
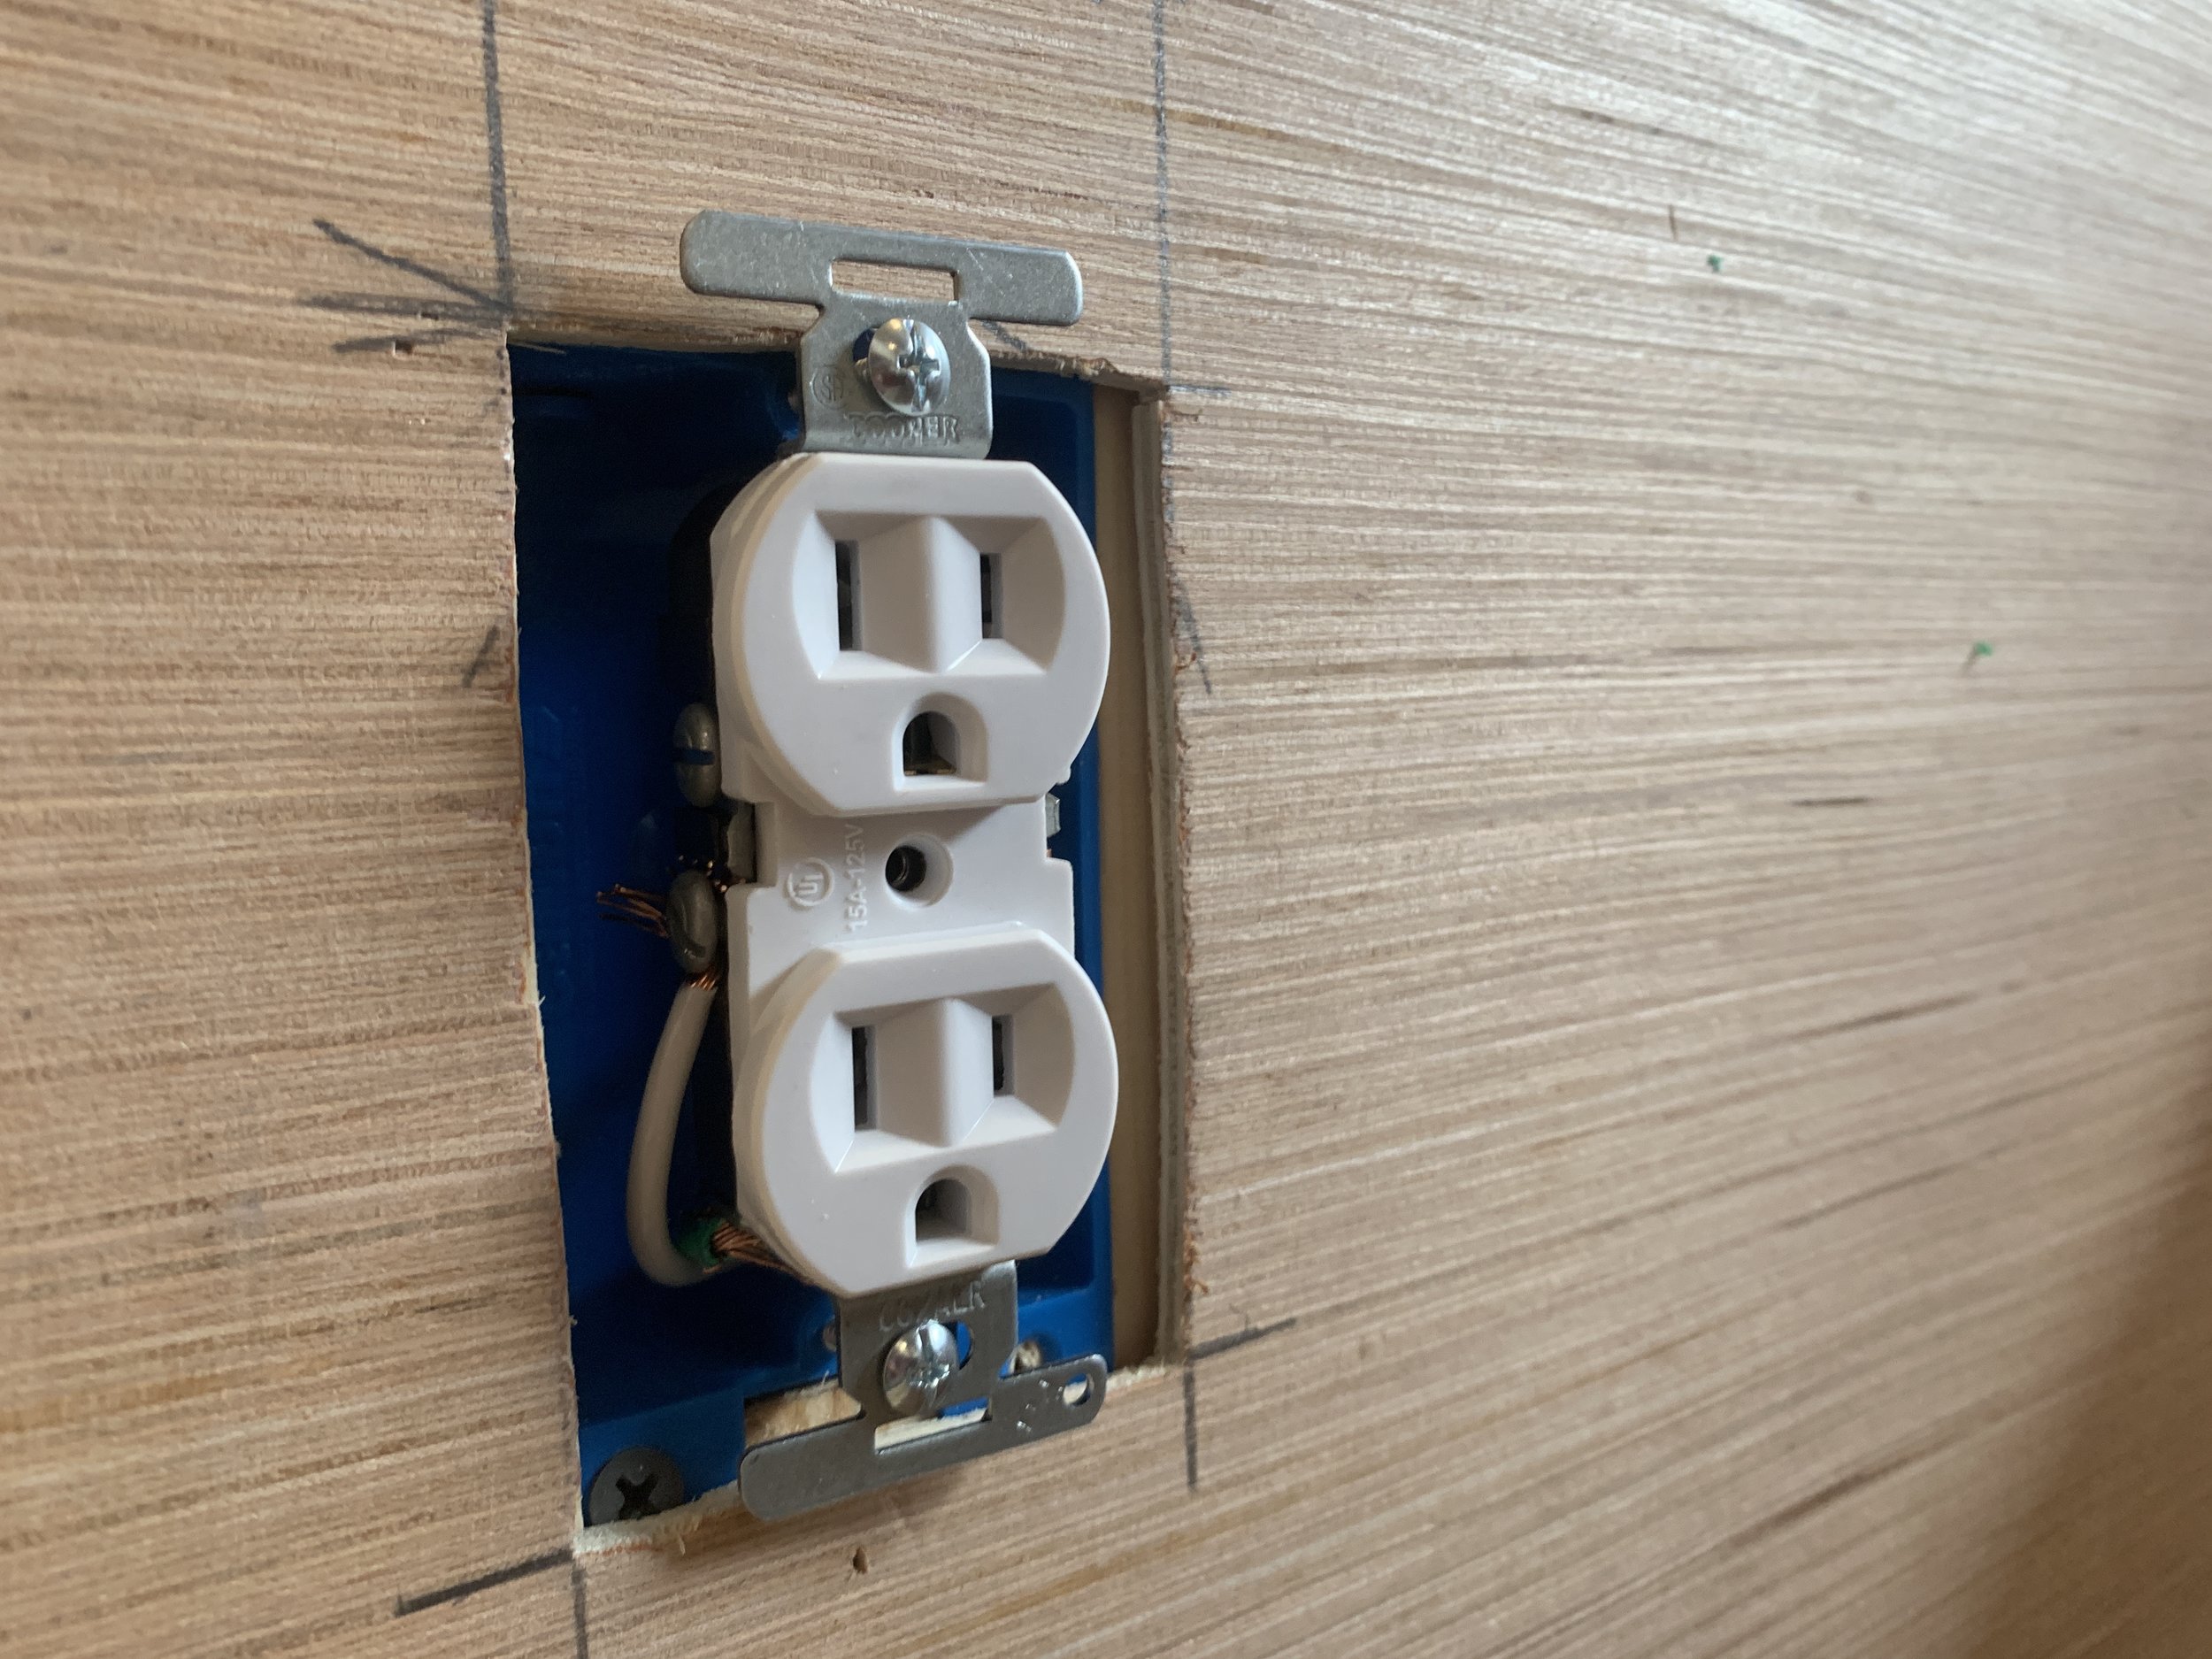
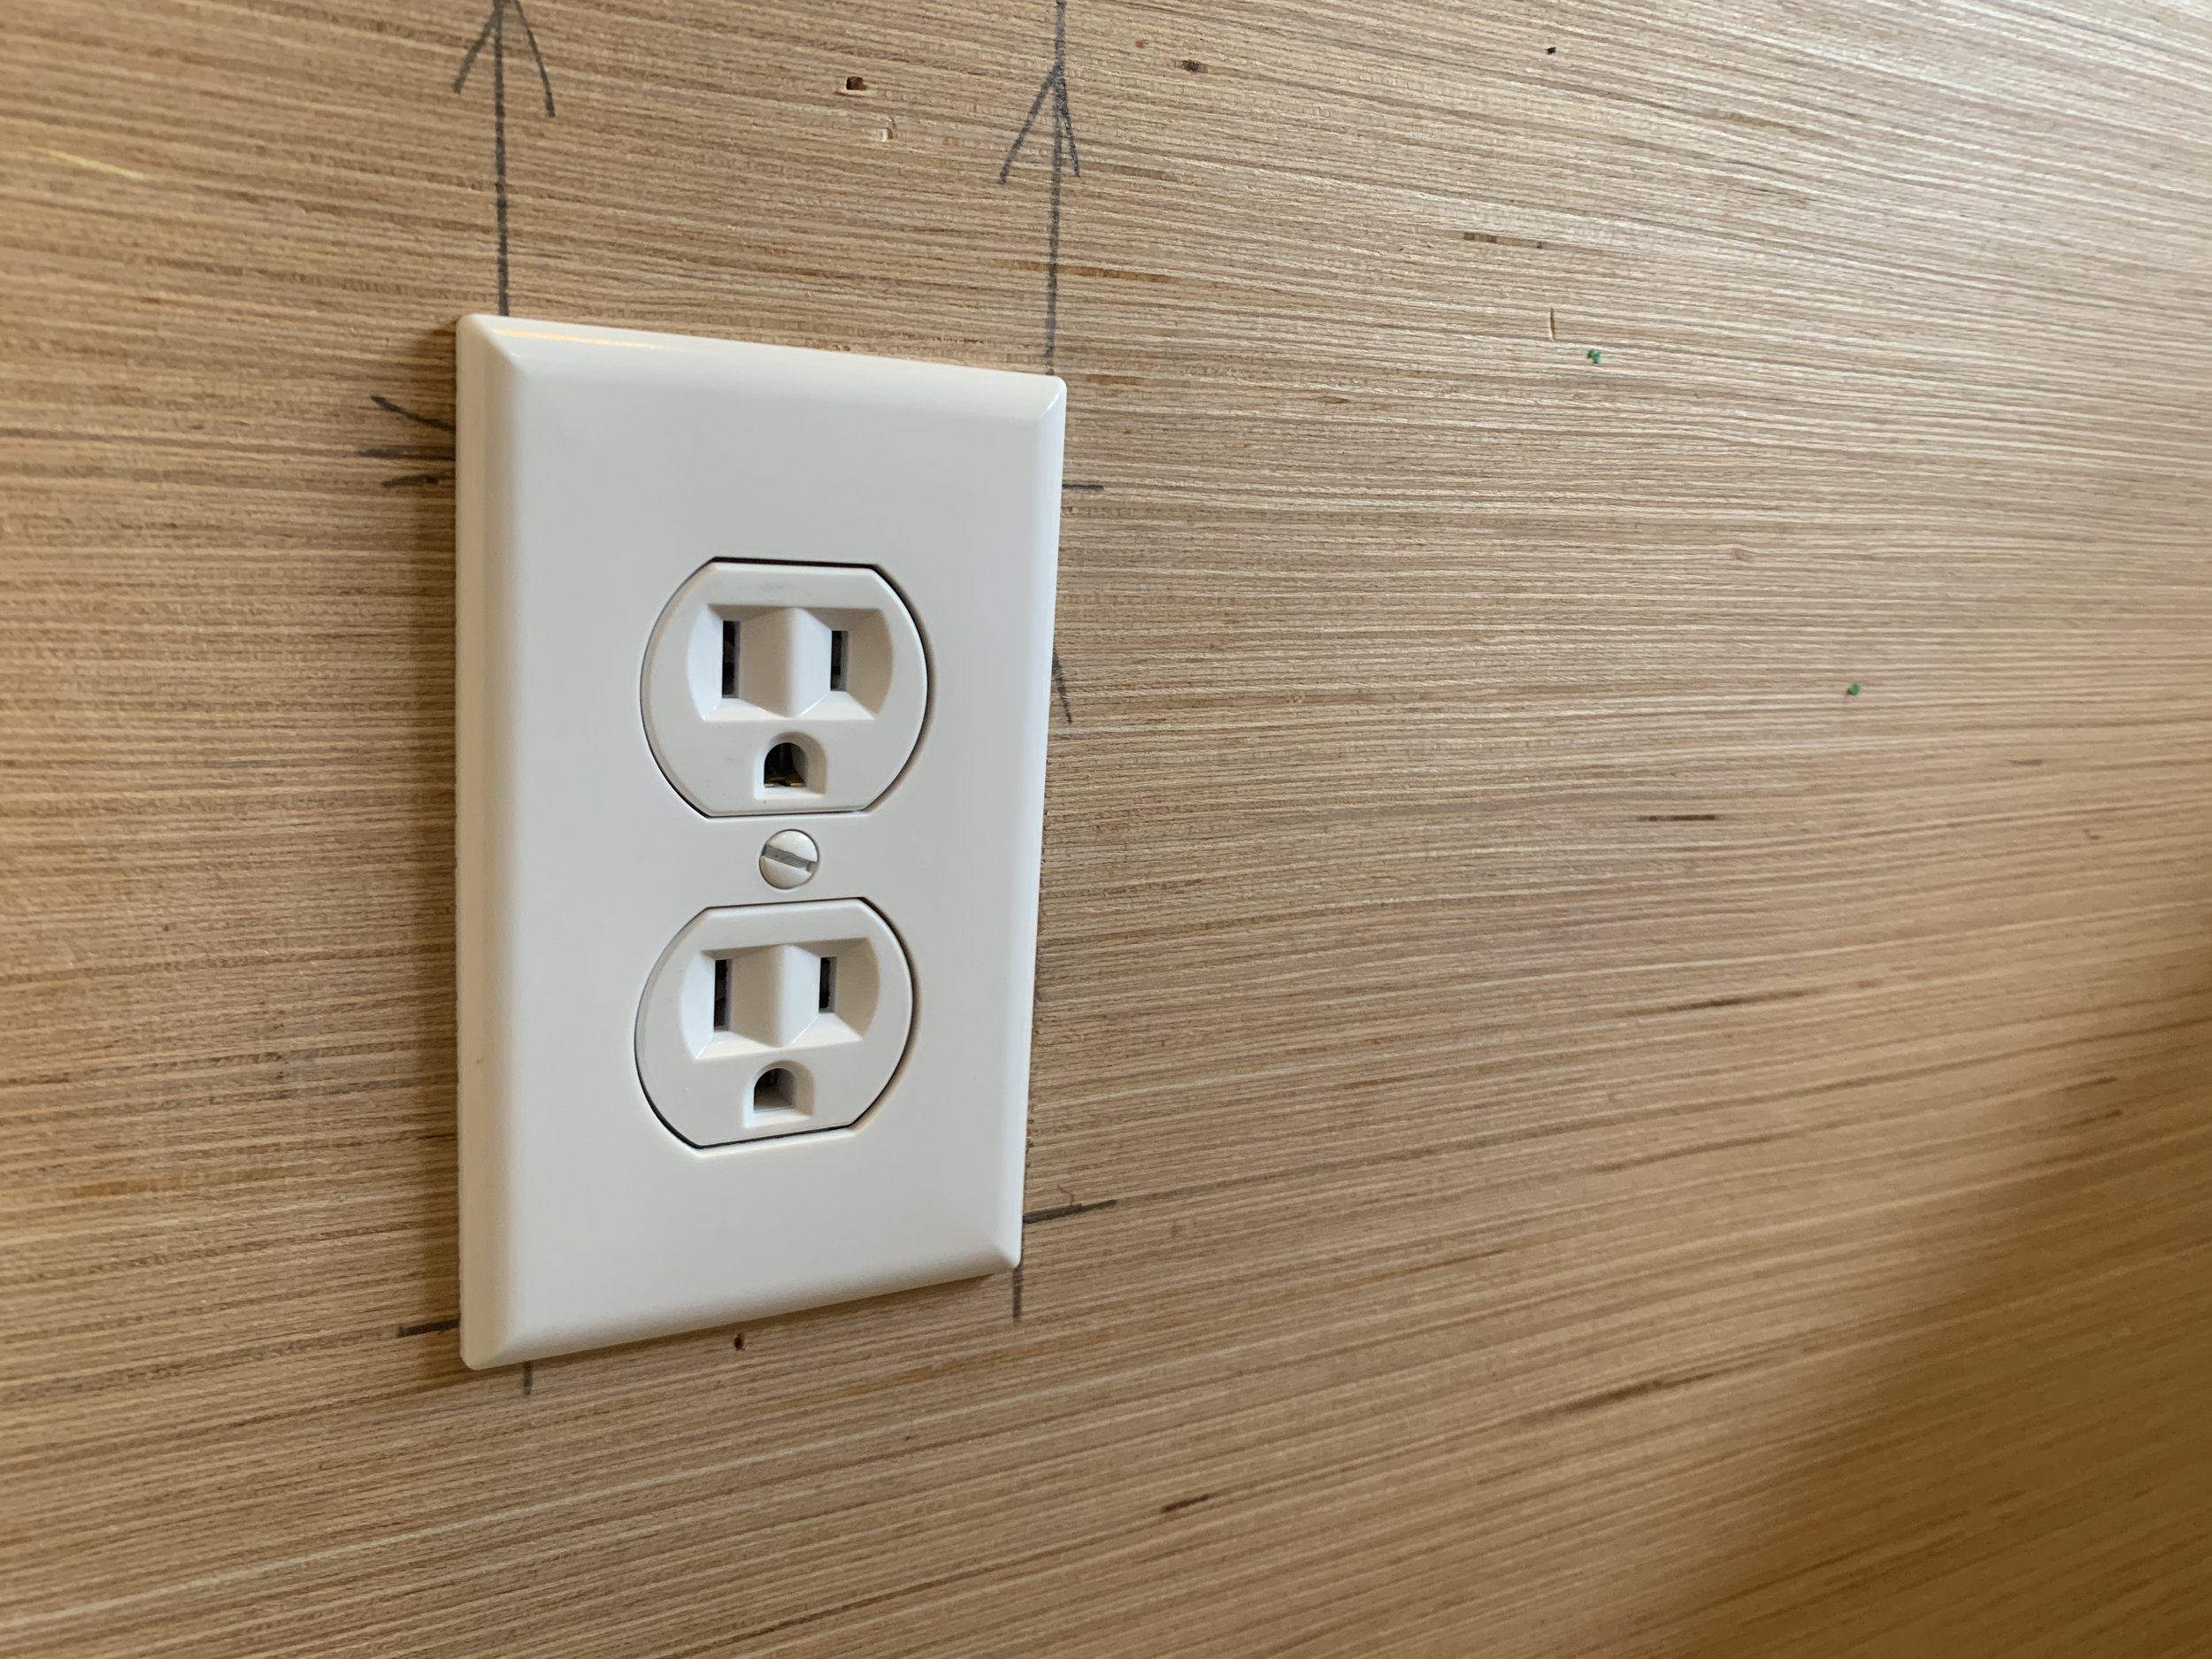
Wiring the outlets
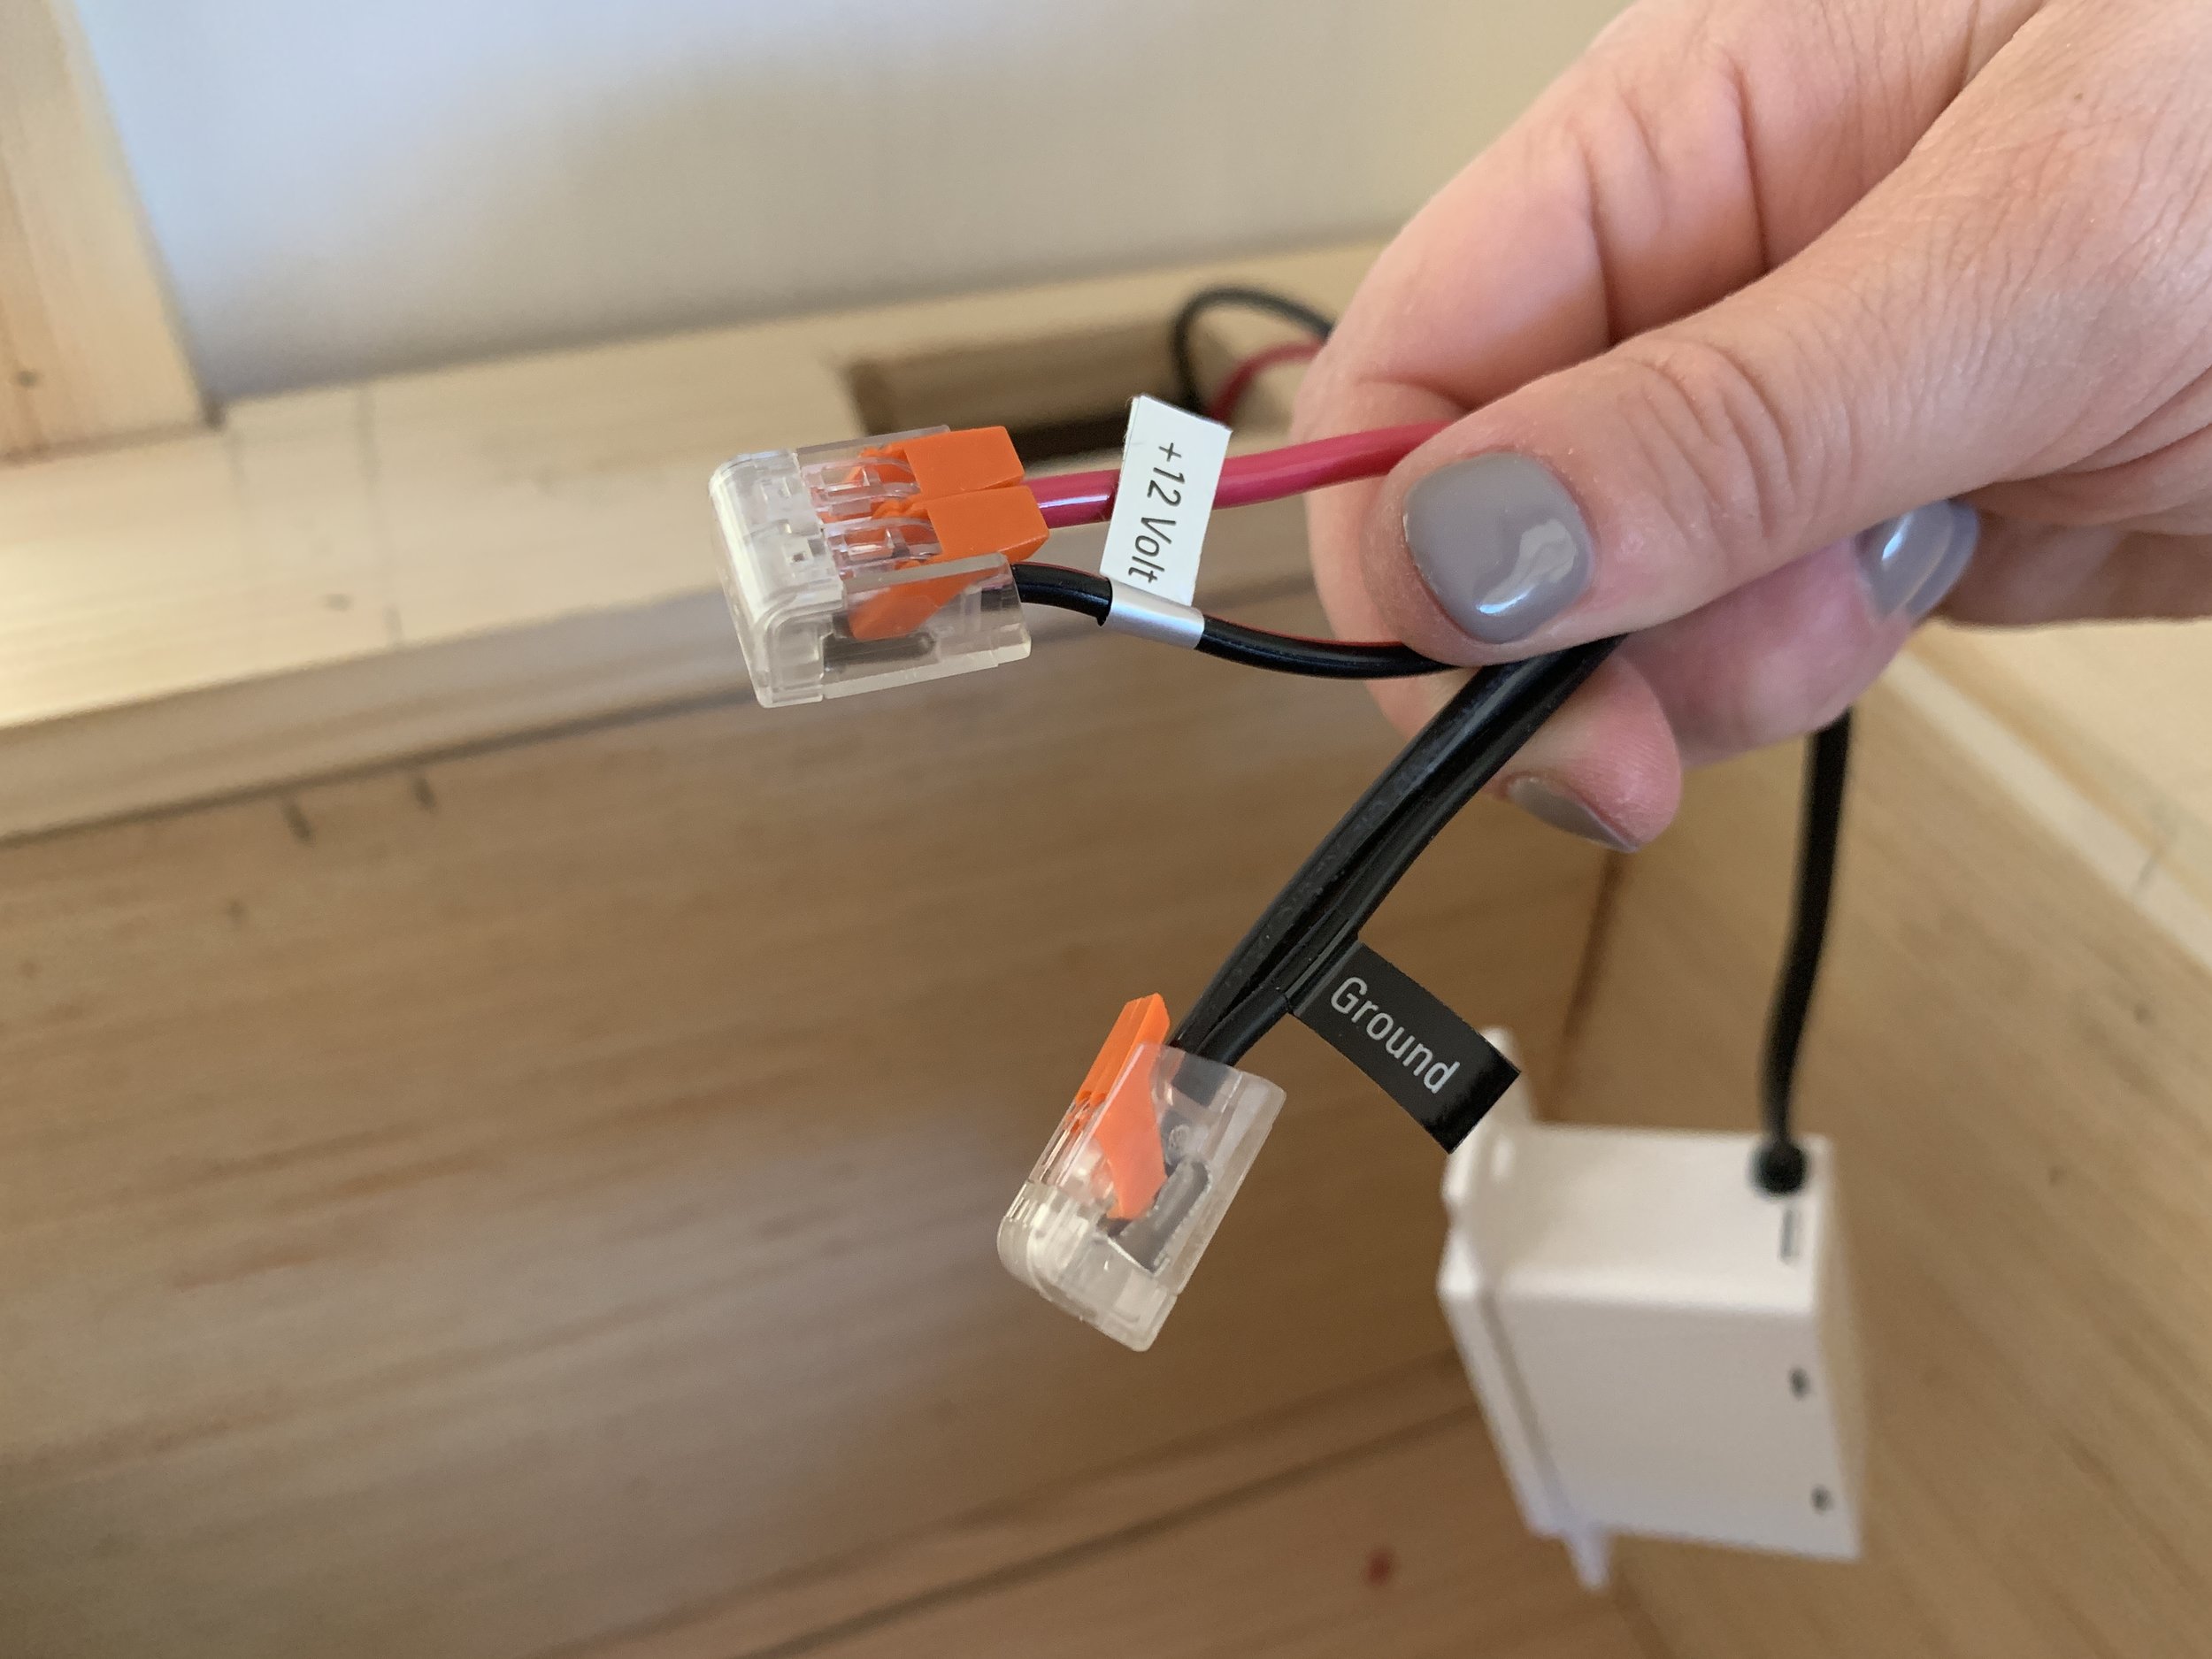
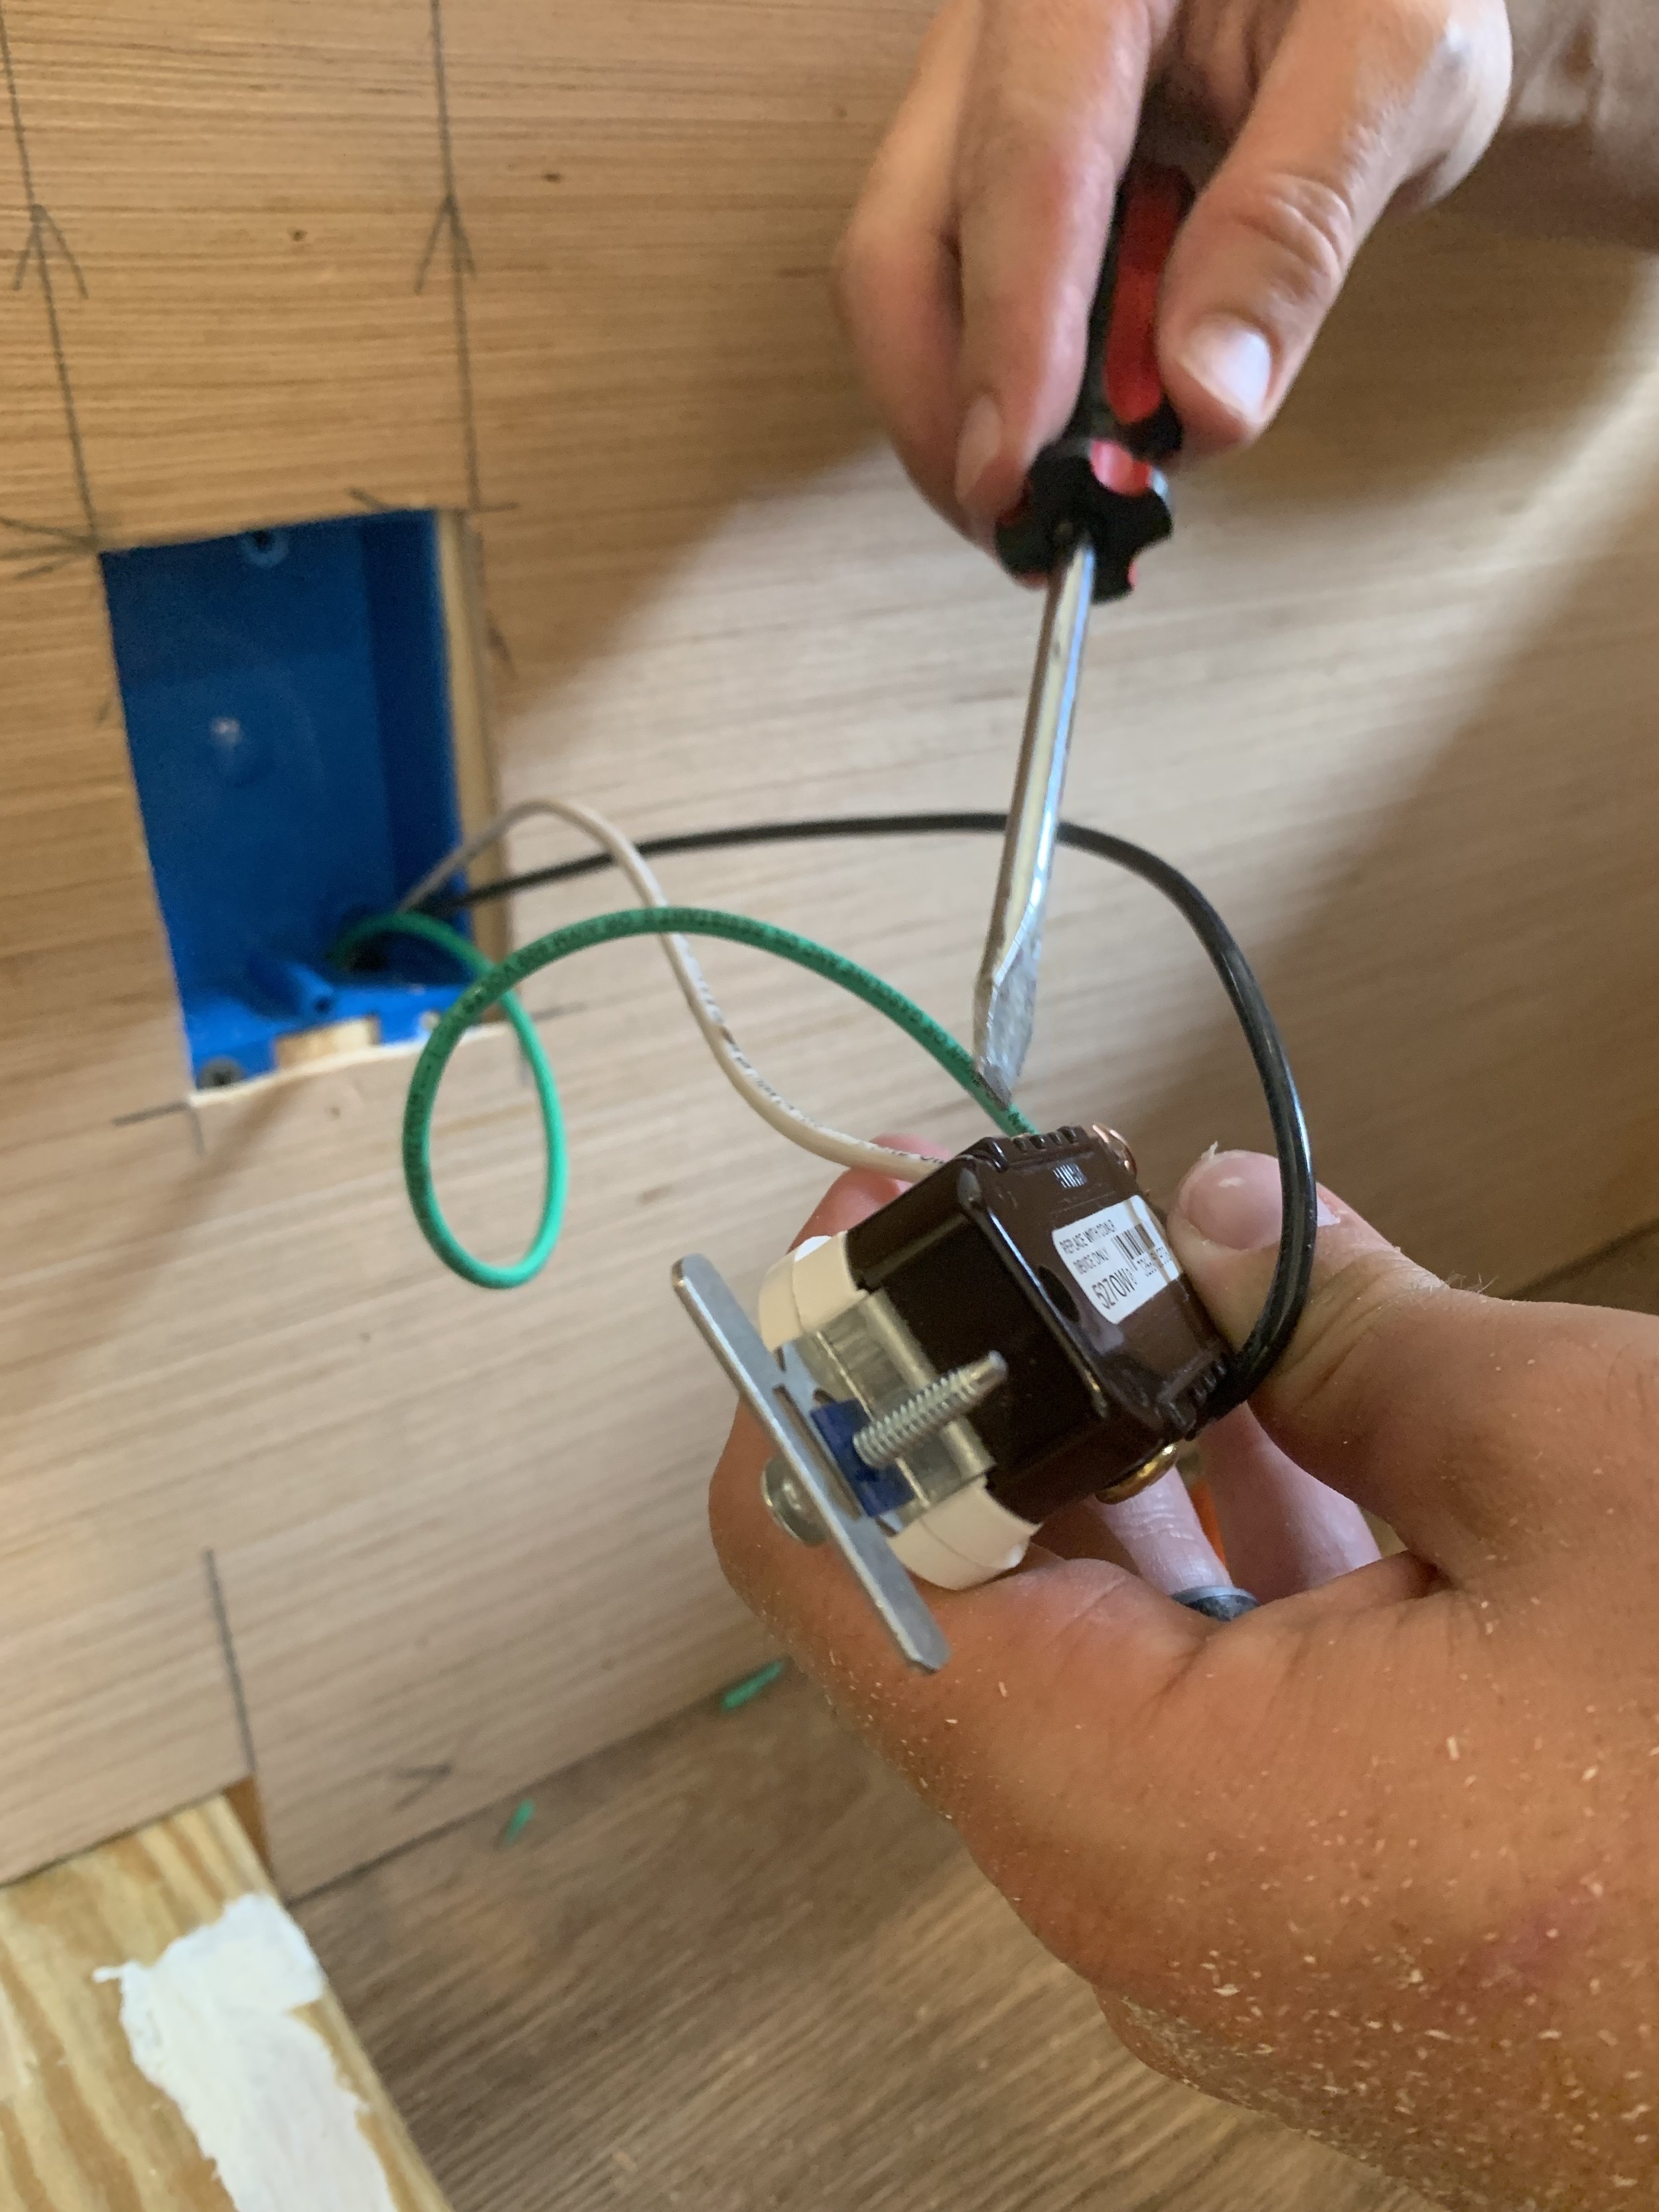
We also used our jigsaw to cut out where the outlets would go. We installed both a 110V outlet (the green + black + white wiring on the left of the window) and a 12V USB-only outlet (the red + black wiring on the right side of the window) in the main back rest. We shared the importance of splitting up the two different types of outlets in detail here, but the gist is your camper wastes unnecessary energy to convert and then invert the different types of energy if you’re using a combo 110V outlet with USB ports so we opted to split them up for added efficiency.
Lining the inner walls of the under bed area
After the main structure was complete, we used 1/4” plywood to close in the interior of the area under the bed, starting with the long back edge first. This is when we added additional vertical 2x4s between the bottom and top 2x4s for more support, but mostly so we had something to nail the plywood into so it wouldn’t sink in when bumped by storage items. It’s in the left 1/3 of the storage/under bed area that we installed a 110V outlet for the A/C to plug into.


Making the bed “lid”
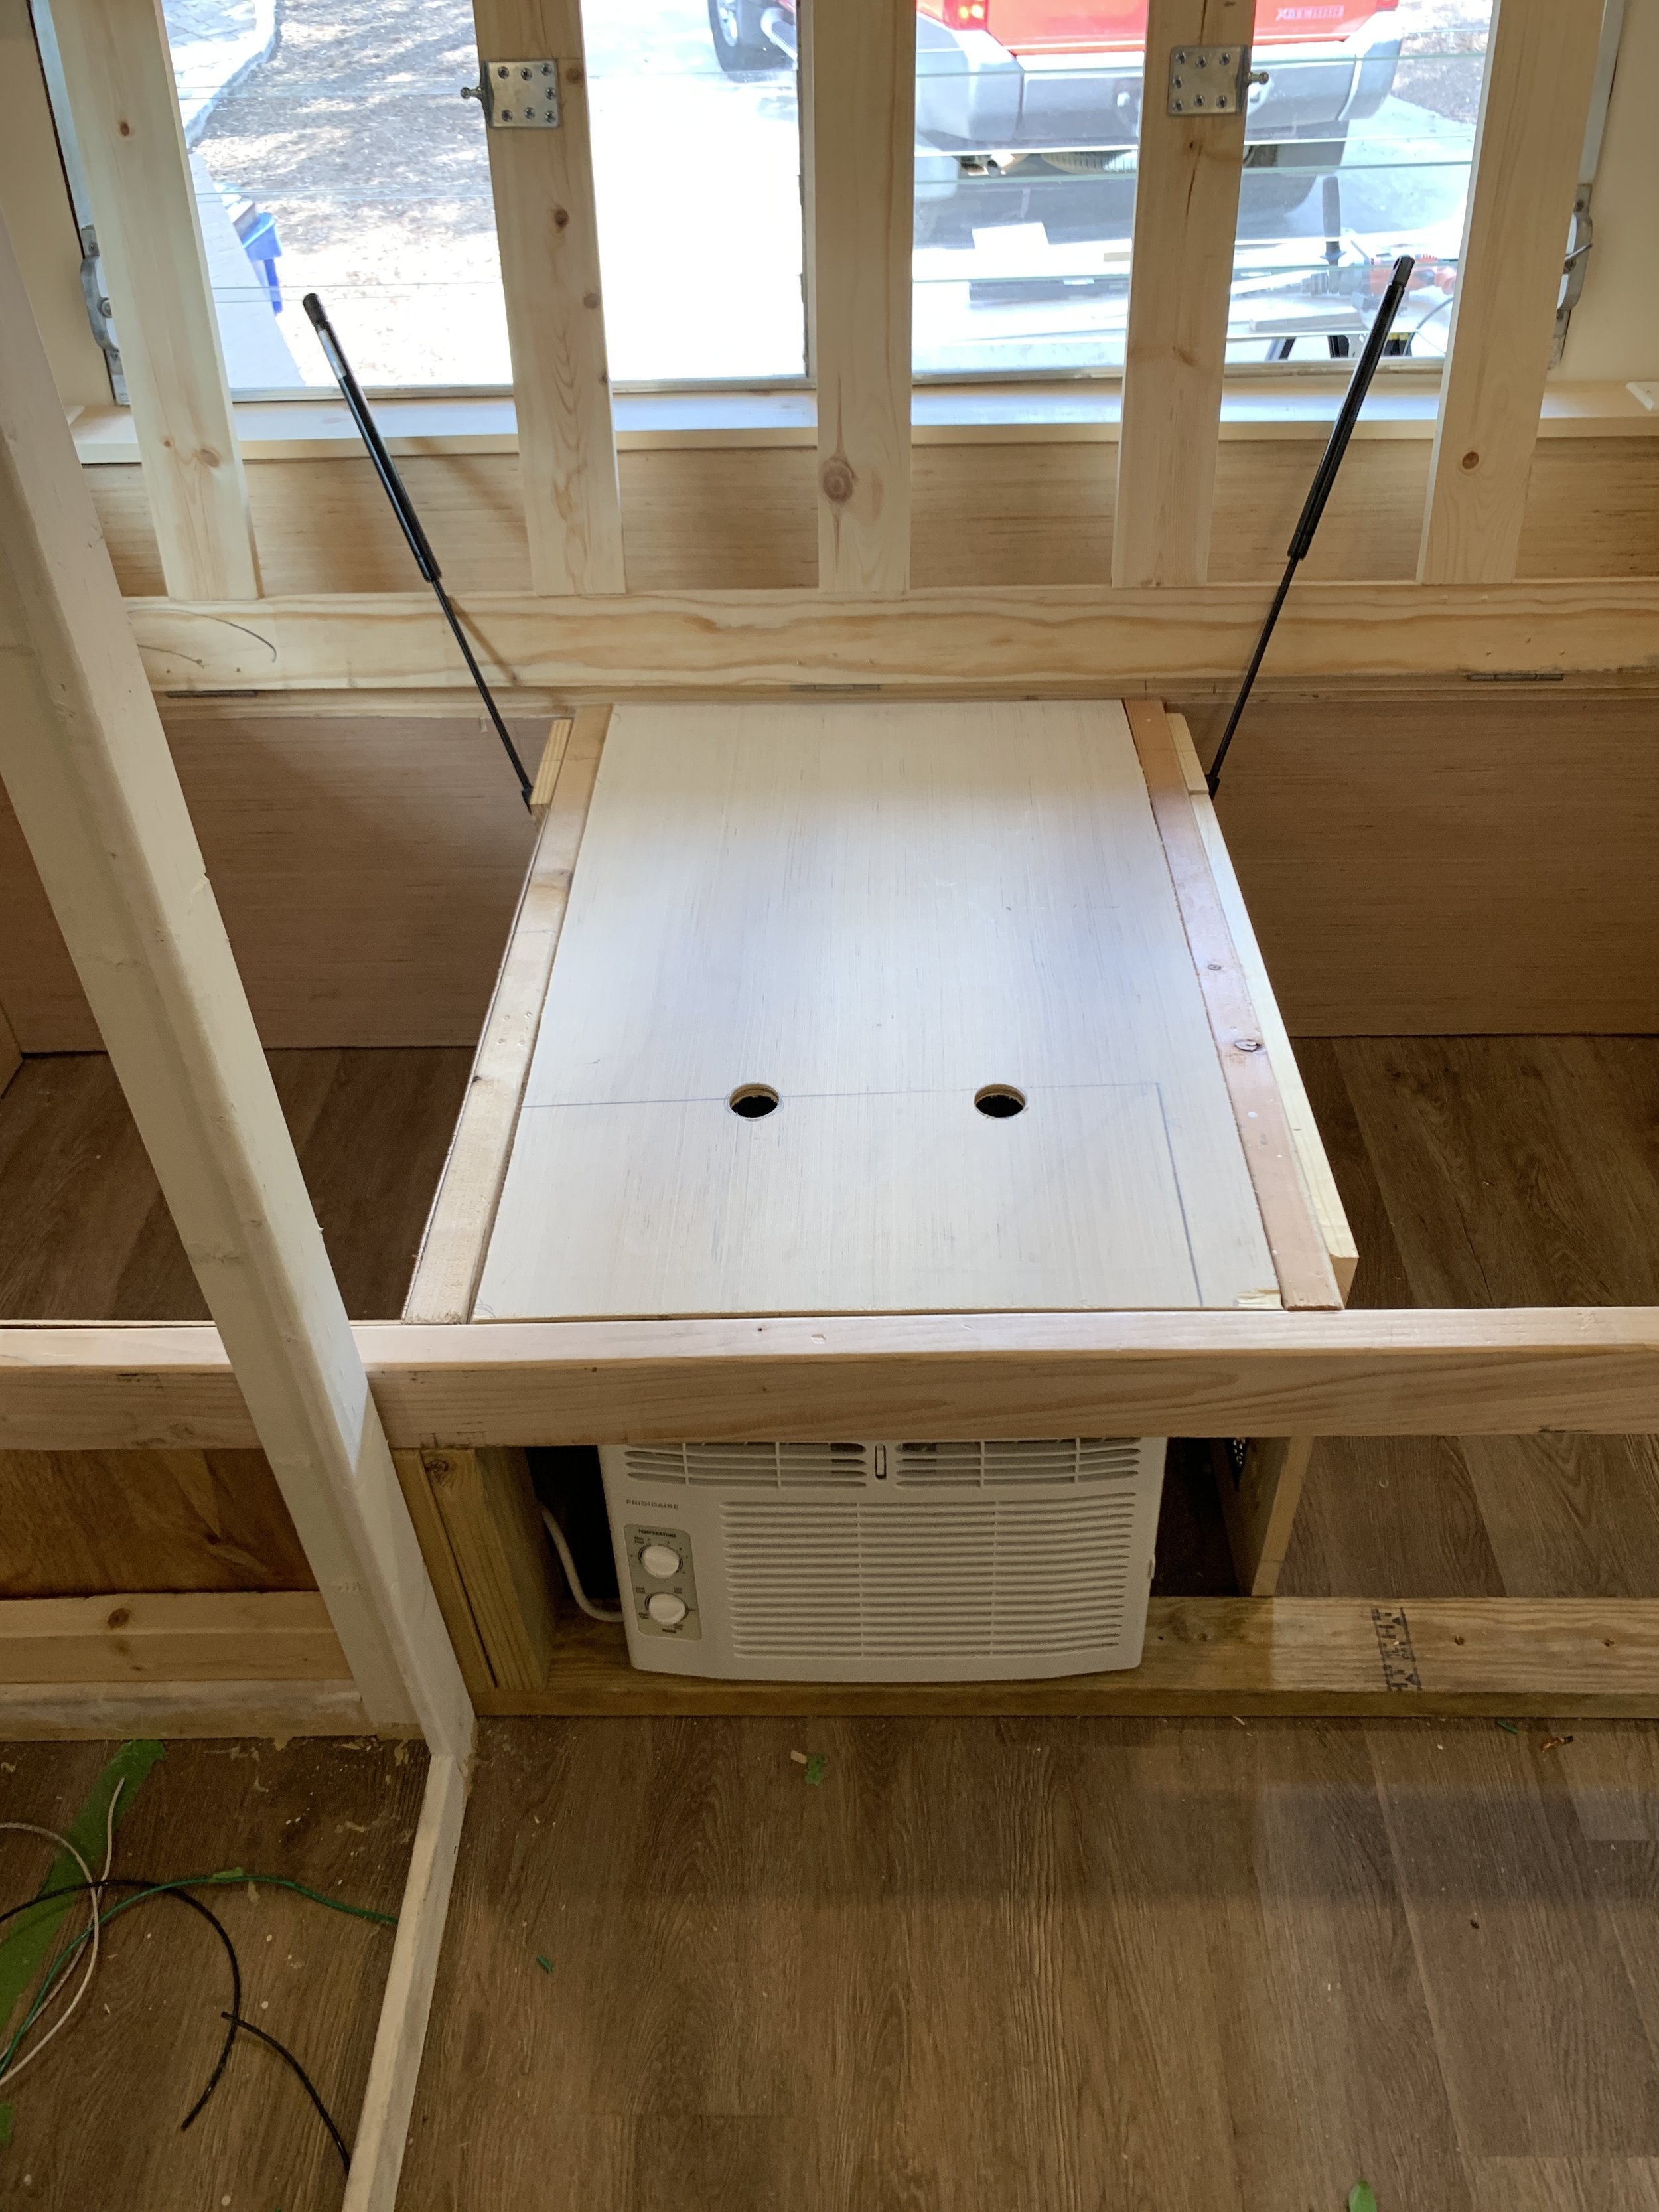
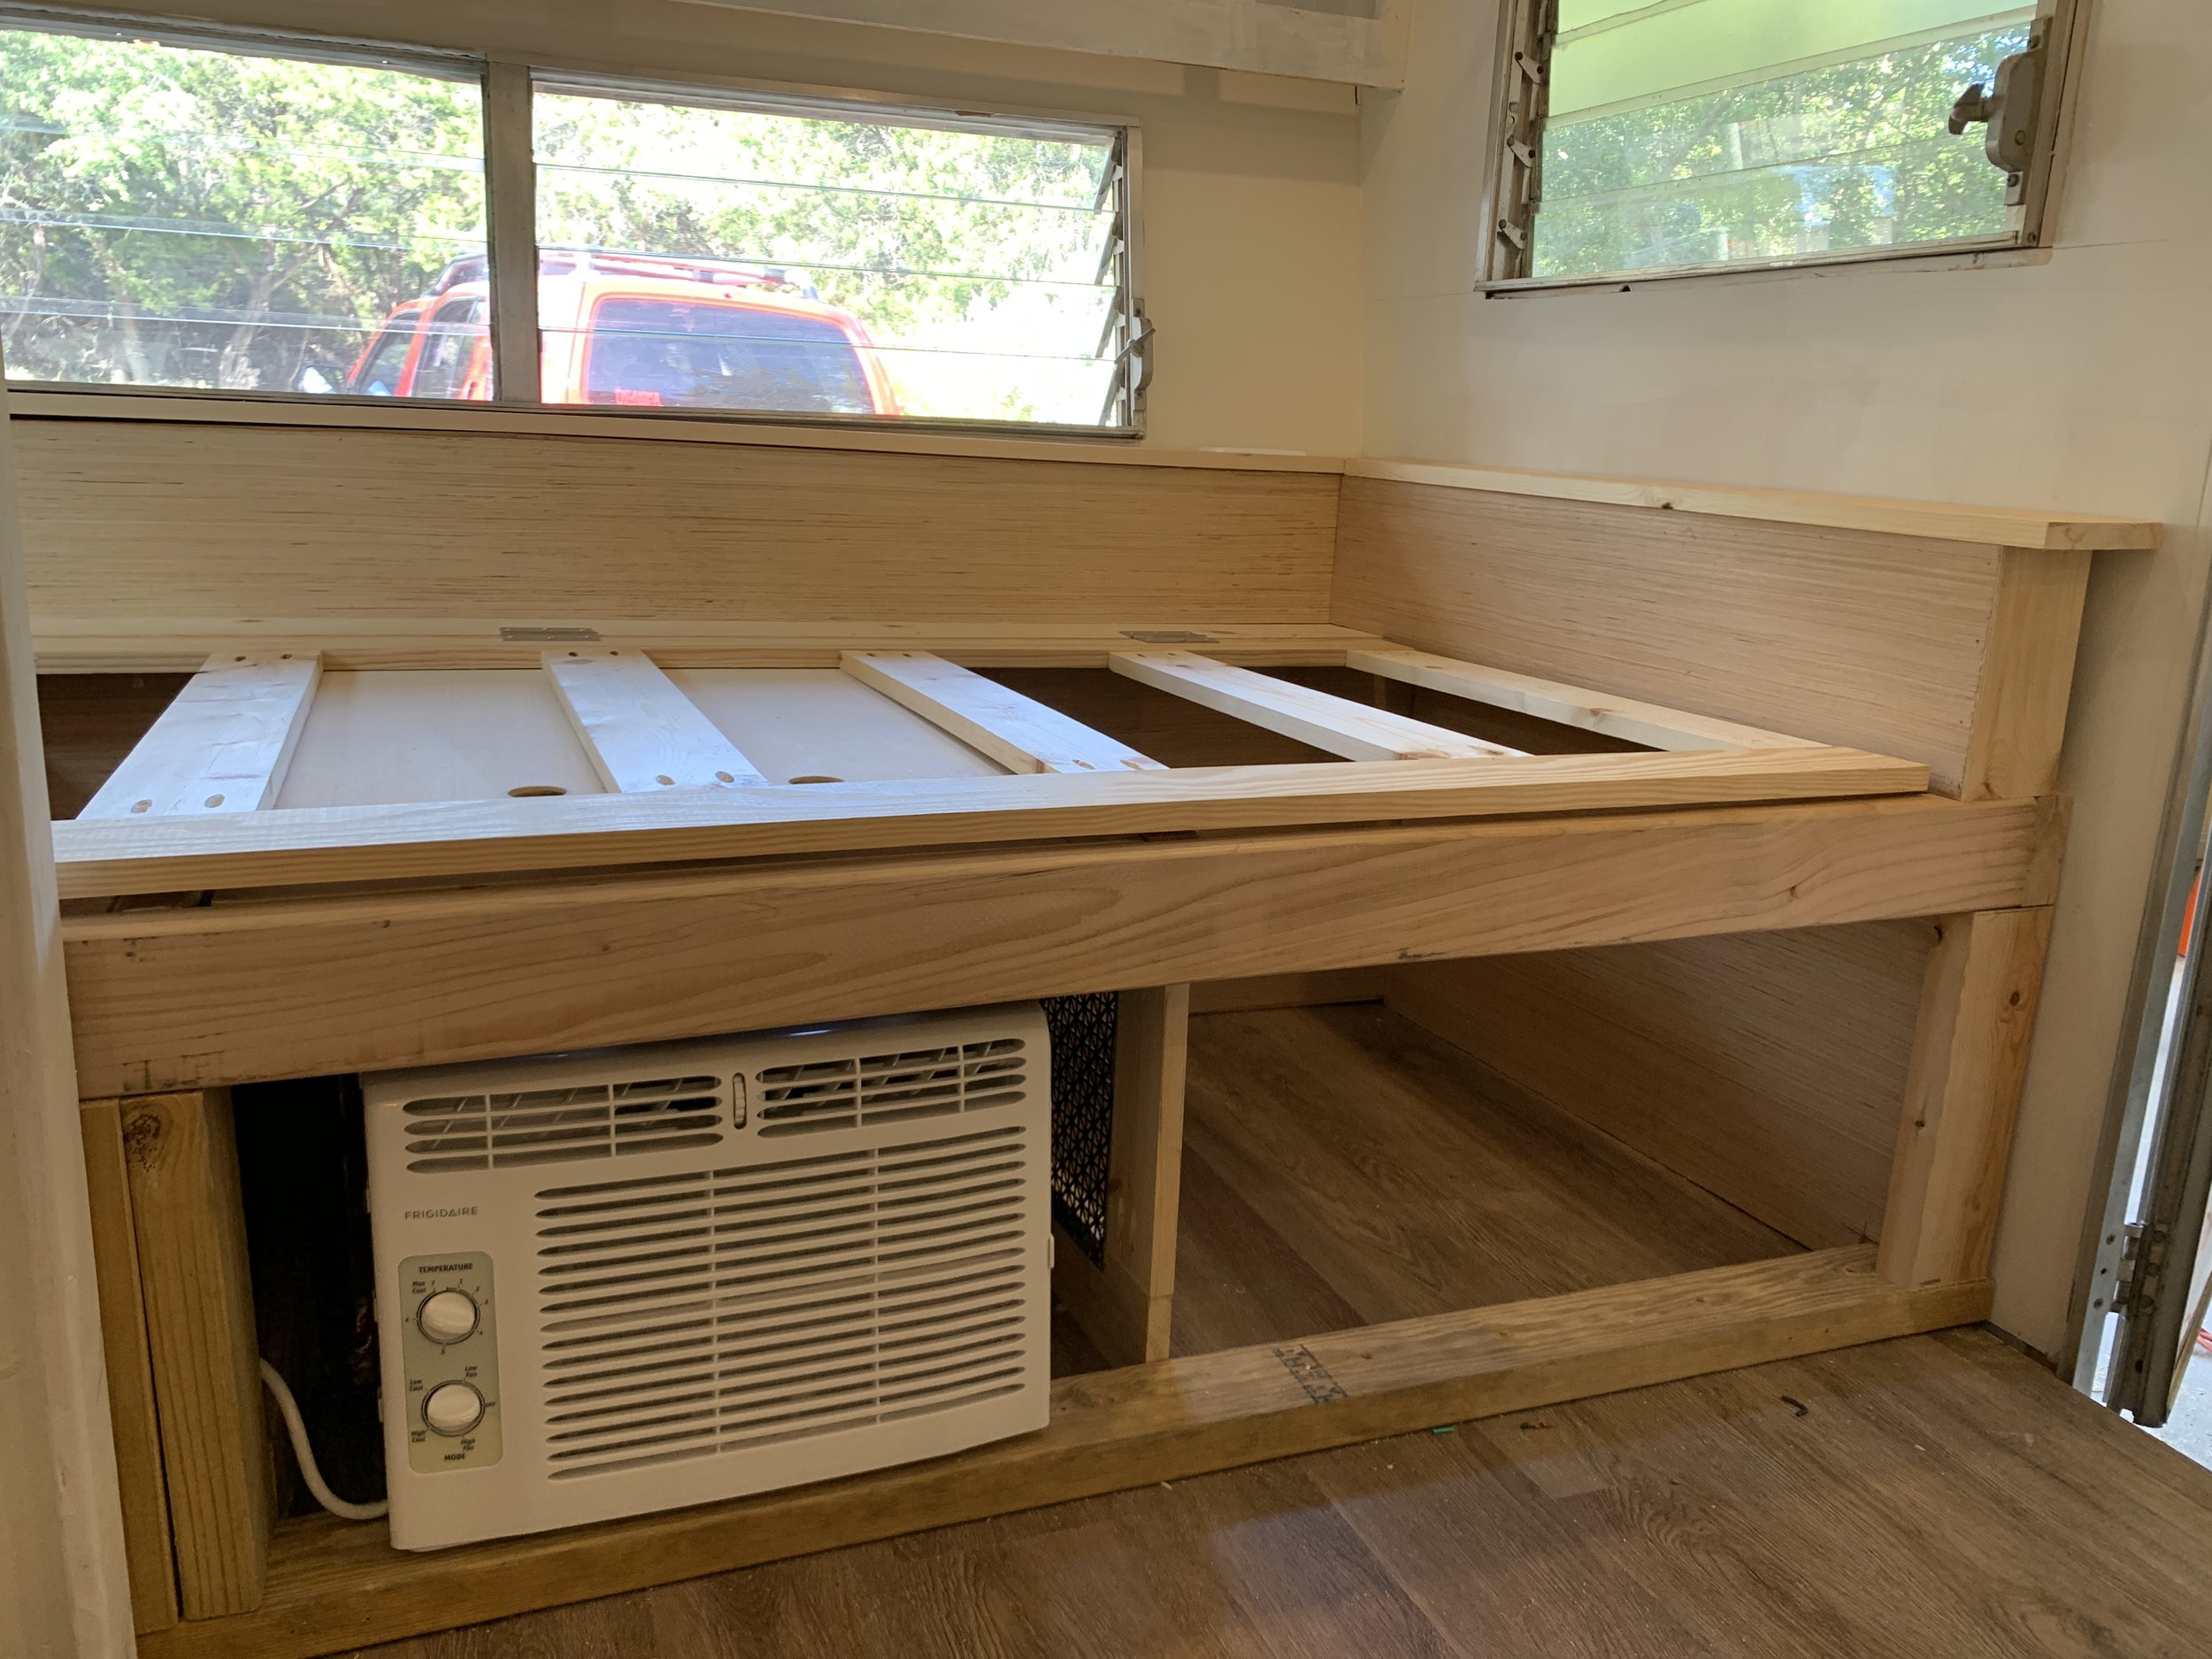
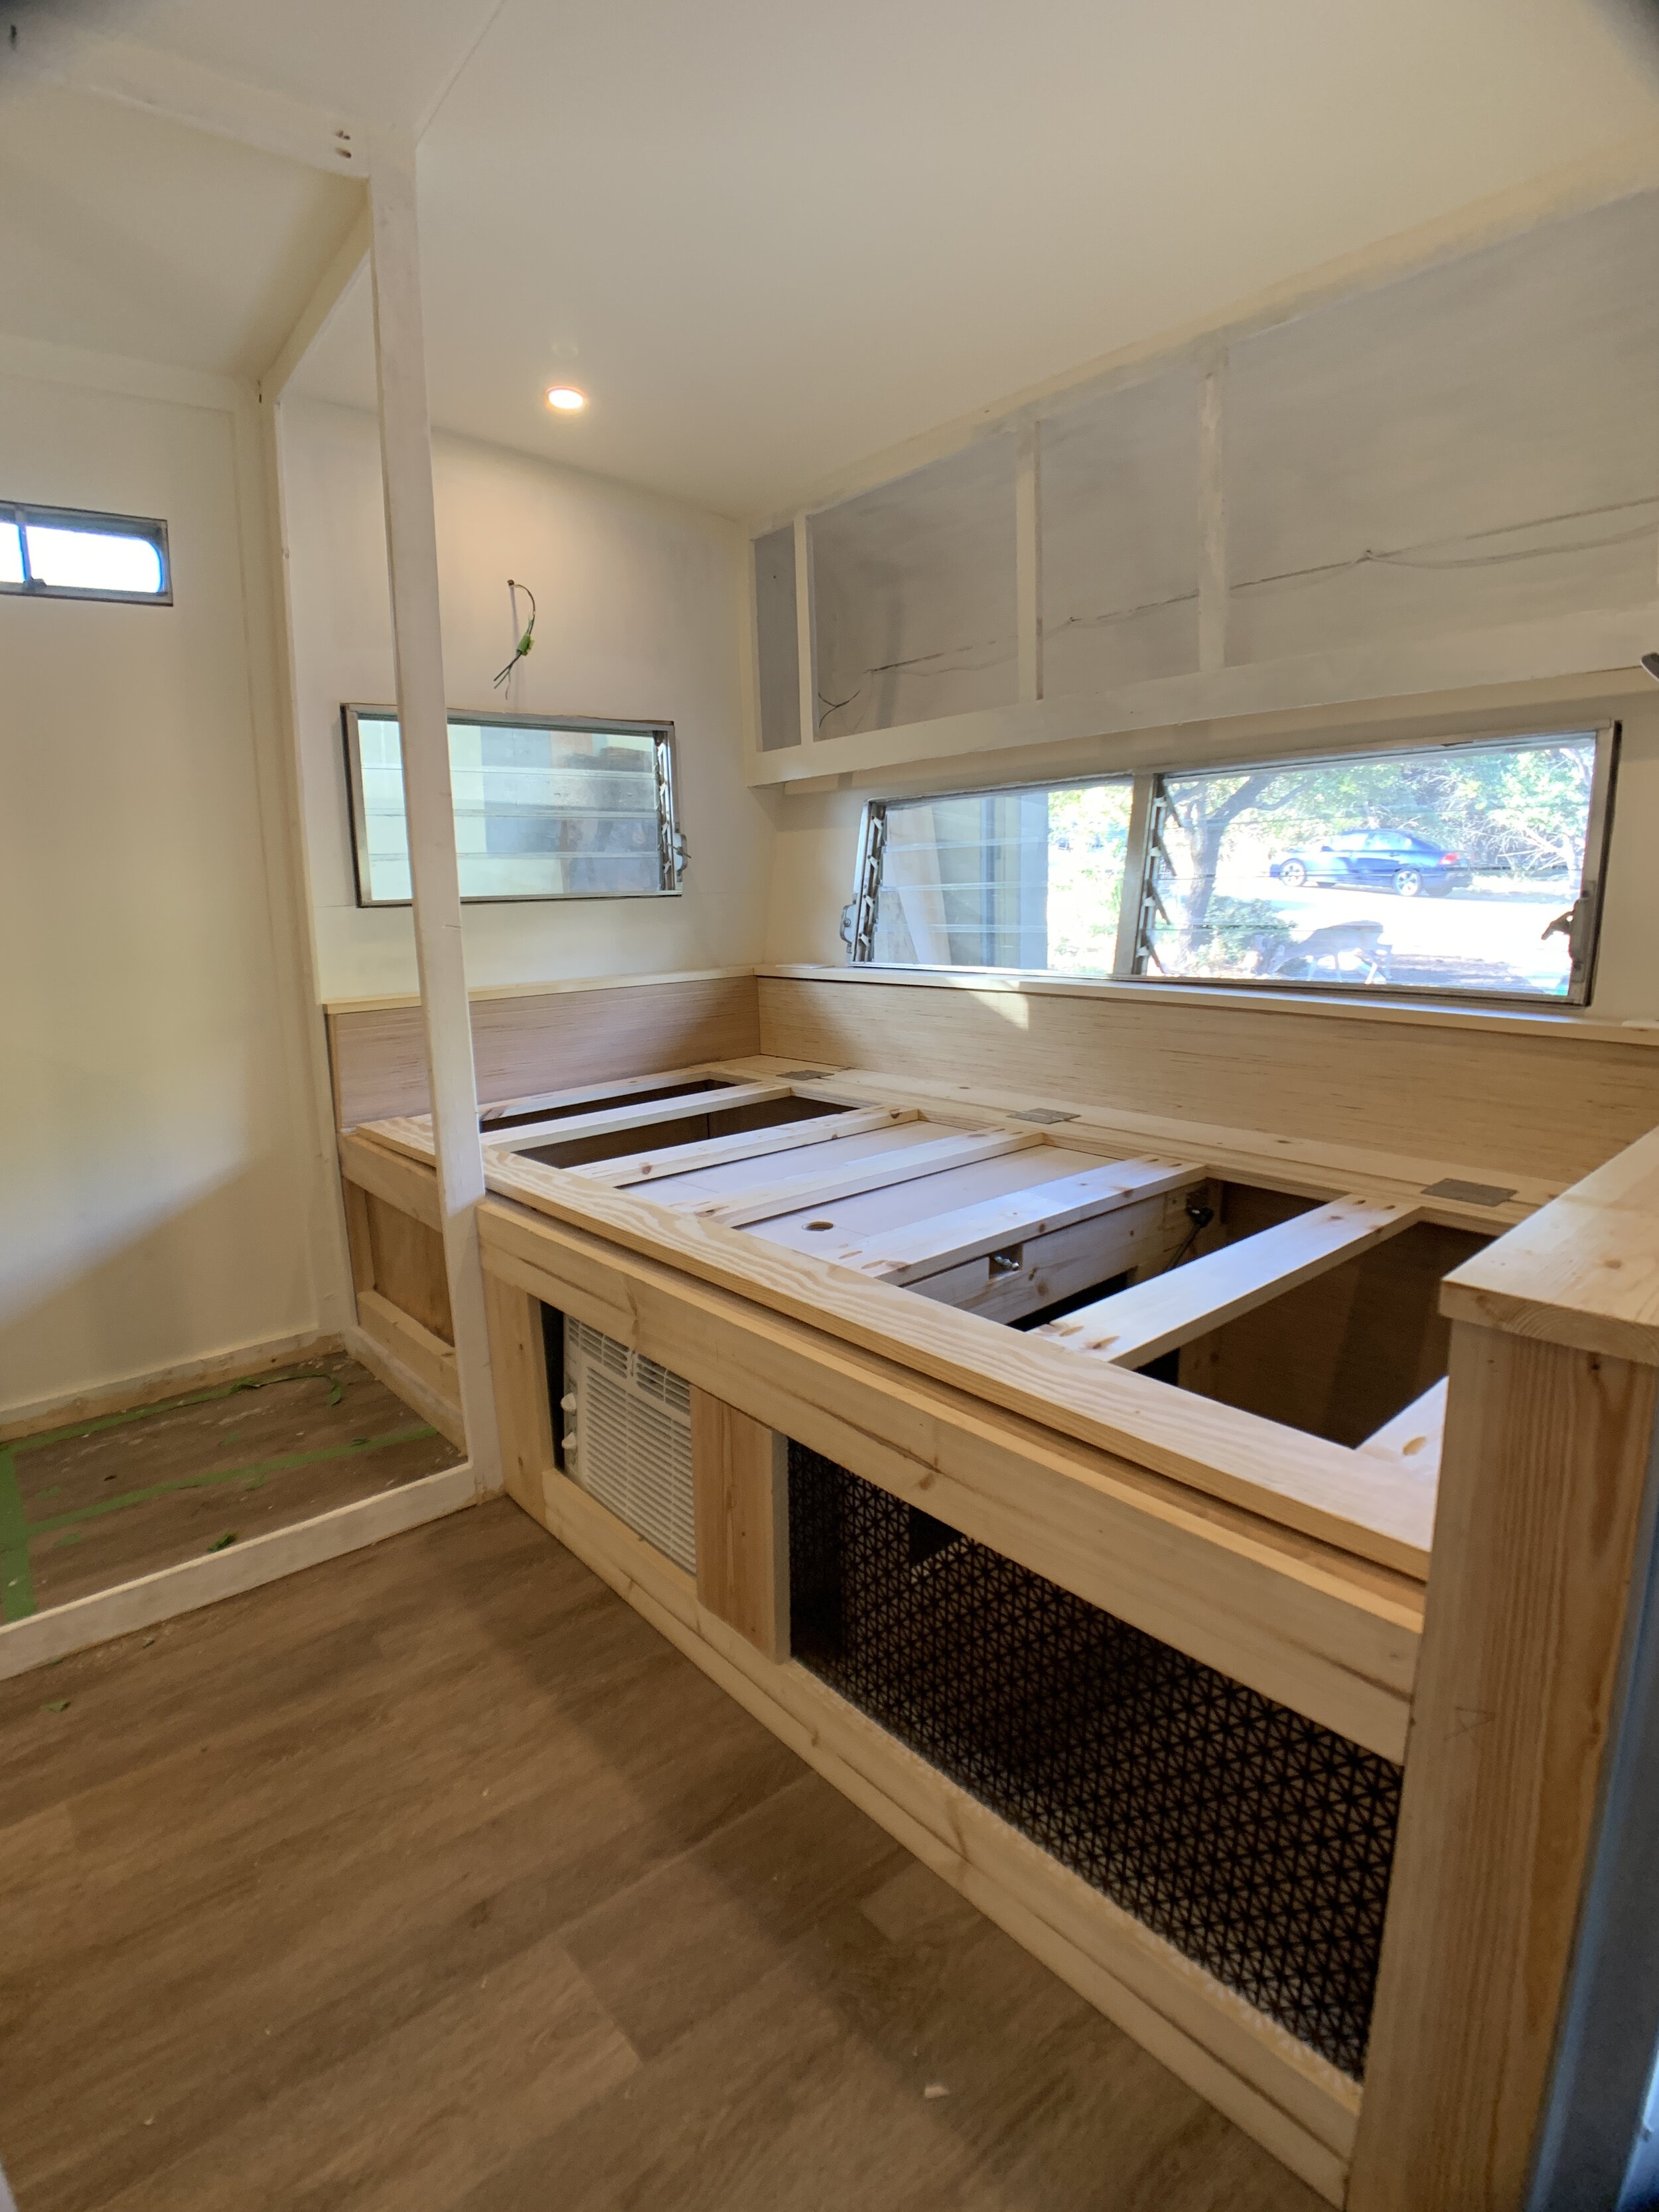
After we installed the electrical outlets in the main back rest and lined the inner storage area, we made the slatted portion you see in the photo below that acts as both the platform the mattress sits directly on, and the “lid” to the storage part of the bed.

For this portion of the bed build, we first attached the hinges to the 1x6 back rest base to help determine the gap needed for the hinges, which then helped us figure out the lid depth dimension. Then, we figured out our clearance width by measuring side to side from window crank to window crank. At first we planned to have an XL twin bed (80”) in this area but realized since we would be lifting the top up like a lid, even though we had enough camper width (at 84” wide), an 80” bed would interfere with our window cranks when accessing storage underneath the bed. Mid-project we decided to swap to a standard twin (75”) which would clear our window cranks just fine. After that change up, we added fixed 1x4s to the sides (or footboard/headboard areas depending on how you look at it) of the bed, screwing them into place on top of the original 2x4 base. After determining our lid dimensions, we Kregged all of the bed slats into place and after centering within the space, attached the lid to the hinges.
We decided to use slats instead of a solid plywood lid to help us save a little weight. As of now we’ve semi-installed hydraulic hinges to help raise and lower the lid, but haven’t clicked them into the lid just yet because they need the weight of the mattress (which we don’t have yet) to make them actually close. If we click them in now we’ll be stuck with the lid in the open position. For the rest of the build we’ve just kept the lid open all the way and leaning against the window/wall and plan to click the hydraulic brakes together after we paint out the bed and have the mattress set on top. (Fingers crossed they work right when the time comes!)
Framing the side back rests/headboard + footboard
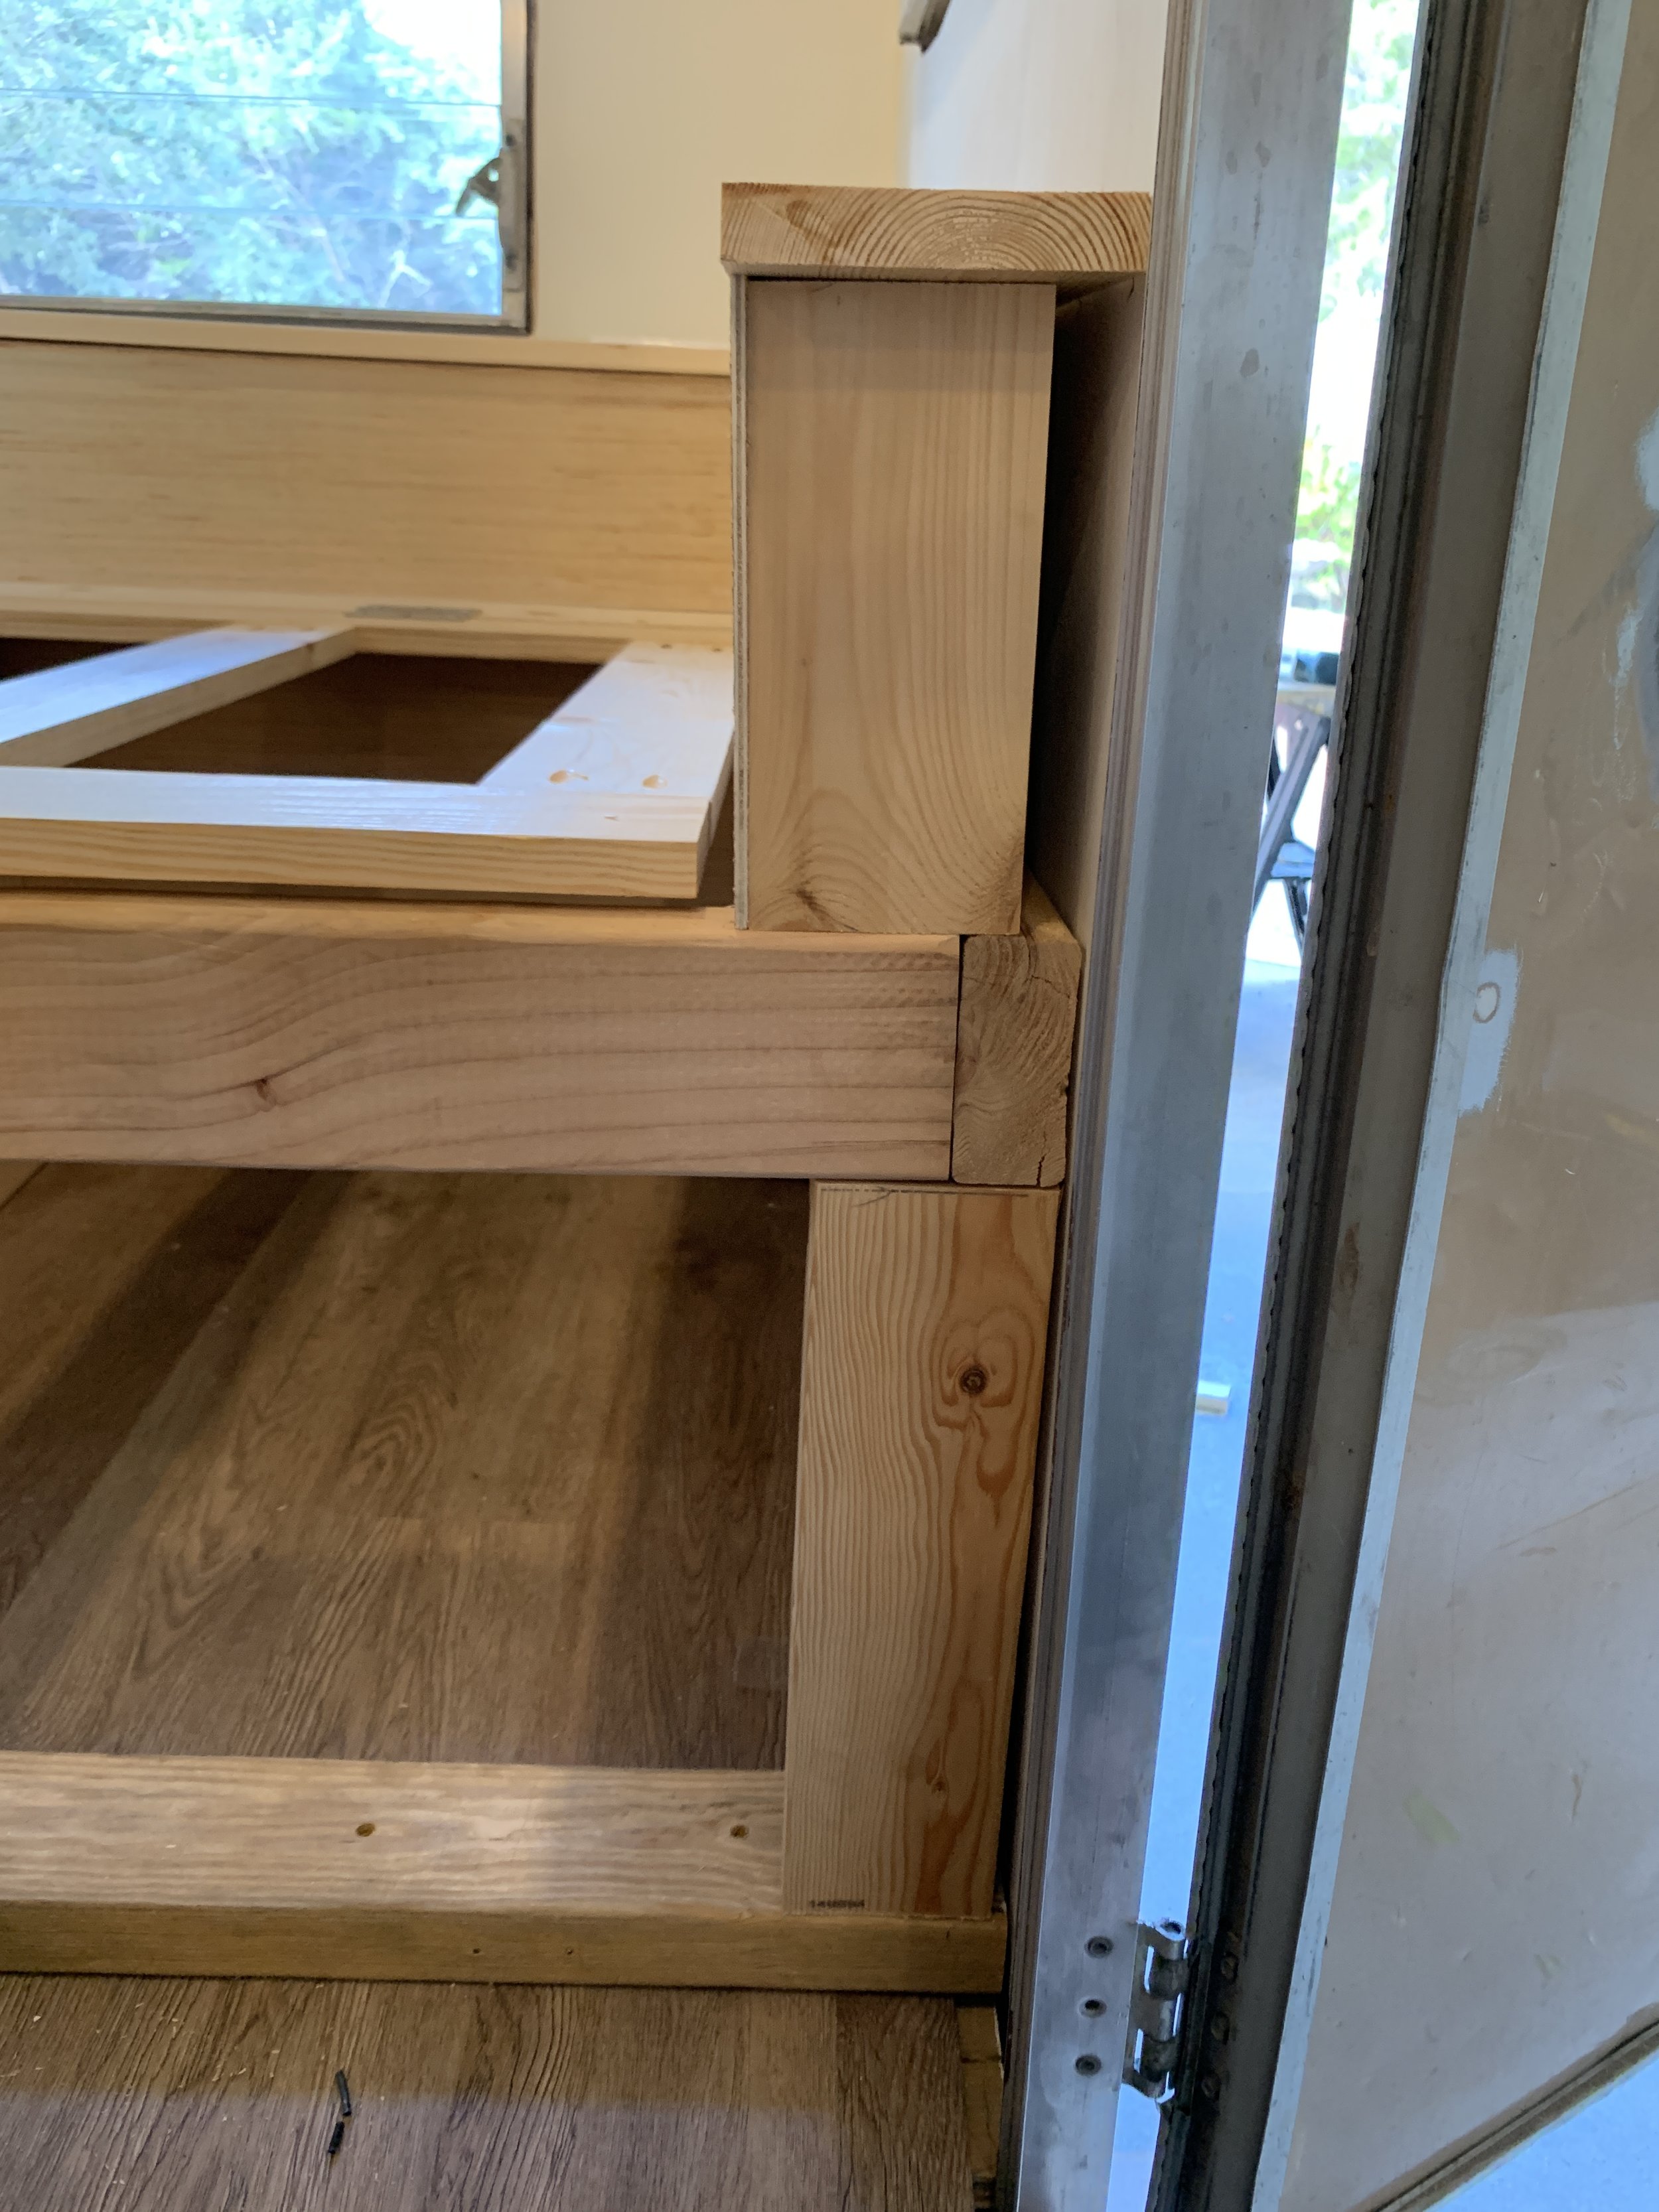
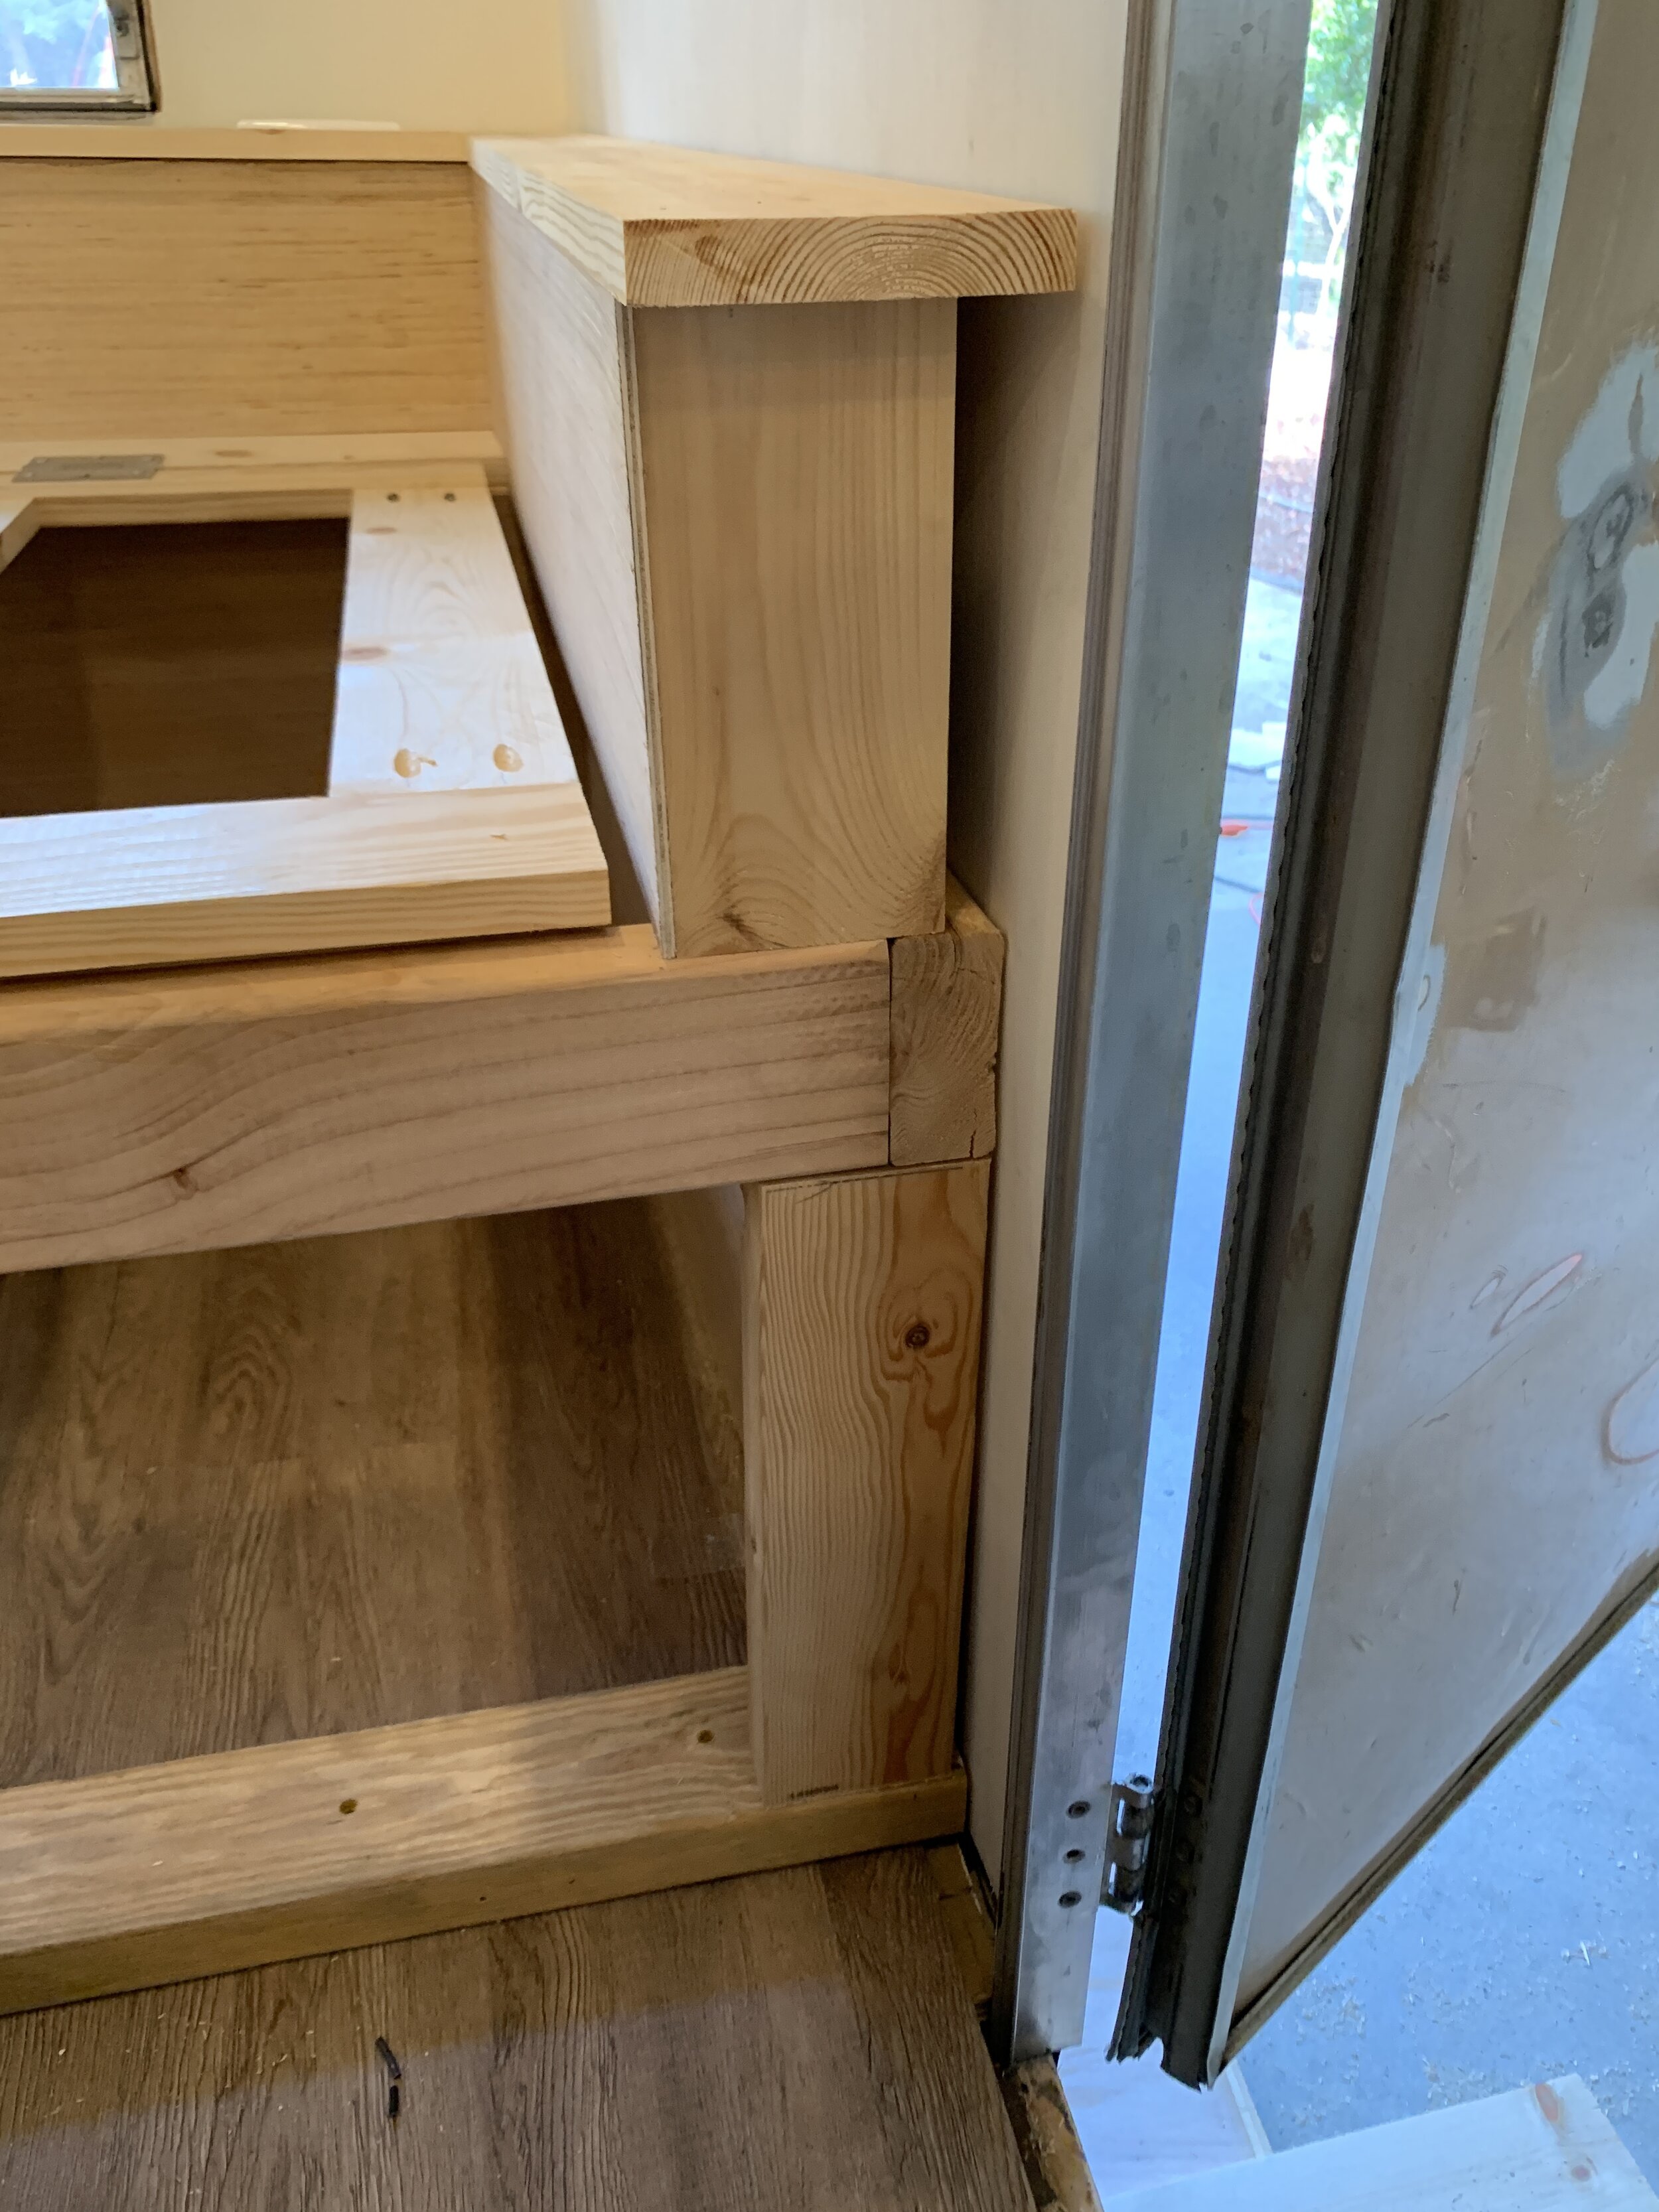
Because we decided mid-build to switch to a regular twin instead of an XL twin, we built back/armrests later in the build after we’d already worked on other things rather than at the same time we did the main back rest. No matter, it all worked out in the end. We followed more or less the same process for these side back/arm rests as we did for the long stretch, installing vertical supports on each side and throughout the middle, as well as horizontal boards for added support areas to nail the front plywood and top into. Because nothing in this camper is really “level” or square, (the camper itself isn’t perfectly leveled as it’s parked, making it a little difficult to build the things inside level) we built the height of the side arm rests to be flush with the back rest we’d already built and parallel to the bottom of the windows. The door-side wall of the bed was particularly uneven, so we cut our top board to follow the wall and knew the gap seen from the front would be covered by the front finish out we had planned. The main thing we checked throughout the build of these arms was making sure we had at least 75” clearance and that the insides of the two arms were square to the main back rest and parallel to each other.

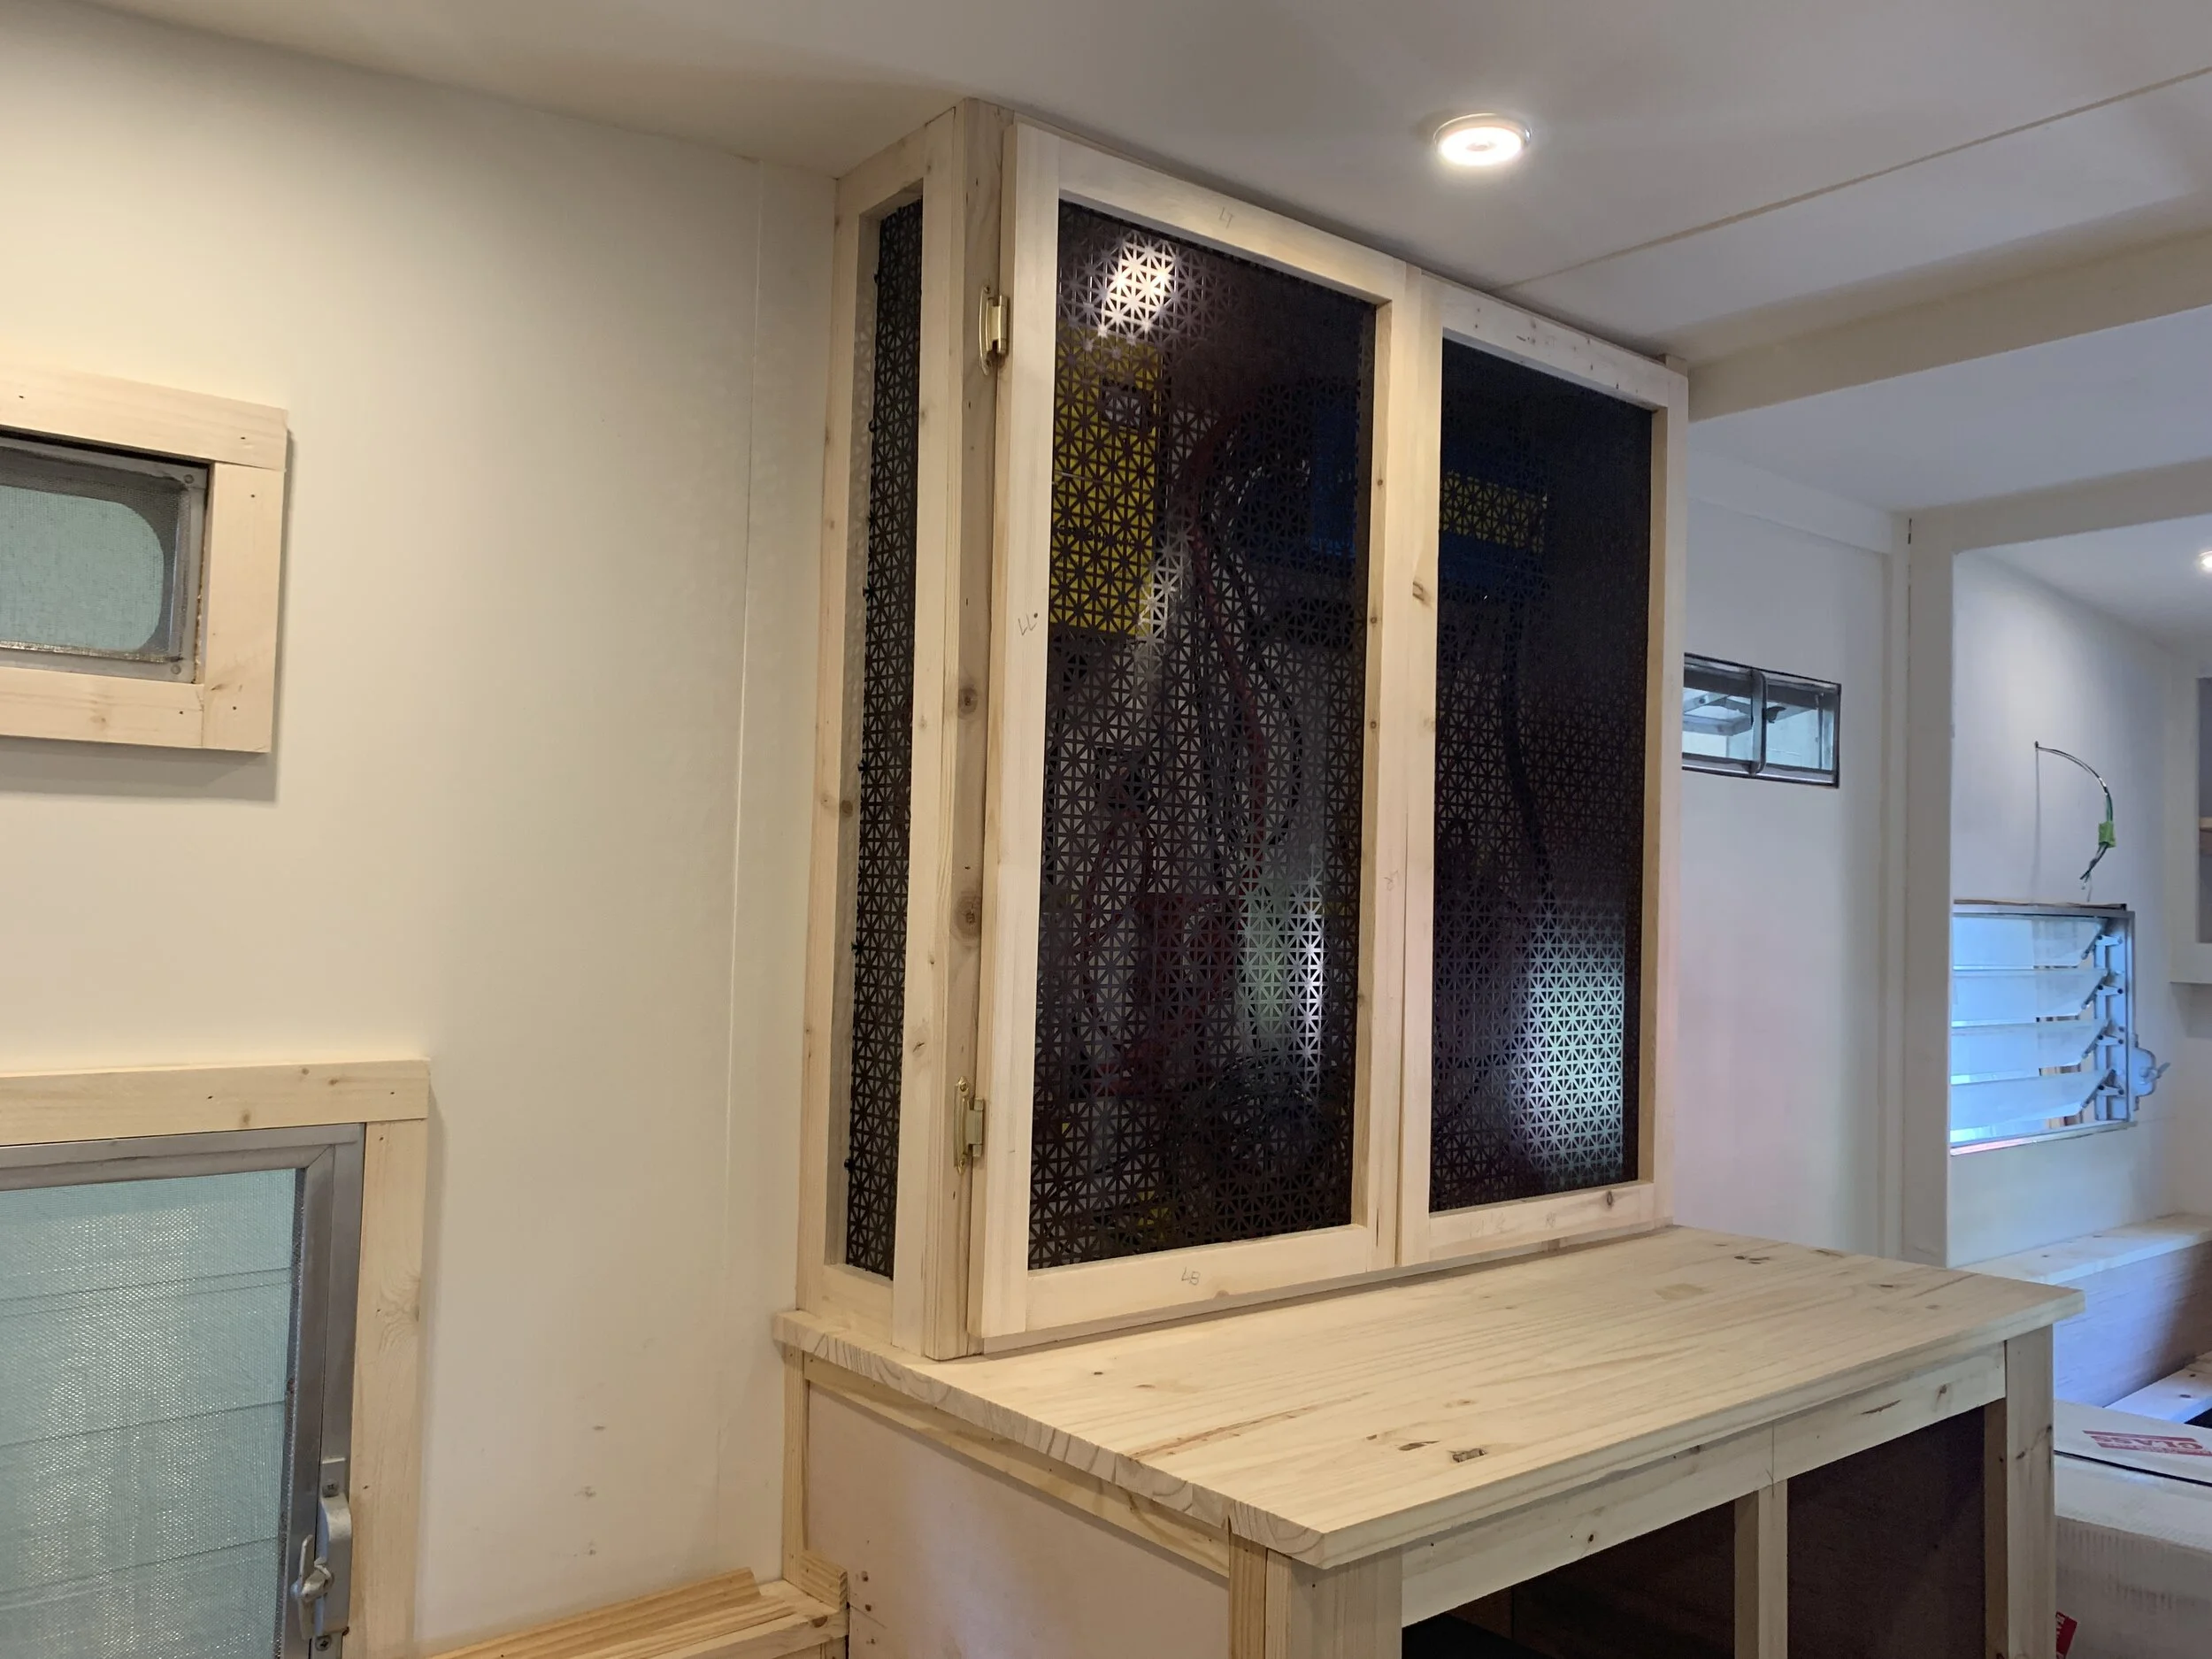
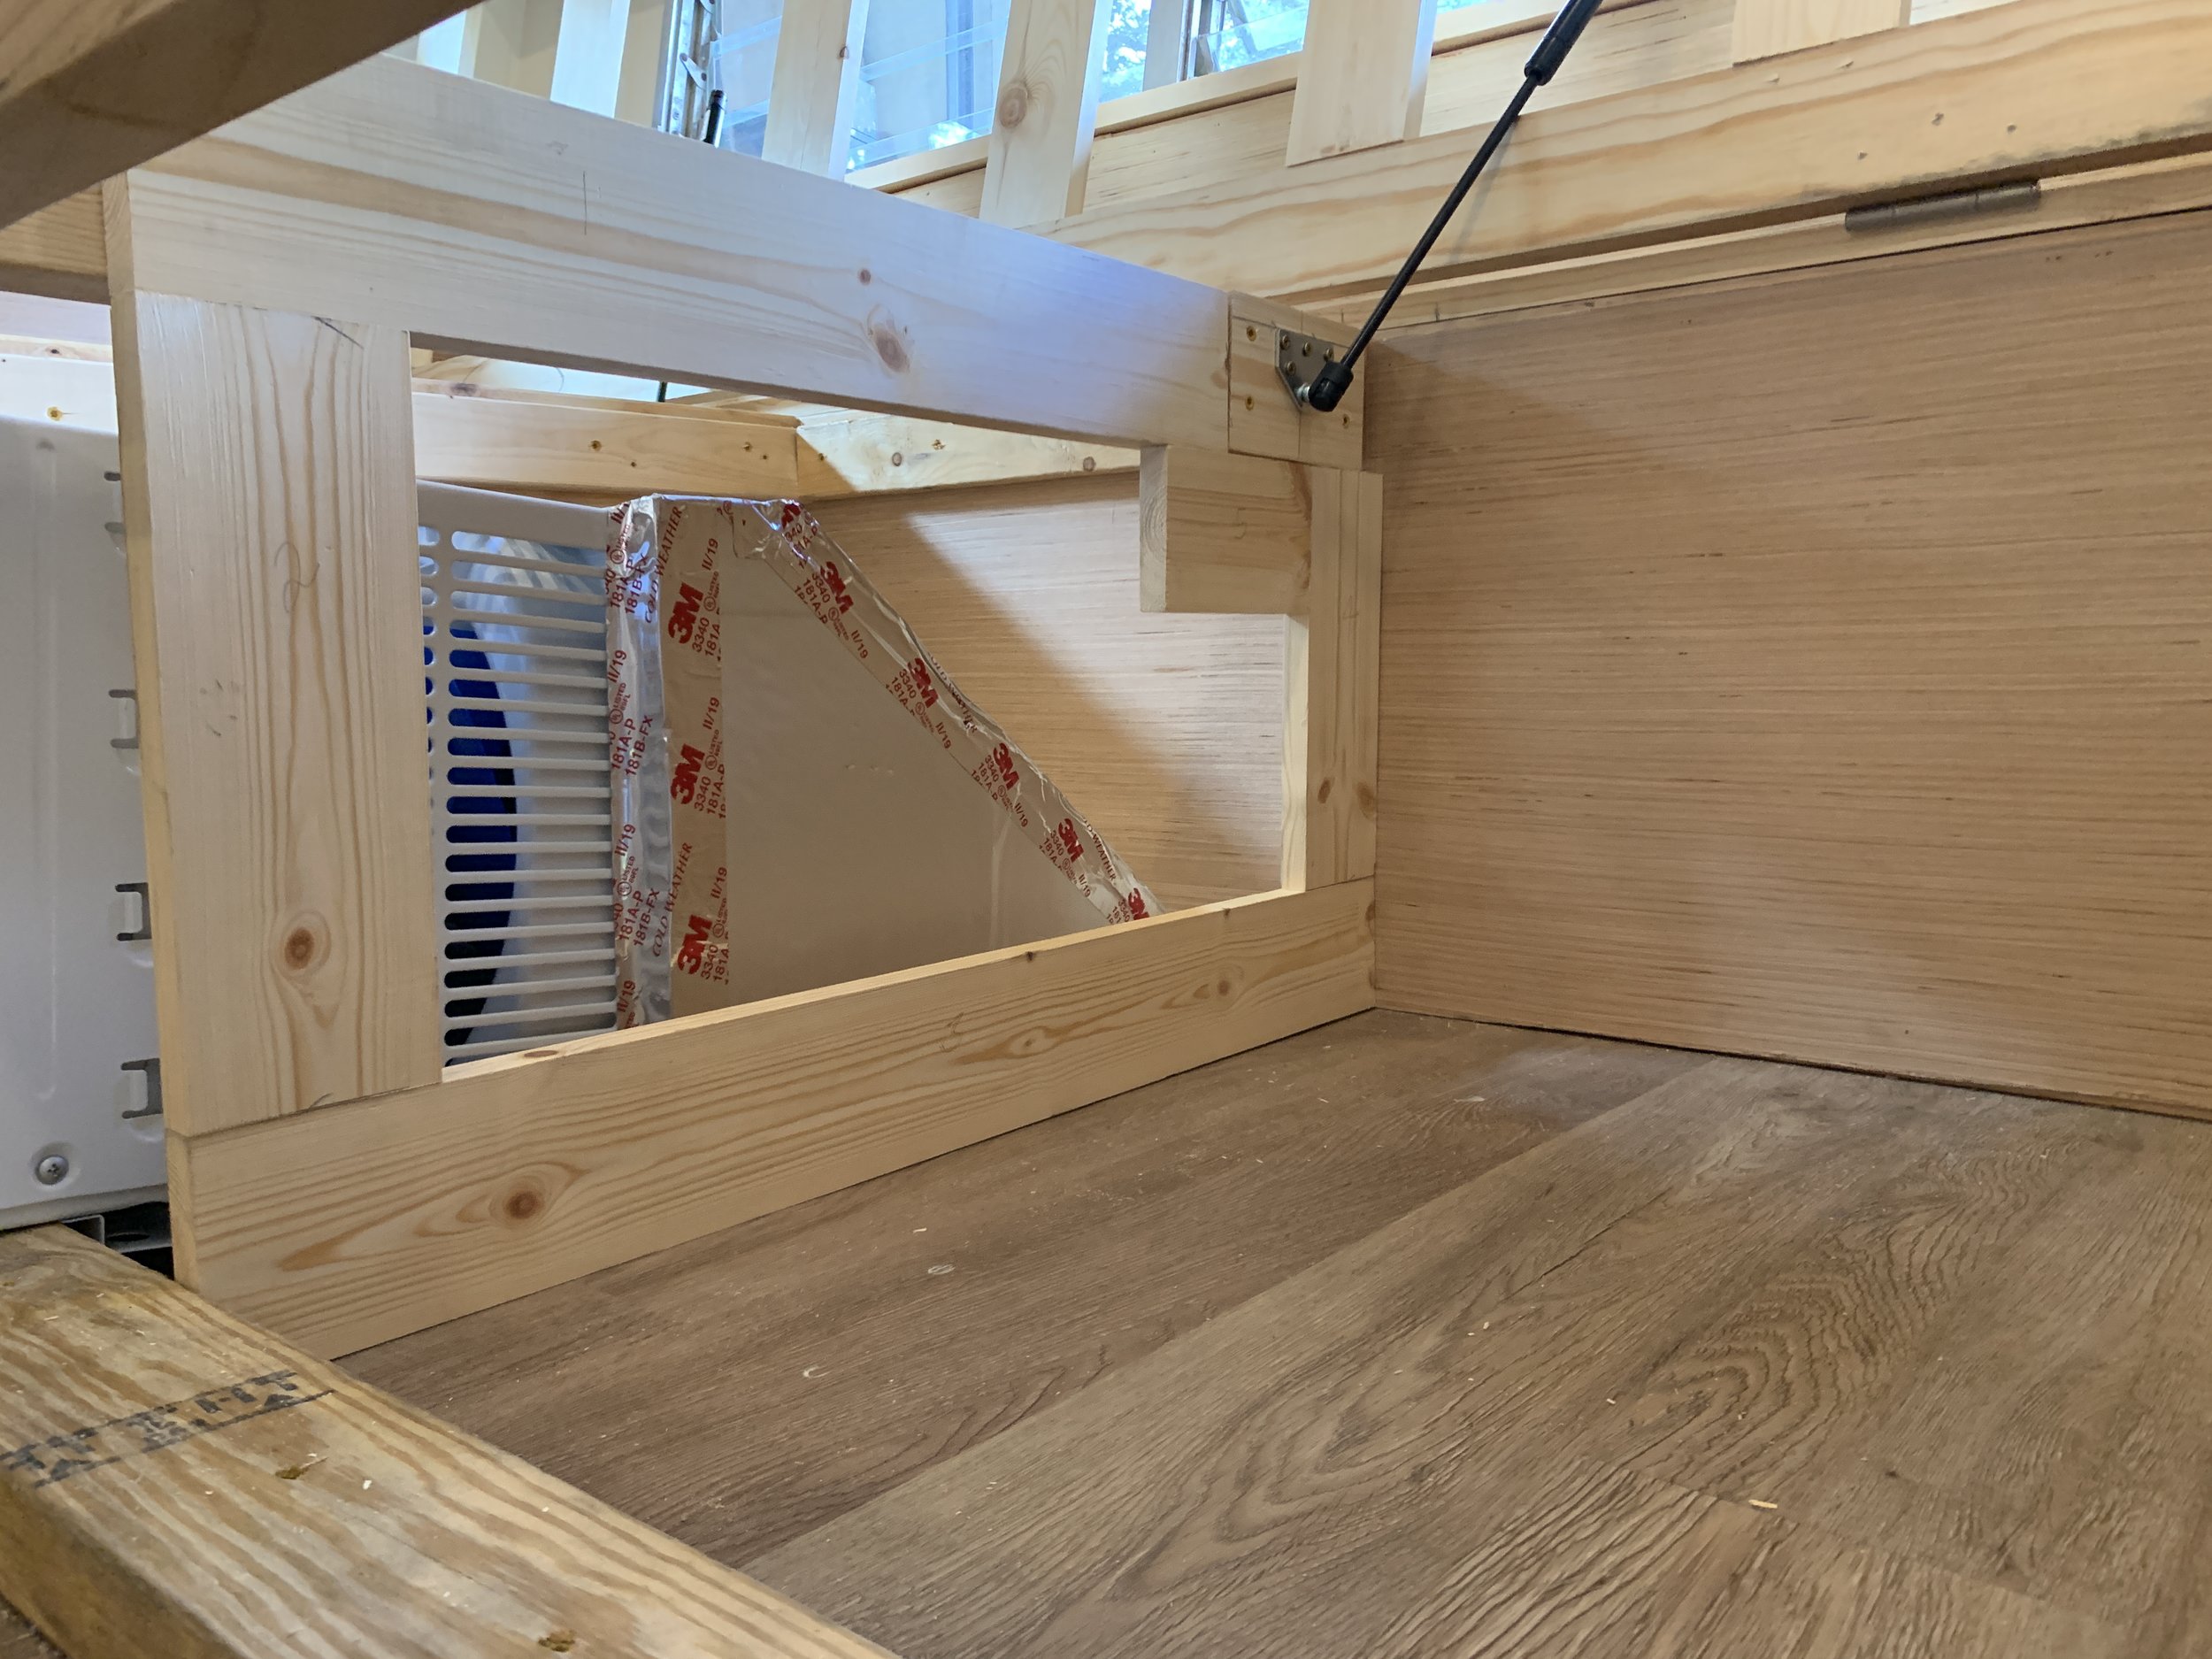
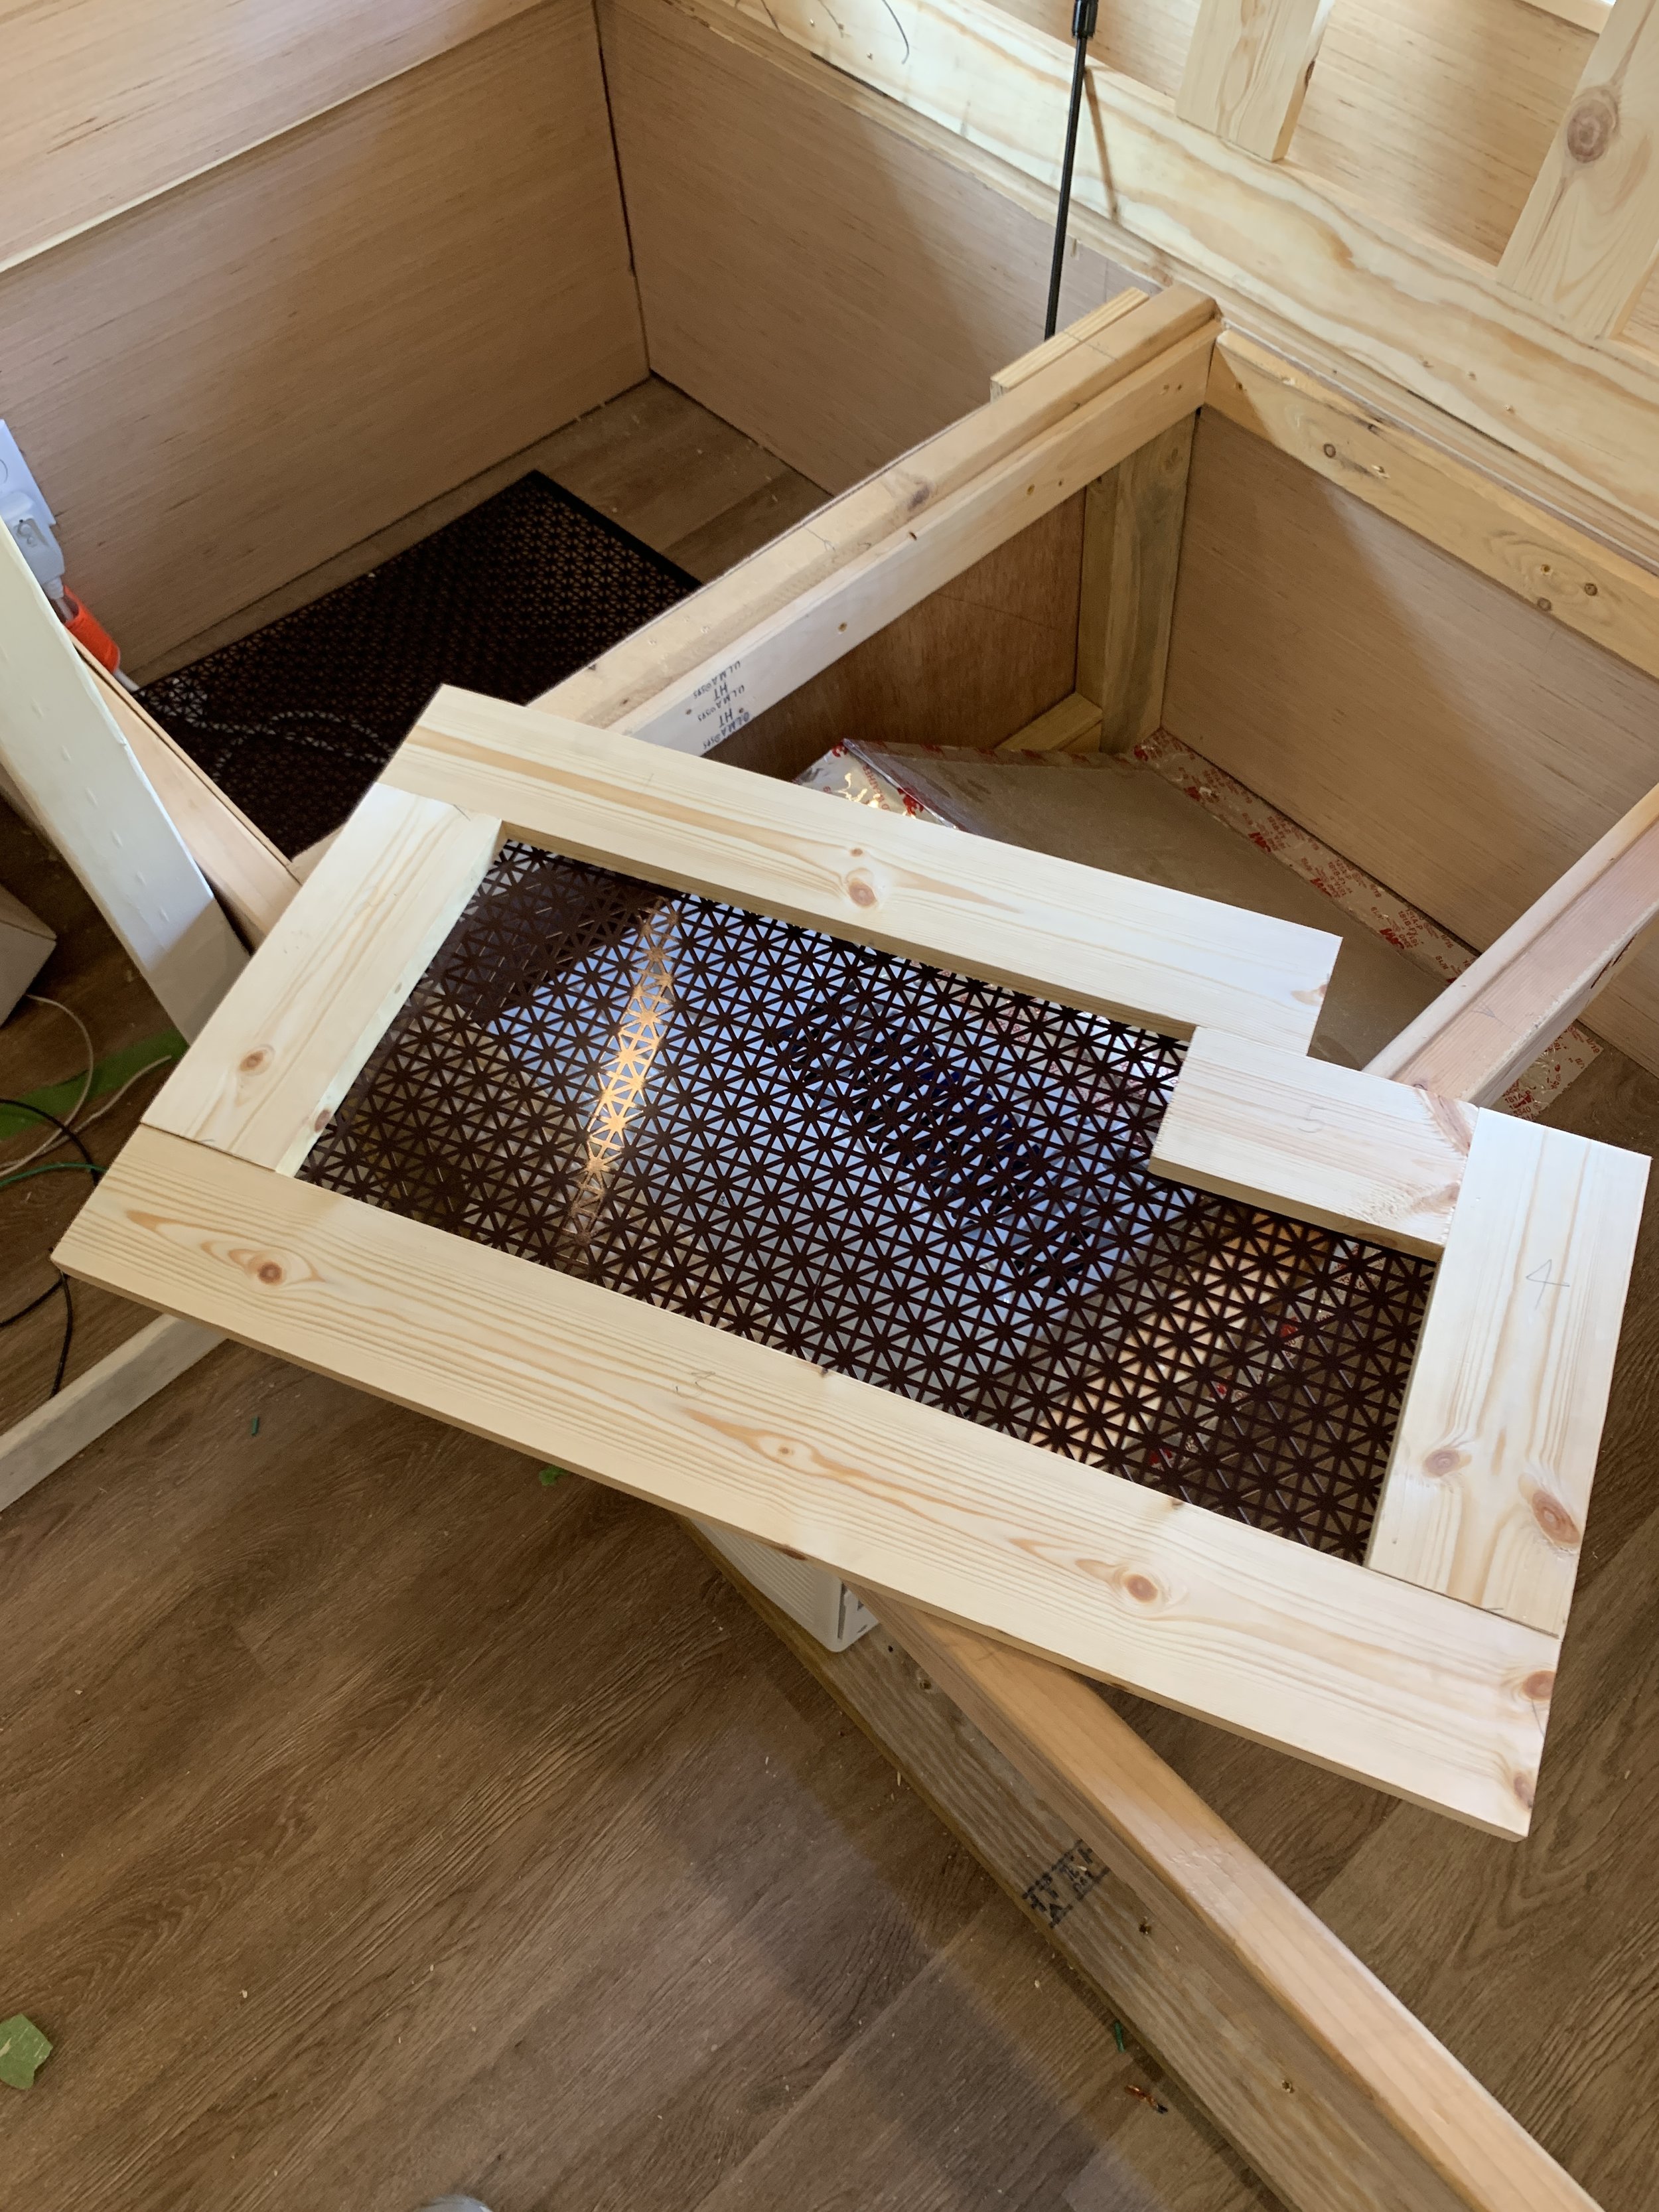
Creating storage areas + protecting the A/C
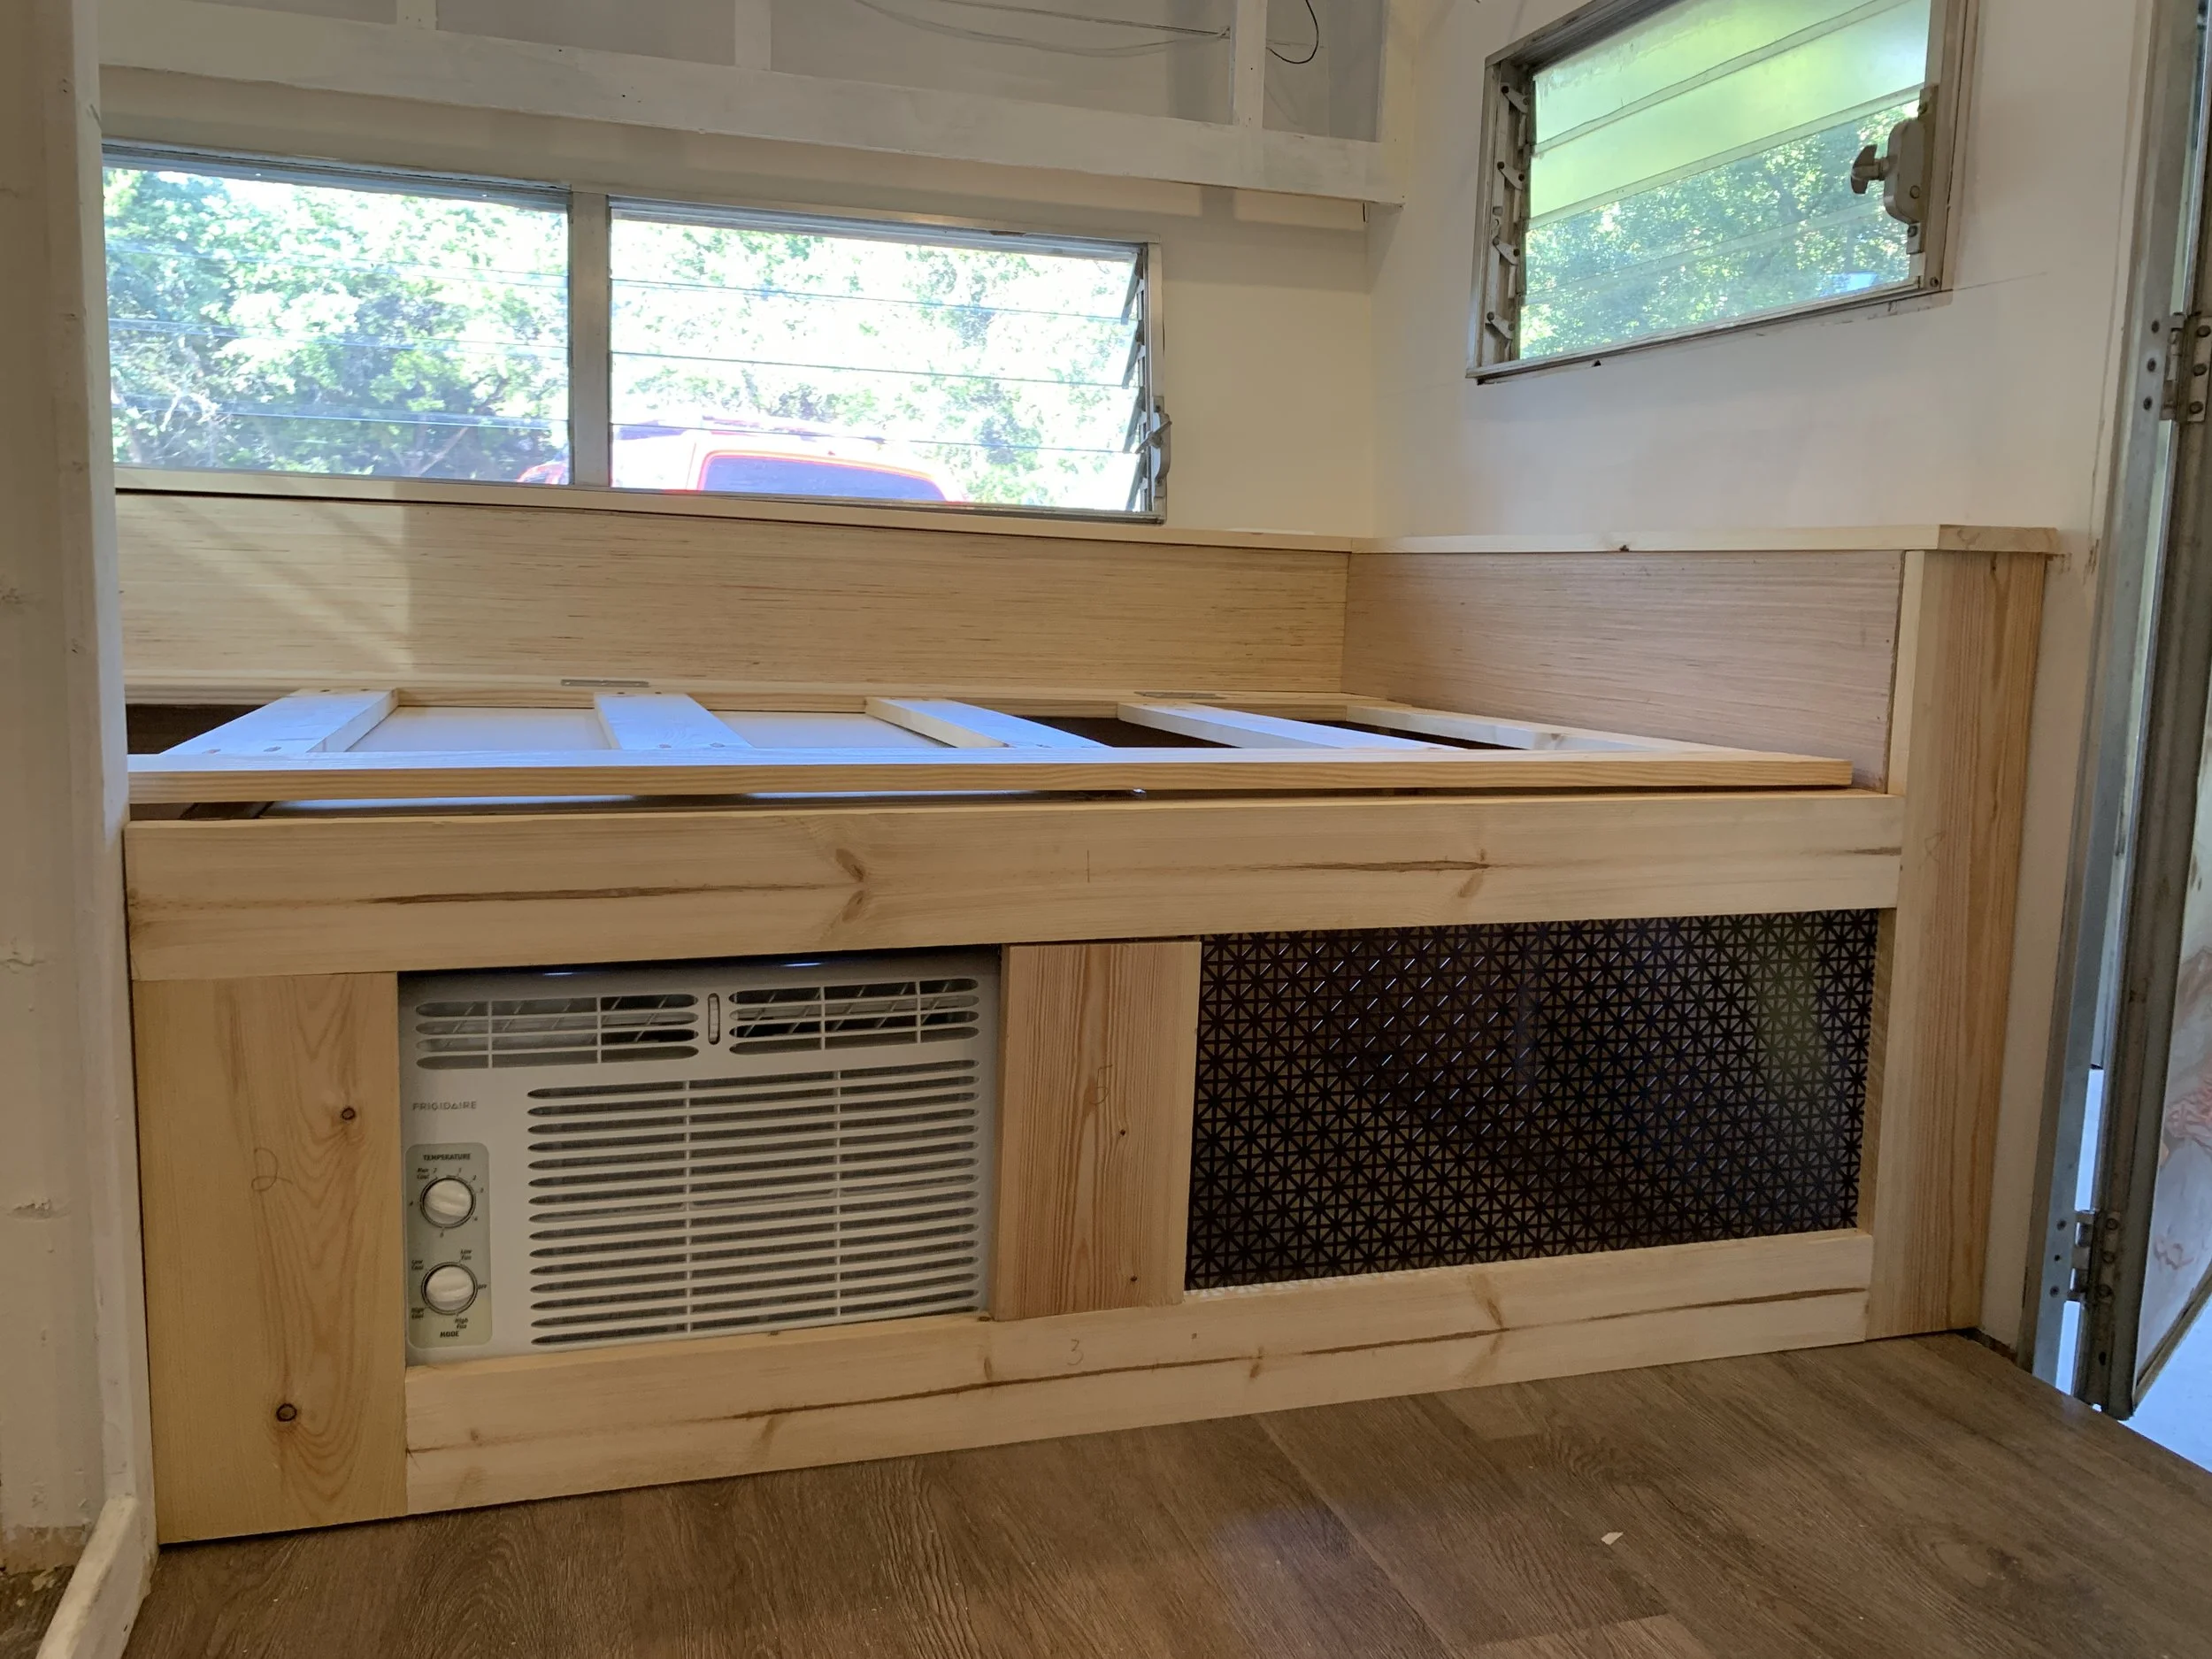
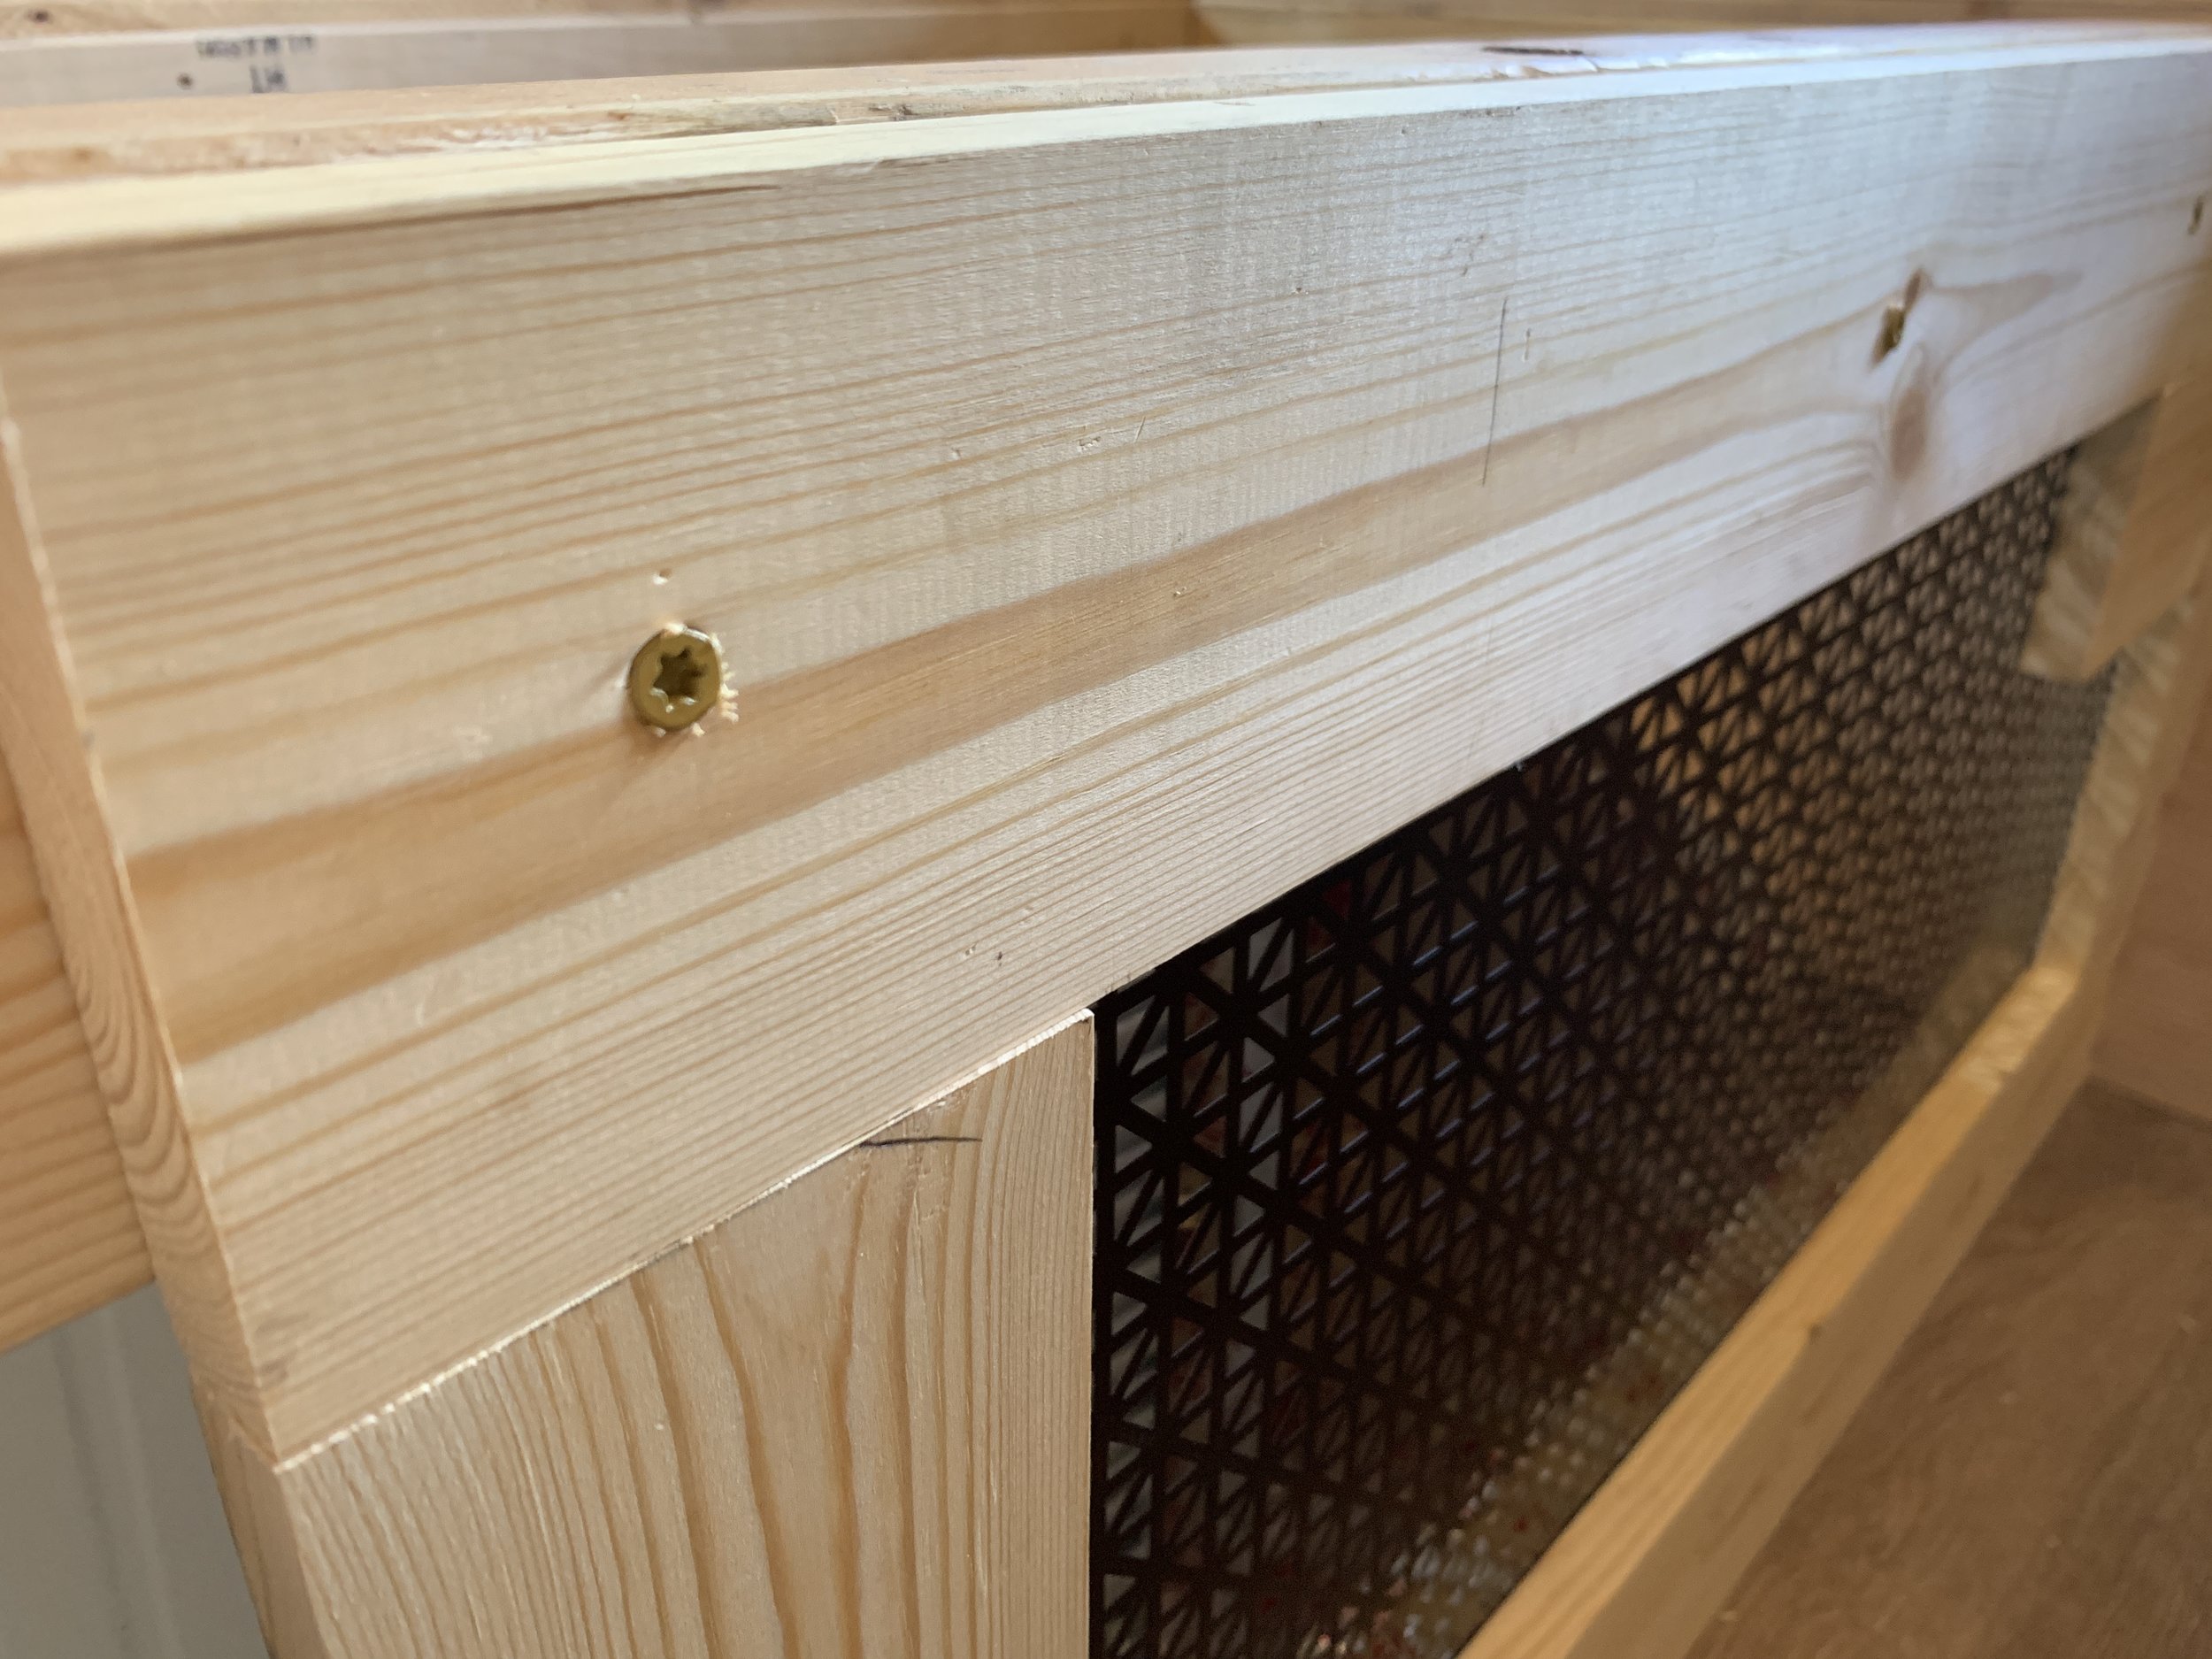
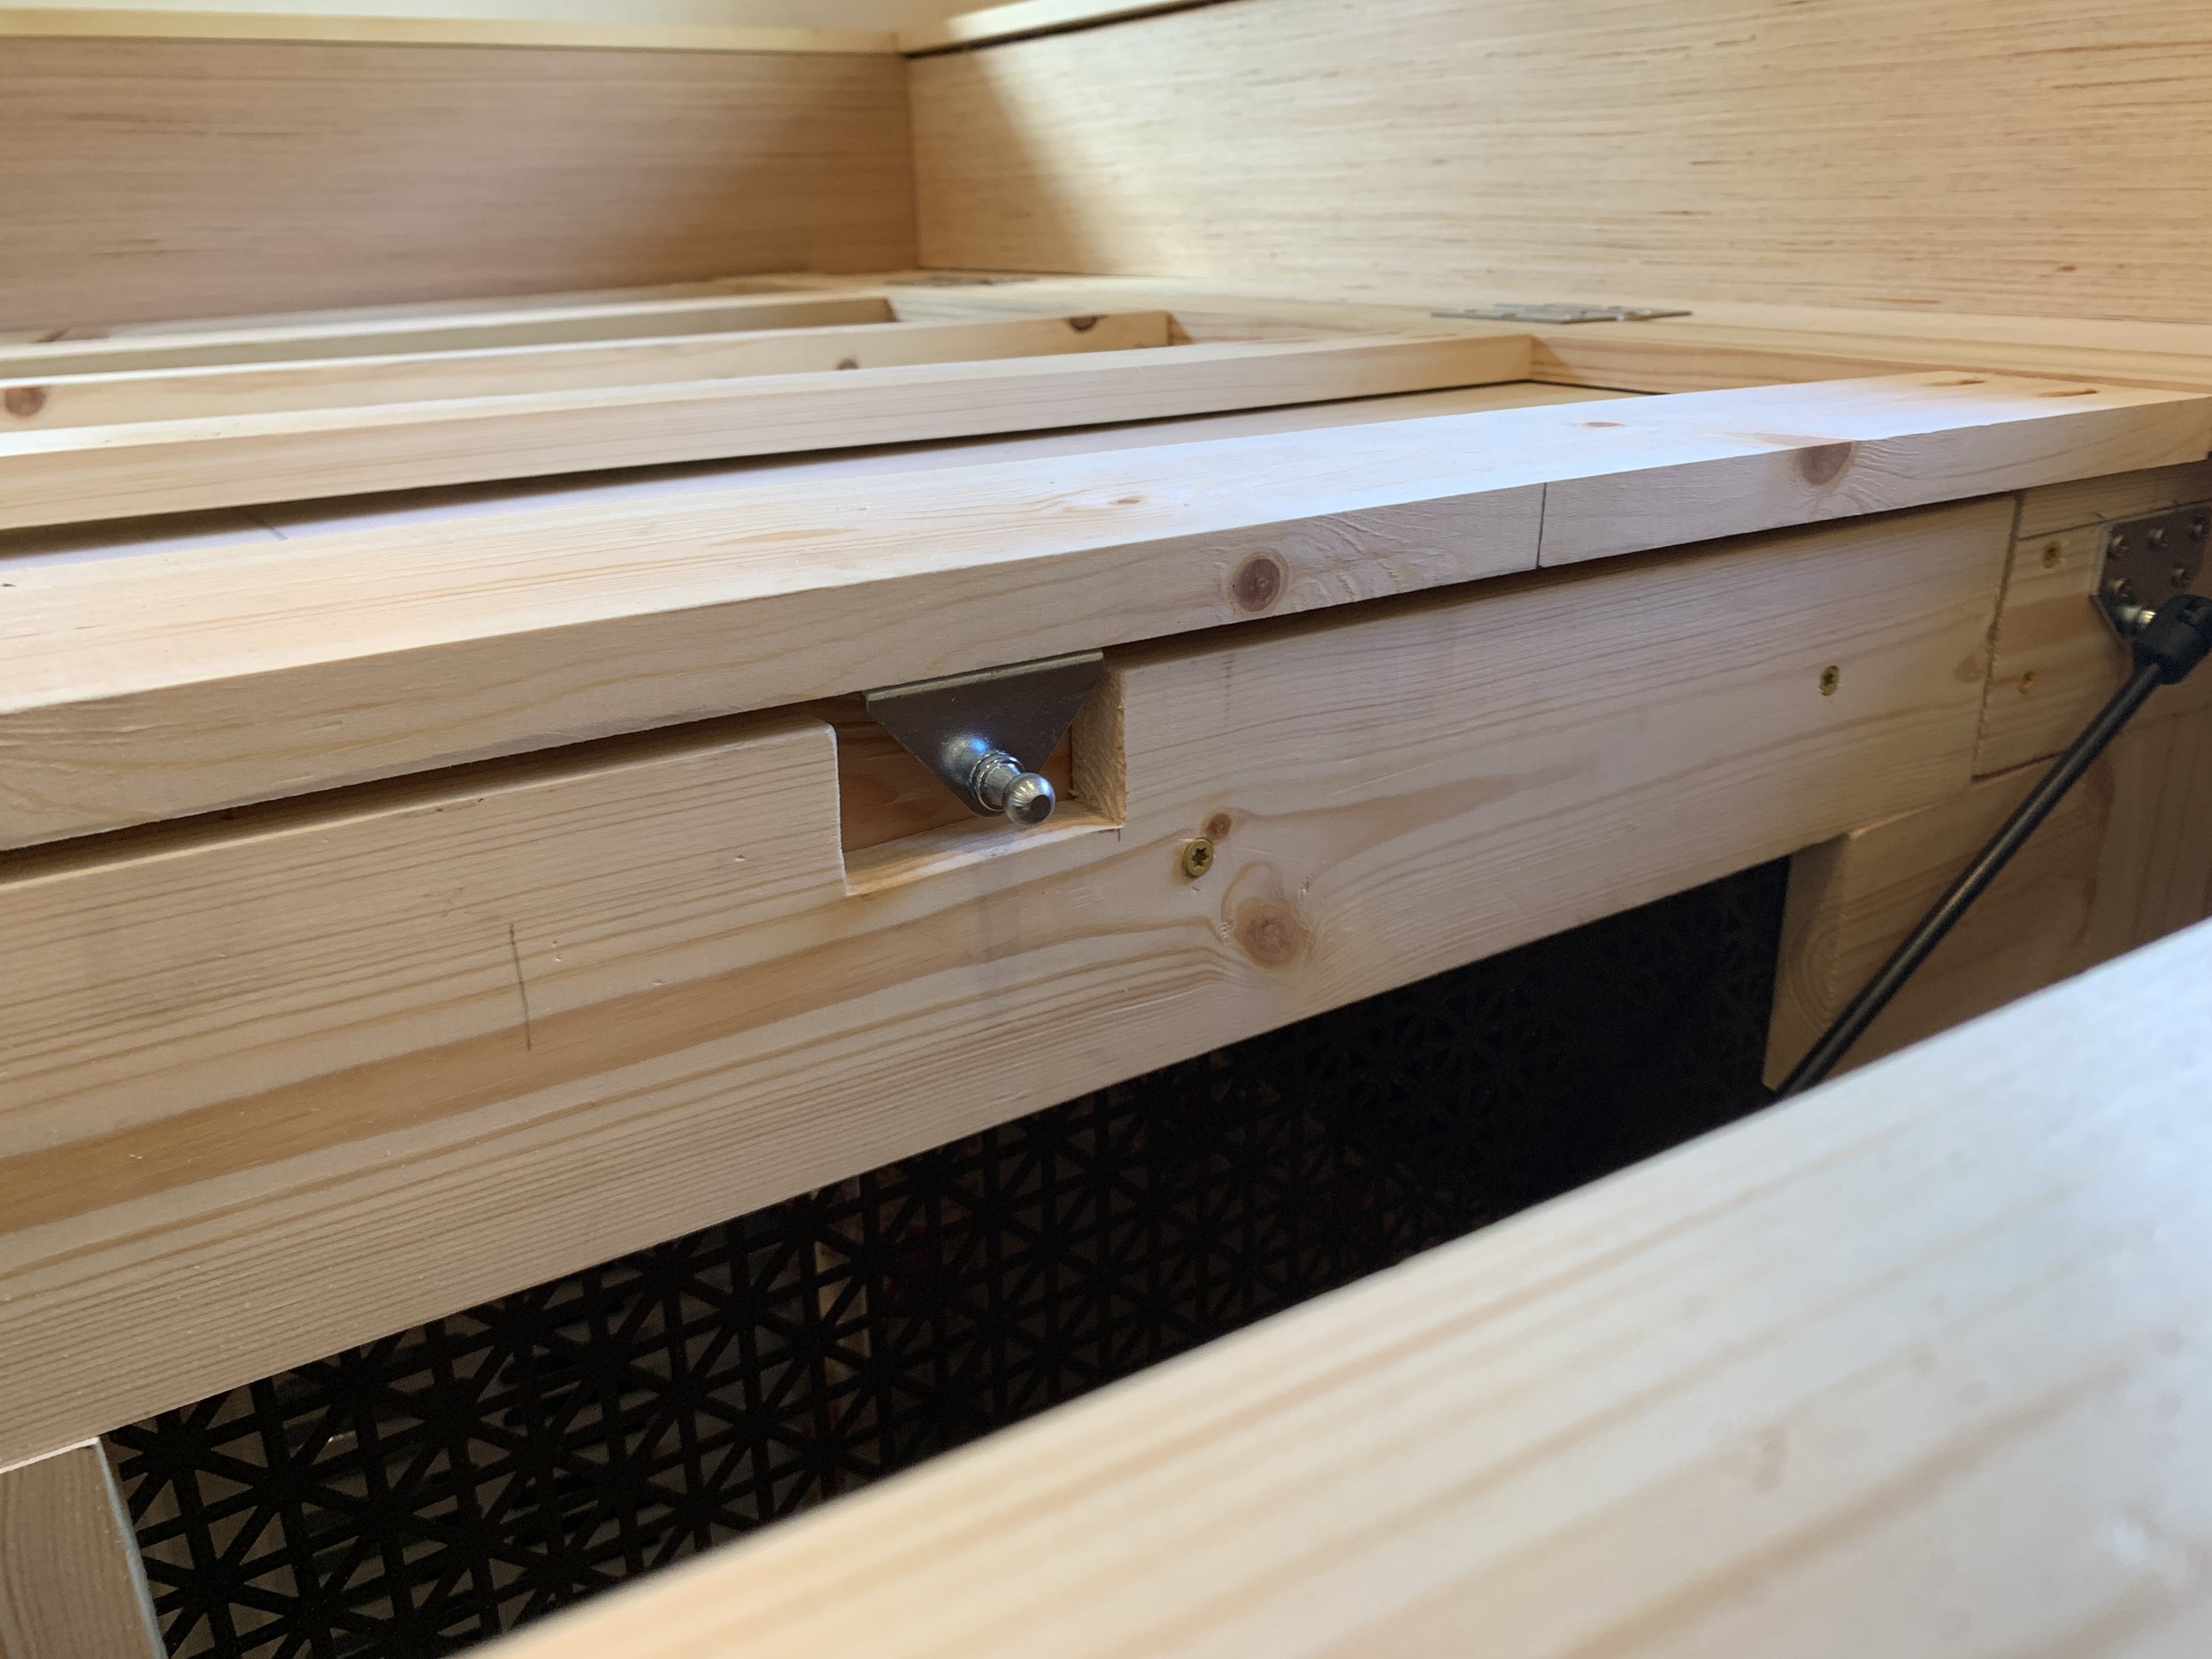
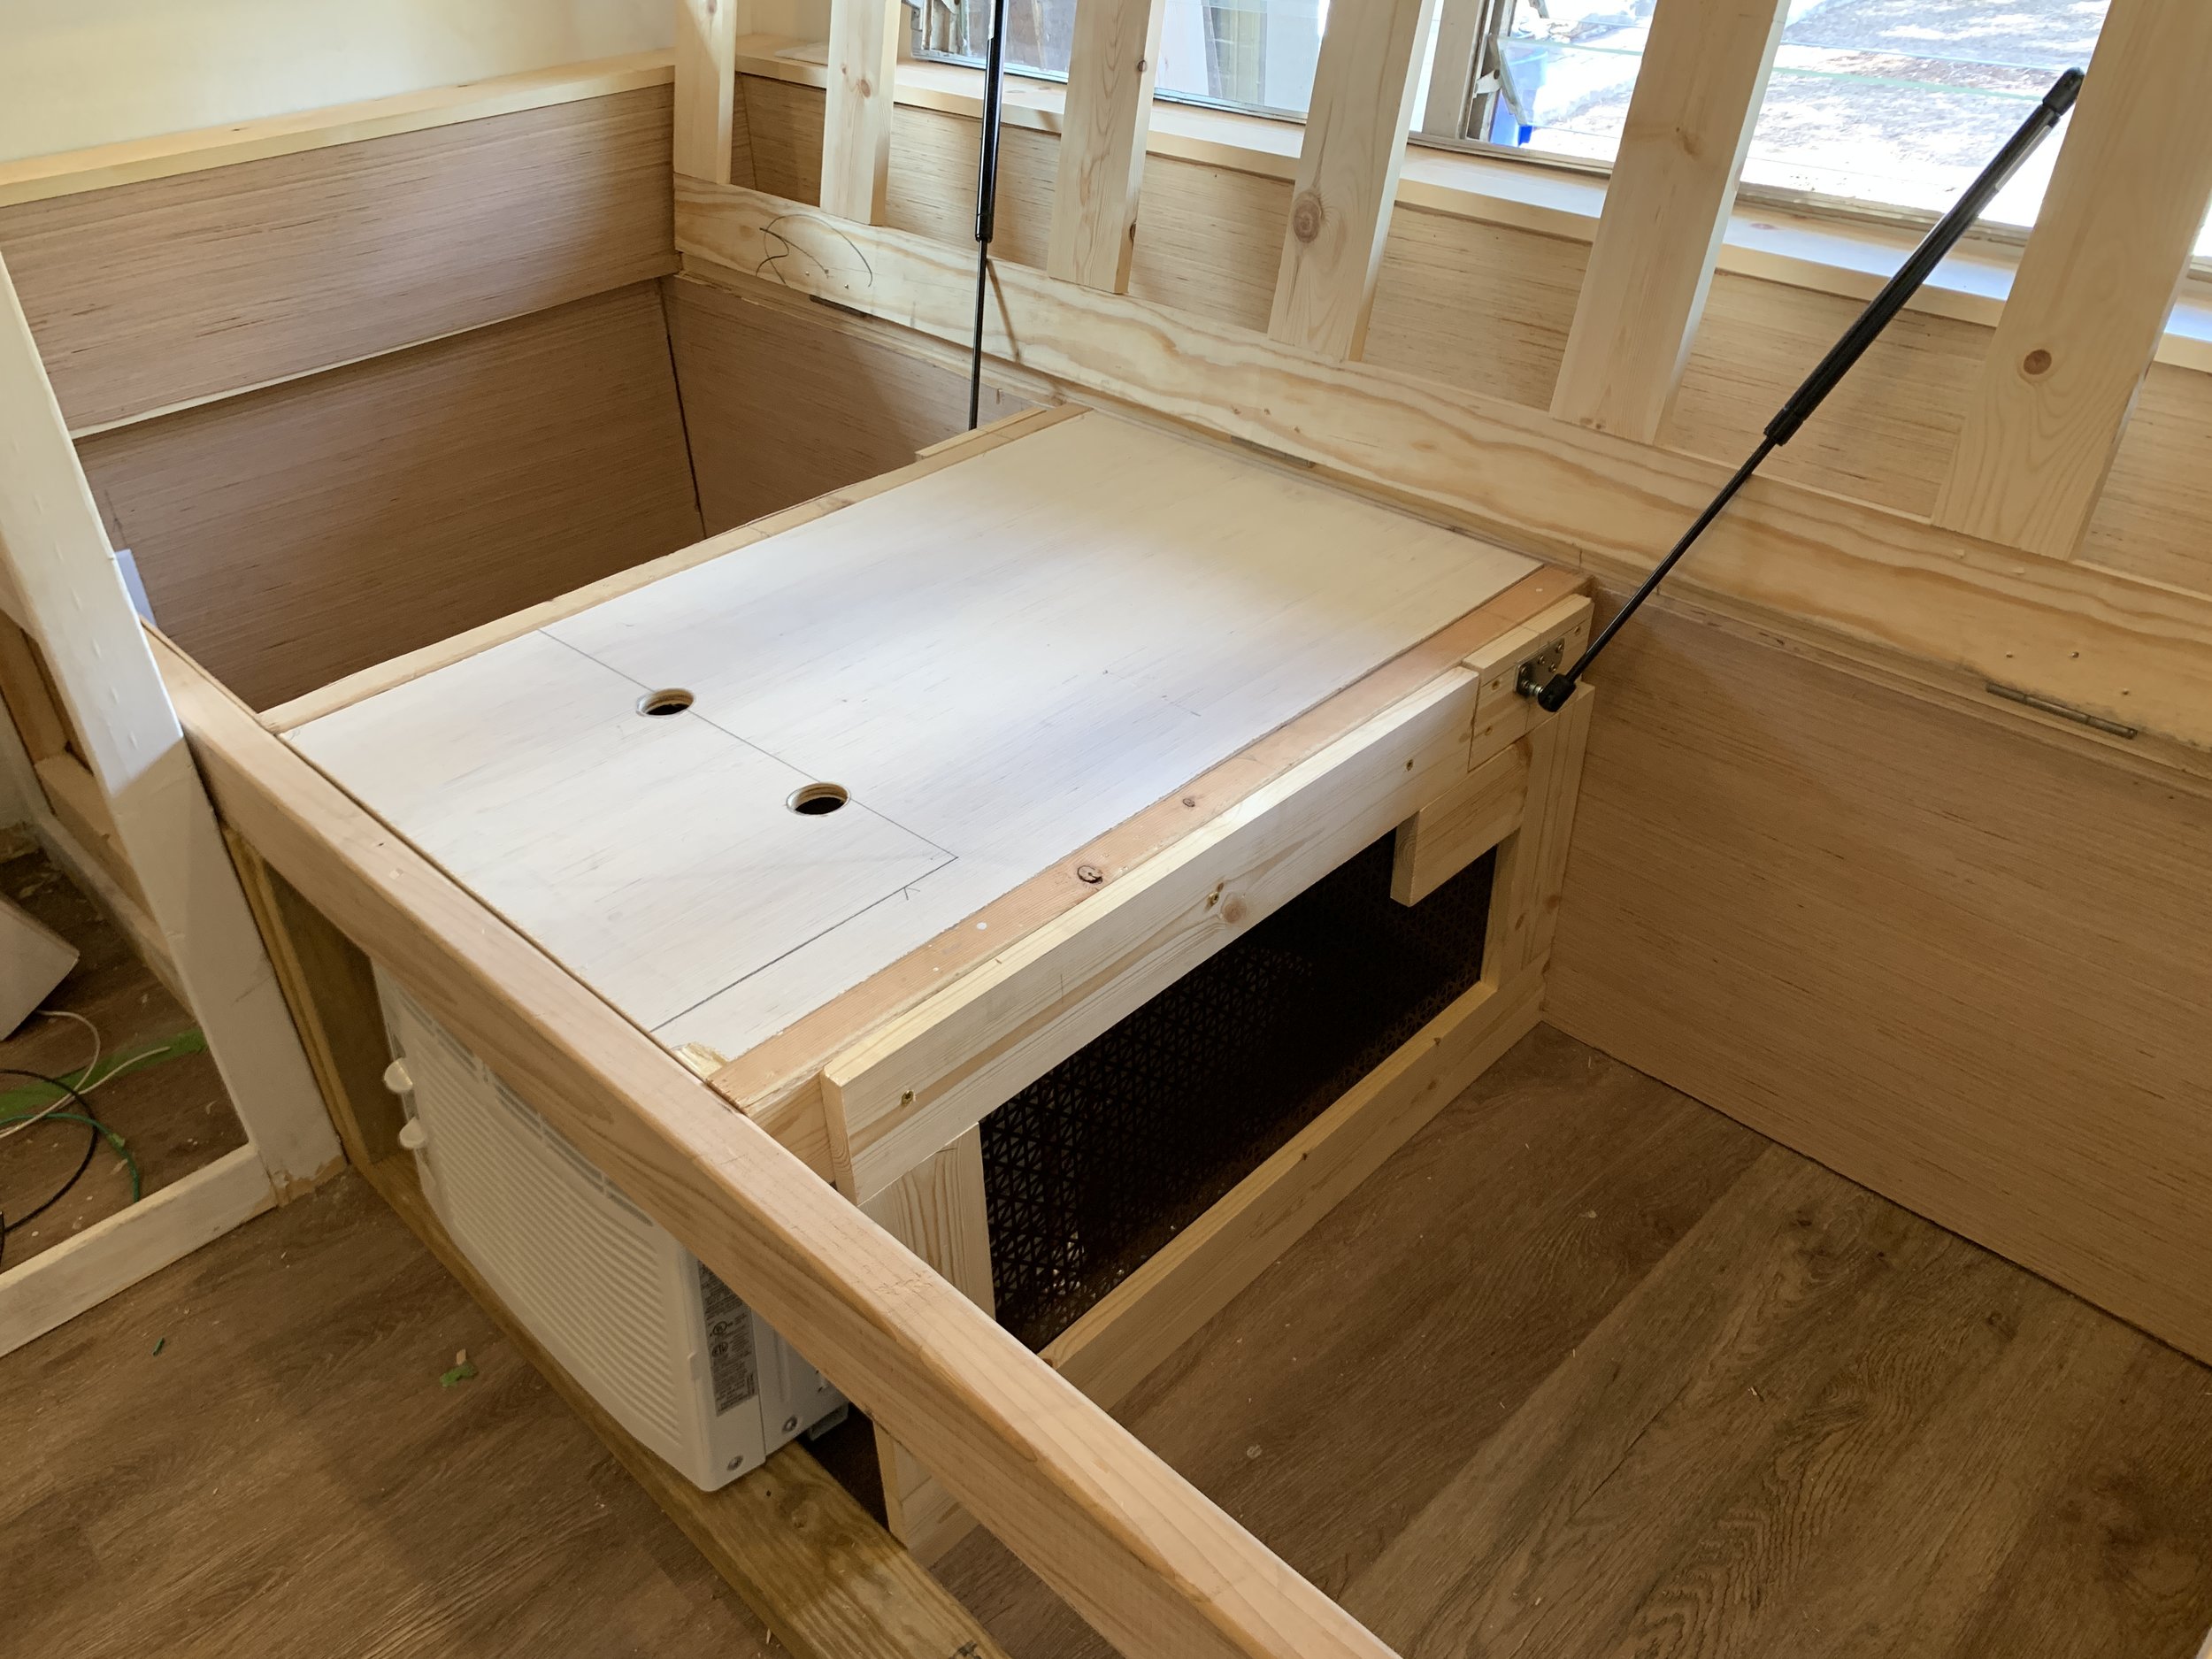
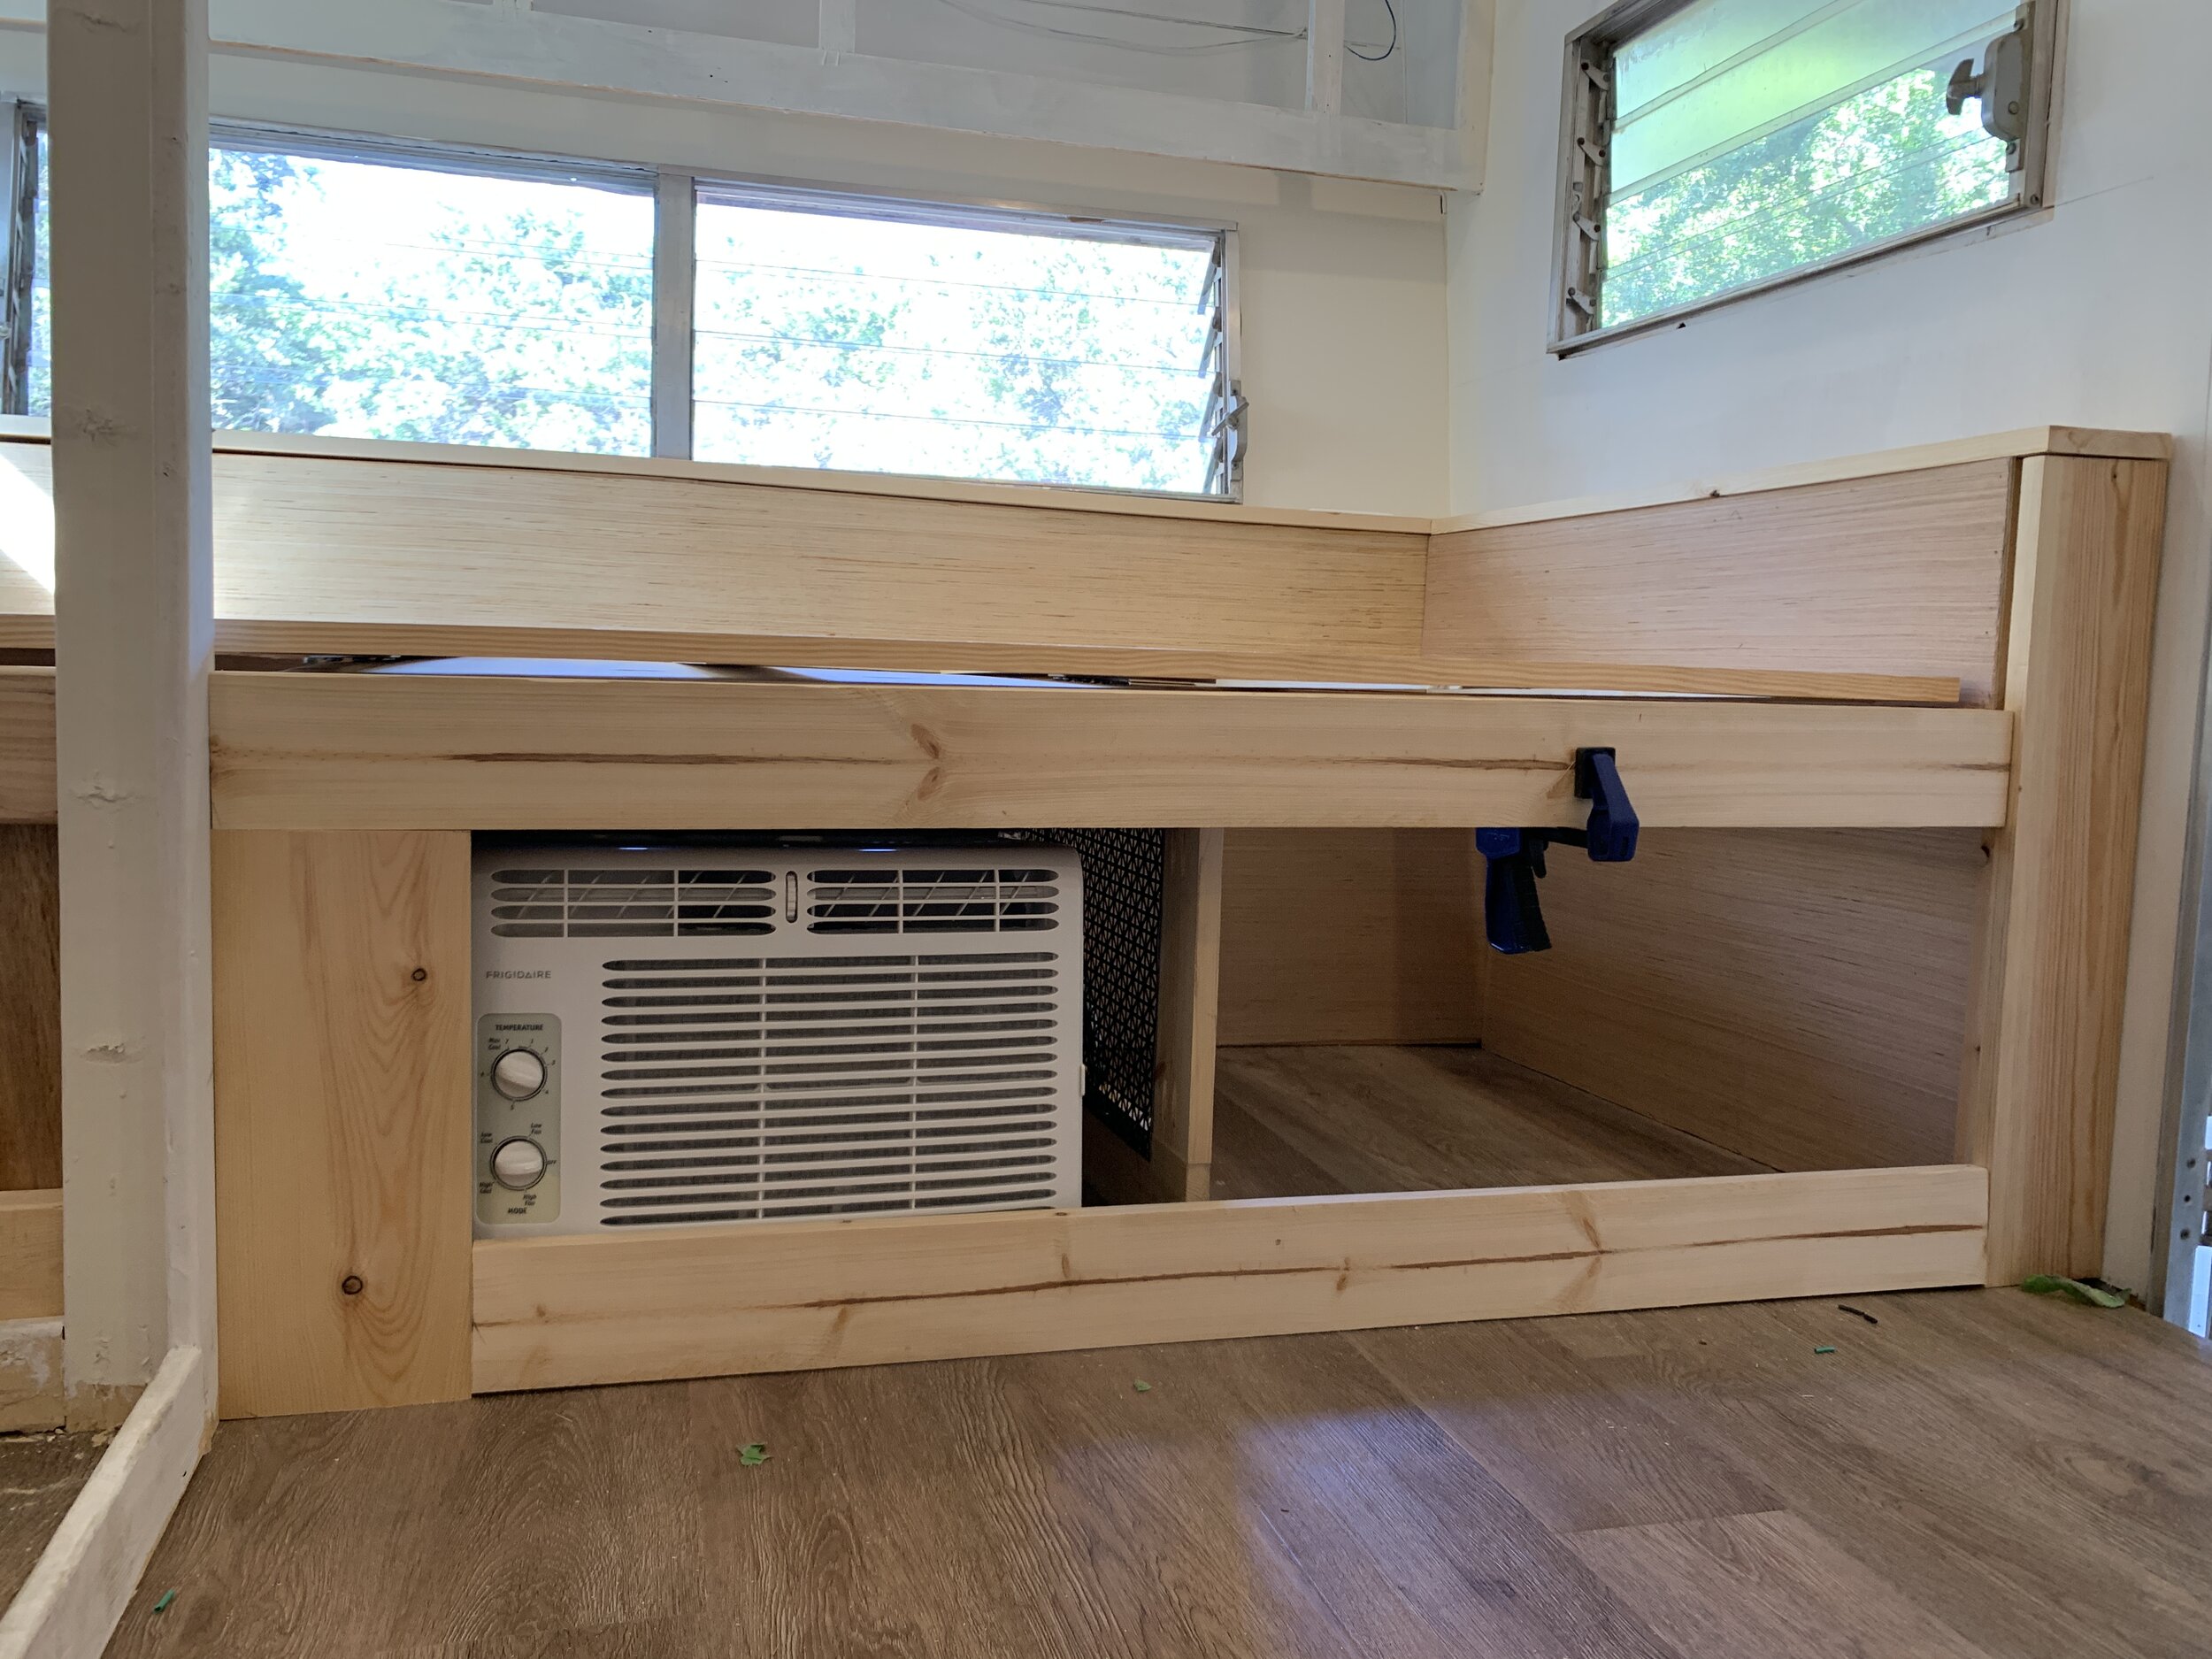
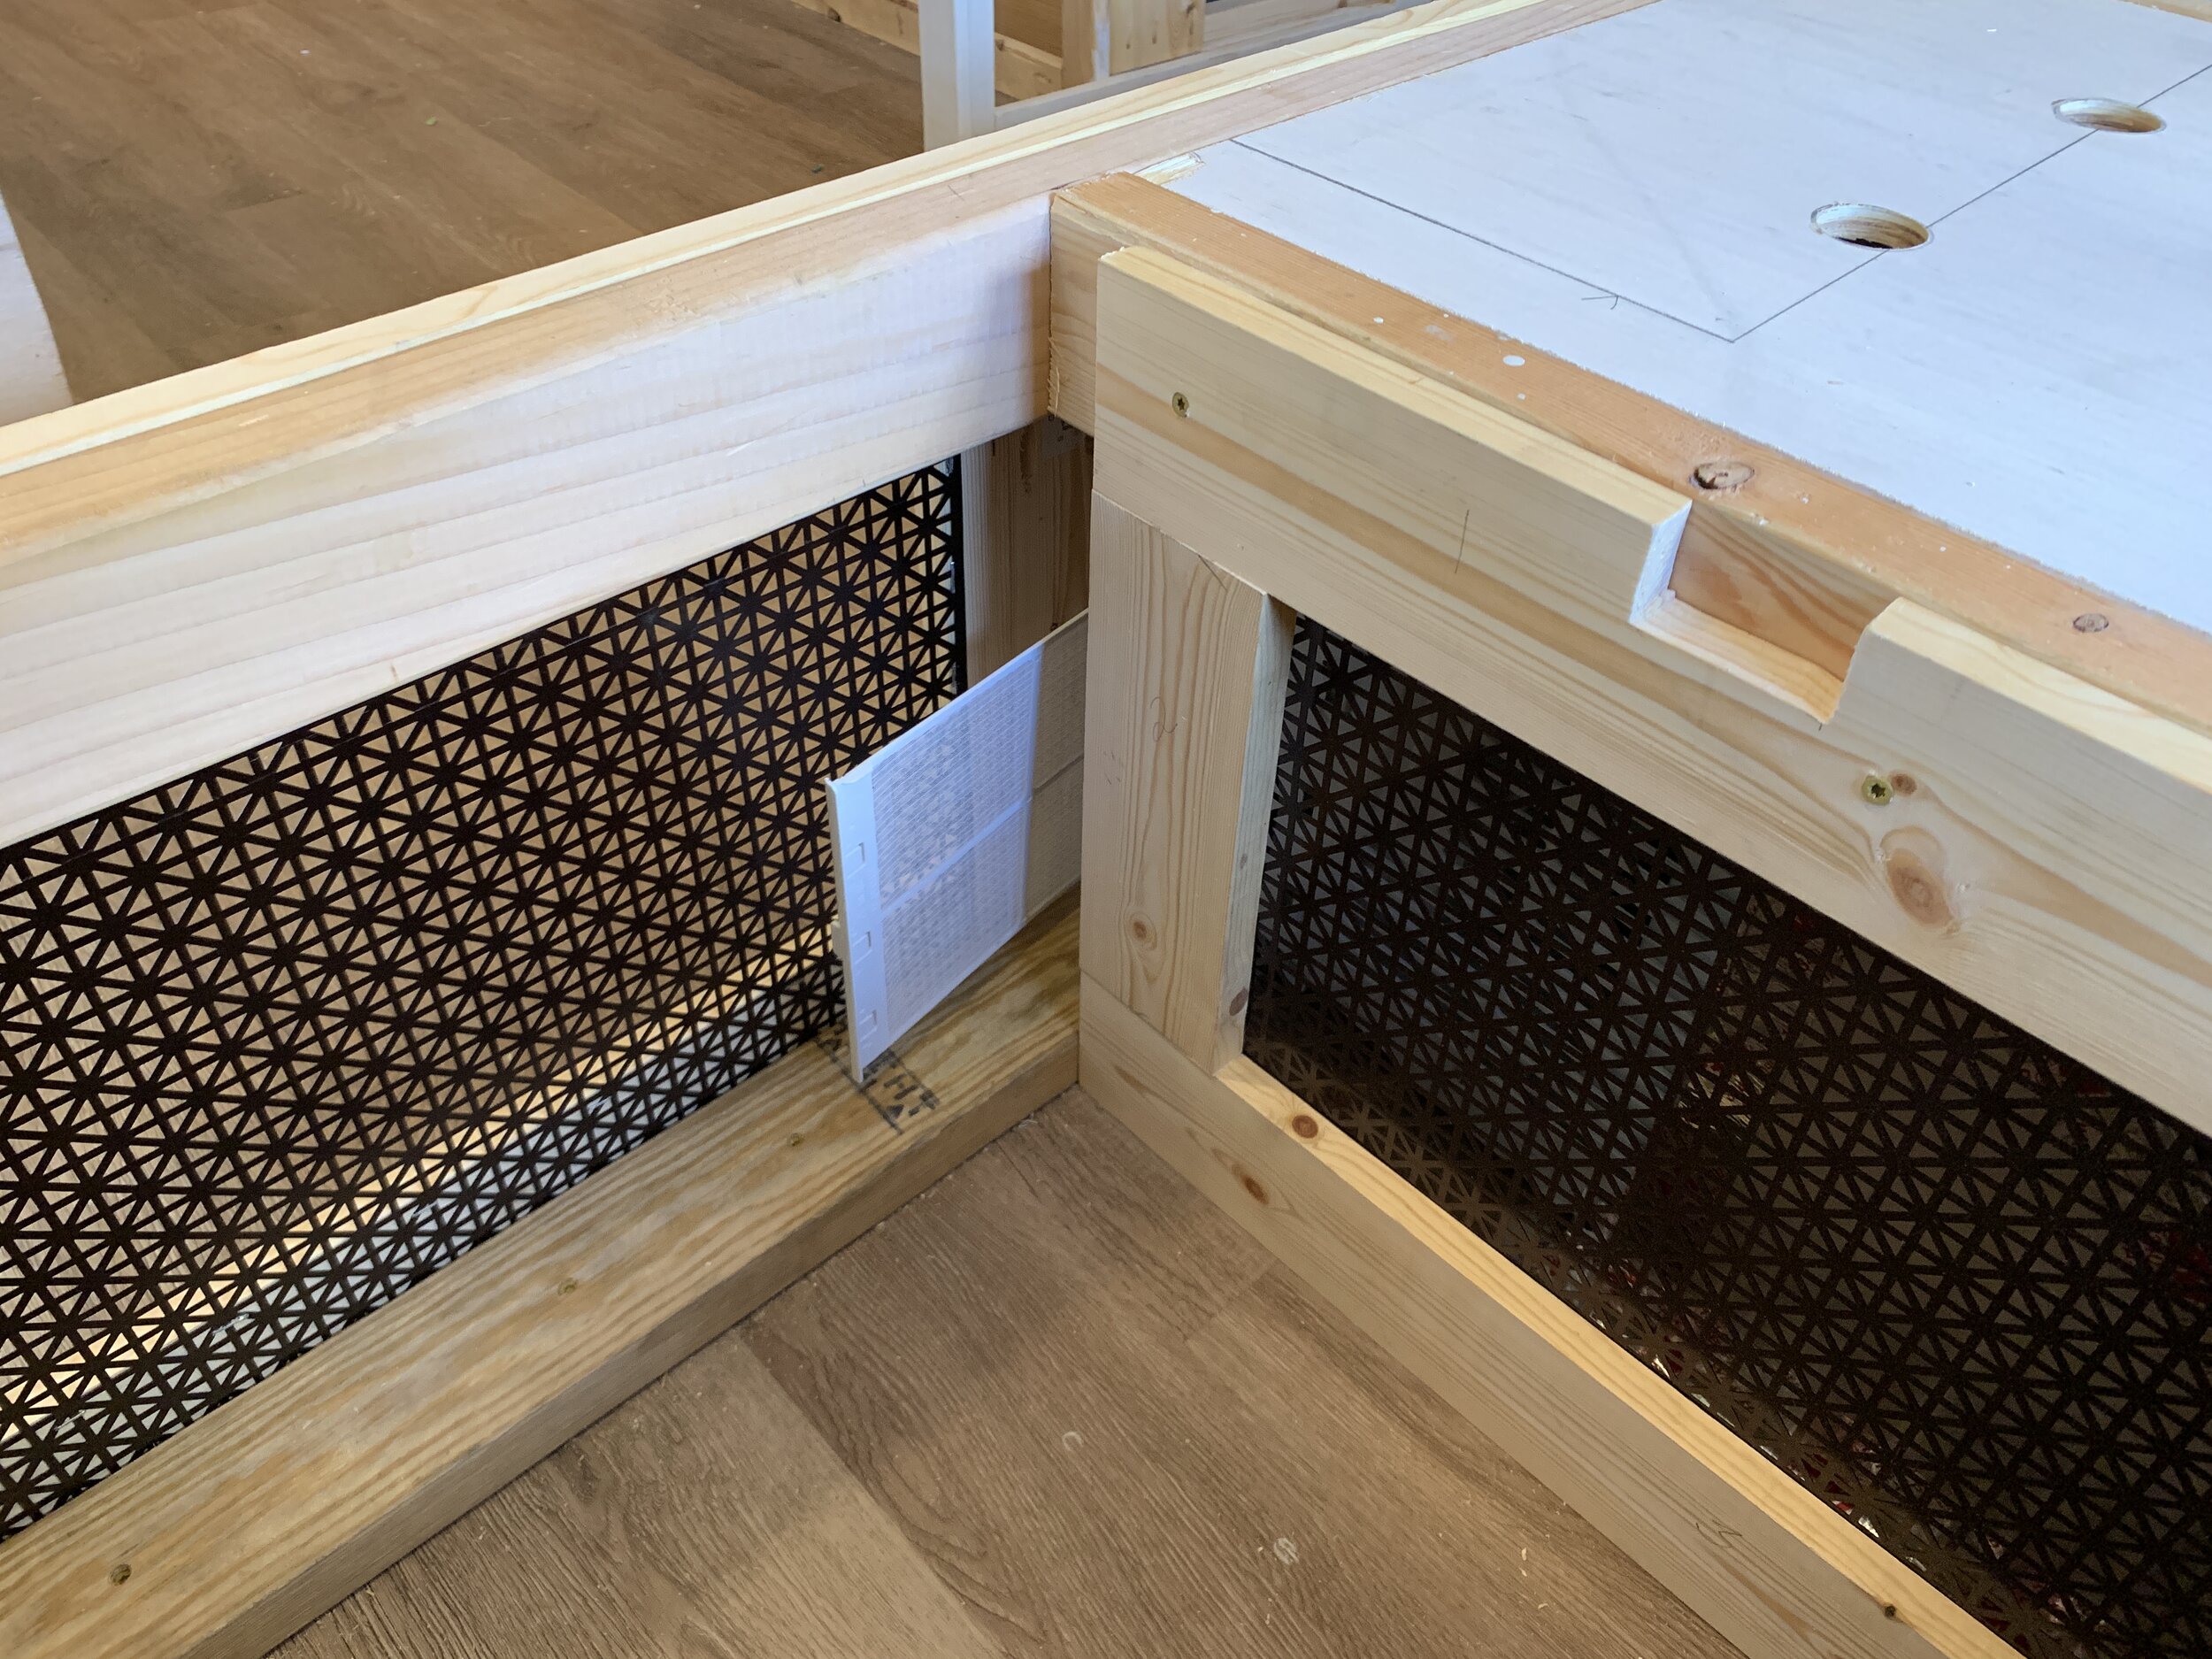
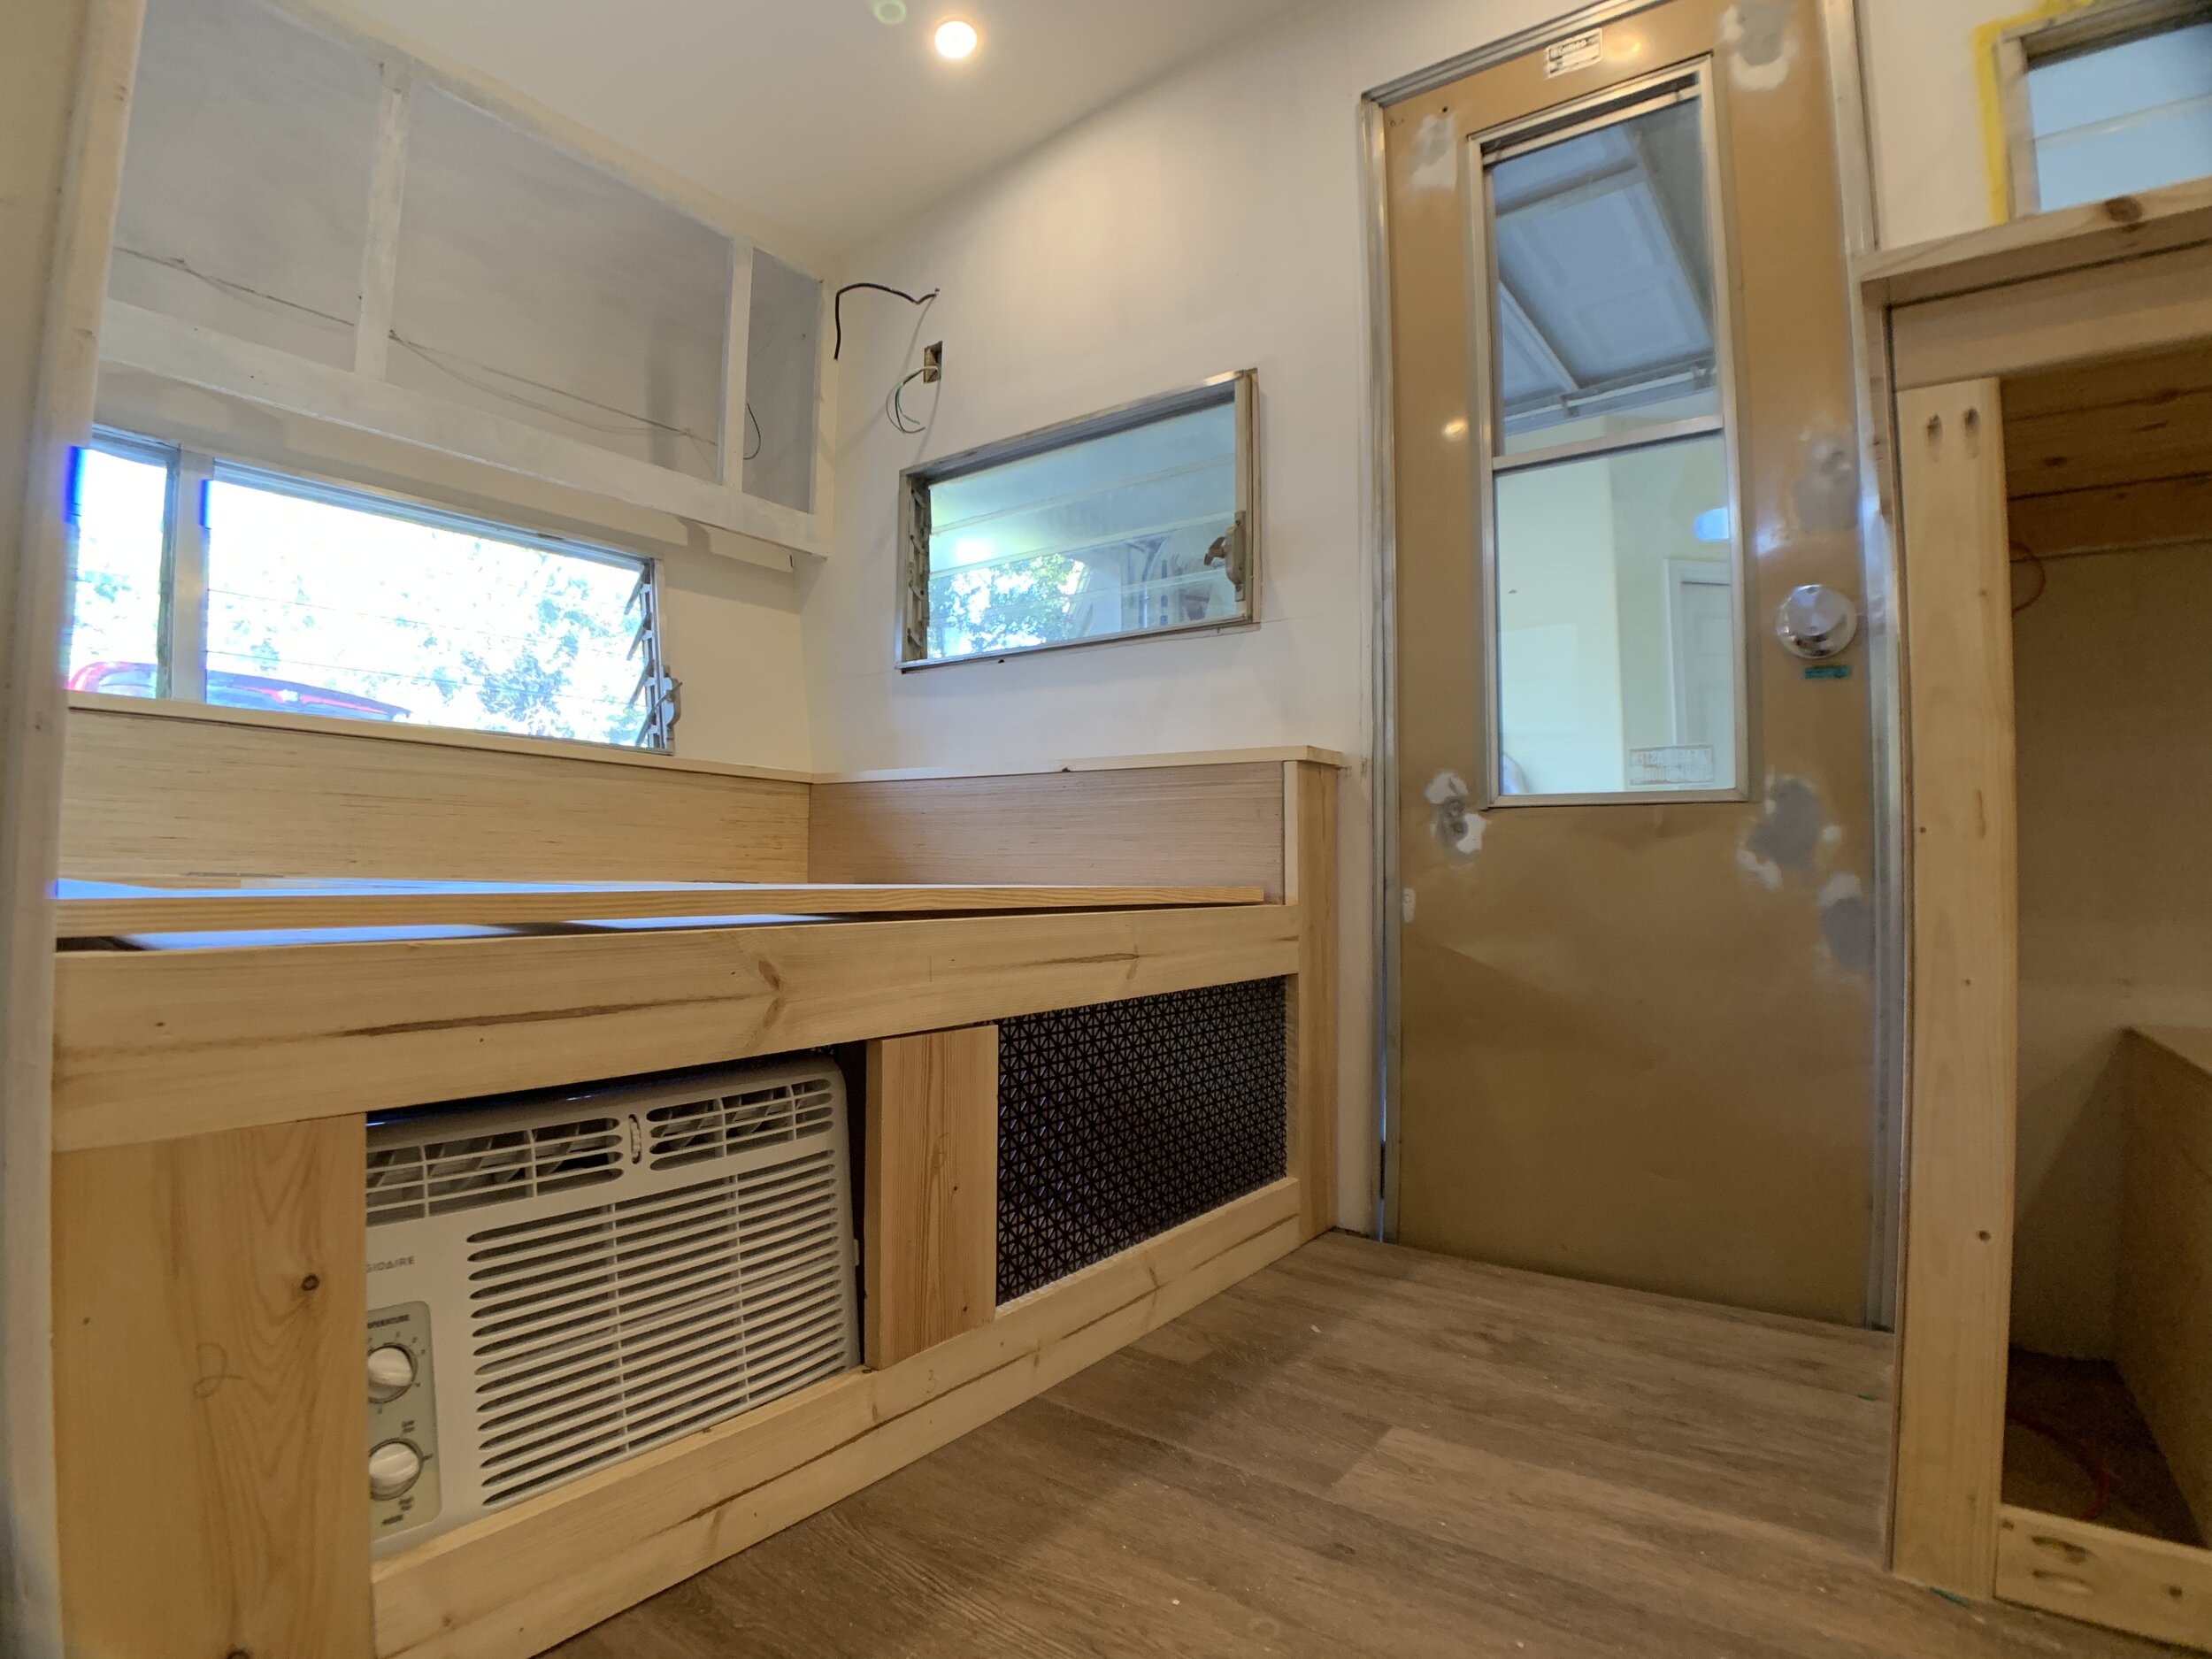
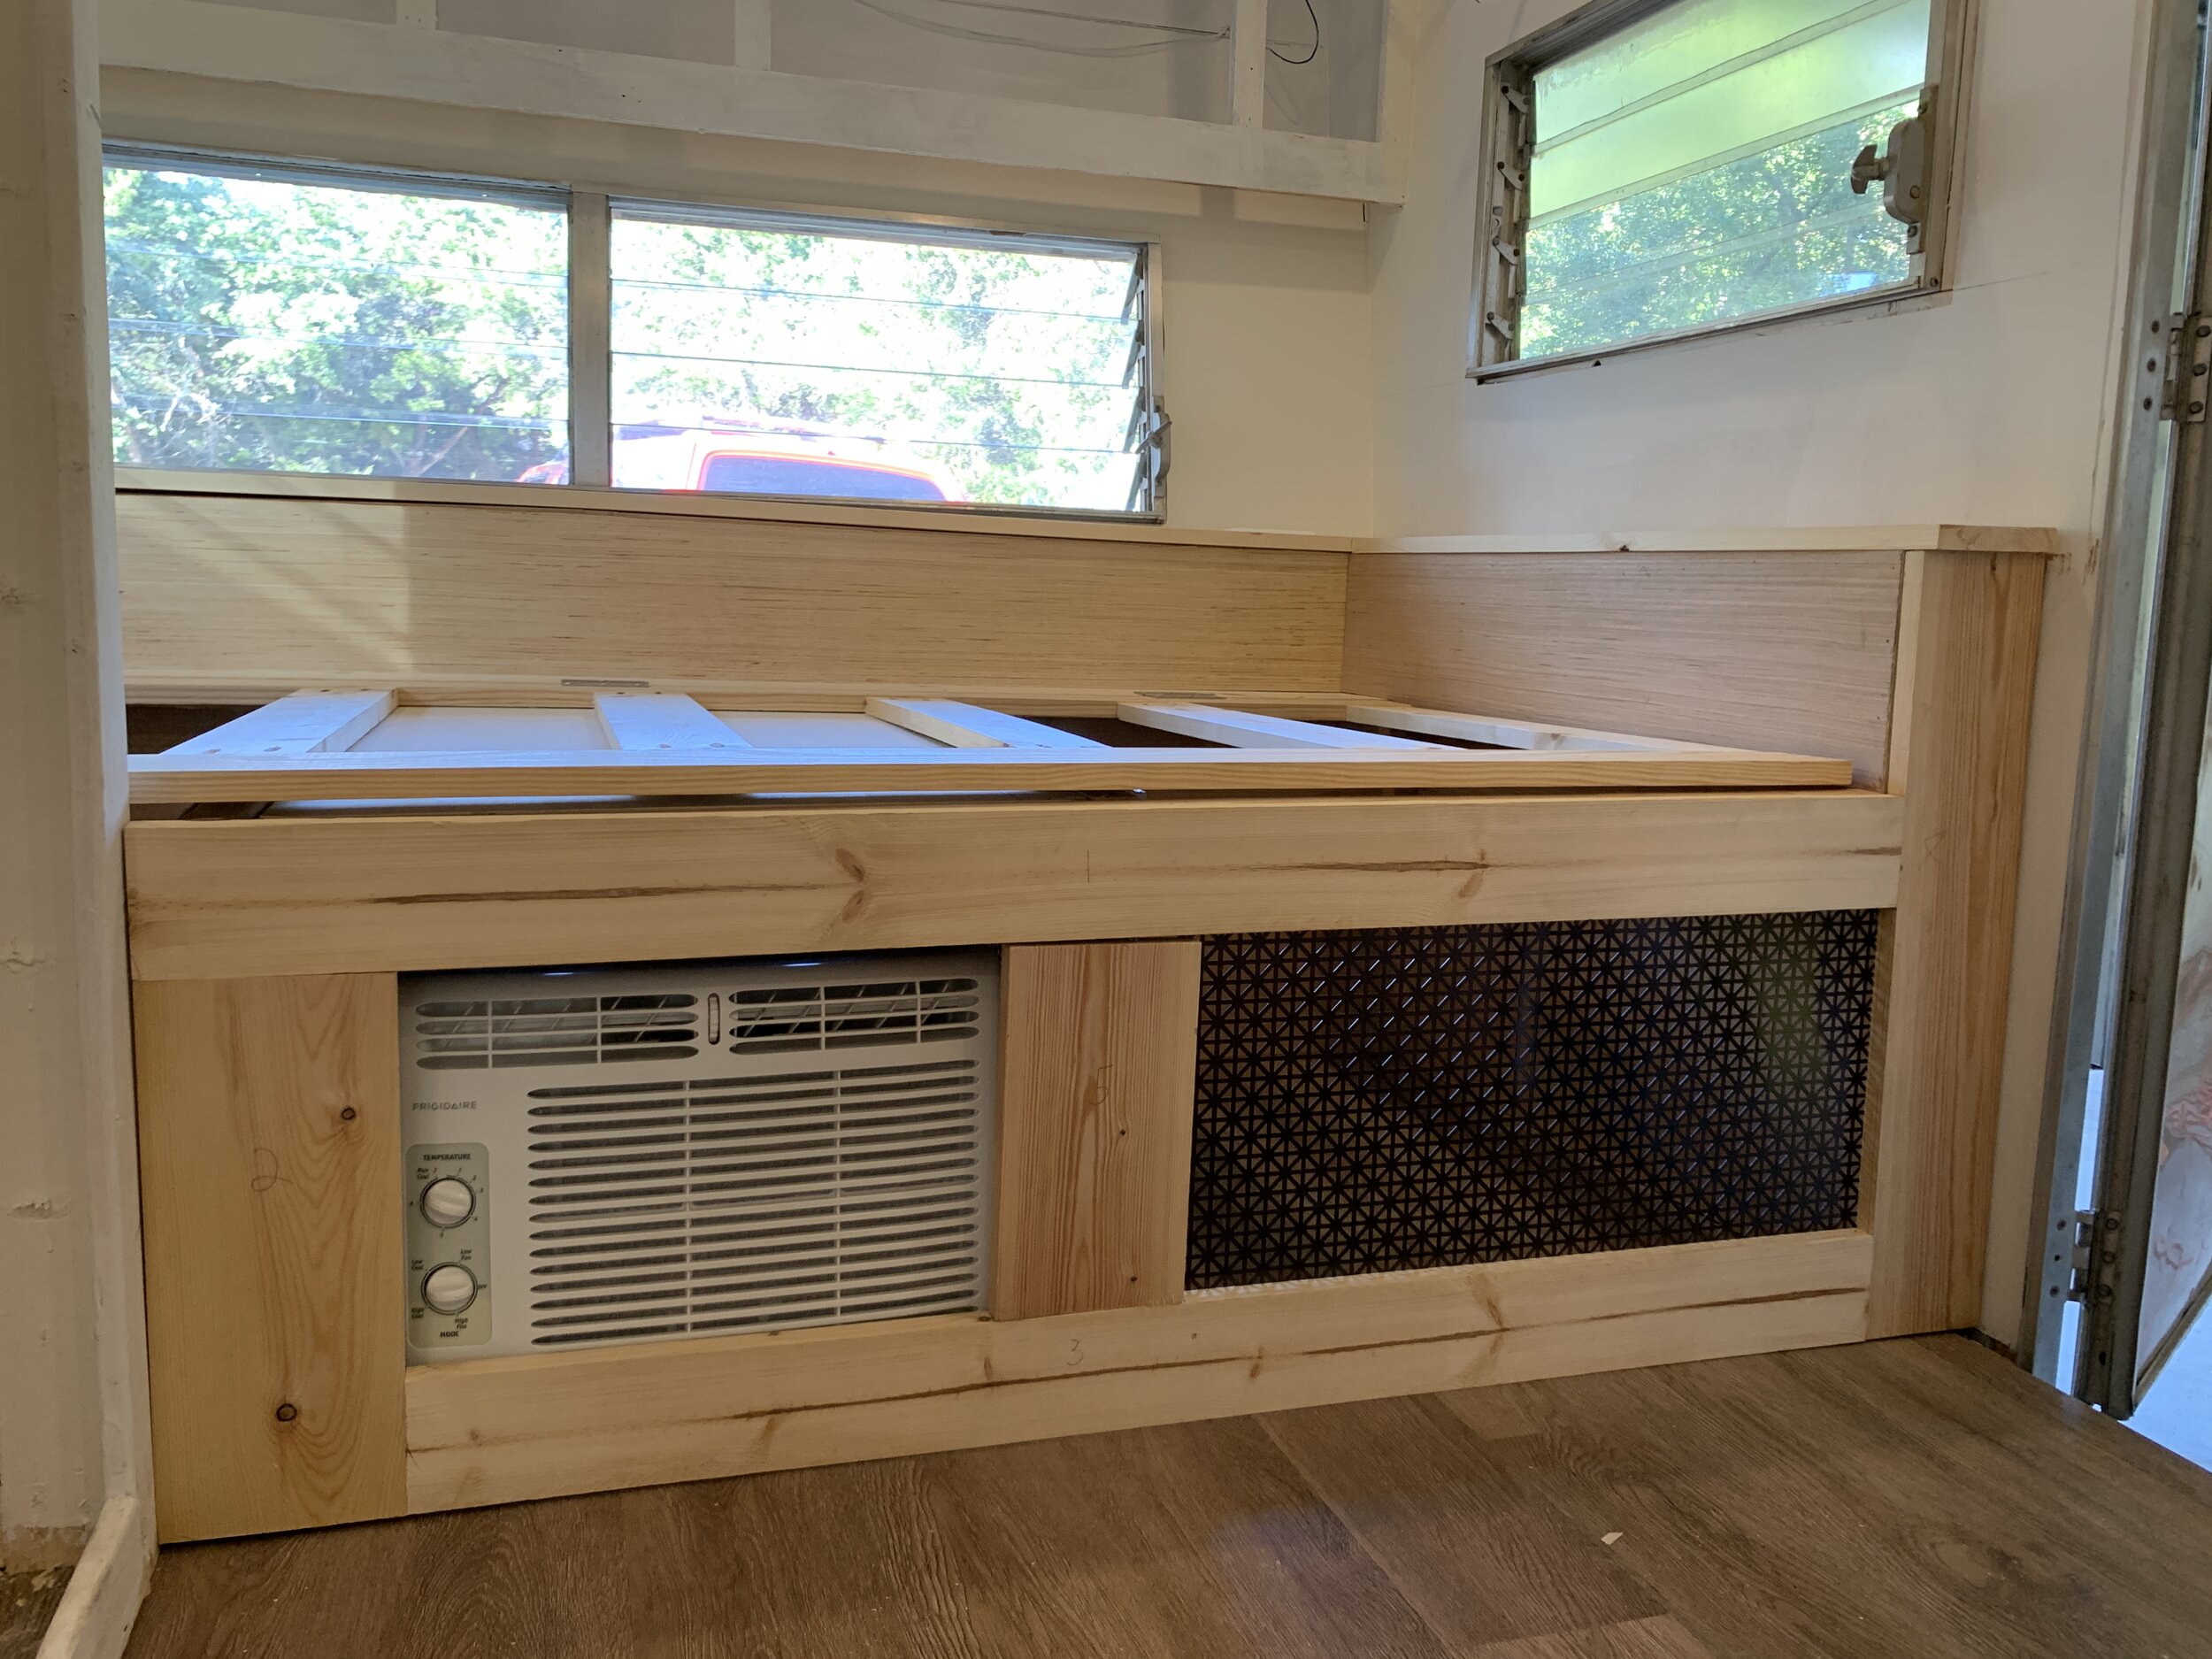
We previously installed all the perimeter “walls” of the storage area, so at this stage all we needed to do was the two divider portions. The left 1/3 of the twin area we closed in on all sides since it butts up to a solid shower wall so airflow is restricted there. The center 1/3 of the twin area houses the A/C unit, and the right 1/3, more storage. To add circulation and air intake for the A/C unit in the center segment, we screened in the divider wall between the center and right areas and the front of the right area with decorative perforated metal screen. We decided to divide the center and right segments to help keep anything we store in the right area from getting sucked to the side of the window unit, and notched out a portion of our divider screen frame to account for the hydraulic brake when the bed is closed. We opted to secure the screen to the bed structure using screws (that we’ll paint over) in case we ever need to take it off to access the A/C unit. You can tell in some of the photos below how we made the screen divider intentionally short instead of extending it all the way to what would be the inside front of the twin bed. This is so we have a hand-sized gap to be able to access the air conditioner’s filter that slides out of the right side of the unit.
To further protect the A/C unit, we added a solid 3/4” plywood lid that goes underneath the full slatted lid for the center section to keep any sheets wrapped under the mattress from restricting air flow. For the supports, we added a frame of 1x2s recessed 3/4” below the top of the bed platform so the 3/4” plywood A/C lid would sit flush with the top of the bed and allow the slatted bed base/lid to lay flat on it when closed. We used a 1” hole saw to make two finger holes in the top of the lid.


Closing in the front of the bed
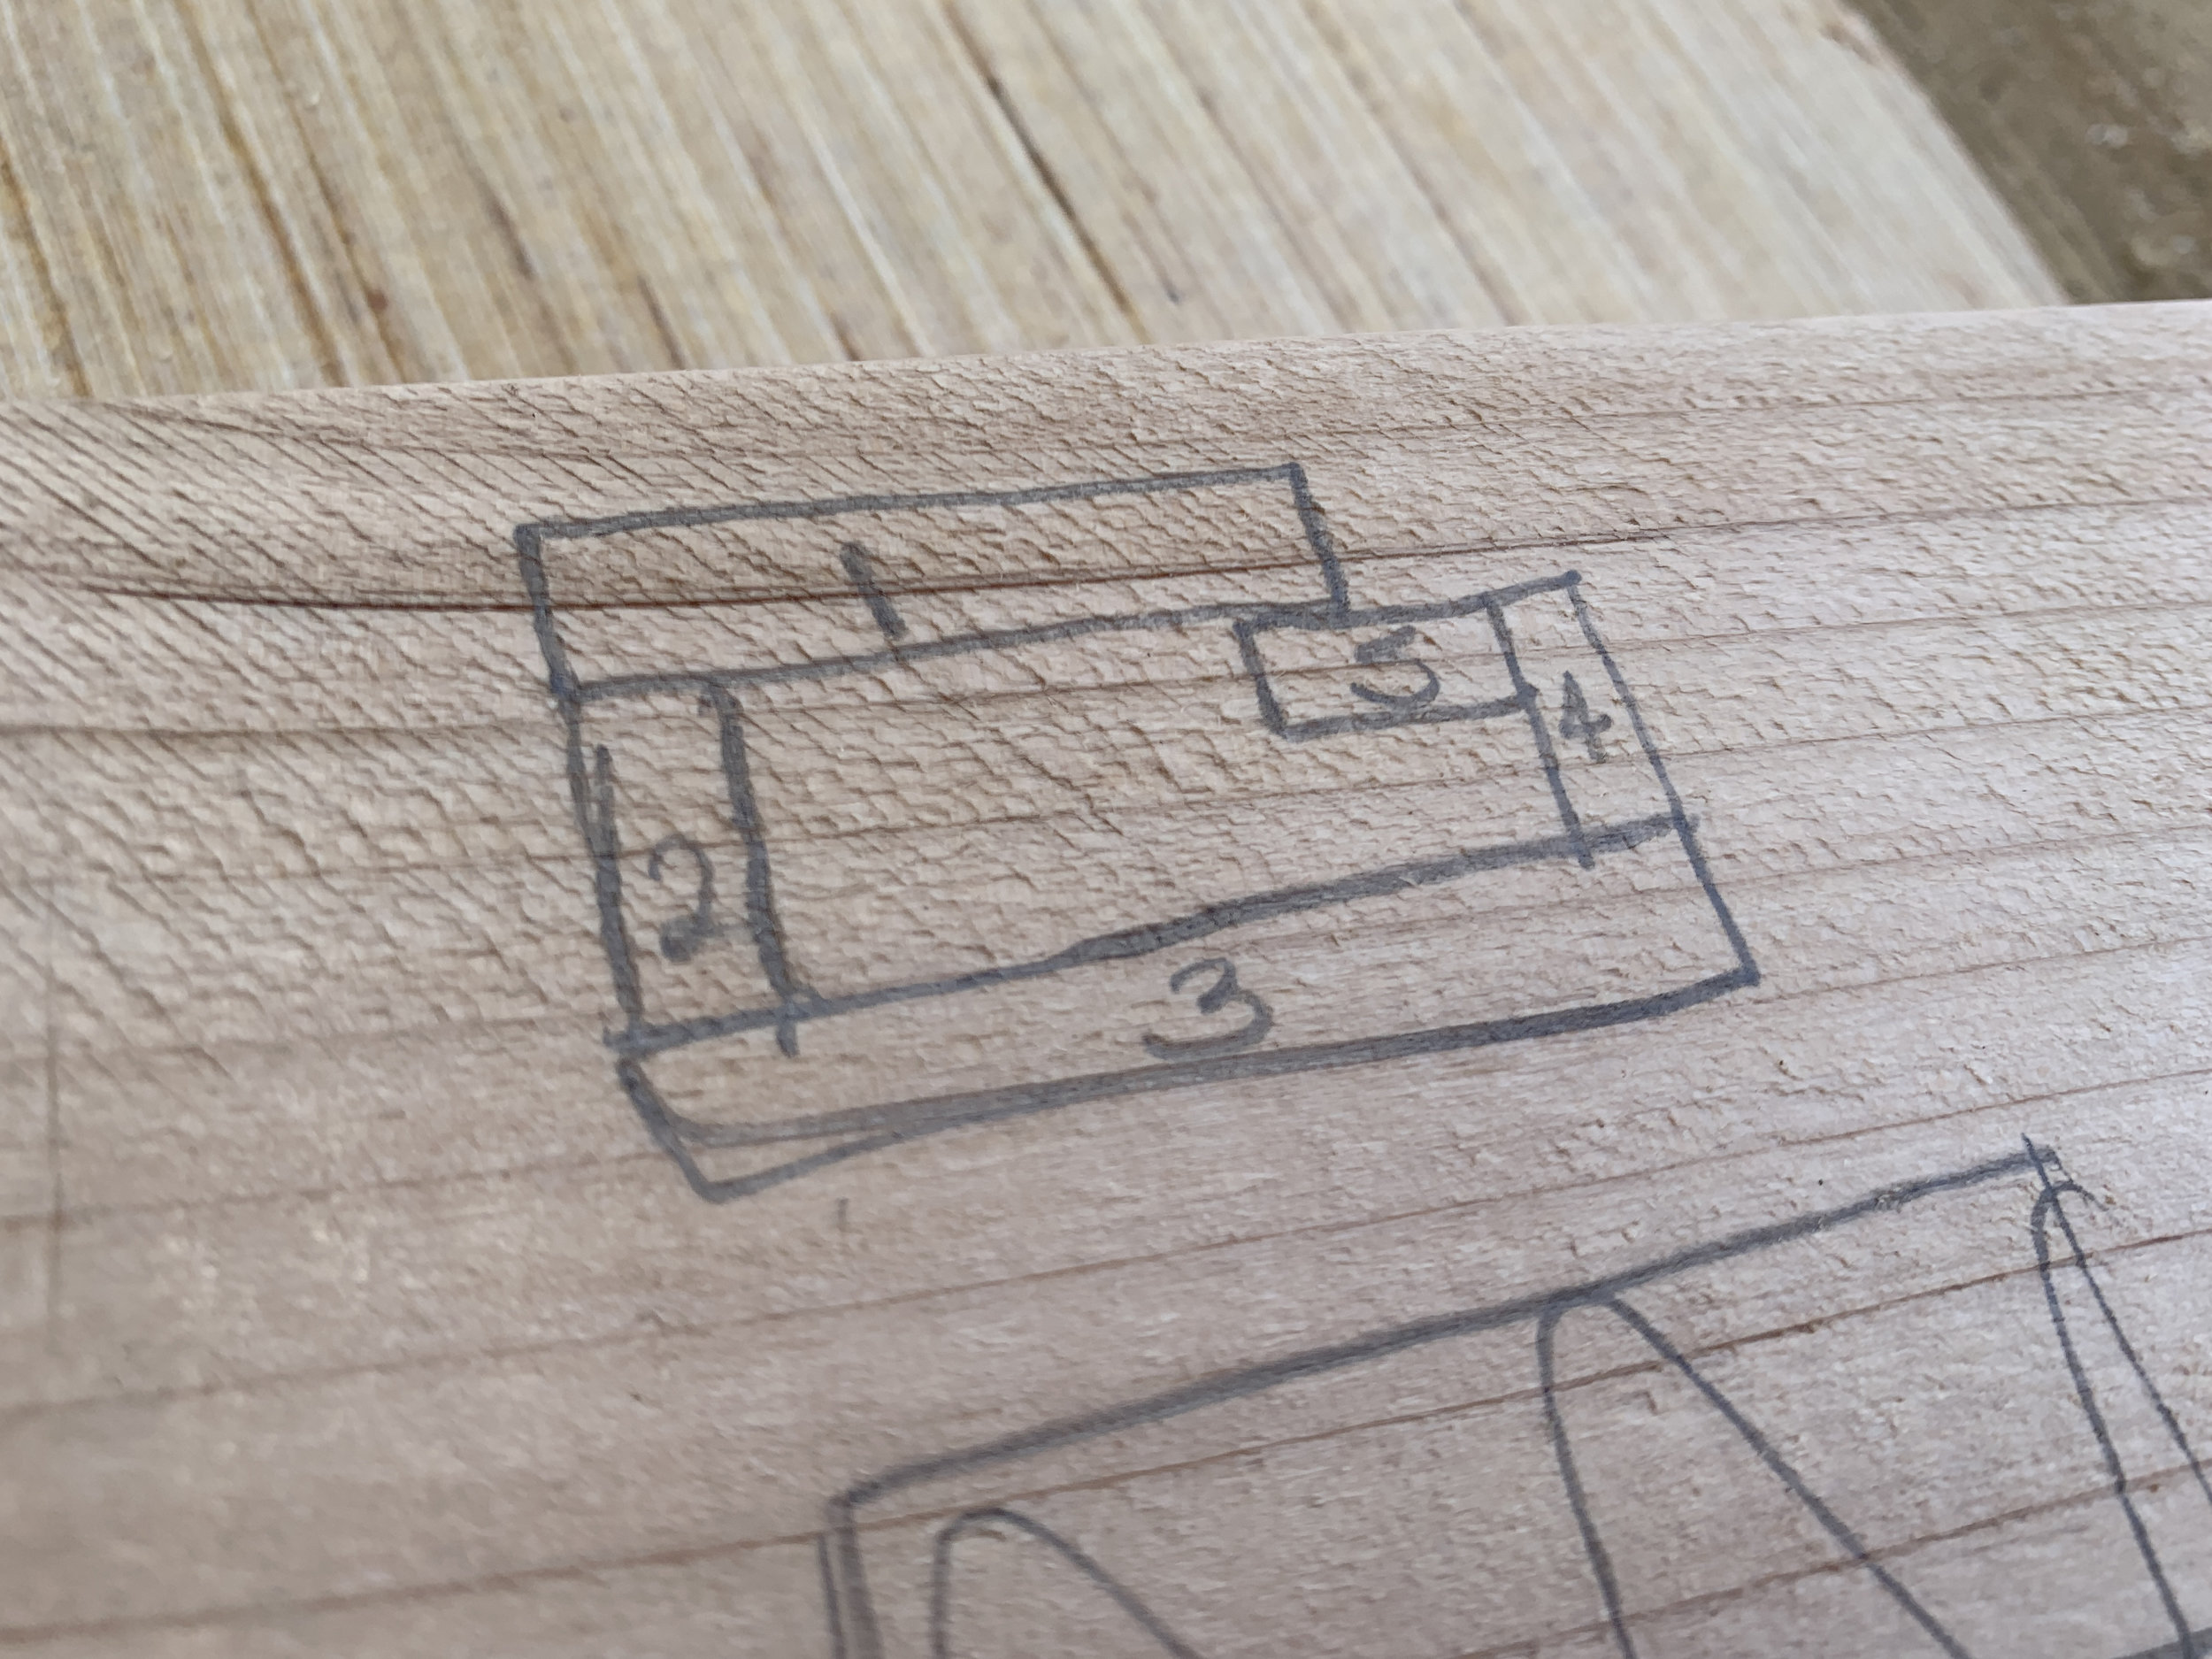
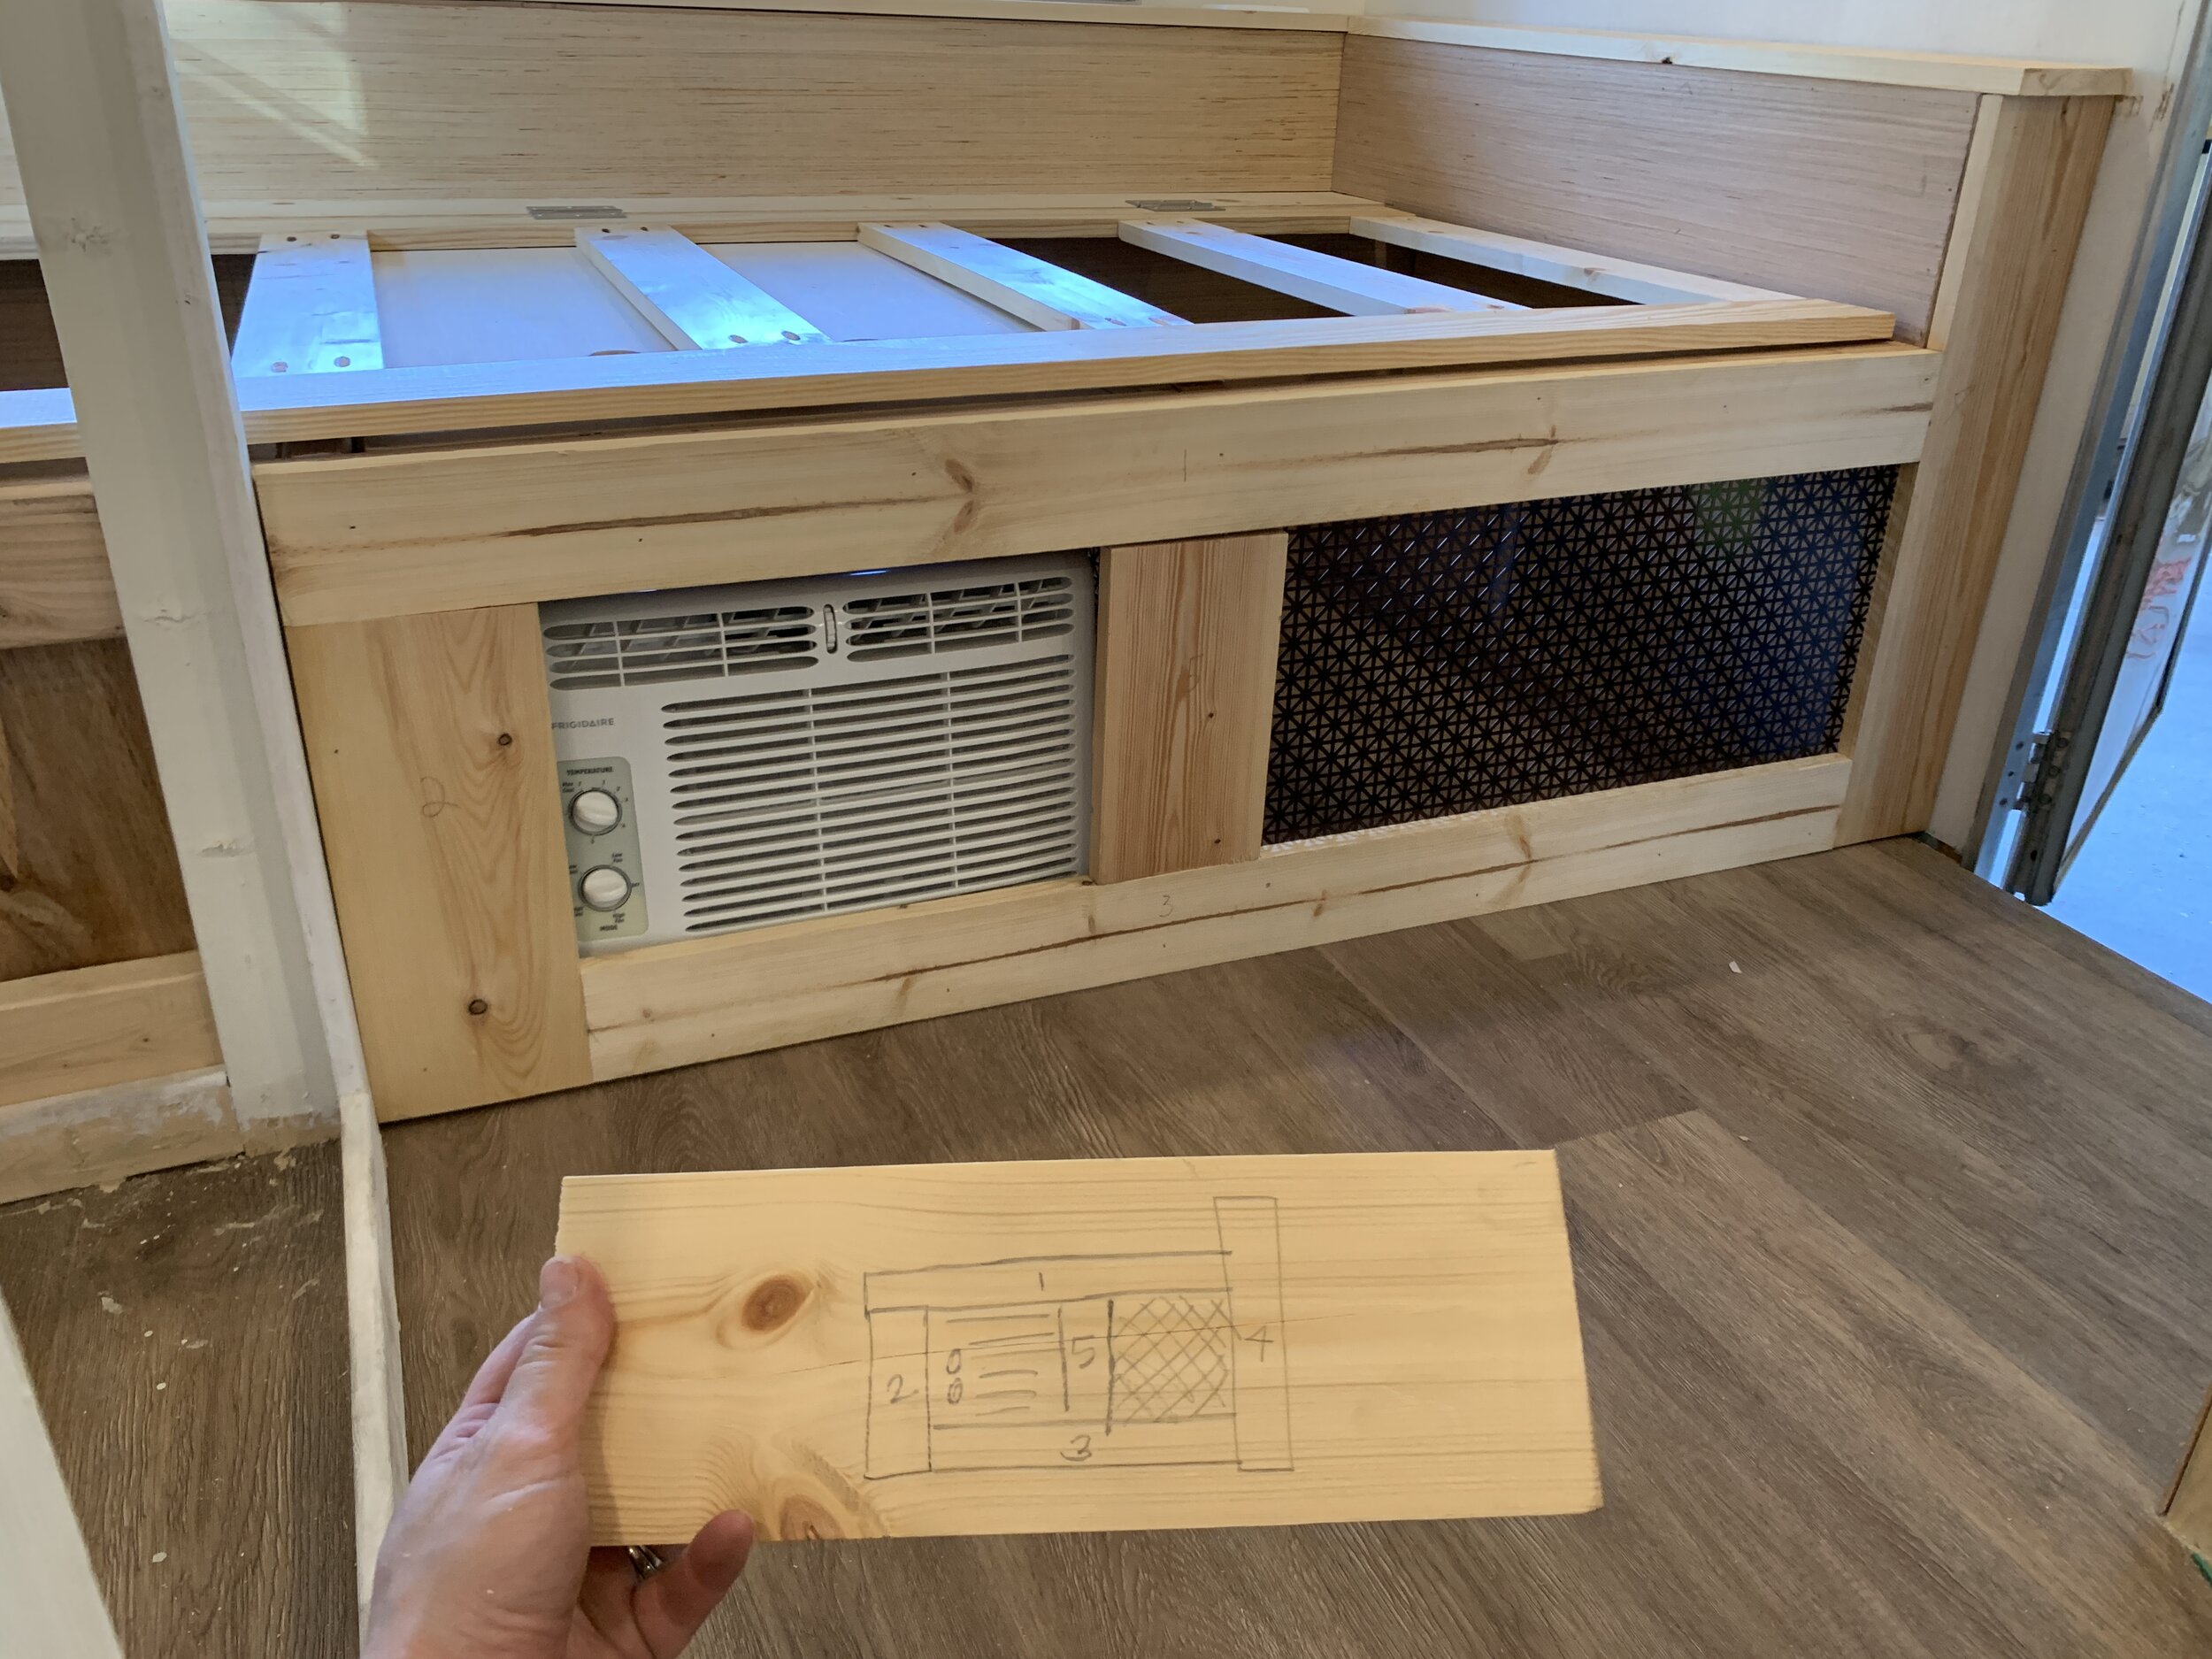
The final part of the build was the attractive front of the bed. We used 1x lumber in various widths and Kregged the set together, drawing the plan out on a scrap piece of wood and numbering each board accordingly to match the plan. We built the whole frame together in the camper on the floor and dry fit the whole thing in place before attaching the screen to the back of the frame using a staple gun. We nailed the whole thing in place from the front and will paint it all out down the road. You can see how we planned the attractive front frame so that it covers the gap between the arm and wall by the door and helps obscure the inner structure of the storage area as well.


So what’s next?
We’ve recently finished building our dinette area, closing in our lower and upper electrical cabinets, wiring our 12V two-light switch, and making our bumper extra fancy (and we’ll share all that coming up in future posts). In addition to finishing our interior builds with caulk and paint, we still need to do all of the plumbing – our tanks are starting to arrive this week!), some electrical and some super exciting attractive stuff that I can. not. wait. for.
So what do you think about this one? Do y’all have any questions? Anything you want us to cover in future posts that we haven’t shared yet? And if you’re not already, follow us on Instagram where you can see what we’re up to in real time.