The Cameo Camper Renovation: Installing Exterior Electrical Ports

Hello again. If you’ve been following along lately, you know we’re trying to play catch up on all of the things we’ve finished on The Cameo but haven’t shared quite yet. It’s strange but all of a sudden it feels like nice bloggable chunks just kind of finished up over night. (Not to say we still don’t have plenty left to do, because we definitely do.) So today we’re going to talk about the different exterior electrical ports we installed on various sides of the camper. If you’ve missed the posts on how we wired our camper from scratch (AKA the electrical system post) or the one on how we ground our camper (mucho mucho important!), you may want to check those out too as they’re related to today’s topic…
Oh and I should preface by saying that this post is out of order and we did all this before we put up our insulation and interior walls.
Installing exterior (electrical) ports

Y’know, for the crucial camping stuff, like pulling in shore power from a campsite. And plugging in string lights. And watching TV outside without having to run extension cords through the window. Like I said, the crucial stuff. ;) Now I’m specifying electrical ports because we’ll also share our water ports in a separate post when we get there since it’s a whole ‘nother beast entirely. And for the sake of today’s post, let’s just agree that “electrical” will cover the following (even though one of the things is really more electrical-adjacent):
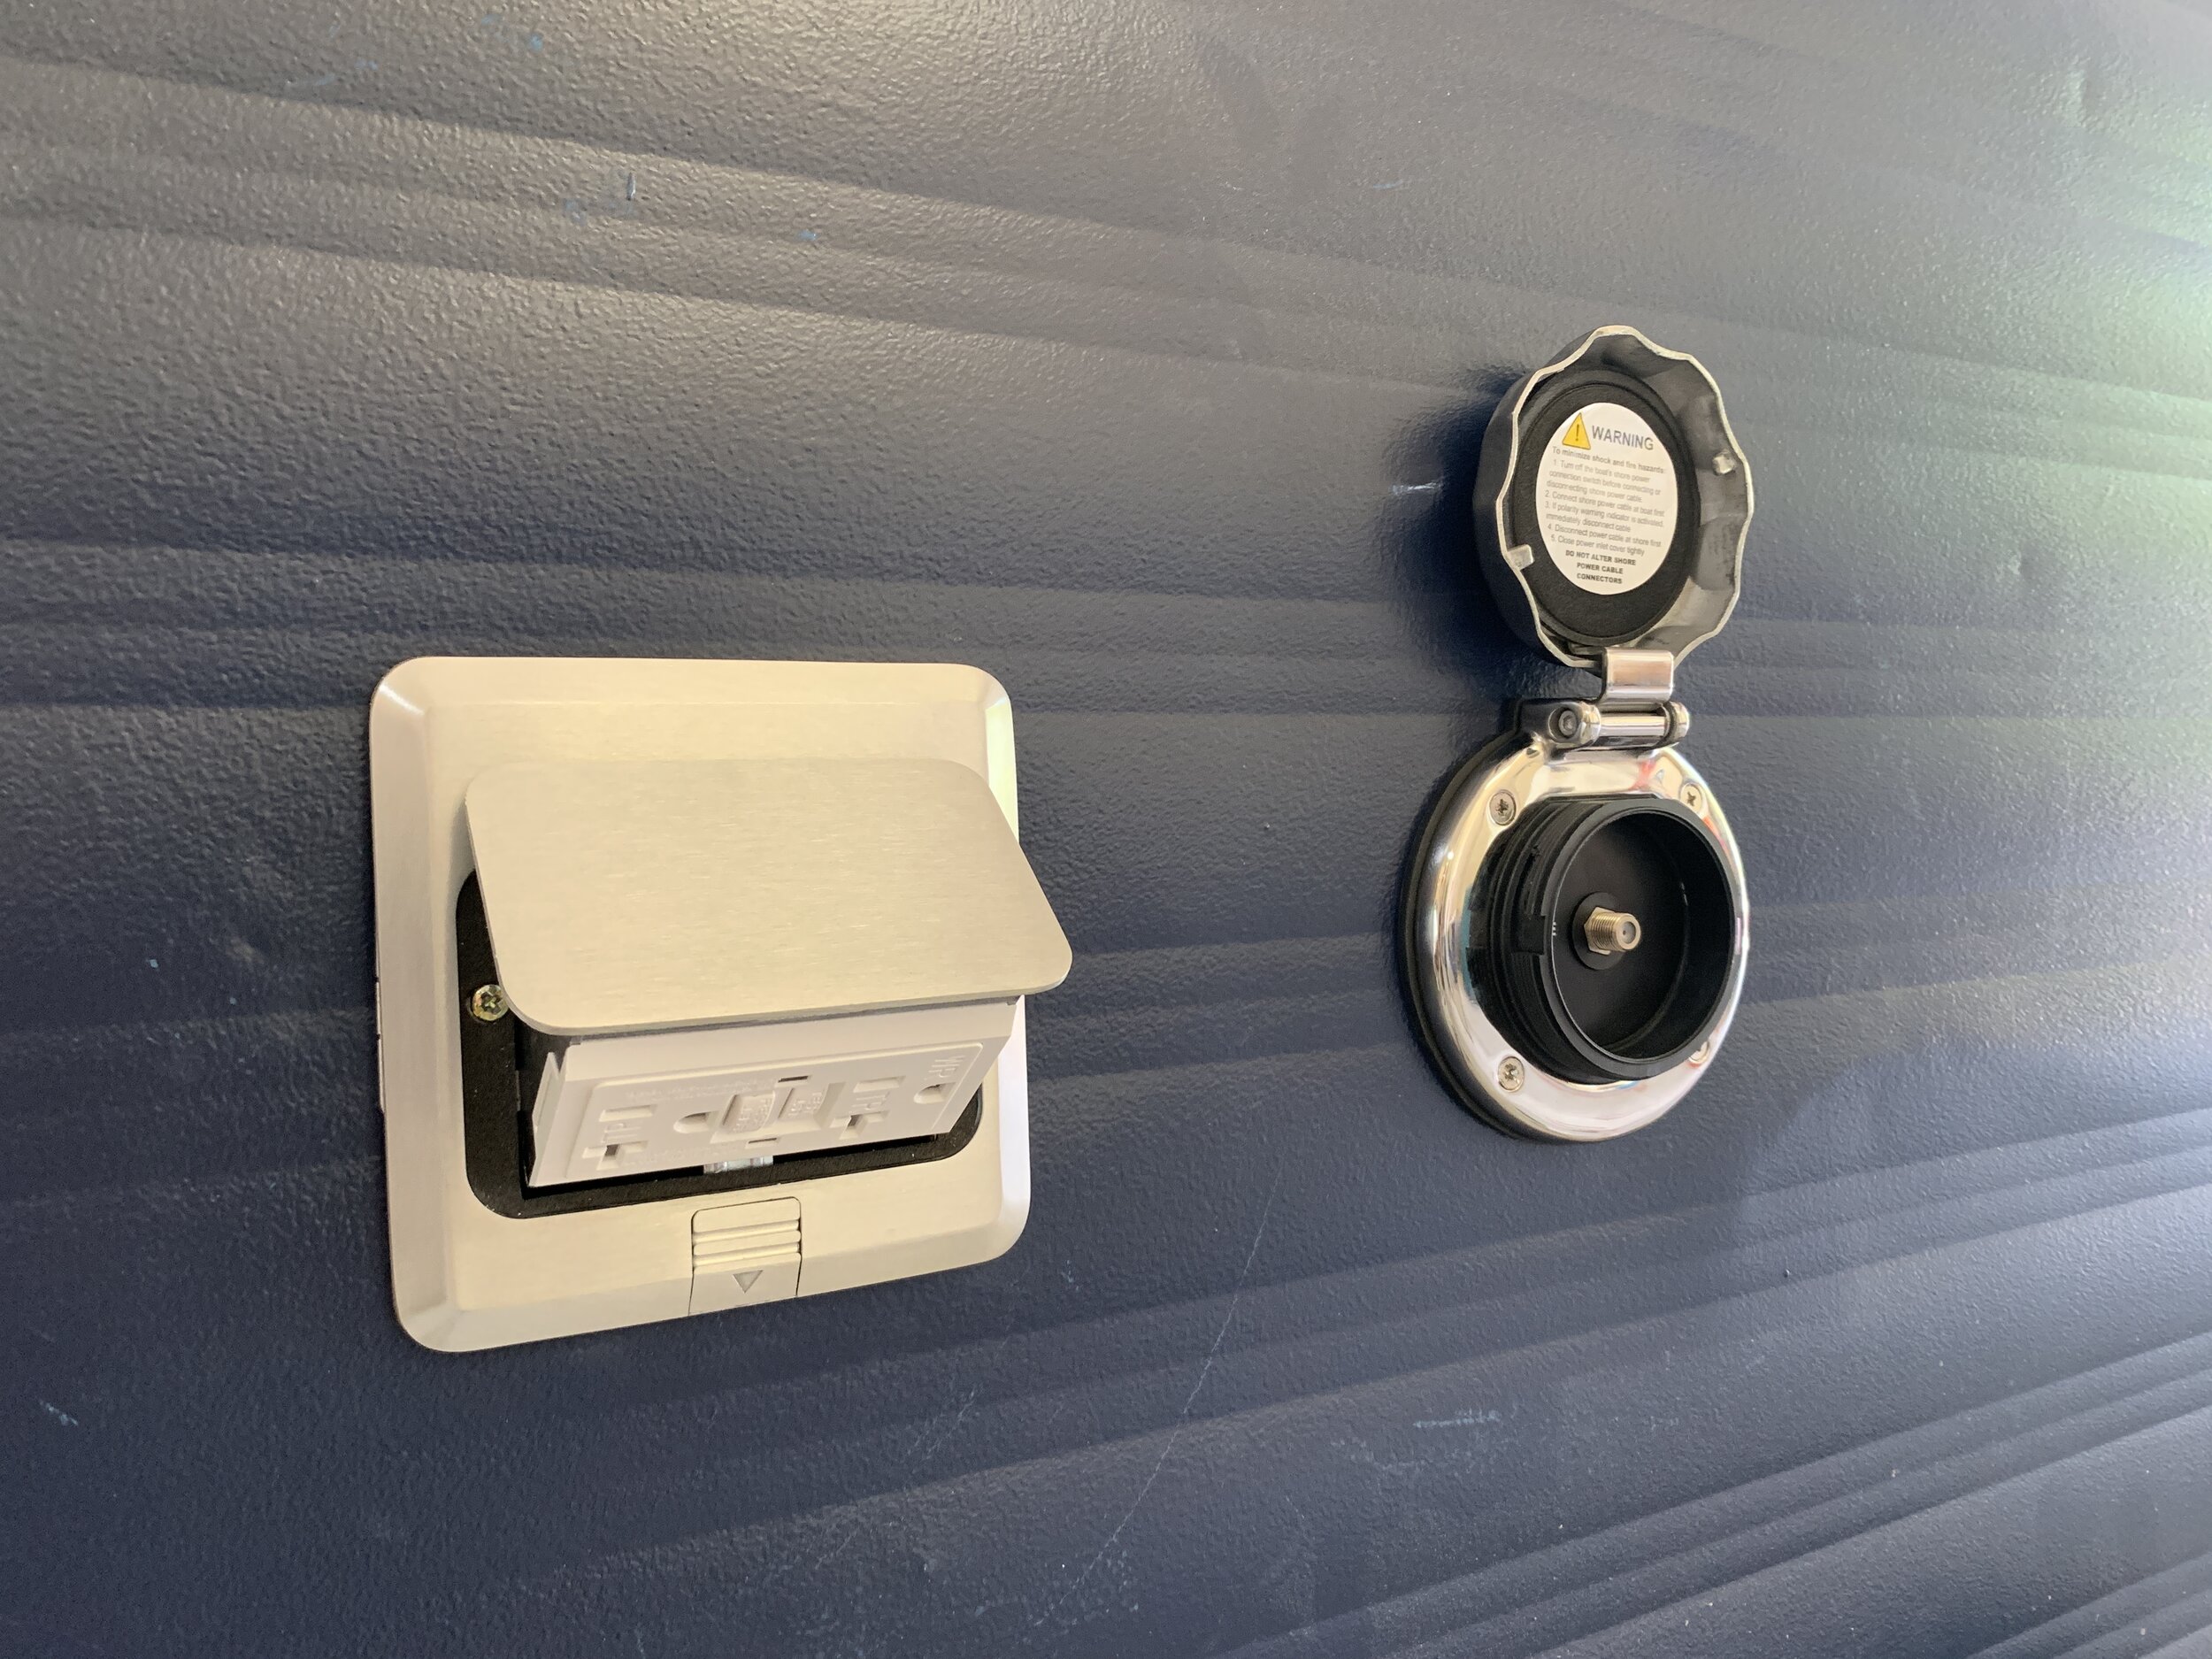
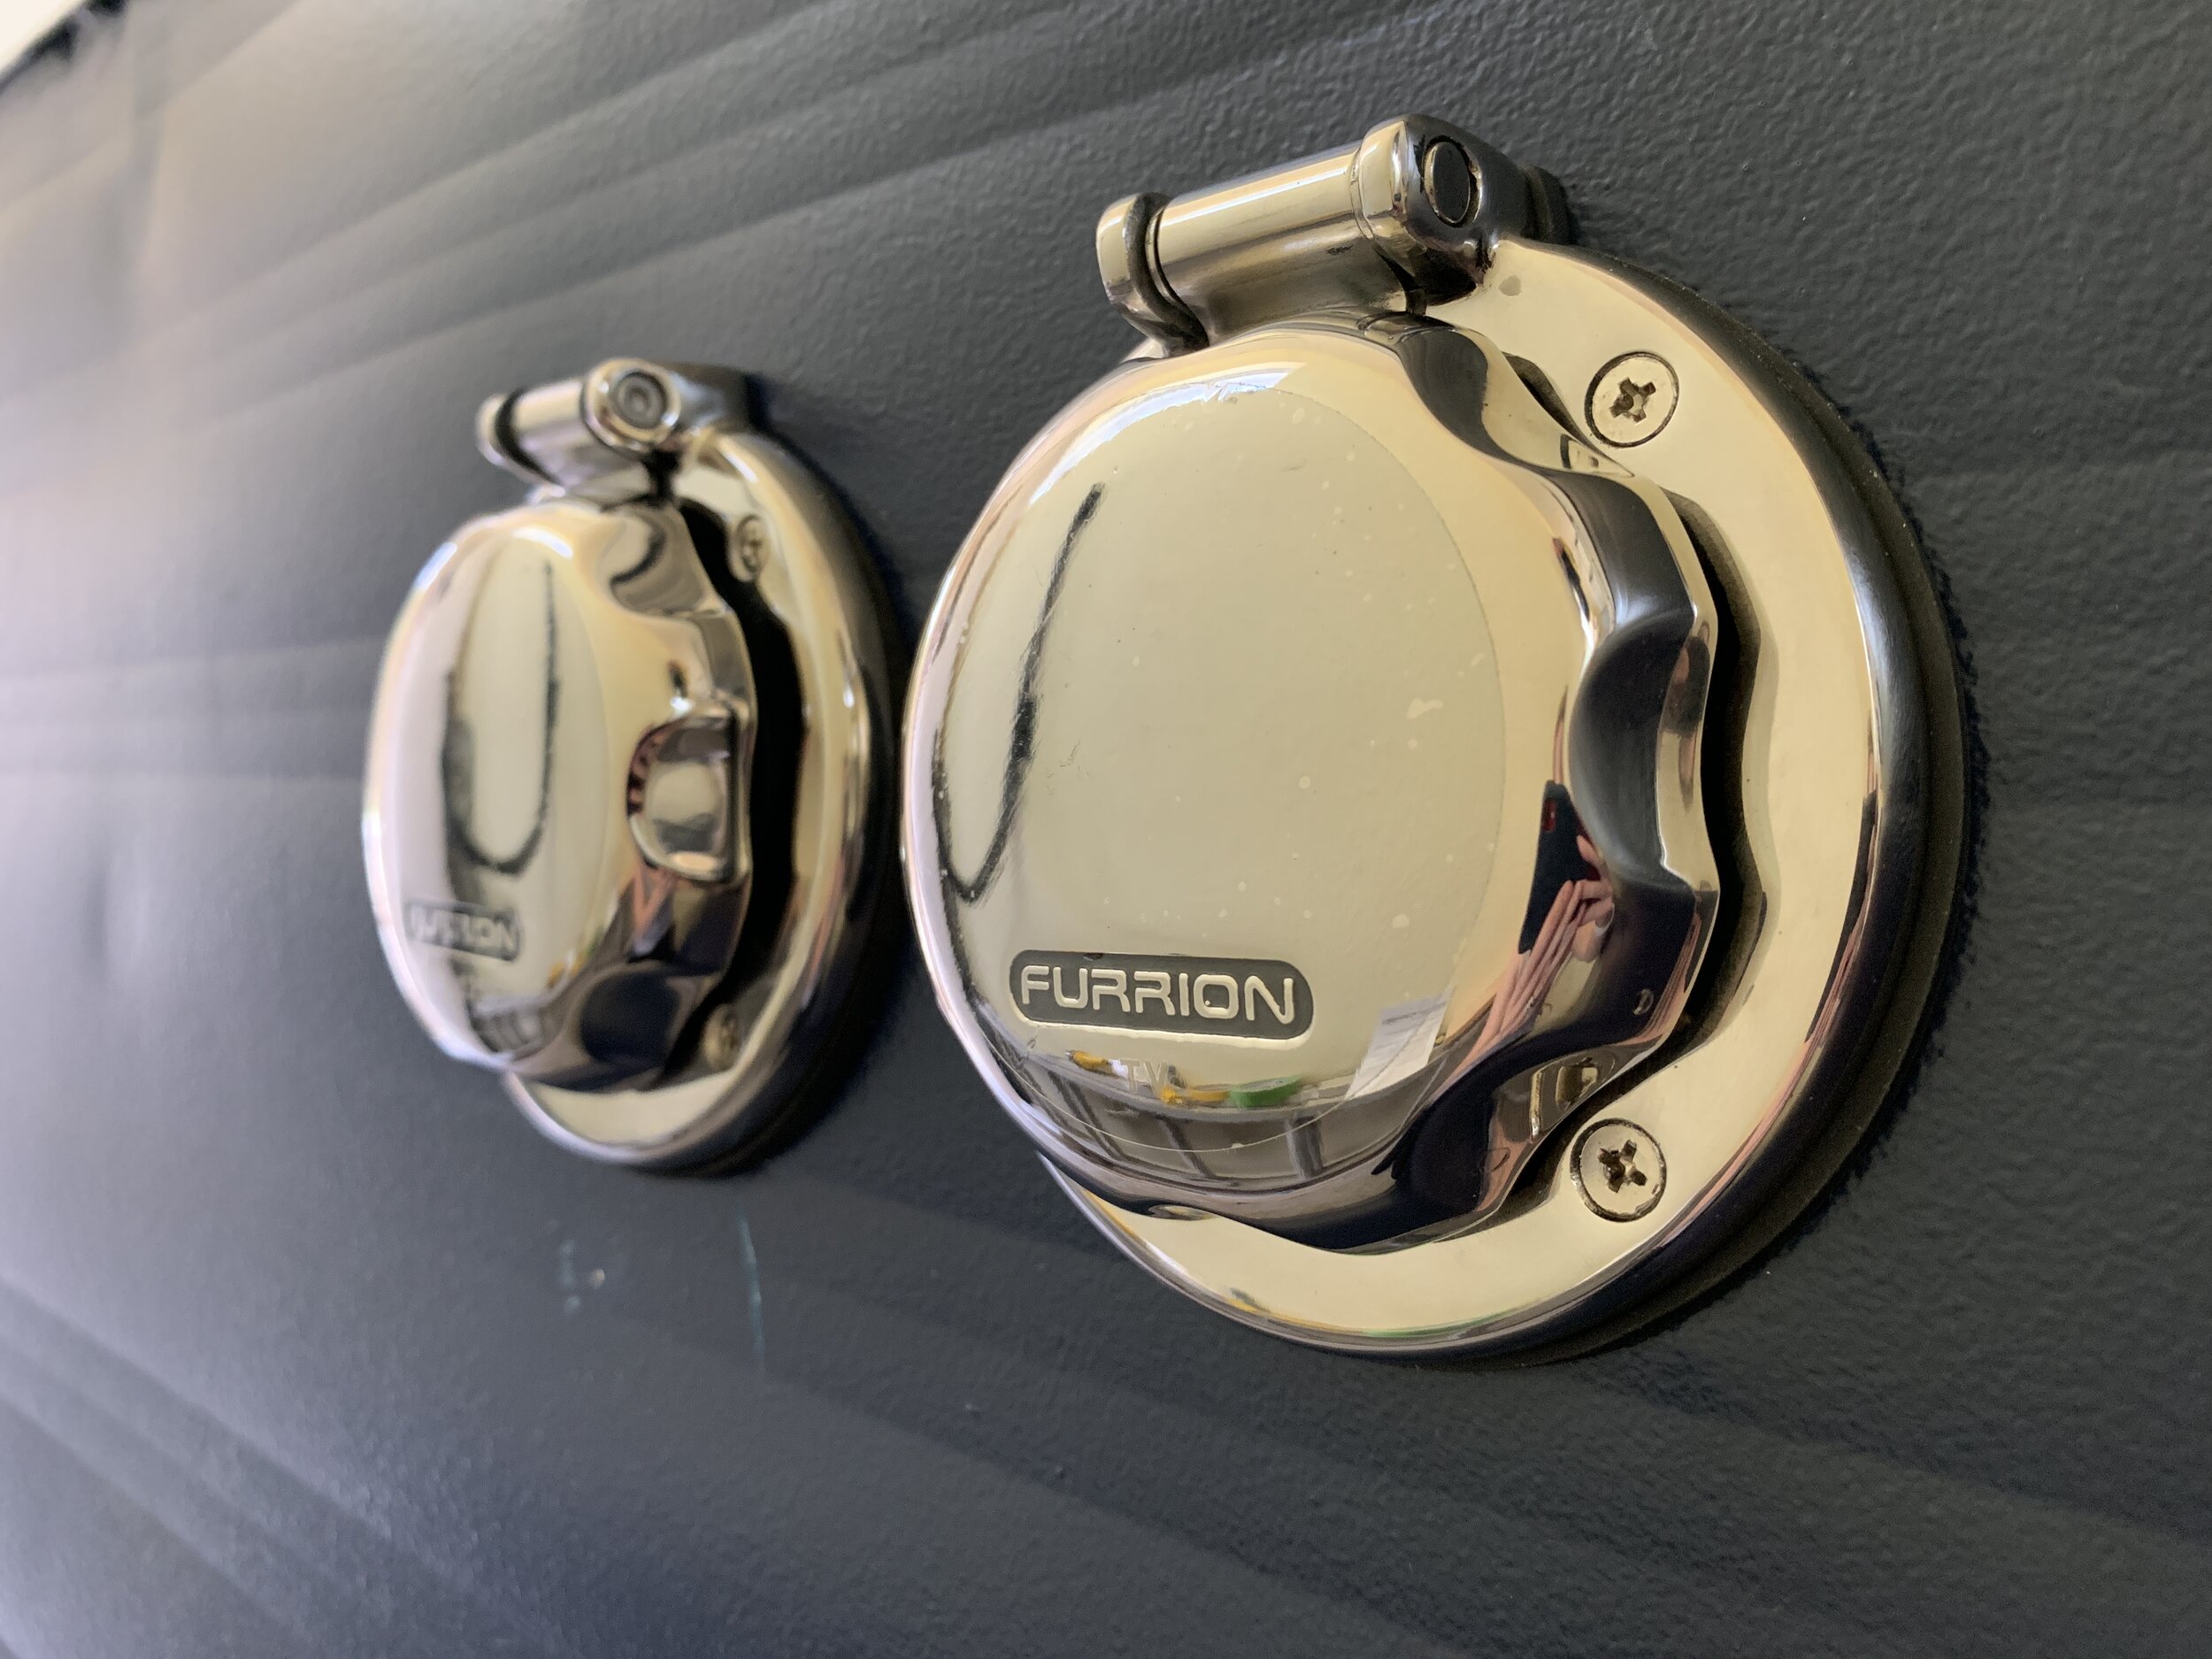
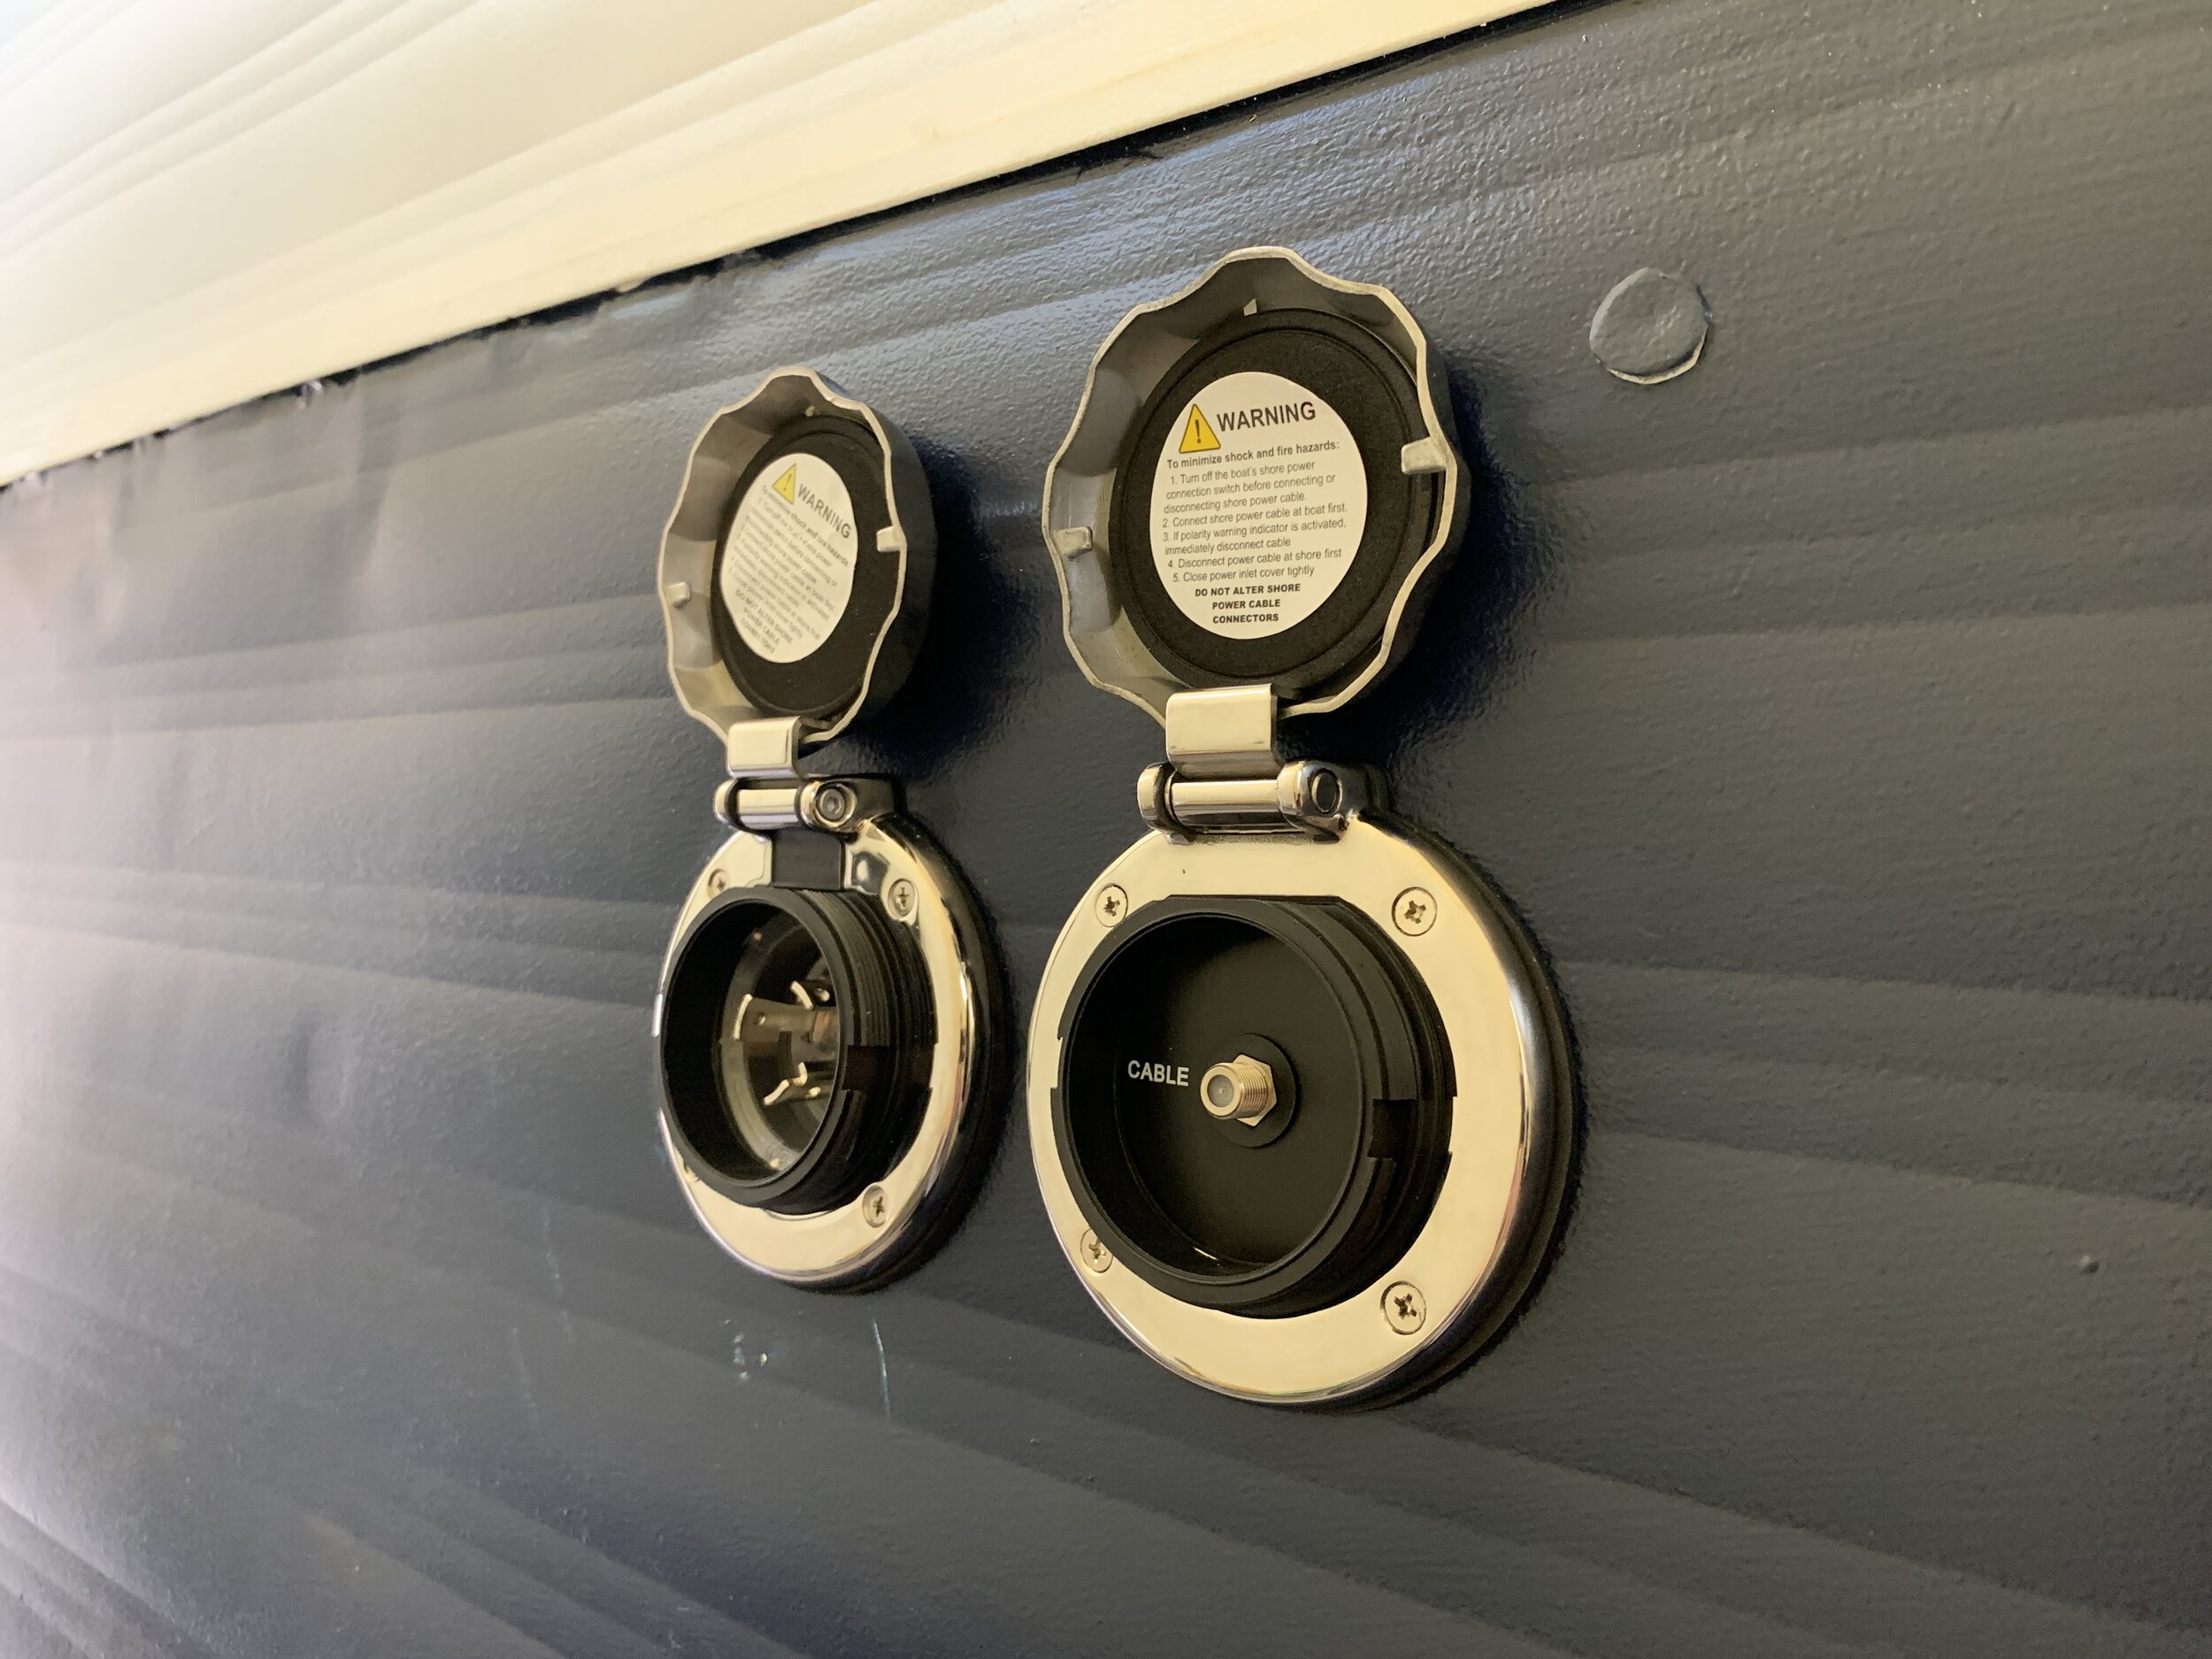
Incoming shore power (30 Amp port)
Weather-protected 120V electrical socket
Coax cable hookups – one incoming for TV service and one outgoing for TVs themselves
Probably the most important thing that most campers will need from this short list is the port for incoming shore power, since it’s basically the main power source to the whole rig.
How we installed our 30 Amp shore power inlet port
30 Amp inlet port shopping list
3/4” thick plywood – or same thickness as your wall studs – in amount large enough to span between studs. (Ours was approximately 1 sq. ft.)
Kreg jig
Kreg screws (in length appropriate for your stud/plywood thickness)
Kreg bit
Painters tape (not used by us for this one, but learn from our mistakes and just use it)
Jigsaw
Crimper/strippers
Drill with phillips head bit or phillips head screw driver
30 Amp female to 15 Amp male dogbone adapter (for testing/plugging into your house’s power)
Choosing our location
First, we knew we wanted our power inlet port to be on the side opposite from our door. Partly for aesthetics, and partly because that’s the side our electrical cabinet + battery were on so it just made sense. Then, we picked a low-ish area (again, aesthetics) that was big enough to be drilled and cut into without compromising the structural studs we’d already installed, and installed a 3/4” plywood support big enough to fill the space in between the studs using pocket holes + Kreg screws.
You can kind of see in the photo below the placement we went with, kind of above the wheel well. (Please forgive the awful photos – there’s only about 2 feet between this side of the camper and the garage wall, so our options are kind of limited…)
Installing the port
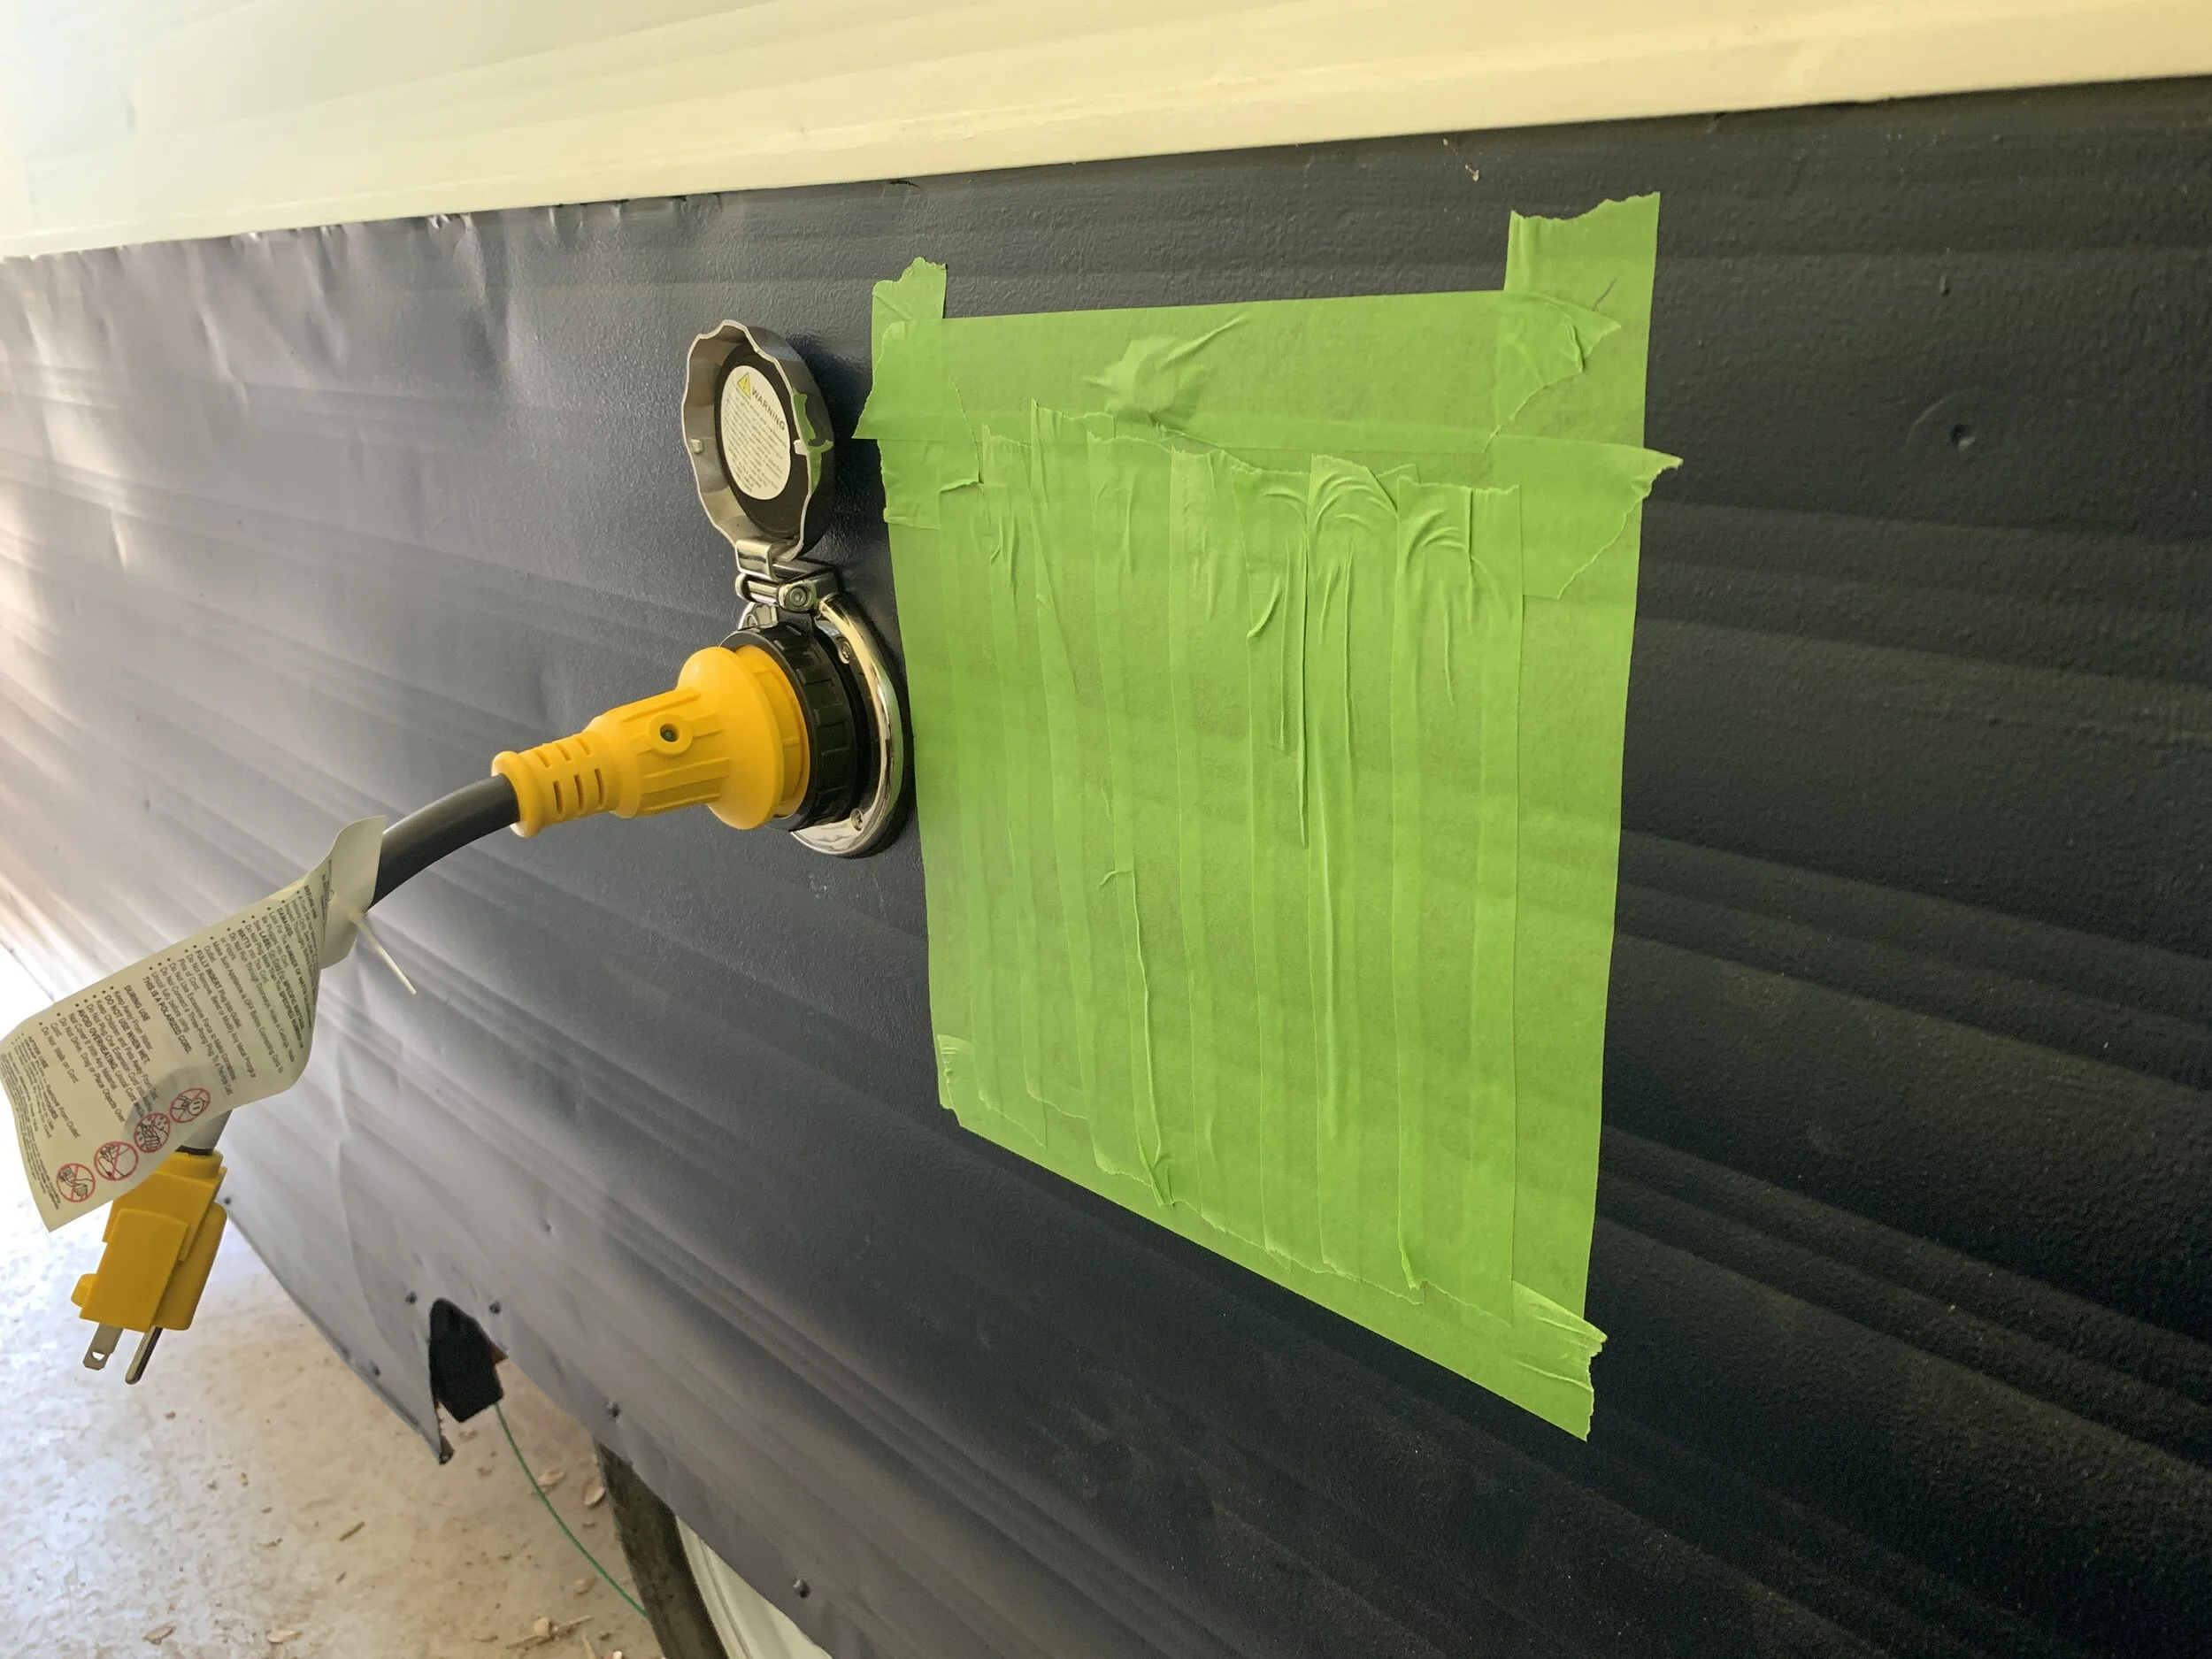
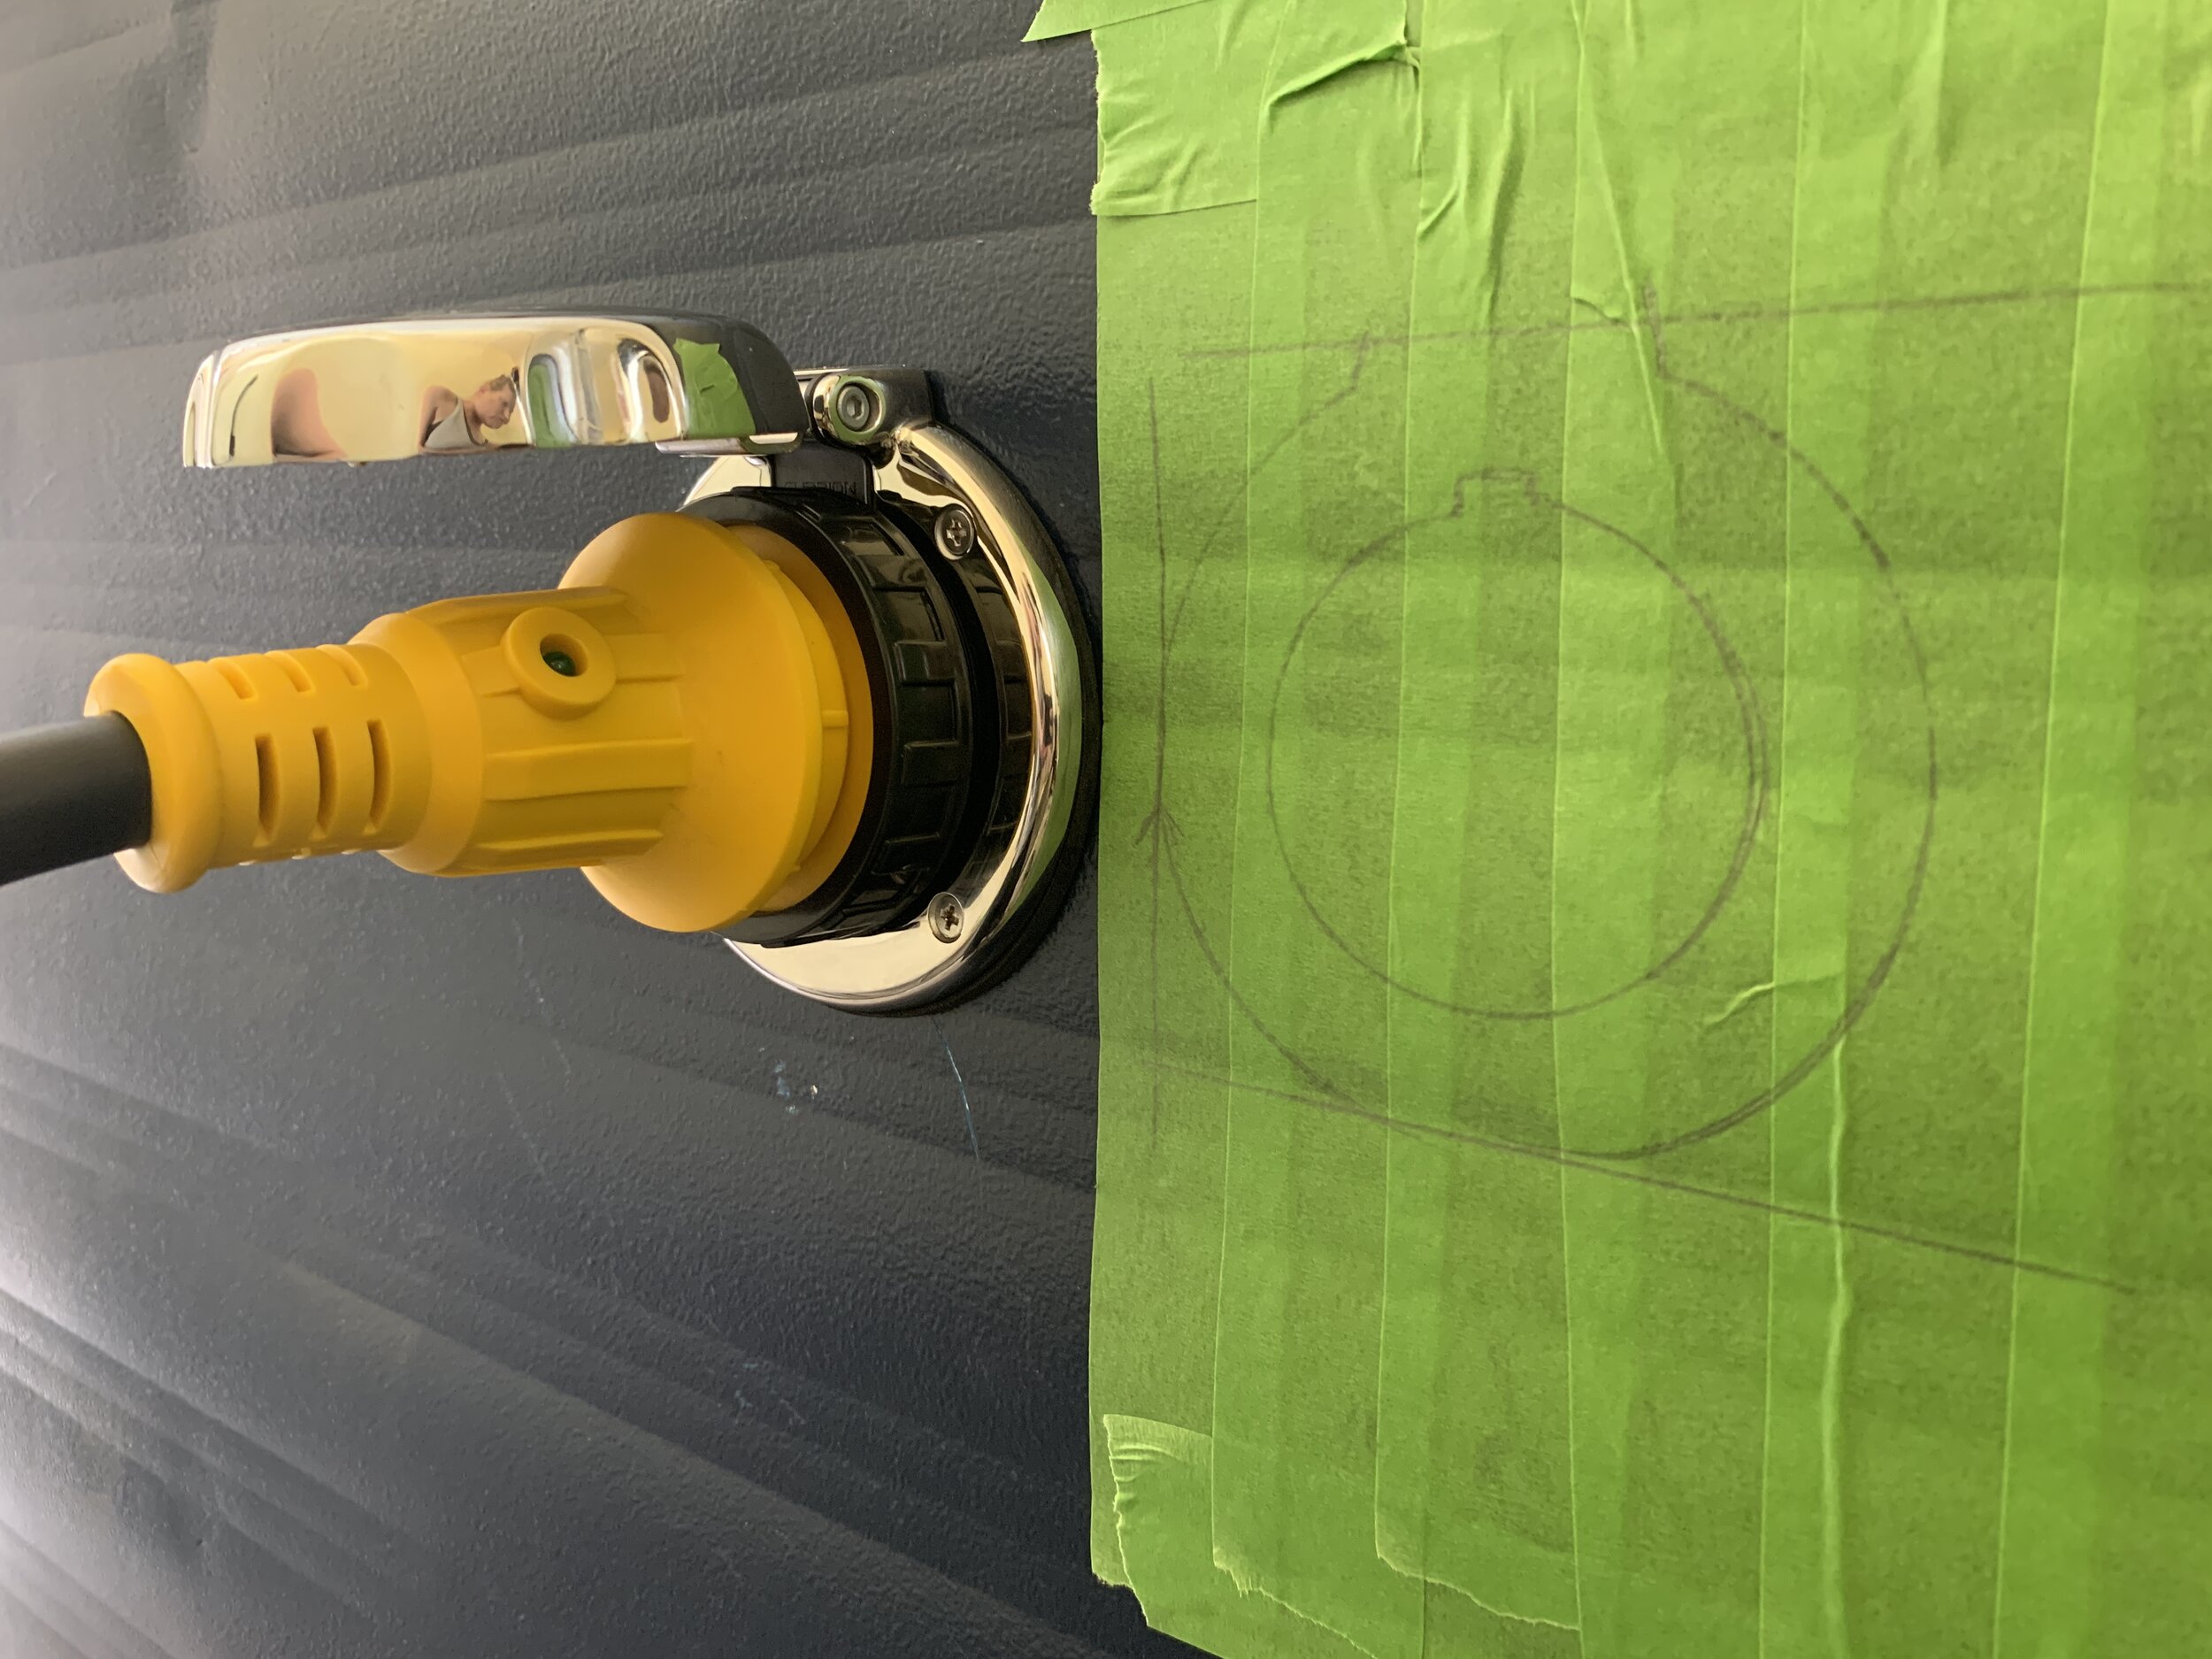
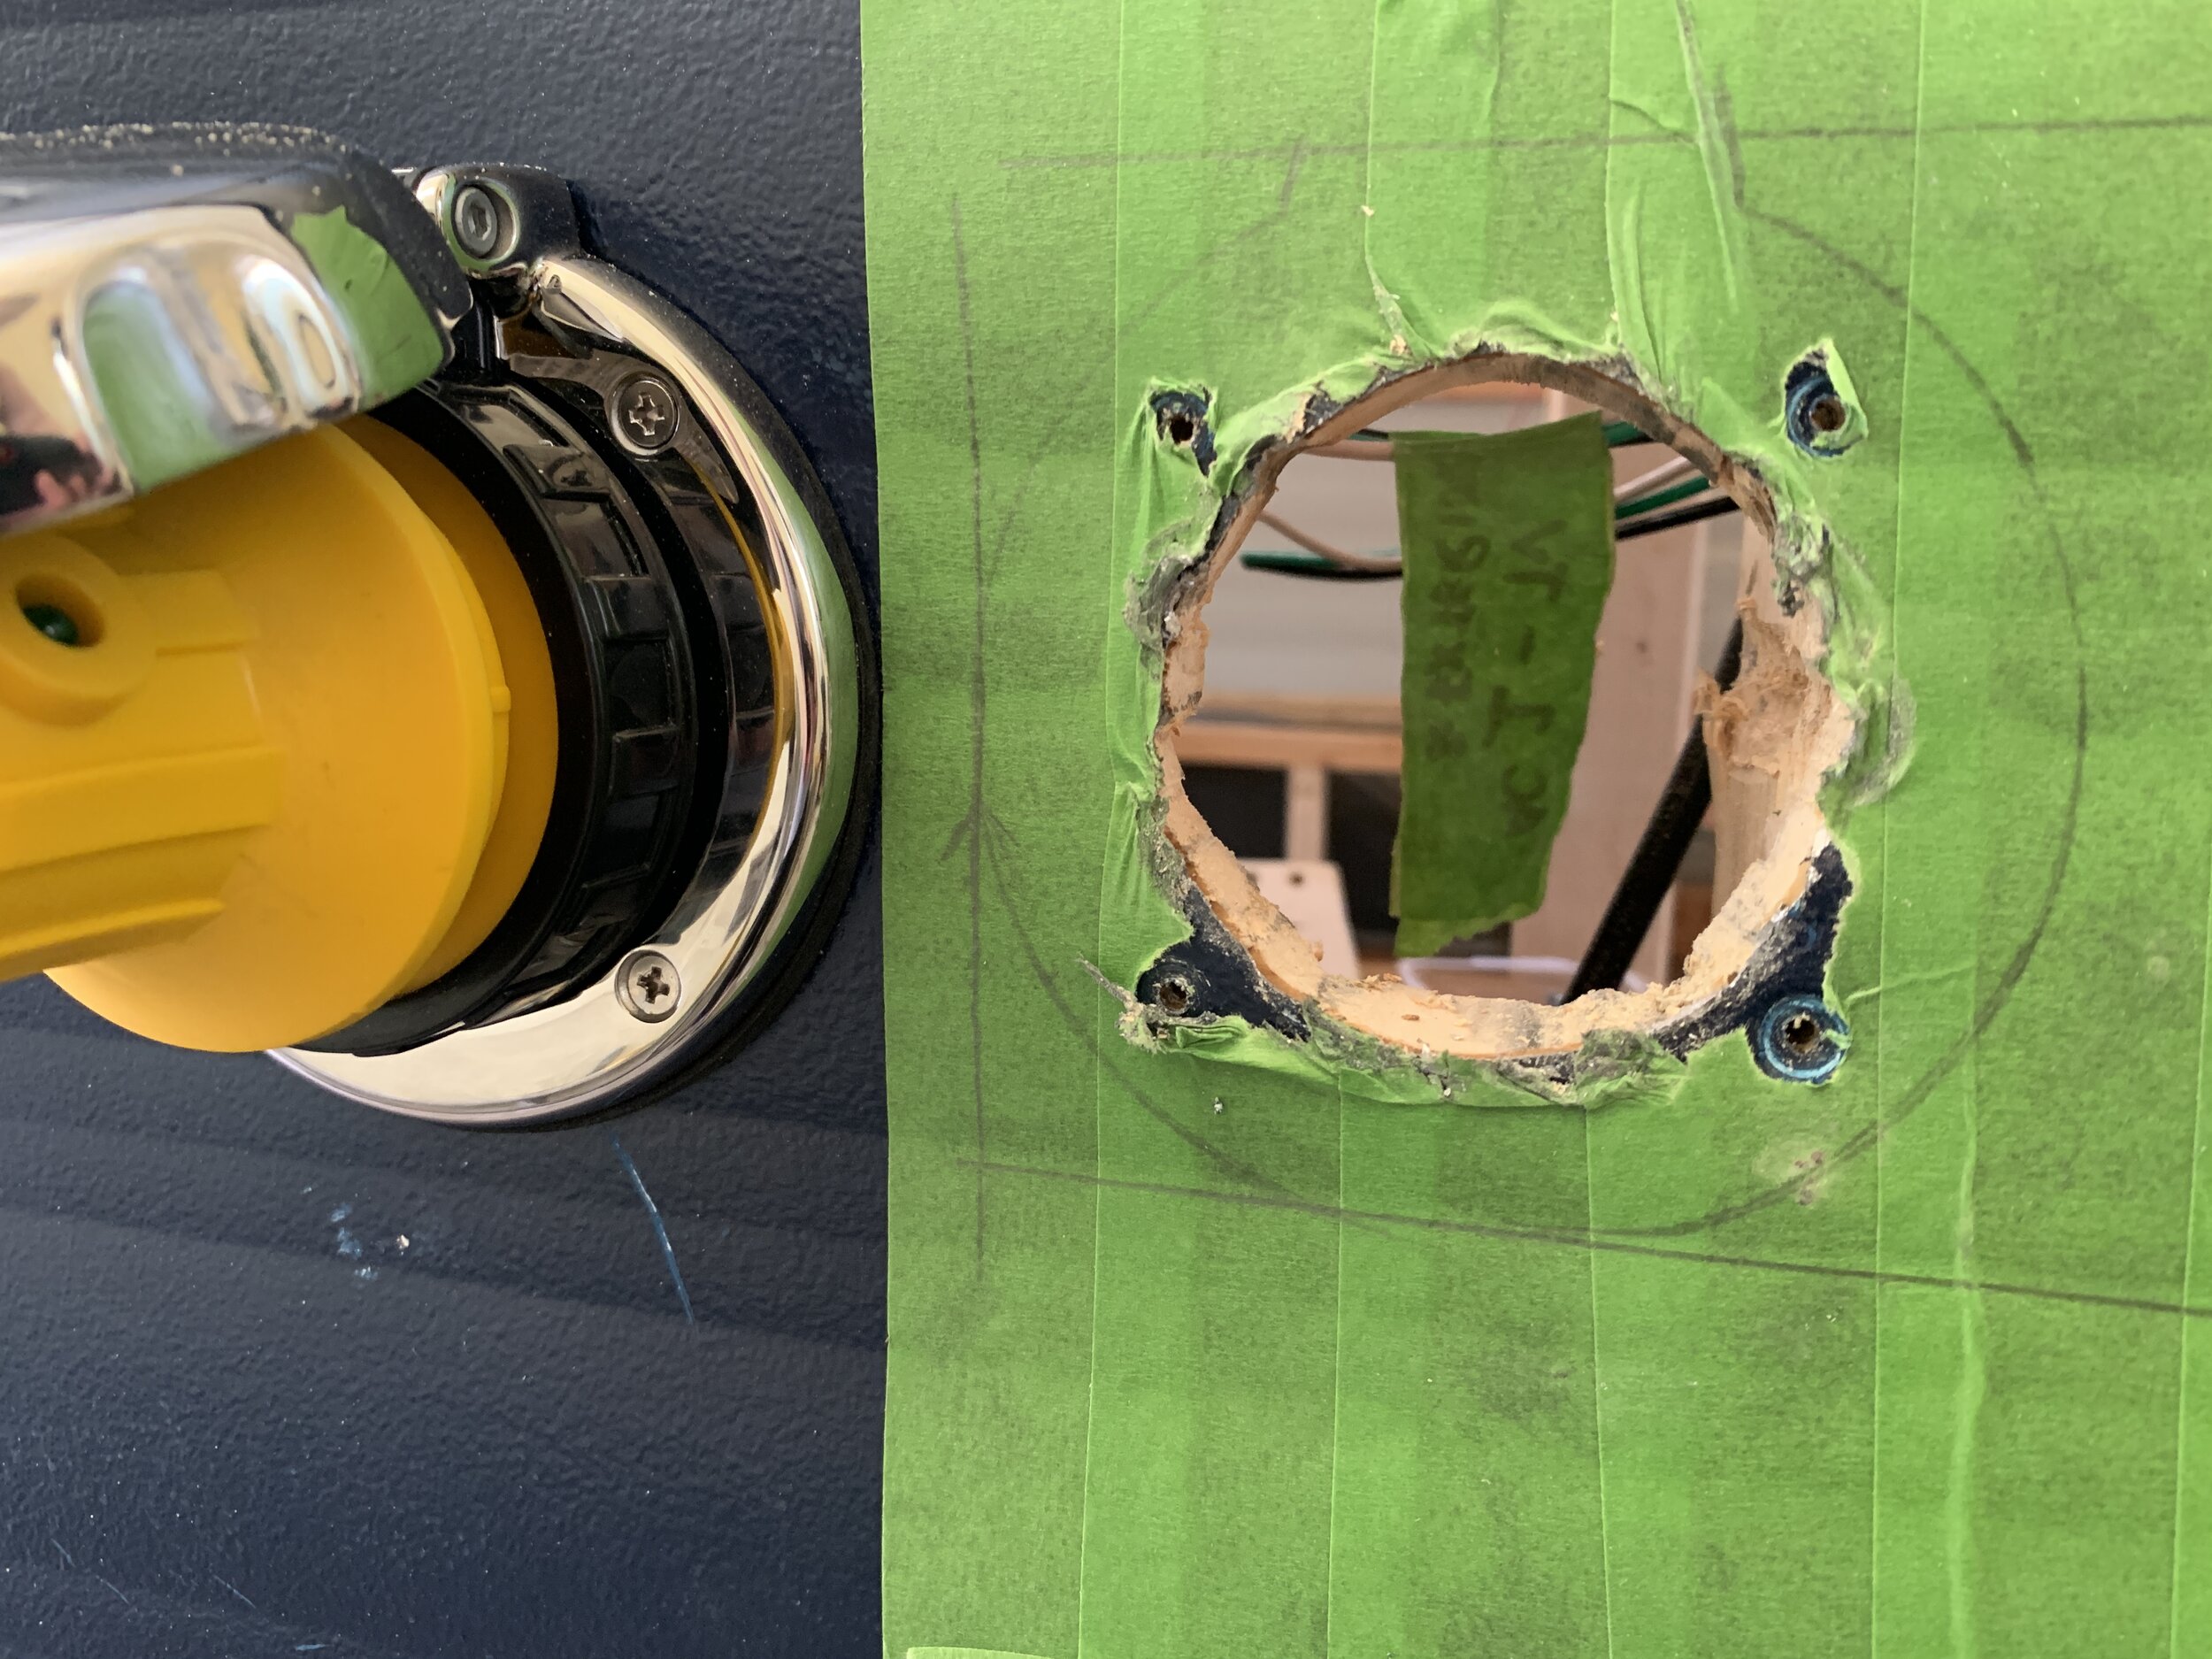
Once our location was chosen and our plywood supports were in place, we marked out the interior shape and four small mounting holes of the included foam gasket with a Sharpie. It’s important to note there’s a small margin of error between the hole size that needs to be cut for the port to stick through and the mounting screw holes. You don’t want to cut the main hole so large that you accidentally remove the parts of the plywood you’ll need to screw the ring portion of the port into to secure it to the wall – so be careful and take your time when tracing and cutting this hole. We drilled multiple holes around the inner perimeter of the drawn shape and connected the dots using the jigsaw to cut our gasket/port shape. Then we predrilled our four little screw holes around that.


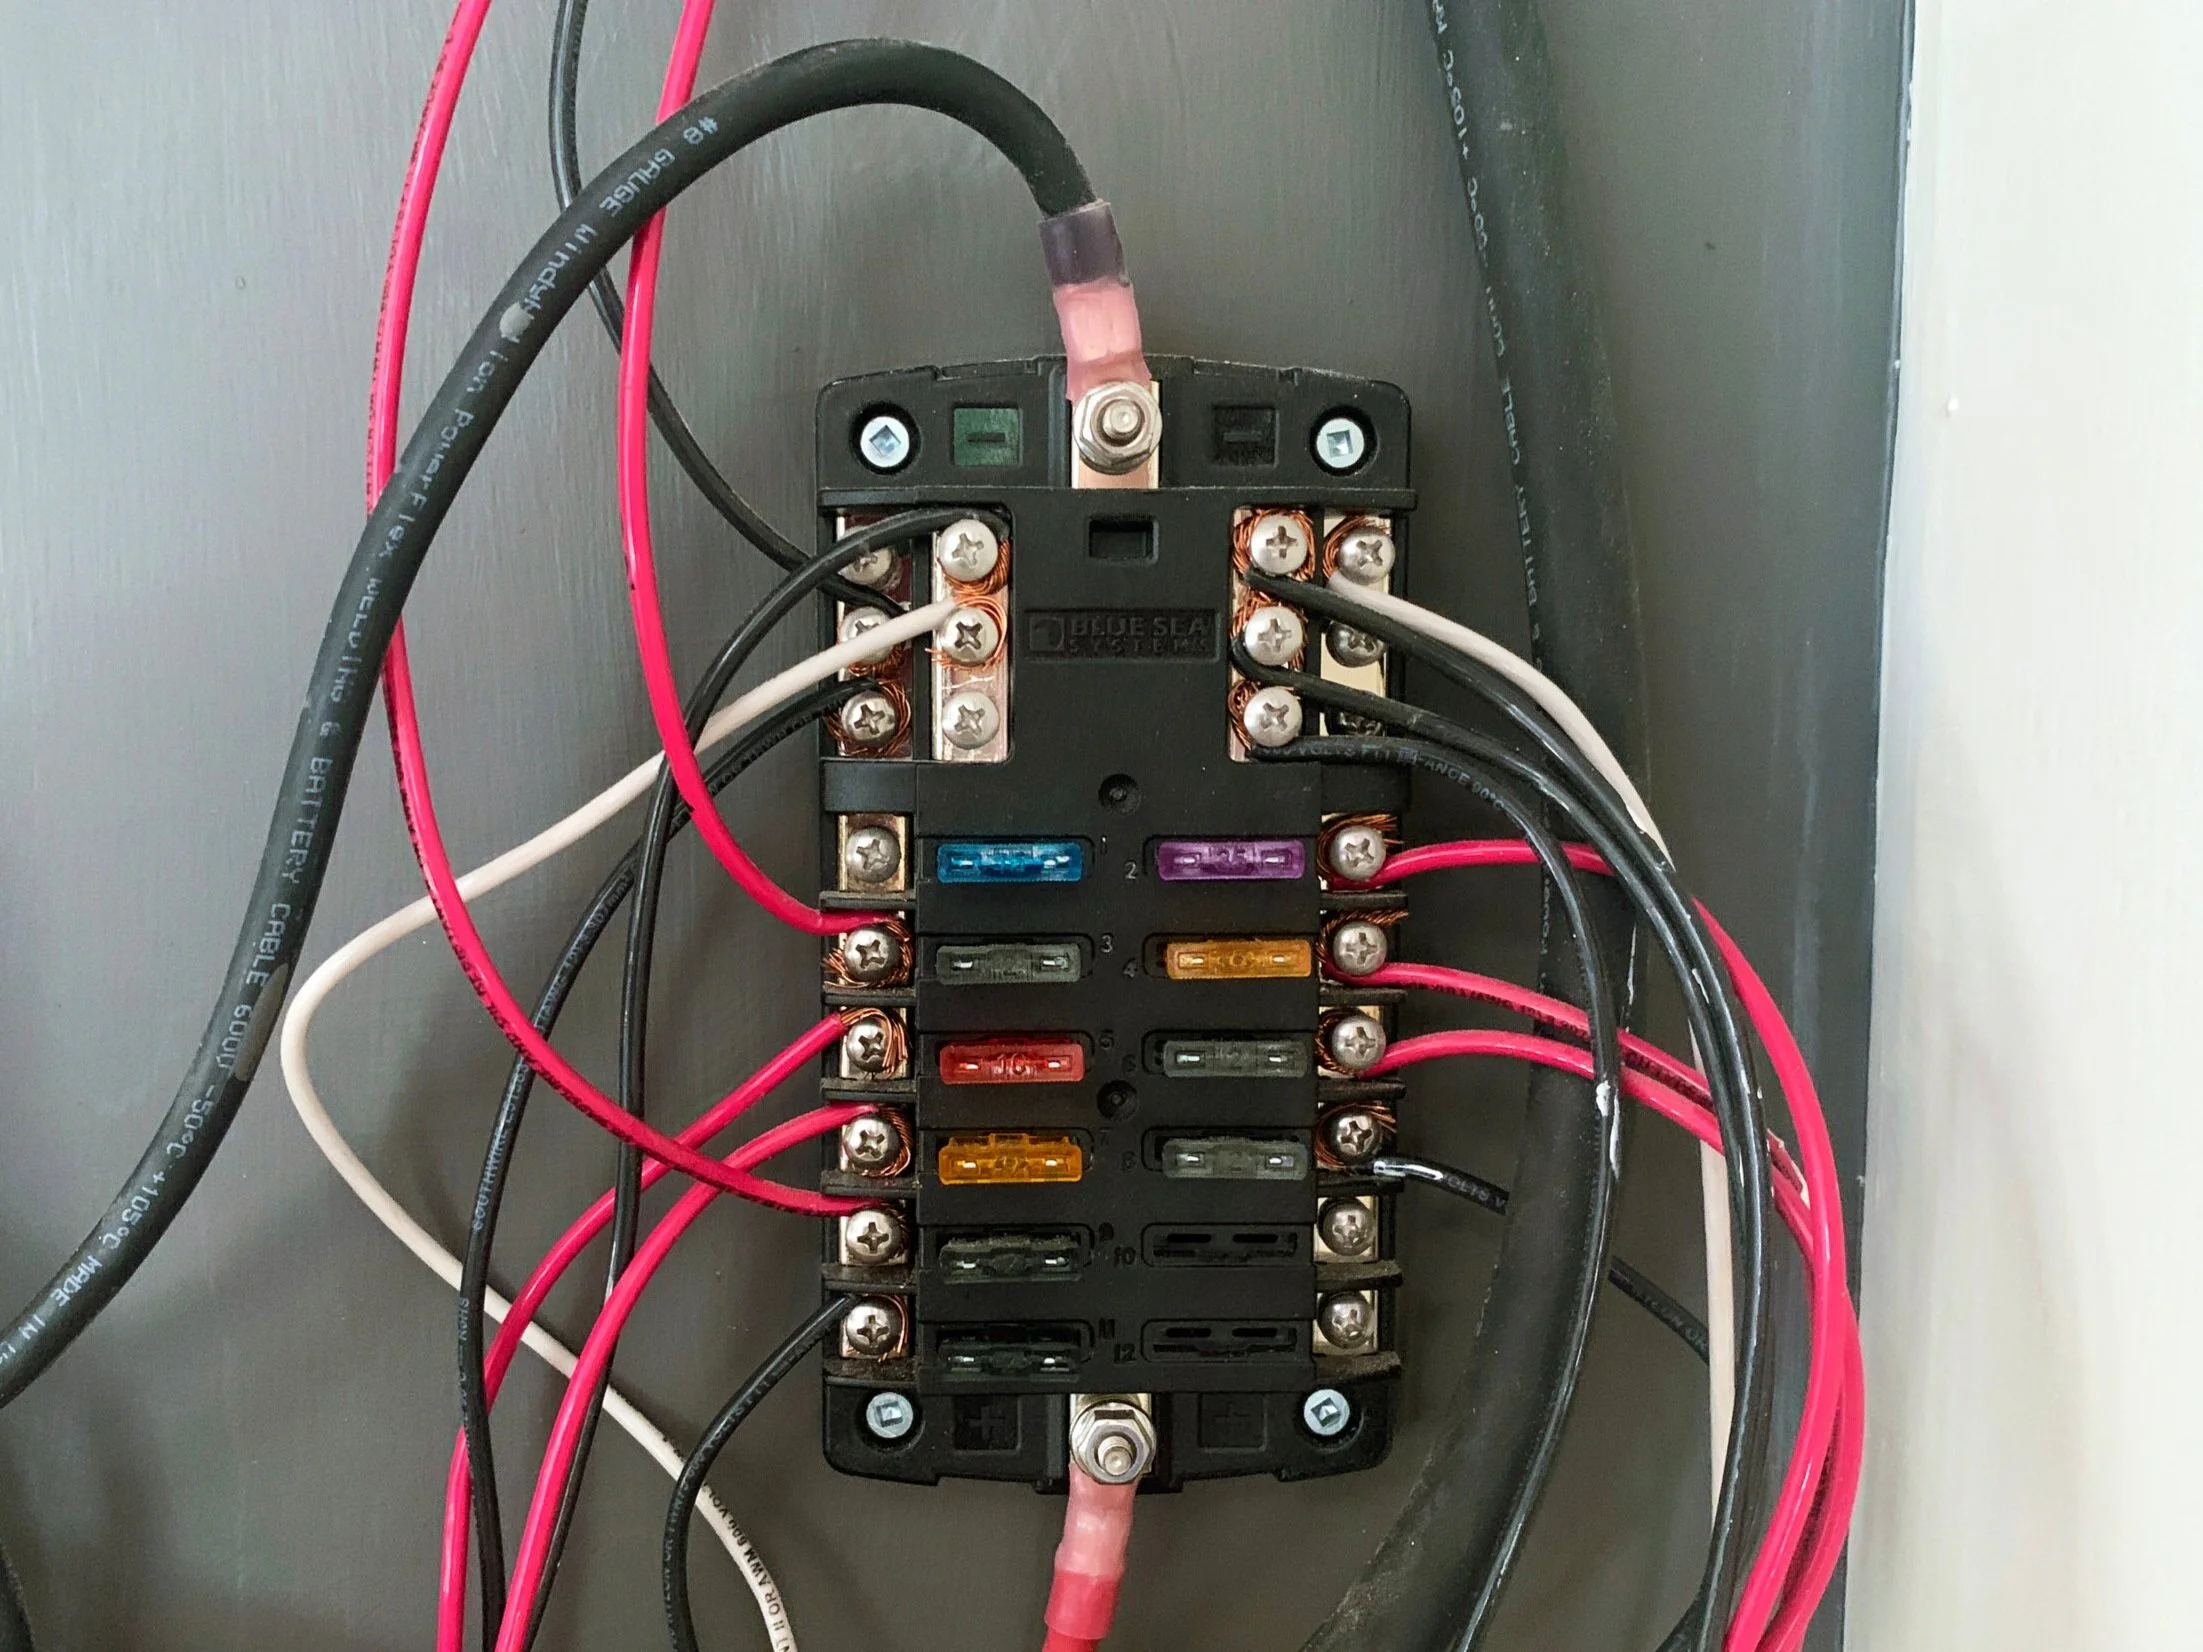
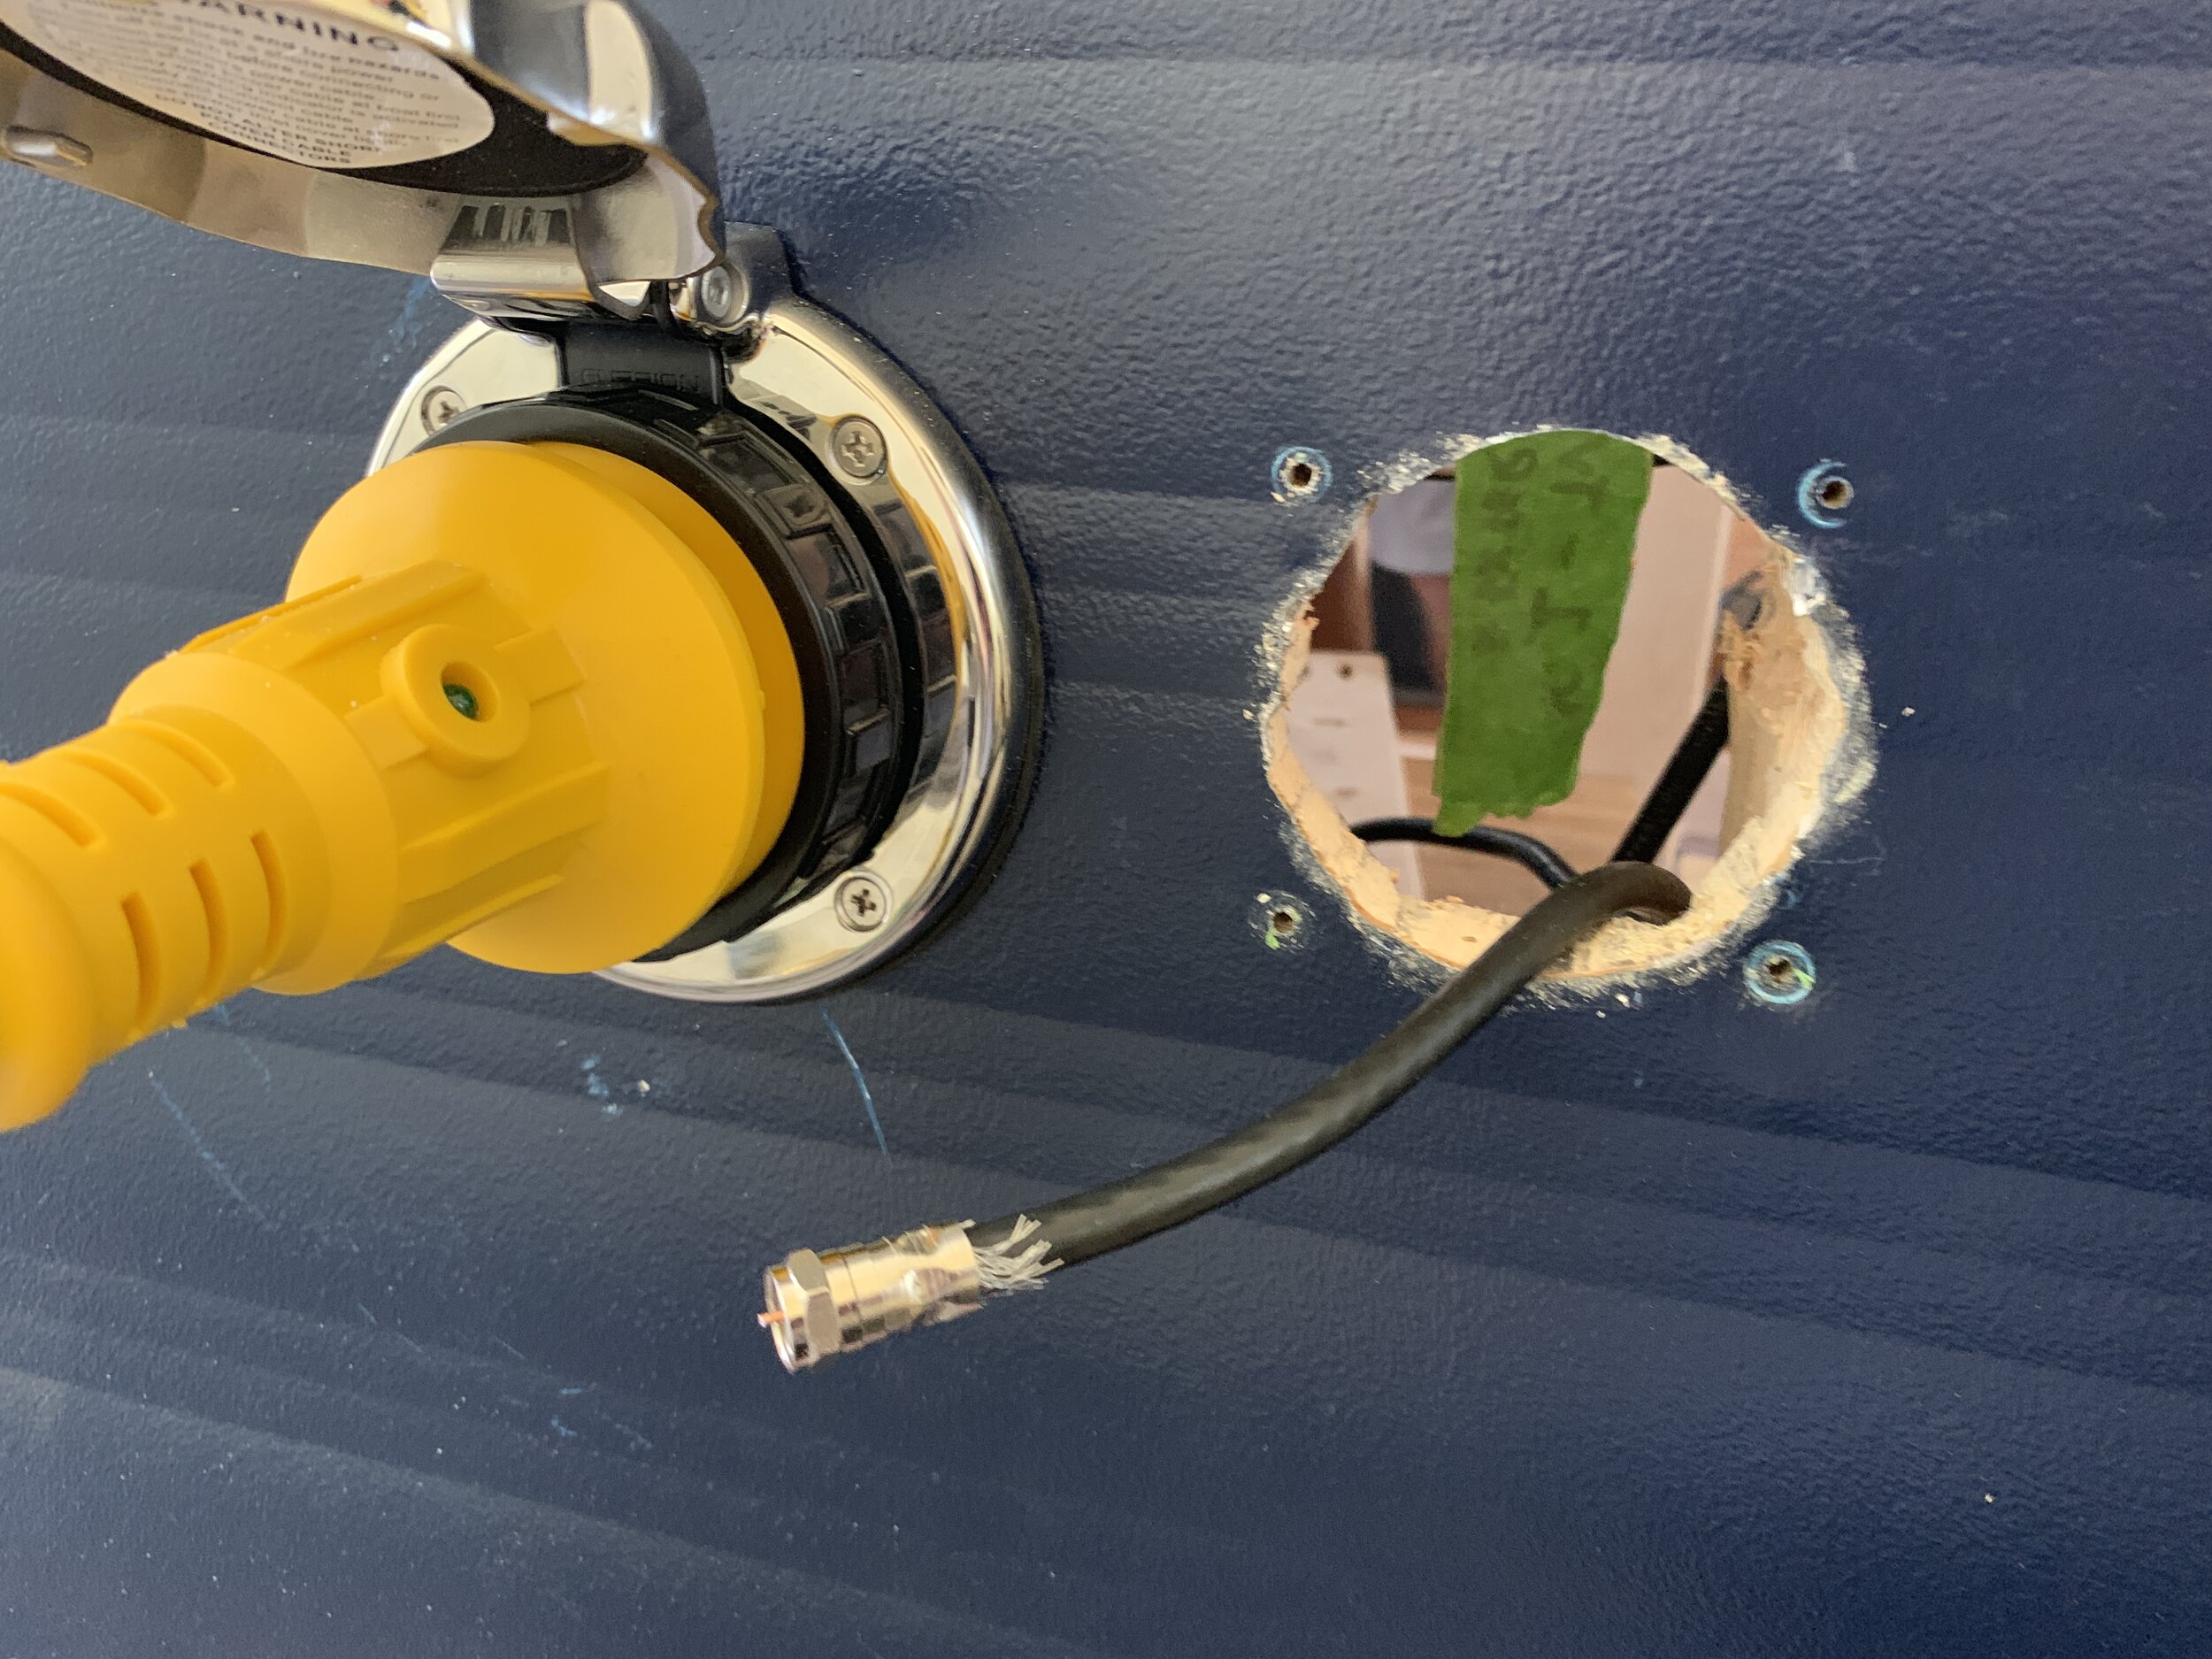
As previously (briefly) mentioned in our electrical system post, we cut off the end of the electrical cord for the converter/charger (the yellow box in our electrical cabinet), threaded it through the new hole in the wall and the foam gasket, stripped the green, black and white wires that were inside the beefier black cord and connected each to the color-coded holes in the backside of this port. (This means when we plug into shore power through this 30 Amp port, the first stop in the electrical system we built is the converter/charger before heading off to charge the battery.)

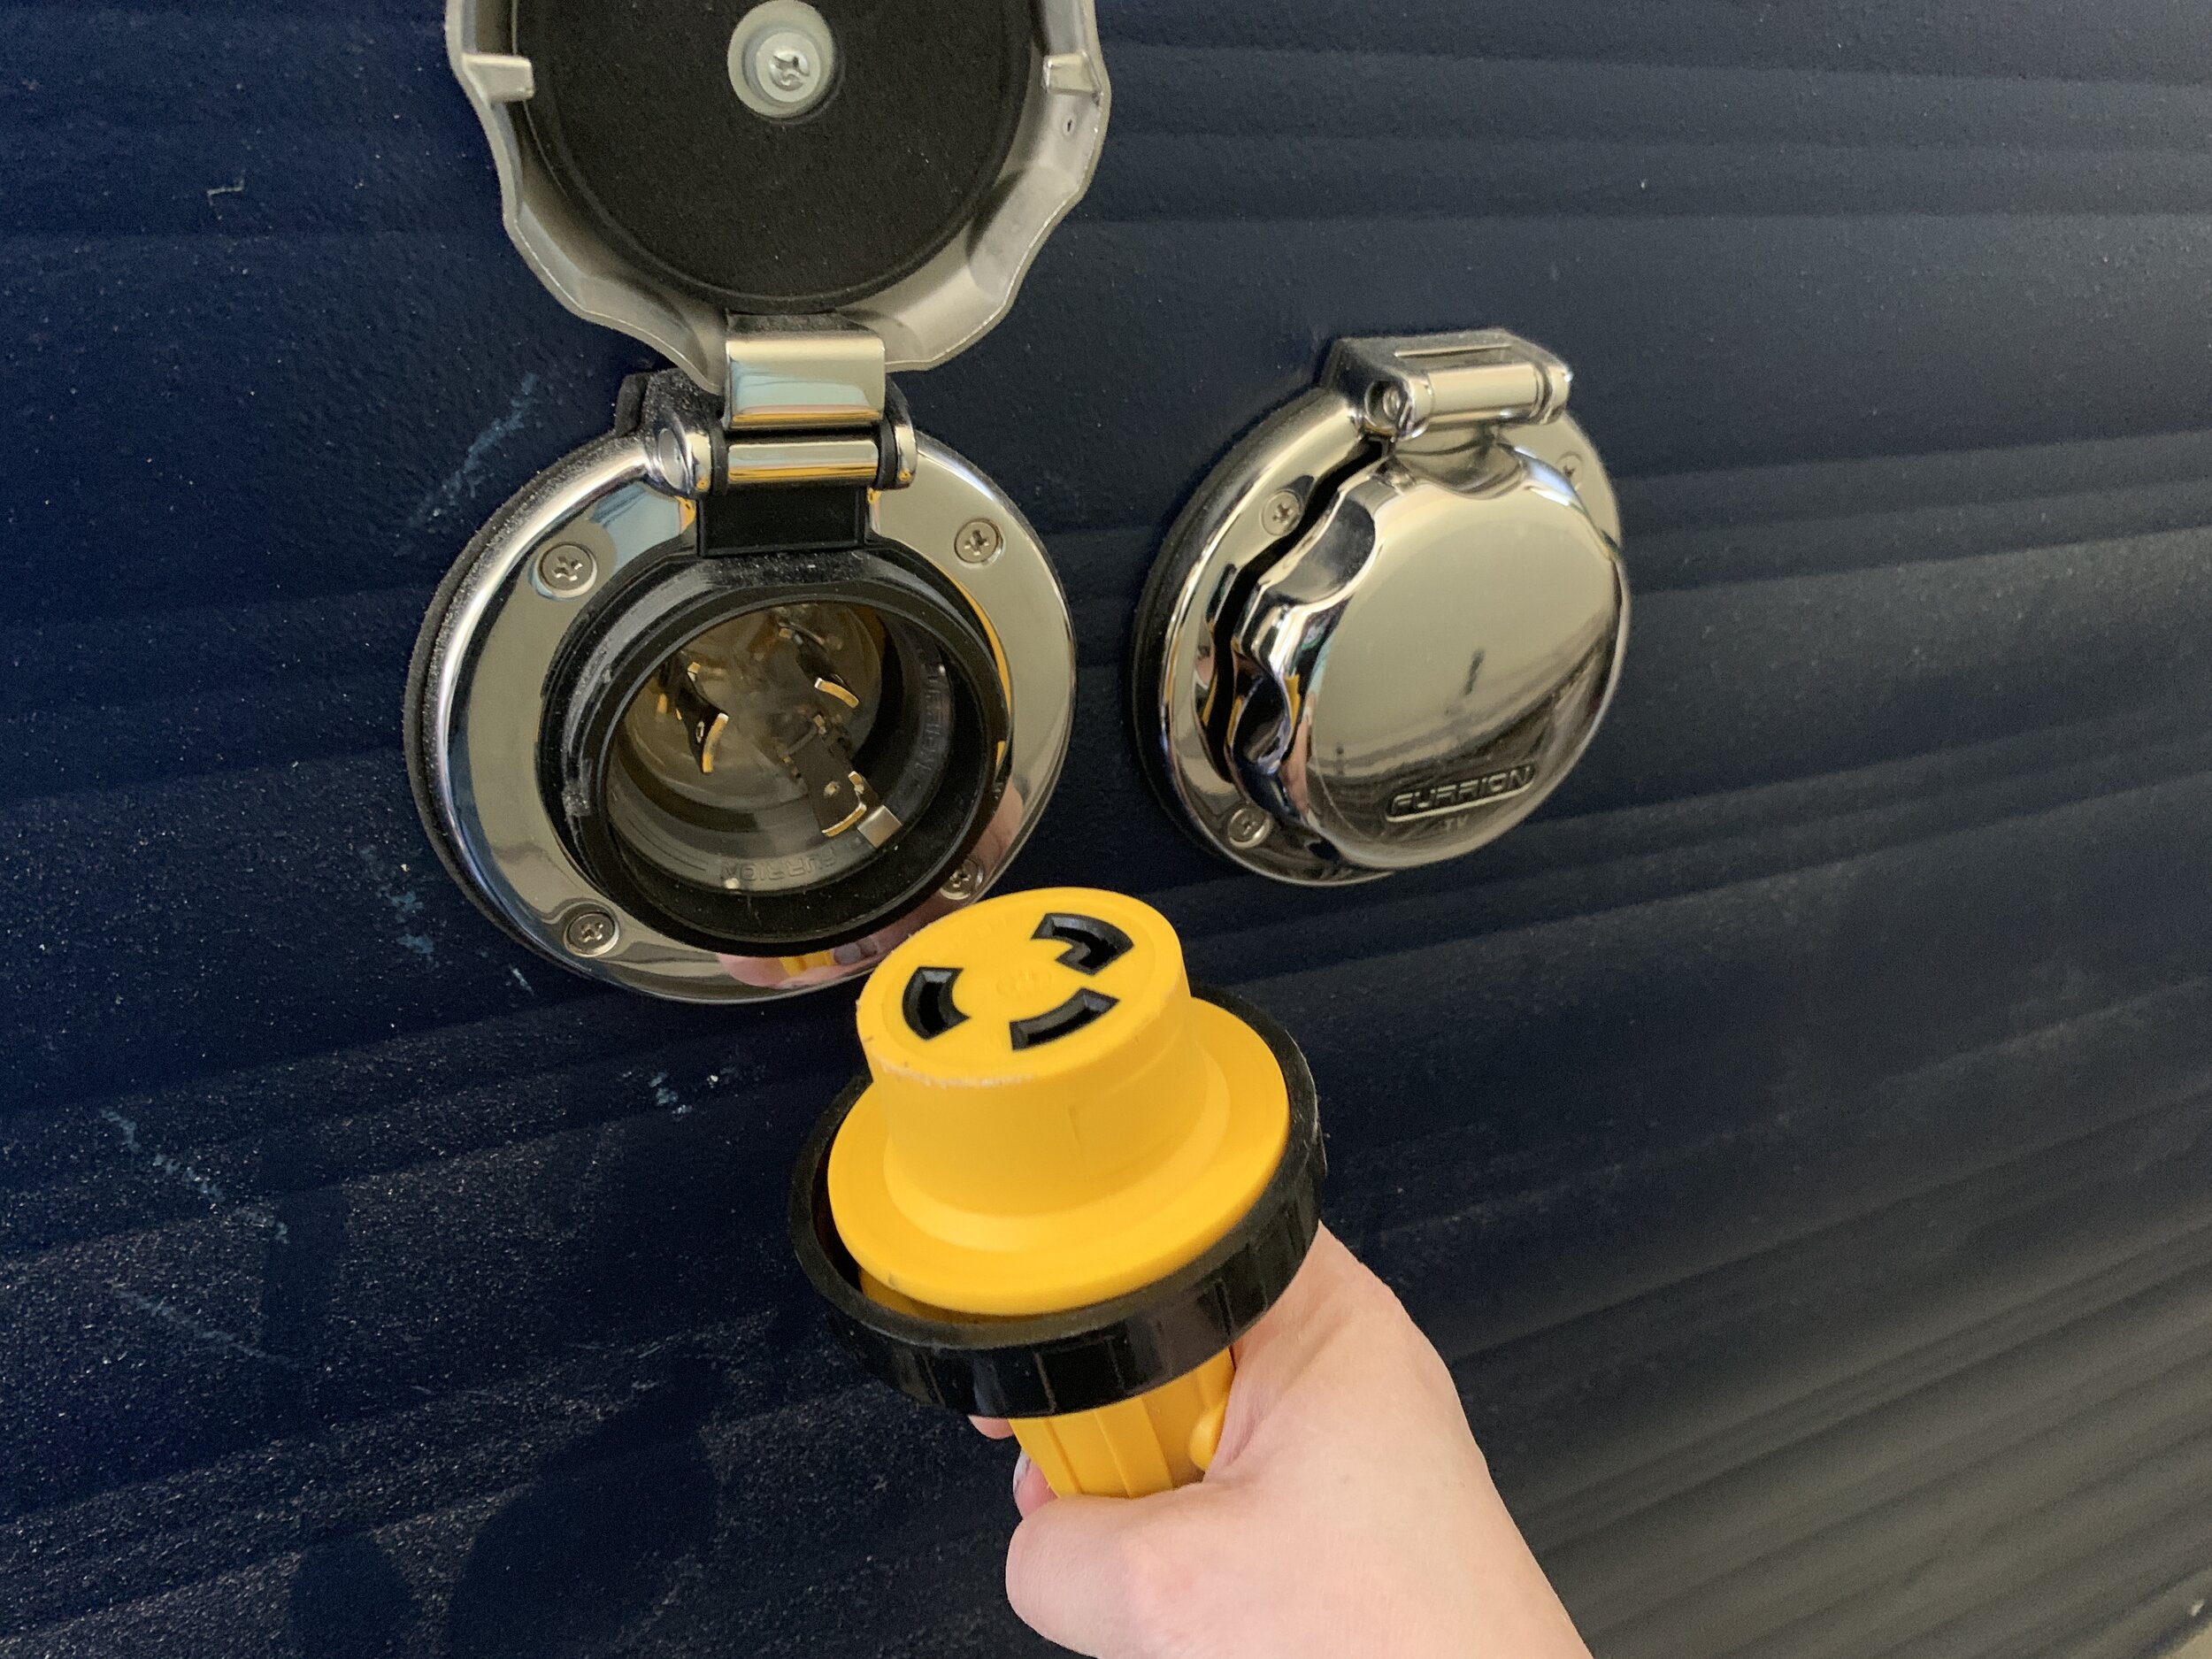

Once we had the electrical wiring in place, we tested it to make sure our connections were good by connecting our 30 Amp female to 15 Amp male dogbone to the camper port and the house (via extension cord) before permanently mounting it to the side of the Cameo. After we confirmed the electrical was working (as indicated by the light on our converter/charger), we lined up all of the parts with the shape we’d cut into the camper and secured the metal port from the exterior side of the camper with the included screws and tested it all again for good measure.
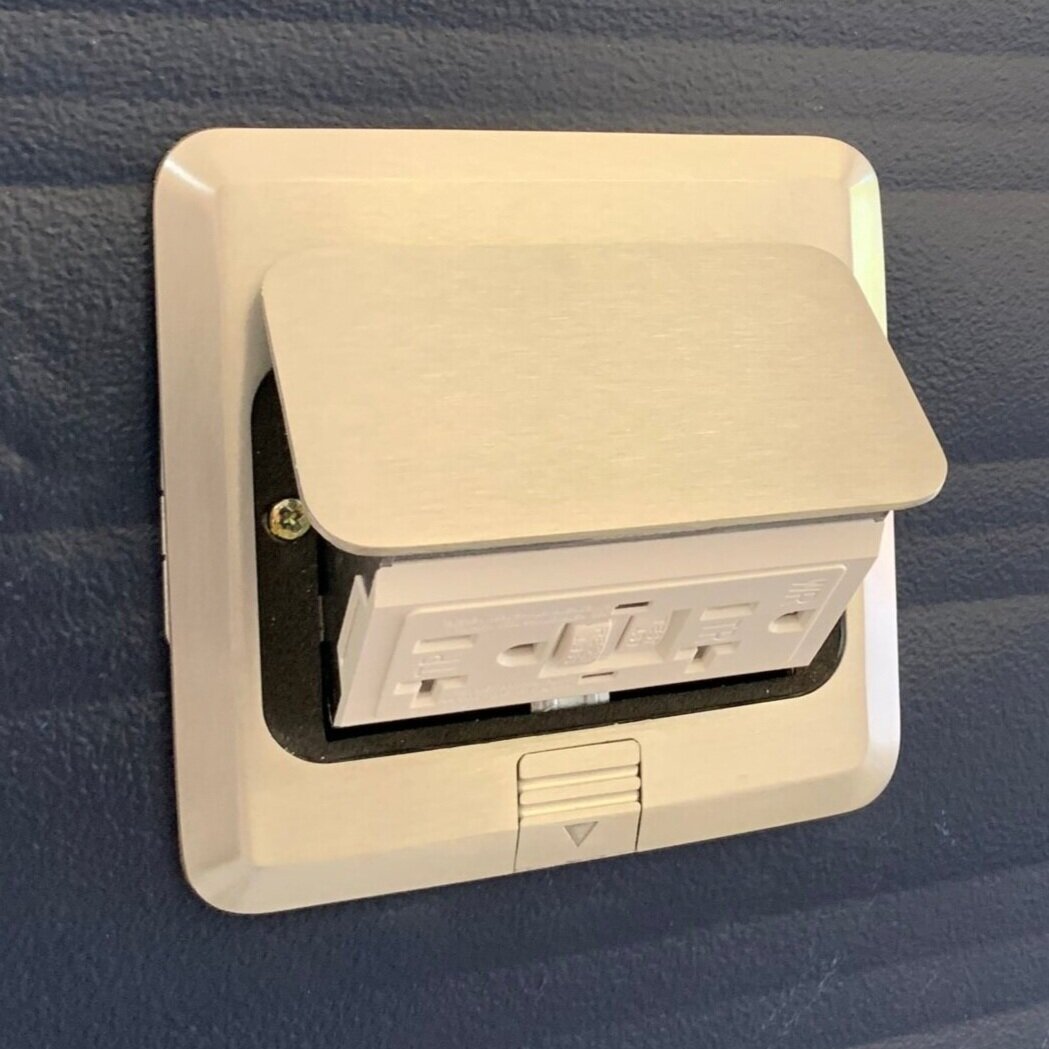
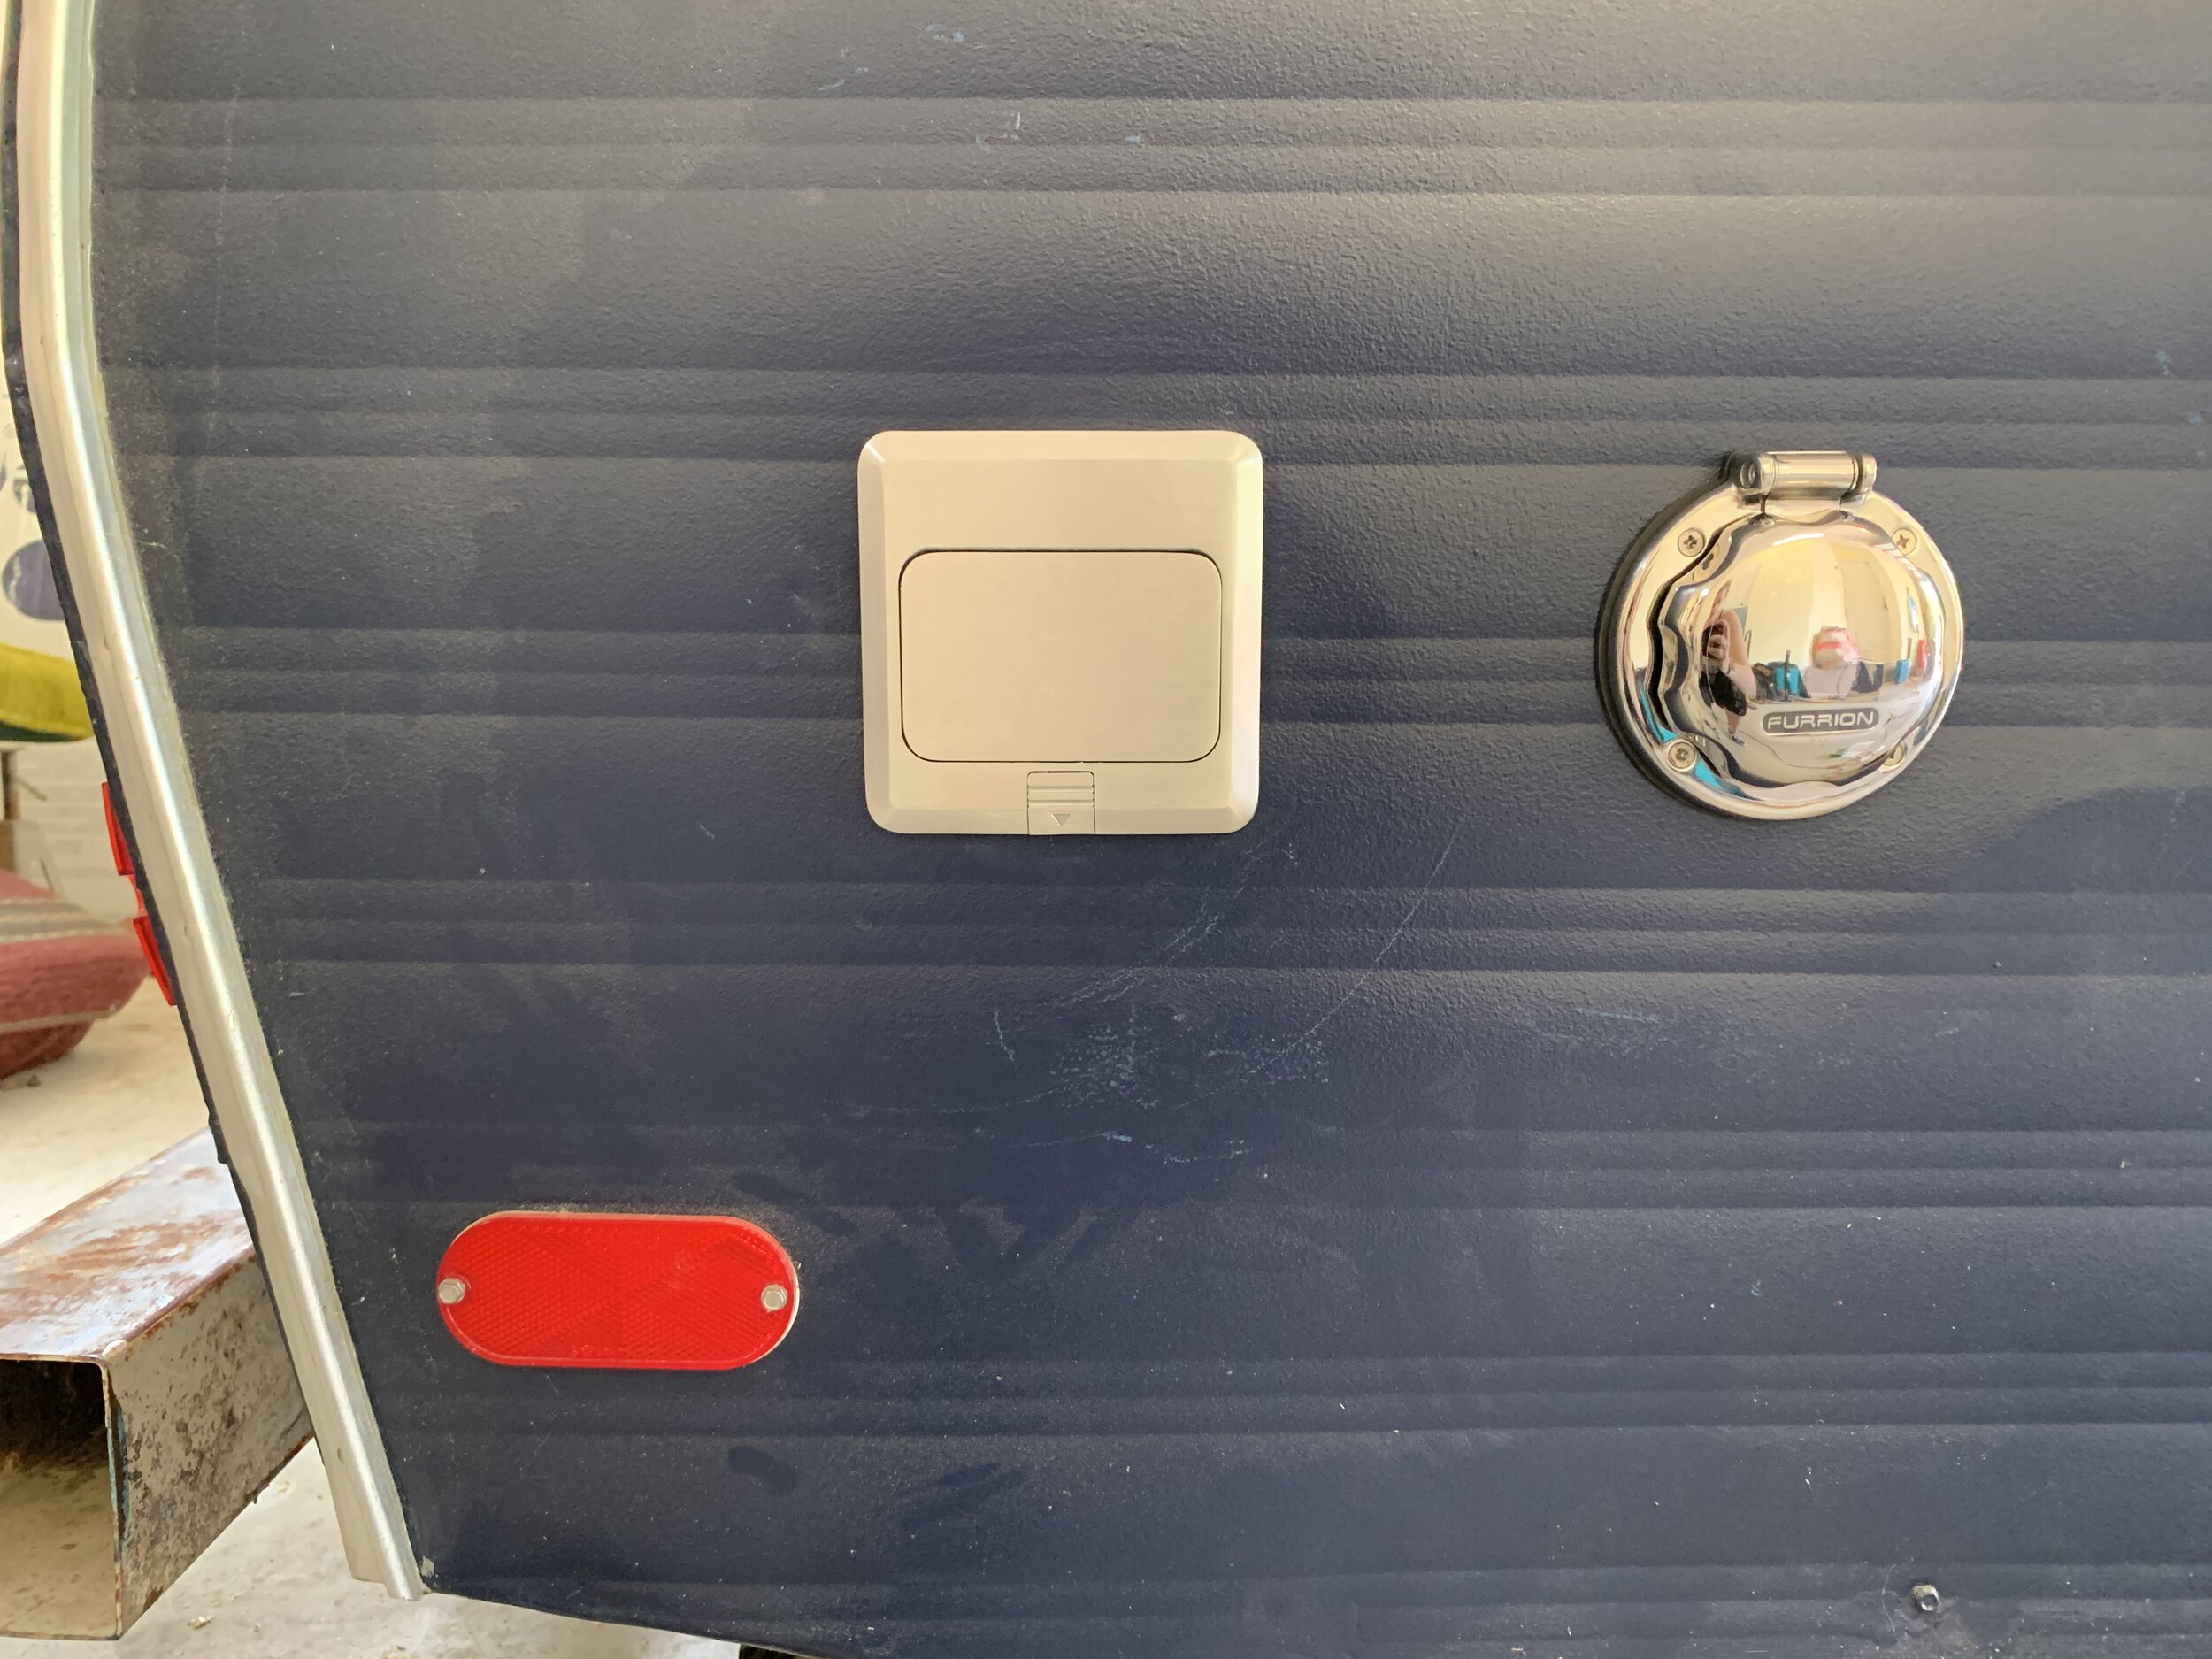
How We installed our 120V exterior outlet
(AKA our plan to tailgate with this beast.) A main driver to this camper is tailgating during football season, and that requires that we have the ability to watch all the games outside on those glorious fall Saturdays.
In addition to the function of an exterior outlet that would be protected from the elements, we wanted an attractive option that would blend in as much as possible with the camper’s exterior and coordinate with the other external ports we’ve got going on.
Our exterior outlet shopping list
This outlet – originally designed to be sunk into floors for a flush appearance, it’s meant to stand up to being mopped over, walked on, etc. and it won’t stick out of the side of our camper when closed, meaning less wind resistance and less chance of damage.
Jigsaw + blades
Painters tape – to help protect your paint job
3/4” thick wood (or the thickness of your wall studs) – we used plywood in most cases. This is so you have something to screw the box into.
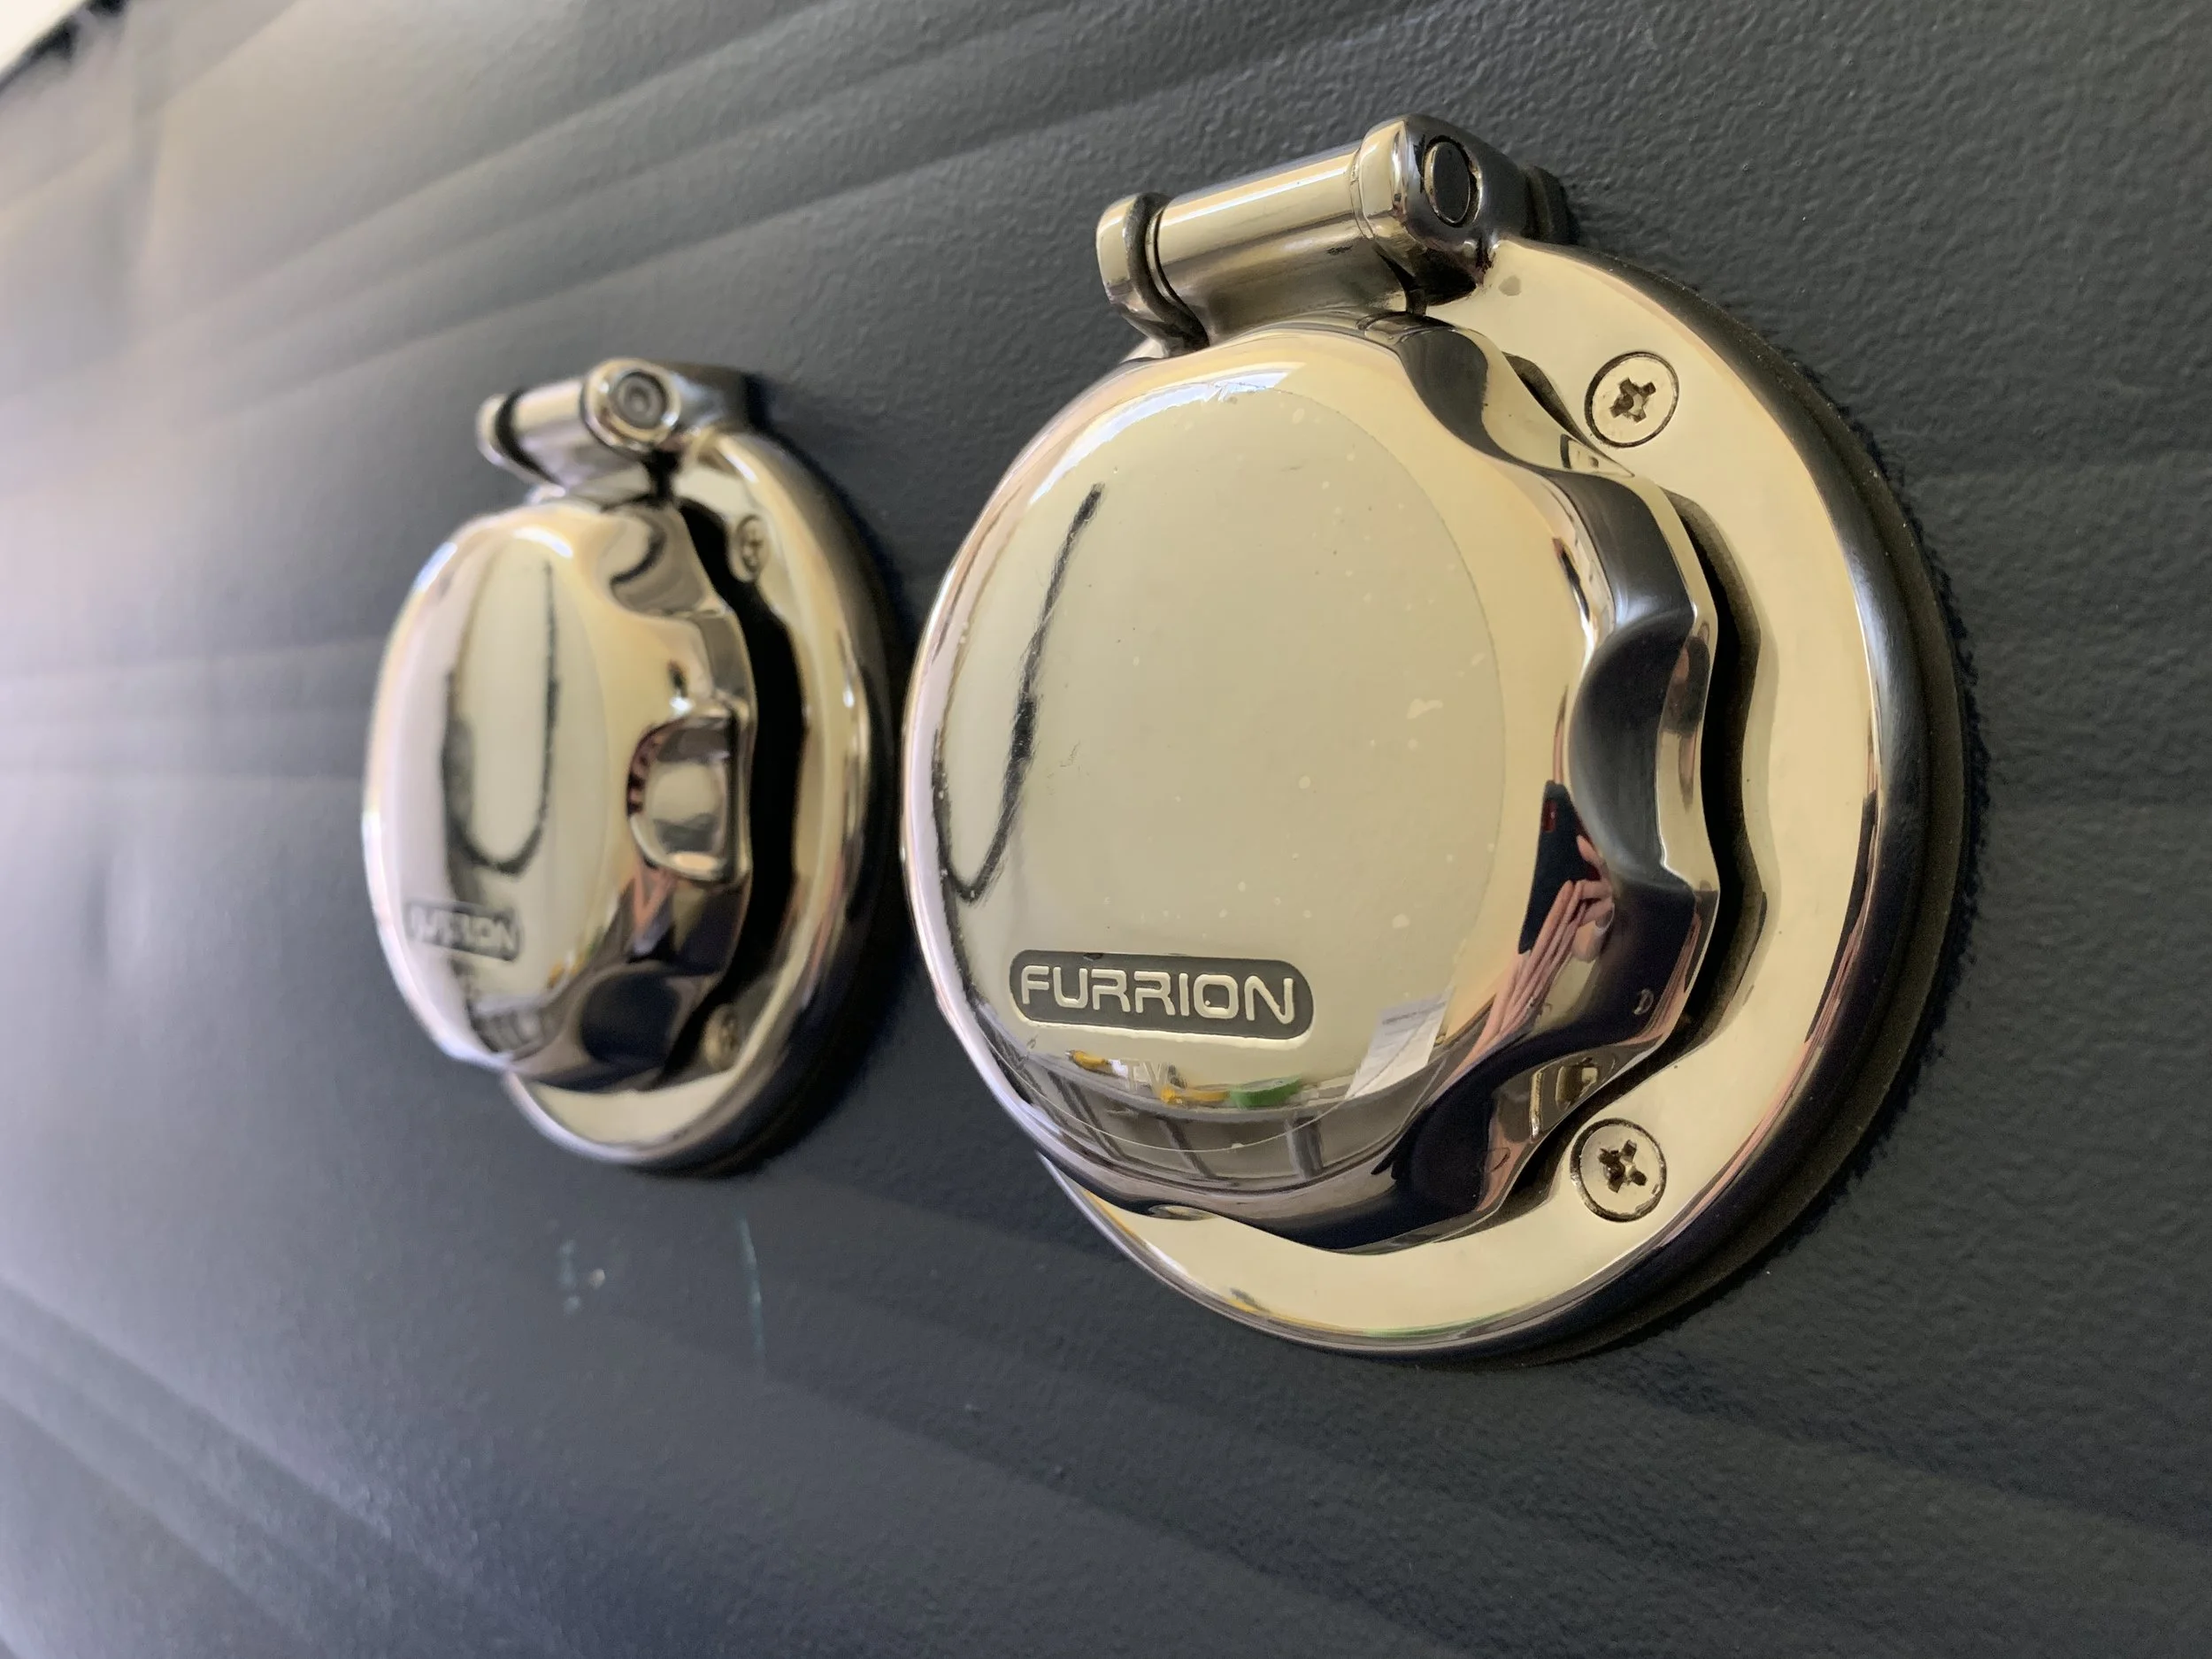
For our door-side ports, being two different shapes and styles we knew we wanted to center them vertically with one another for a clean, organized look, and being opportunists used the sawdust that had accumulated on the side of the camper to finger draw our locations for each before taping off. (Score one point for us non-cleaners!)
This box was a little different than the other style of ports but the basic install is about the same. The main difference is the wires for this one will be your green, black and white and for us stands on its own individual circuit and goes to a standard male 120V plug we attached on the other end to plug into our blue inverter box.
Improving our install method
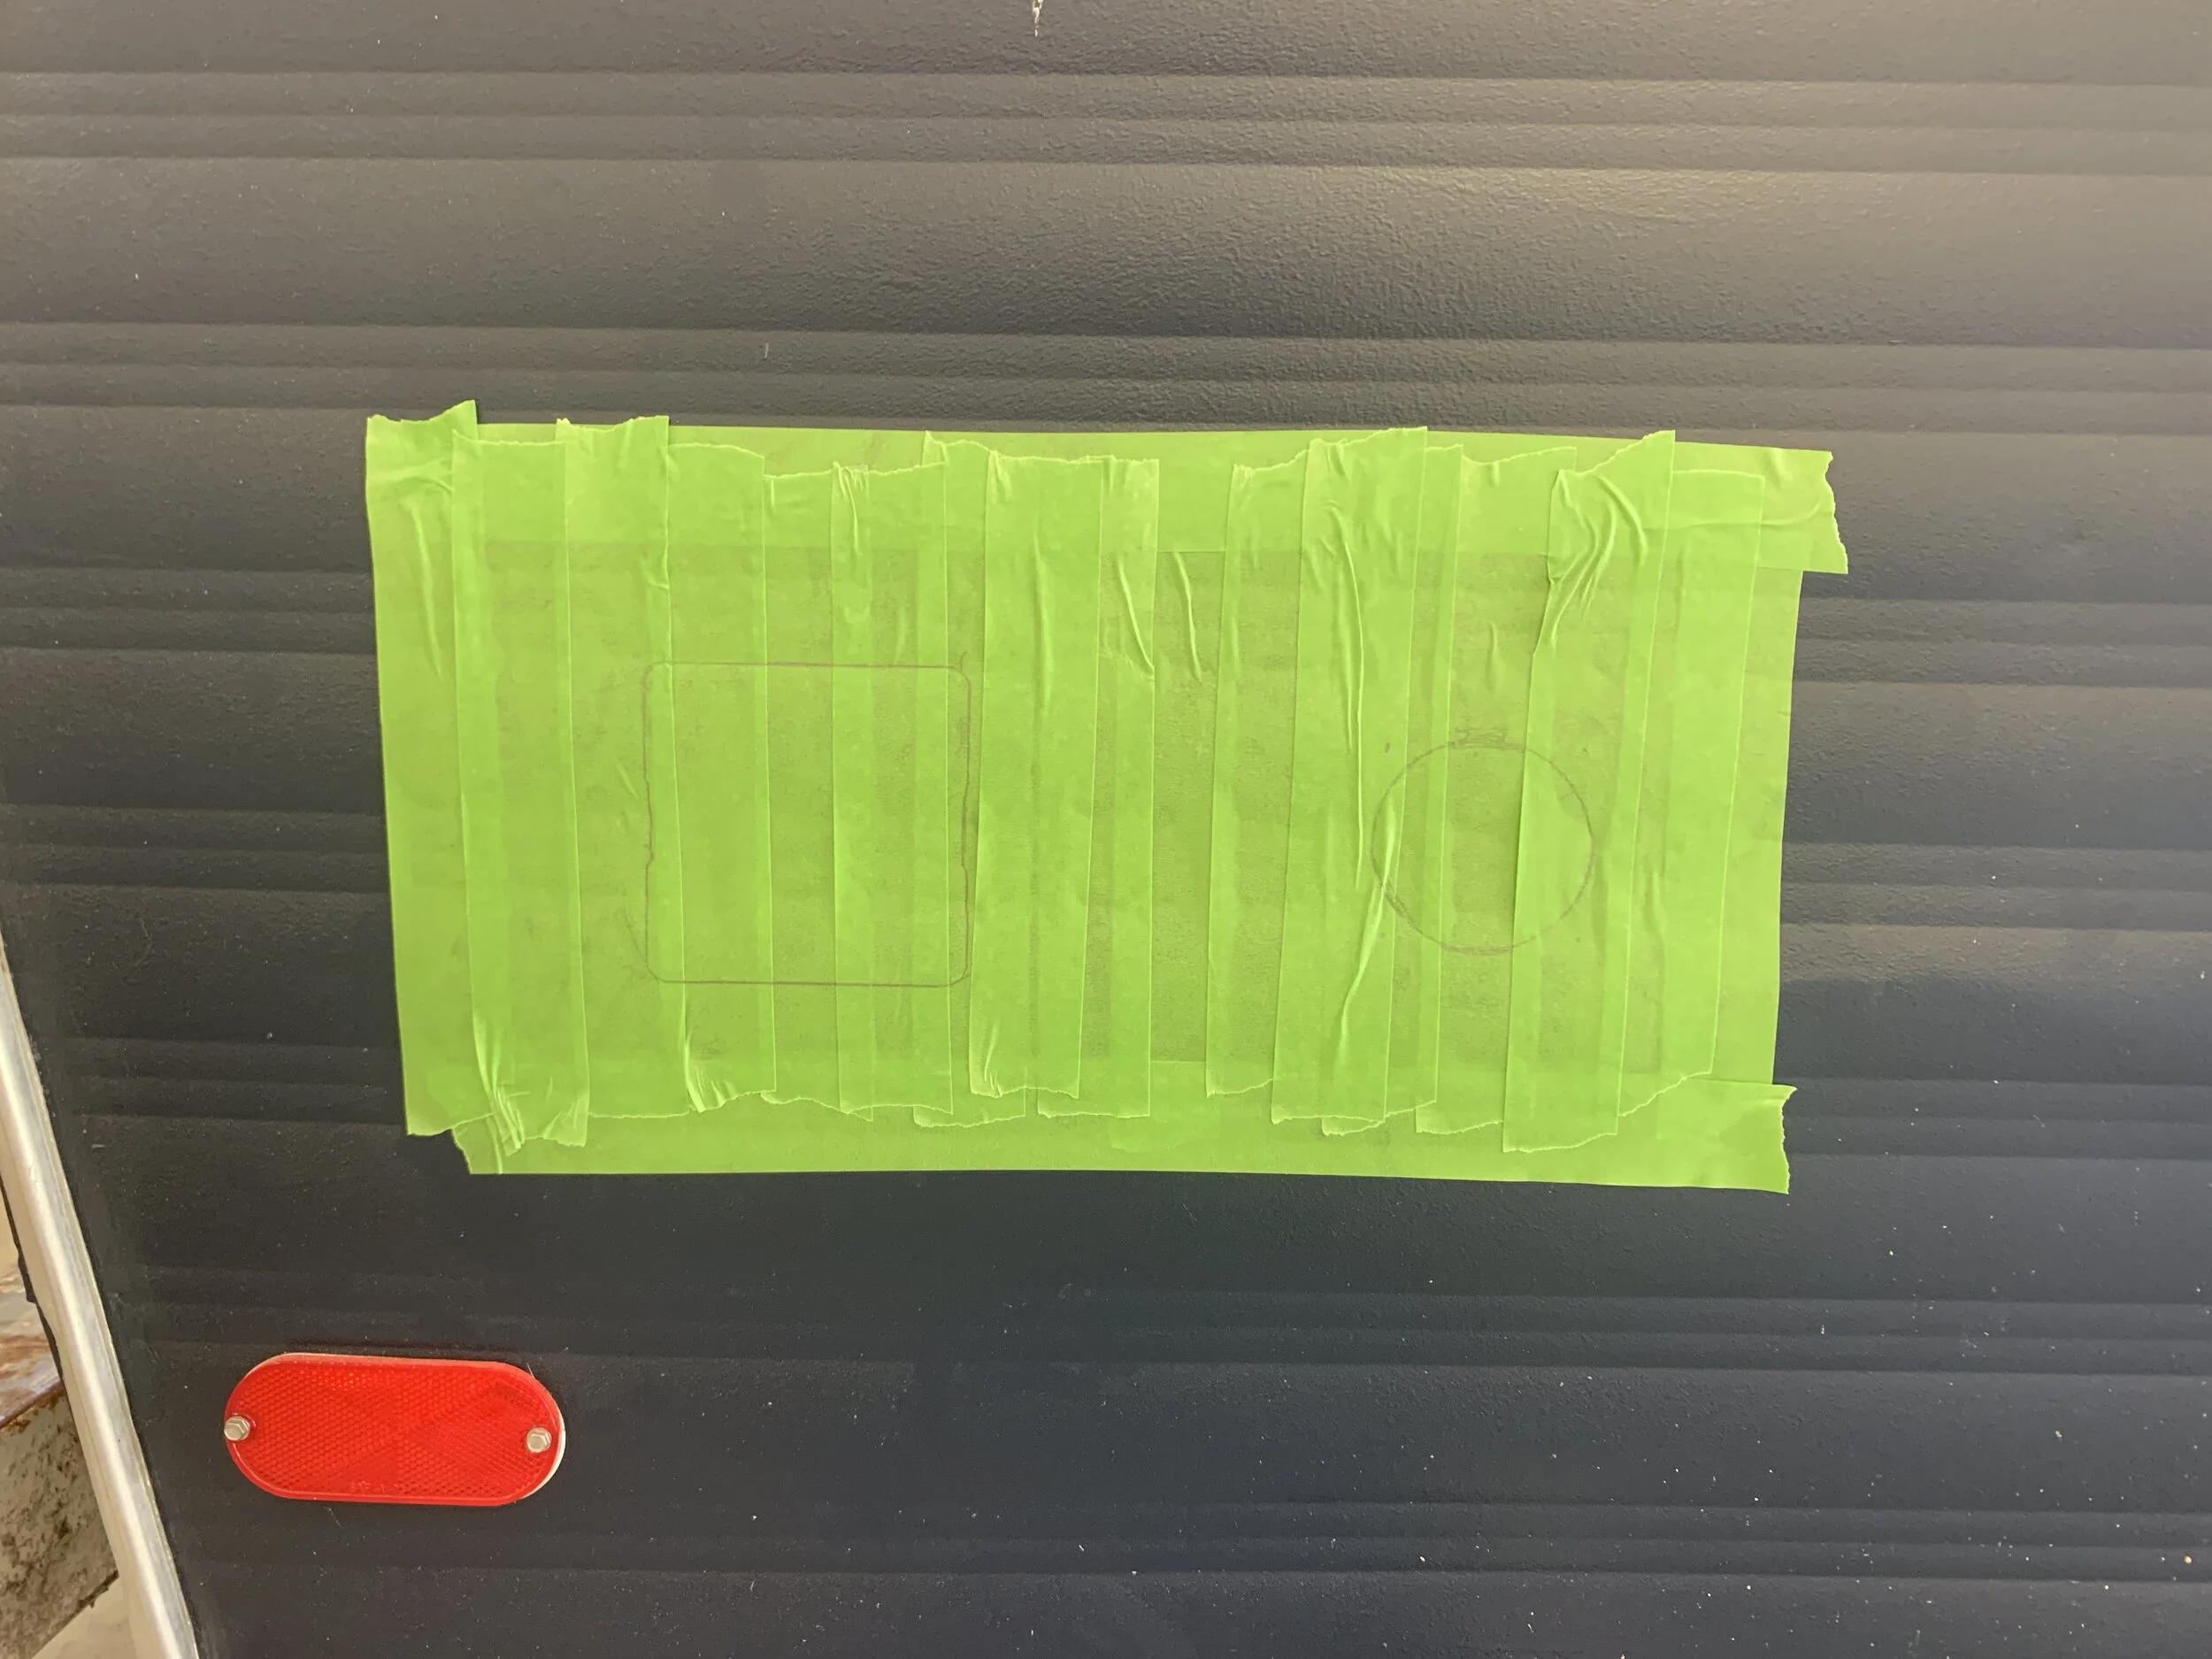
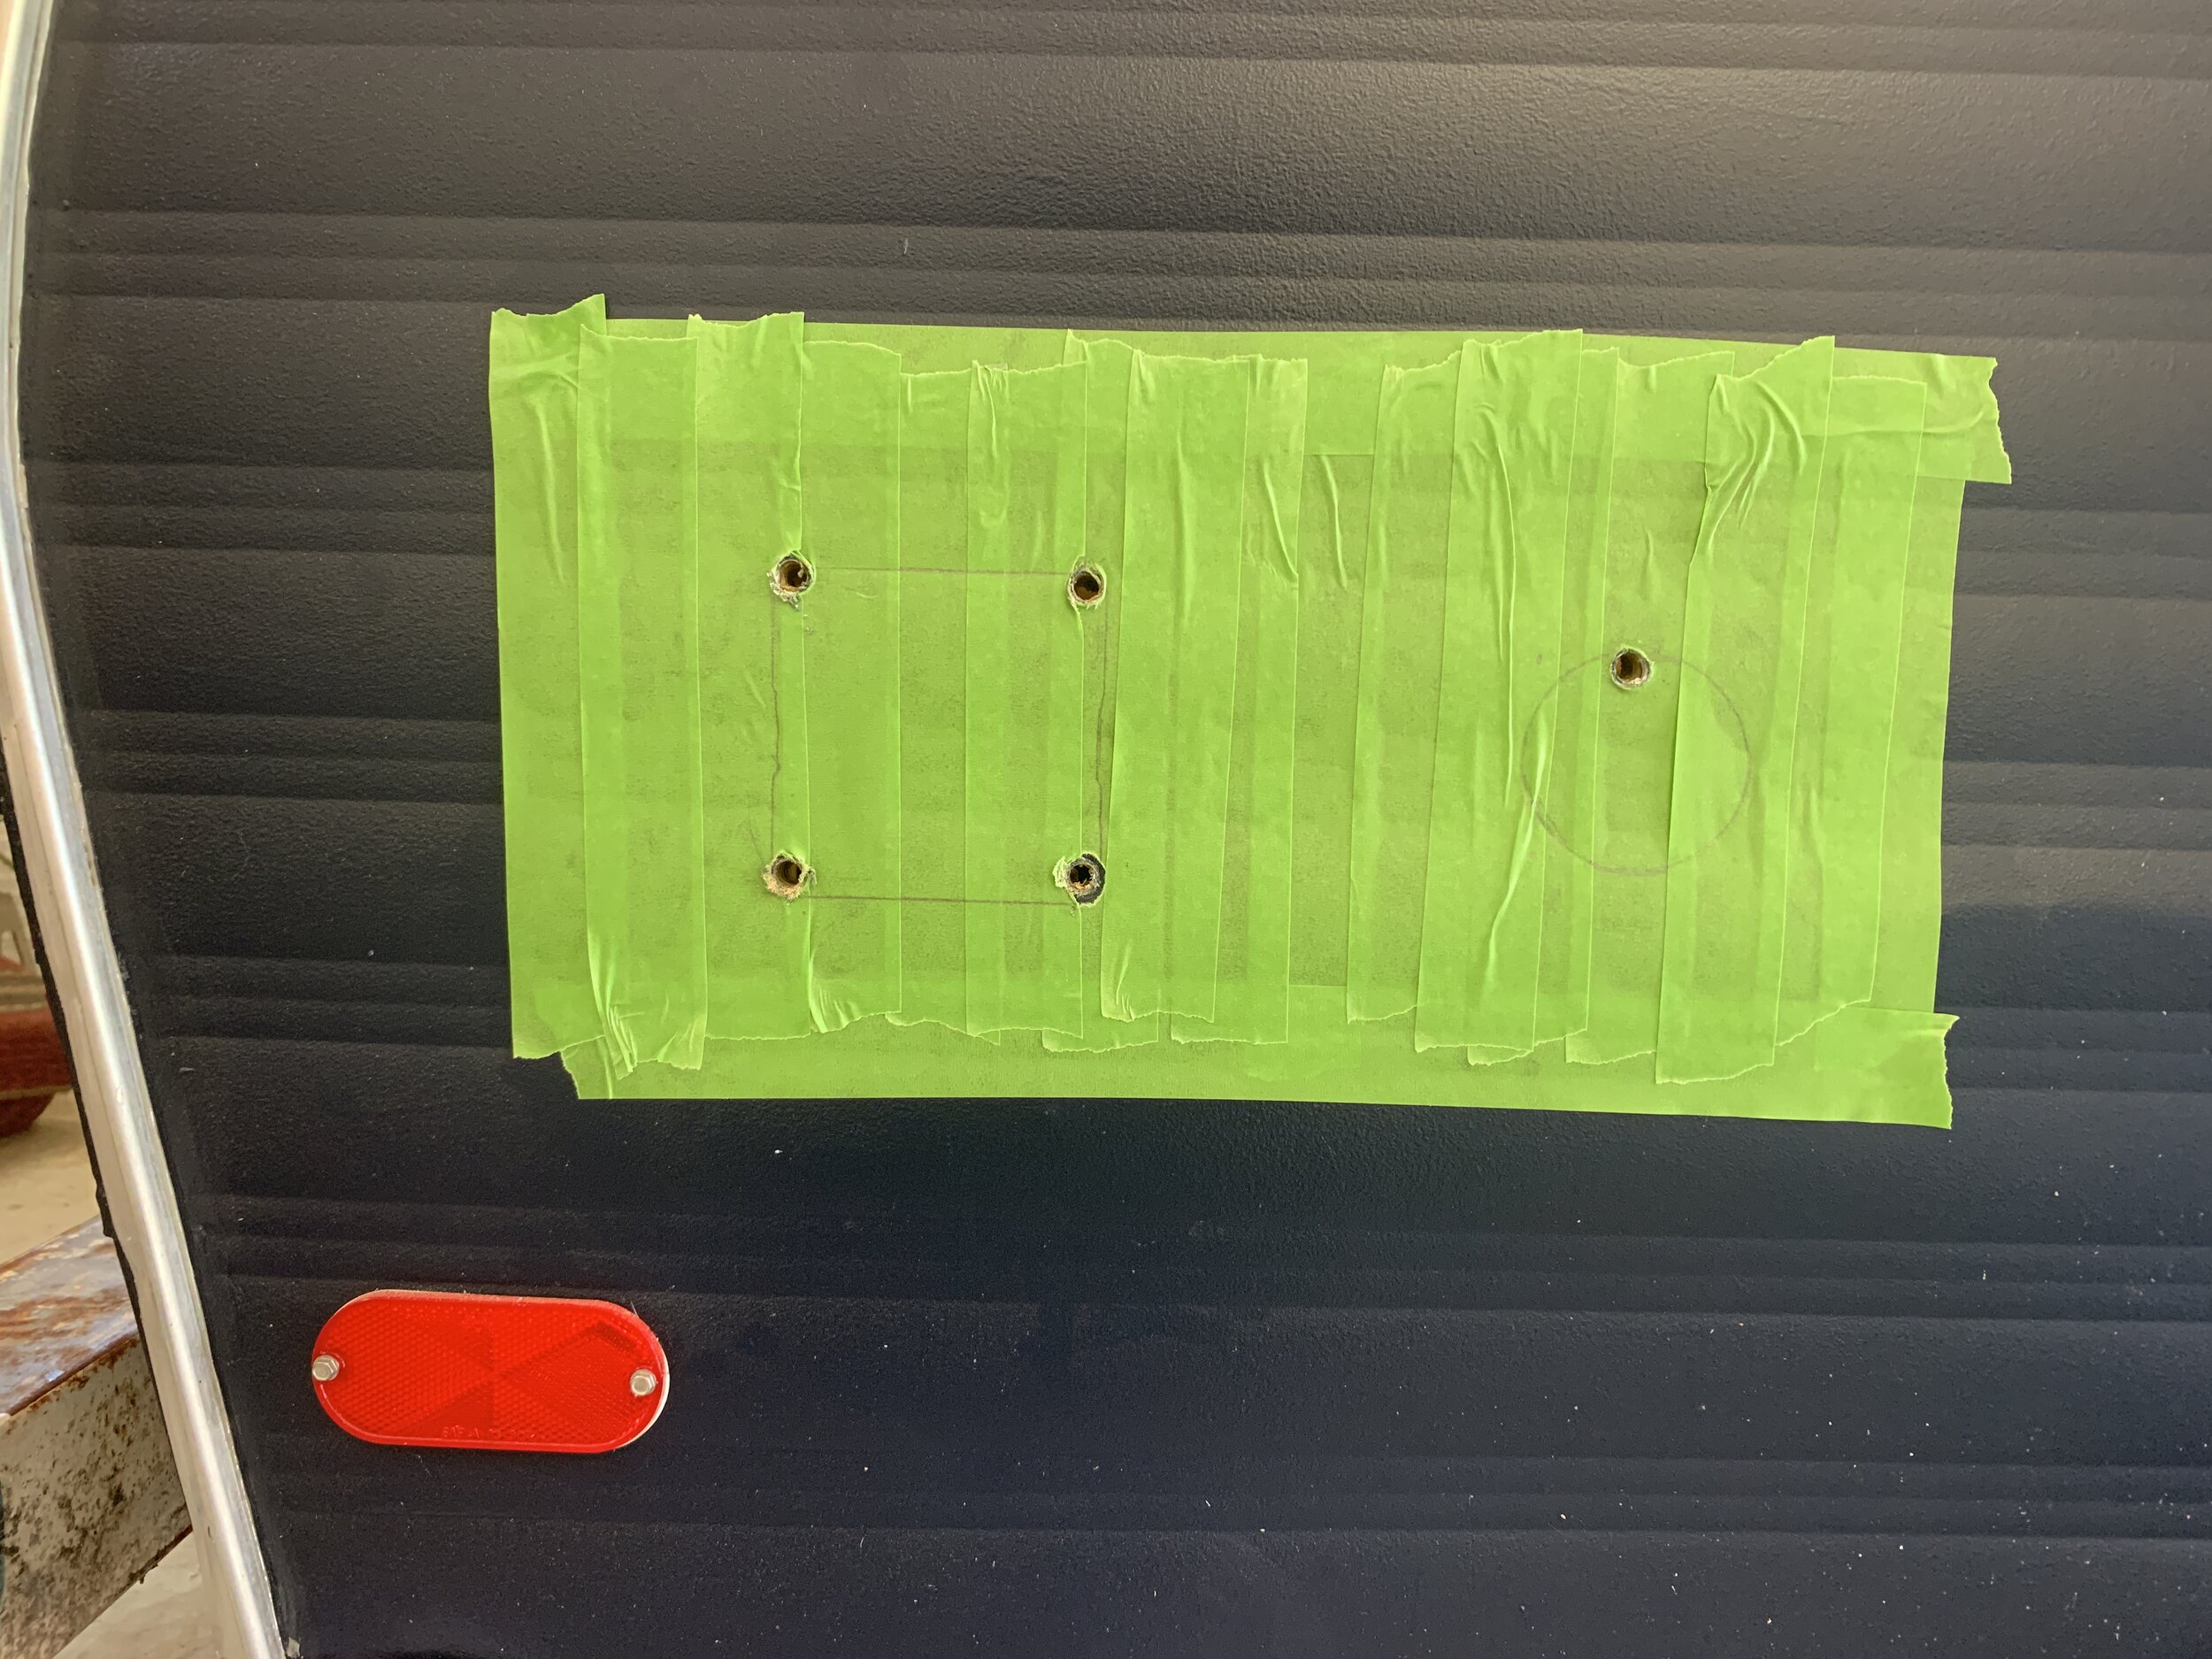
You might’ve noticed in the photos above and below some little superficial scrapes around the 30 Amp inlet port. One key thing we changed in our install method for the remaining ports is that we taped the location on the outside of the camper body with painters tape to protect the paint, and then drew out the shape of the included metal box (rectangle port) and foam gaskets (round ports) in pencil before drilling and cutting in. It looks like such a huge area taped off, but you have to take into account the size of the base of your jigsaw going around the hole at 360 degrees.
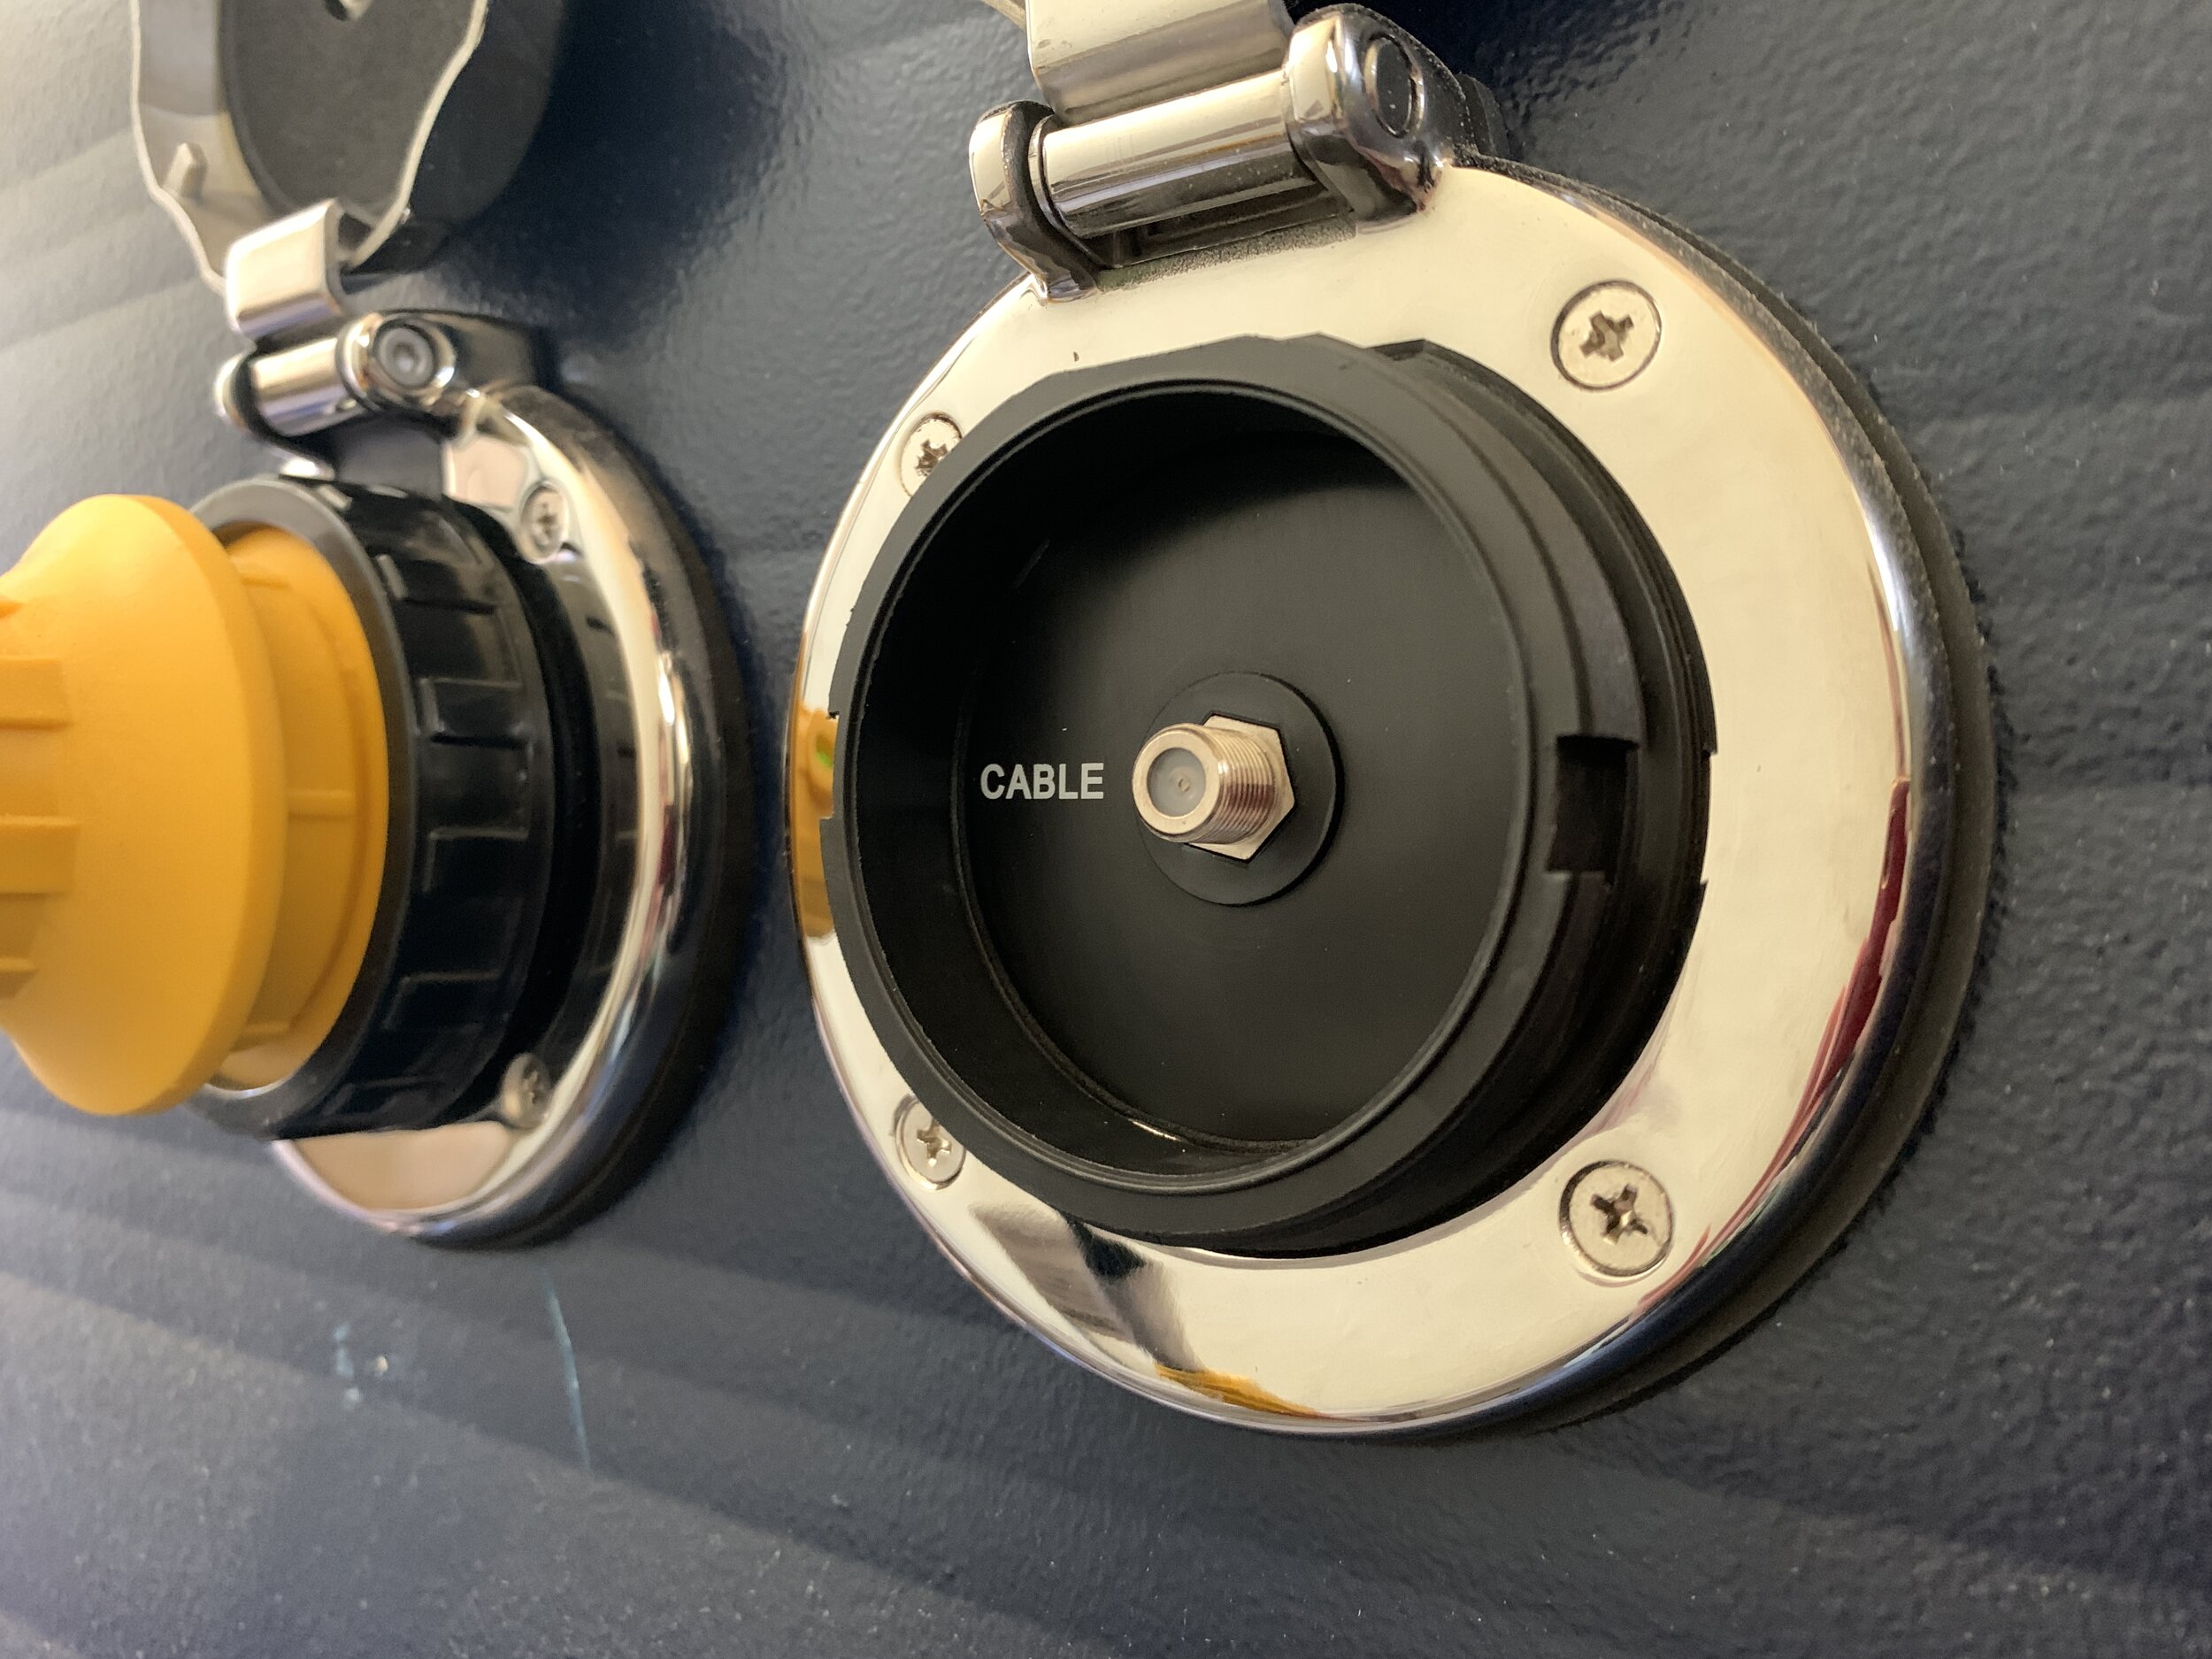
How we installed our exterior coax ports
Since we used the same brand and style of port for the coax ports as we did for the 30 Amp shore power inlet port above, we followed basically the same install method, only we used the coax tool to prep the coax cable for the port. As mentioned in the section above about the 120V outlet install, we taped off the exterior first for this one to protect the paint from scratches.
We wanted our coax and 30 Amp ports to be in line with one another, so we used a long level and the horizontal pattern on our camper exterior to line them up vertically. After eyeballing the left-to-right placement by how much space we thought looked good and would still give enough plywood support “meat” in between the ports, we marked out our gasket and cut it out just like we did for the 30 Amp port install.
Locations, locations, locations
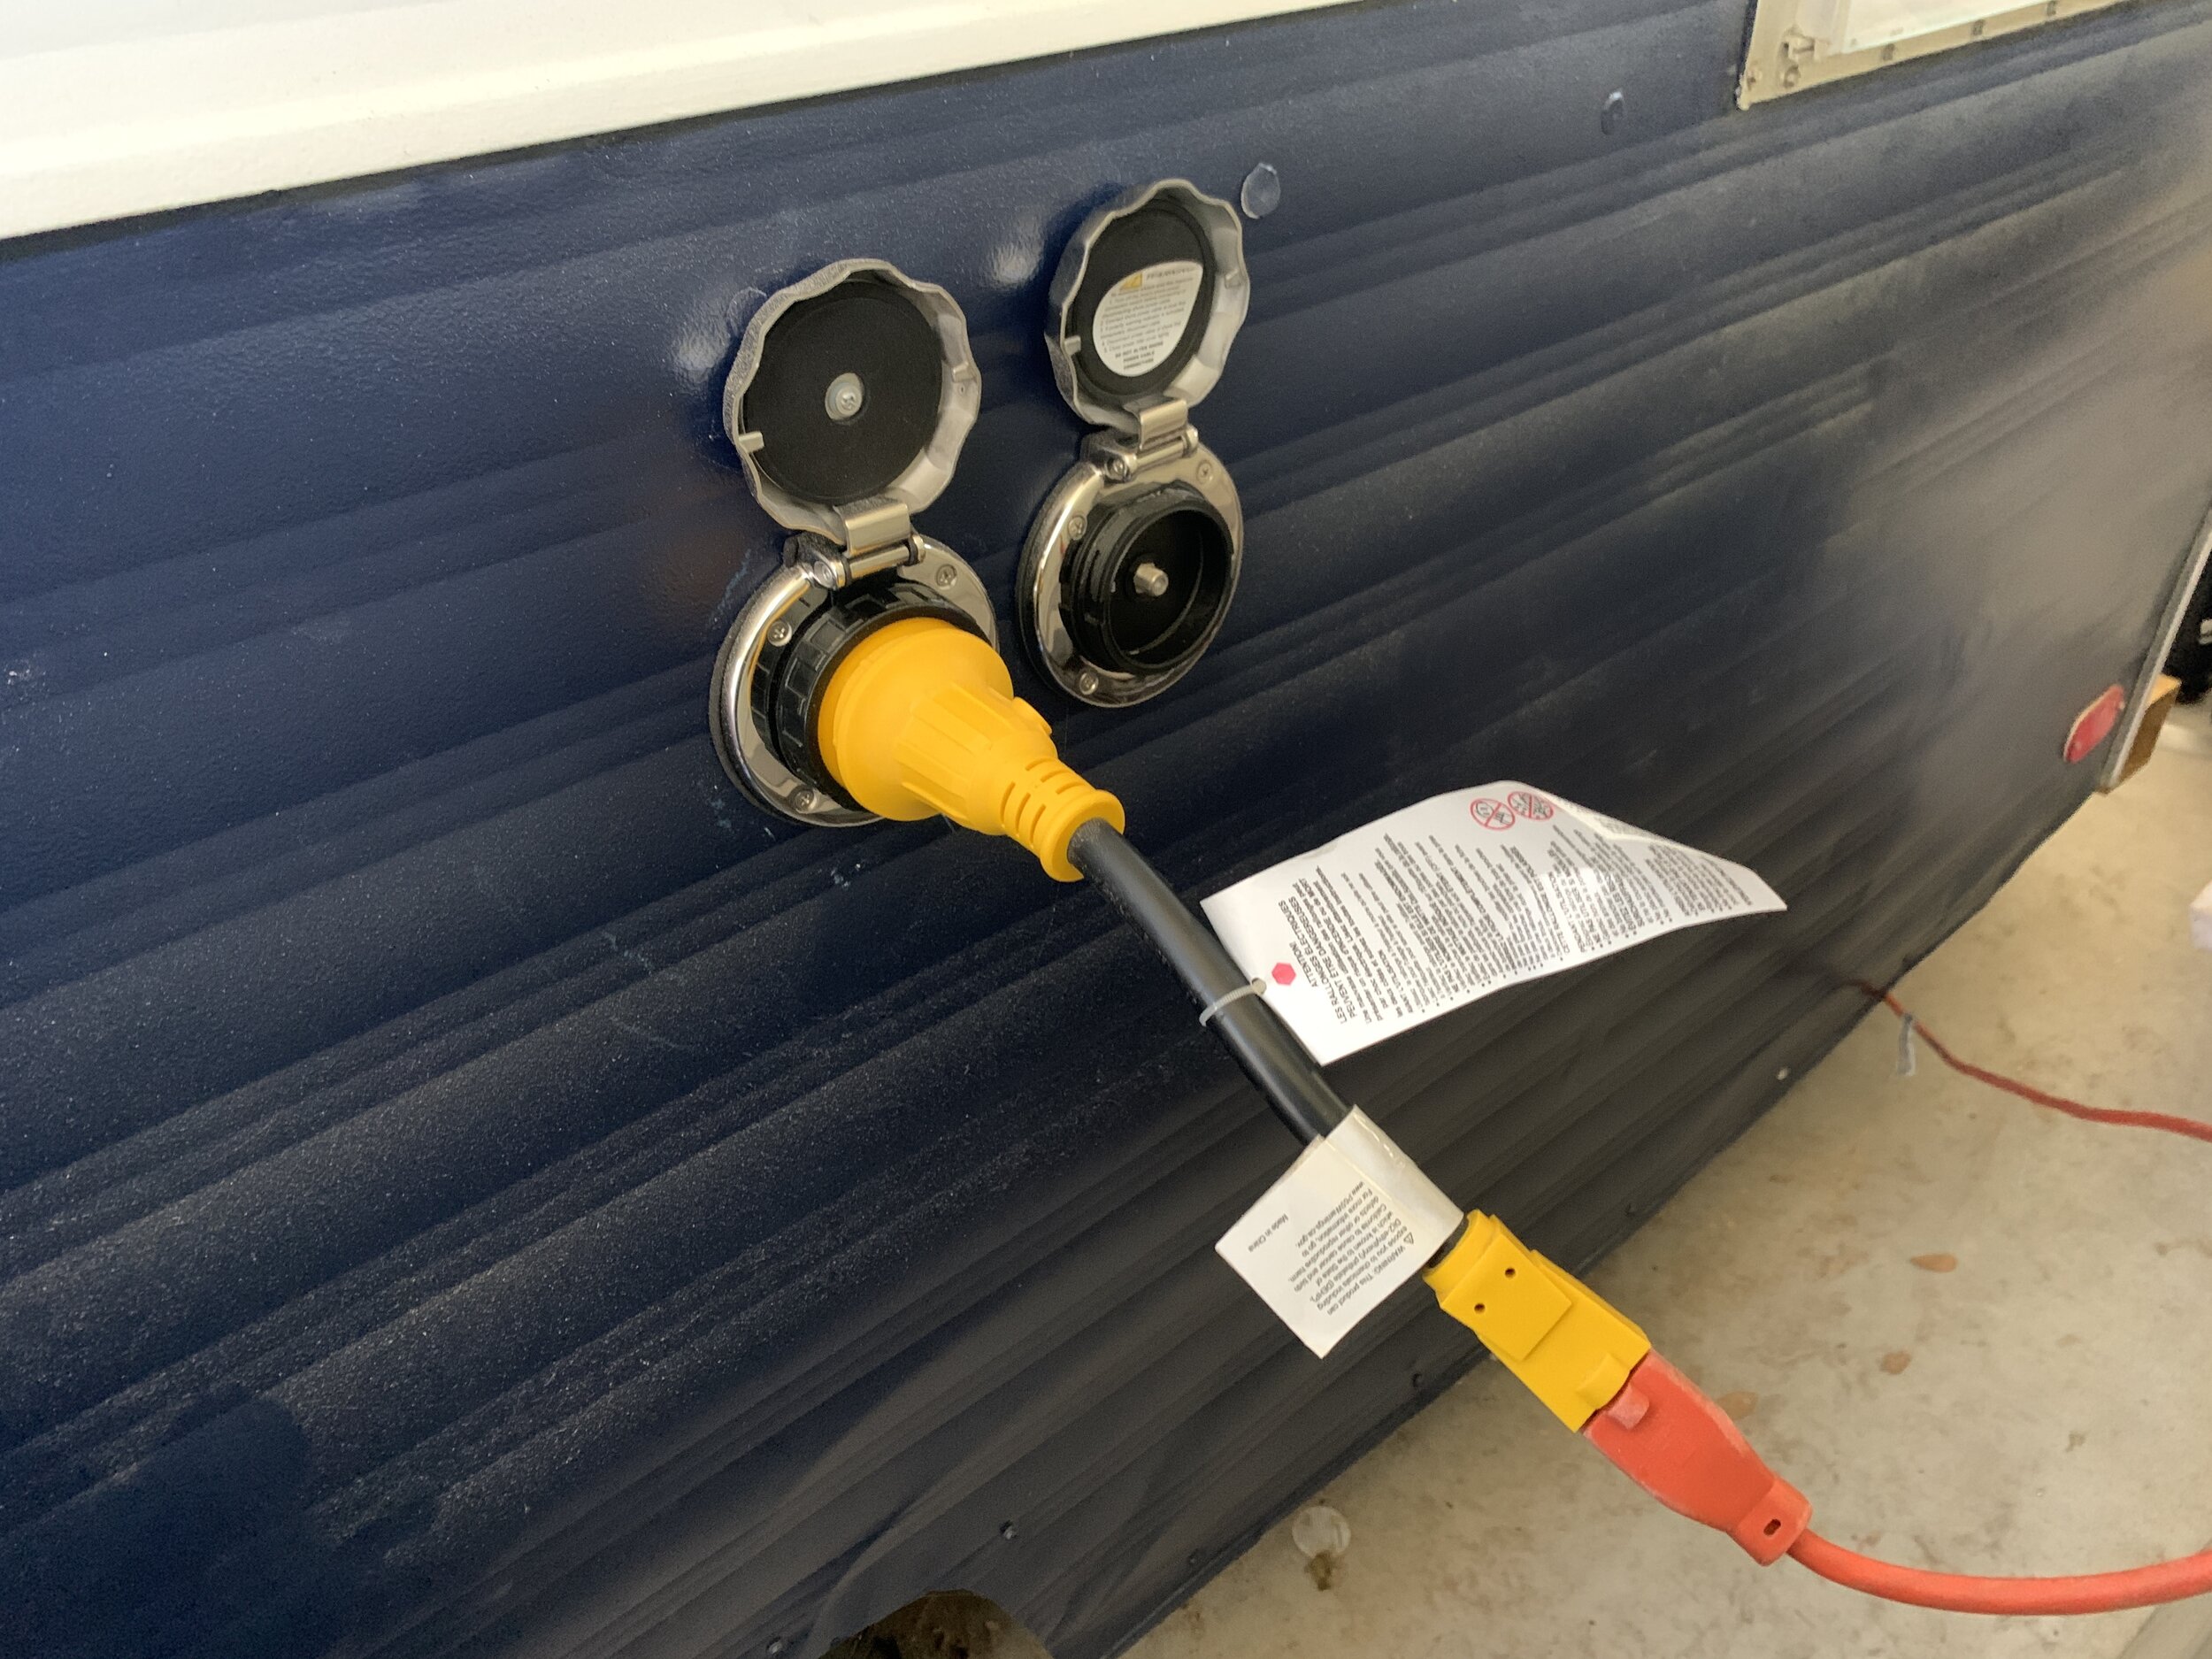
We installed 2 coax ports, the plan being that the port on the back side of the camper (next to the 30 Amp inlet) will be used as the coax “in” port (from the campsite, etc.) and the coax port on the door side of the camper will be the coax “out” so we can watch TV outside. It really doesn’t matter about “in” vs. “out” since they’re the exact same port installed the same exact way, and they could just as easily function the opposite way at any given minute. Only one is located conveniently next to the power inlet while the other is next to our 120V exterior power outlet, and we’re much more likely to be hanging out outside on the door-side of our camper.

COAX inlet + outlet ports shopping list
3/4” thick plywood – or same thickness as your wall studs – in amount large enough to span between studs. (Ours was approximately 1 sq. ft. or so for each port)
Kreg jig
Kreg screws (in length appropriate for your stud/plywood thickness)
Kreg bit
Painters Tape
Jigsaw
Coax crimper/stripper tool
Drill with phillips head bit or phillips head screw driver
Coax cable + female fittings
1x2 coax splitter, maybe – this depends on how many coax TV ports you’ve got

Coax splitter just inside the external port. The “in” cord comes in on the left – the two “out” connections take coax to where our internal TV will be mounted and our outdoor coax port.
On the inside of our coax inlet port, we installed a splitter – one way goes to our interior TV mount and the other goes to the other, door-side external TV port.
Our tips for a flawless external port install
Use painters tape to protect your paint job when cutting. Make the tape area much larger than you think you’ll need. Remember it needs to be big enough for your jigsaw’s base to make a full 360-degree circle to cut your hole.
Cut into your metal exterior only after you have plywood support underneath. It helps provide structure and keep the aluminum wall from tearing.
Take your time and measure and mark carefully before you cut. It’s not super fun to plug holes in the outside of your camper.