The Cameo Camper Renovation: Drop it like it's hot – Replacing rotten framing
Y'all, I feel like it has been forever and a day since we last talked about the work that's actually happening in the camper. A lot has changed in the now three weeks since you last saw any actual work on our 1969 Cameo Travel Trailer. About a week and a half ago we spent some time ogling some pretty sexy finish options for her so I didn't lose my mind IRL while we dealt with (and let's be honest, obsessed over) the topic of today's post. If you need to, take some time and read from the beginning so you can see how exactly we found ourselves going from "that should be a relatively quick rehab job" to looking like this:
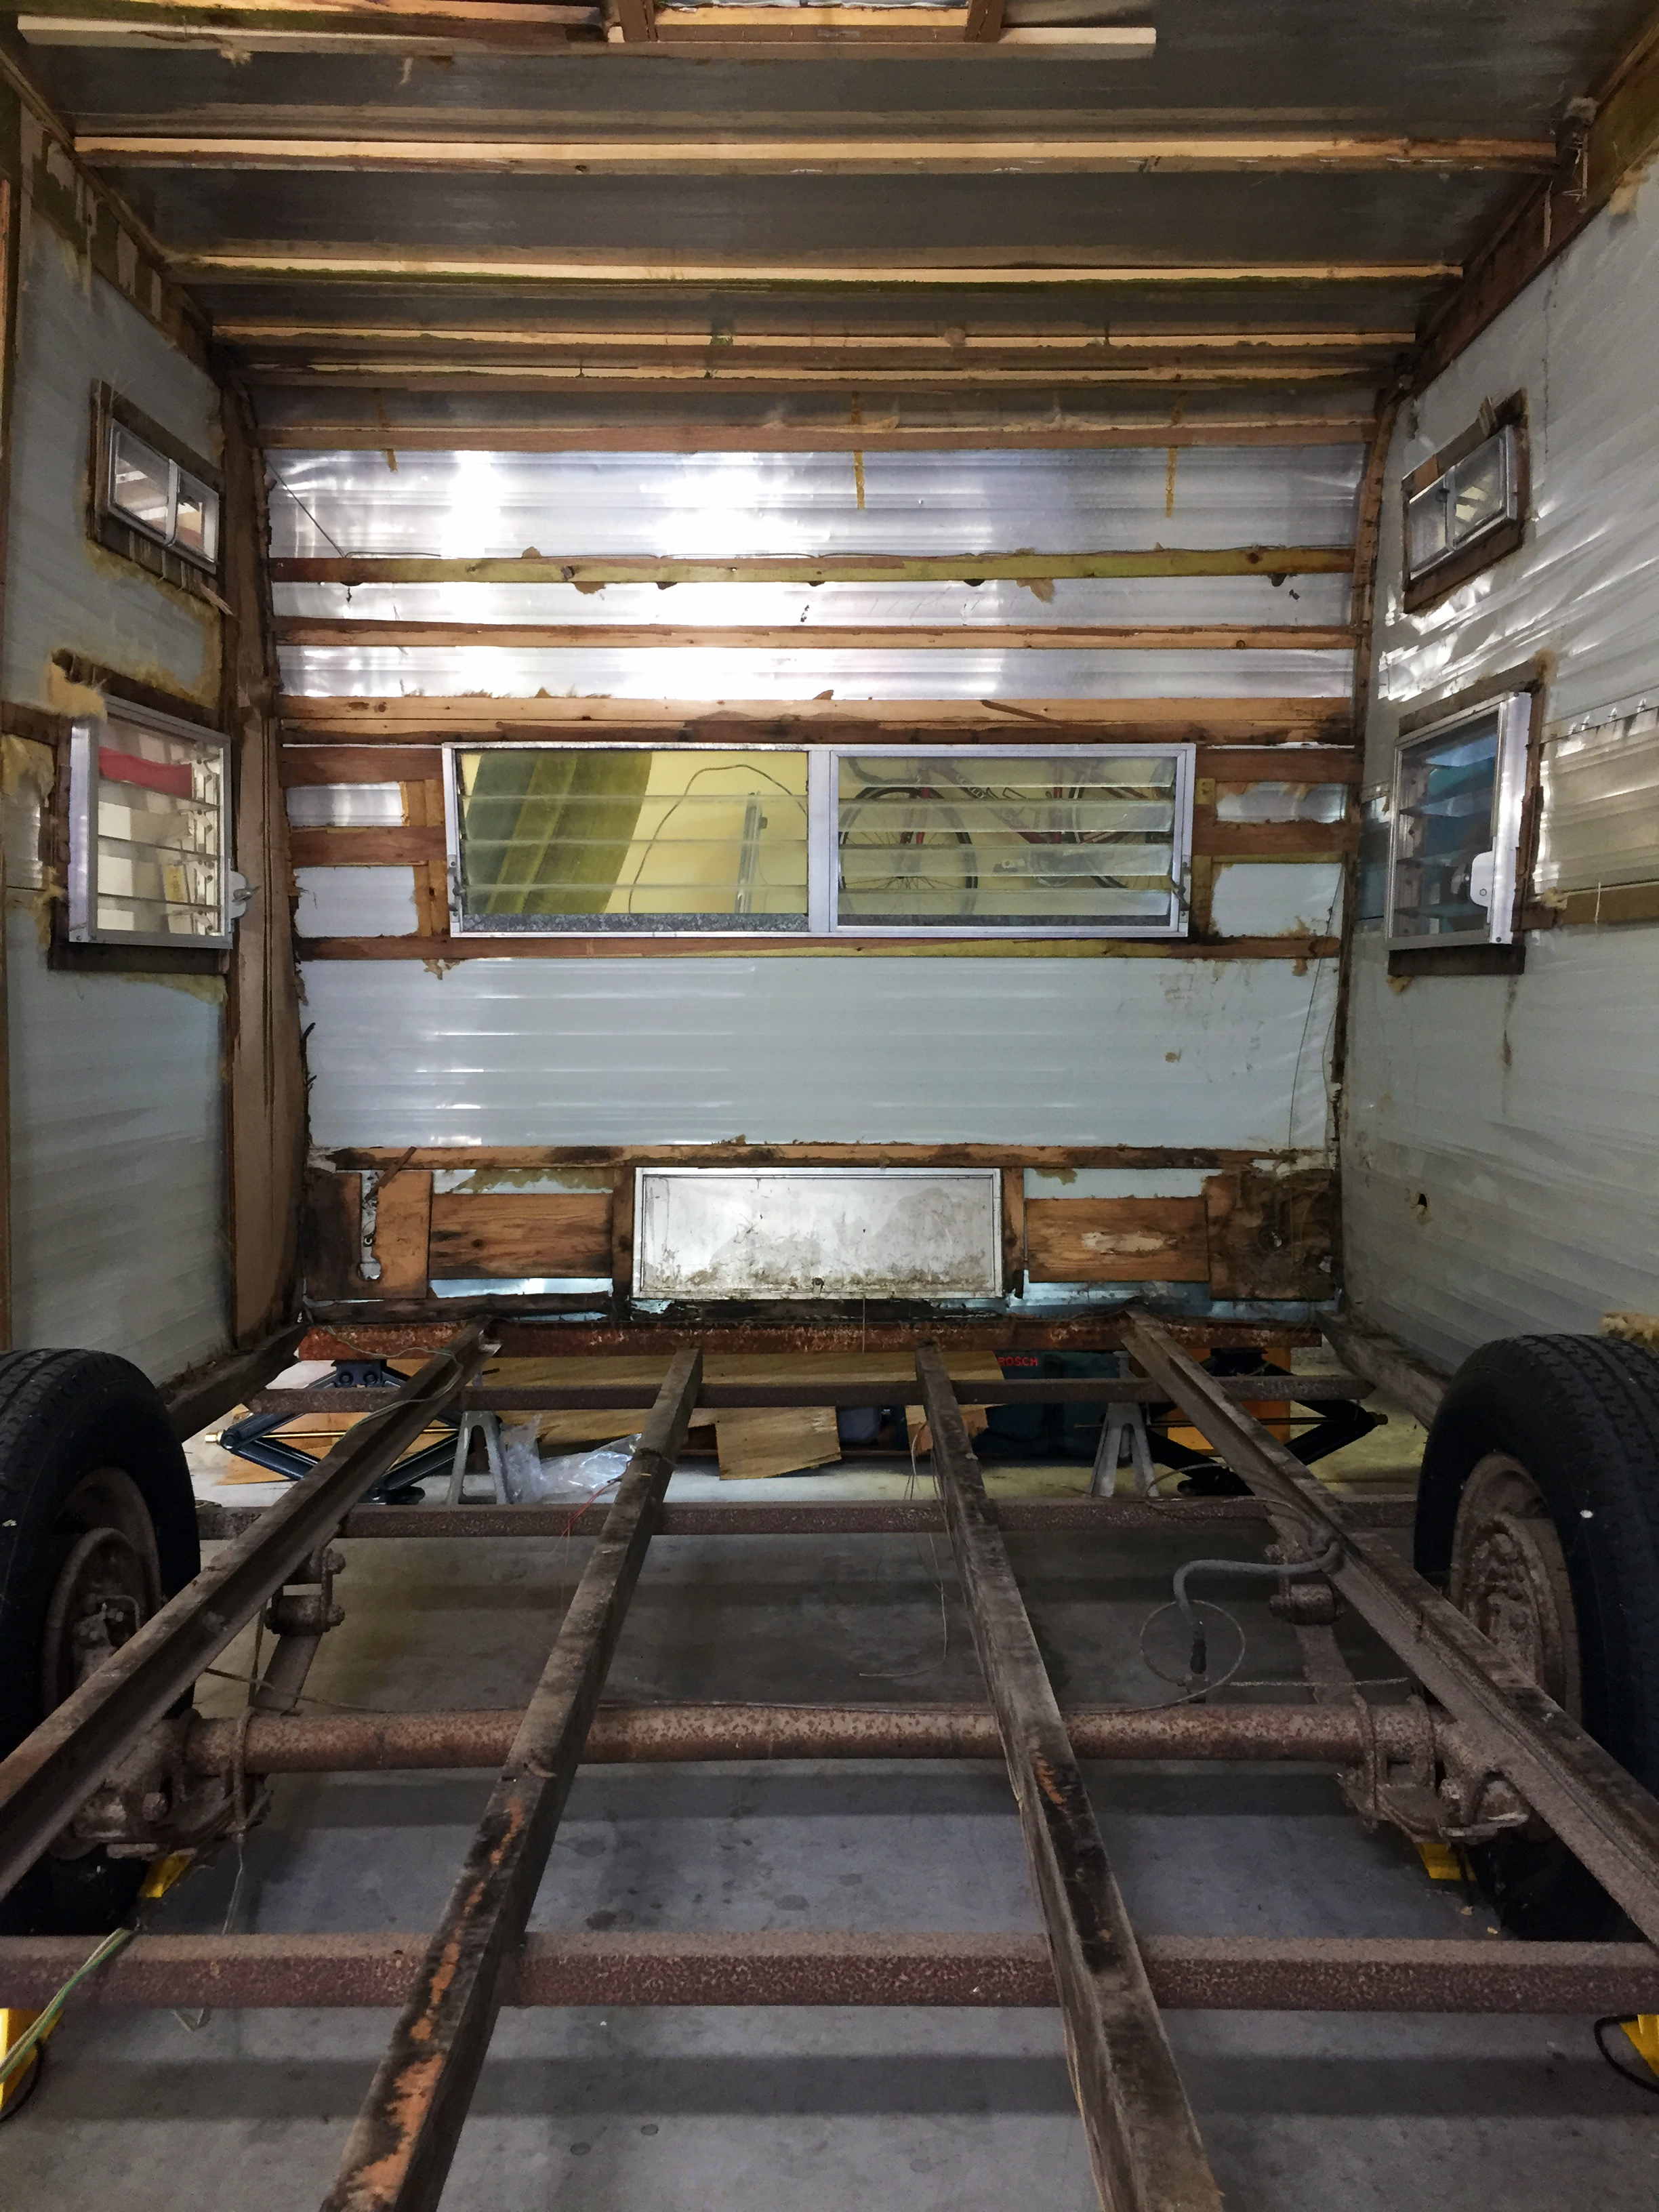
The Cameo, torn down to (and beyond) the studs.
Agh! I can hear what you're probably saying: "Wouldn't it have just been easier to build a camper from scratch?" Maybe. But it probably would've been much less fun and eventful, and you wouldn't be able use us as a cautionary tale.
One step forward and two steps back
Y'know that old adage when something must look worse before it can look better? The Cameo camper is 150% this statement in action. And boy did we have some action happen what now feels like forever ago (real time: three weekends ago, over the long Memorial Day weekend) that will go down in history as the time we almost completely broke our adorable little vintage travel trailer in the blink of an eye/turn of a few screws.
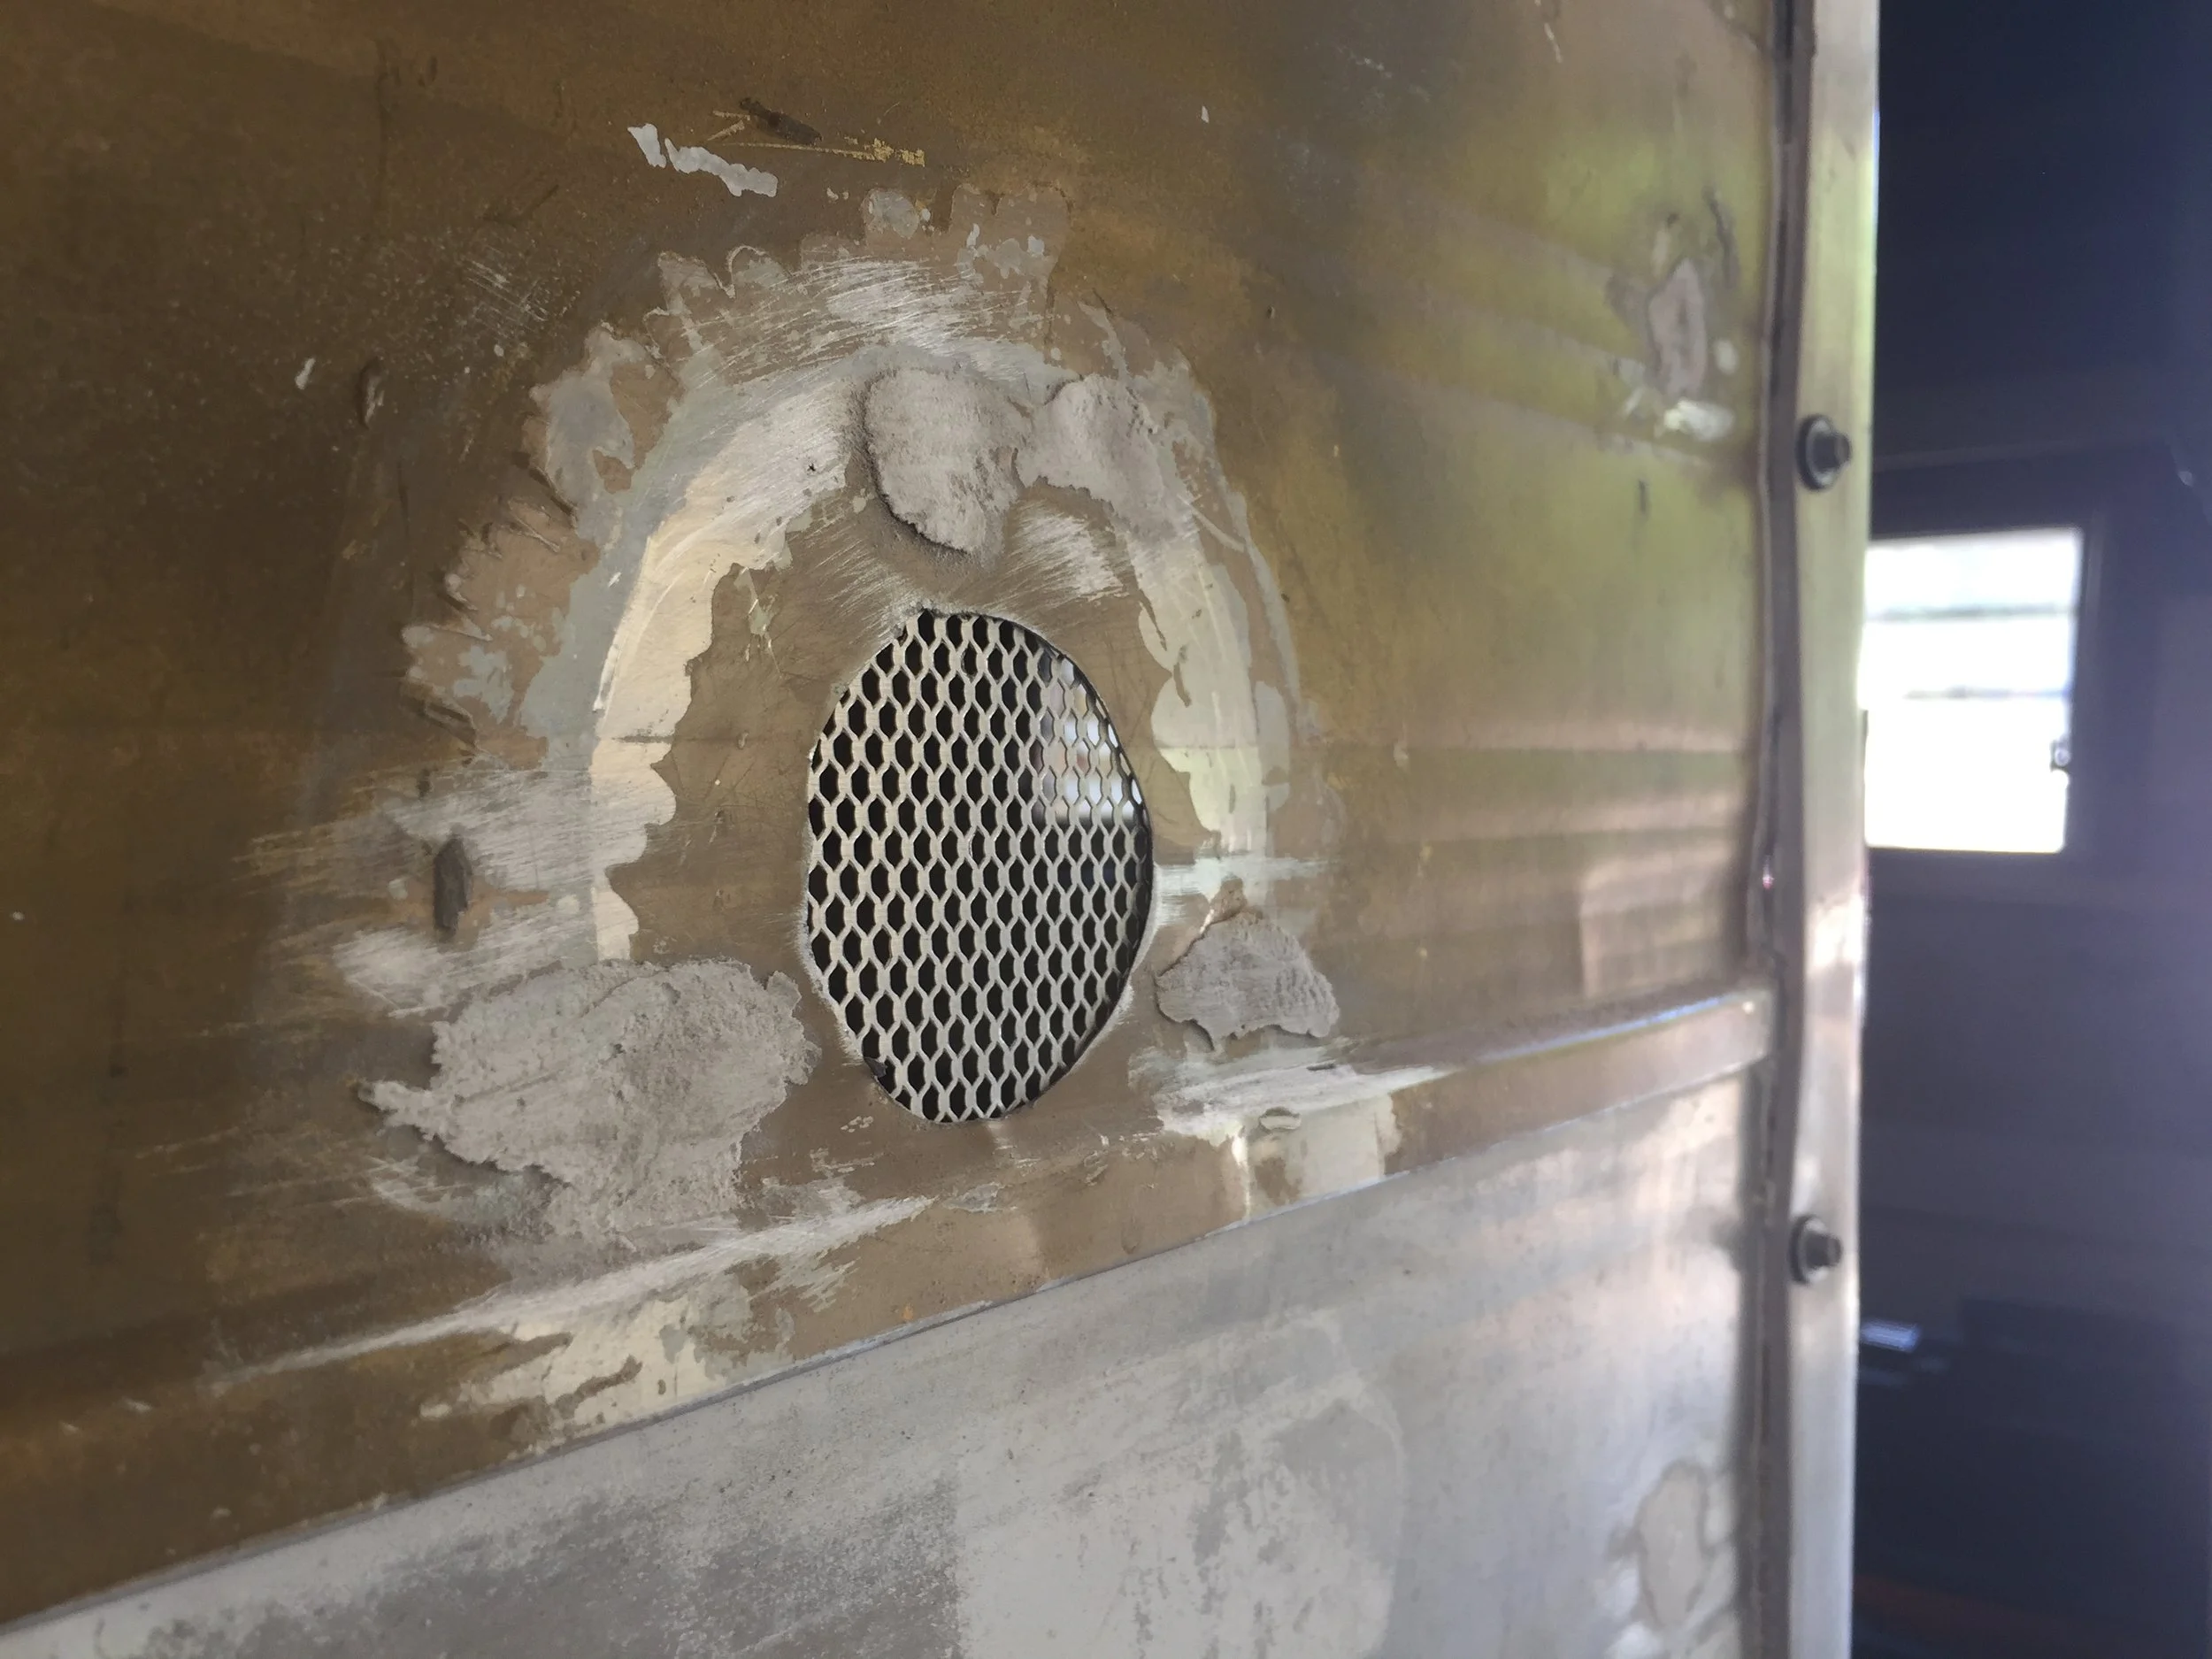
If you recall, our continued plan has been to find and repair or replace damage, which has turned out to be pretty much everything. All caught up? Good. We thought we'd err on the side of caution and get her as safe as possible (since "we've already done this much, we might as well not cheap out, phone it in at this point and start with a strong, solid foundation...") so this meant the old plywood subfloor – some of which was soft and brittle and so thin it was semi-transparent from water damage (that someone at some point decided to just cover up, maybe hoping the problem would go away by just adding another layer of wood .... spoiler alert: it didn’t), and other parts that were more solid, but had holes cut into it in order to run plumbing and gas lines throughout the camper, like underneath the area formerly known as the shower/toilet that now looked like Swiss cheese – would need to be replaced.


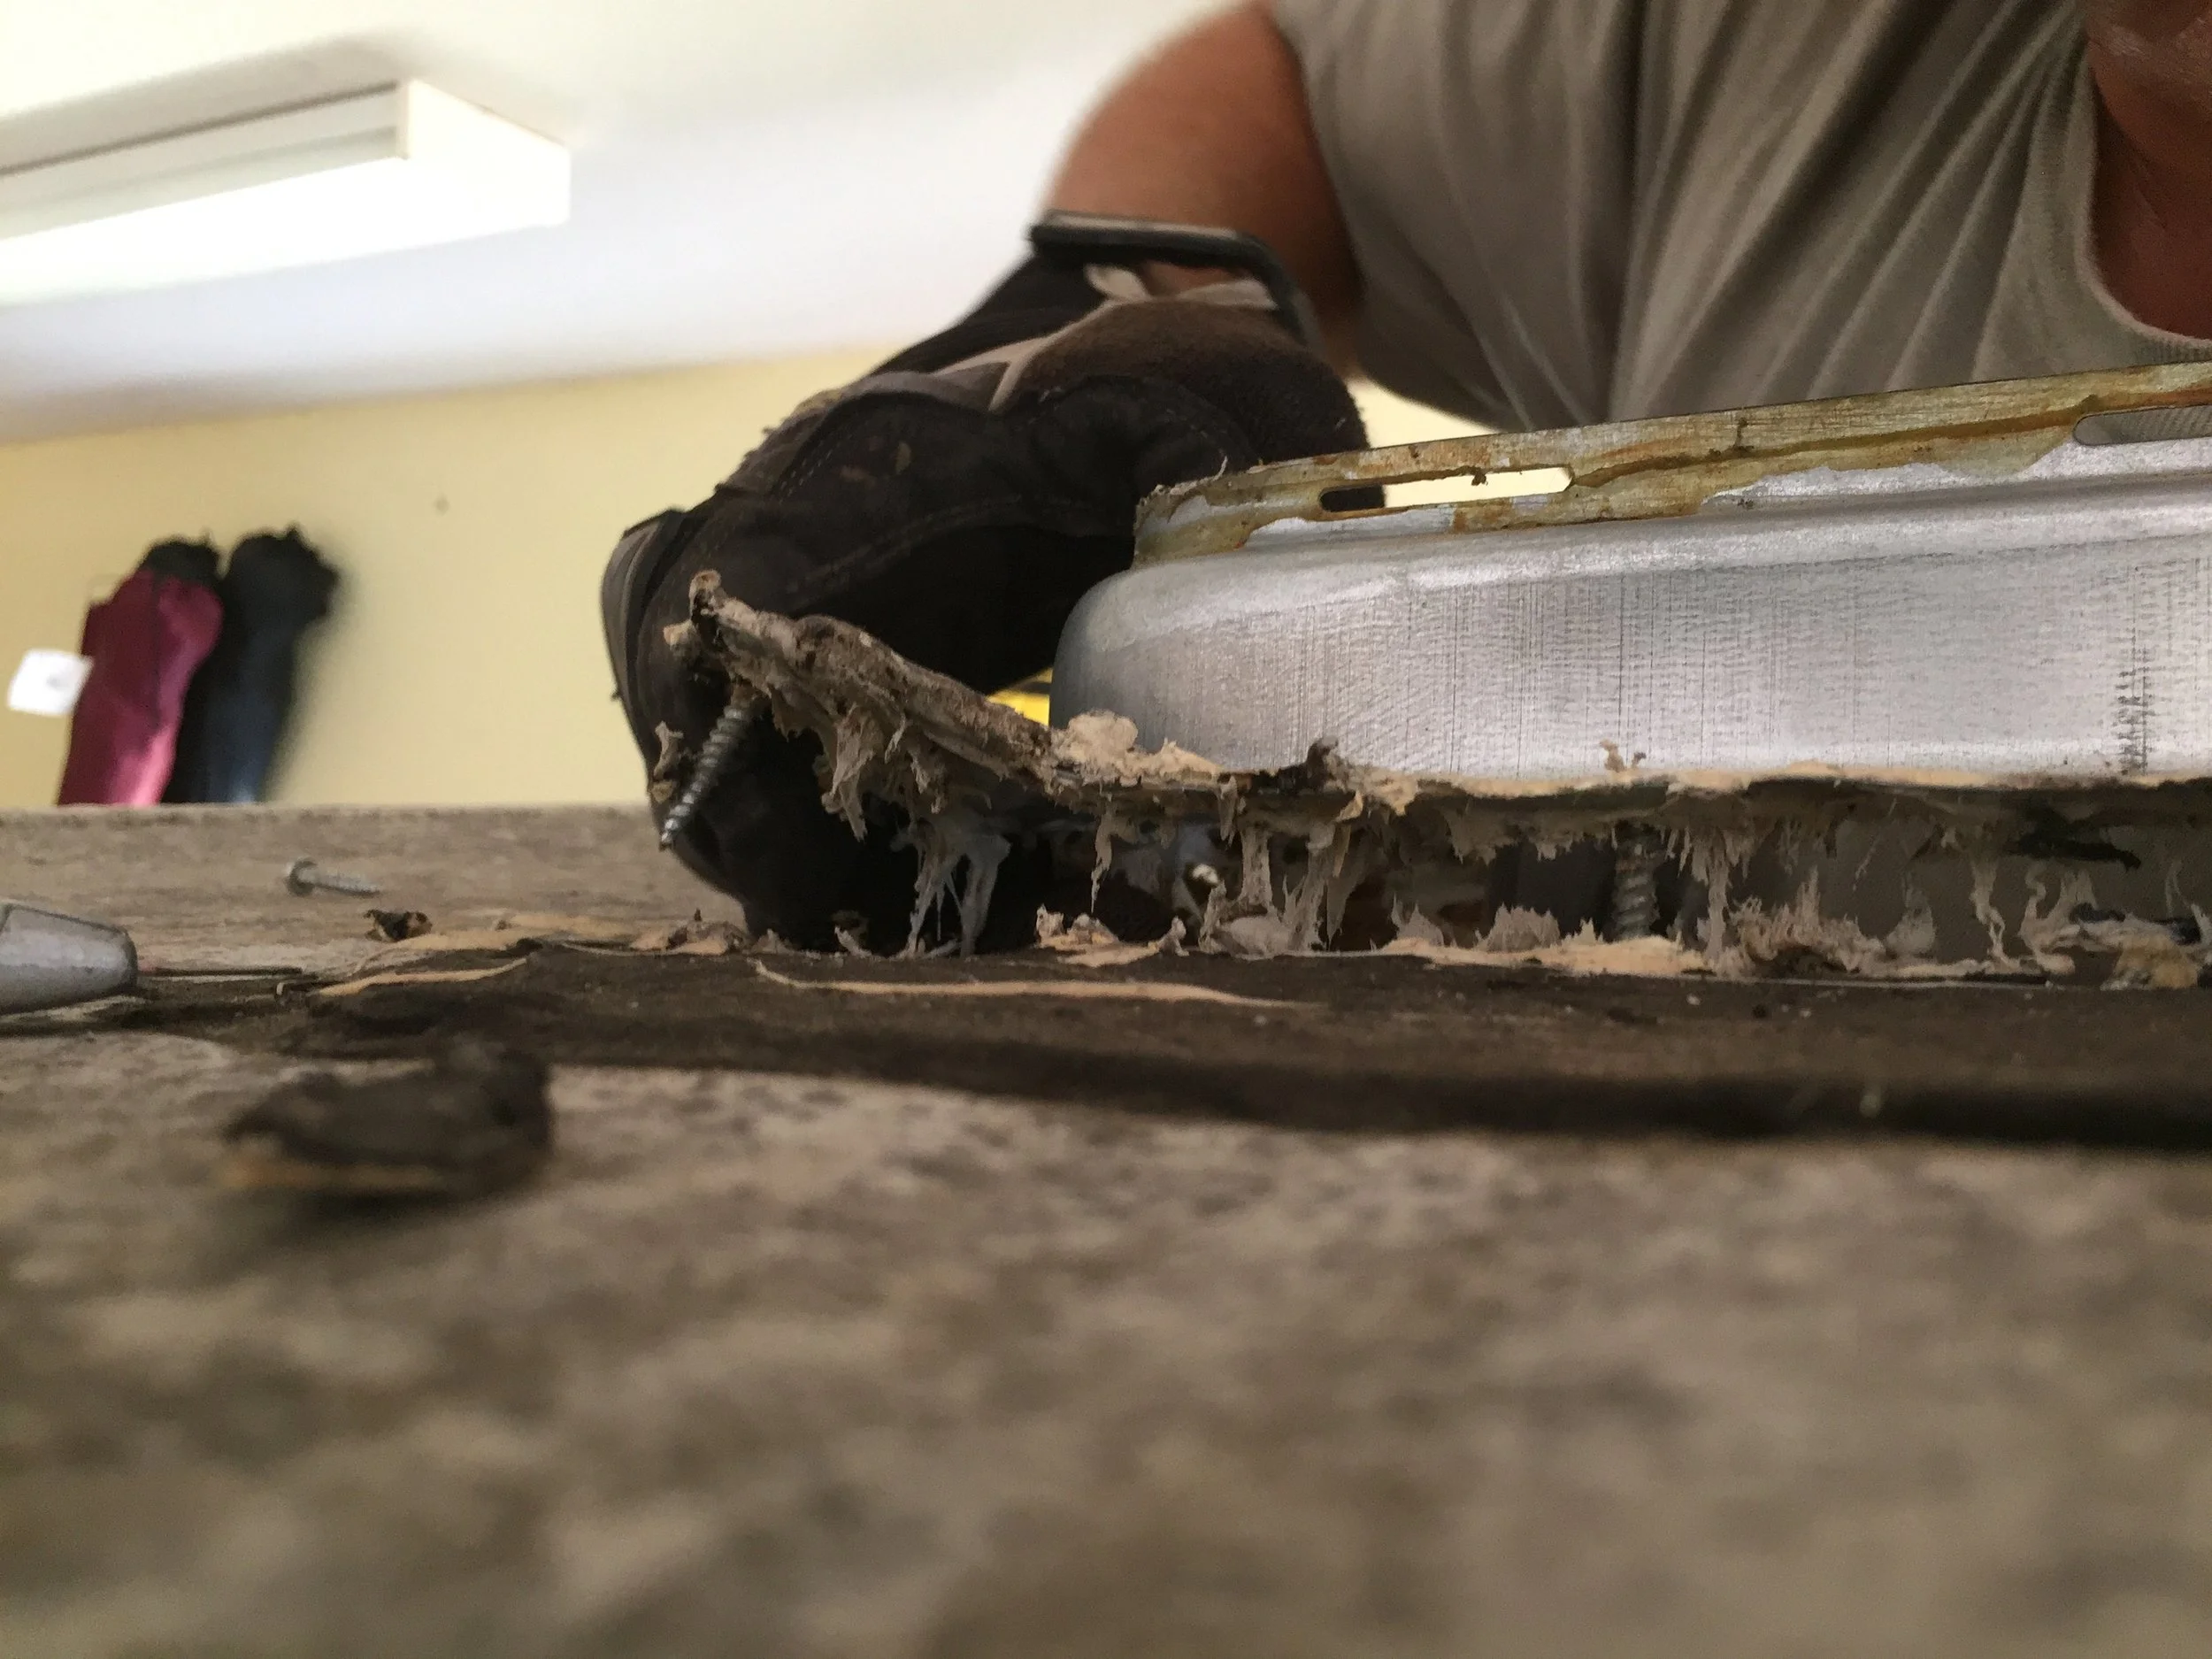
After we removed the old plywood subfloor we confirmed some, if not all, boards running along the perimeter of the camper (whose very important purpose is to both support the walls and connect said walls to the plywood subfloor) also needed to be replaced due to some severe water damage. Read: These once-hefty support beams were now dark, moldy, and crumbling into dust and mulch. The deeper we get into this thing the more we realize it was some sort of miracle this thing has remained upright and travelled as well as it did when we picked her up.
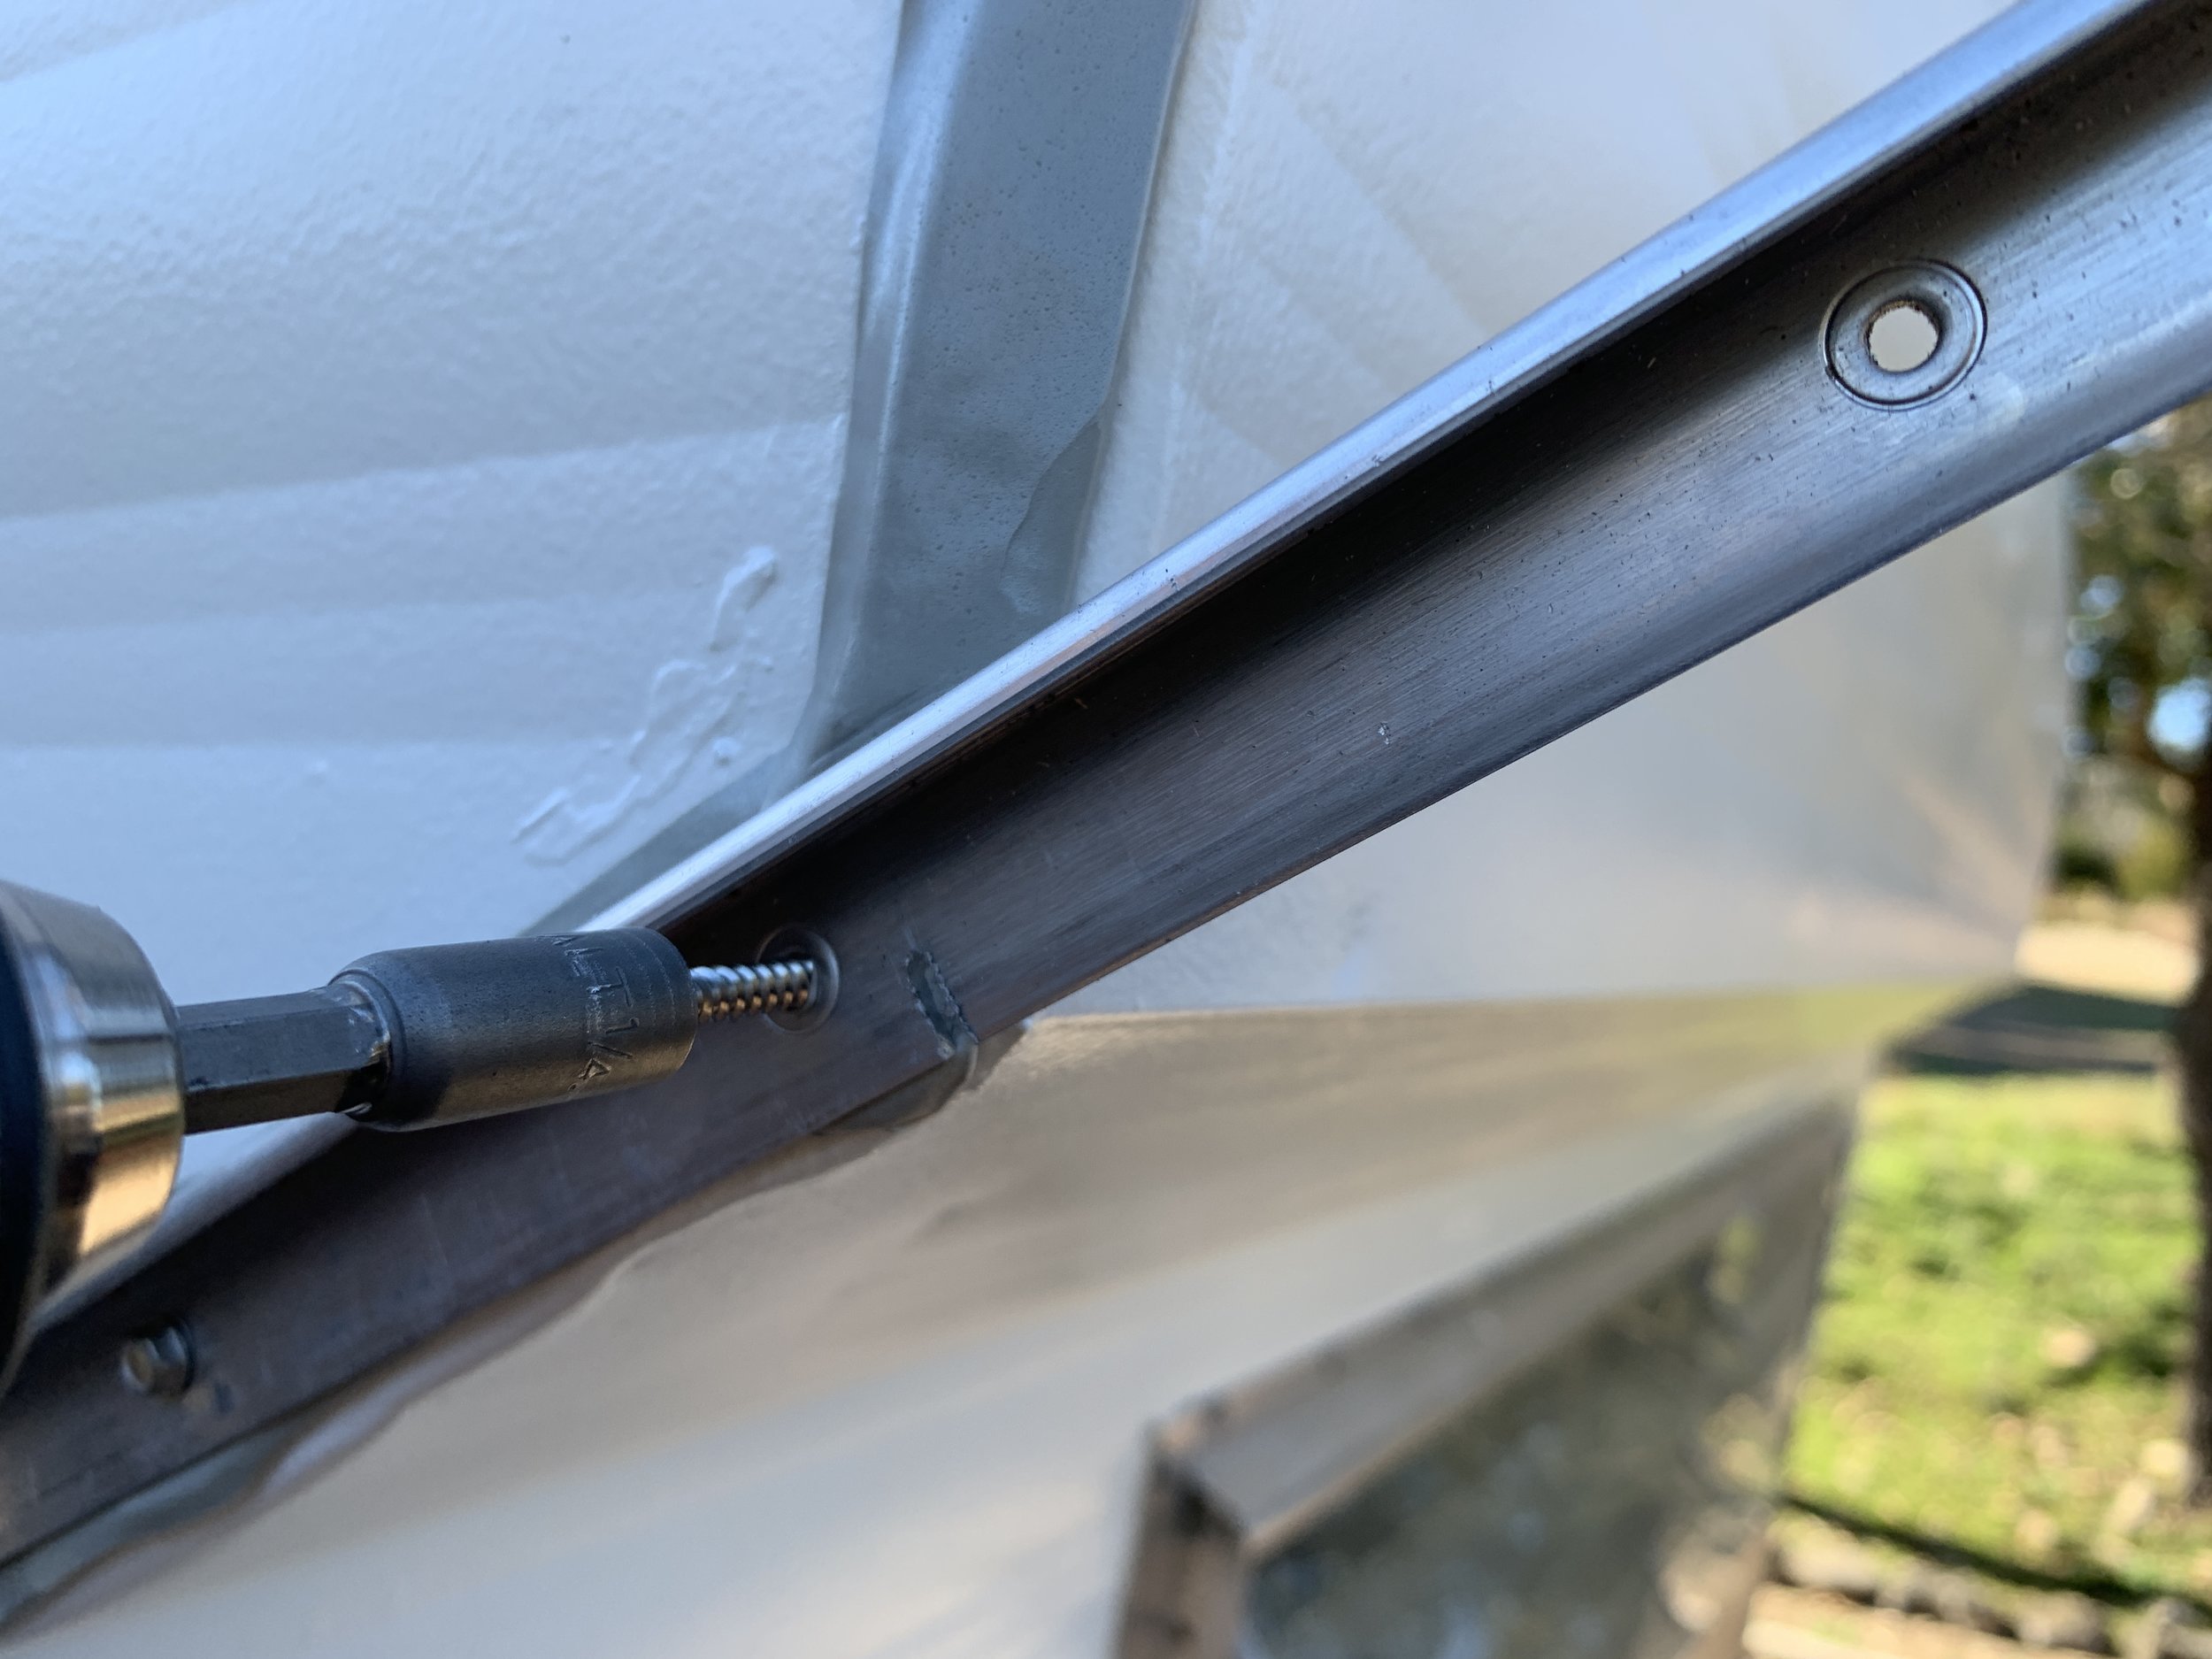
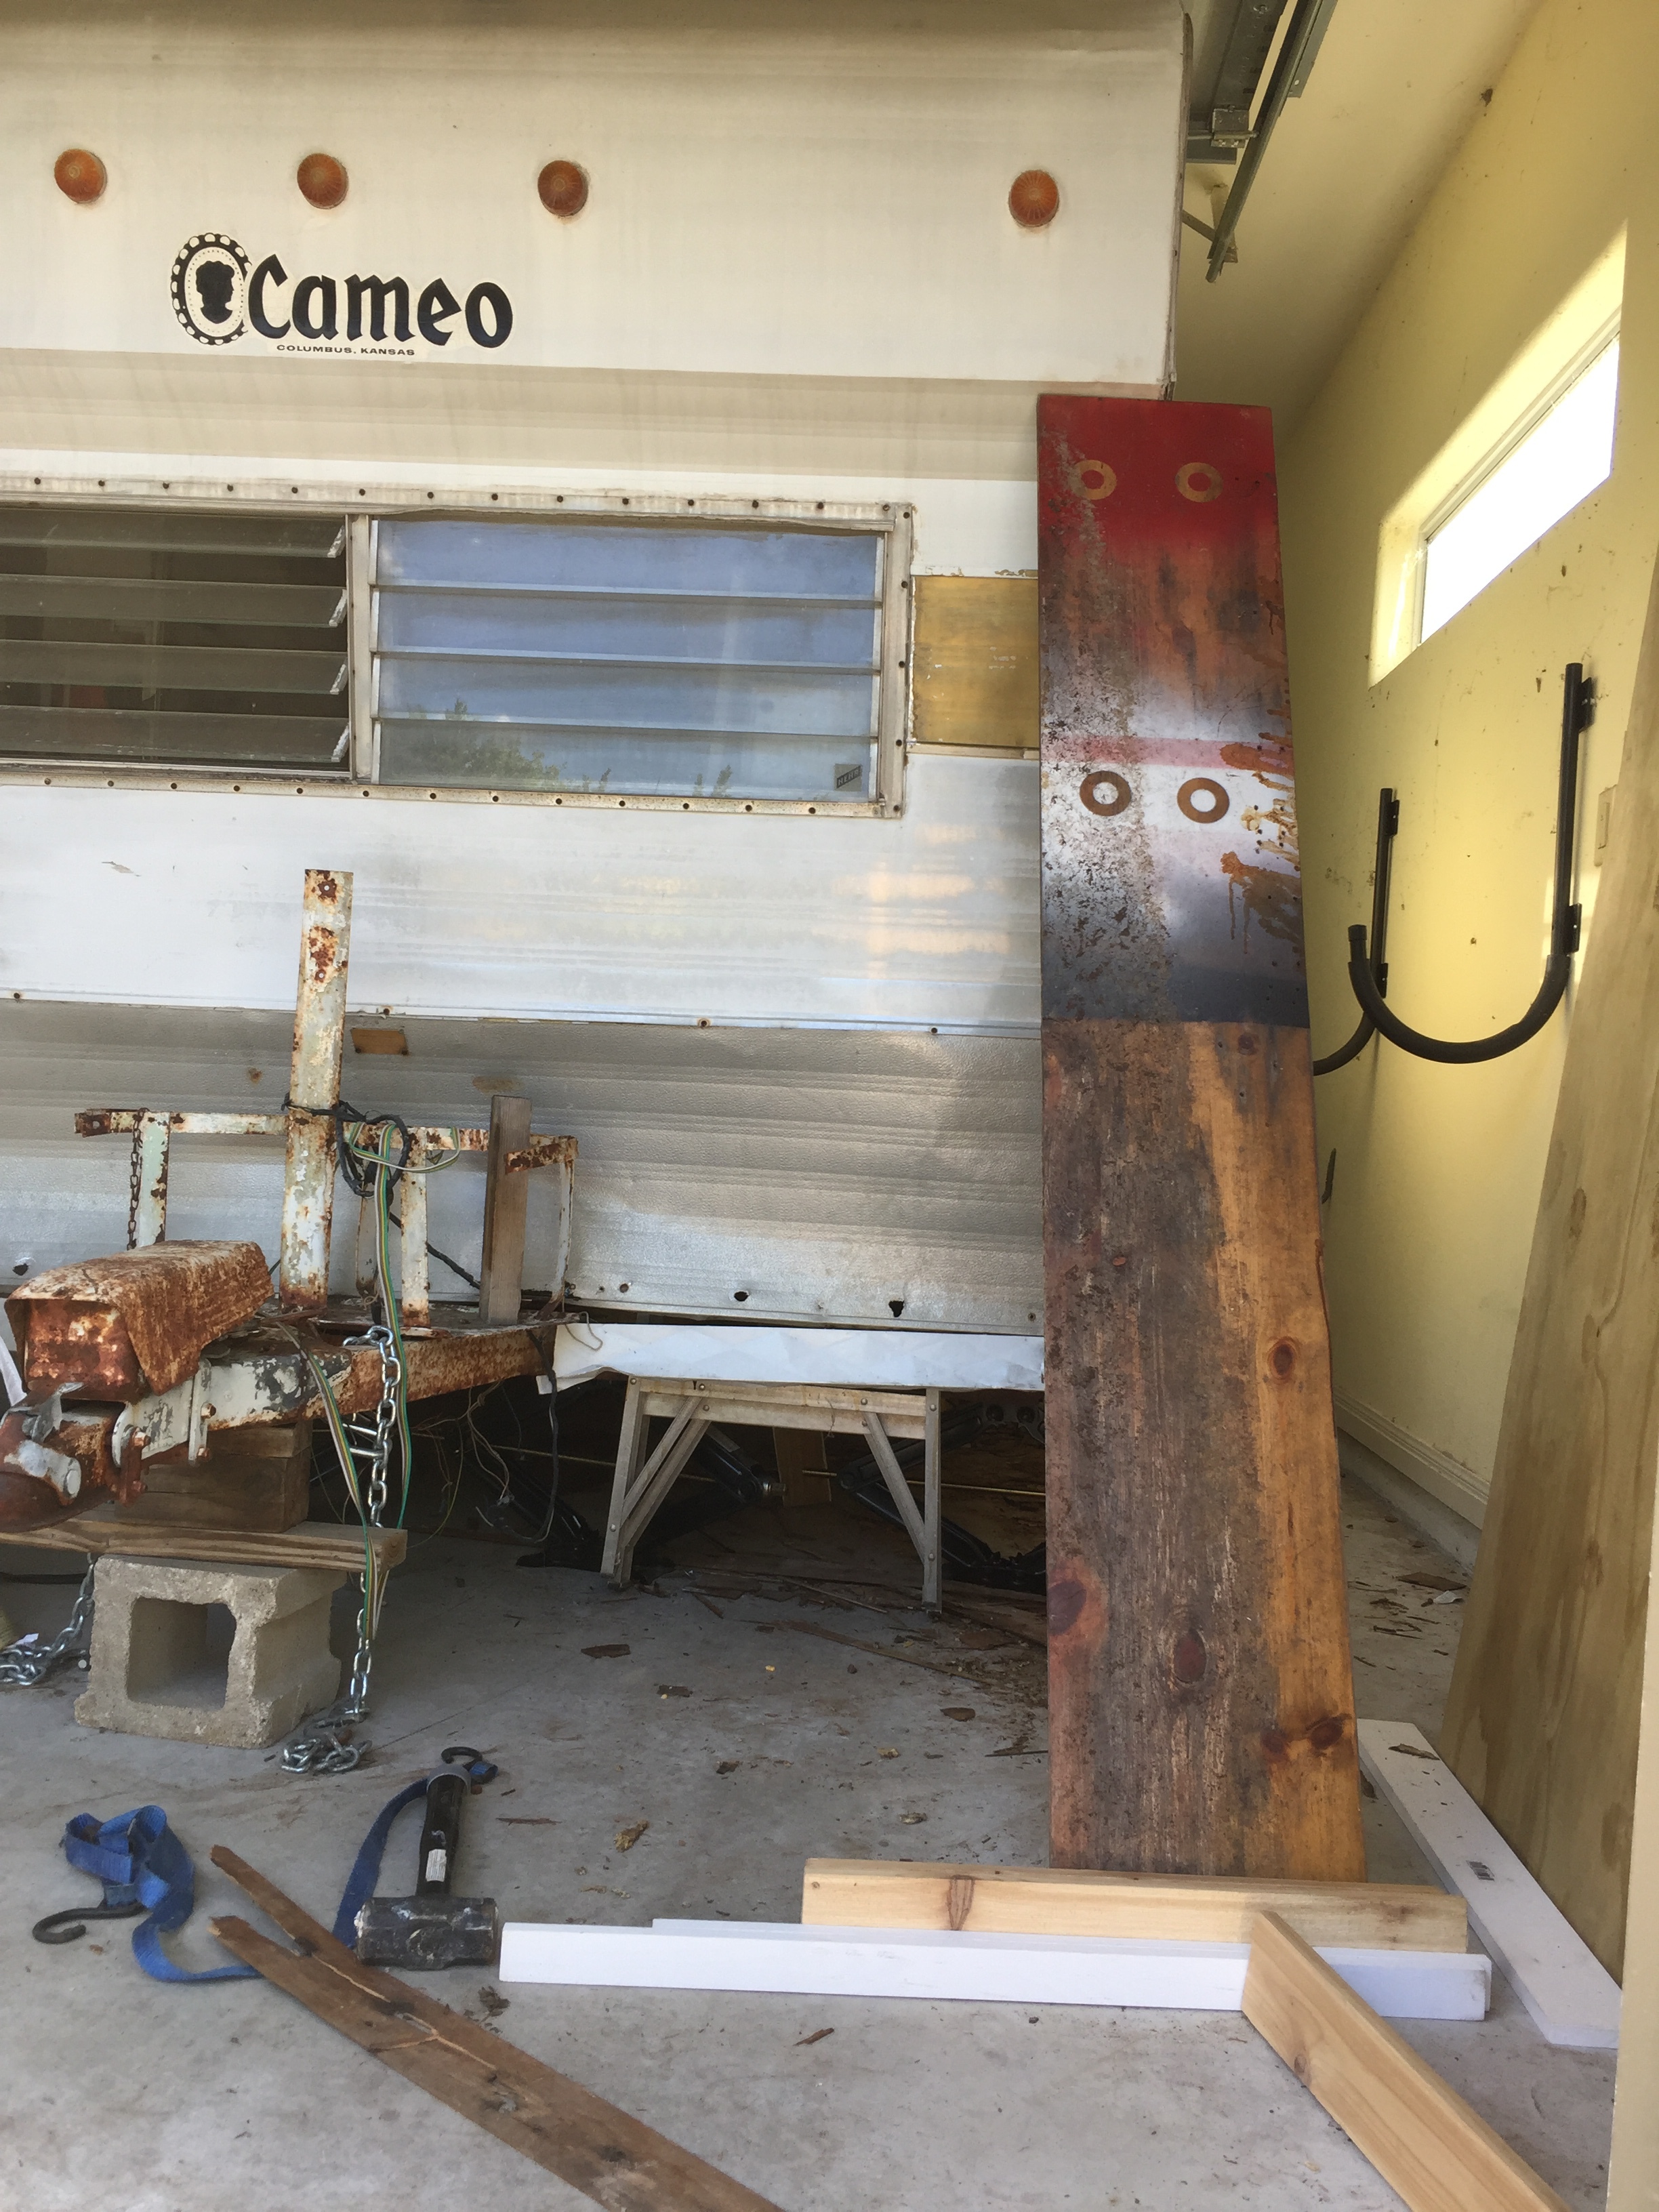
We decided to start with what looked like the piece with the most damage and therefore probably currently providing the least amount of structural support for the camper when compared to the other "perimeter joists" – the wall across from the door, slightly to the right (toward the front of the camper). First we (Nick, with his impressive grinding skills) cut through and removed the two metal carriage bolts connecting the metal trailer frame to the underside of the wooden perimeter joist (that were completely rusted through and hanging on by a thread at this point) and then one by one removed the handful of old hex screws from the outside of the camper that were securing the side of the crumbling perimeter joist to the bottom of the exterior metal wall.
And that's when it all came crashing down.
As the camper started to fall down and to the side, I did what any questionably sane person in my position would've done and wedged myself under the little bump out area on the front right of the camper to try and keep us safe from the crash and also protect our new baby from going down completely and taking all of its beautiful jalousie louvered windows with it. The exact order of everything for a while was (and still is) somewhat of a blur as our quasi-relaxing three-day holiday weekend quickly vanished and turned into full on trailer triage.


Alternating between propping the saggy camper up with various body parts, boards, ladders and stabilizer jacks, and somewhat sloppily securing temporary screws (despite our best efforts to fasten them in attractive, orderly lines) as best we could into the remaining pieces of semi-rotten perimeter joists, we were able to keep the camper mostly upright, if not for a few bends, creases and bulges in the metal here, there and everywhere. Though it fell a good 4-6 inches, thankfully we made it through the weekend without any other major incidents – including any damage to people, dogs, and my in-law's car, which when we're not working on it is parked next to the camper.


I don't think I've ever worked so hard in my life and had so little to show for it.
In addition to being pretty physically and emotionally exhausted, I just about drove myself (and probably Nick) crazy racking our brains for weeks about what happened, where we went wrong, what we needed to do to iron our walls back out and permanently stabilize The Cameo. I'm so unbelievably happy to tell you that after I don't know how many hours stretched over the course of five working days, we (Nick) finally seemed to solve the puzzle of what kept making the walls so terribly wavy and bulging even after they were supported with our first attempt at wall studs. Nick realized after we shimmied and shifted wall sections to and fro for hours and hours that we needed to add extra spacers to the sides of the perimeter joists to add a little extra width along the bottoms of the wall to make the floor the same width as the camper was at the ceiling. The perimeter joists had additional 3/4" spacer boards like this before we removed the rotten pieces, but everything was in such rough shape it was really hard to tell what was really supposed to be going on and what layer of wood belonged with what. (Now if only he could've thought of that a little sooner it would've saved us weeks of sleepless nights... but I guess I really can't complain too much since I didn't even think of it at all! It's times like this where I'm so happy I married a genius. But don't tell him that.)
Splitting at the seams
Another extra surprise while we were trying to stabilize and straighten the walls came when the long wall across from the door side of the camper (the most problematic of the walls post-demo due to it's length and lack of natural structural items like a door frame) kept popping out and literally coming apart at the seams, adding another level of difficulty to the project. After about a day and a half of strategically screwing and unscrewing countless screws in and out of the holes we'd already made in our prior attempts to stabilize the walls and toe nailing 1x2 wall studs into each other, the tides finally seem to be turning on this renovation as we made some major progress in the structural integrity of the camper walls and dramatically improved the waves and bulges. Dare I say we are finally to a place where it actually might be looking better than before.


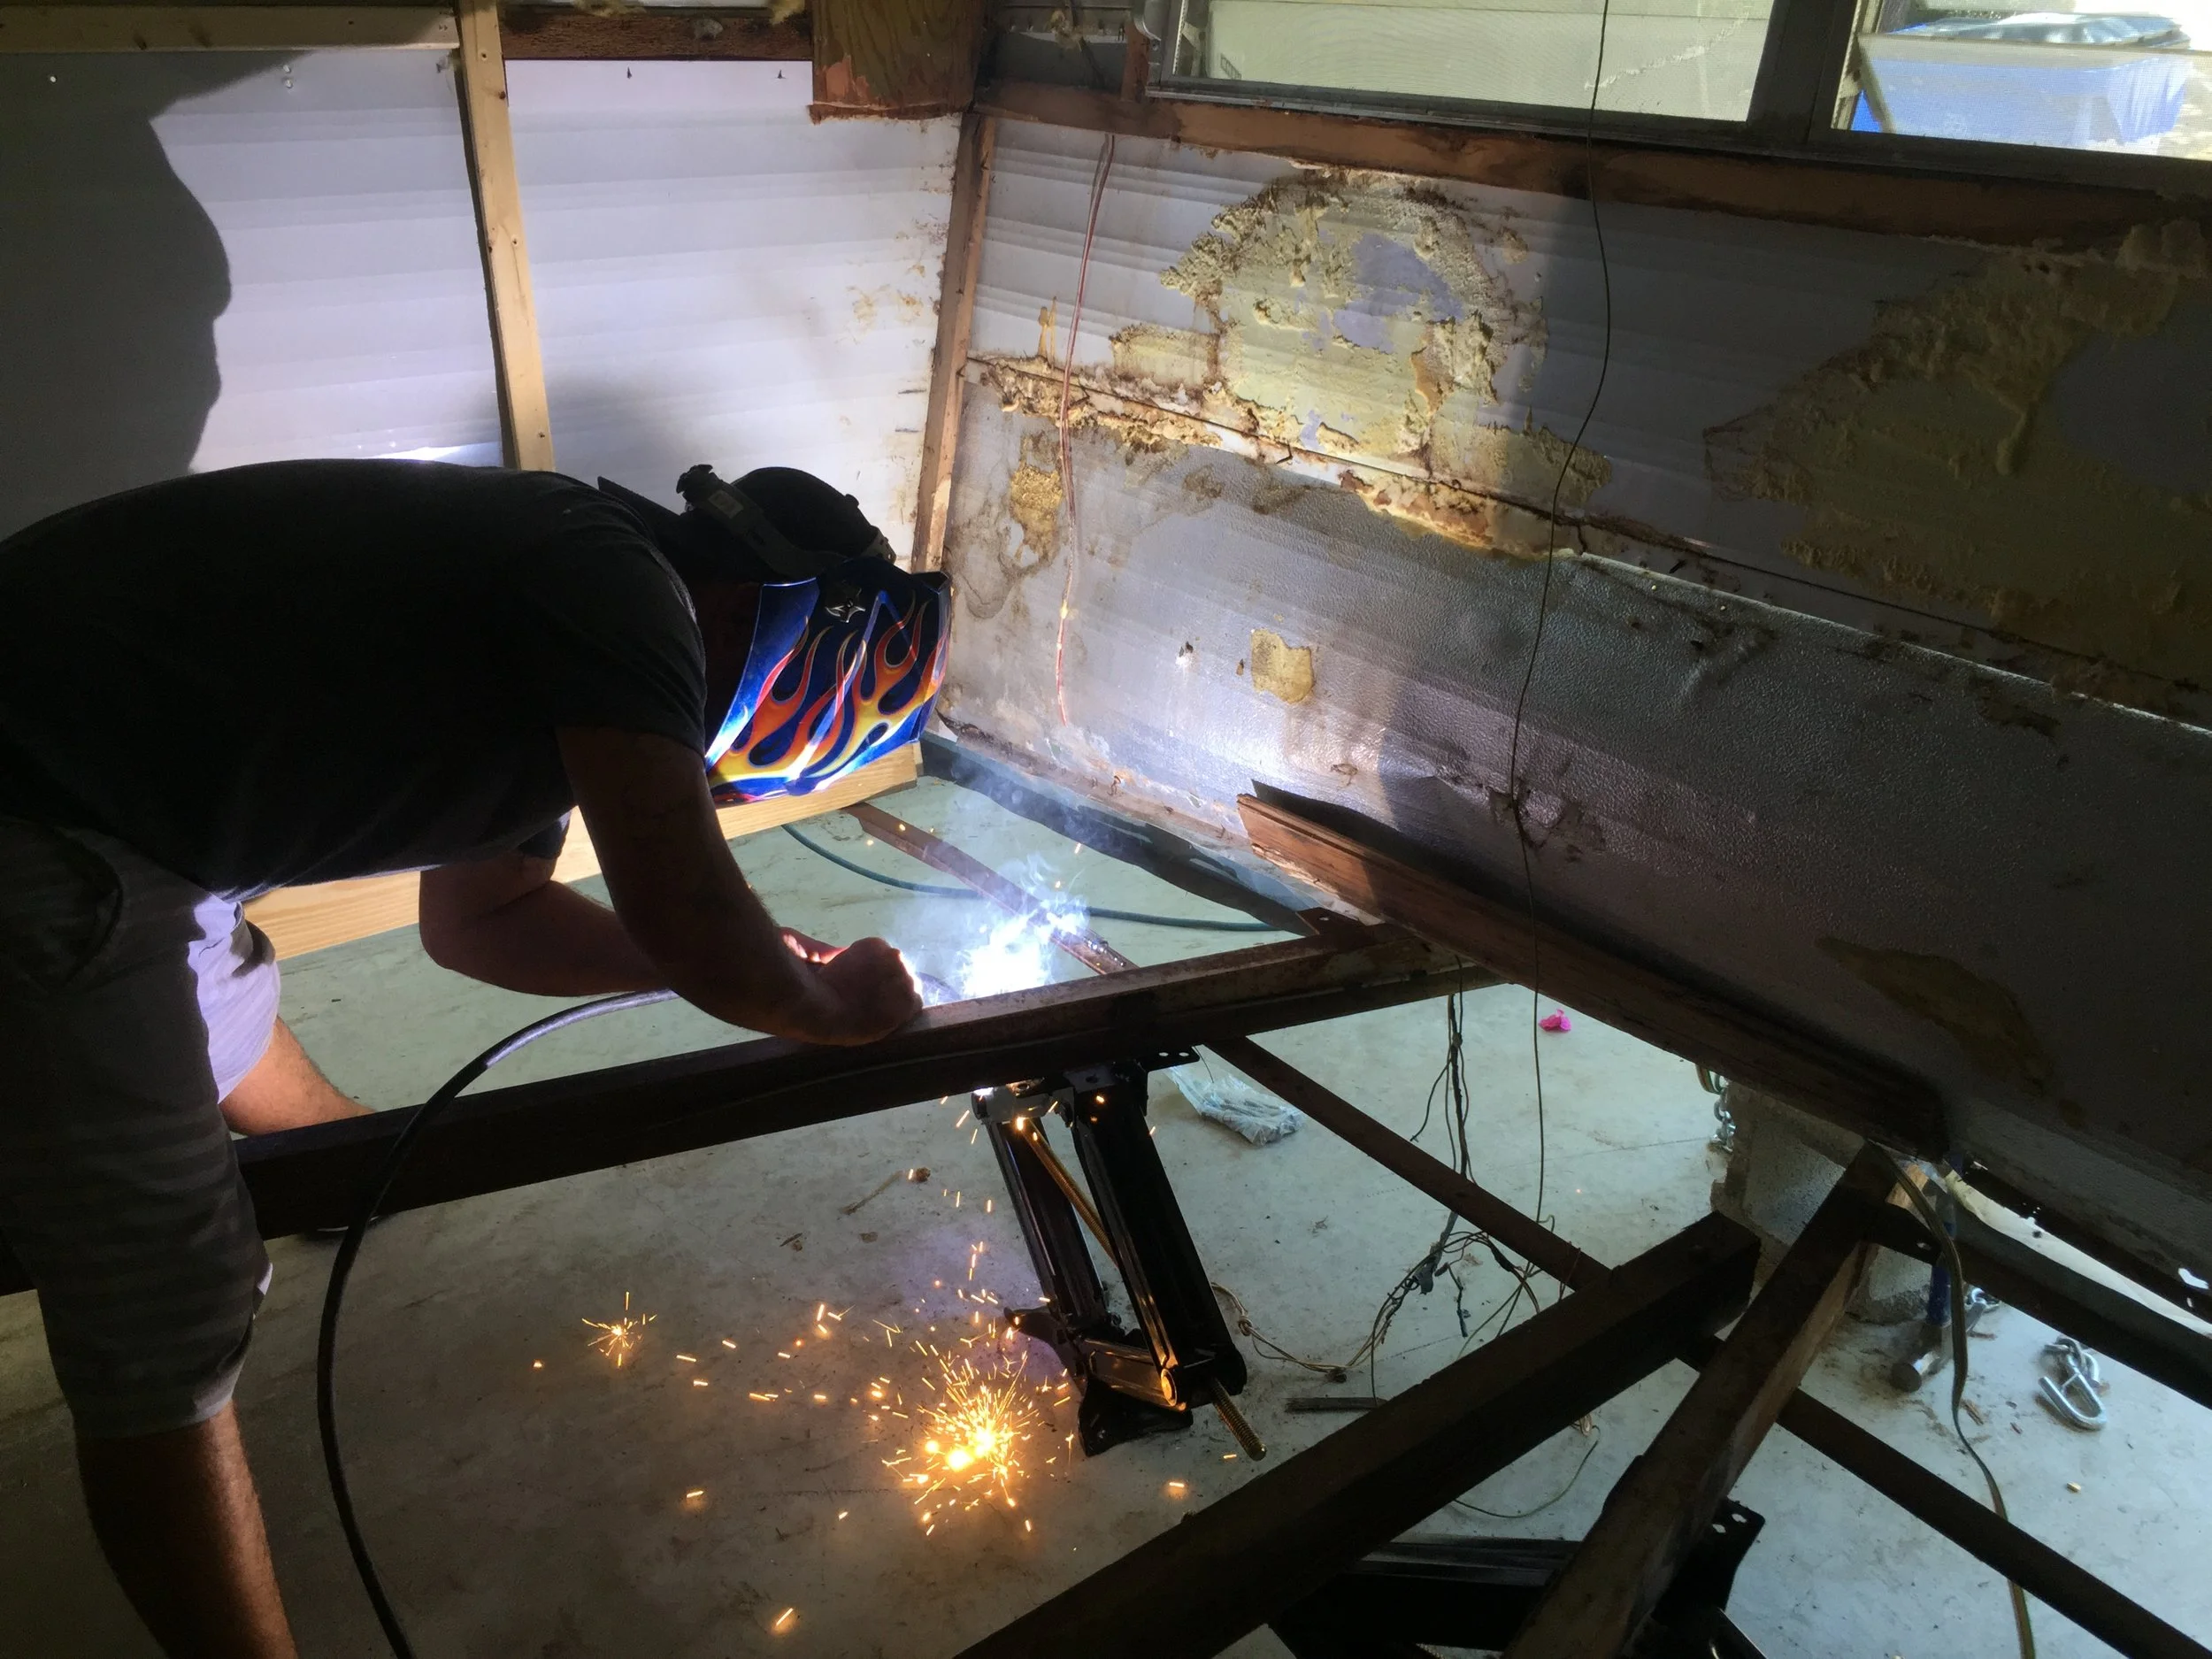
Or maybe not, but we can finally see the light at the end of this ugly tunnel! And it looks like building things: Adding brand new floor joists, welding bits and pieces to the trailer frame, and laying a brand new plywood subfloor. I don't think I've ever been so excited for such unsexy, soon-to-be hidden things to happen, not to mention we finally found a project to help use our miscellaneous scraps of lumber that have been taking up space in the garage for years. Double score!
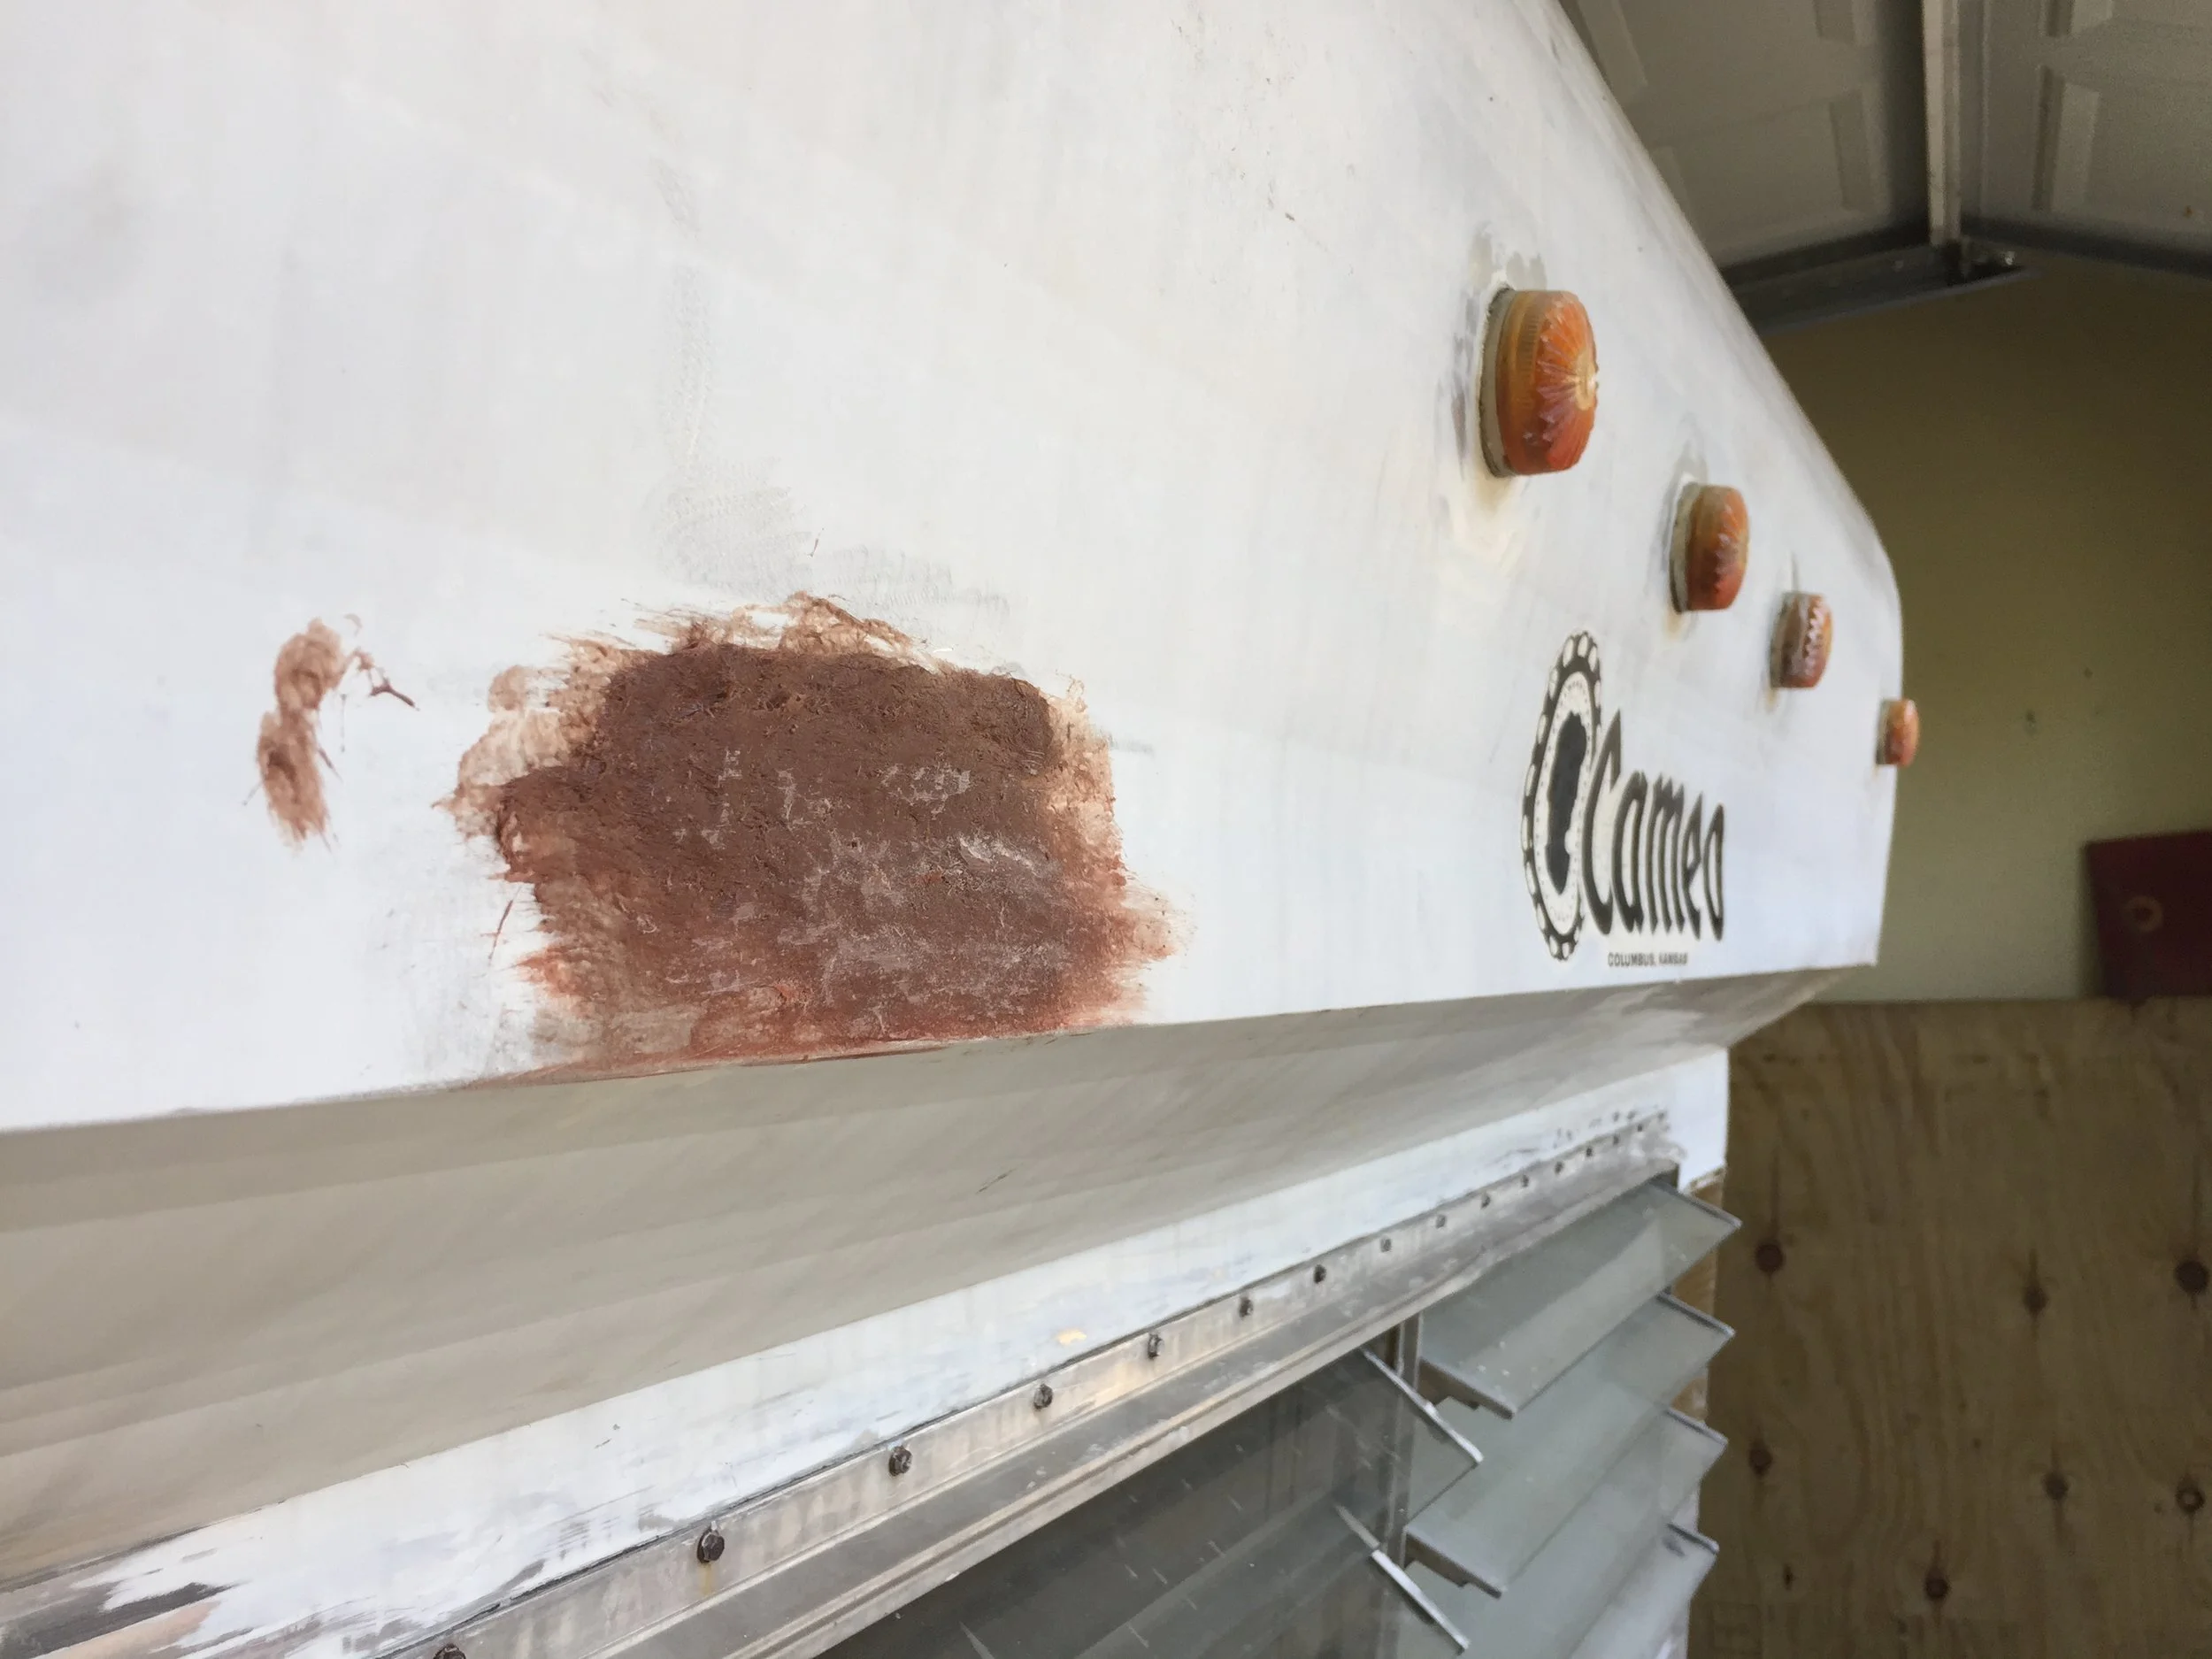
The exterior walls still are far from flawless and sadly will probably require more work than originally thought since we basically perforated them, but they should continue to look better and better as we finally move to the painting! I'll leave you with some shots of how she's sitting today: Straight and tall. It may not look like much has changed, but we're so much more at ease now that we've made it this far, knowing that the next part is where we begin to start adding and building things! That's when it really gets fun!

The door-side wall is much straighter, almost as if nothing happened. We will likely have to replace some metal on the front of the camper, but we knew that already with the huge holes that were already torn in it.

The long, problem wall is finally straight and should only improve after we add more structure when the interior walls go up.

It may not look like much has changed, but the supports on the side walls are brand new and sturdy.

Even though it's made up of a hodgepodge of wood from our lumber scraps, these walls are finally sturdy. You can see the light coming in from the holes in the wall when we had to temporarily support the wall in a rush. We'll be filling these in later to make The Cameo water-tight.
Are we completely crazy for tearing this thing down beyond the studs? Are you as shocked as we are The Cameo made it out of this relatively unscathed? Any suggestions as we head into reinforcing the somewhat saggy roof (someone recently incorrectly installed a skylight, causing a roof sag and minor leak), installing the plywood subfloor, waterproofing the exterior, and planning the overall layout?
Let us know your thoughts below!