The Cameo Camper Renovation: Backlit Shower Walls Part 4
Last time we shared how we installed the 12V LED strip lights and the bathroom’s light switch.
Today we’re continuing our wet bath tutorial with how we plumbed for our shower and toilet, hiding it inside the wall, and prepping the interior supports needed to mount our shower fixtures.
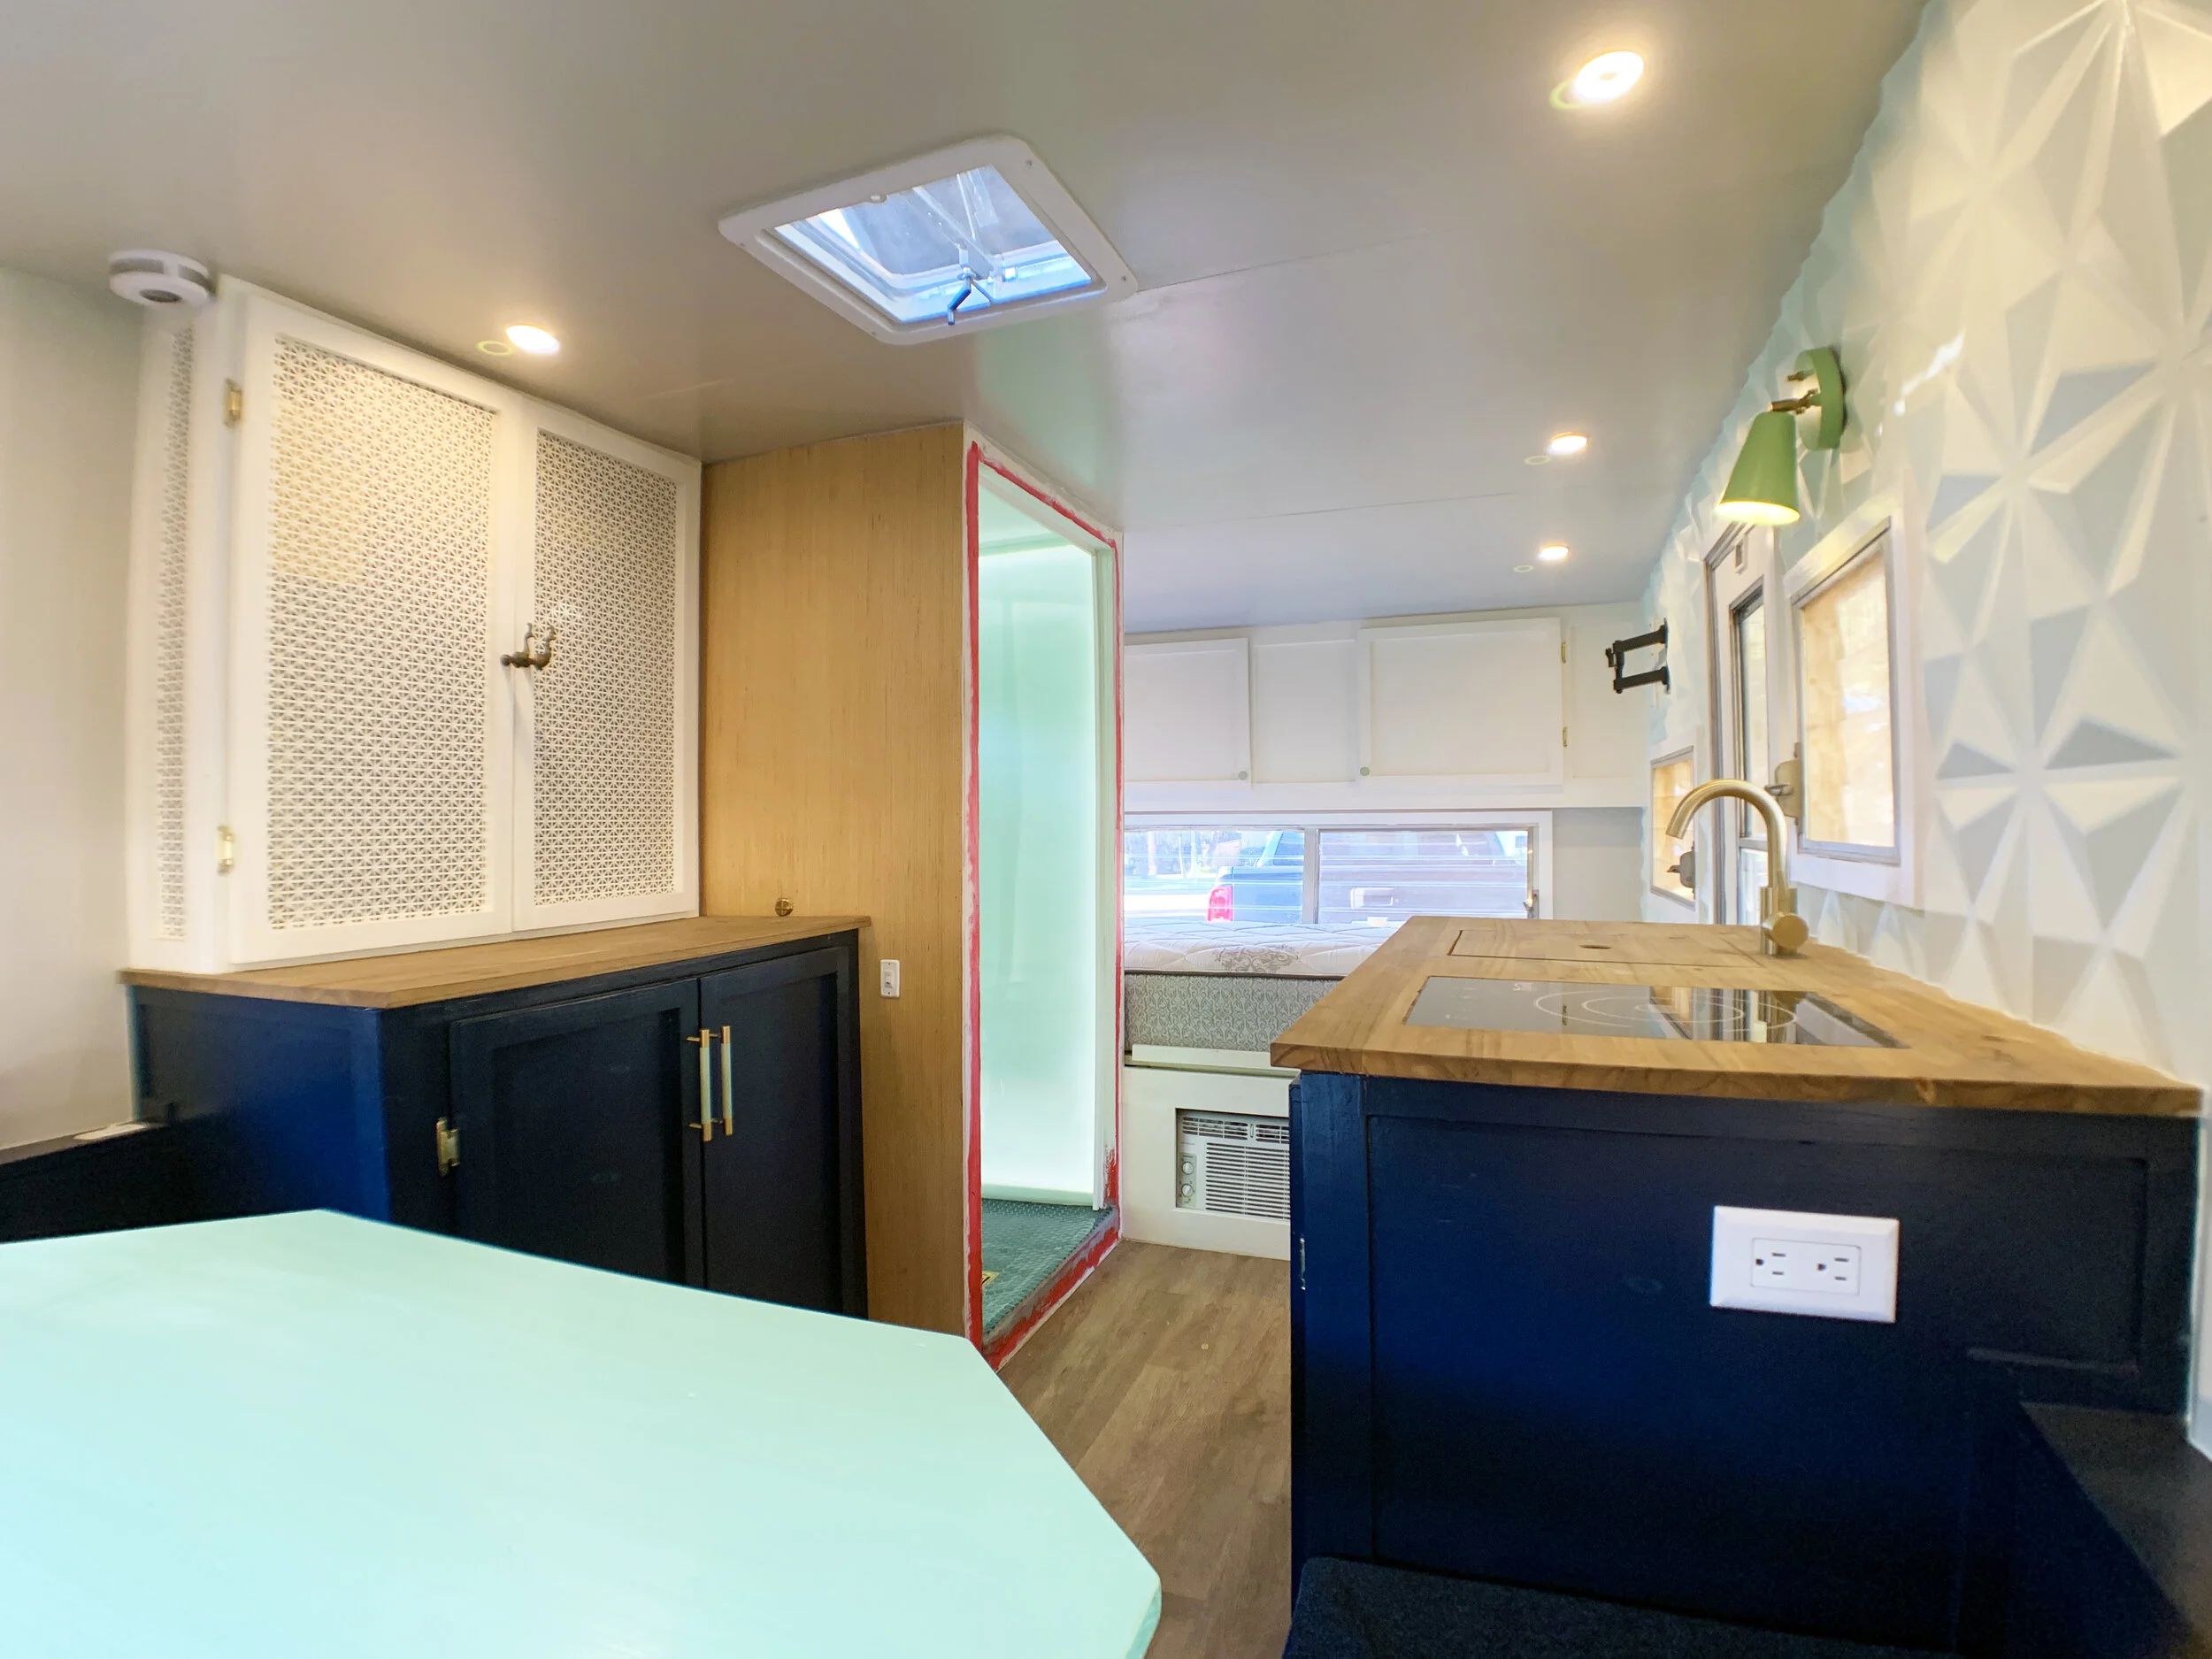
When the interior walls are finished the mint-colored acrylic has a soft, diffused glow and the “things” – electrical, plumbing, structural supports – hidden inside the walls sort of disappear so the brass shower fixtures look like they’re floating in the acrylic:

OUR BACKLIT SHOWER WALLS (PART 4) SHOPPING LIST
Shower fixtures – for measuring + planning supports:
Trim kit – AKA the attractive shower handle
Handheld shower head + slide bar – our multifunctional, space-saving solution
Drop ell – the port that gets water to the handheld shower head
Shower diverter valve – this needs to be compatible with the trim kit you choose
Toilet – for measuring + planning spacing. (We got the Dometic 310 “high” toilet in white, because no one likes a squatty potty.)
1/2” PEX pipe – the same as what we’ve been using throughout the camper.
PEX cutter tool – for 1/2” PEX pipe; You could also buy a nicer one (especially if you’ll be cutting a ton of PEX professionally and/or need to also cut copper or something), but the more compact, cheaper one (at 1/4 of the cost) worked well for our use of cutting just PEX, sometimes in tight spaces.
PEX stainless steel clamp rings – One clamp ring for each cut end of PEX pipe (e.g. one segment of PEX has two cuts, which means two rings).
3-handle 3/8”-1” PEX clamp tool – for crimping rings around connectors
Brass fittings – this will vary based on your specific setup, but we used:
(5) 1/2” x 1/2”elbows – part #UC248LFZ
(1) 1/2” x 1/2” x 1/2” tee – part #UC362LFZ – for the toilet
1/2” x 1/2” MNPT male adapter – part #UC120LFZ – (we used 3 – 1 for connecting our shower head to the diverter valve and 2 for connecting our hot and cold water supply lines to the diverter valve.)
1/2-in diameter threaded male adapter plug fitting – to plug up the fourth port on the diverter valve since we don’t have a bathtub
Teflon plumbing tape
1x4 wood scrap – to make small blocks and round supports for the slide bar; could also be PVC board
1x4/1x6 PVC board scrap – to make layer 2 of round supports for the slide bar
Construction adhesive
Caulk gun
Nail gun + 1/2” nails
Painters tape
Tape Measure
Drill
1-1/8” and 3/4” spade bits – for our hack to add enough room for our diverter valve since it’s a little to deep to fit inside our shallow wall
U-shaped metal straps + short wood screws
PEX cap – we used 1 so we could test the line before the toilet was installed
Coming into today, we’ve already made our acrylic panels, framed our shower and run the electrical, including installing the light switch.
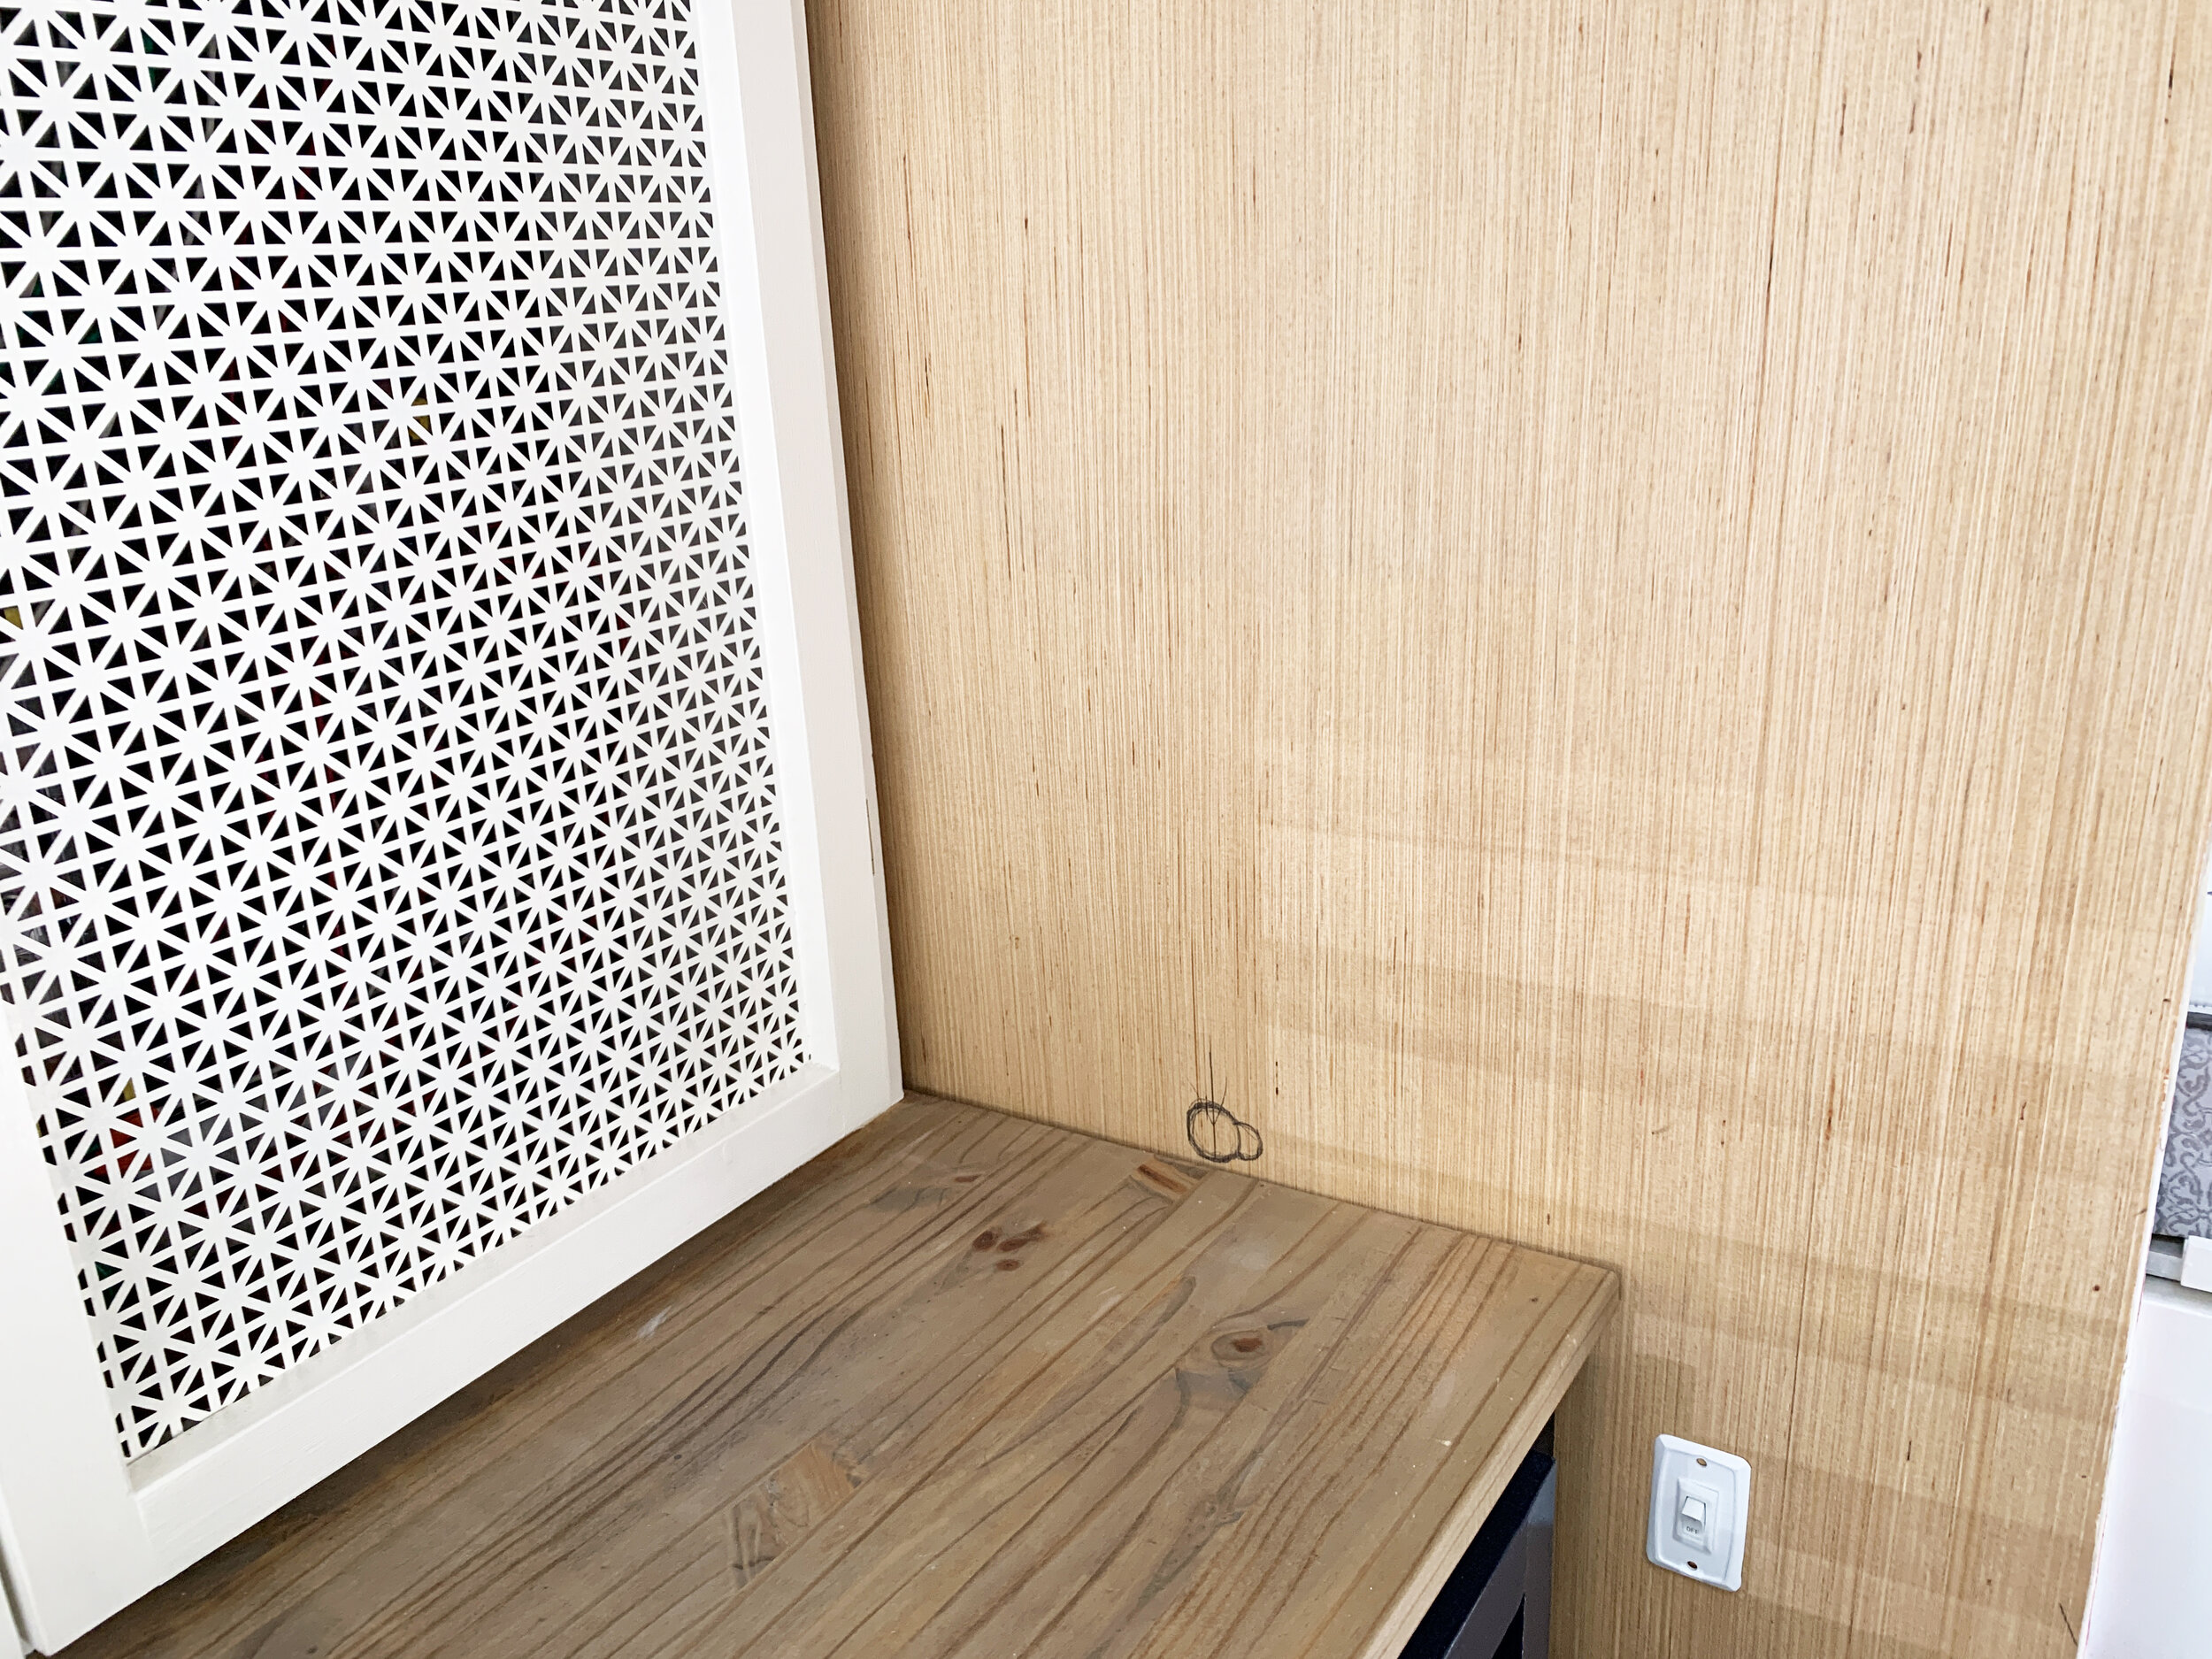
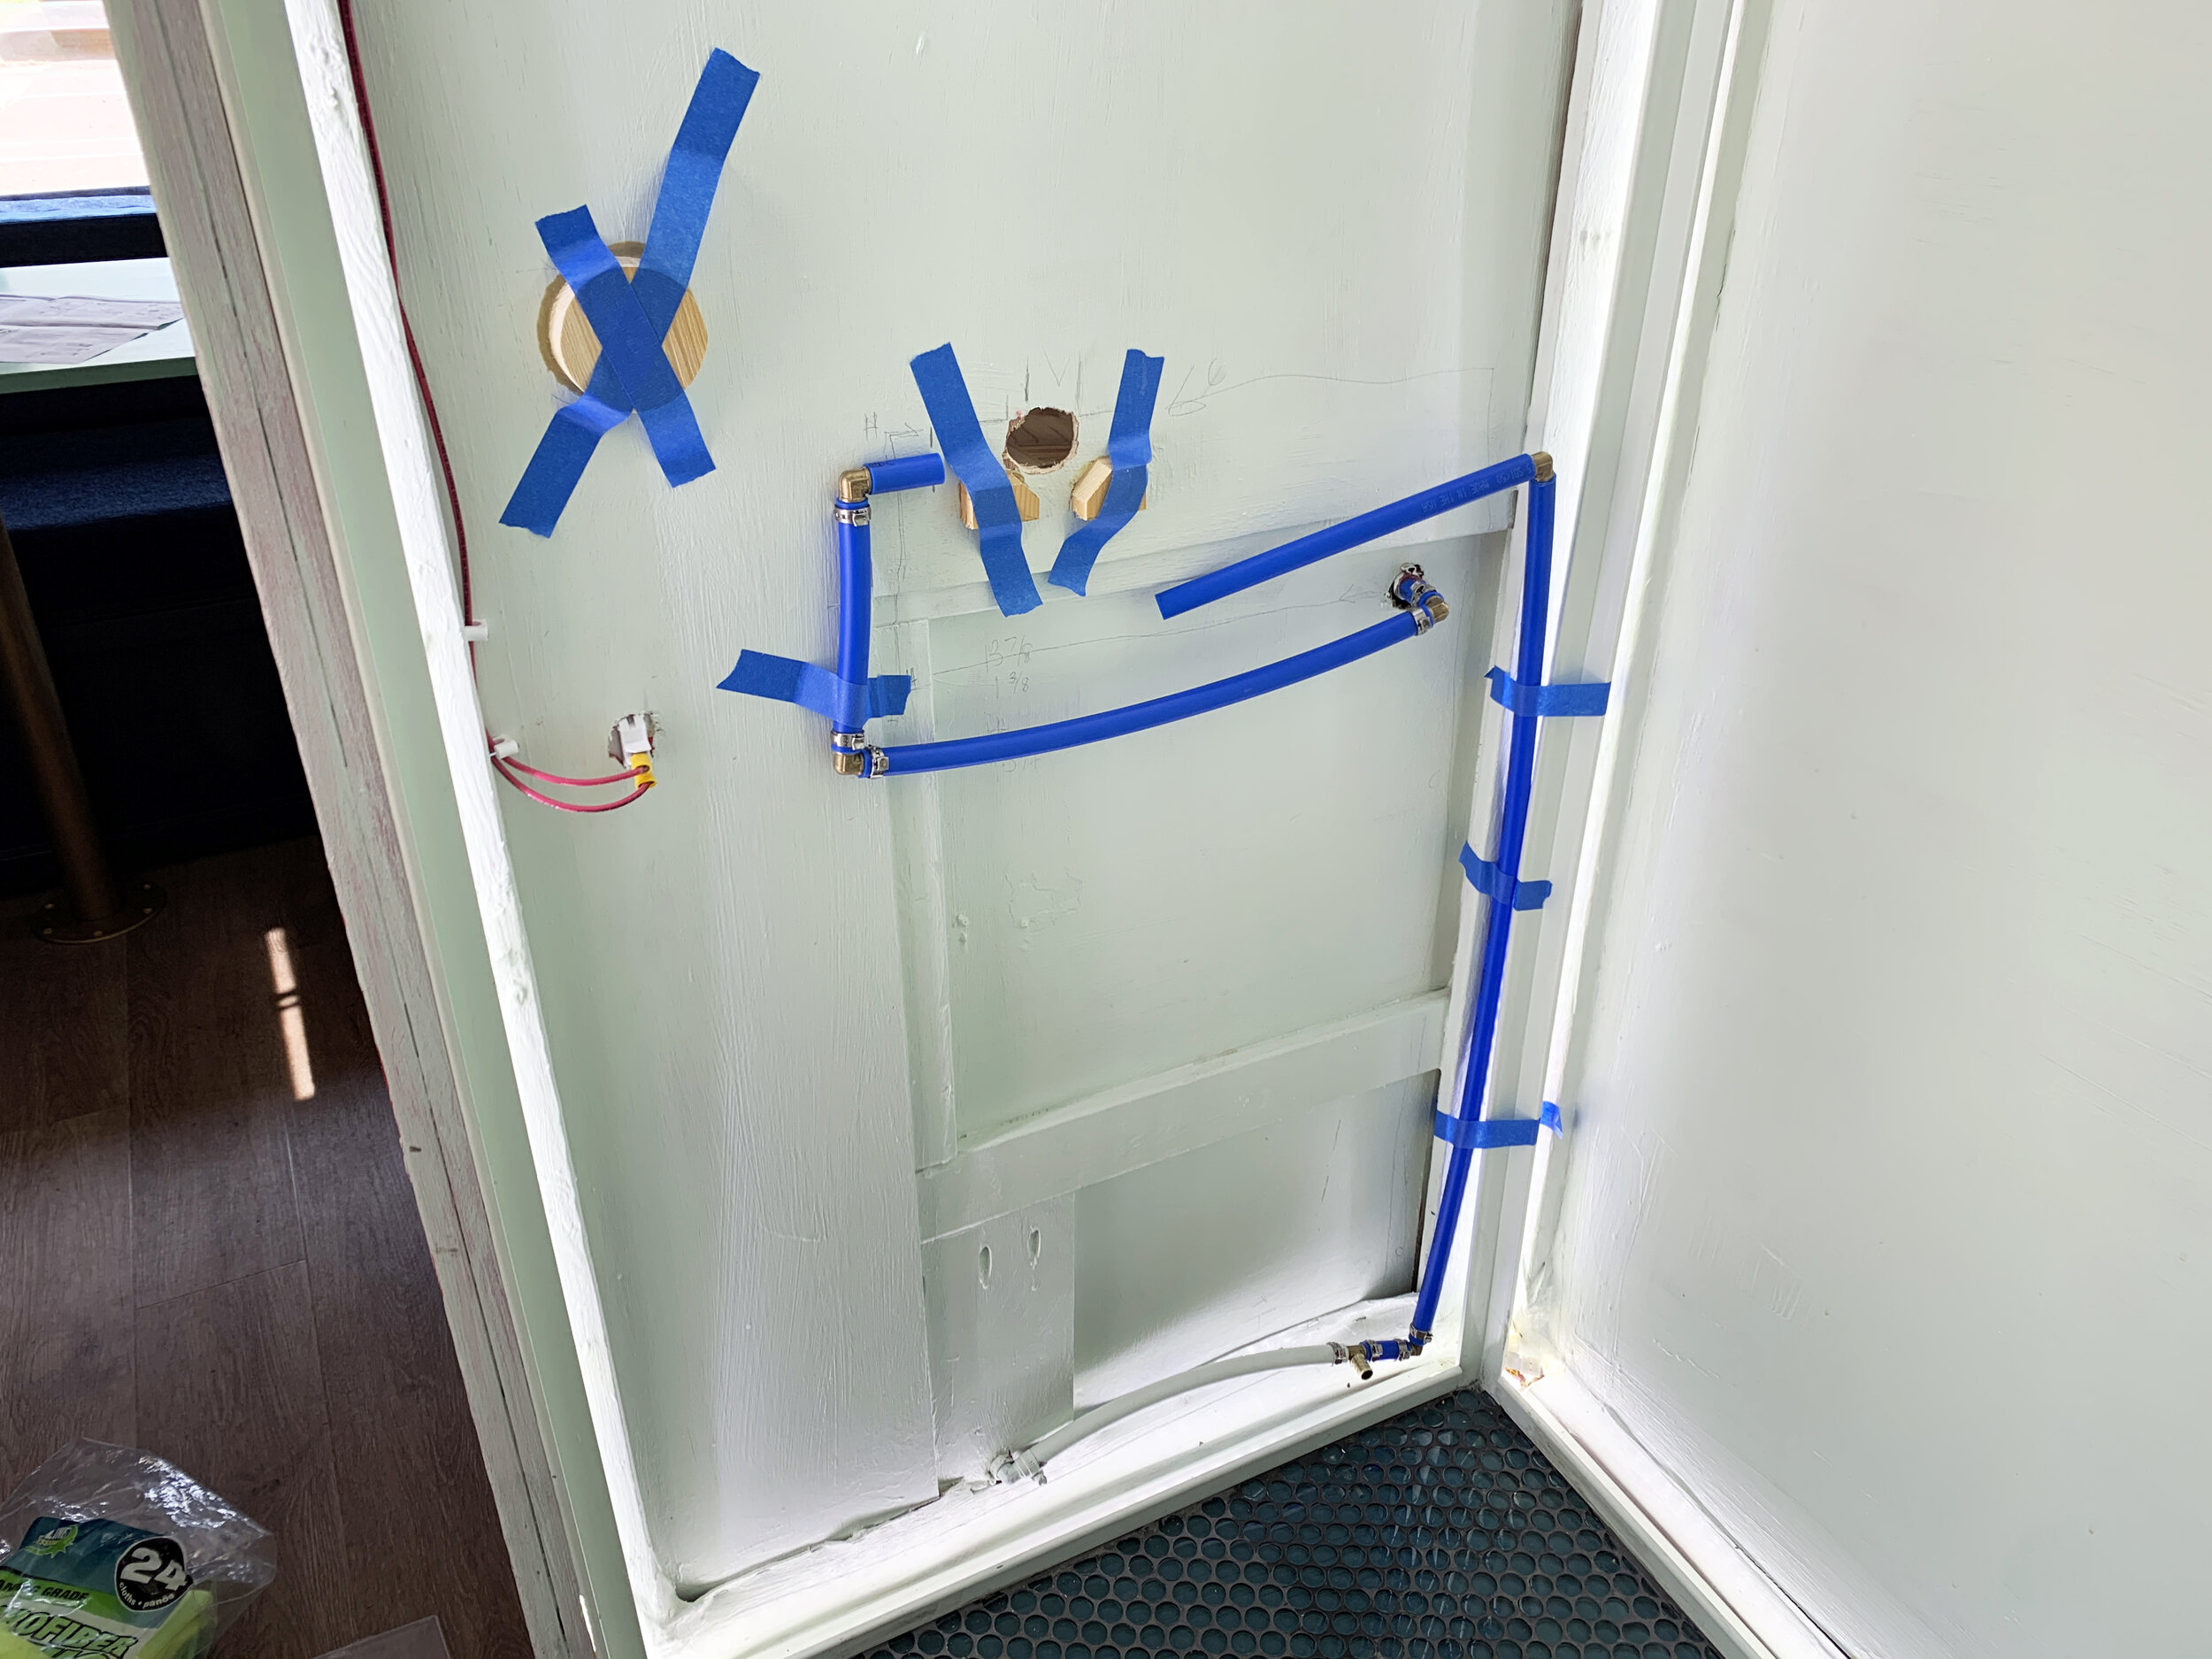
Deciding + measuring fixture placement
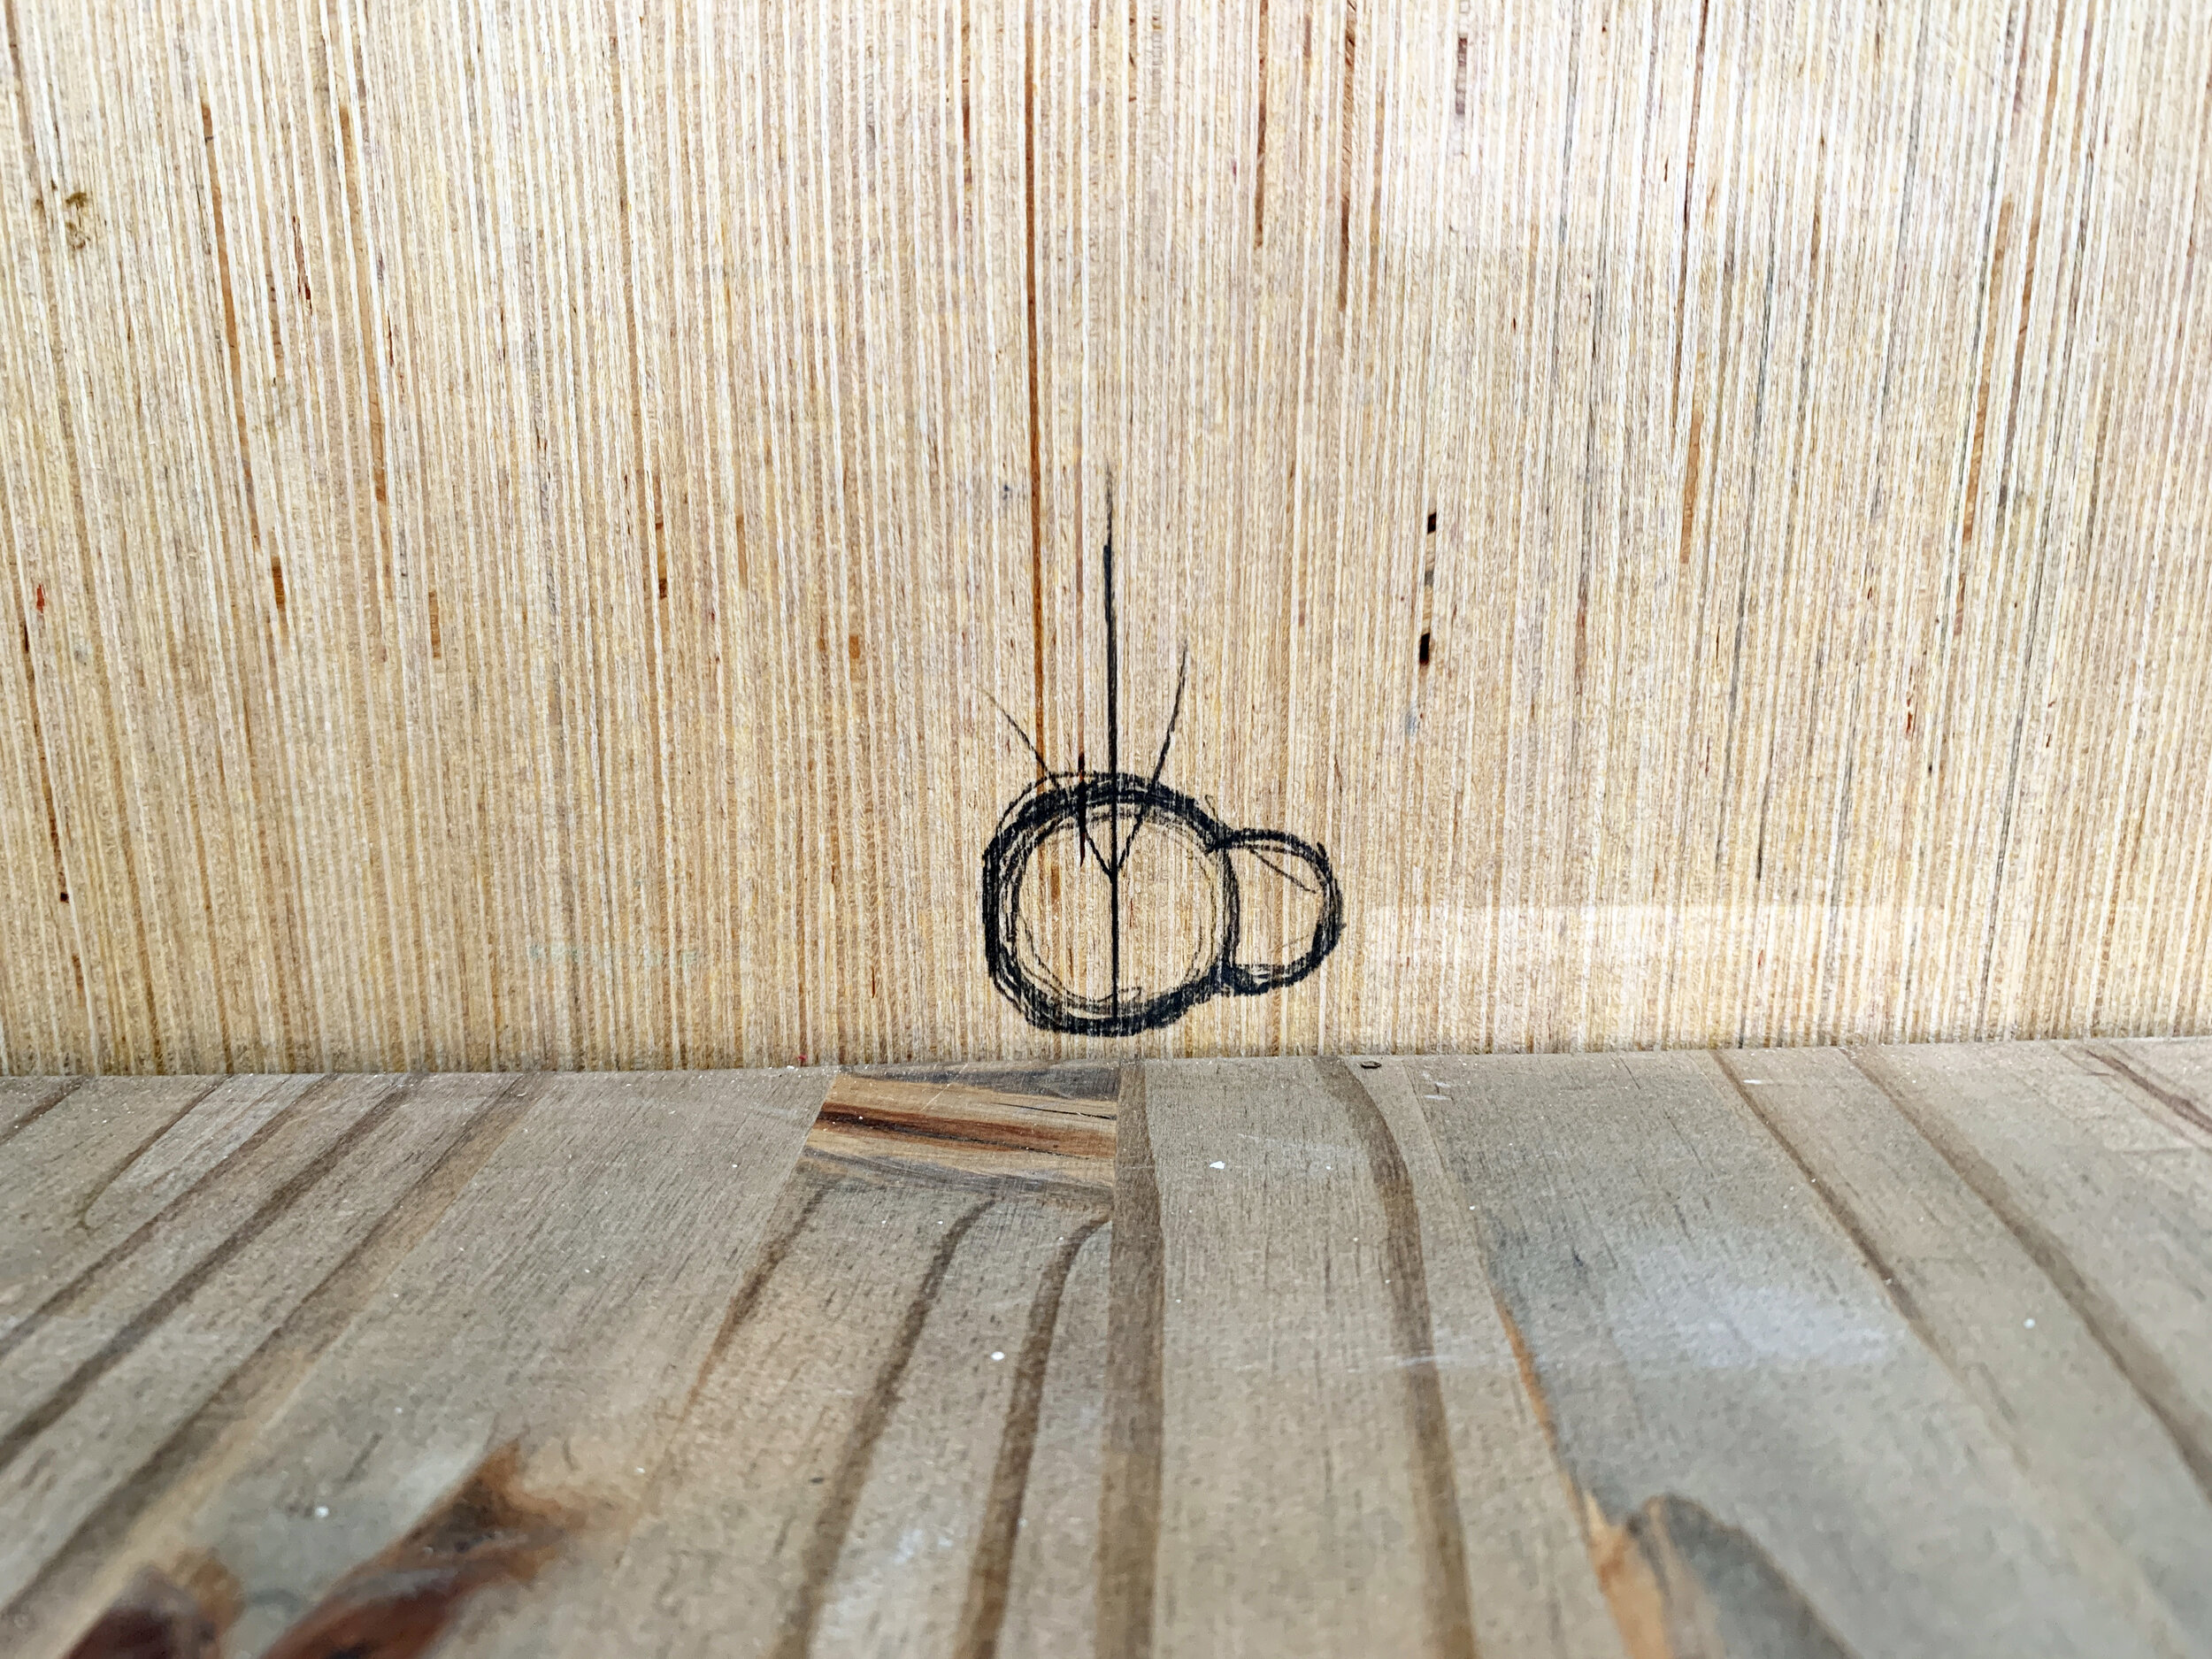
First we decided where we wanted each of our fixtures – the shower handle and shower head, which in our case is a handheld wand on a slide bar – by holding it up together in the space.

Then we traced around the bar mounts where they touched the wall.
Optimizing the small (approximately 32x28”) bathroom, we decided to install the toilet in a corner at an angle to allow for more knee space when sitting, mount the shower slide bar/shower head on the left well close to the door so the spray would shoot at an angle away from the door to help prevent any water coming out of the wet bath and into the main are of the camper, and the trim kit (AKA the control knob) centered in the left wall at a comfortable standard height from the floor where it won’t stab the person using the toilet.
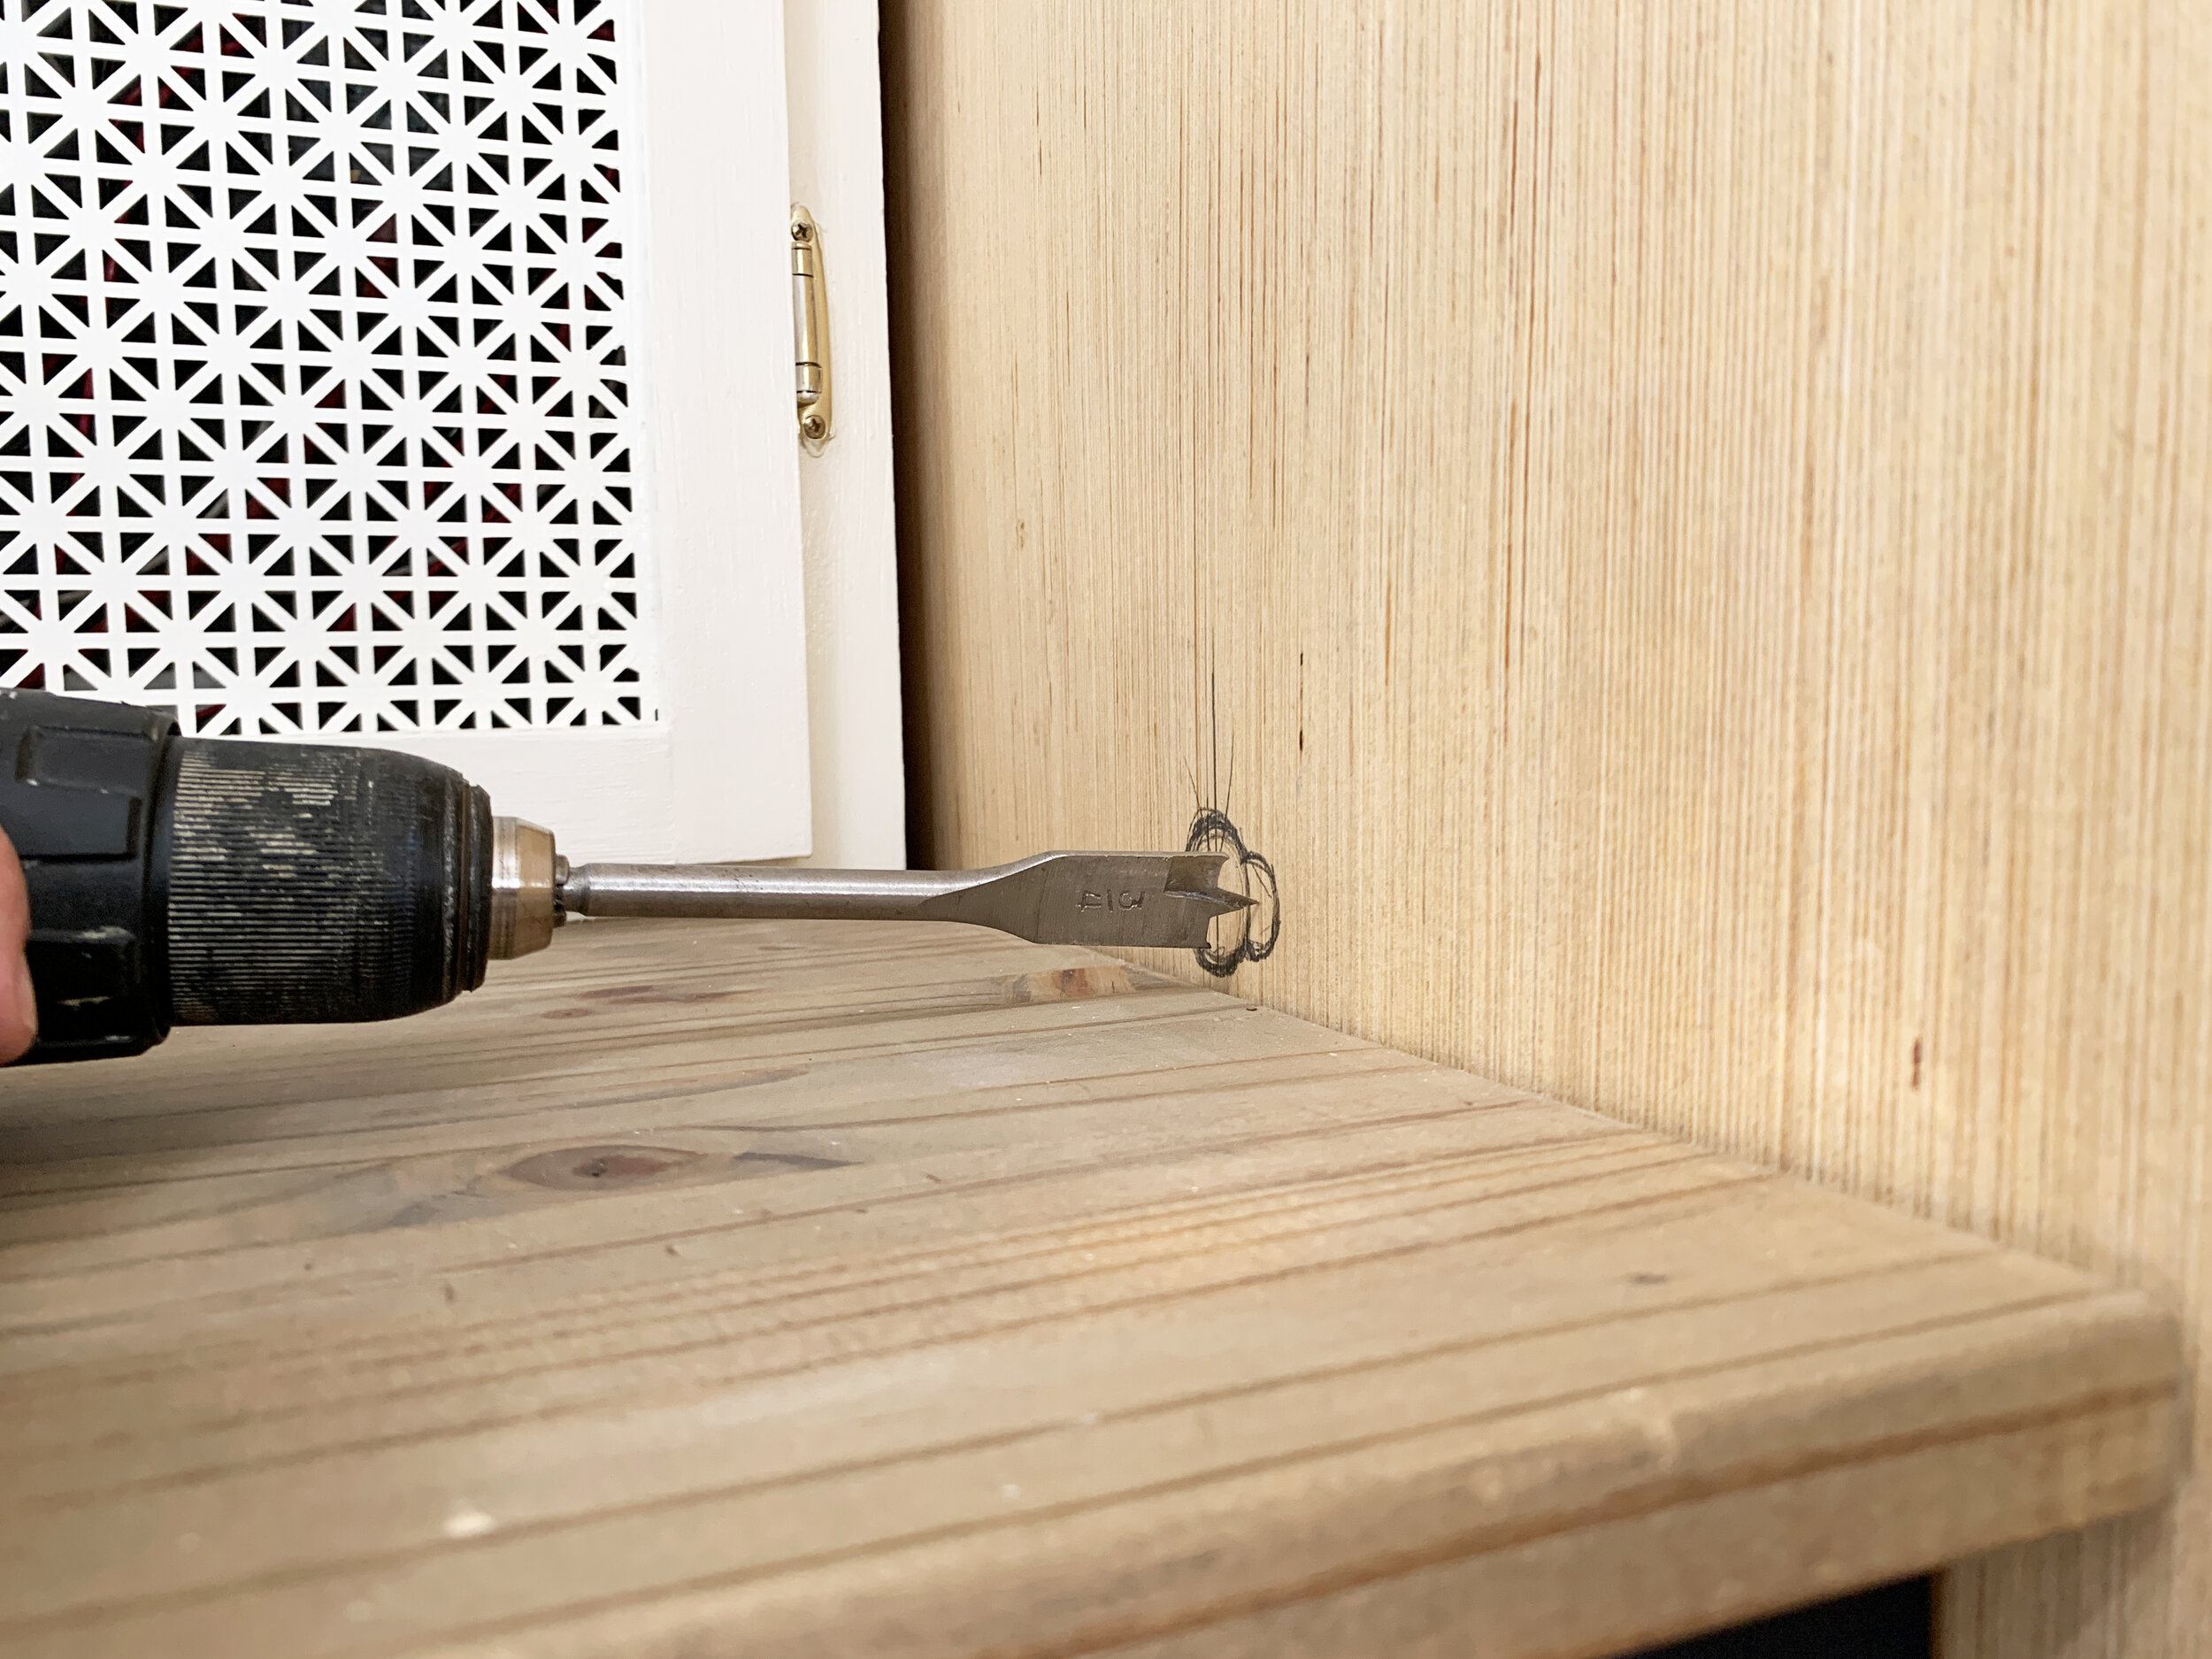
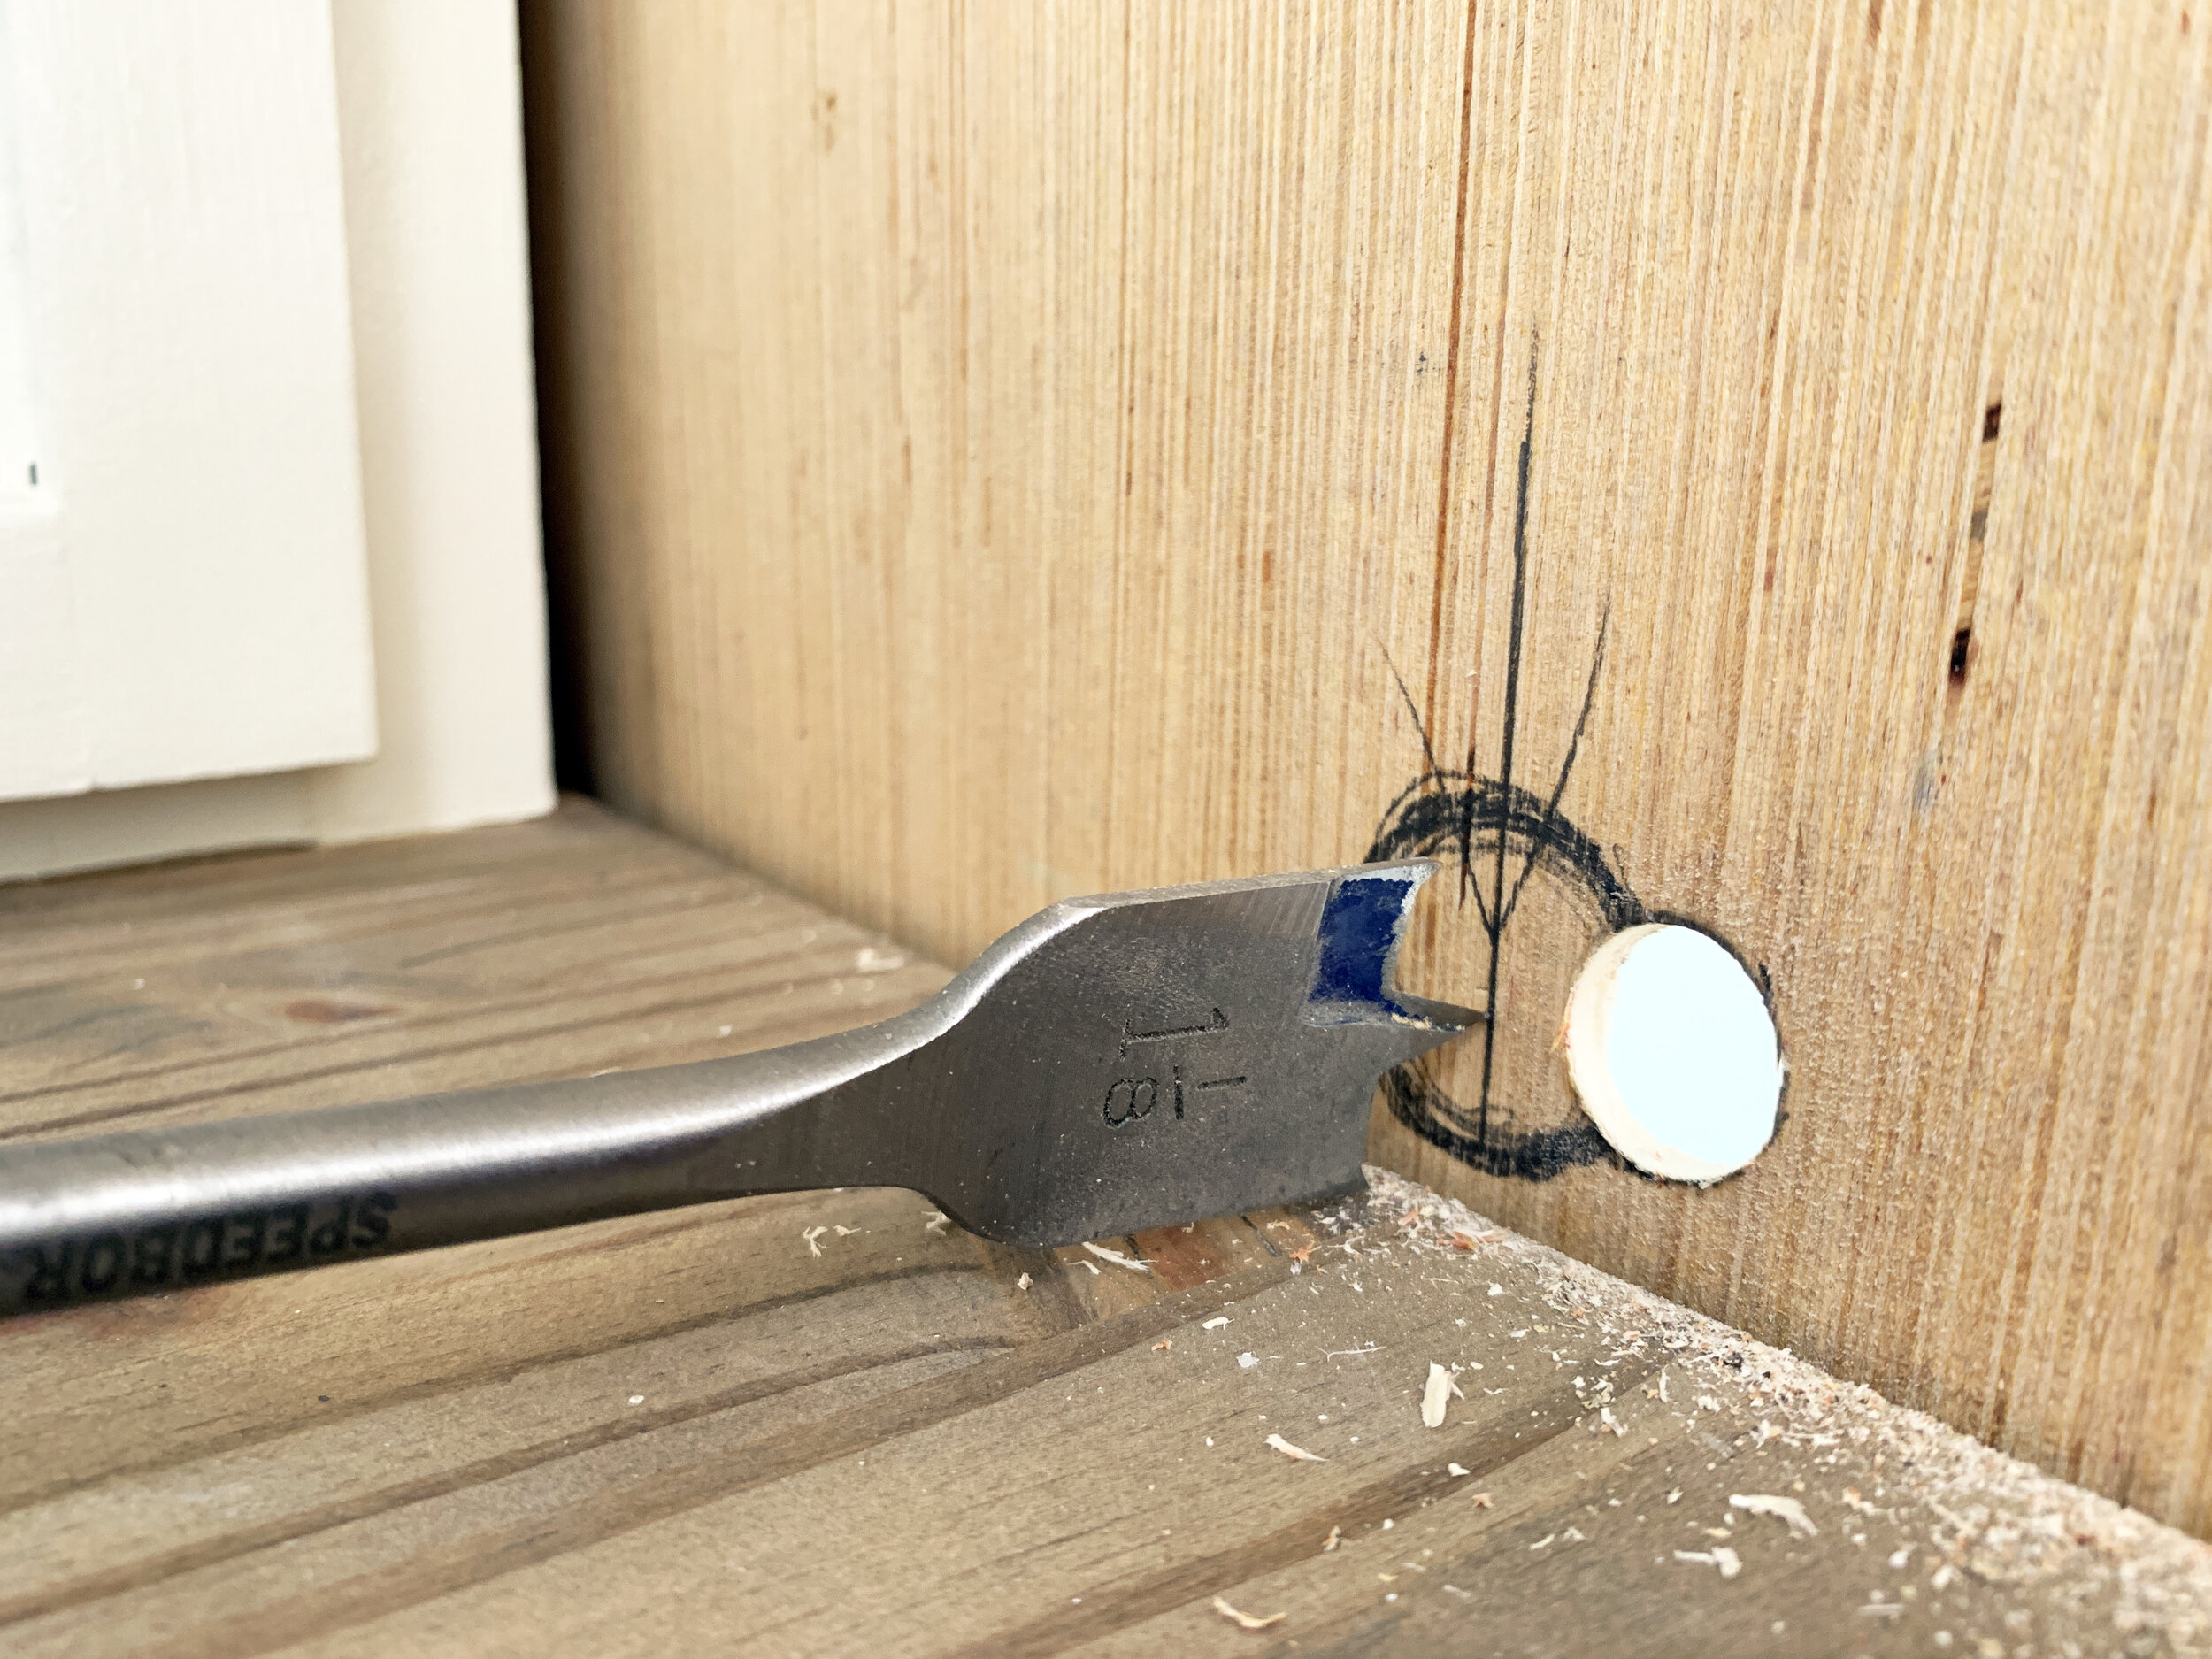
The slide bar
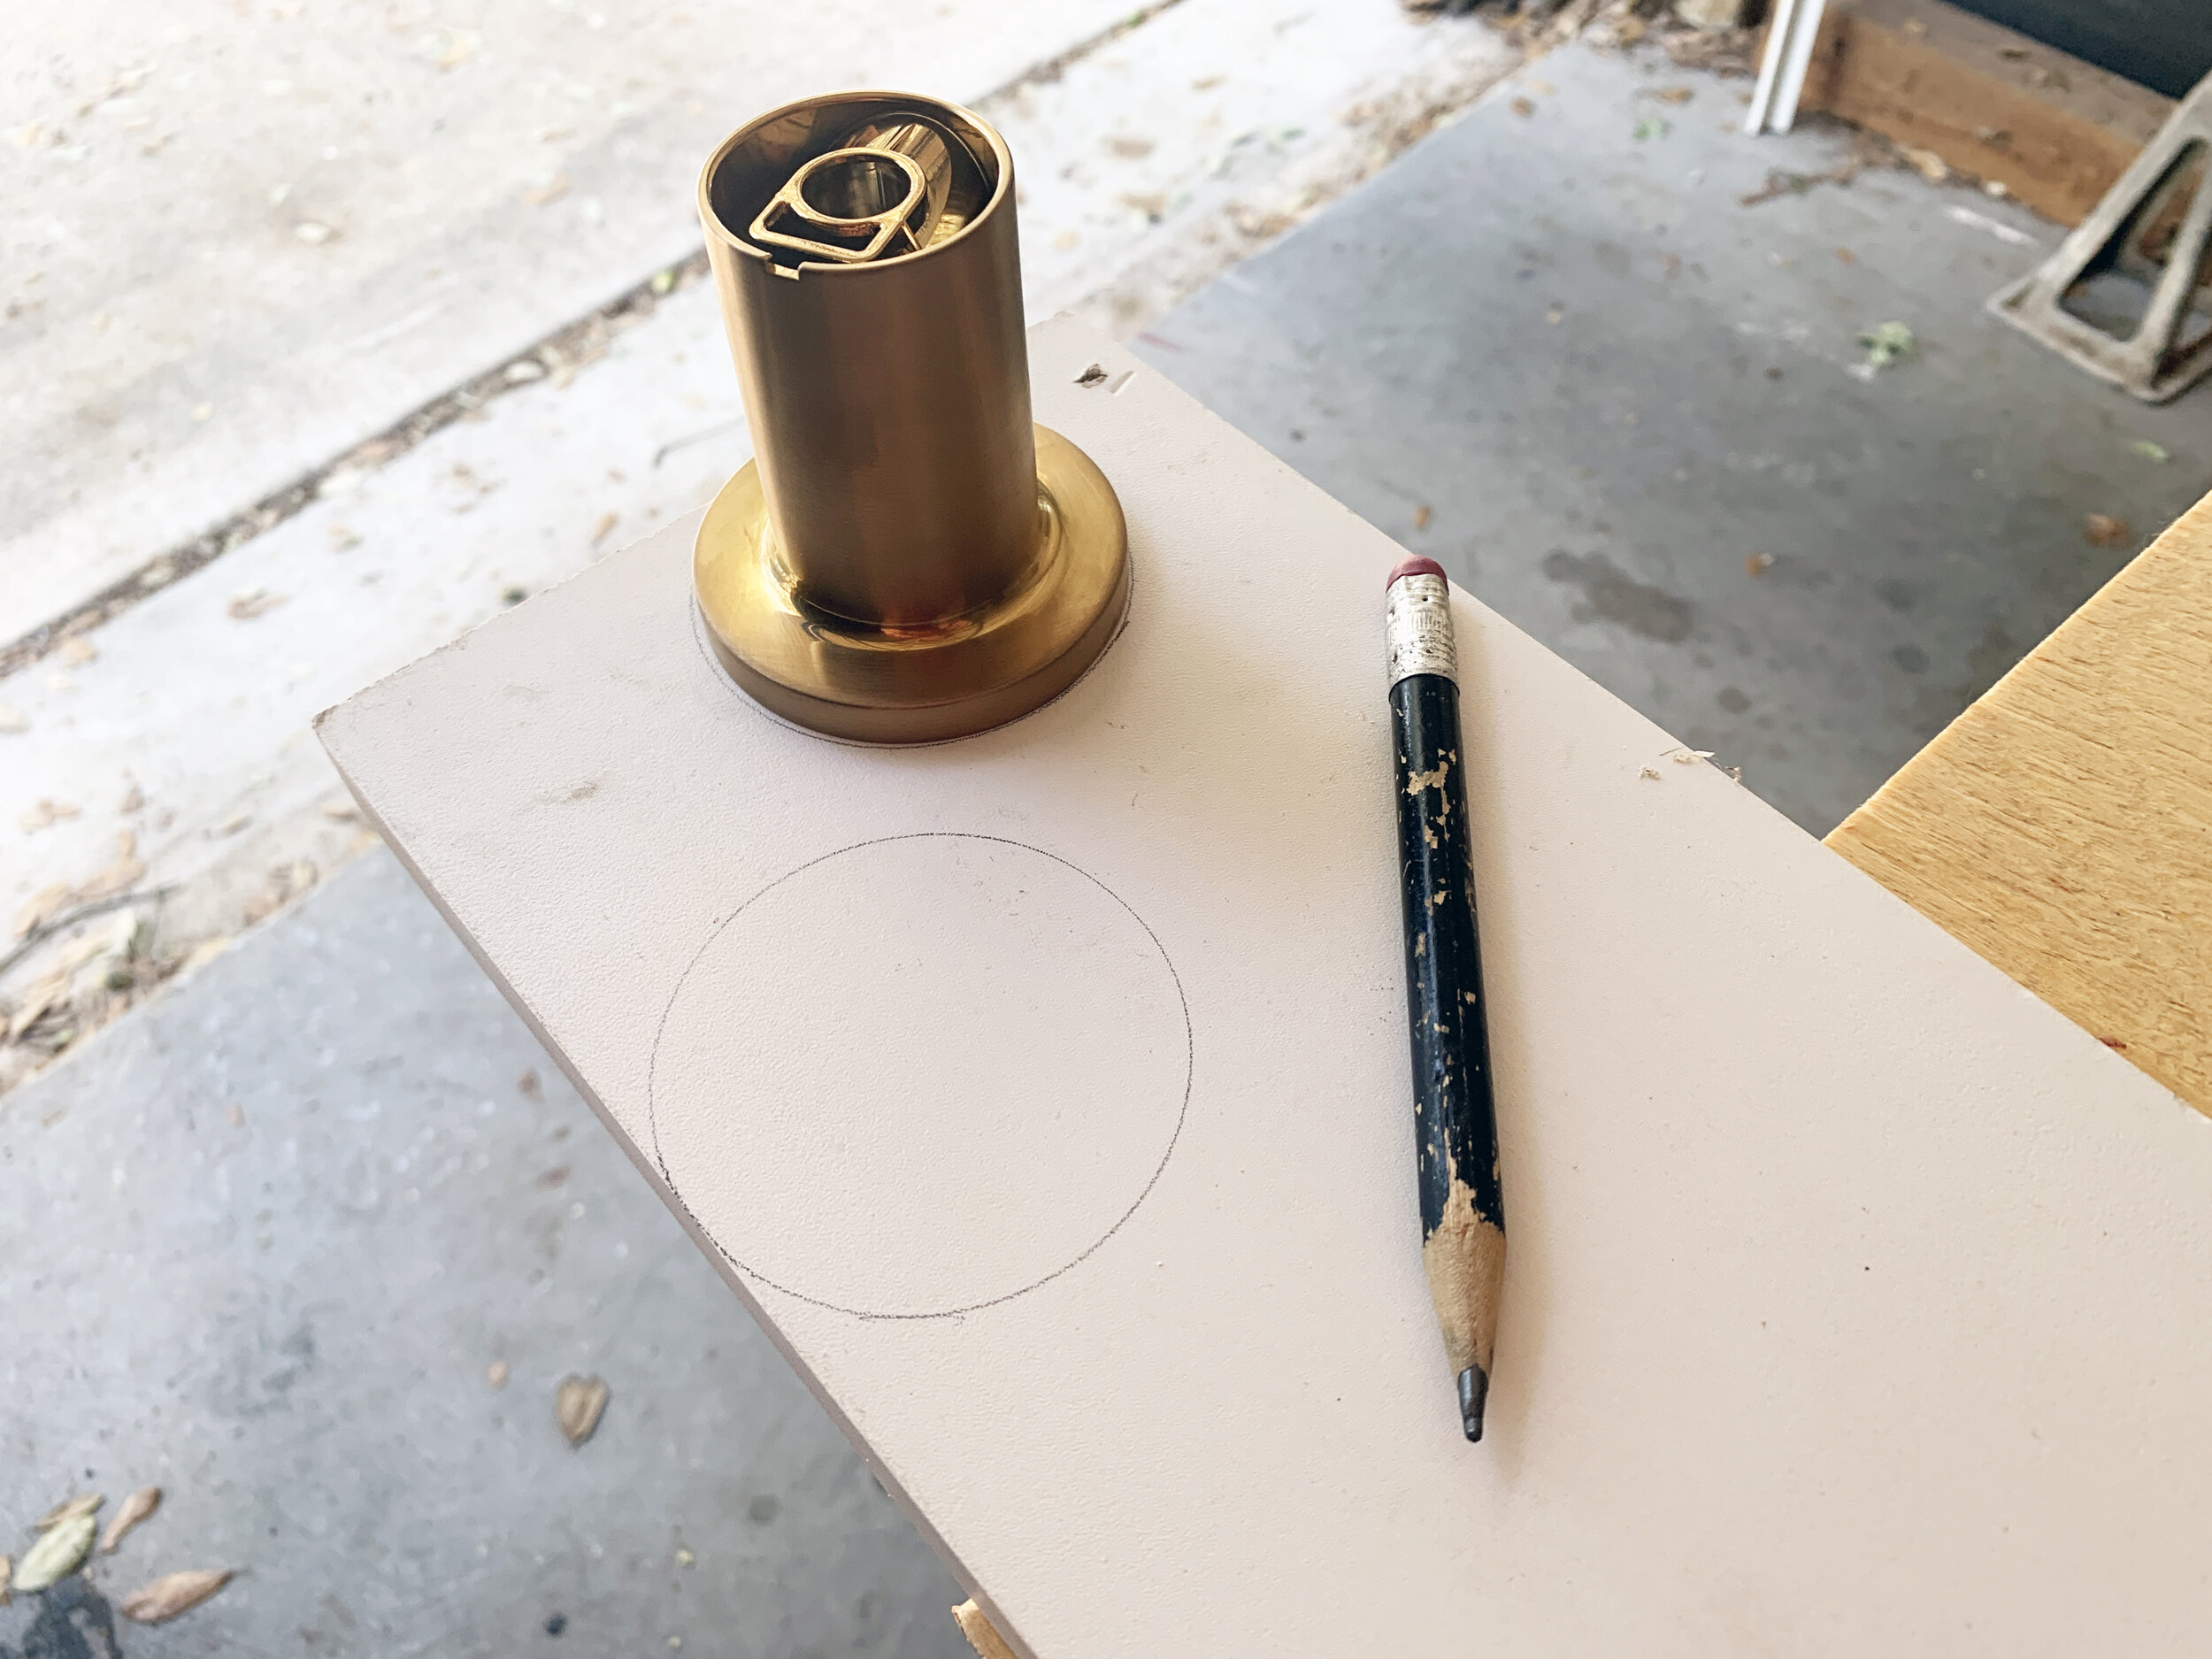
After planning and marking out our precise placement on the inside of the wall, we traced the slide bar’s round fixture mounts onto wood and PVC and cut them out with a jig saw. We had two circles of each material, though all could be done with PVC since it’s a waterproof material … just in case.
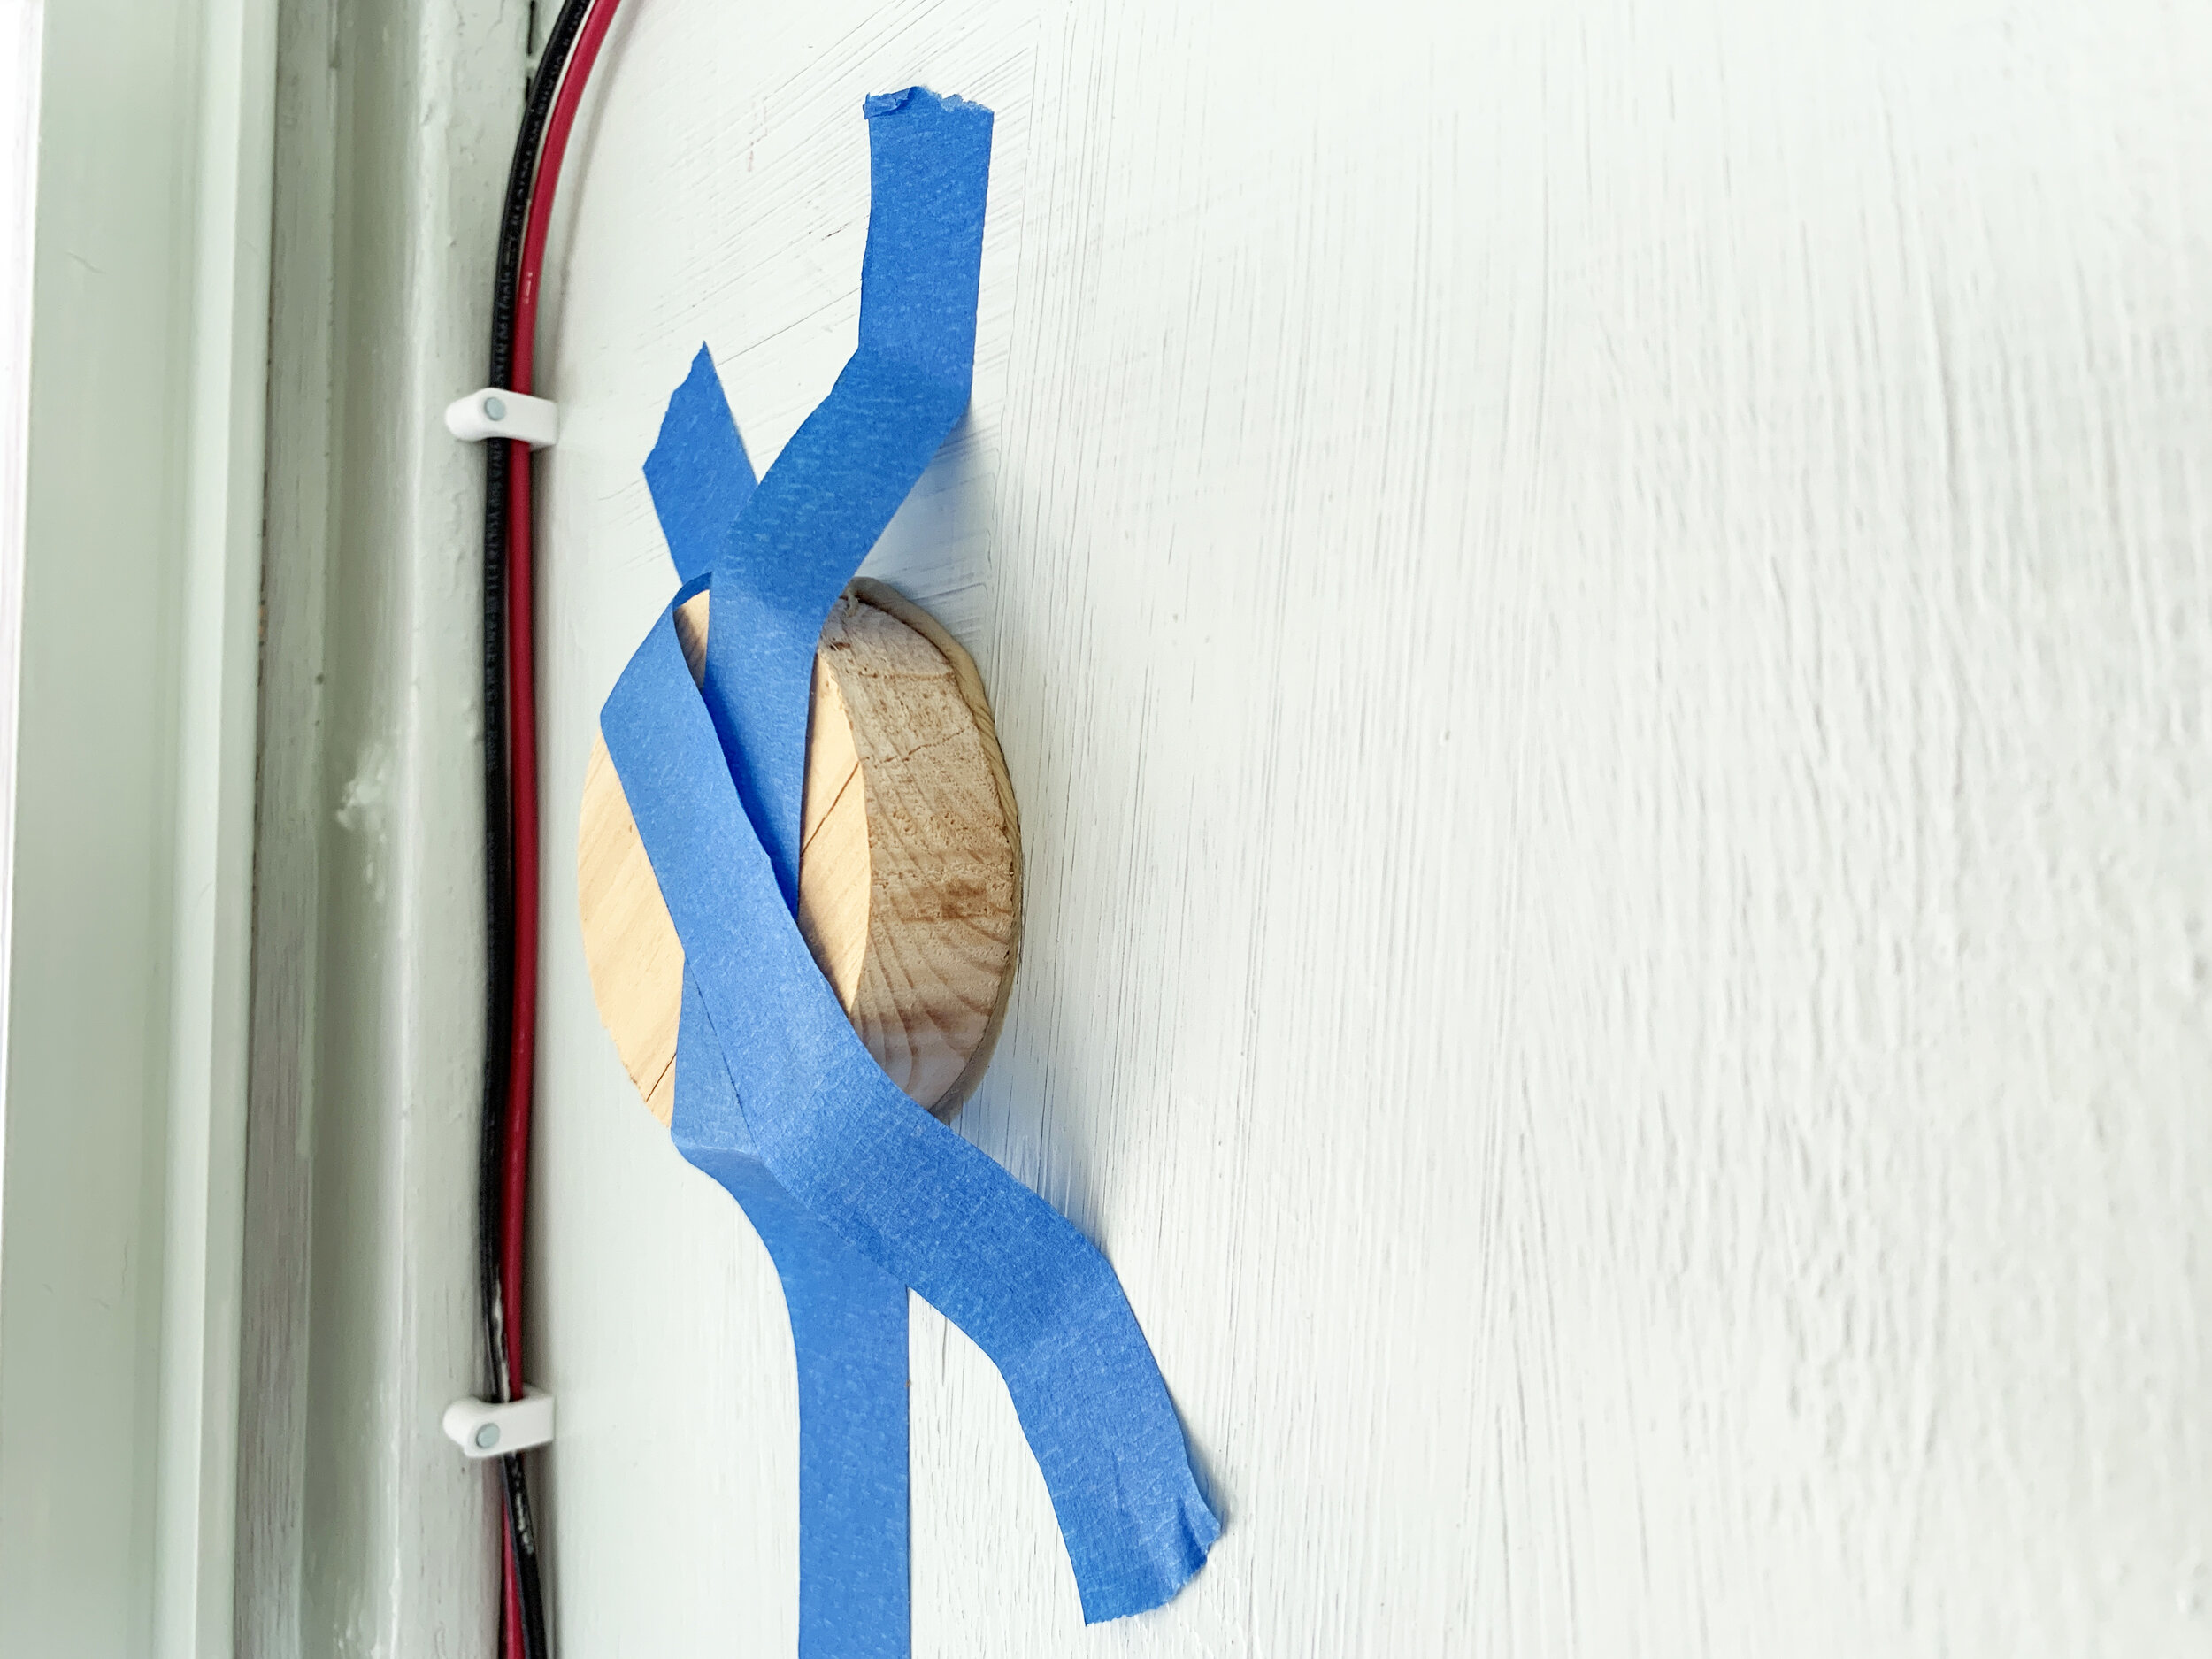
Then we glued and precisely stuck the first layer (the wood circles) on the inside of the exterior wall and taped them in place until dry.
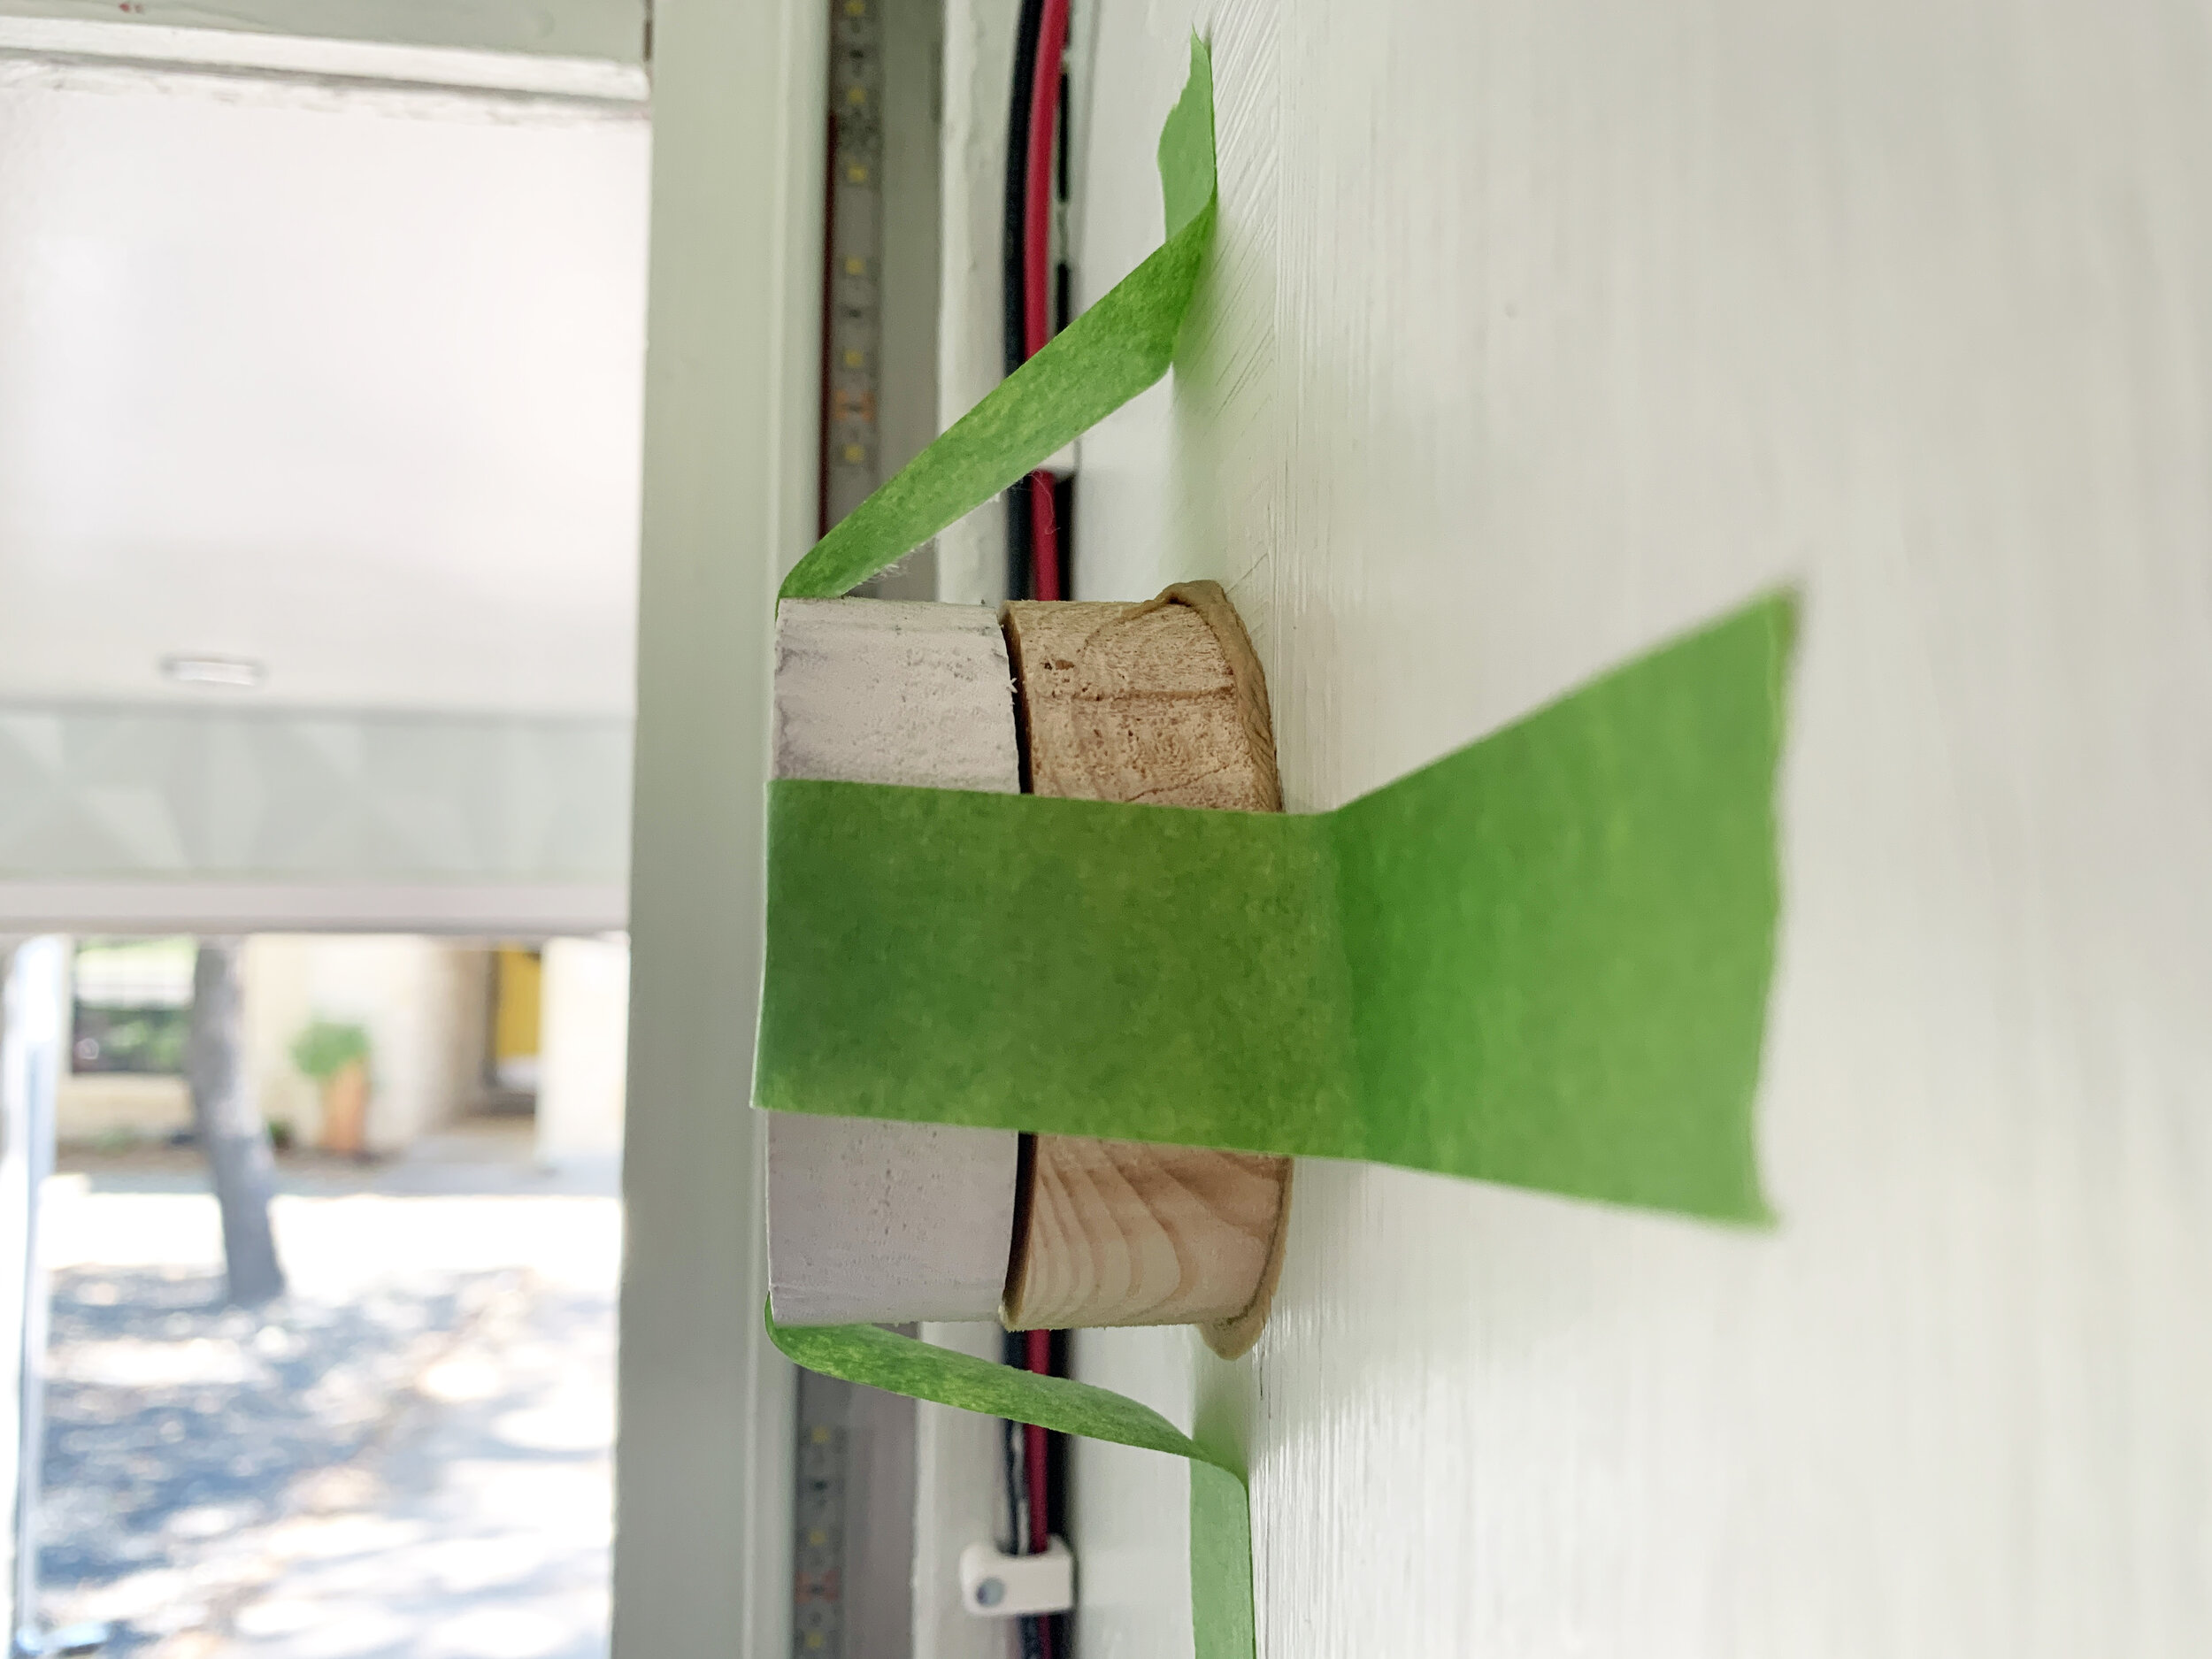
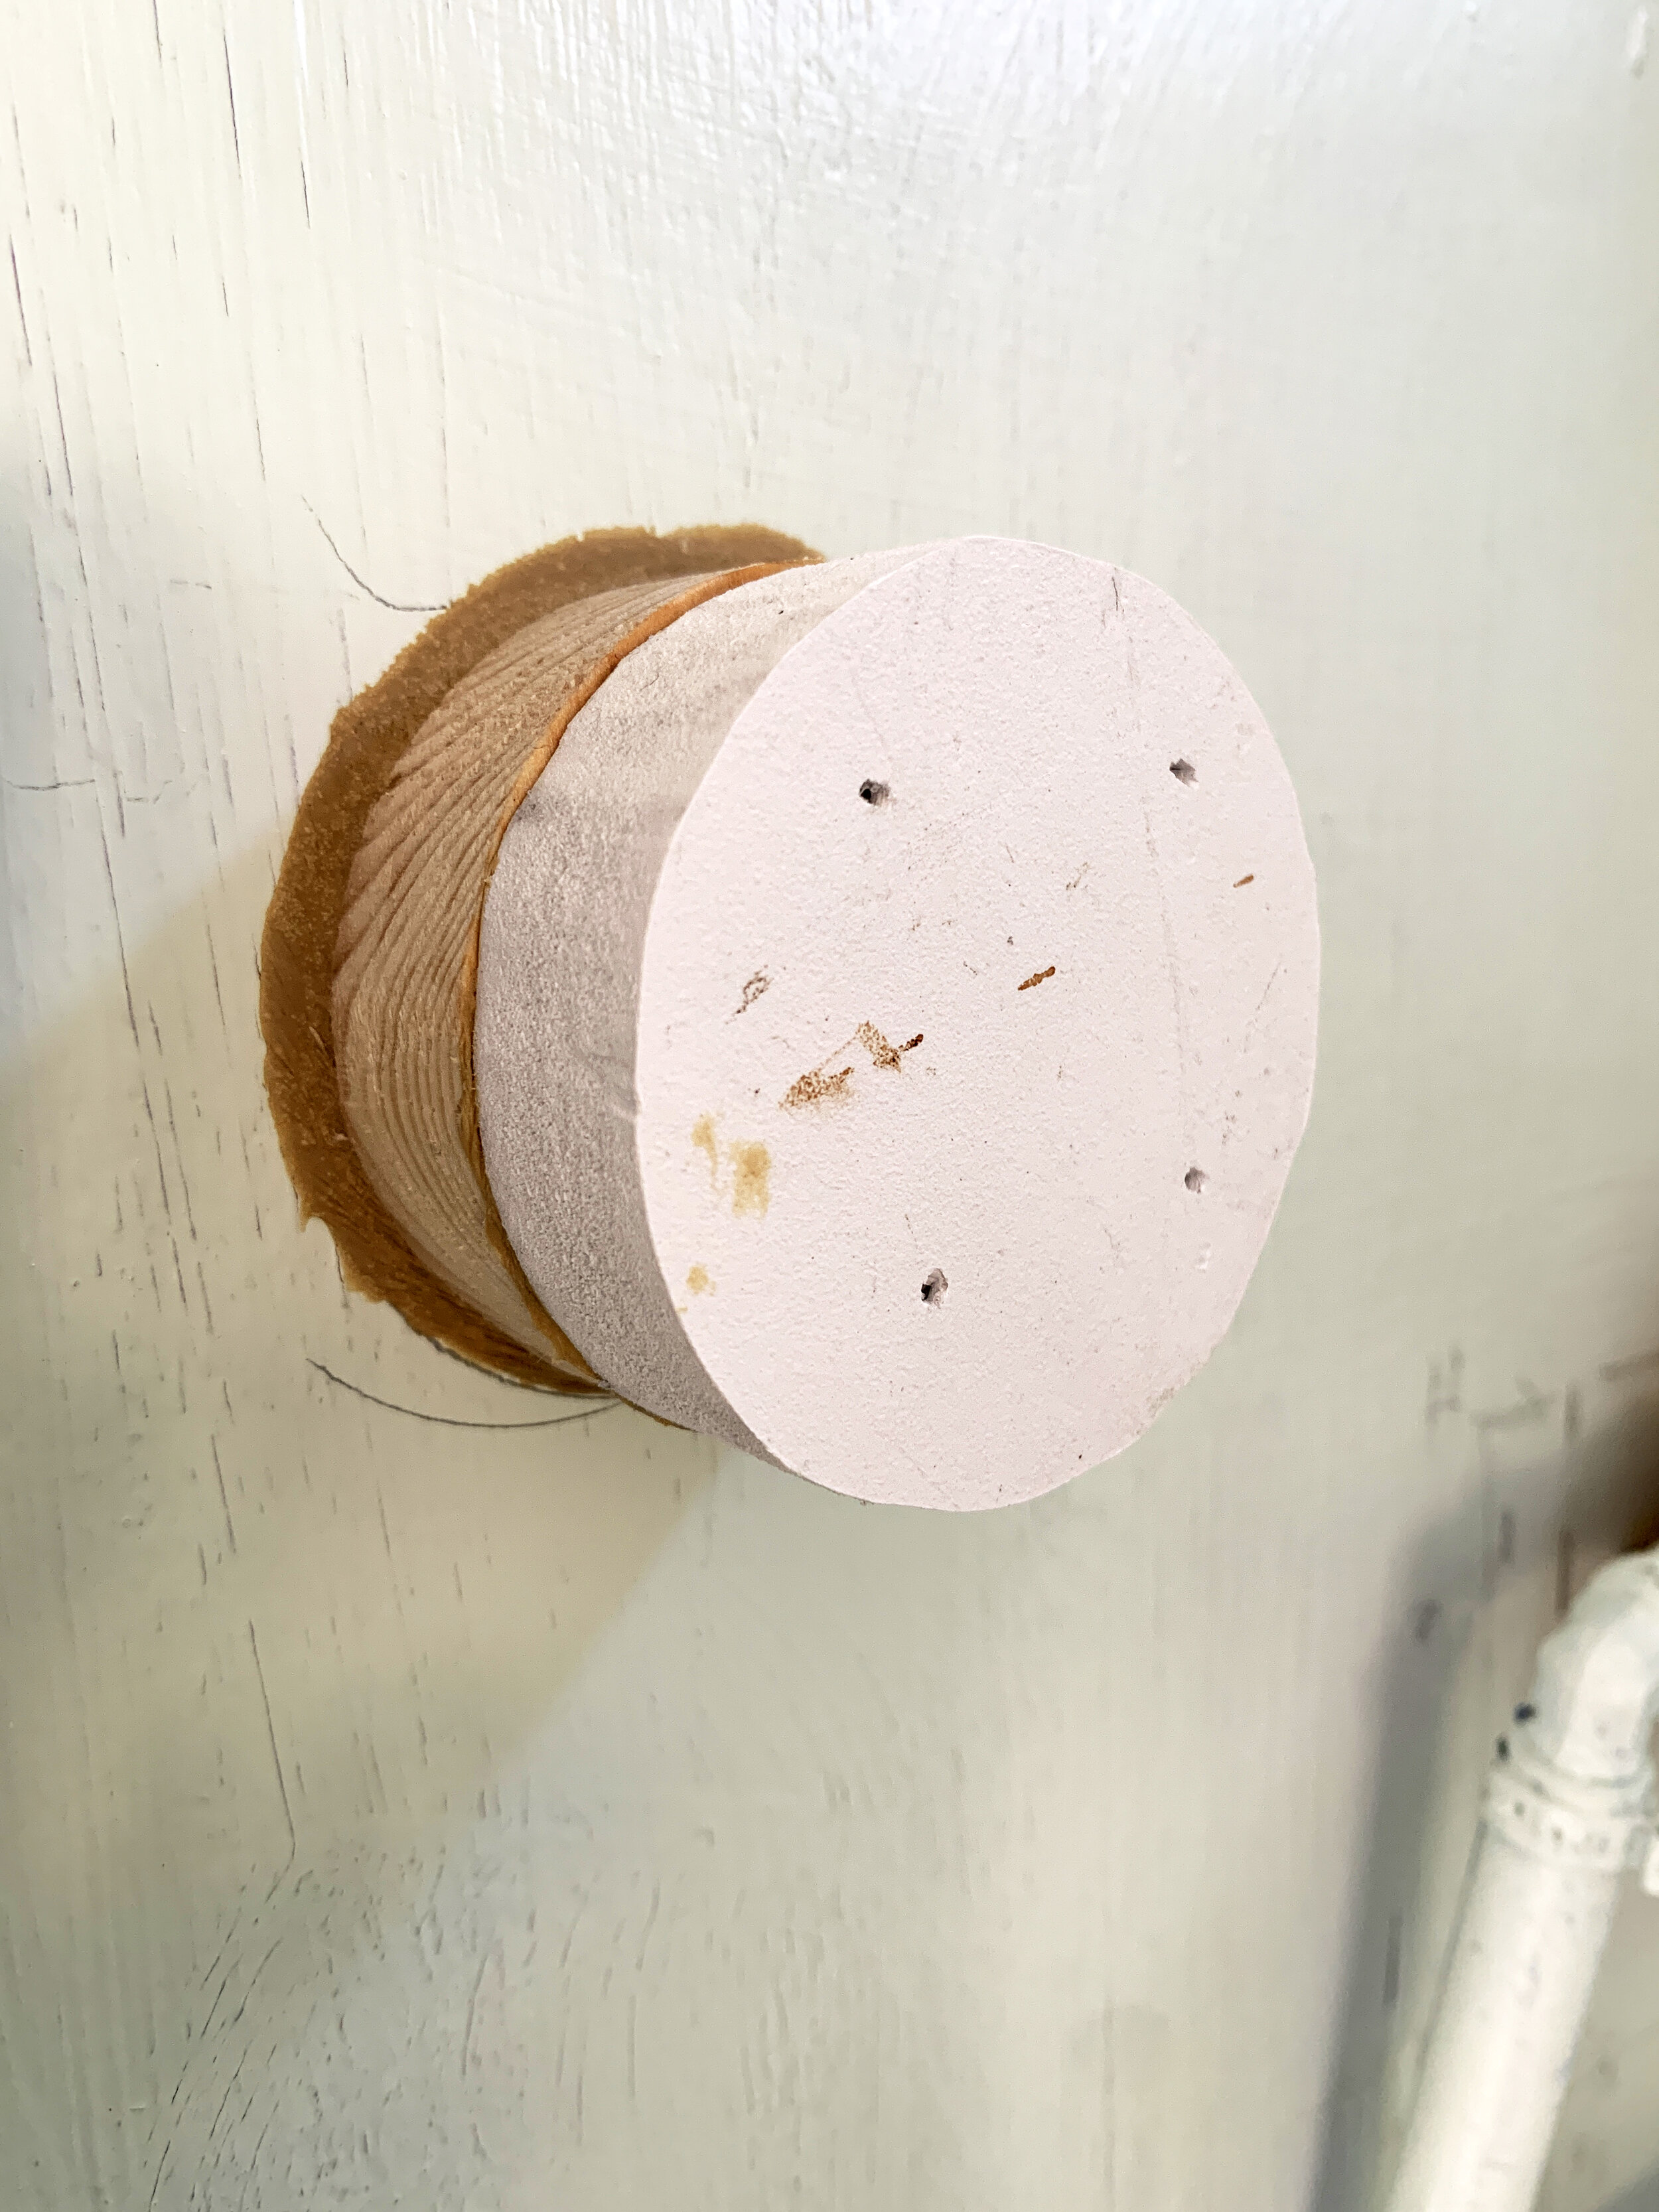
After the construction adhesive was dry (overnight), we aligned the pieces and nailed a round PVC block on top of each round wood block so that the depth of the wood rounds met the depth of the wall already set by the perimeter wall framing.
Important!
When nailing, avoid the center, since that’s where you’ll be screwing the bar mount into later.
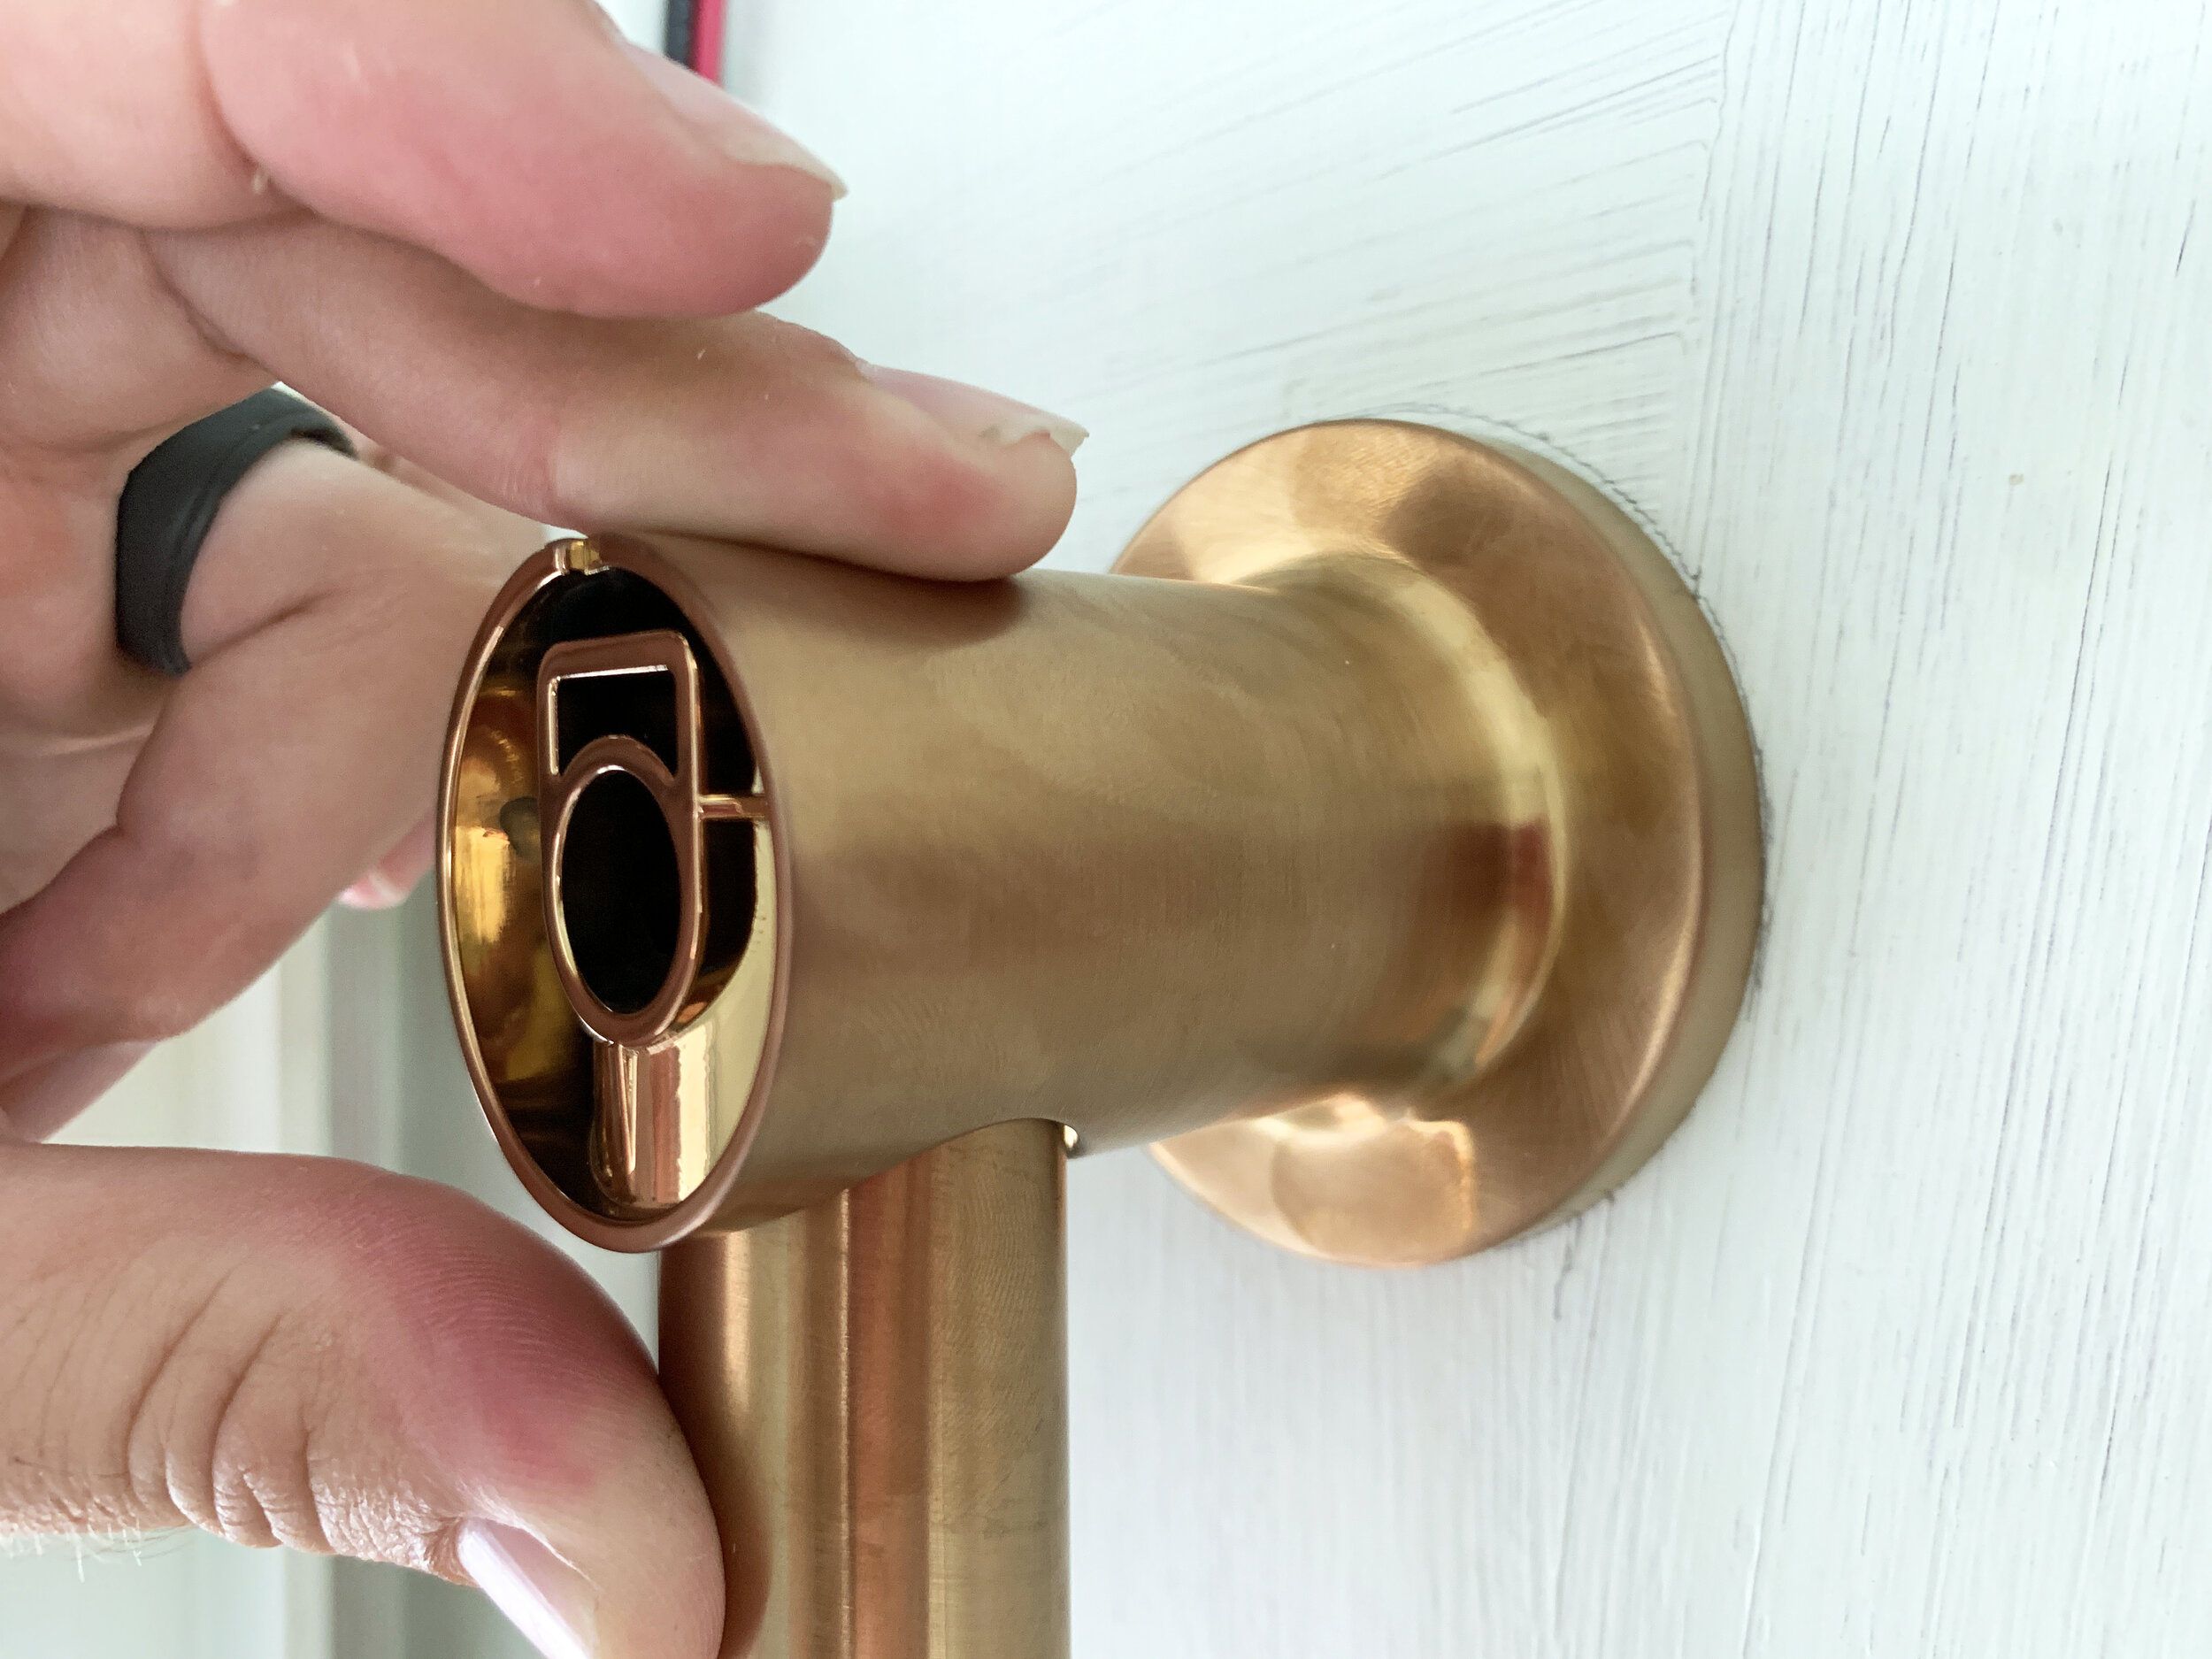
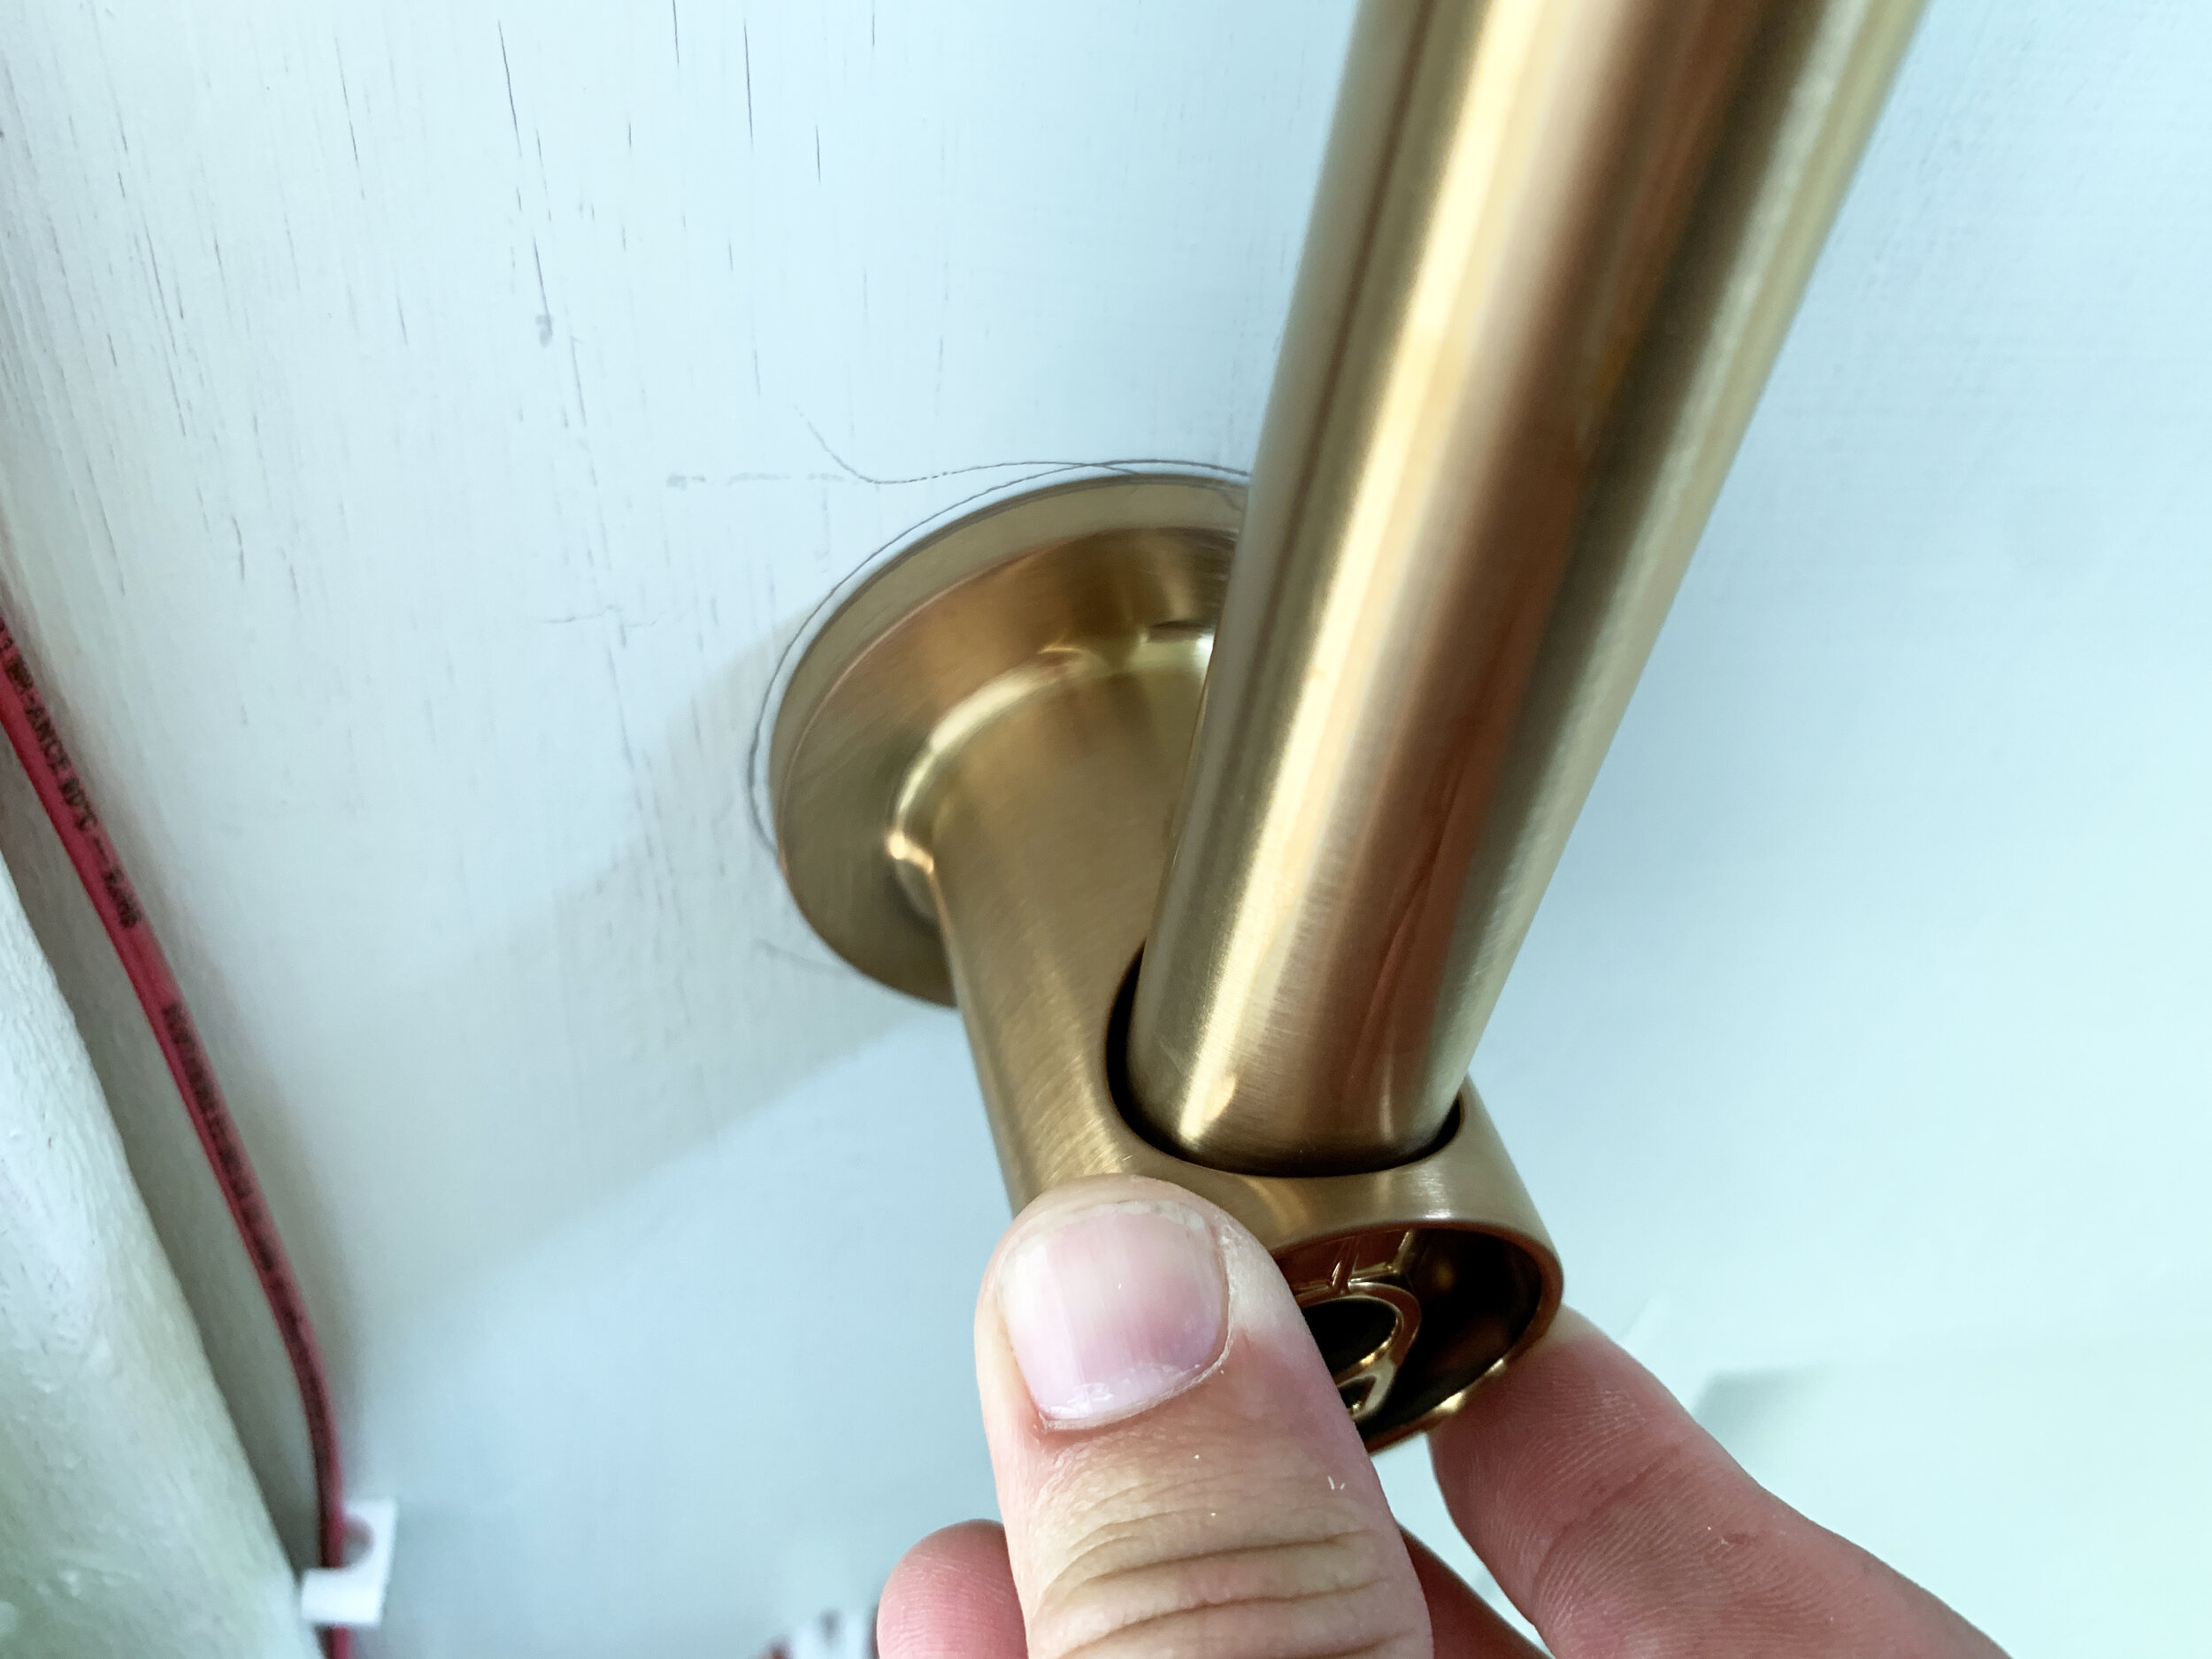
The trim kit / shower handle
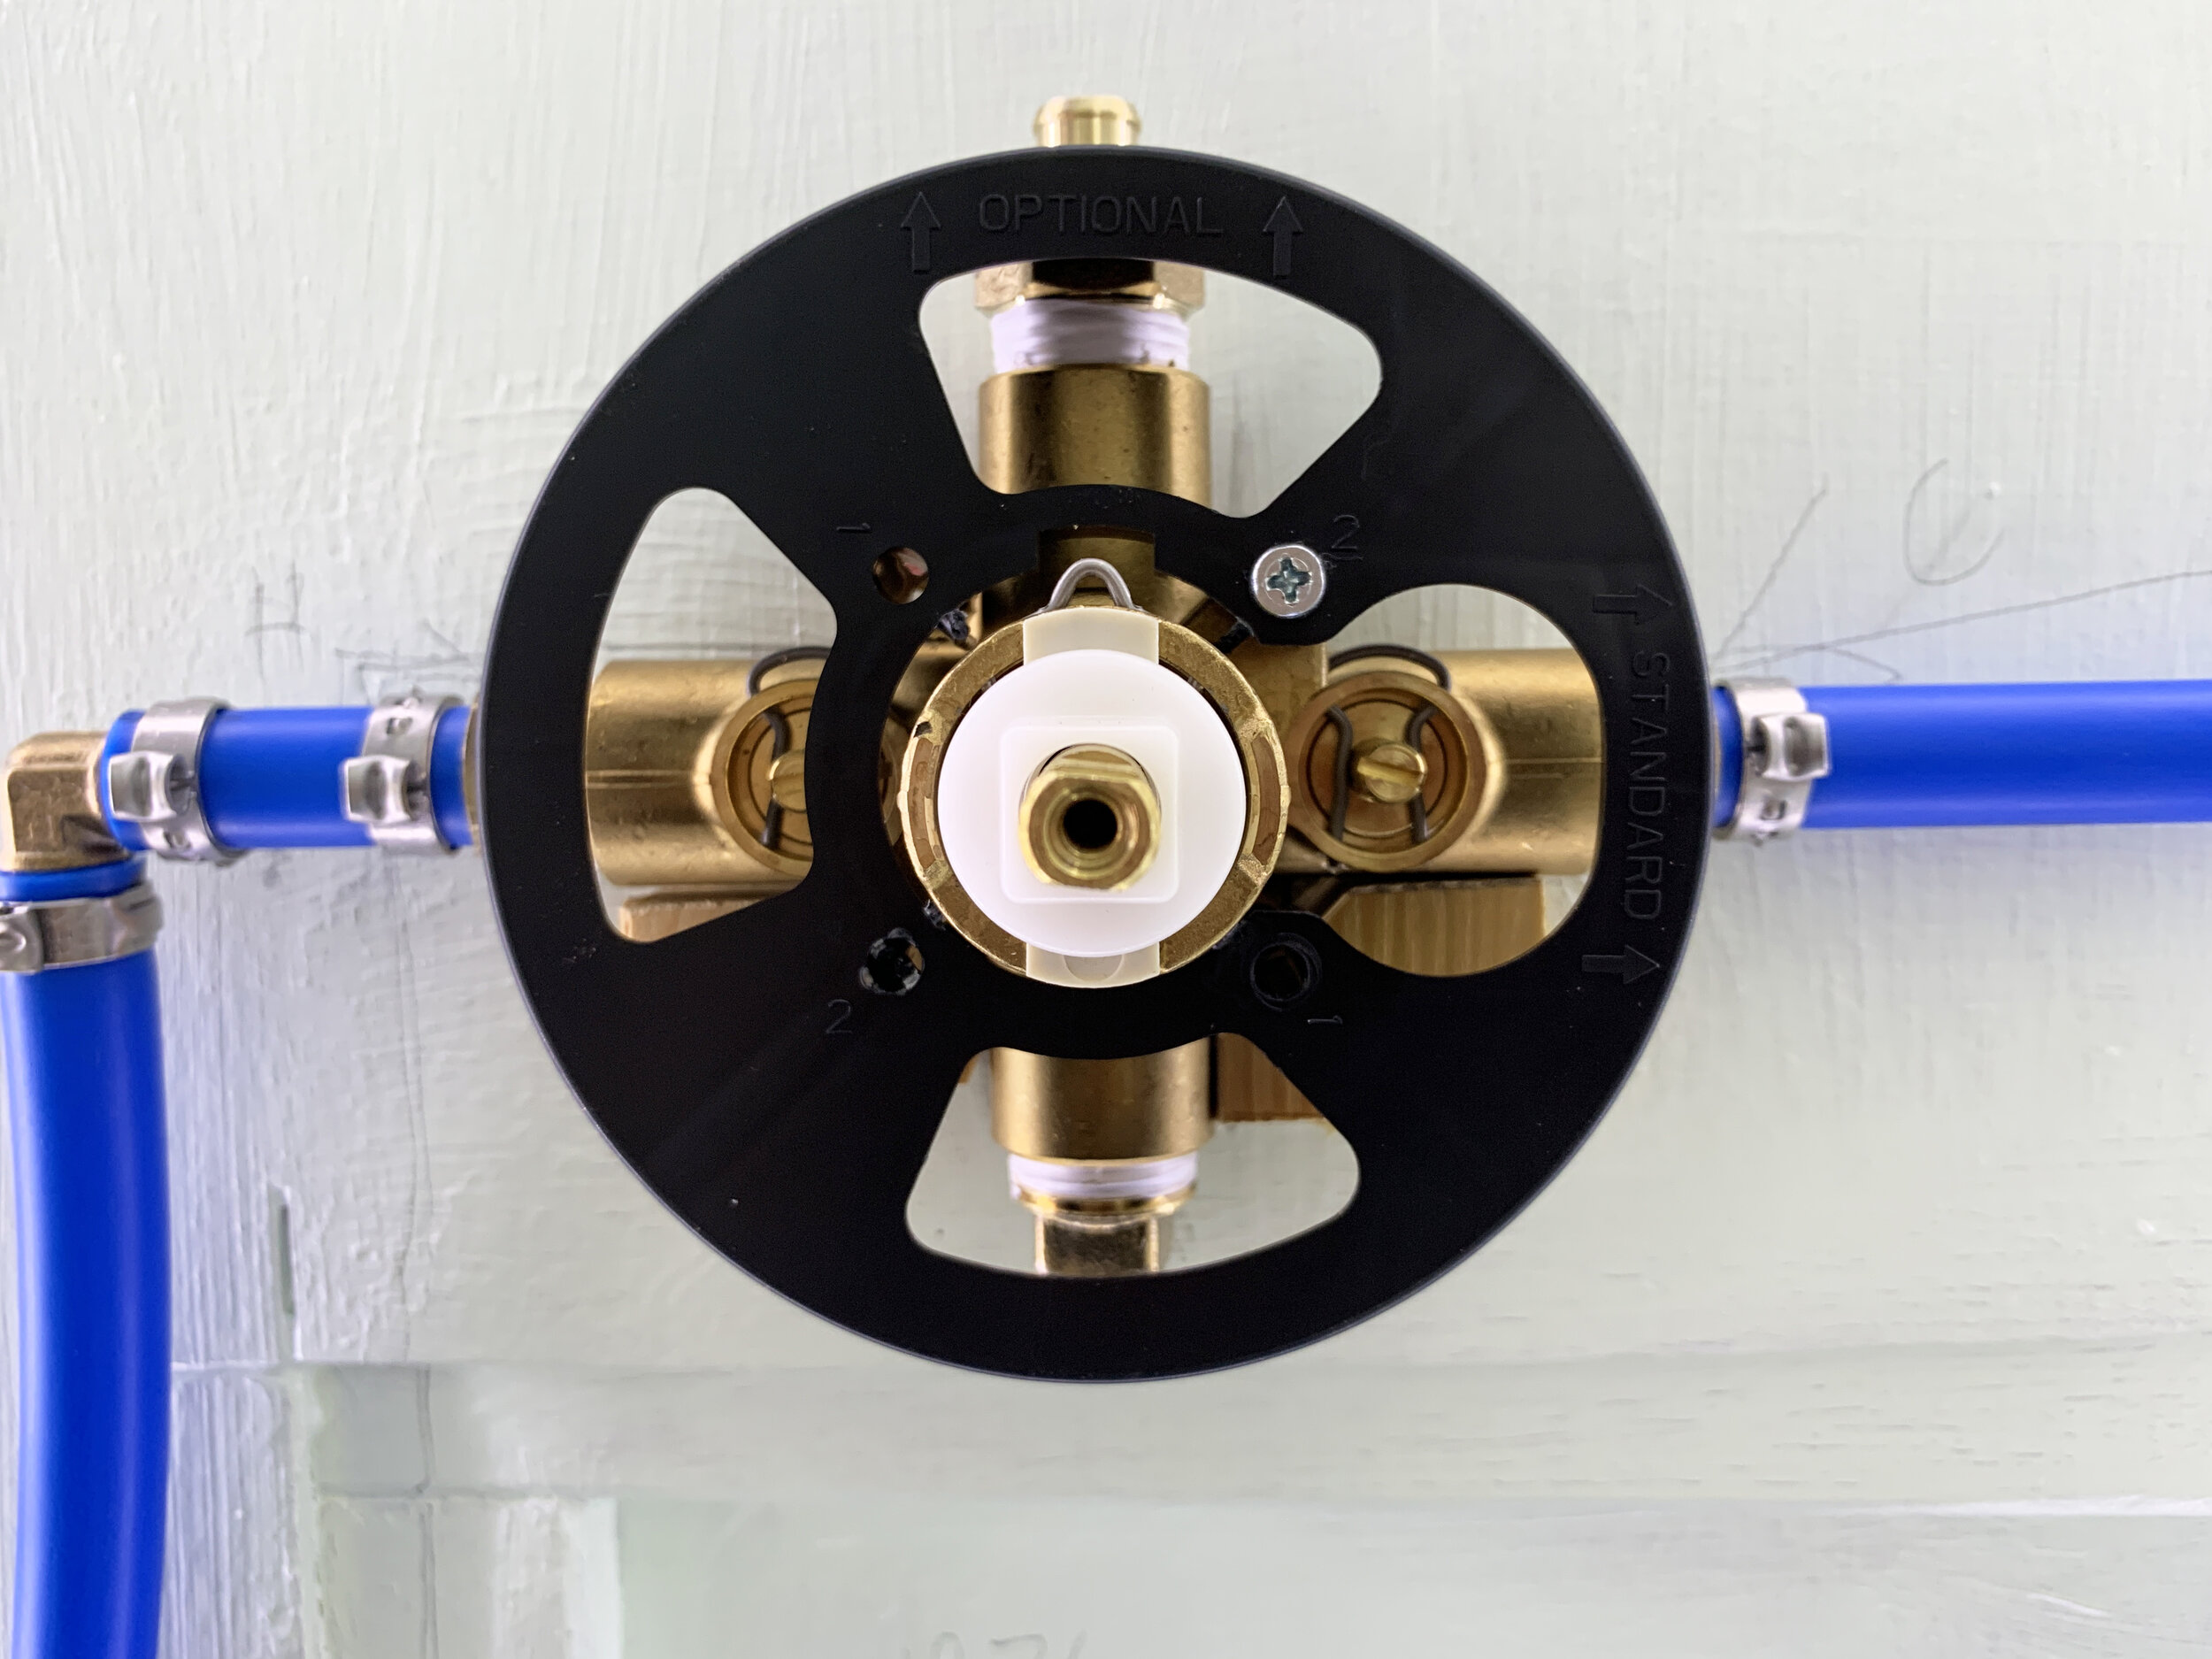
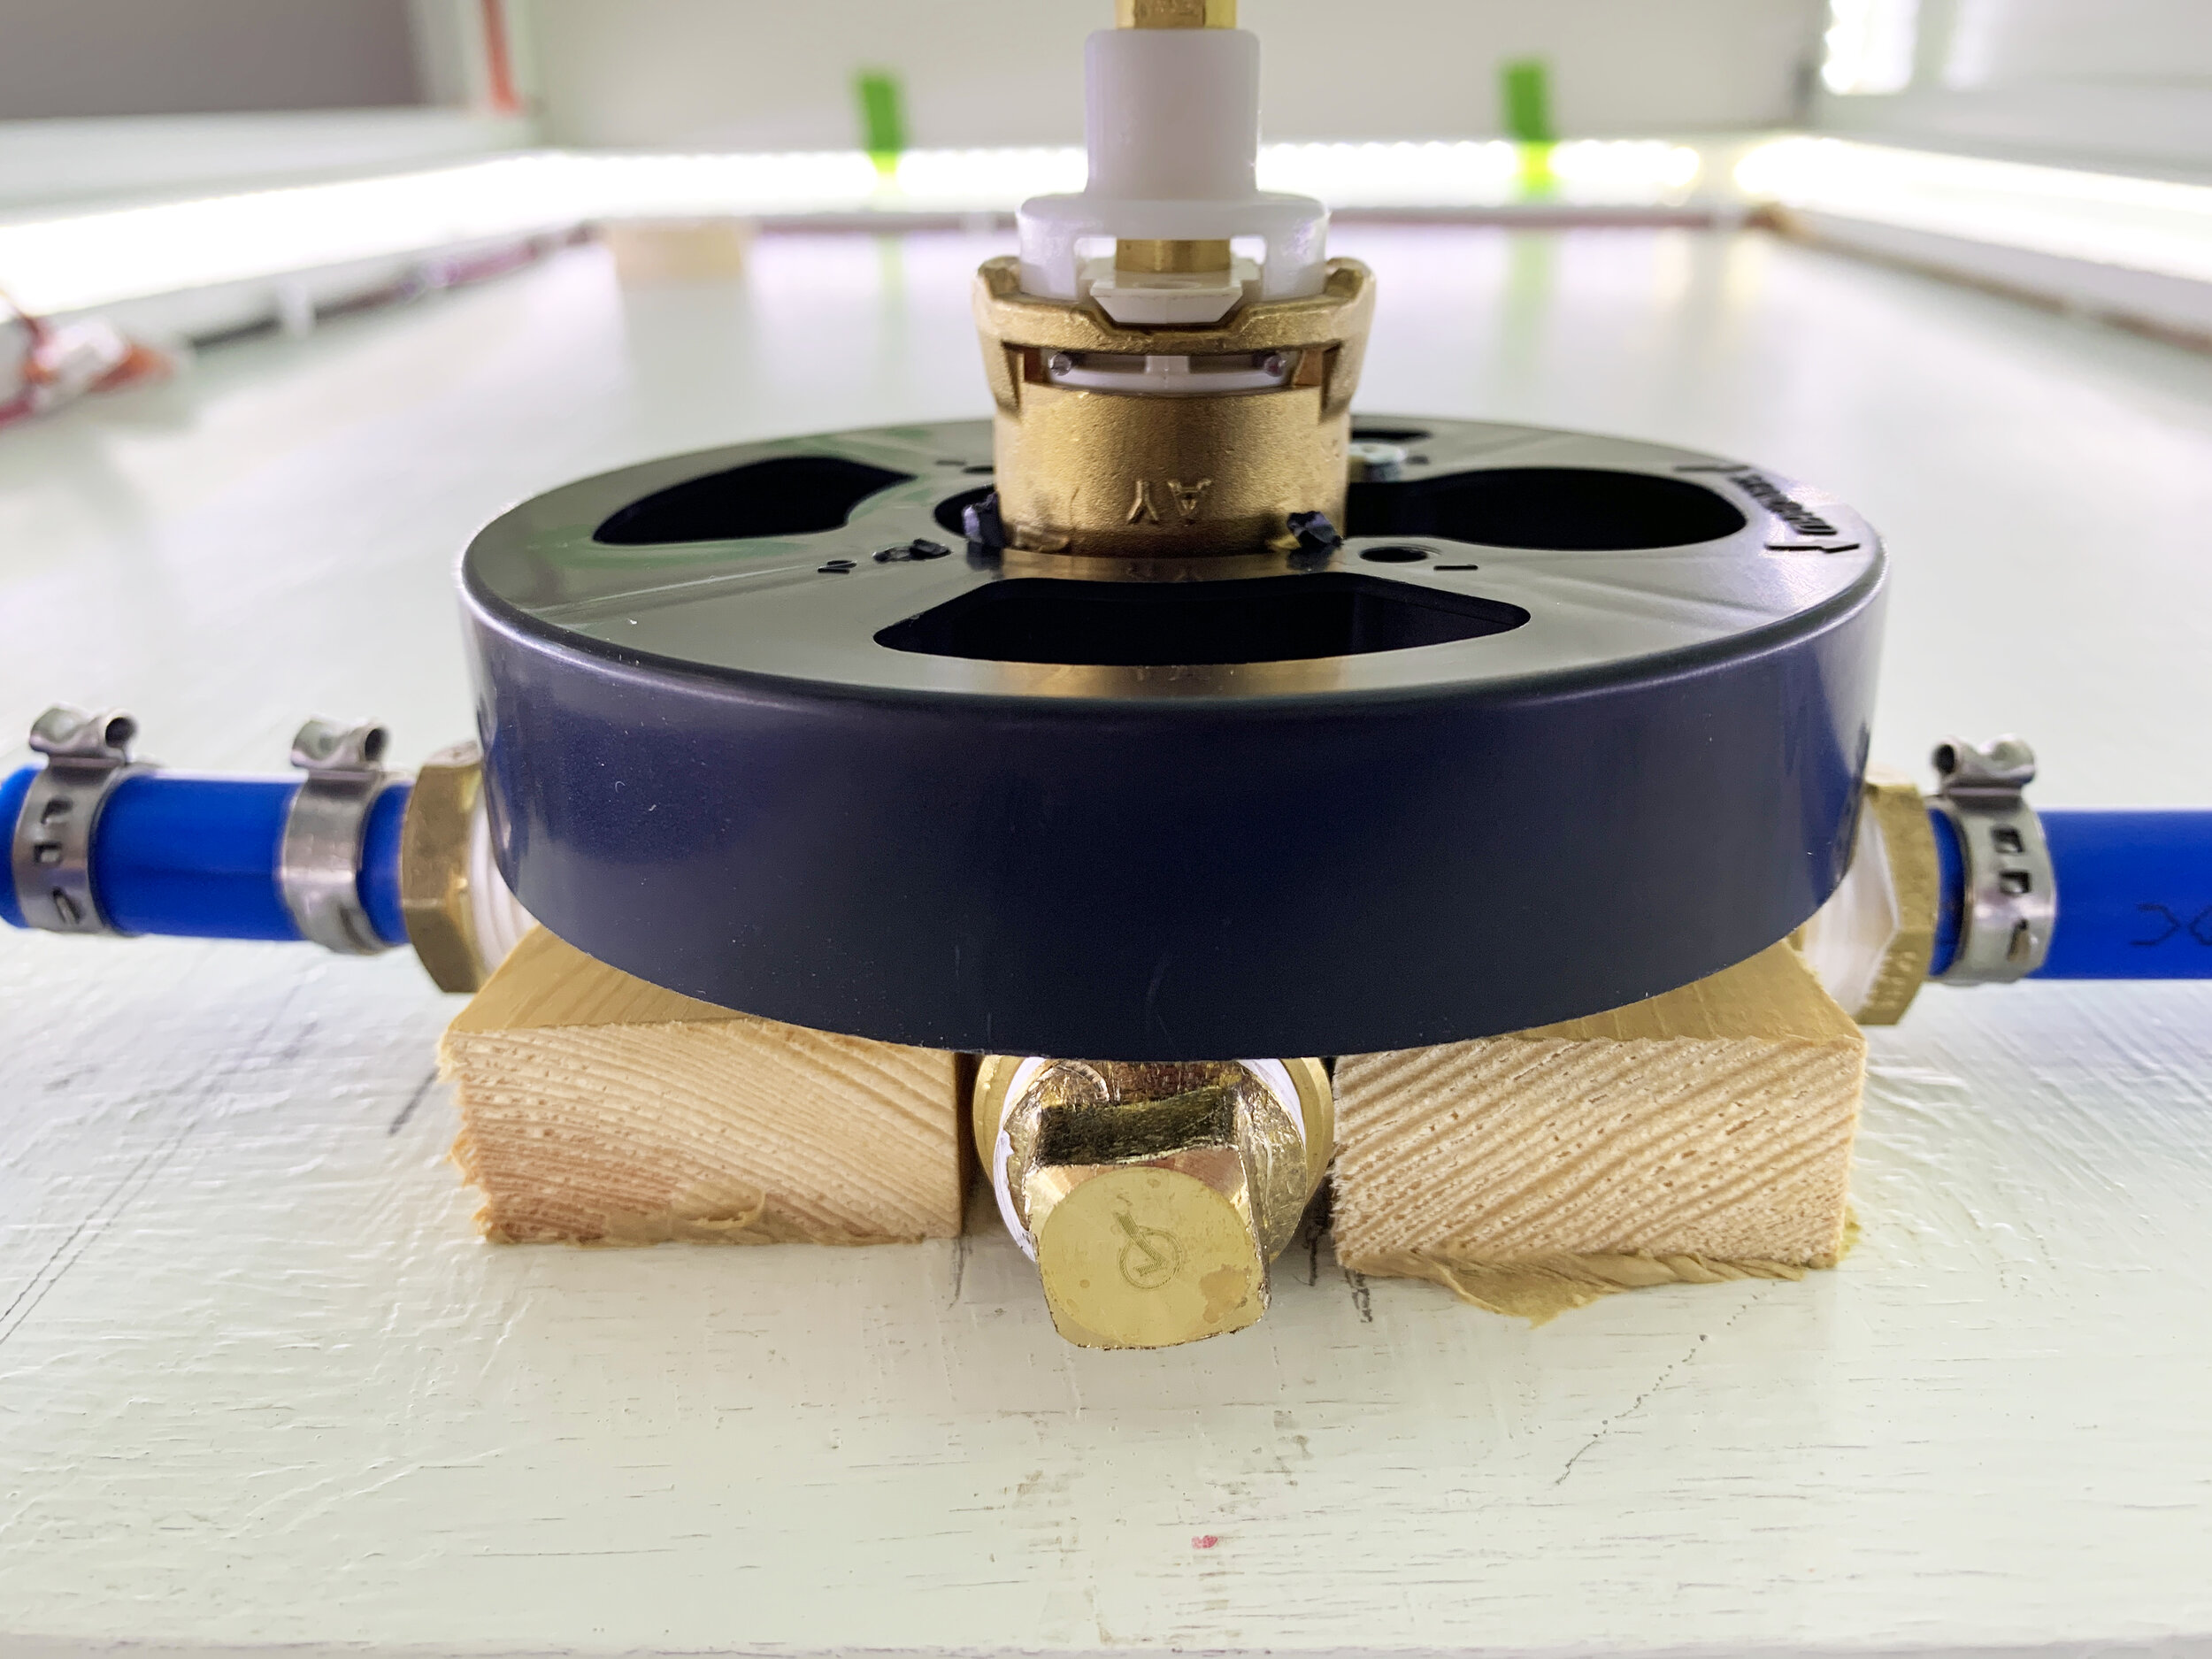
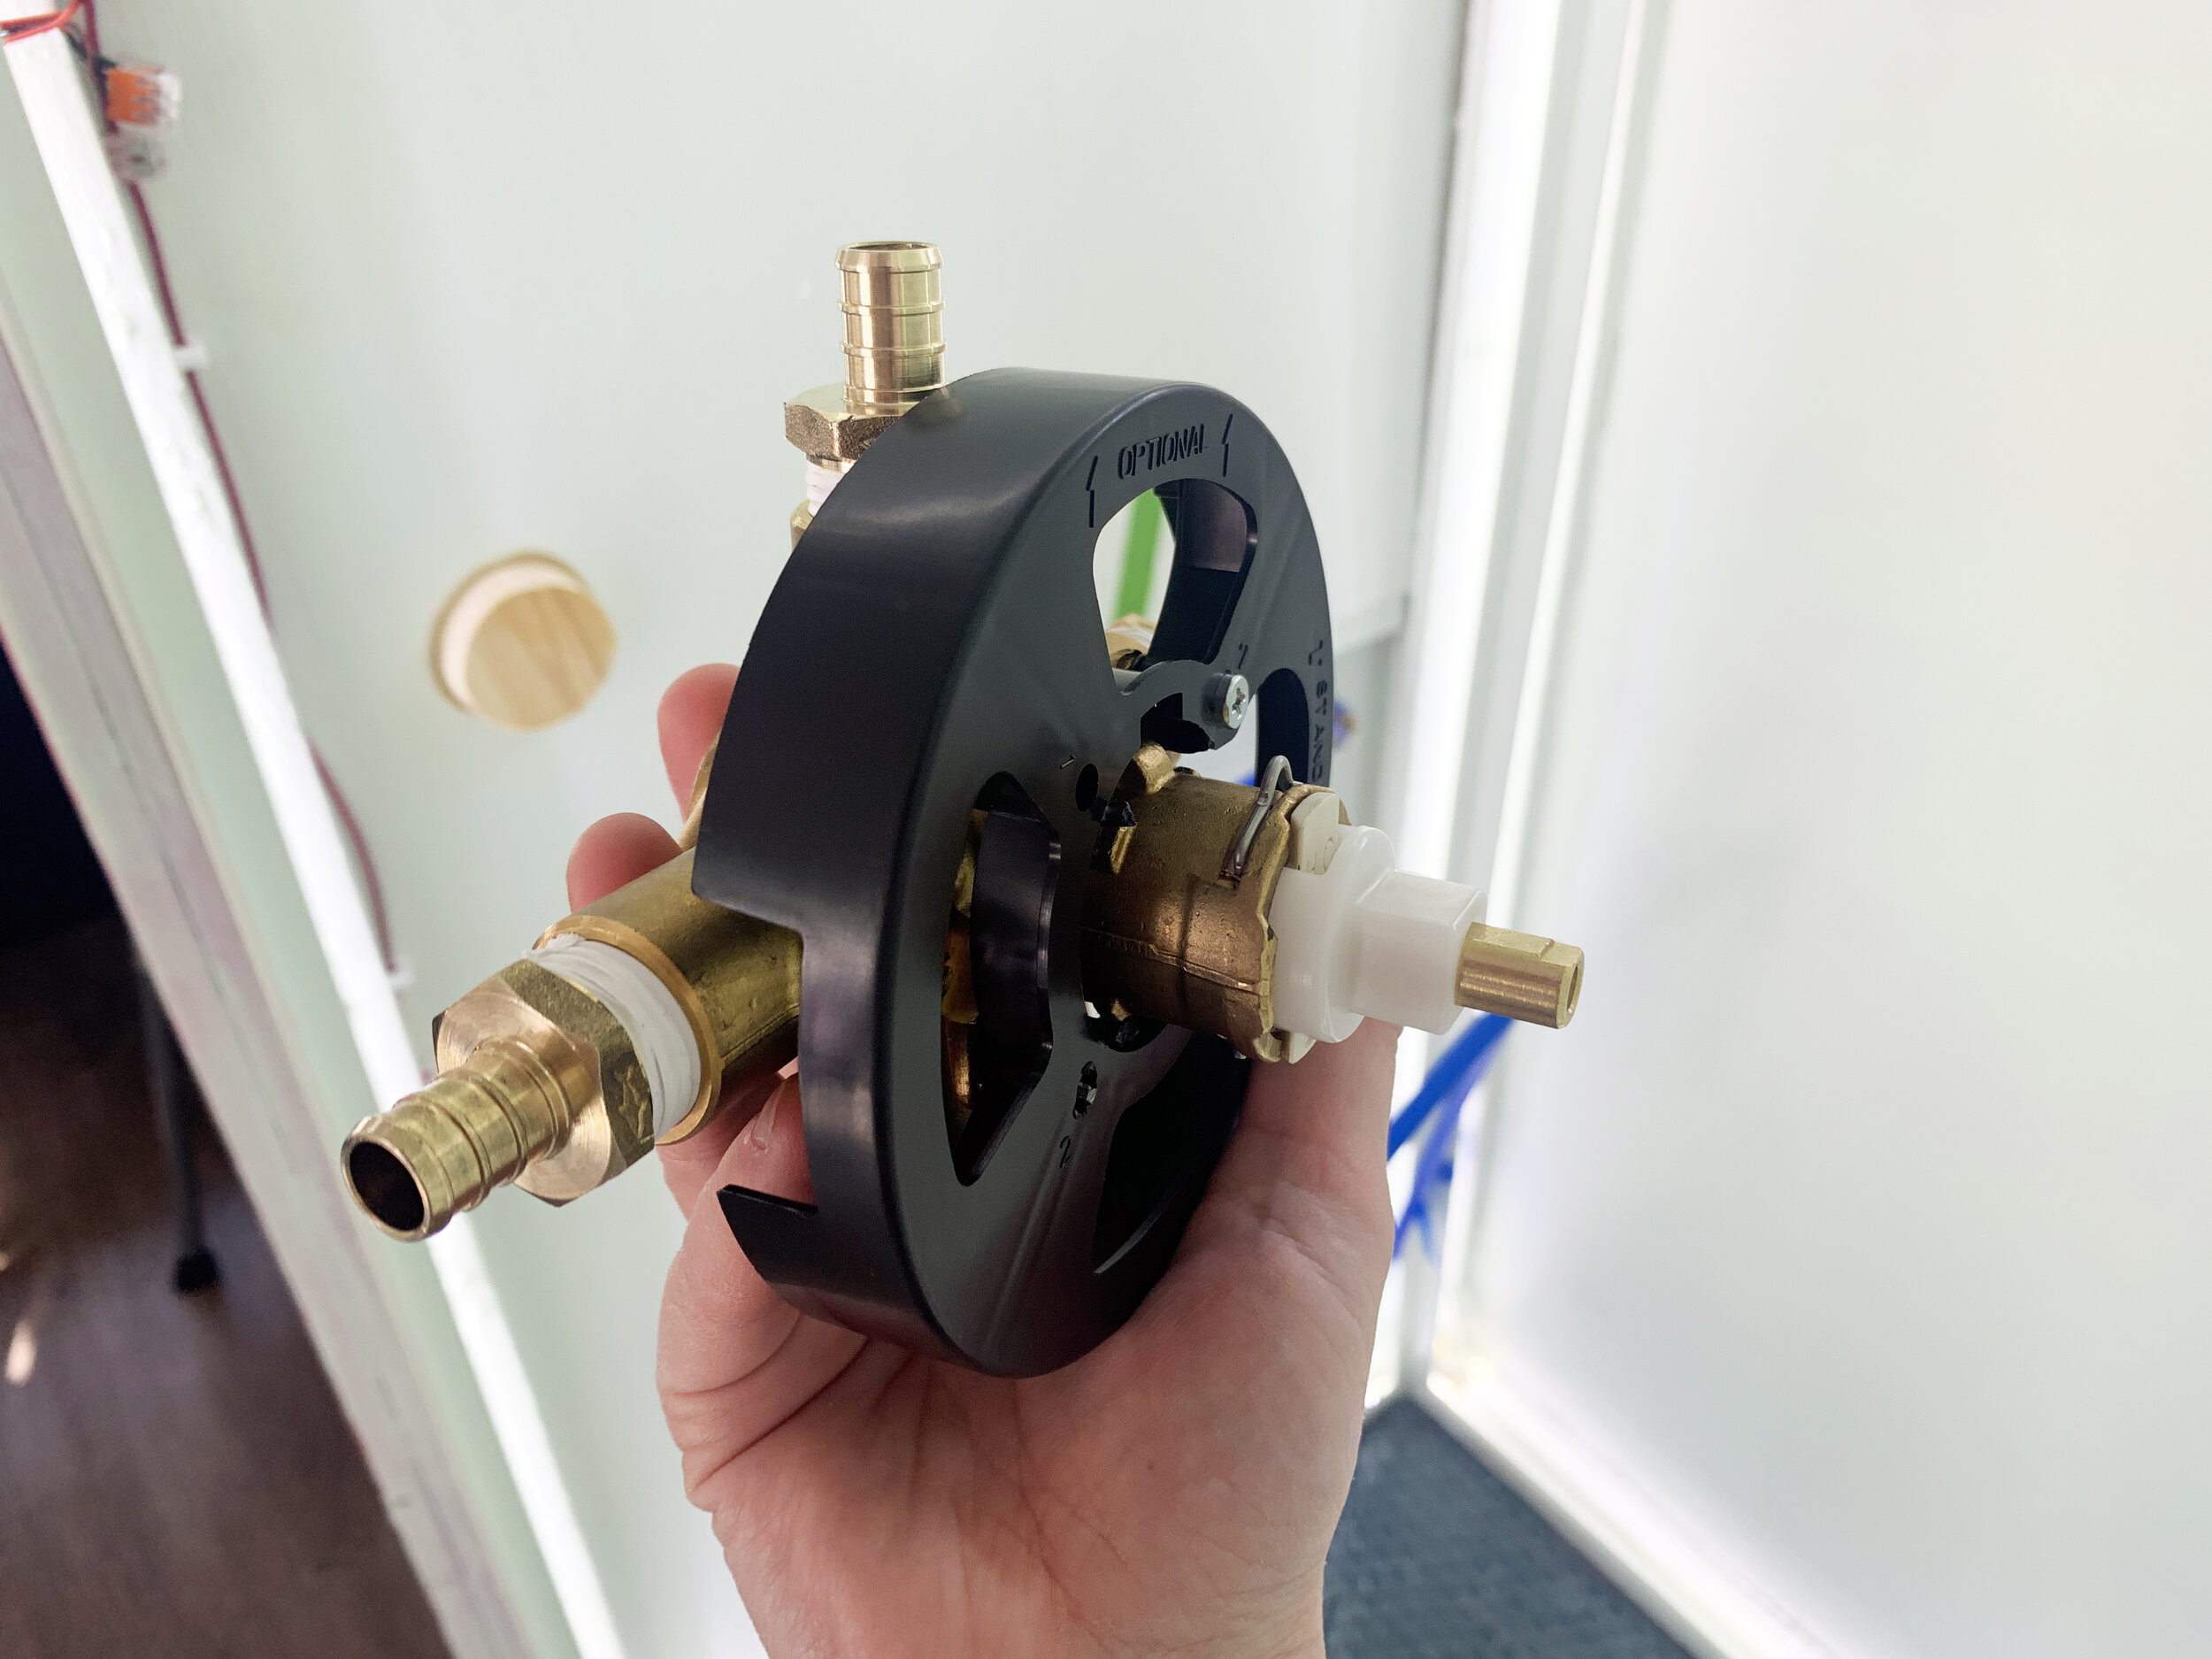
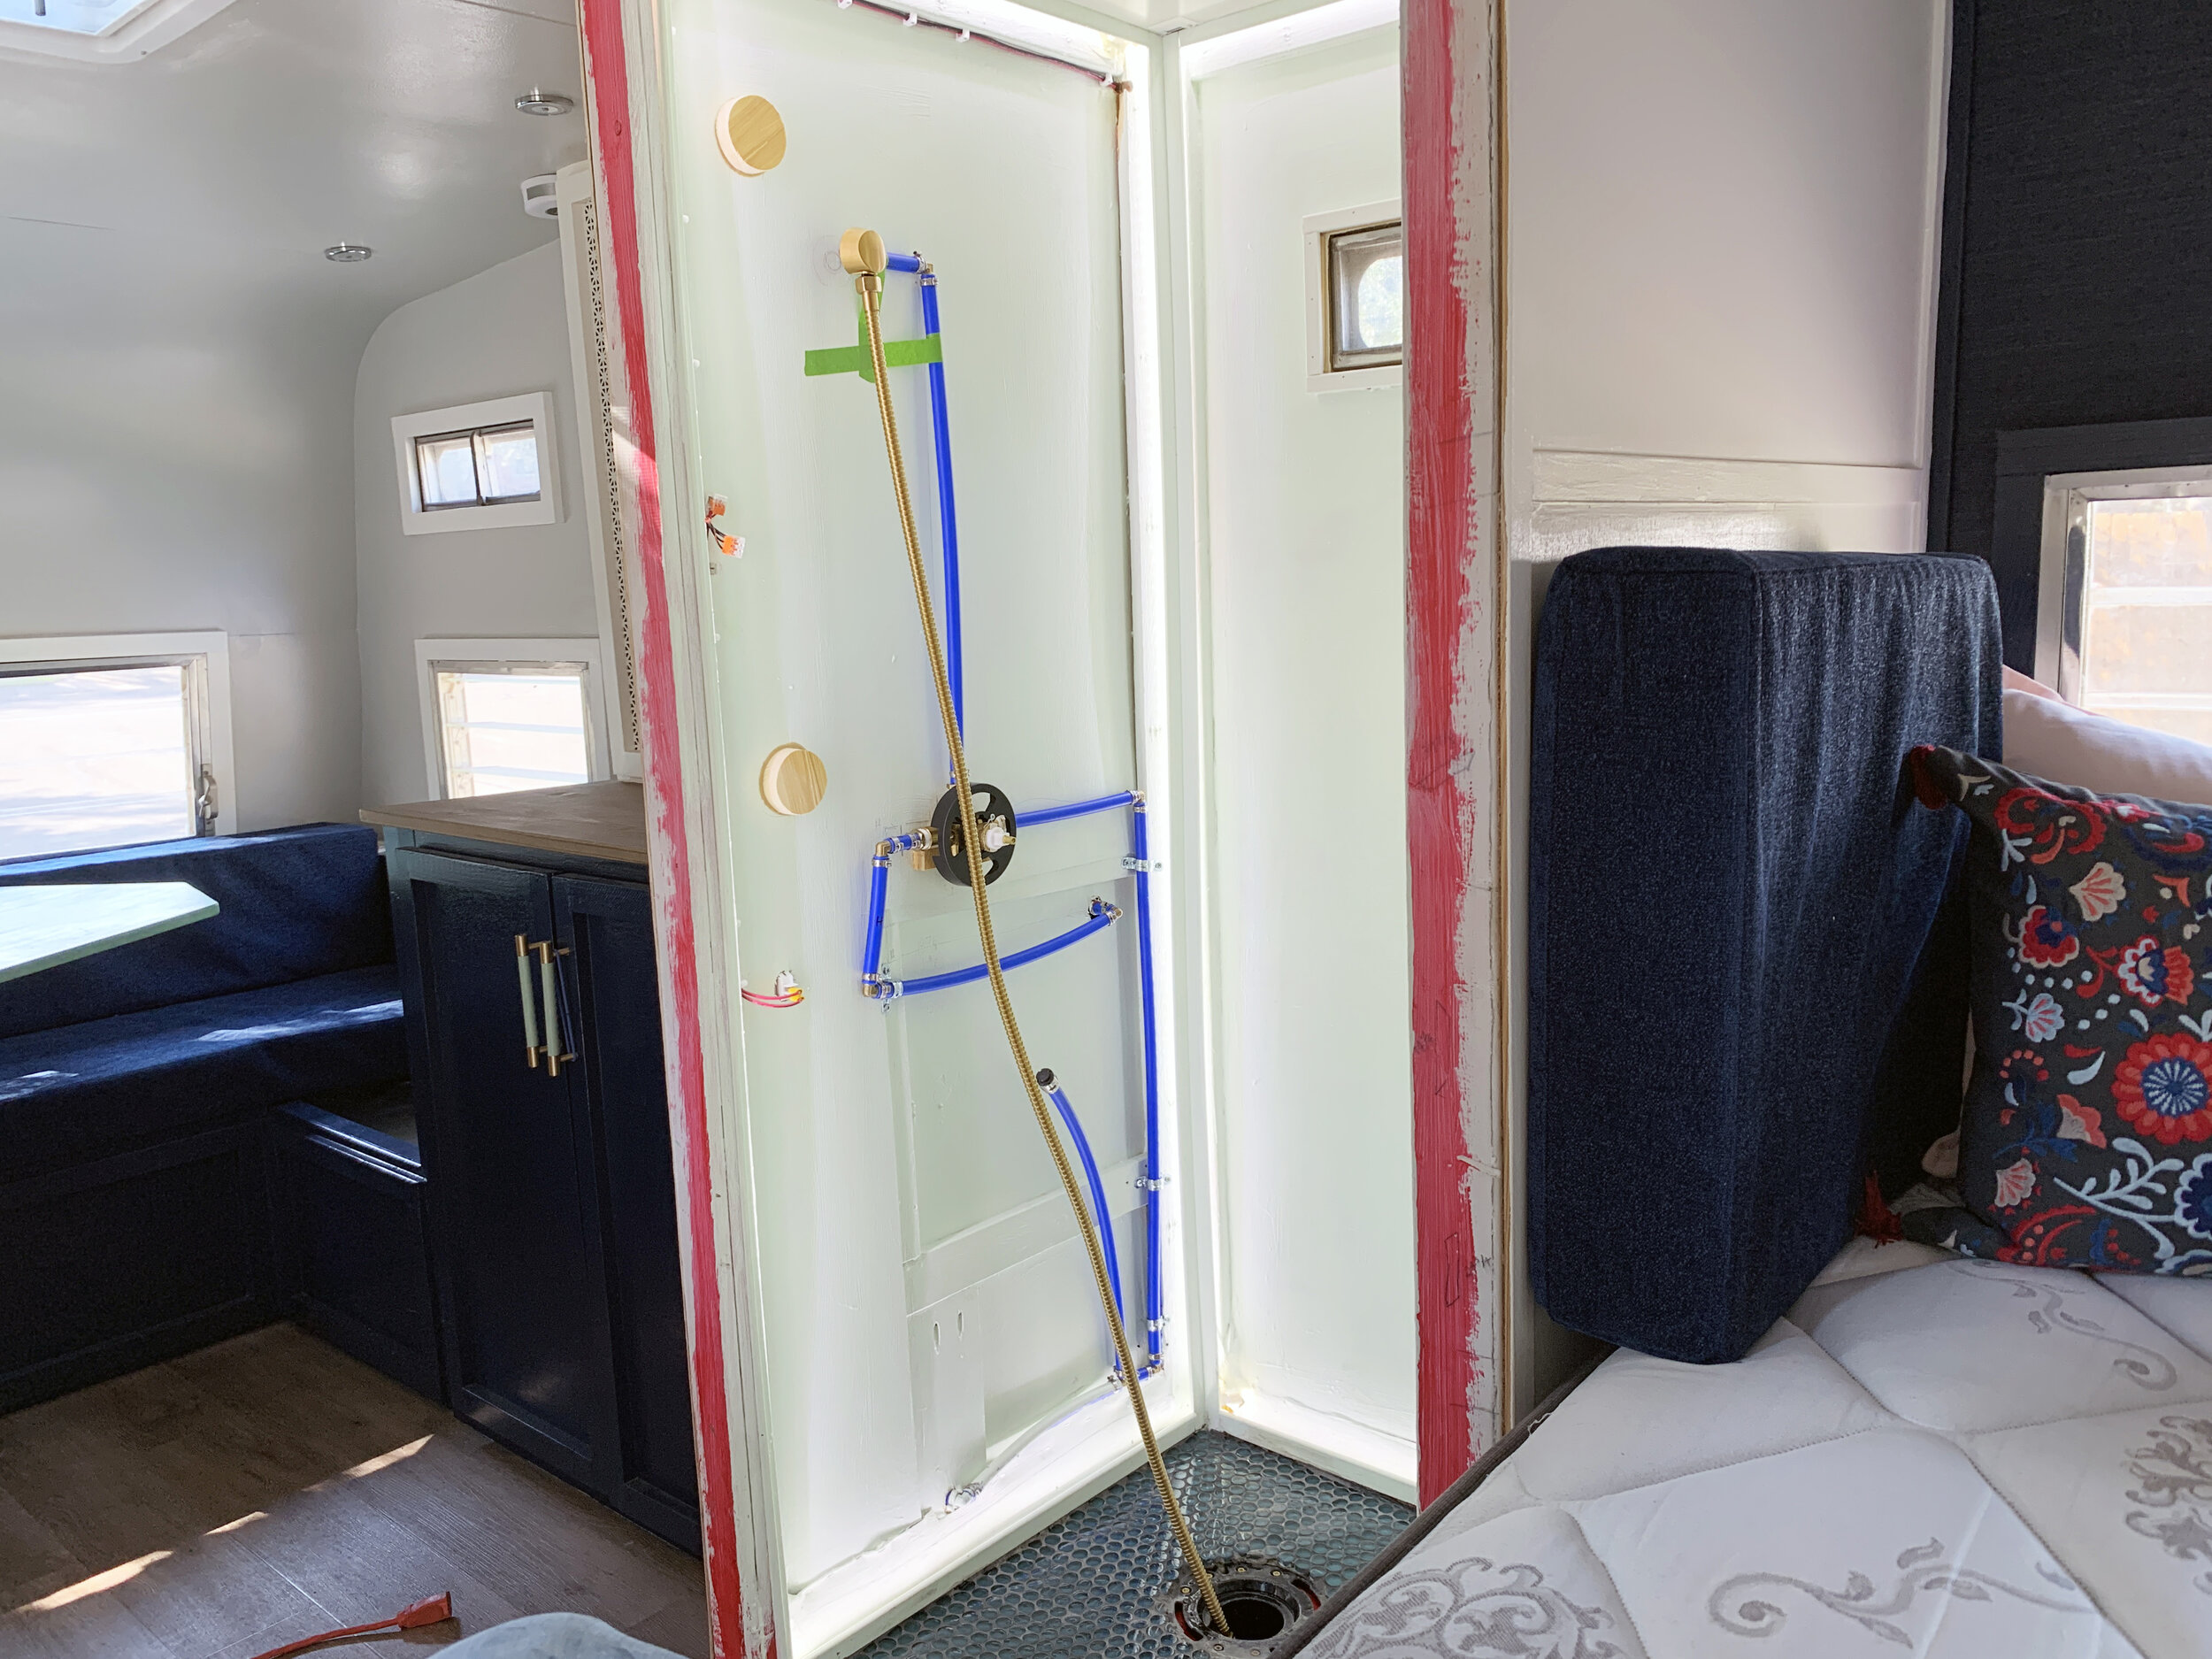
Because of our wall thickness, we came up with a smoke and mirrors solution to fit our shower diverter valve inside the shallow wall. (Yes it involves a hole … but don’t worry, it will get covered and no one will ever know. Unless you share it on your blog…)
Careful to make sure the diverter valve was placed above the counter’s height that’s on the outside of the wet bath, we marked and drilled two adjoining holes in the lefthand side exterior wall for the knobby bump out piece on the diverter valve so it could be pushed as far left/back (toward the electrical cabinet/rear of the camper that’s touching the left shower wall).

You can see in the photo below how the arrow-looking part just to right of the little + sign on the back of the diverter valve sticks out more than the four pipe connection areas, making it so we had to cut a larger main hole and then a little side nobby hole.

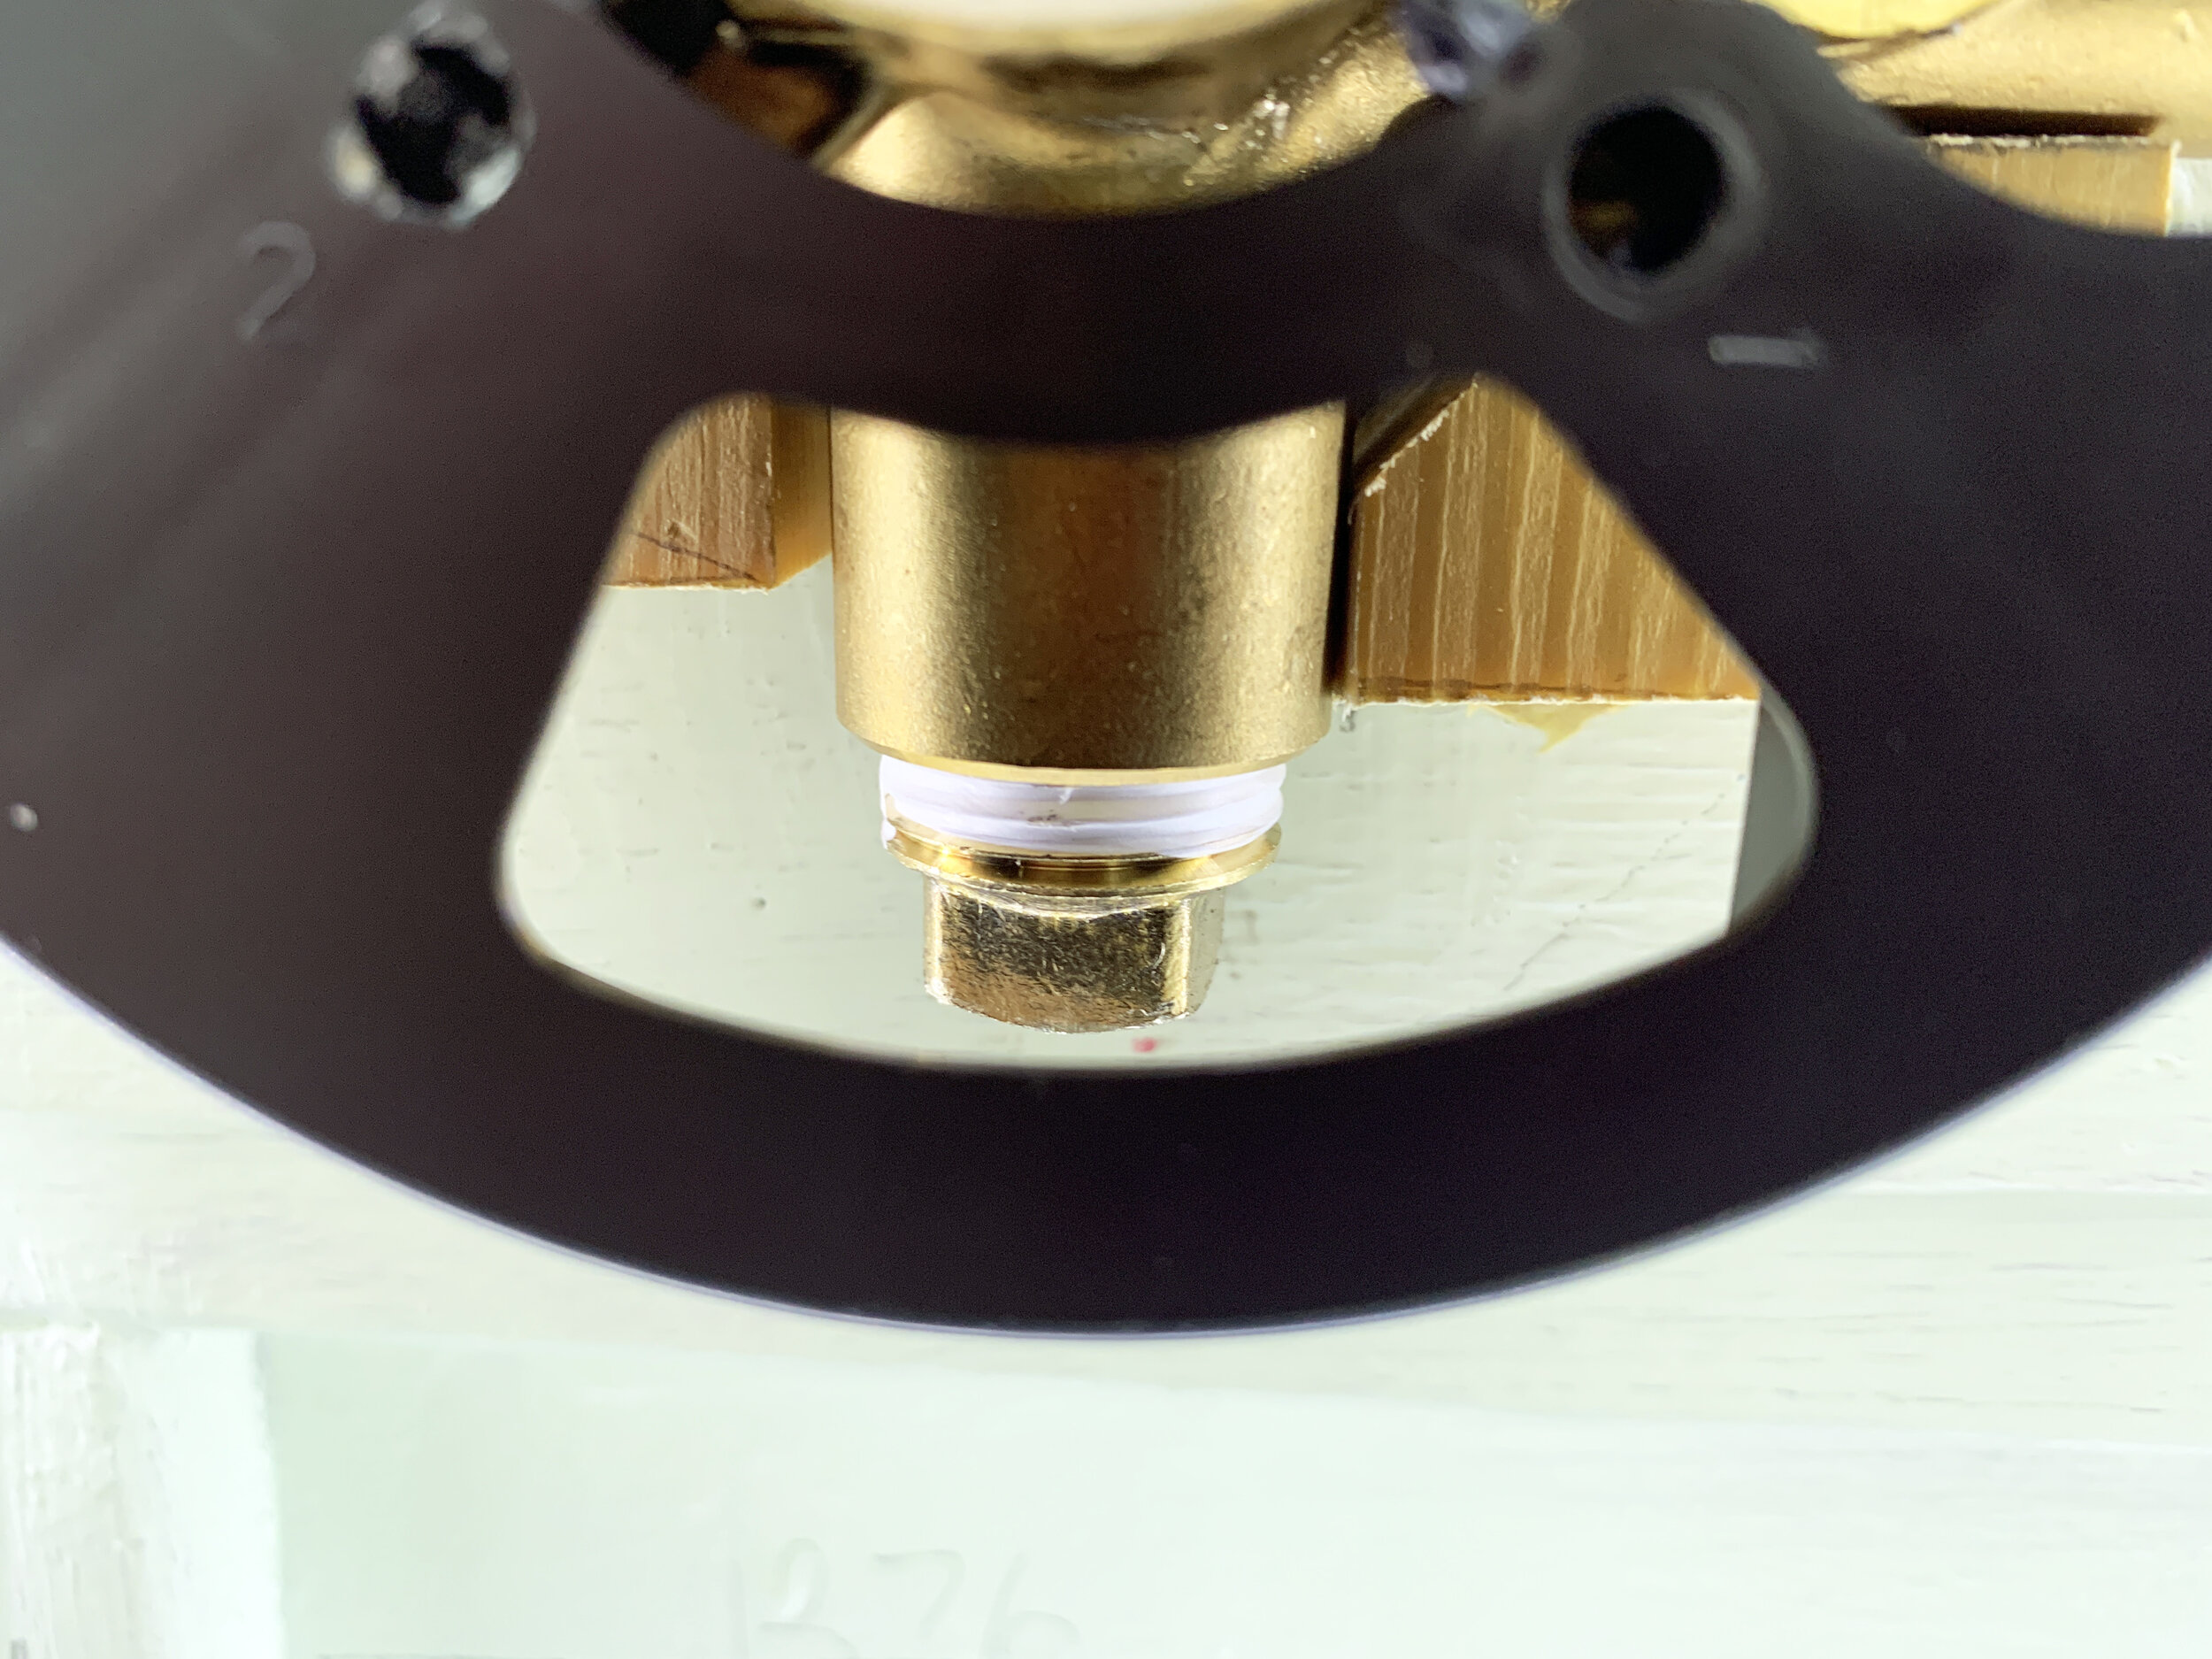
Being pretty heavy, we decided to provide internal supports for the diverter valve so it wasn’t fully supported by PEX pipe.
With the diverter valve pushed into the newly made bump out hole, we held it in place to mark out the shape of the underside.

After we marked out the bottom of the diverter valve on the inside of the shower wall, we cut two small support blocks – one for each side of the bottom of the diverter valve – to help provide a “ledge” of sorts for support.

We used construction adhesive to glue the angled blocks to the wall and taped them in place until dry (overnight).
Plumbing
With our structural supports in place, we began running our PEX pipe from the previously-run hot and cold water supply lines to our shower and toilet. These next steps assume you already have run water lines to your bathroom. (Haven’t run your plumbing yet? Check out this post for a tutorial on how to get water to your bathroom, and this post on how to get hot water to your bathroom.)

Toilet plumbing
From our cold water supply line (previously run down low by the floor and coming through the cabinet/left side of the shower) we installed an elbow fitting and PEX pipe (run to the right), followed by a tee connector with a longer-than-we-needed piece of PEX pipe on the single arm of the tee (the one that’s pointing into the shower) where we wanted to bring water to the toilet, and capped it off with a cap so we could test the plumbing later, before installing the toilet.
Important!
Leave the end of this PEX toilet supply line longer than you’ll need it in the end. We’ll cut this piece to length and add the correct toilet adapter fitting later after we’ve threaded the acrylic wall over this pipe. If there’s something on the end, you’ll have to fight with it later and chances are the acrylic won’t fit over the fitting.
Shower plumbing
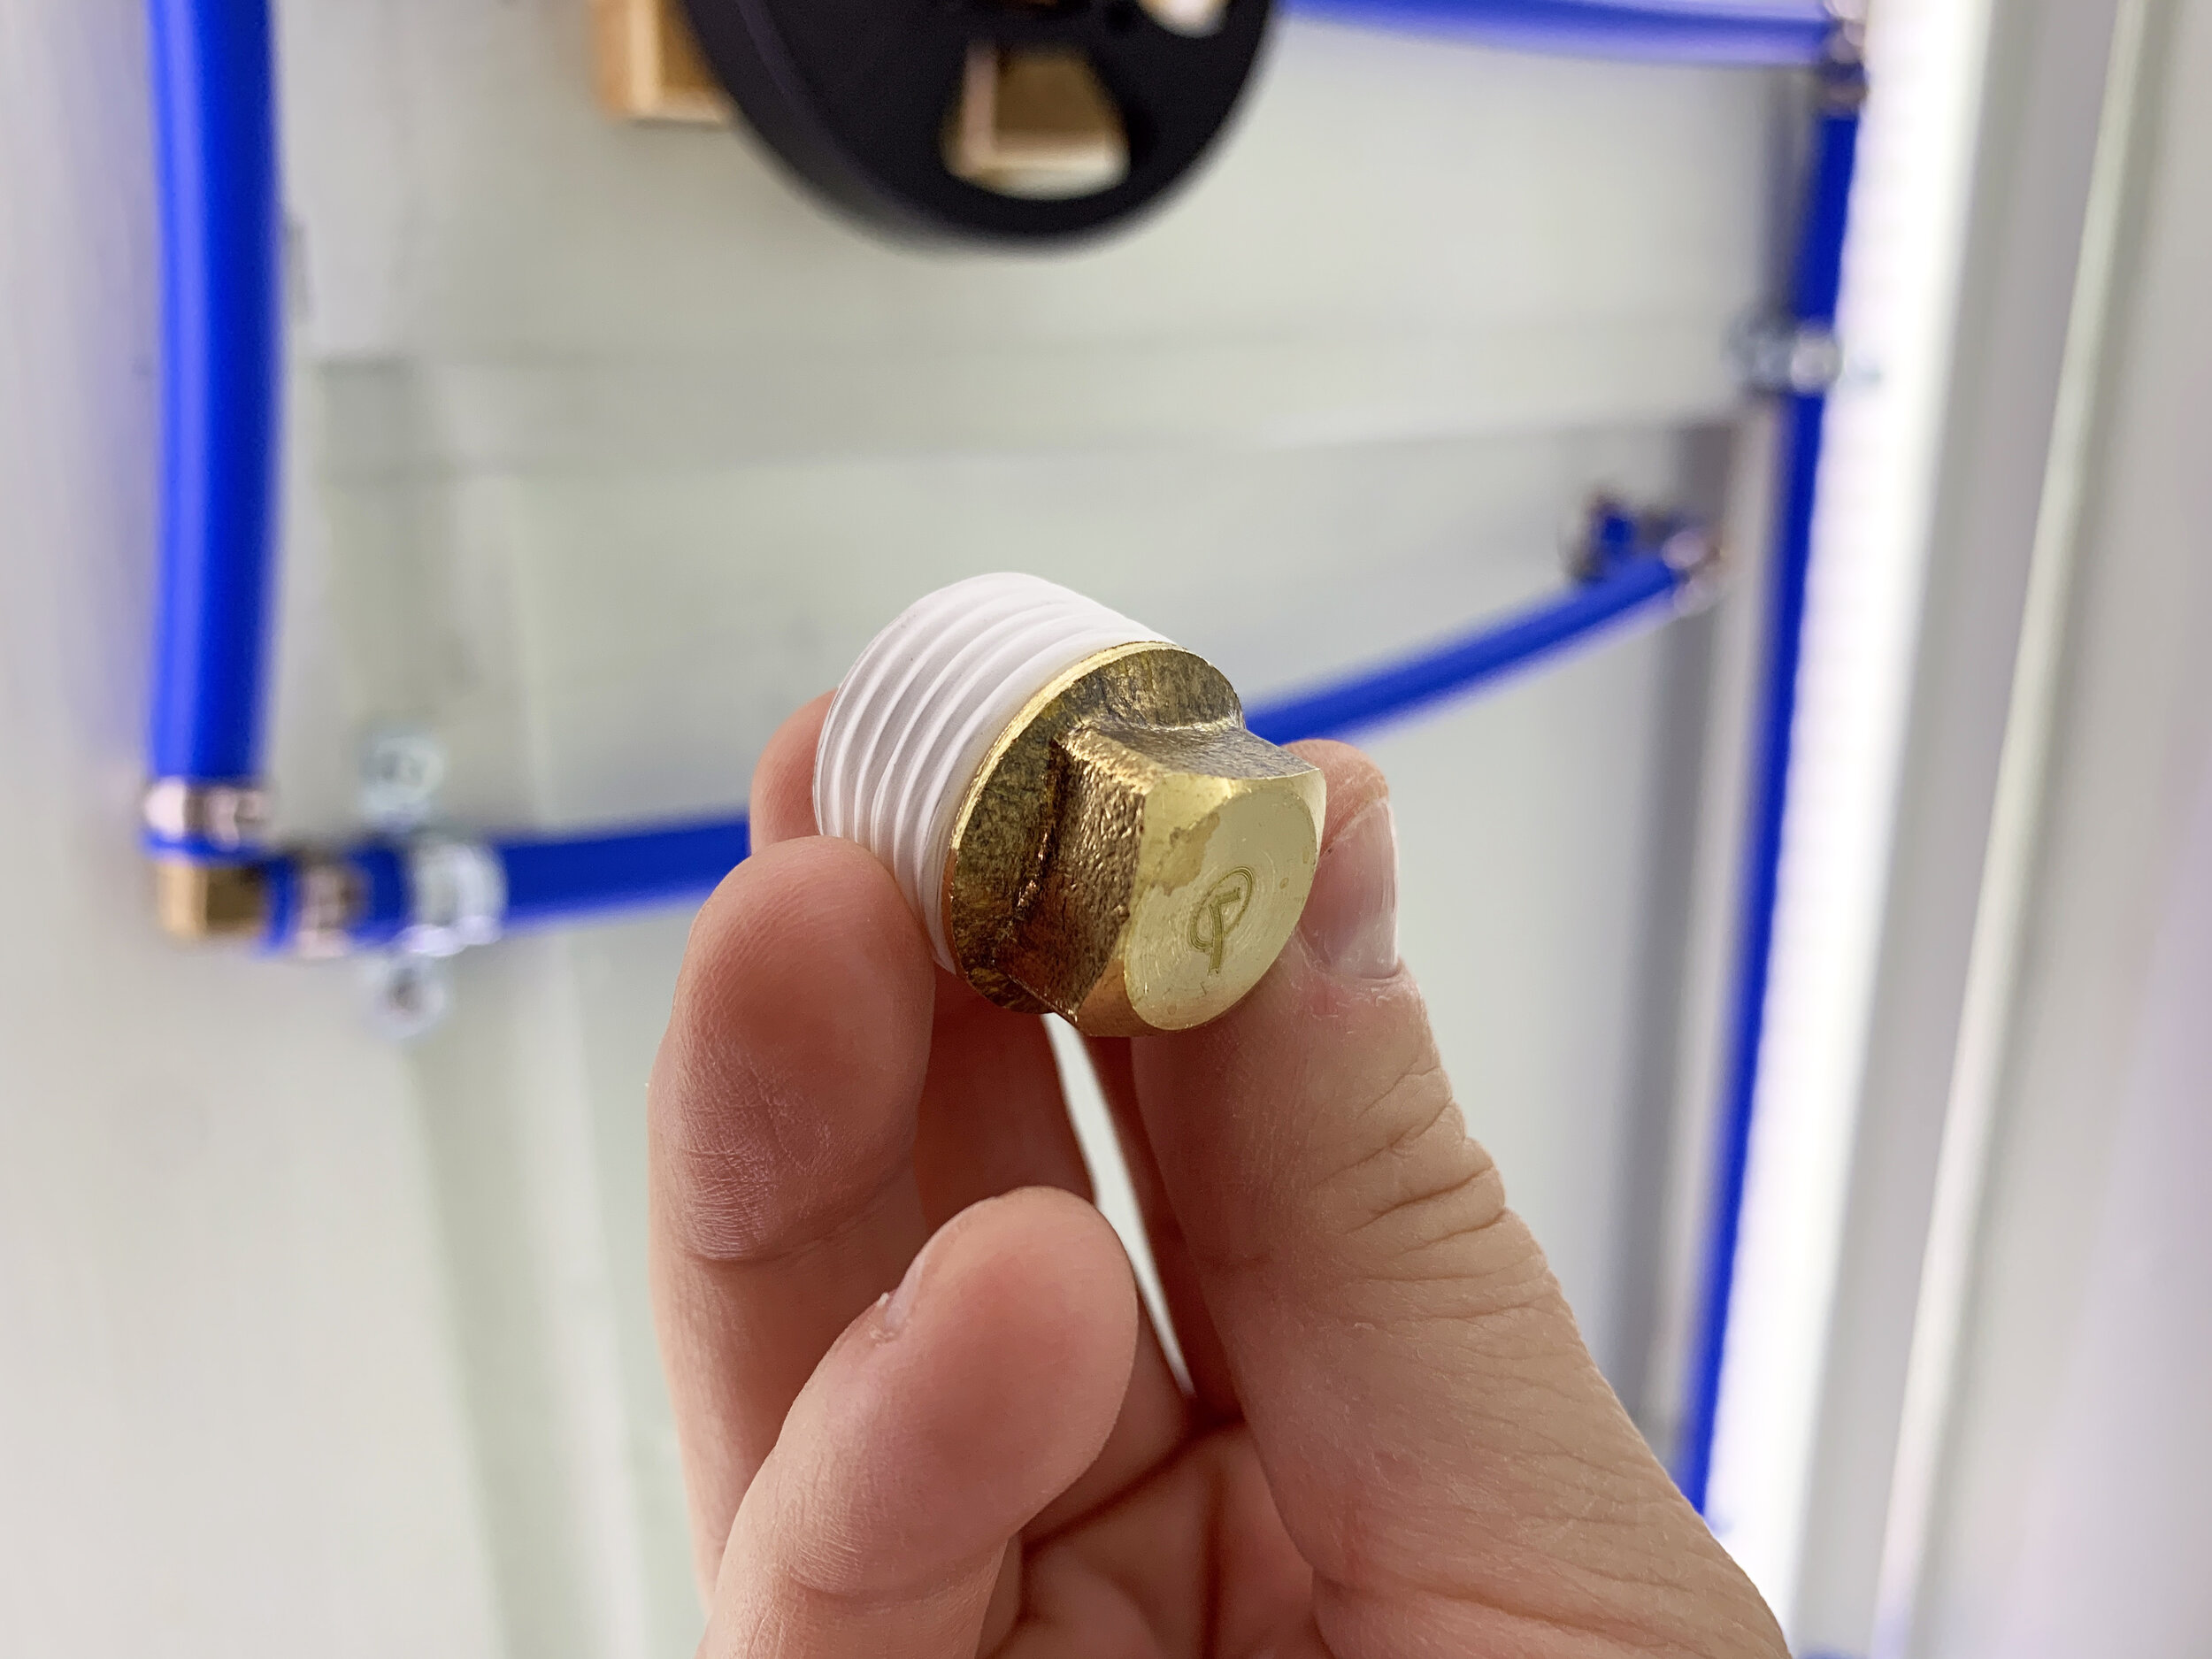
Plugging the bathtub port
First, because we don’t have a bathtub in our camper, we plugged up the threaded port on the bottom of the diverter valve with a Teflon tape-wrapped 1/2-in diameter threaded male adapter plug fitting.
Cold water supply
On the other side of the toilet tee connector mentioned above, we kept the cold water supply PEX pipe moving right, then installed another two elbow connectors to run the cold water line up the right side of the wall and then turn it to the left to meet the threaded water-in port on the right side of the diverter valve.
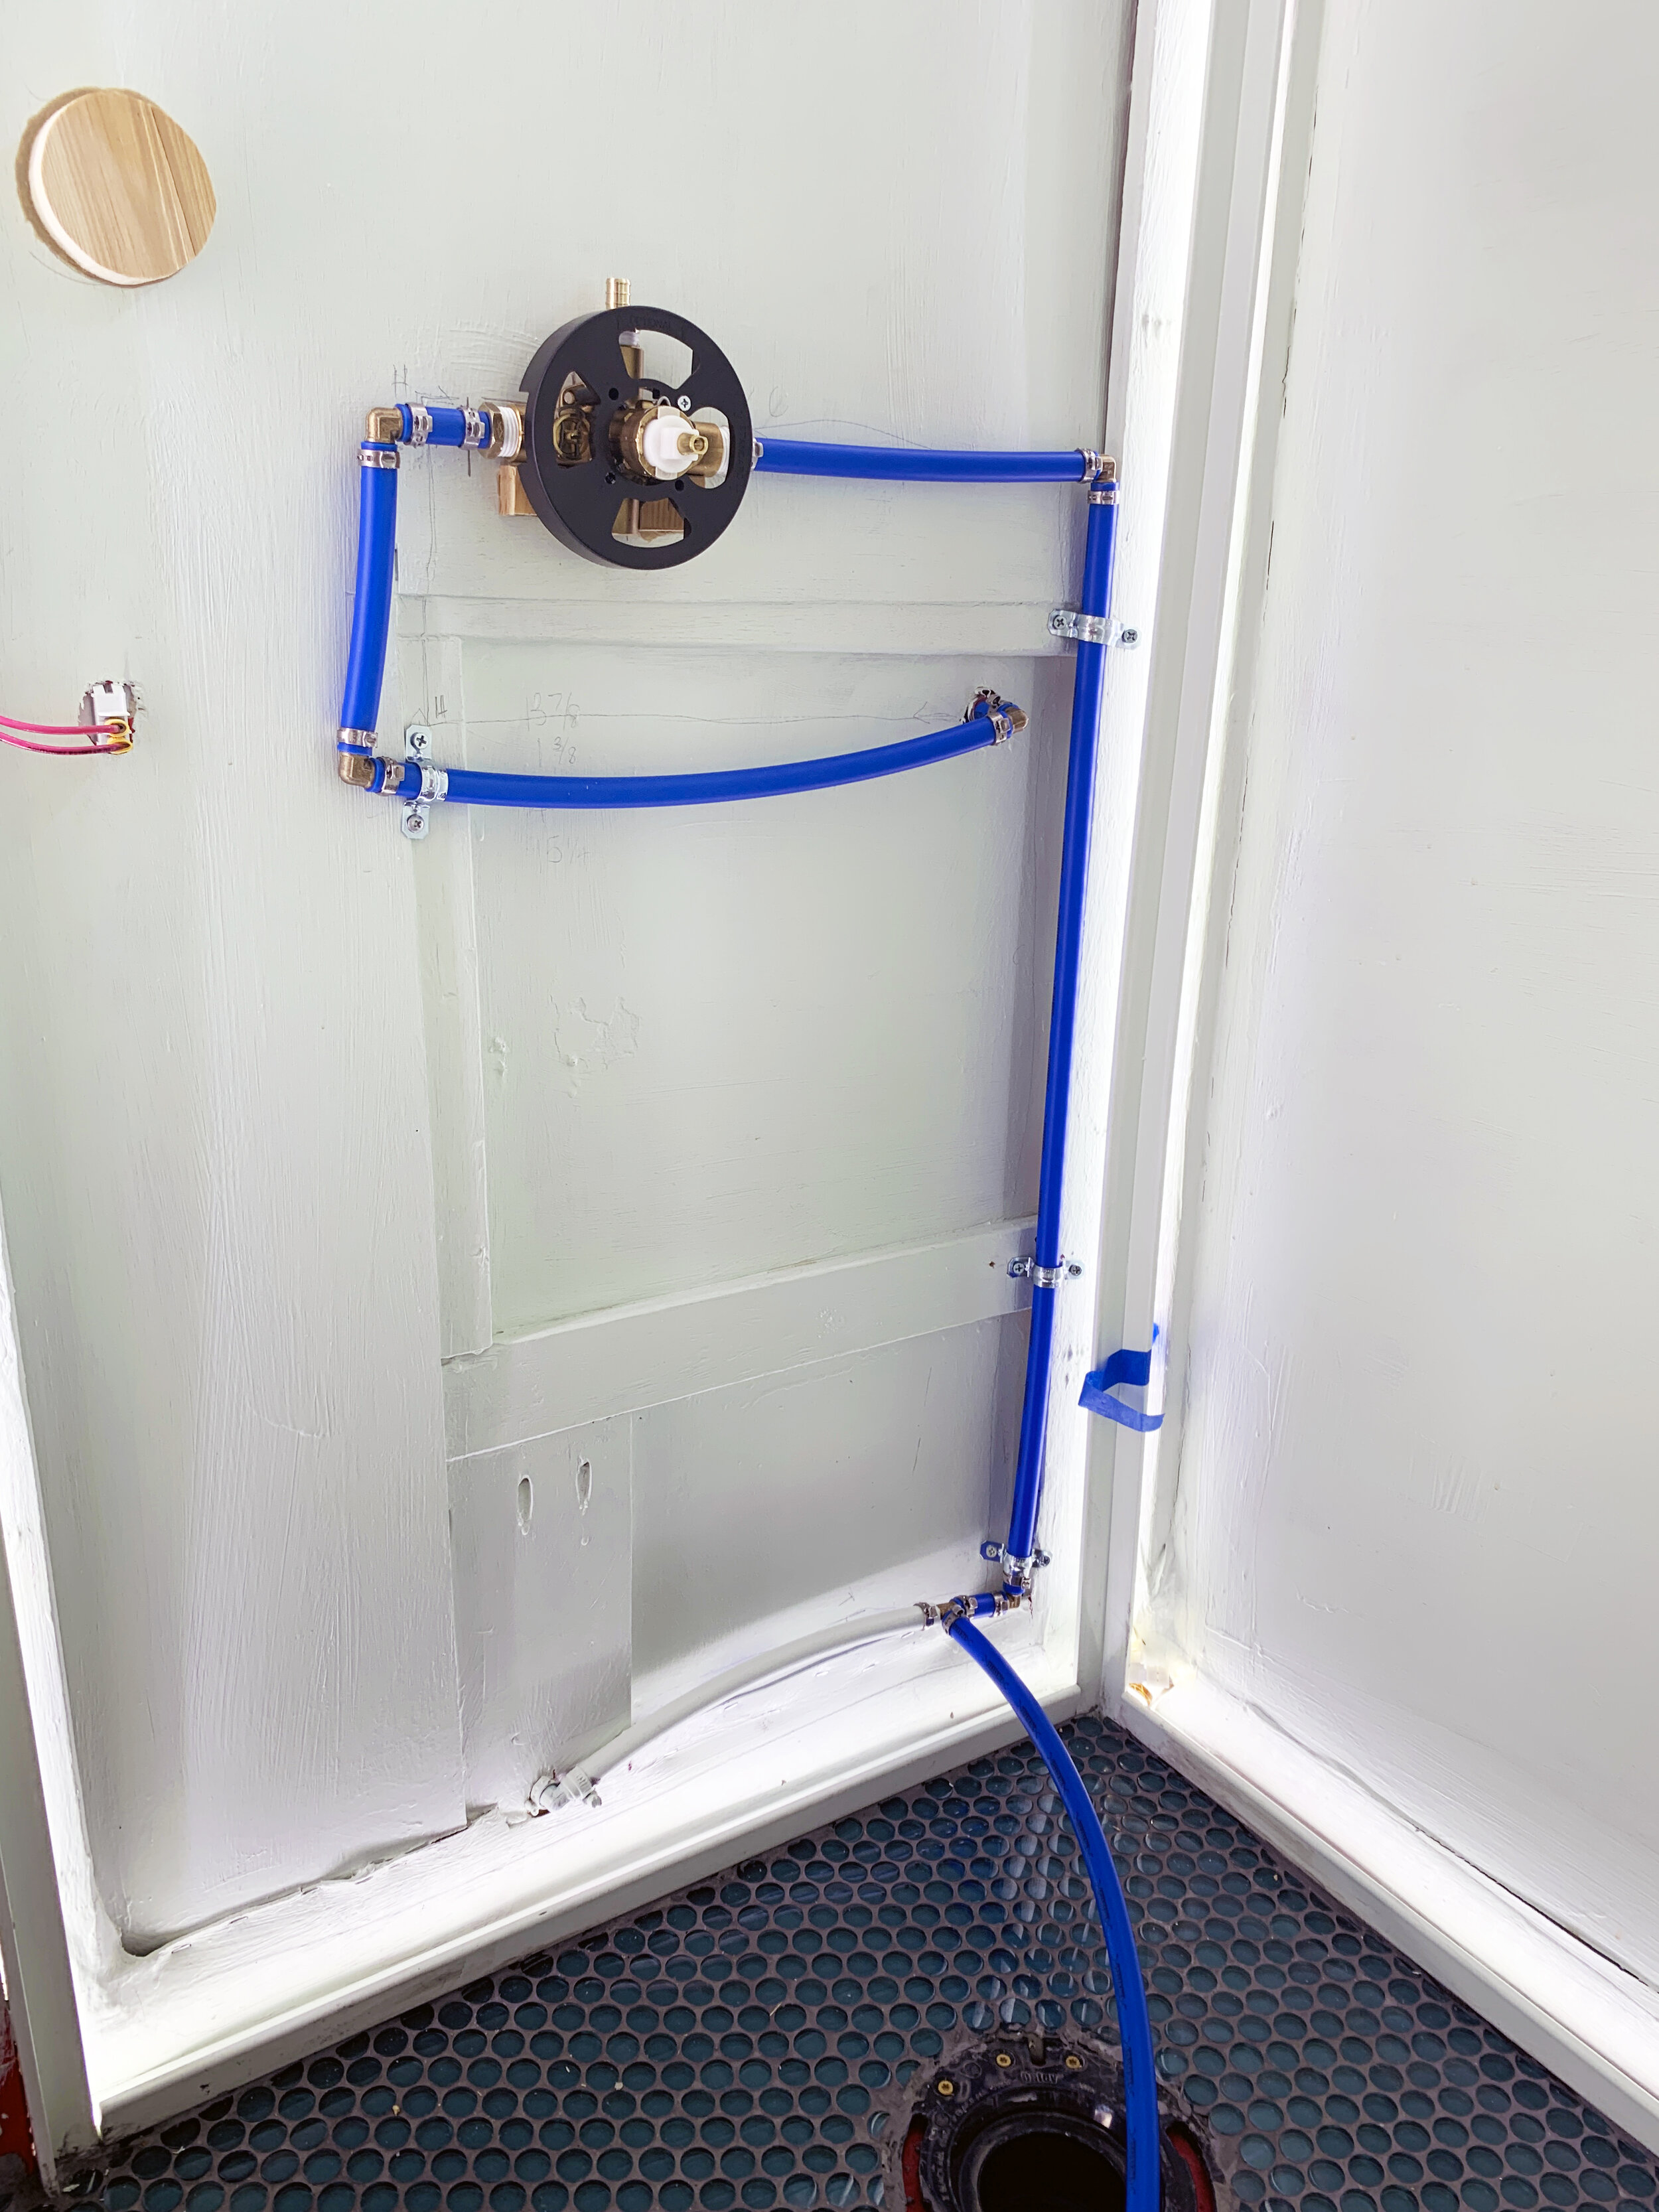
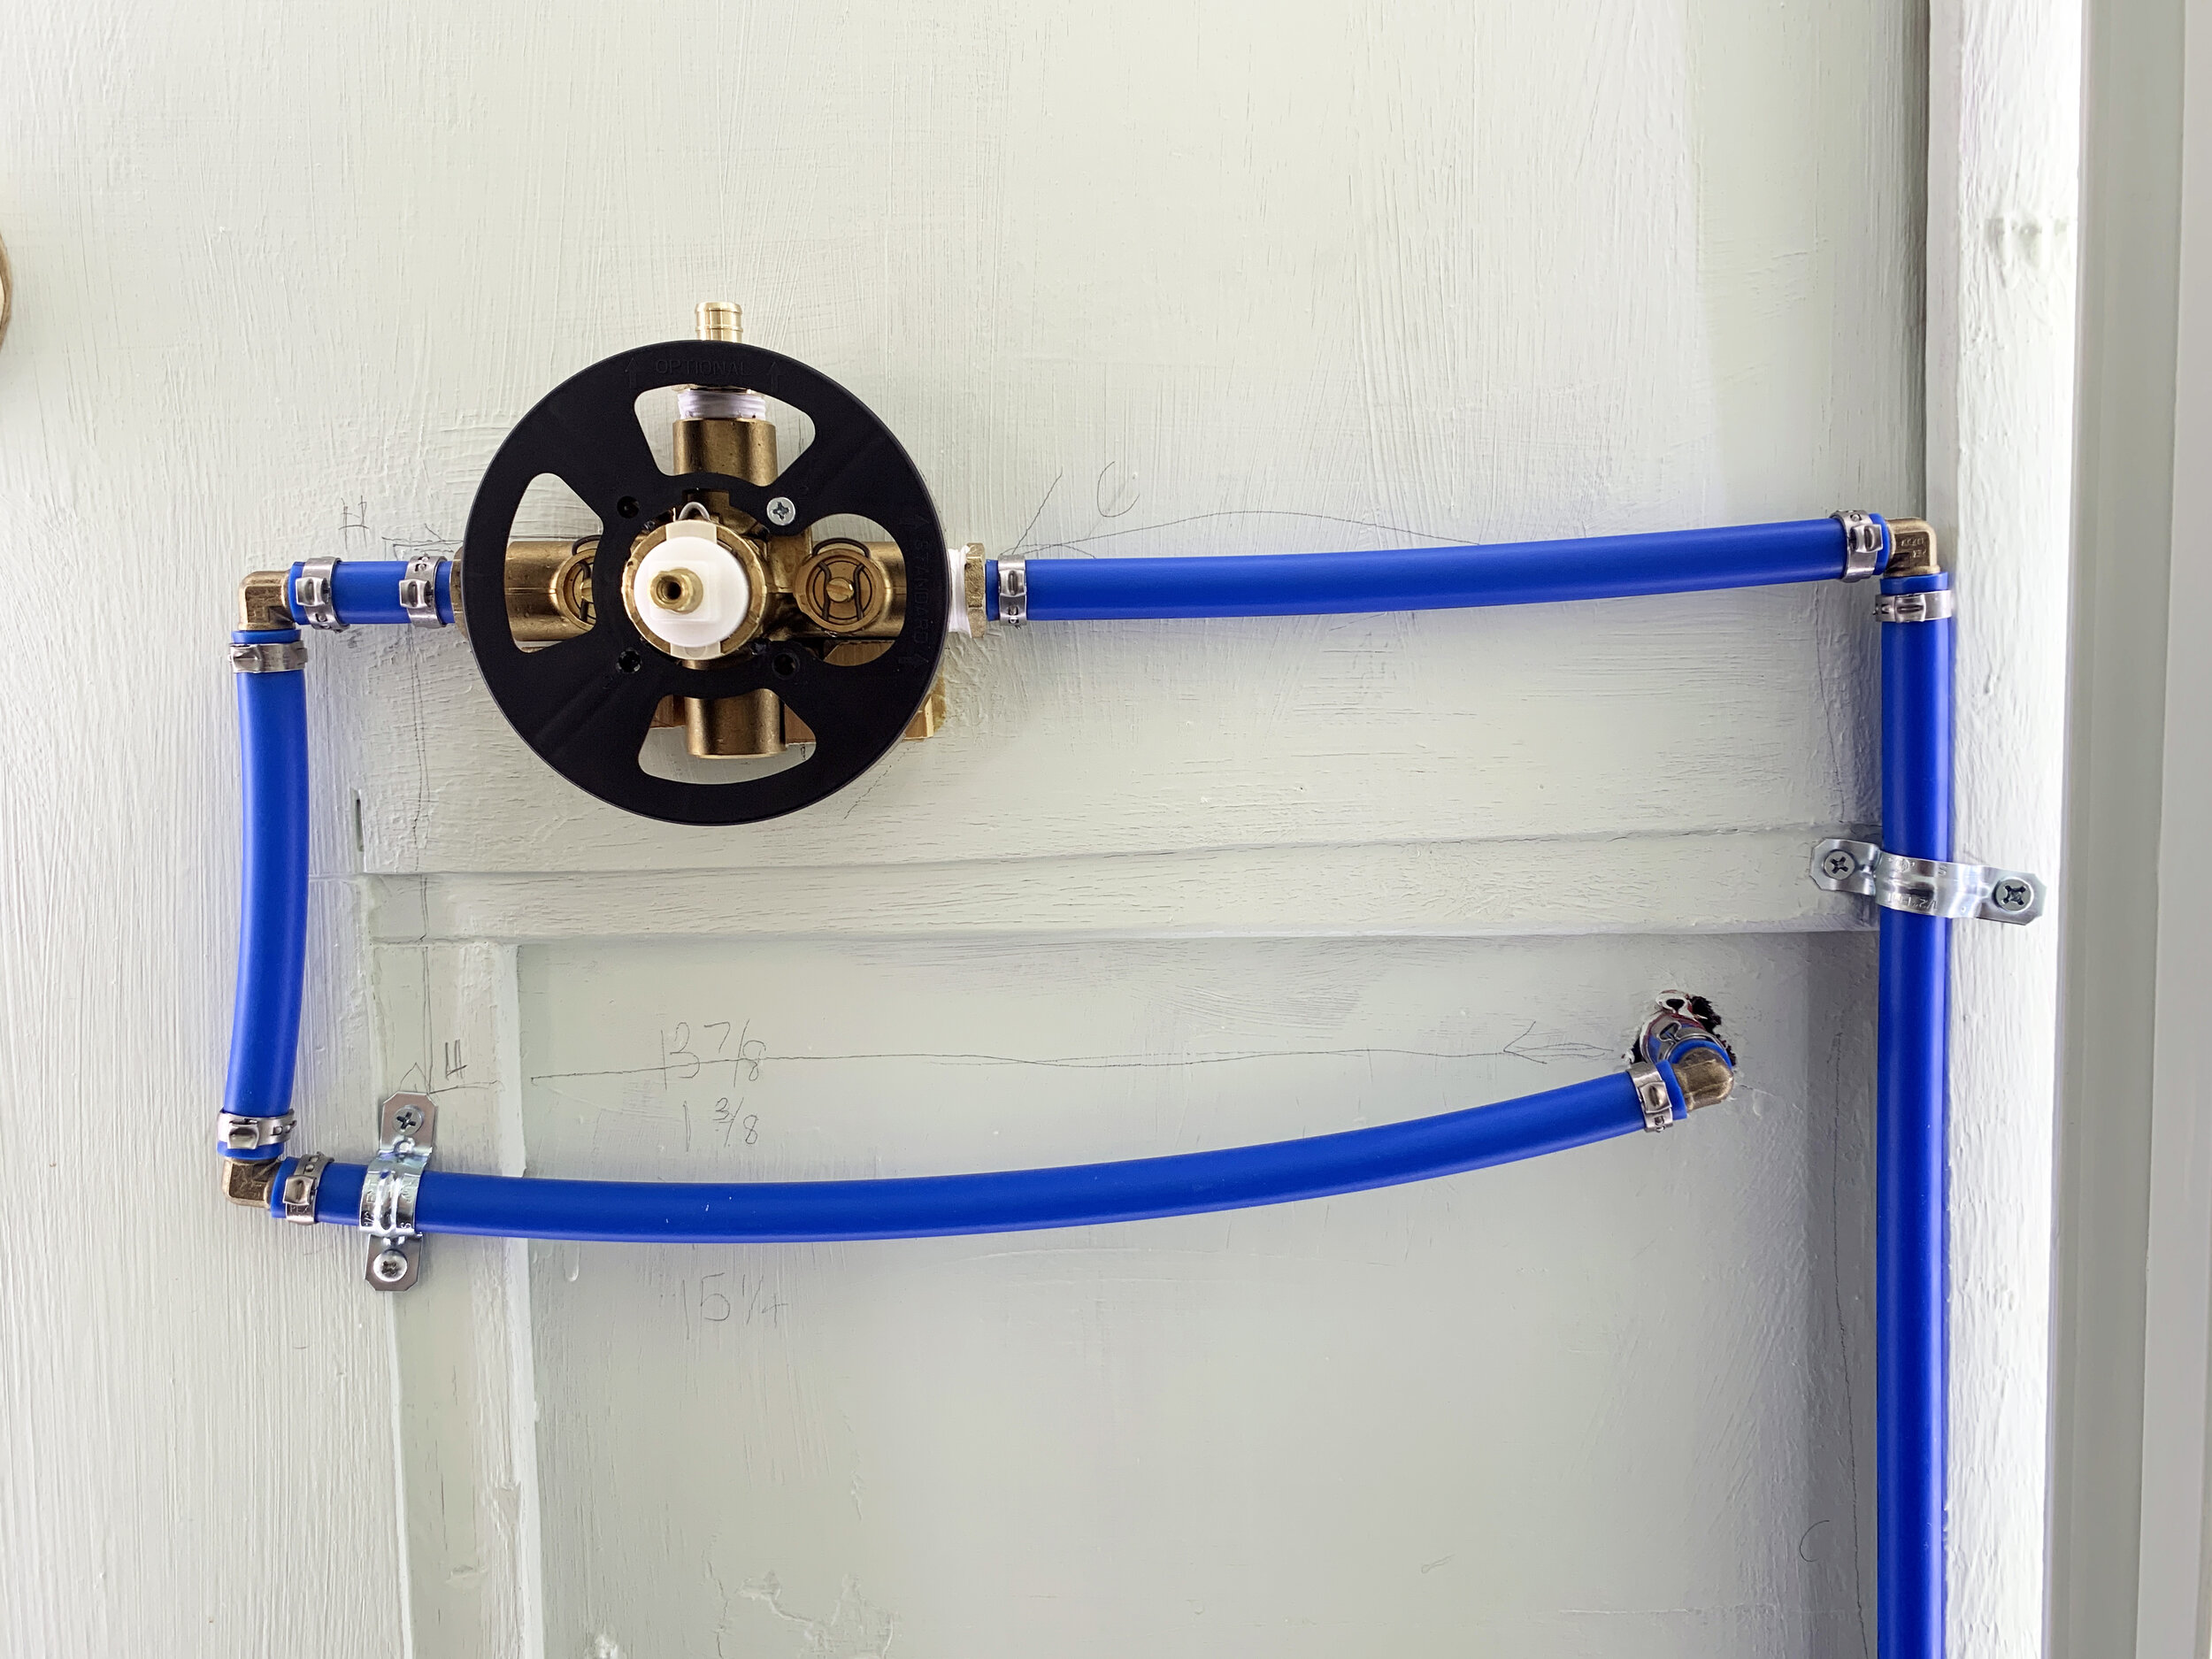
Hot water supply
From the hot water line we’d previously poked through the side of the cabinet/left wall of the shower, we used an elbow connector to immediately turn the water line to the left so it stayed as shallow in the wall as possible, running it below the diverter valve, and then an additional two elbows and PEX pipe to bring the hot water supply up and to the left side of the diverter valve. (Though we used blue PEX pipe, the hot water line in the photos above is the line coming out of the left side of the round black and brass diverter valve. The line coming out of the right side of the divert valve, down the wall and along the floor is the cold water supply line.)
We secured the flexible PEX line to our shower framing with metal brackets.

Connecting water lines to the diverter valve
After screwing a 1/2” x 1/2” MNPT male adapter into the left and right threaded ports on the diverter valve (with Teflon tape on the threads!), we used our clamp rings and clamp tool to connect the adapters to the ends of the cold and hot water lines.

Getting water to the shower head/wand
We used the same method above to run a water line out from the top port of the diverter valve to supply the shower head/want. We also used an elbow to take the plumbing left to meet where we wanted our brass drop ell to go, and finished off the line with another 1/2” x 1/2” MNPT male adapter wrapped in Teflon tape.

Testing the connections
Before we close in the wall, we temporarily hooked up our drop ell and handheld shower hose to the top shower head port to test for leaks. We didn’t have any drips at our crimped connections, but had one where we didn’t screw in an adapter tight enough. (If anything is dripping, carefully tighten the threaded adapters with some pliers until it stops.)
That’s it – everything is in place and finally ready for installing the frosted acrylic walls, which means we are SO CLOSE to having a finished bathroom!!