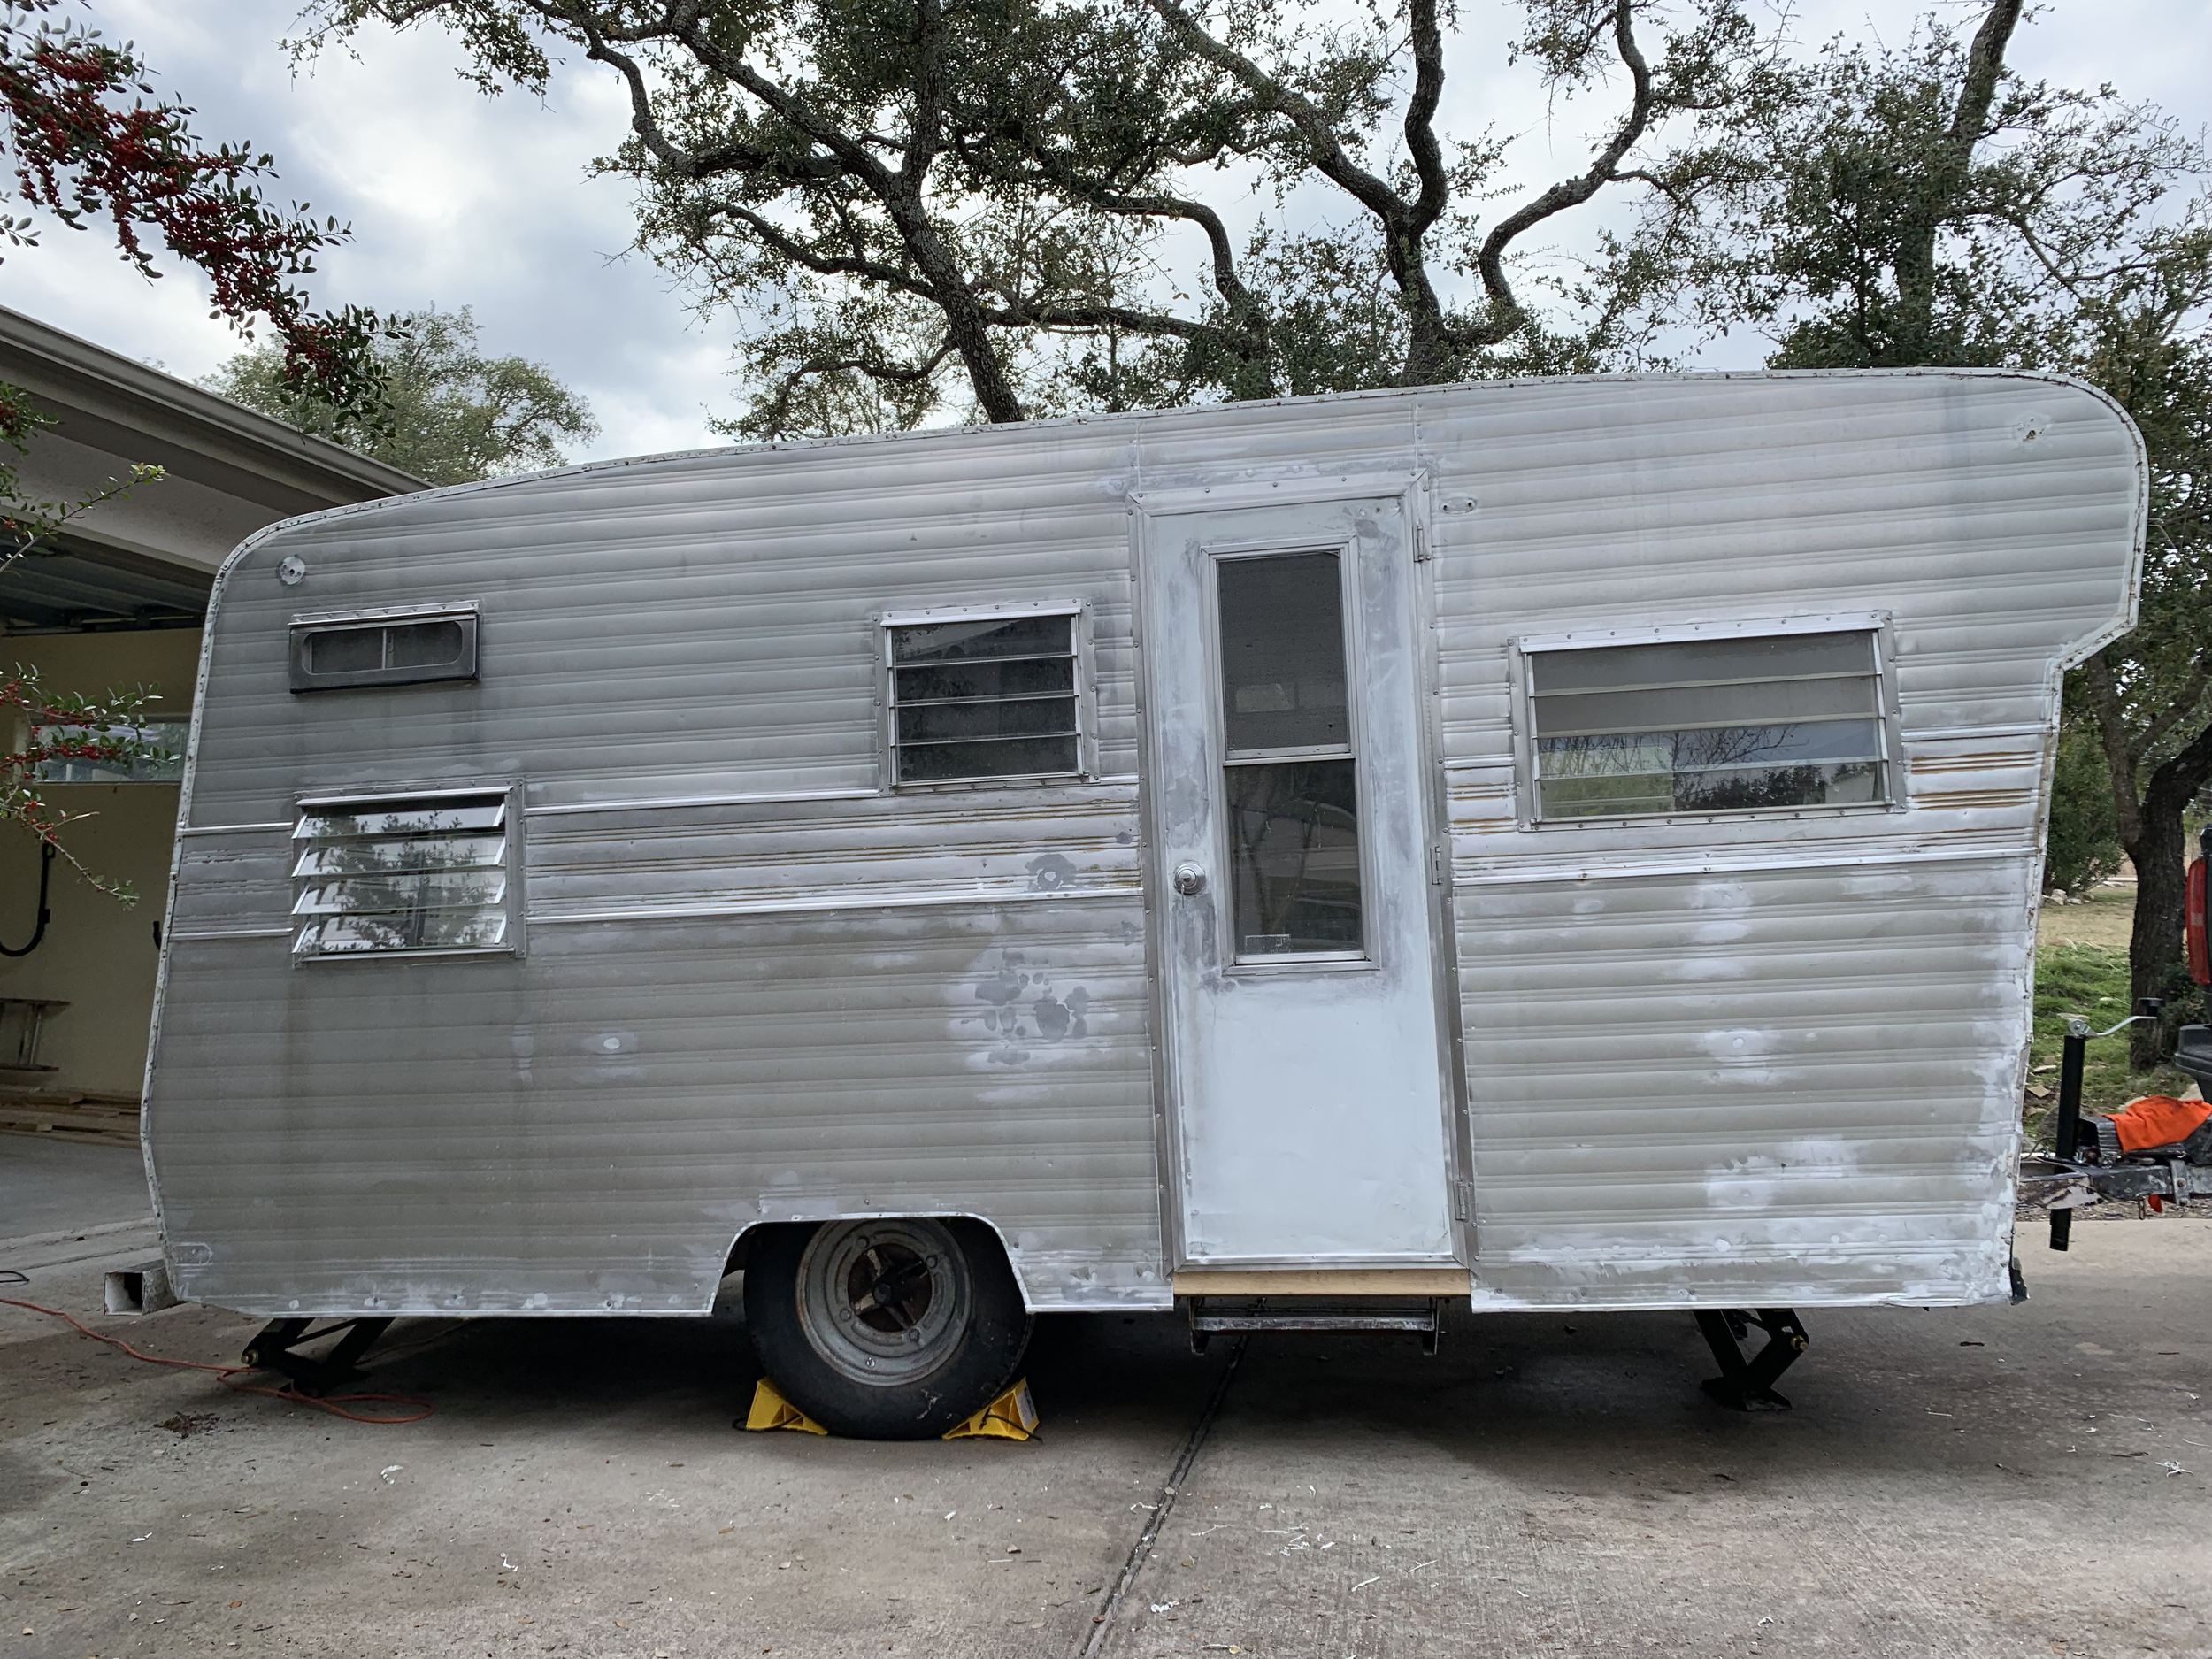
The Cameo Camper Renovation: Door Rehab

The door to The Cameo seems to be the gift that keeps on giving. You might not’ve ever guessed looking at photos so far, but true to our typical project form, we keep having recurring (yet different) problems with this door. It started way back when we first bought her a little over a year ago and were driving her back (remember all the wall/door flapping?), and since then it seems as though we’ve touched this thing about a bajillion times to get it to close properly. So much so that I’m going to share some of the door-related trials and tribulations we’ve faced to hopefully help save you from going through the same thing. Or at least, give you some tips and tricks we learned along the way to help you fight back if you’re ever in the same boat (and would rather rehab your door instead of buying an all new one).
Today we’re going to share how we:
Fixed the sagging door
Repaired holes in the door’s wooden interior/core (without taking it apart)
Widened the door
Installed a keyless door lock
Fixed some minor flaws and imperfections on the outside of the door
Installed a magnetic doorstop
How we fixed our sagging camper door
If you remember when we first picked her up, the “flappy” wall the door latched into was disconnected from floor, and then when we had to reframe the floor/structure for the whole trailer and reattached the walls to it, the door frame shifted ever so slightly. As we worked on the surround we shut the door and checked the latch often to help try and keep it all in line, but the micro-movements as we worked on everything around the door continued to cause little alignment issues here and there.

After we got the door-side walls in place, the door sagged down on the left (so that to close the door we had to use the doorknob to kind of hoist it up to align the latch). To fix this, we adjusted the hinges slightly, bending the top hinge in with pliers so it made less than a 90-degree angle (to the right if you’re looking at the door from outside) and then flattening the bottom hinge a little with pliers (bent to the left if you’re looking at the door from the outside) to help push the bottom of the door left. Unfortunately, I don’t have any photos of the before/during/after (because, new phone who dis?), but basically this kind of helped turn the door clockwise ever so slightly to help fight the sagging. We adjusted the middle hinge slightly just to keep it in line with the new alignment of the adjusted top and bottom hinges. Now that the door was swinging properly and not dragging, it was time to move onto the new doorknob. Or so we thought.
How we (eventually) installed a new doorknob
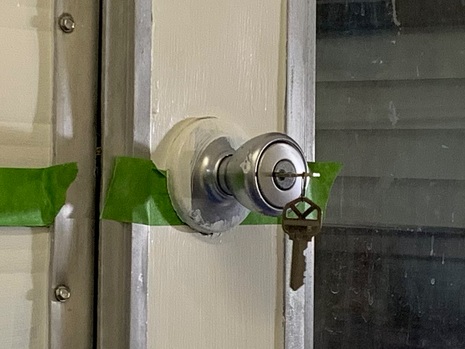
One of the many things keeping the door looking all sorts of janky (aside from the door itself, of course) was the old loose doorknob. It was old – but not old enough that it was stylish and vintage to fit the cute style of The Cameo, it required a different key than the little hatch on the back of the camper, and was so loose and floppy it was just barely functioning as a doorknob. For this we opted for a modern solution, but first we had to deal with a couple other things.
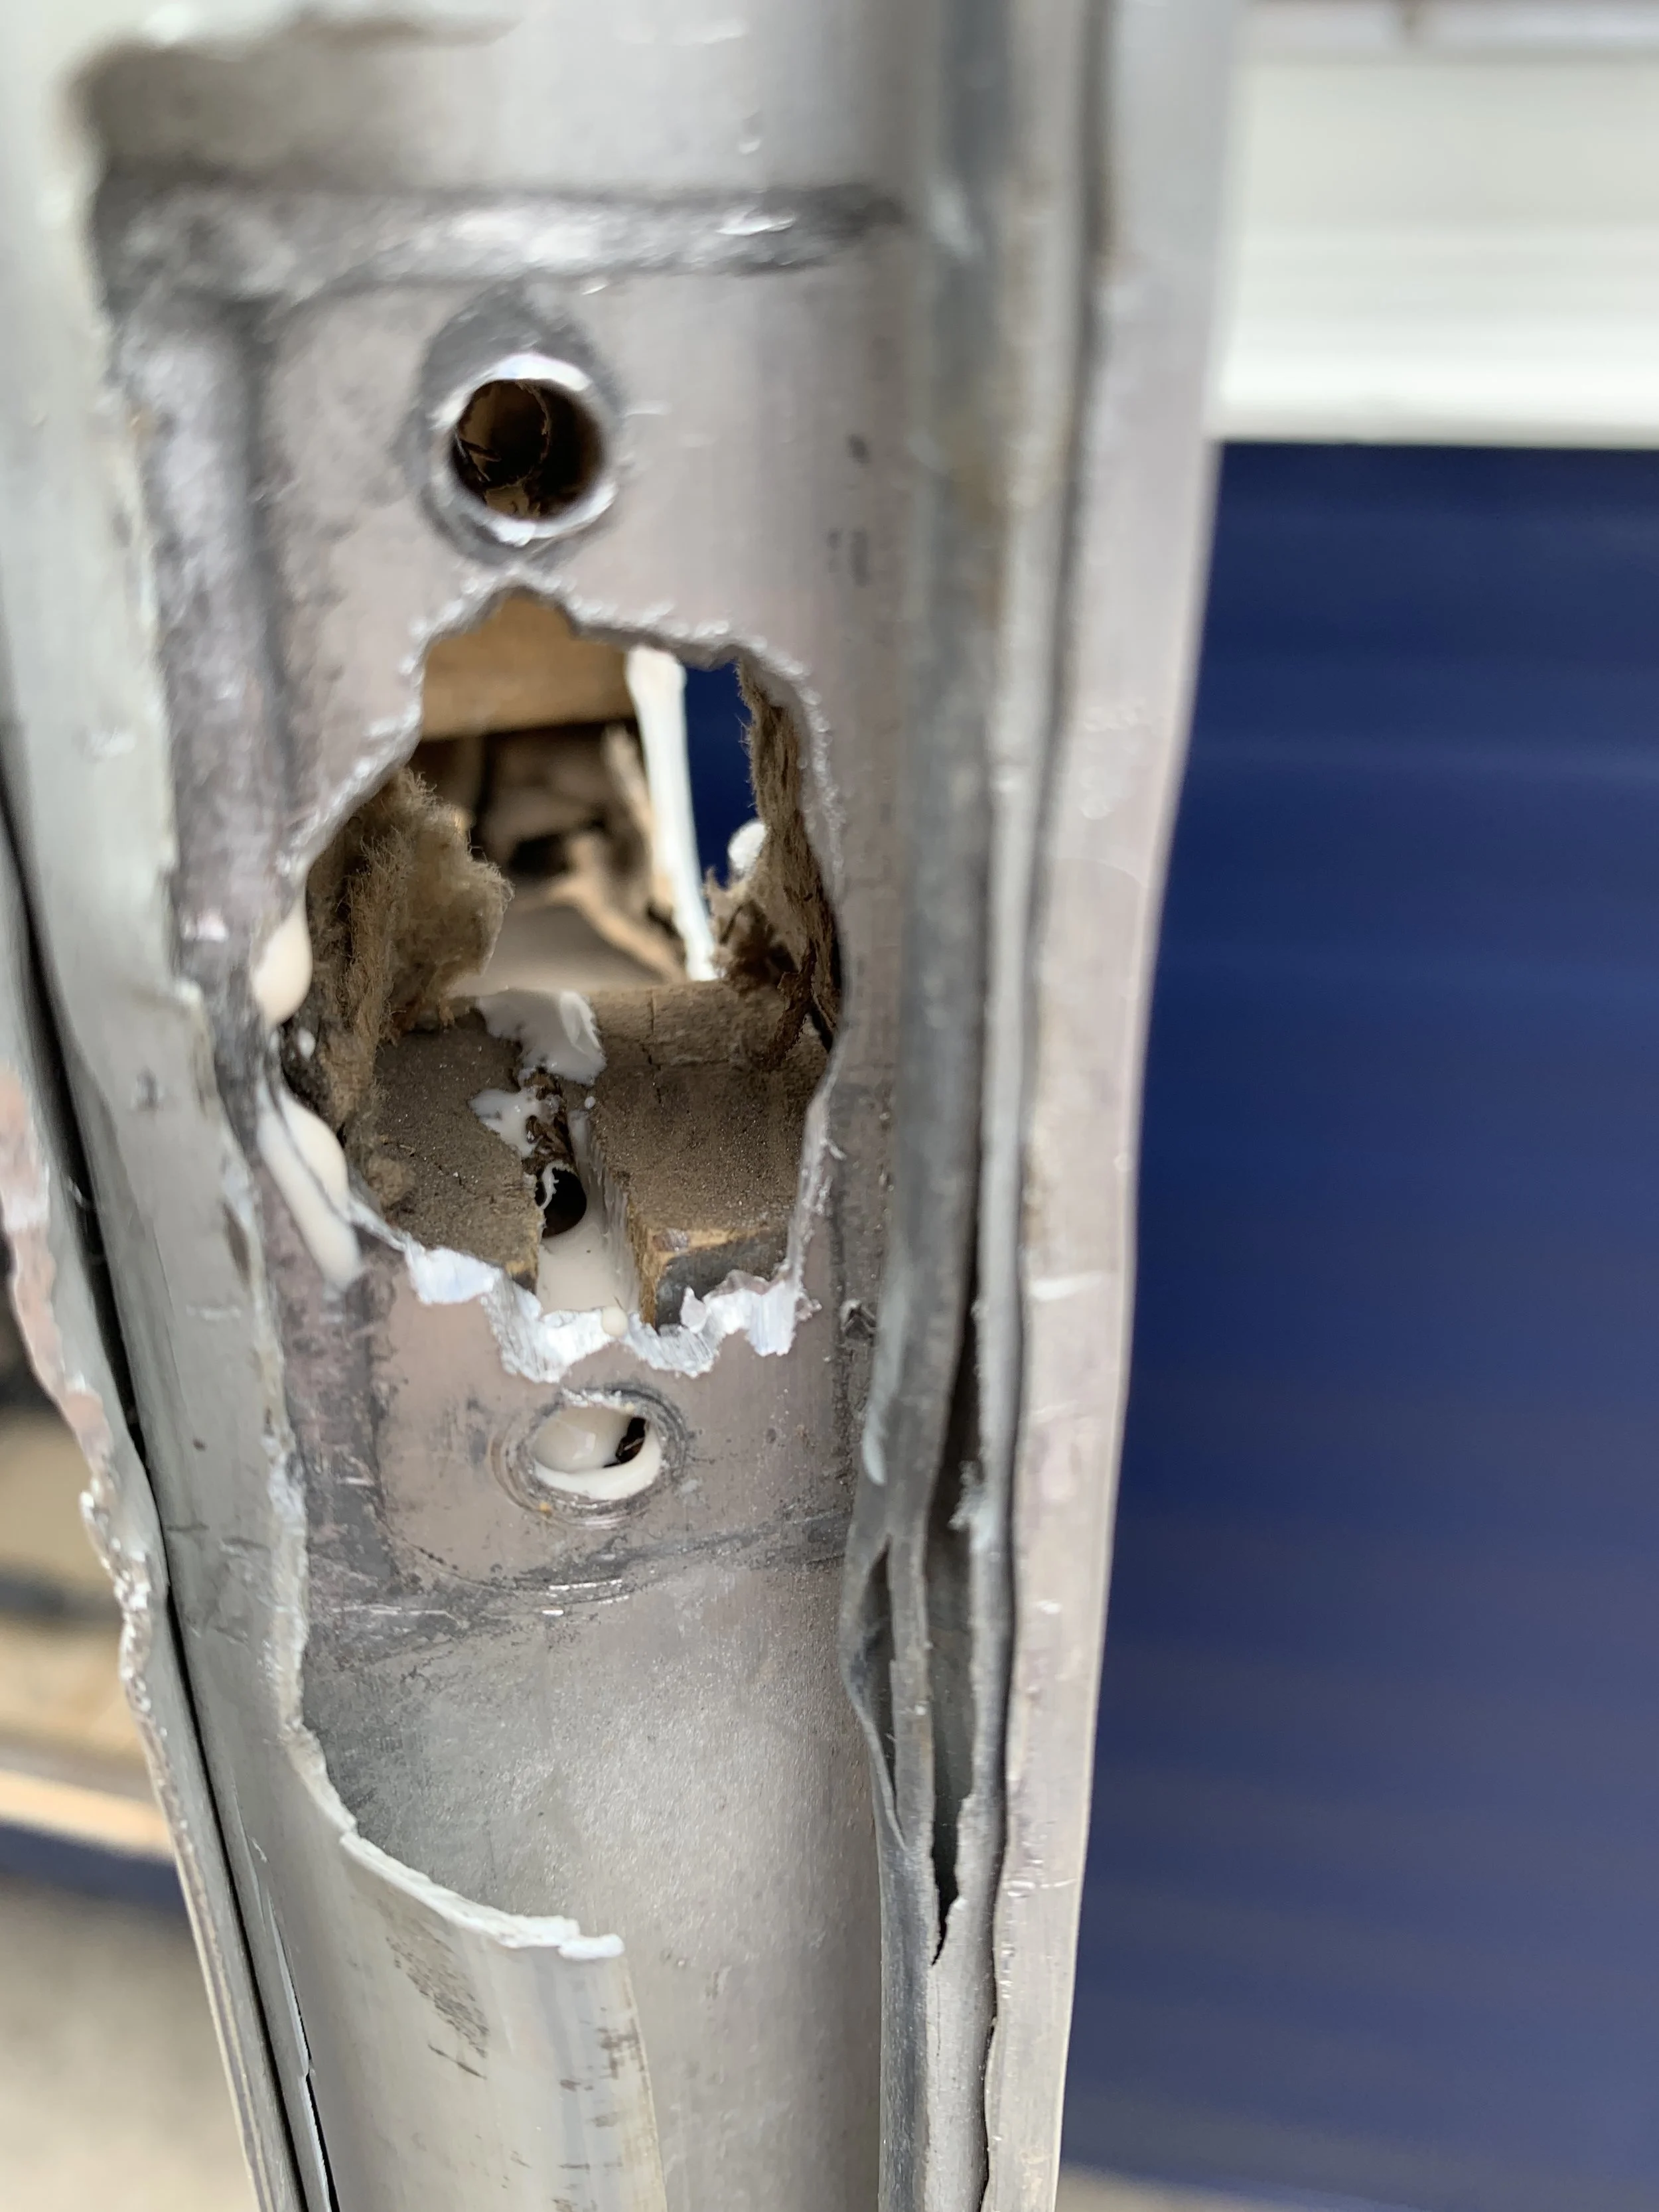
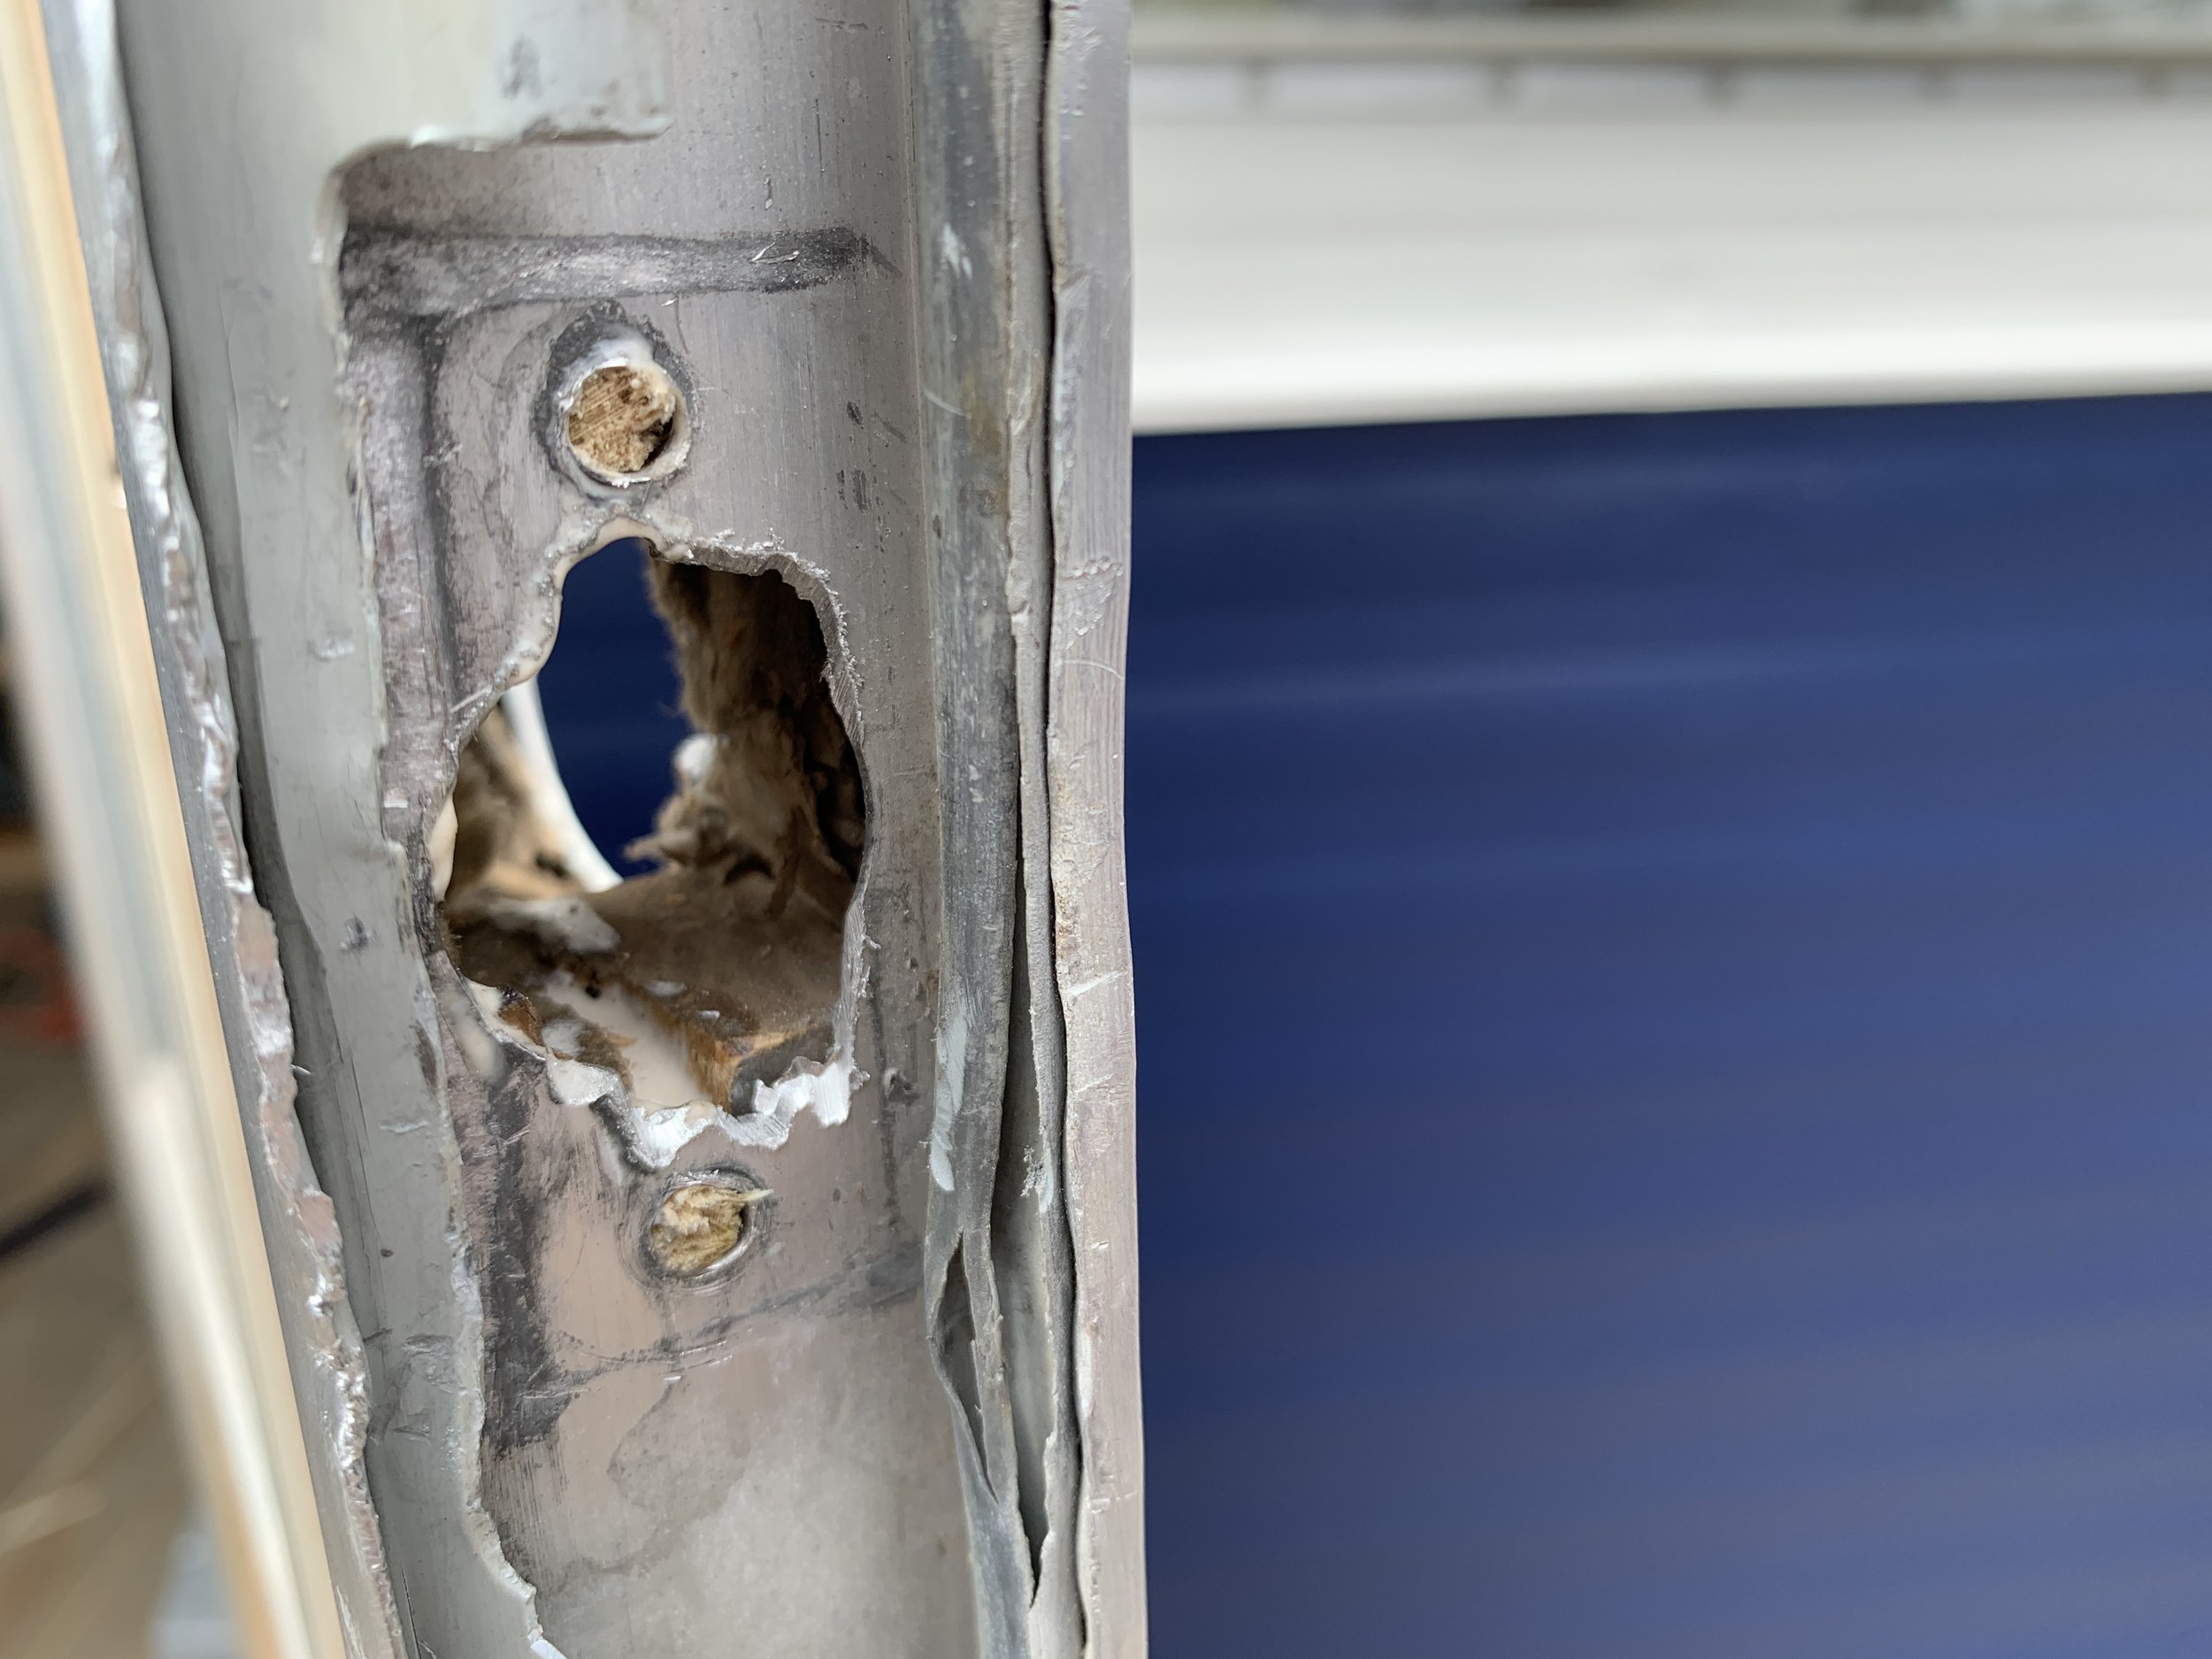
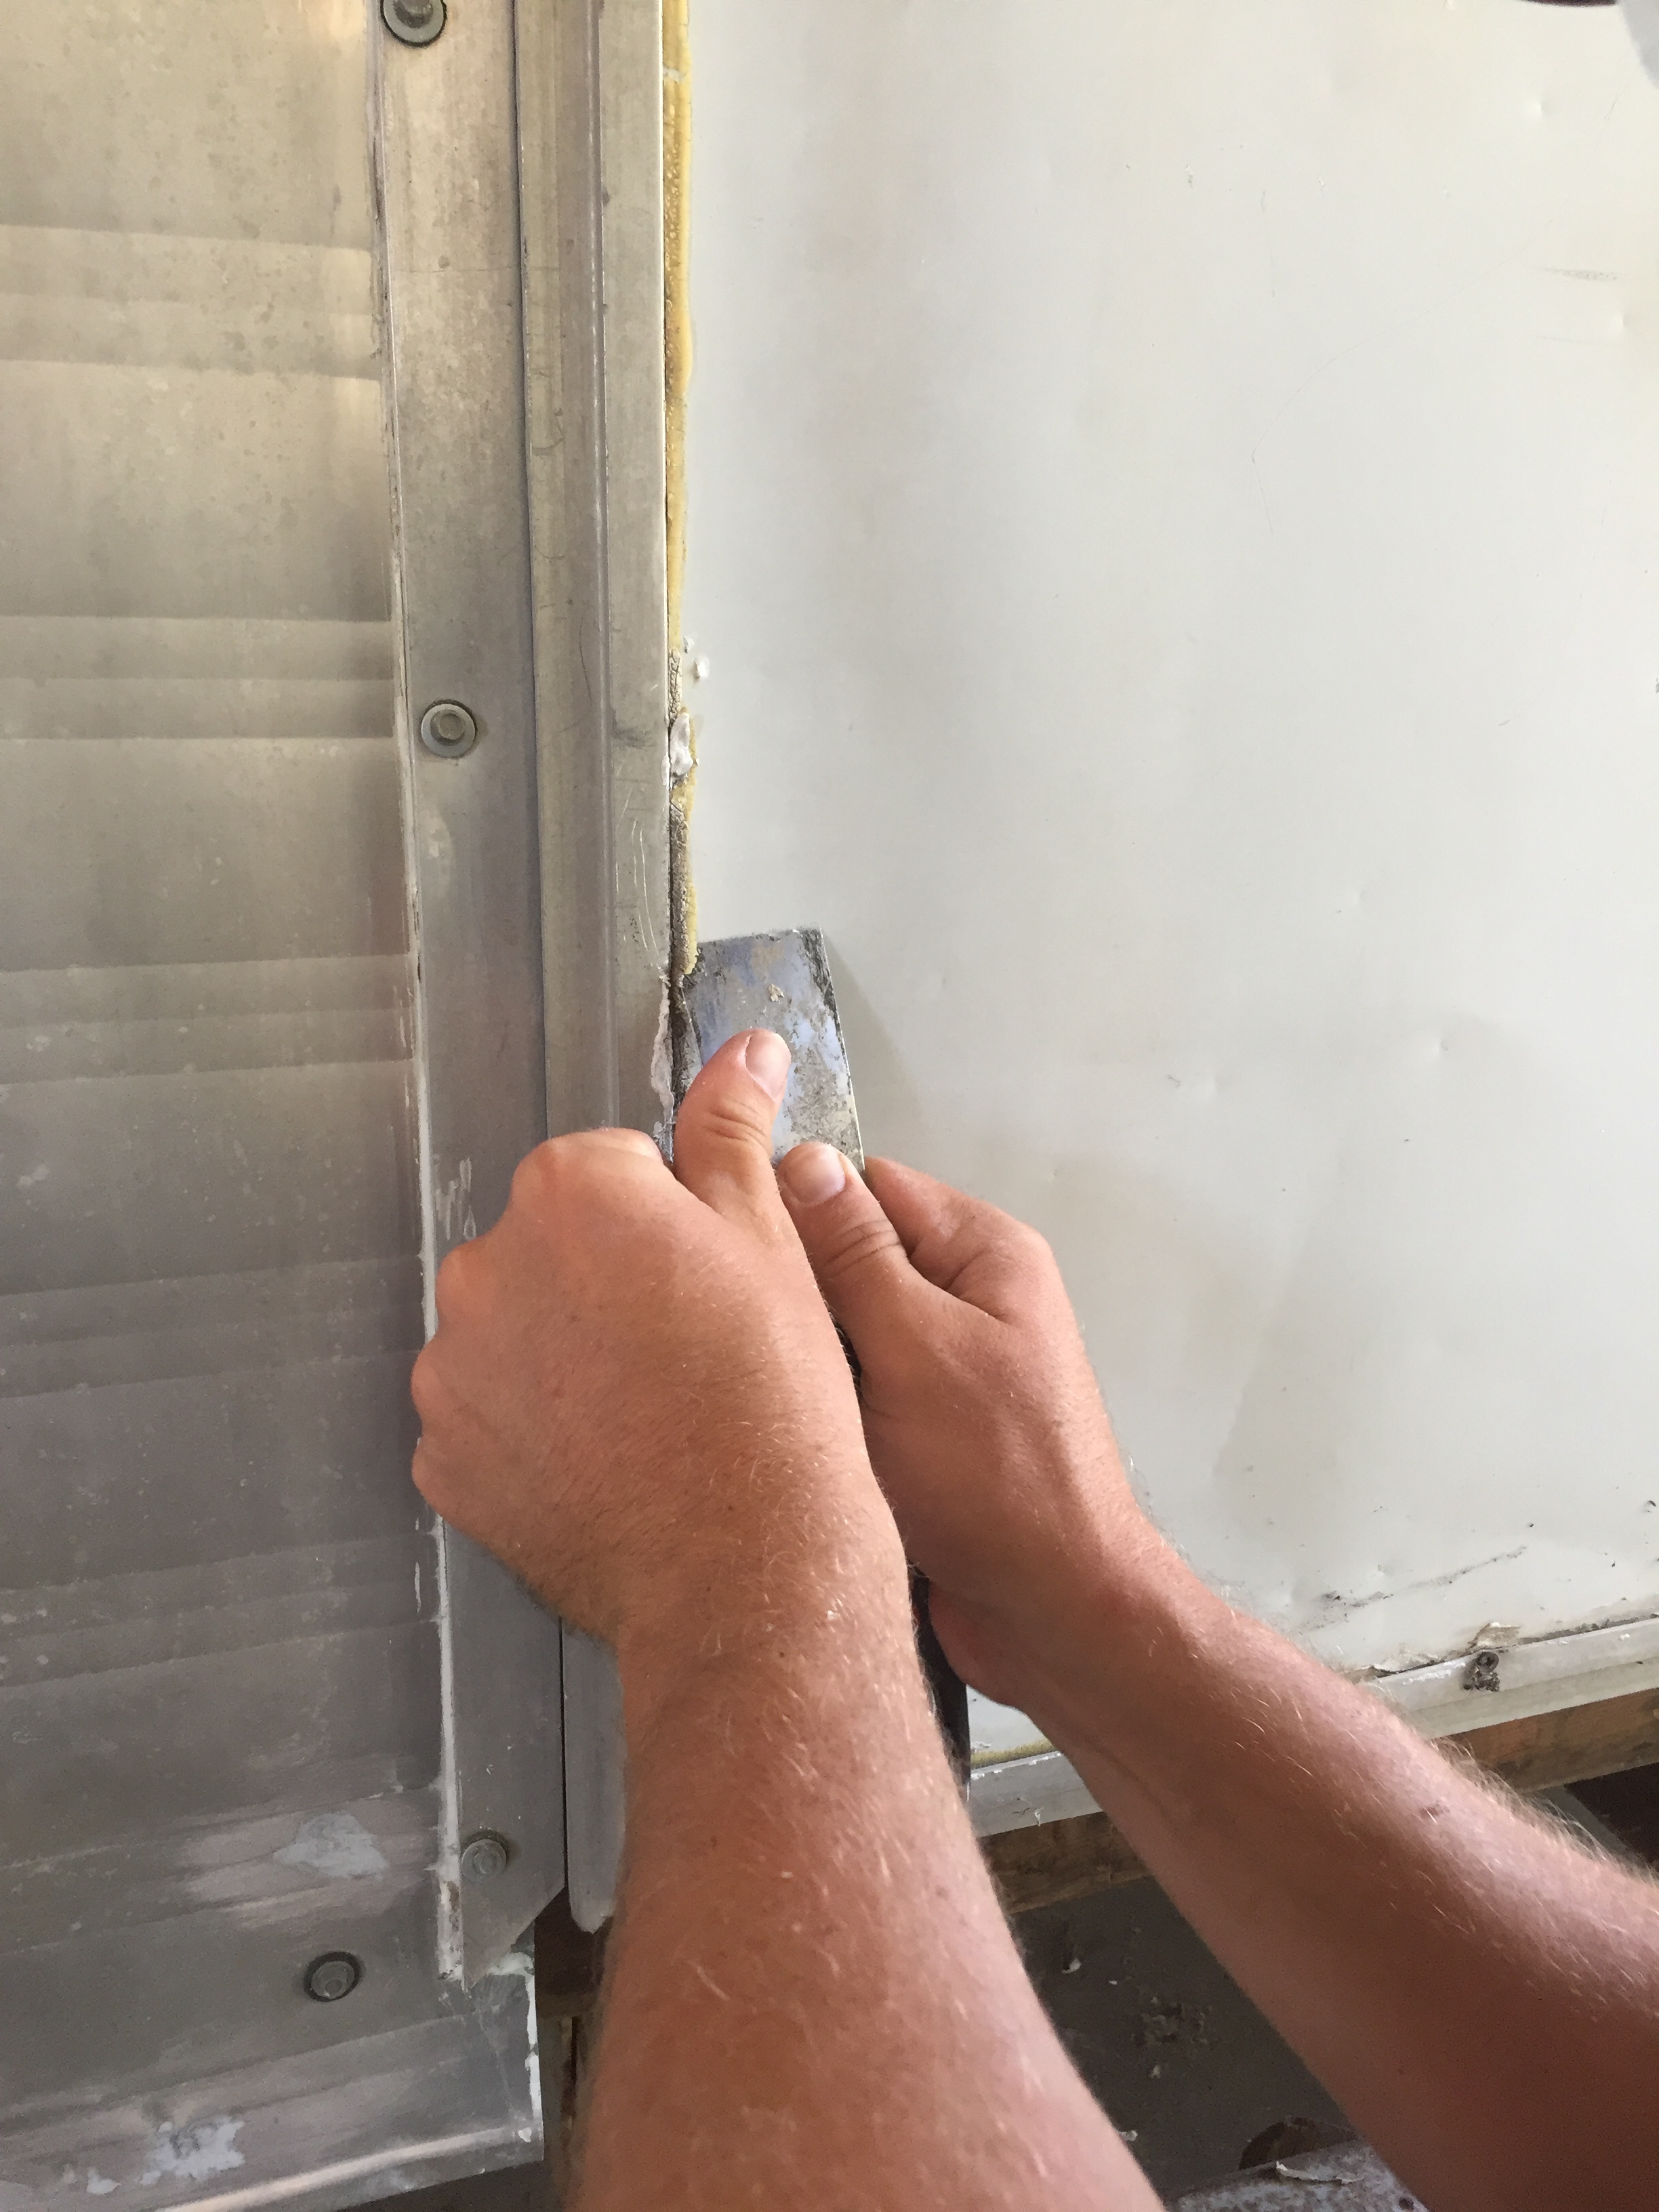
How we repaired the inside of the door without disassembling it
When we removed the old doorknob, we quickly realized why it was practically falling off. The wood inside the door had split and there wasn’t much left for the strike plate screws to attach to. Now at this point, most people might have given up and just bought a new door.
We are not most people.

Tools for the job:
Round wooden dowel in the diameter to match your holes – we used an 1/8” diameter dowel (if your holes are big enough, wooden golf tees would even work)
Wood glue
Needle nose pliers
Gloves
First, we cleaned out the debris from the areas we were going to be filling. Then after dry fitting a couple different size dowel options, we figured out what size we needed and squeezed a small amount of wood glue into the hole. Then using a combo of my fingers, and then pliers when it got tough, I slid the dowel into the gluey channel. Next I gave the dowel about a quarter turn – an important step – to help lock it in place. Lastly we broke off the extra 3.5+ feet of dowel using our fingers (since our dowel was so thin) and then snipped the end flush with the sharp part of the pliers and let it dry.
Repeat this process as many times as needed until all holes are plugged. We waited a full day to let the wood glue fully dry before installing the doorknob.


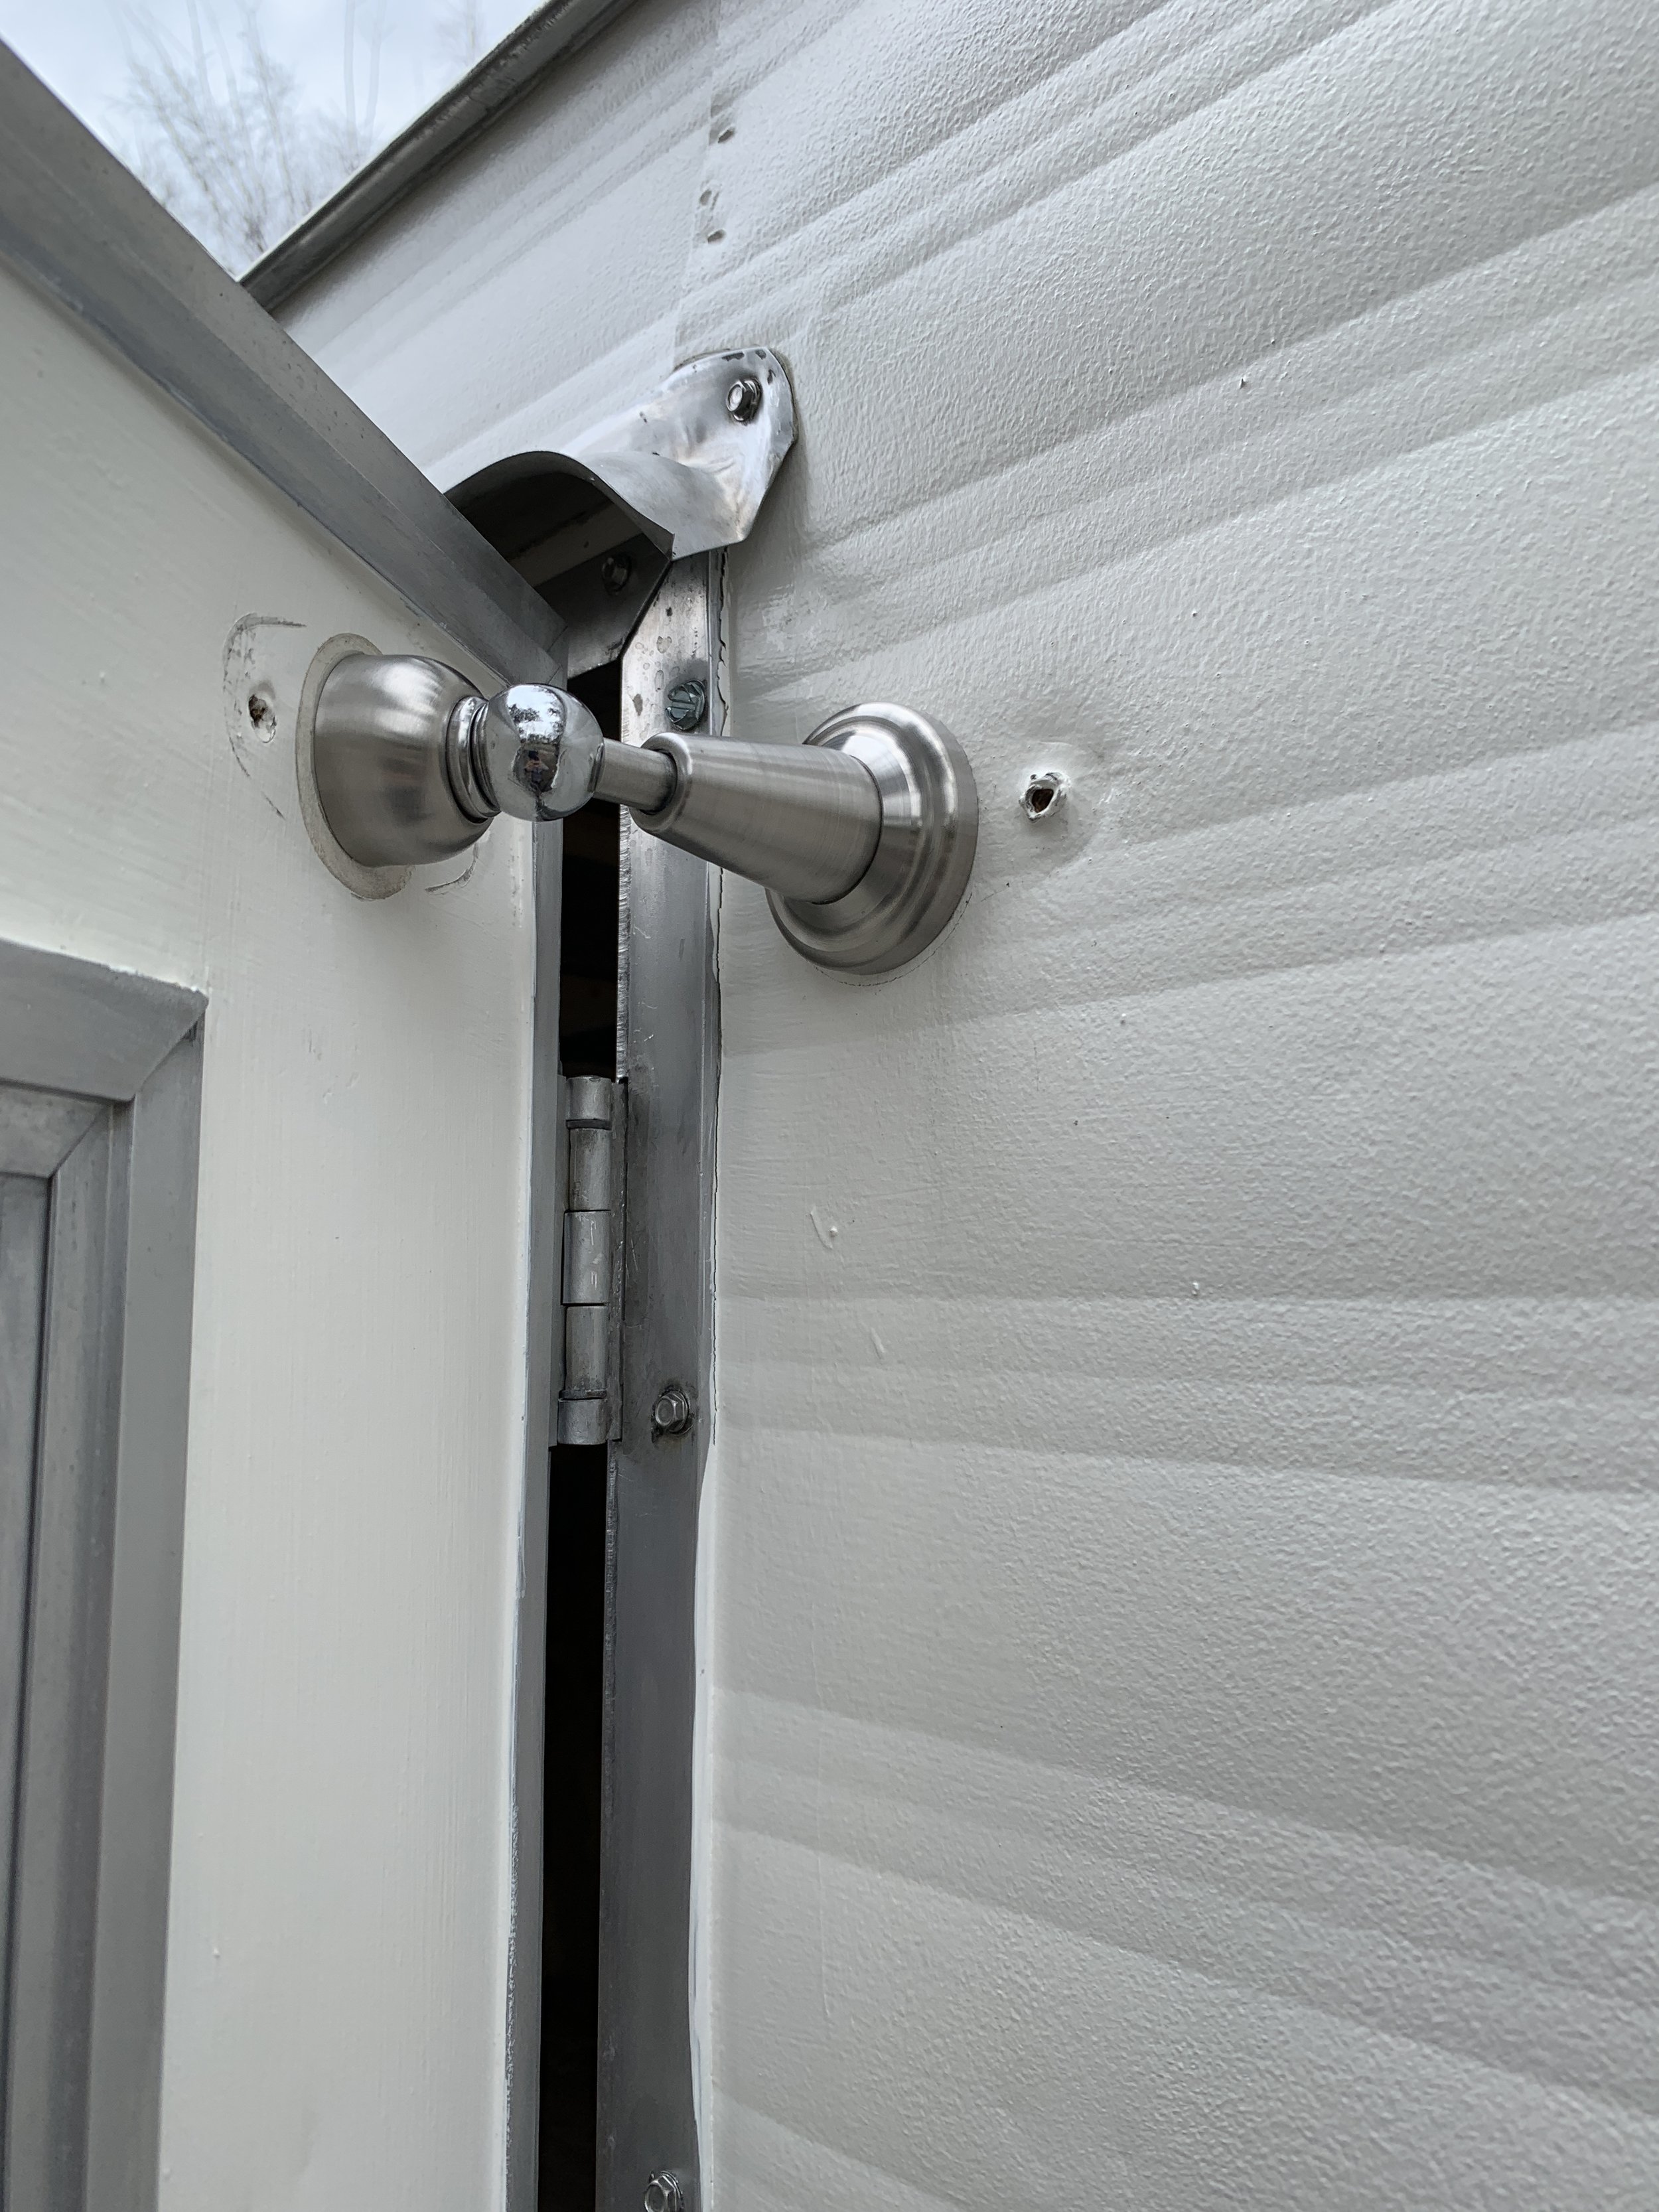
How we widened the door
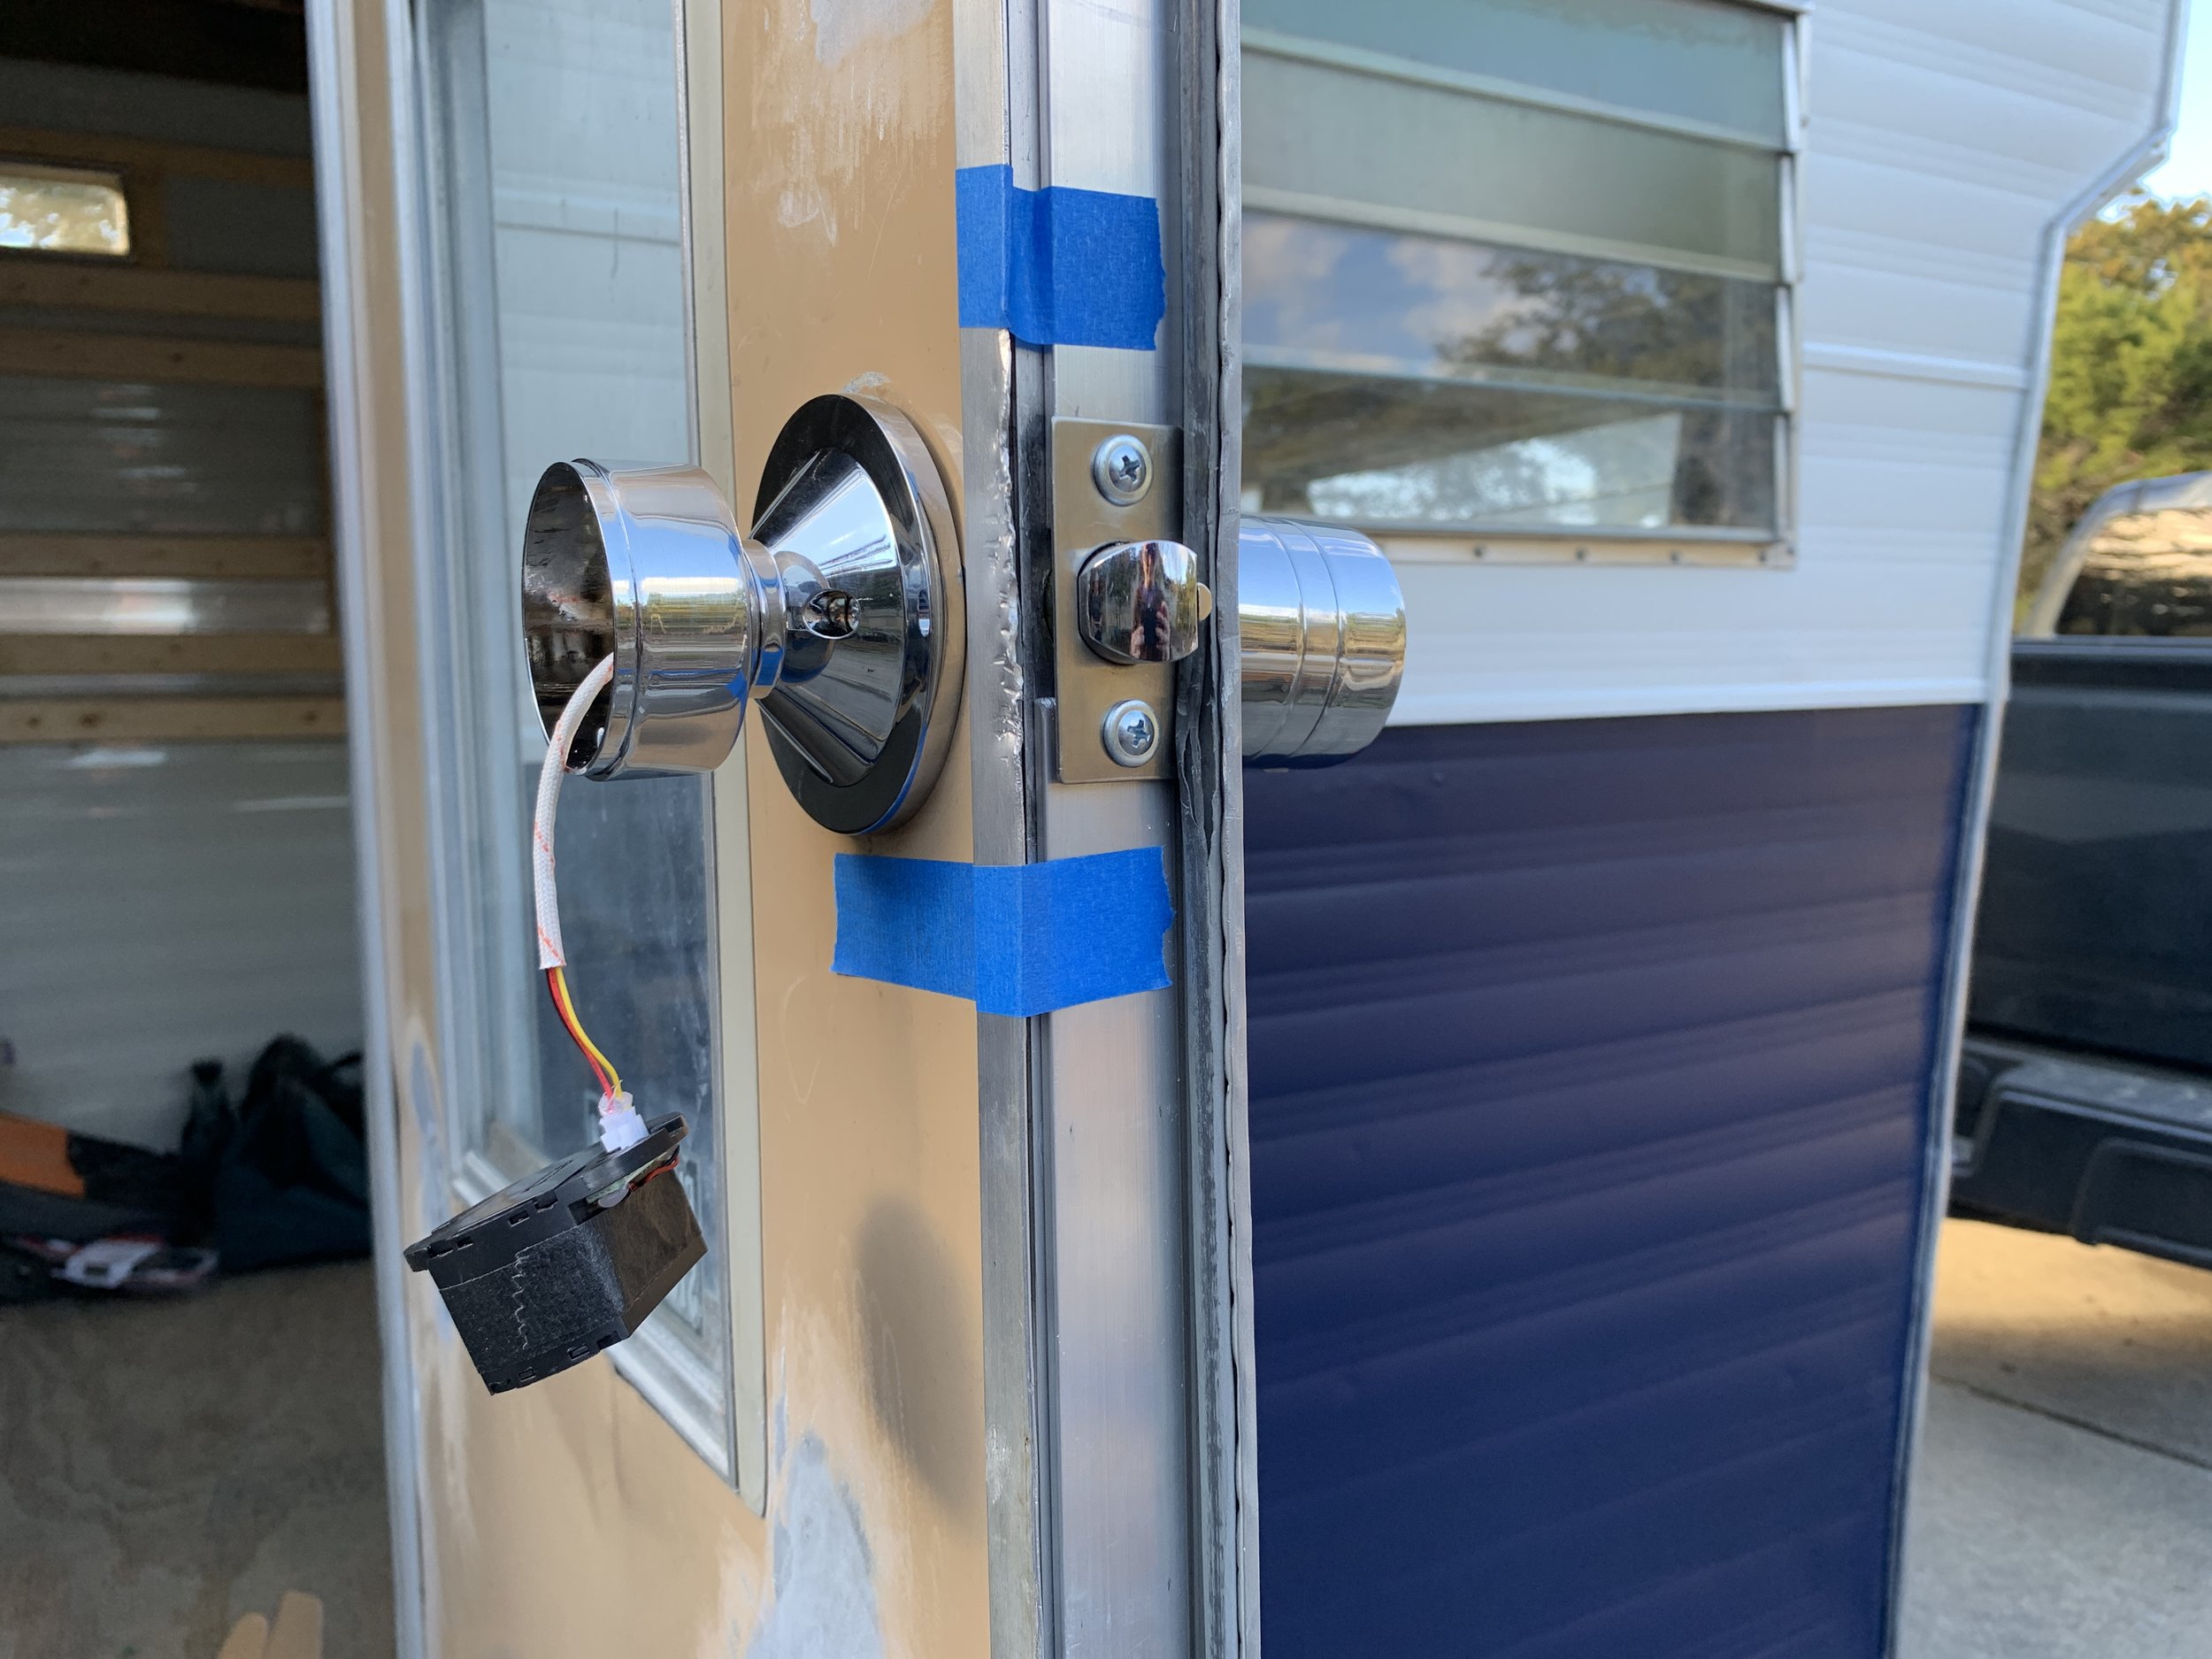
While we were trying to install the new doorknob we realized the latch wasn’t catching into the doorjamb as much as it should/could be and there was a little more space between the door and door frame than we wanted (we could see light through it when the door was shut). Instead of reframing the entire door frame (again) or messing with the hinges (again), we decided to add a little beef to the door itself since that would fix both the latch depth problem and gapping around the door at the same time. Not much beef to the door, just enough to push the latch out a bit to give us a more secure closure.
Tools for the job:
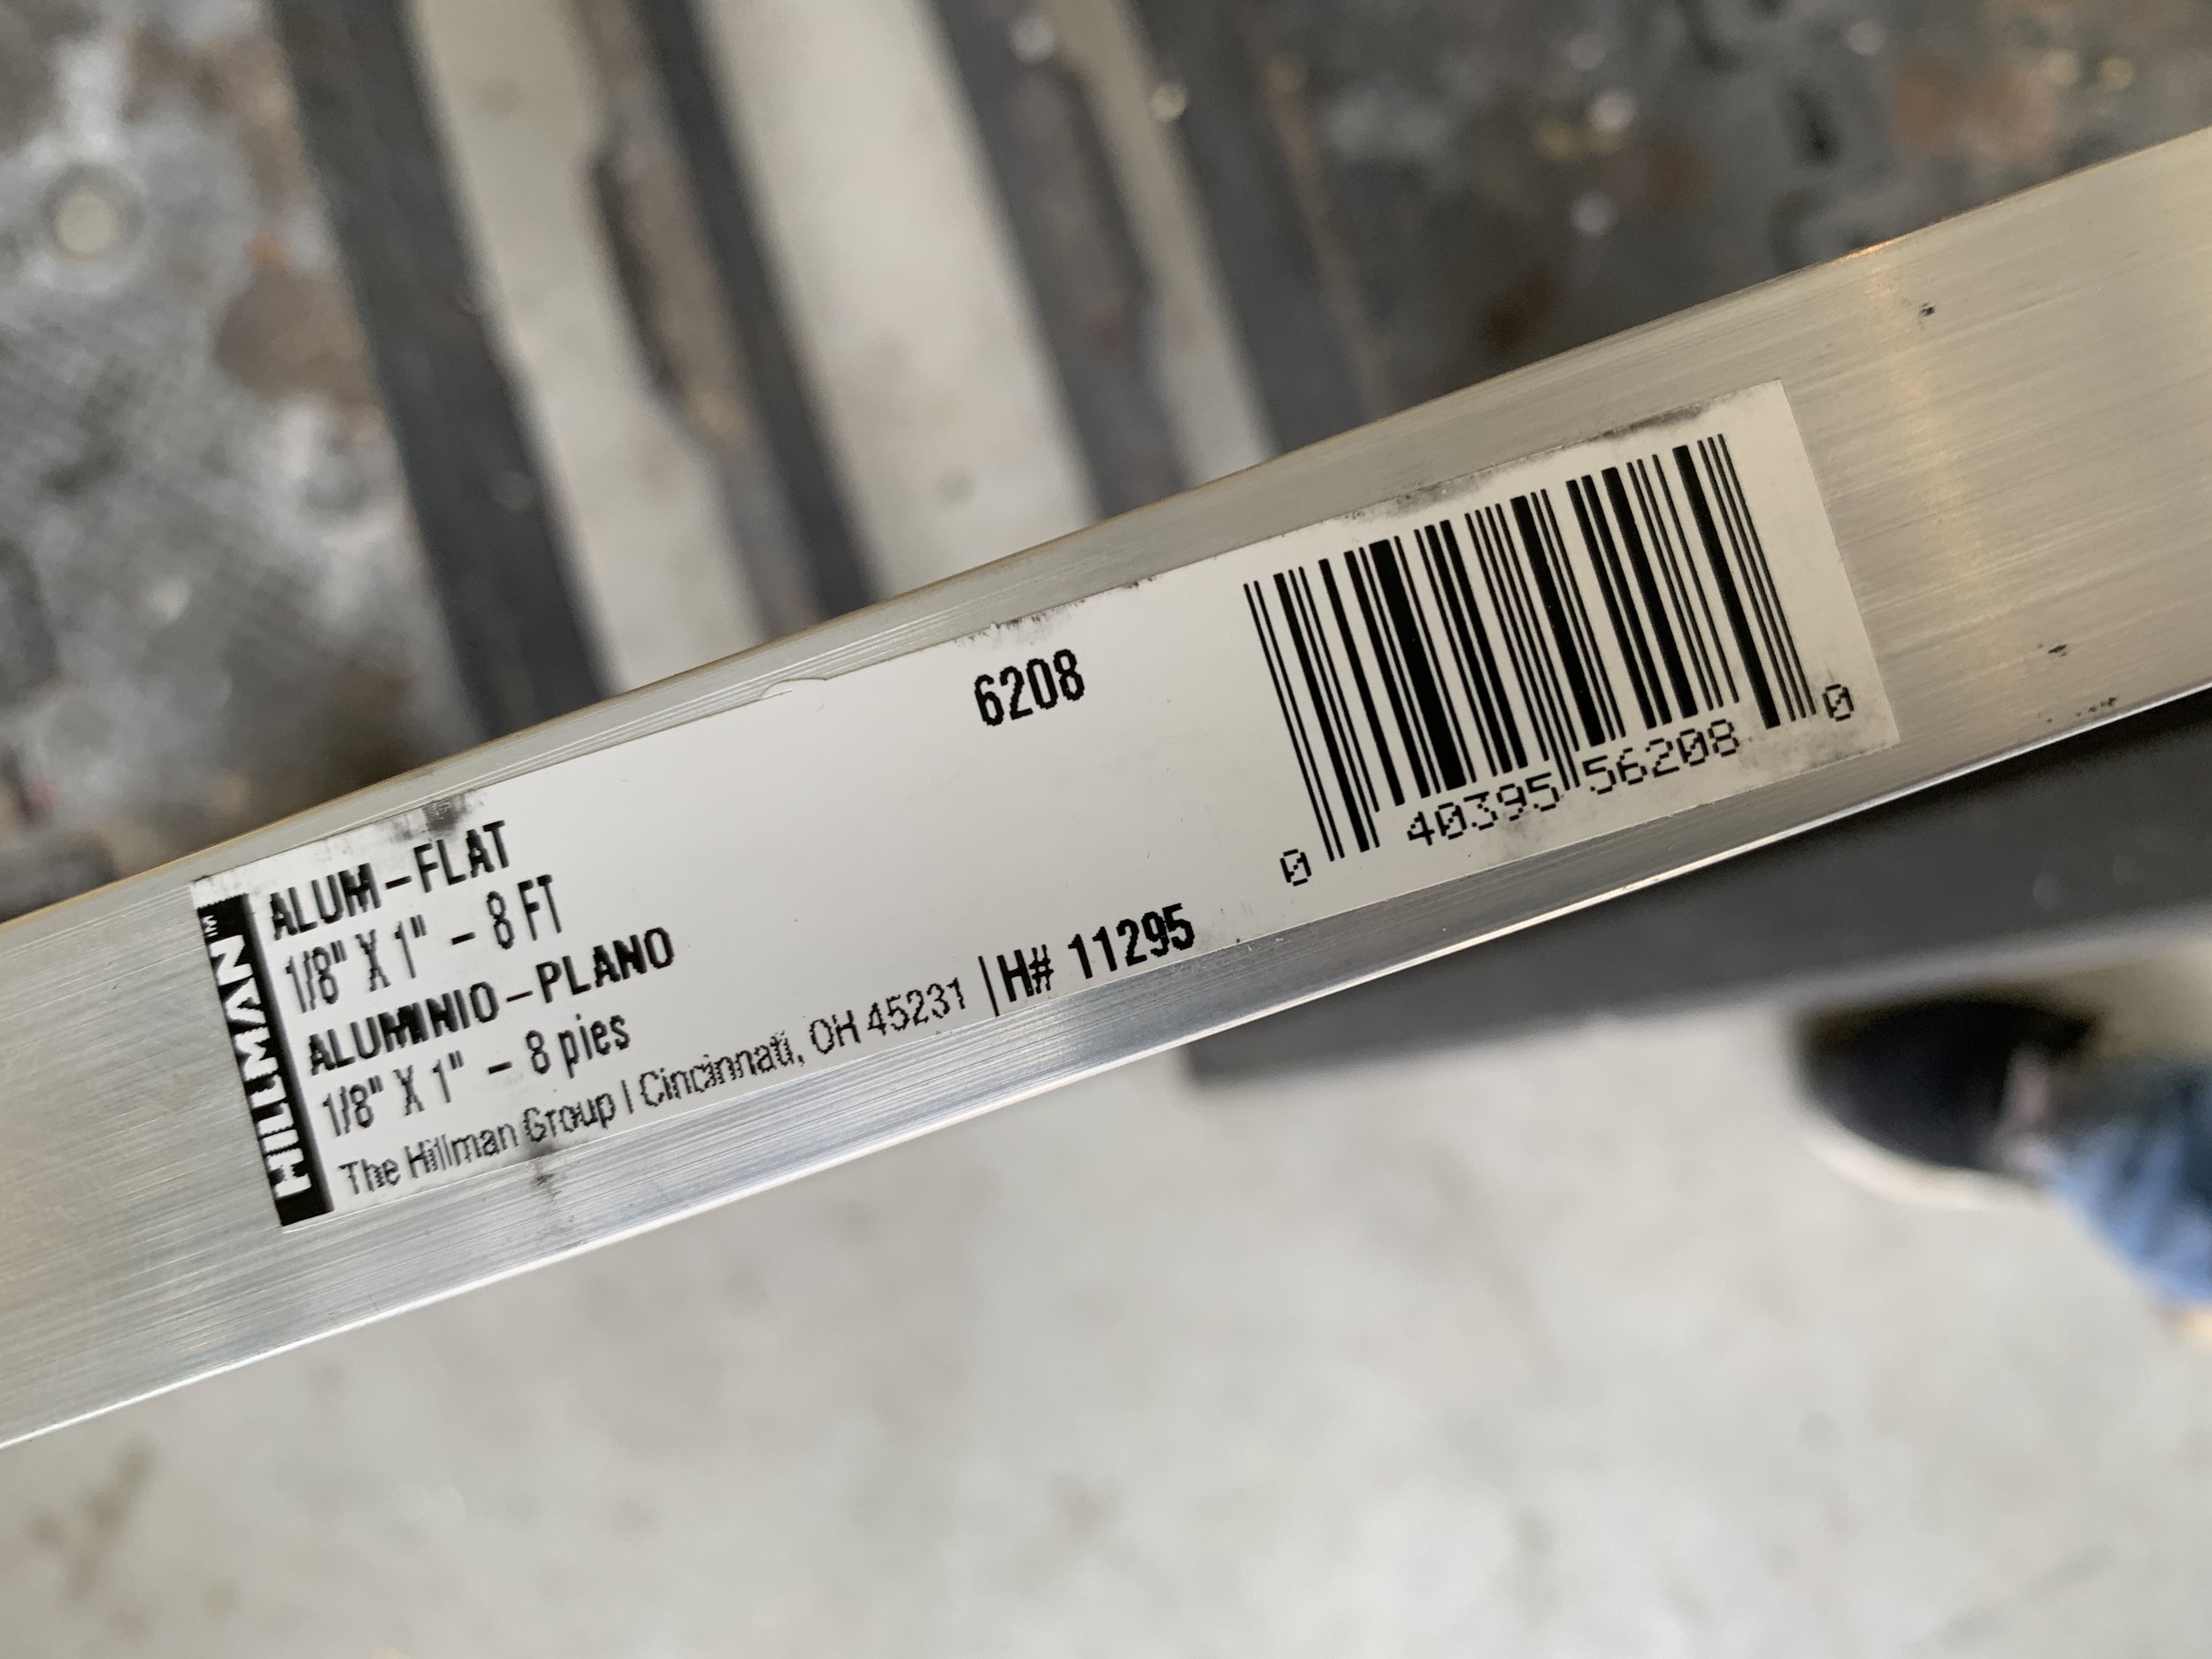
Aluminum metal flat bar (we used a 1” wide x 8' piece)
Tape measure
Grinder/Dremel to cut the metal flat bar to length
Safety glasses
Work gloves
Liquid Nails adhesive (make sure it’s good for adhering metal to metal)
Painter’s tape
Our door had a plastic door seal running along the top and down the sides that had definitely seen better days. It was cracked and irregular and wasn’t really doing it’s job since you could see light around the entire door when it was closed. We decided to remove it (by cutting it off with a utility/box knife) and plan to replace it down the road with something that looks better and actually works.
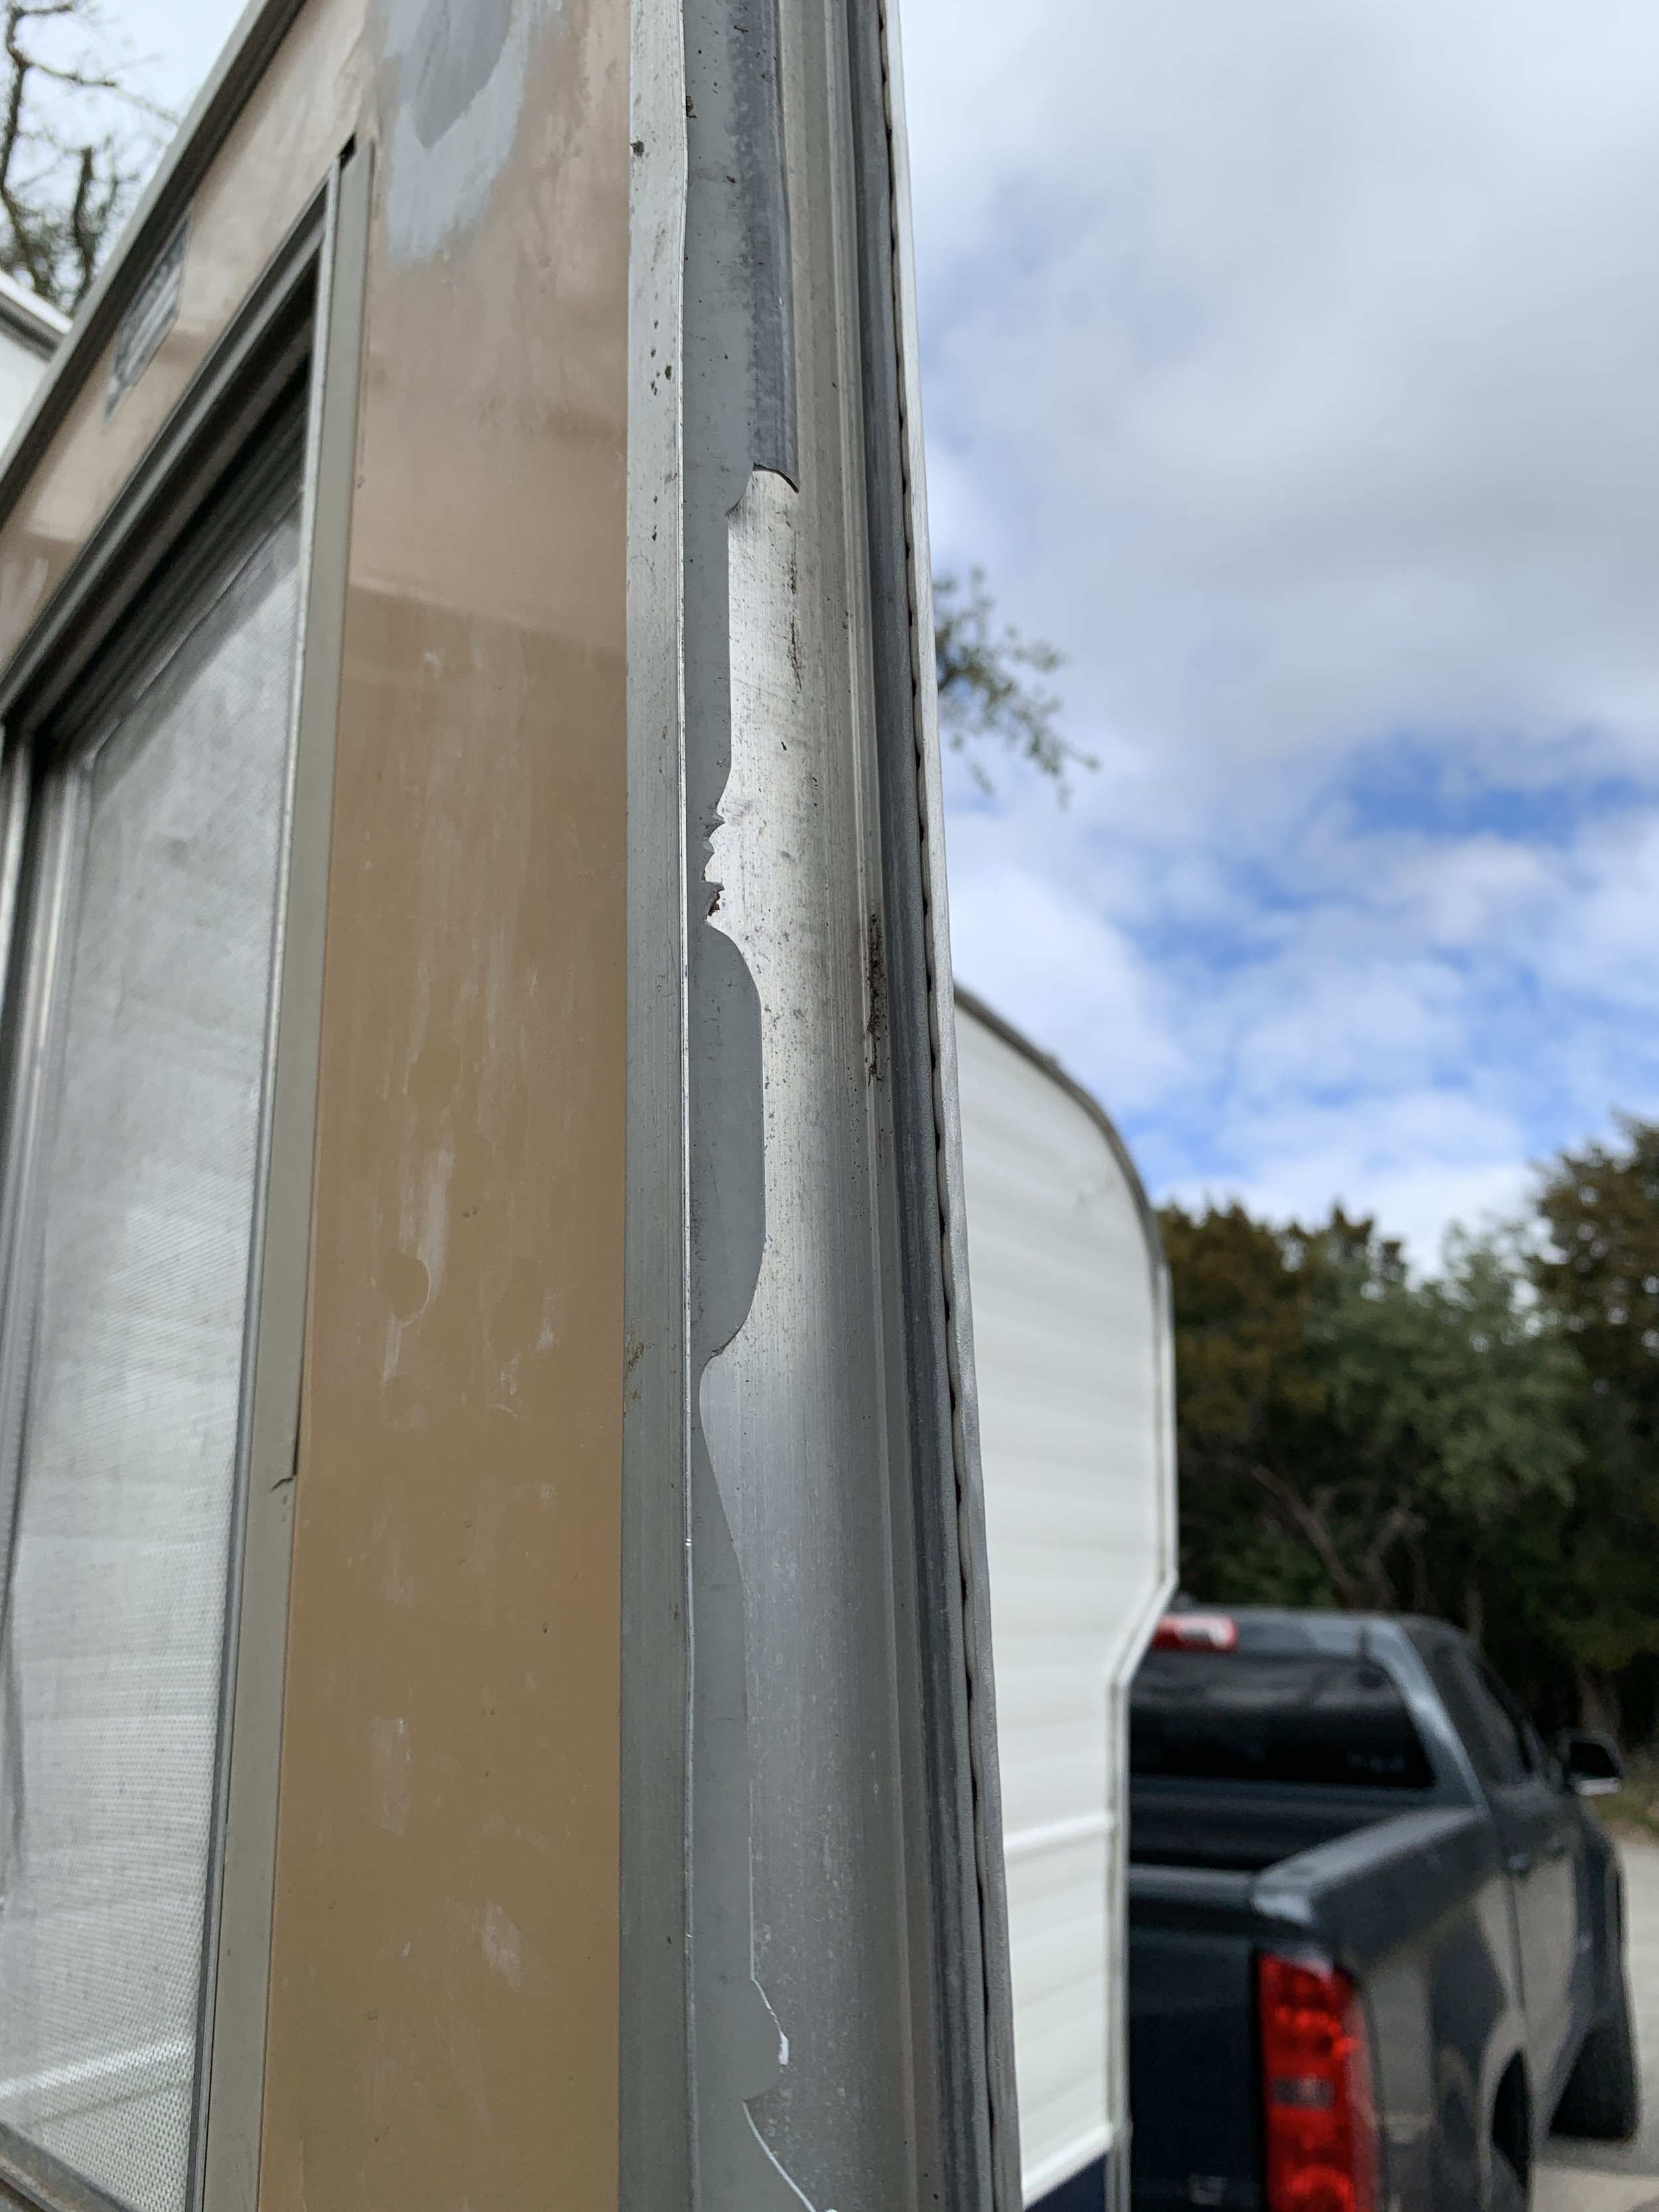
After cutting off the broken plastic bits, we measured the lengths above and below the door latch to figure out how long our metal bars needed to be before cutting them with a grinder (safety glasses + gloves on!). Once the metal bars cooled off from cutting and were safe to handle, we marked and pre-drilled holes in the ends. At first we tried pre-drilling these holes using drill bits but weren’t having much luck. We wound up using the self-tapping metal screws which worked like a charm.
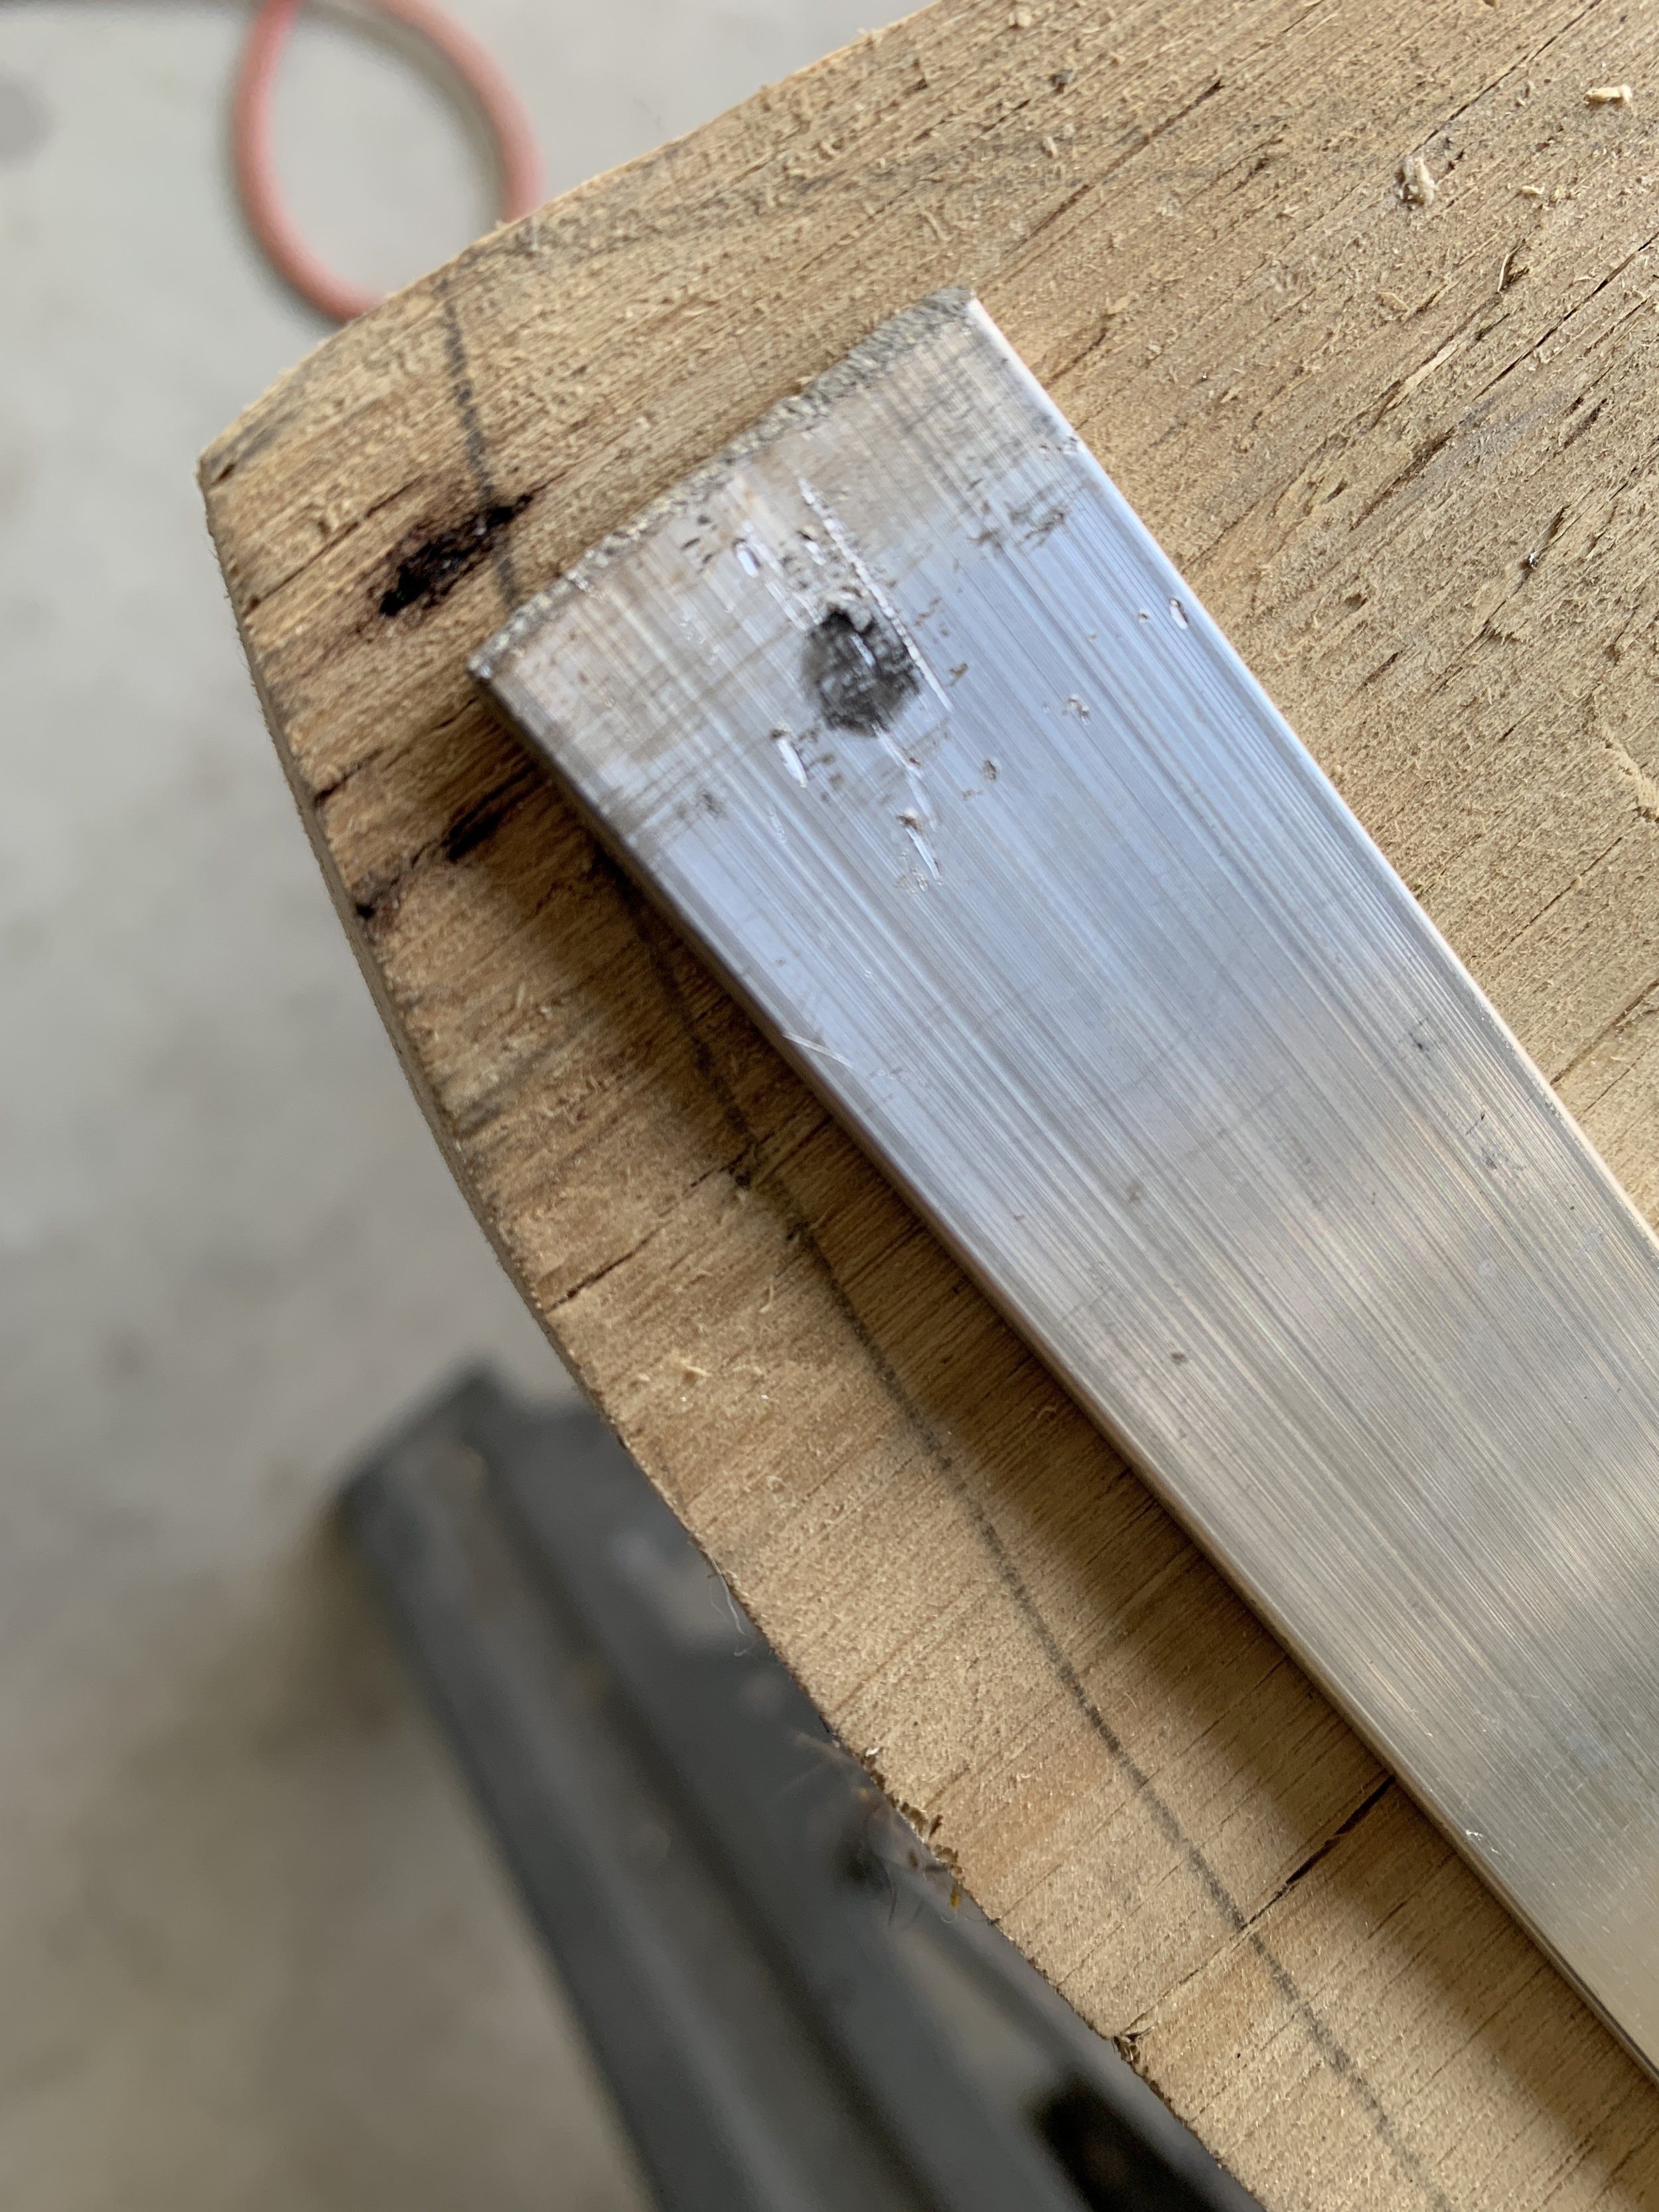
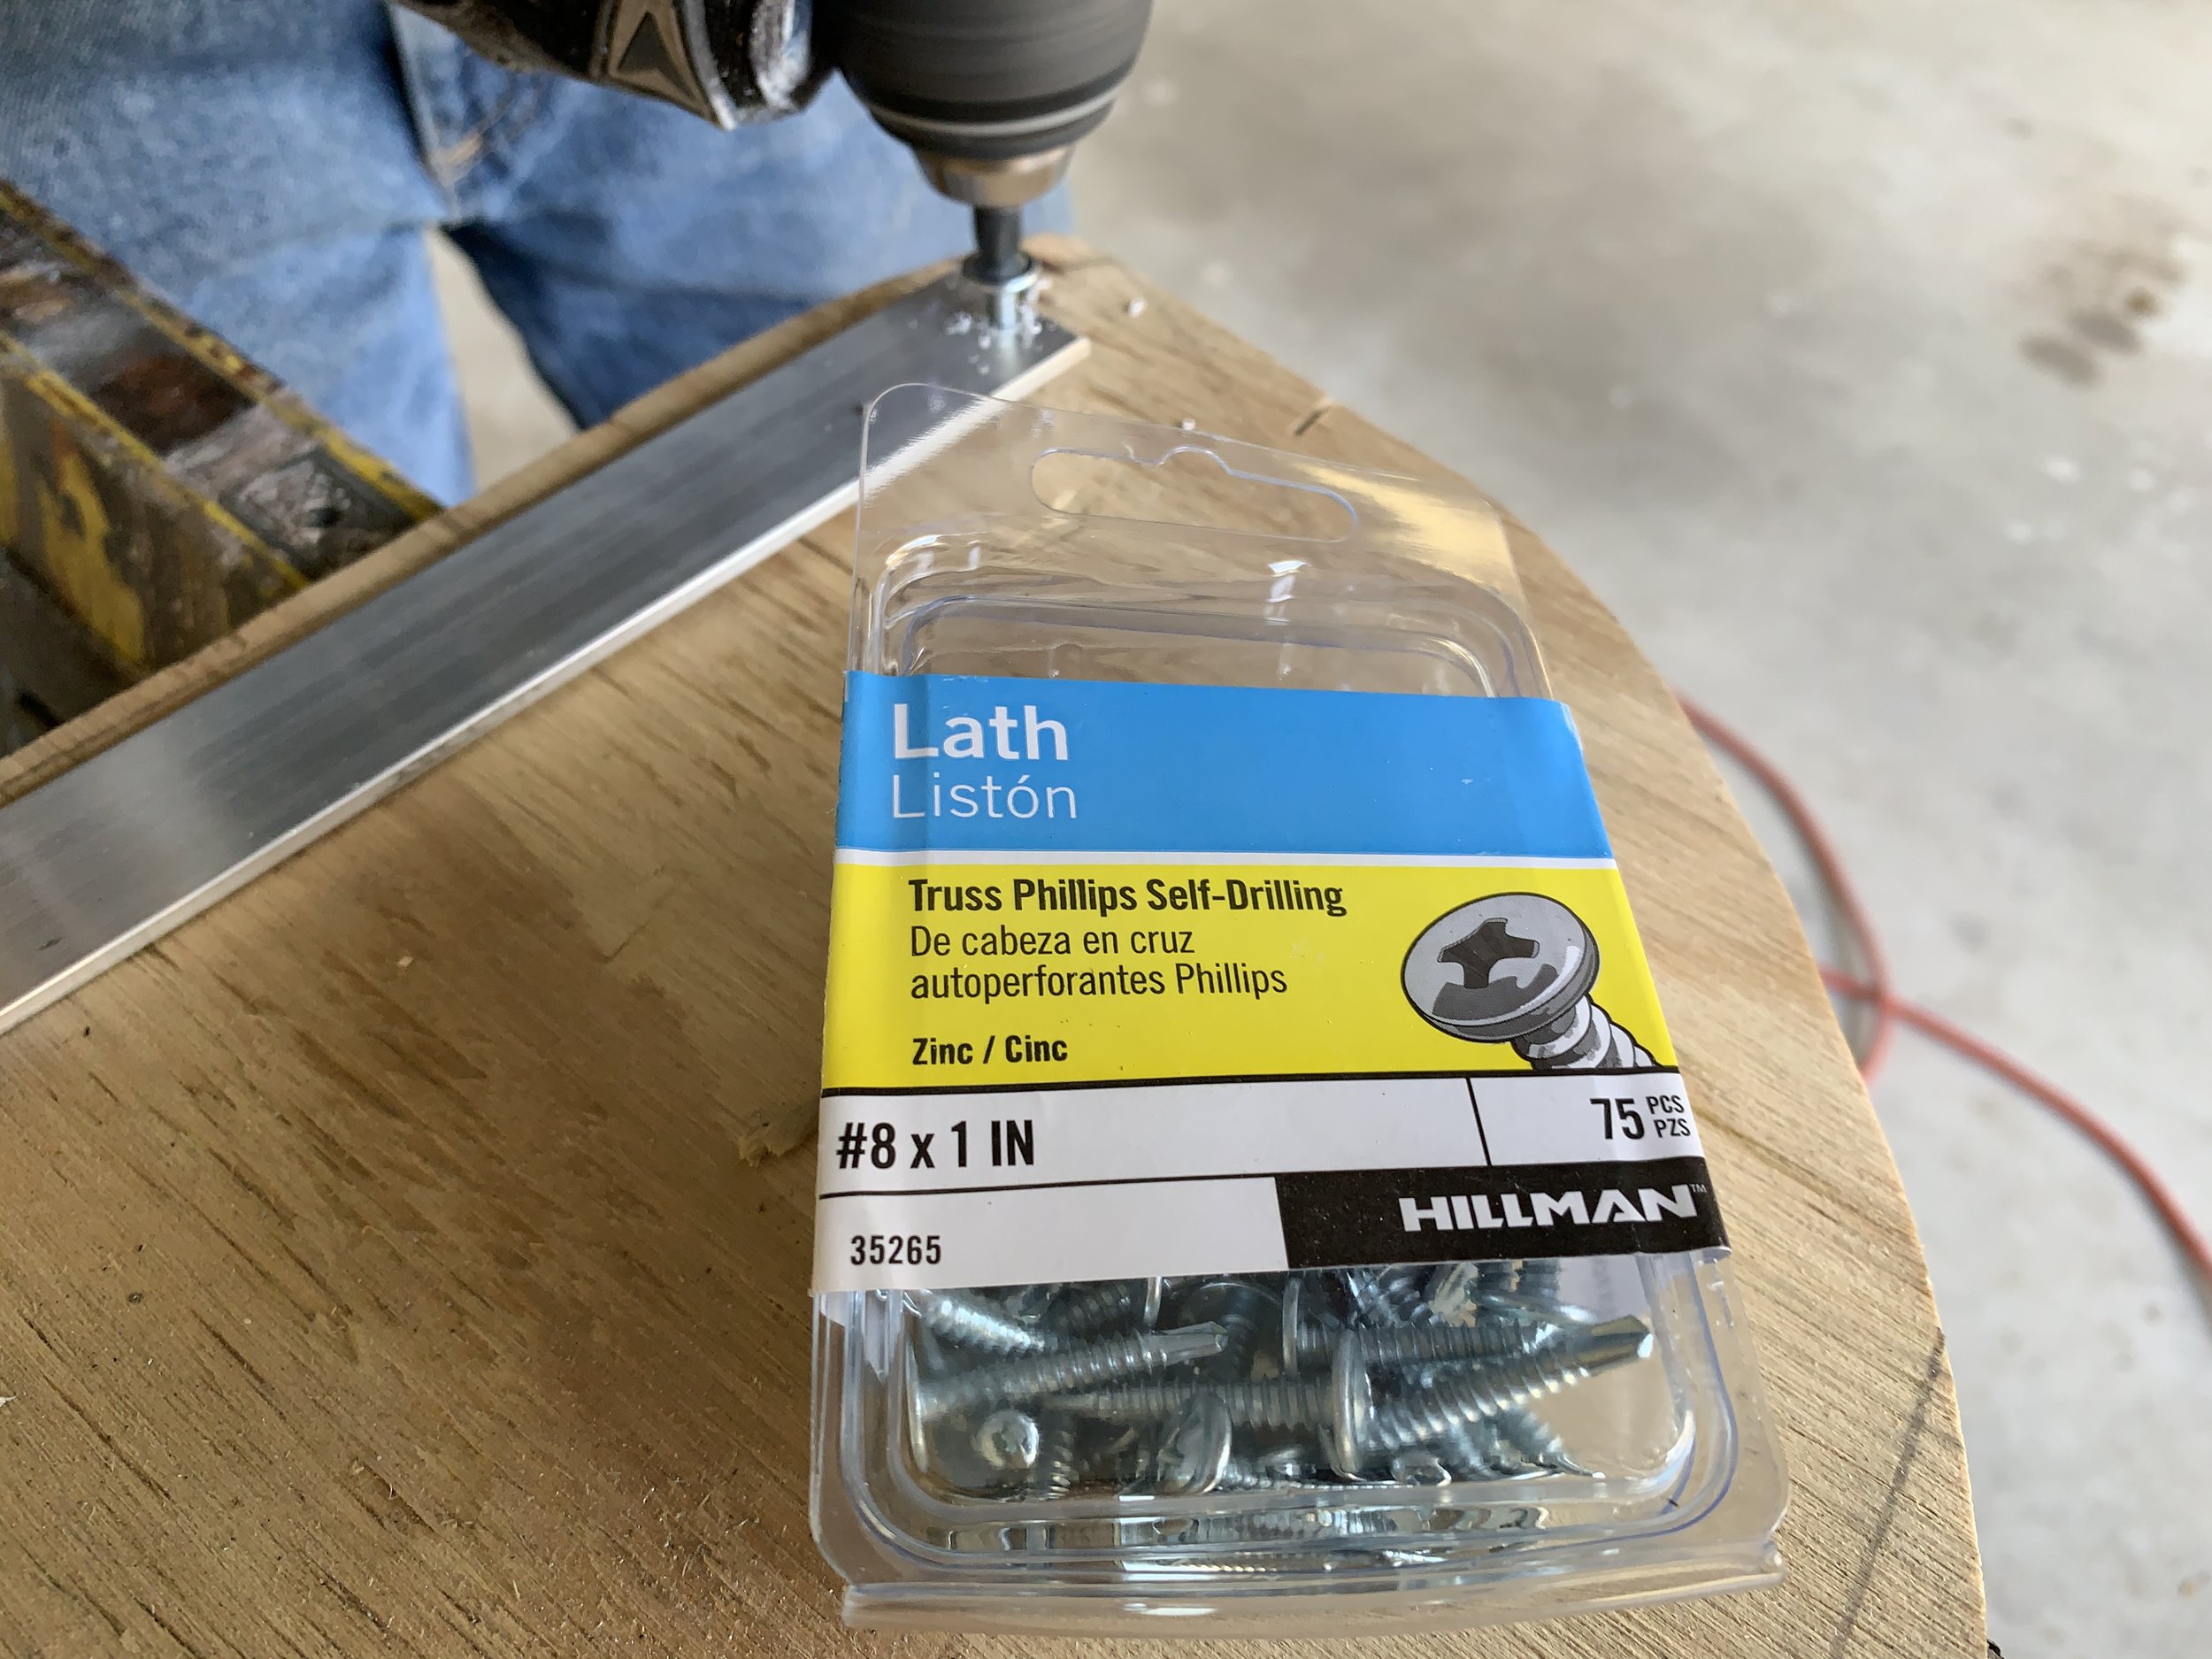
With all our materials prepped, we wiped down the door track with soapy water to prep it for adhesive. We followed the instructions on our adhesive, which said to wet the surfaces to be bonded lightly for better adhesion when joining metal to metal. Once we piped out our adhesive, we stuck the pieces onto the door and taped them in place with painters tape, and then lastly used the sheet metal screws to secure the top and bottom of each bar to the door. Because we’re impatient – and the newly-installed metal bars were tightly screwed into the door – we immediately moved onto…
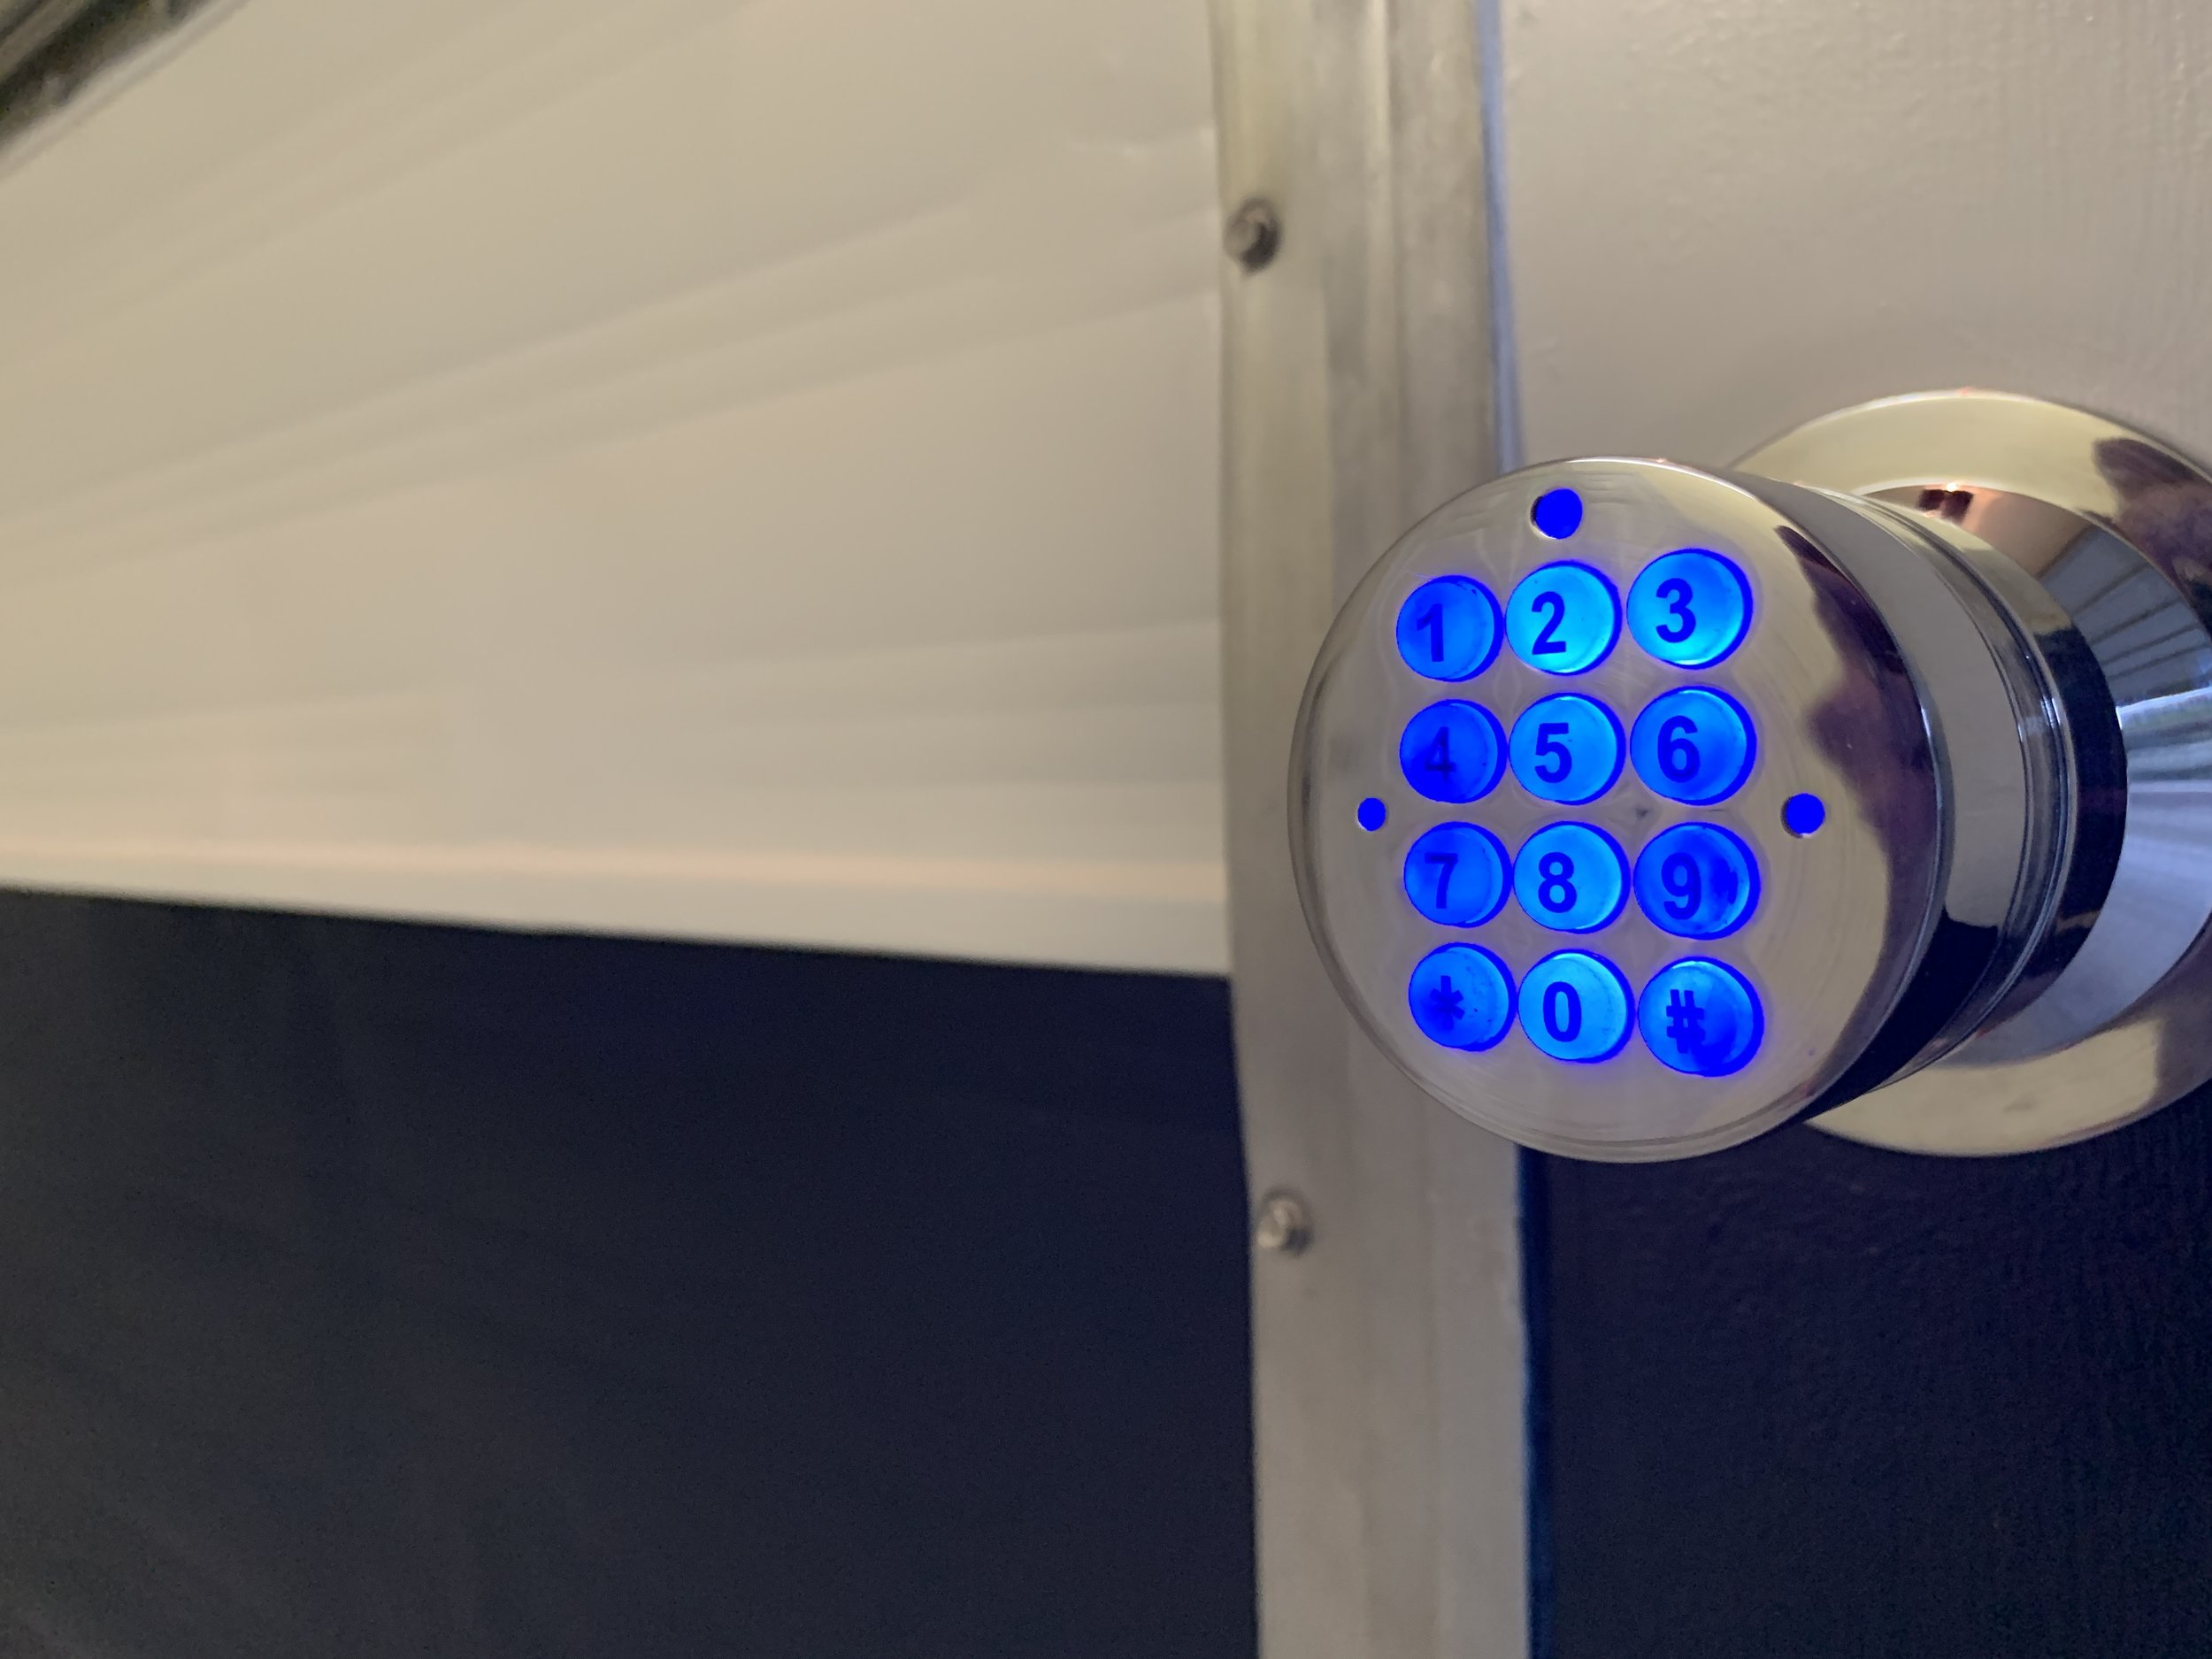
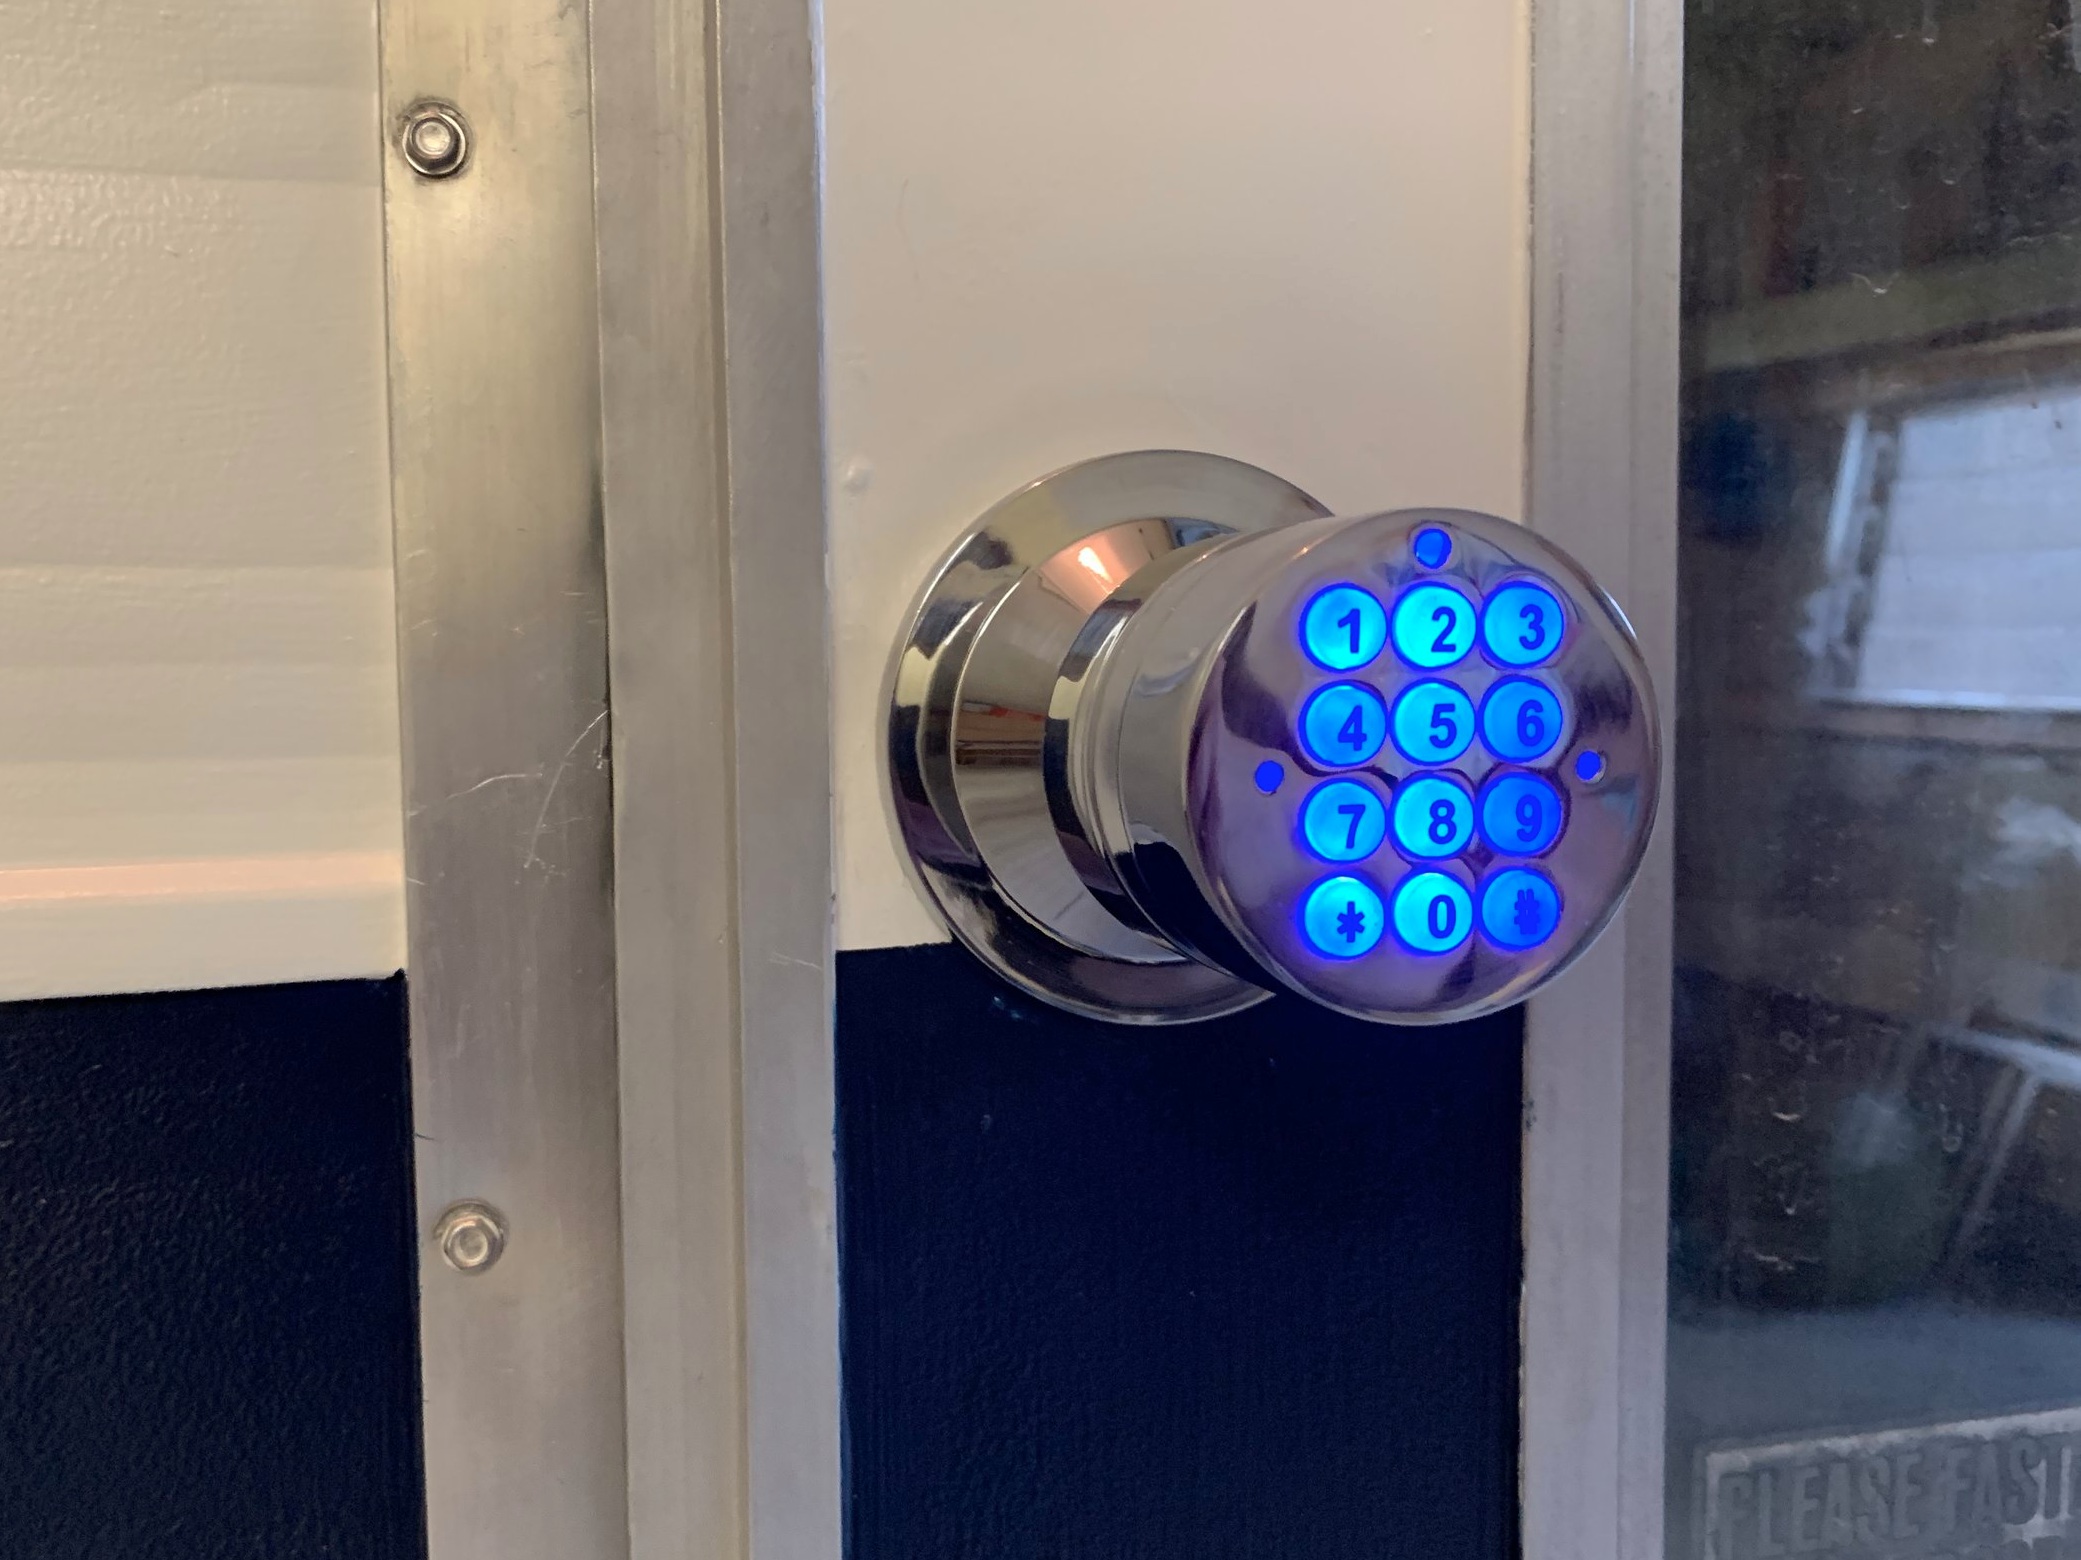
How we (finally) installed a keyless doorknob
Tools for the job:
Screwdriver
Batteries
Once we modified our door, the doorknob install itself was a piece of cake. We just followed the instructions that came with it and it was pretty smooth sailing, not unlike a regular doorknob install. Tip: If you happen to get this same doorknob, you’ll actually need four batteries (not two) that all go in the interior of the doorknob. (So if you found one battery hatch and put in two batteries and think you are done, you are not. Keep looking and find the second hatch or else it won’t work.)
Yeah, yeah… but do you like having a keyless doorknob?
Heck yes. We’ve had ours installed for a little over six months so far and we LOVE it. It’s been really nice to not have to carry a key around and still know the camper is nice and secure. Plus, if we’re ever not there (now or down the road) and someone needs to get into it for any reason, we can share the code (and even give them a special guest code) so they can access it, which we think will come in handy when we’re tailgating or camping. And it automatically locks from the outside, but always remains unlocked from inside the camper. And there’s an emergency backup battery pack with a little plugin port just in case the batteries run out of juice before you replace them. We haven’t had to use it, but it’s nice to know there’s a failsafe just in case. Lastly, and I know this is maybe least important, but the keys light up in a really nice blue which really complements The Cameo’s new paint job.

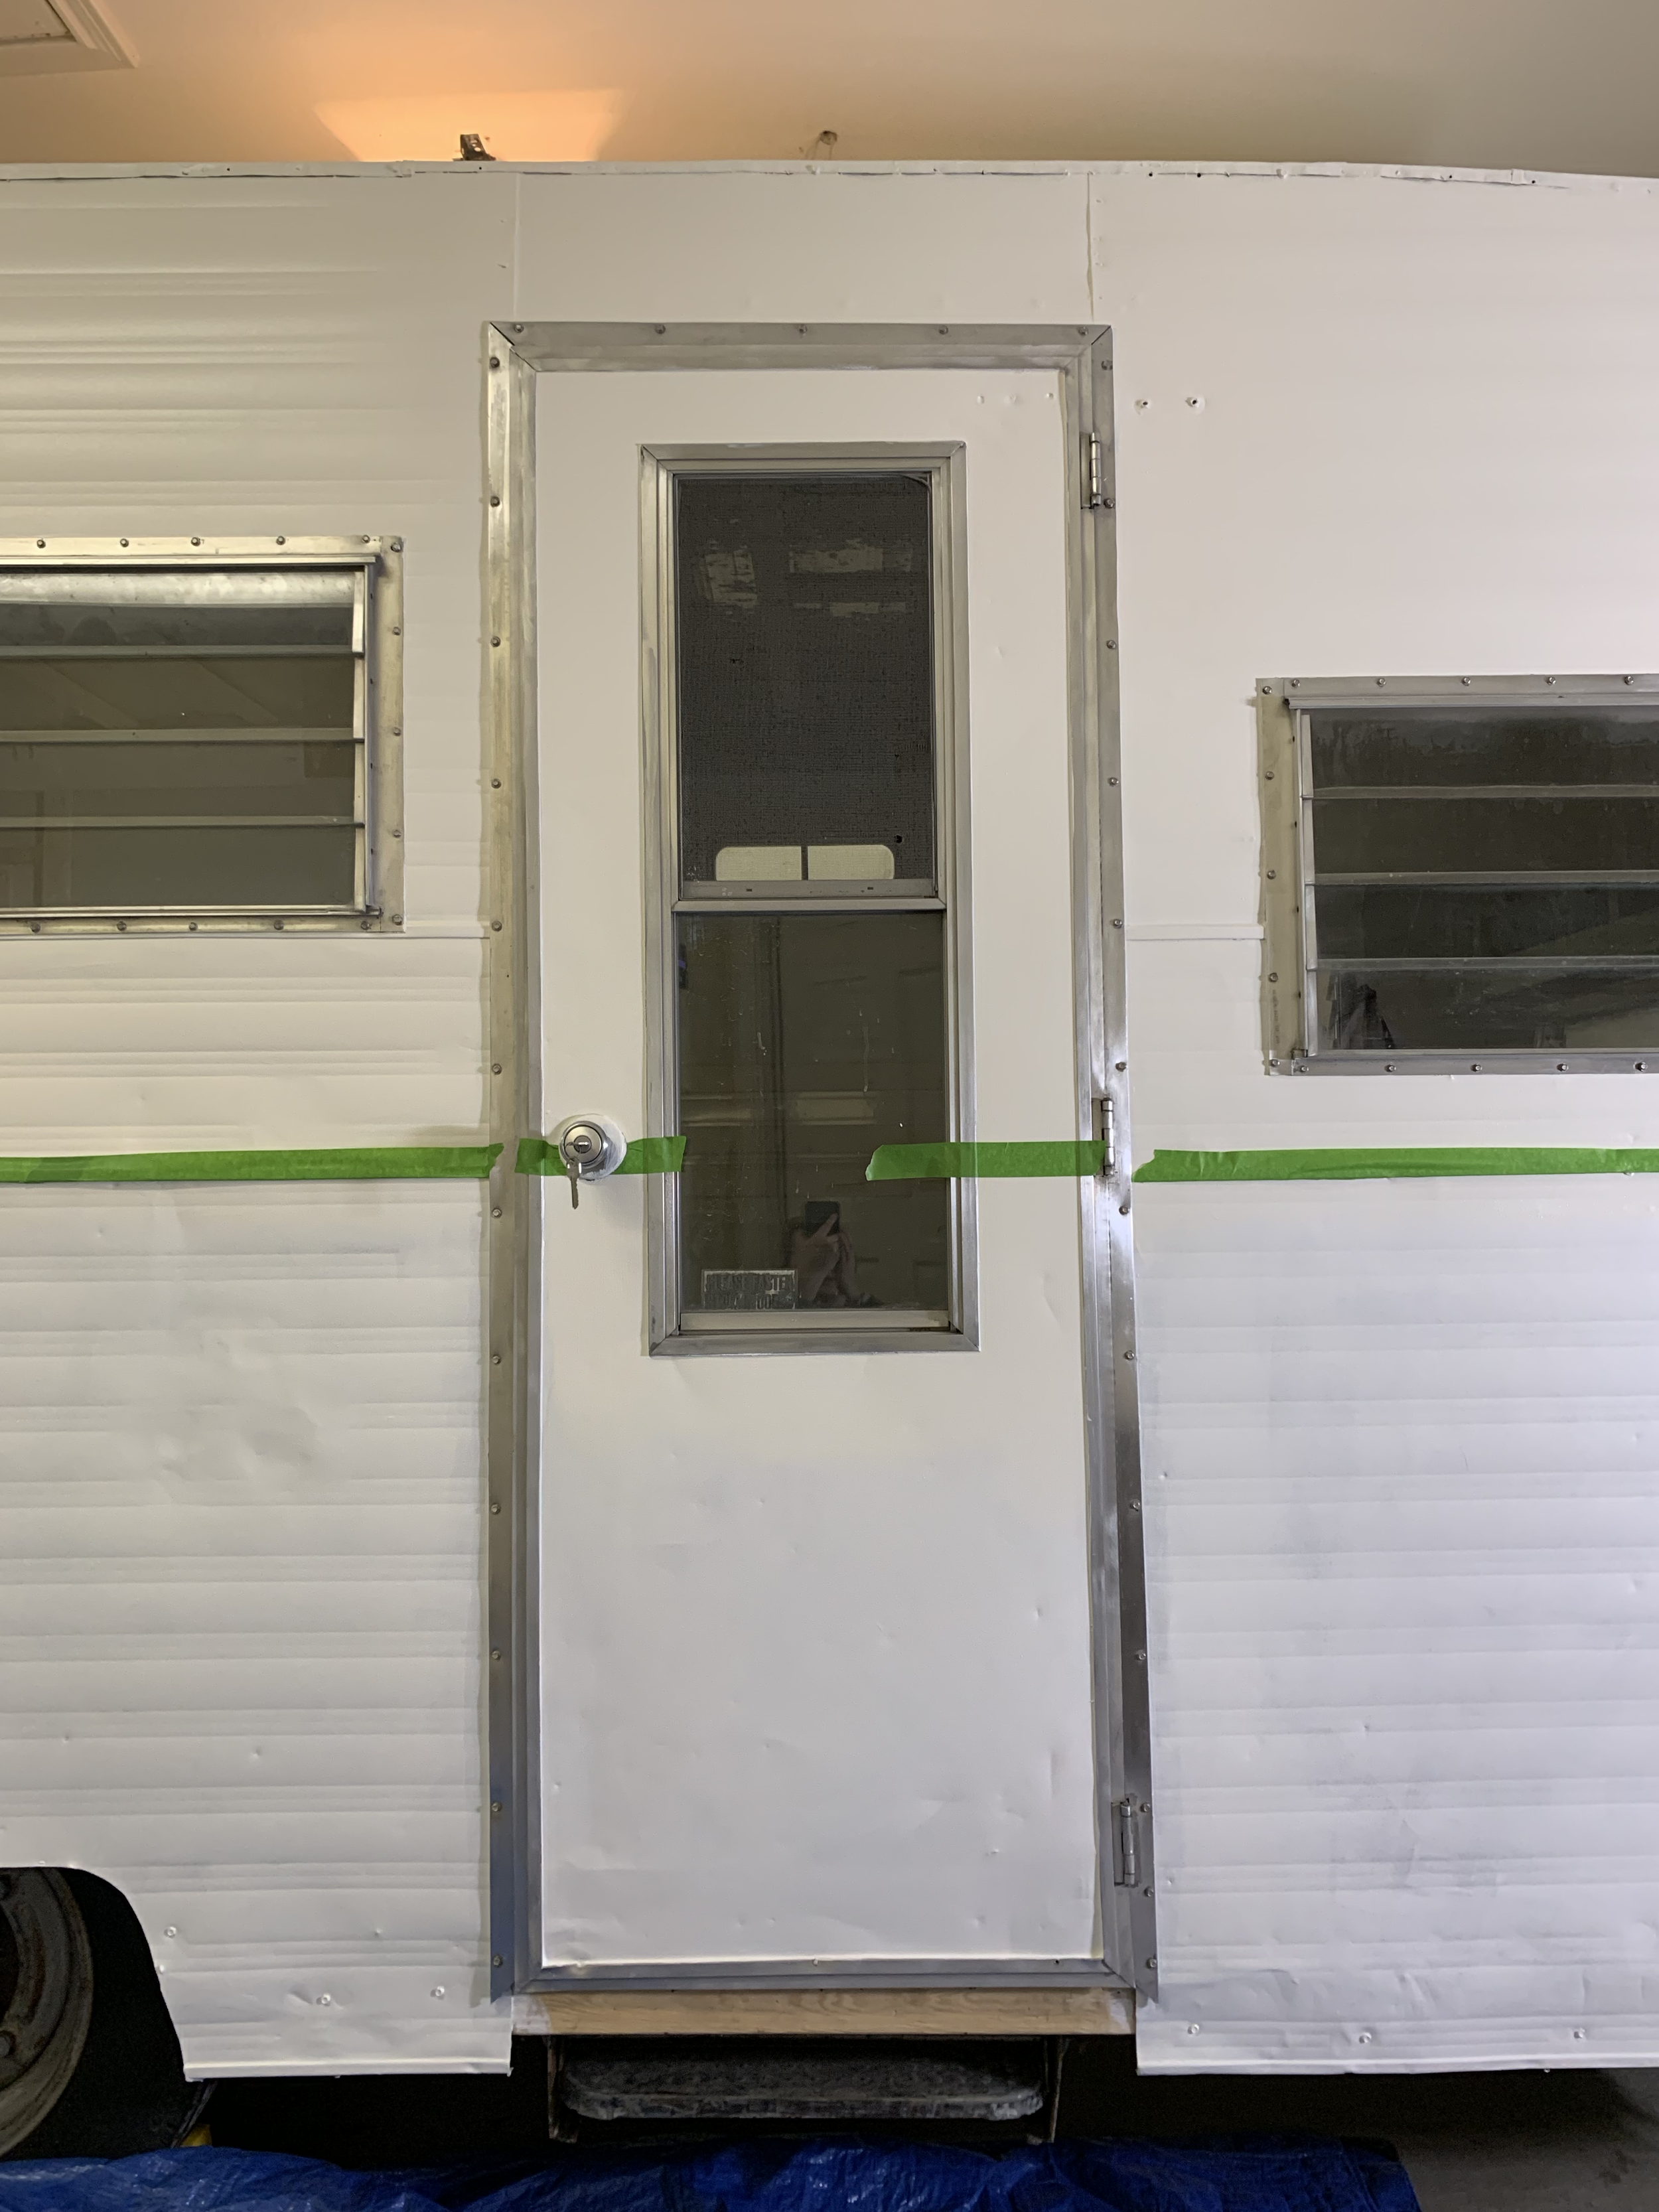
Now before you say something, I know you can probably tell that there are some gaps on the side of the door now that we’ve bumped out the lock. When we get farther down the road and move onto the aesthetics of the inside of the door, we plan on filling in gaps and cracks with paintable caulk and painting everything out so you’ll hardly even notice the little irregularities and it will look like one seamless piece. The most important thing for us right now is that it’s functioning and secure.
Prepping the door for paint
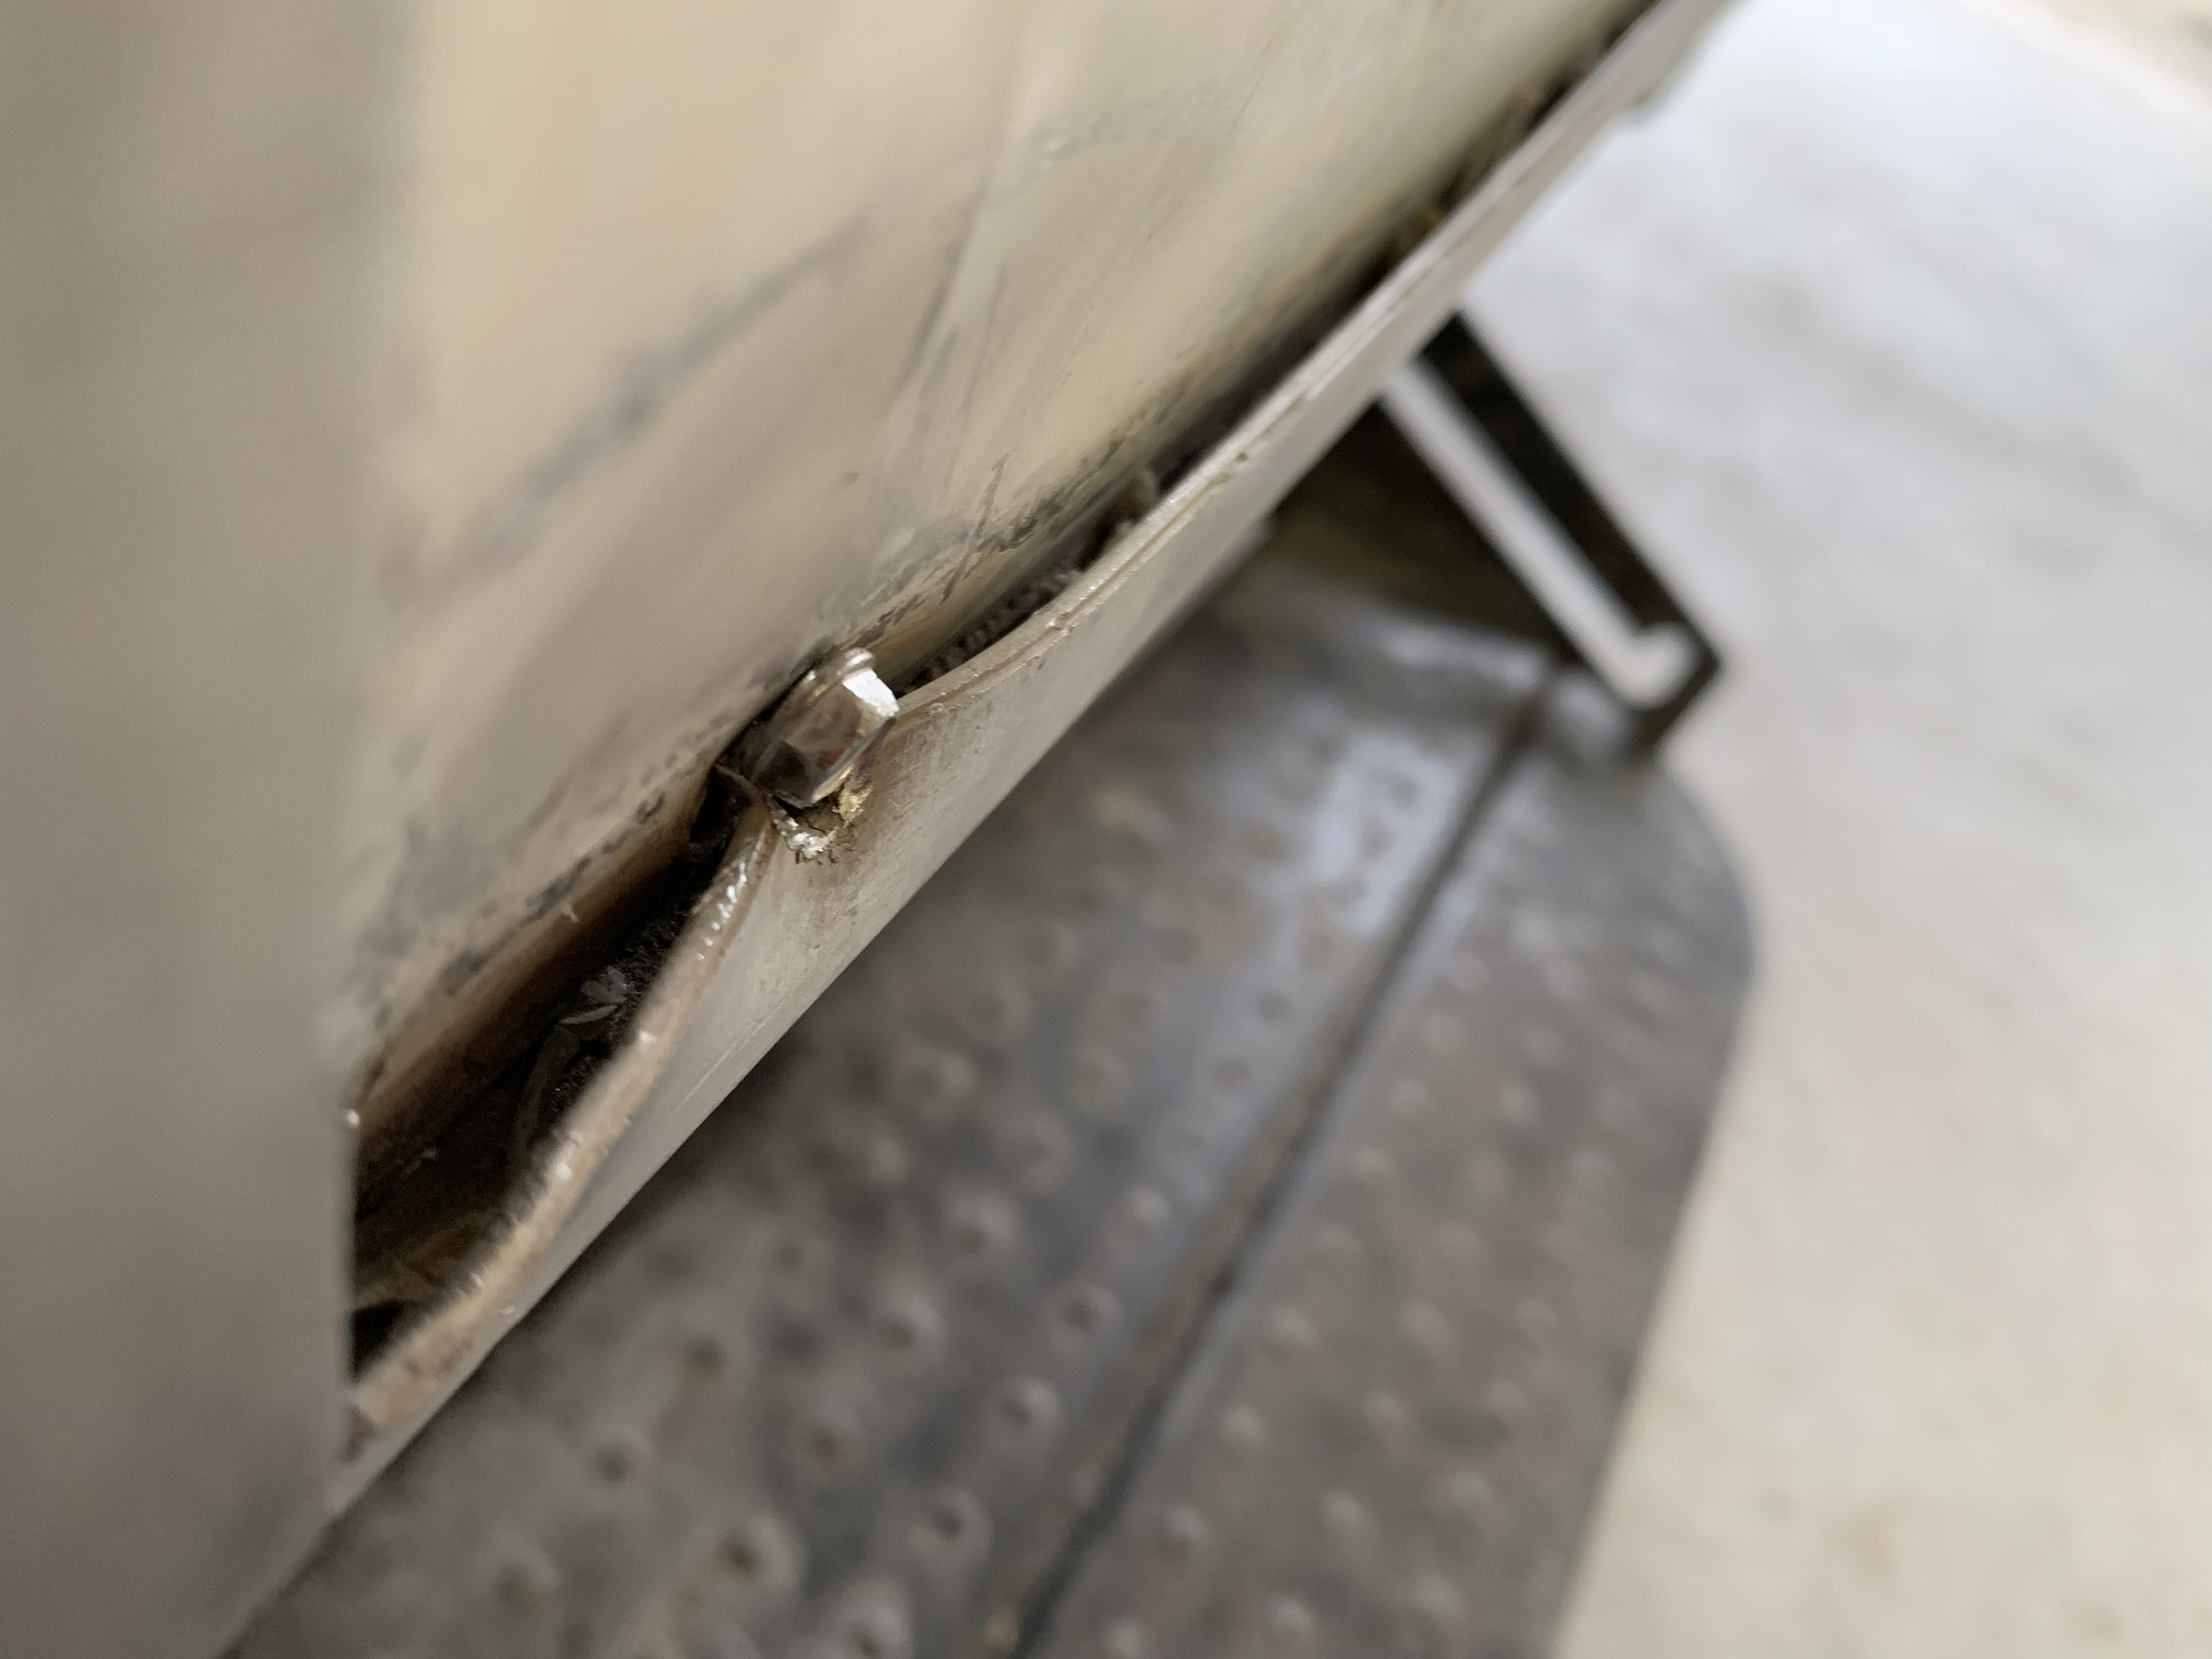
You might’ve noticed in some of our photos, but the metal frame on the exterior of the door was bent. And the metal panel that makes up the whole door was pushed in all along the bottom causing a big gap between it and the door’s aluminum frame. After what felt like years of scraping and cleaning the whole thing the irregularities and damage were a lot more noticeable. We cleaned and sanded and cleaned the door again before filling all the gaps and seams with paintable caulk. Then all we did was paint it when we painted the rest of the camper.

Installing a magnetic doorstop
At first, we replaced the original doorstop with an aluminum plunger-style vintage replica, but it worked too well and practically ripped the door frame apart when trying to pull the plunger out of the rubber stopper. So we decided to scrap that and went a slightly different direction… one that hopefully would hold the door open without breaking the whole wall anytime we actually tried to use it. Enter: this amazing magnetic stainless steel door stop.
Since we took the photo above, we patched the holes left by the first doorstop using one of the many techniques we discussed here. Now it just needs touch up paint, which we’ll do later when we touch up some of the other areas that need another pass of paint.
Camper door before & after
Somewhere down the road, we’ll finish up the door including caulking those little gaps and seams around the latch area, adding a new seal around the door and finishing the interior to match whatever we decide to do on the rest of the interior. Plus I’m super excited for what we’ve got planned to swanky up all of the windows (including the one in the door)! We just have a few (hundred) things to do before we get to that part. But the suspense is killing me!
Do you have any questions? Tips of your own you’d like to share? We’d love to hear it!
And if you’re not already, don’t forget to follow our progress in real time on Instagram.


