The Cameo Camper Renovation: DIY RV Window Curtains
Oof, has it been crazy here in Texas. Thankfully, after all the winter storms that rolled through the week before last, we were lucky to only be without power for 36 hours before we were put on rolling blackouts through the rest of the week. It definitely got real chilly in the house without any heat, but had no water or plumbing issues thank goodness.
That said, I thought I’d take a little break from all of the plumbing-related camper renovation posts to share how we made our custom blackout window curtains for the camper.
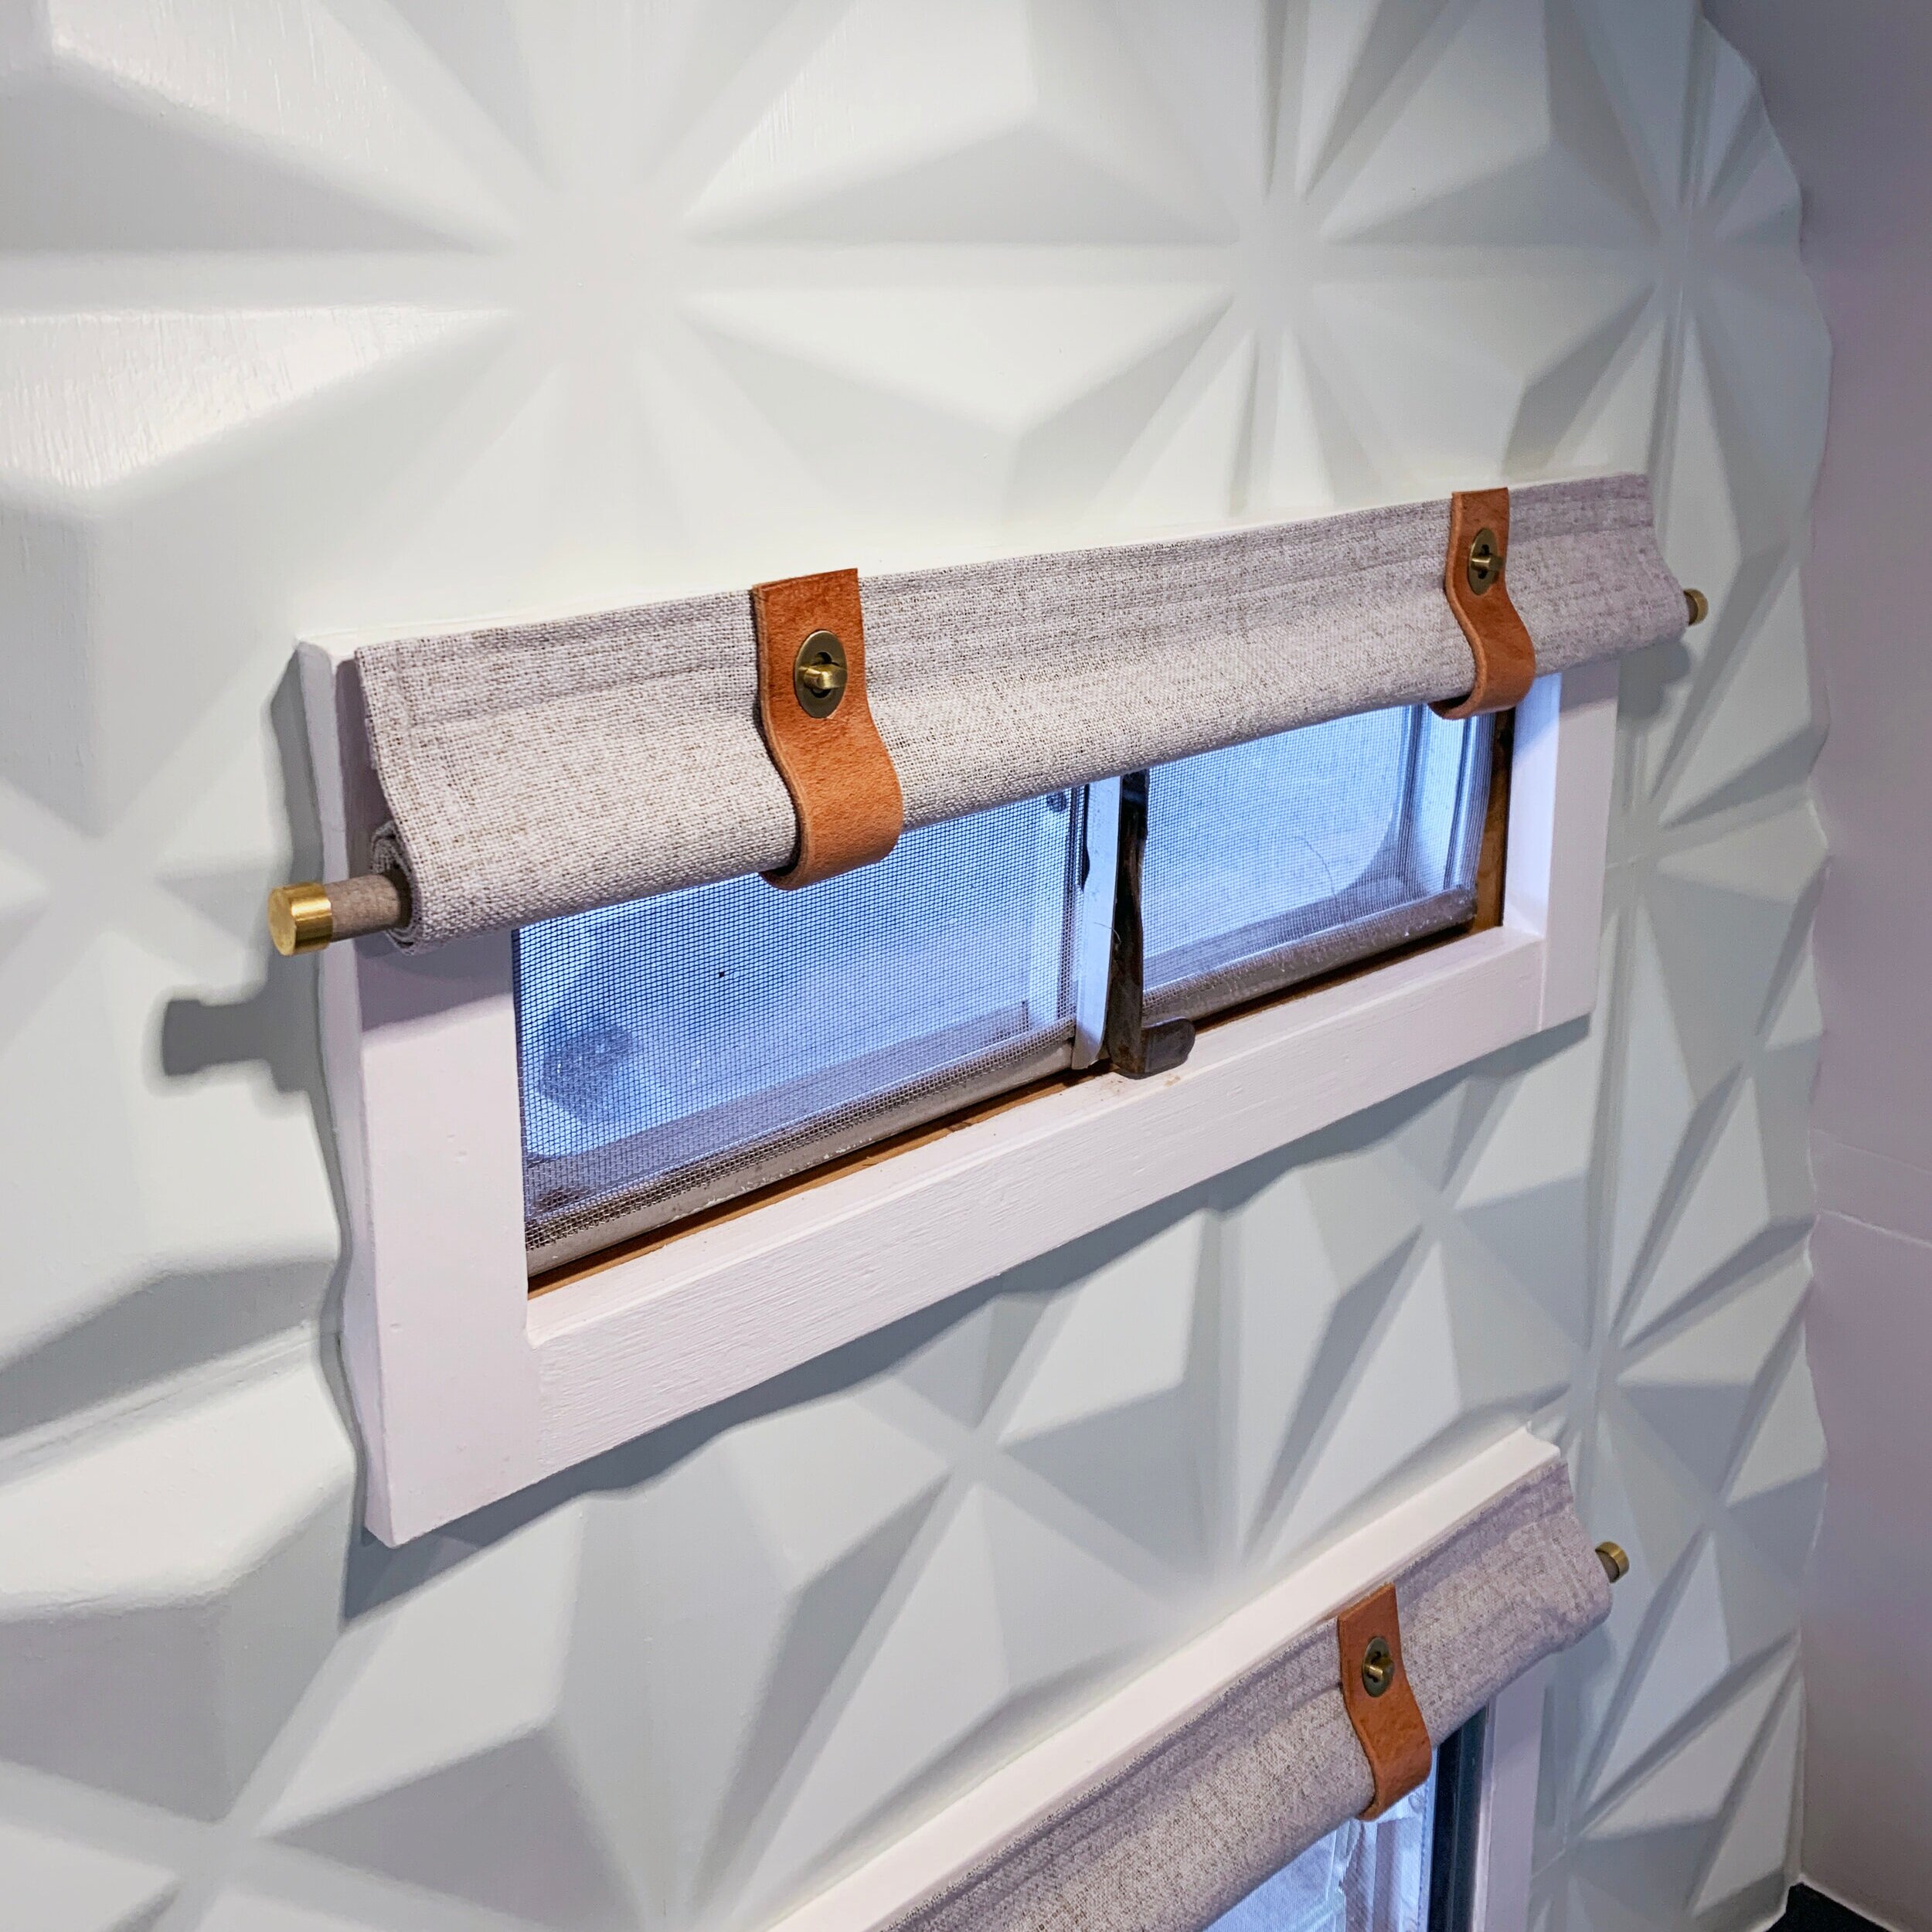
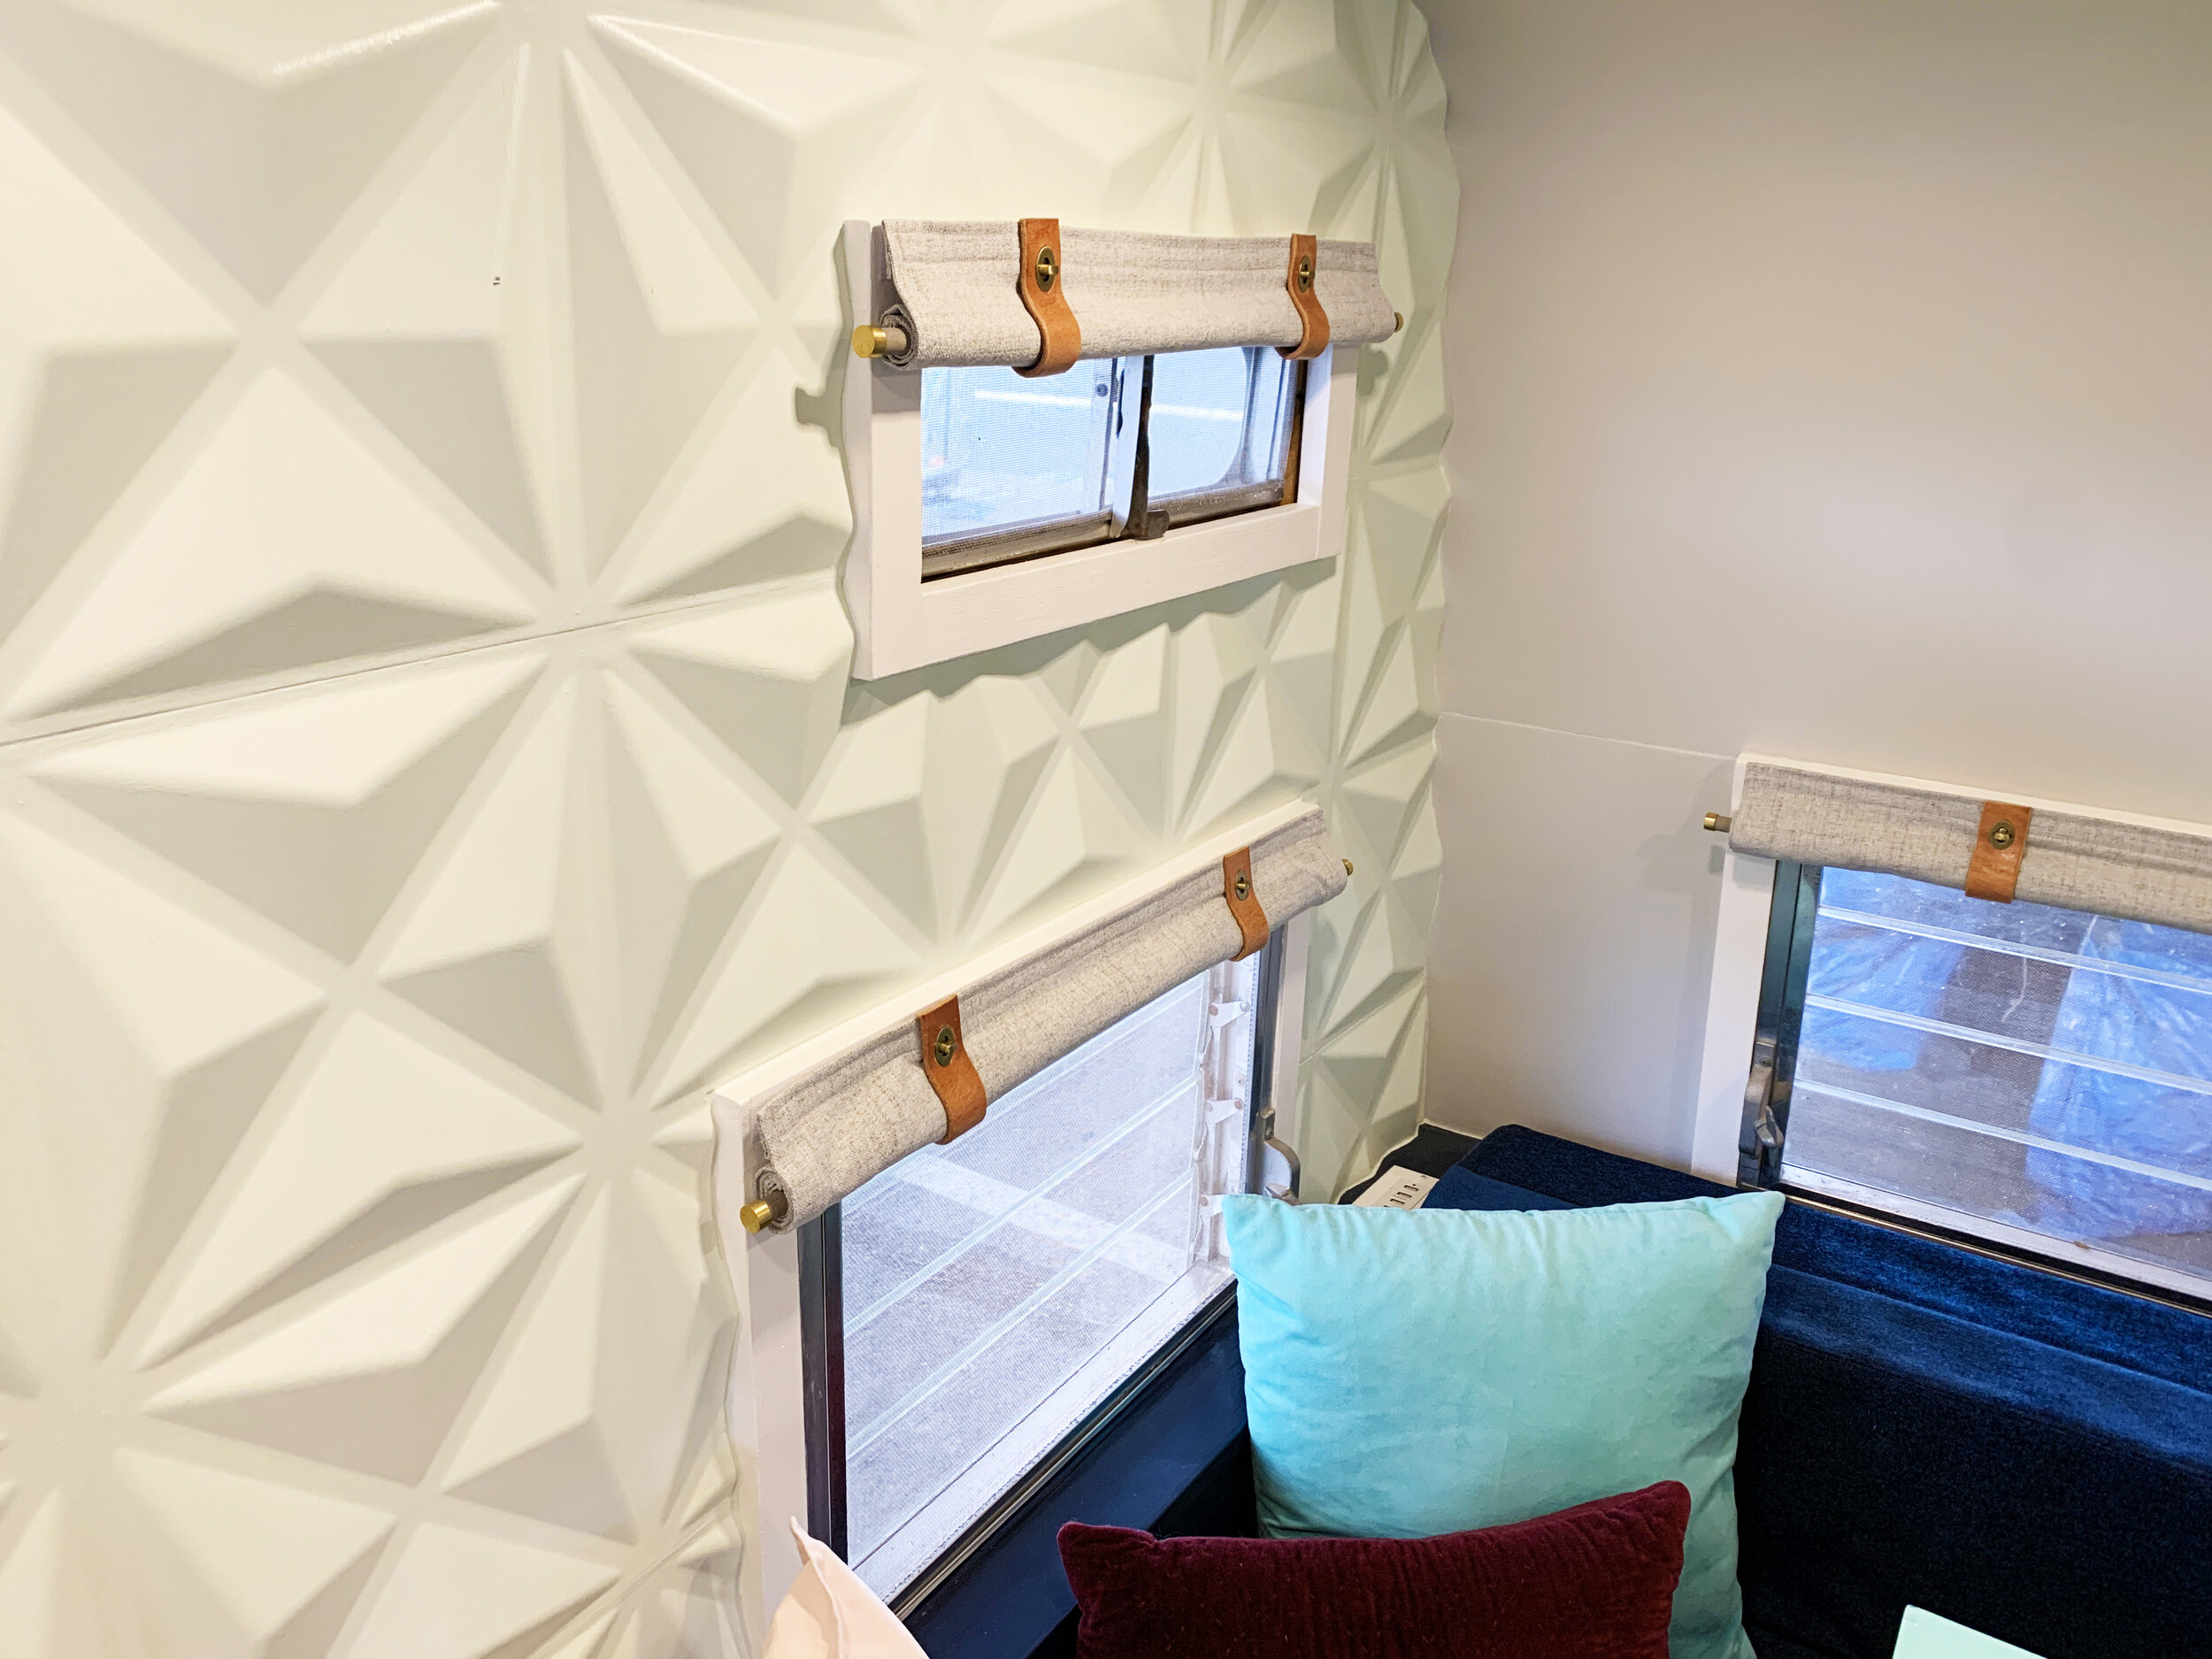
They’re a very simple design in terms of how they function in that there are no cords, curtain rods or rings so they stay in place when we’re driving. You just roll them up by hand when you want the curtains open, and unroll them when you want them closed. The curtain panels are secured in the open position with leather tabs and brass latches, but are actually held on with hidden Velcro. (Shh! It’ll be our little secret…)
Our DIY RV Window Curtains shopping list
Not including the bathroom (where we did not add a curtain), we have 10 windows in our camper, which means the following made 10 curtain panels, 10 wooden dowels, 20 brass caps, and 24 leather tabs with clasps.

Curtain fabric – we got 2 packs, for a total of 4 curtain panels
Iron + ironing board
Thread that matches fabric – we used white
Sewing machine – our is old, but this is the current version of the one we have and love (it does embroidery, too!)
Measuring tape, ruler + T-square
Pencil + thin pen
Fabric cutting wheel / fabric scissors – I used both
Cutting surface
Velcro – Two types: adhesive (for window) and sew-on (for curtain panel)
Leather straps – we ended up using two of the 1-1/4” wide x 84” straps with only a couple of inches to spare in the end
Brass clasps – we got 8 packs, for a total of 24 clasps
X-acto knife + blades
Flat head screw driver
Small phillips screw driver – (a real small one, like for glasses or electronics)
1/2” diameter round wooden dowels – we got two 72” poplar dowels and six 48” poplar dowels and trimmed them to length
Chop saw / miter saw
Sandpaper – rough, like 80-120 grit
Wood stain / watered down paint
Brass caps – we used the 1/4 IPS cap finials in the solid raw brass finish
Paint thinner
Lint-free rag
Making the curtain panels
We used pre-made blackout curtain panels, cutting them down to the smaller sizes we need, rather than buying fabric and adding our own blackout liners, but these curtains could just as easily be made with fabric from the fabric store.
When picking out your fabric, think about the orientation of any pattern it might have as you might need to order more fabric to account for the way the pattern runs. Because of the fabric style we chose – which is just a square weave that looks the same up and down as it does side to side – we could cut our curtains out of the fabric in different directions without having to match a pattern or specific orientation.
Fabric dimensions
Each piece of fabric need to be cut 3” wider than the finish size (1.5” per side) and 4.25” taller than the finish size (1.5” for the top + 2.75” for the rod pocket at the bottom). For example, a curtain that is 32” wide x 18” tall when complete needs to start with a piece of fabric that is 35” wide x 22.25” tall.
Cutting the fabric
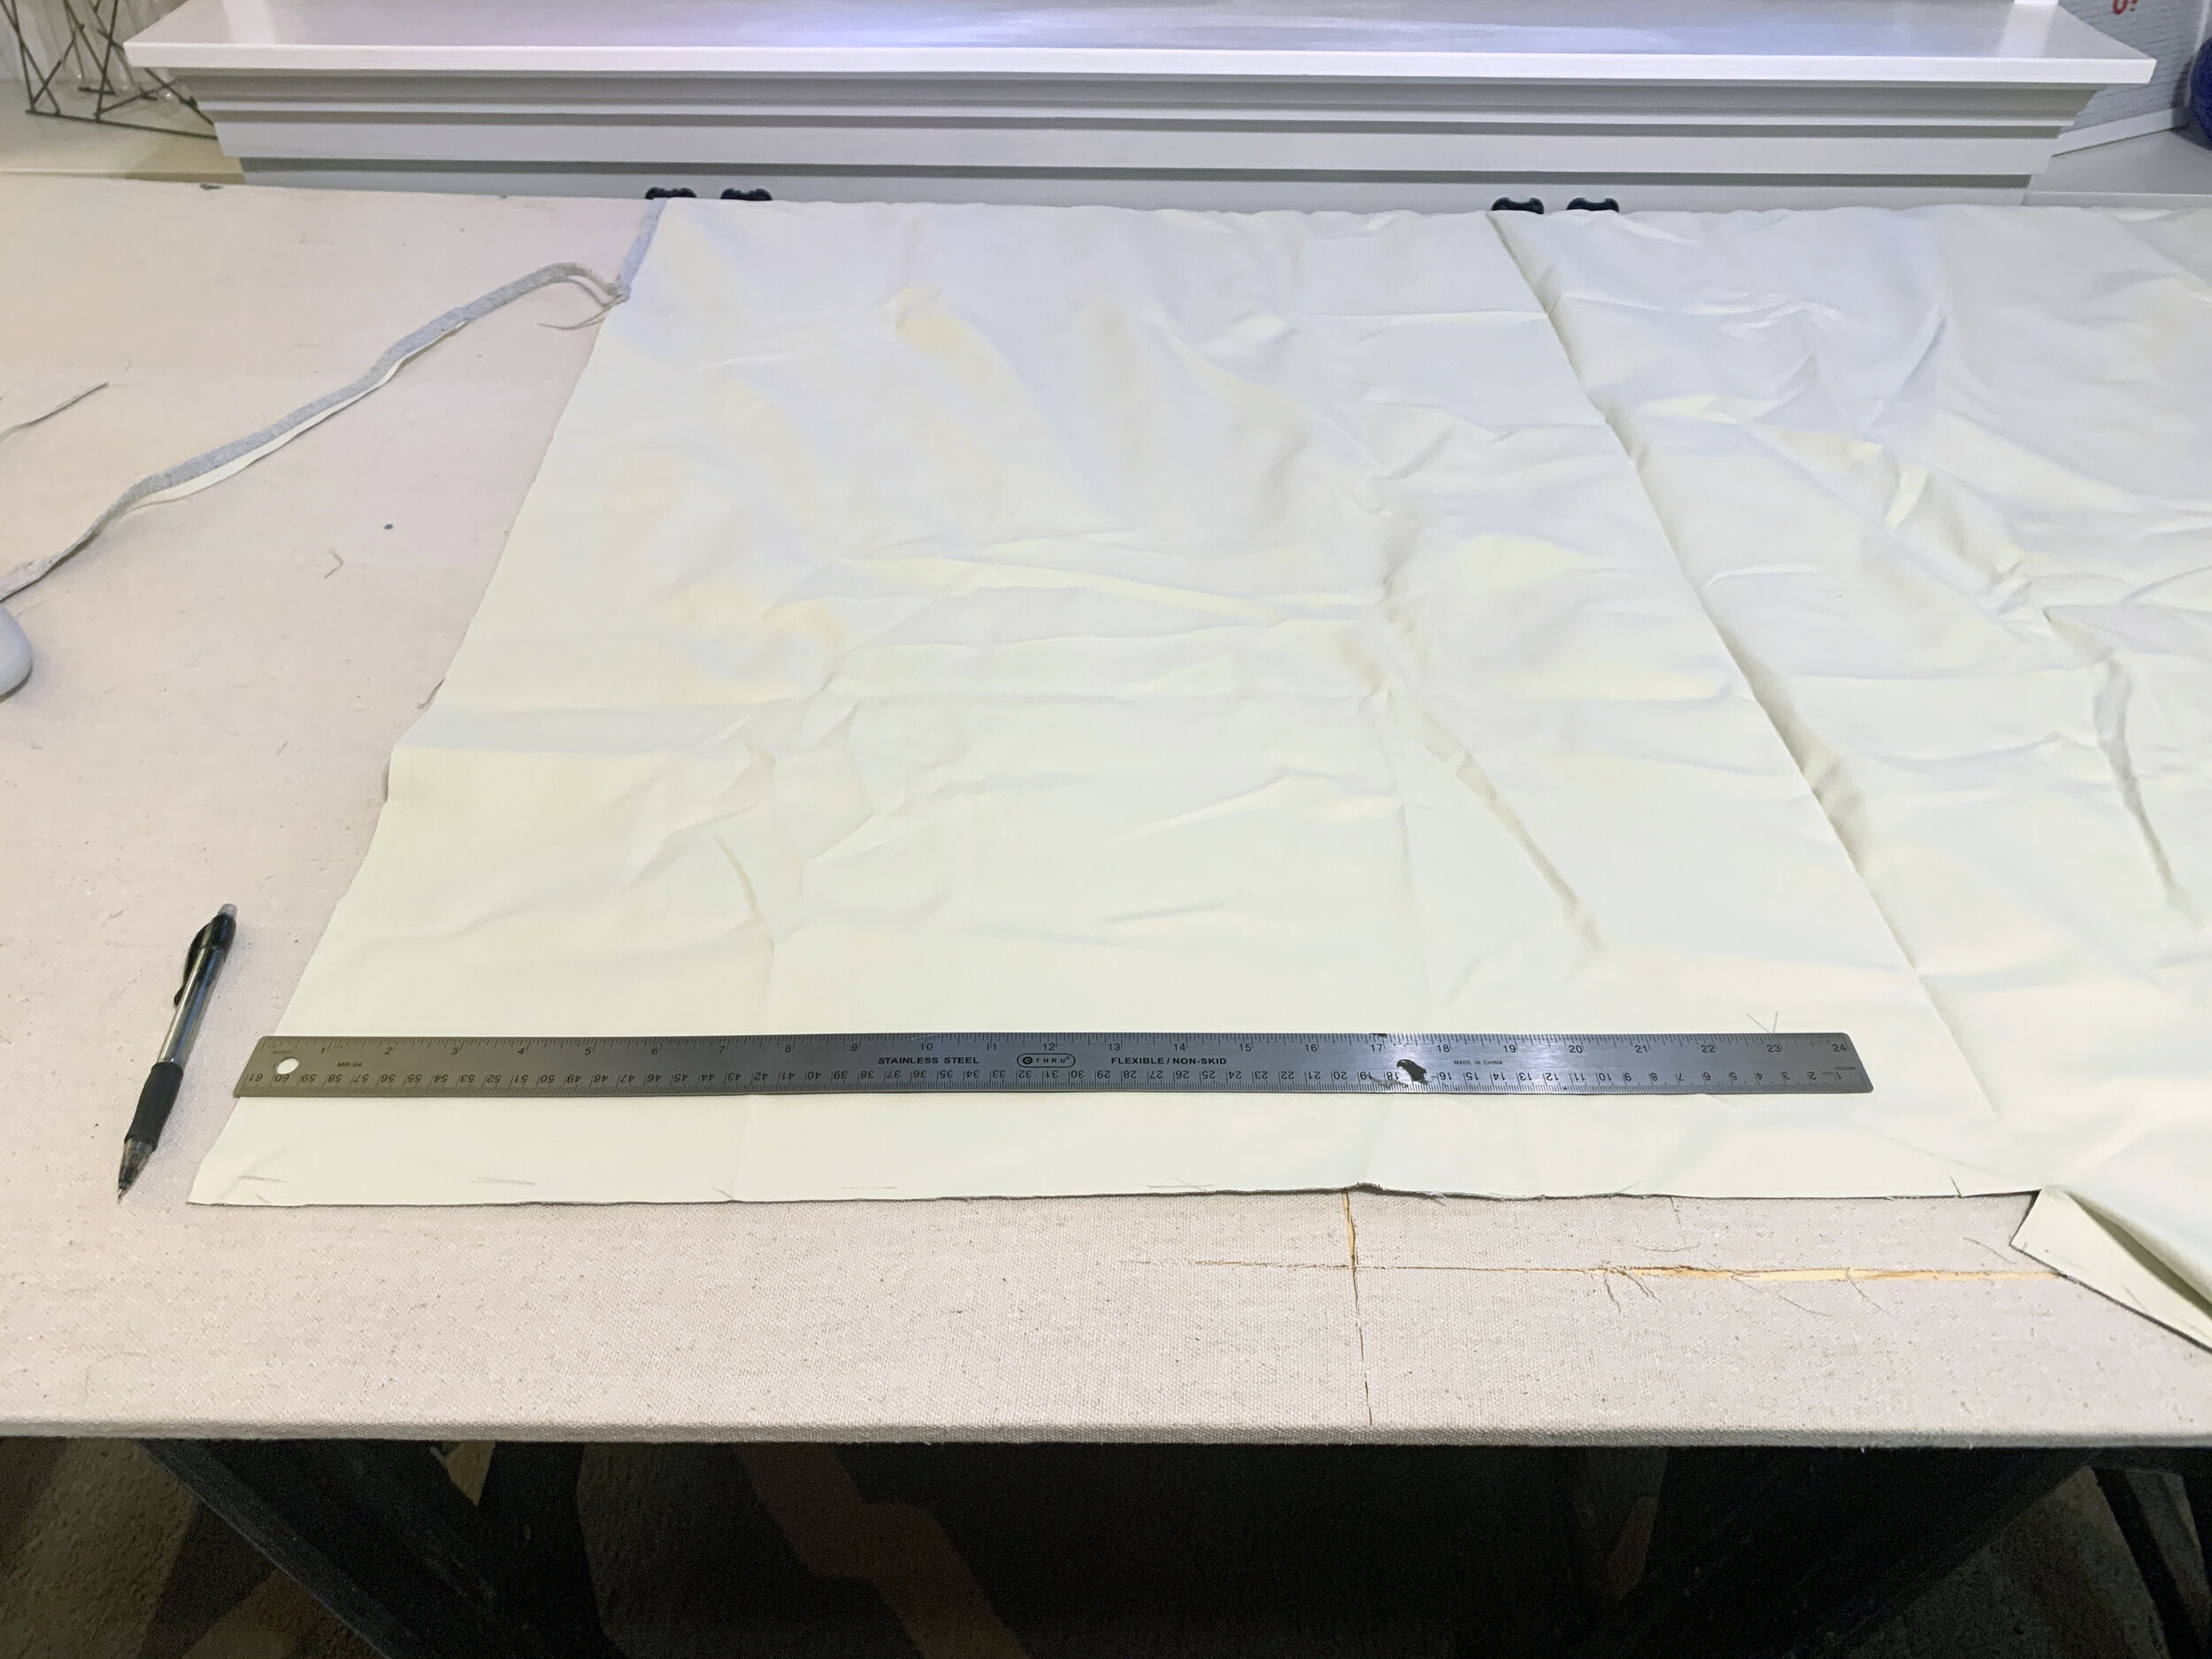
Because I don’t sew often, I don’t have all the fancy tools specially made for sewing (or the sweet skills and quick tricks) that would probably make this go way faster. But don’t fret – even without it all I was able to use a combination of my measuring tape, a long ruler, T-square and pencil to mark out the dimensions on the back of the fabric, and if you can cut and sew a straight line this project is totally doable.
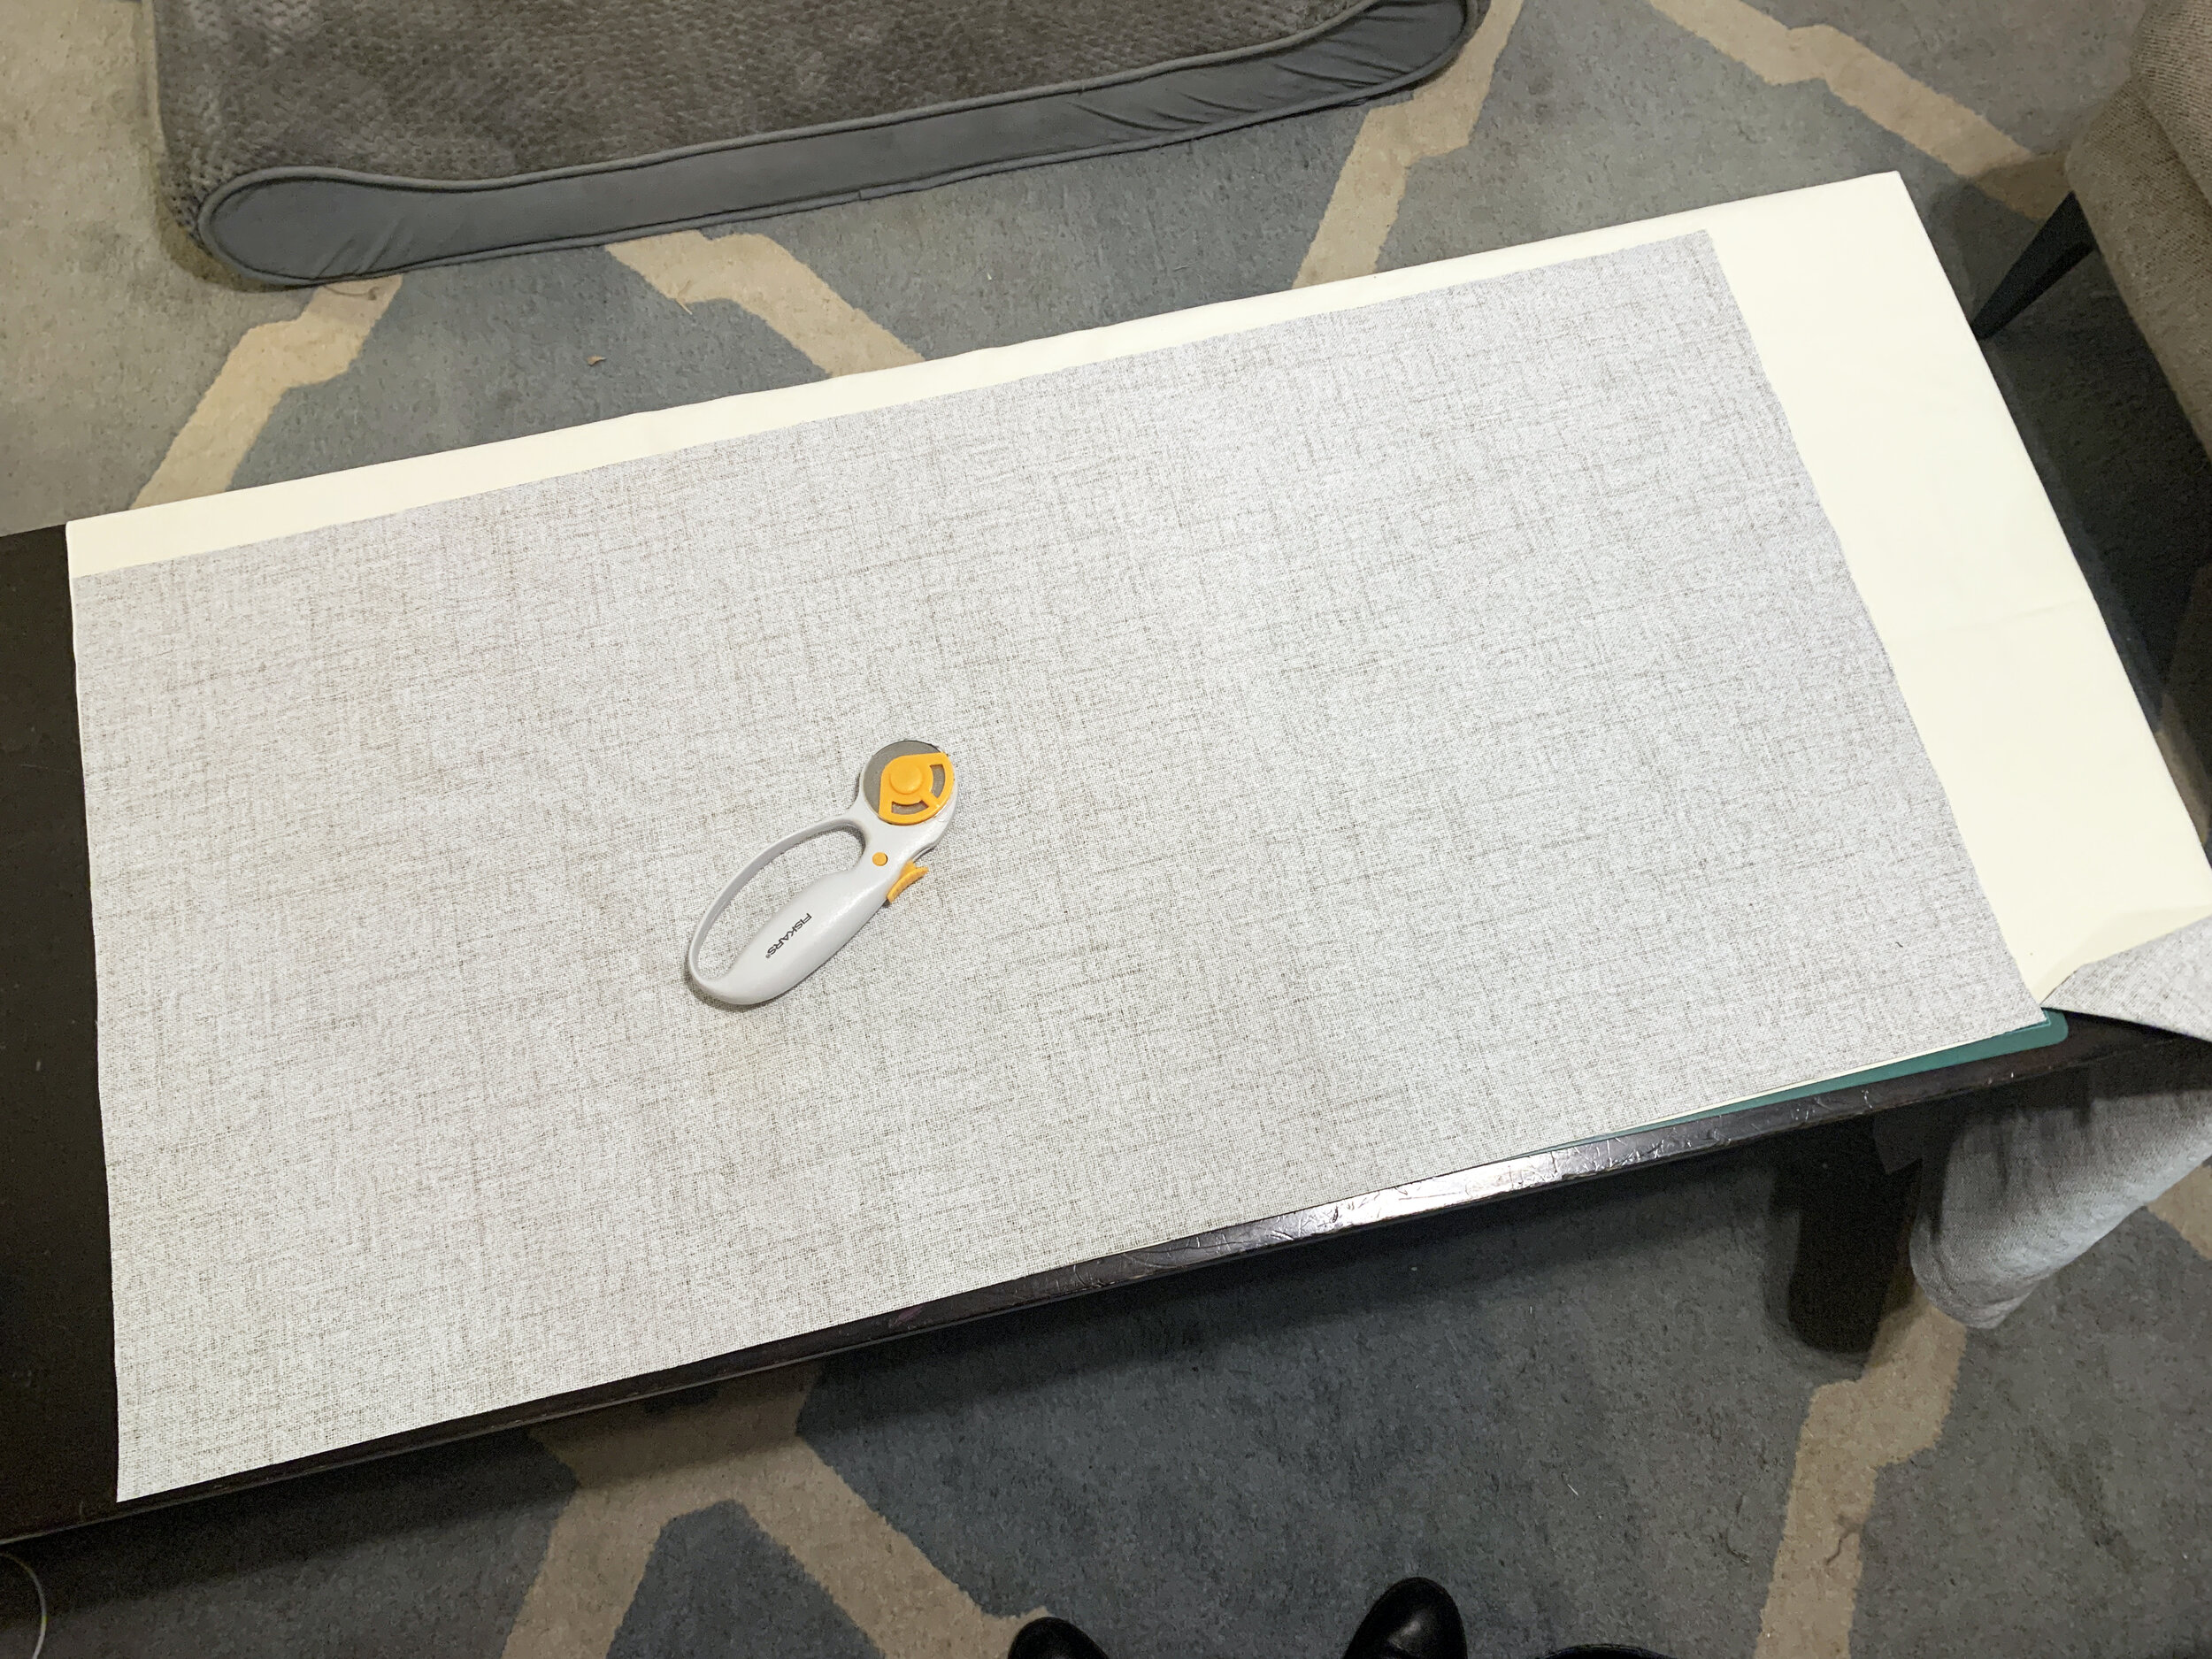
Oh, and when Nick noticed my cutting struggles on our relatively small coffee table, he set me up with a super fancy setup in the living room, which worked great:

Pretty much any large, flat surface you can cut on will work here … and it did take a while so it helped to have something to watch while working.
The most important things about marking out the sizes are:
Iron your fabric first. It will make the cuts easier and much more accurate.
Triple check your math and write the dimensions down in an easy to read order that’s the same for every panel. (I had far too many “oops” dimensions cut accidentally from mixing up my lengths and widths, because even though my design brain thinks width first followed by length, I wrote down my measurements length then width for some reason.)
Measure and remeasure and remeasure before you cut to make sure you have consistent, square panels (90° angle corners) marked out.

Sewing the curtains
Pressing + pinning the edges
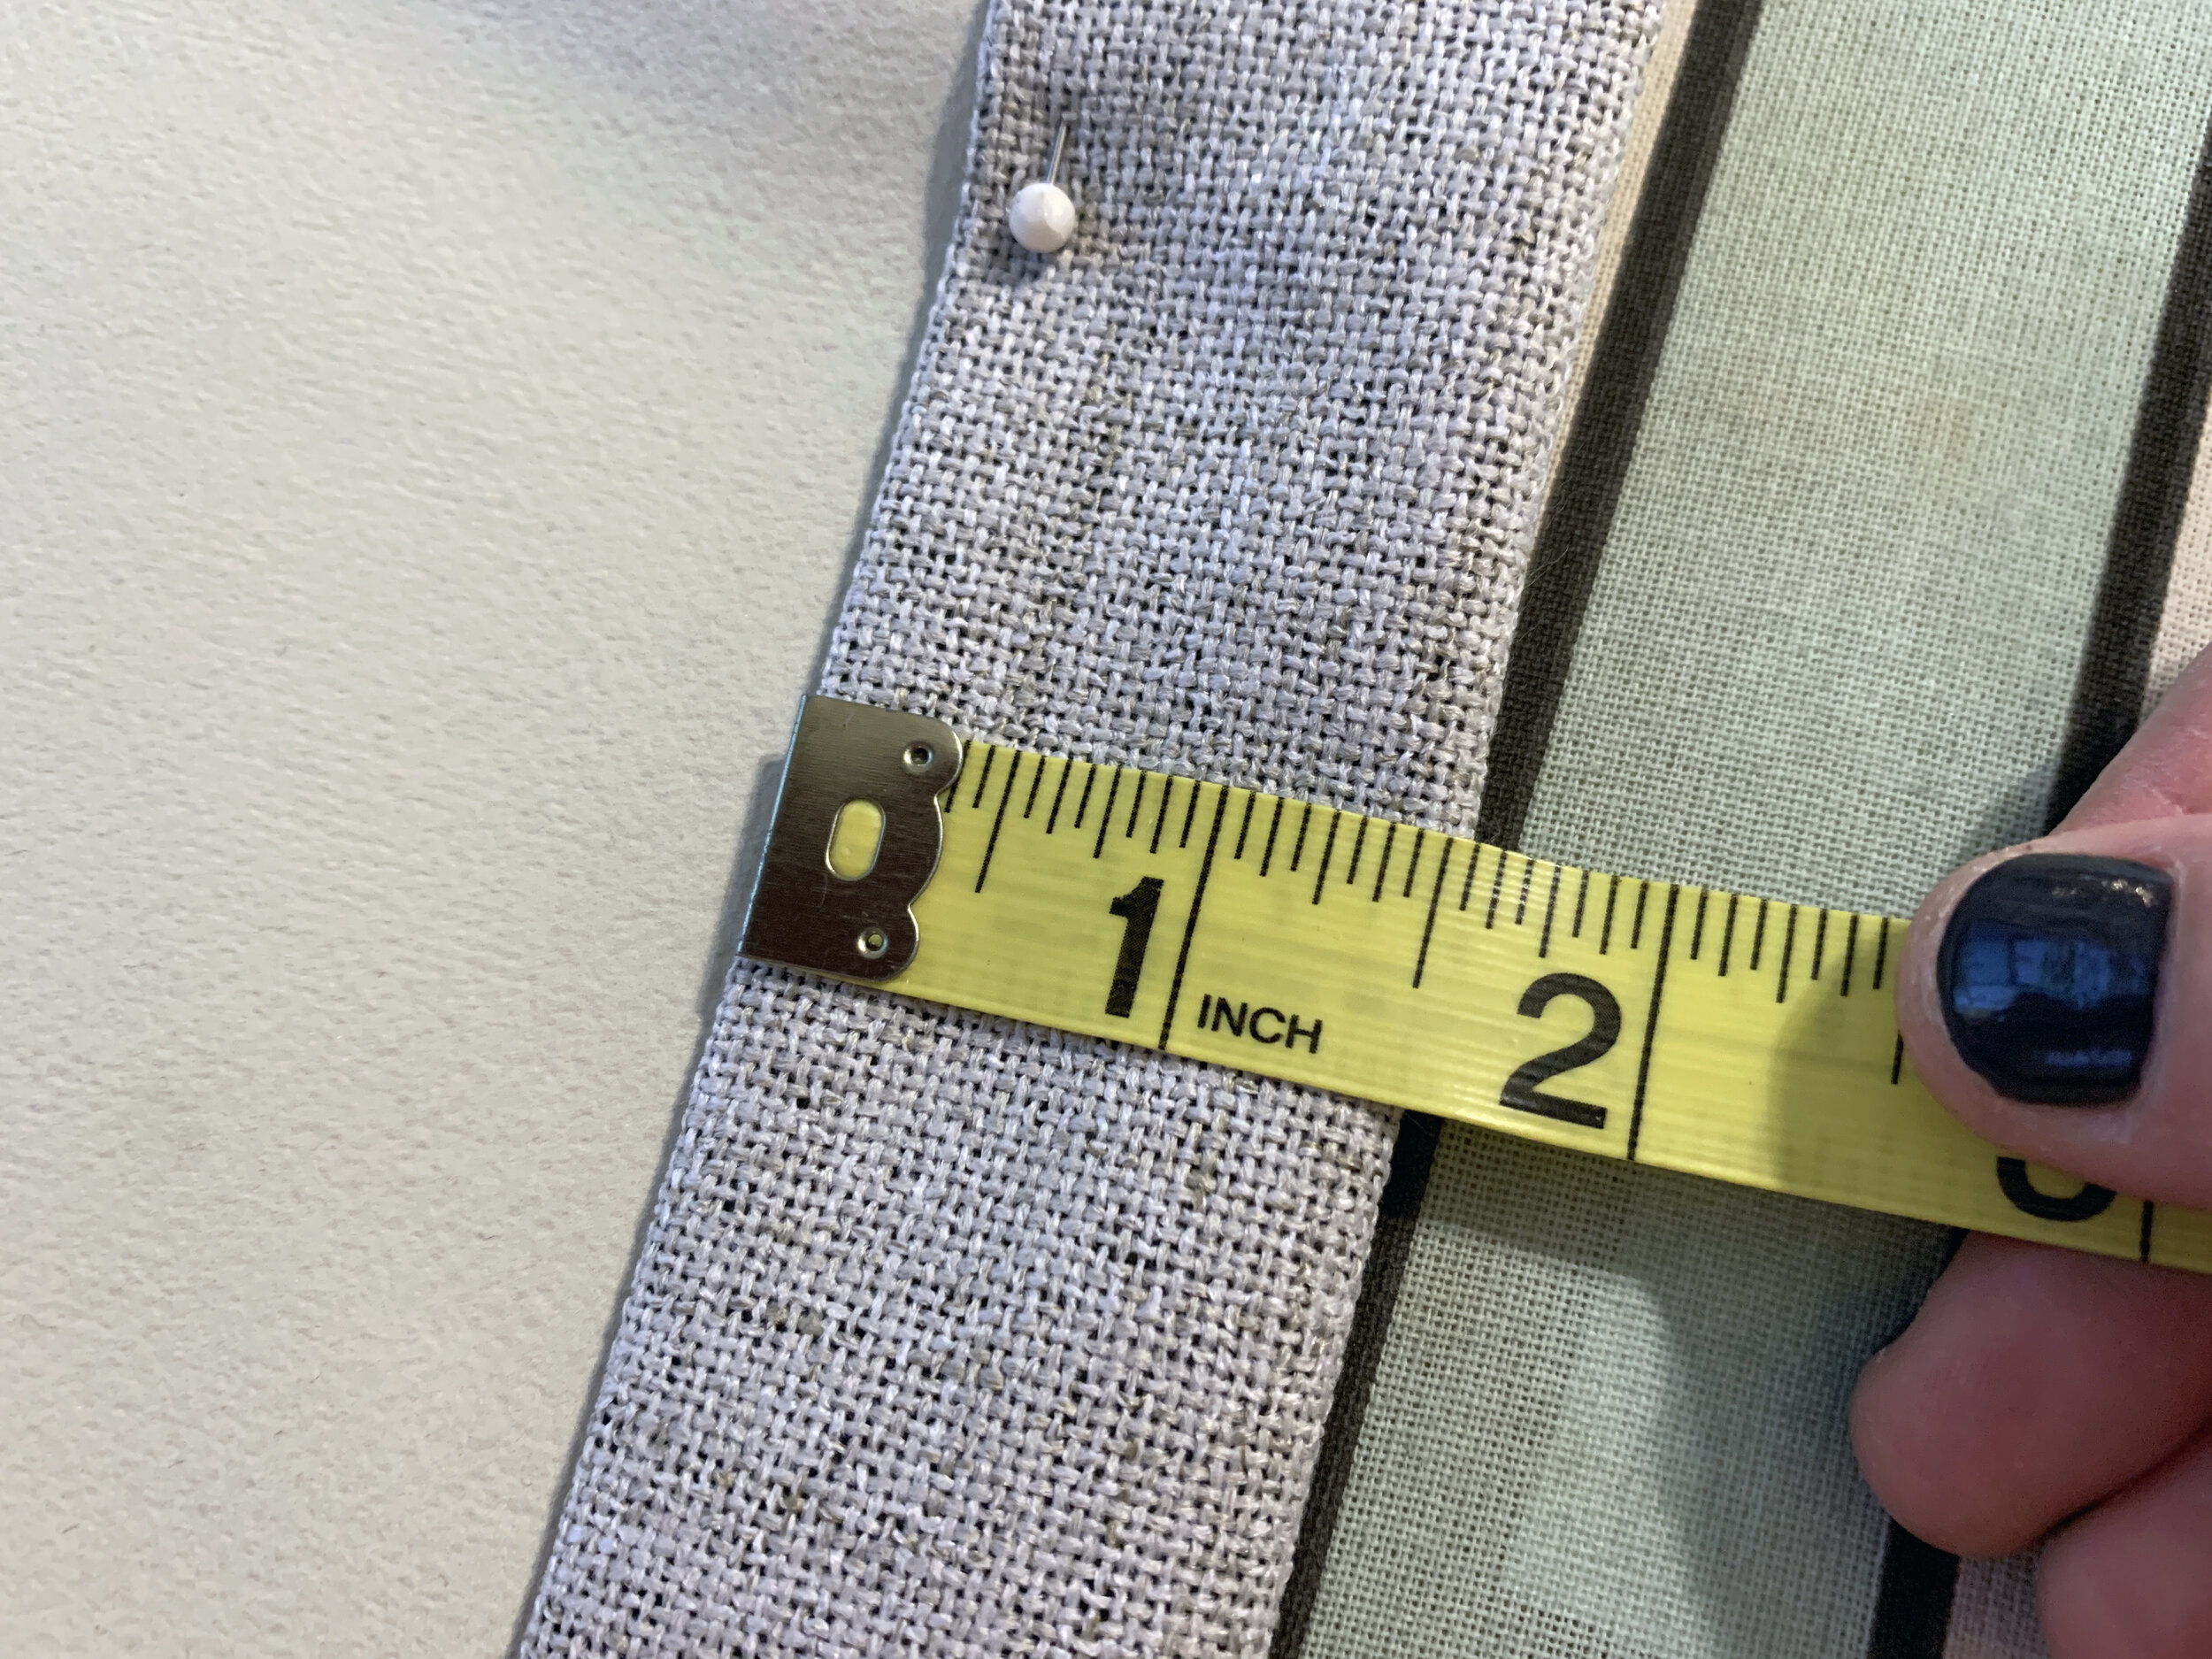
Before sewing the edges, I carefully measured the correct distance from the cut edge and pinned the fold with a row of pins before pressing the fold flat with an iron. (I found it better to press and lift before moving on to the next area versus moving the iron side to side down the length of the crease.) Then, I removed the first row of pins, measured the following fold, pinned the second fold in place and pressed the second fold flat with the iron. I then secured the flat pressed double fold with a row of pins, placed lengthwise to run through the sewing machine.
Sewing the sides
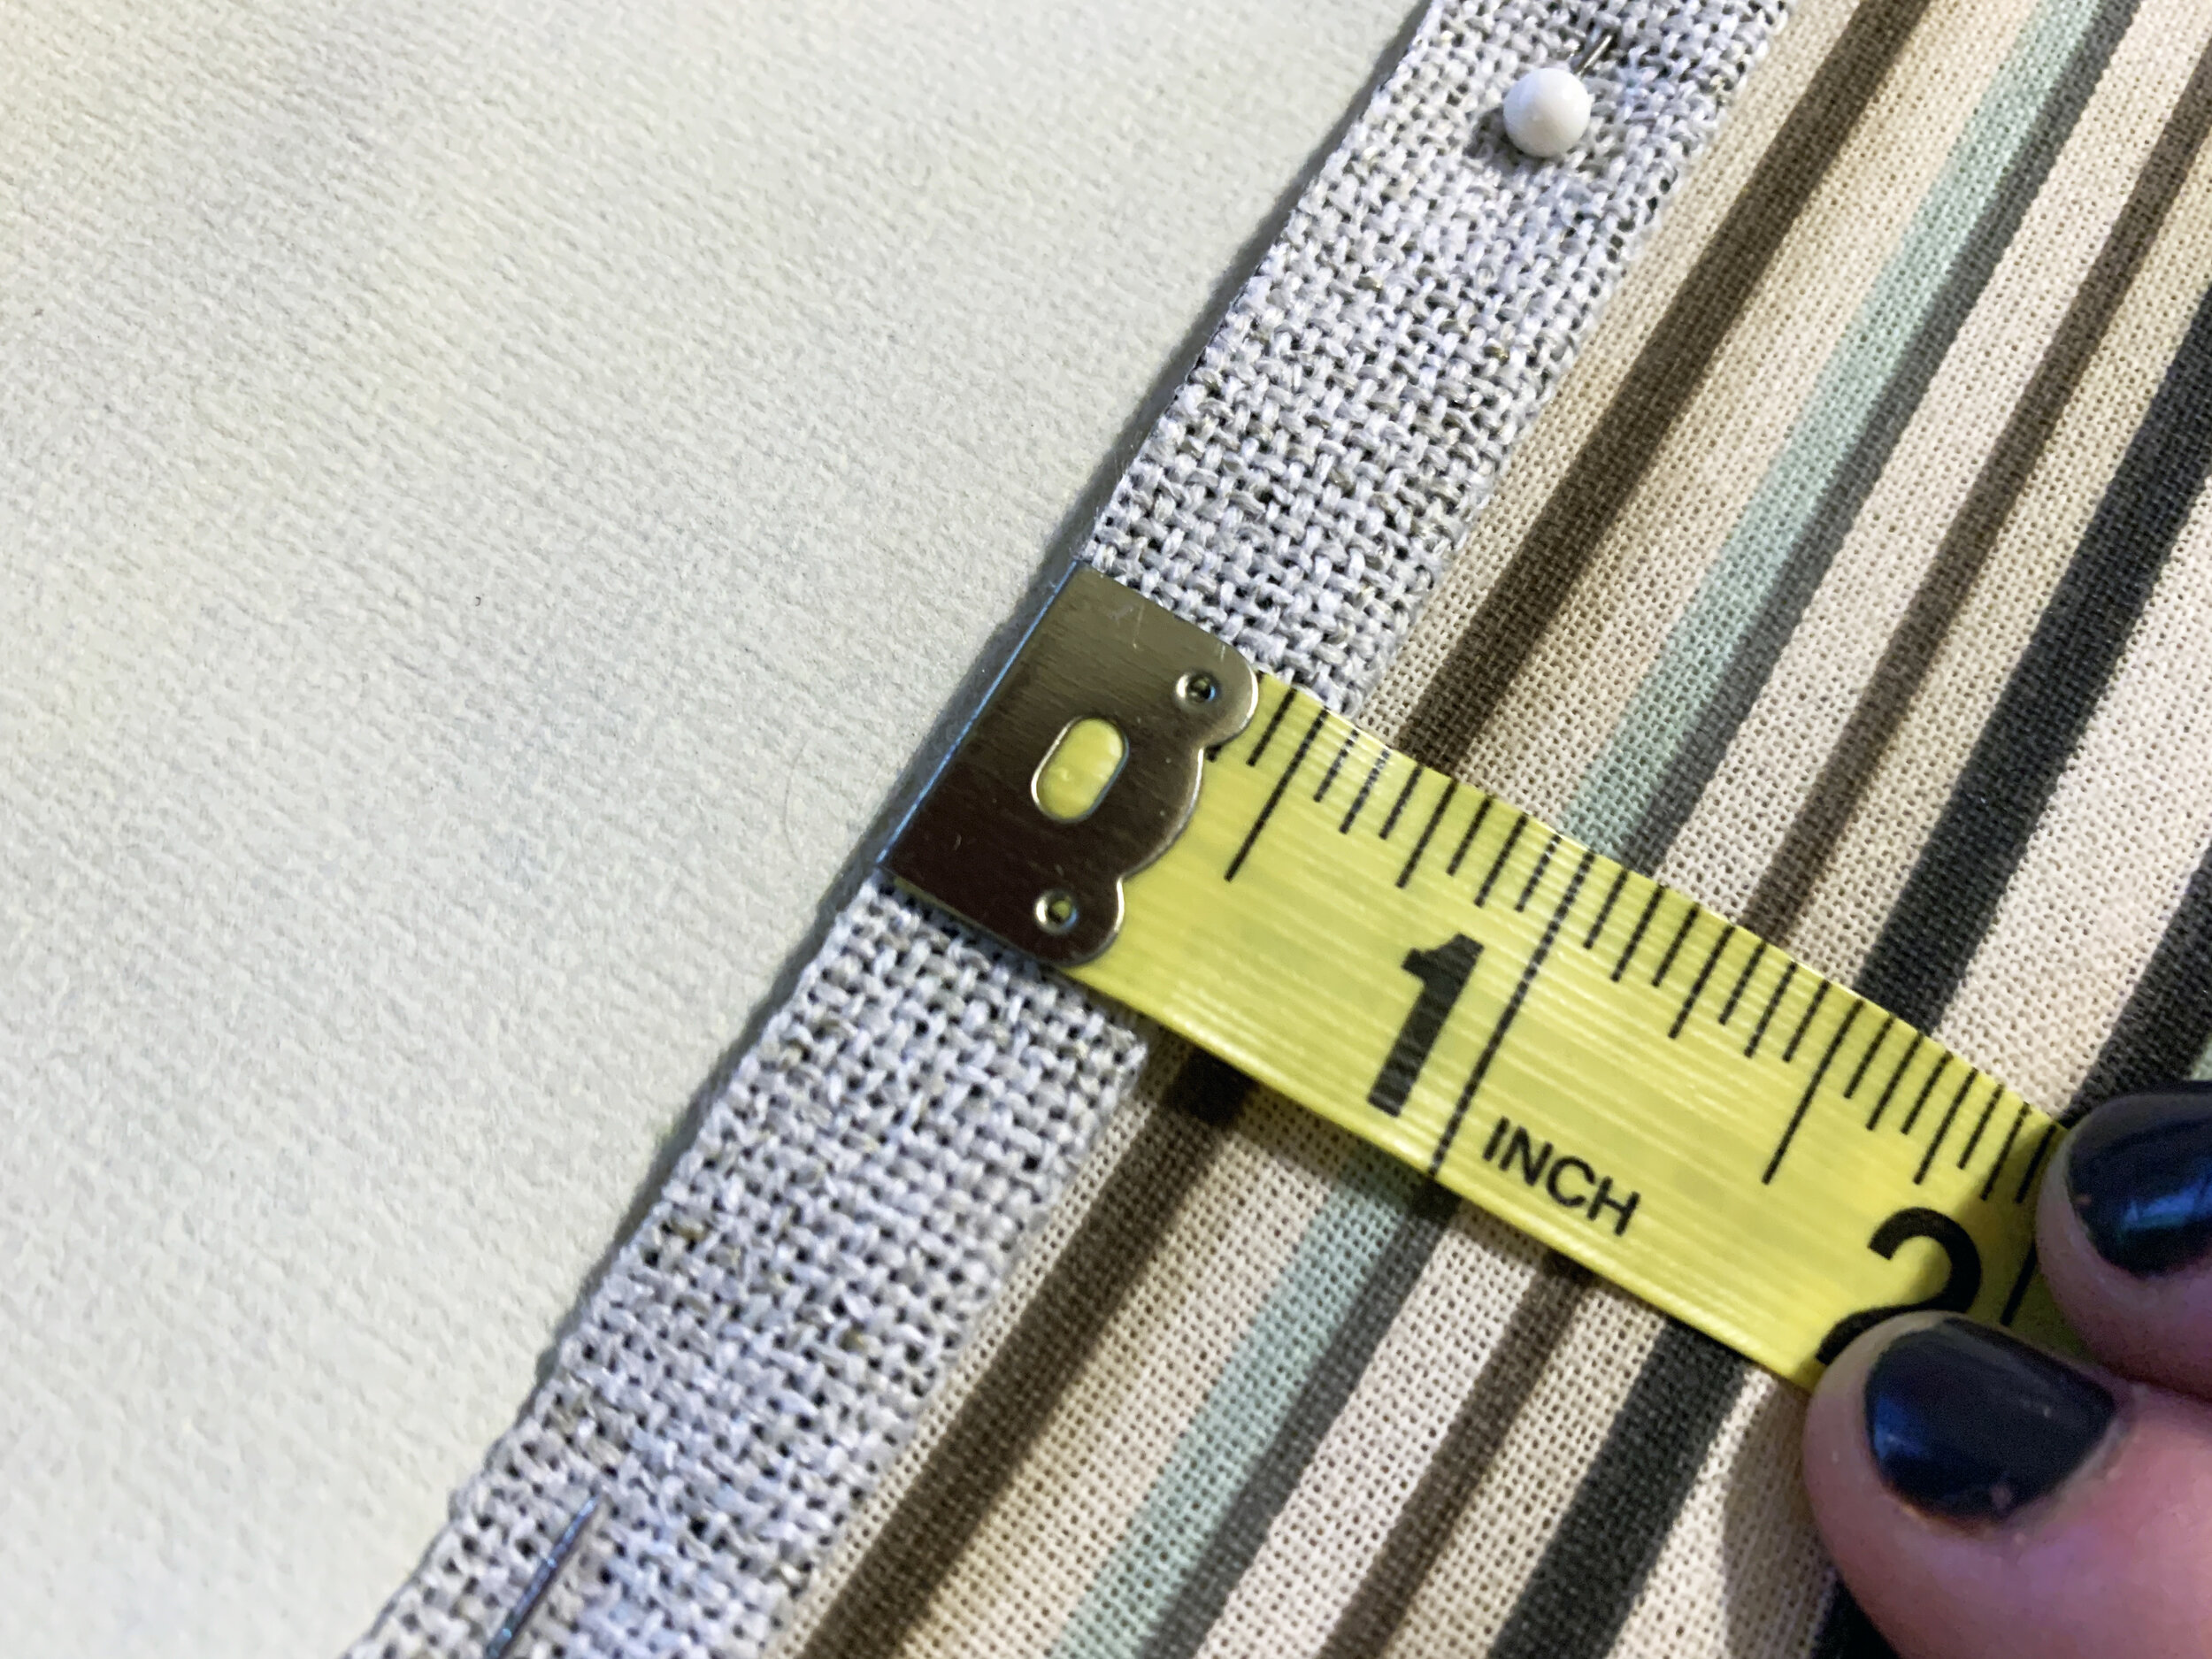
First I worked on the left and right sides of the panel, using the process above before sewing the edge. The first fold for the sides is 1/2”, and the second fold is 1”.

I lined the left side of the fold up with the left side of my sewing machine’s foot and sewed a straight line from end to end.

Sewing the top
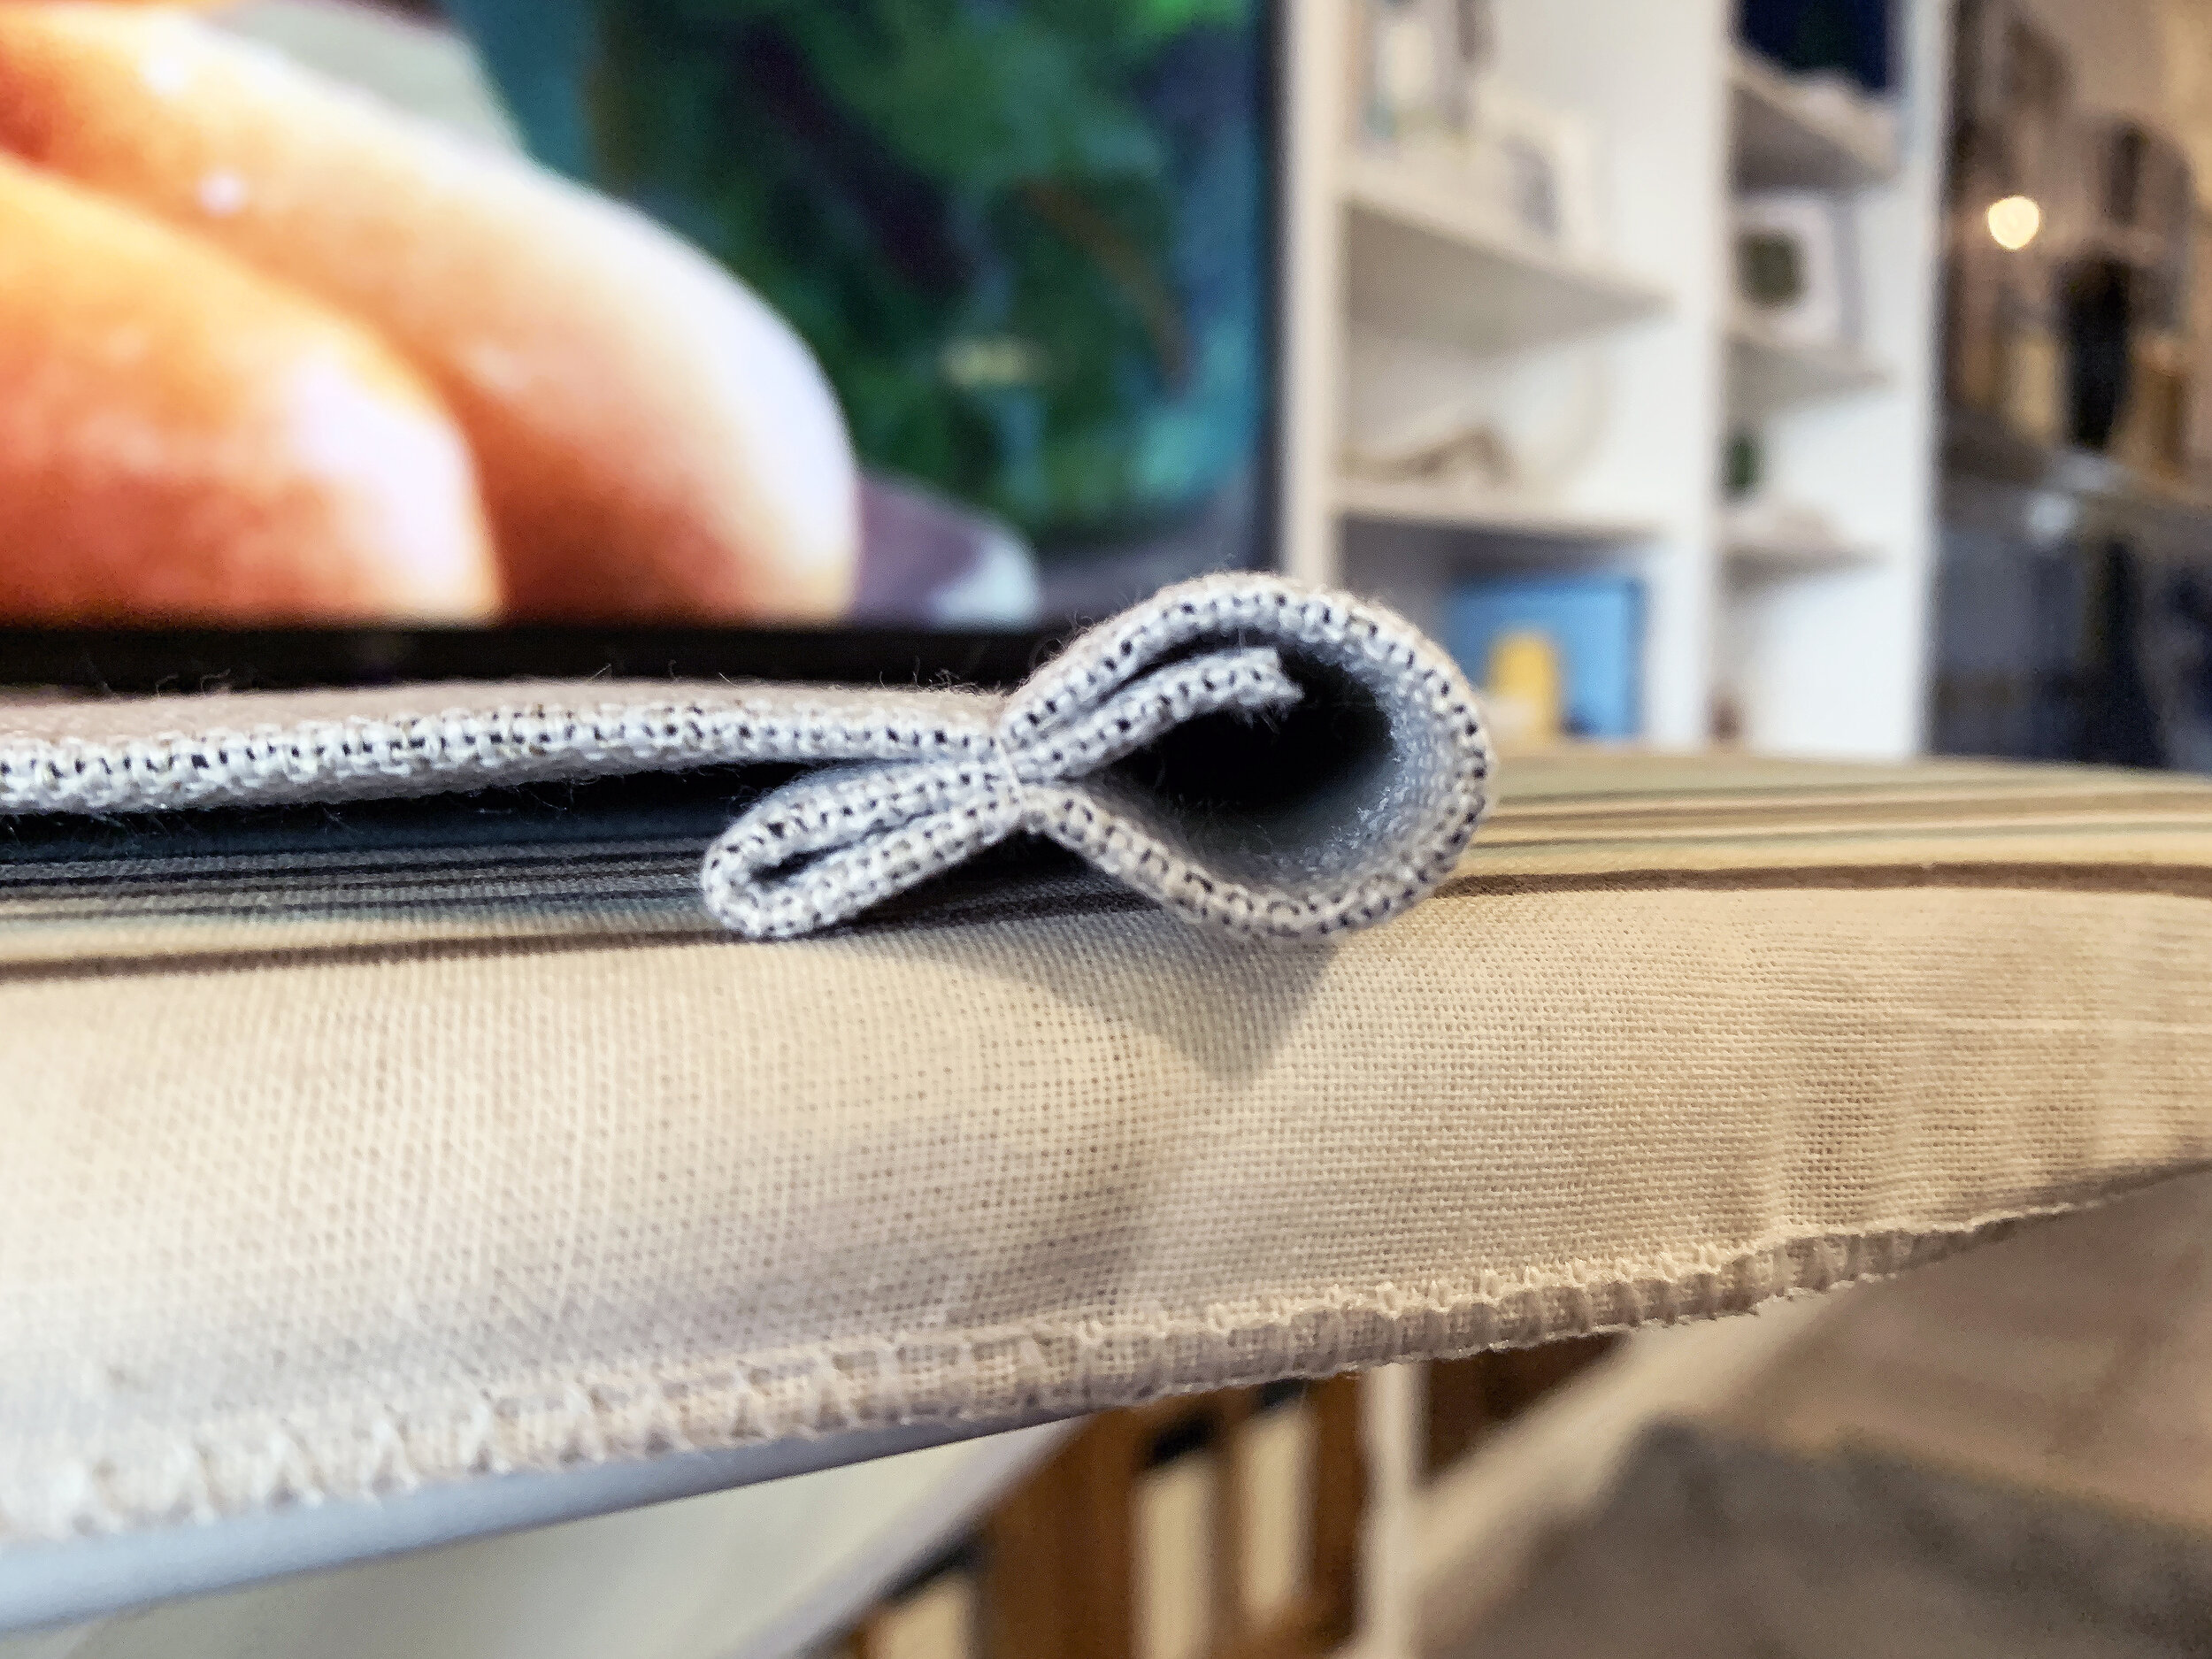
After each side was sewn I did the top edge, following the same 1/2” length for the first fold and 1” for the second fold just like the edges, and pressed the fold with an iron before sewing.
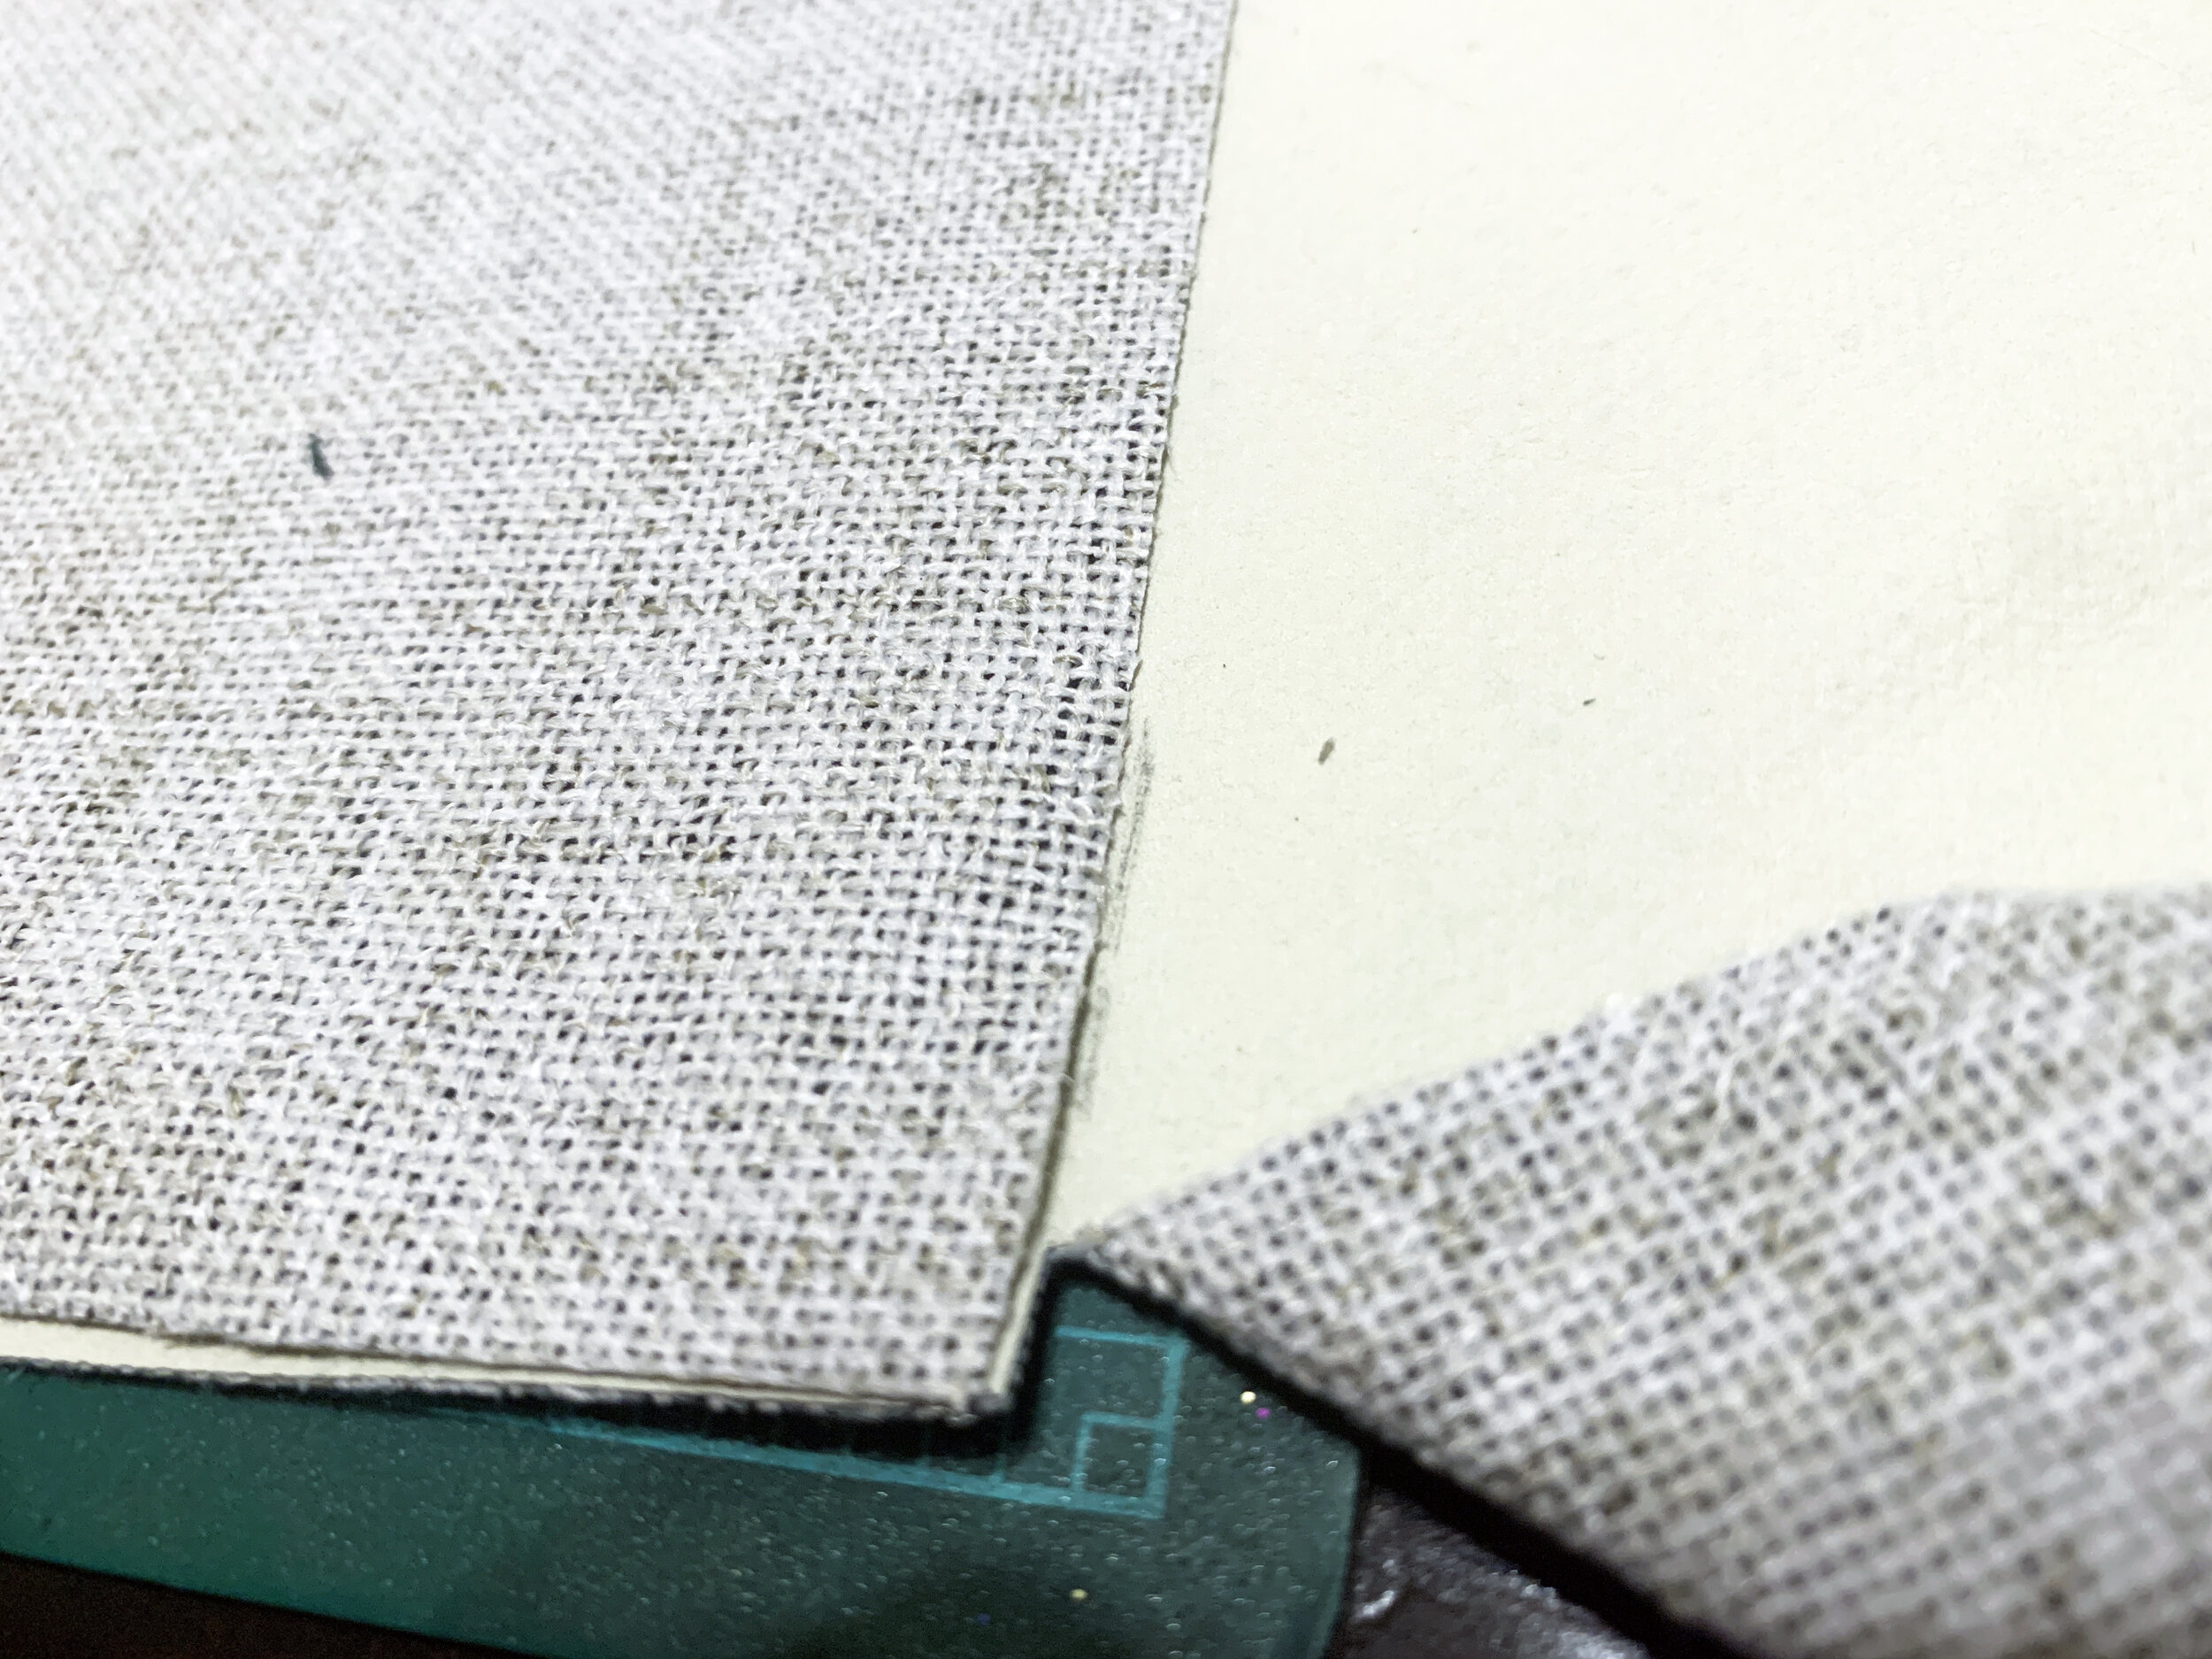
Here’s what the top folds look like from the side before sewing:
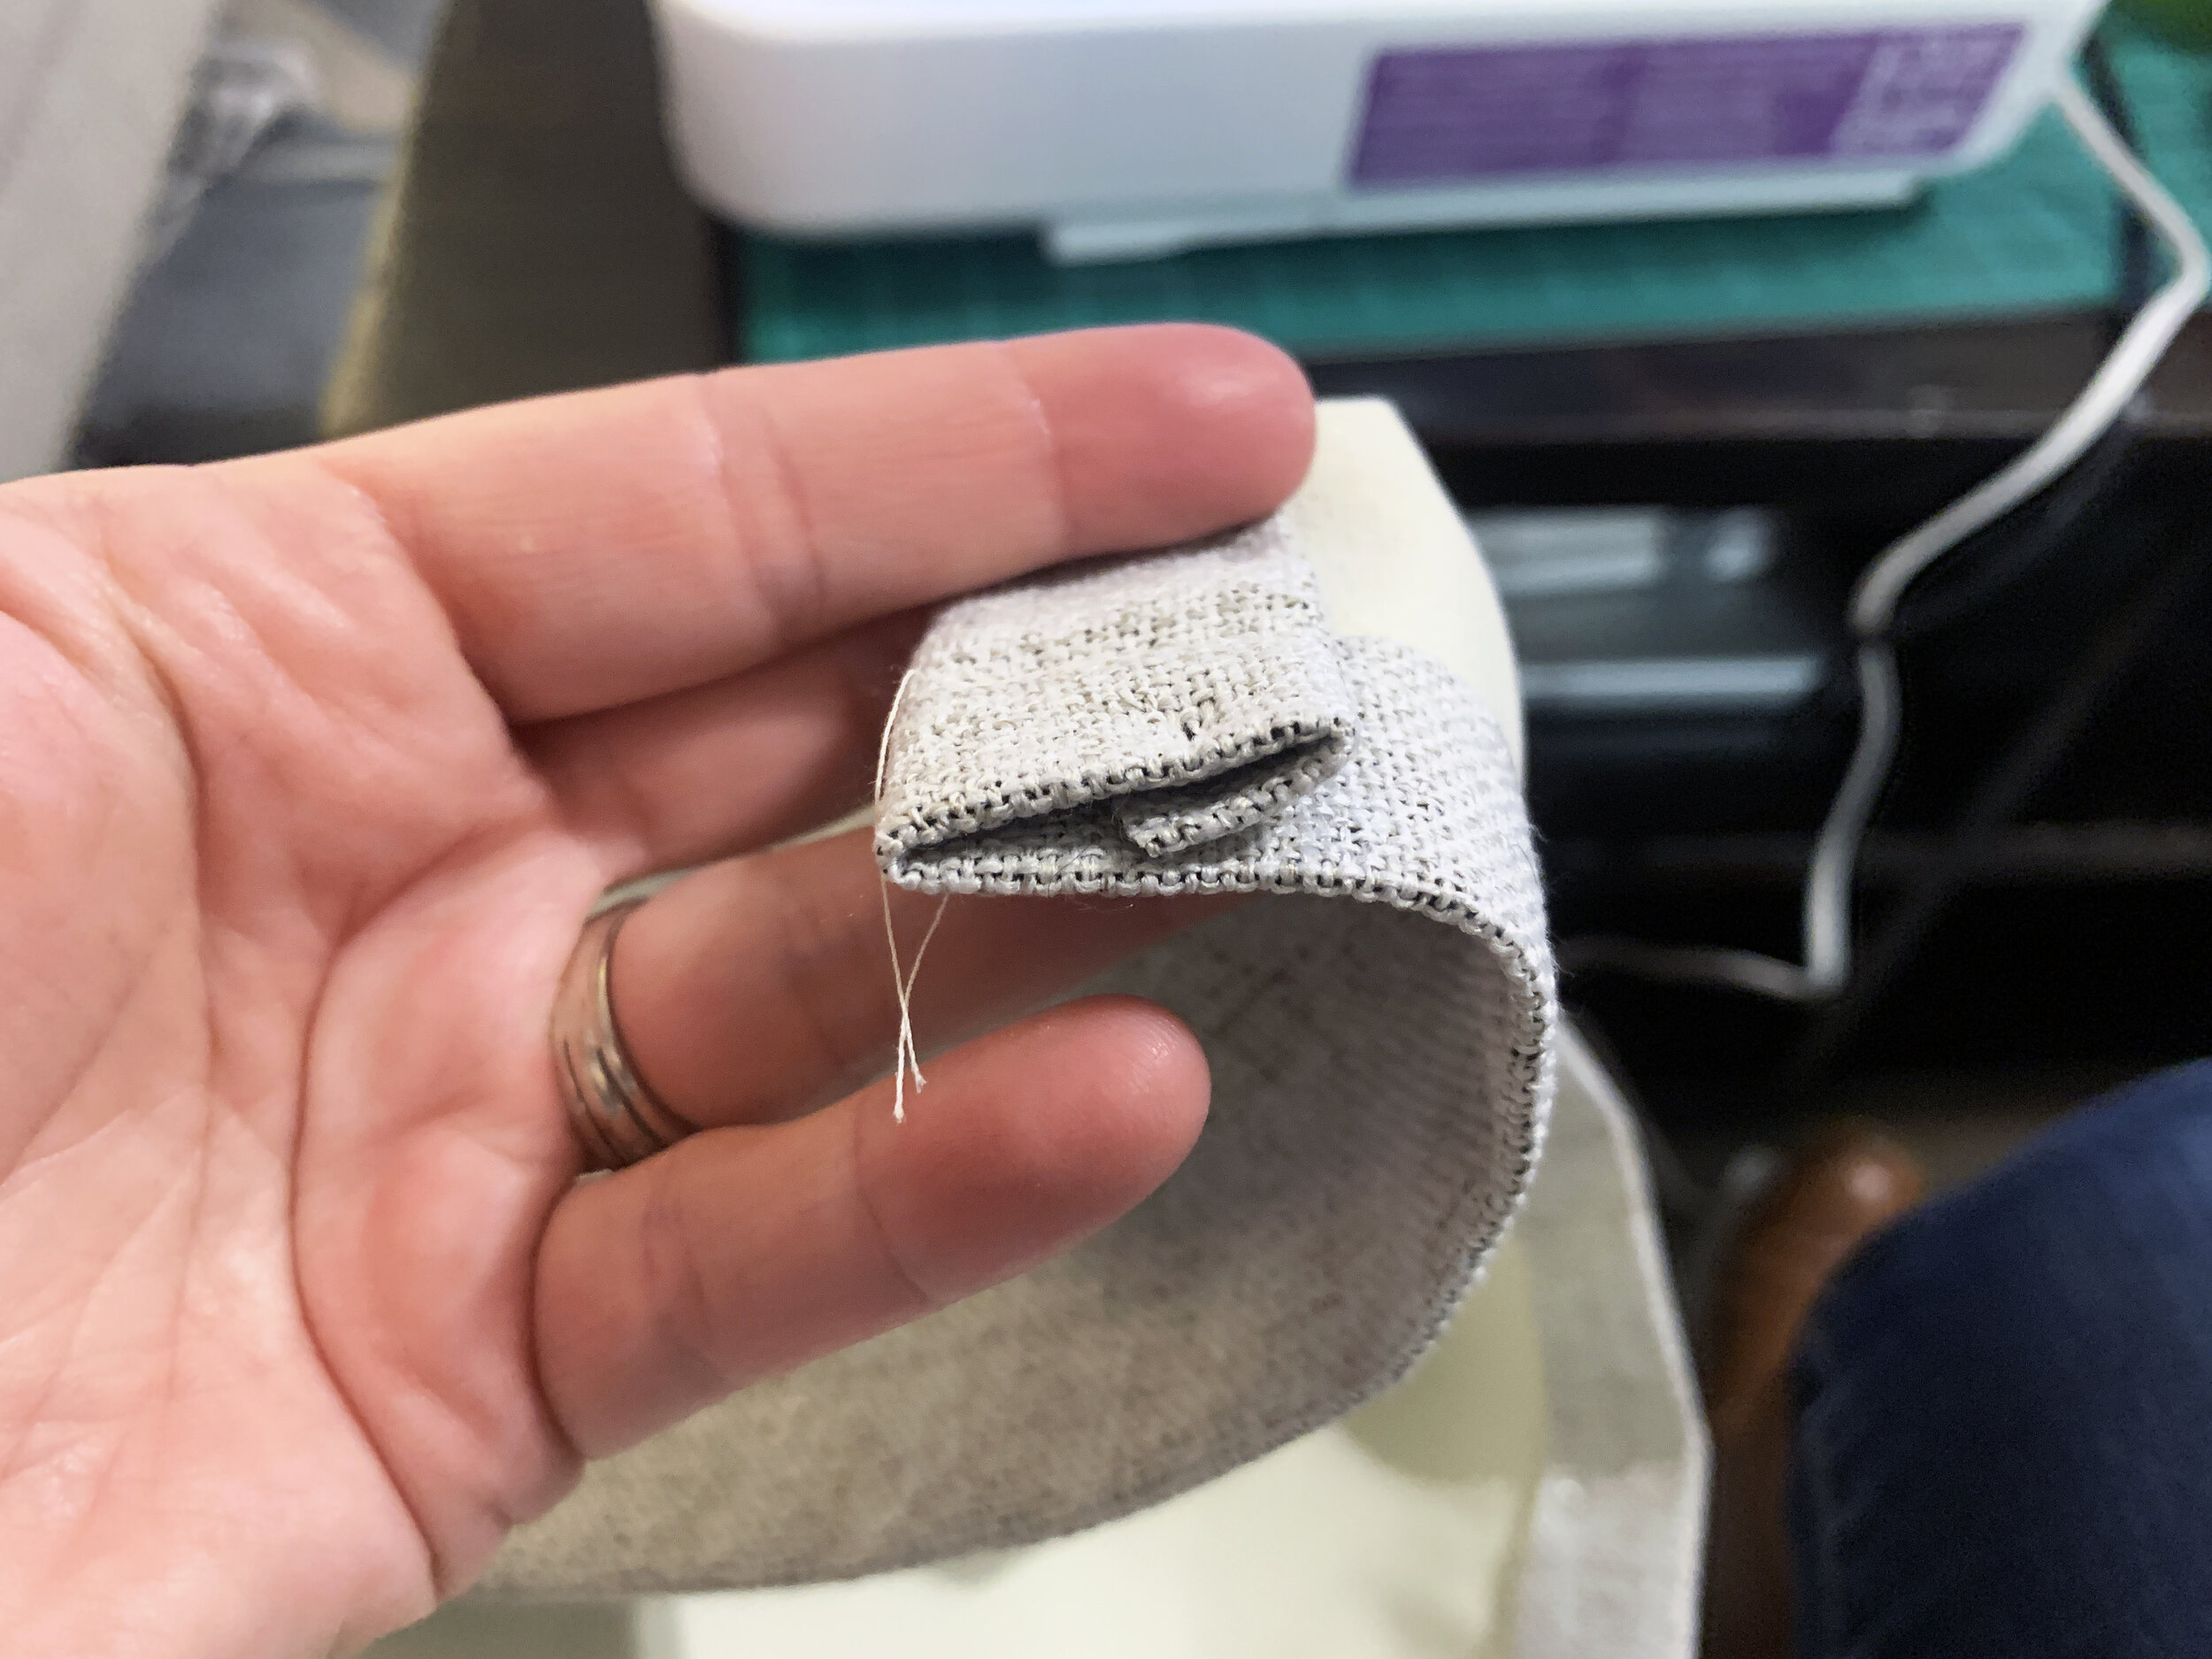
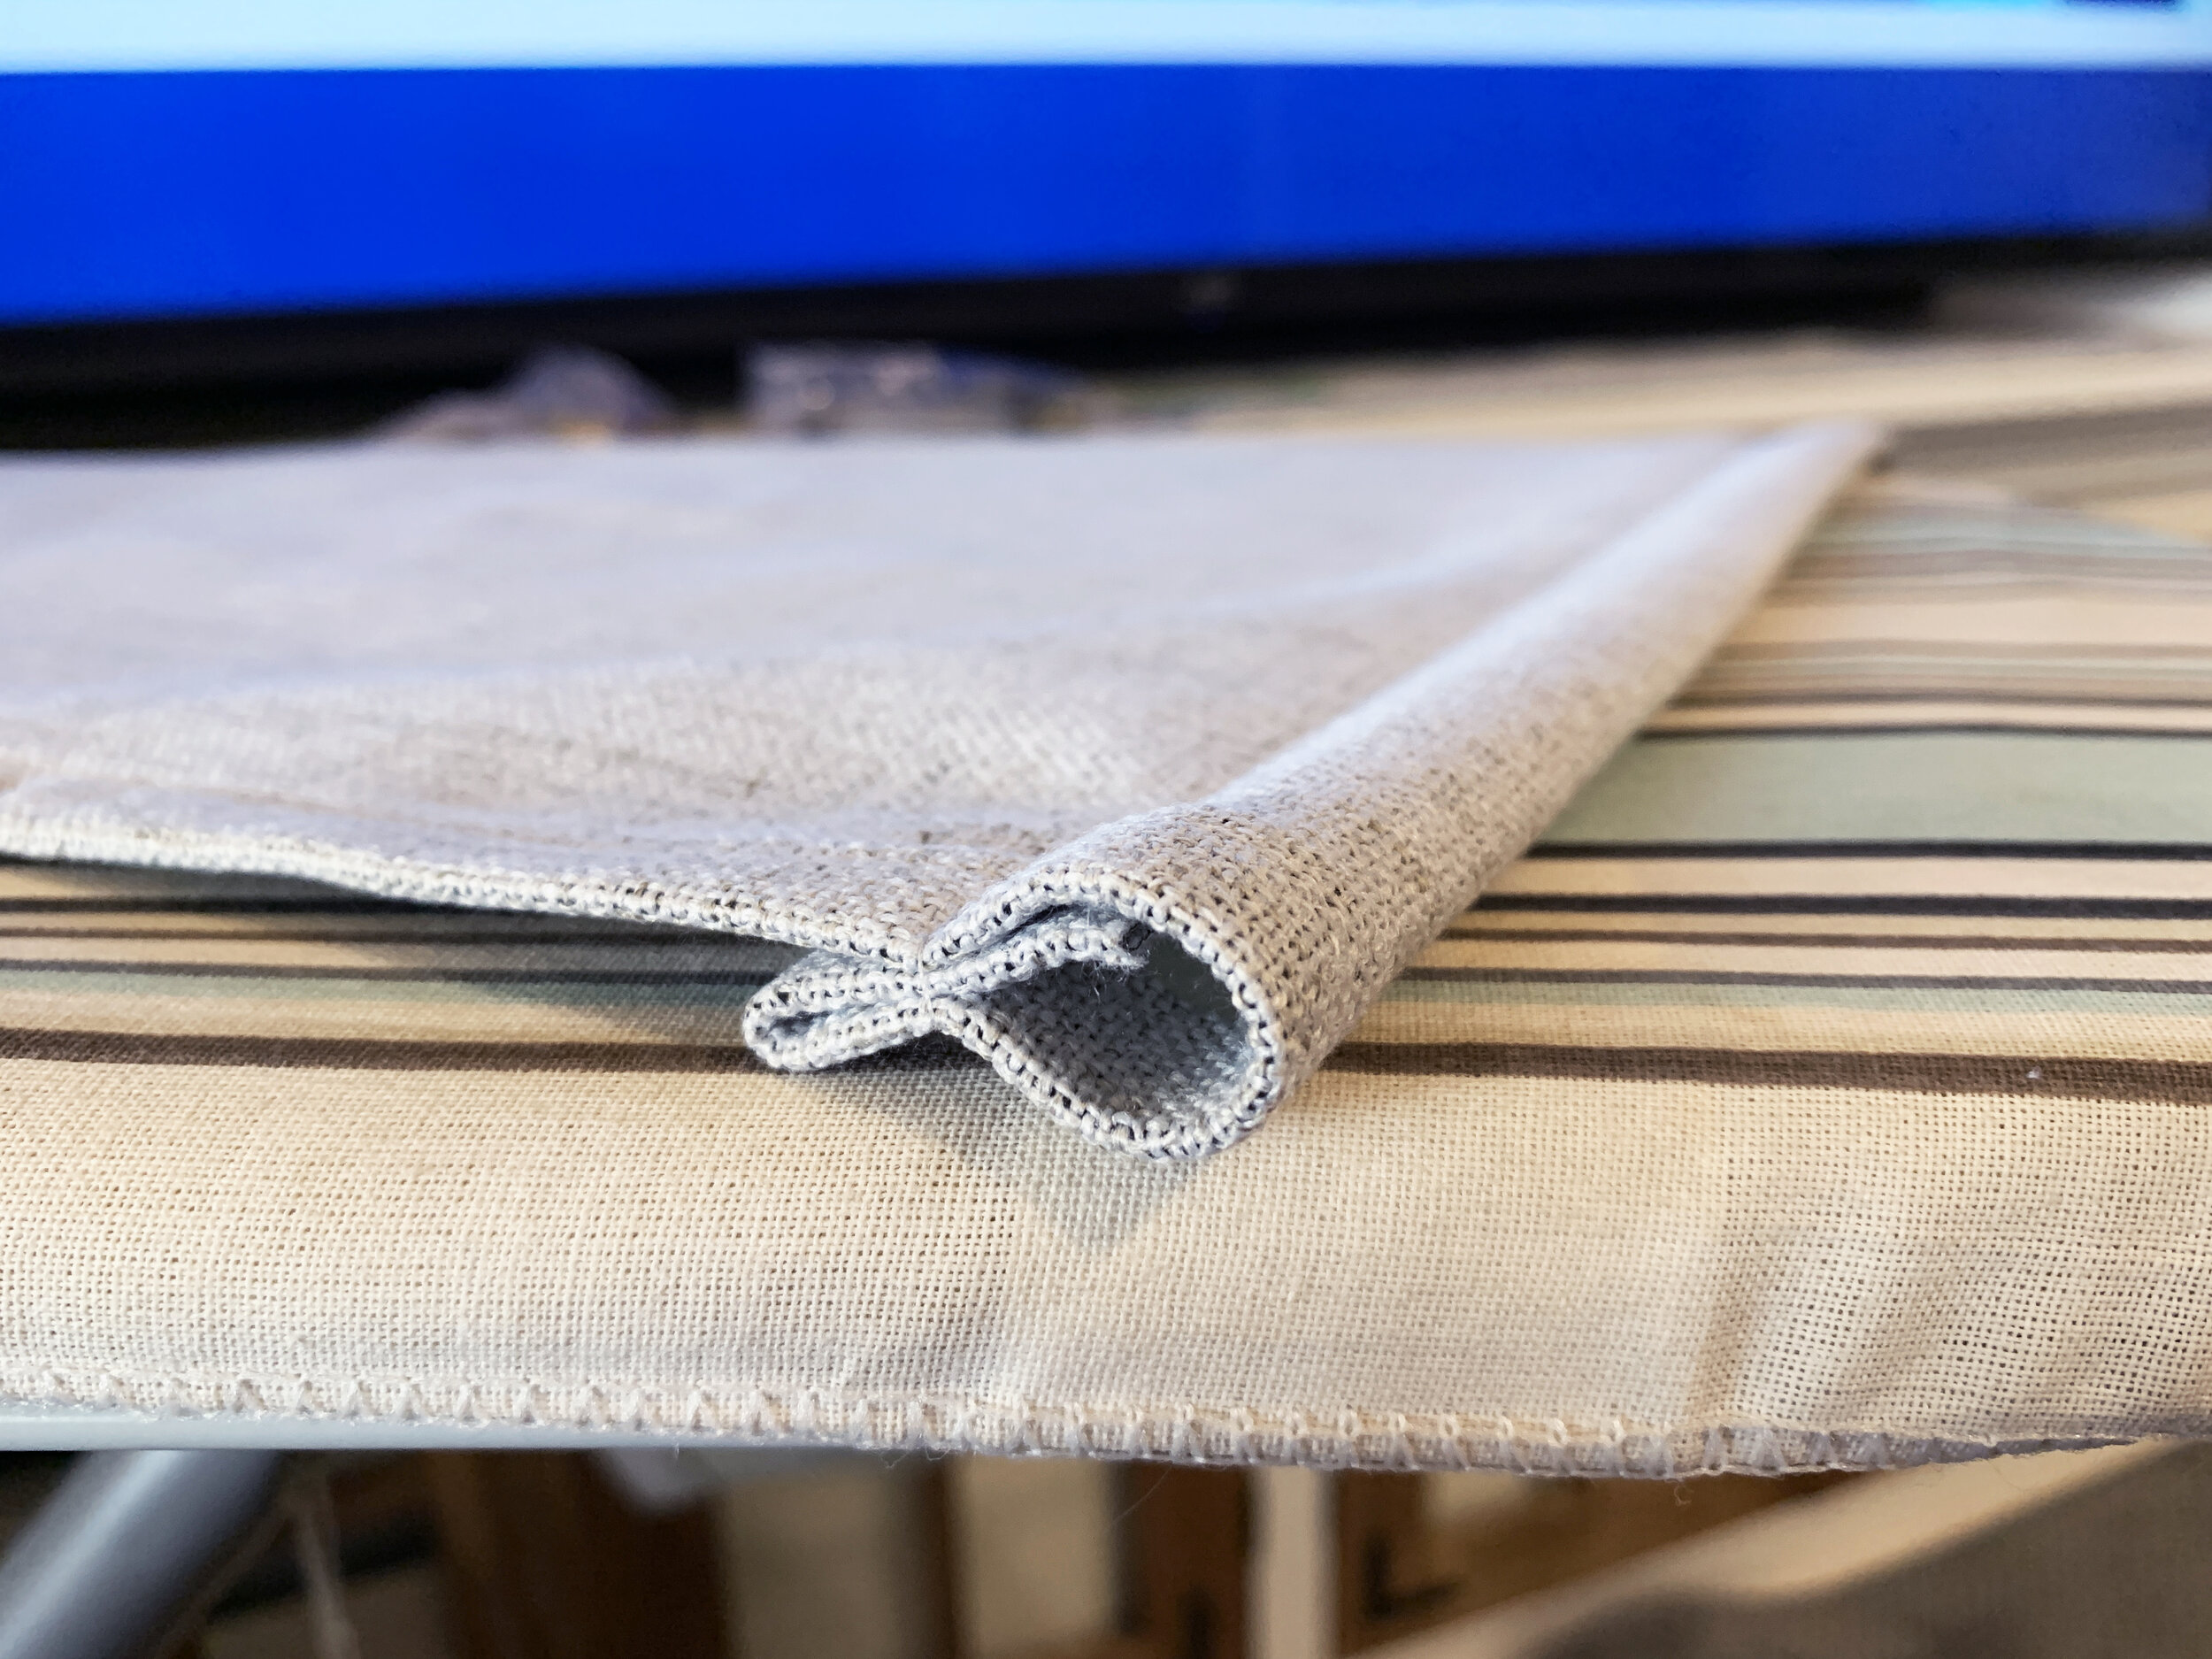
Making the dowel rod pocket
As with the previous edges, I used two folds to make the rod pocket. The first fold was 1” and the second was 1.5”.

Adding the Velcro
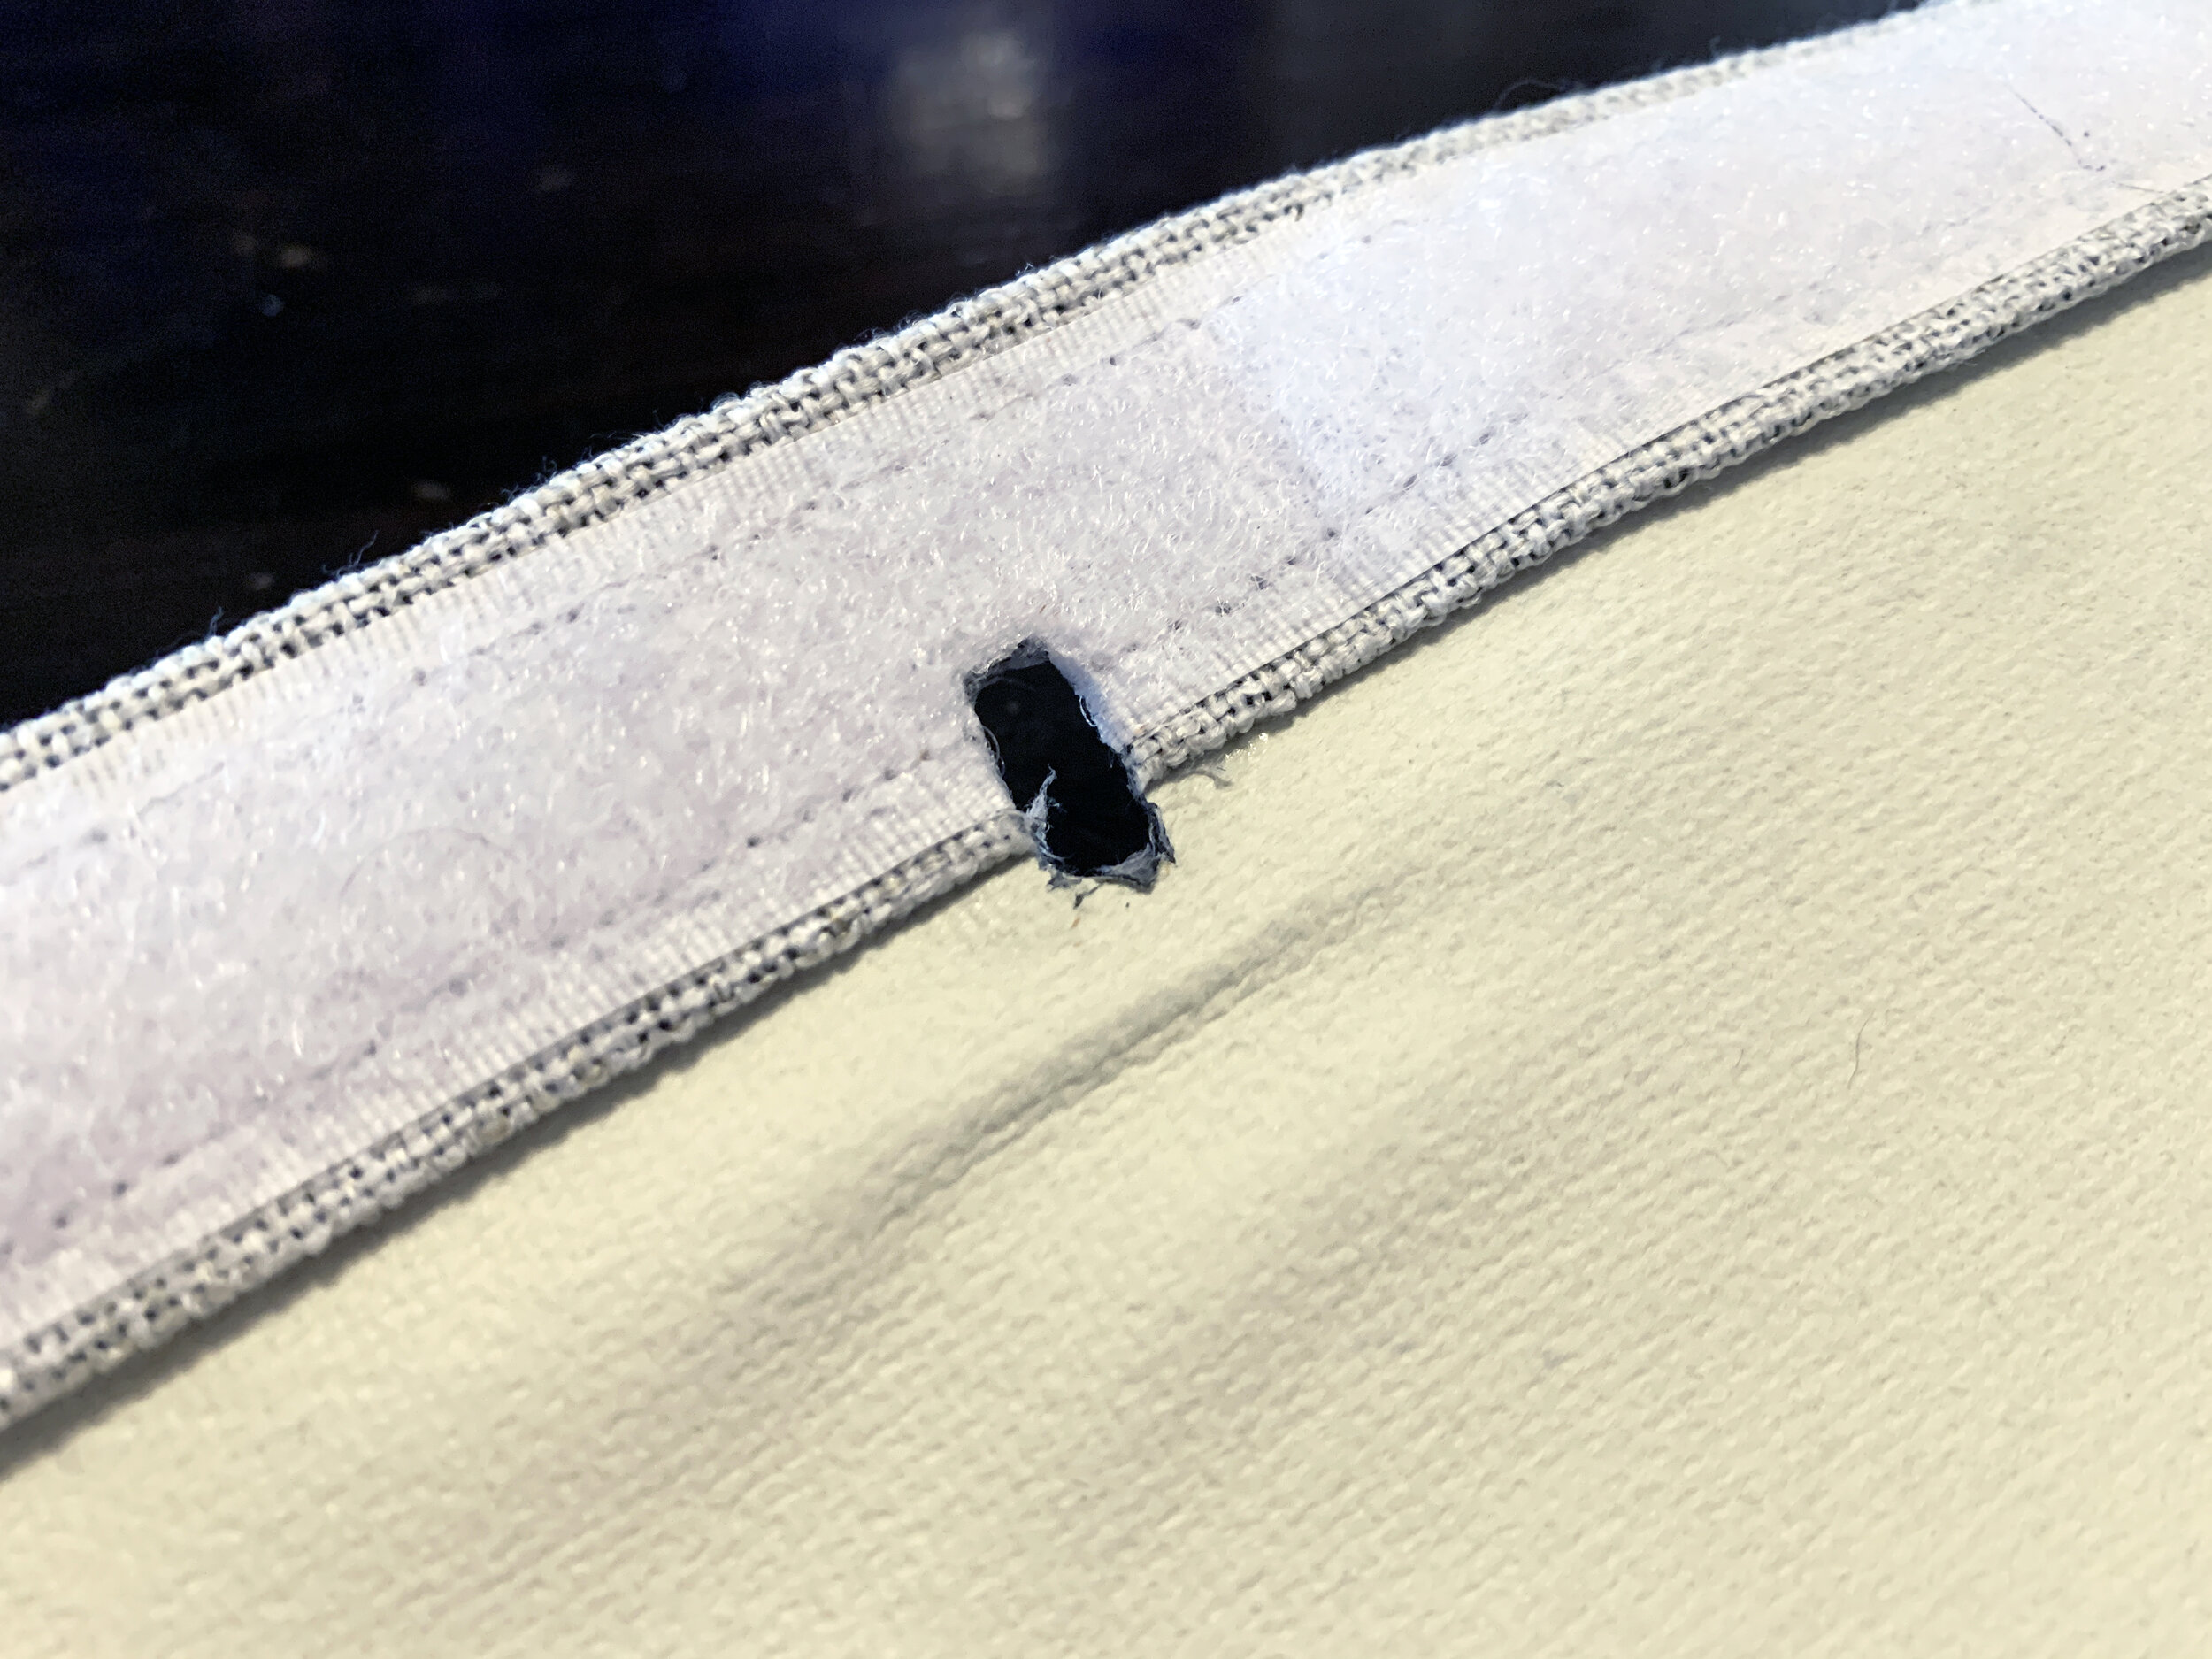
Here you could either apply three pieces of Velcro per panel, leaving two small, roughly 1/2” gaps where you want the leather tabs to be, or you could do what we did and sew one full Velcro strip to the top fold and then carefully use an X-acto knife to cut the Velcro and two layers of folded fabric on the back out so there’s only one thin layer of fabric around the metal clasp so the clasps turn easily. In other words, with the particular brass clasps we used, thin fabric is good for easier operation.
Important
As we found out upon install (and why we had to cut layers out with an X-acto knife), if the fabric/Velcro layers are too thick around the clasp, it makes them really hard to turn, which doesn’t feel great on your fingertips x the 24 clasps we have in our camper.

Cutting the sewable Velcro strip slightly shorter than the width of the finished curtain panel, I sewed the Velcro to the back of the top fold around all sides to lock it in place. I also found it helpful to label the back of each panel with a piece of painters tape to keep all of the panels organized.

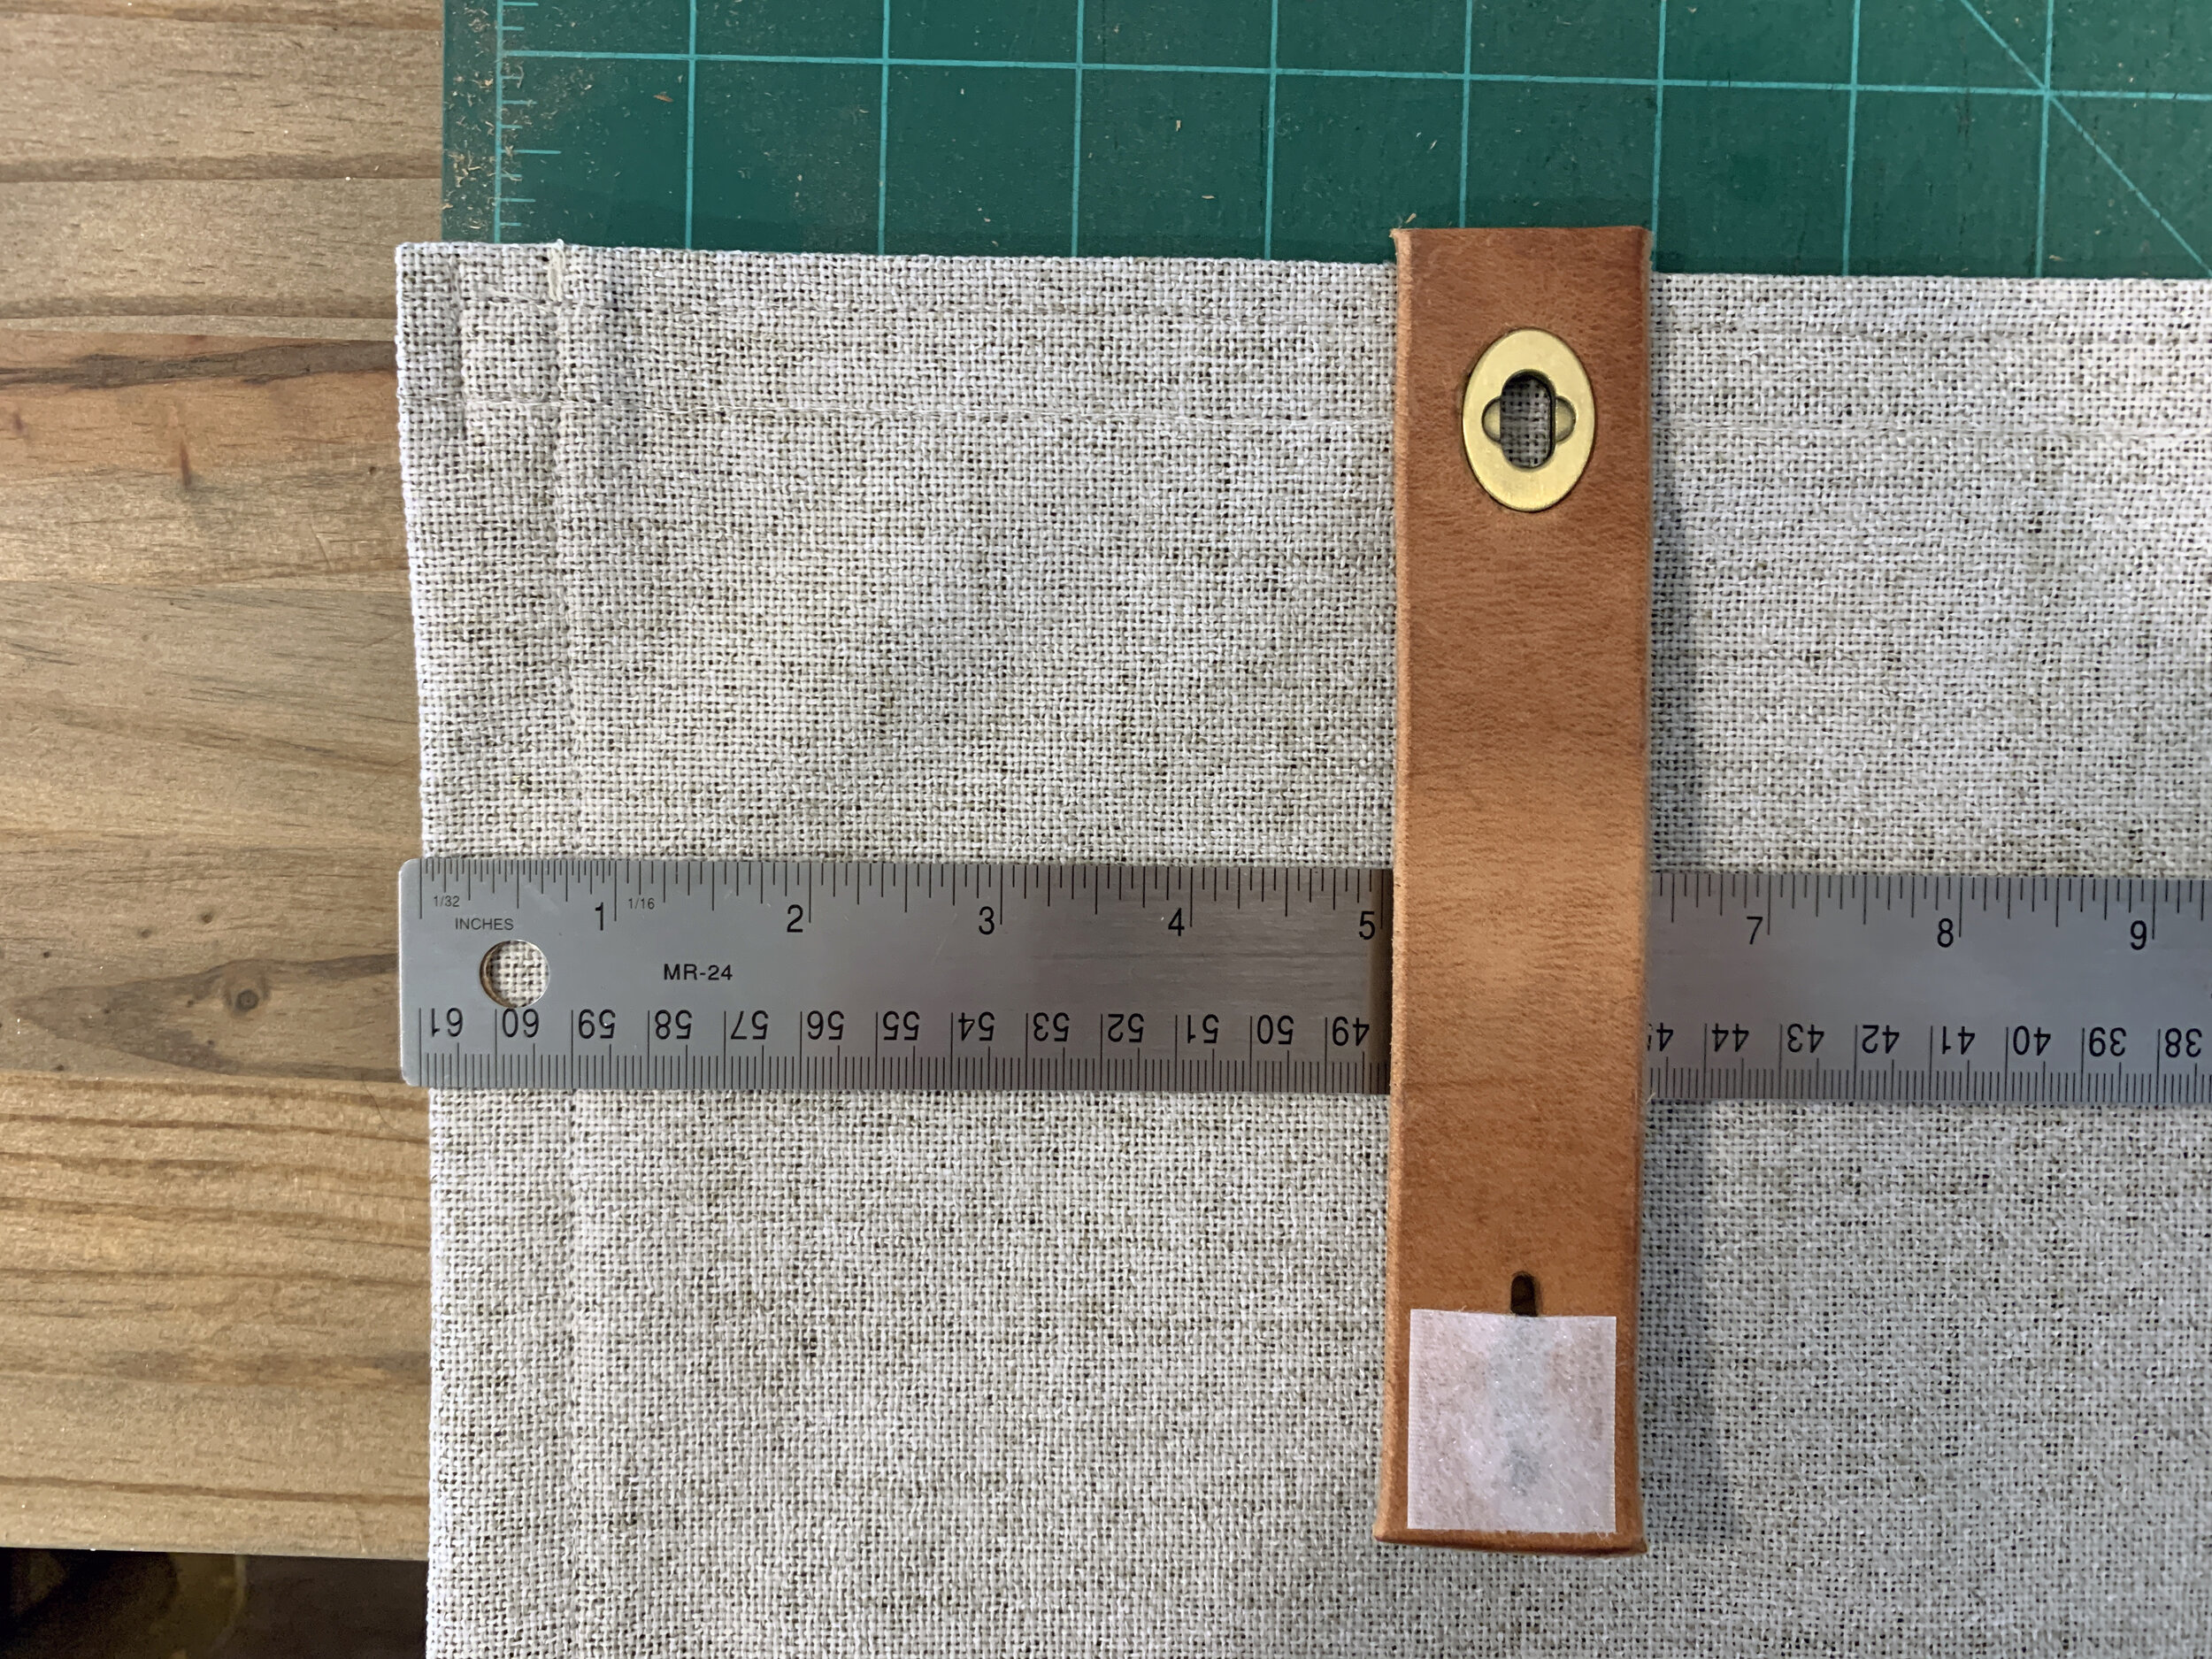
Making the leather tabs
Cutting the leather to length
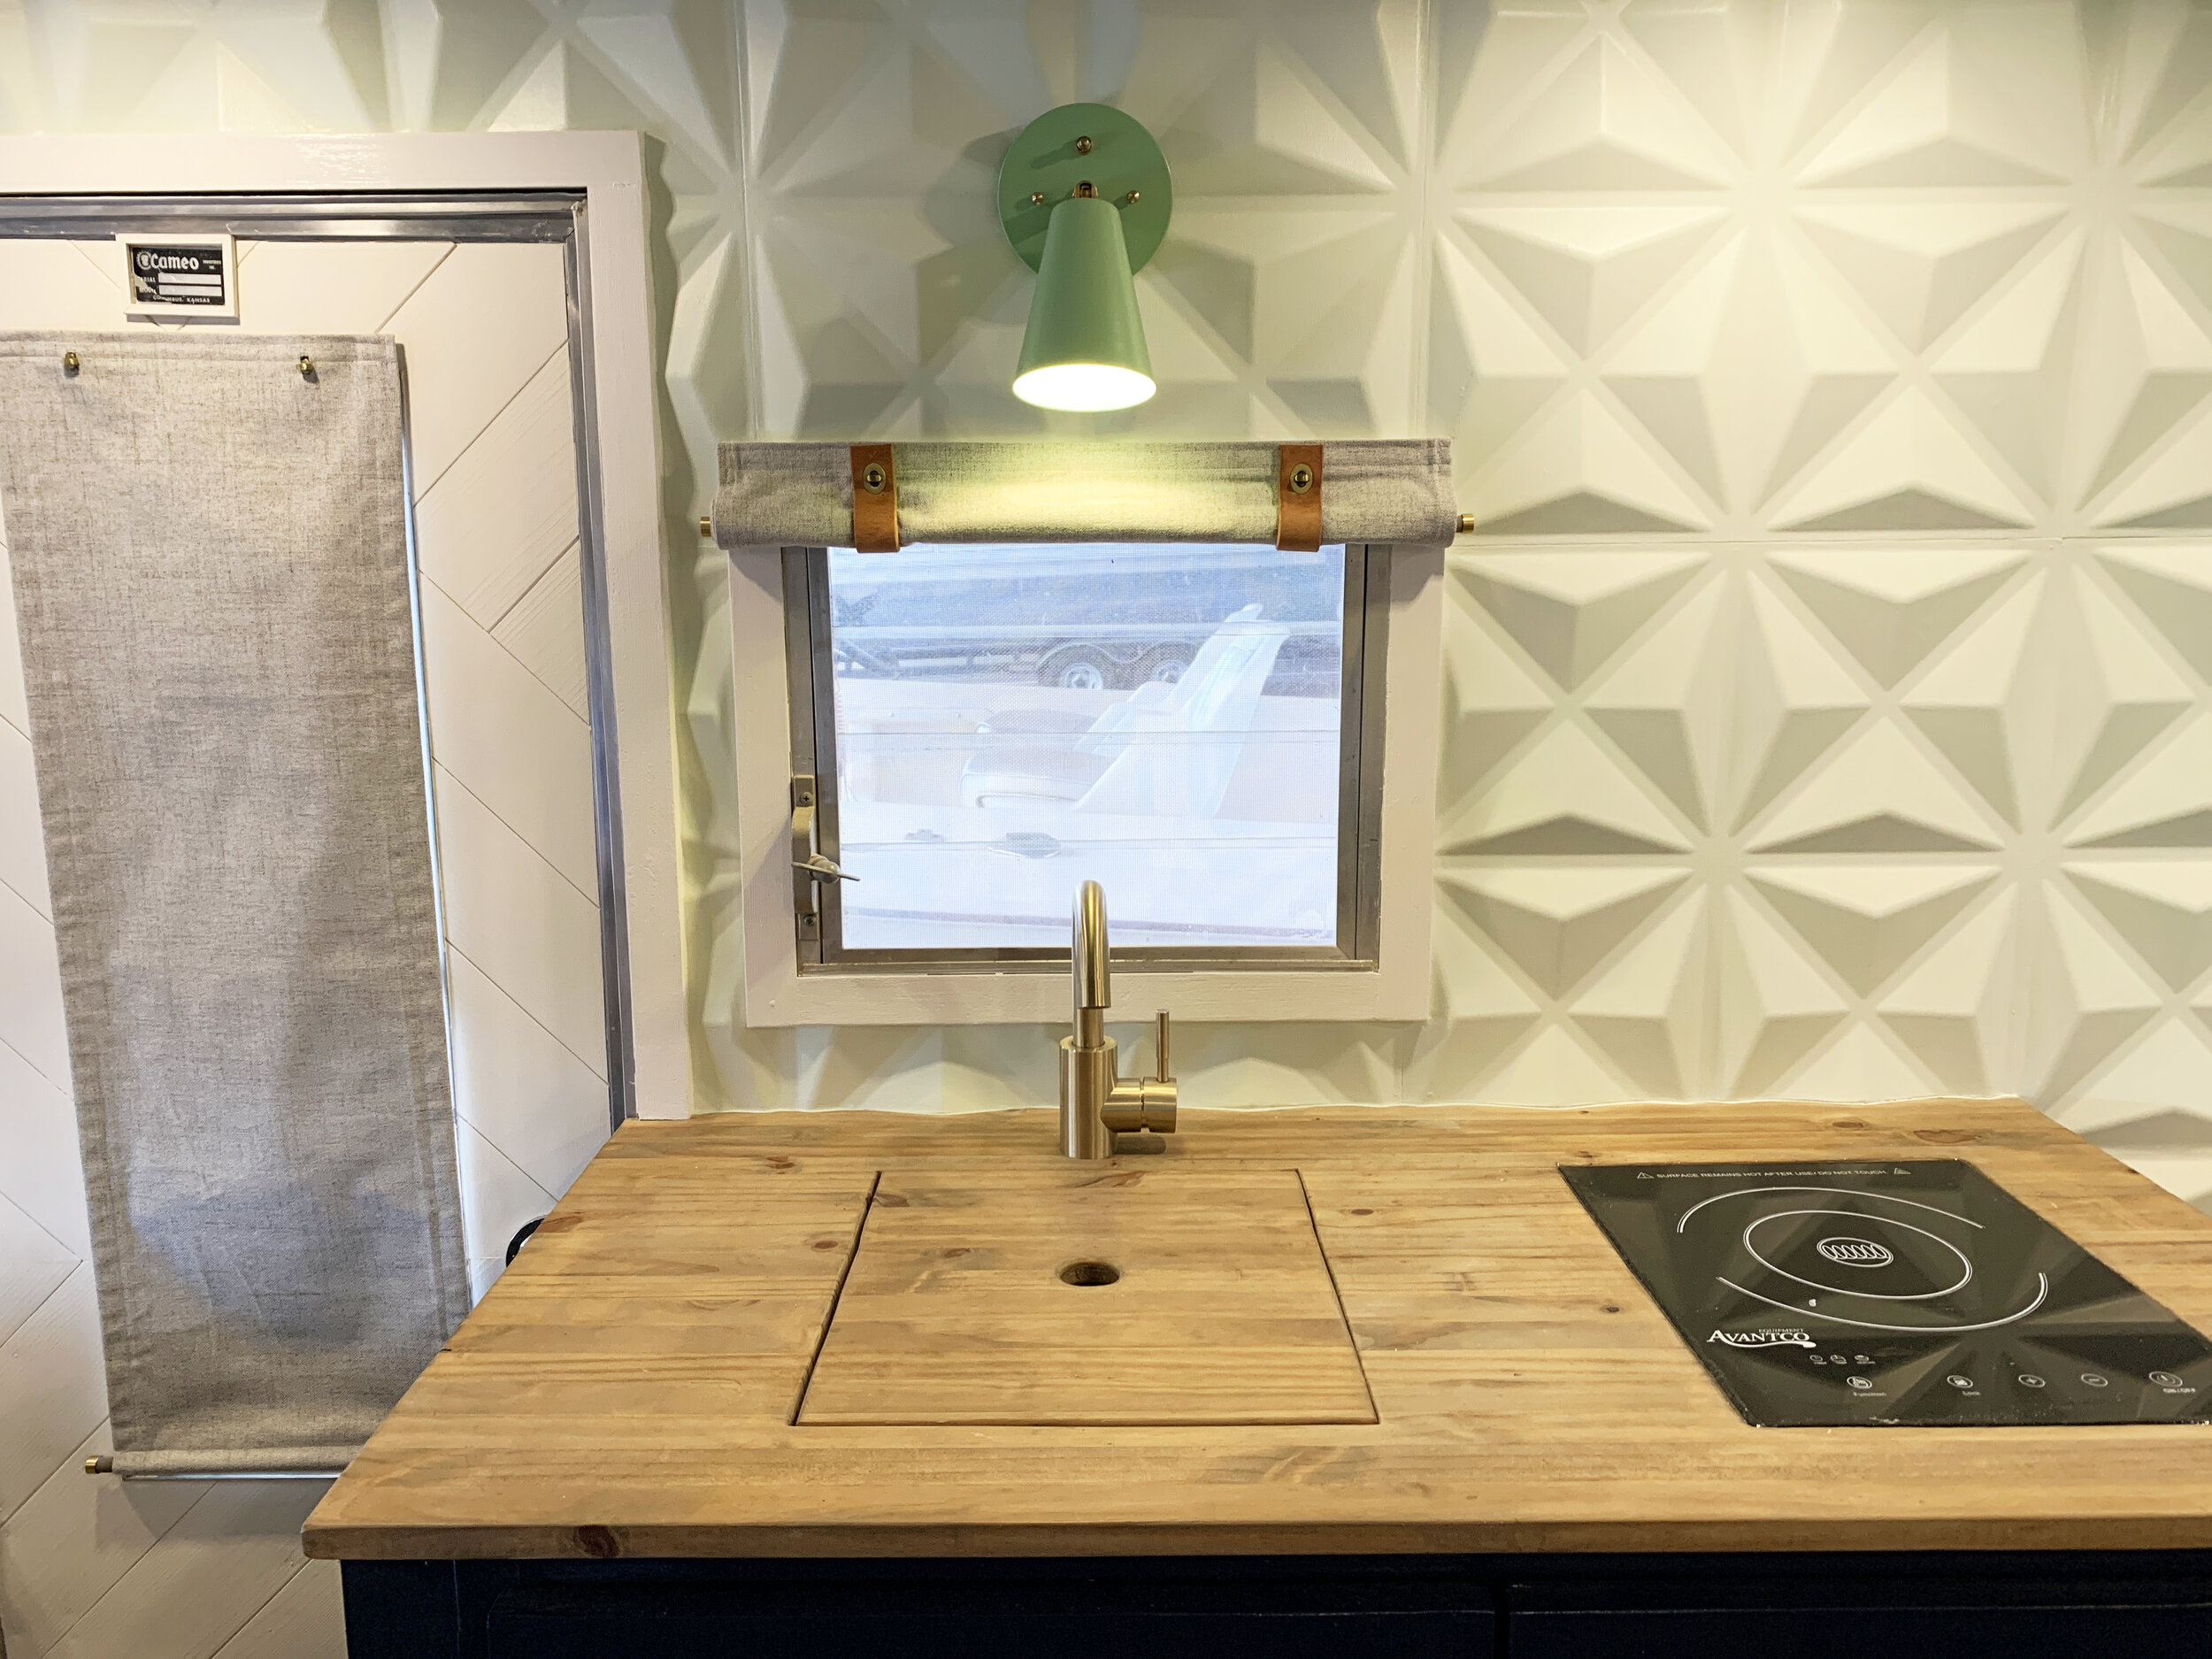
Most of our windows are all pretty short, so each of our leather strips are 6.5” long. For the extra tall (36” long!) door window curtain, we needed longer leather tabs to make it around the thicker fabric roll, at 9” long.

Adding the brass clasps
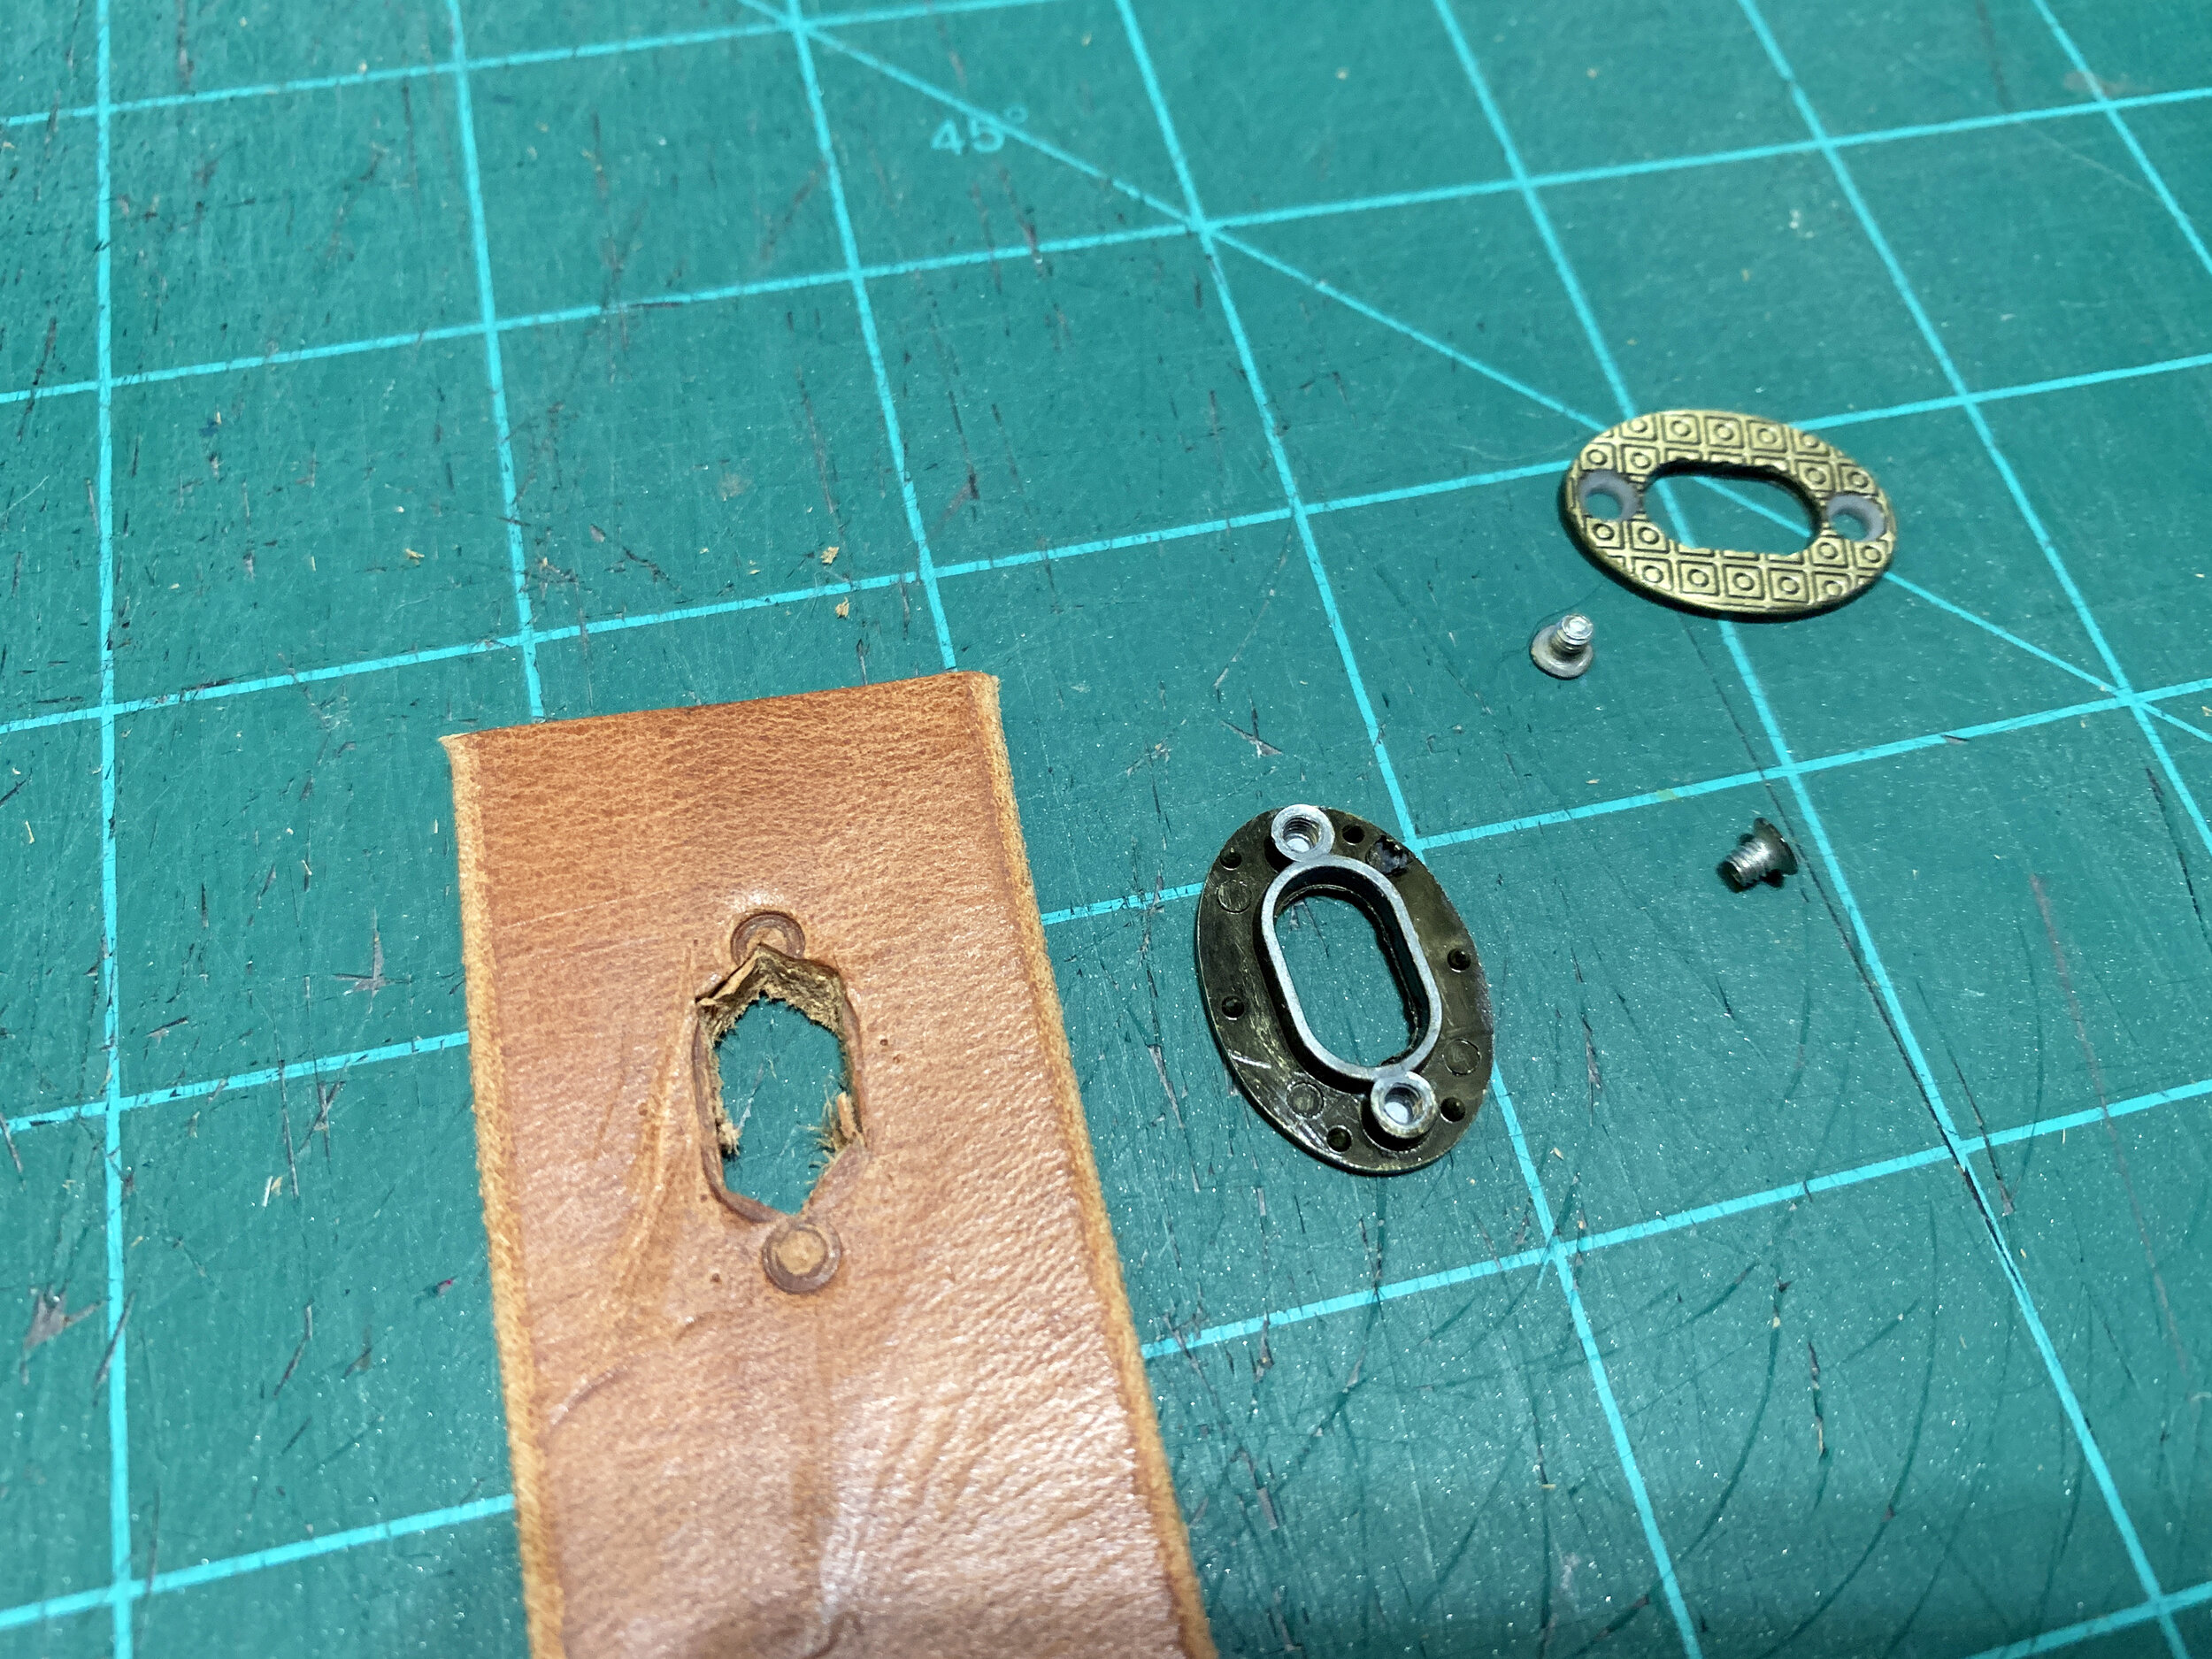
First, I separated each clasp into the two main parts – the center turning peg-side and the perimeter oval hole-side – as well as used our small screwdriver to then take apart the front and back of the hole-side of the clasp. (The hole-side of the clasp separates and sandwiches on the top and bottom of the leather for a finished look on the front and back.)
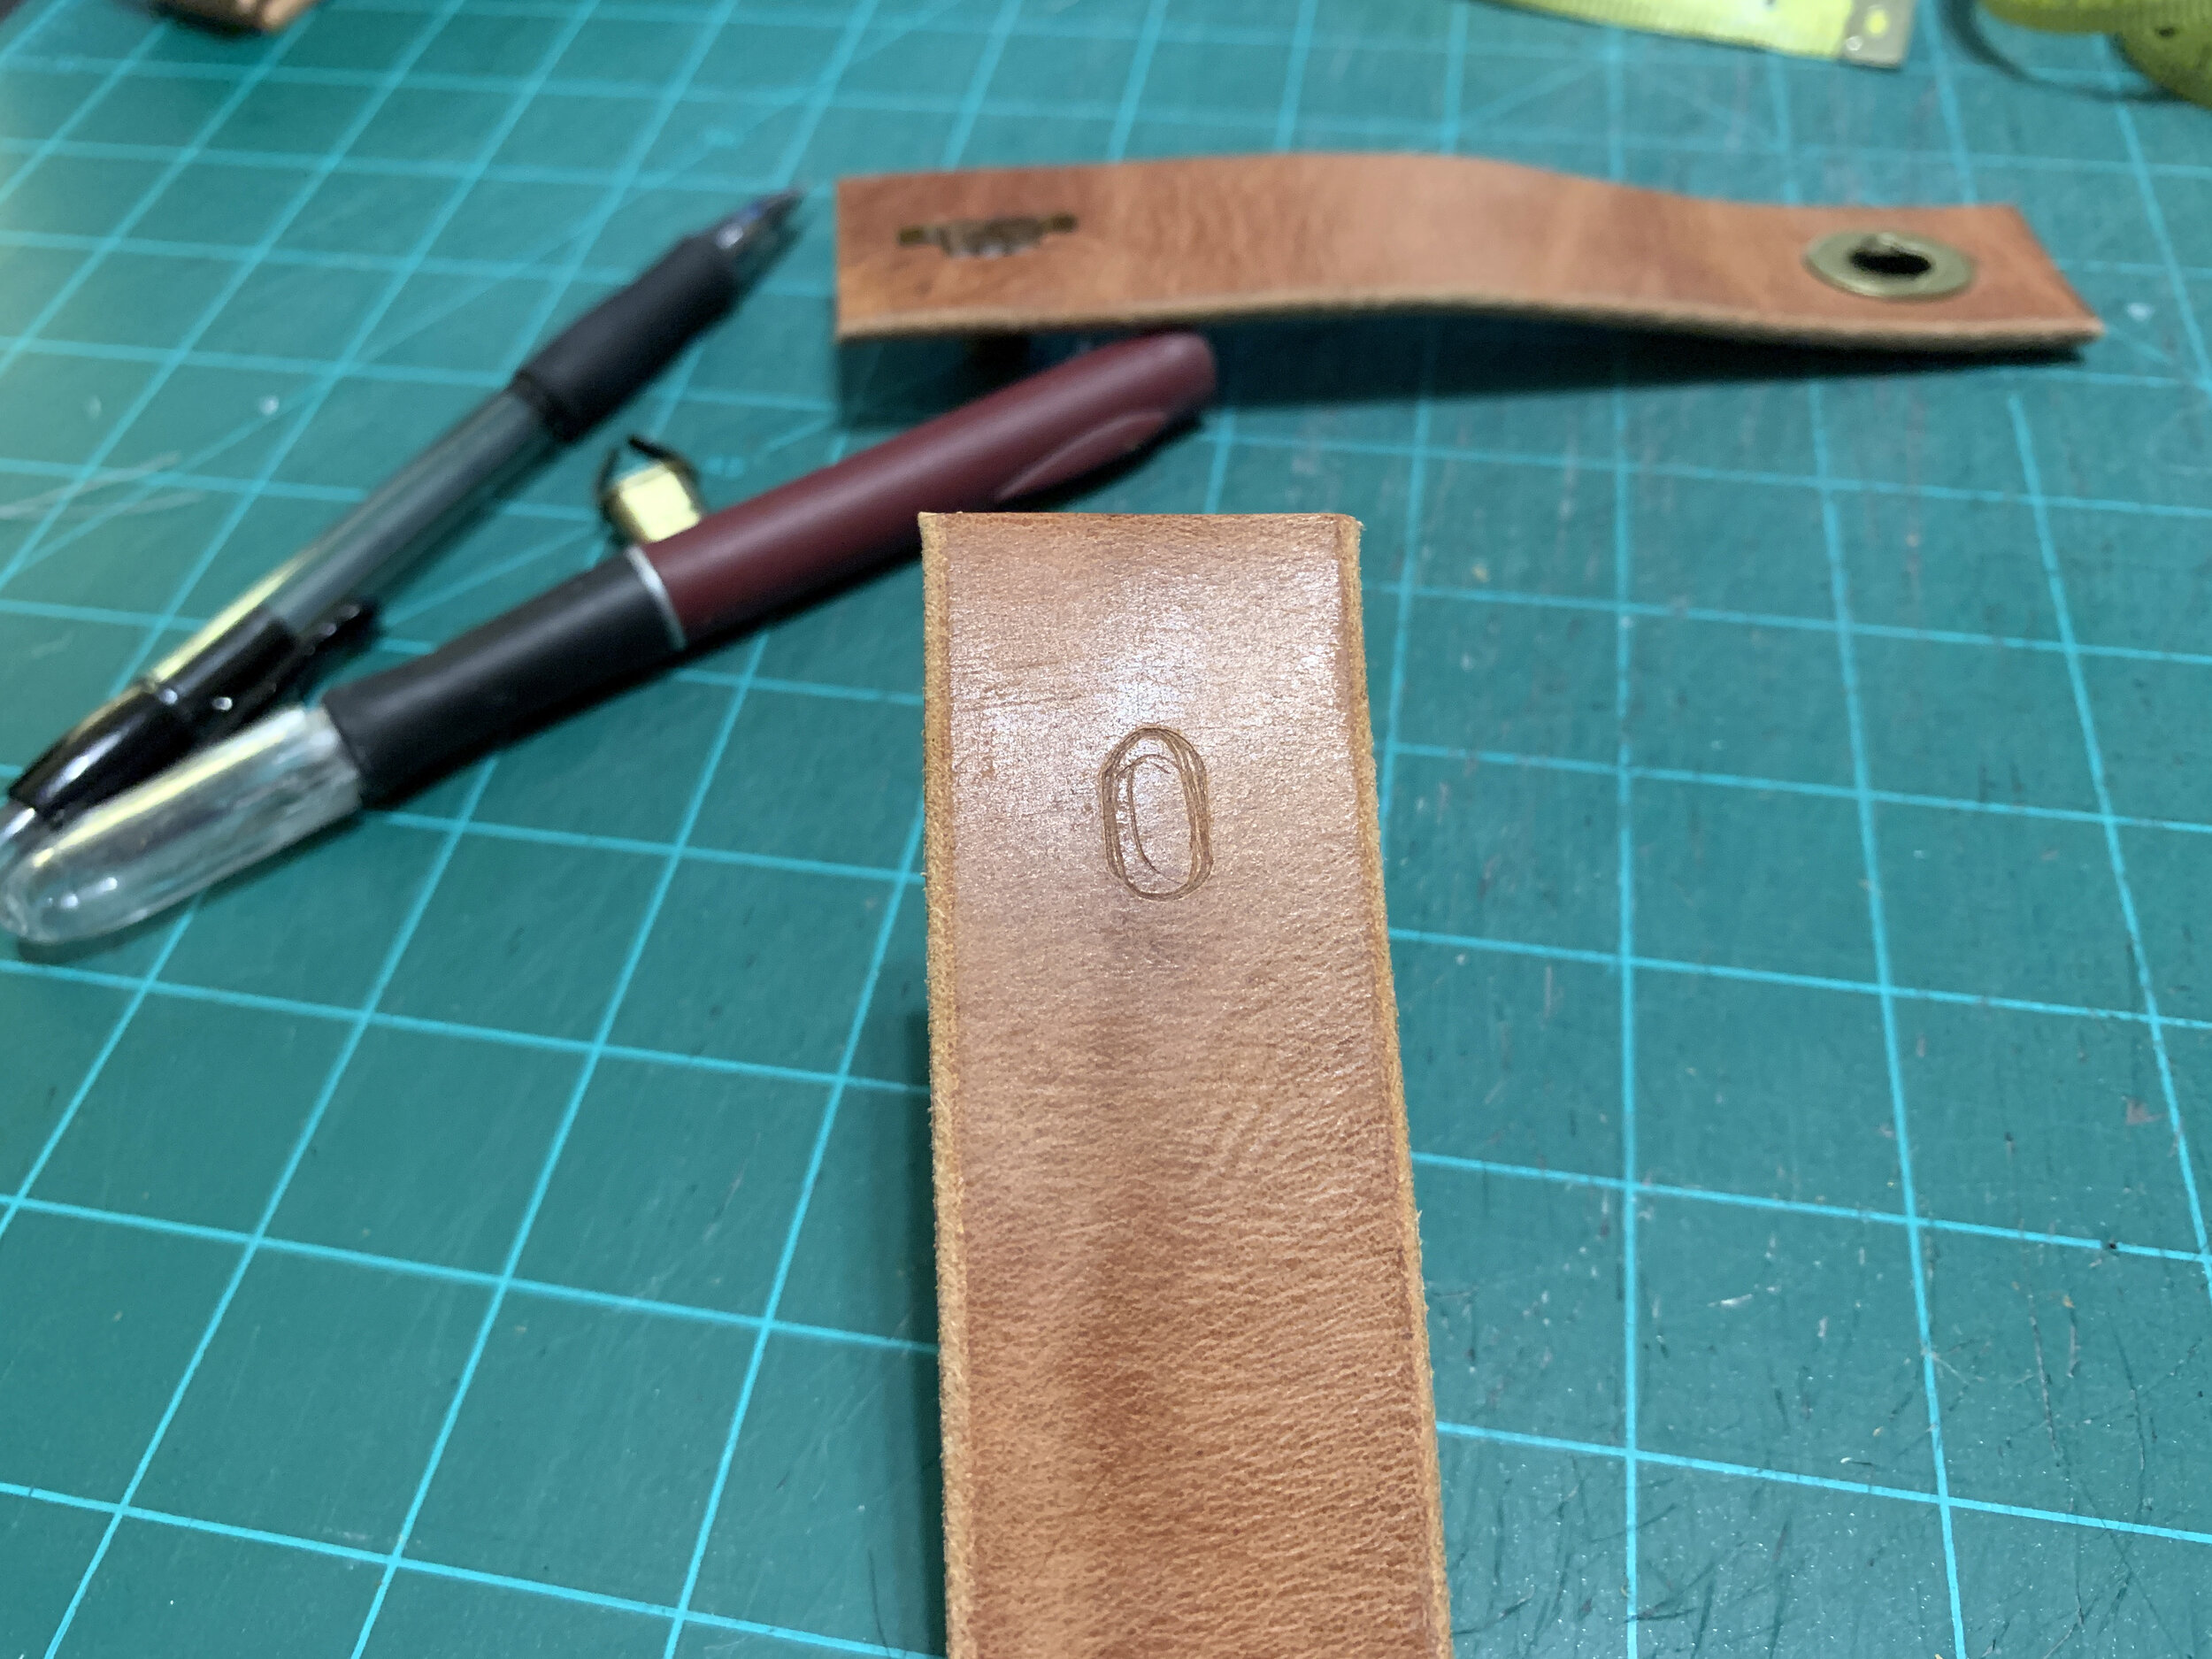
Eyeballing the location on the frontside of the leather strip, I used a pencil to trace the inner oval of the hole side of the clasp onto the finished front side of the leather. Then, I used an X-acto knife to carefully cut the oval out. I used the front brass part of the oval to push an indent into the leather to find where I still needed to expand the hole for the oval hole side of the clasp to fit.
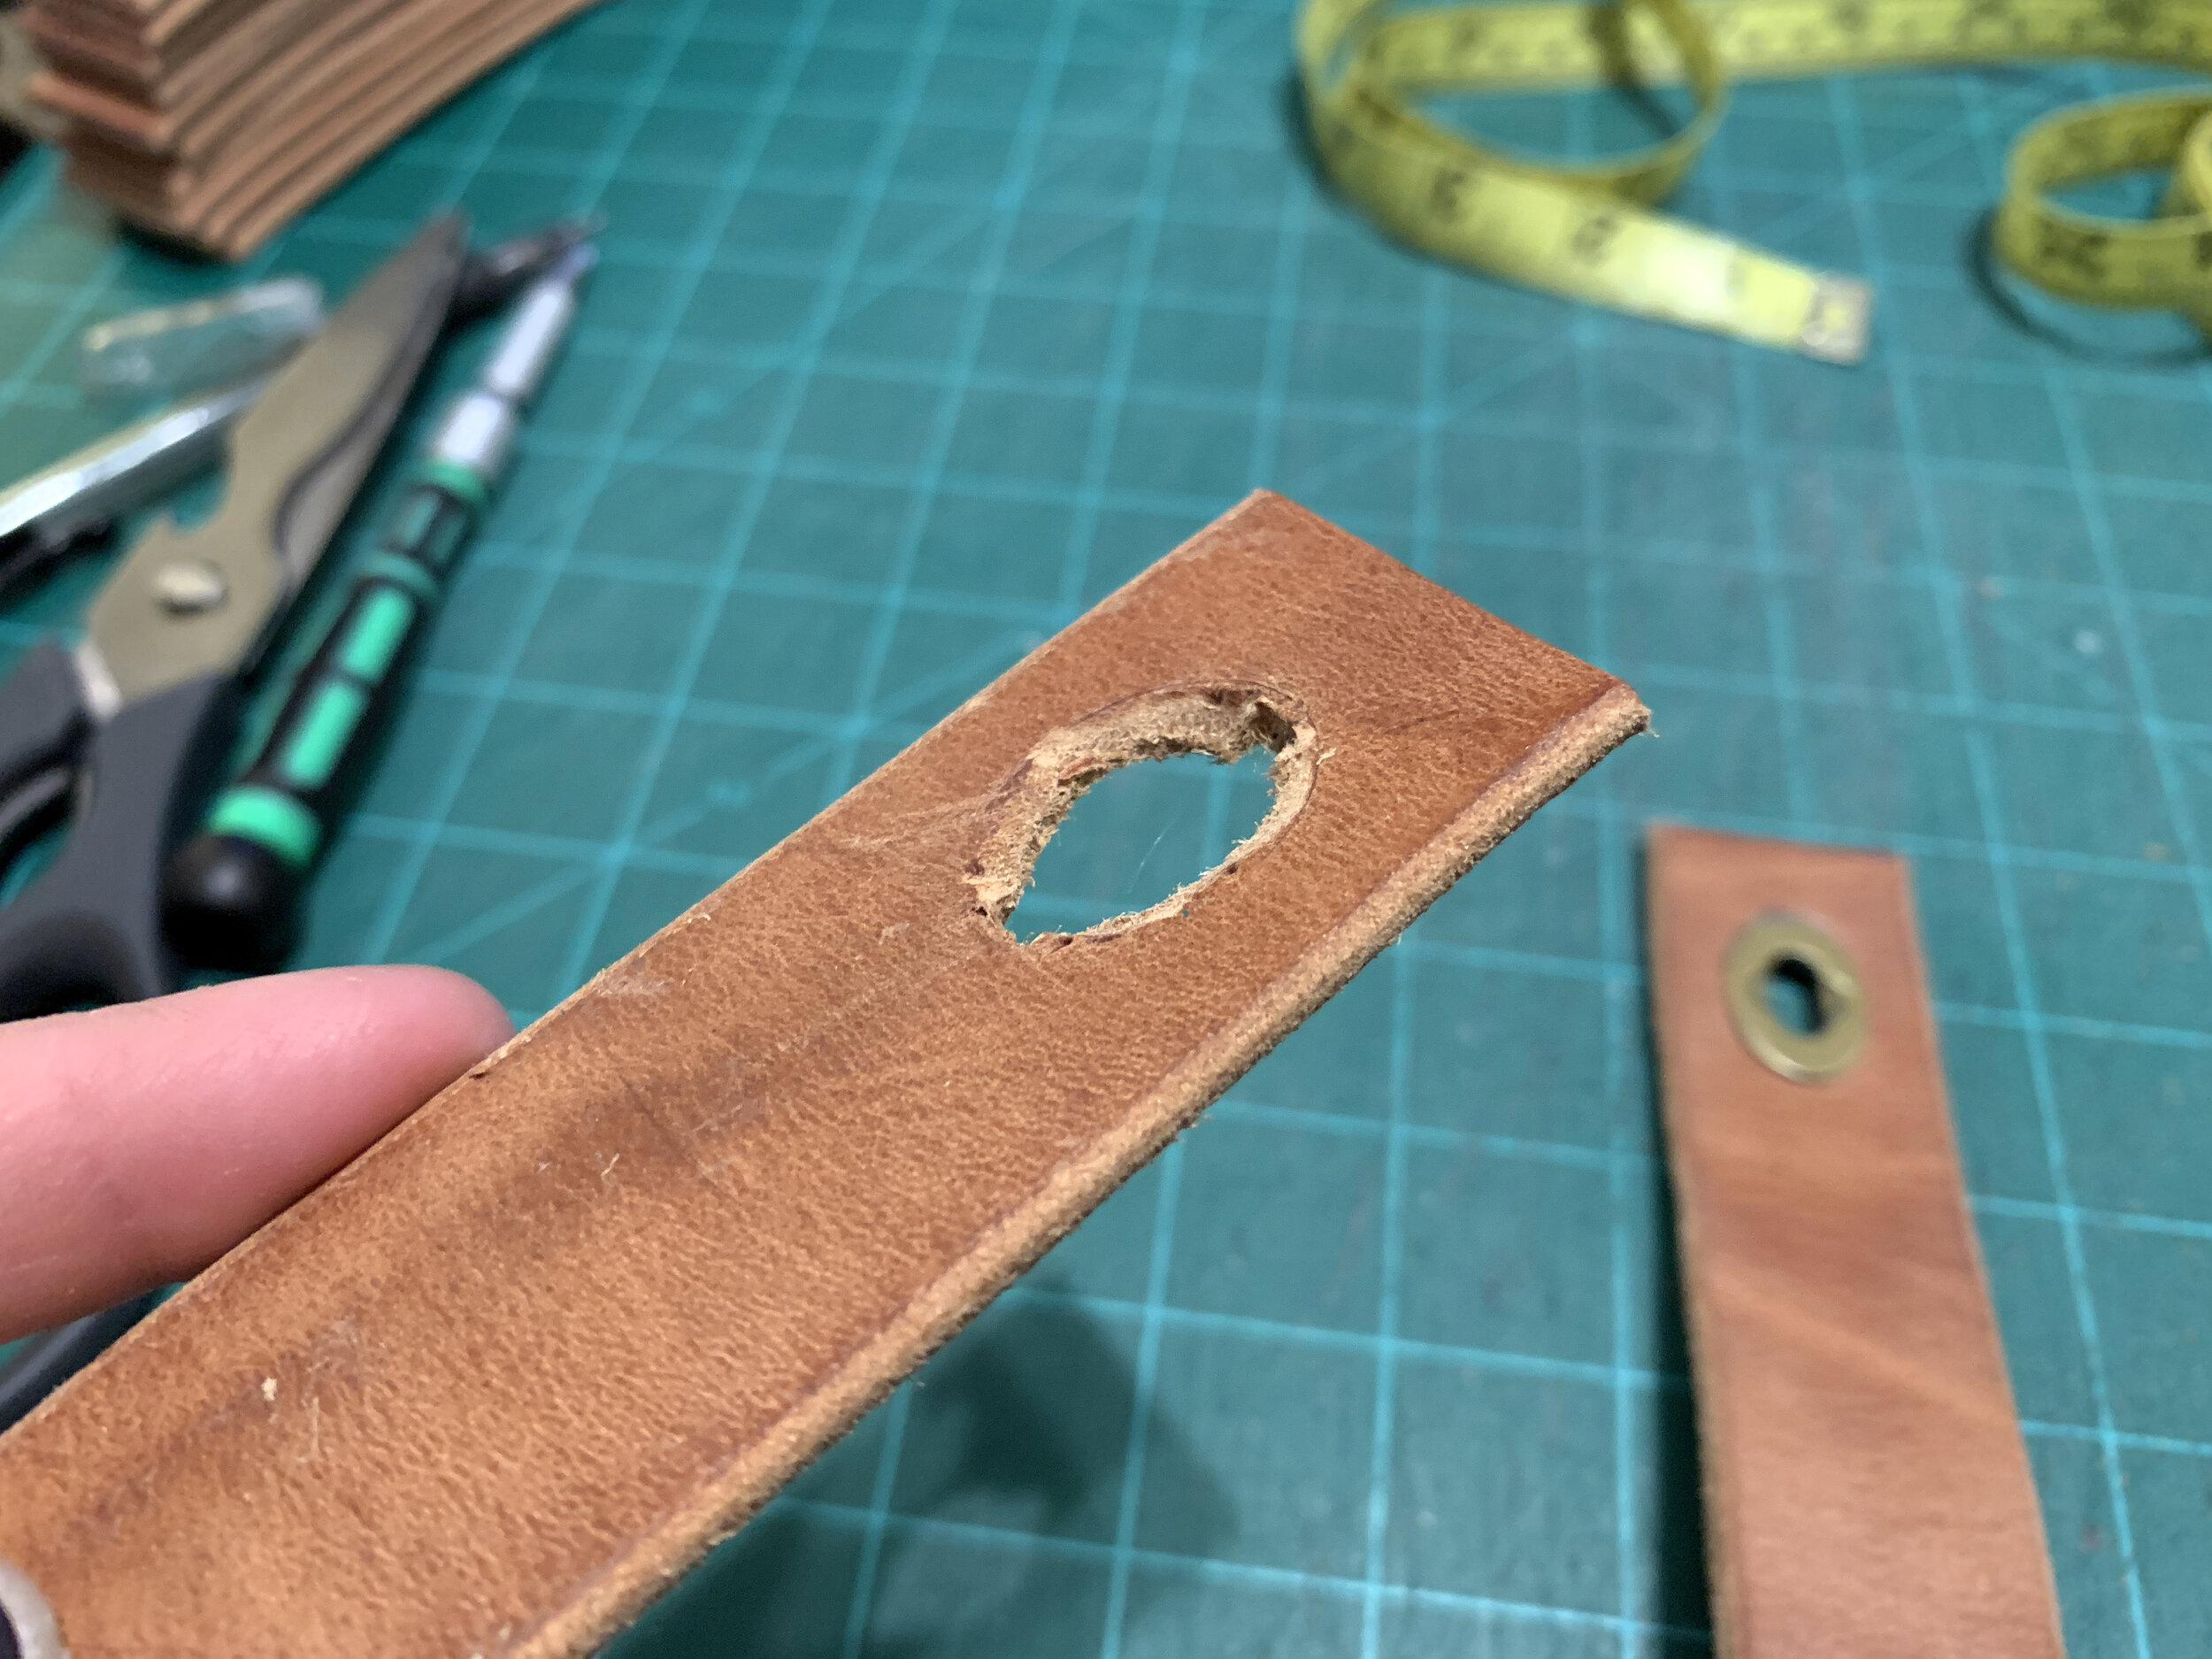
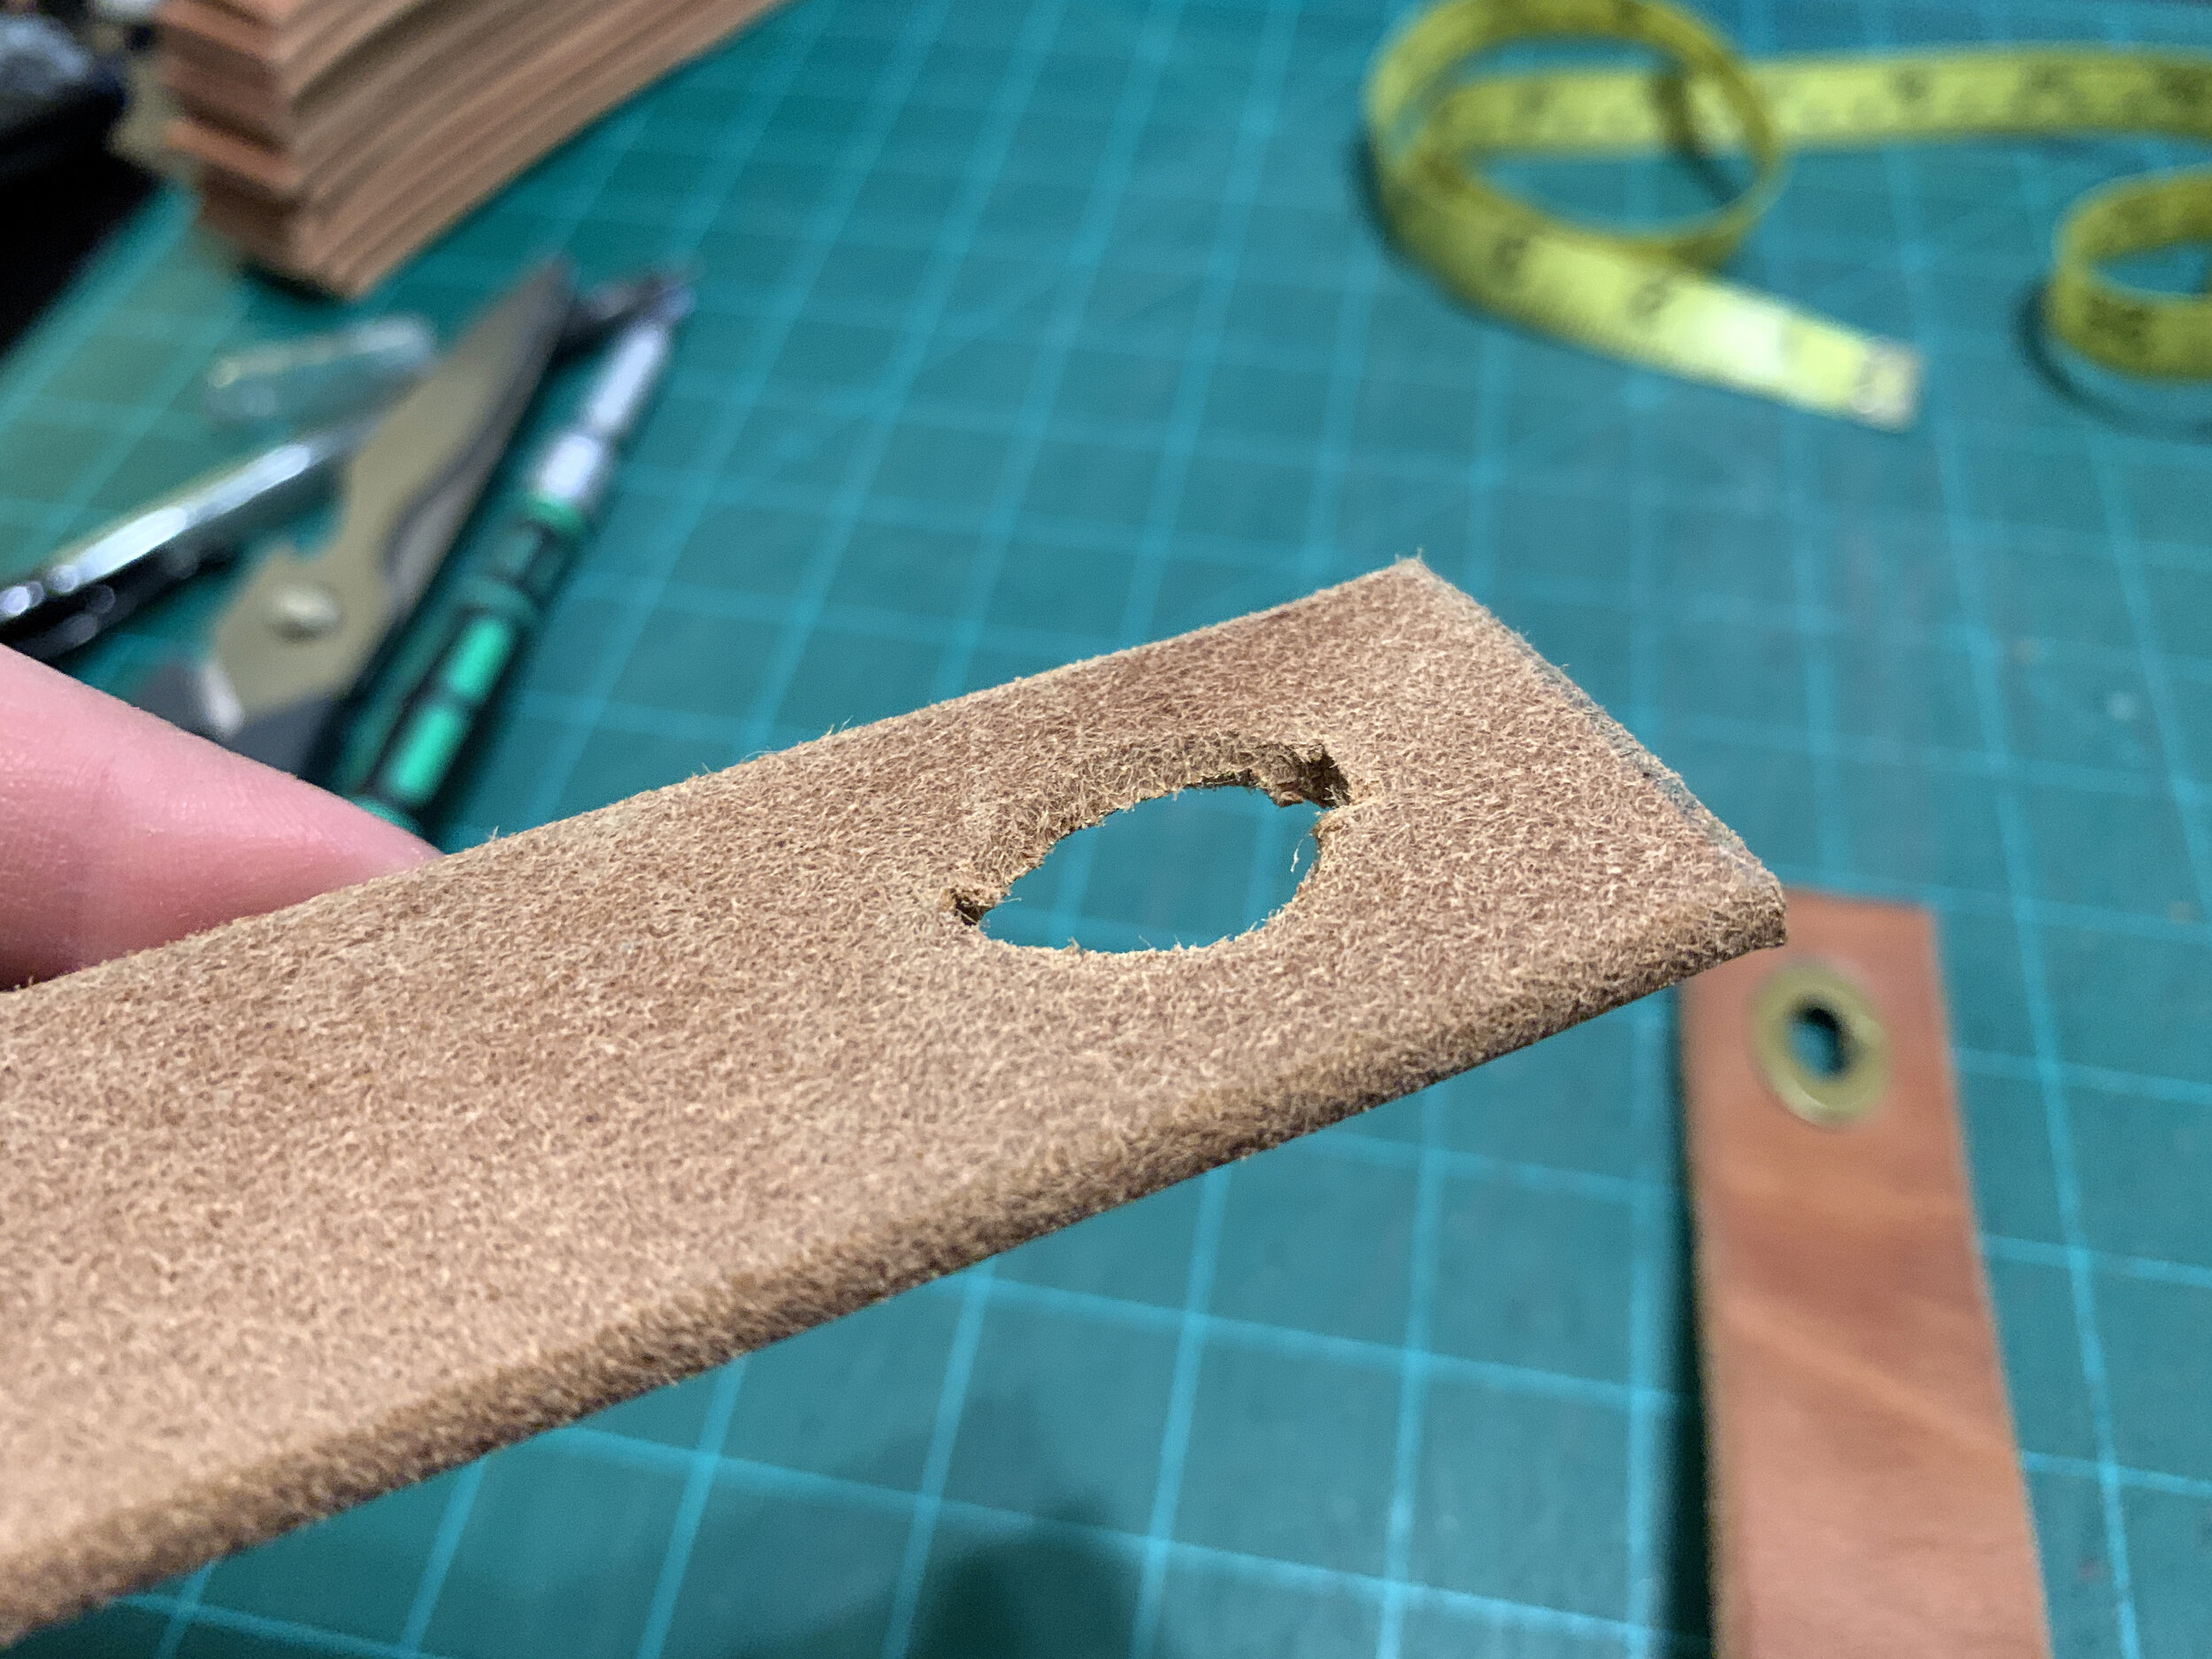
Because the leather we chose is such a thick, high-quality leather, I had to then thin the oval hole, tapering out at an angle so that there was still some meat for the oval to sandwich around but whittle down the thickness so the short baby screws for the clasps would make it into the female, back side of the front oval piece.
If you don’t want to do this, I suggest finding thinner (and maybe even faux) leather.

I used the small screw driver and provided screws to sandwich the leather in between the front and back pieces of the oval side of the clasp until the hardware was nice and tight on the leather.
Folding the leather strap almost in half (with the finished side out) until the cut edge on the side with the installed oval clasp is about 1/8” longer than the other cut edge, I used the placement of the already-installed oval side of the clasp and traced out the inside of the oval to mark the placement of the peg-side hole, which I learned is easier to just make rectangular.
Keep this rectangular hole clean – no shaving needed (or wanted) here.

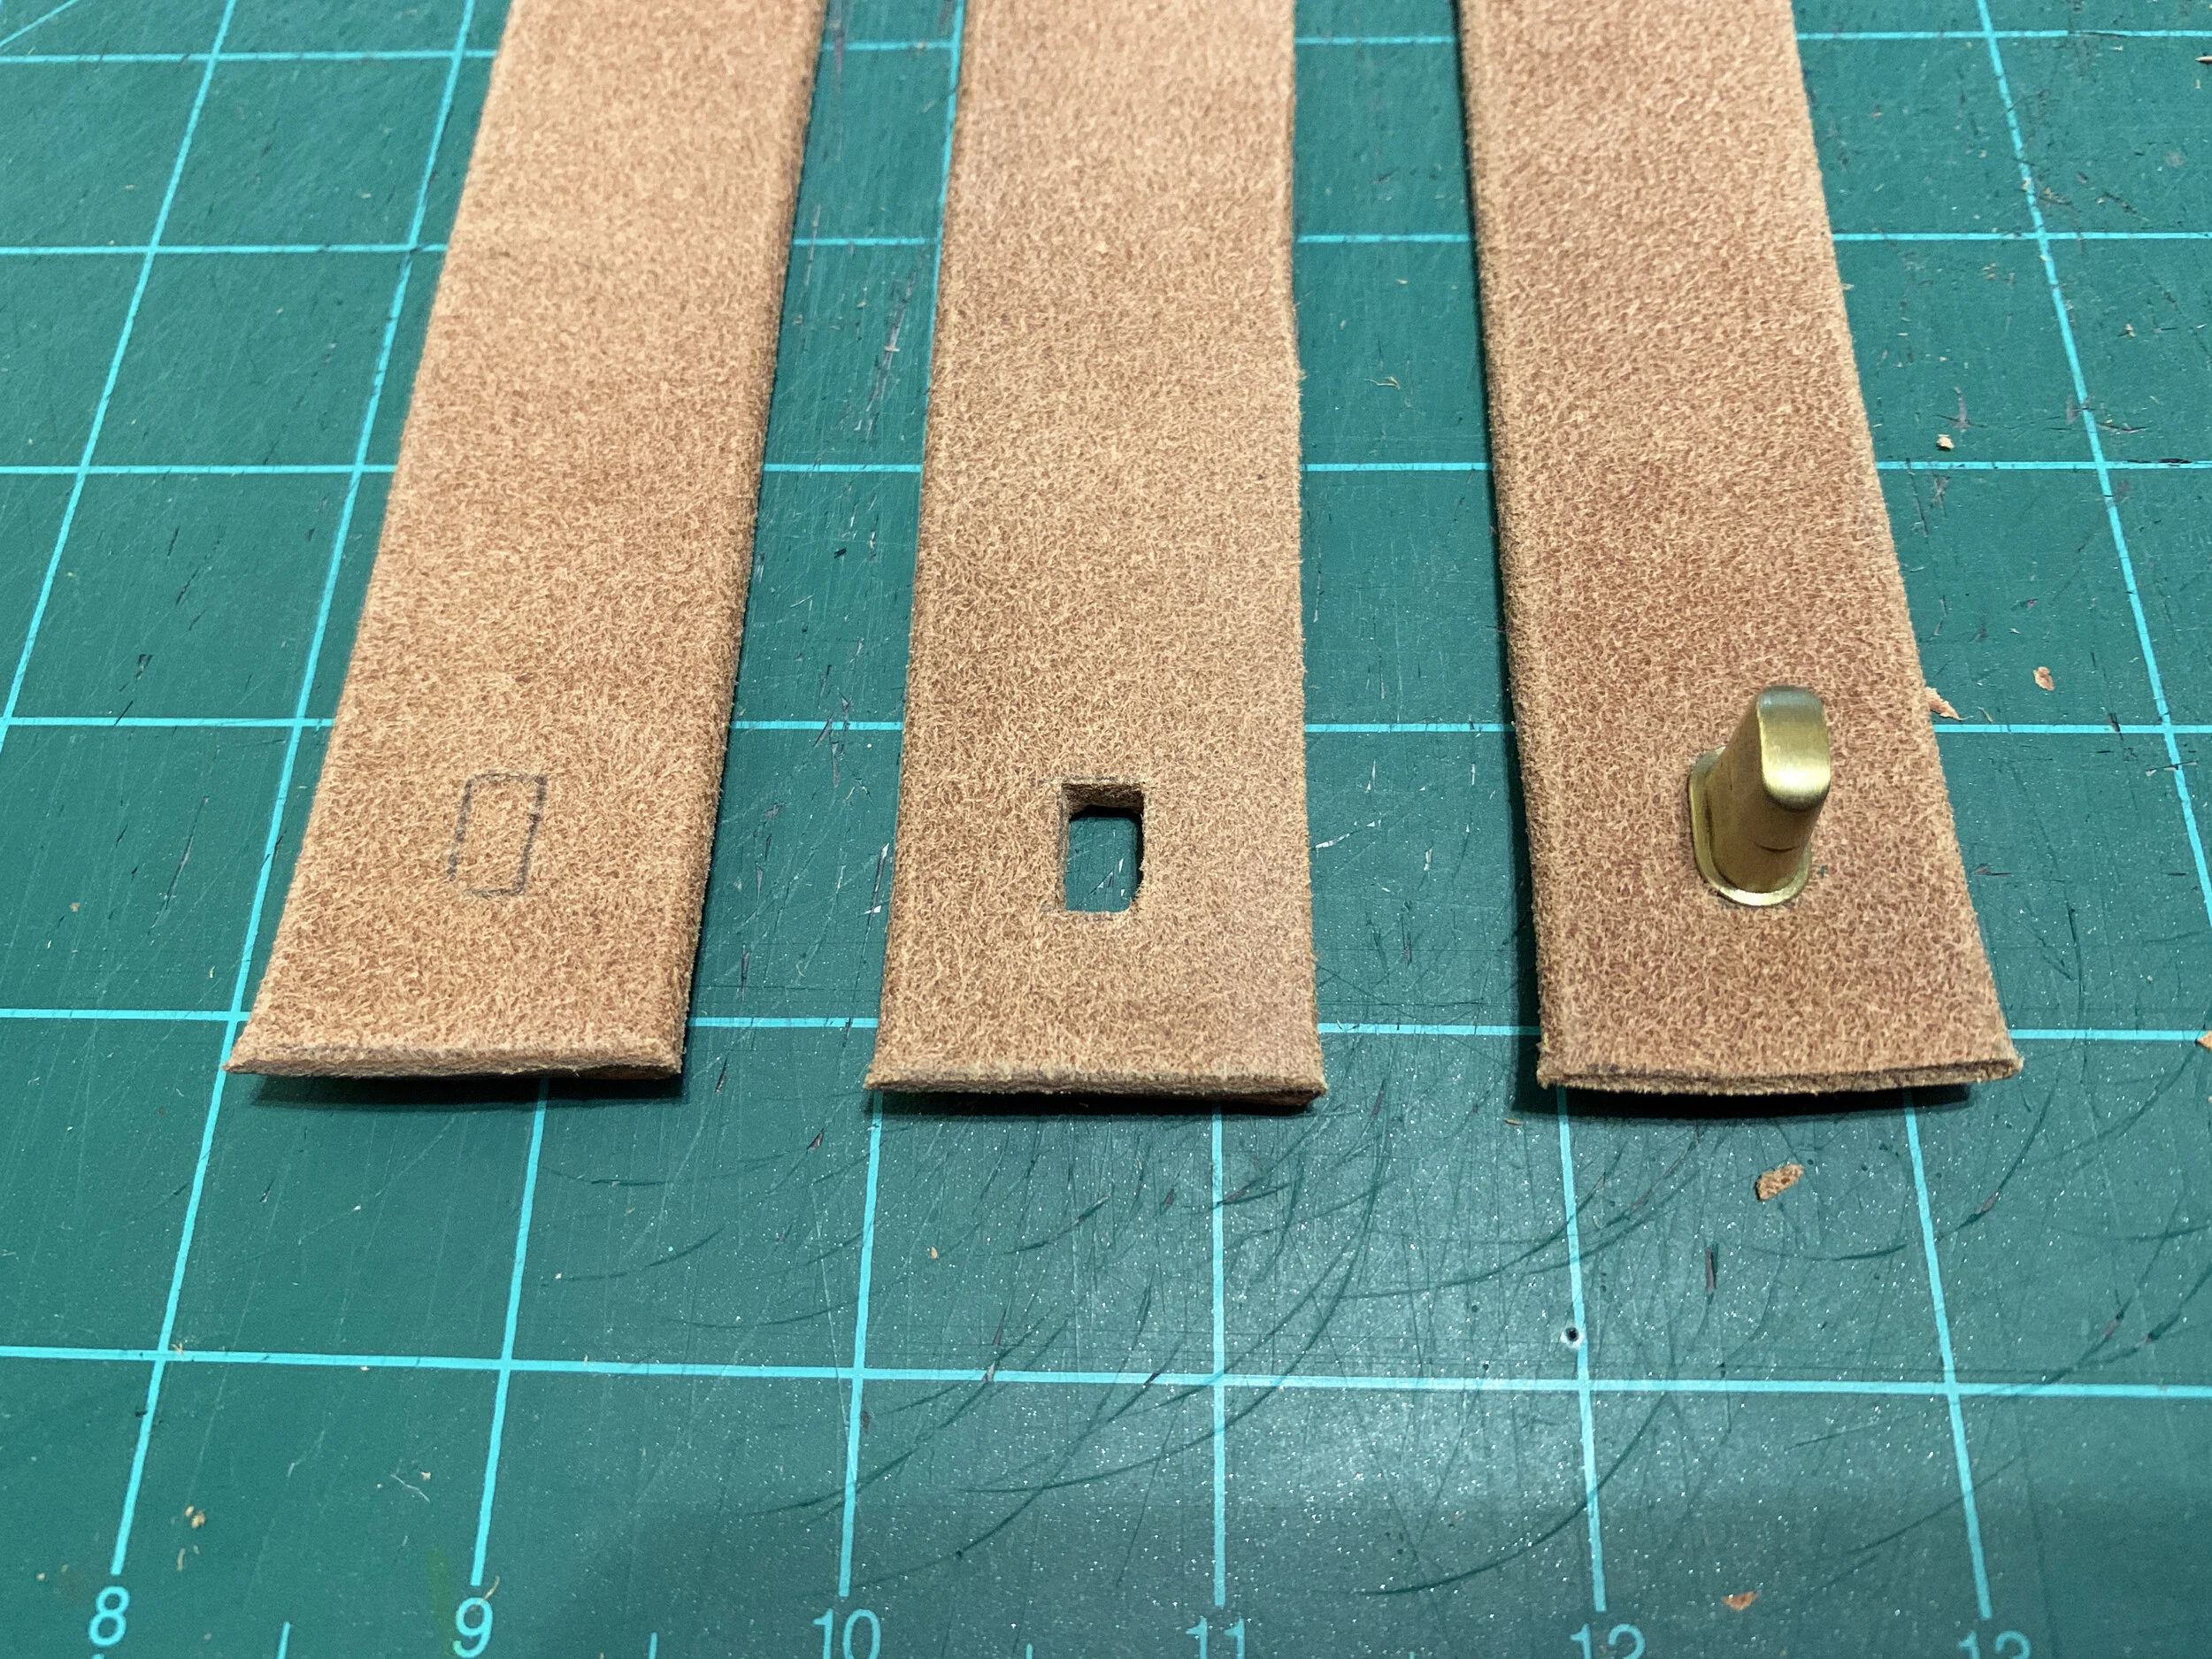
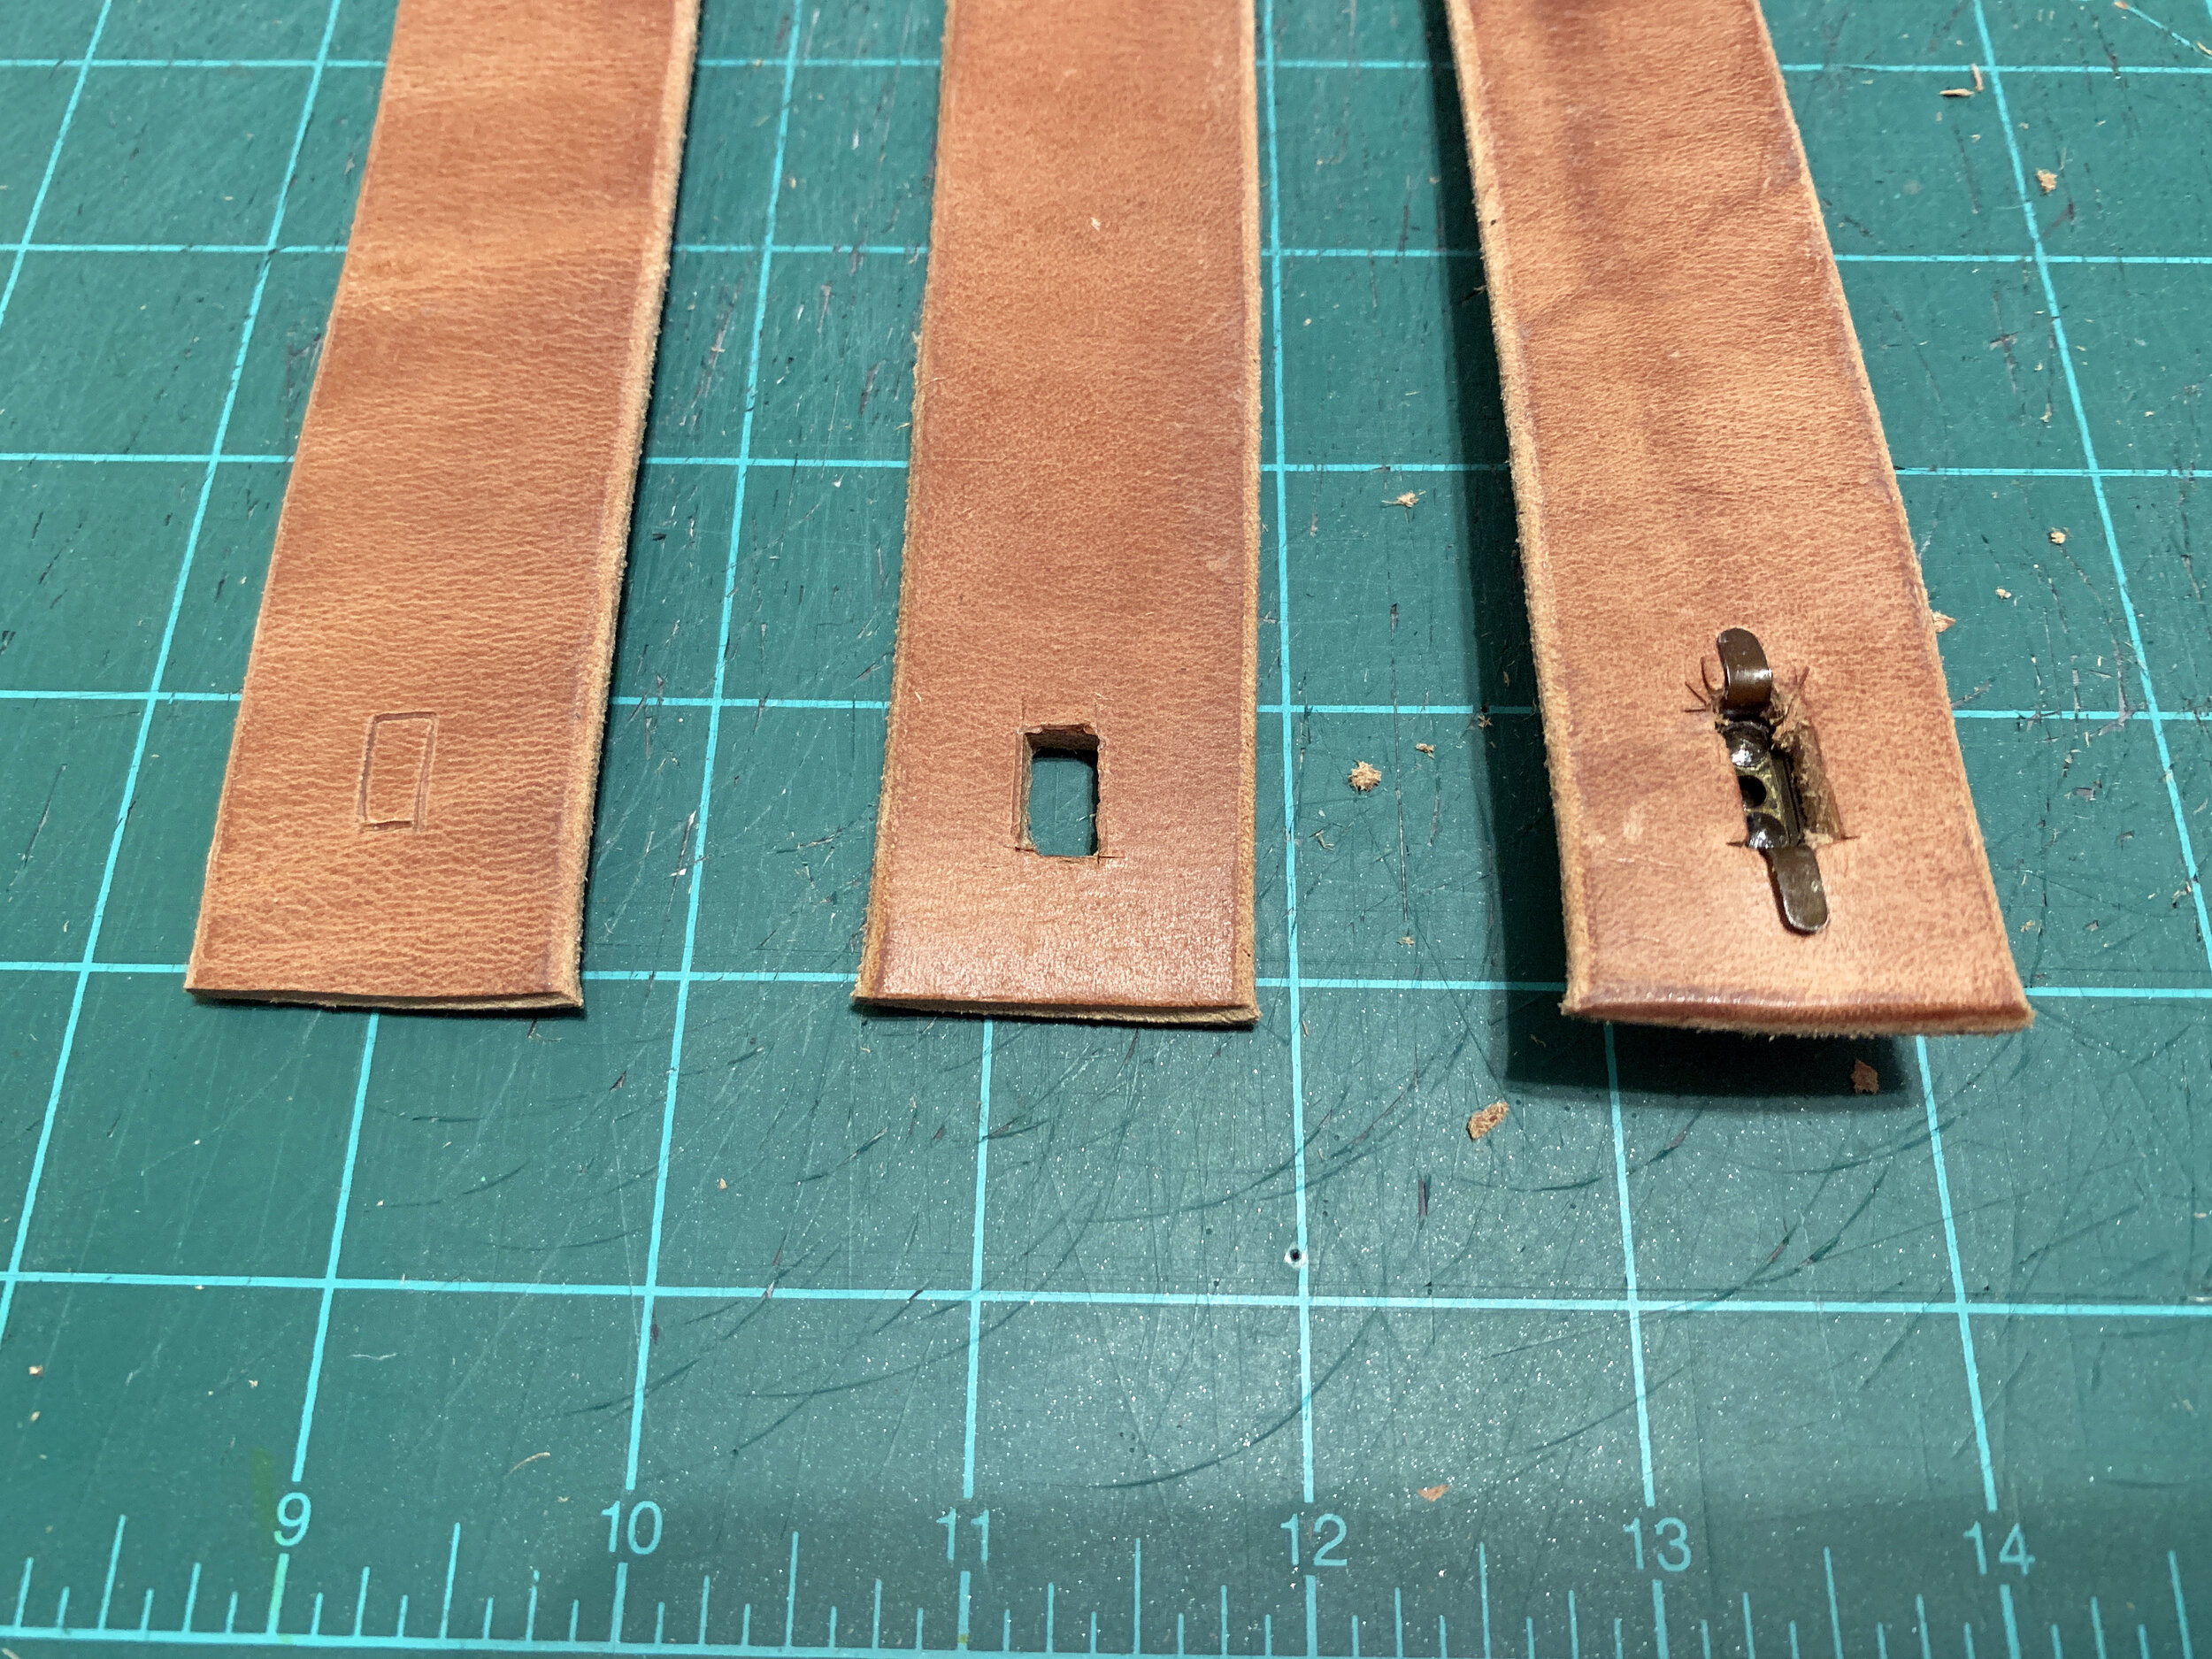
The trick on this cut is to make it just large enough for the brass peg’s tabs to slide through from the front without the peg’s base falling into the hole. You want it to be very tight so the leather helps support this piece when you bend the tabs back around to the finished side of the leather.
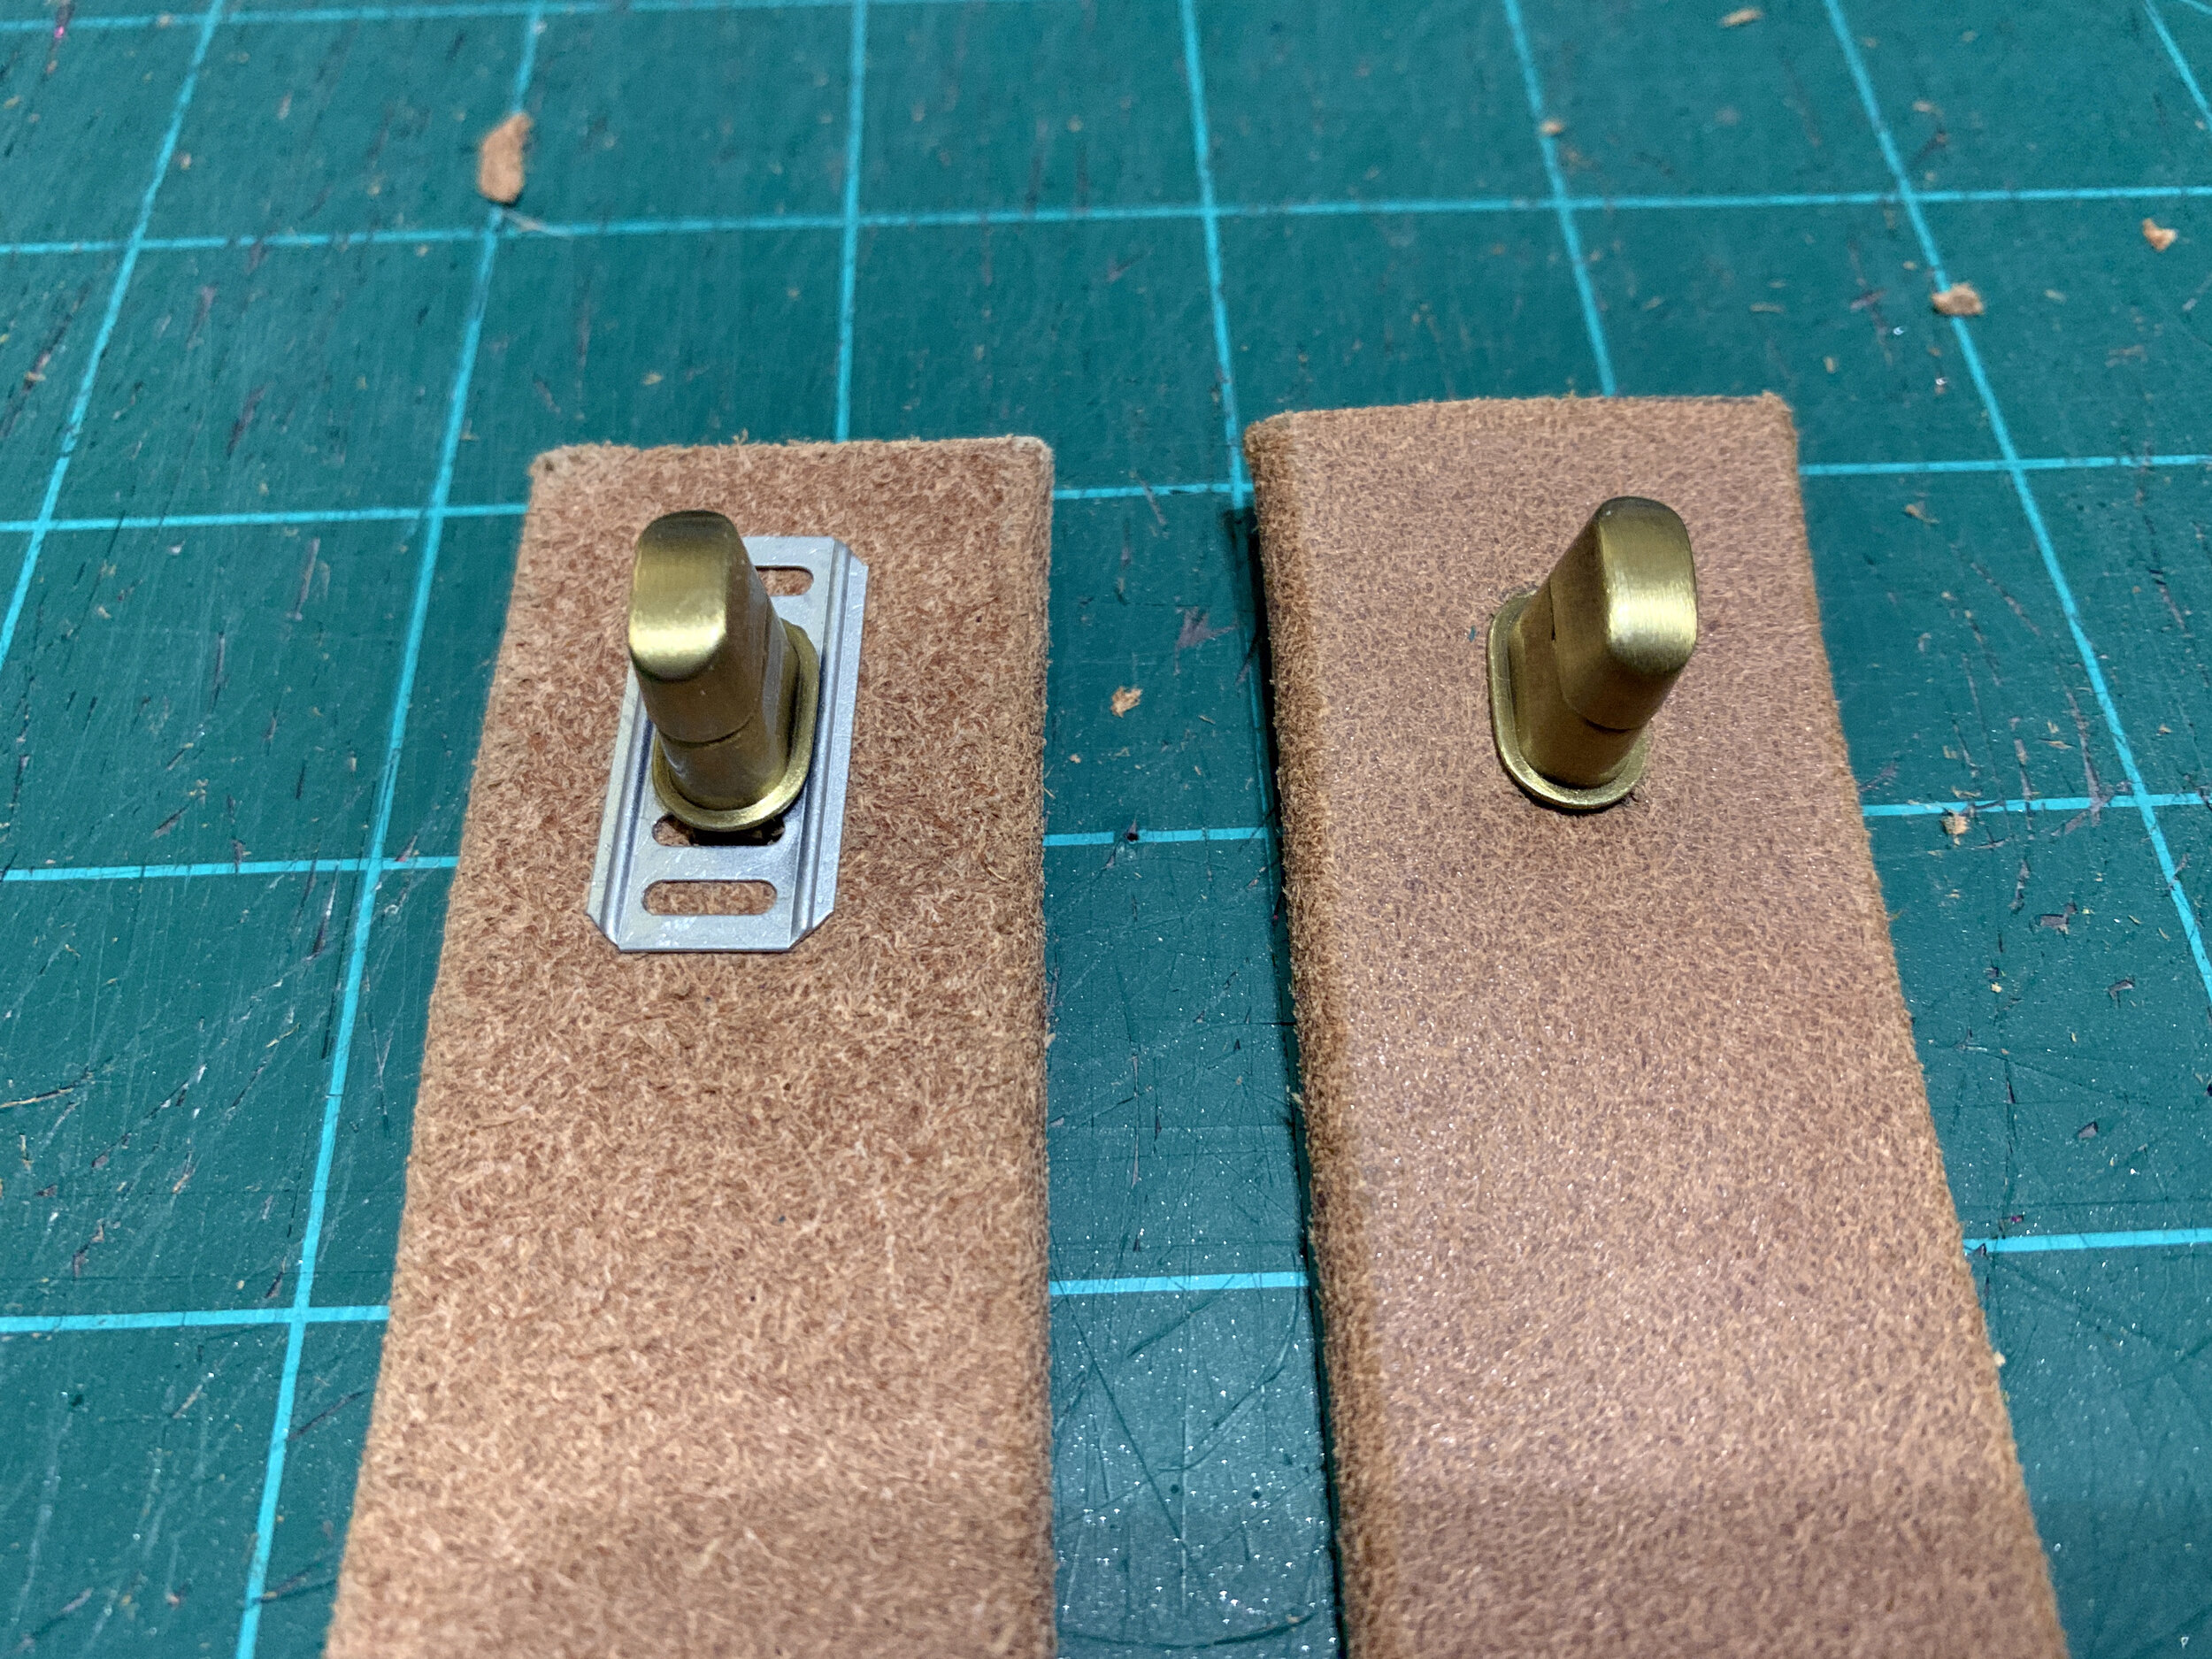
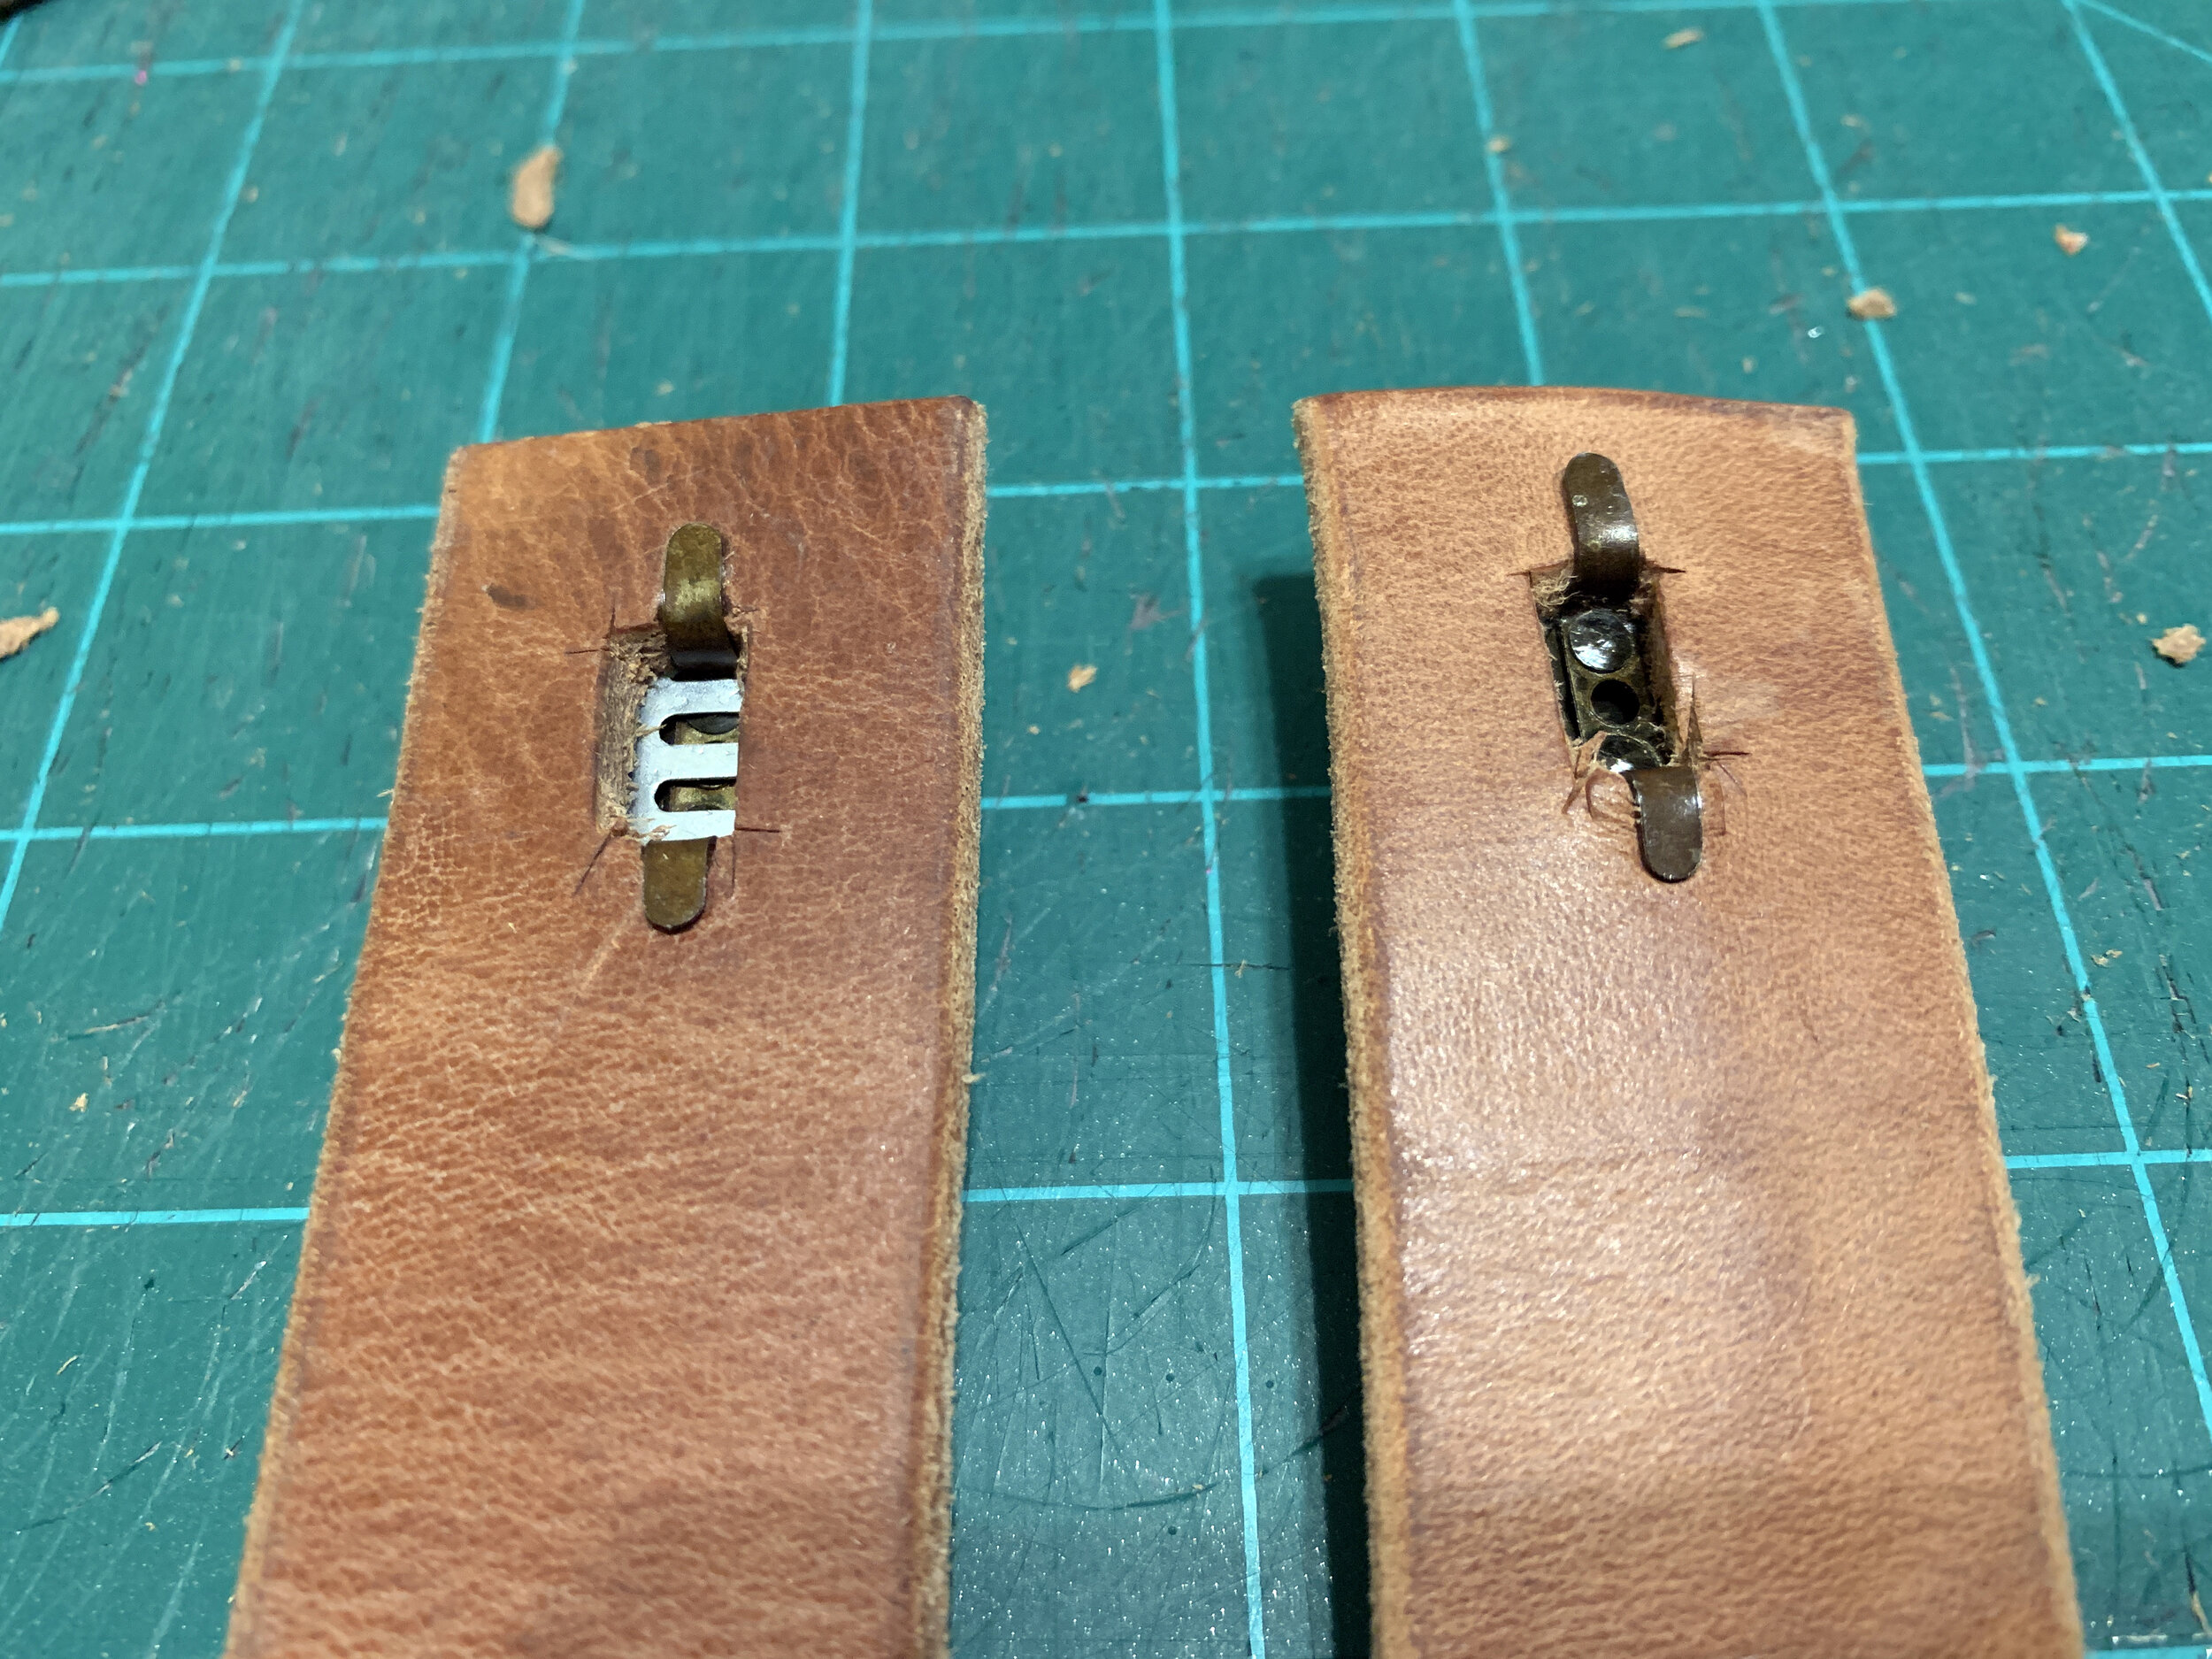
In only some of our packs of clasps were these little slotted silver metal pieces that help hold the tabbed peg in place included. I used all of the ones we were given, but I was able to make the pegs work without the slotted pieced as well, as long as the peg-side hole in the leather is cut tightly, so that just the tabs go through and not the whole peg itself. (From what I can tell, the slotted metal pieces just give you some wiggle room for the size of the holes in the leather tabs.)

Adding Velcro to the tabs
I don’t have a photo of this particular step, but after the tabs were complete, I simply cut a square of adhesive Velcro and stuck one to the back of each leather tab, right behind the peg-side of the clasp, directly on top of the folded tabs.
Cutting clasp notches
After we determined placement for the tabs (4” to 6” in from each side of the curtain panel depending on the width of the panel, and with the cut edge of the leather tab placed 1/8” higher than the top edge of the curtain), we cut two small rectangles out of each panel just big enough for the brass peg to fit through using an X-acto knife.
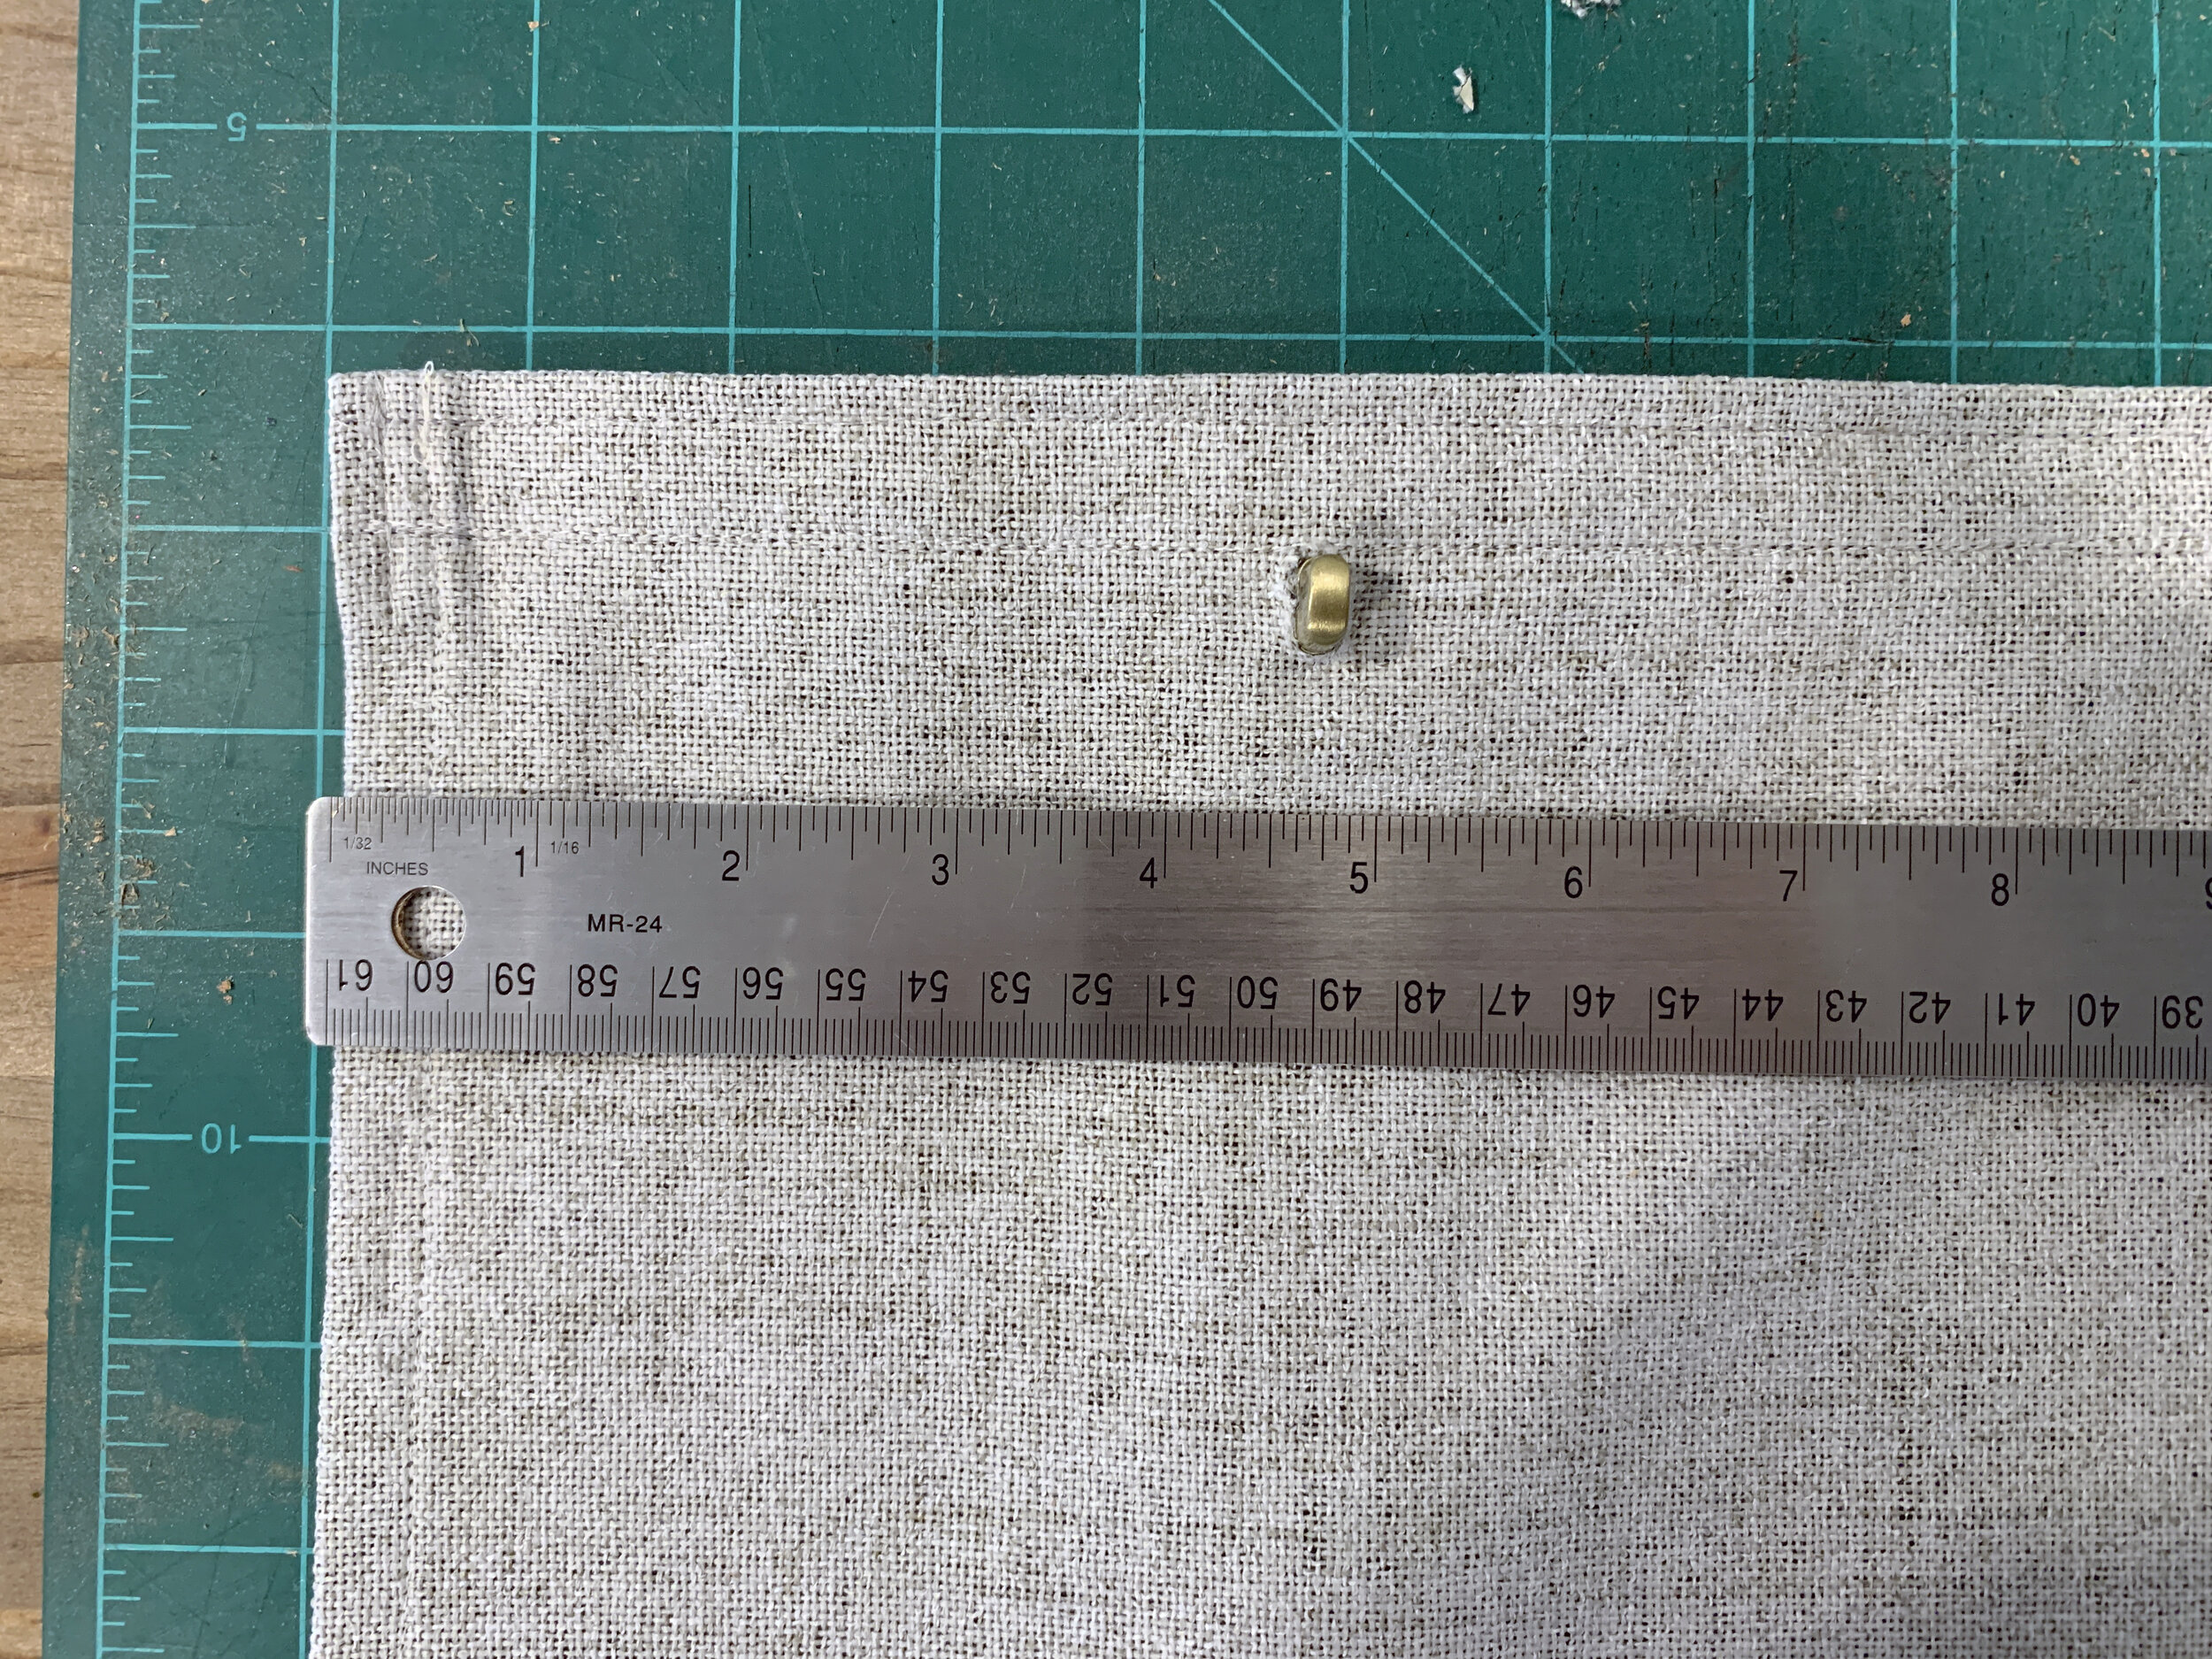
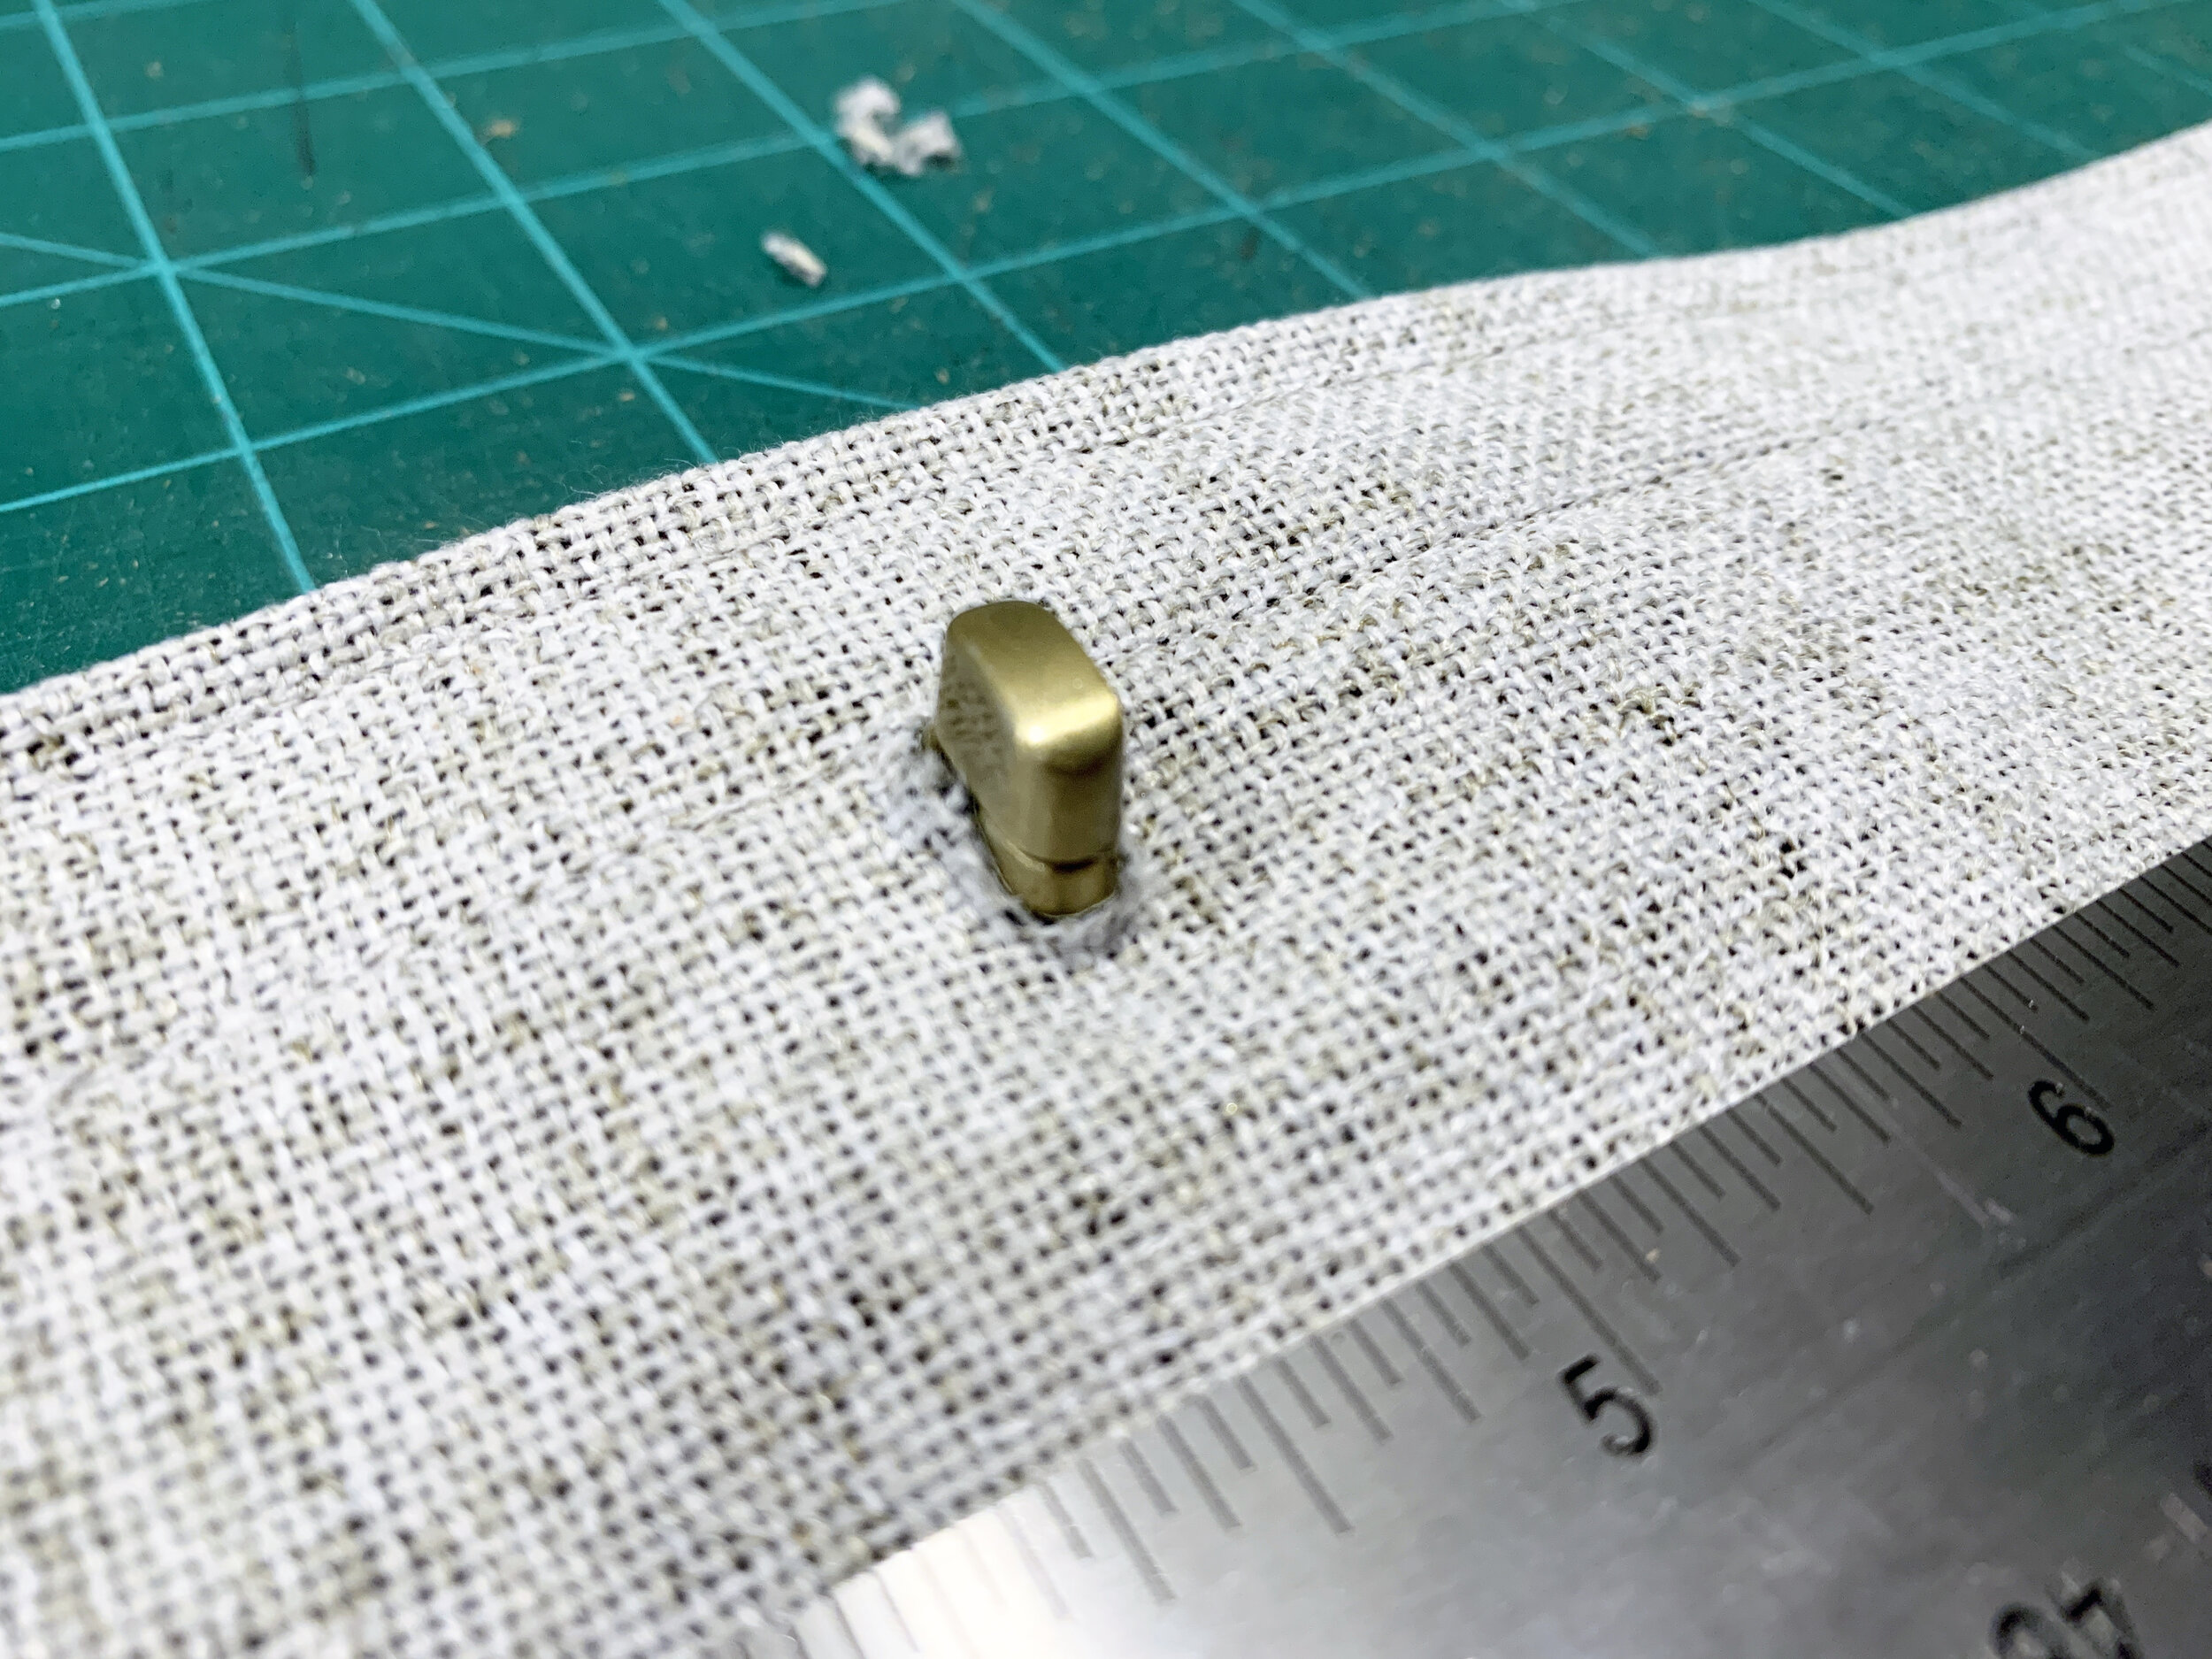
As I mentioned earlier, after the Velcro was sewn to the back of the curtain panels, I also carefully cut off the Velcro and folded fabric layers around each newly cut out peg hole so the fabric would be thin enough for the clasps to easily turn. (Technically, we did this modification after install, but it’s more convenient to do it at this step.) You could also avoid this step altogether by leaving small gaps in your Velcro in that step above.

I used Alene’s Stop Fraying on the cut edges to prevent any fraying, just in case.
Making the dowel rods
First, I used our miter saw to make a straight cut in the wooden dowels, making sure they were 1.5” longer than the finished curtain panel’s width. I labeled each rod in the middle so I easily knew which panel each dowel went with as I worked.

Then I sanded the edges of the wood dowels to a slight, smooth taper so that it would fit snuggly inside the brass cap.
After dry fitting the dowel ends in the brass caps, I used watered down gray wall paint to stain about 6” or so on each end of the dowel.

After the paint dried, I slid the dowel rods into each corresponding rod pocket.

Lastly, dropping a small amount of glue in the brass cap (making sure to get glue on the inside threads too), I carefully glued a brass cap onto each end of the dowel, immediately wiping off any glue that squeezed out with a rag. We let the curtains sit to dry overnight before installing.
Installing the curtains
While keeping the protective adhesive backing on, I matched up and connected the rough, hook-side of the adhesive type of velcro with the length of soft velcro sewn onto the back of each panel and trim trimmed it to length.
With the full collection of 10 curtains in the camper, I wiped down the front face of our top piece of wooden window trim with paint thinner and a lint-free rag to remove dust and oil, letting it dry before removing the adhesive backing and sticking the Velcro (with the curtain attached) to the window trim.
Sticking the adhesive Velcro to the window with the curtain on helped us to line up the Velcro nicely on the window trim.
Don’t worry, if the Velcro sticks on a little squiffy – you can always detach the two pieces of Velcro from each other and just cheat the curtain hang, leaving the sticky window-side Velcro in place. No one will know!
Finally done
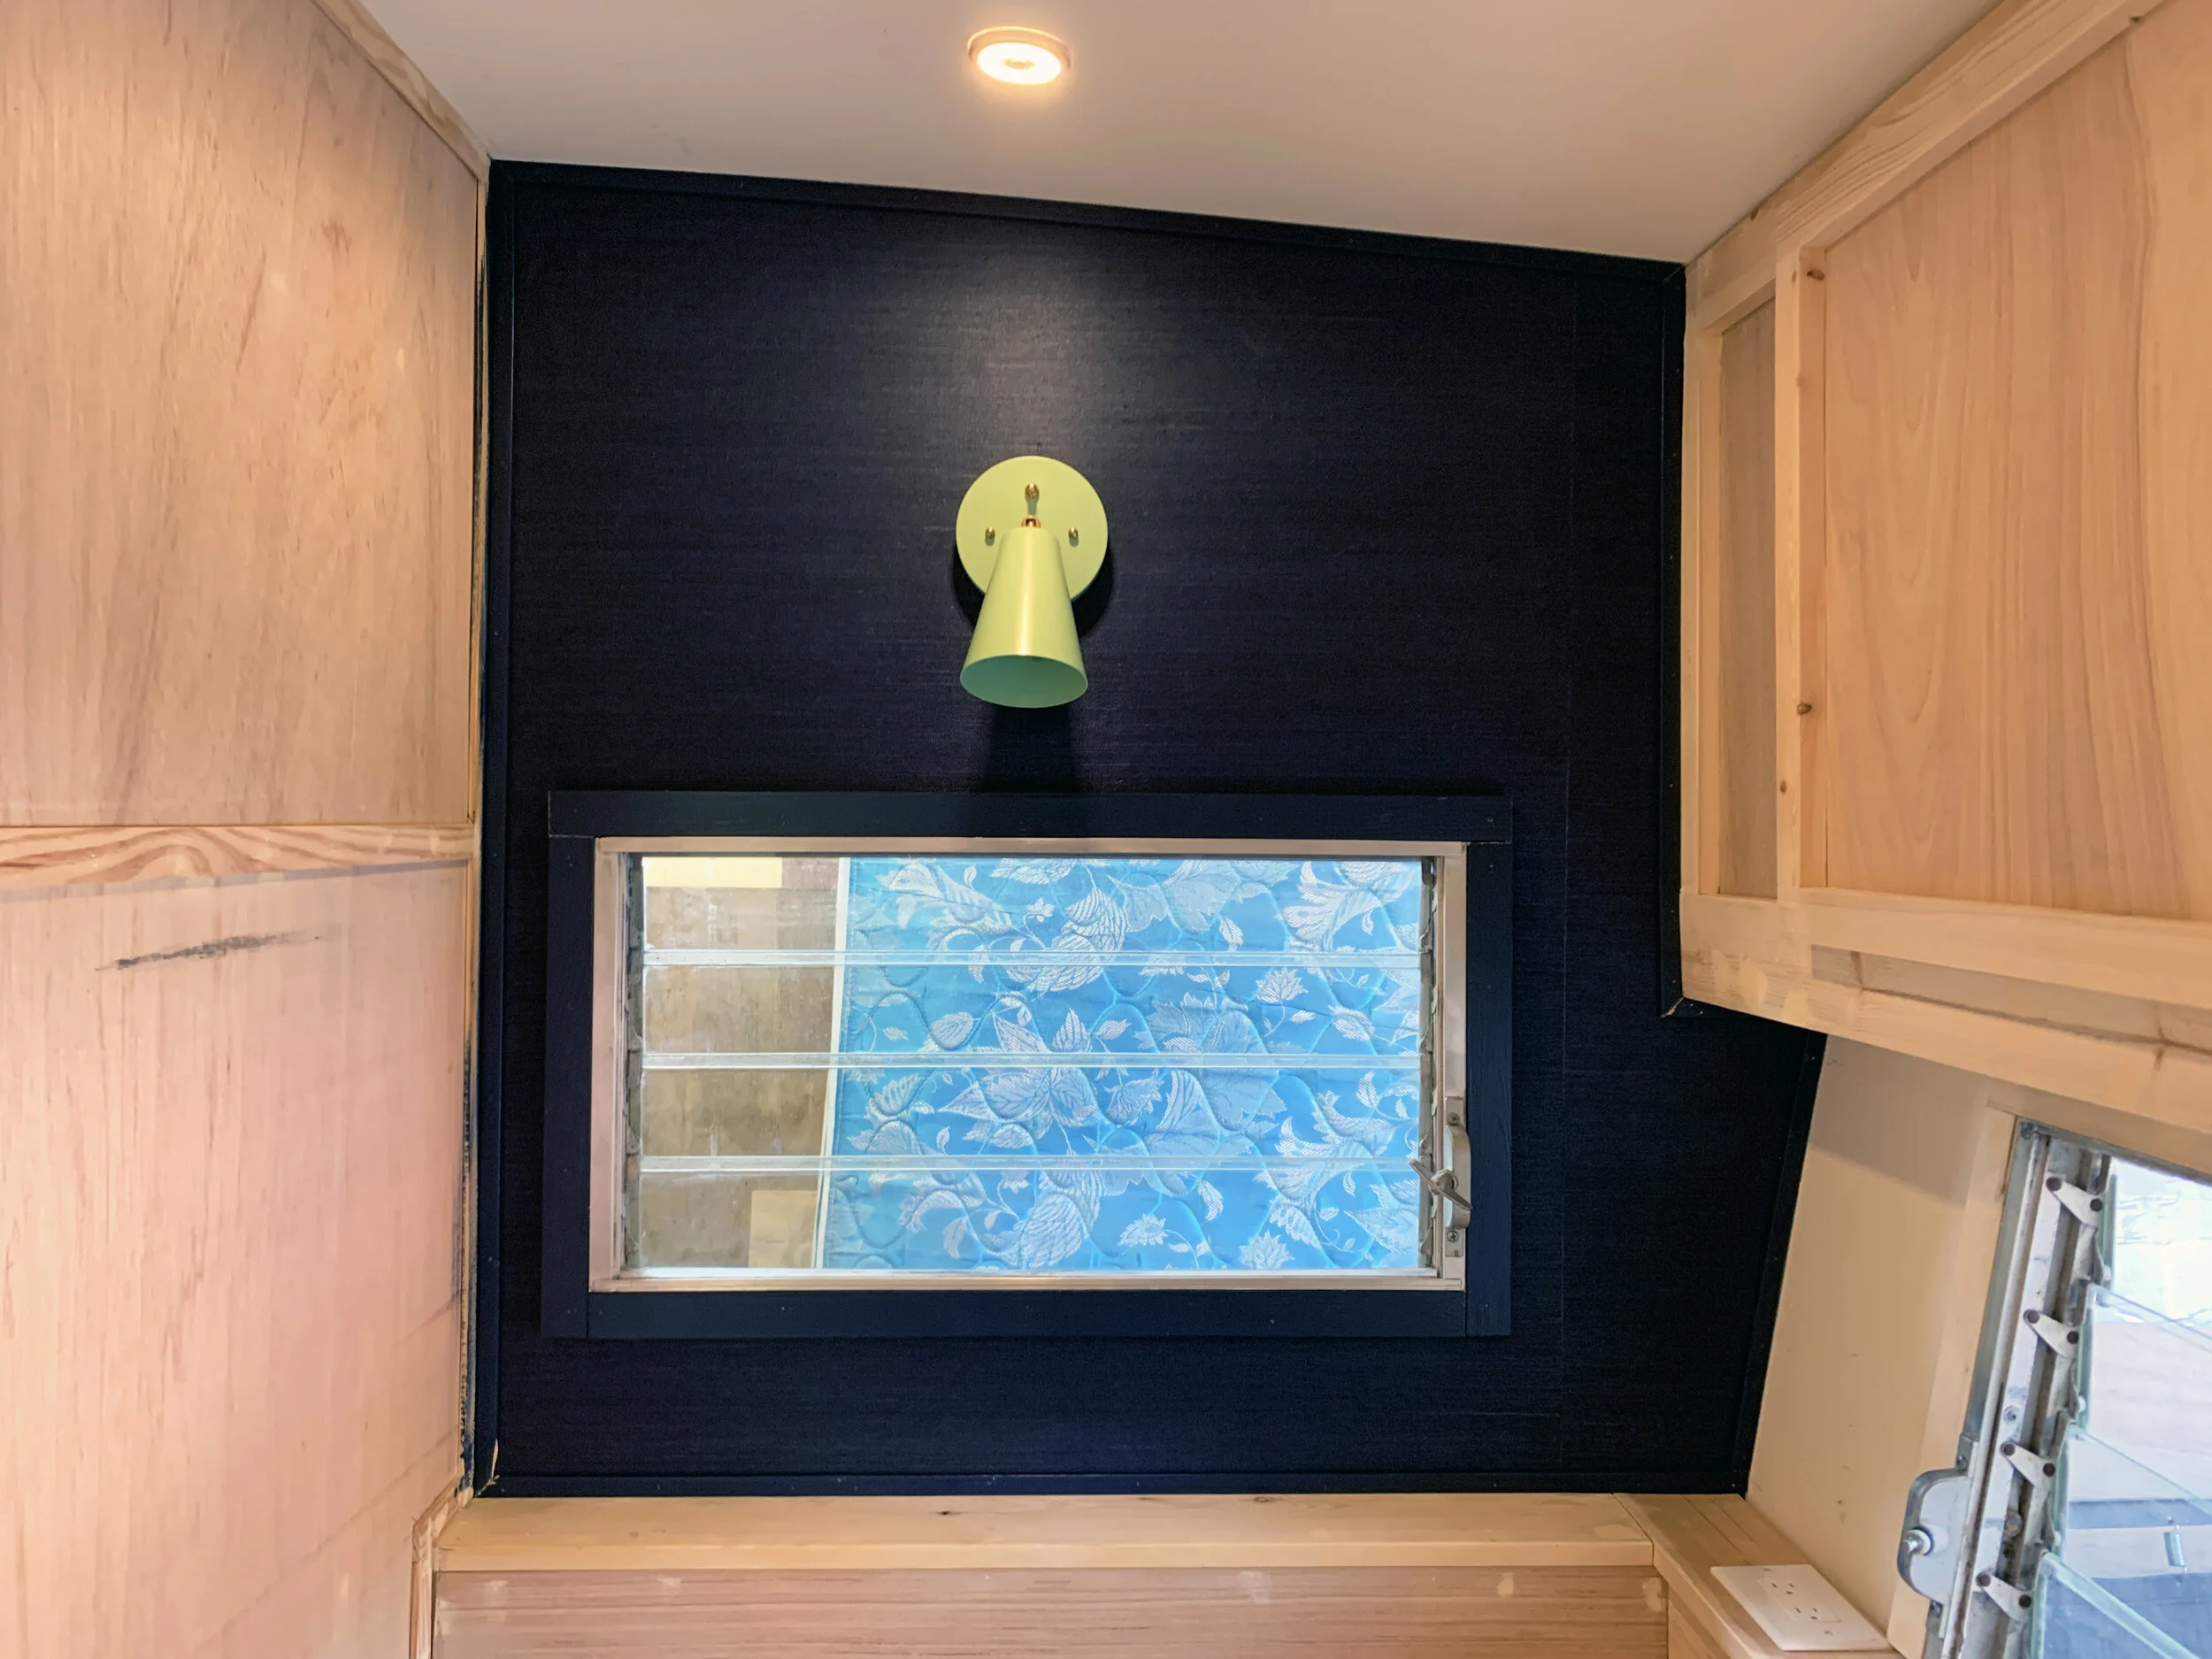
Voila! After all that, here are some finished photos of the curtains finally in place!
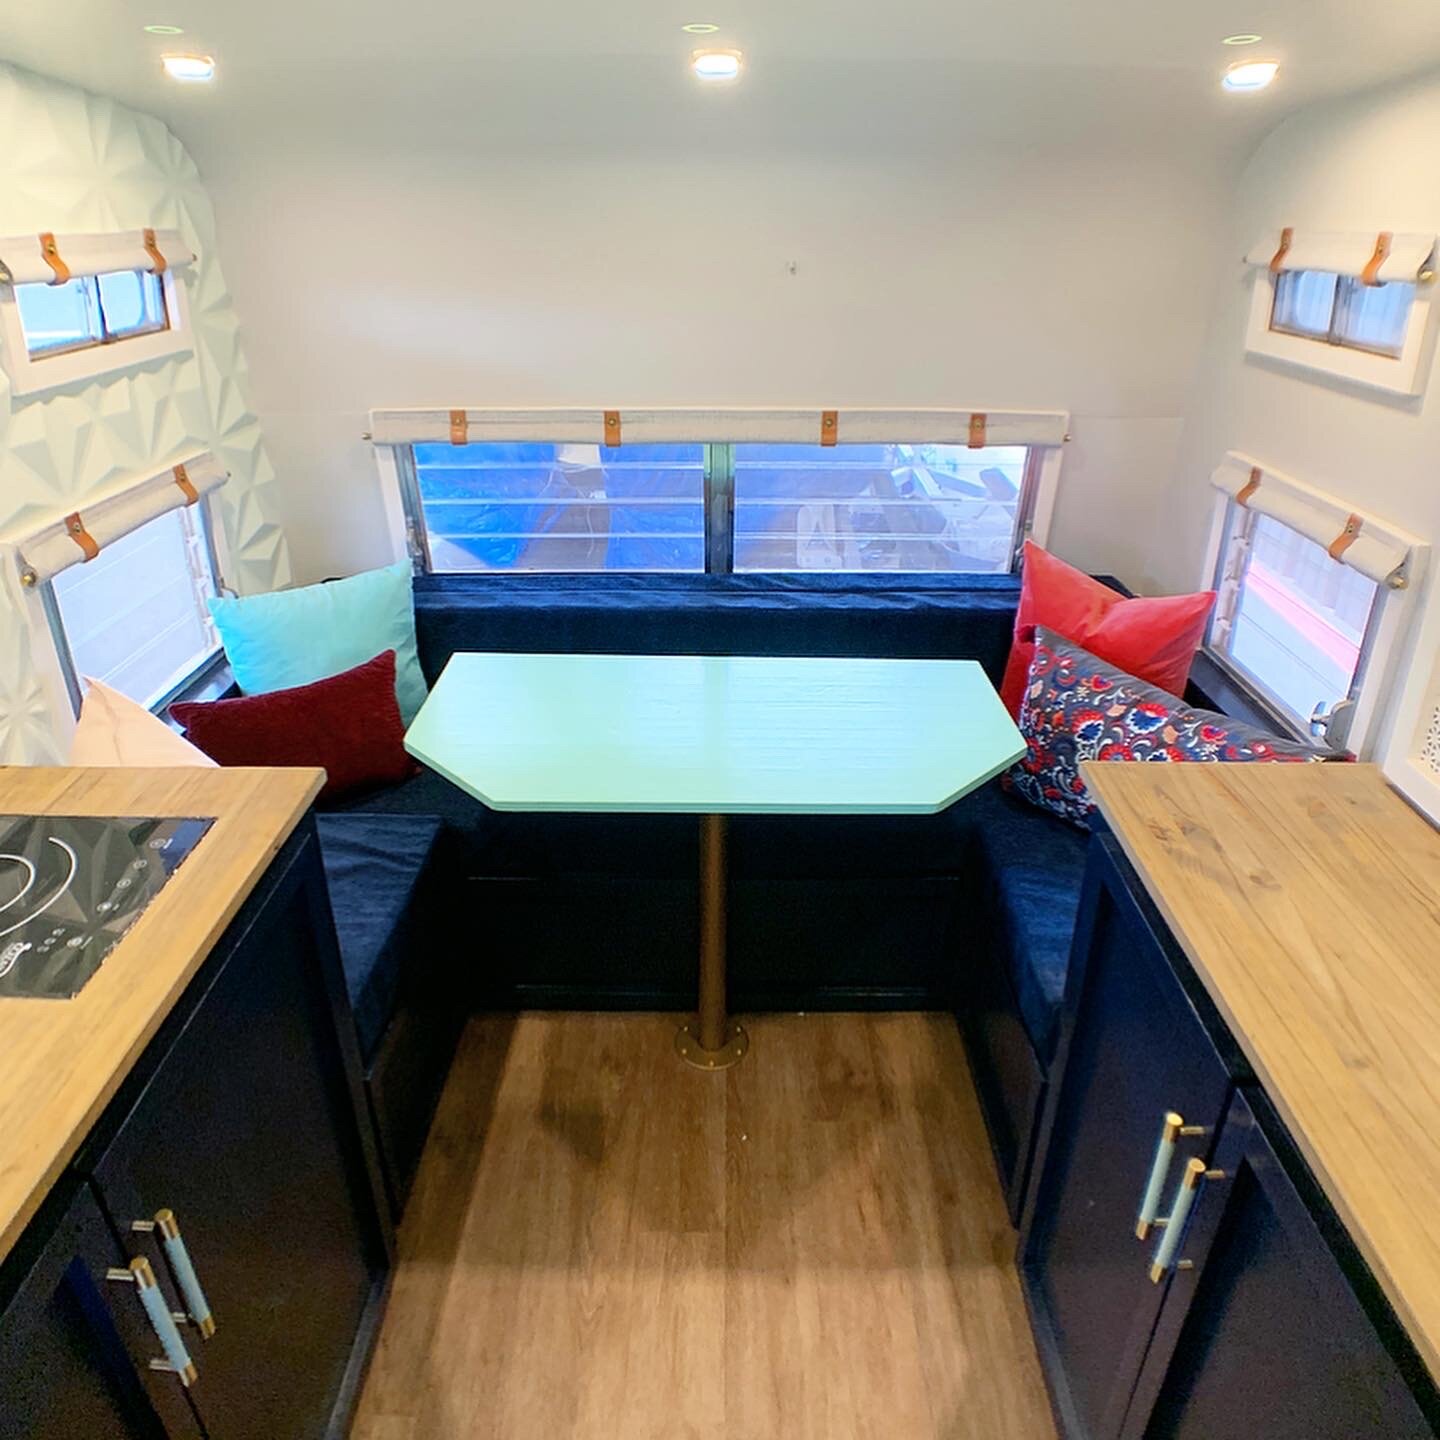
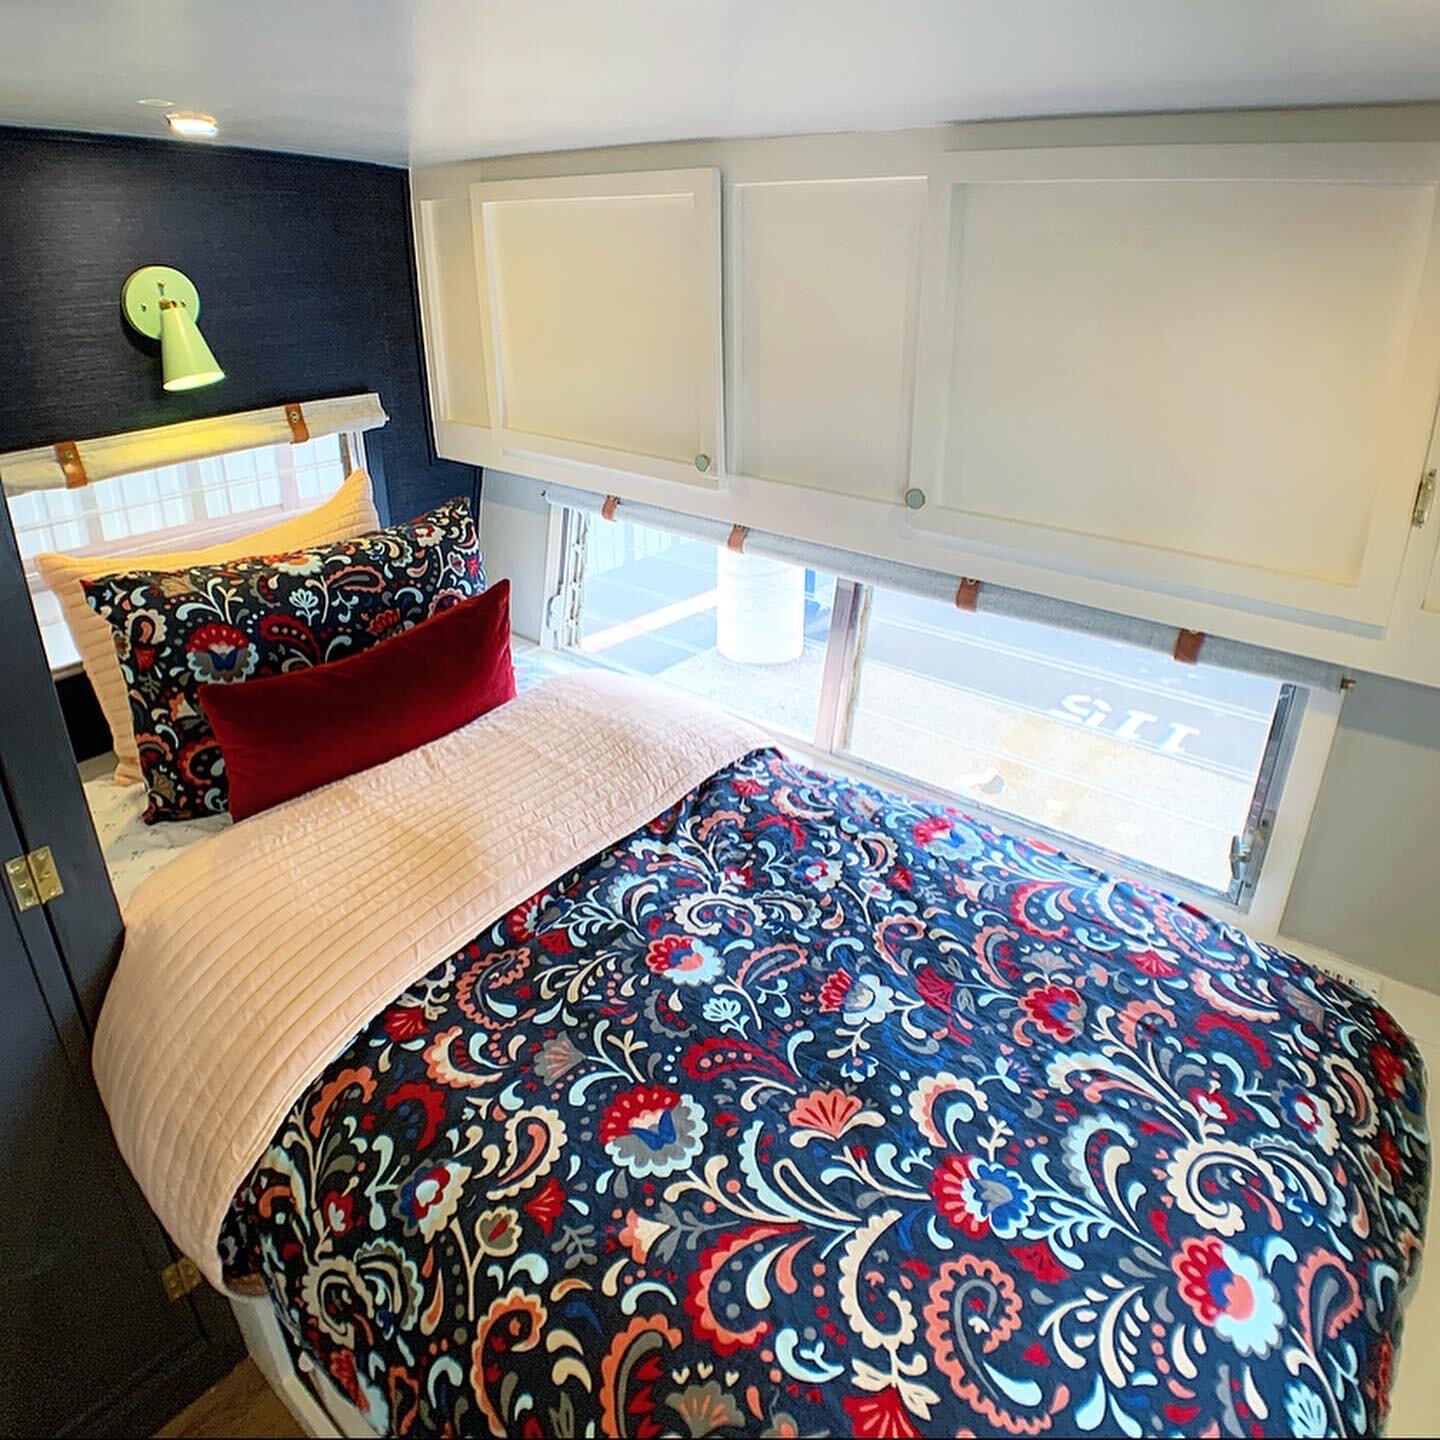


Even though these took some time to make, they are so easy to use and have held up great so far. The blackout curtains are a game changer to keep out any light from neighboring campers and unfortunately placed lampposts for a great night’s sleep.
We’re really happy with how they turned out!