The Cameo Camper Renovation: Backlit Shower Walls Part 1
Today we’re covering one of my most favorite areas we renovated – and what a lot of you have been really excited about as well since you’ve seen it pop on our social media channels. The backlit walls in the wet bath. More specifically, this post will cover prepping the panels (with so many tips on what not to do) and follow-up posts will cover the electrical work, framing structure, wall panel installation, toilet install, the custom door build and how we waterproofed the door crack on an out-swinging door, etc.
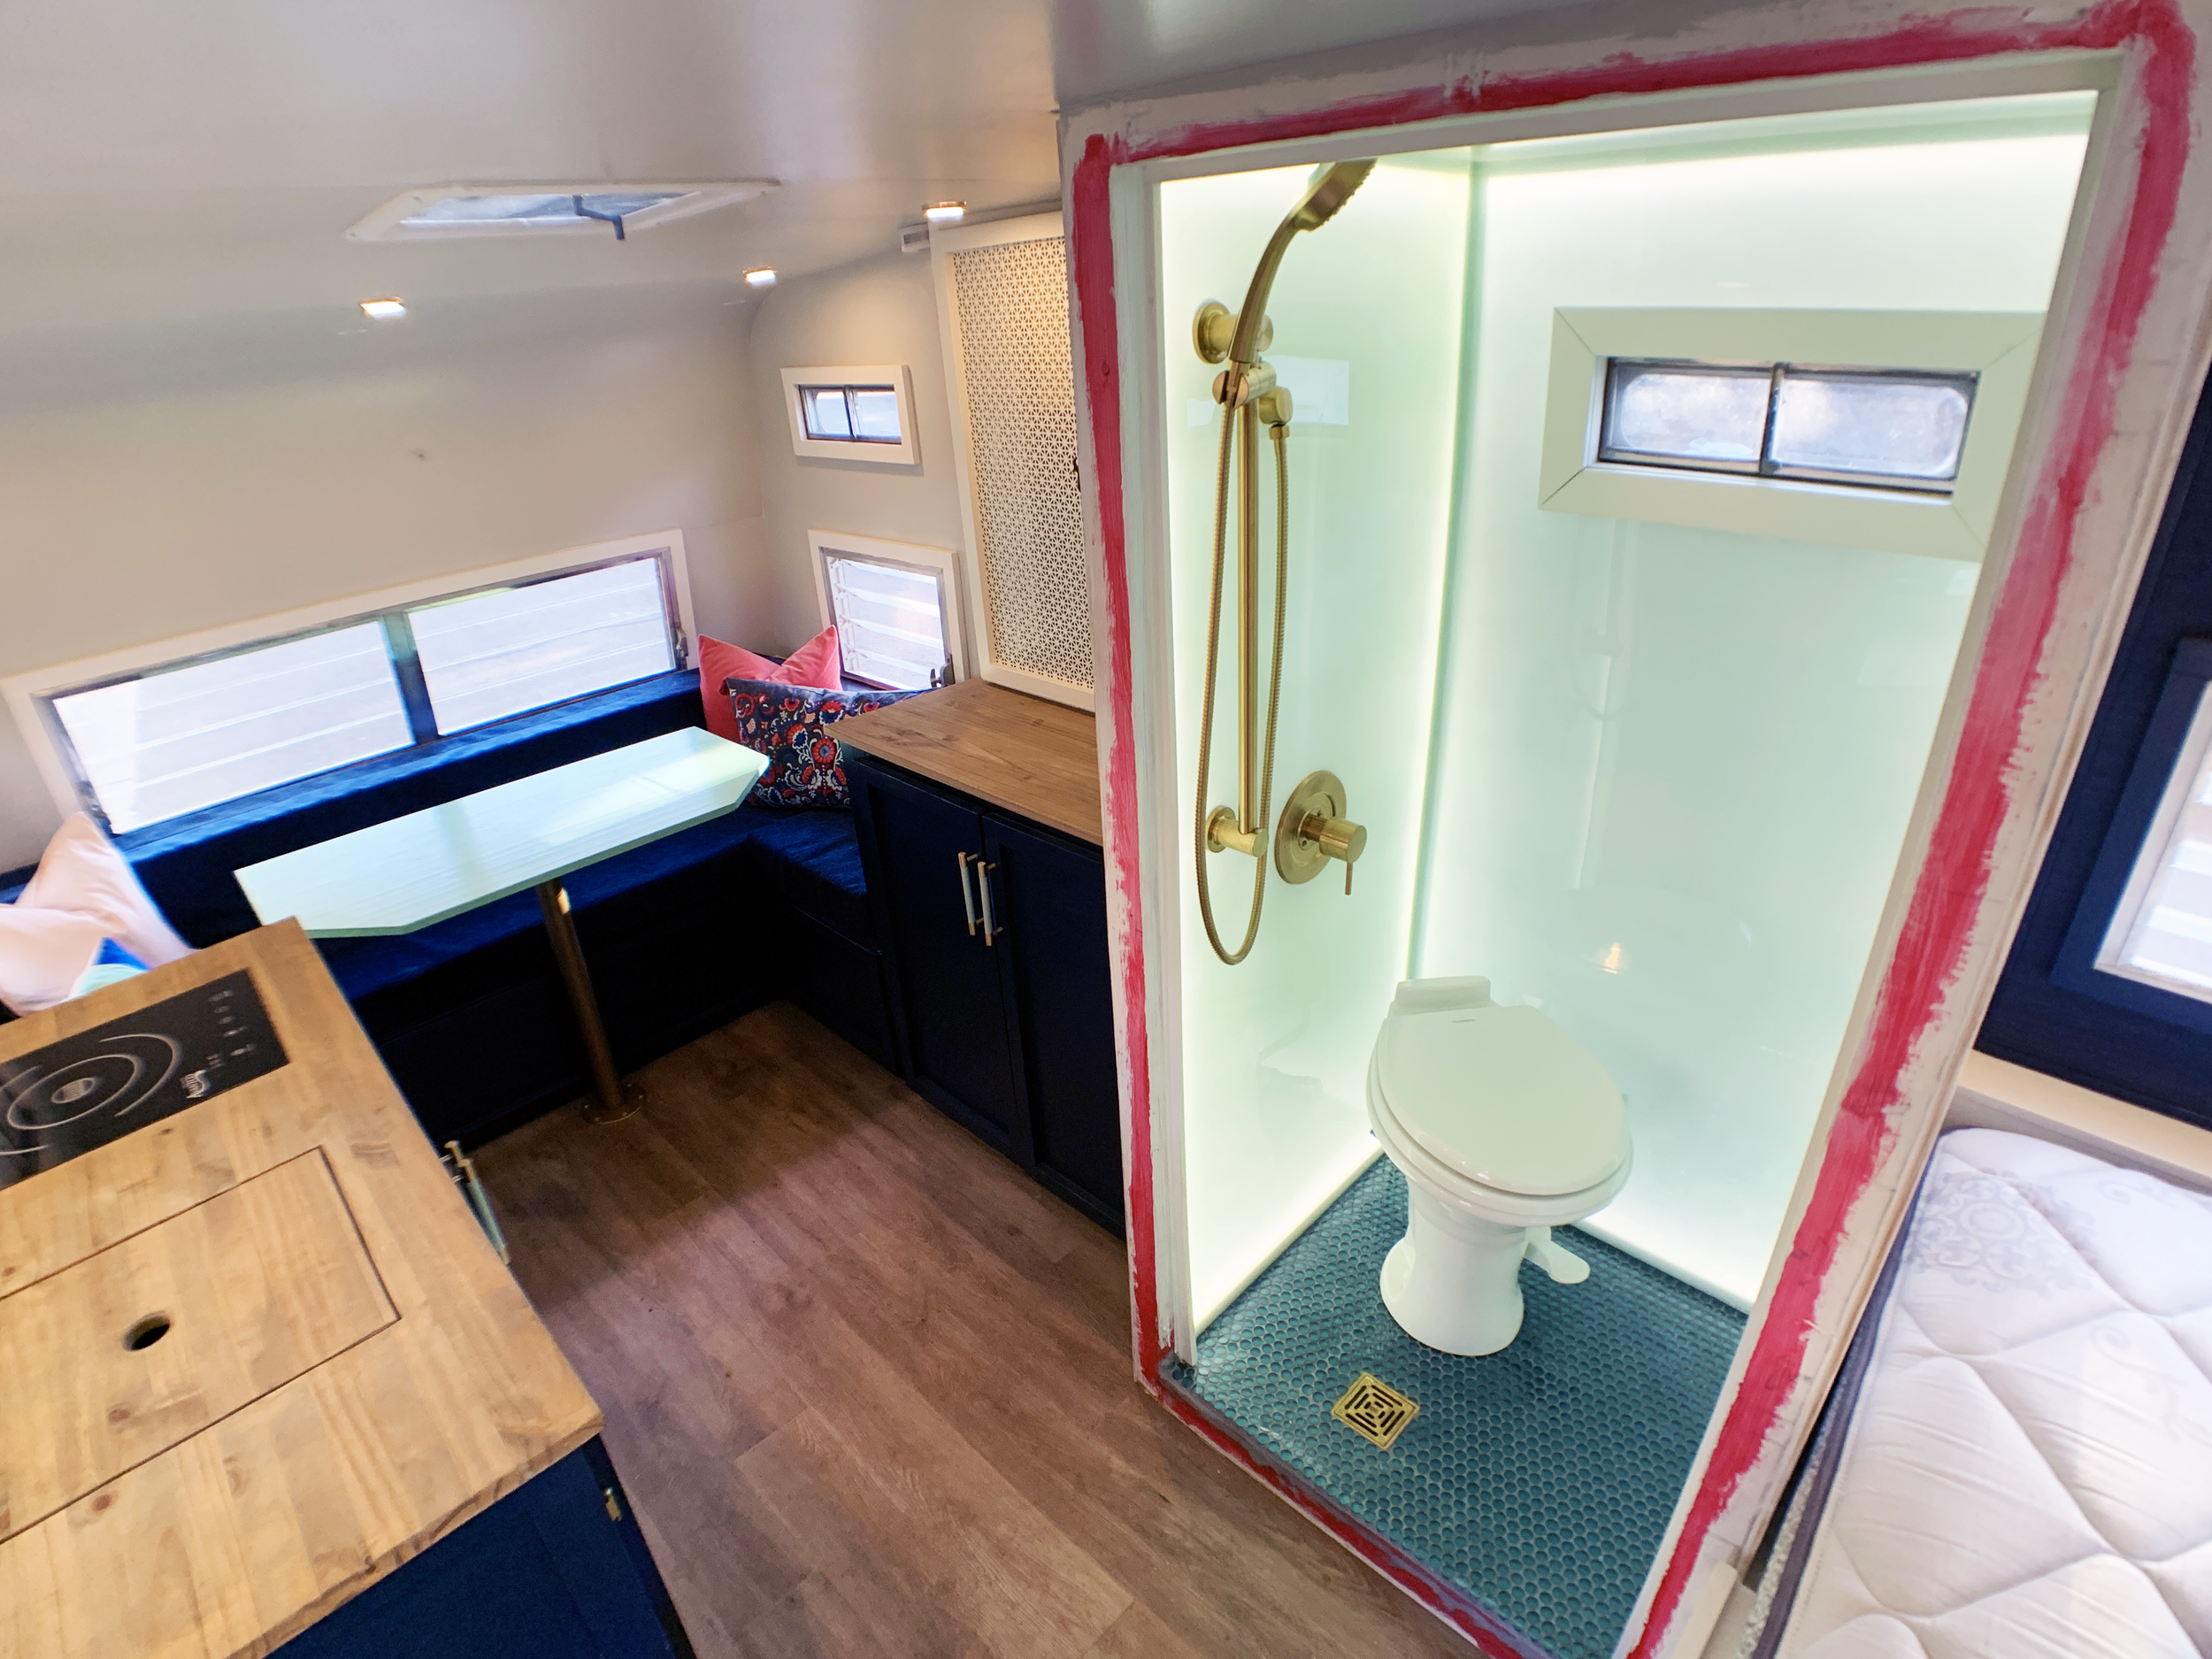
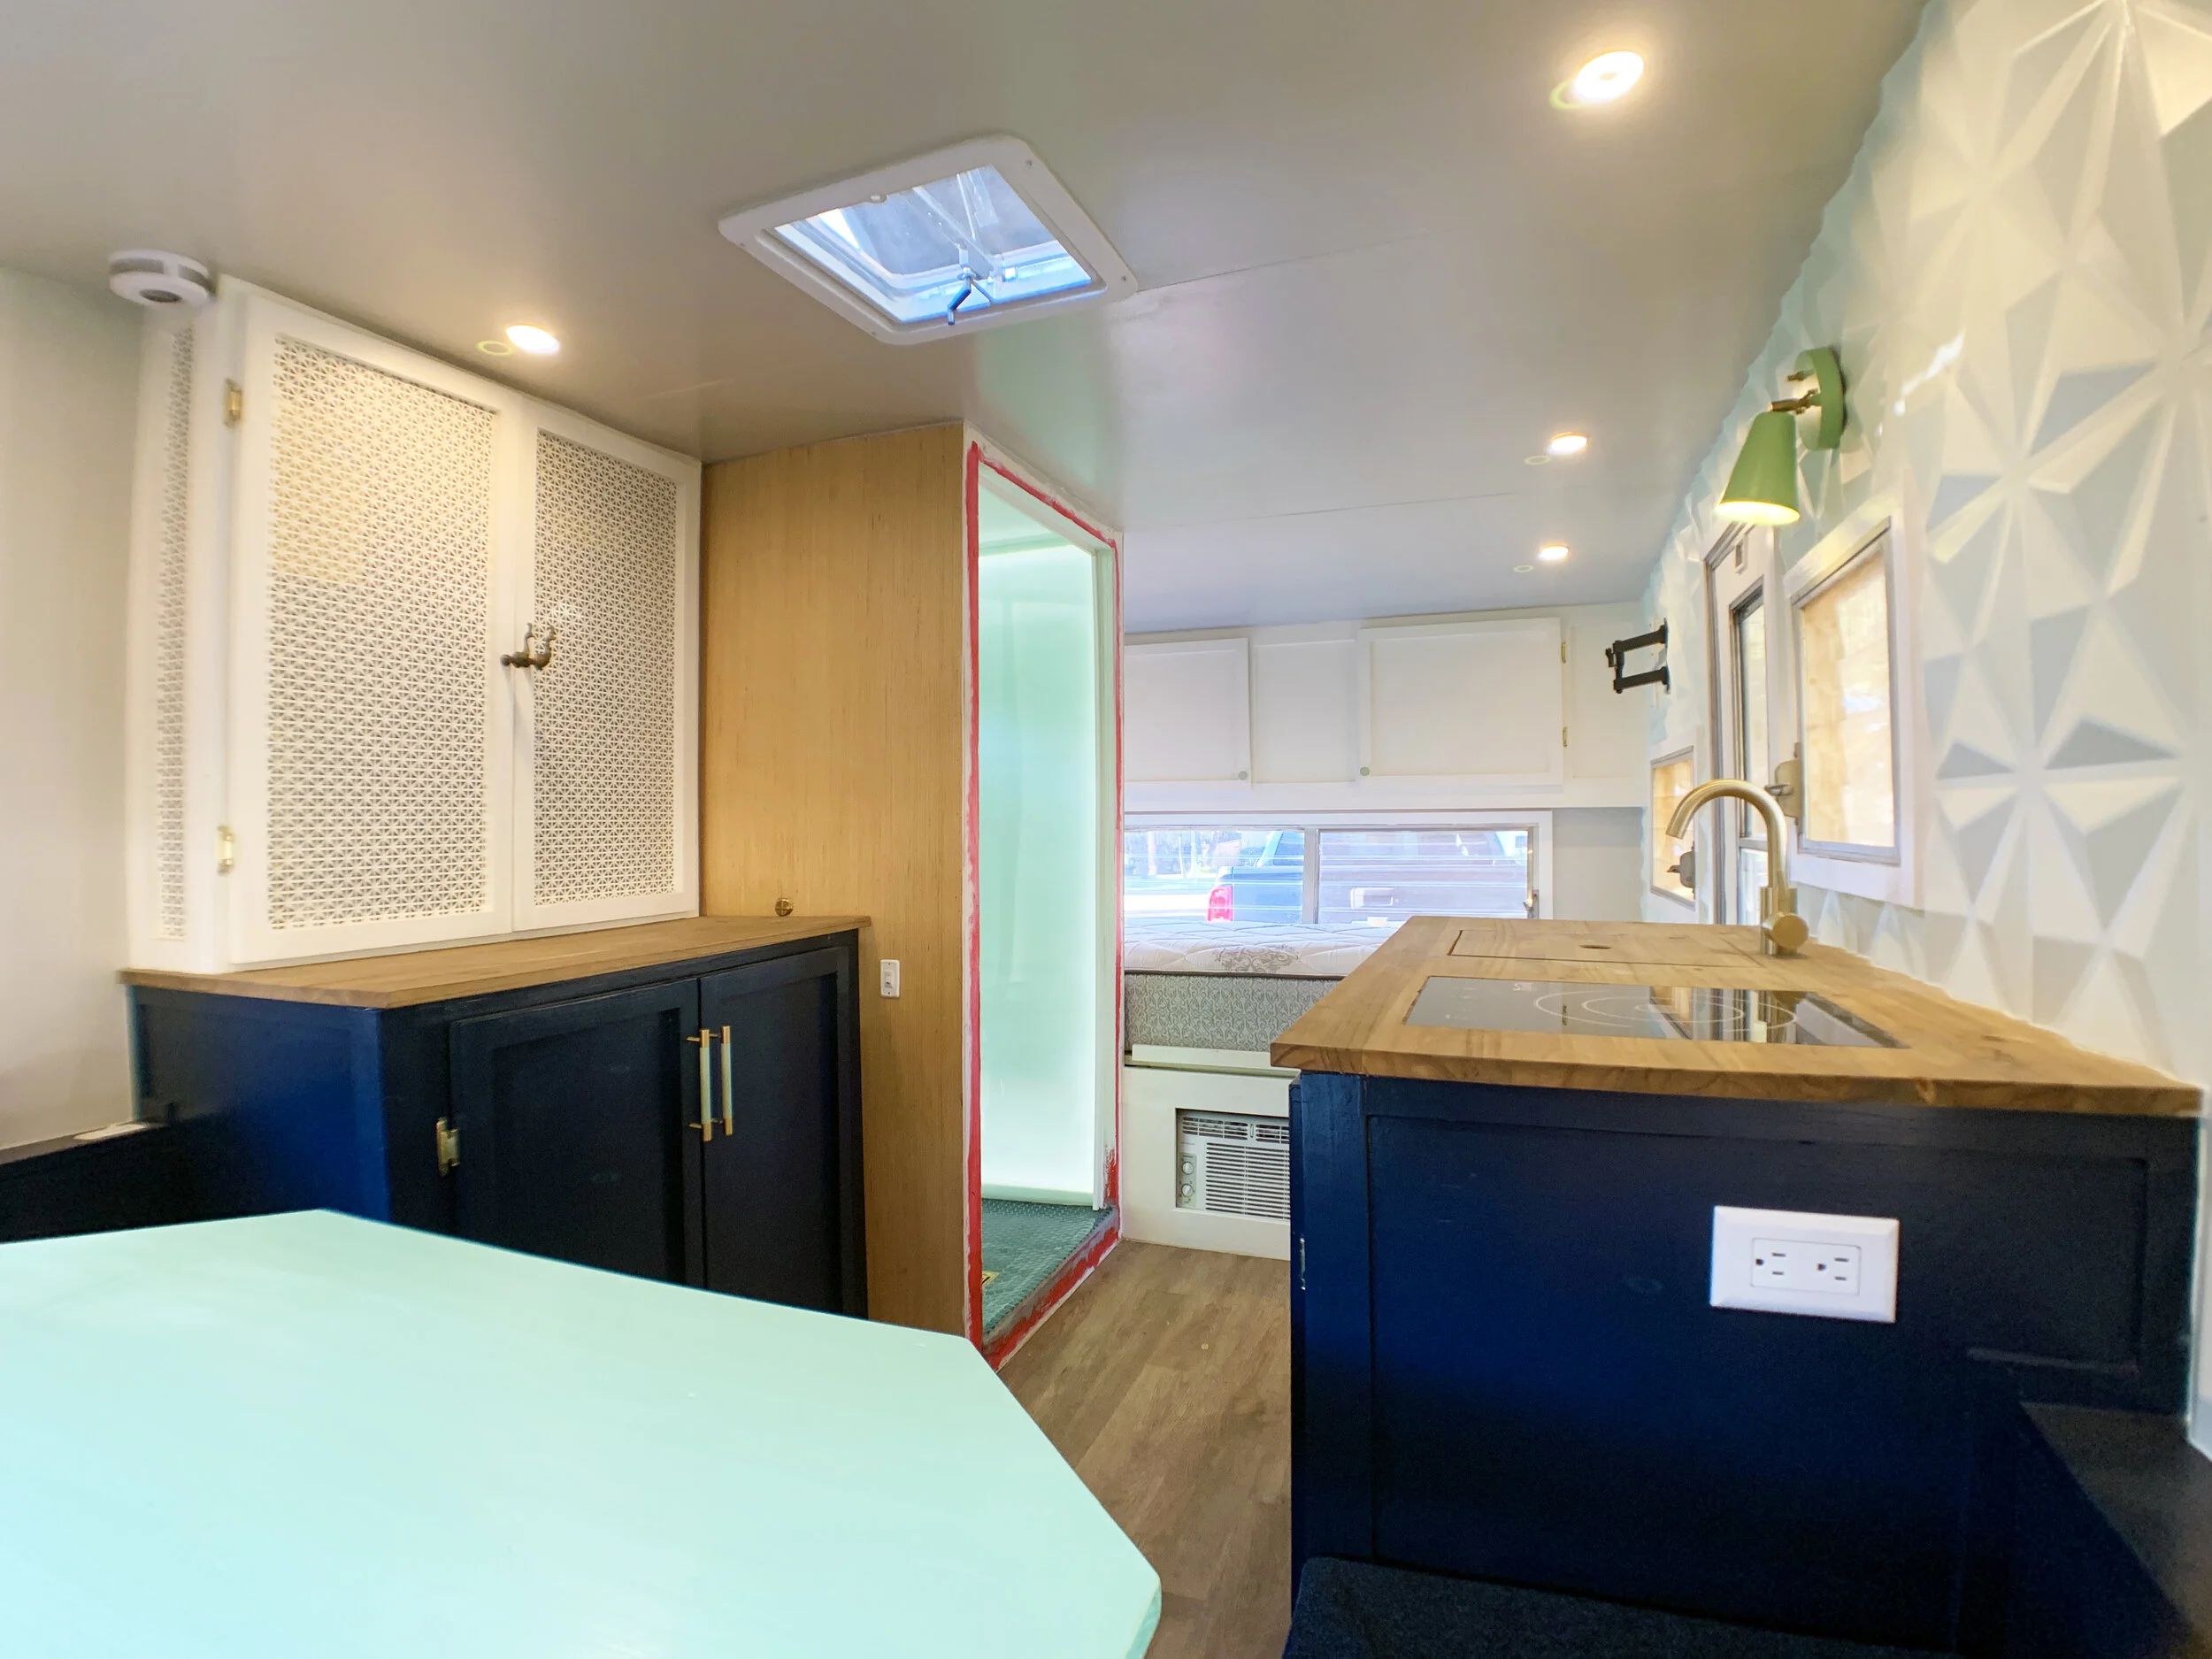
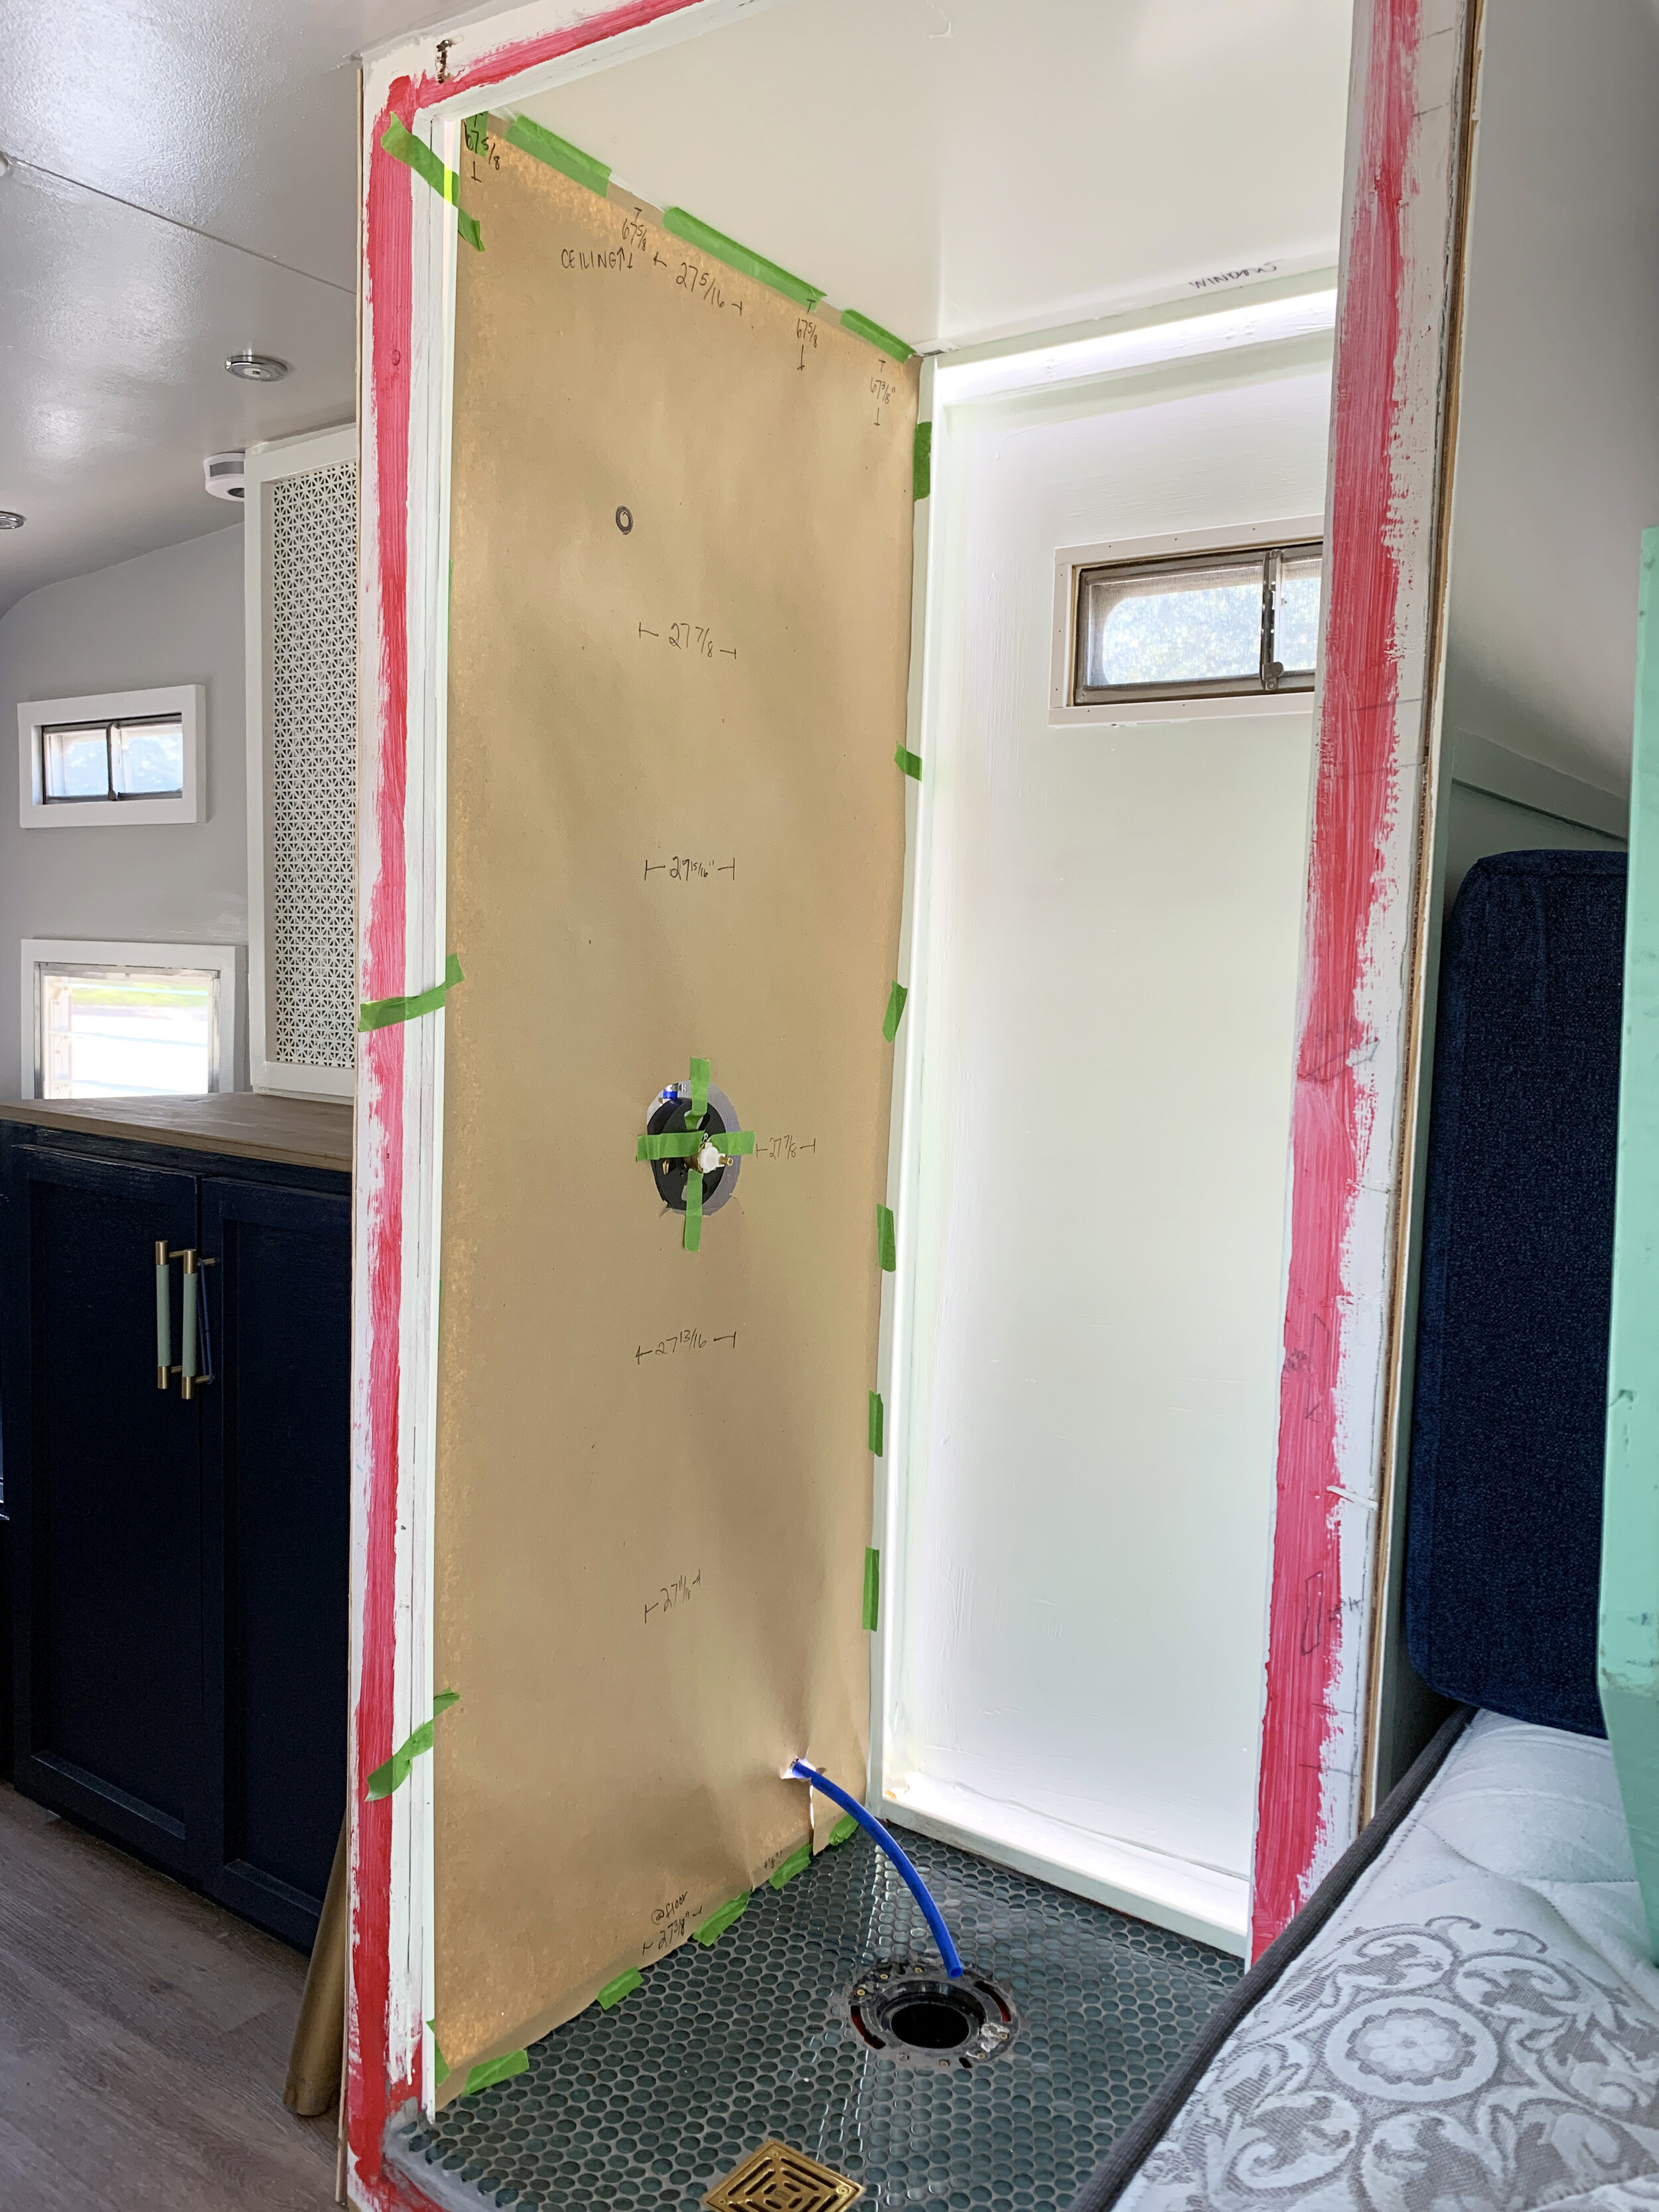
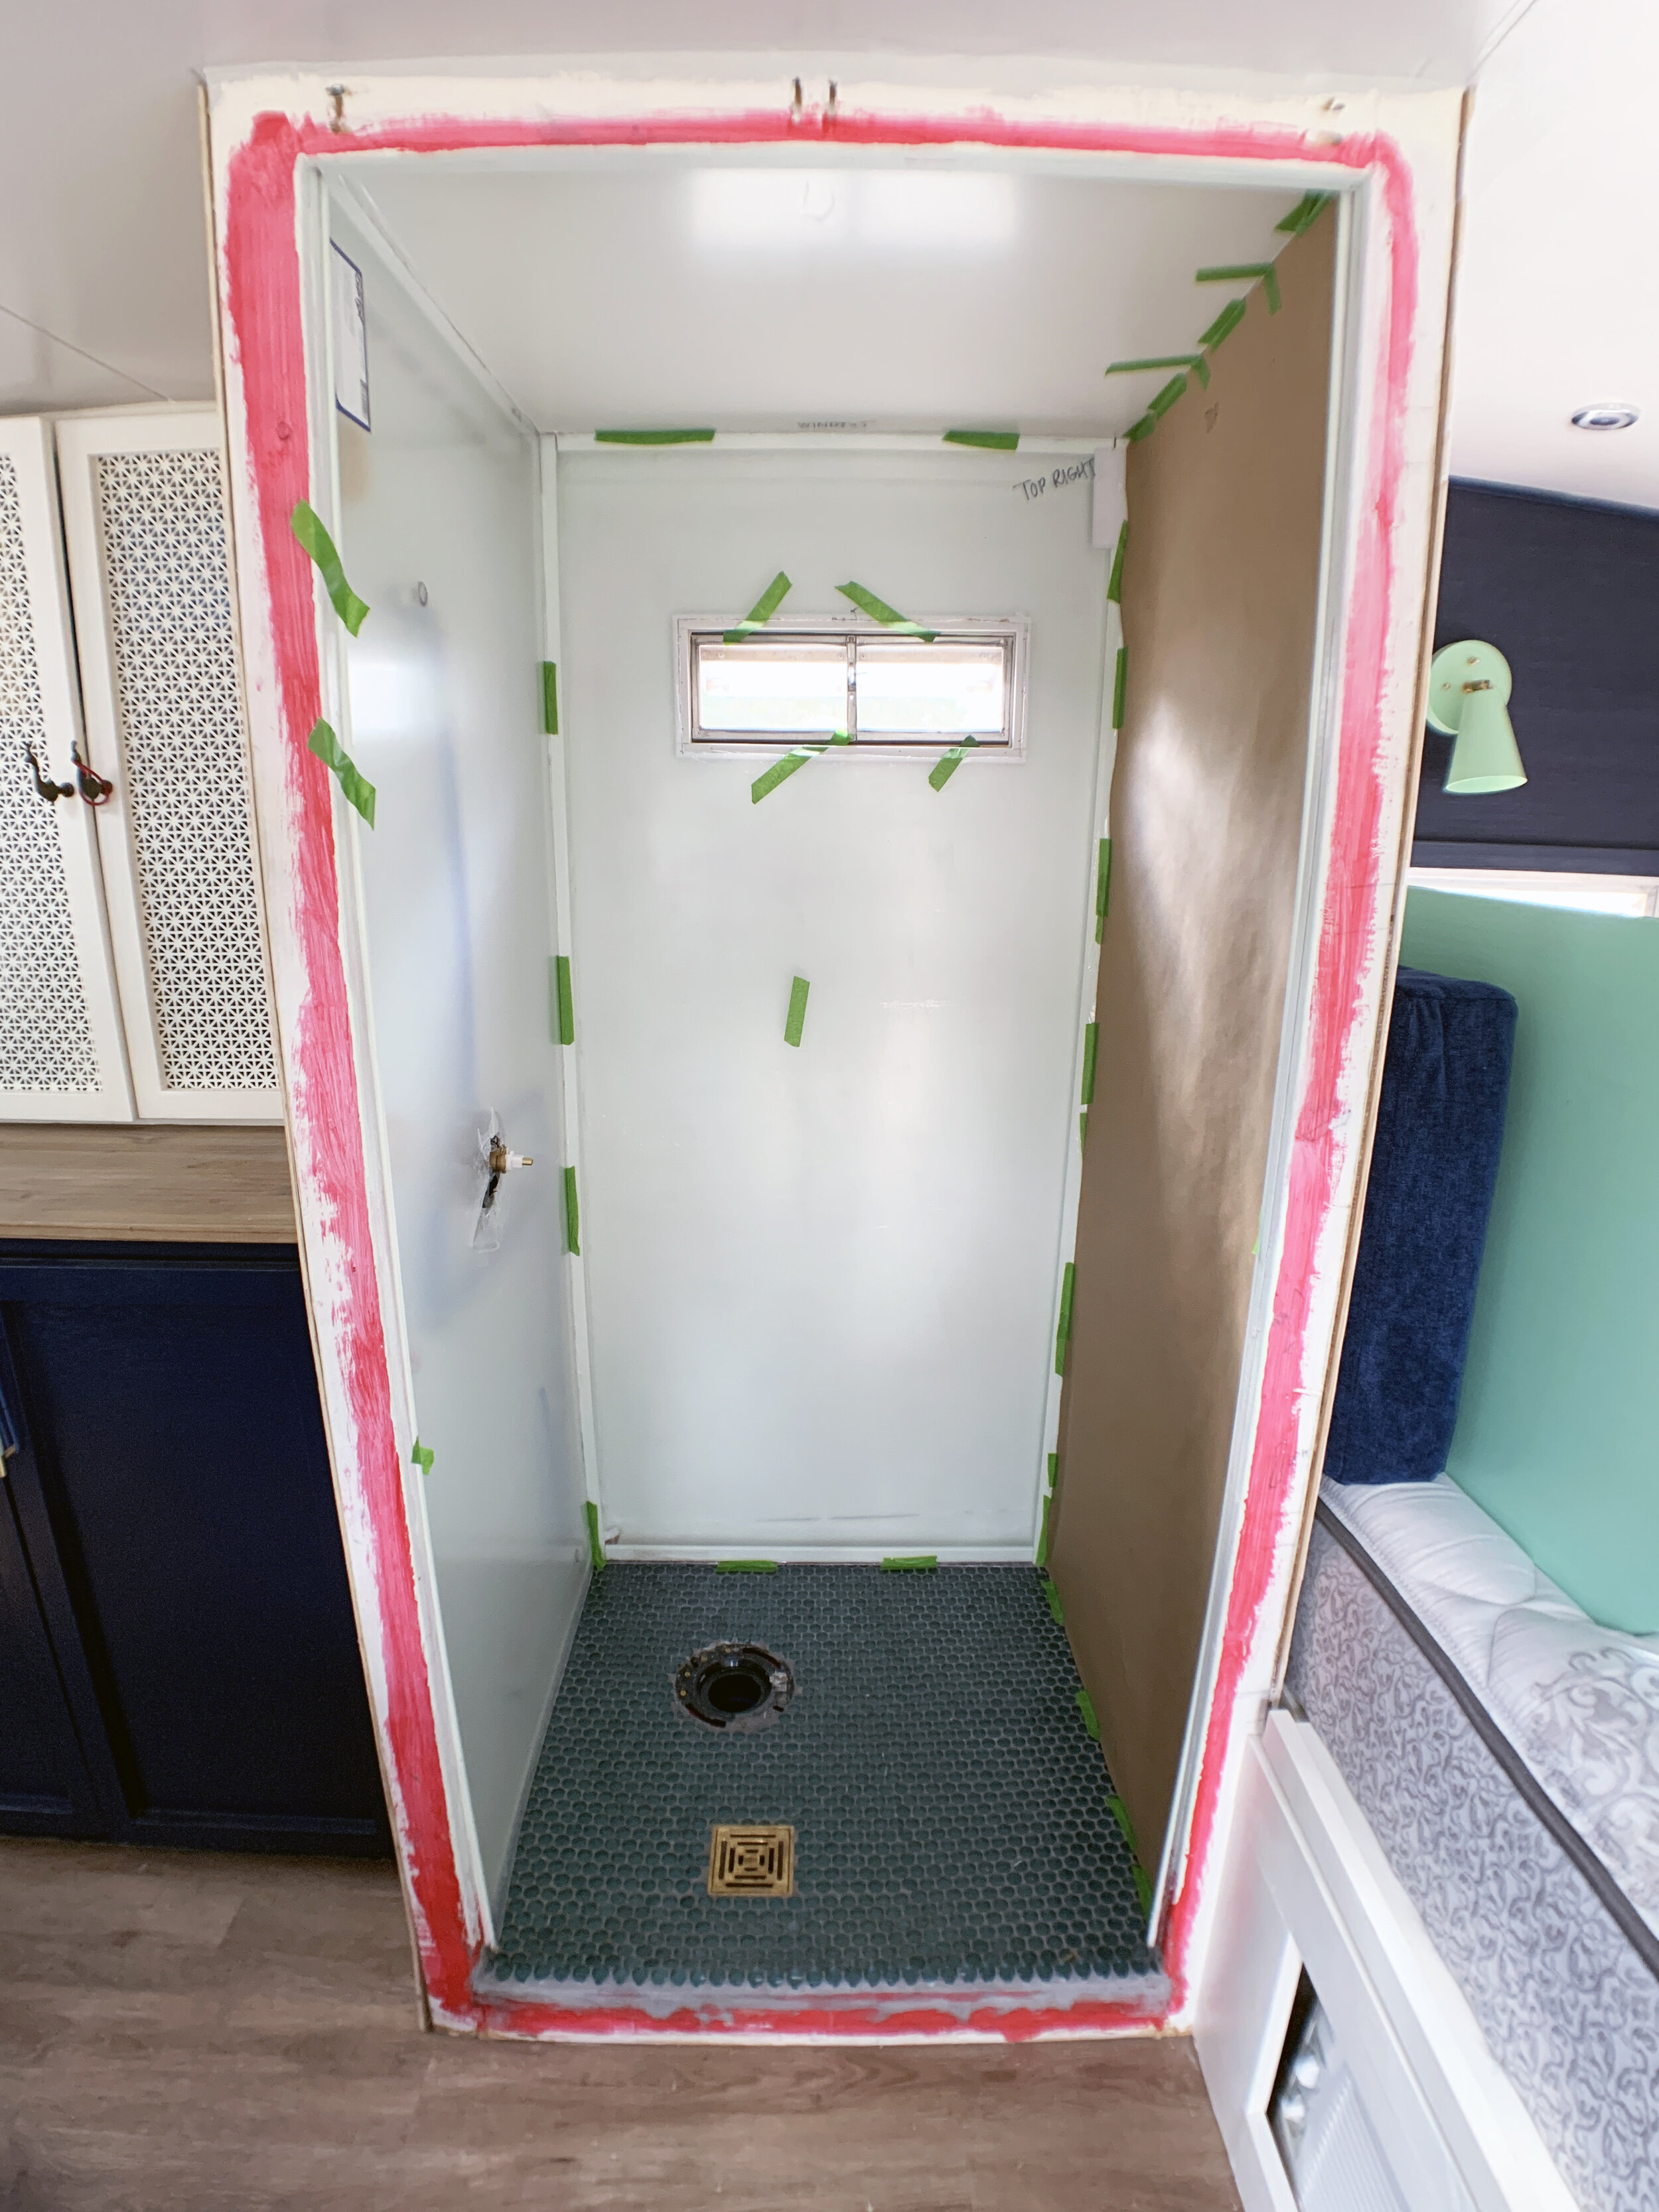
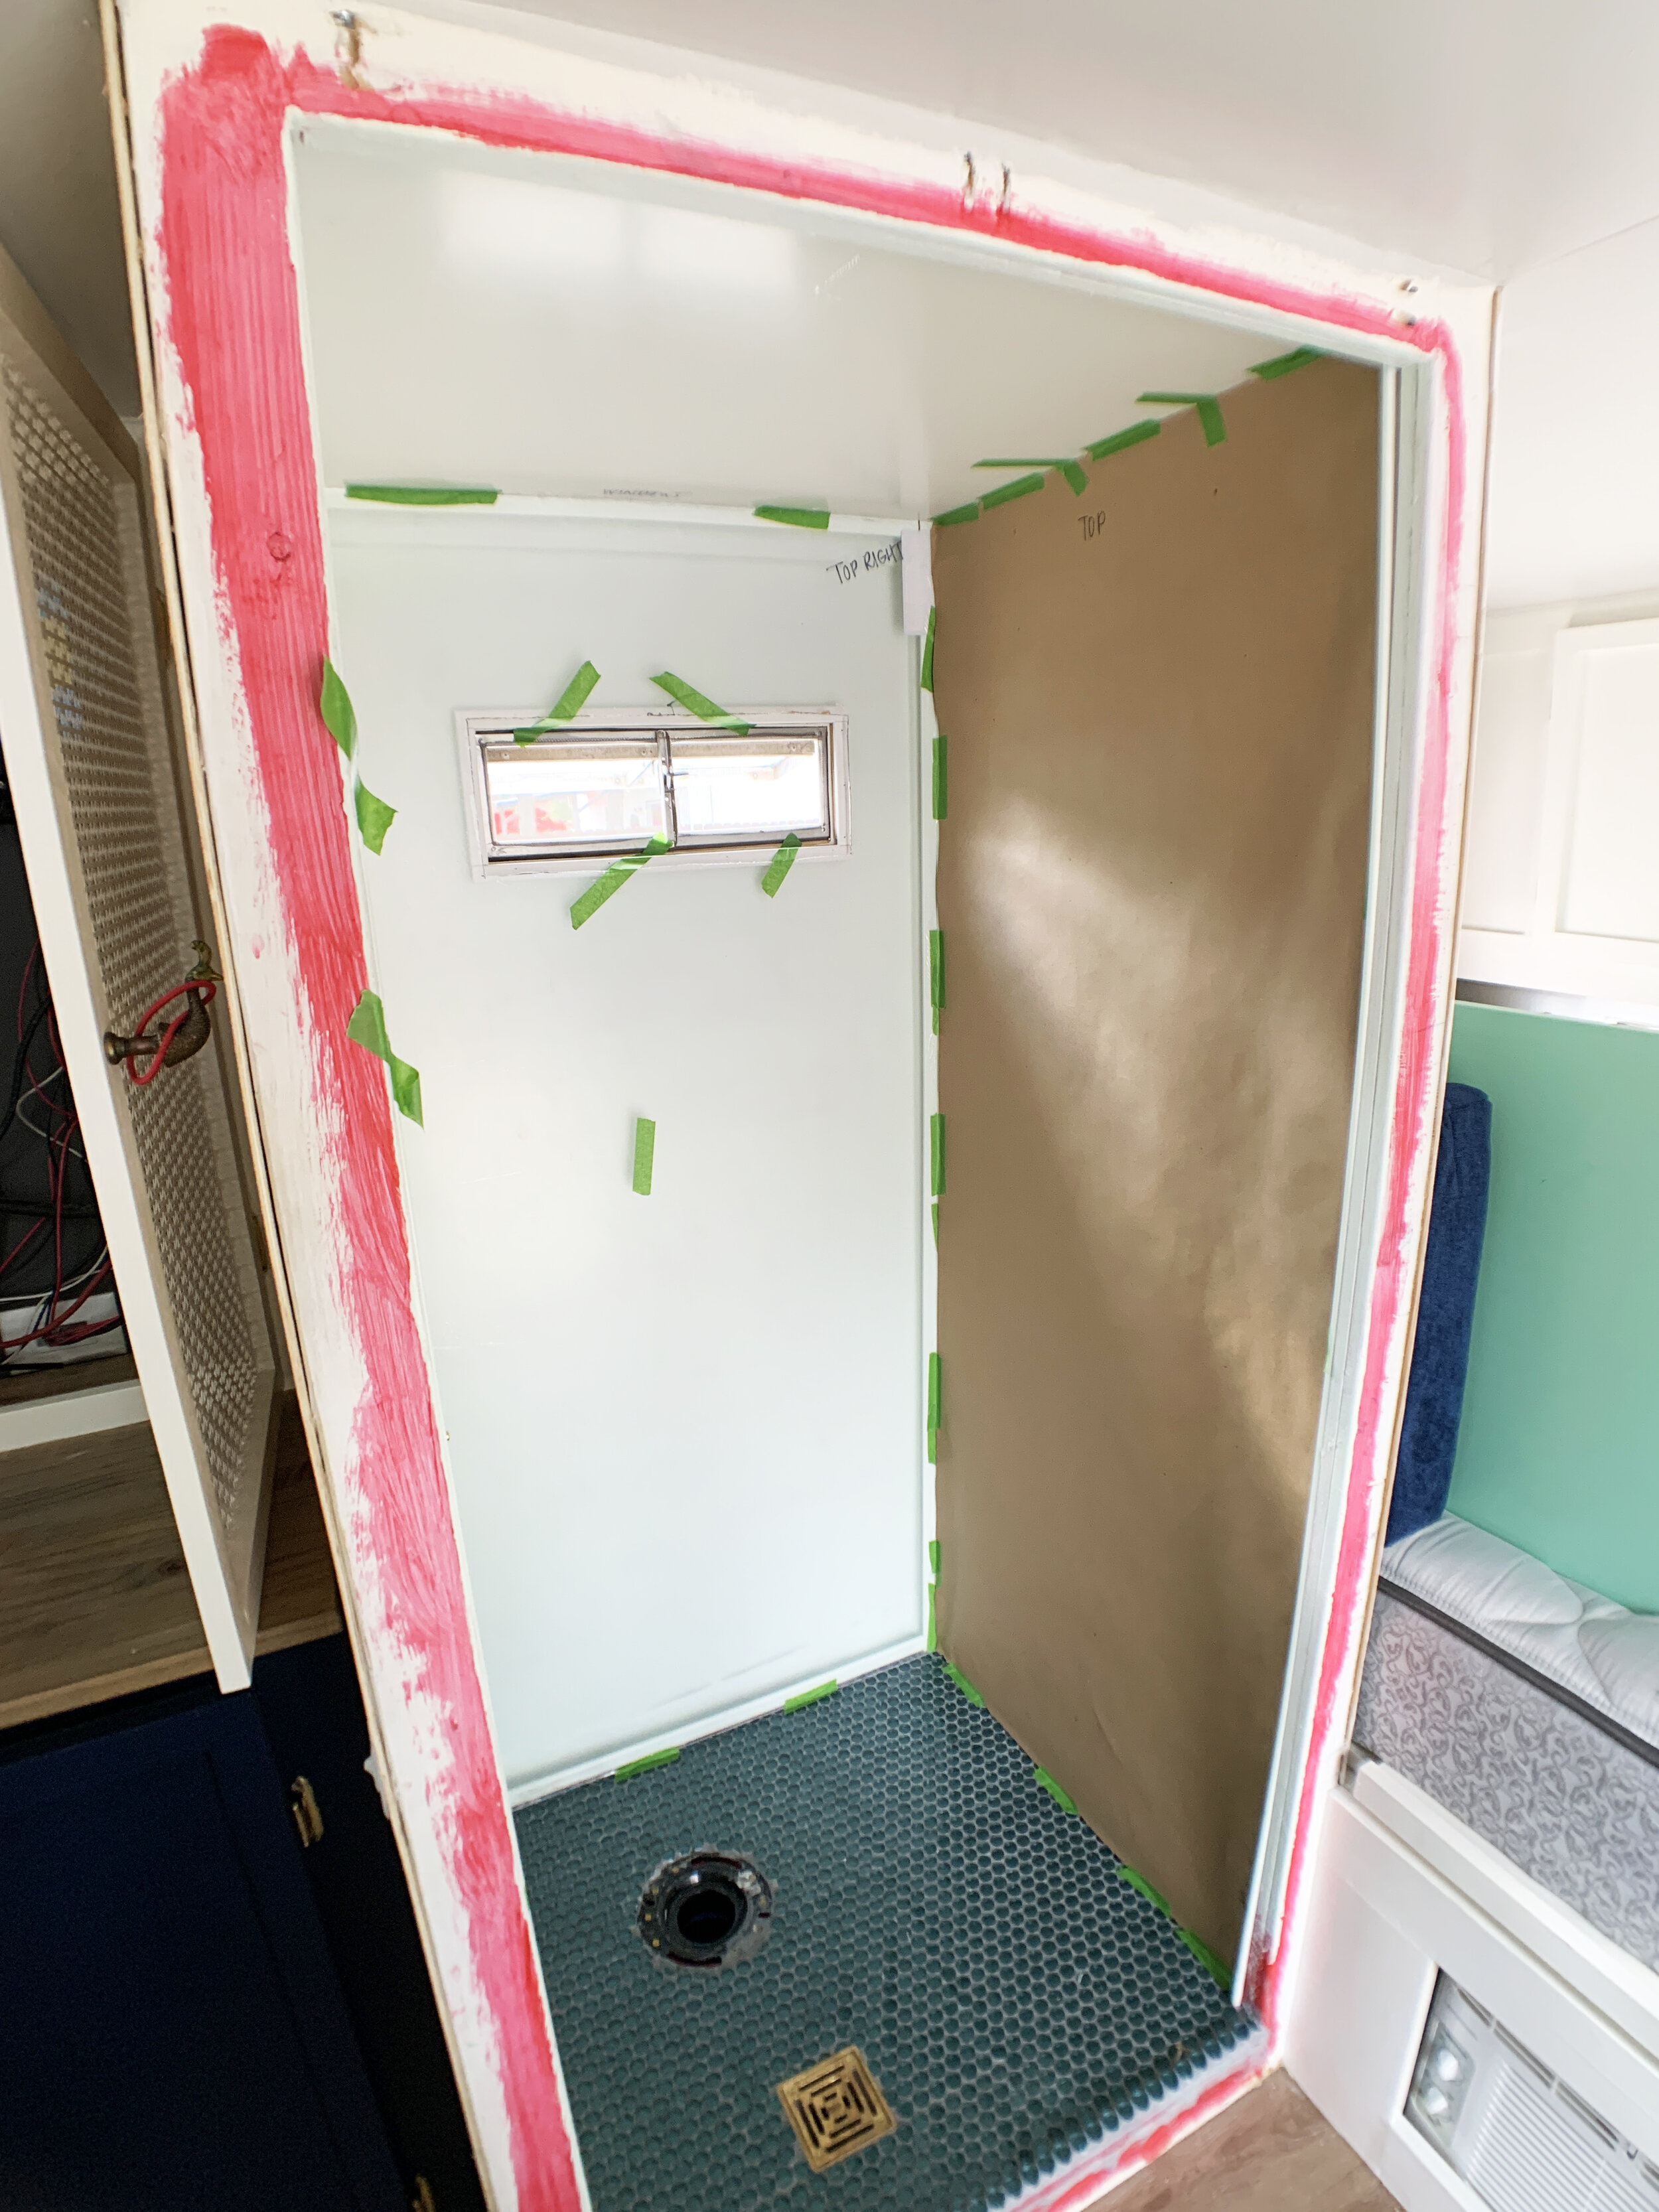
Being such a small area – now, rebuilt a little larger than the original at 33” wide x 29” deep x approx. 68” tall inside the room – it was important for us to come up with a lighting solution that didn’t hang into the space, taking up valuable space, as well as one that was safer than the exposed light fixture originally in this area.

The original bathroom with a big rectangle light up on the ceiling – It was mounted hanging into the space, with a rocker-style light switch on the bottom of the light itself so that it was exposed to water, with the electrical cord coming from the left and disappearing into the wall, leaving a possible entry point for water to get behind the shower surround.
Many things in the above photo scared us, and so, finding a way to backlight the interior walls quickly became my obsession, brainstorming many solutions over the nearly two years between when I first had the idea for a safer lighting solution, and when we were ready to actually do the work.
A note before we start
Now before we get into it, I’m going to be really, really honest with you.
We had some real struggles with these things. Problems with the painting/frosting … breaking three panels – and occasionally, our spirit – along the way.
At many times throughout this process, we felt like giving up entirely, myself stubbornly pushing forward to realize the harebrained idea I’d imagined for years now and we’d both re-worked so many times before on the hope of what might be, if we could get it to work. While I am thrilled with how it ultimately turned out and so enjoy reading the positive reactions from our wonderful followers (thank you), it certainly was not easy and I’m honestly not sure if it is for everyone.
I am, however, hopeful that if you do plan to do this in your own camper, that we can help you avoid some of the numerous pitfalls we faced during this project and get you a stellar, modern, and less frustrating waterproofed shower surround.
Our backlit shower walls (part 1) shopping list
This shopping list only includes what we used for this portion of the project. For the acrylic panel install, door build, electrical work and shower framing, I will include additional shopping lists in those particular posts.
Clear acrylic panels:
(3) full-size 36x72” panels (1 for each wall)
(1) smaller 36x30” panel (for the ceiling)
Kraft paper/large roll of paper – for templating walls
X-acto knife + blades
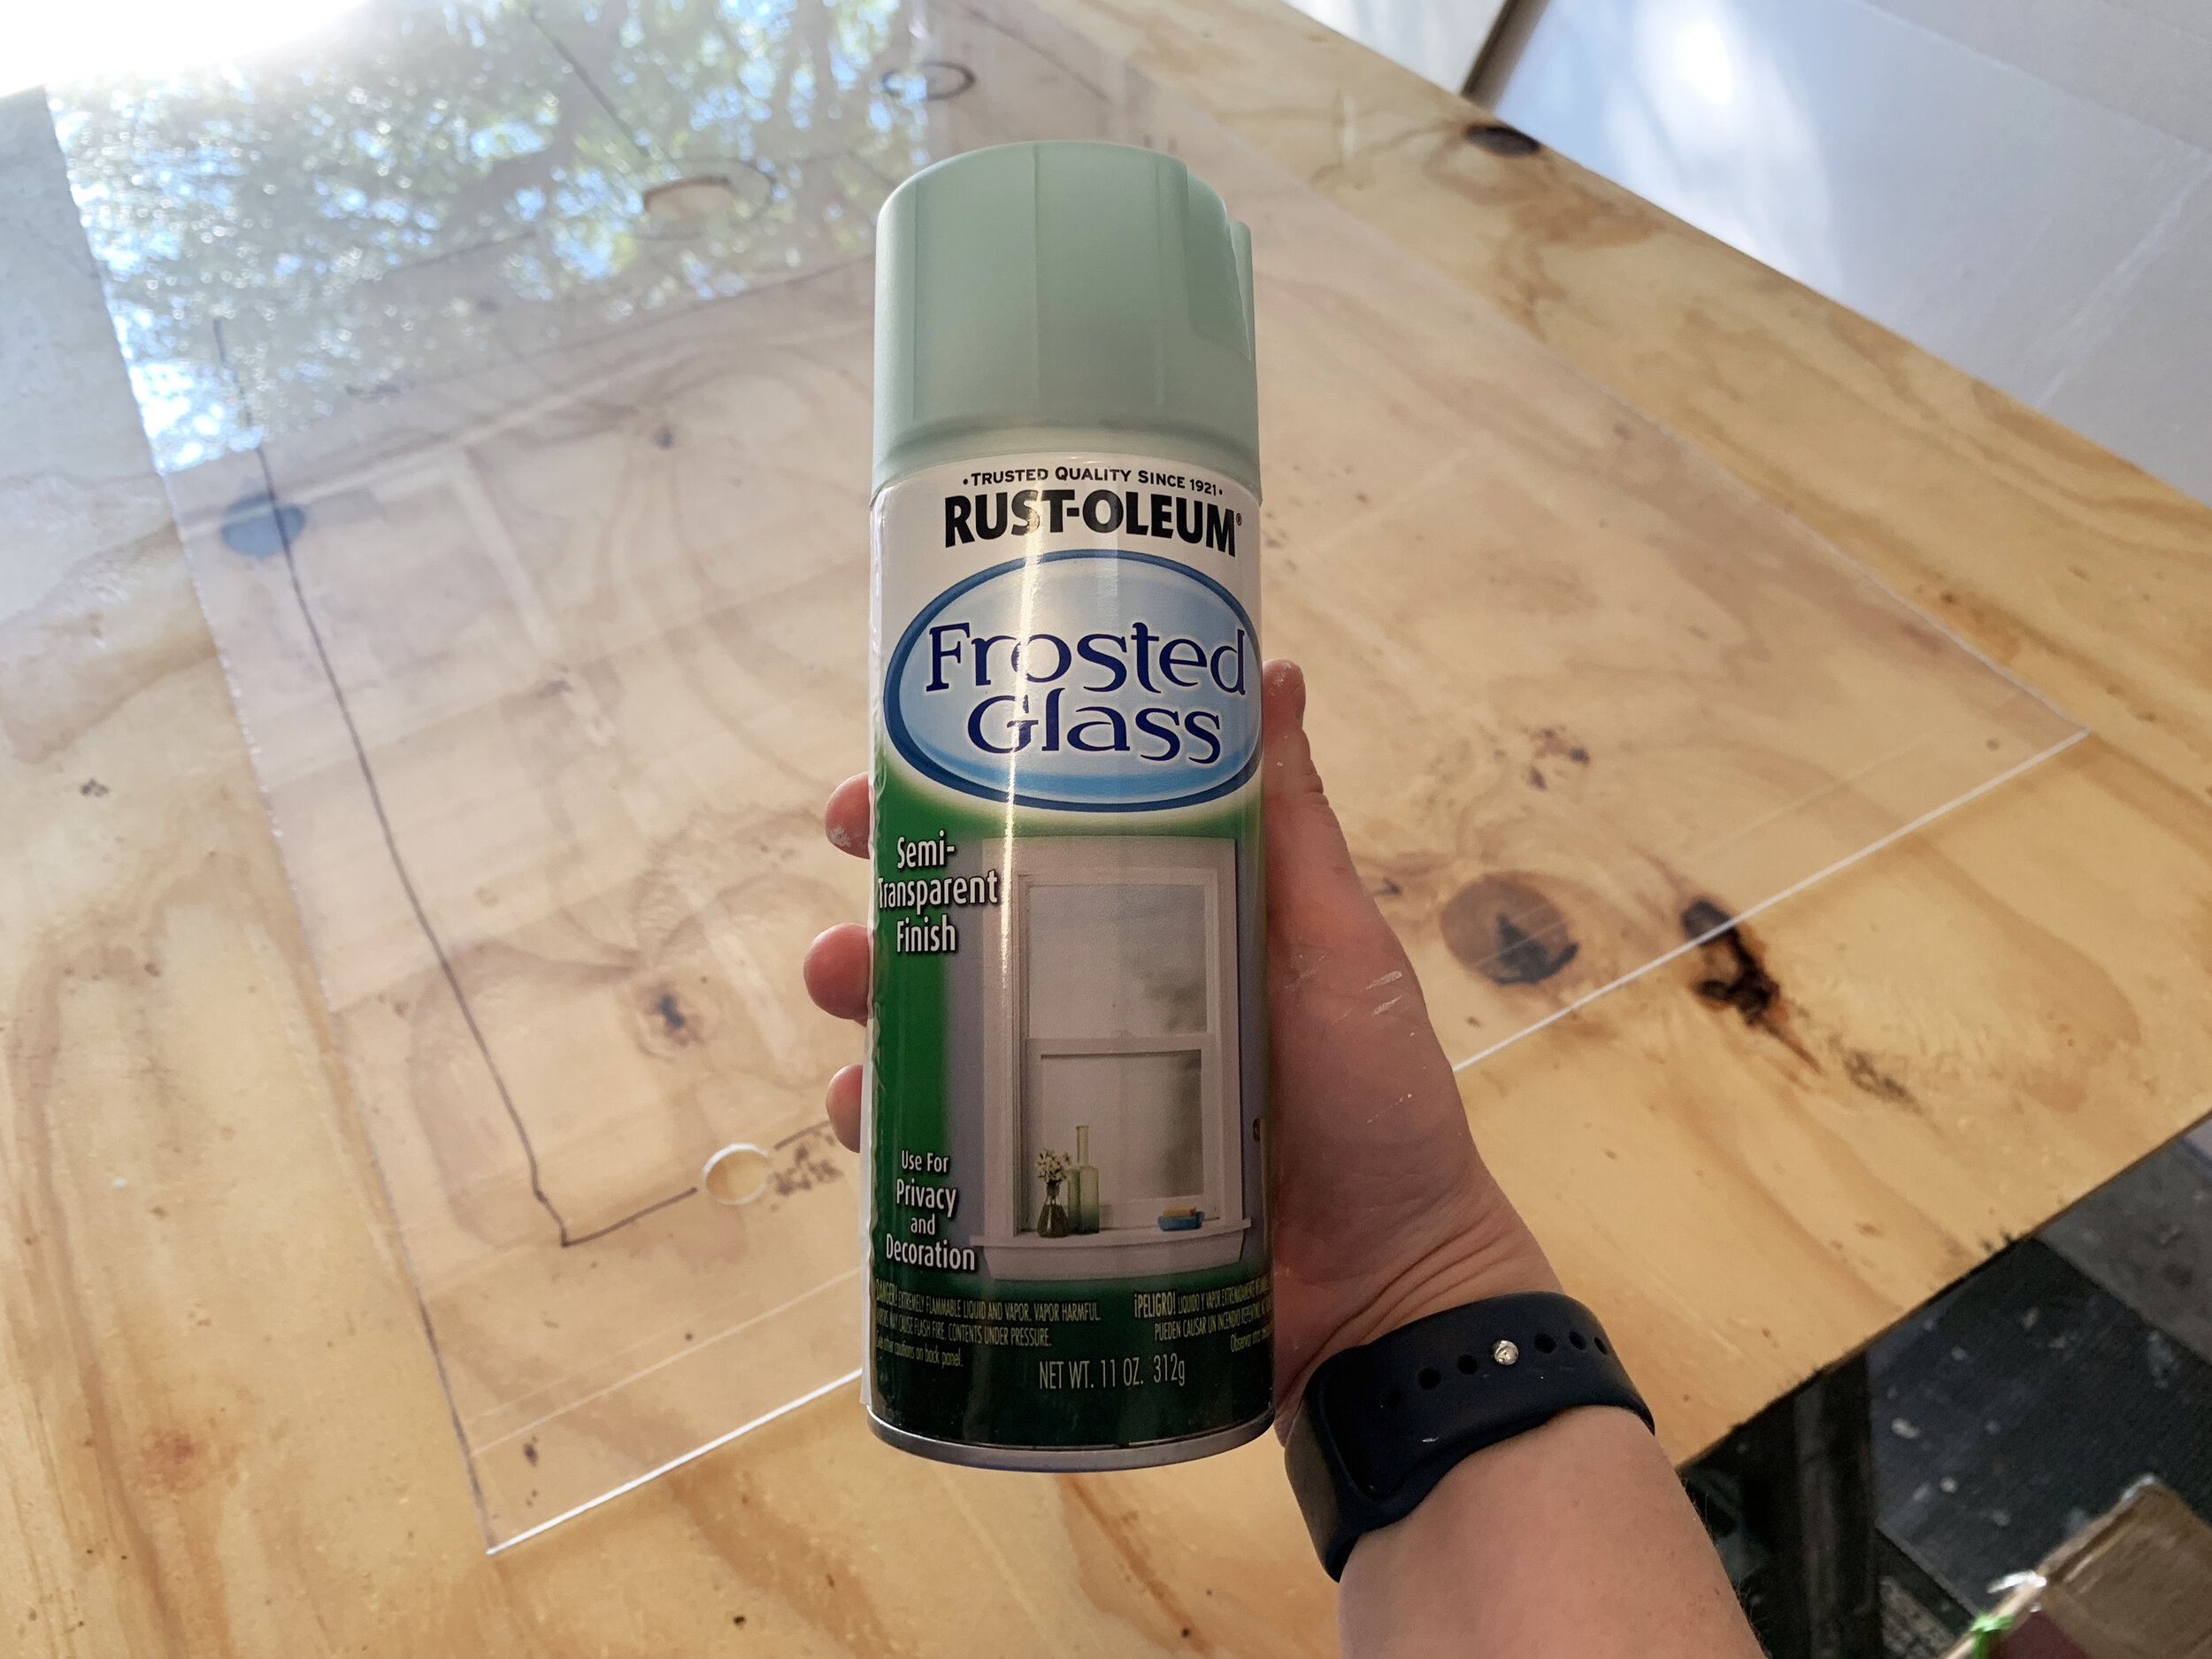
Frosted sea glass spray paint – for any areas being backlit; in our case the left, back and right walls. It also comes in the regular white frosted color.
Solid latex paint – for any areas you don’t need/want to be backlit; in our case the ceiling panel and door. We used the same SW White Mint paint we used on our 3D wall.
Paint roller + foam rollers – we like these 6” cabinet + door foam rollers for this
Spray paint handle* – optional, but recommended for comfort with this amount of spray painting
Mask/respirator
Work gloves – to protect yourself from sharp acrylic edges
Sharpie
Tape measure
Long level, or something else to draw cut lines
Painters tape
Safety glasses
Circular saw
Stable cutting table/surface – we used sawhorses and sheets of plywood
Drill + various bit sizes
Hole saw(s)/spade bits for drill – will depend on your specific fixtures/shower’s needs. We used a 1” spade bit as a pilot hole for our jigsaw, but it just needs to be larger than the jigsaw blade.
Jigsaw
Dremel with sanding wheel – for making micro trims to the panel edges
Safety + caring for acrylic sheets
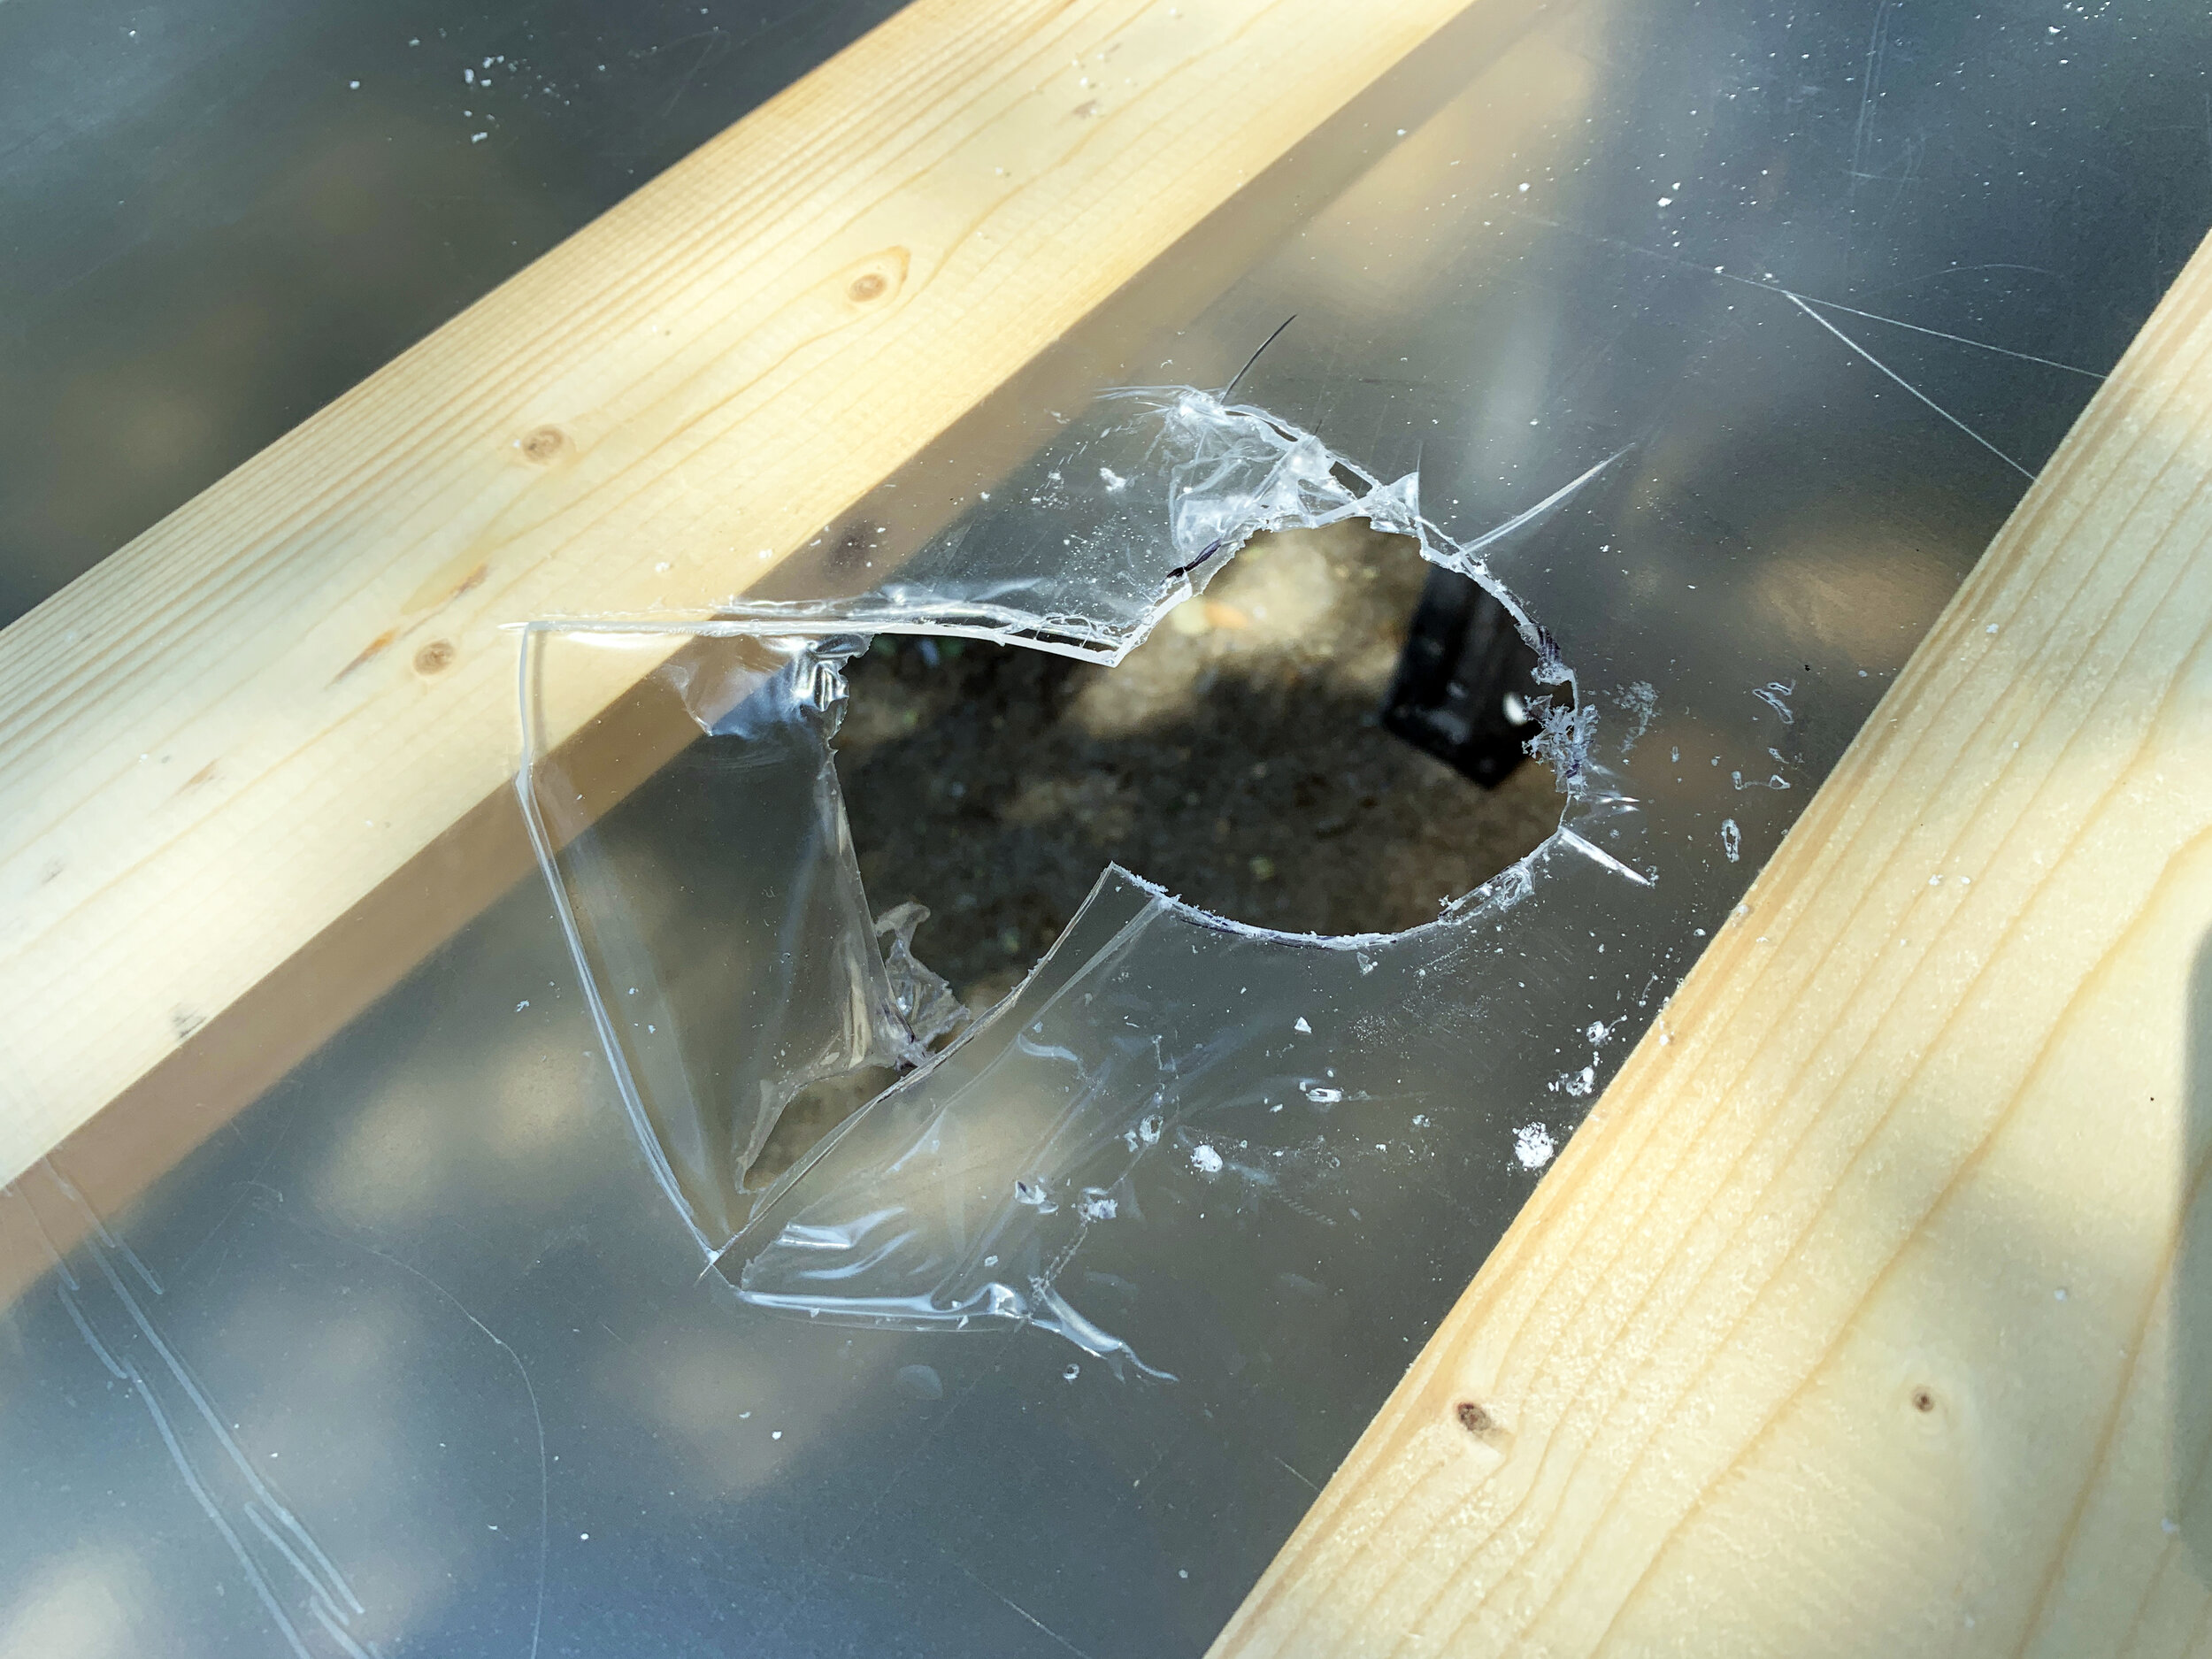
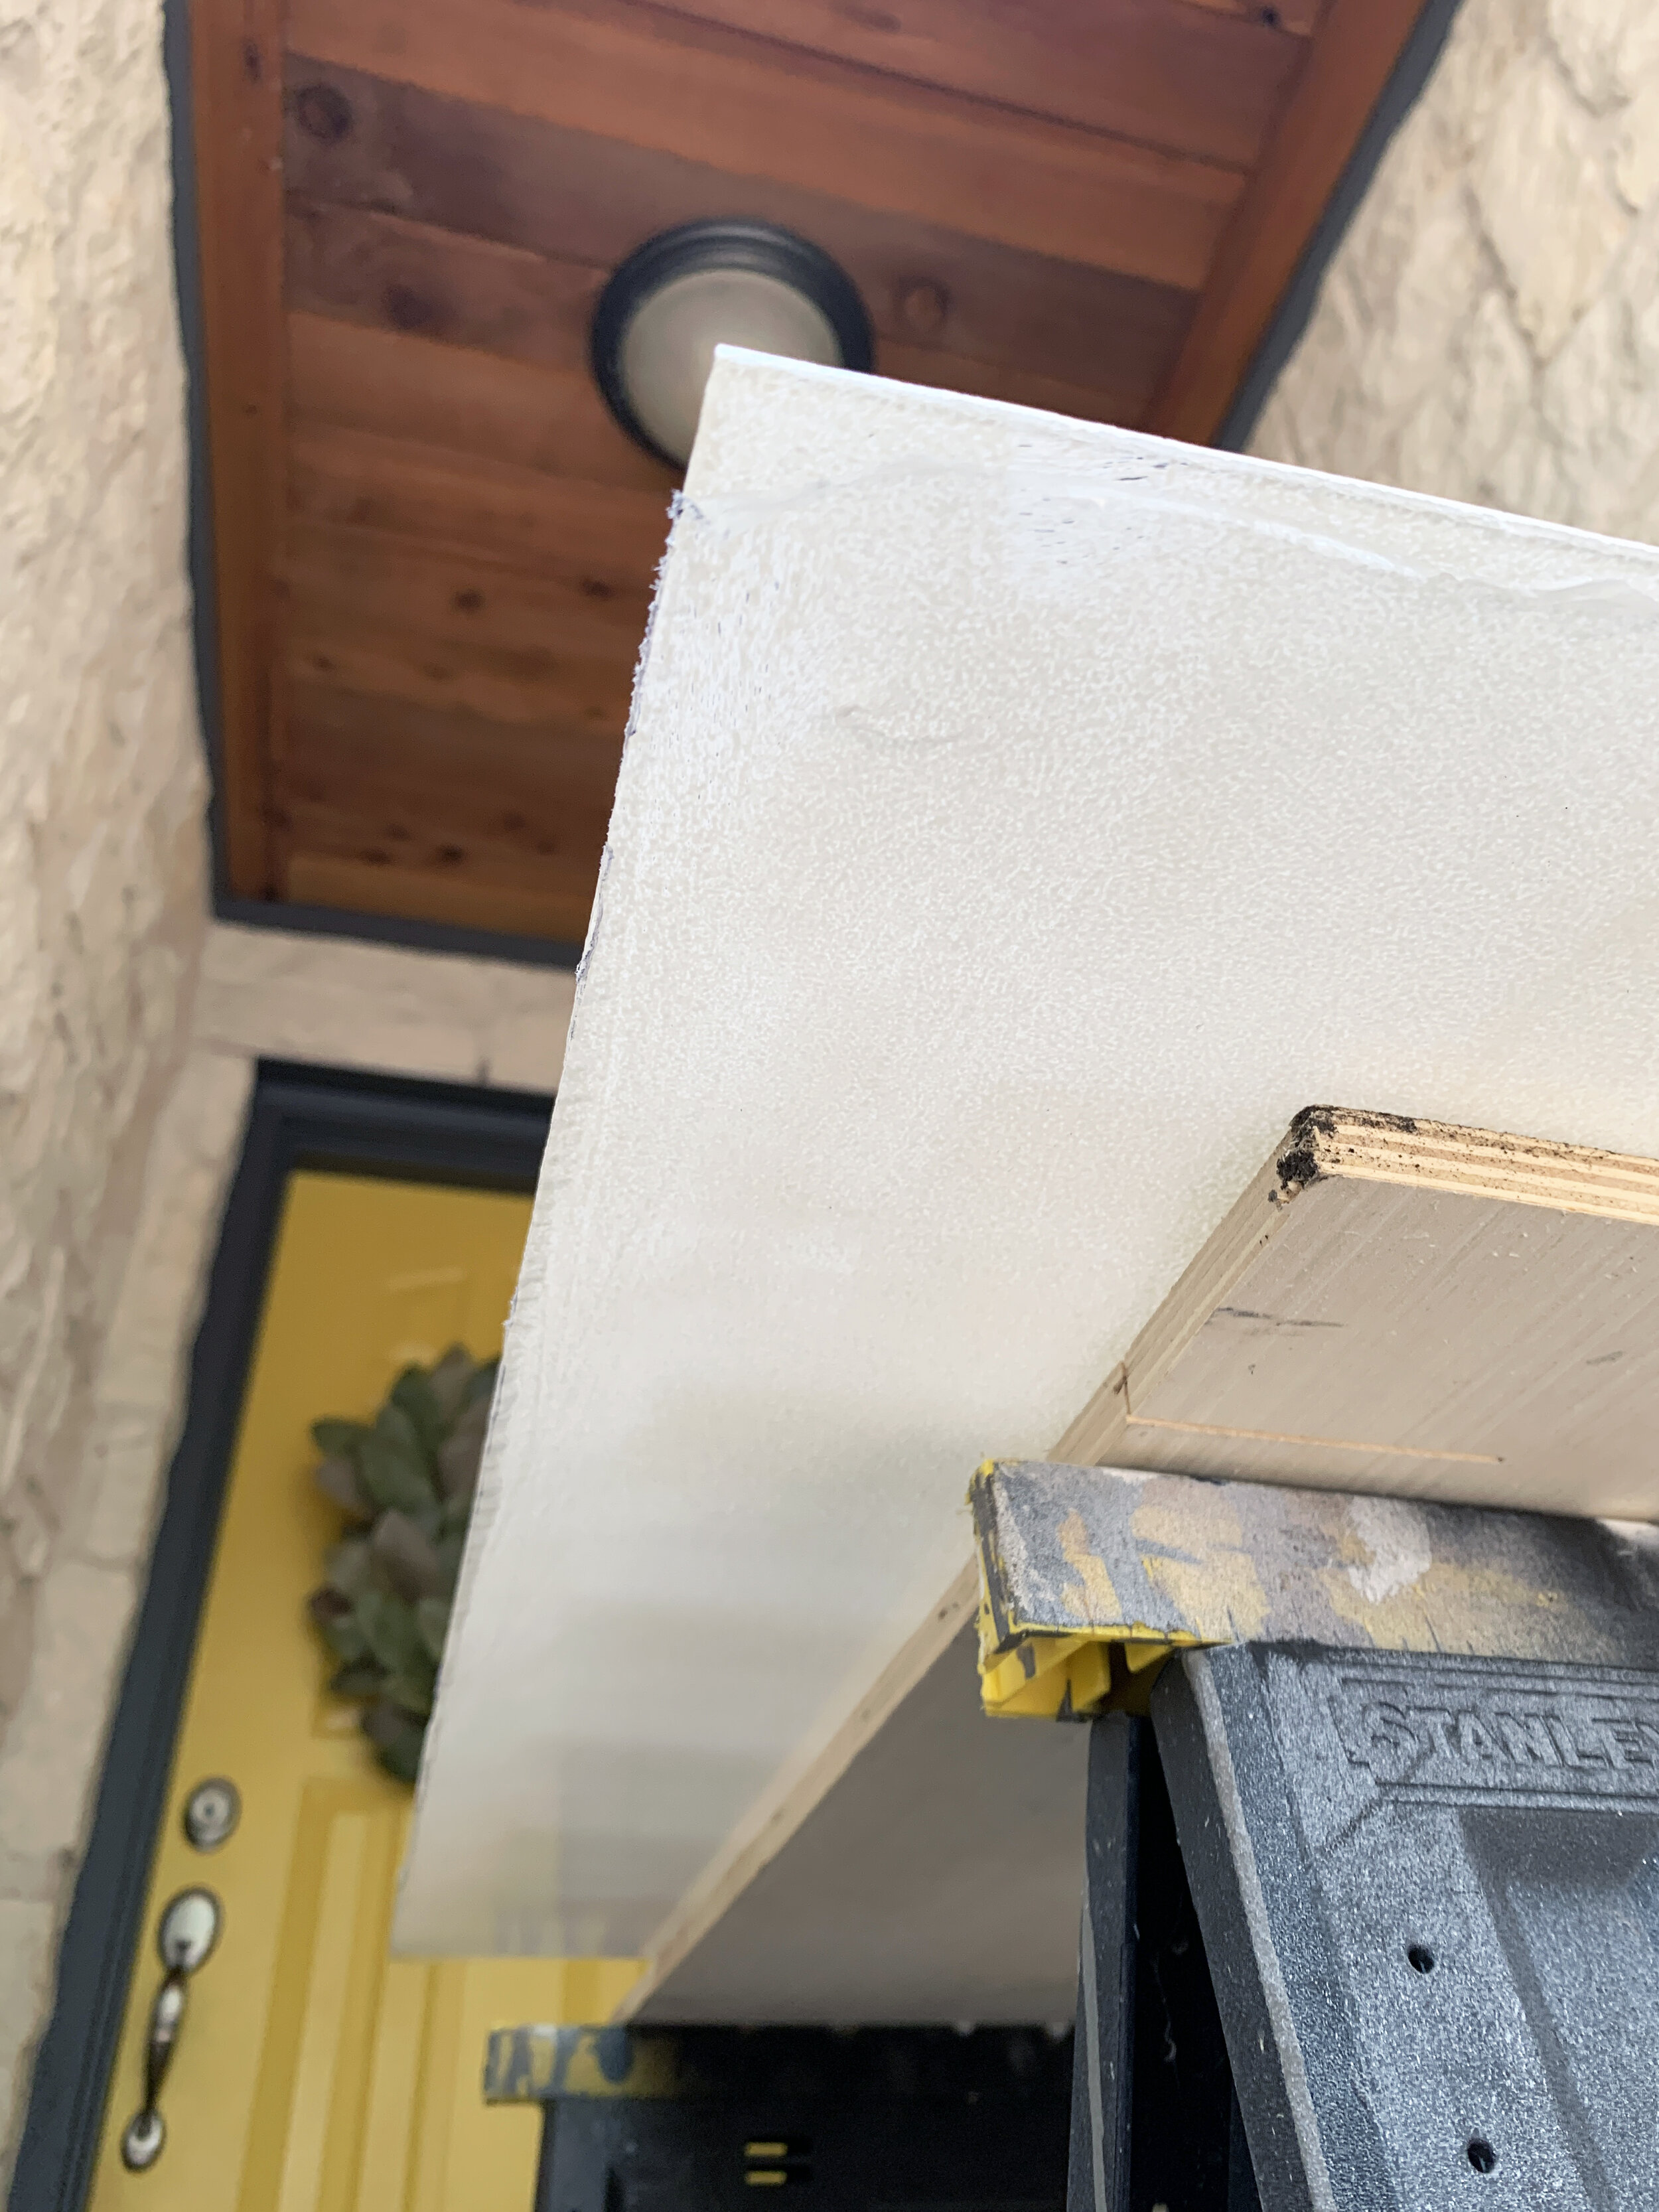
It might be different in your area (and vary with COVID), but we had luck ordering our acrylic panels online and choosing locker pickup from a couple of different locations in town. When bringing the acrylic sheets home in the truck bed and when we got the panels home, we made sure to keep them pretty straight and flat to avoid cracking or breaking. The acrylic panels are flexible – and at the request of one of our curious followers I stress-tested a panel, finding out the long length can curve to bend about 90° – but as we later found out, definitely have their limits and will scare the bejeezus out of you if/when they pop. The corners also can easily chip if they are set down too hard, causing very sharp, stabby edges, so do be careful and wear gloves when handling the acrylic sheets, and safety glasses, as it does definitely effectively turn into shrapnel when being cut.
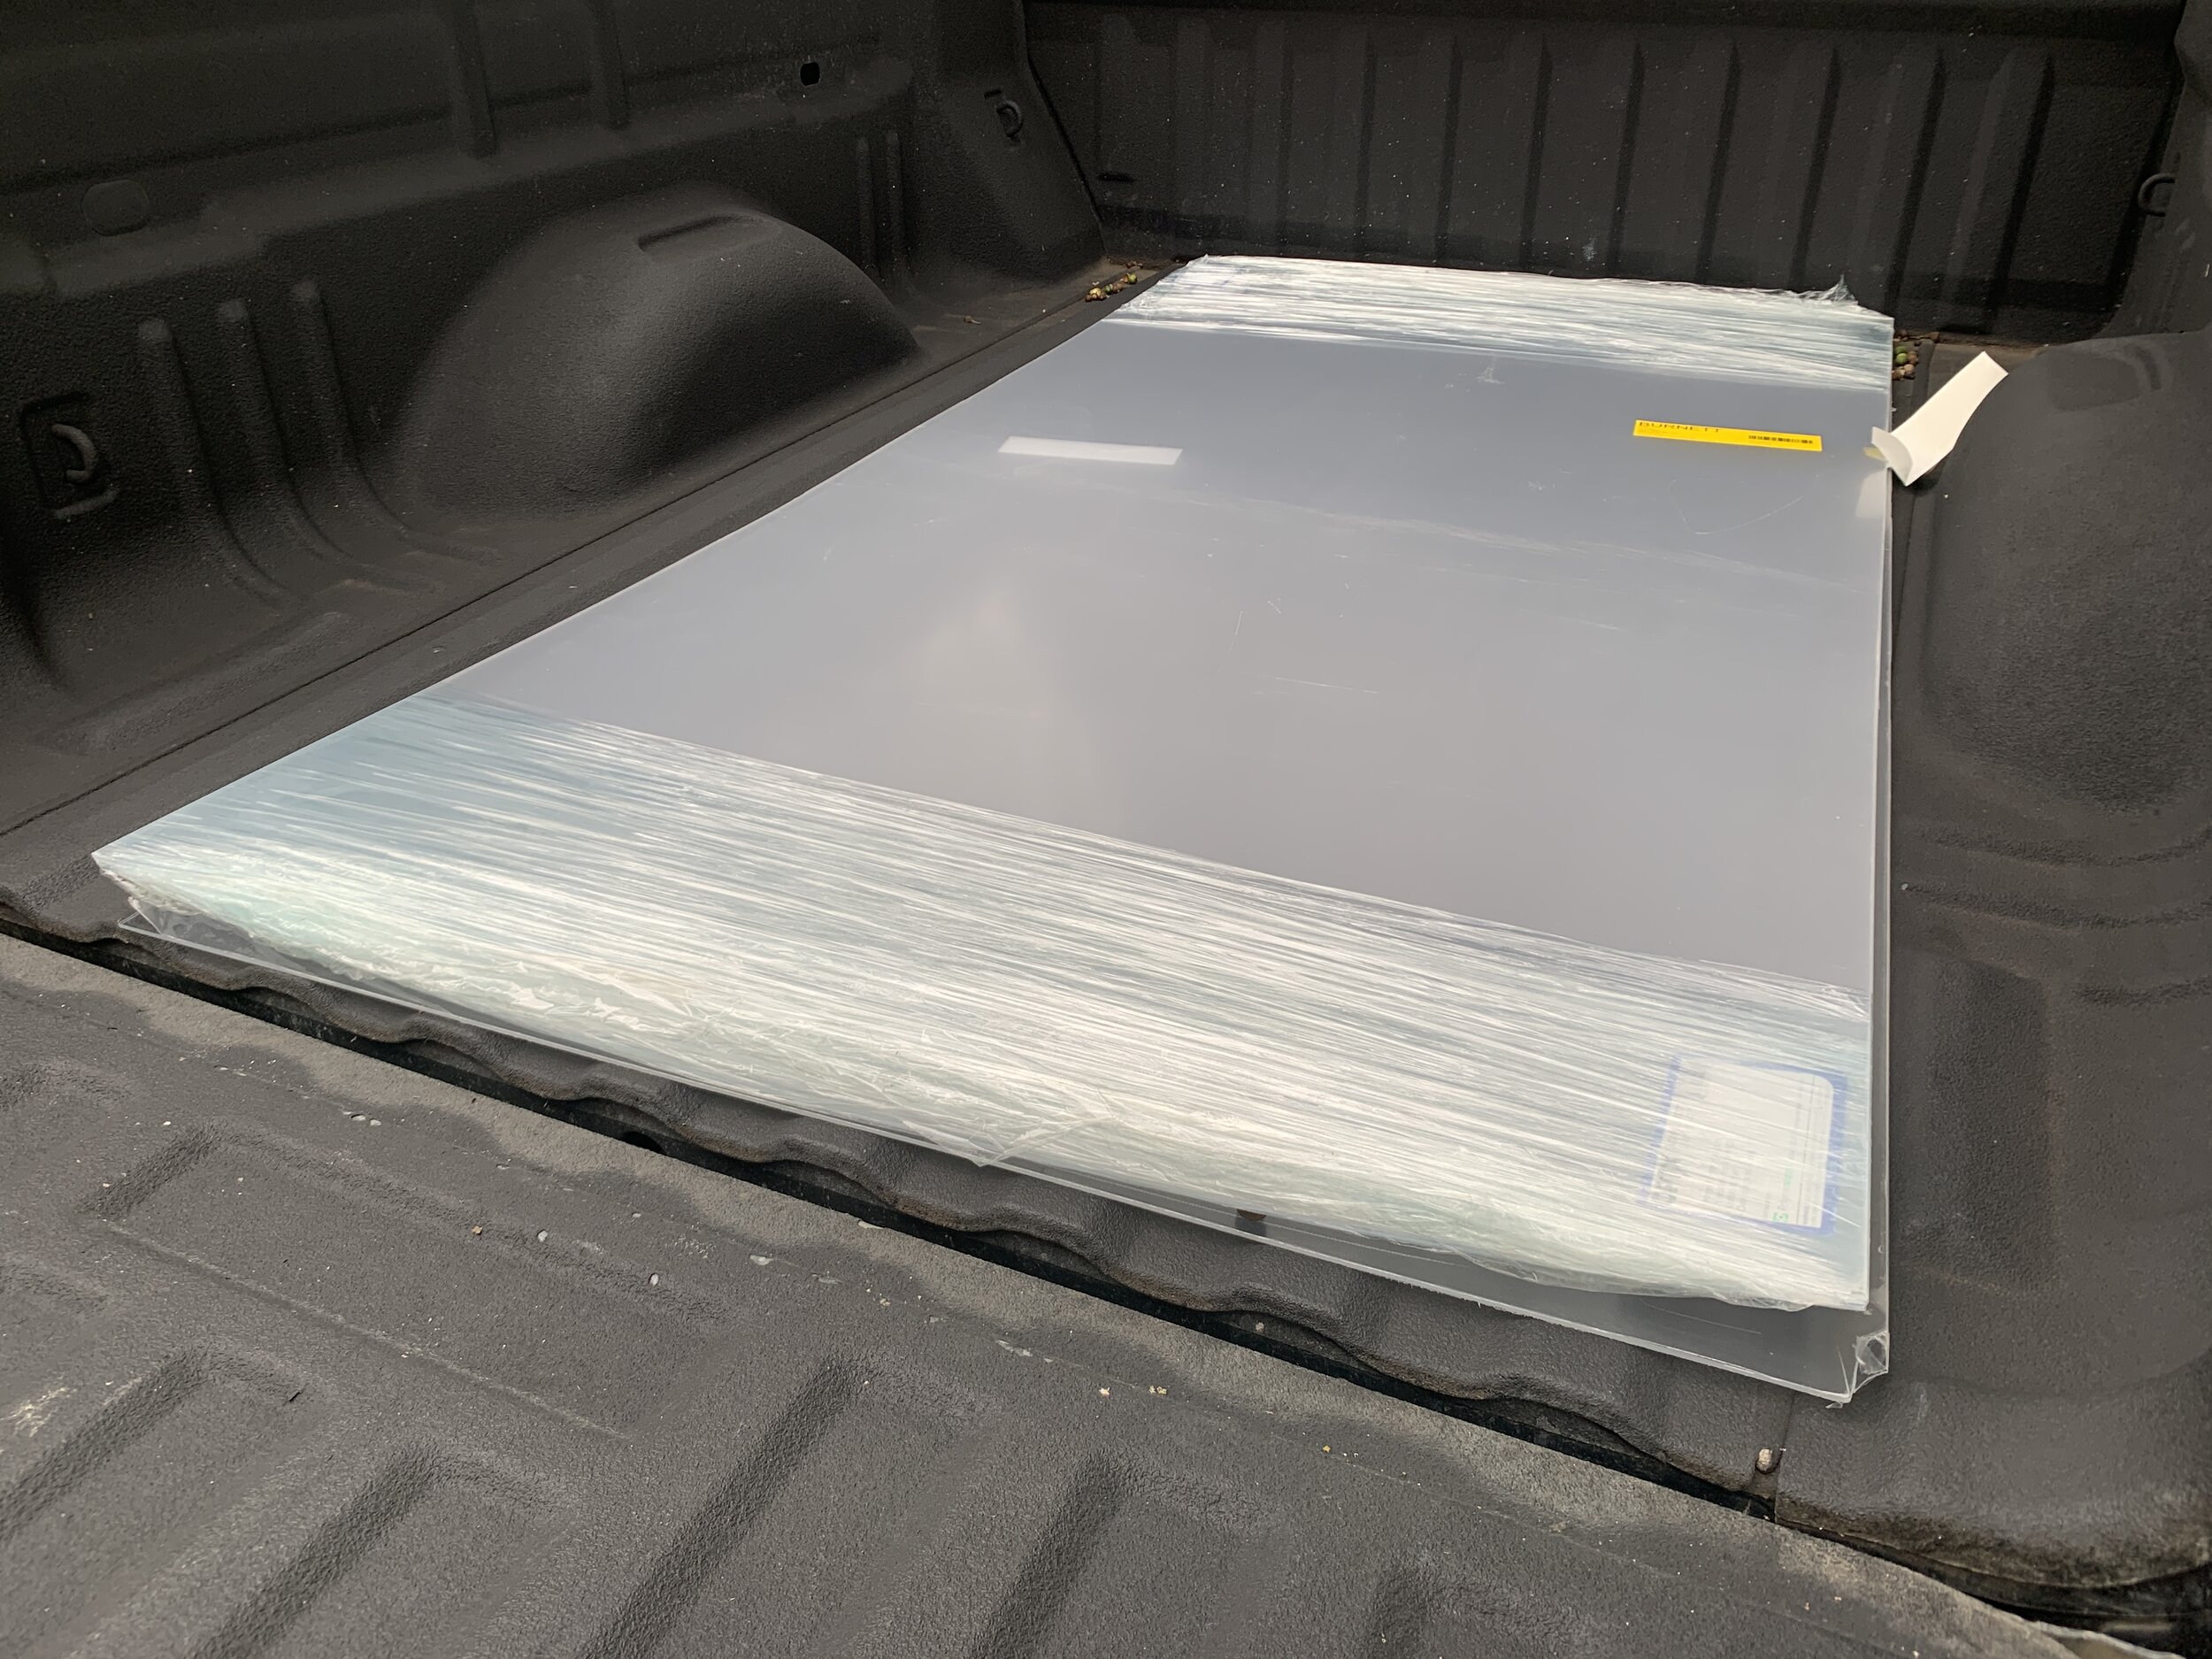
We made sure to leave the protective film on both sides of the acrylic sheets as long as possible, which not only helps protect it from scratches and dirt, but also helps protect you while you cut and drill into it as the film helps keep acrylic shards kind of encased.
Order of panel installation
Because of the way we worked on these – doing multiple steps on one panel before moving to the next, instead of doing the same step to each panel at the same time – I am breaking out the order before I go into detail and tips to avoid failure here:
Ceiling panel
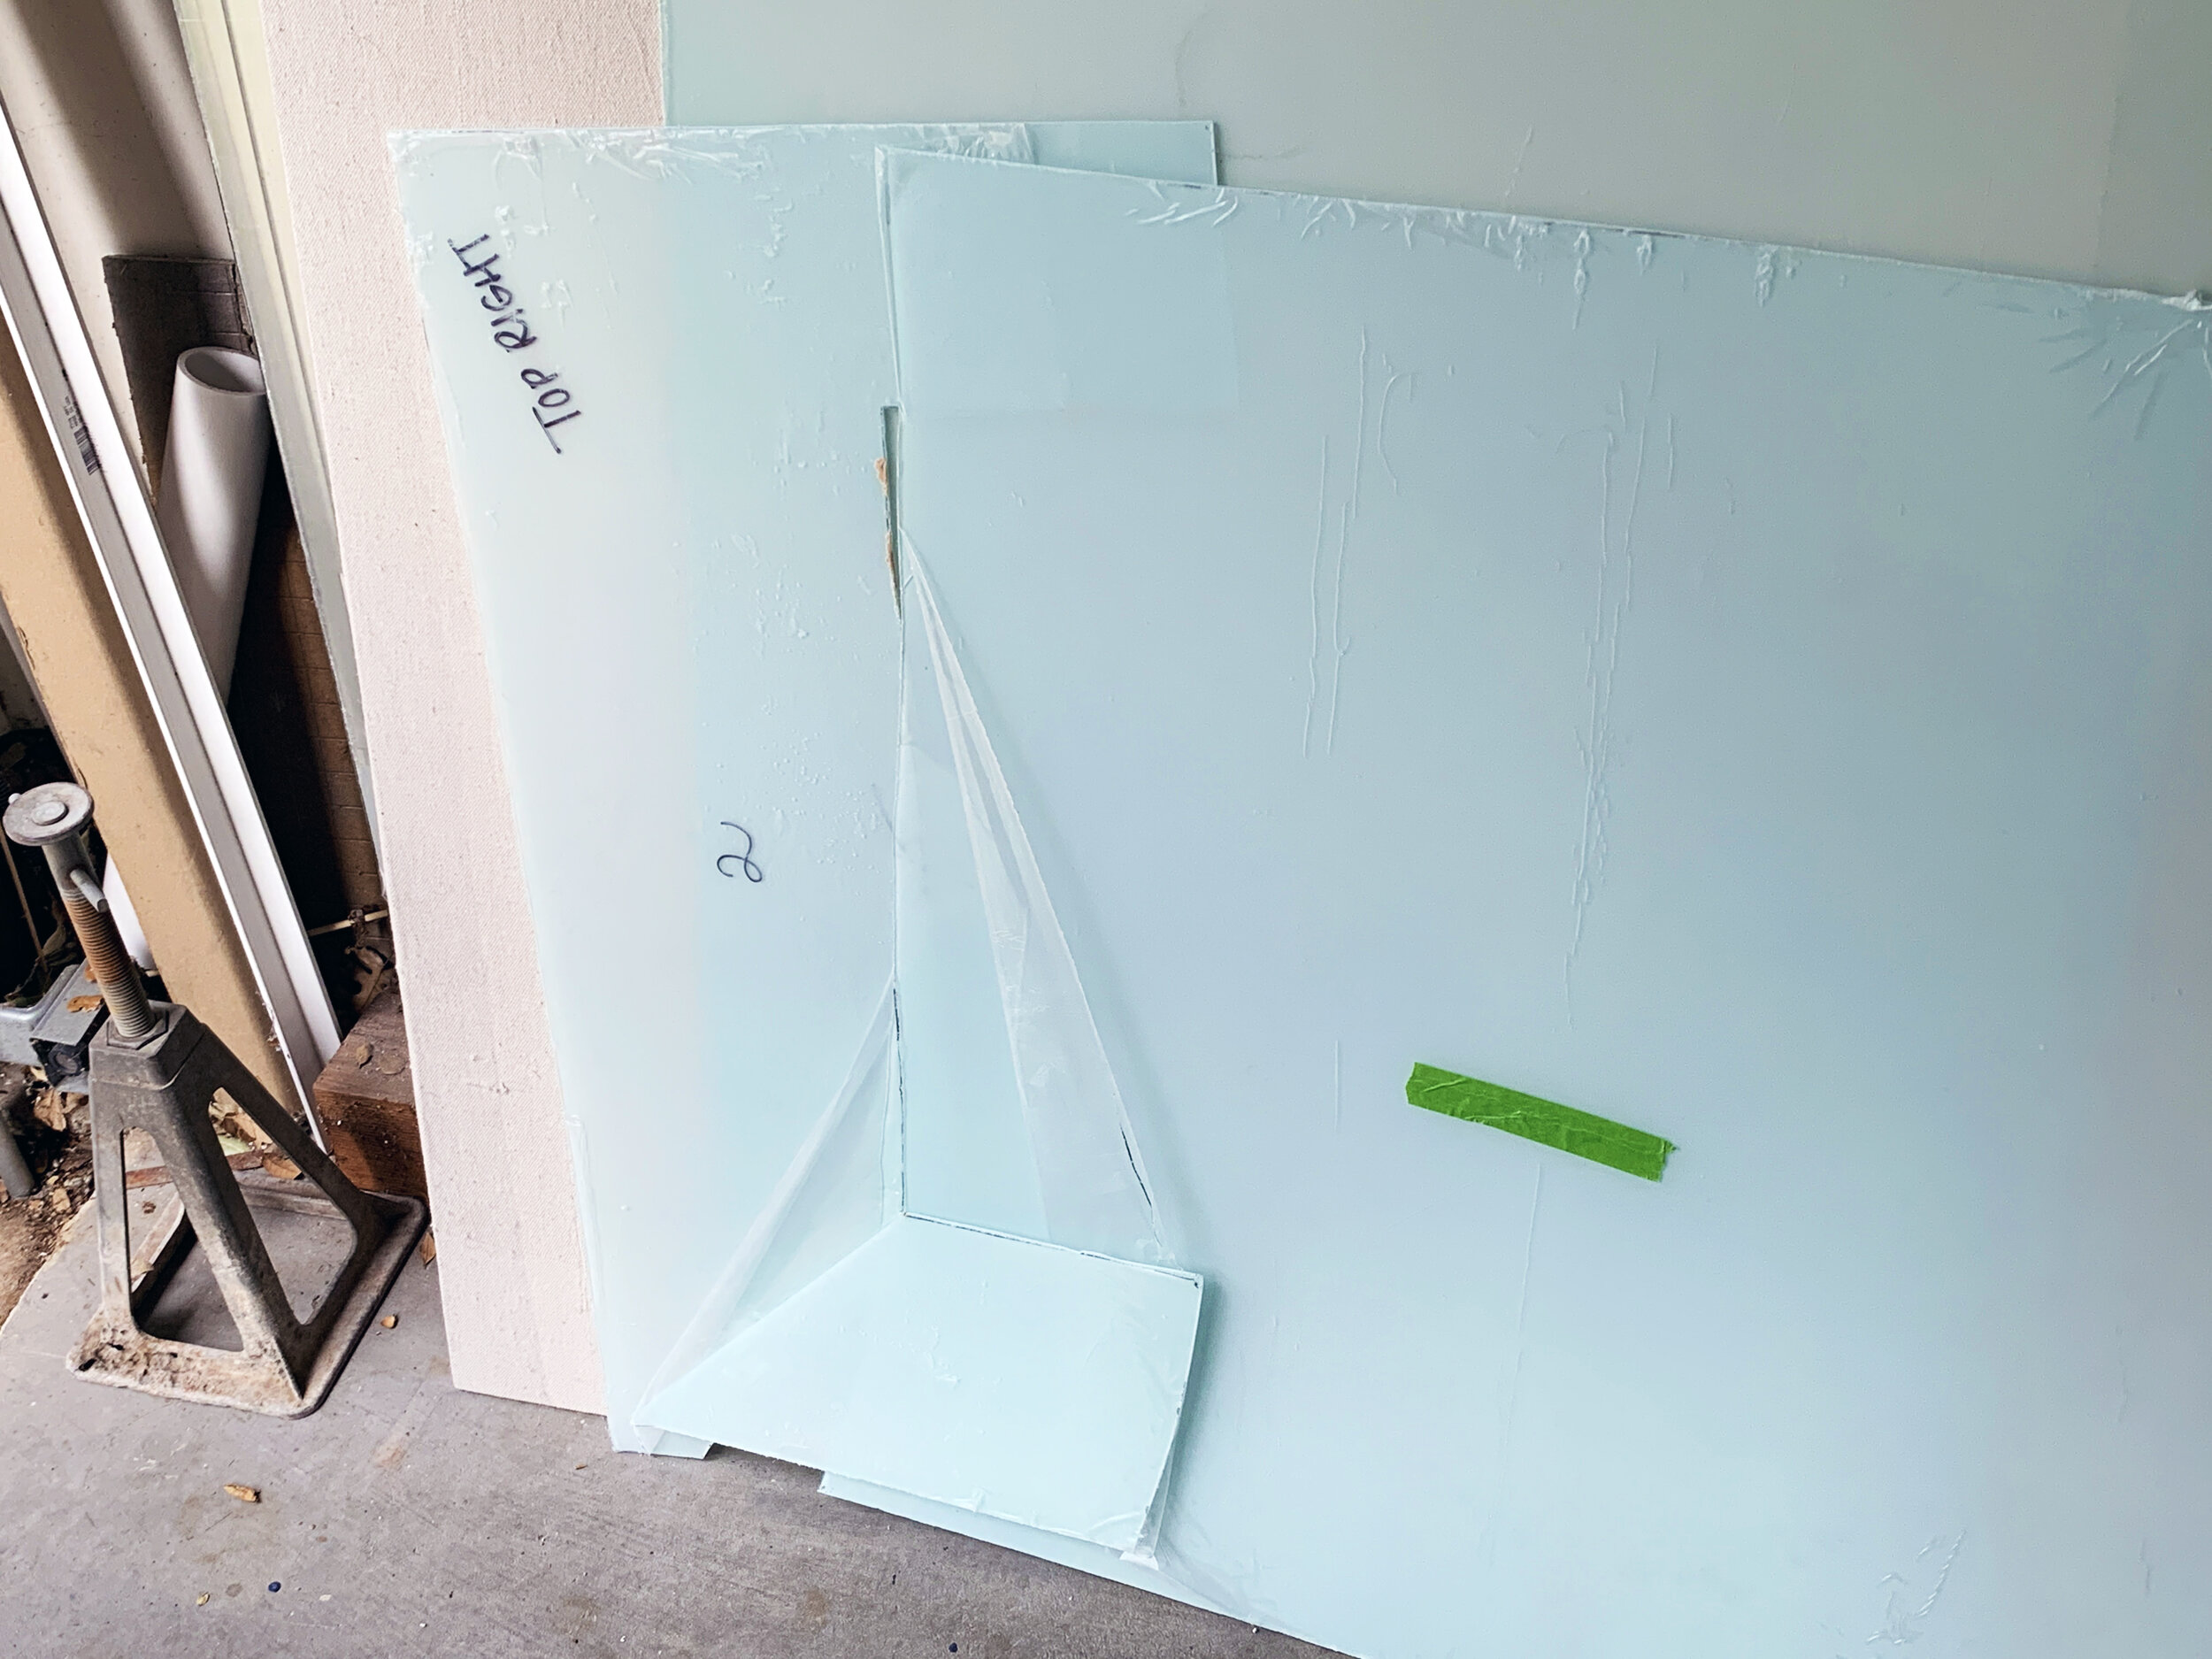
Make template using paper. Label which side is which for reference.
Using template, mark out and cut acrylic panel. With protective film still on, label top side of acrylic panel.
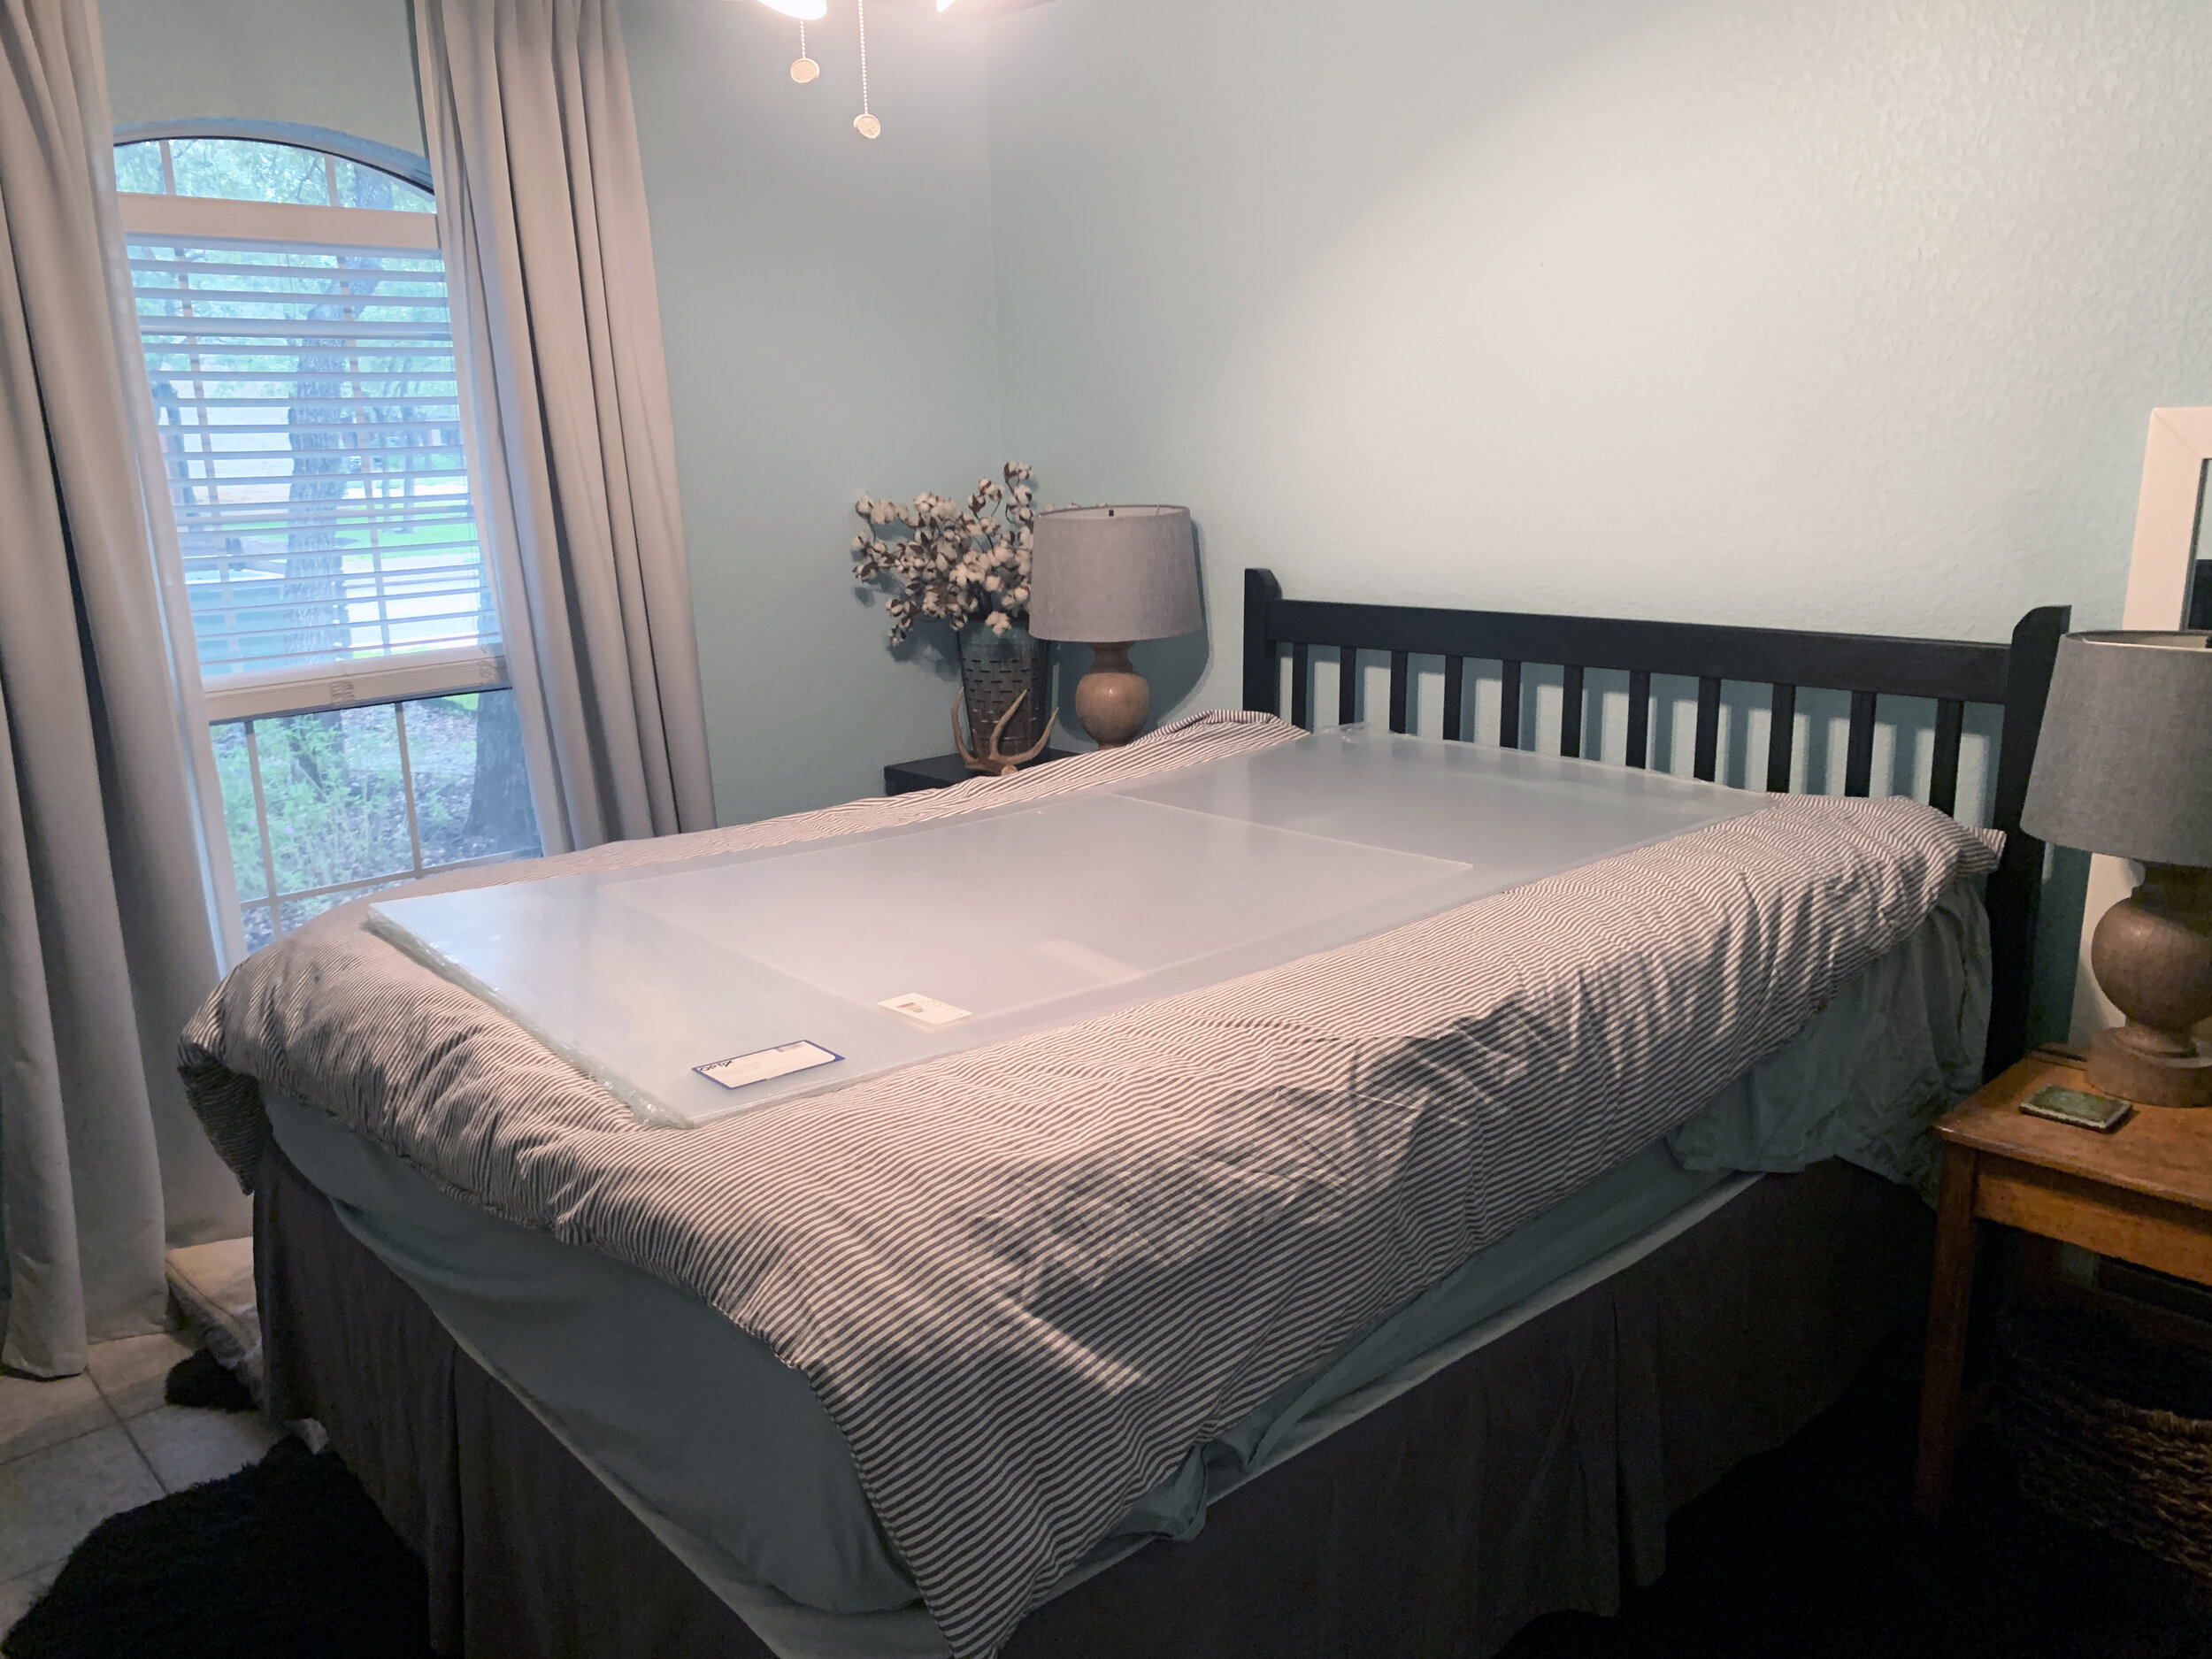
Dry-fit panel. Make adjustments to size, as needed.
Paint back of acrylic panel with solid paint. Allow to dry.
Glue to ceiling using clear silicone and tape in place with painters tape.
Use miscellaneous objects to rig something to apply pressure across ceiling. Allow to dry before moving on to next panel.
Left wall first, back wall second, right wall third
Choose which wall to start with, and always go in that order, as the size of each subsequent panel depends on the previous panel.
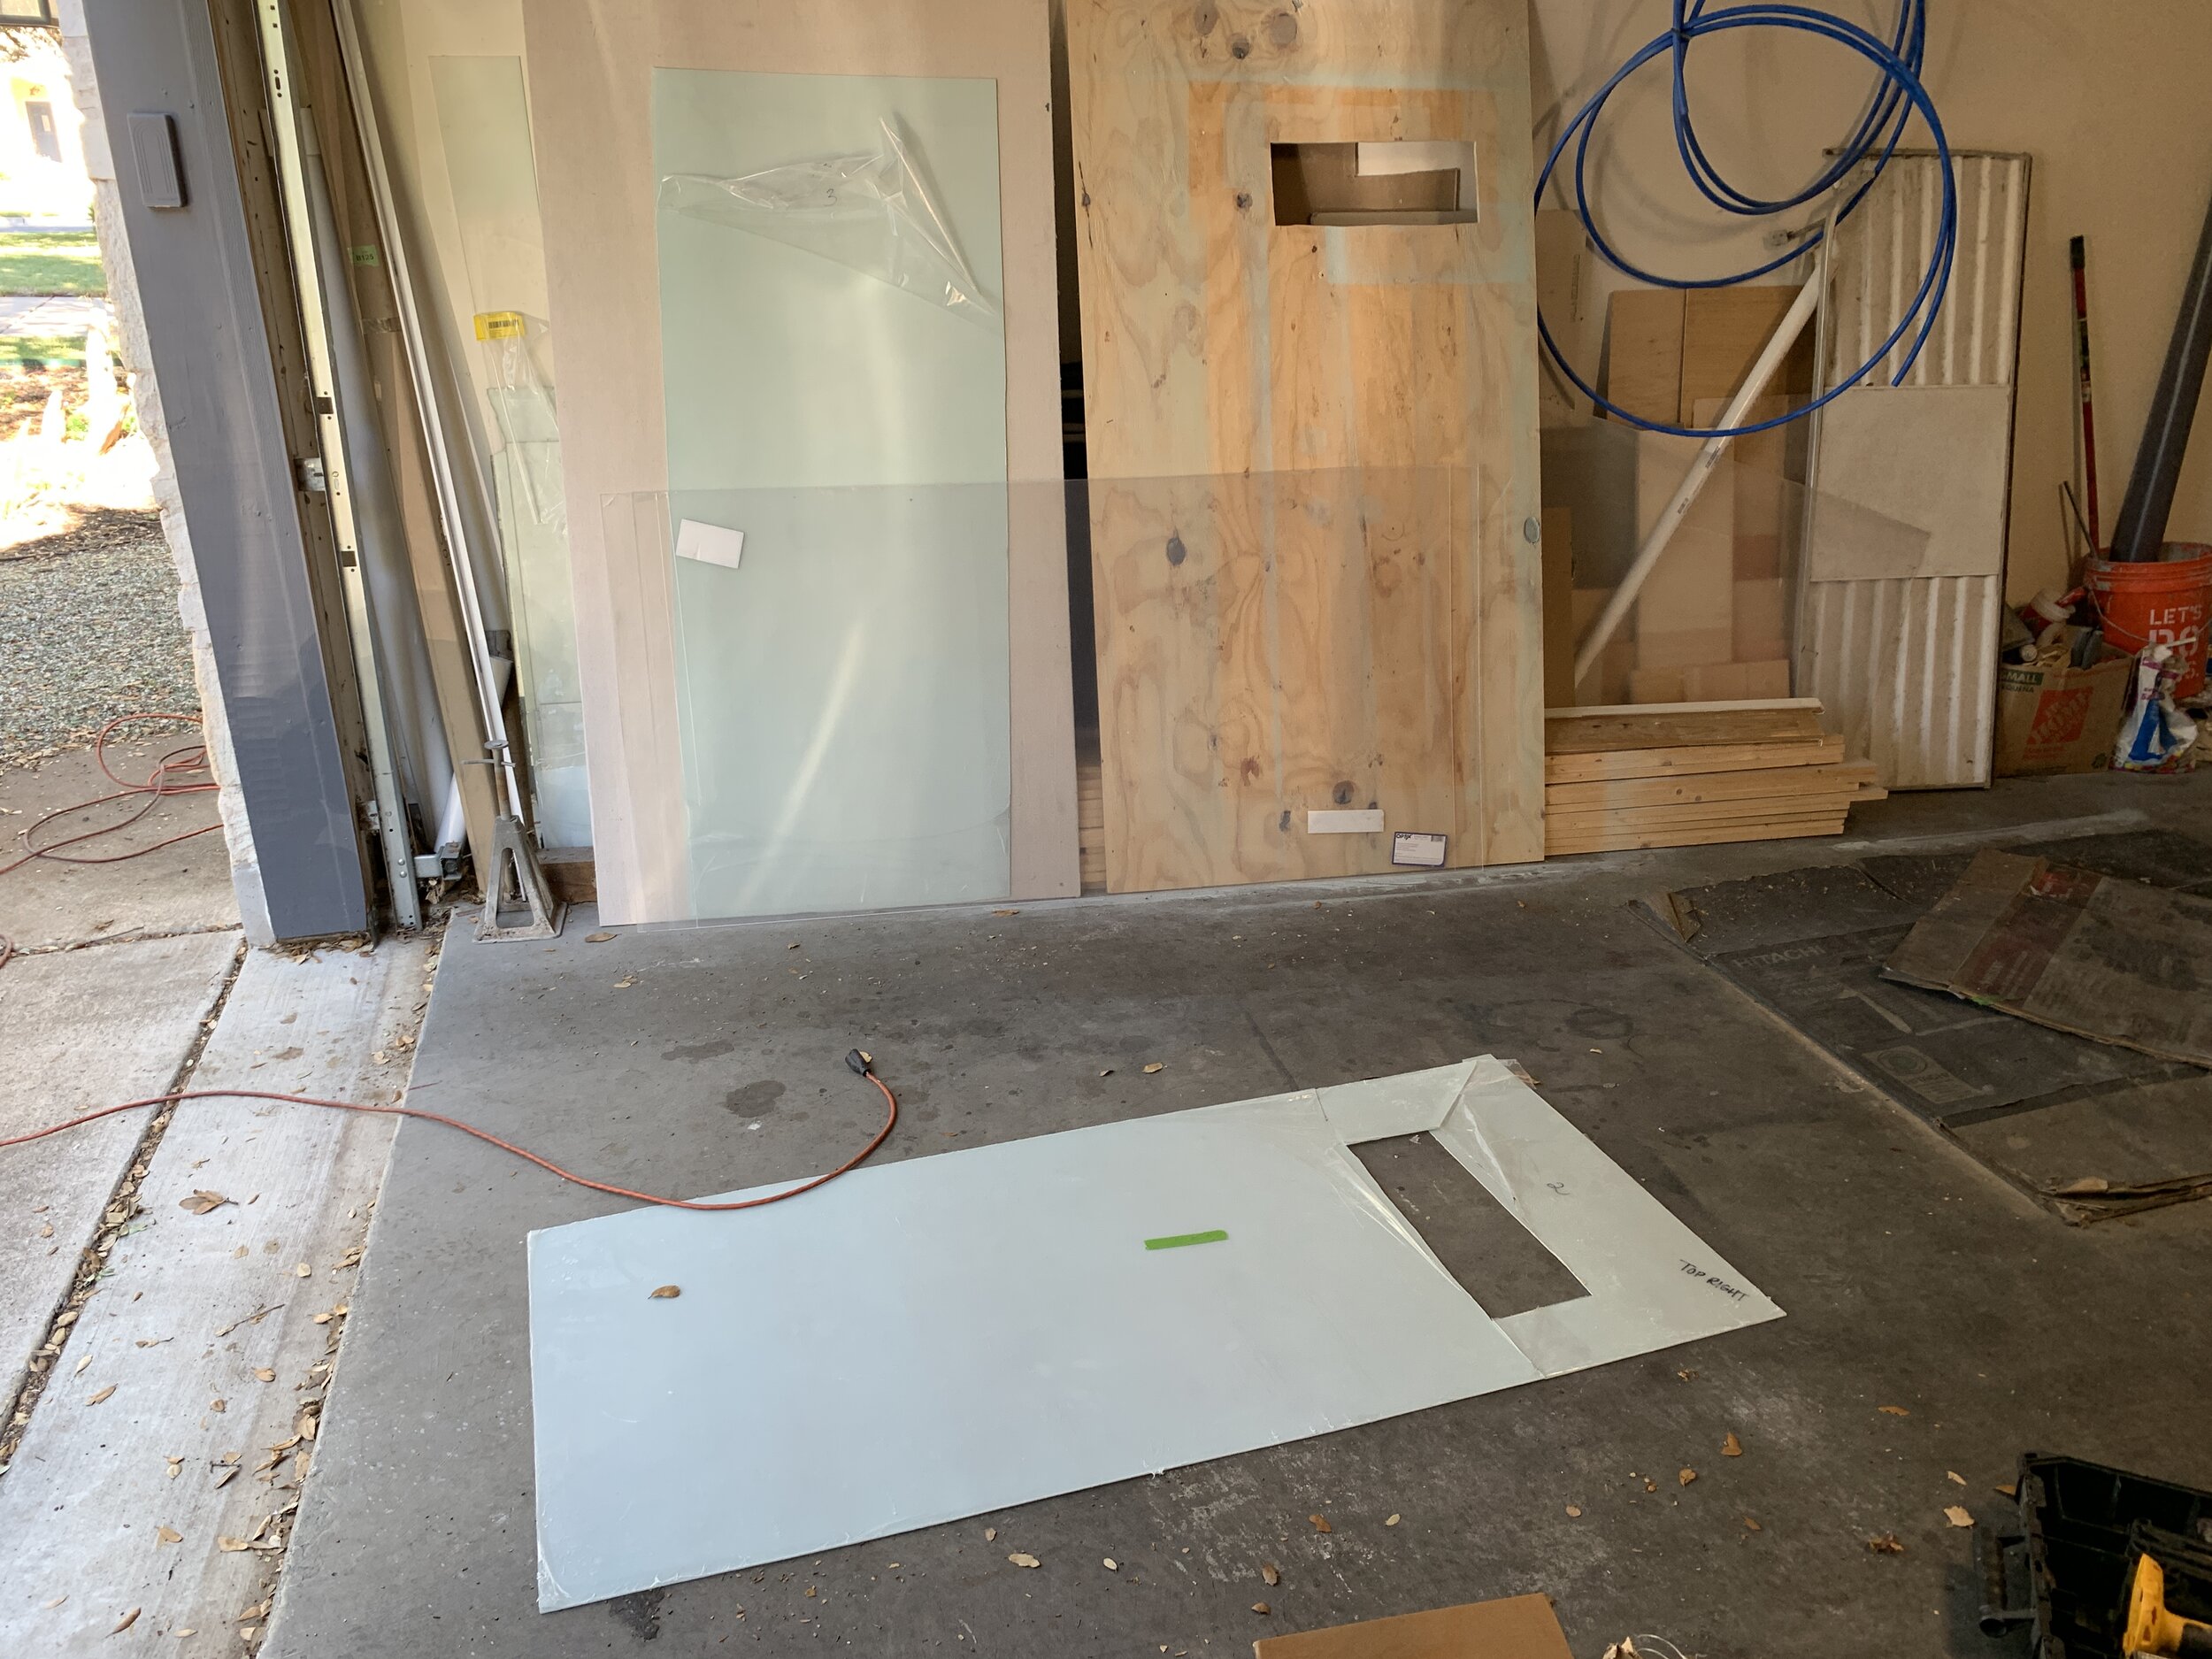
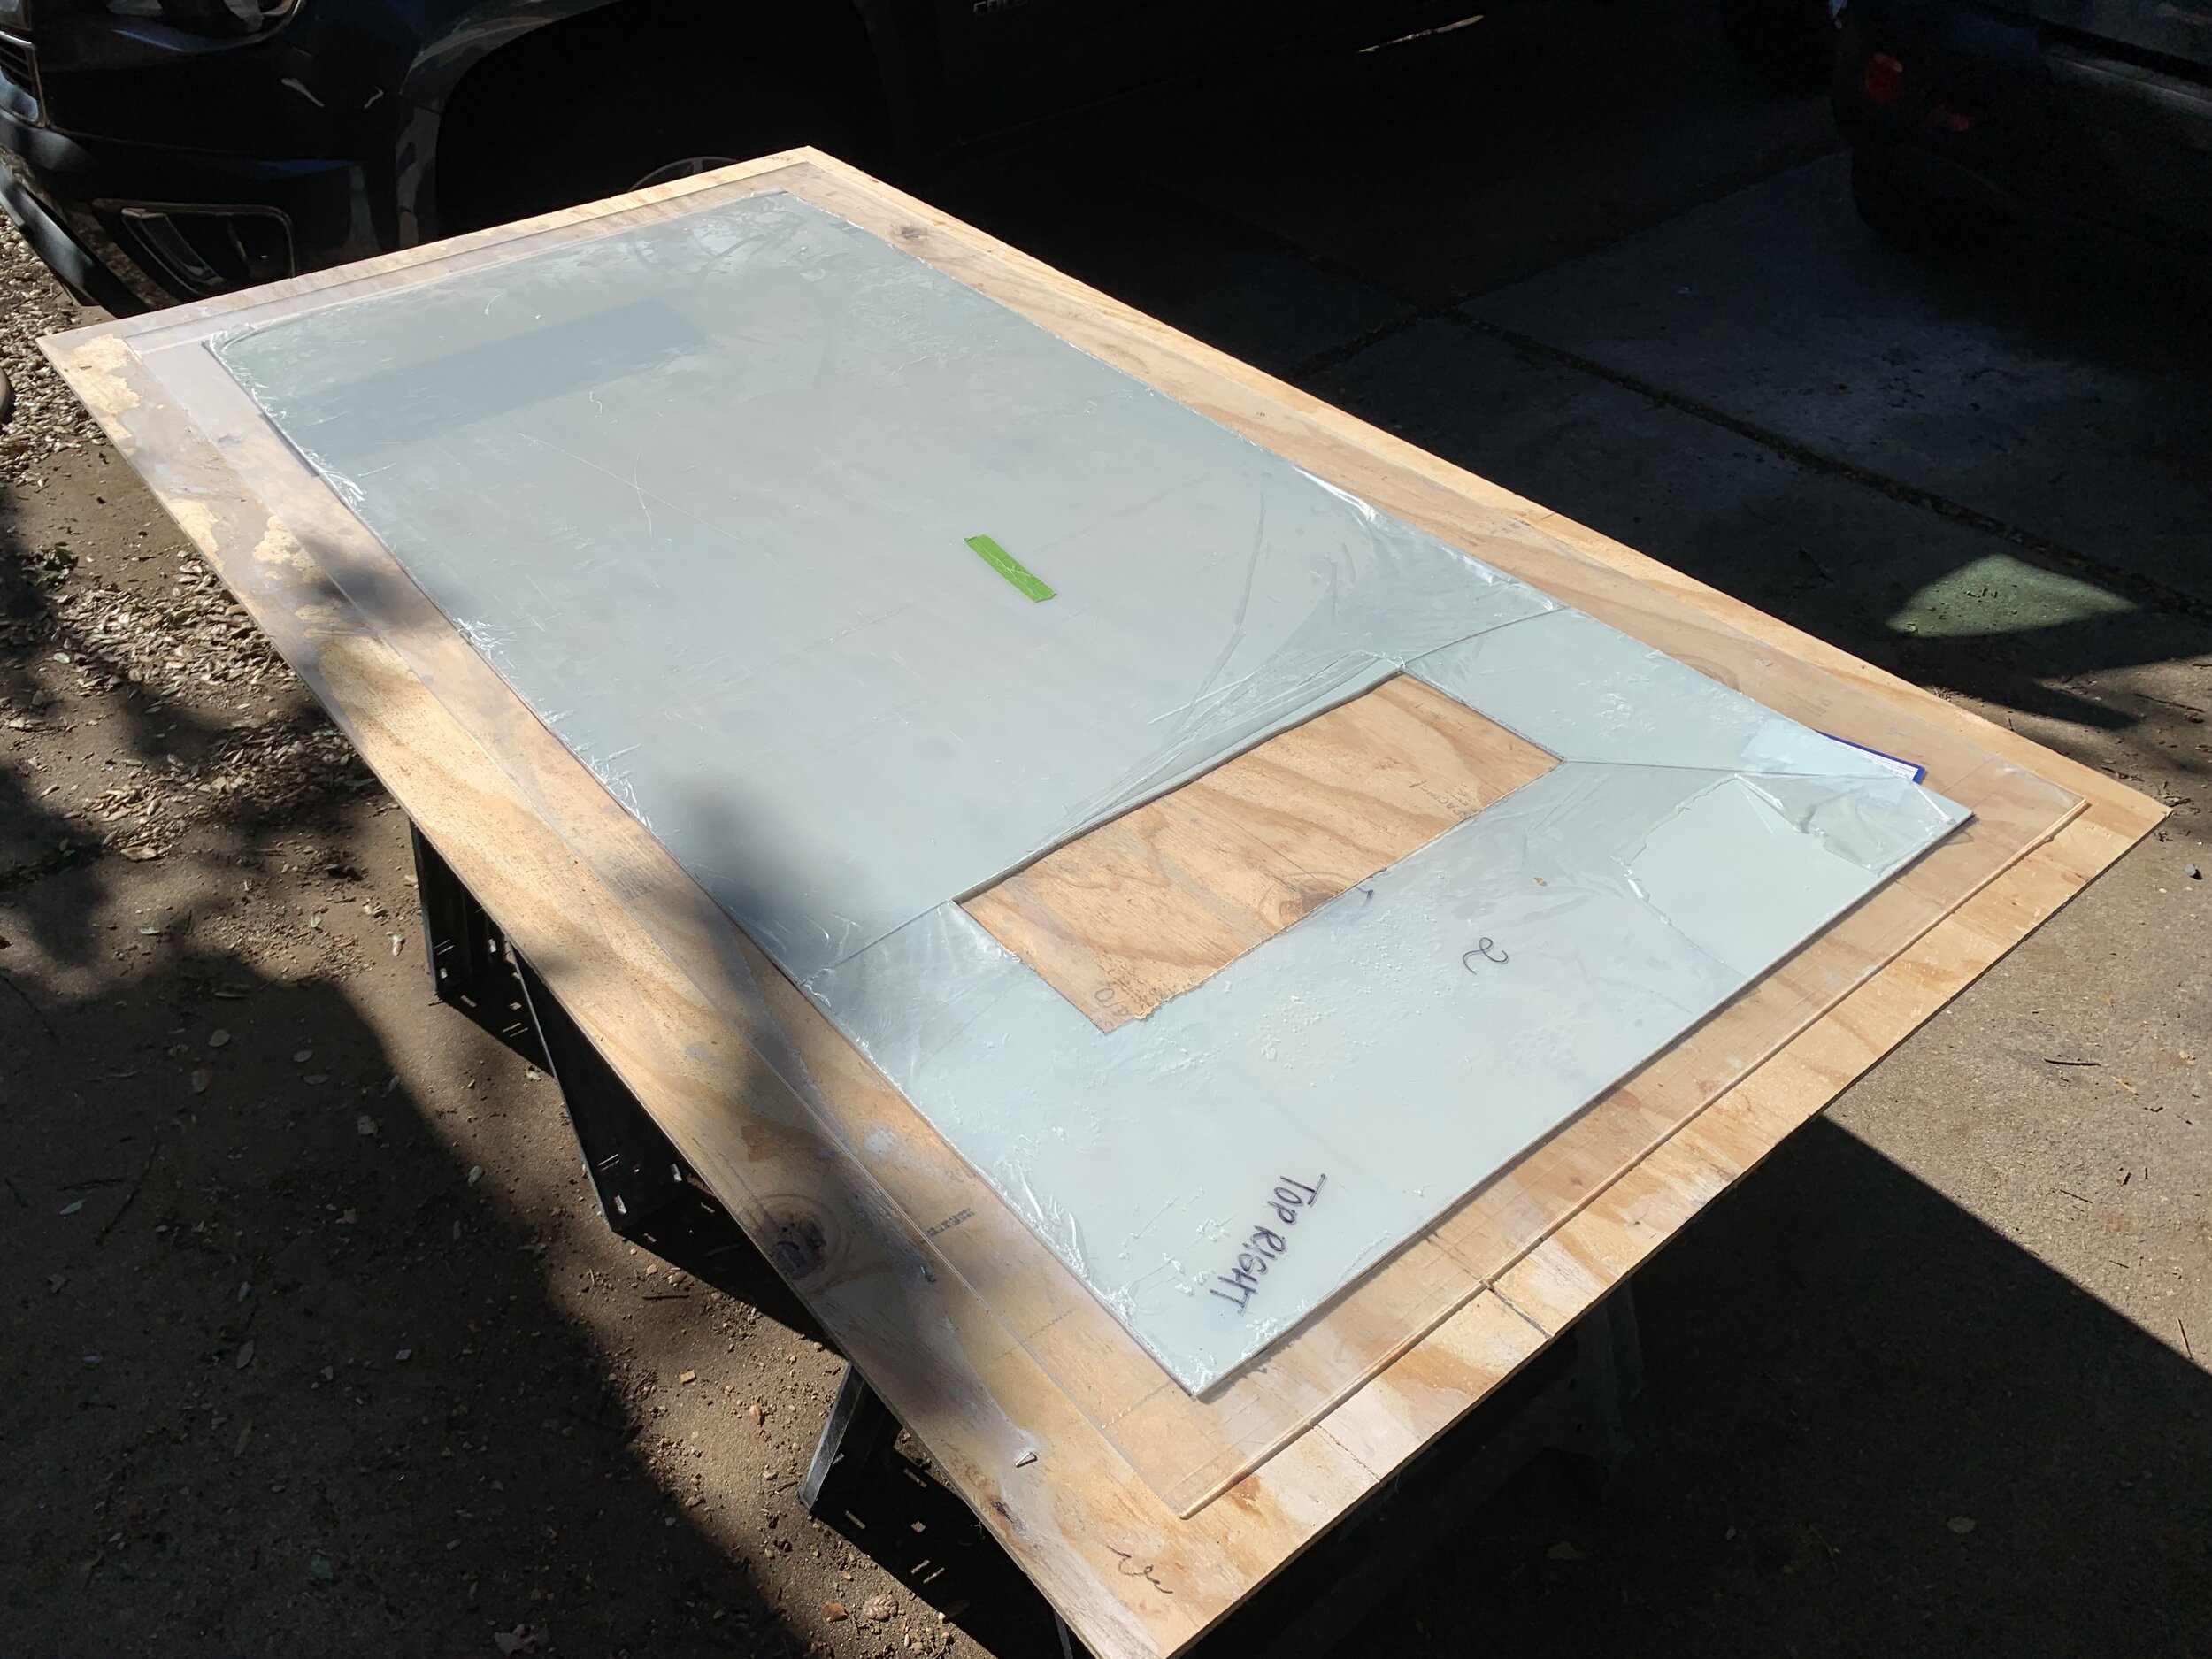
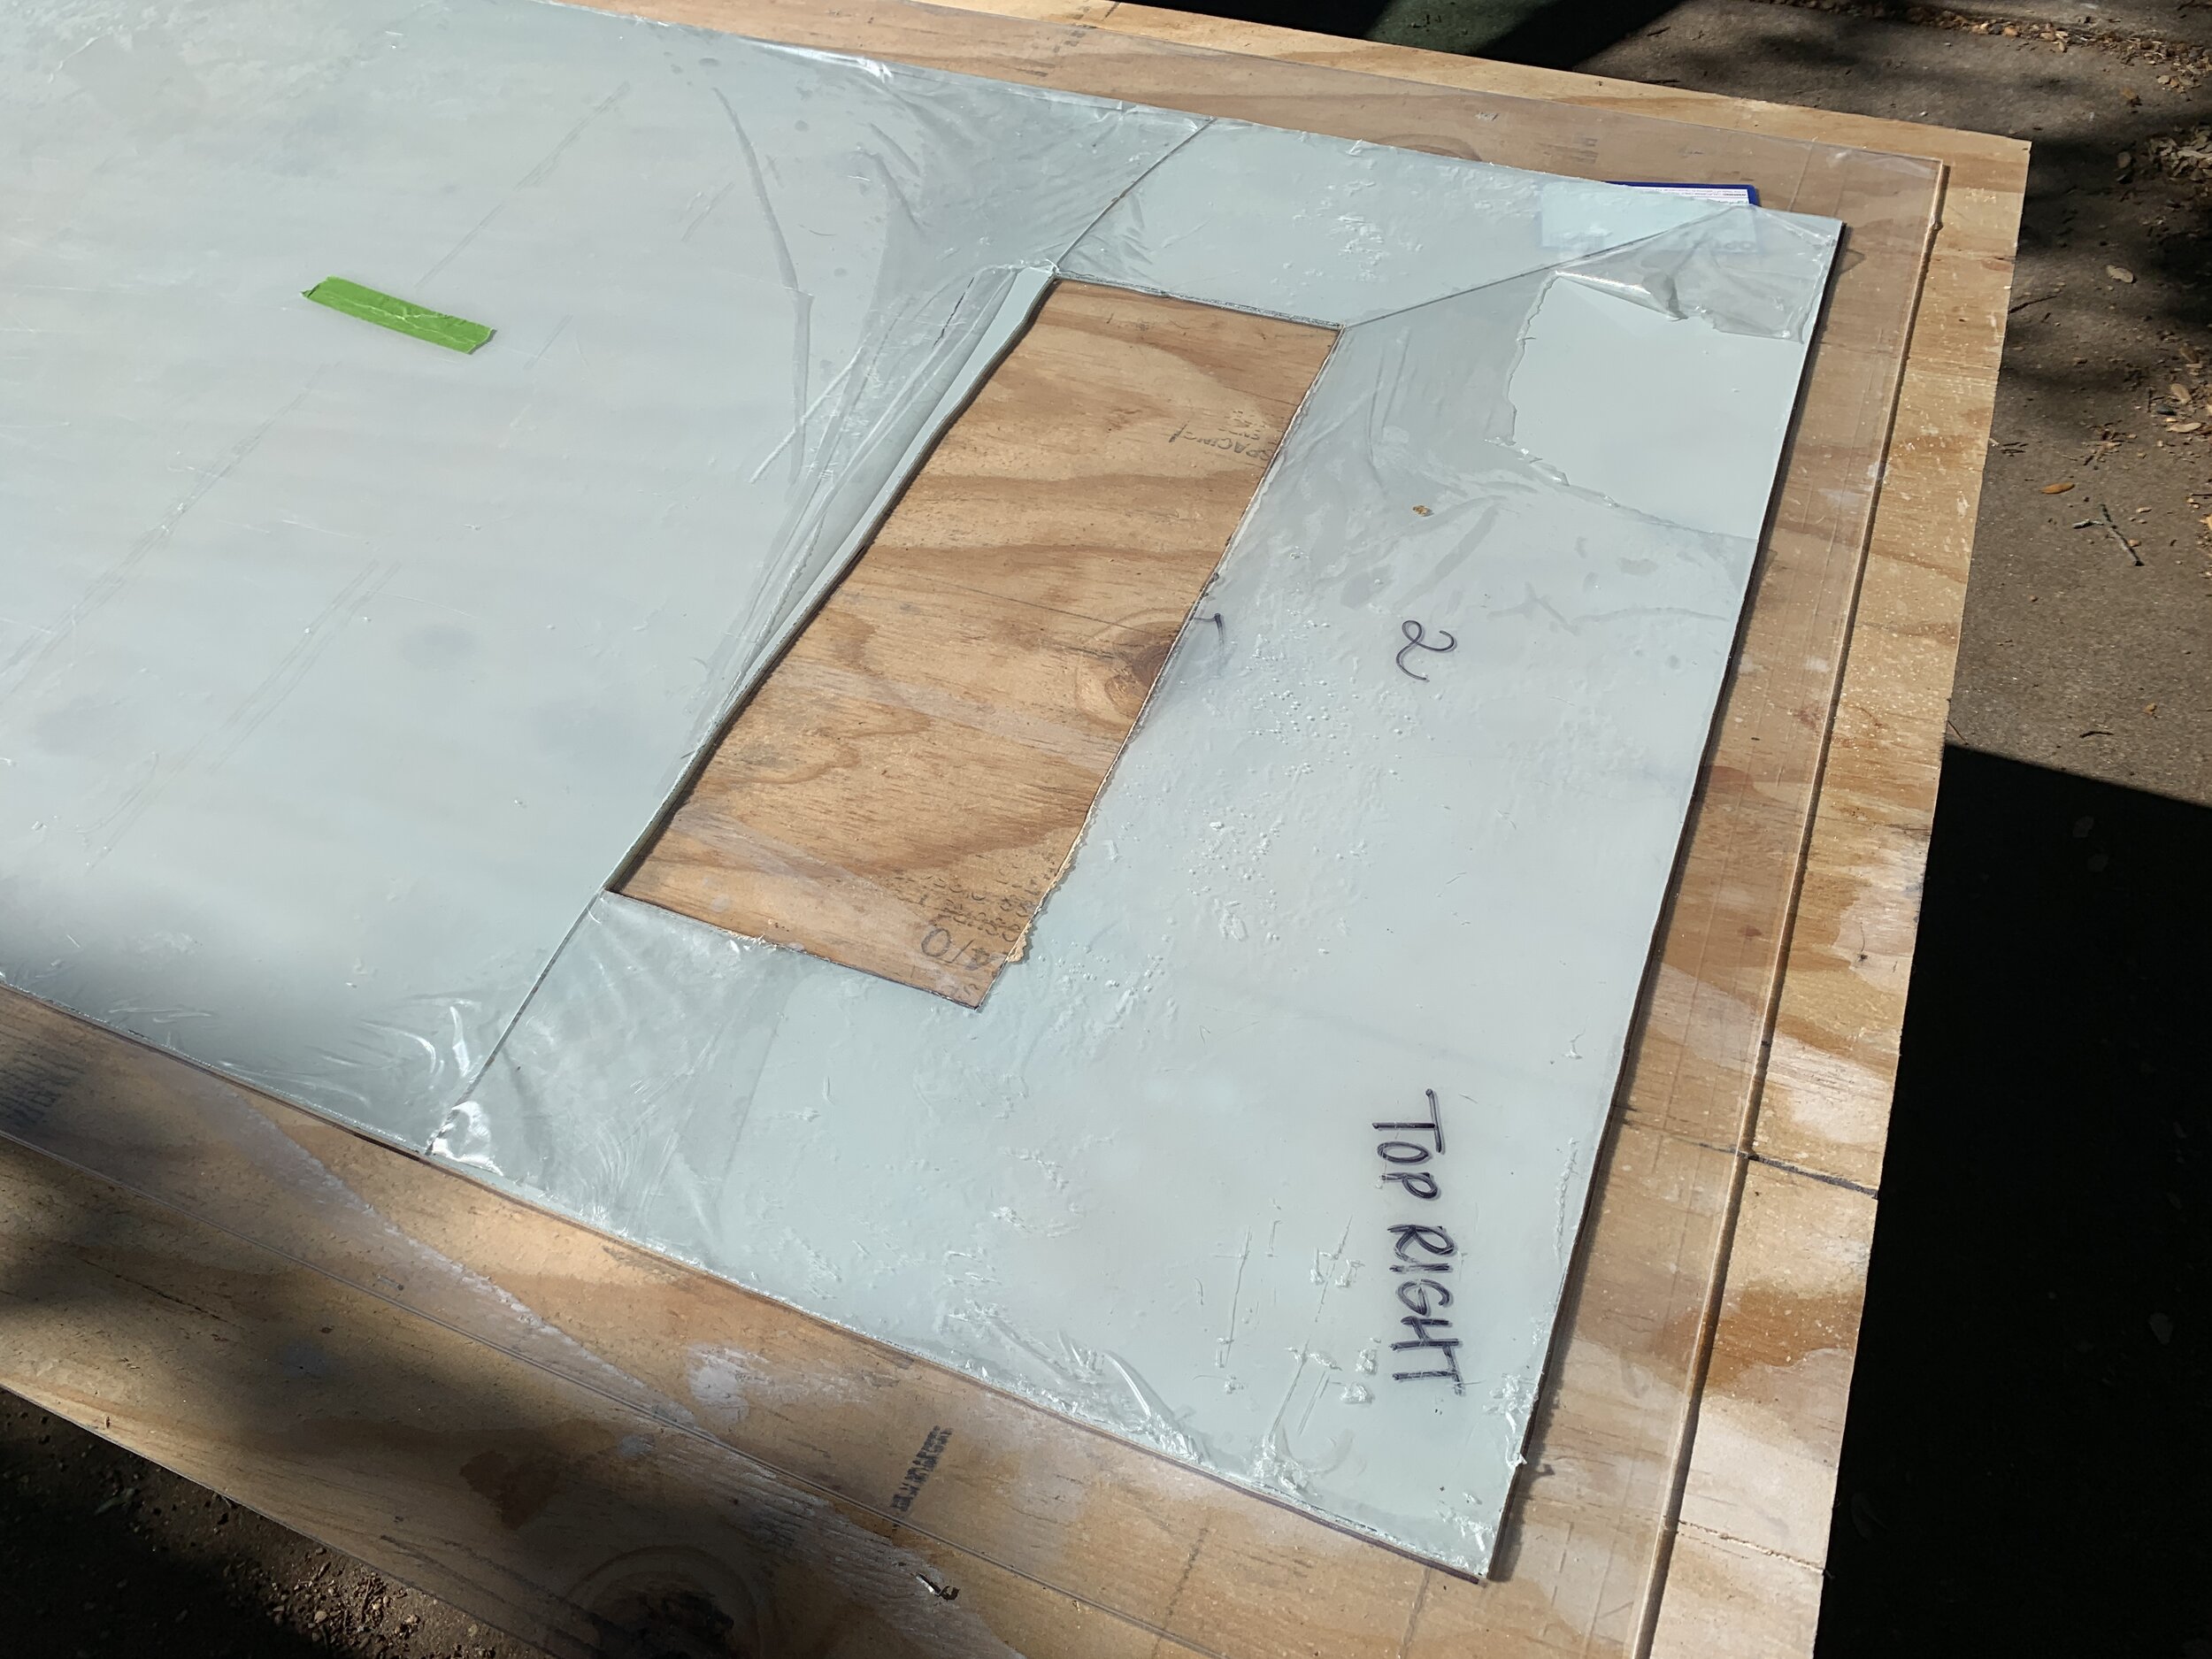
Make template using paper, marking/cutting out shower fixture holes, windows, etc. Label which side is which for reference and number panel.
Using template, mark out and cut acrylic panel. With protective film still on, label top side of acrylic panel.
Dry-fit panel. Make adjustments to size, as needed, until it fits snug.
Keep dry-fit acrylic panel in place when templating the next one until all wall panels are dry-fit.
Carefully remove dry-fit wall panels in reverse order (3 to 1).
Remove protective film on the backside only and paint back of acrylic panel (the side of the panel that will not be exposed to water) with frosted spray paint. Allow to dry.
Working in order of panel 1 through 3, glue to wall framing using clear silicone and tape in place with painters tape before moving on to next panel.
Cutting acrylic panels to size
Templating the ceiling + walls
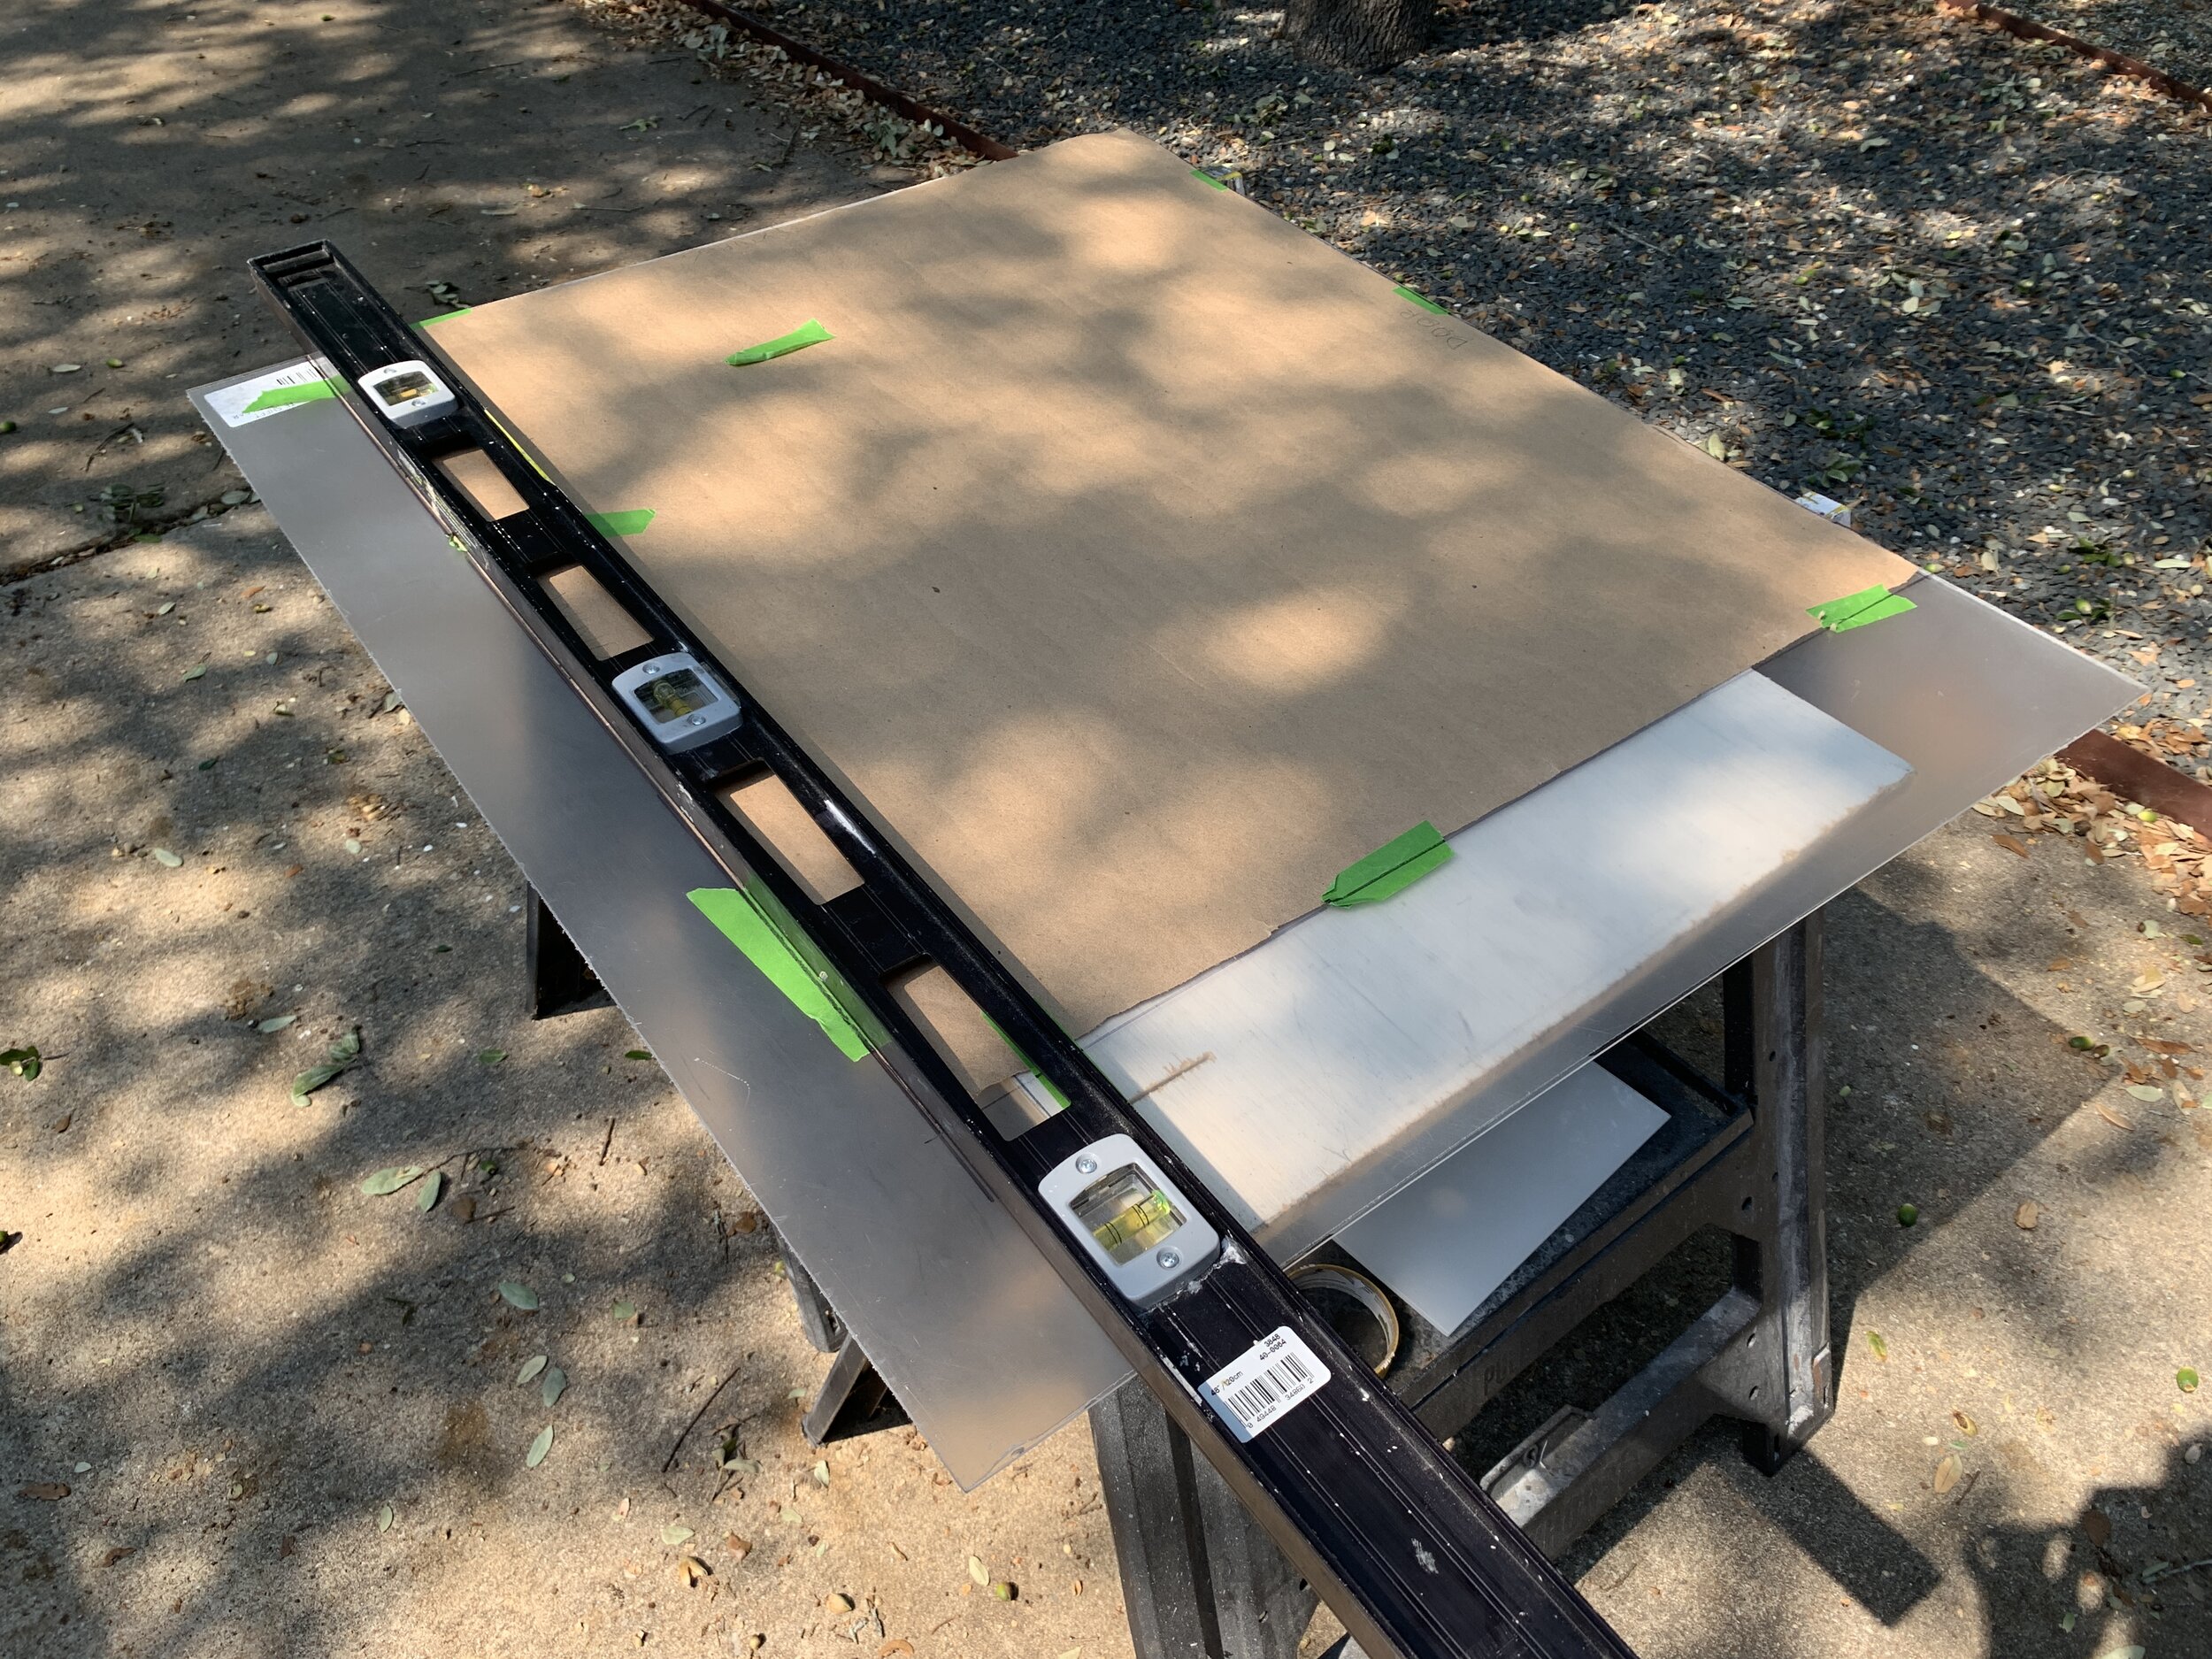
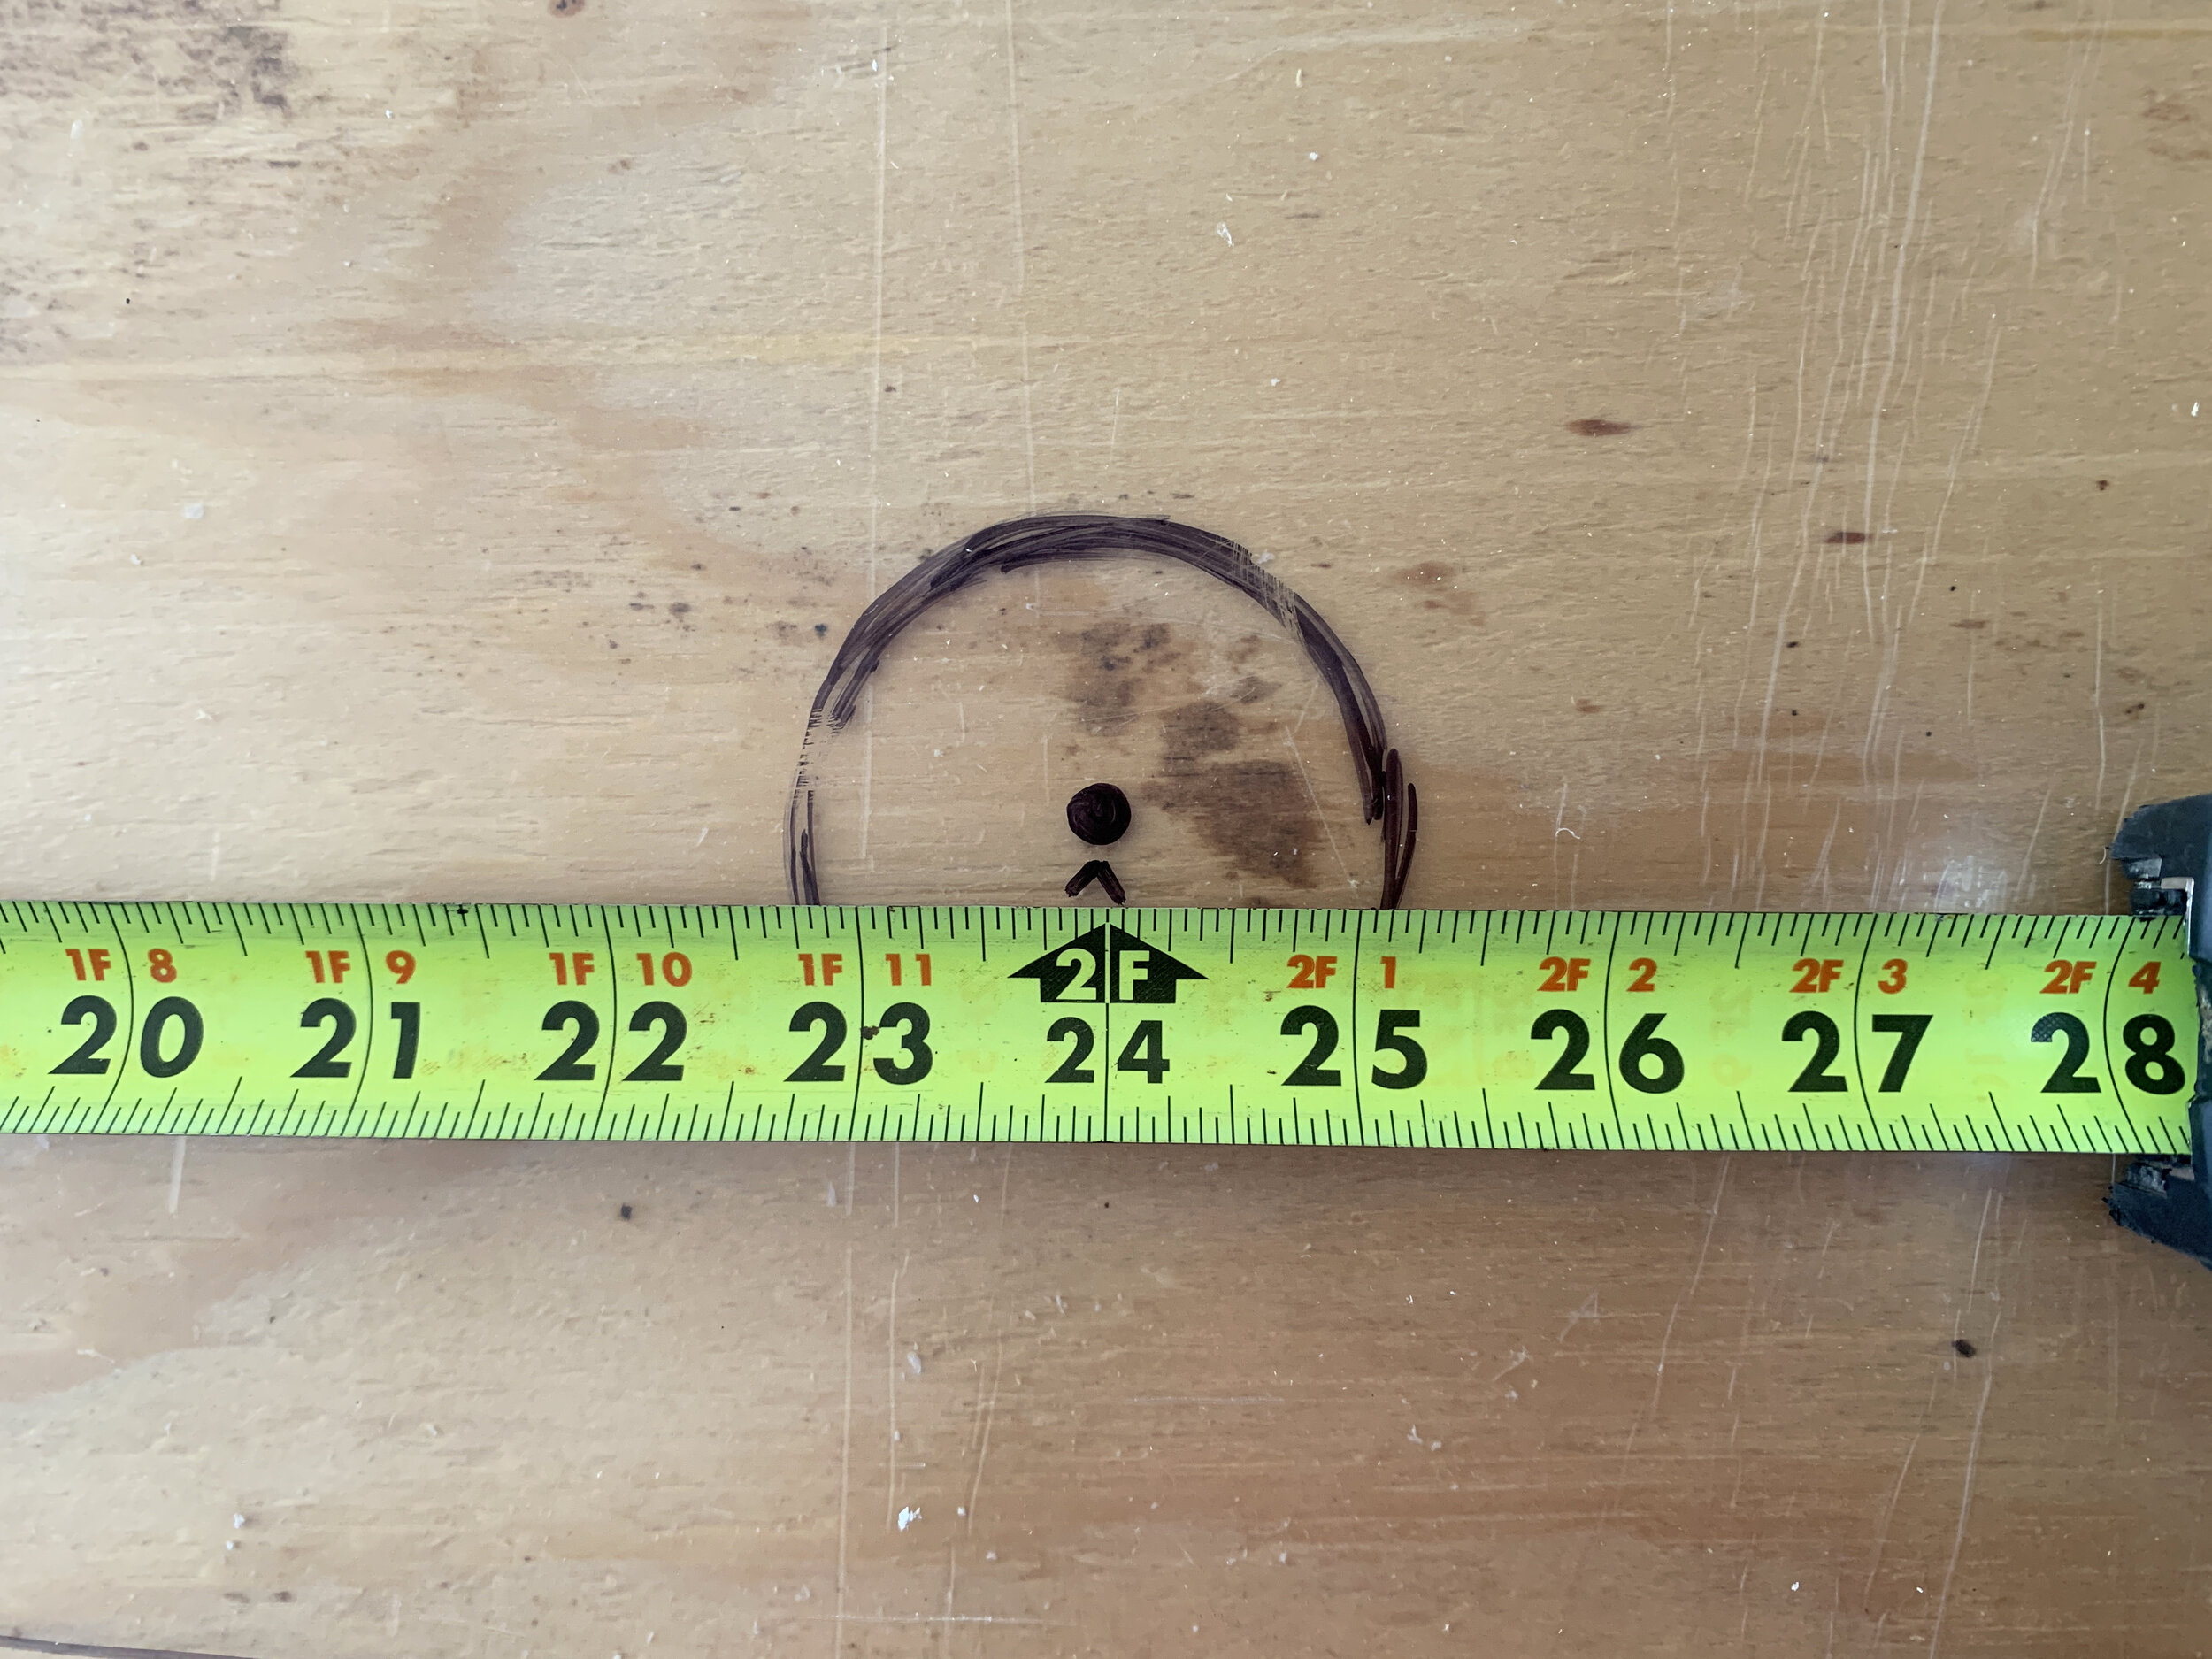
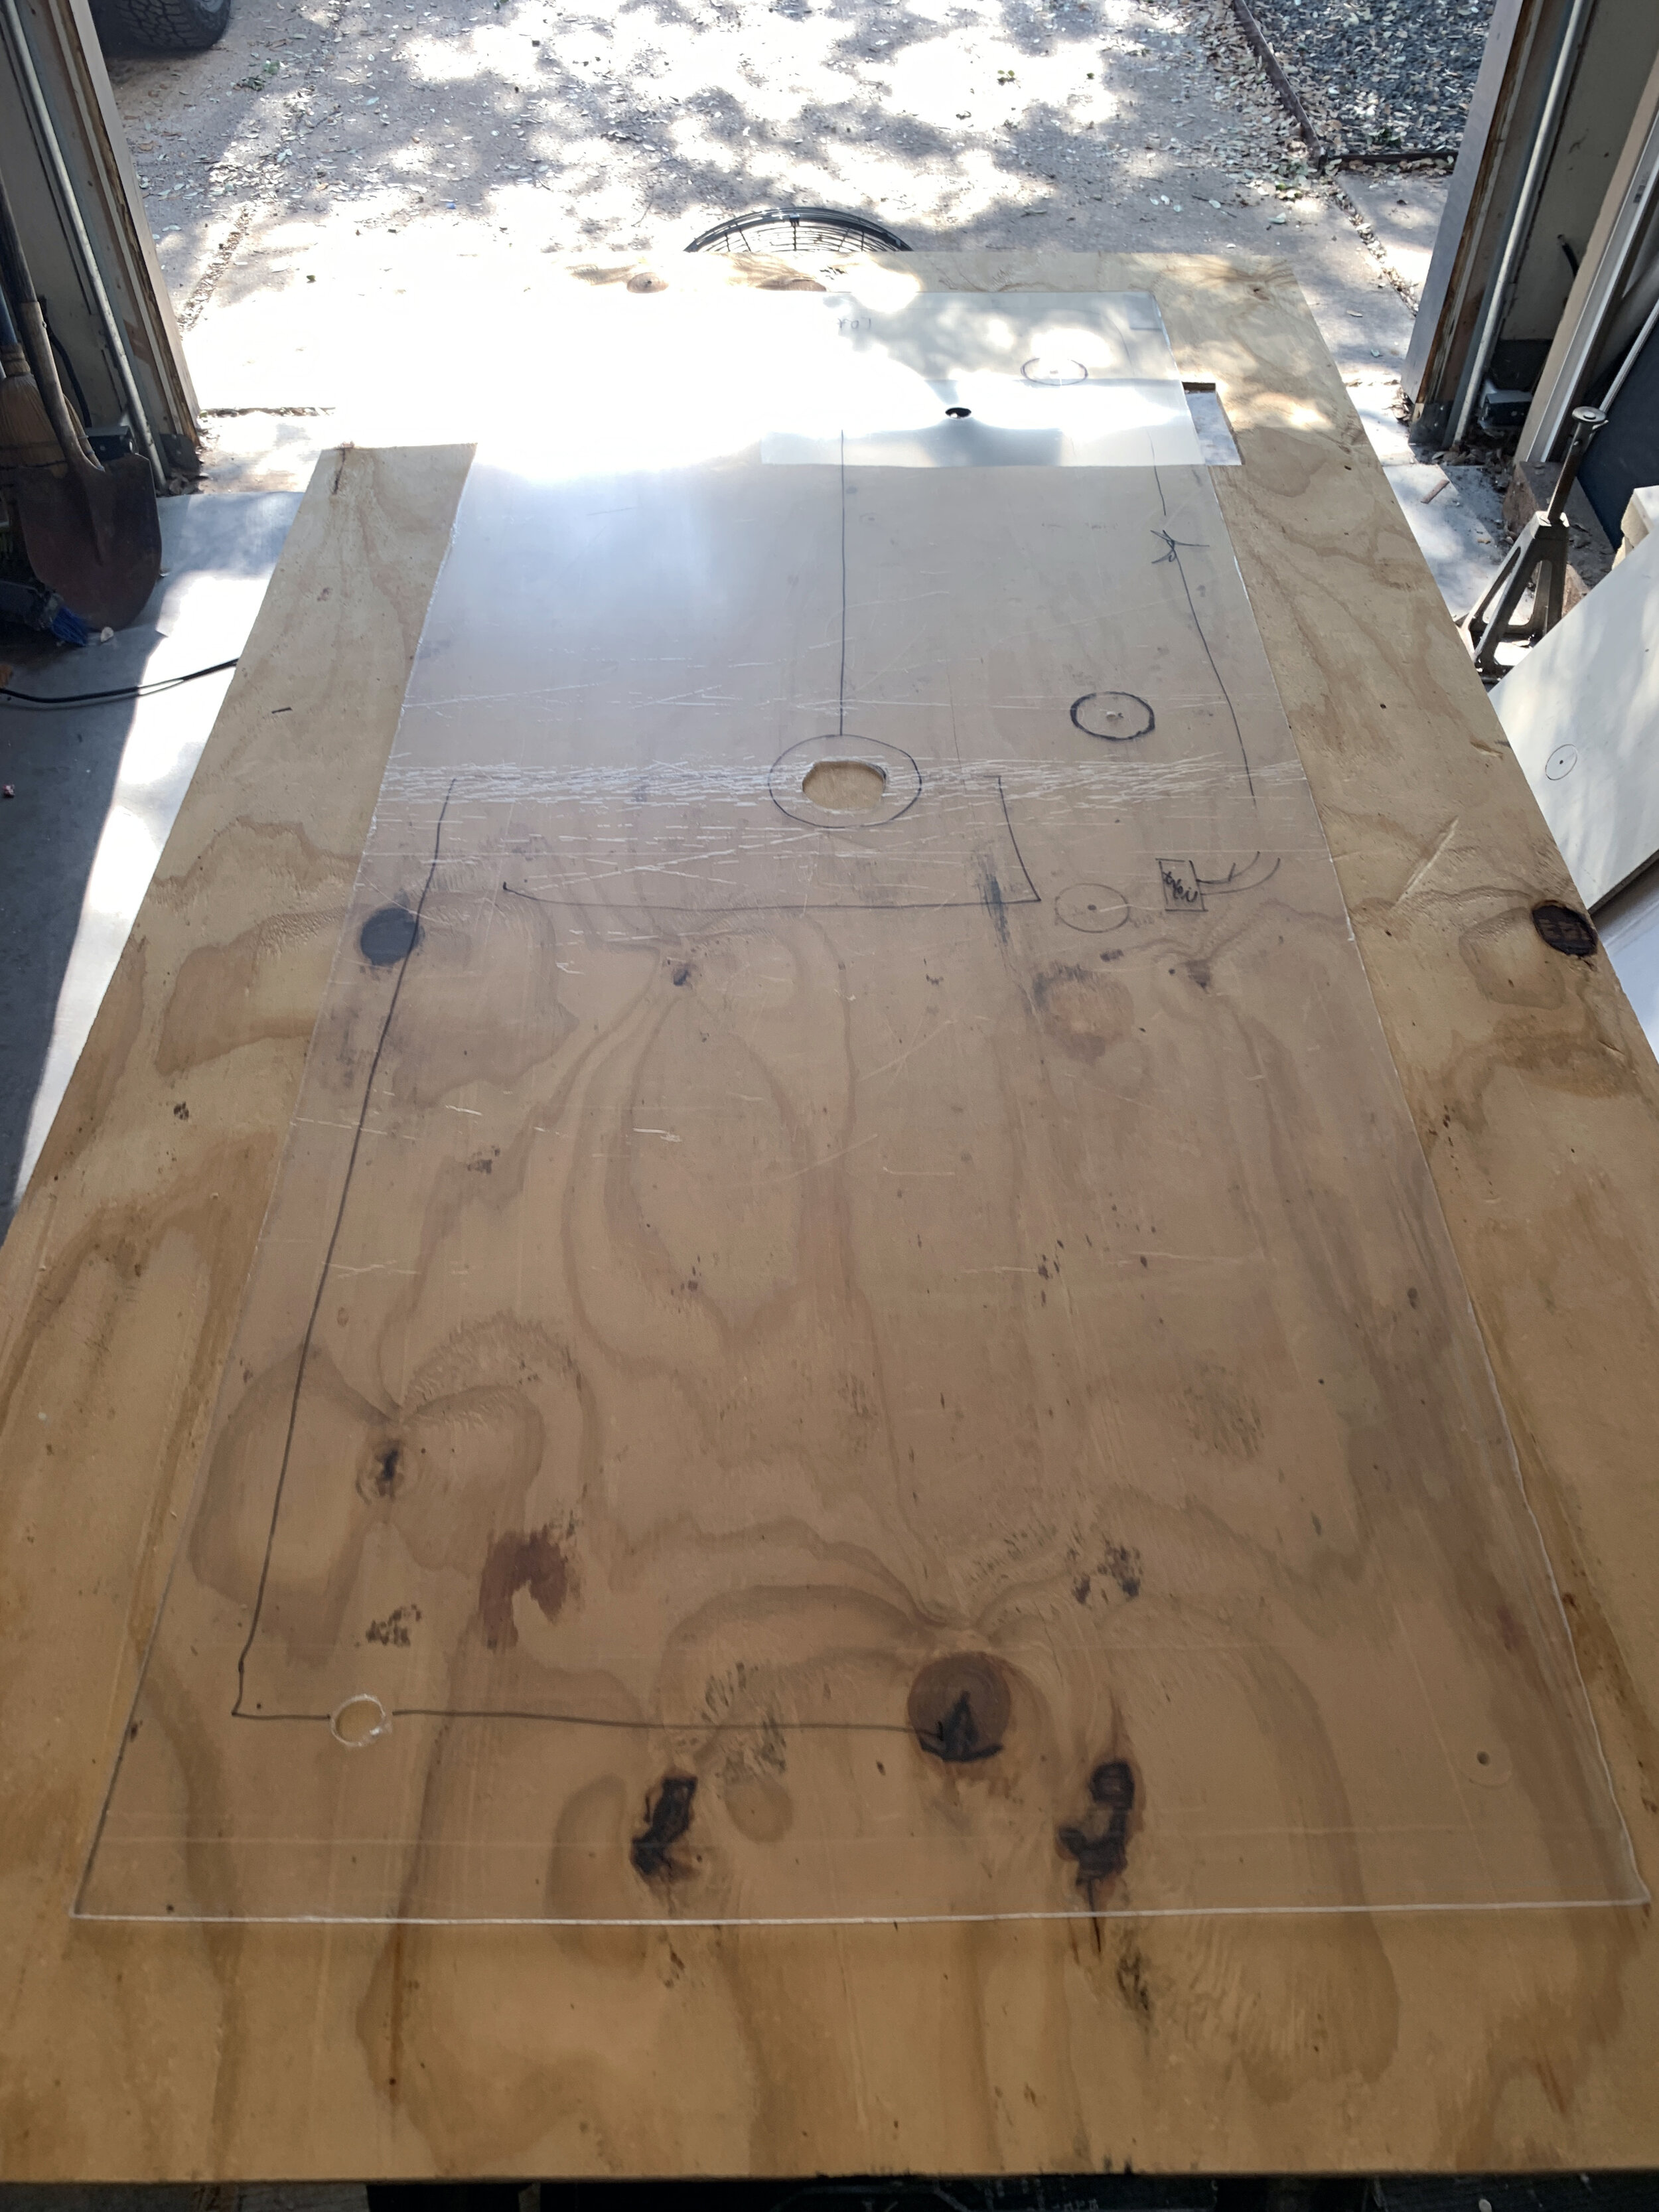
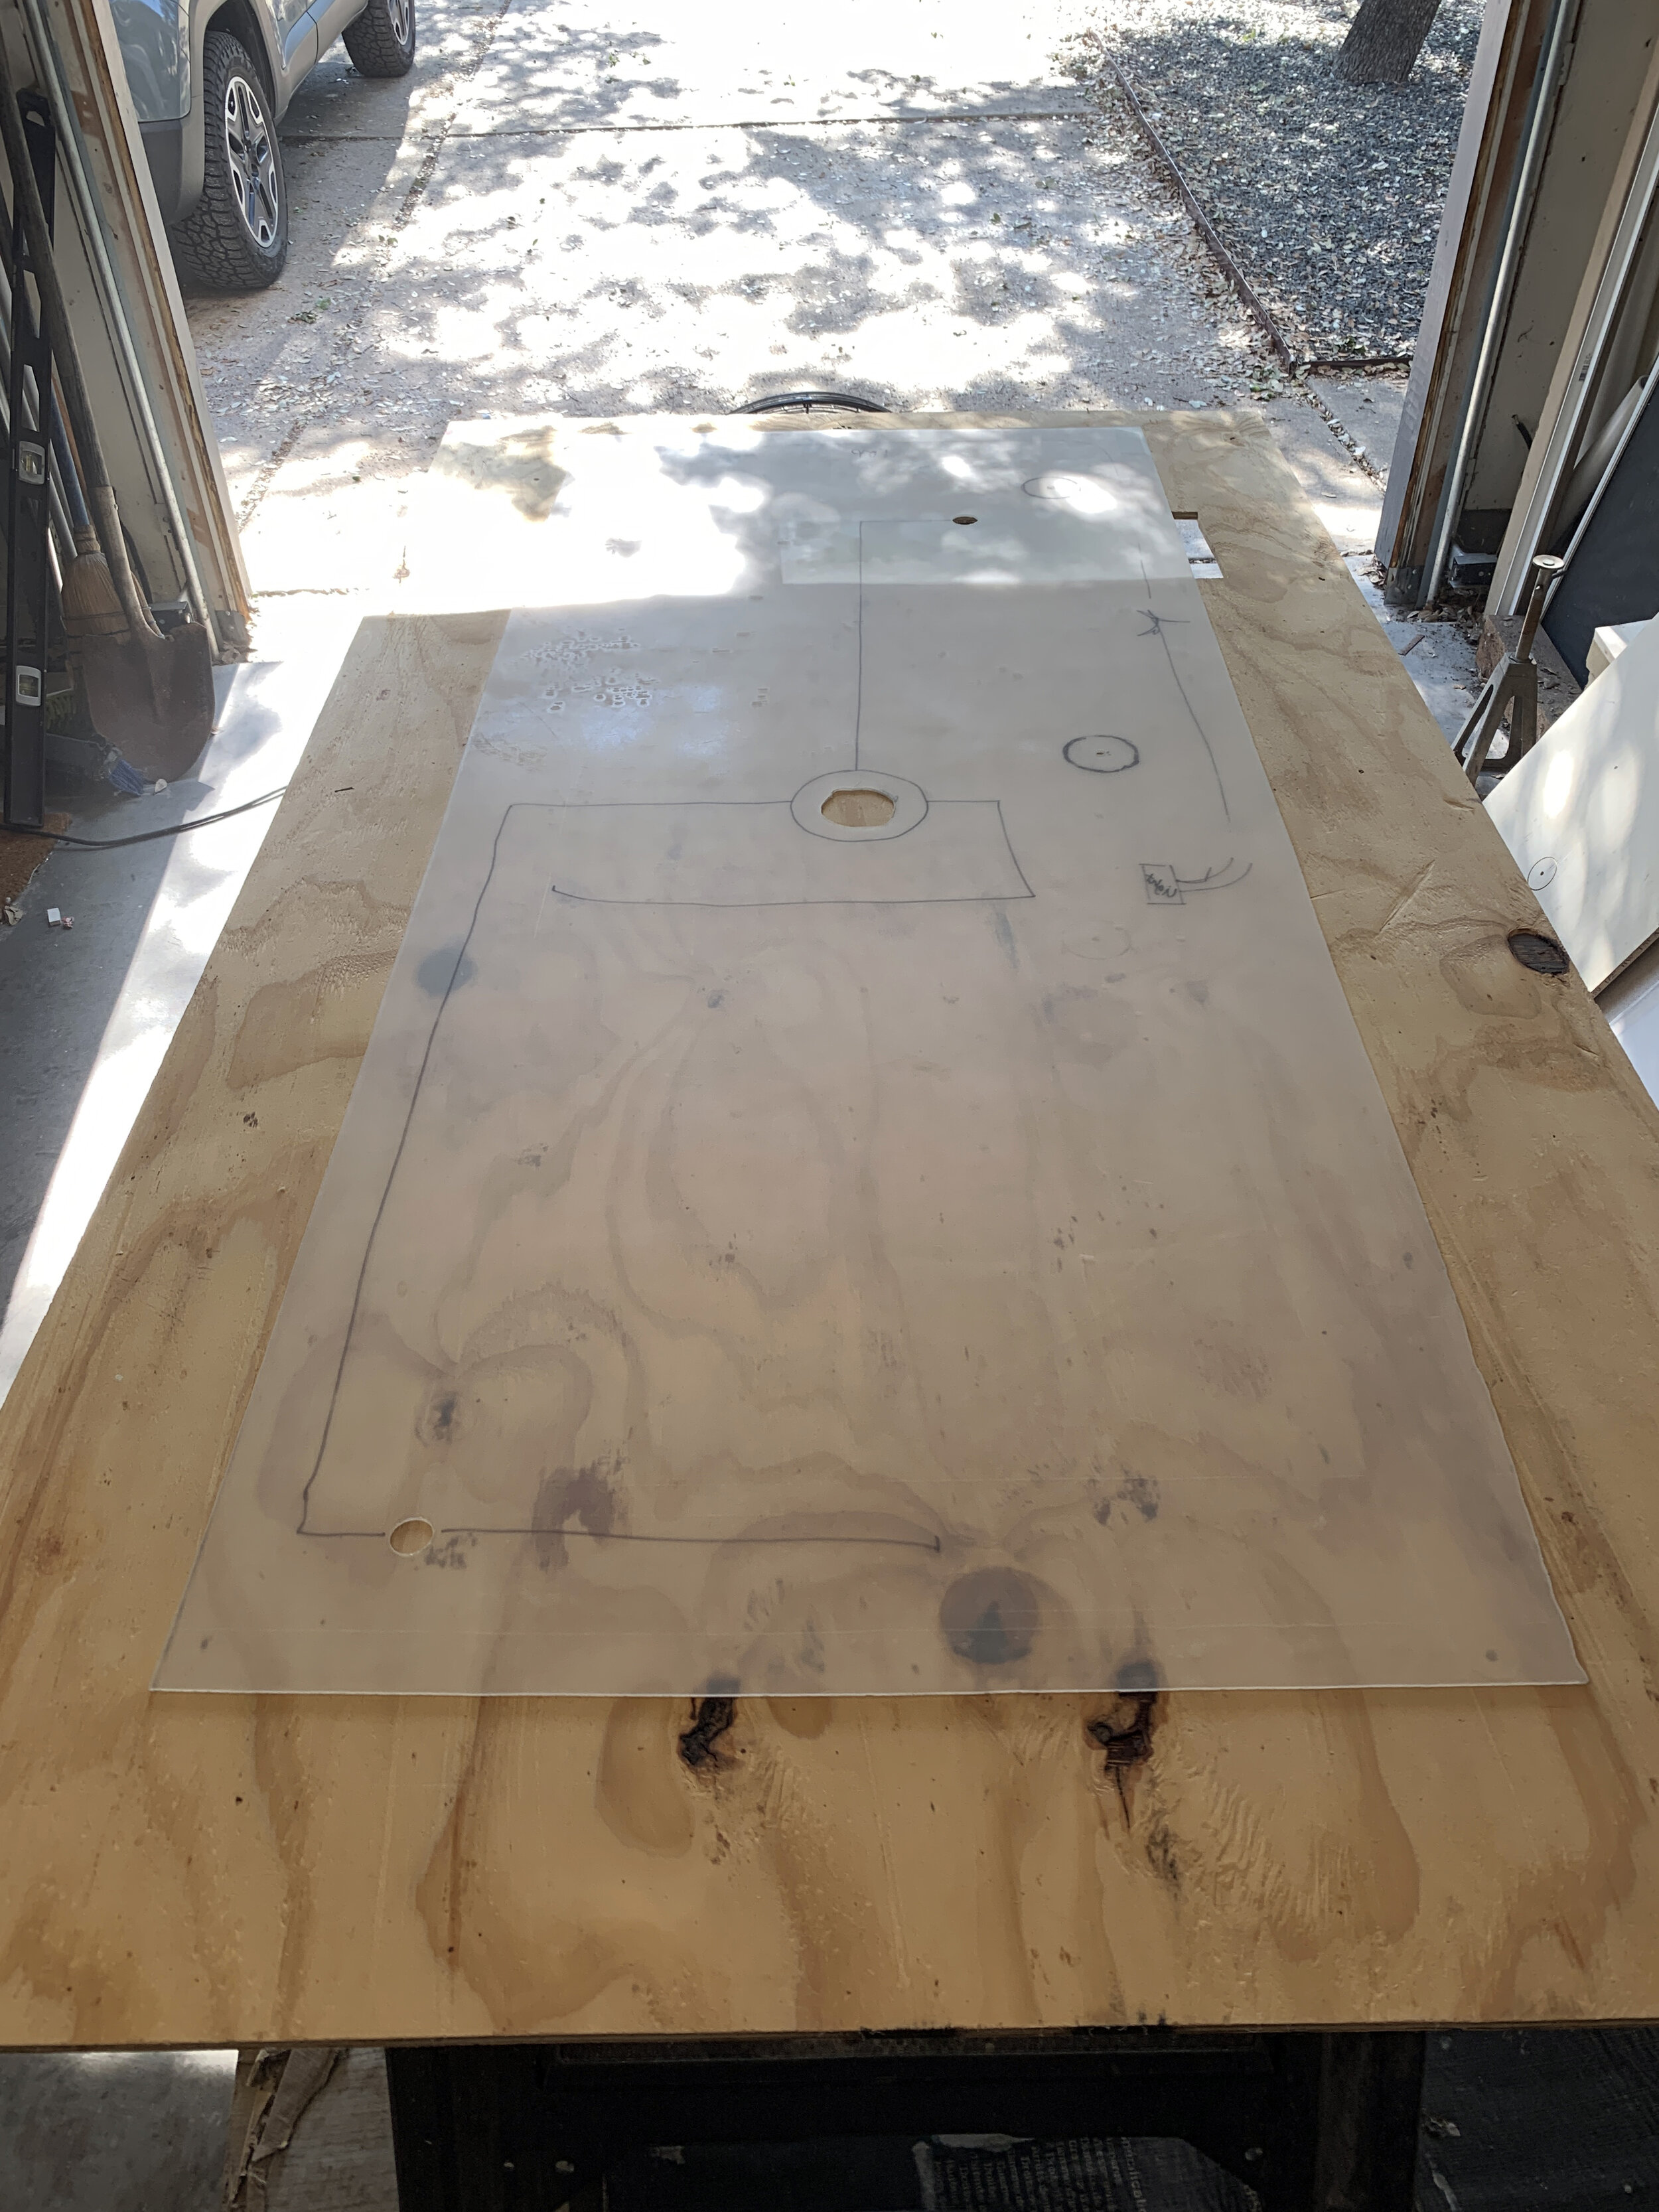
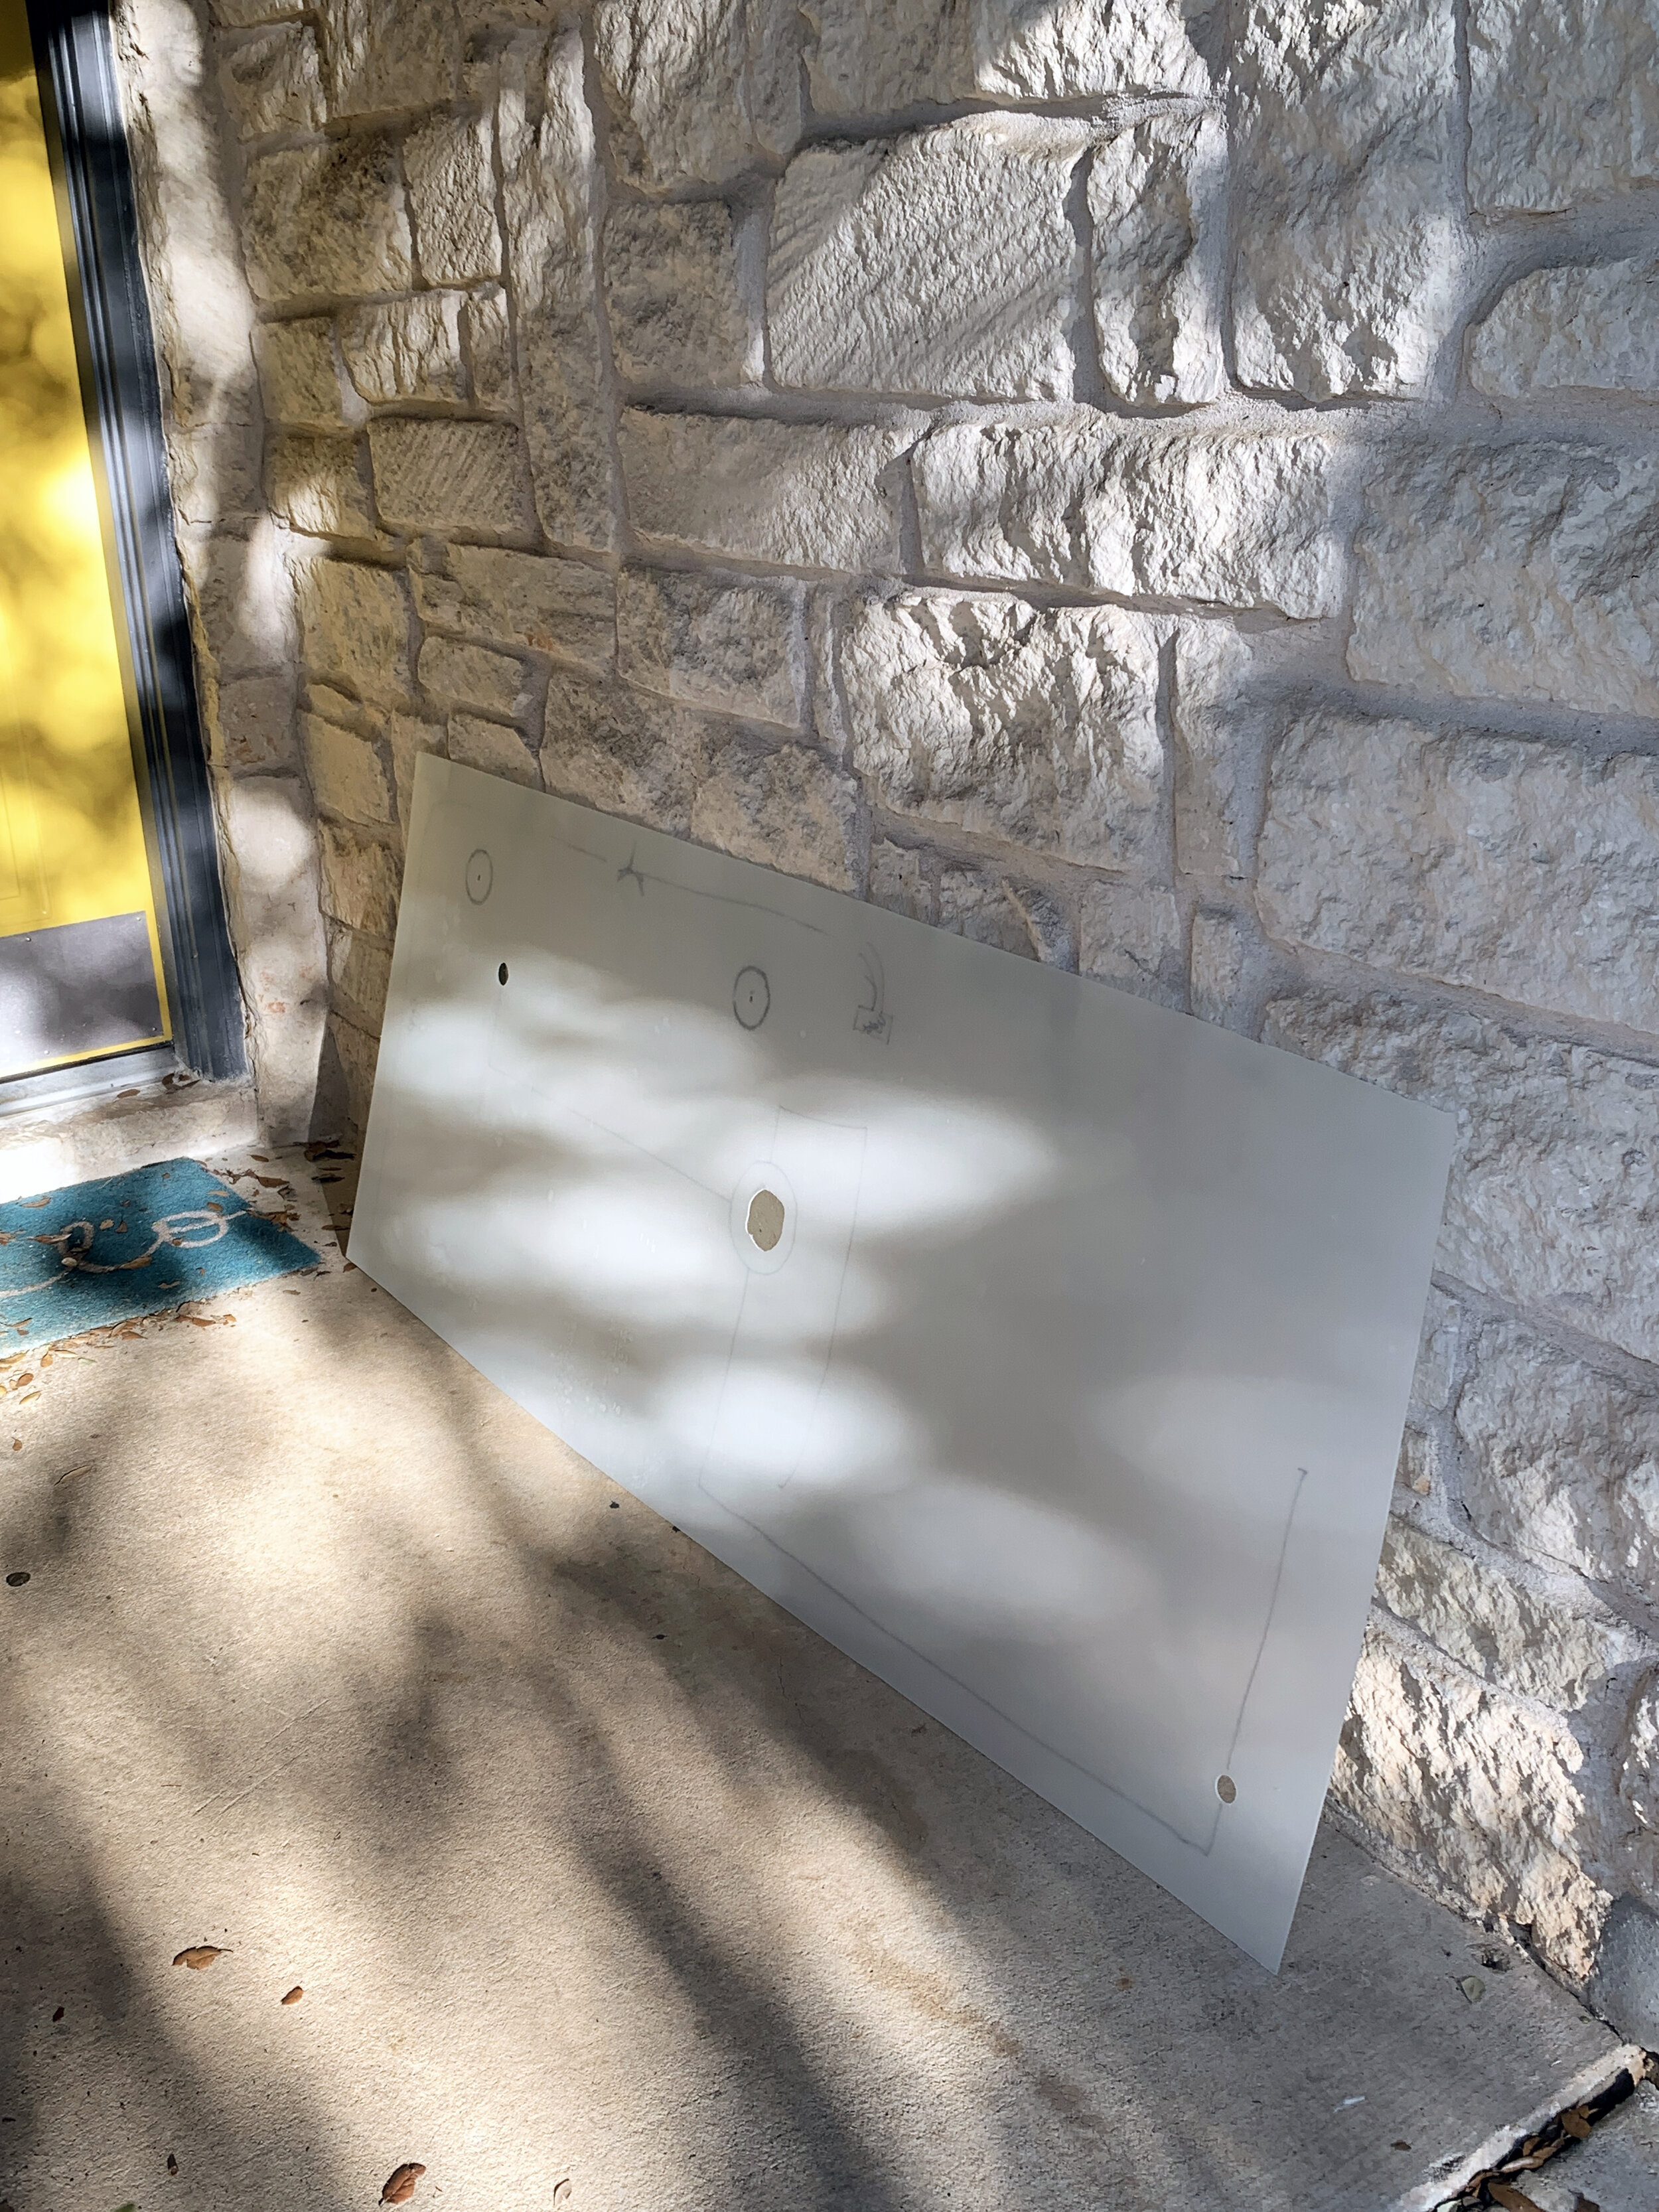
First, our acrylic sheets needed to be cut down to size for the ceiling and each wall, and because nothing in here is square it was not as simple as just taking measurements with the tape measure and cutting it out.
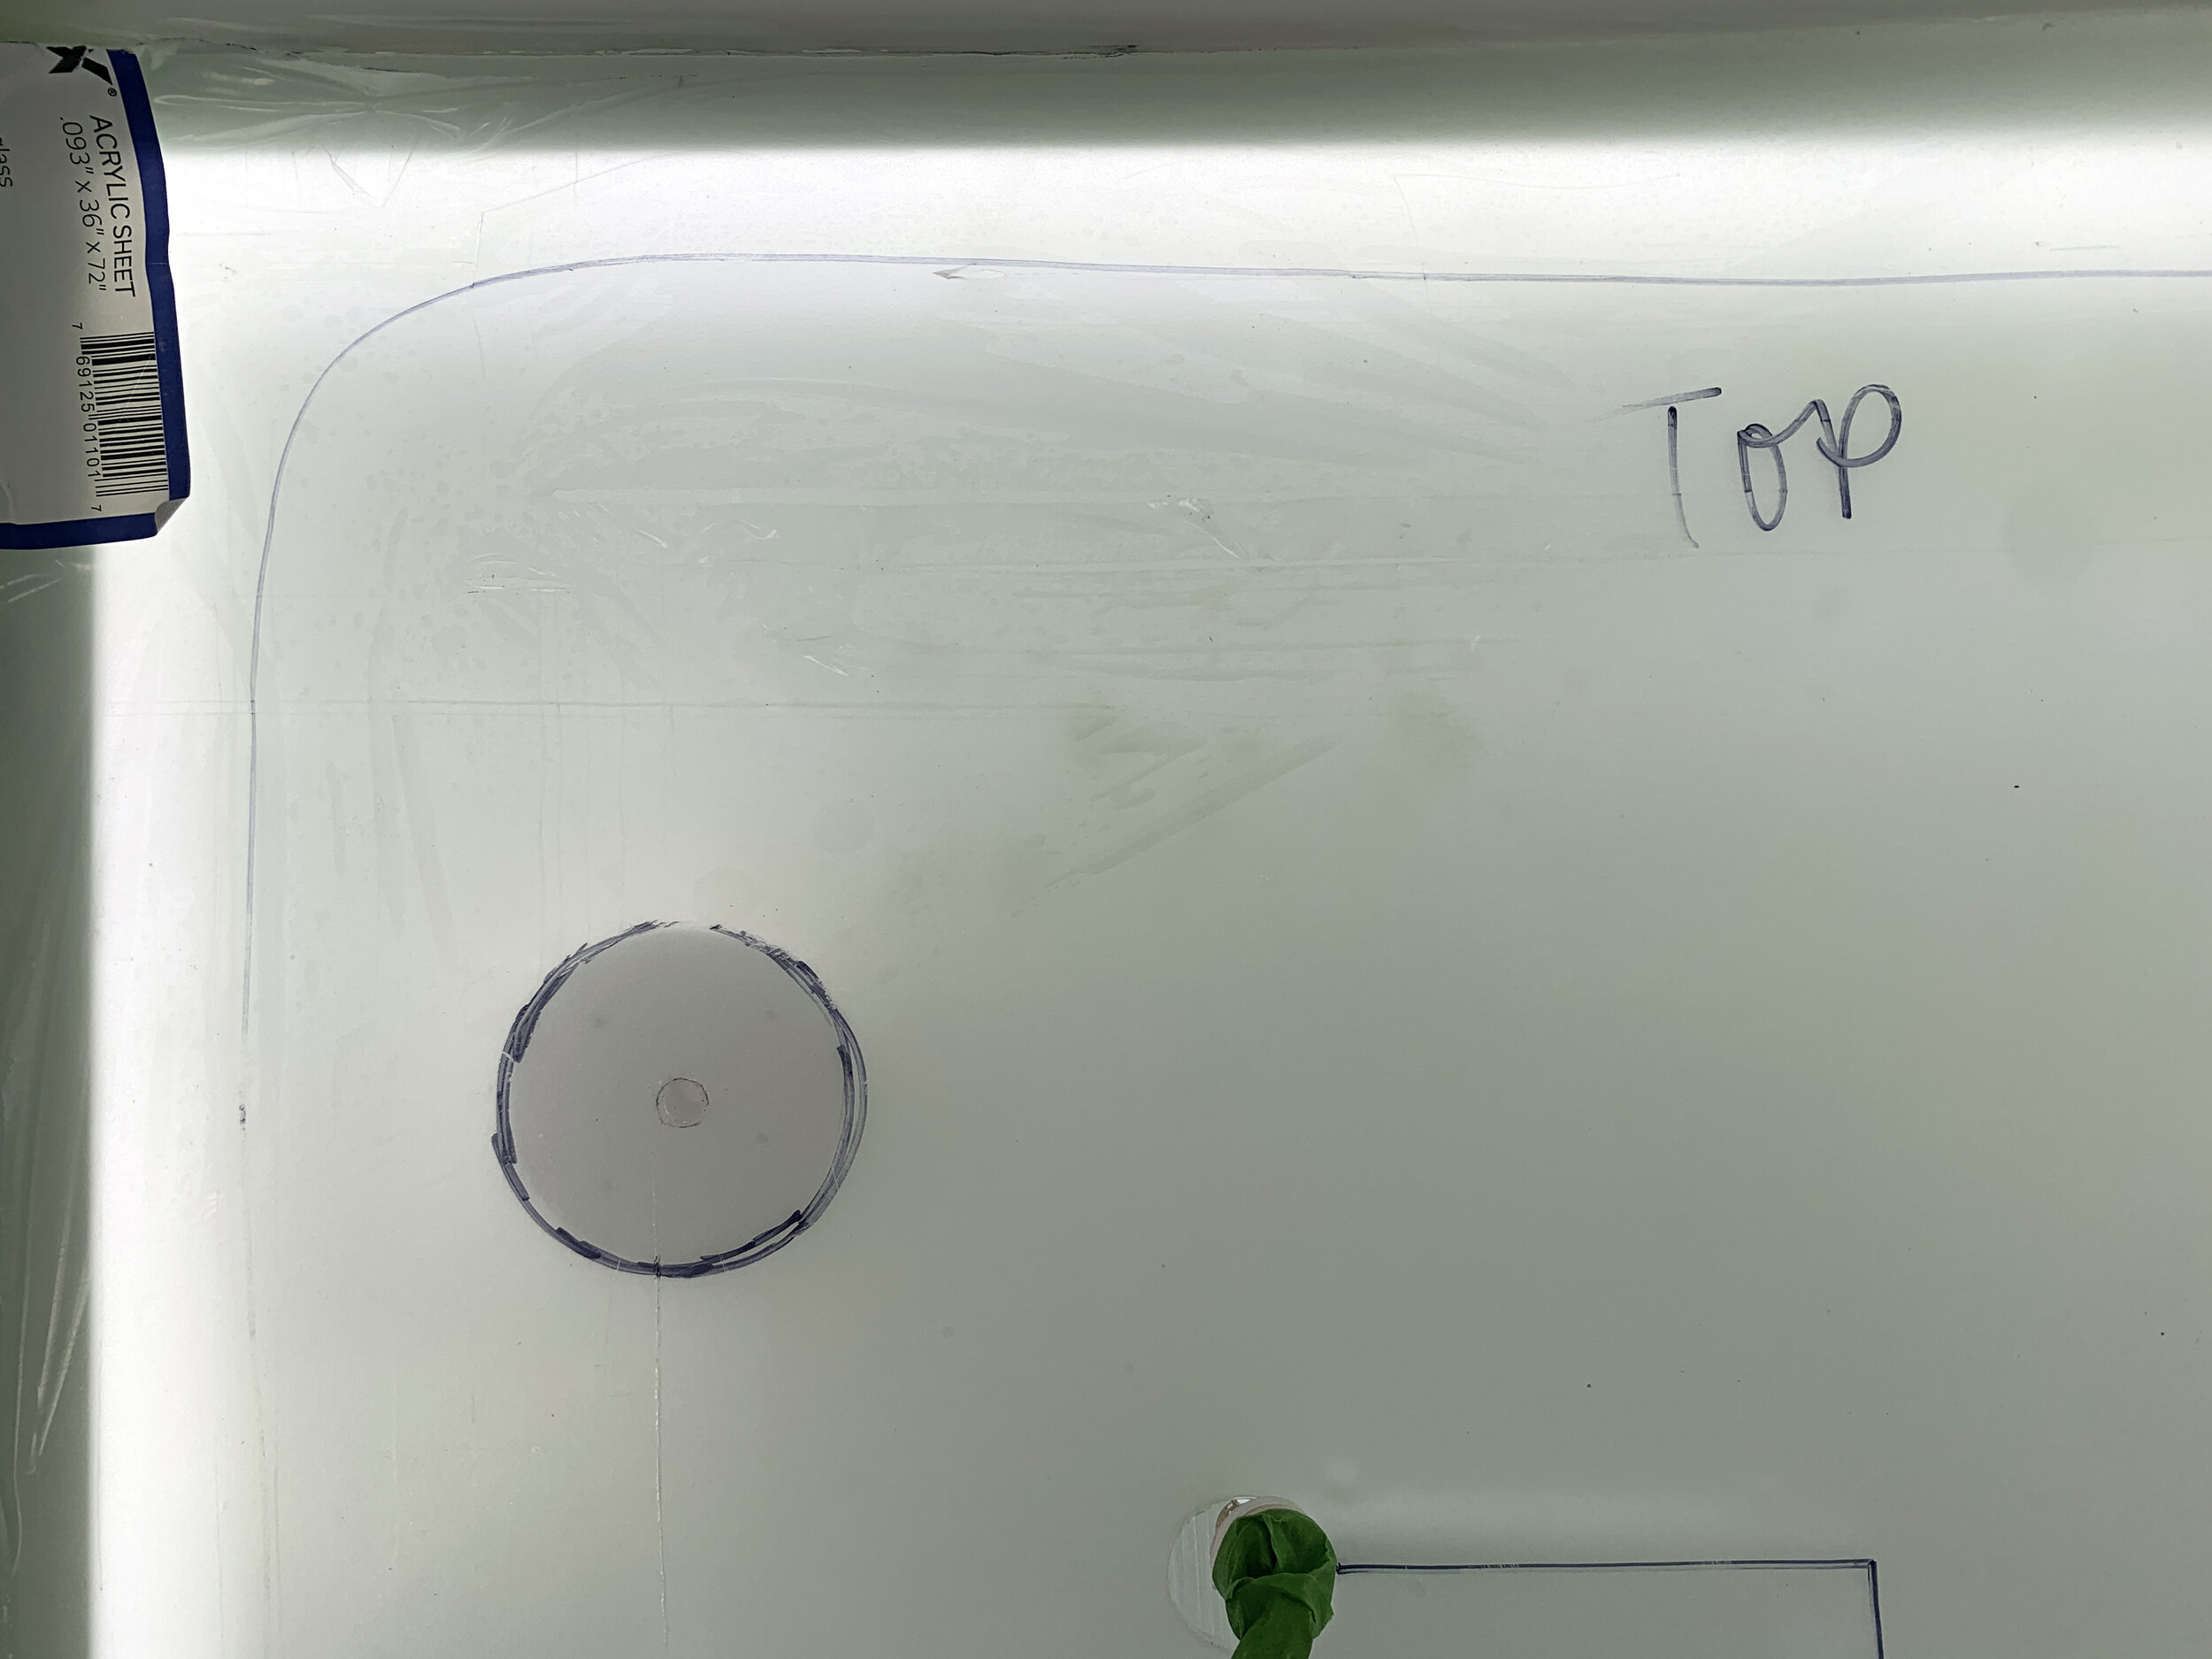
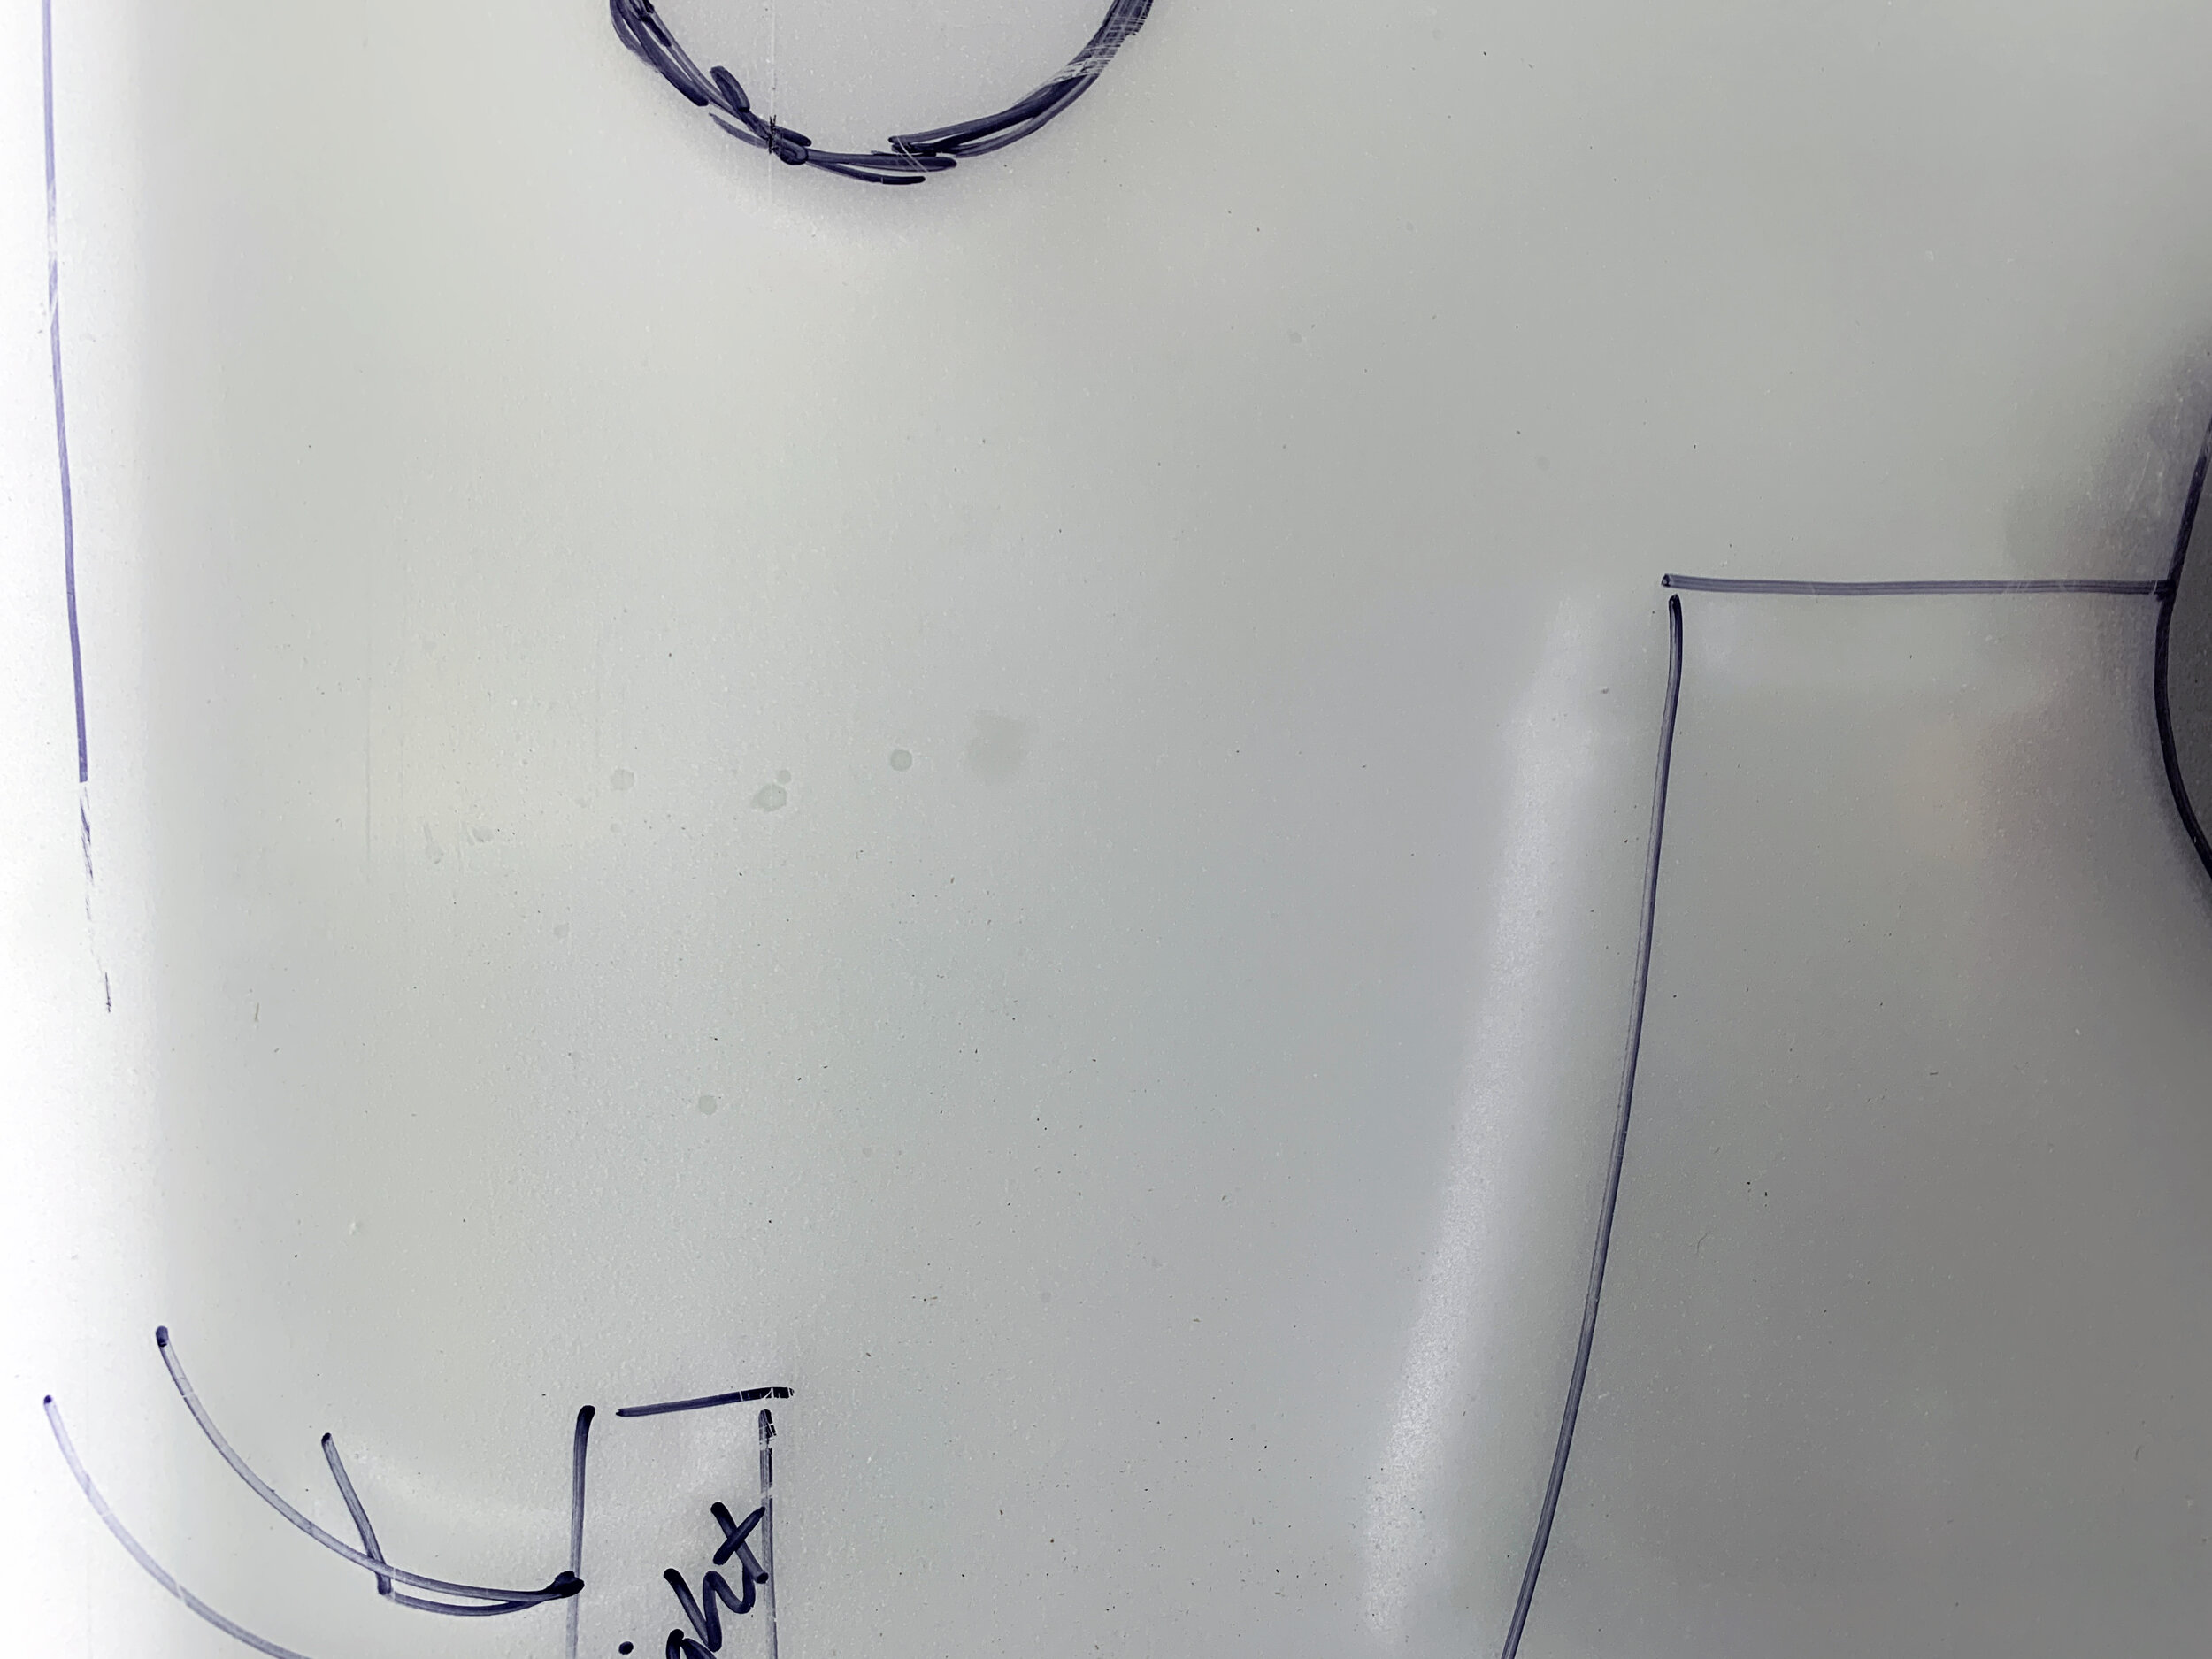
Starting with the ceiling first (so it spans the entire ceiling and the wall panels installed later would overlap a bit help further hold the ceiling panel up), I used our roll of kraft paper and painters tape to get the exact shape and size of the area, making sure before I removed the sized template to label which side was which.
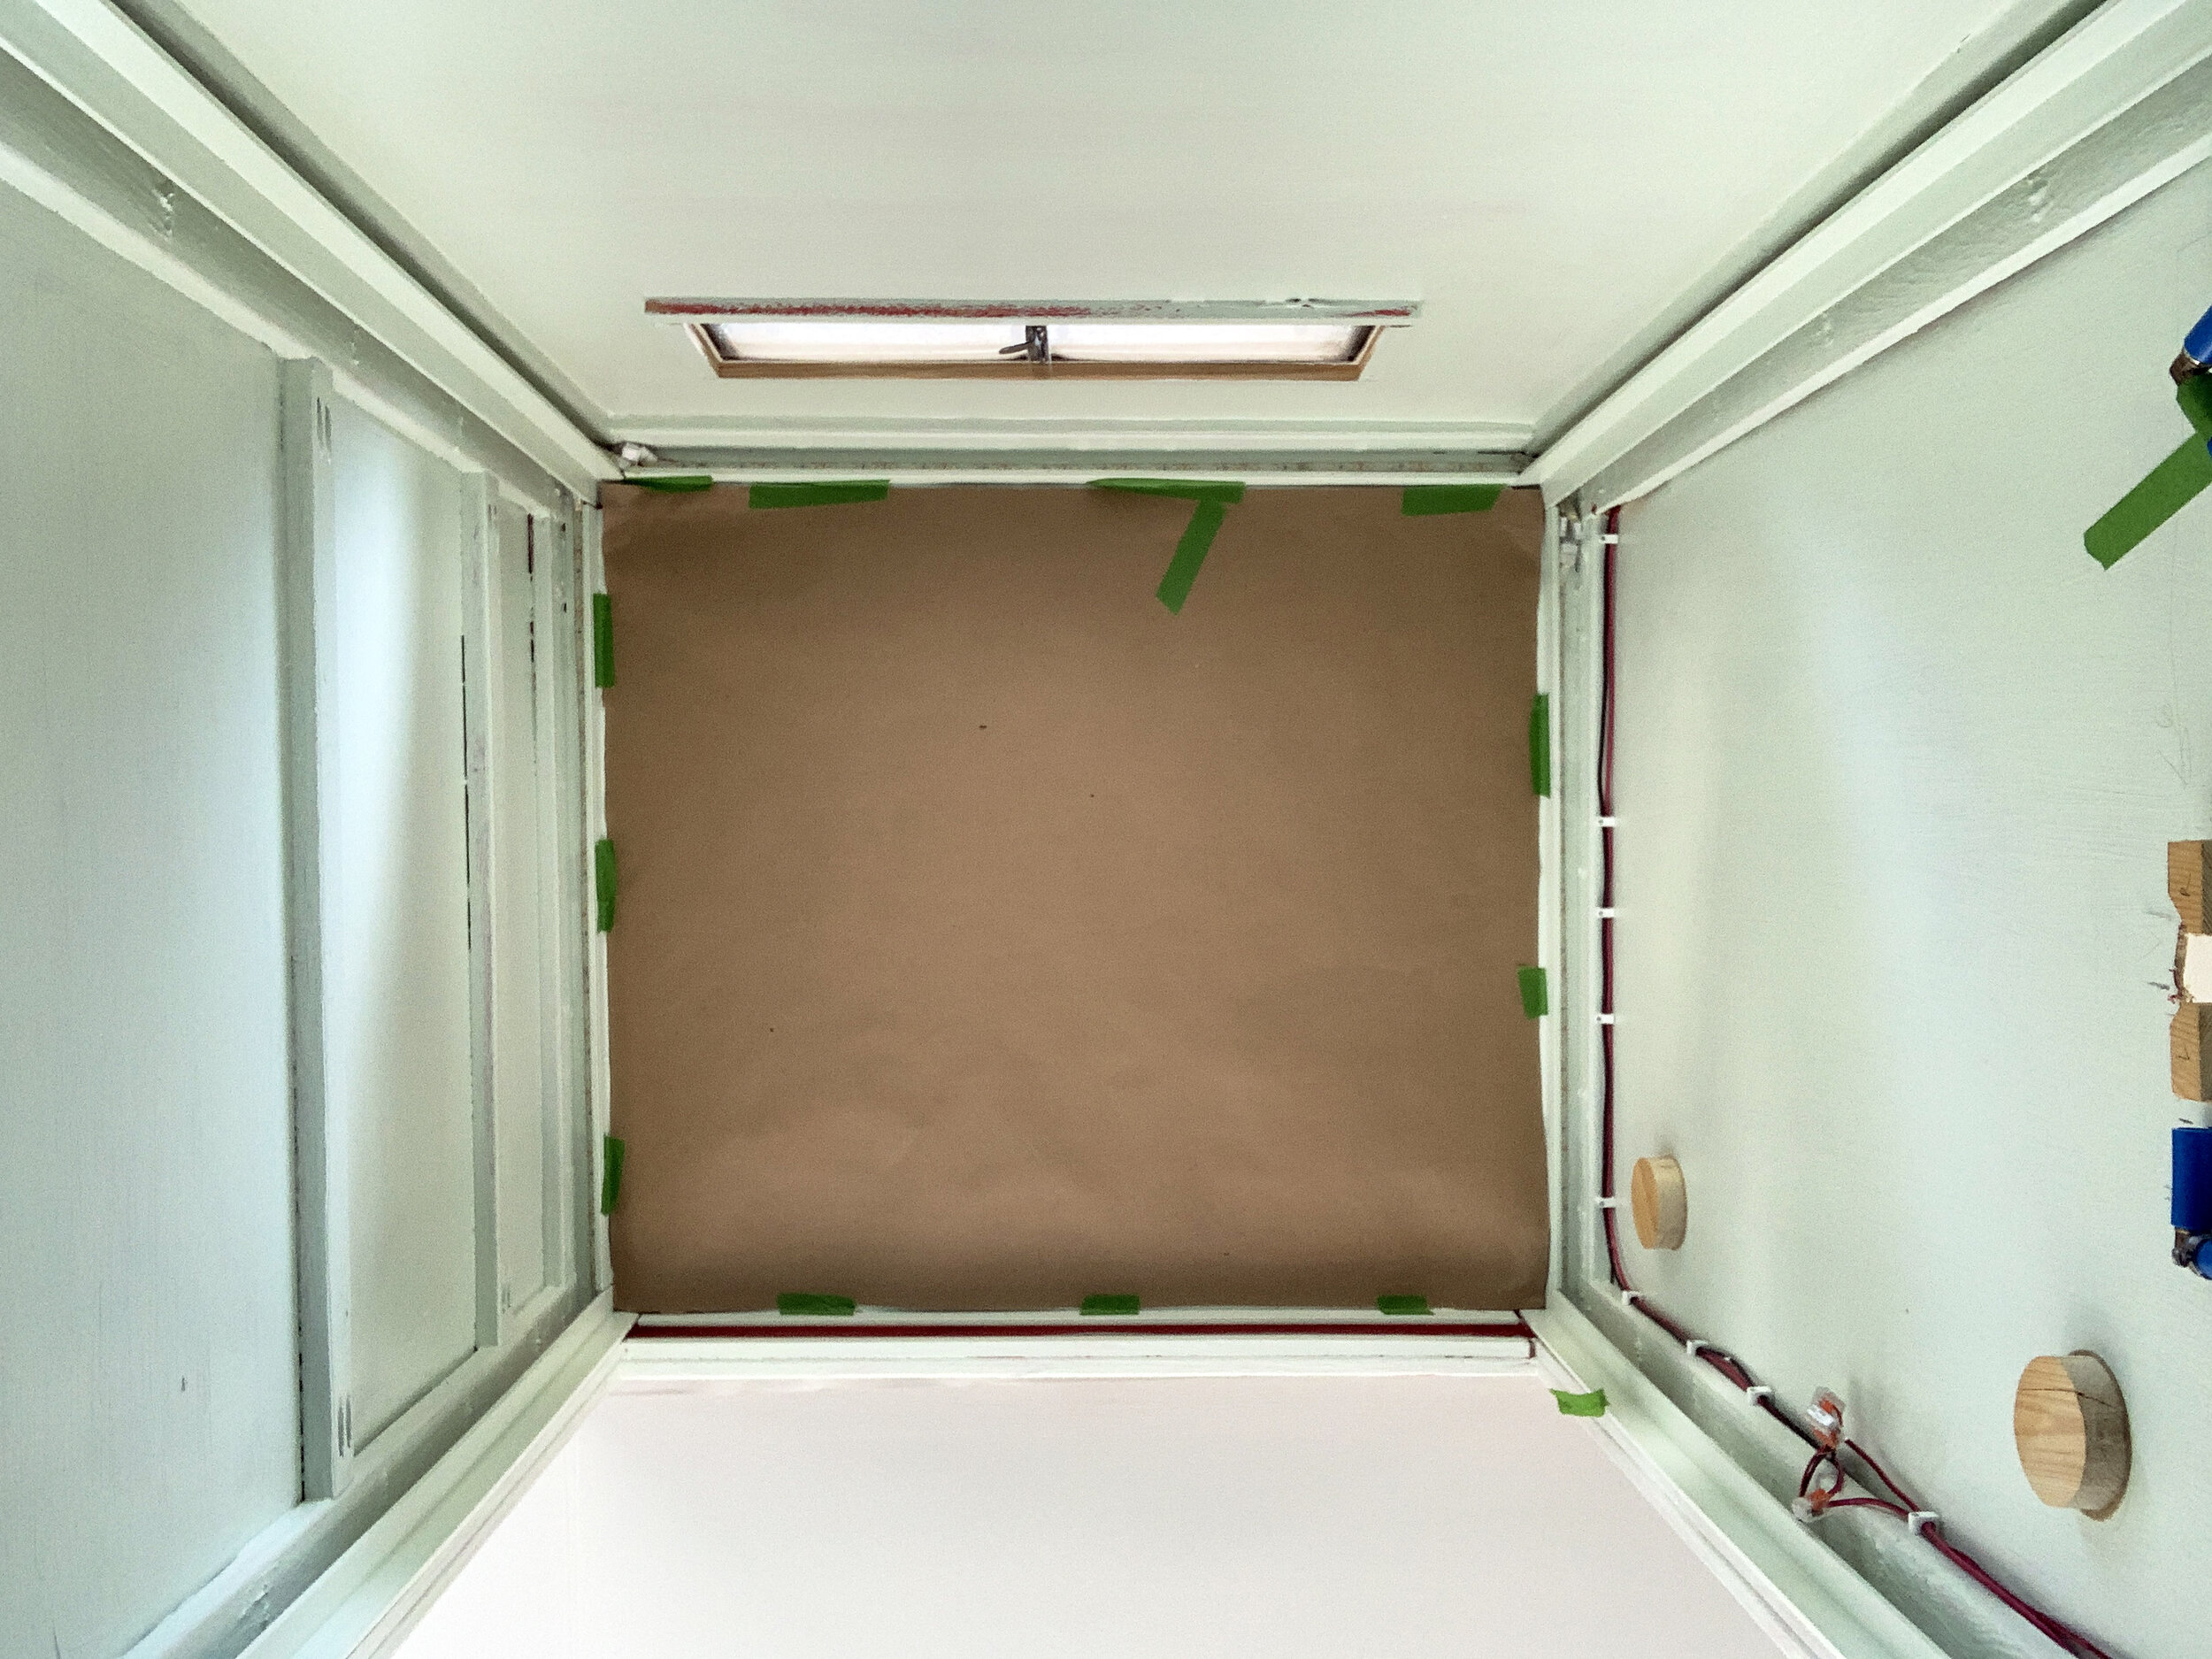
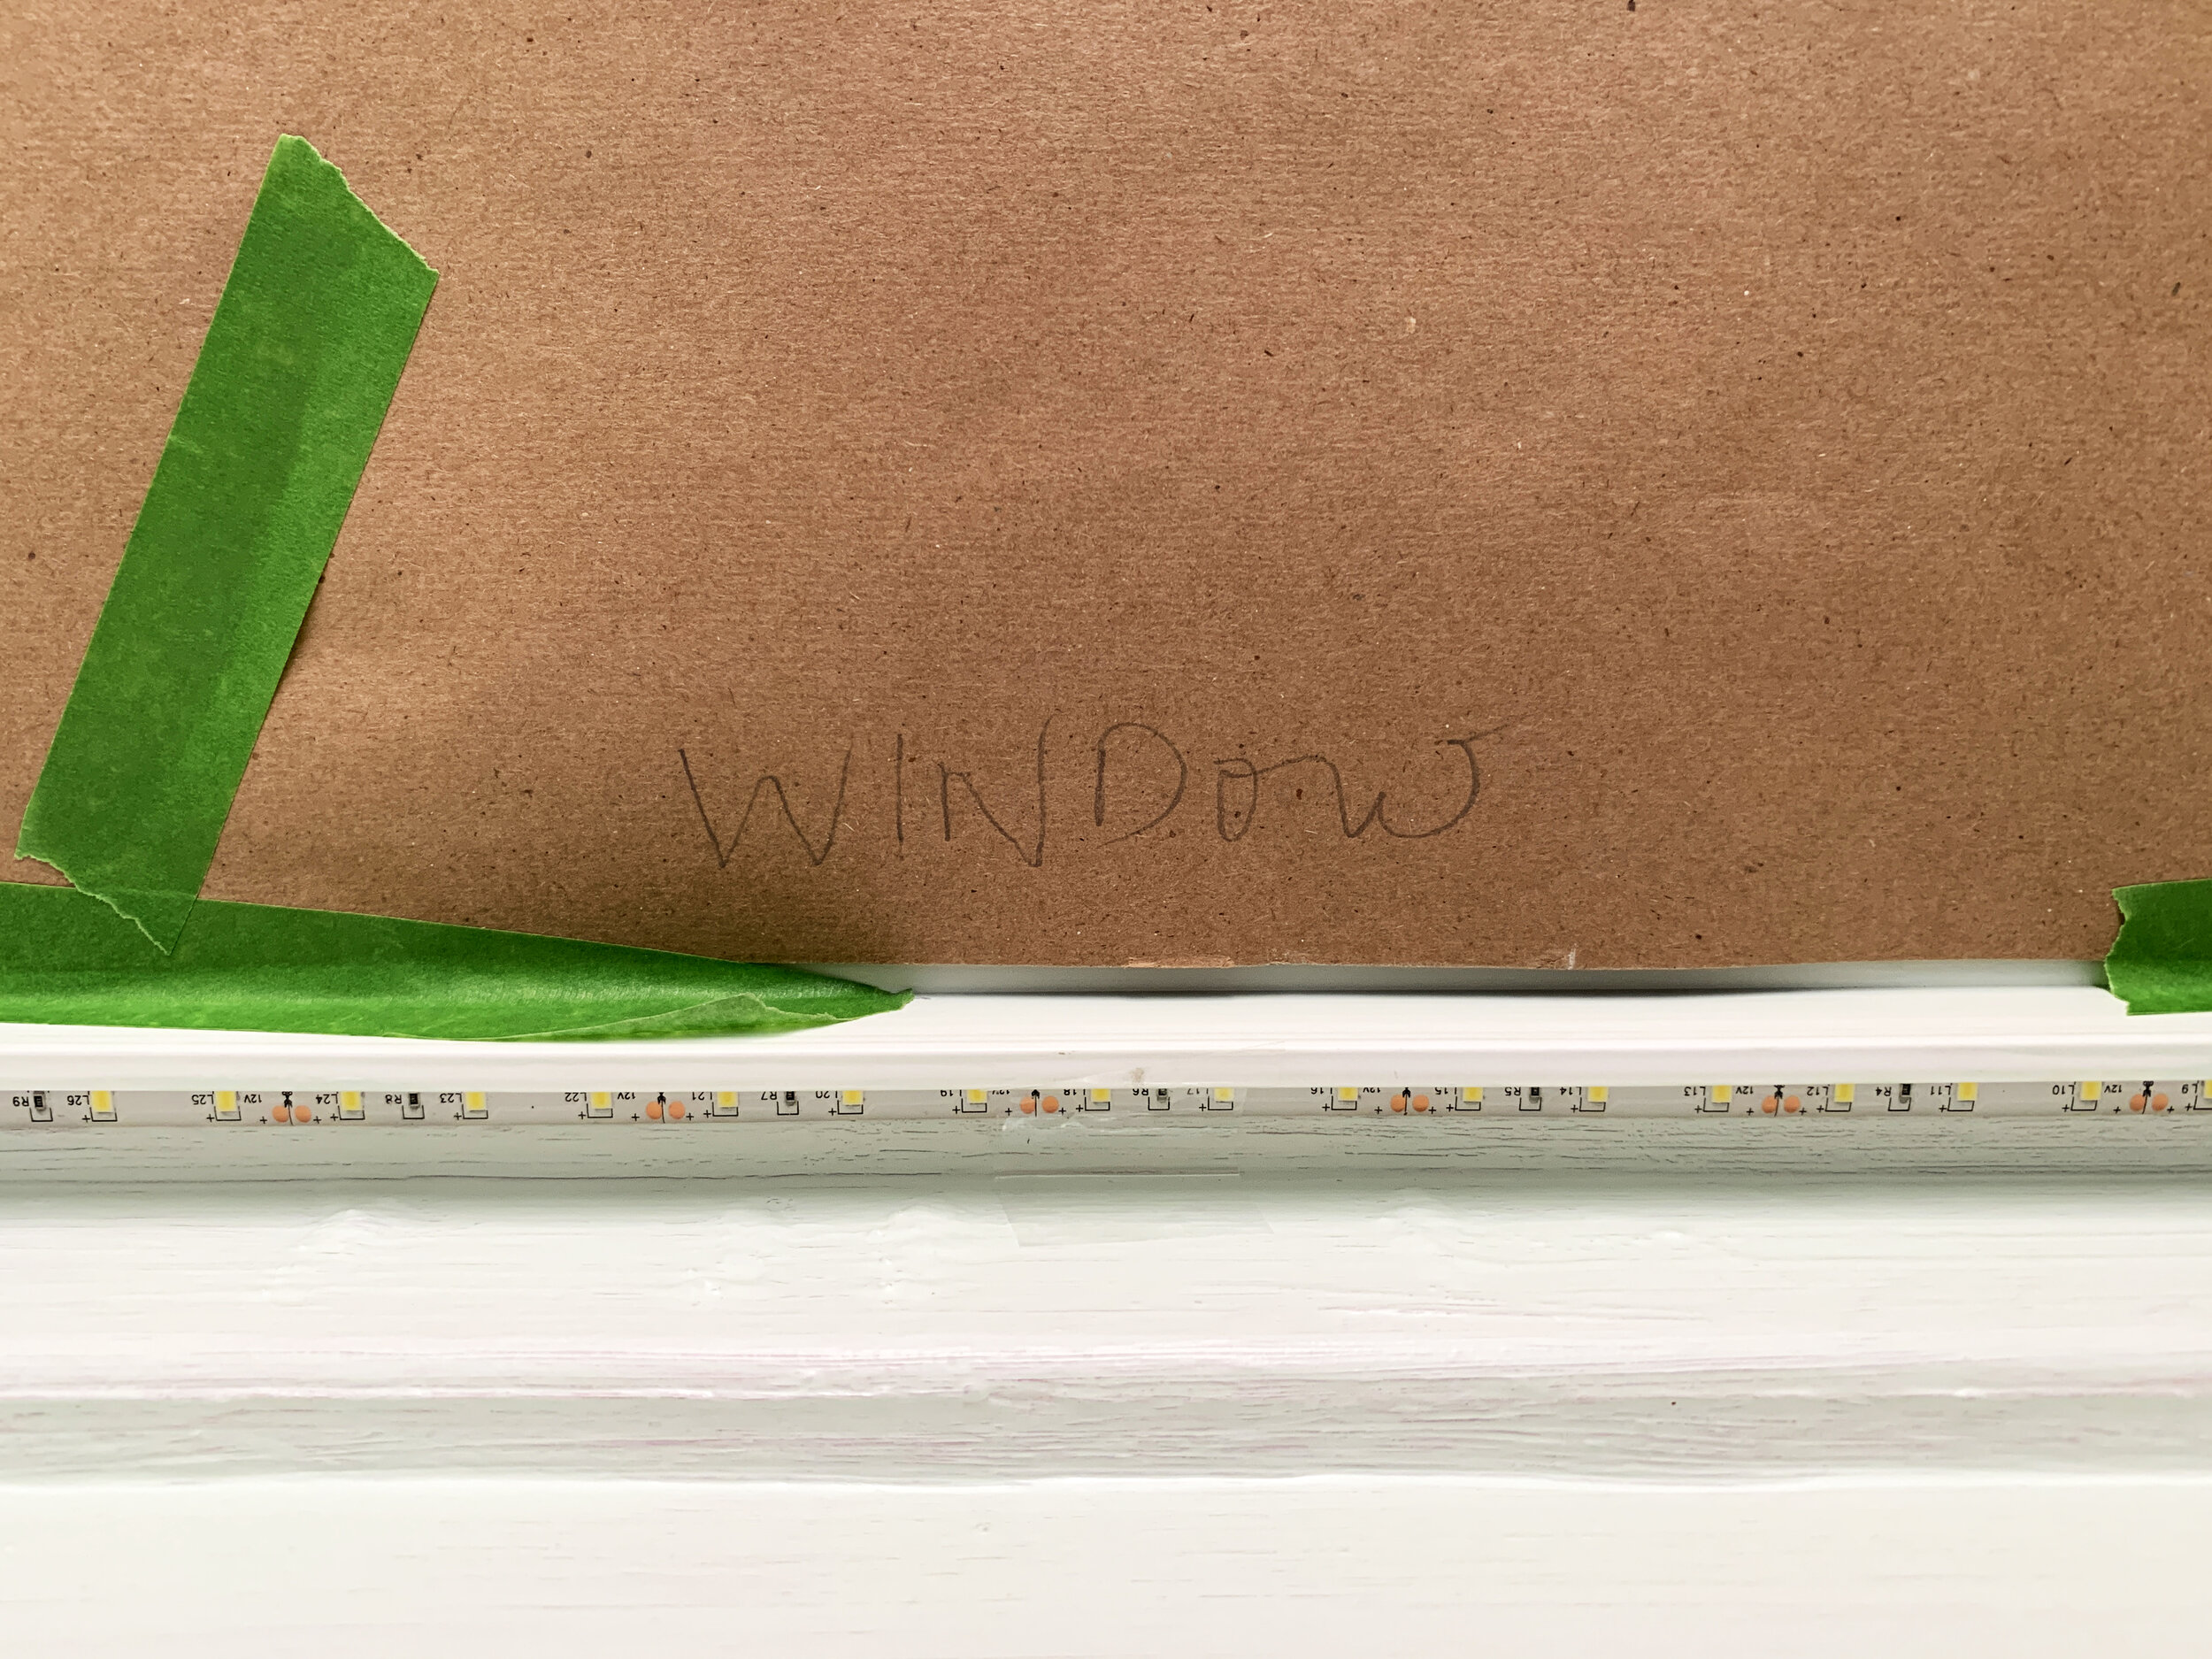
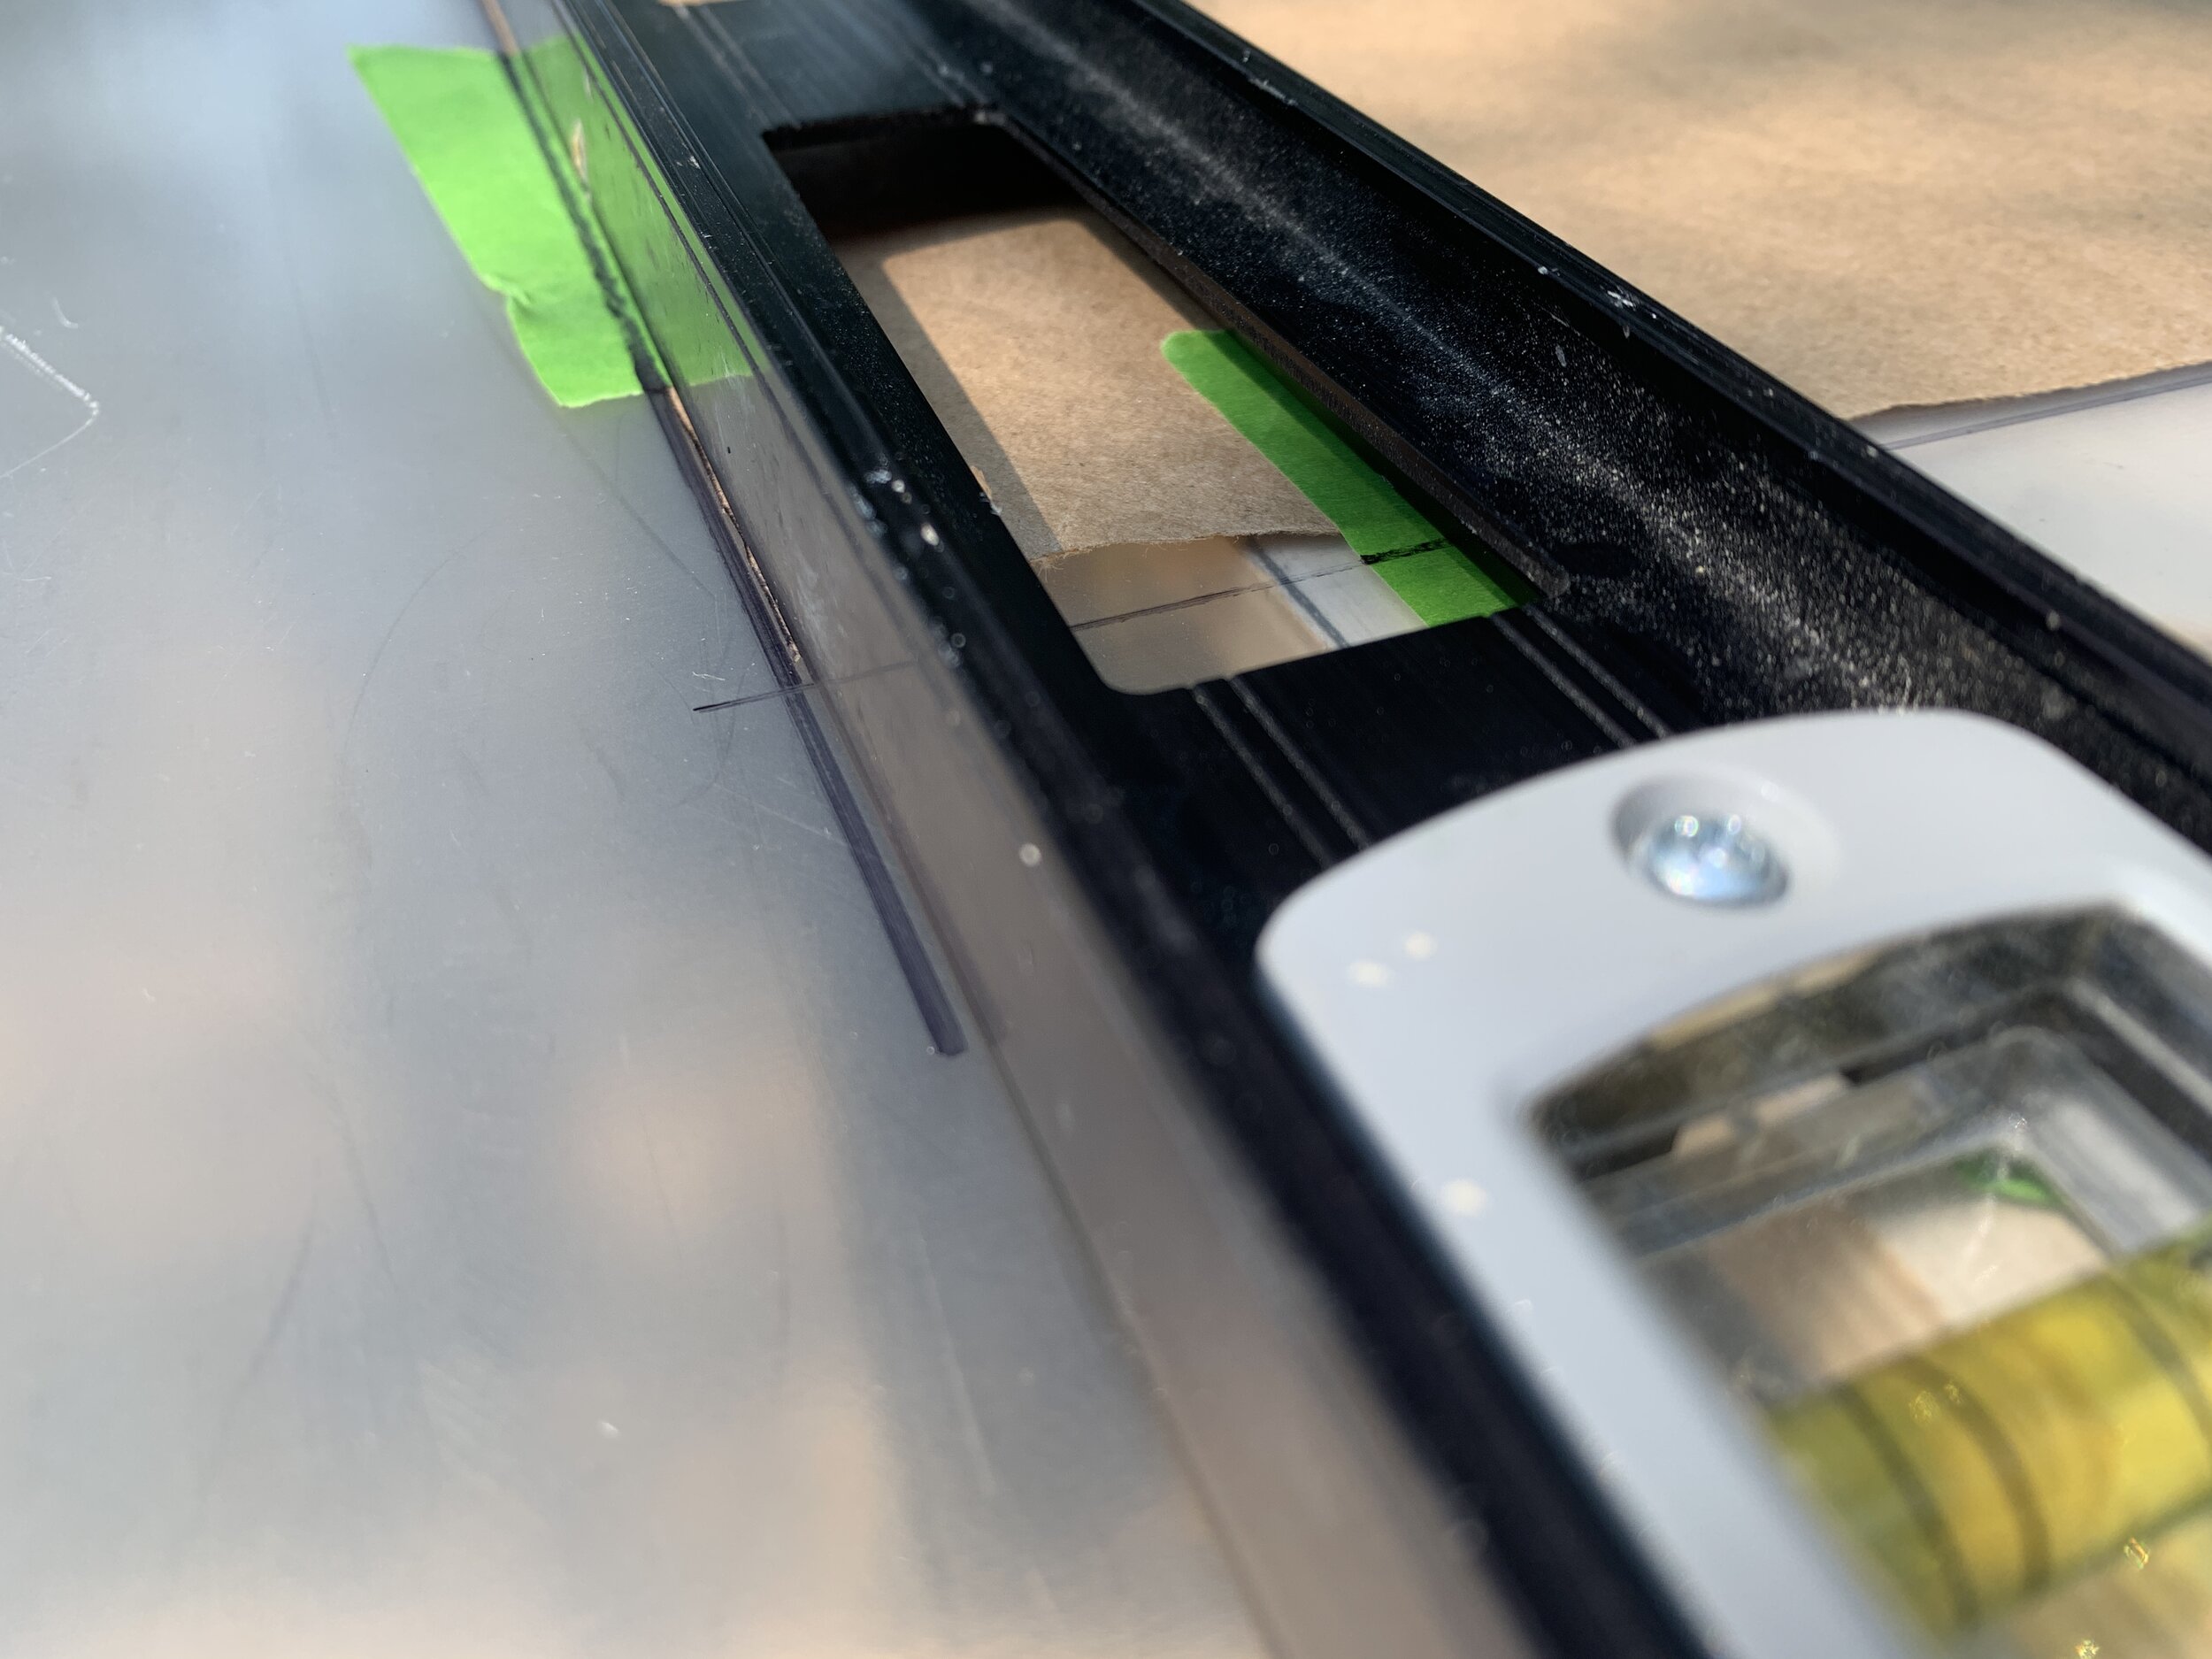
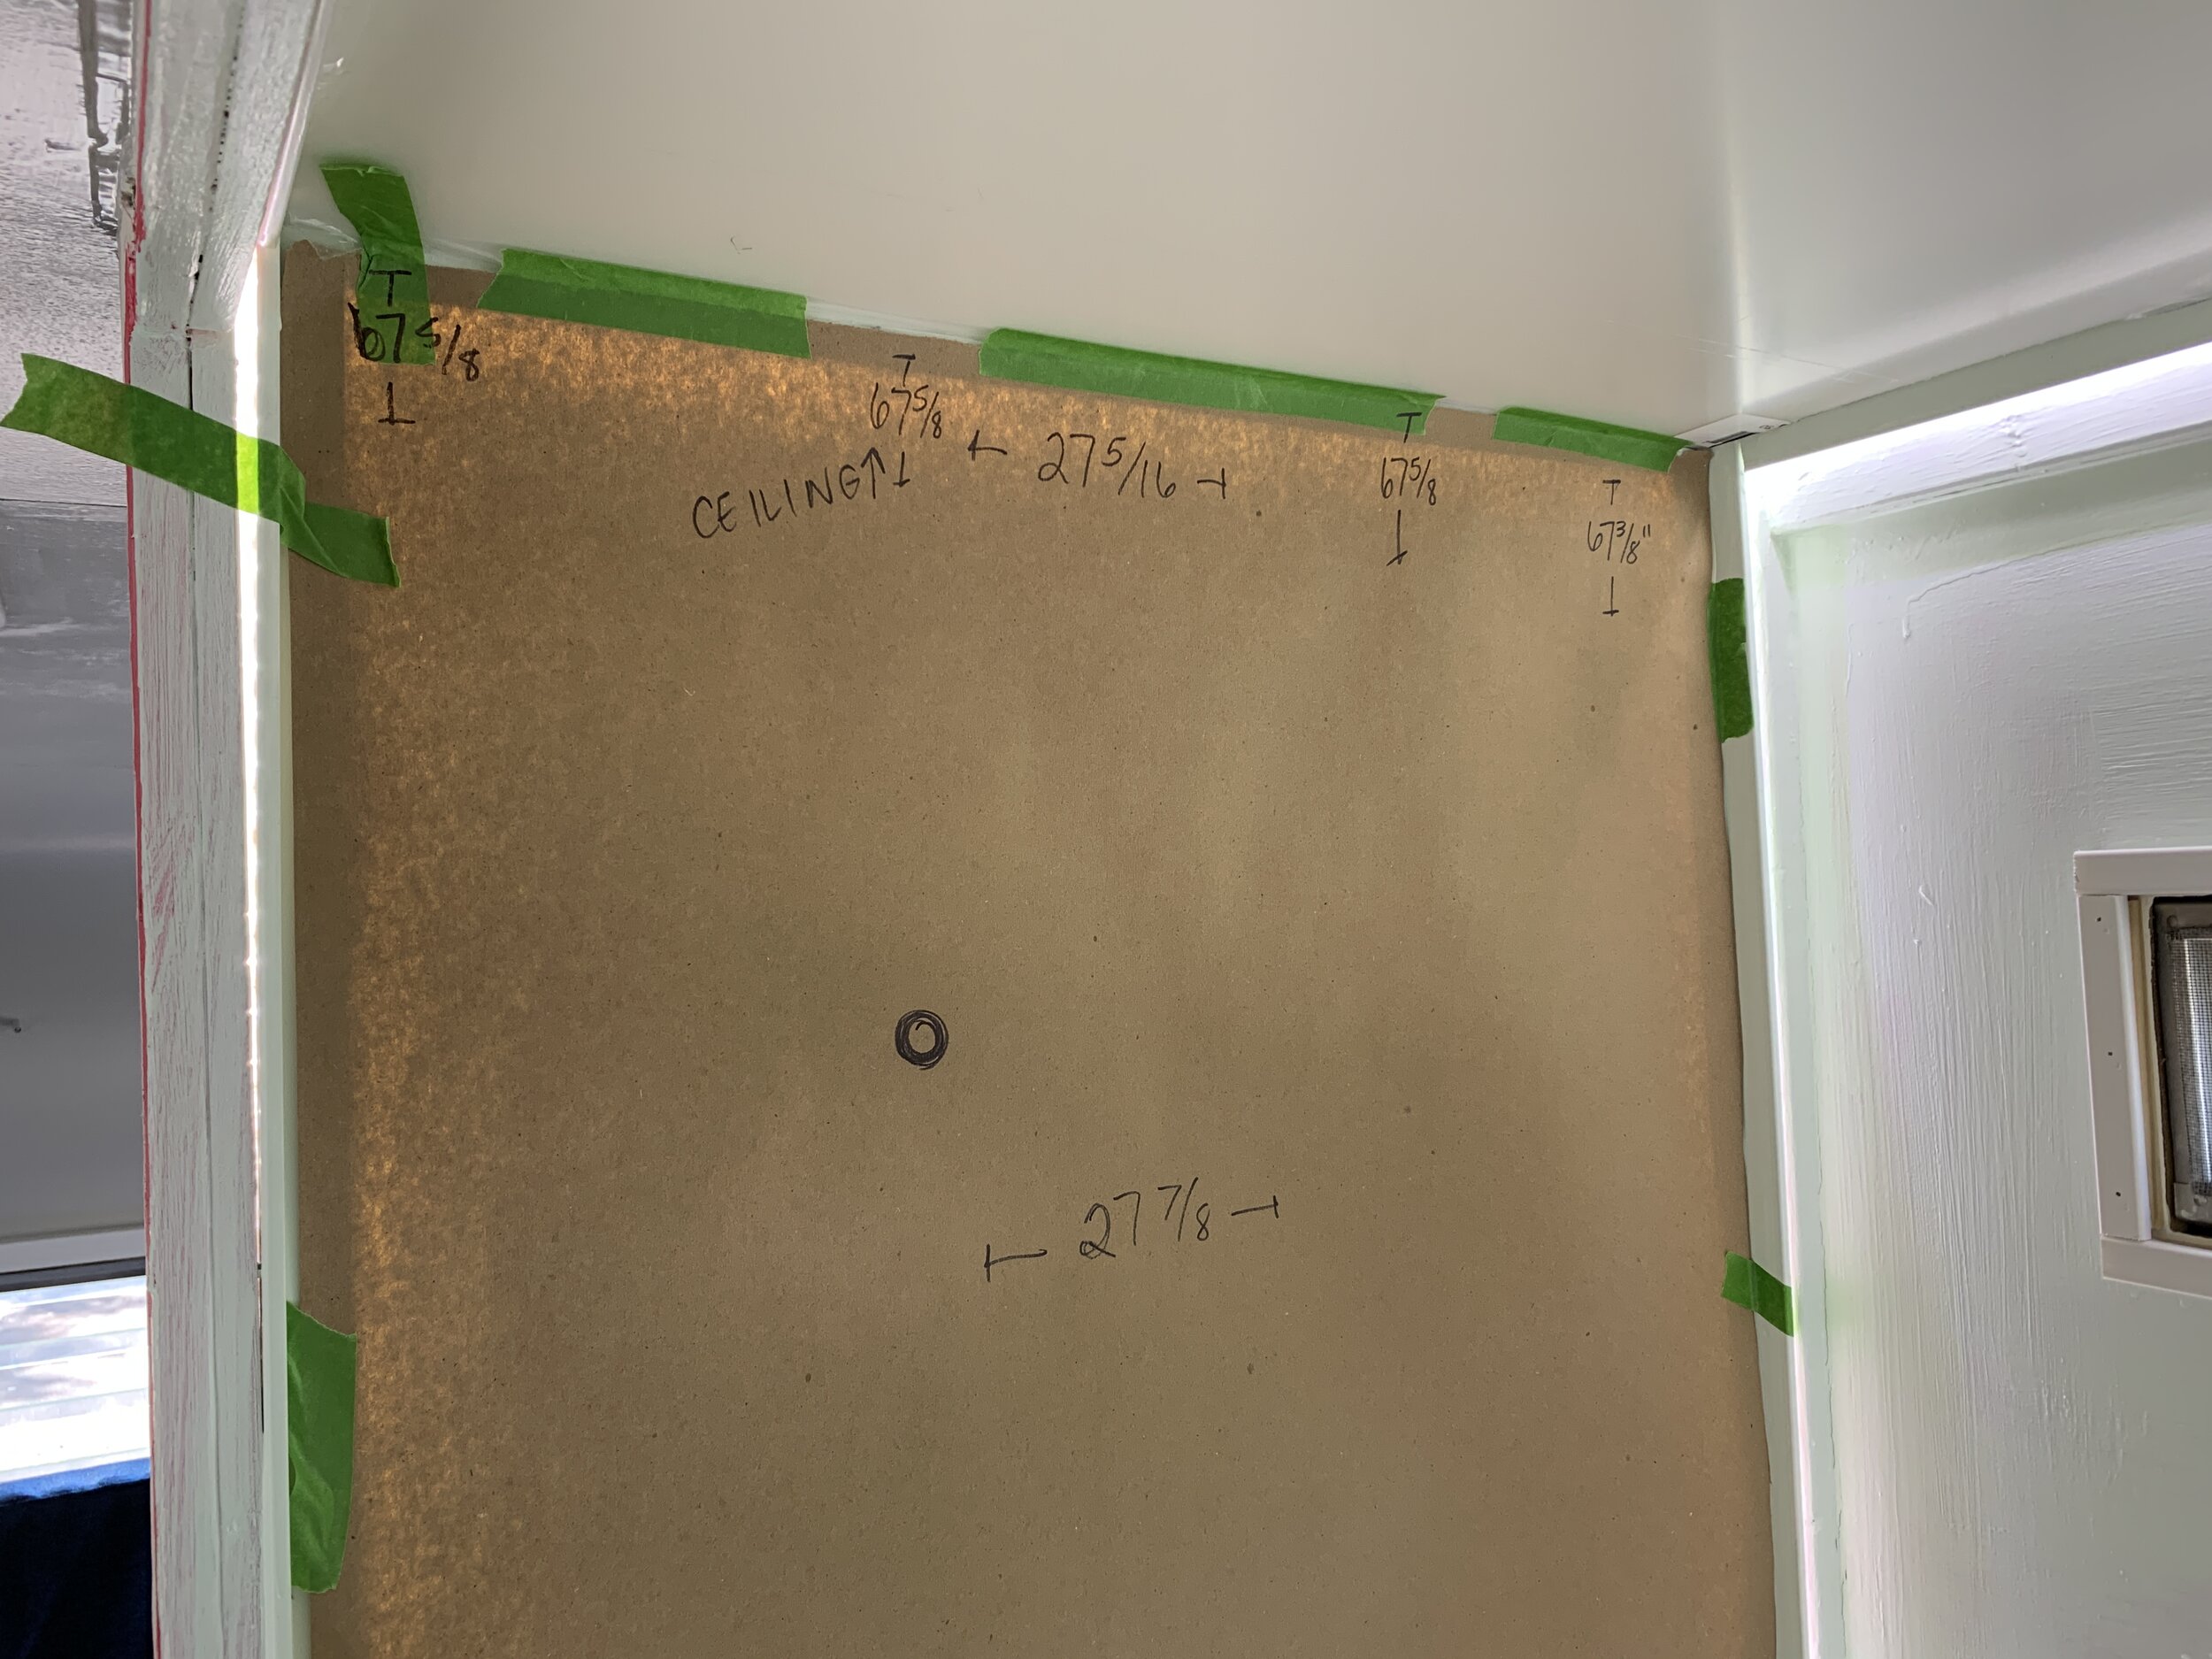
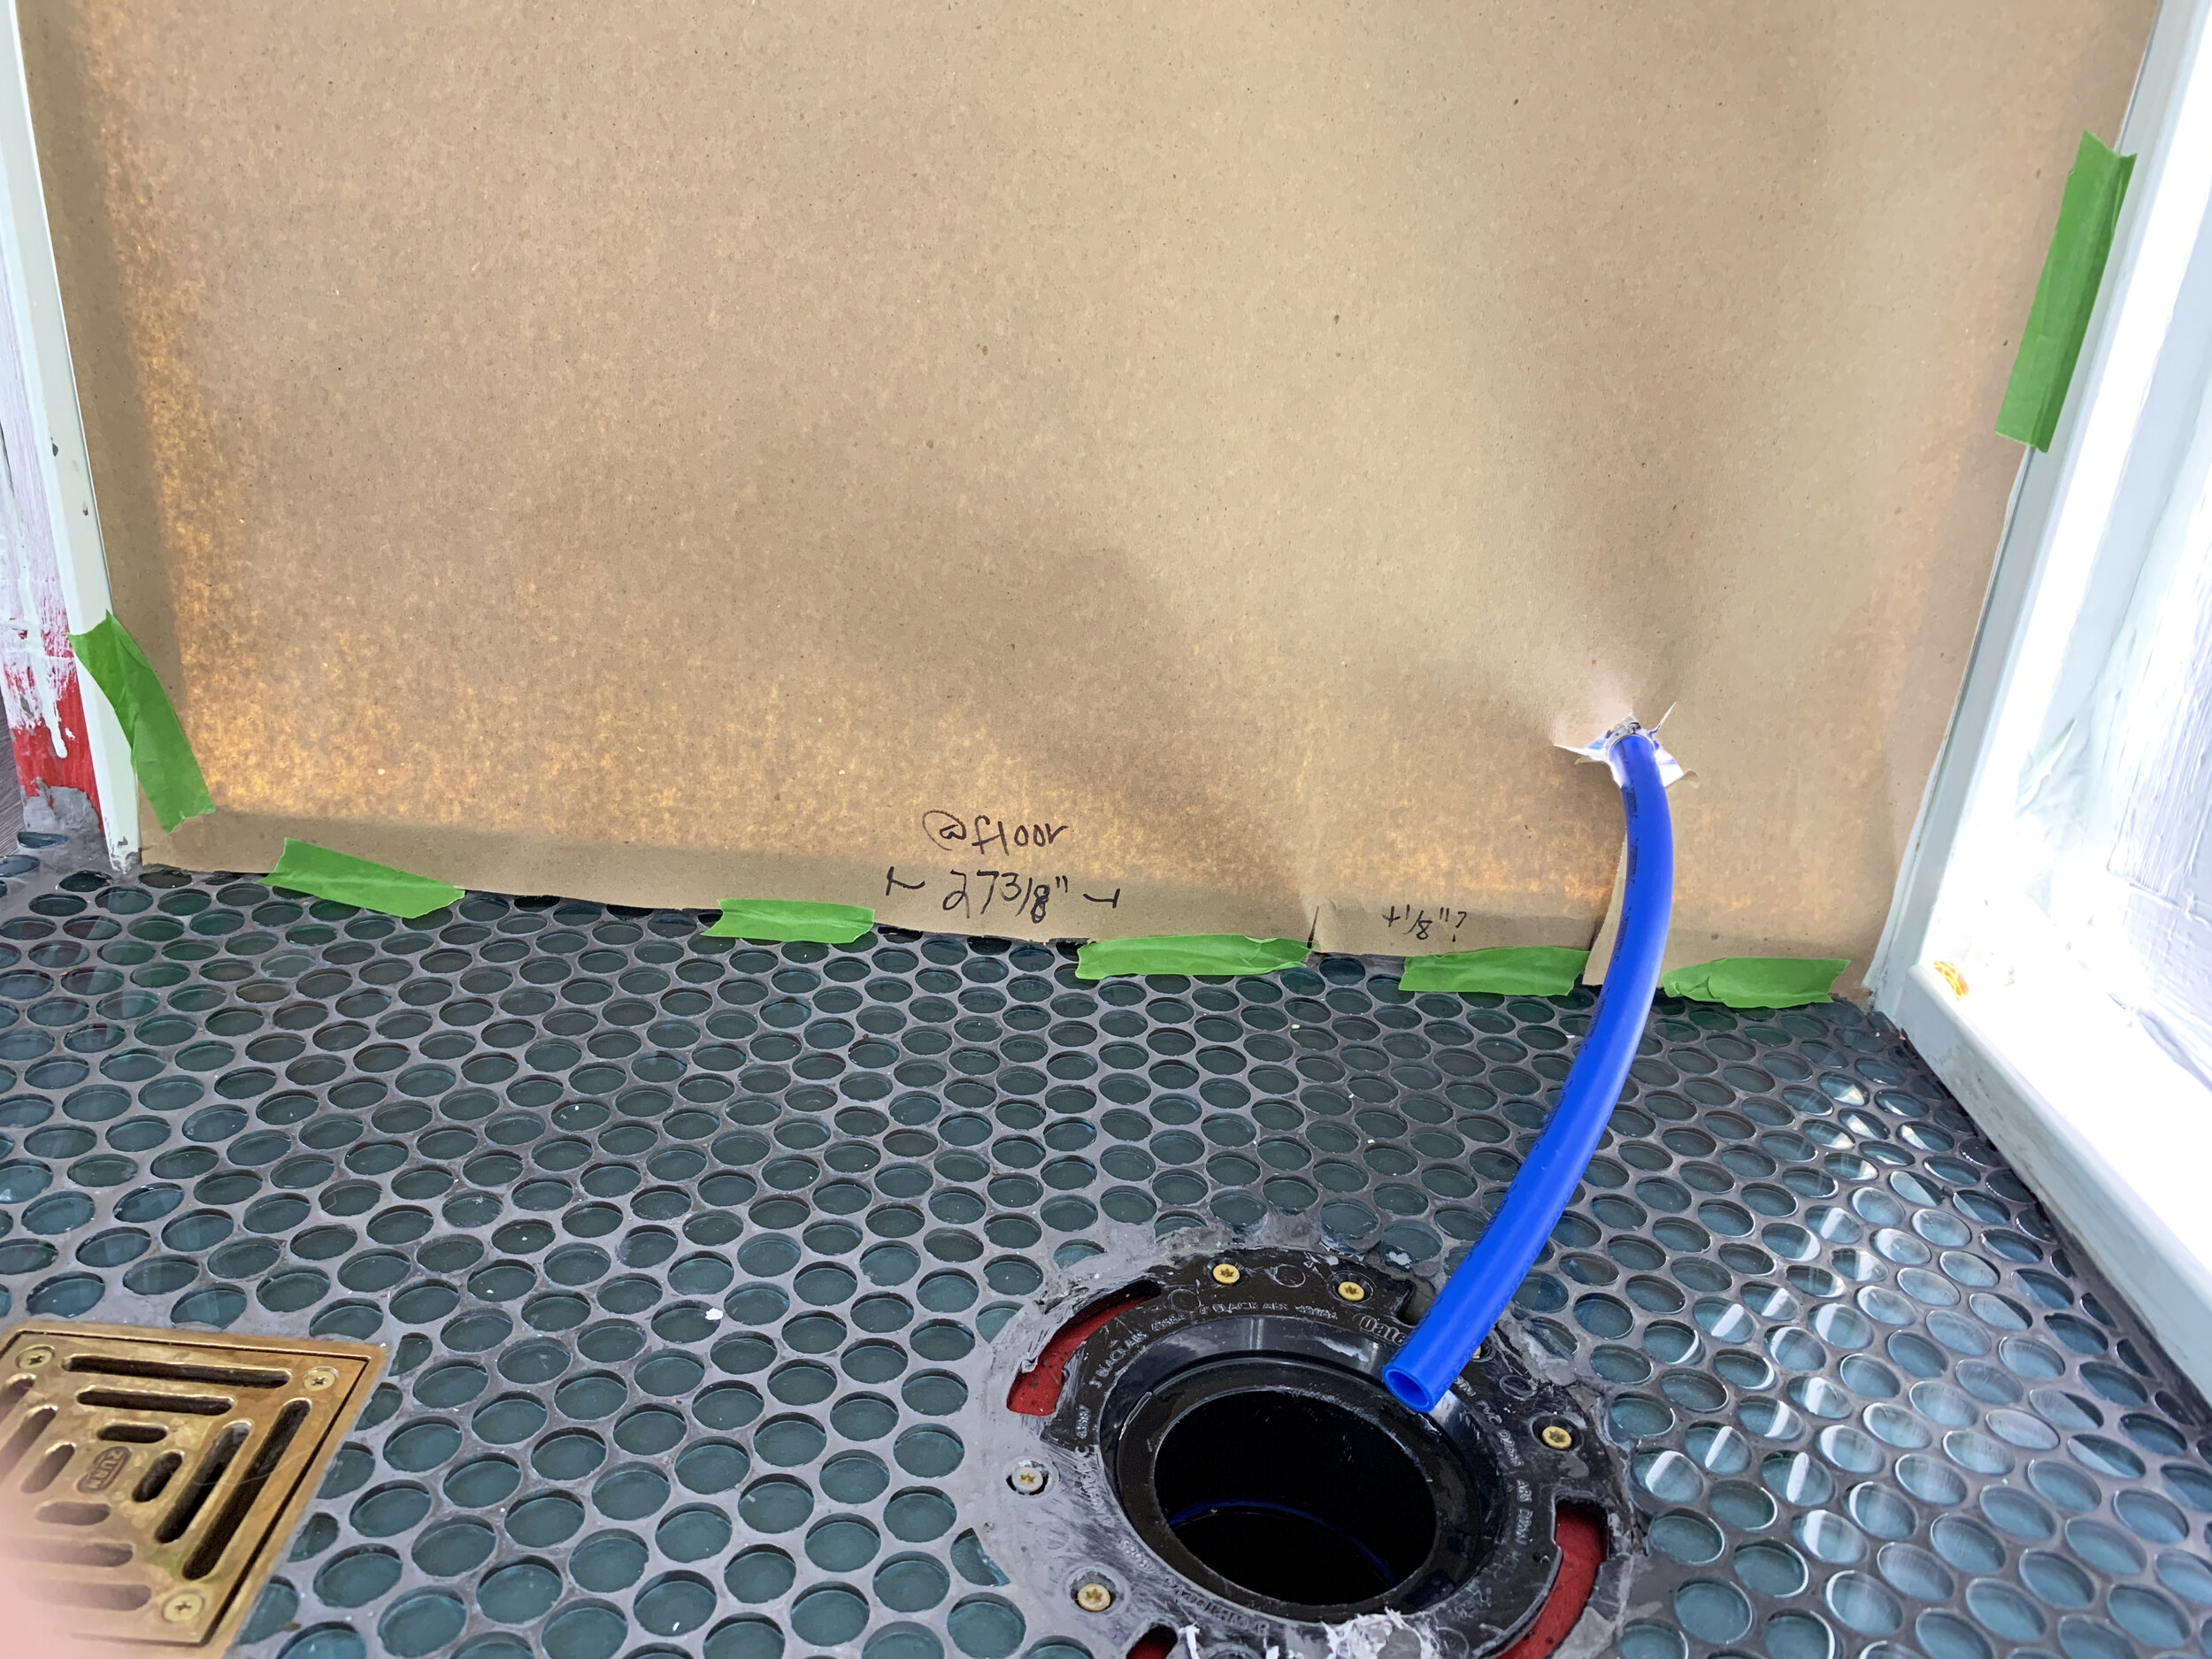
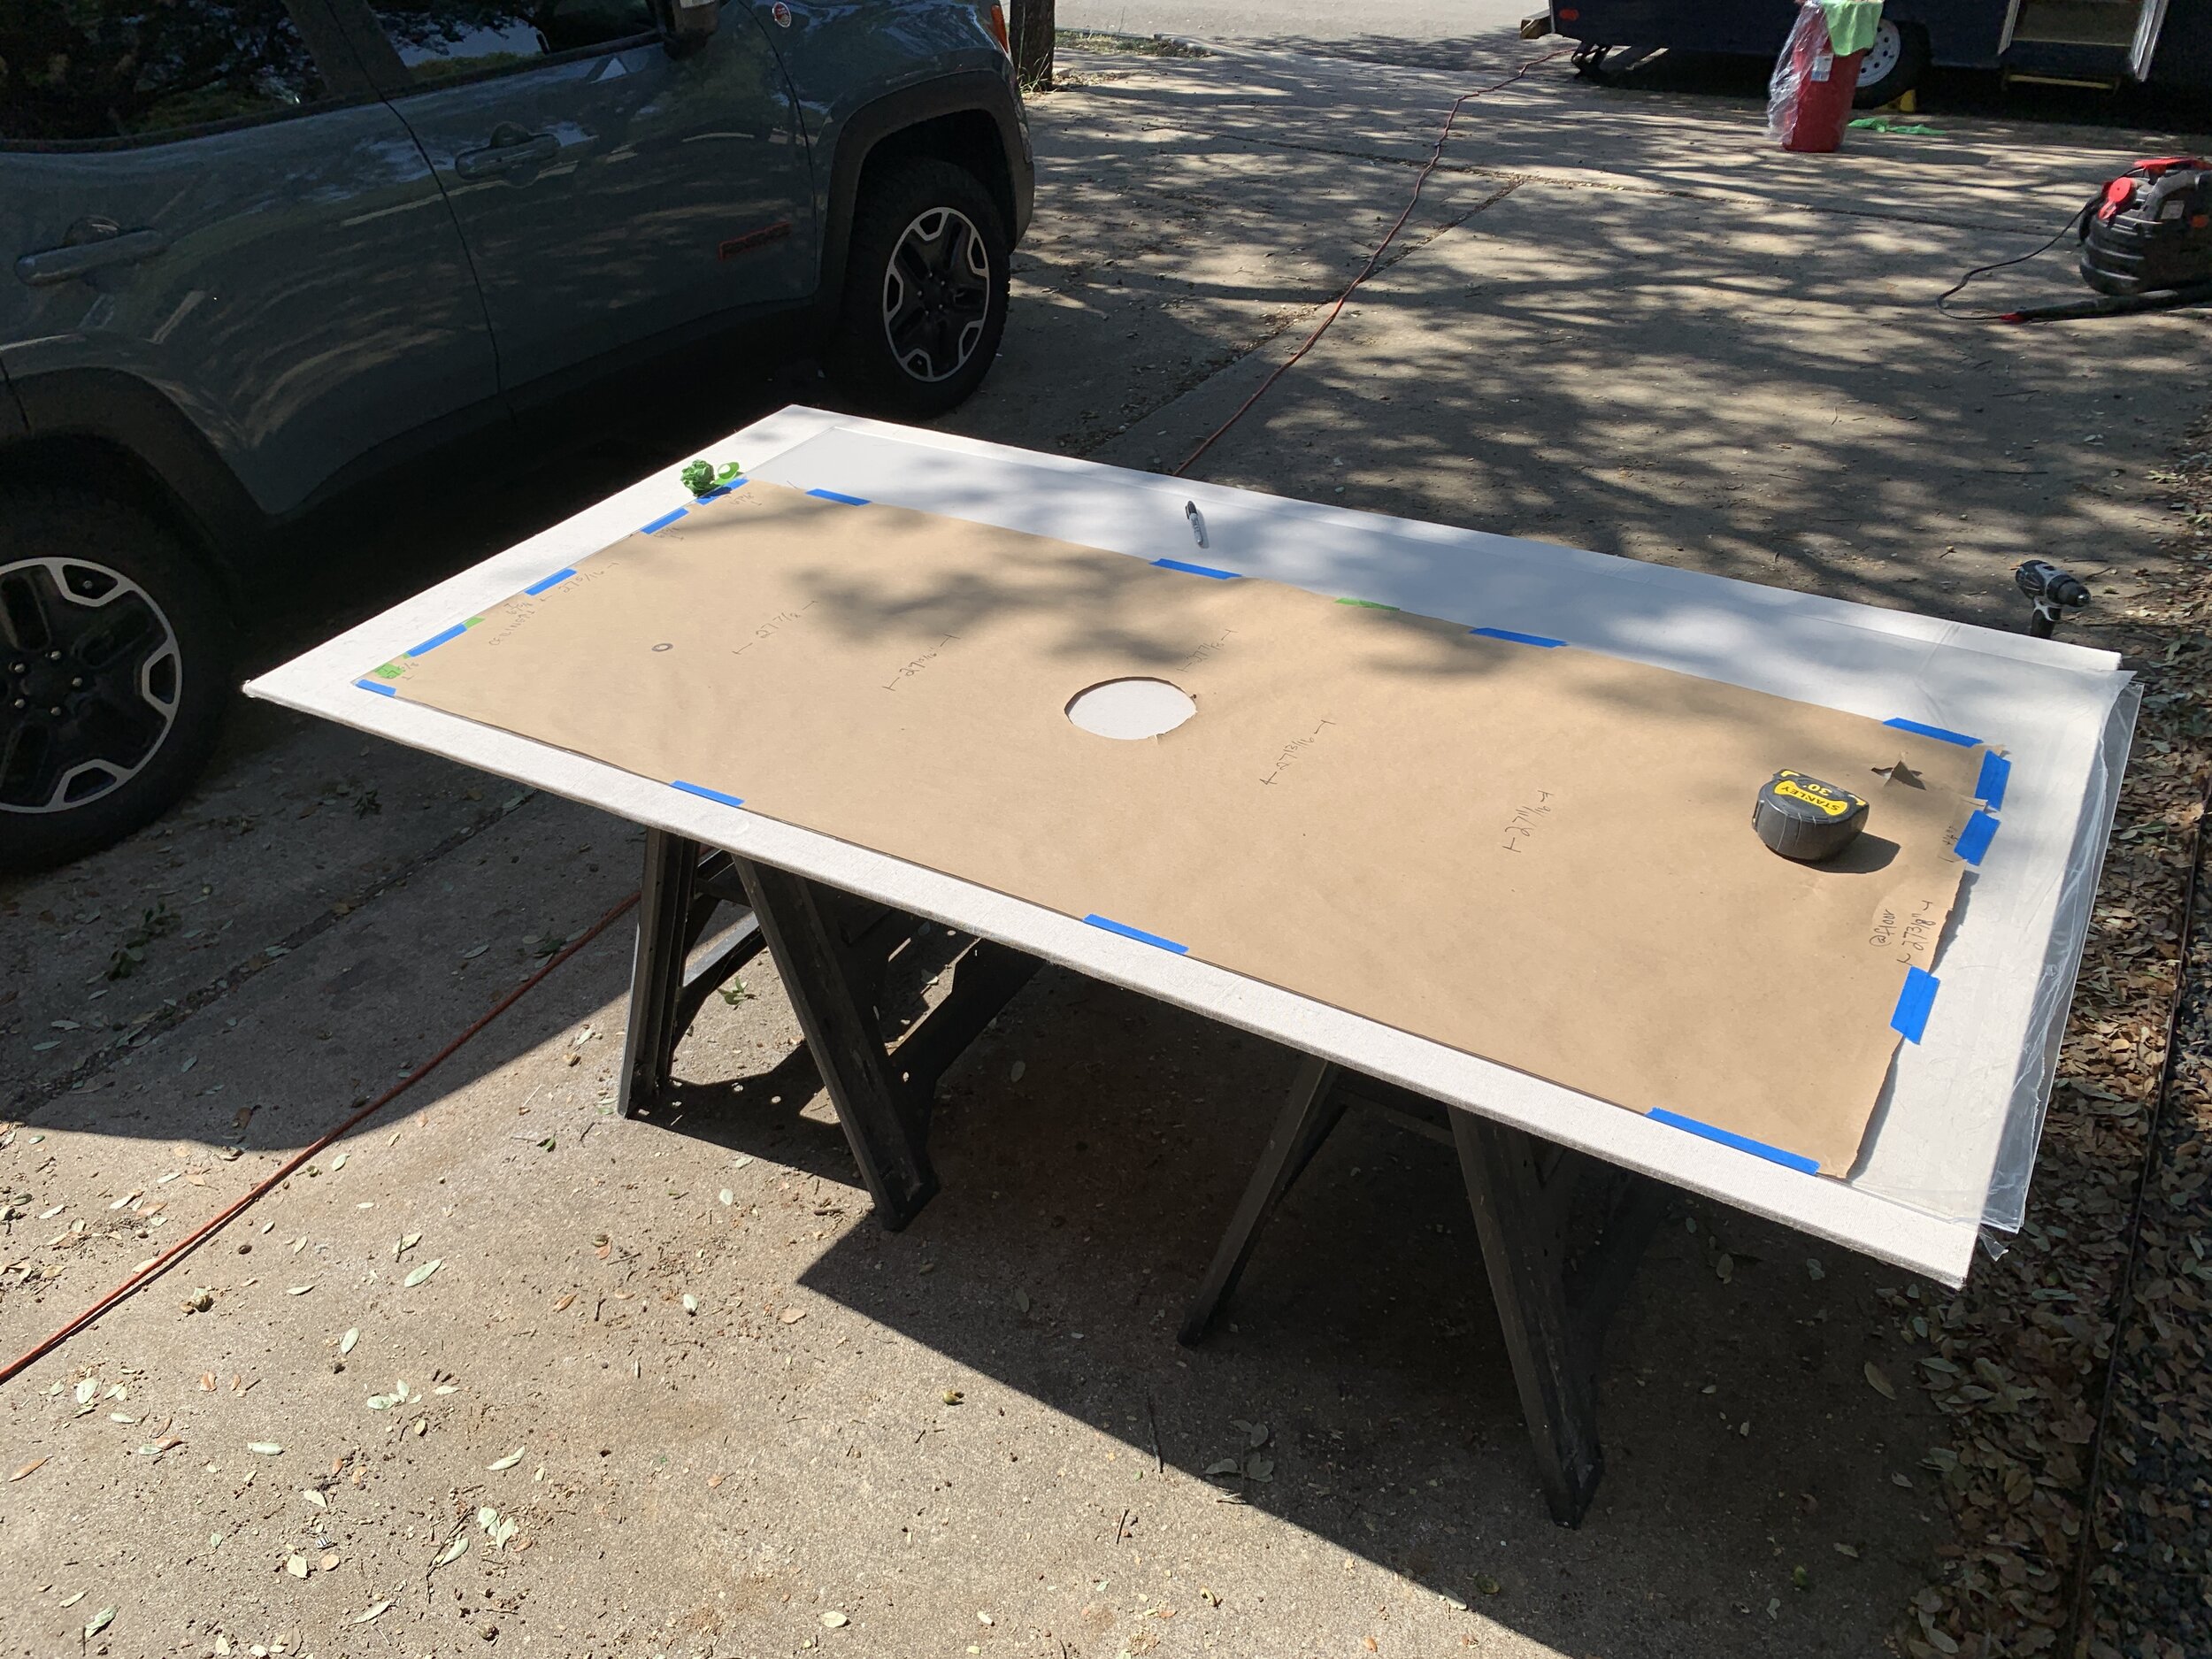

When it came time to template the walls, we worked from left to right, labeling each paper template from 1 to 3, along with which side was up, making note of shower fitting locations and our window. As mentioned in the Order of panel installation list above, we templated the walls after the ceiling was in place, wall 2 while wall 1 was dry-fit, and wall 3 while wall 2 was dry-fit.
Tips to avoid breakage
As I mentioned earlier, we broke multiple sheets of acrylic at various phases throughout this project, so the following are what we recommend you do and not do when working with them.

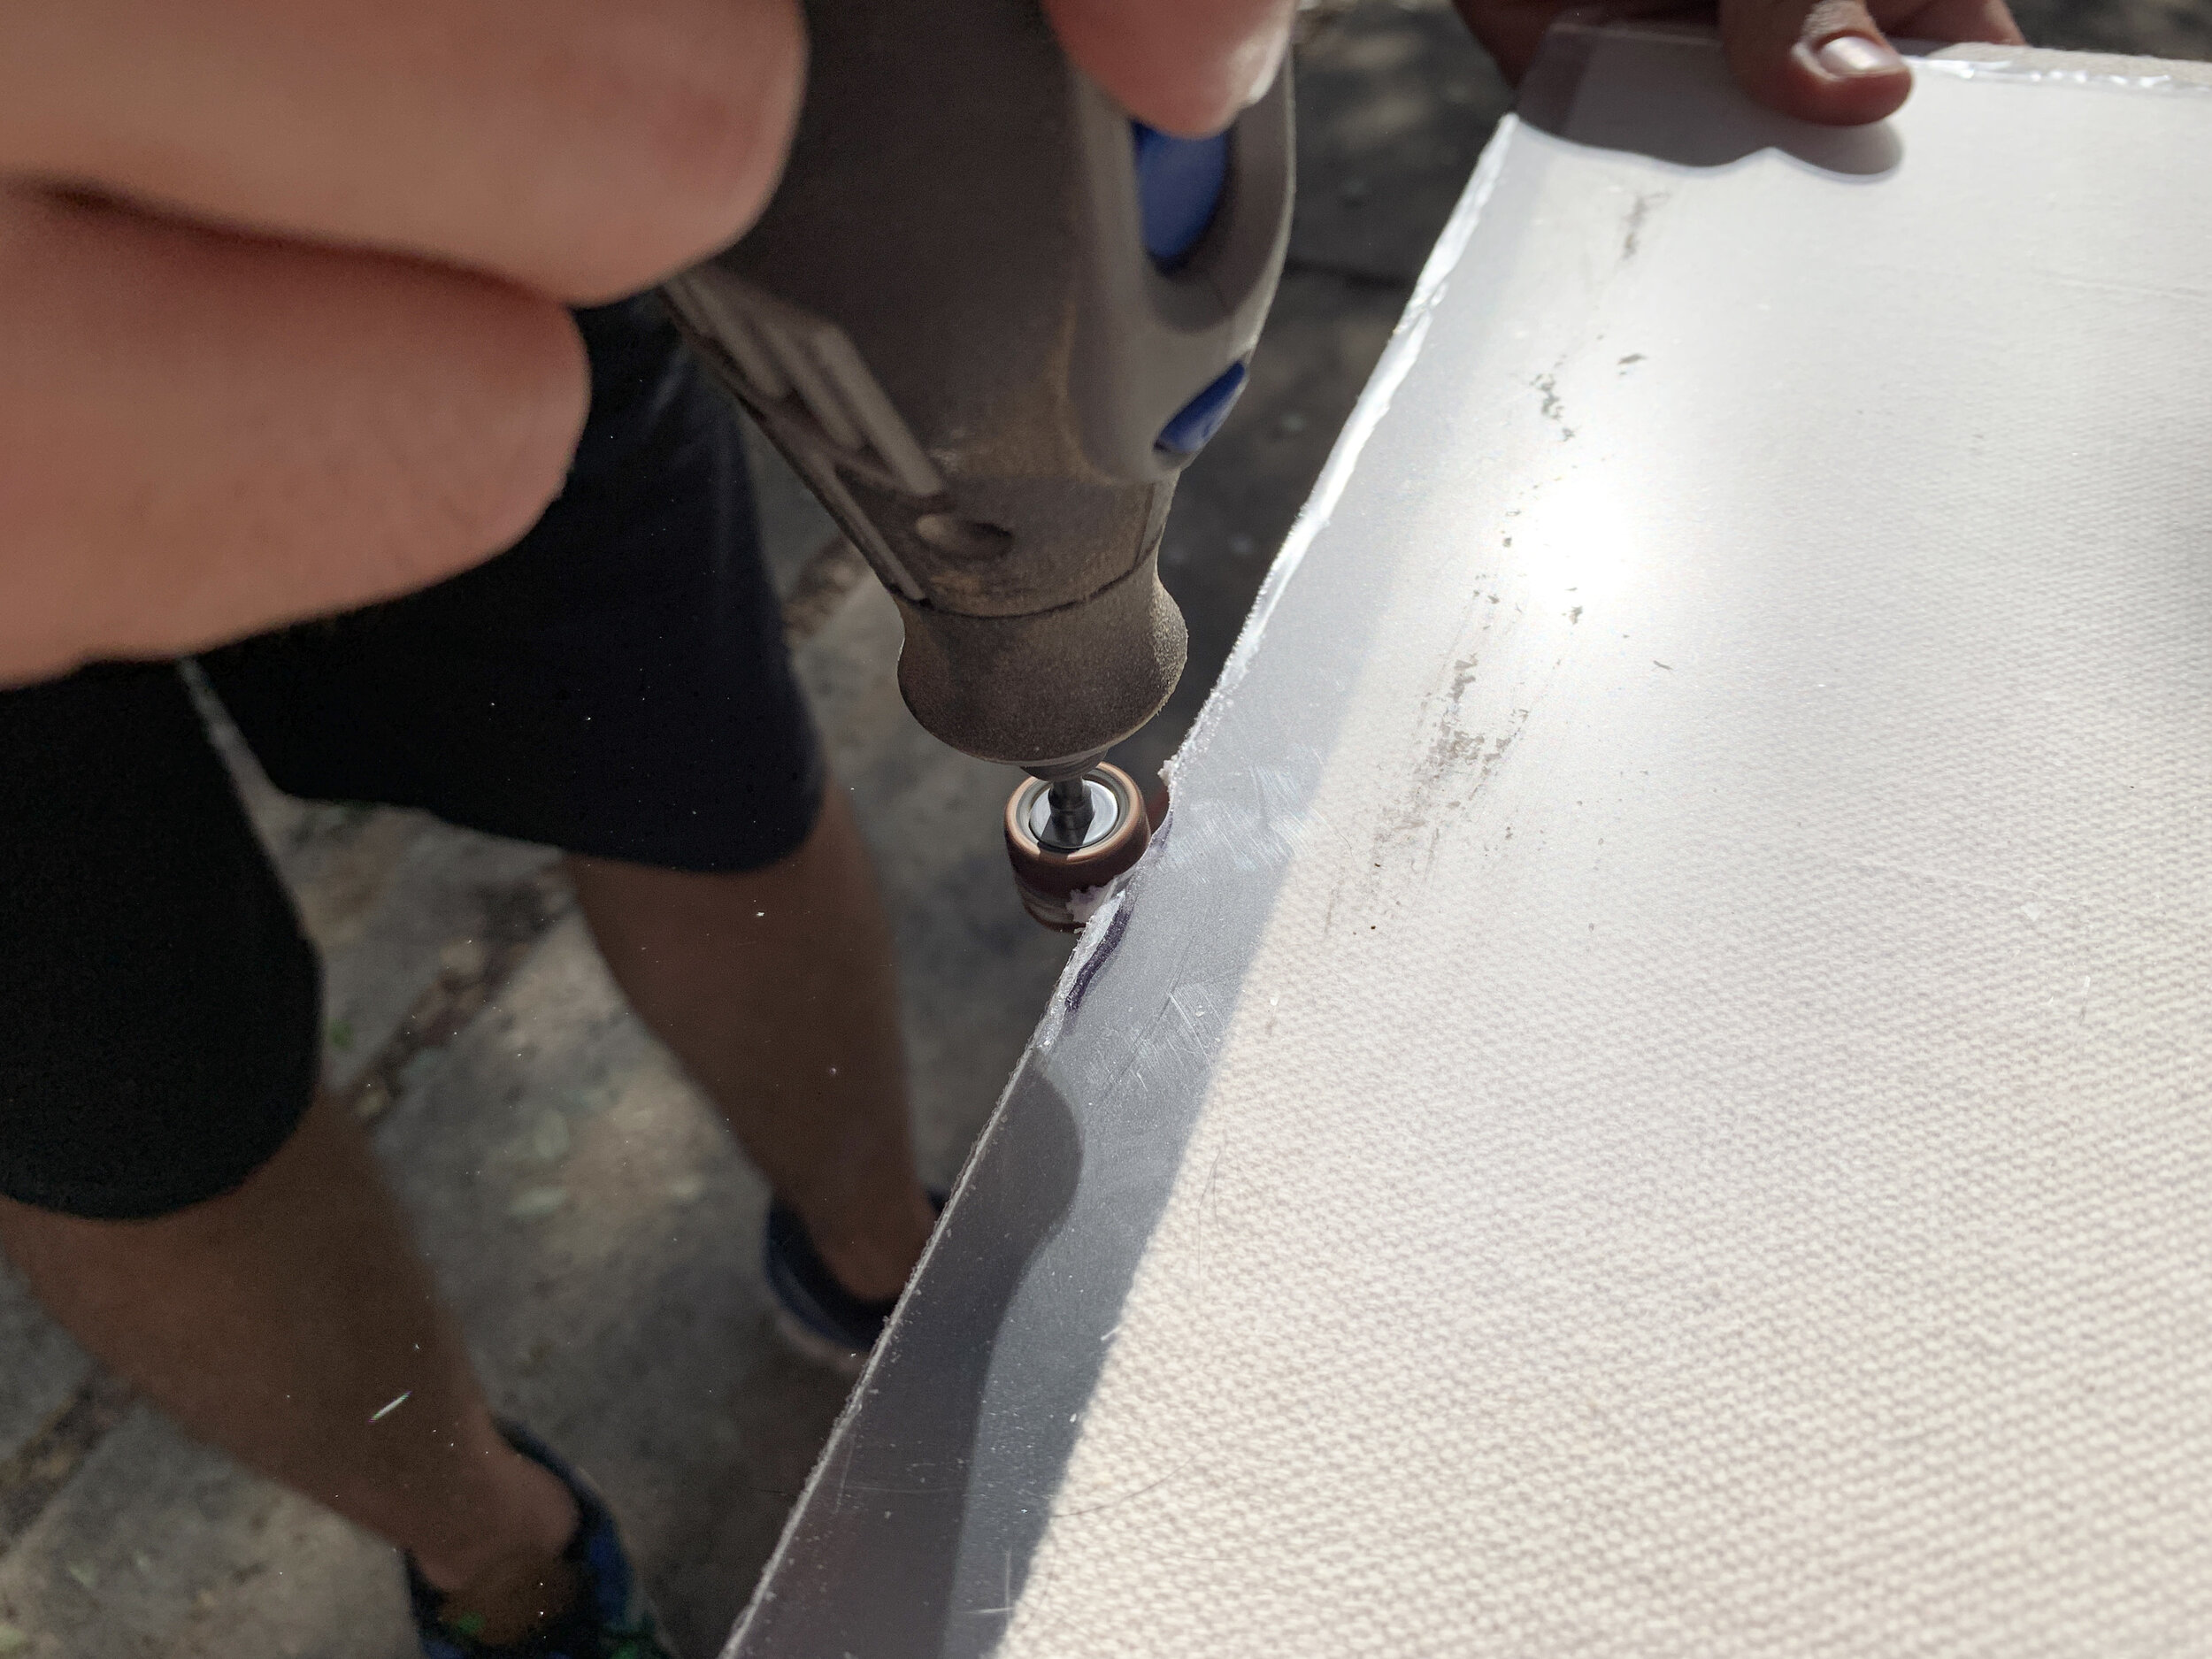
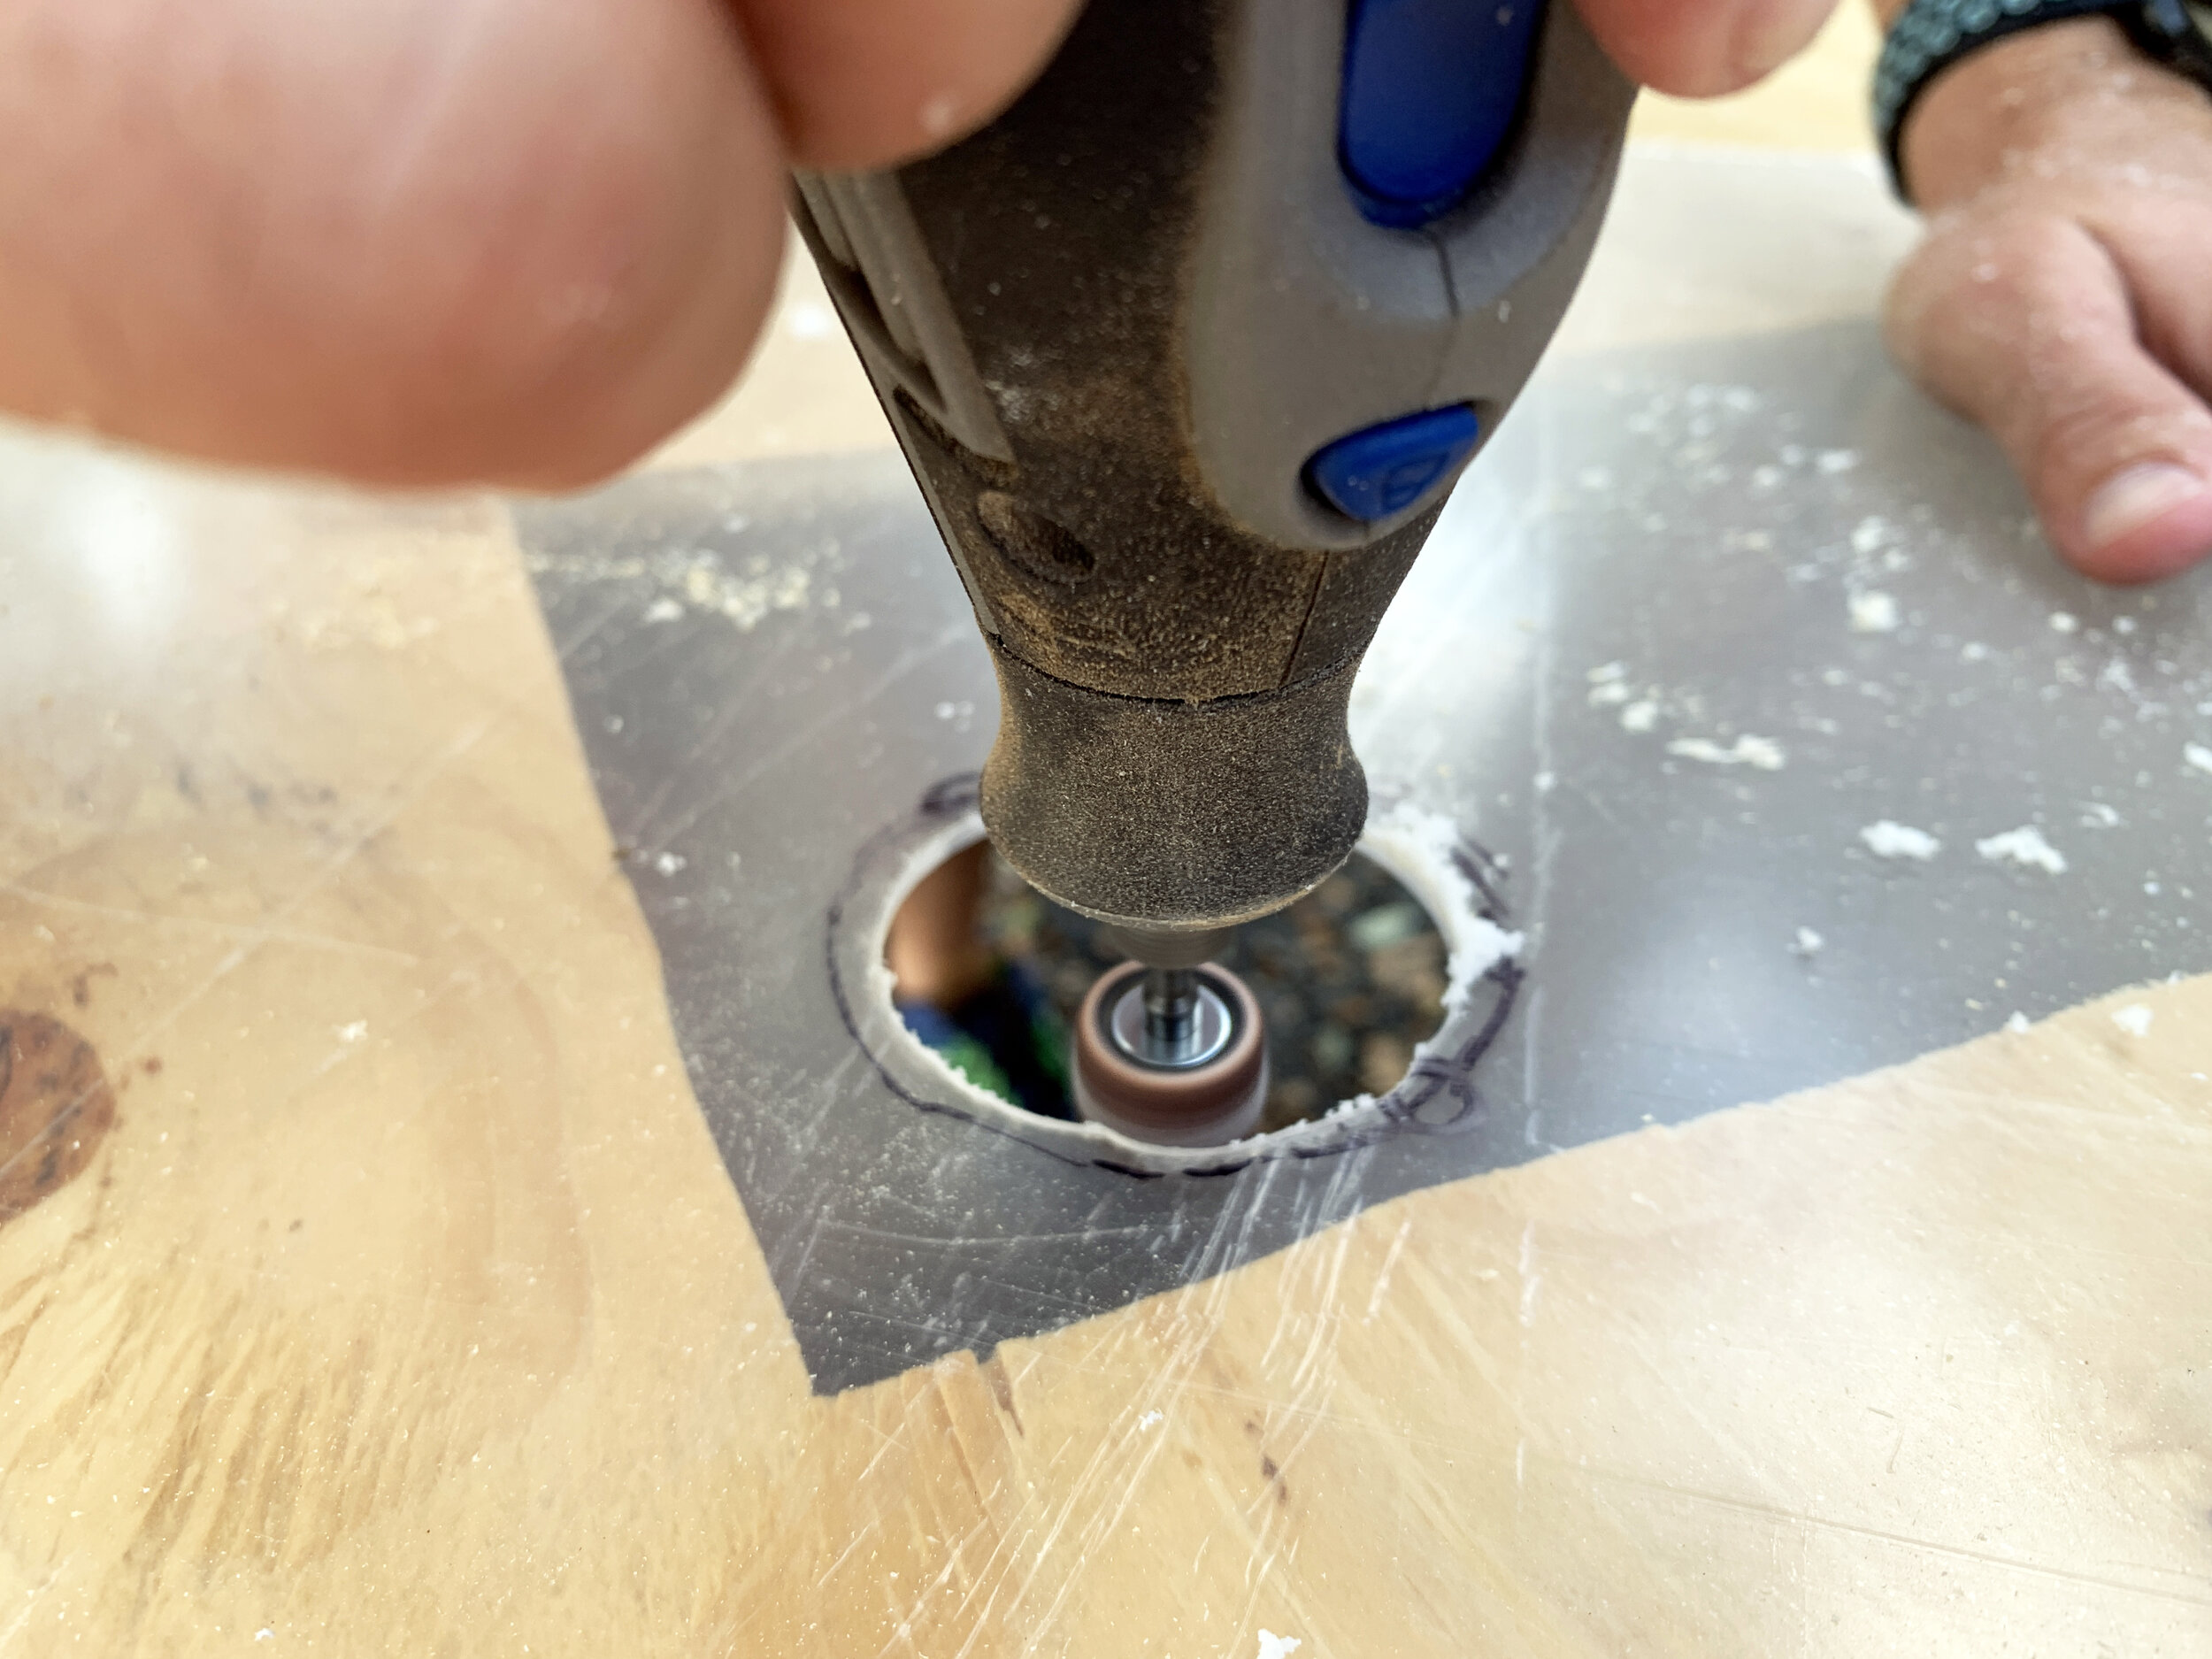
Cutting interior holes
When cutting holes in the interior of a panel, like we did for the shower fixtures and the window, we quickly learned the acrylic panel needs to be very well supported and it worked best for us to actually drill and cut through both the acrylic and the plywood sheet underneath it that we were using as our tabletop.

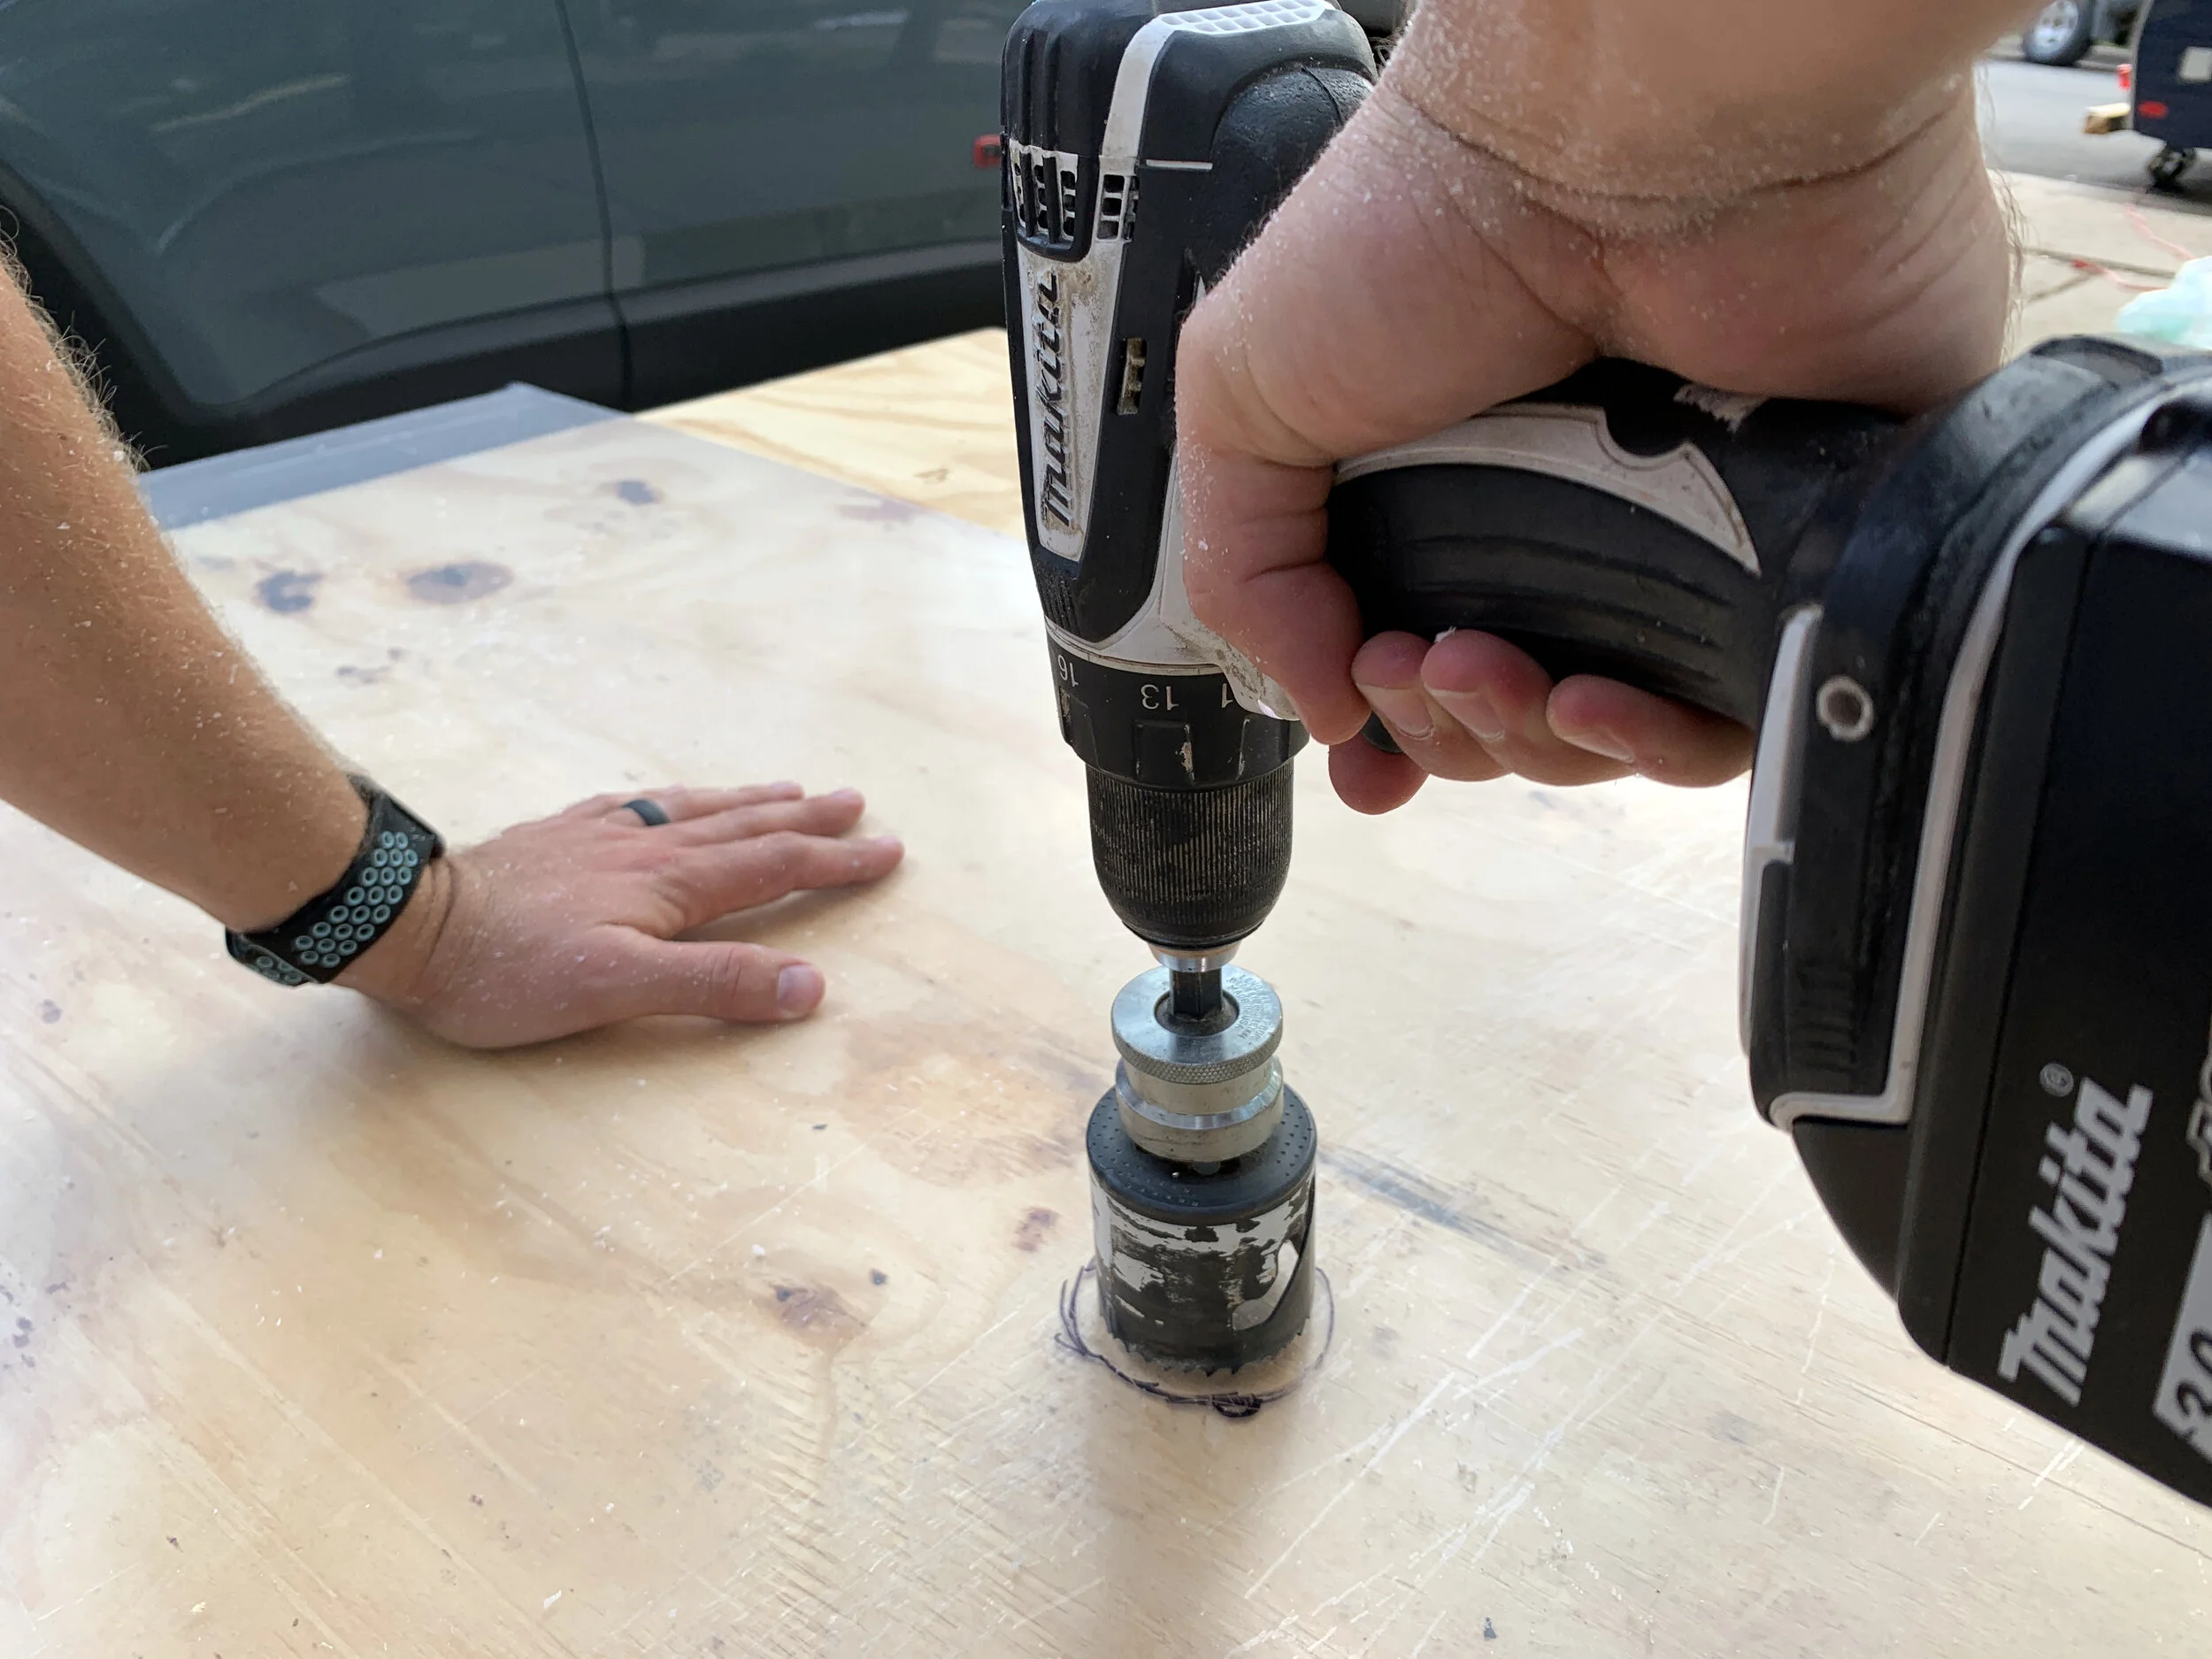
By comparison, when we used either 2x4s with a gap in between, hung the acrylic off the side of the tabletop, or utilized the hole in the plywood left from cutting our window panel, and then applied pressure to the small unsupported section acrylic (even lightly) with the drill, it caused the acrylic to shatter.
What not to do:
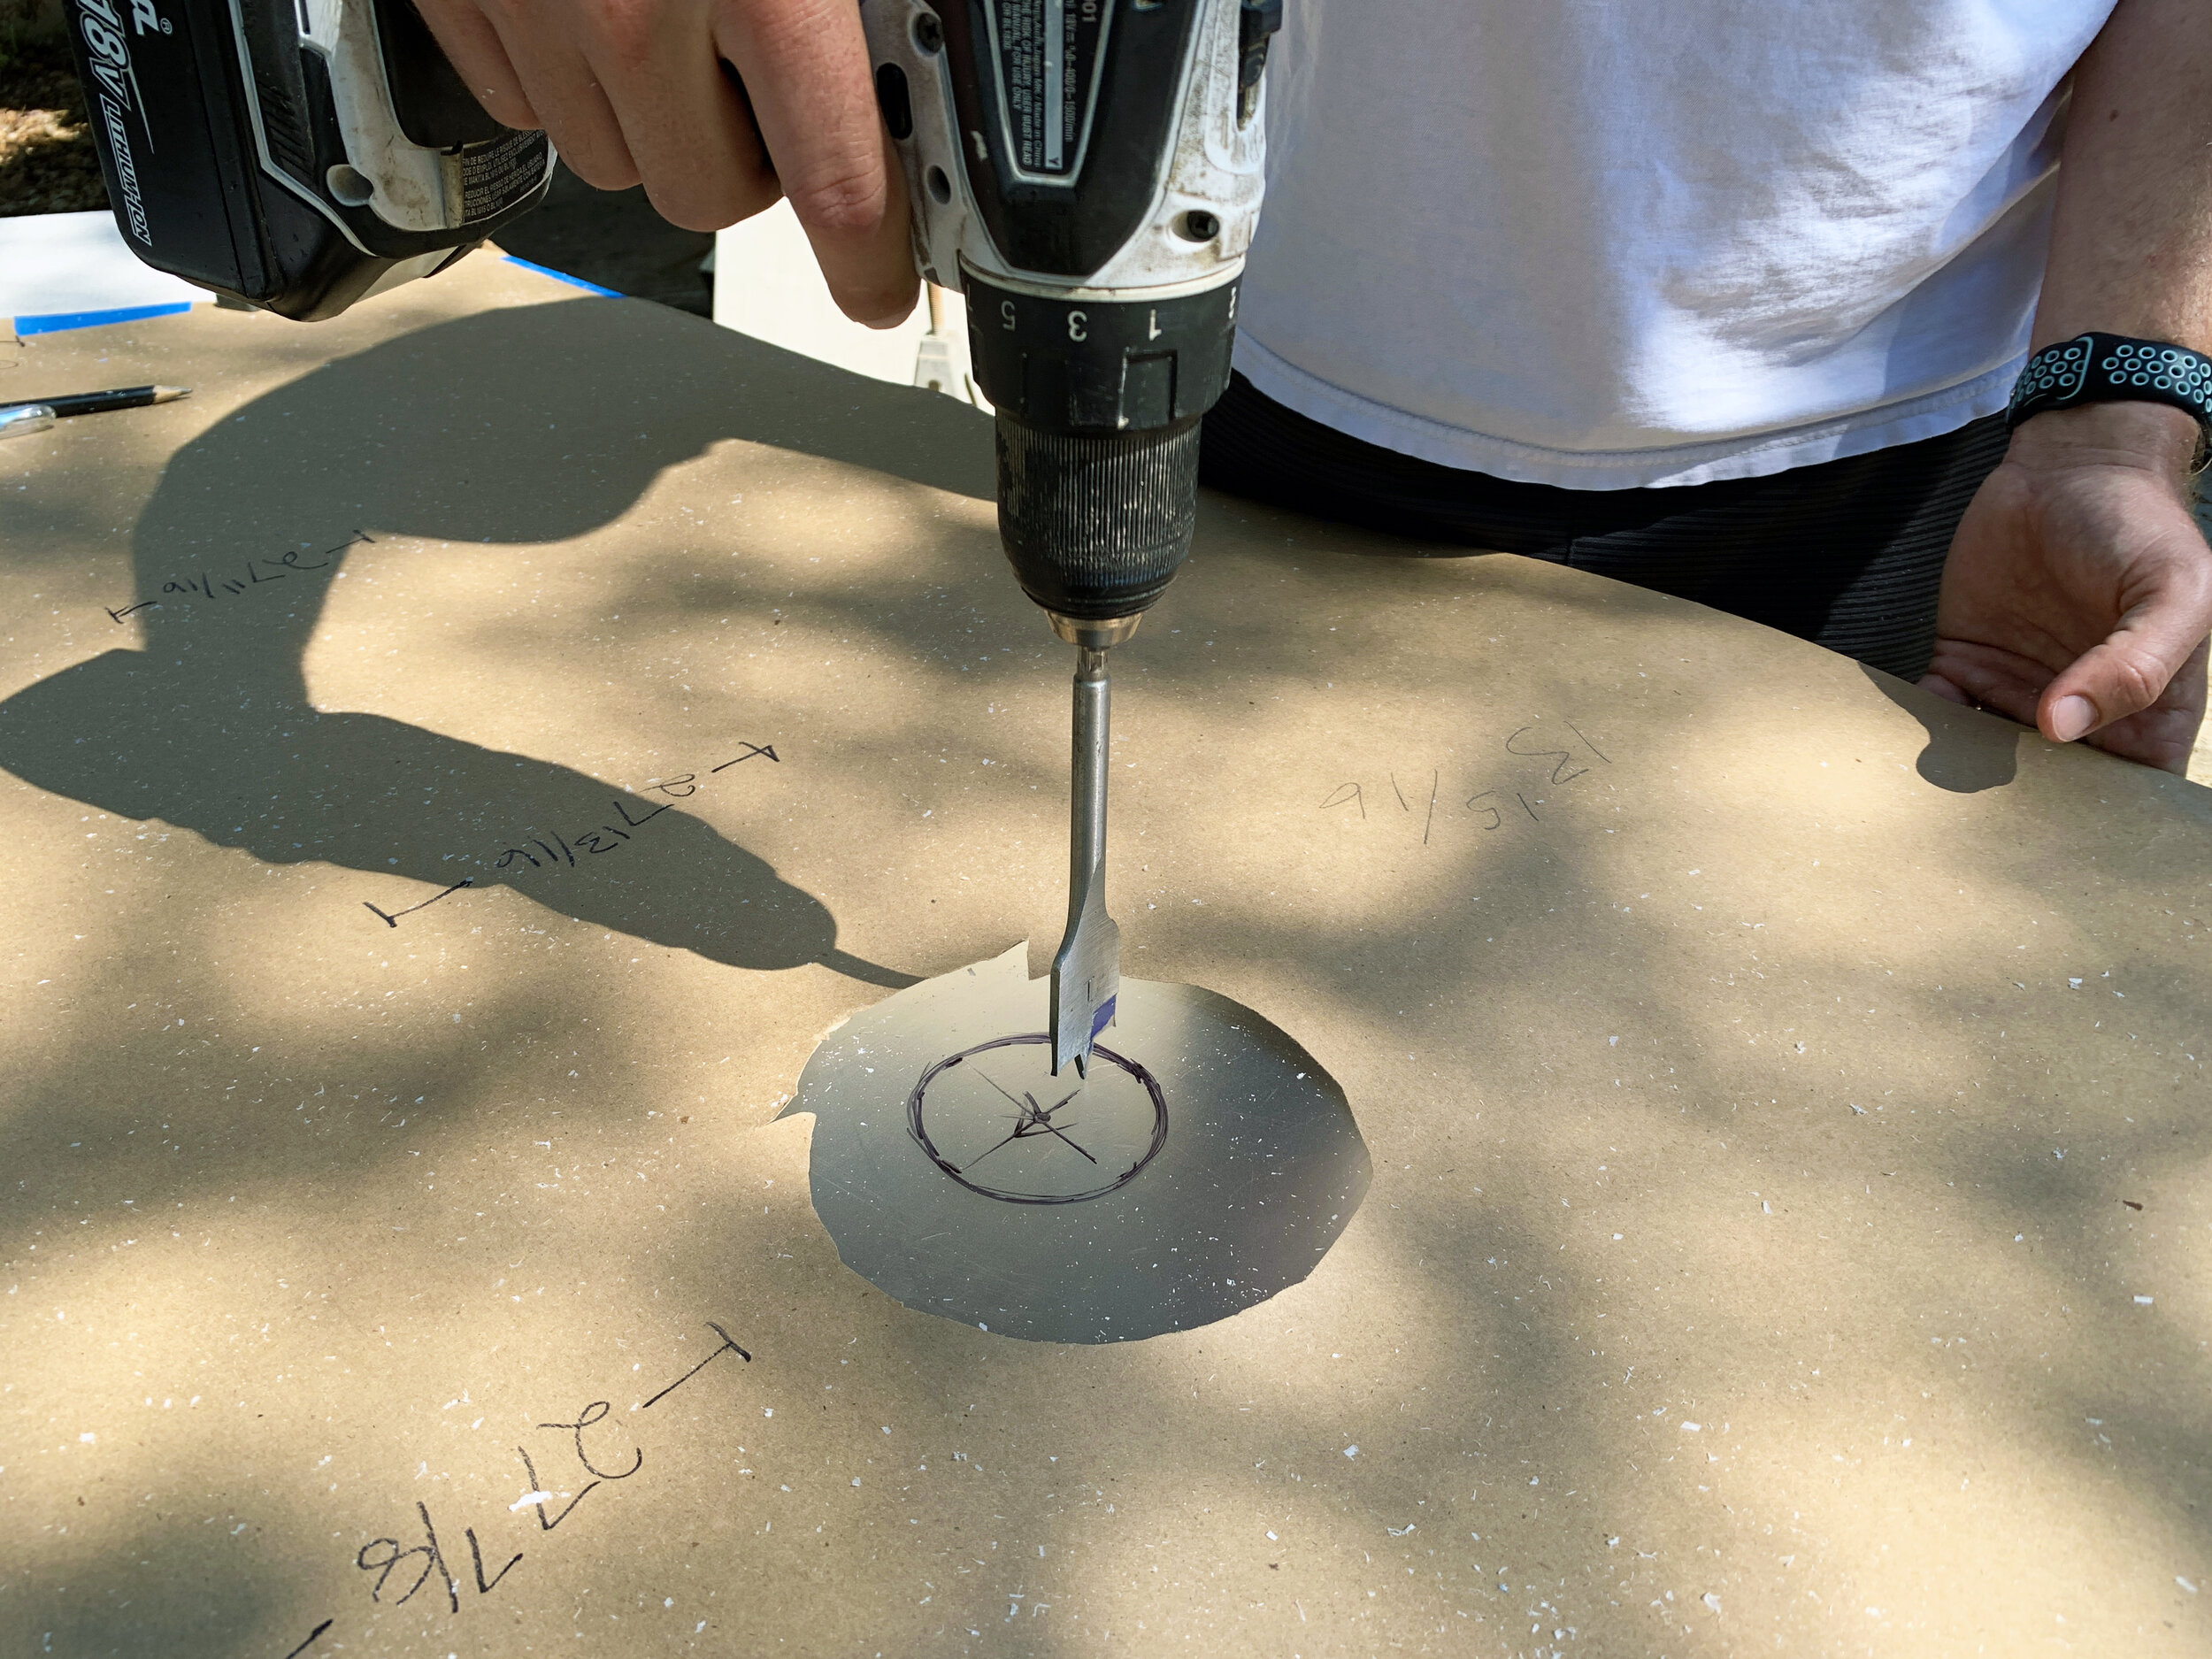

To get our circular holes, we used a hole saw or a large drill bit and drill. If you don’t have a hole saw/spade bit that’s the right size, you can just as easily use a large drill bit and make the hole larger with a jigsaw.
For rectangular/straight interior cuts – like our window – we used a large drill bit and our drill to first make a pilot hole, then cut out the window with a jigsaw.


The jigsaw blade we used to cut our larger interior acrylic cuts – it used to be labeled as a “metal” blade, before it rubbed off.
Jigsaw blade tips
Since doing this project, we’ve seen an acrylic panel-cutting tip on Instagram to use a jigsaw blade with large teeth, as the bigger space in the teeth helps keep the blade and acrylic cool so it doesn’t re-melt together after cutting.
In our experience after trying different types of jigsaw blades, we recommend a blade with smaller, finer teeth like a “metal” blade has, shown here, for a smoother cut that seemed to be less aggressive and catch less on the acrylic. We did not have an issue with our acrylic melting back together, though we have had that issue when cutting holes in our ABS plastic water tanks.
Cutting edges
The edges cut much more easily and with far less chance for breakage than the interior holes; maybe it was because we cut the outside edges first, or because they didn’t compromise the acrylic’s strength, or maybe because it was forward pressure that was nicely supported instead of downward pressure.
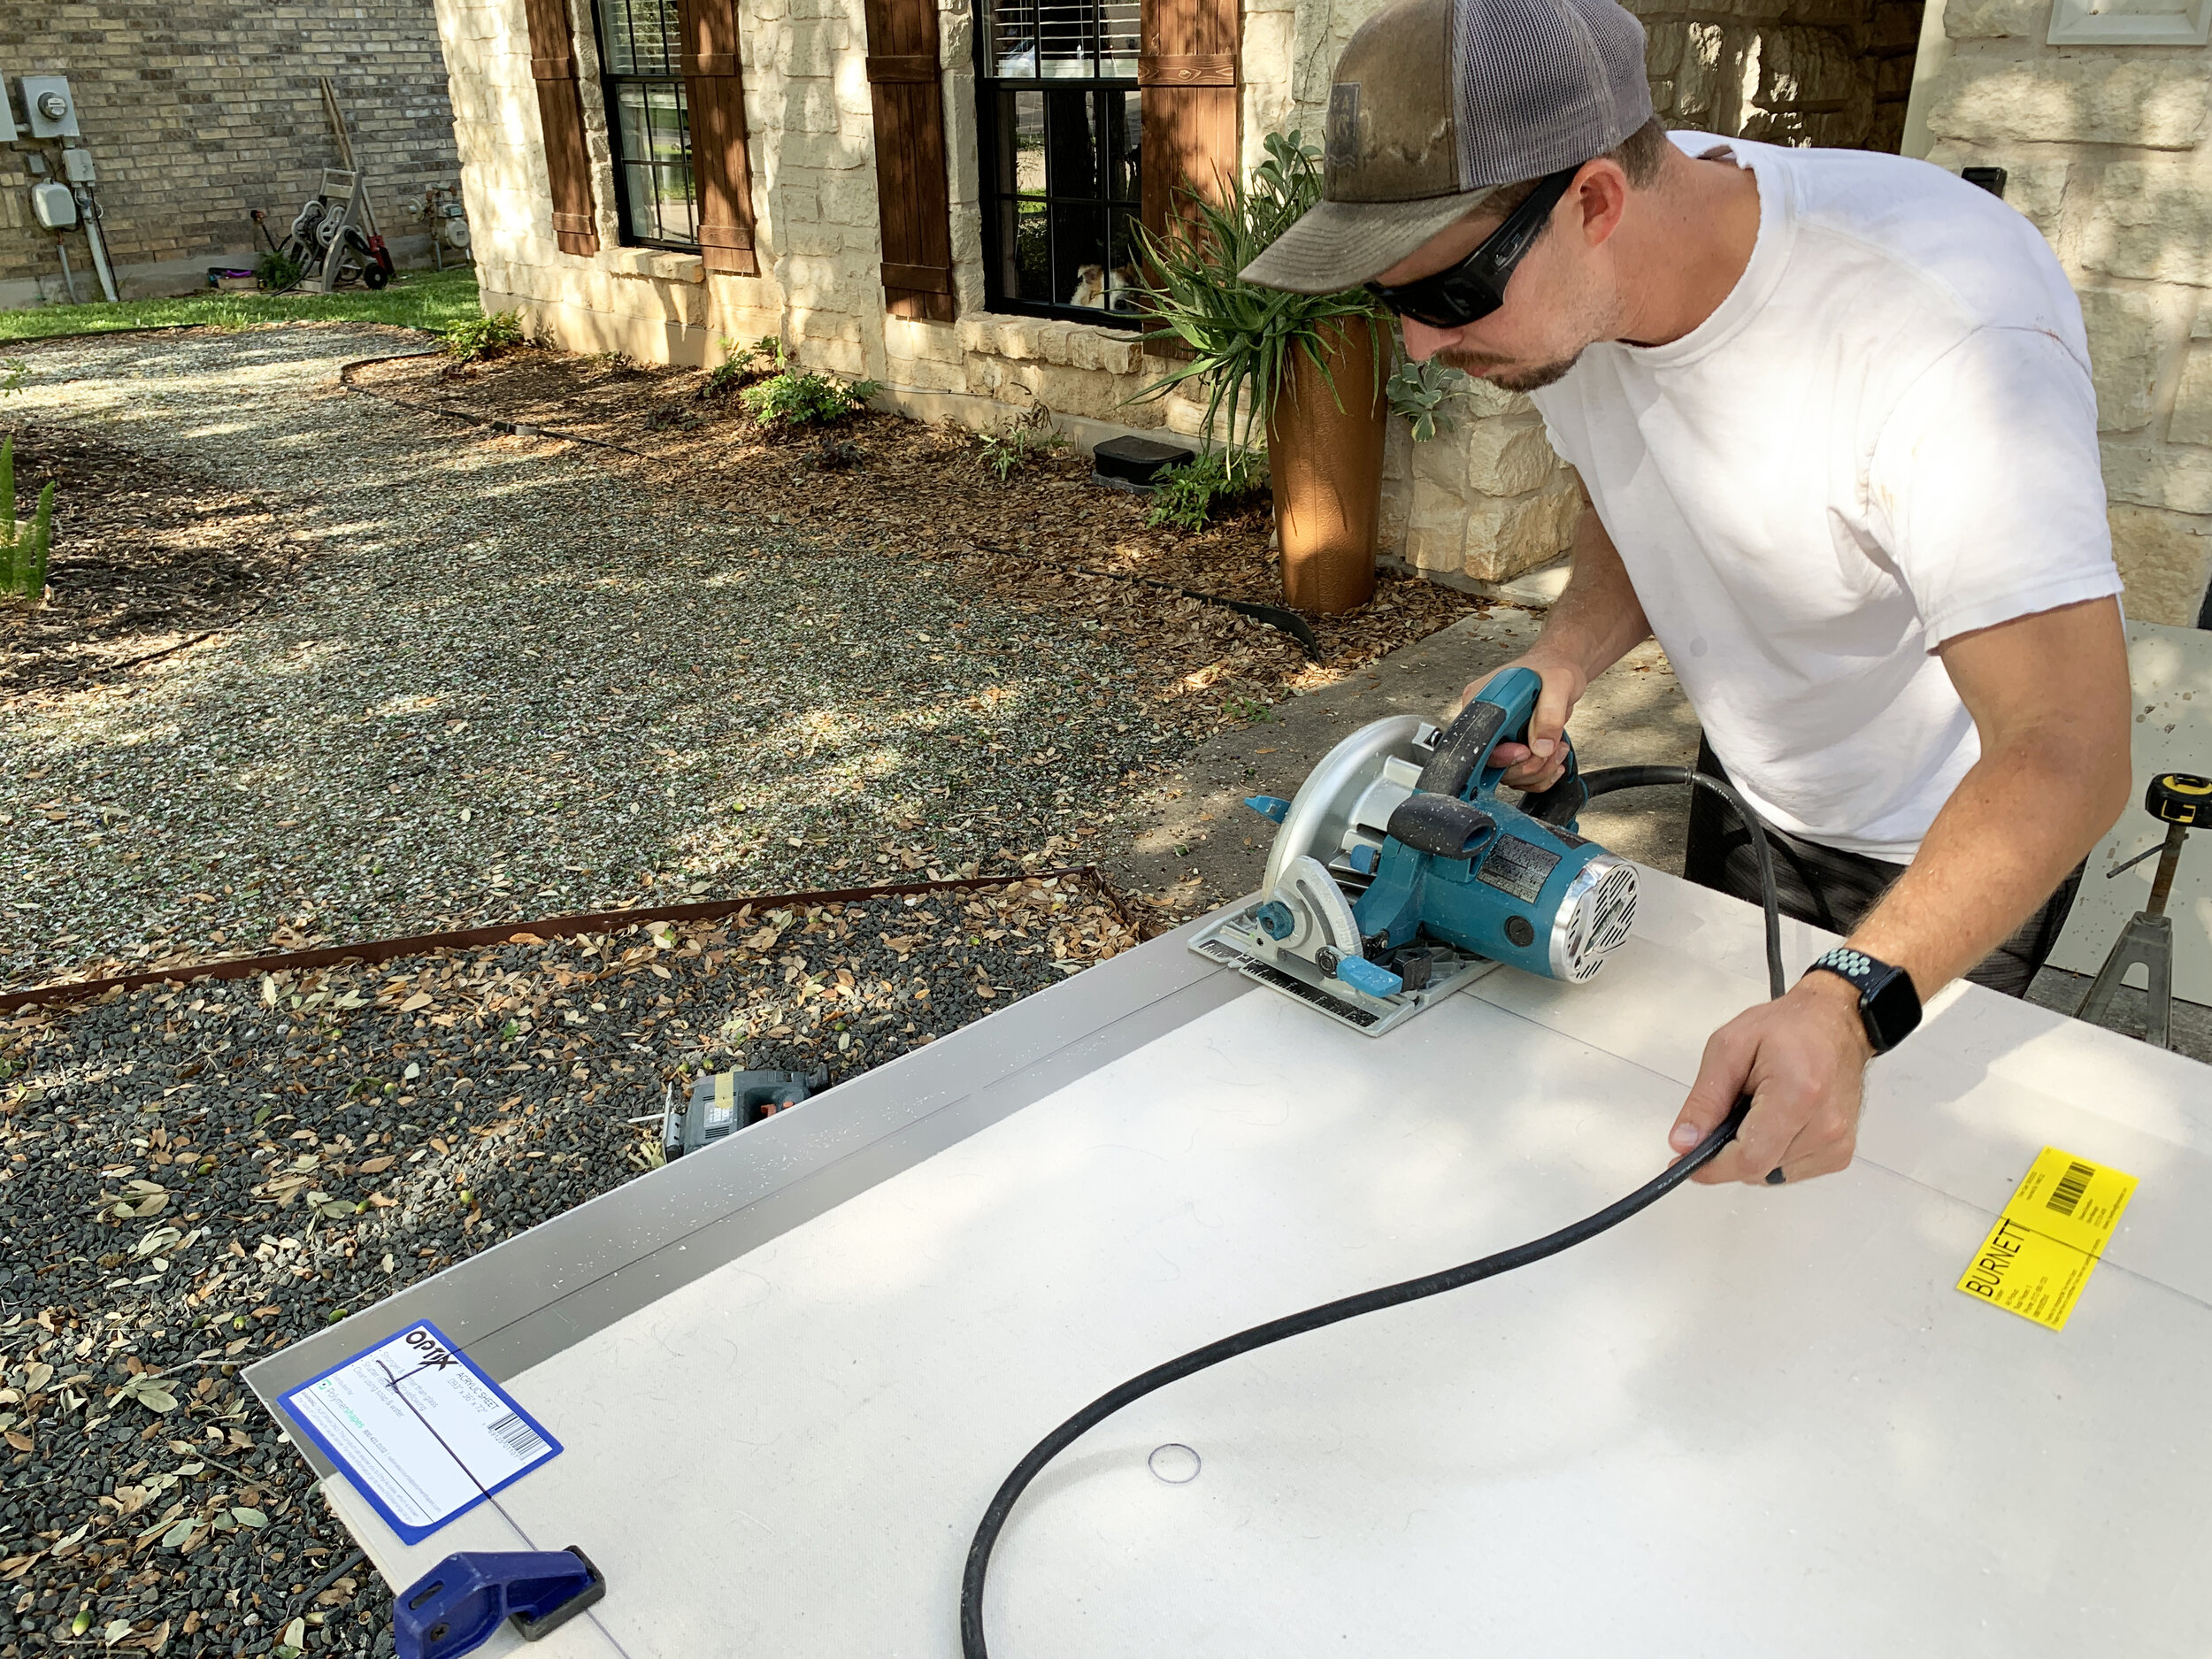
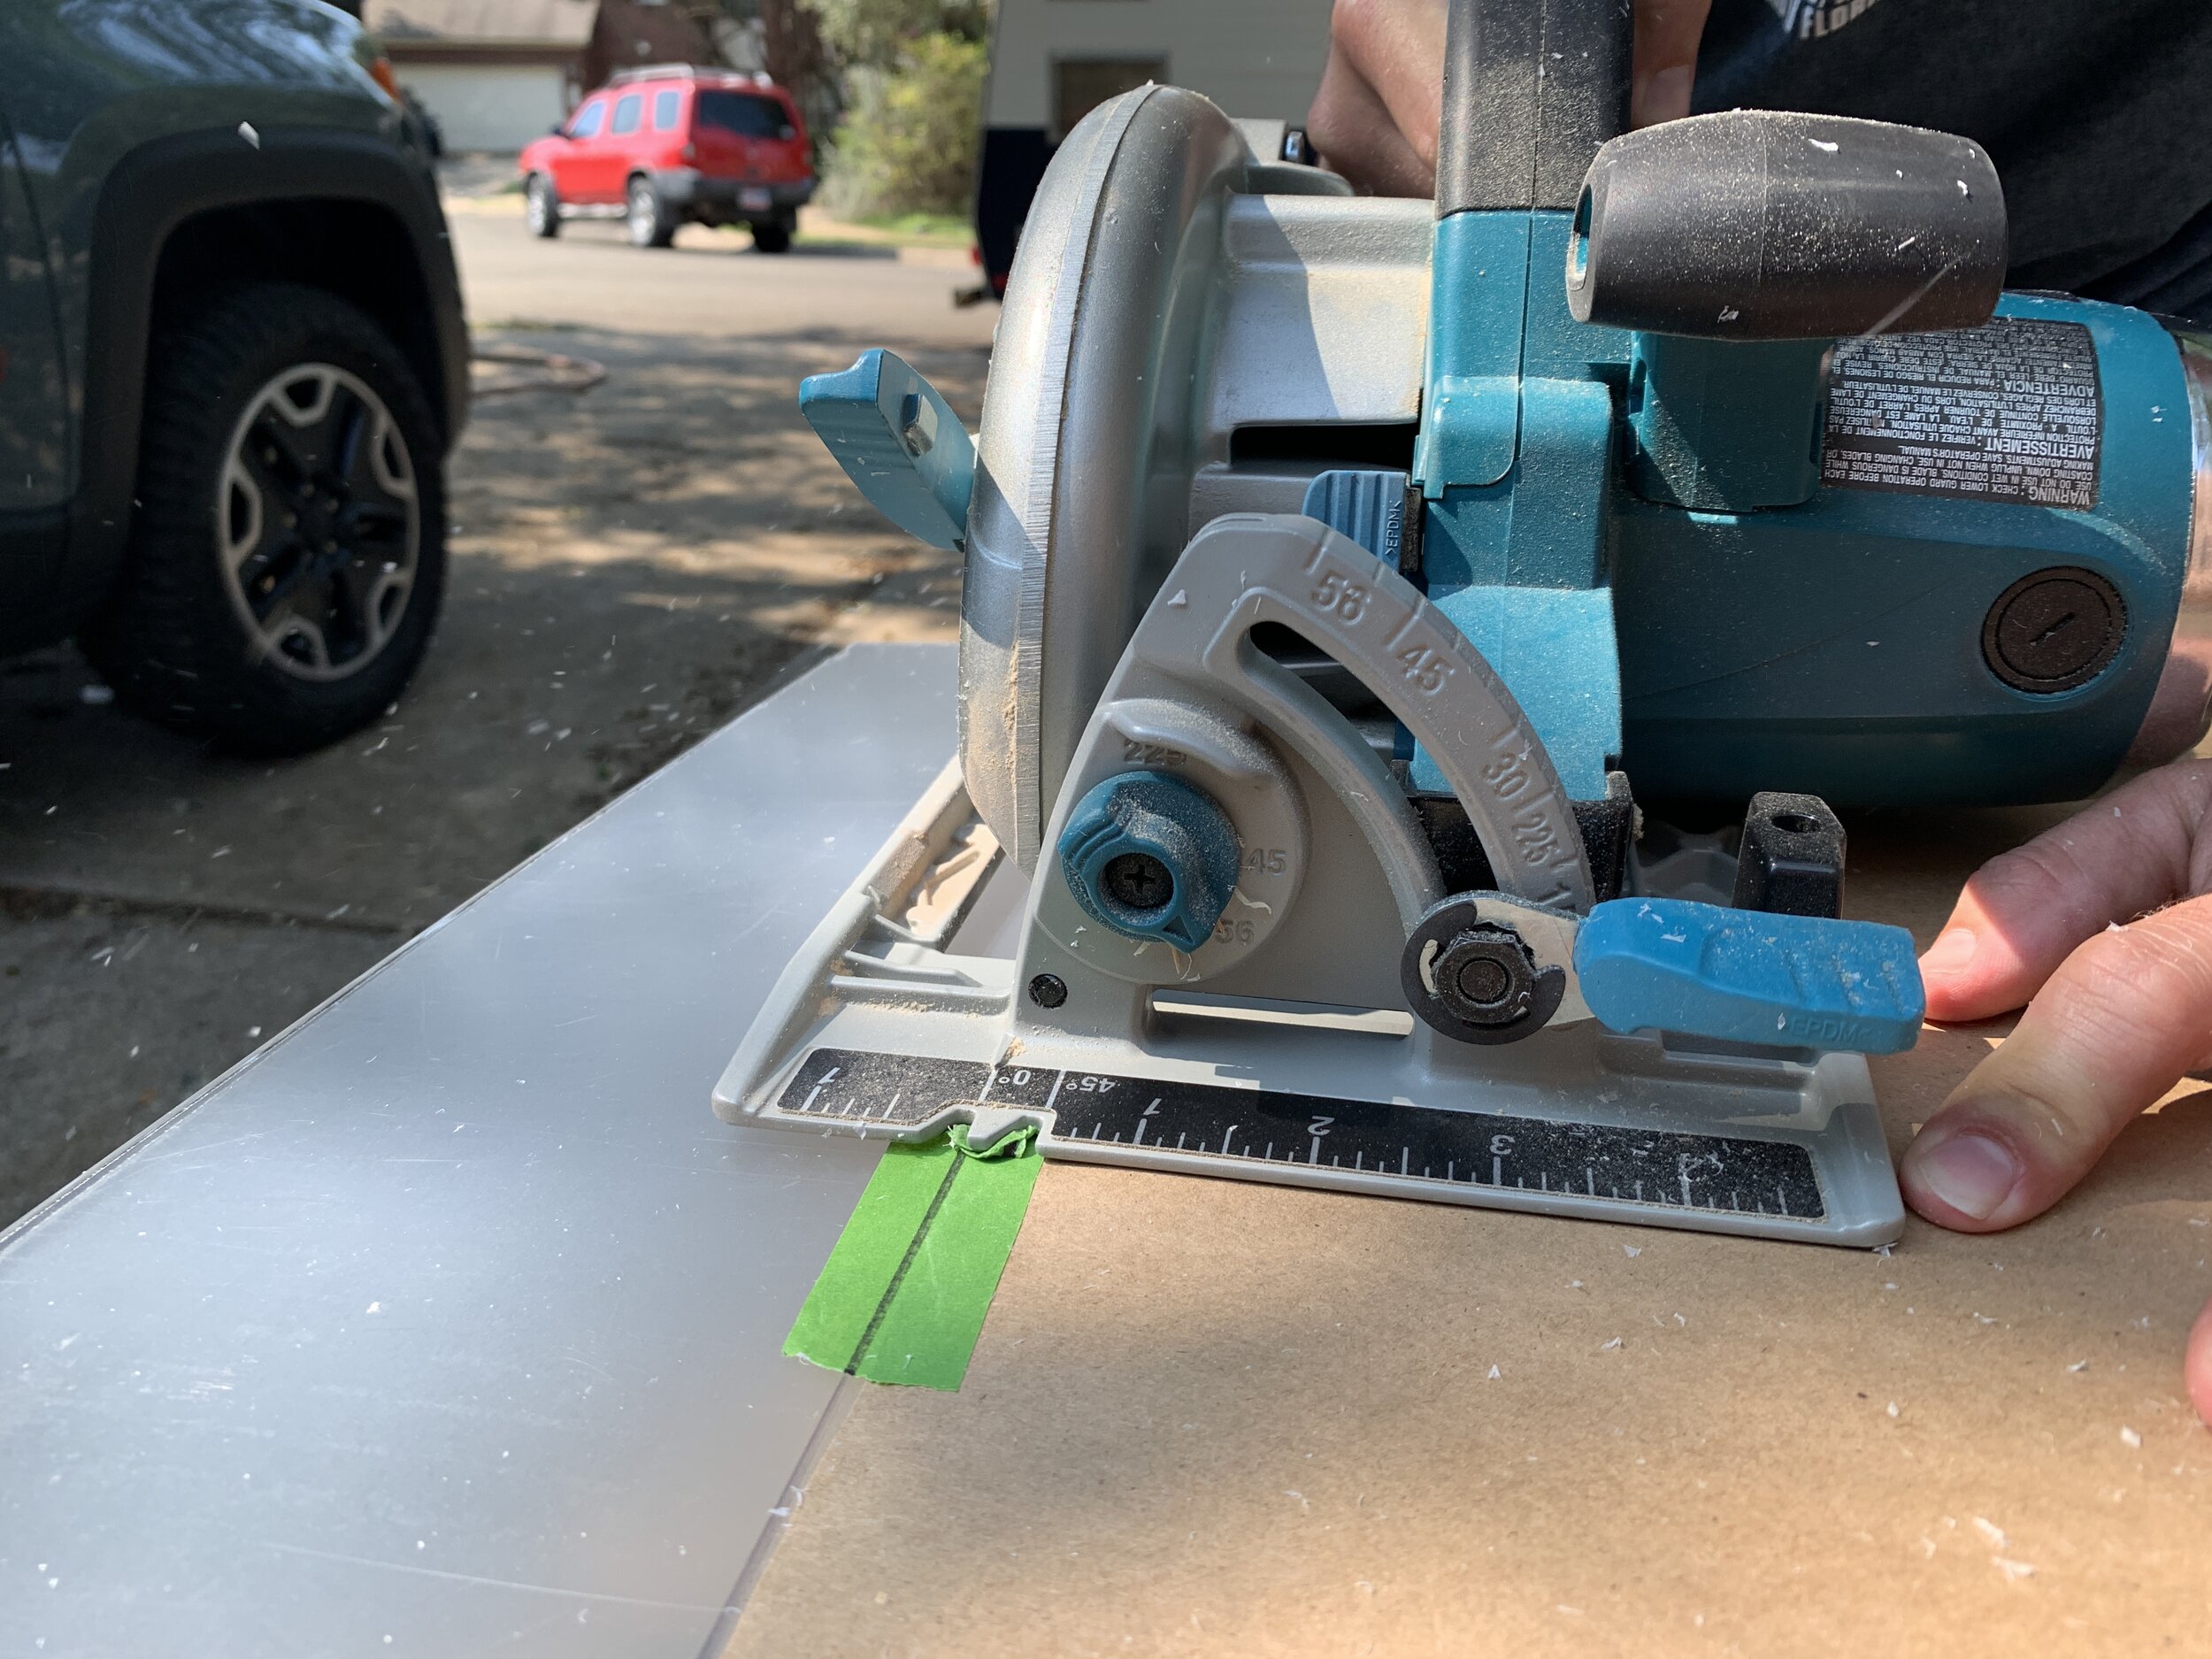
We had the best luck cutting the edges by leaving the protective film on both sides of the acrylic, drawing our cut marks out using a long level and Sharpie, removing the taped template, and then Nick followed along the lines with a circular saw while I held the panel and plywood tabletop in place, with the help of strategically placed clamps.
Safety note!
Make sure you are wearing safety glasses and keep your mouth shut while this is happening. Each time I would hold while Nick cut with the circular saw, I would get pelted with tiny plastic shrapnel!
Refining cuts
For any areas where we needed just a little trim here or there, we used the Dremel with a sanding wheel.
Painting/frosting acrylic panels
Painting the ceiling panel
This part was easy peasy lemon squeezy. Because we weren’t backlighting the ceiling, we didn’t need to do anything fancy for it and were just looking for good solid coverage in a nice light color. We used latex wall paint we already had on hand, our trusty Swiss Coffee color we’d used on our upper electrical cabinet and overhead twin bed cabinet, and – with the protective film removed from the paint-side only) applied four solid coats with a smooth cabinet roller to what would be the backside of the panel. (This is where it also really helps to label the protective film on the acrylic!)
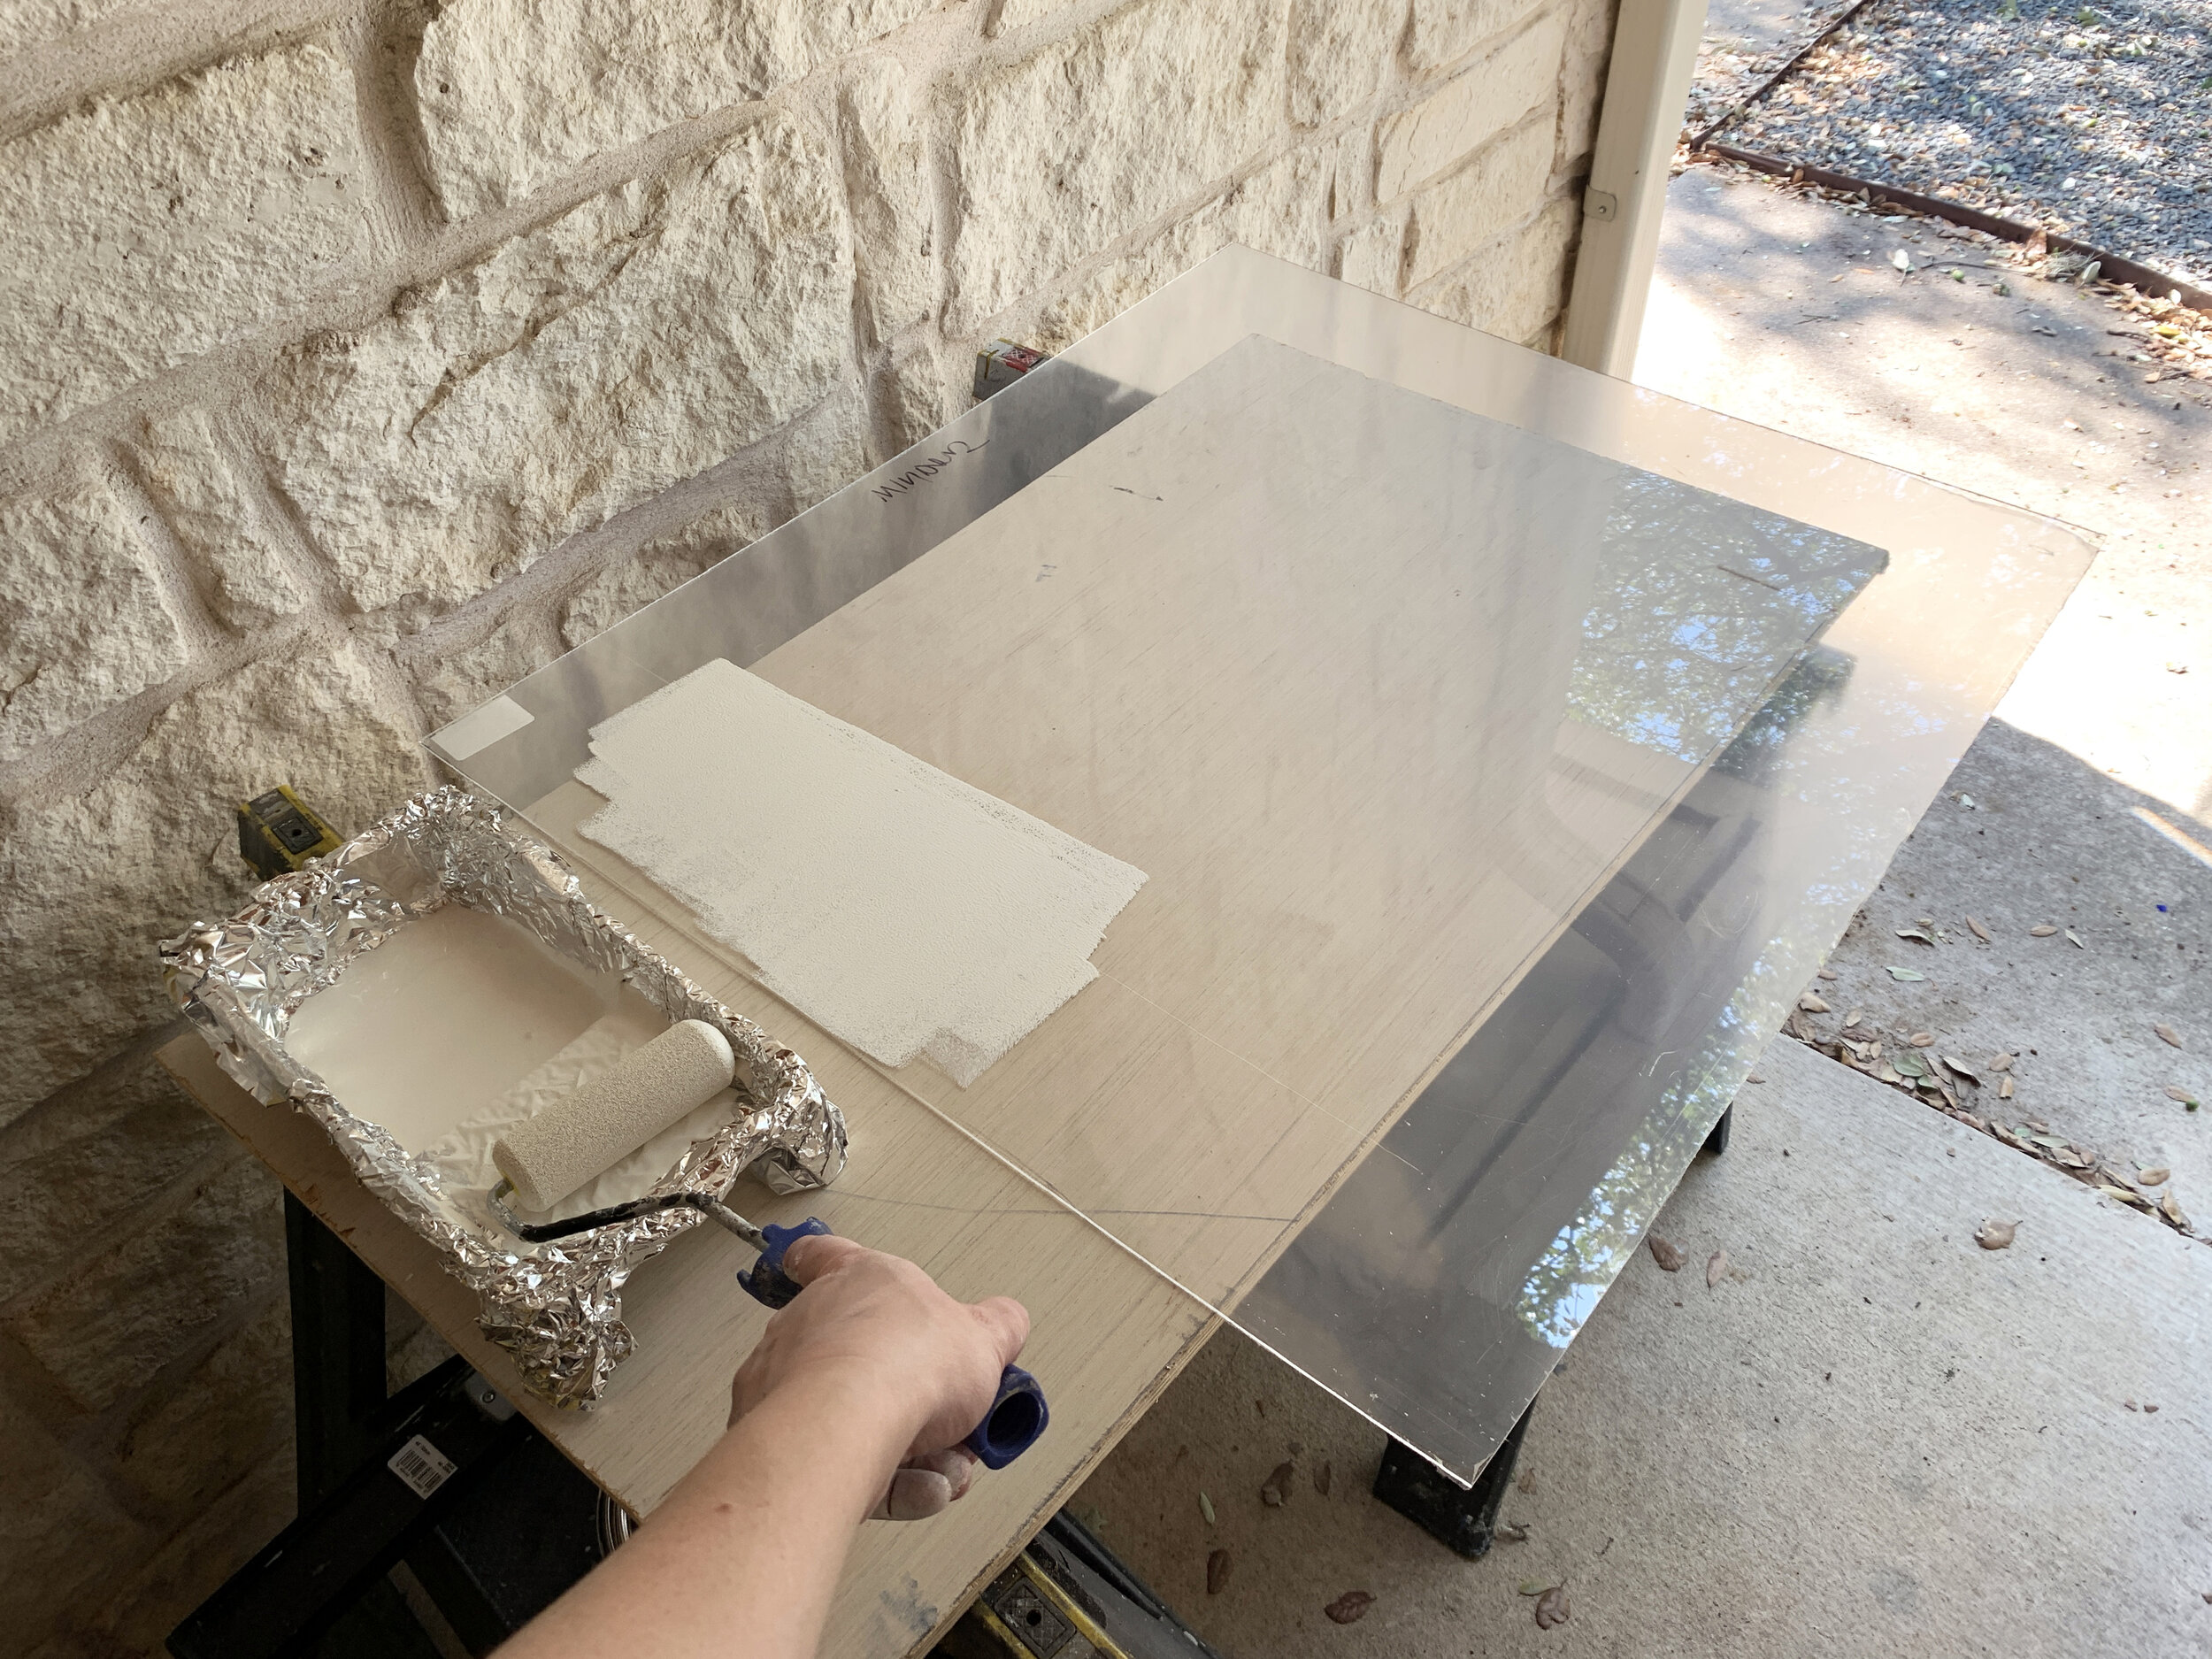


Painting the frosted wall panels
Painting the acrylic wall panels is another area where we had multiple unforeseen difficulties.
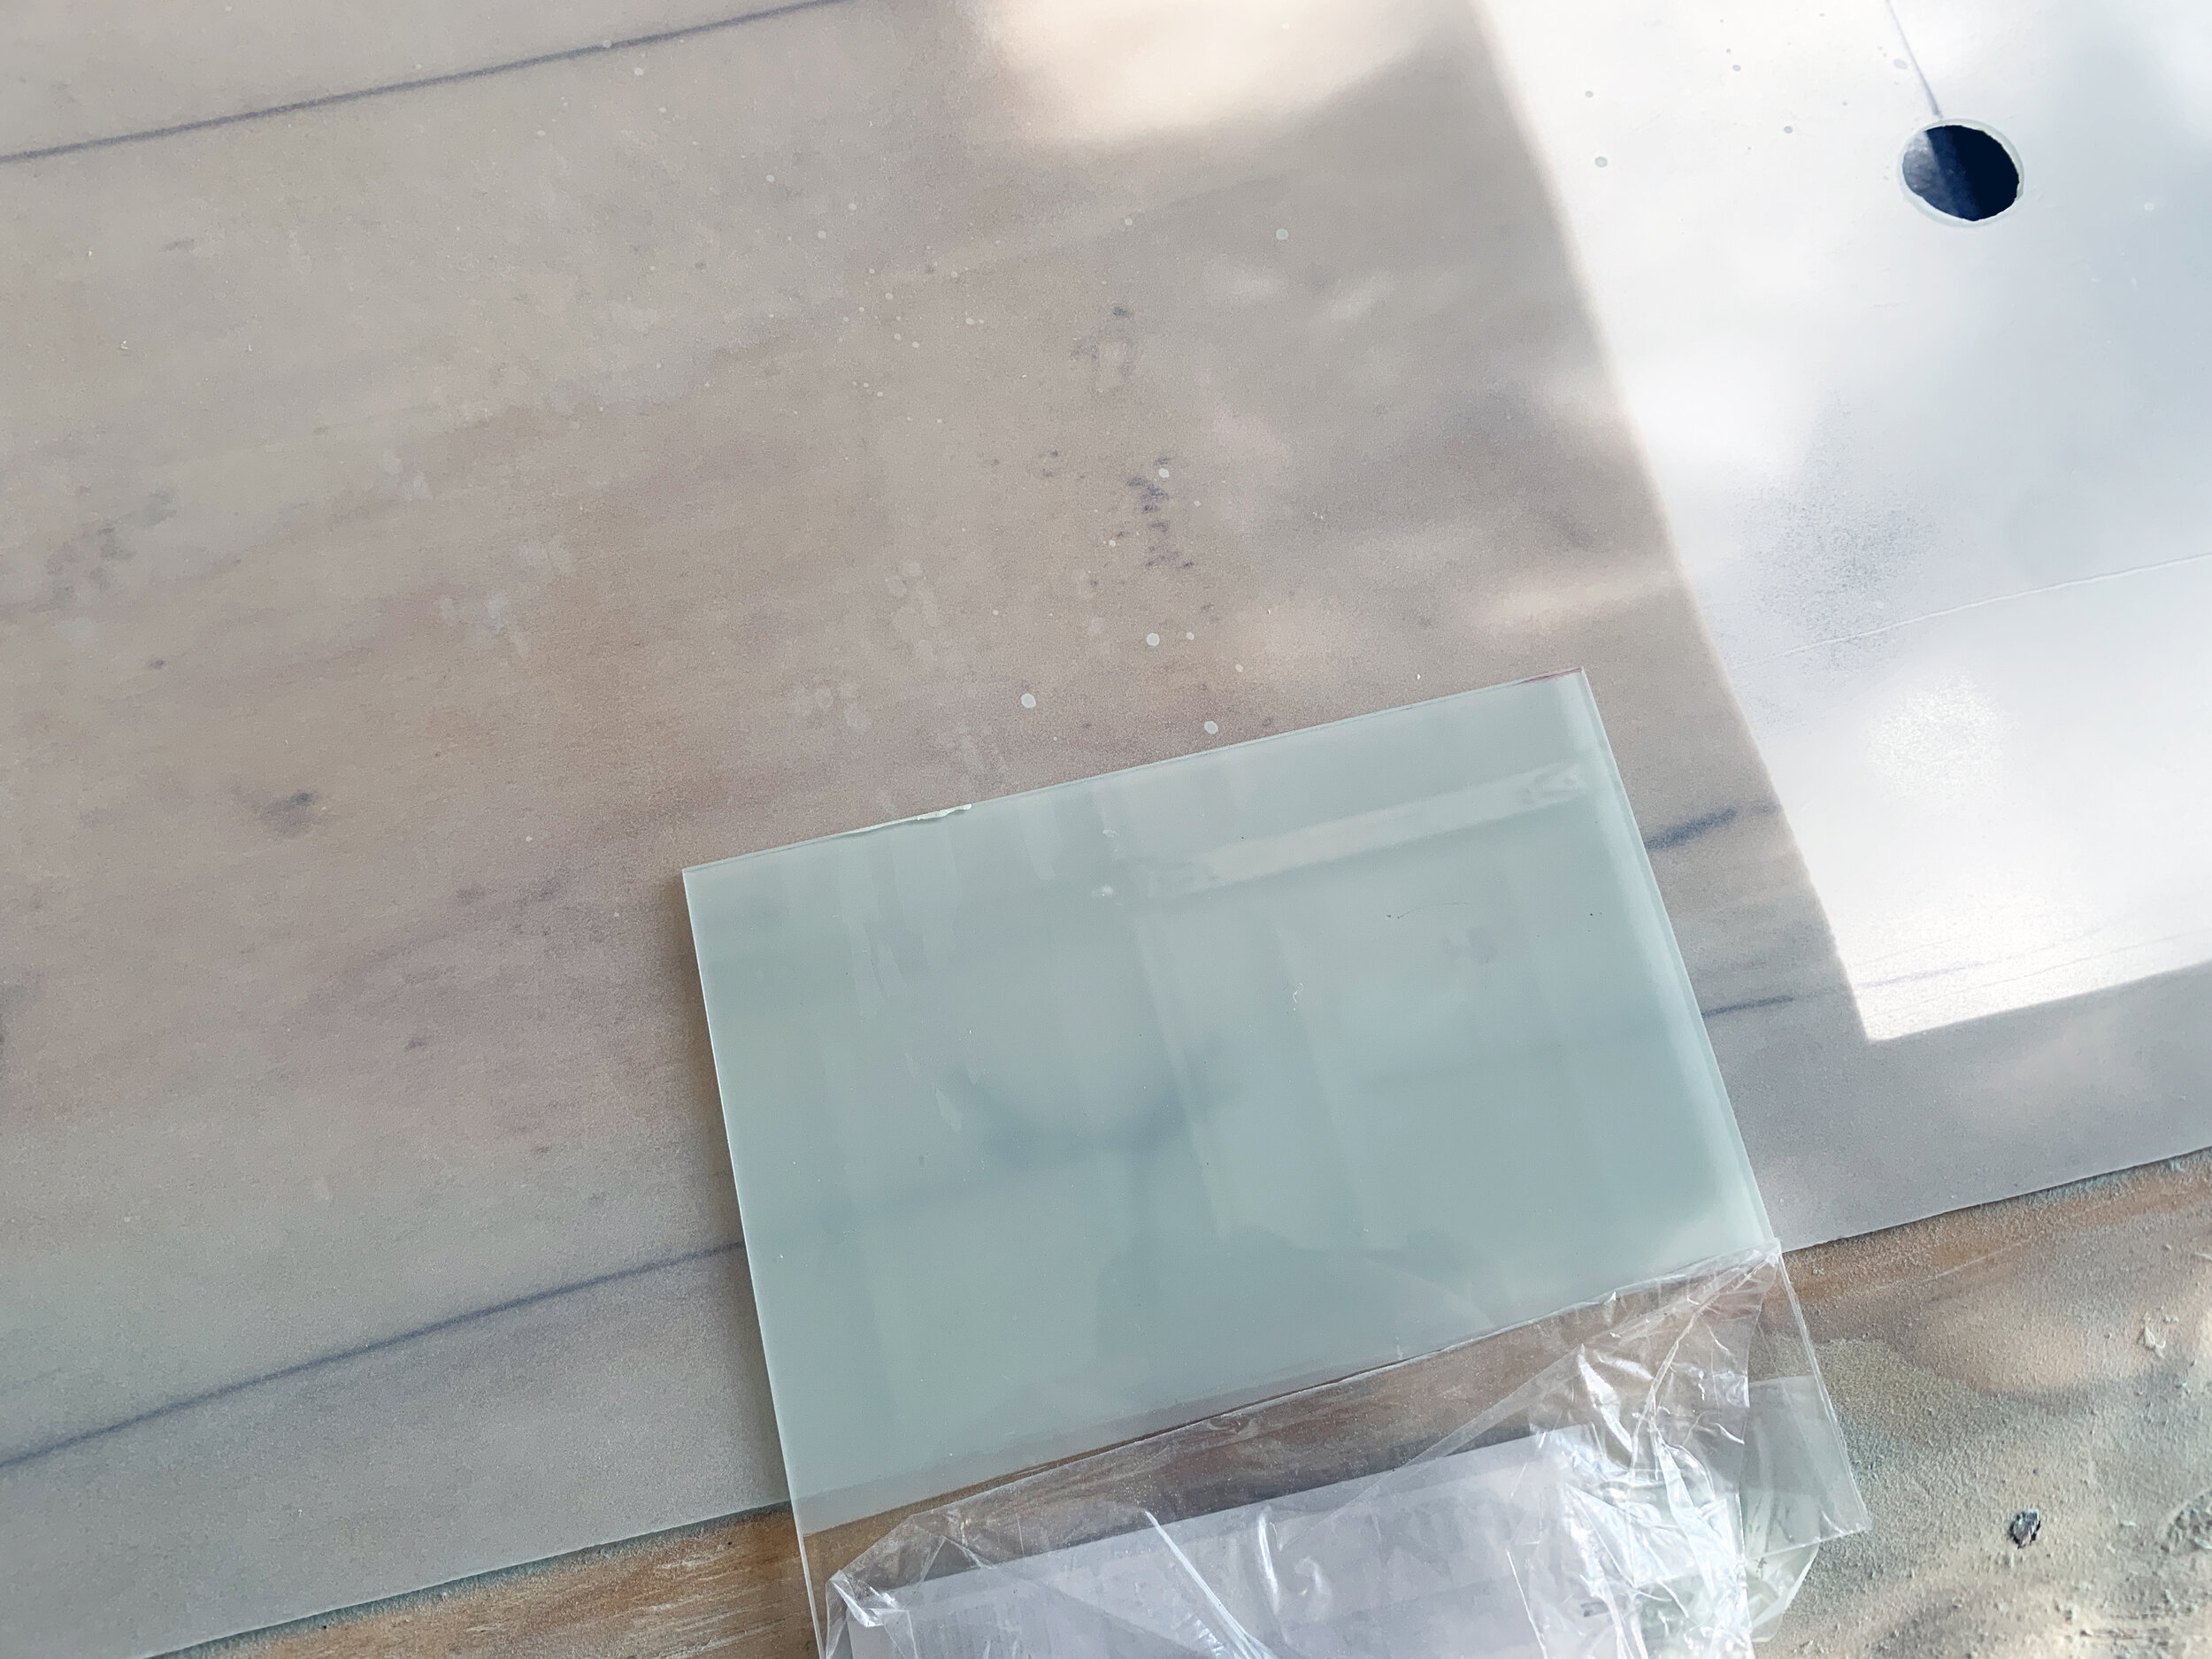
After initially testing out multiple frosting techniques and colors – sanding, painting, sanding and painting – on small sample pieces we determined using special frosted spray paint gave us just the look we were going for: A lightly minty color, a semi-transparent finish that allowed light to come through without showing what’s behind it too much, and pretty even coverage – important since paint coverage discrepancies would only be highlighted when backlit.
Ultimately, I had to paint the panels three separate times – twice because this paint is temperamental (apparently) and once for the one panel that needed to be completely remade because I broke it. When we were doing the final install. (Just typing that sentence is bringing back some mild PTSD – paint traumatic stress disorder.)
I learned some very important information during this process. Do not tilt this type of spray paint at all. Let me say it louder for the people in the back.
DO NOT TILT THIS TYPE OF SPRAY PAINT. AT ALL.
What we did correct from the start
Before I get into the fail (and subsequent redemption), I want to highlight that it is important to paint on the back of the acrylic so that the paint is not exposed to water. Not only will direct water exposure likely ruin the finish and paint job (and it’s clearly listed on the can as a no-no), painting on the backside of the walls will keep a smooth, shiny, factory finish on the front that will be easy to keep clean!
Paint attempt 1 – the fail
The first go-round, I had the panels laying down flat on our makeshift sawhorse and plywood worktable and held the can mostly vertical, but I’m guessing at times at most I held the can and sprayed at a 45° angle? This (unbeknownst to me) caused the paint can to only spit out some weird powder (I’m guessing the stuff that makes it “frosty”) that didn’t stick to the acrylic much at all.
It smelled like normal spray paint and even looked great –like what I thought frosted spray paint would look like – until I finally found my small sample piece I’d done months prior in a pile of stuff in the garage. I didn’t realize until I’d compared the two, touched the real panels and had already used numerous paint cans (like, 5-6) that I’d learned just basically been wasting my time and uselessly huffing paint fumes in the evenings after work. Awesome.
You can see in the video below just how easily the powder dusts off with a light swipe of a dry cloth.
So, since I went through practically a whole case of cans we needed to order more. Yes, order. Of course, we’d chosen a special-order paint and not one that was sold in our color anywhere locally. So we waited for more paint to arrive before I tried…
Paint attempt 2 – the redemption
After learning a painful lesson – truly painful, as anyone who’s pushed on a spray paint can for hours and hours and hours over the course of a week can attest – I tried my best not to waste my time or give myself trigger finger again. This is where the spray paint can trigger adapter came into play, a simple piece of equipment I, and my fingers, highly recommend.

Here you can see the difference in coverage in paint attempt 2 (on the left) vs. paint attempt 1 before dust removal (on the right).
I dusted off the weird frosted powder, then vacuumed and wiped the panels with a lint-free shop rag and mineral spirits before painting them again.
Thinking maybe I just wasn’t effectively shaking the cans enough while I painted the first time, causing the powder to separate from the paint, I made it a point to stop and shake the cans often and for a long time. It was during this second paint run that I learned the can needs to be completely vertical. In my experience, even a 10° angle seemed to matter to not have powdery bits appear on the acrylic.
Multiple coats later, I dry fit the first panel to check paint coverage when backlit, and then checked the opacity of the other two panels against the first. I left each to dry for a bit before they were ready to be handled and installed without leaving fingerprints in the paint.
Paint attempt 3 - the redo
When I broke the second panel – the one with the window cutout – during the actual real install, it meant we had to start over completely on that wall panel. After we got another case of 6 special-order paint cans in the mail and picked up another sheet of acrylic, I used my gridded + diagonal paint method as described in paint attempt 2 above with no problems.
:: Hallelujah! ::
Because I was painting on smooth virgin acrylic that didn’t have a rough texture (left by the weird powder that stuck on the panels in attempt 1) this time, it went on much nicer and shinier, and just as the back of the can said it would. Despite the difference in texture/technique, the panels look comparable to each other since we painted on the back of the acrylic, where texture the was not noticeable.
My tips for success with frost spray paint
Keep the spray can completely vertical.
Shake the paint can very well before you begin and often as you go to keep the paint mixed.
Begin spraying off to the side of the panel first to avoid a heavier burst of paint on the panel, then slowly move across the panel and off the other end of the panel before moving down and sweeping back in the other direction.
Work in a grid and spray each layer of paint in a different pattern. For example, vertically, horizontally, and diagonally in both directions. I found it easiest (especially when my hands started getting tired and needing breaks) to have small tick marks or even blemishes on the wall behind the panels to use as reference for staying on track as I worked.
Use your hand to check paint coverage. As I applied each paint layer, I would place my hand behind the panel to see the amount of coverage applied. We didn’t want the paint to be entirely solid, as we wanted to see light (or in this case, my hand) through the panel, but I also didn’t want the paint to be so sheer that I’d be able to recognize a clear outline of a hand, as we wanted the painted walls to be solid enough to diffuse the light nicely and conceal the plumbing hiding just behind it.
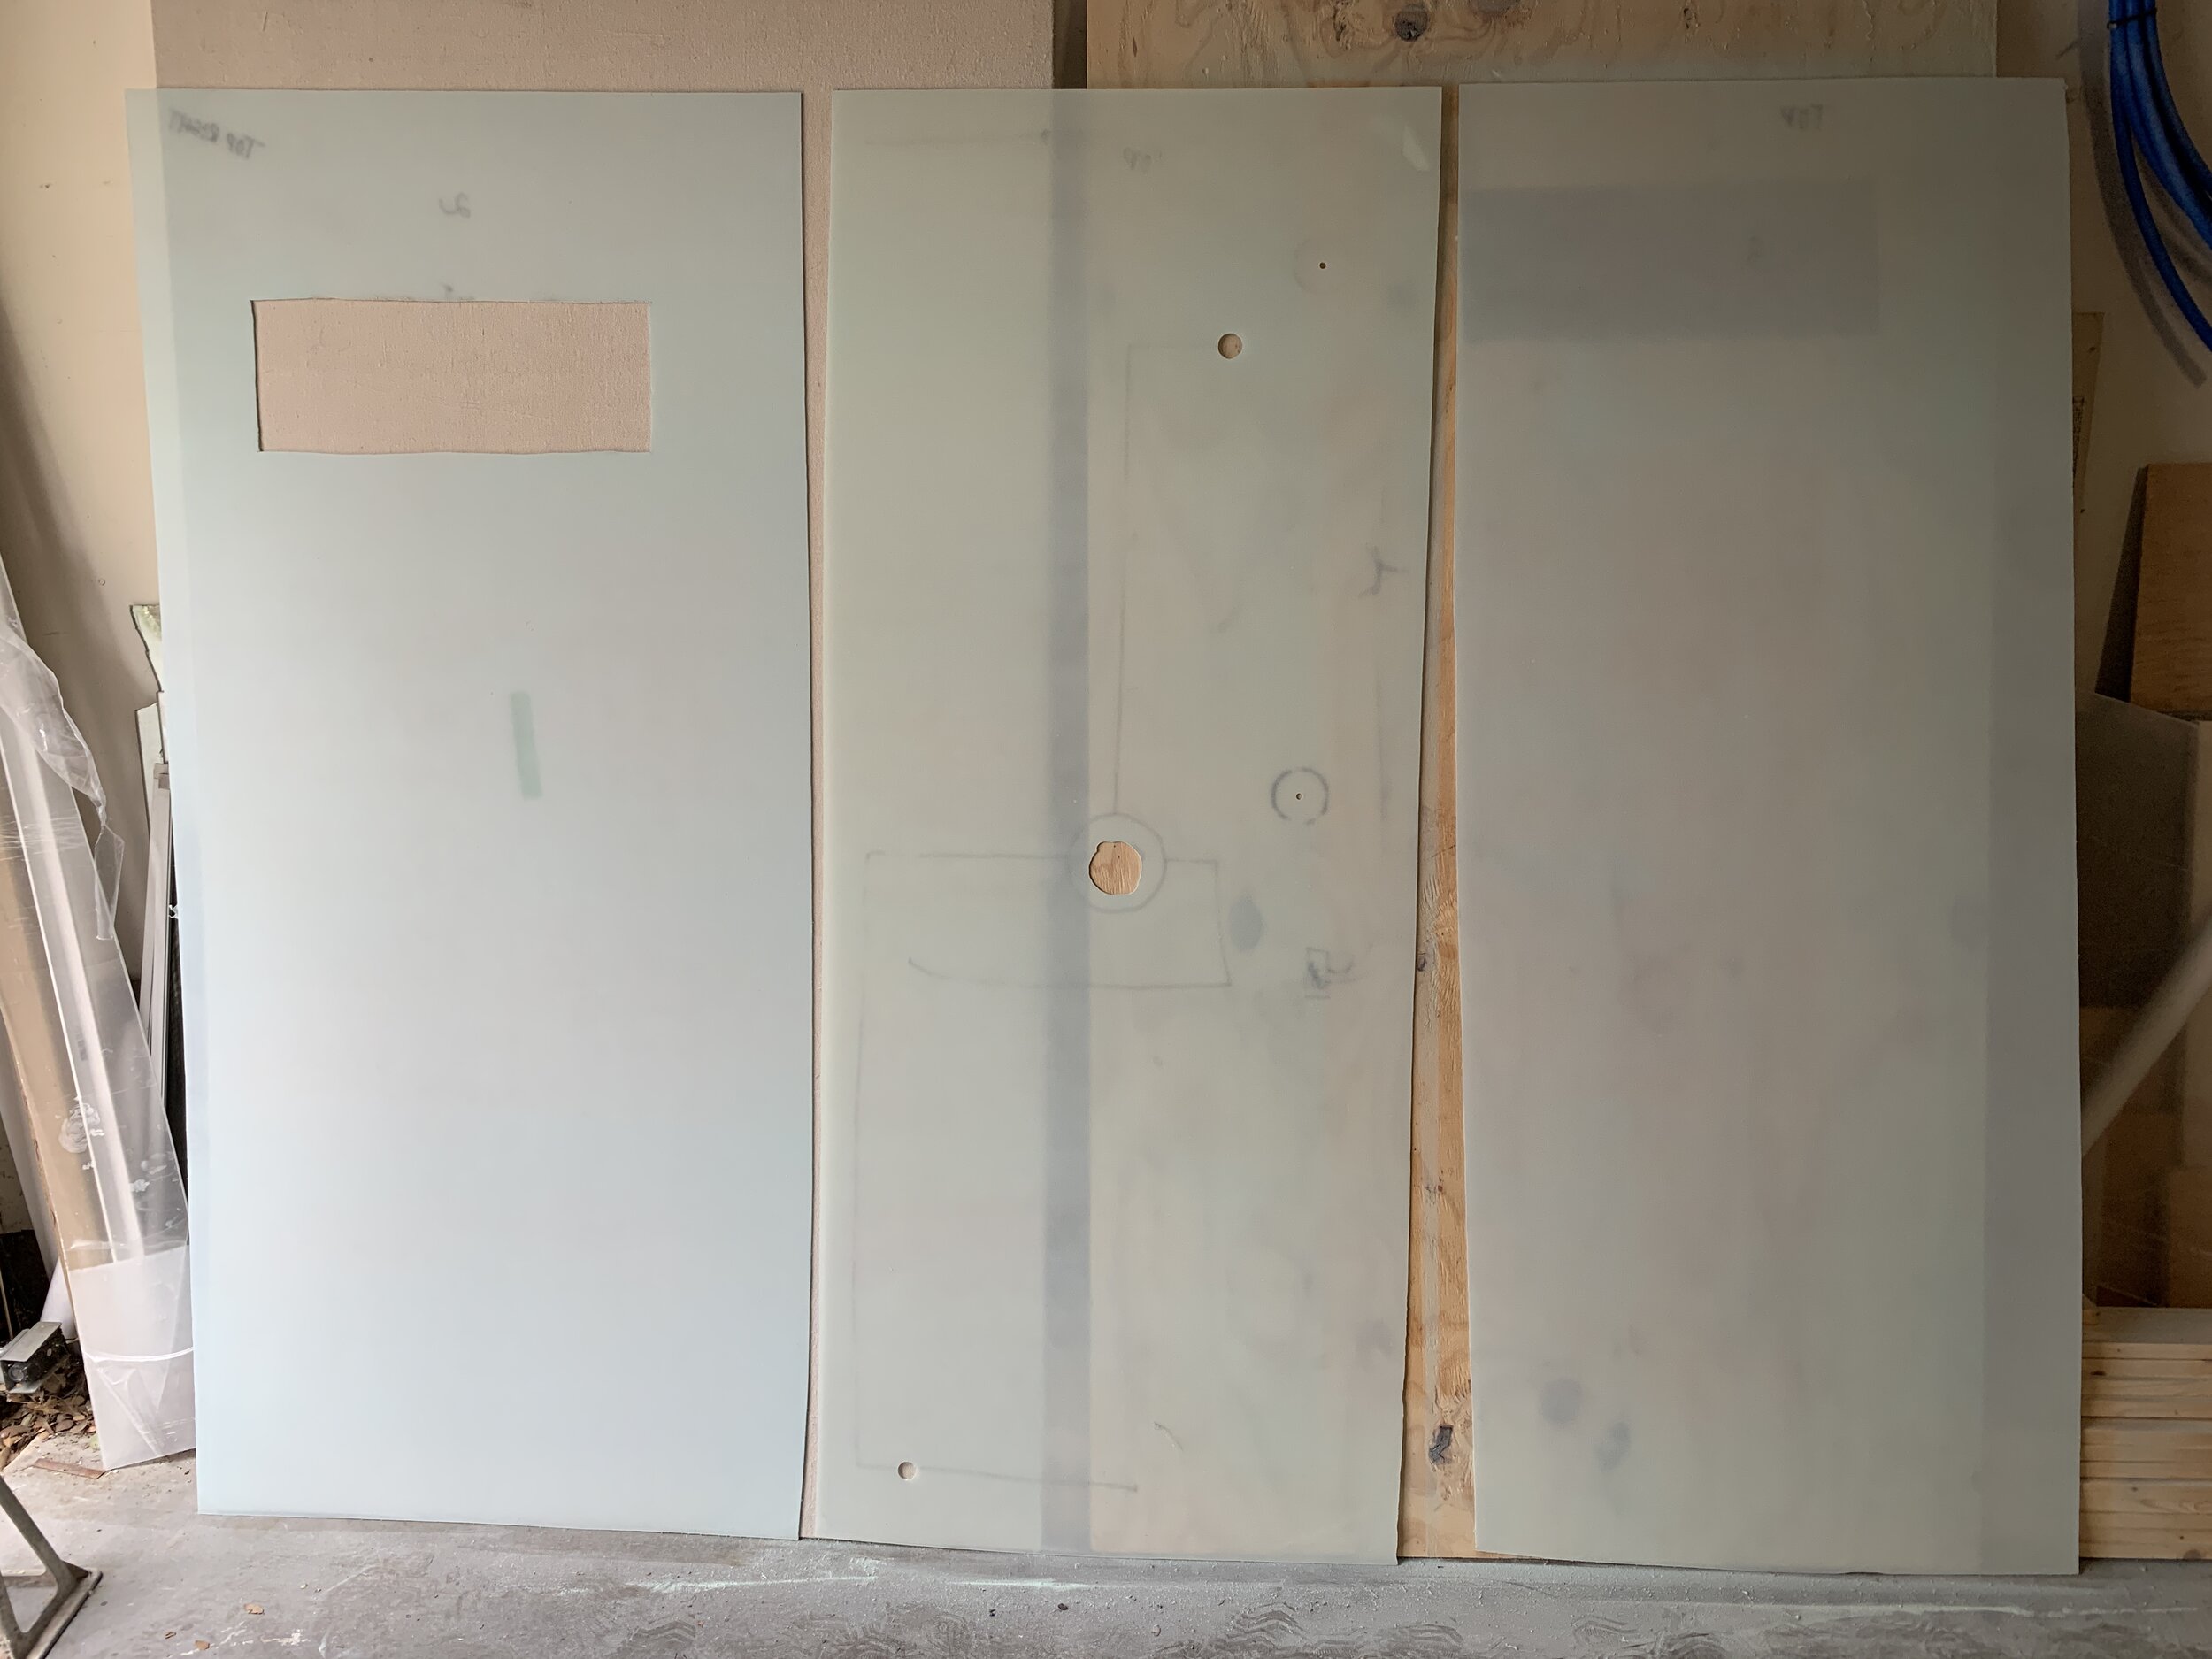
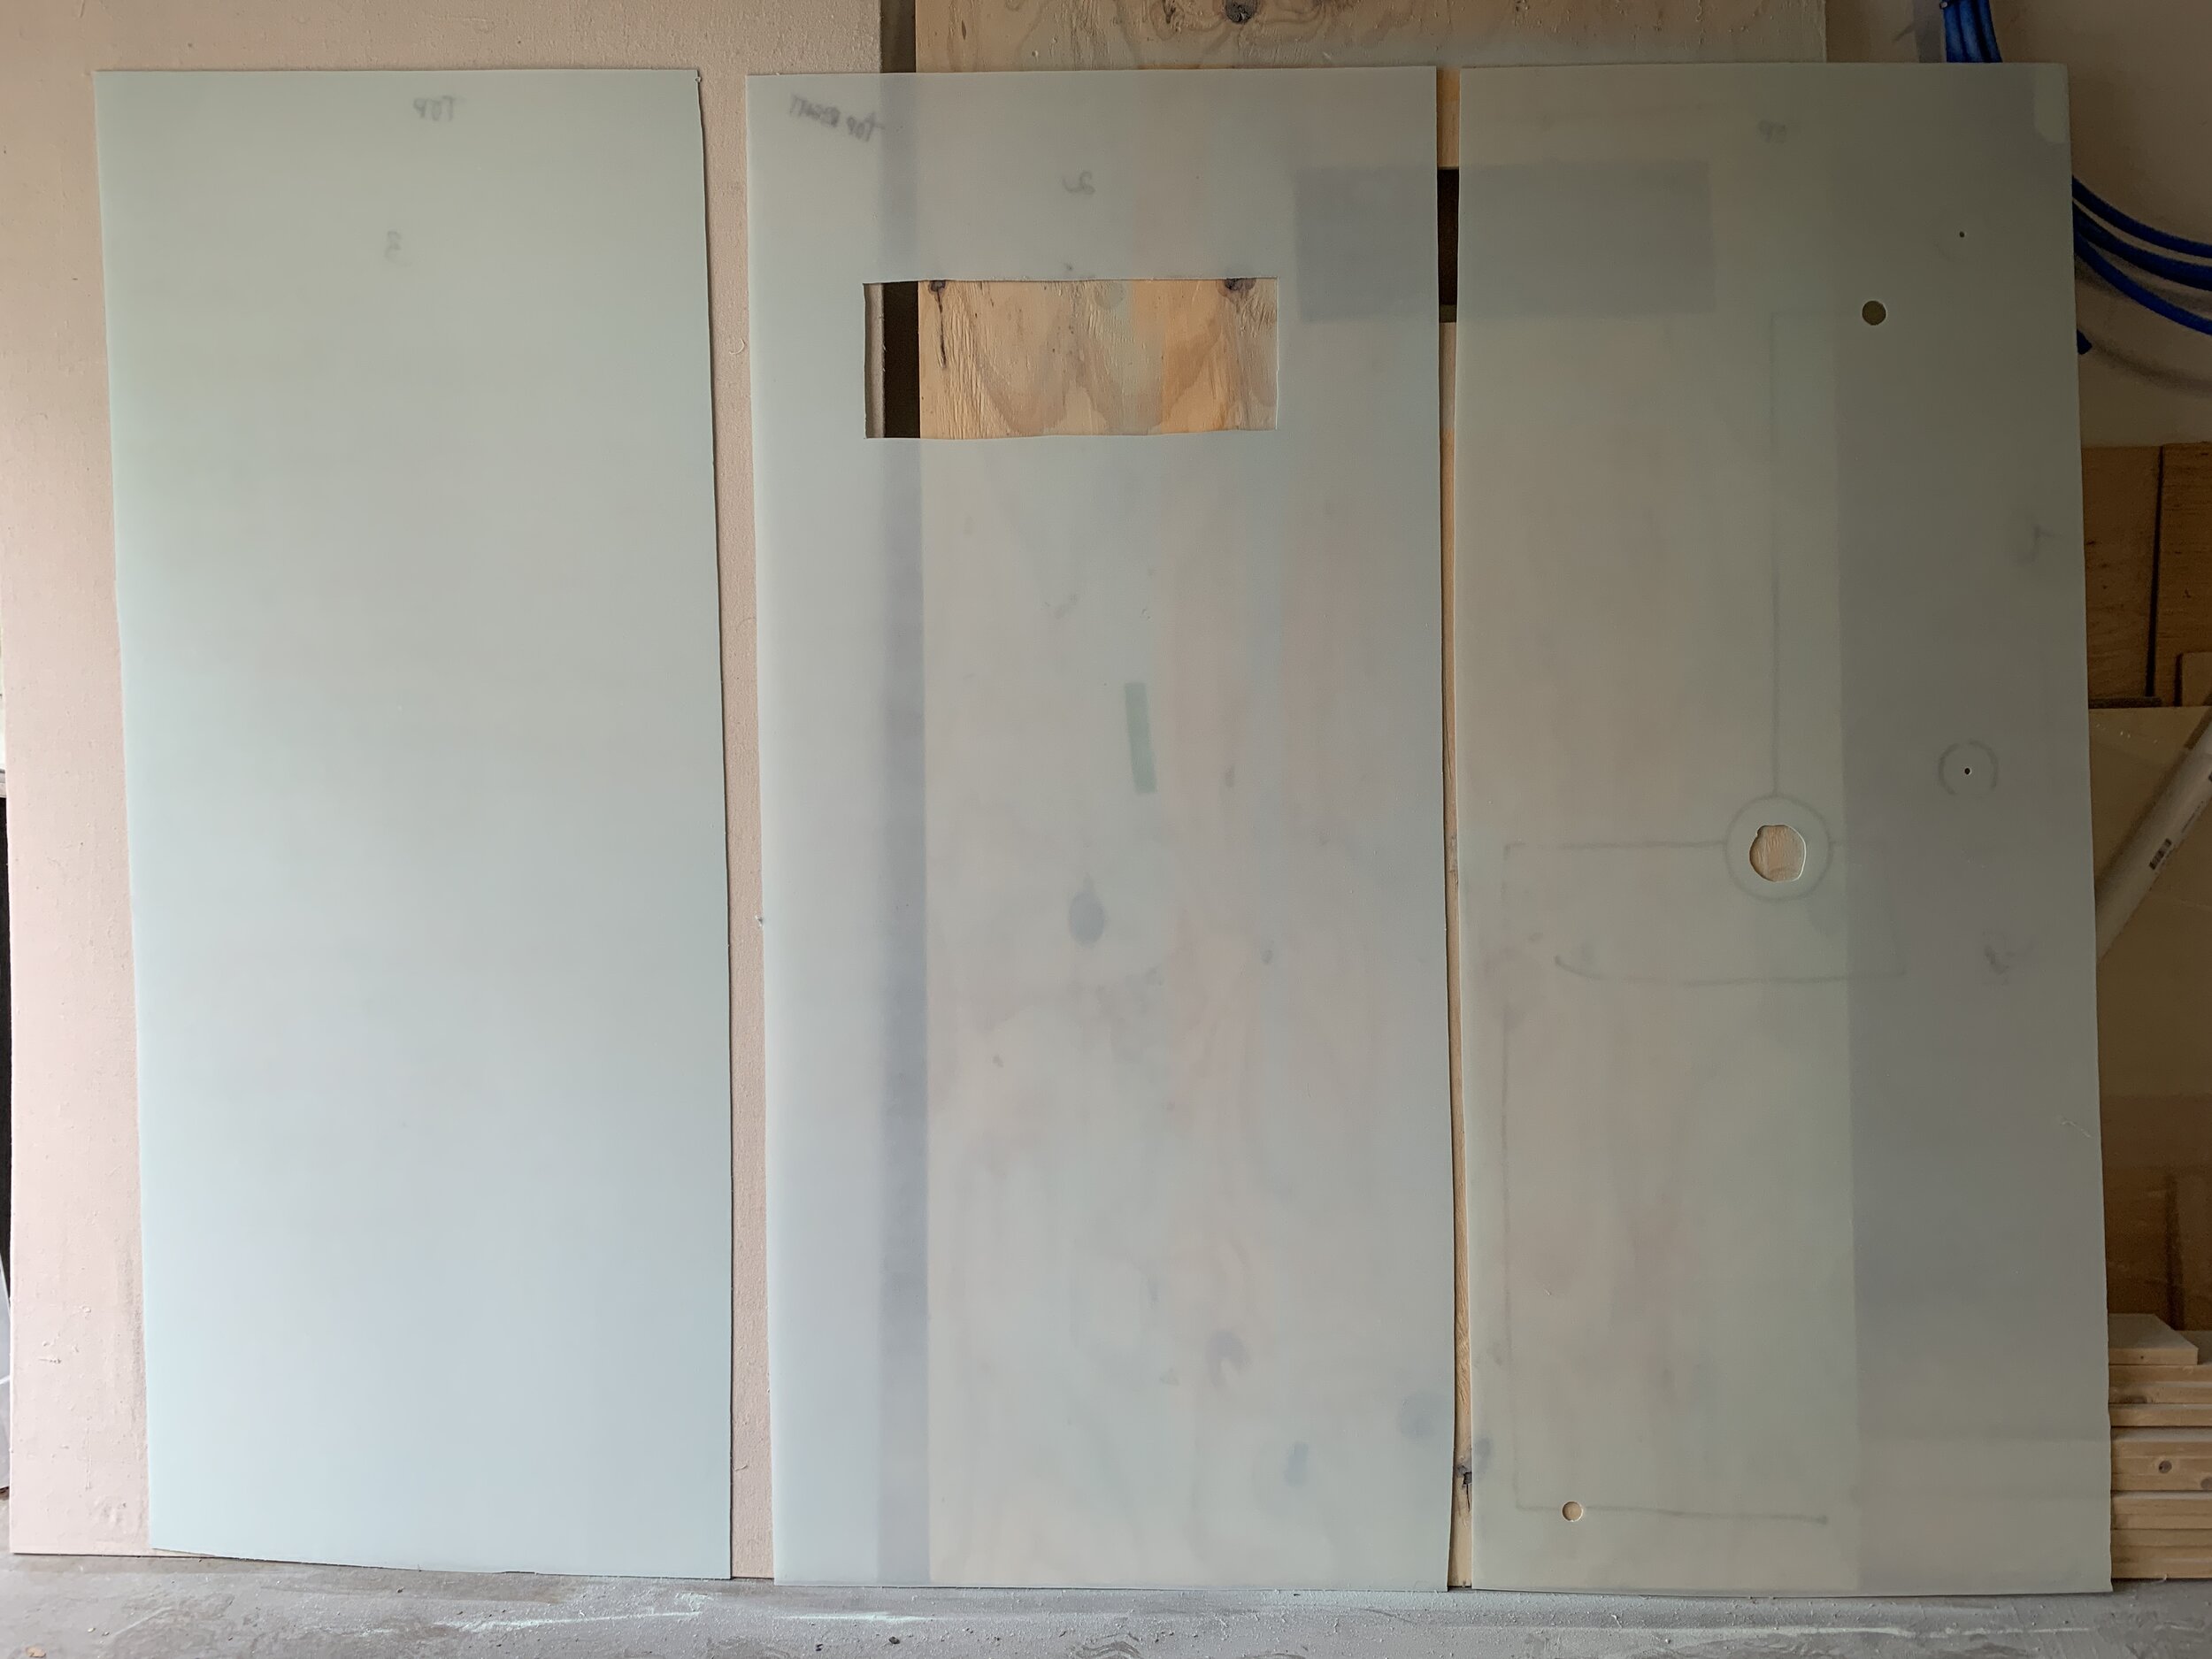
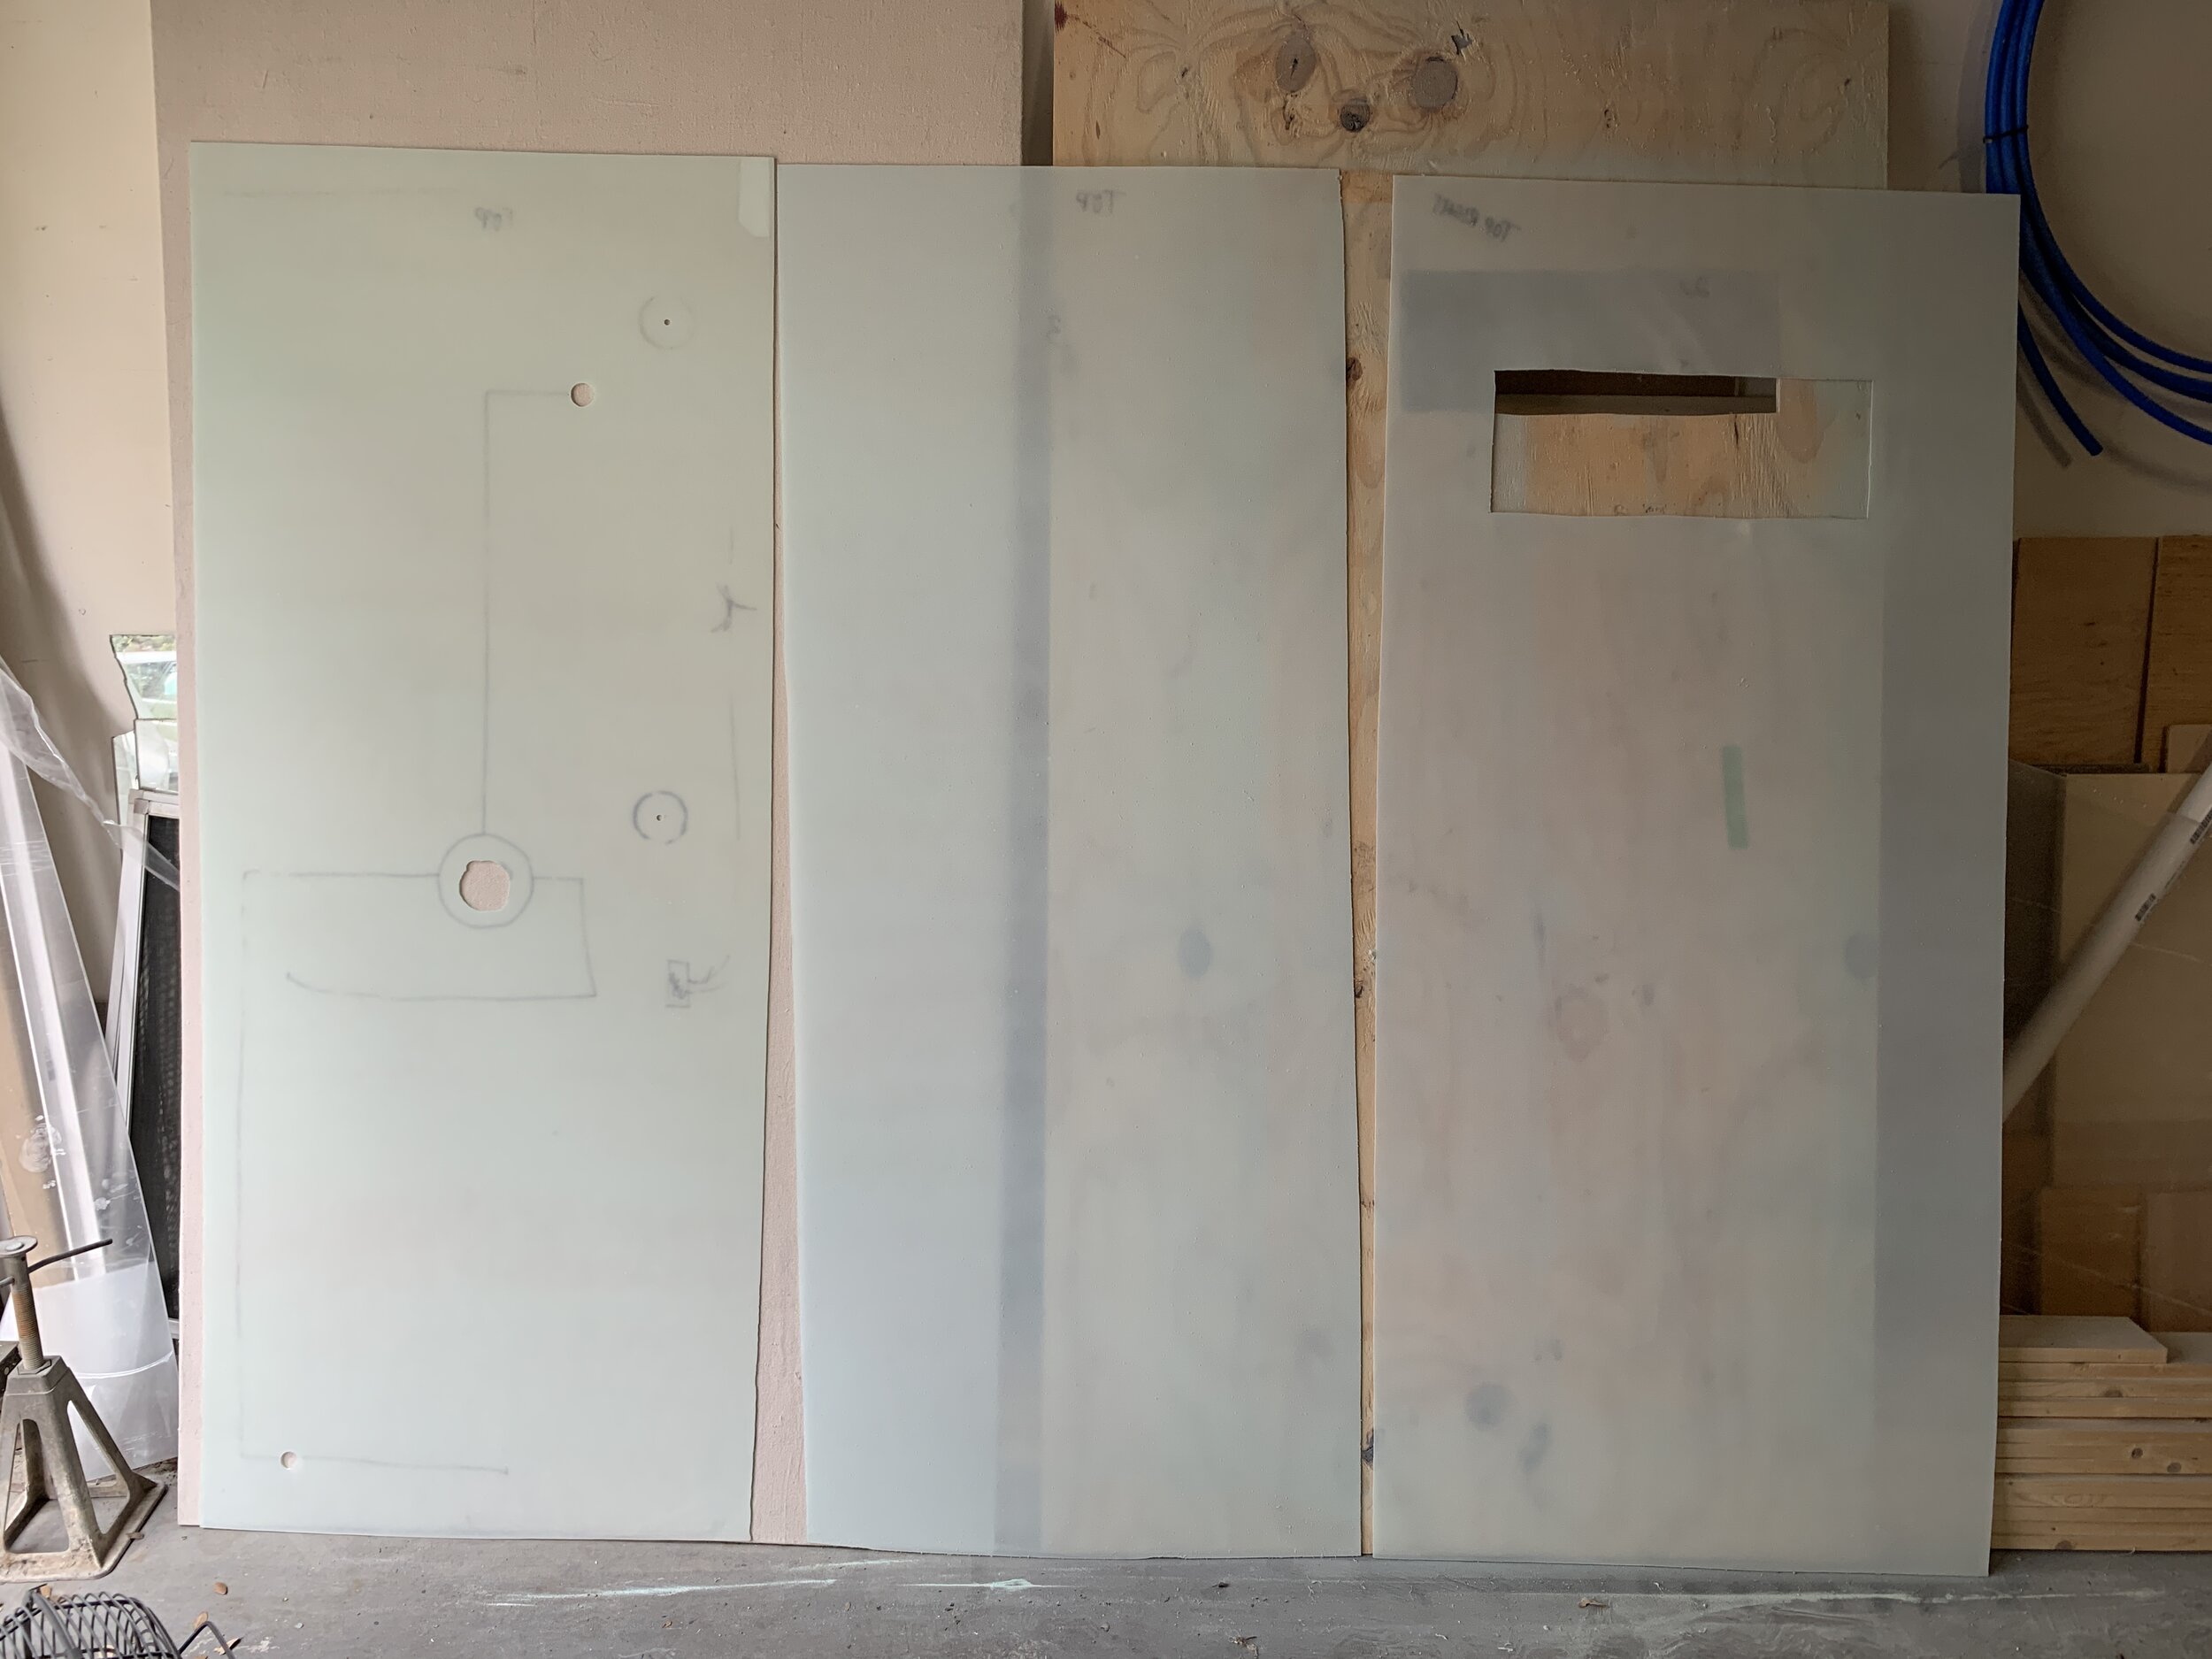
Compare your panels’ paint coverage/opacity against each other on the same type of background. We noticed they looked completely different from one another when propped against a sheet of drywall vs. a canvas-covered piece of plywood we had leaning against the garage wall. Shuffling them around, you could see the panels looked the same when compared in photos. You can see below how the same panels look like they have completely different coverage and don’t match each other depending on what’s behind it. All three of these photos were taken at the same time, with the same paint layers applied to each – I only shuffled the panels around.
Coming up in our DIY wet bath series
Building the framing for the interior wall lighting and acrylic wall panels
Installing the acrylic wall panels
Plumbing the shower fixtures
Installing the toilet
Building the custom door and water sealing the crack on the out-swinging door
Putting the finishing touches on our wet bath
So what do you think? Do you have any handy tips for working with acrylic? We’d love for you to share with us and others what worked (and even what didn’t) in the comments below!