One Room Challenge: Guest Bathroom – Week 4

It’s Week 4 of the One Room Challenge, and we’re definitely solidly into the thick of our DIY guest bathroom renovation now. Even though I feel like we’ve been making good progress, I’m kind of starting to worry about all that’s left now that we’re halfway done – EEK! There seems like there’s still so much that needs to be done, despite all that I feel like we’ve already accomplished so far. (I guess that’s why they call it a challenge!)
If you’re new, here’s a very brief background: Each Wednesday we’re sharing our guest bathroom renovation progress with the final week 8 reveal just four weeks away on May 25th!
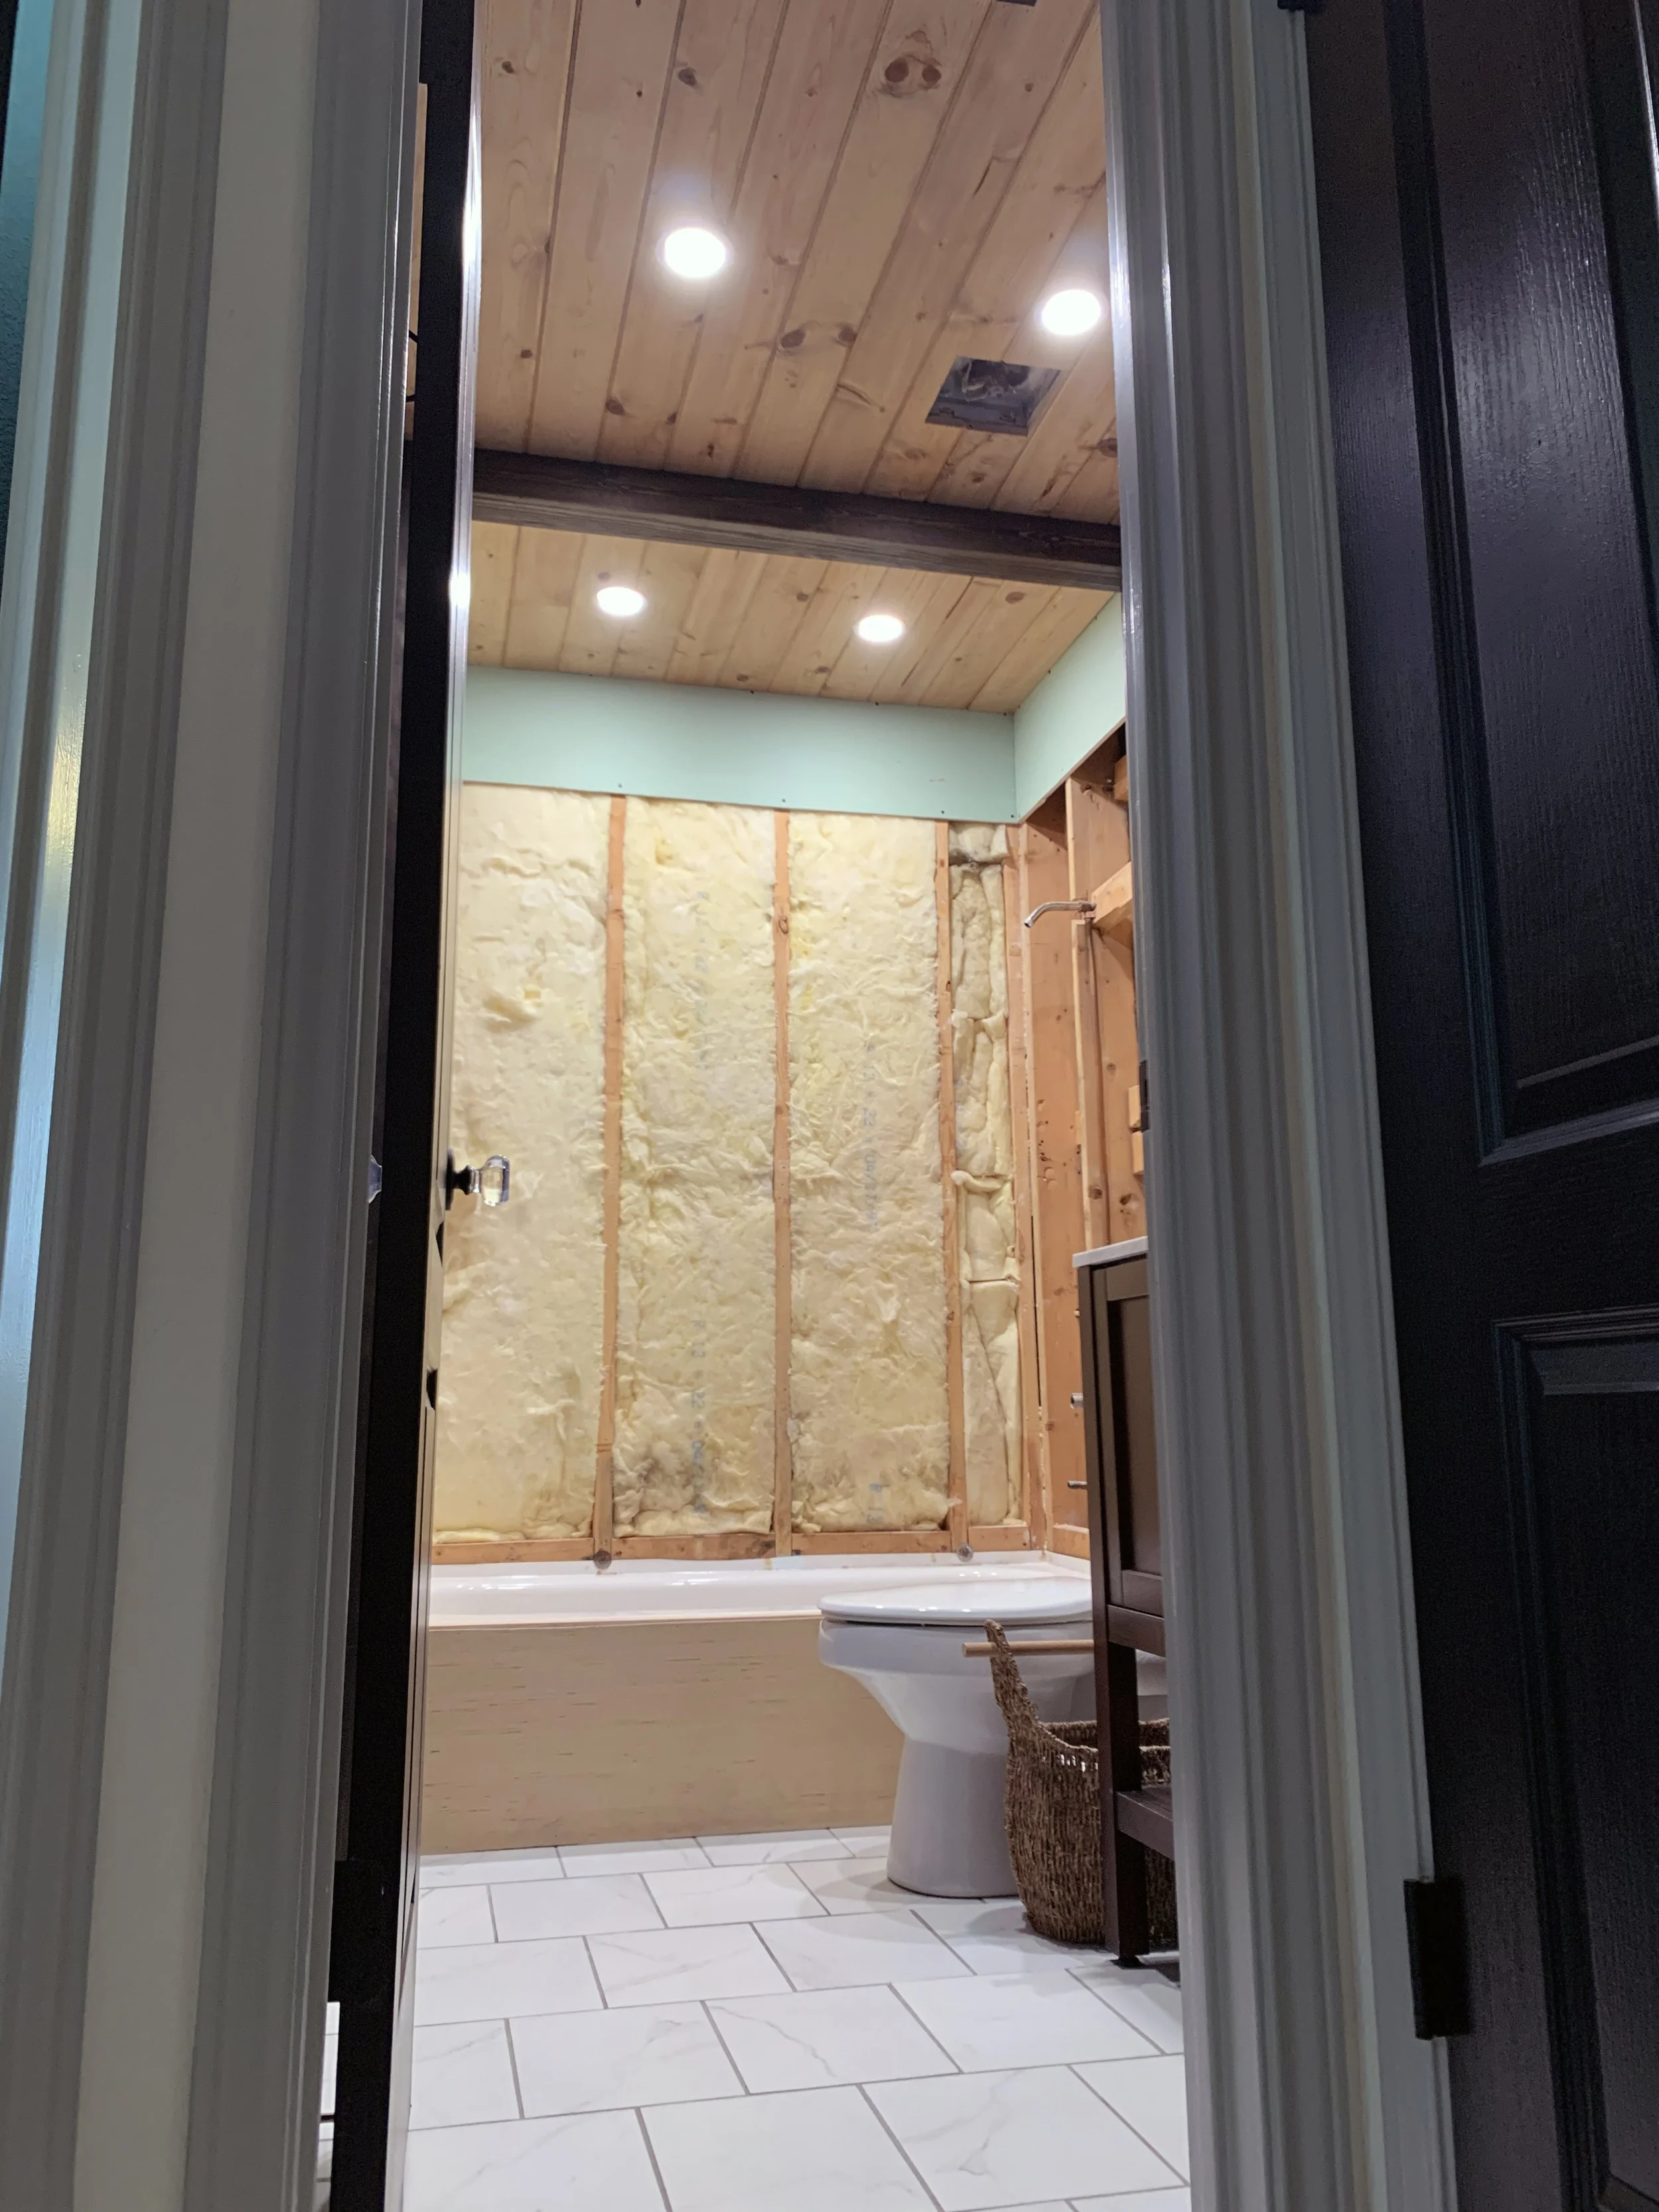
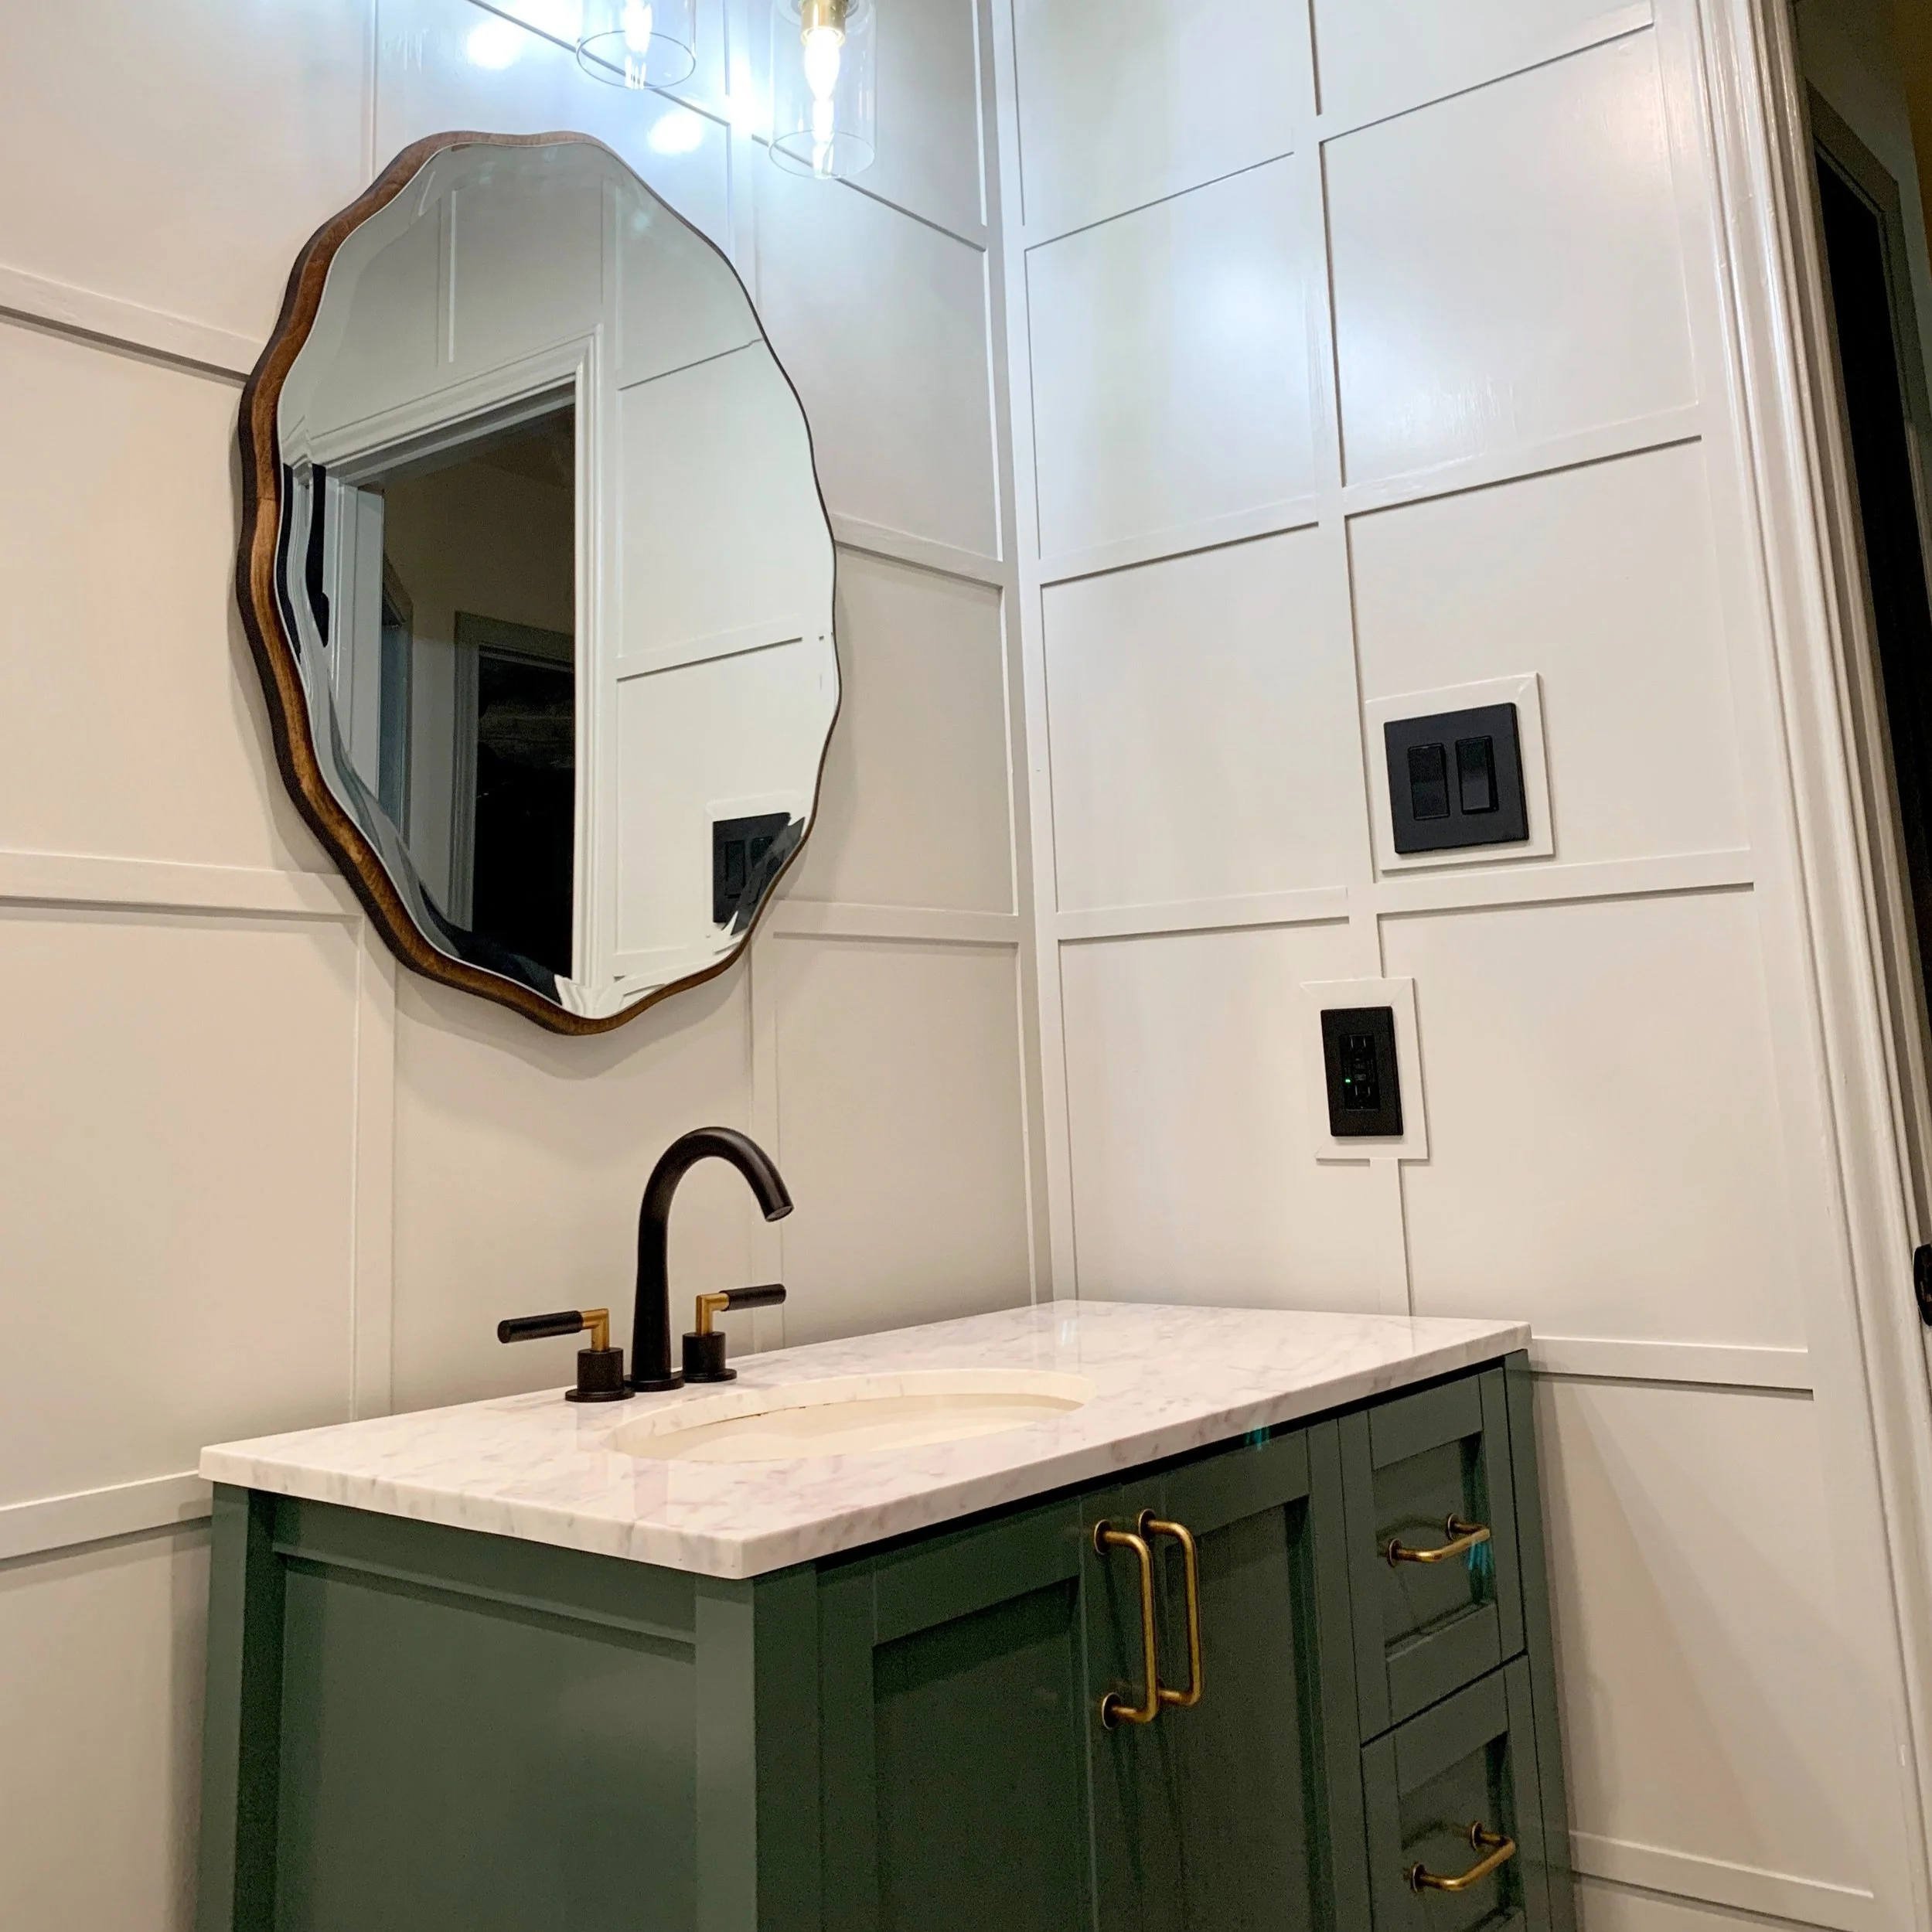
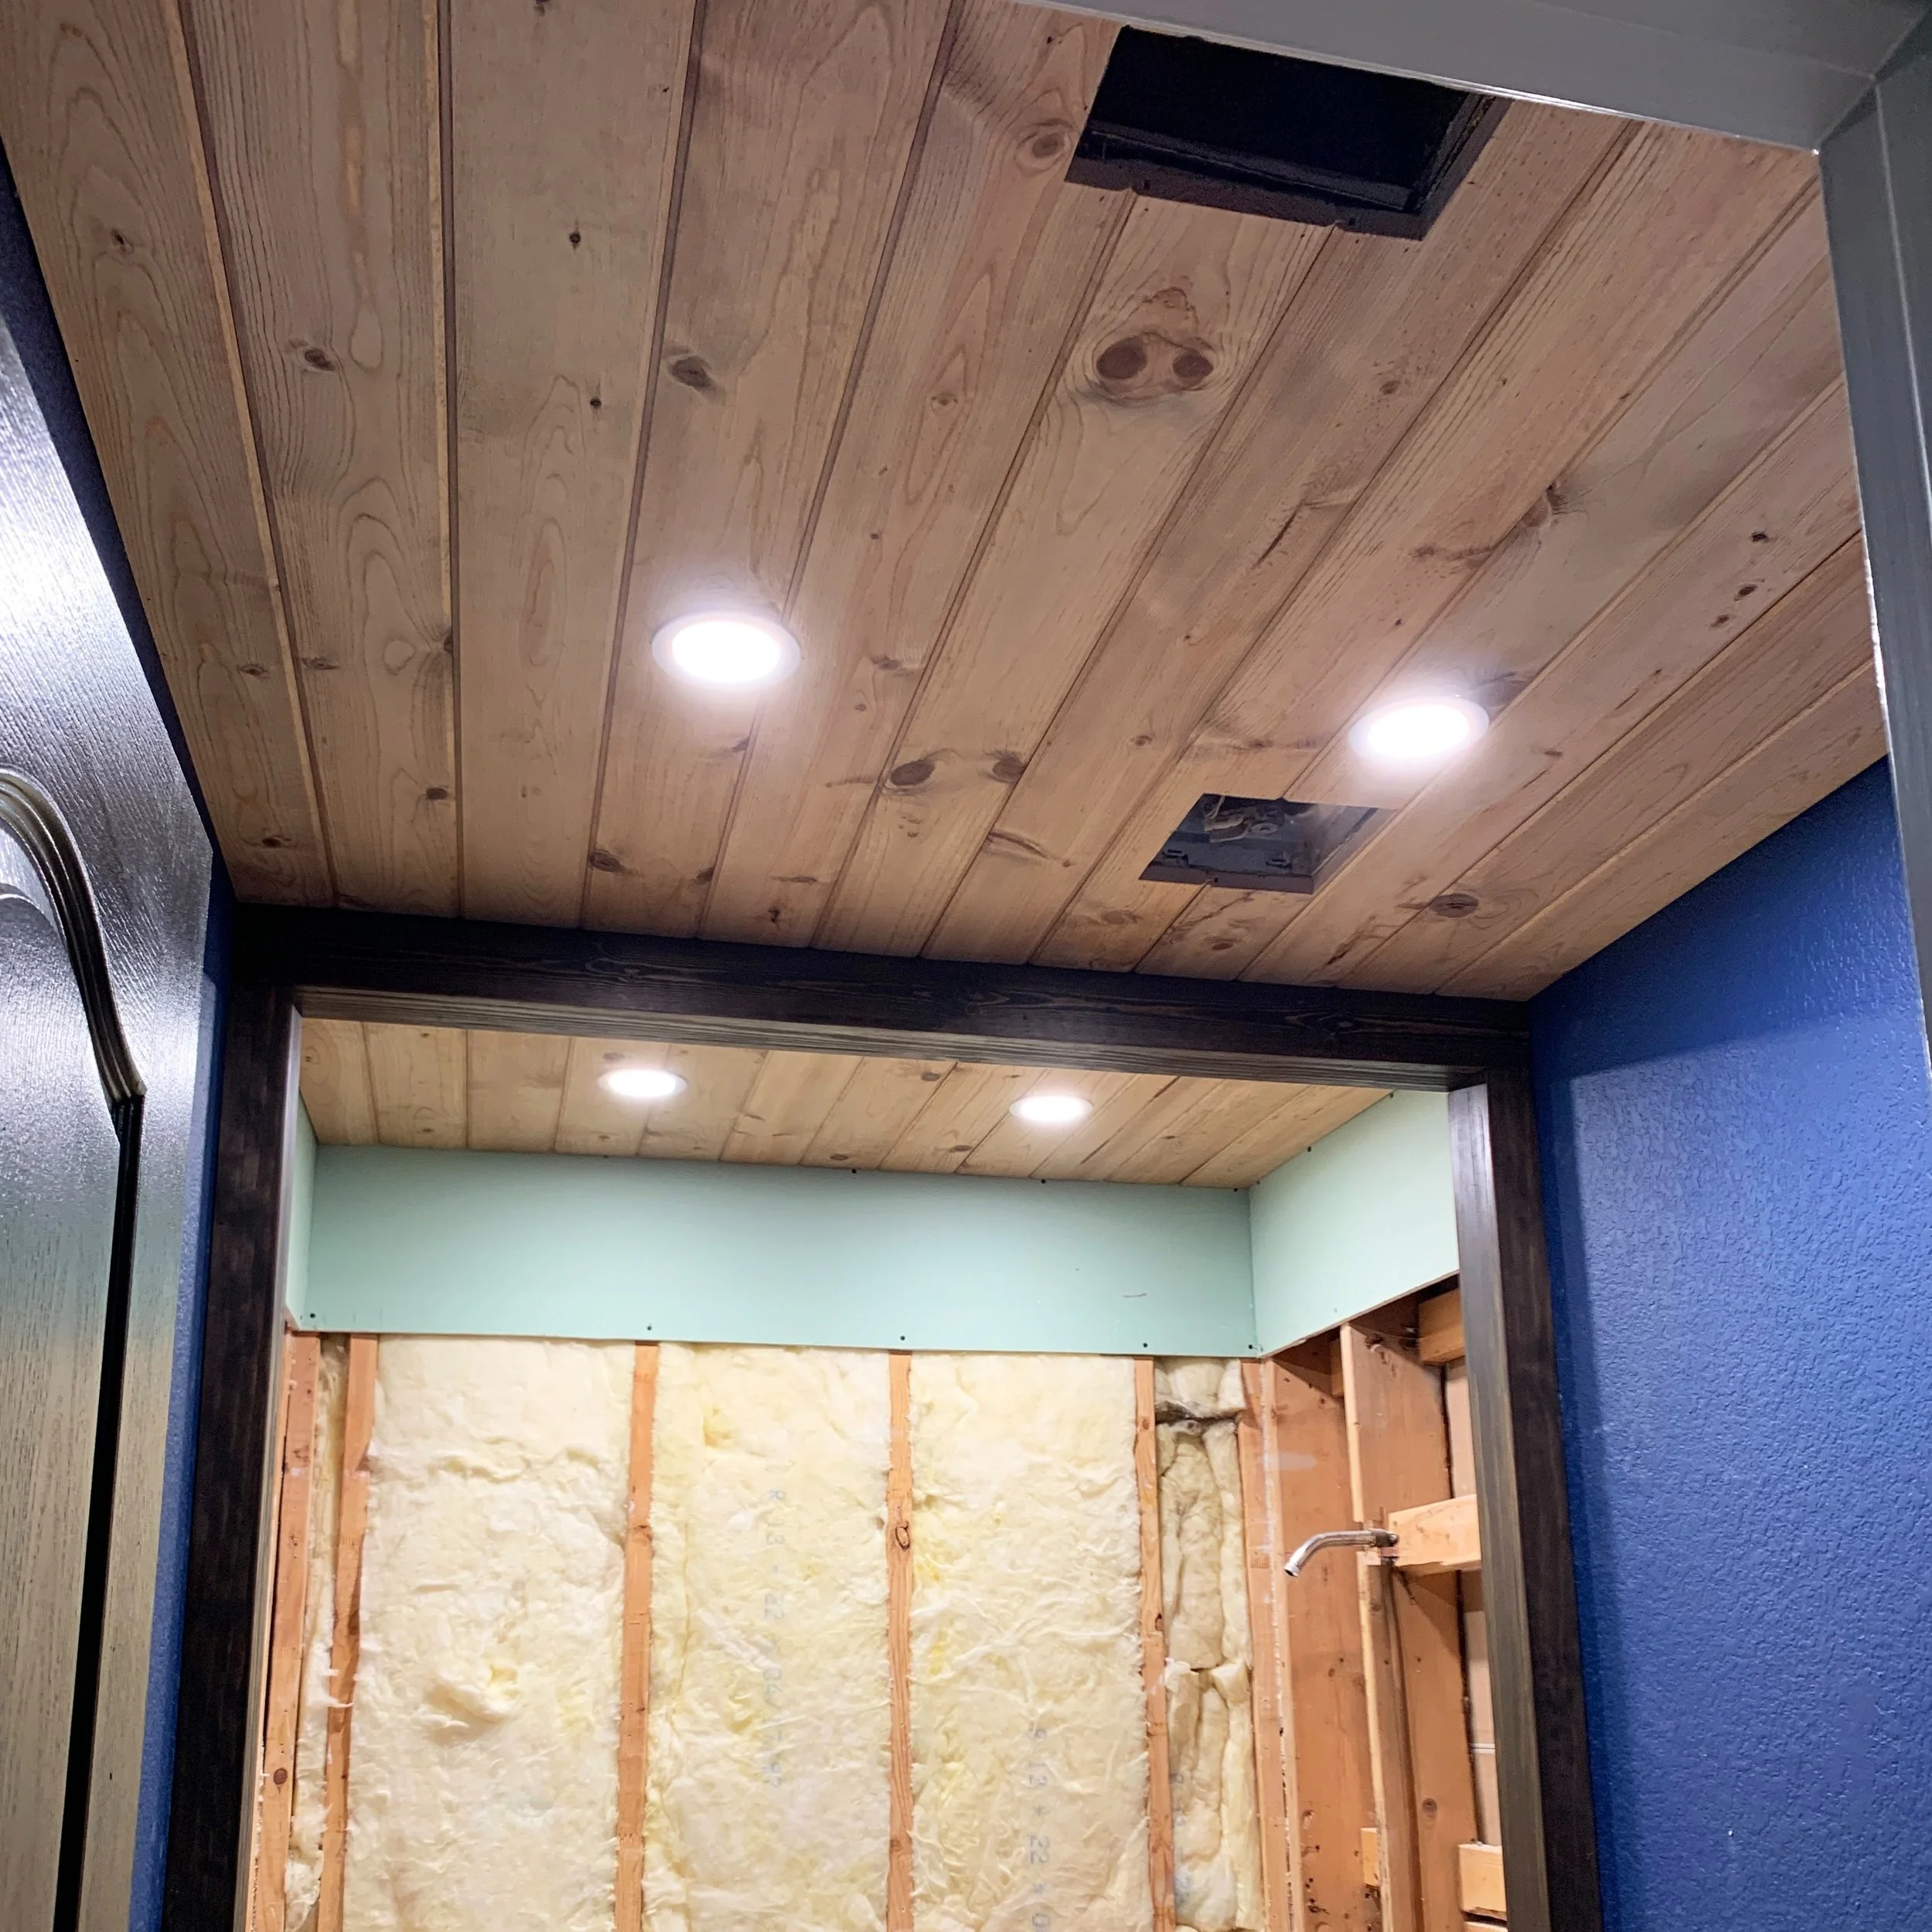
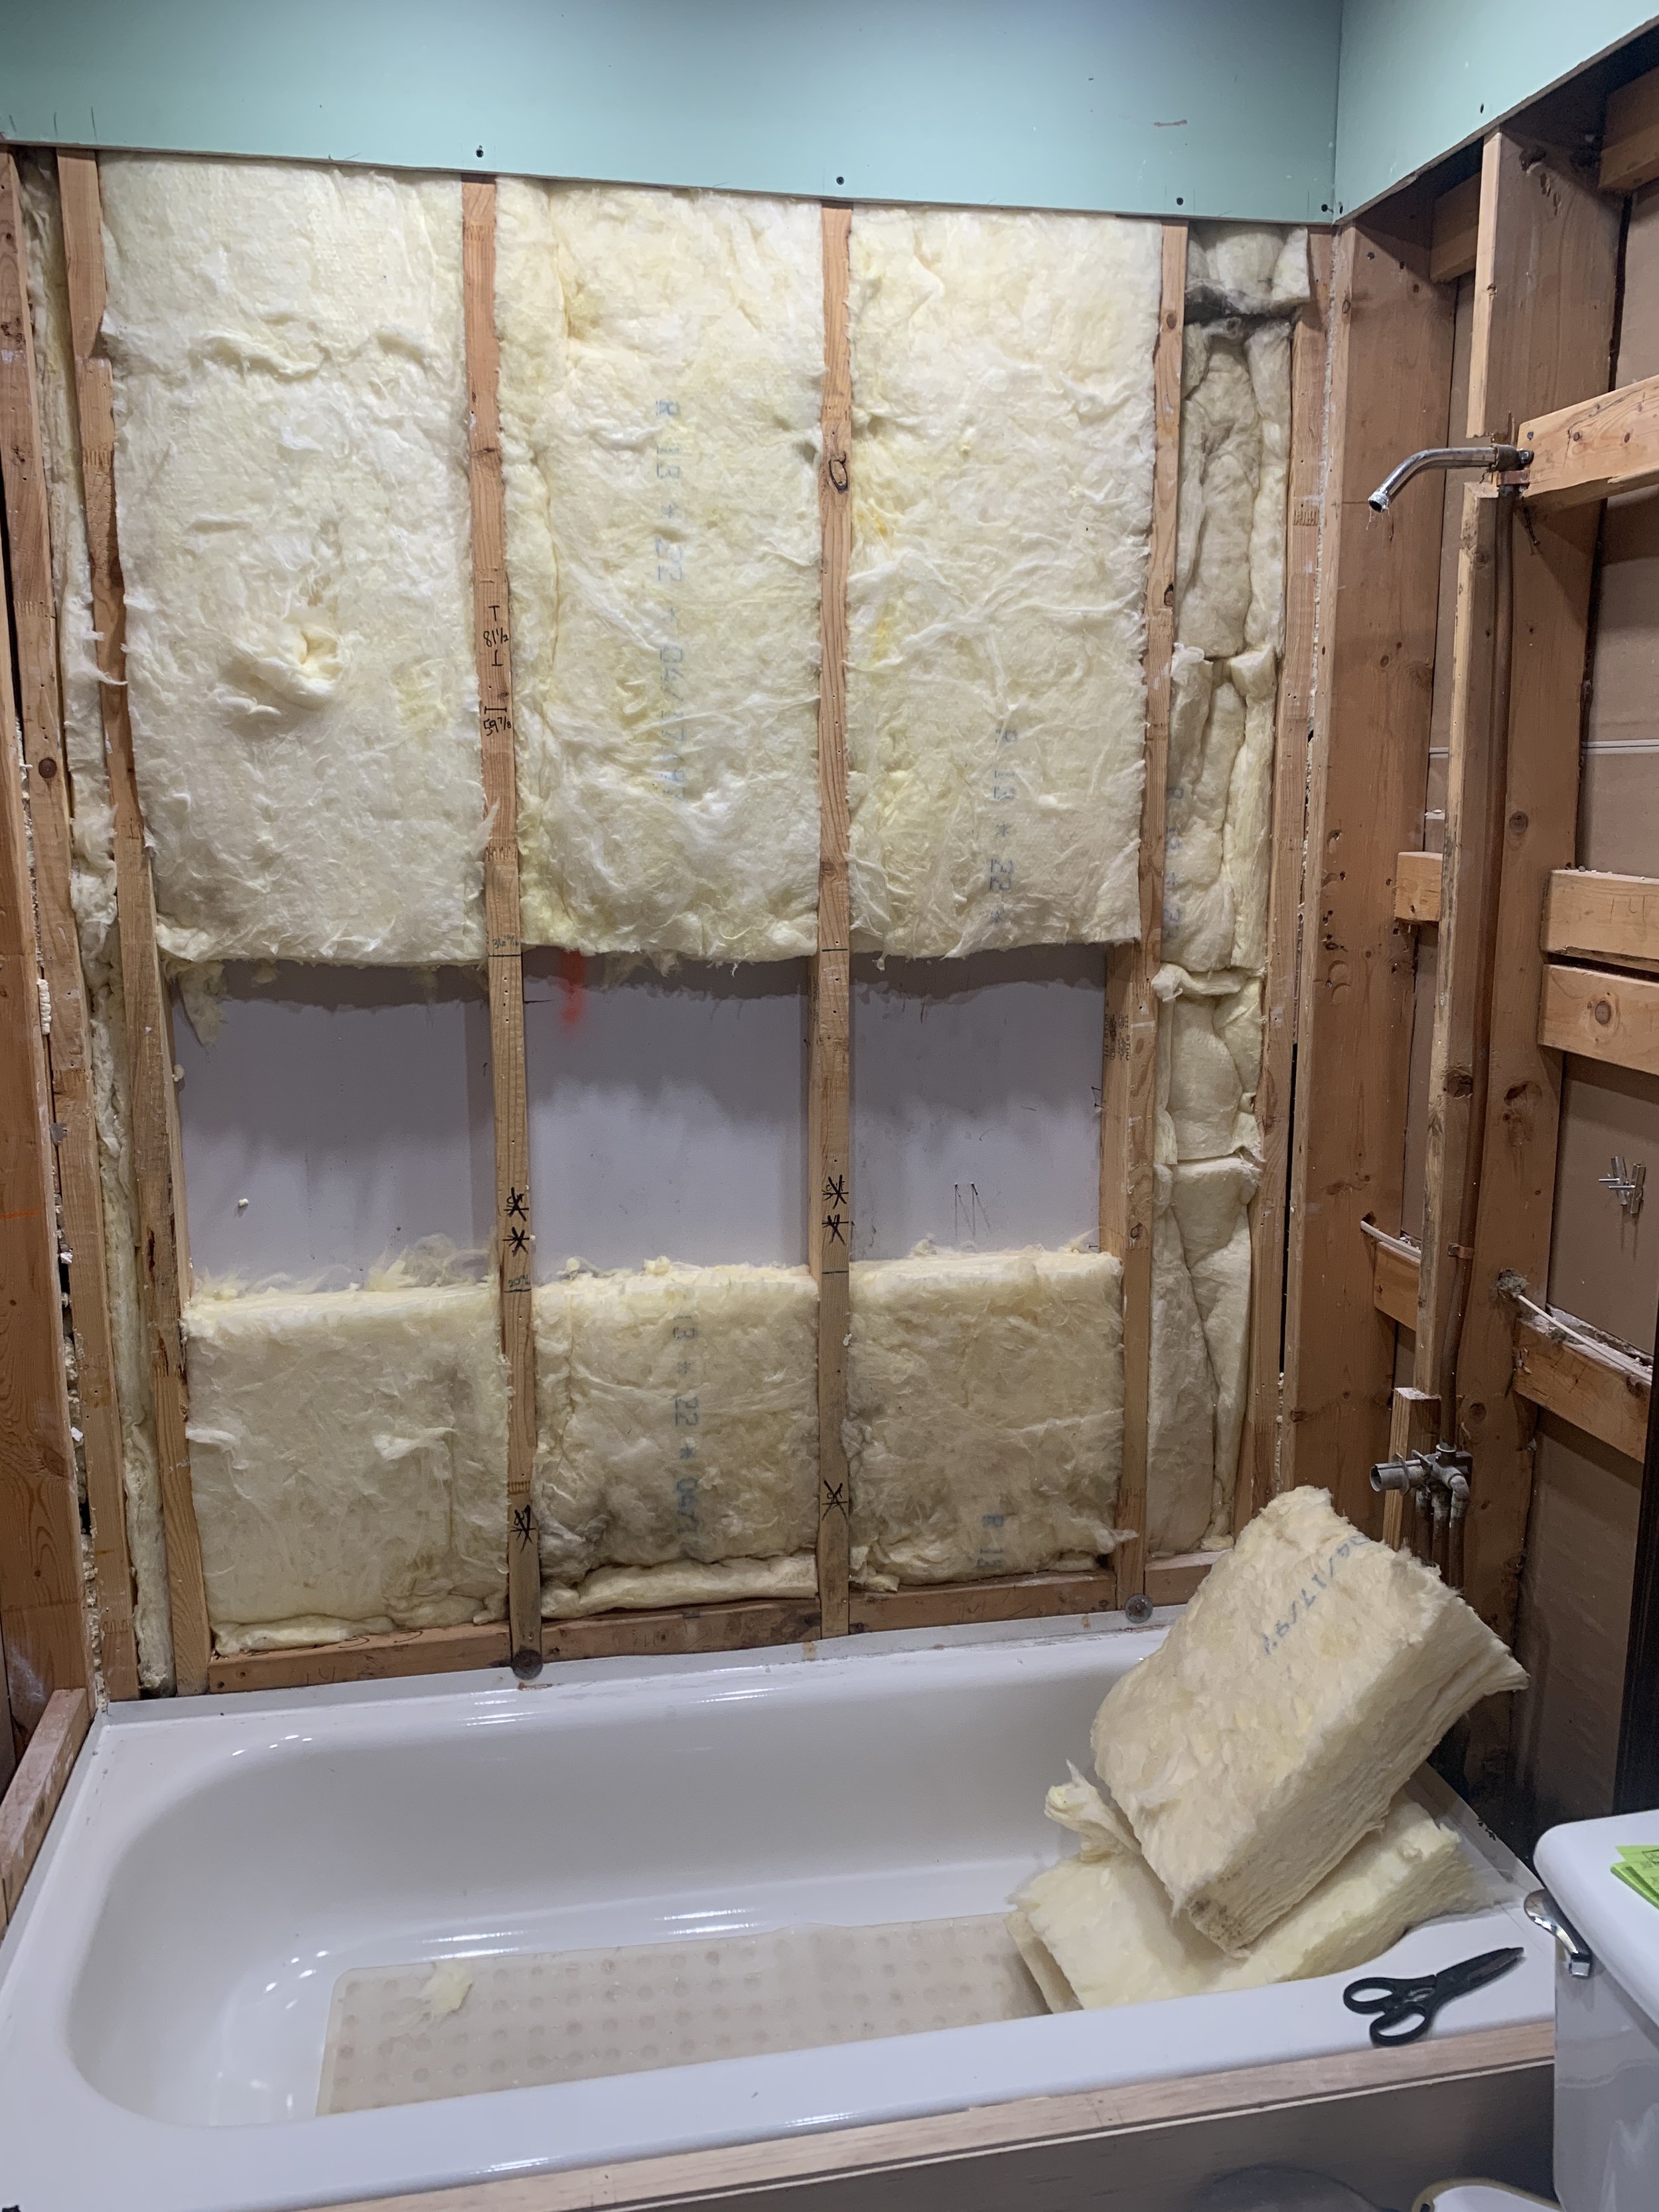
So far we’ve demo’d the bathroom and started to build back, adding all-new recessed lighting (our first-ever recessed lighting project, and trust there will be more throughout the house now!) and a new tongue and groove wood feature ceiling, and framed the shower area with a faux beam and columns to help really make it a statement piece … you know, once we actually tile it and stuff.
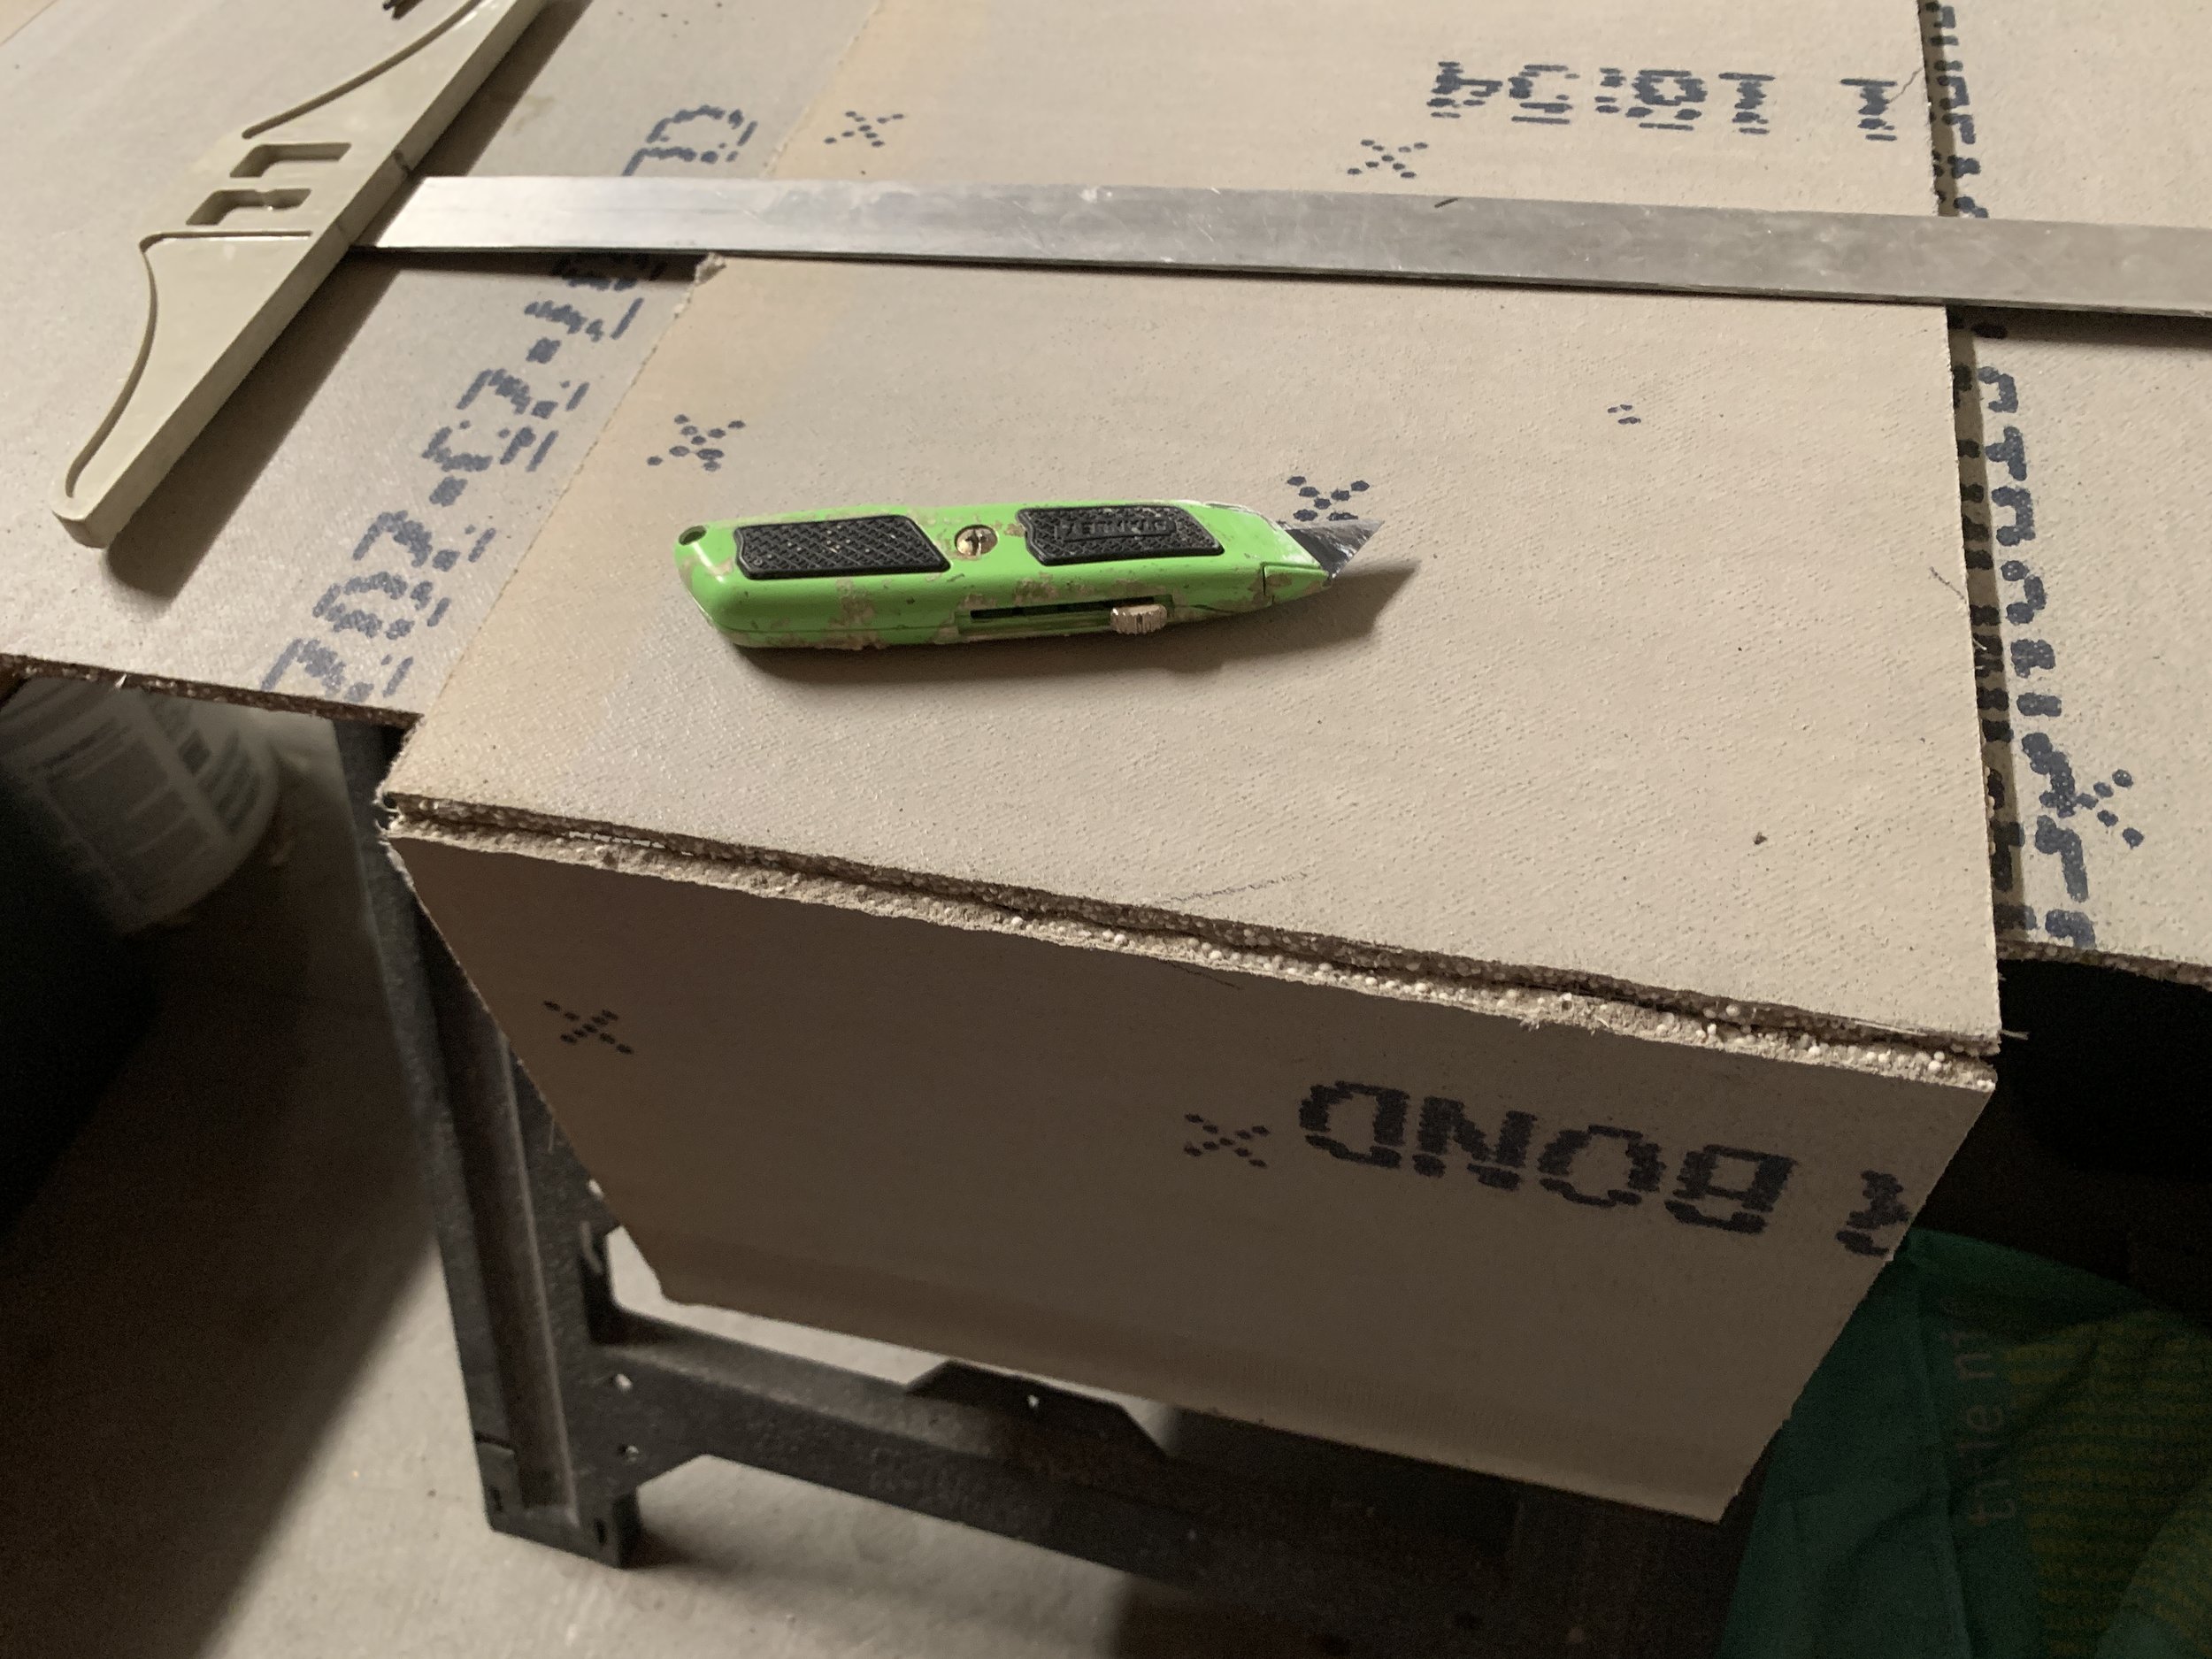
This past week we built a shower niche, began plumbing in the shower (which was … less successful), started drywalling the shower walls (with the waterproof mold-resistant stuff) and waterproofing said drywall. We also picked up our beautiful special-order shower tile, and found the equivalent of about two boxes (that’s 44 tiles of the 301 I ordered) were broken into pieces smaller than what we could use for our cut tiles, so we had to order some more and are currently waiting on them to come in. (Which especially adds a little to the mild halfway-mark-panic that’s started to set in.) On a related note, if you have any positive vibes you want to send our way I wouldn’t turn them away!
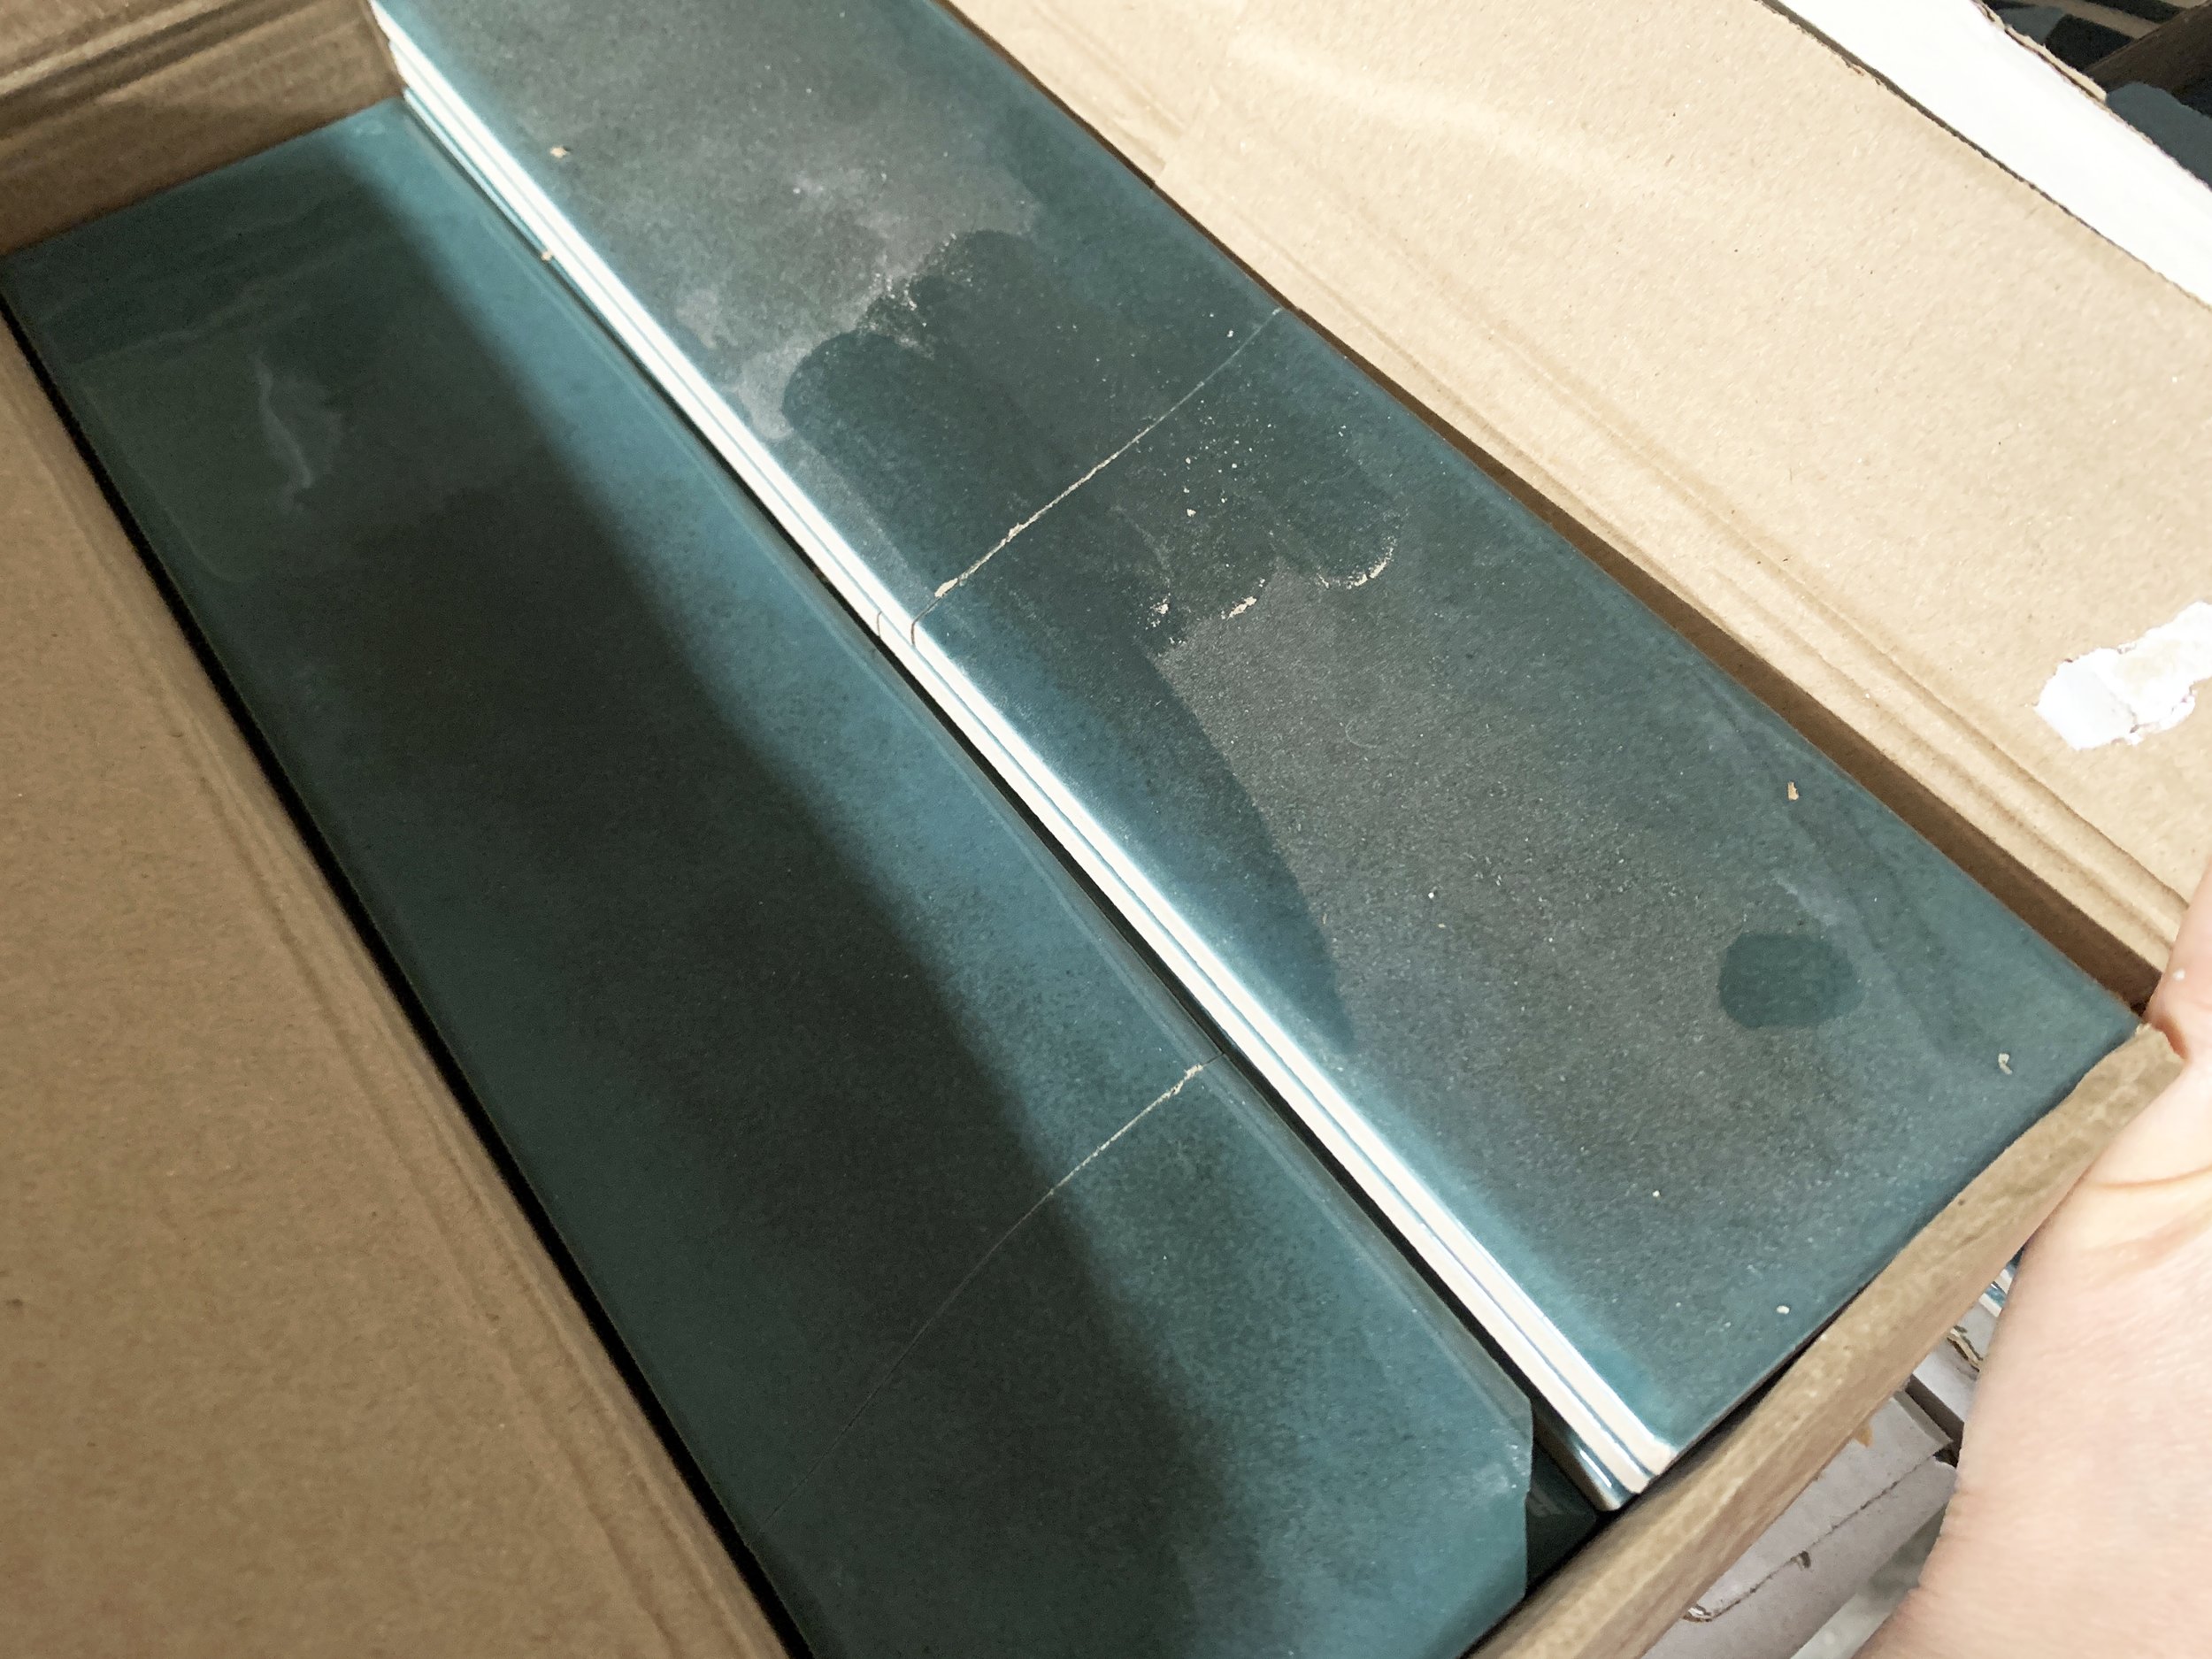
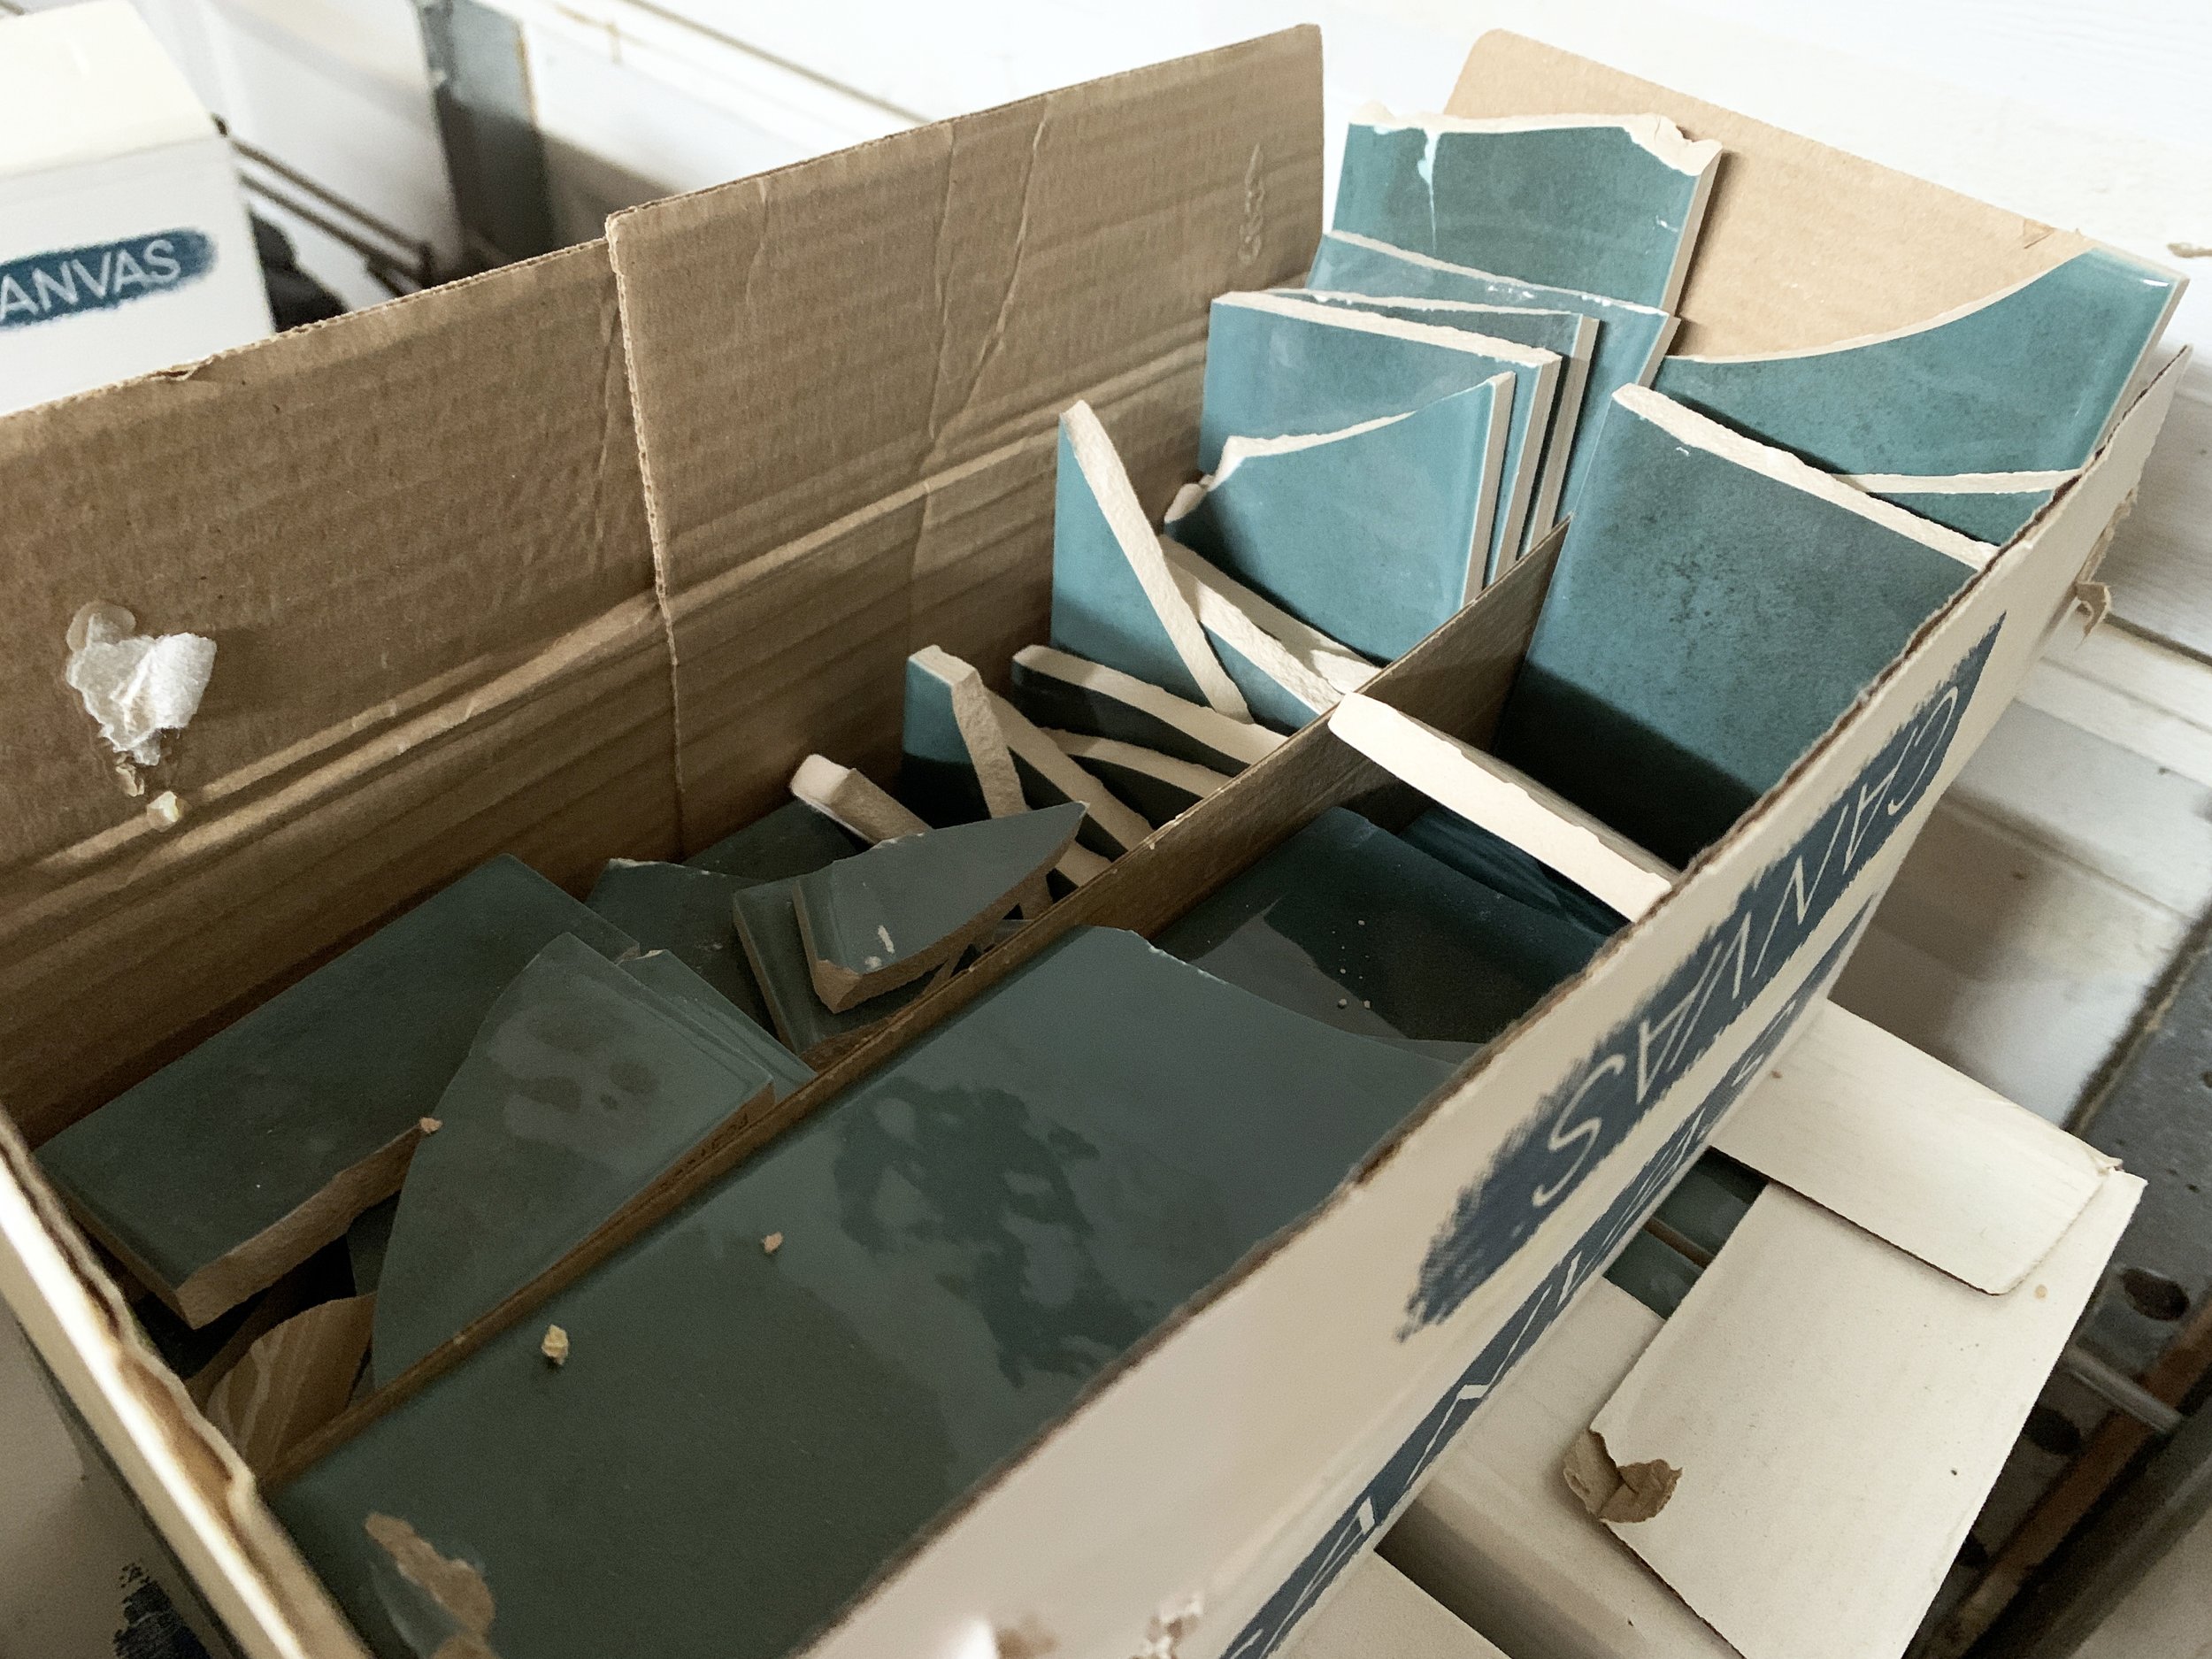
Some were broken fairly cleanly in half, while others were more or less in fragmented shards. Unfortunately the ones cut in half are too small to use too.
But enough of that, let’s talk more about the positives and what we got accomplished this week!
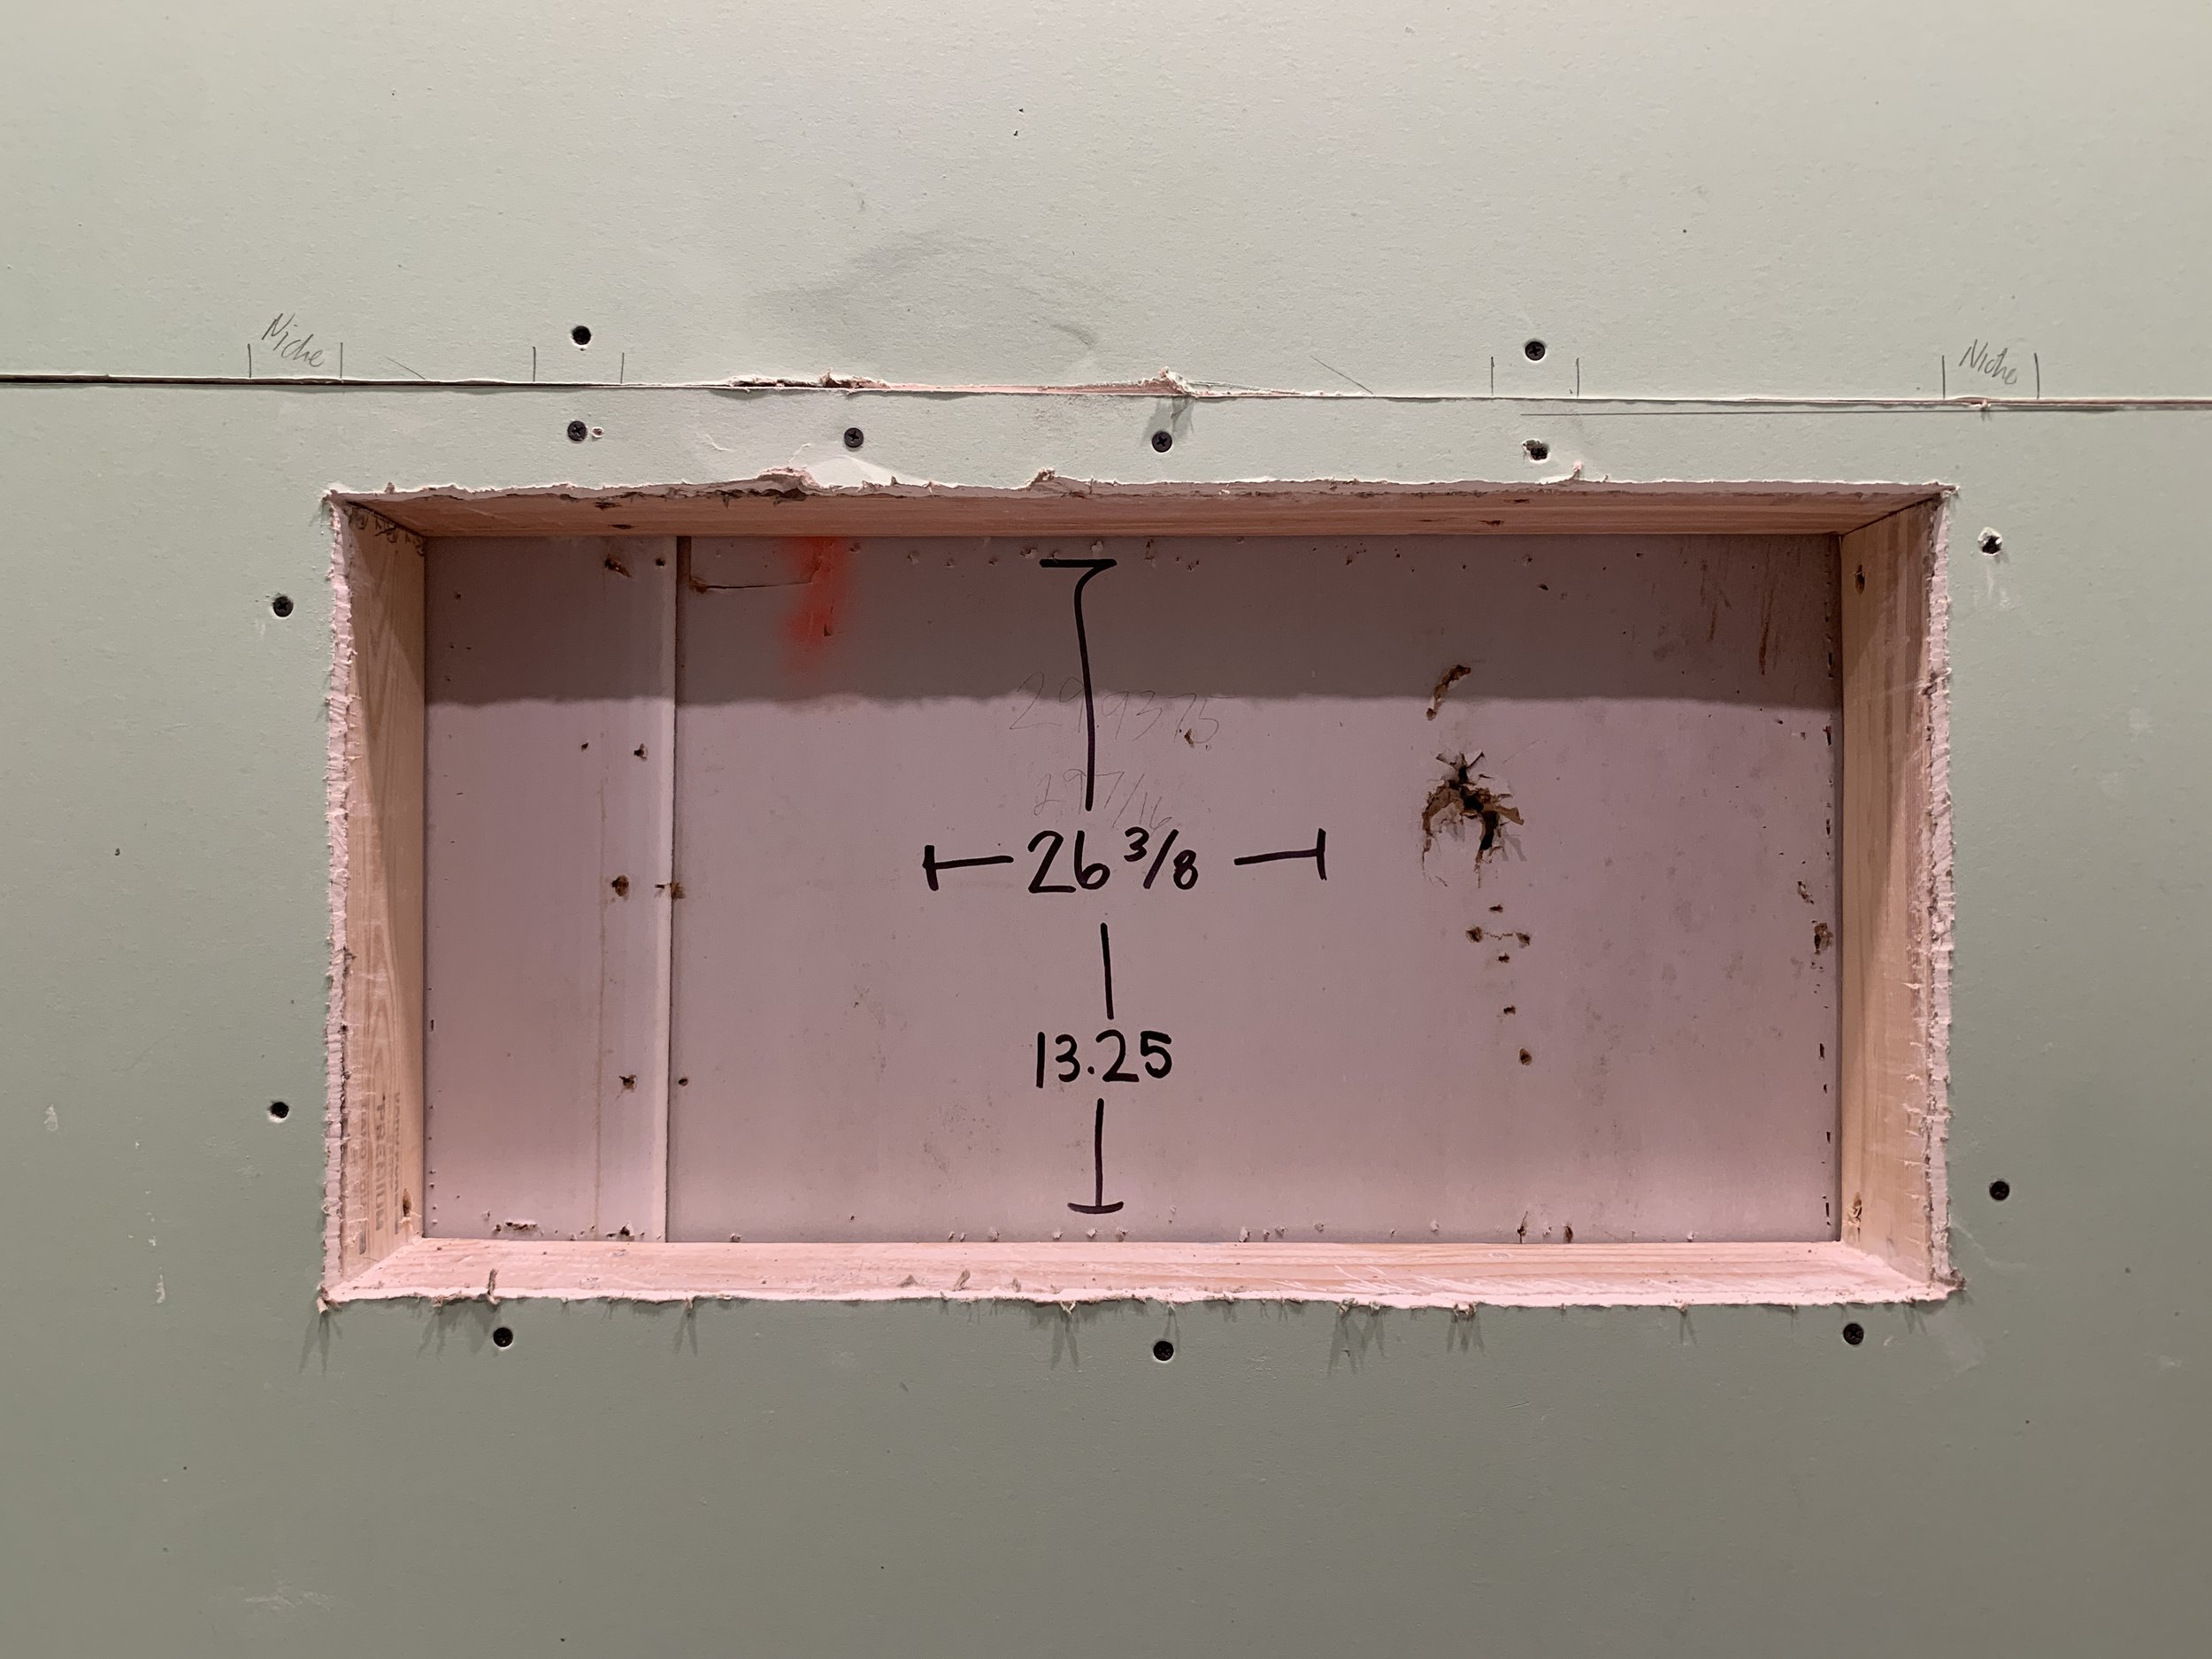
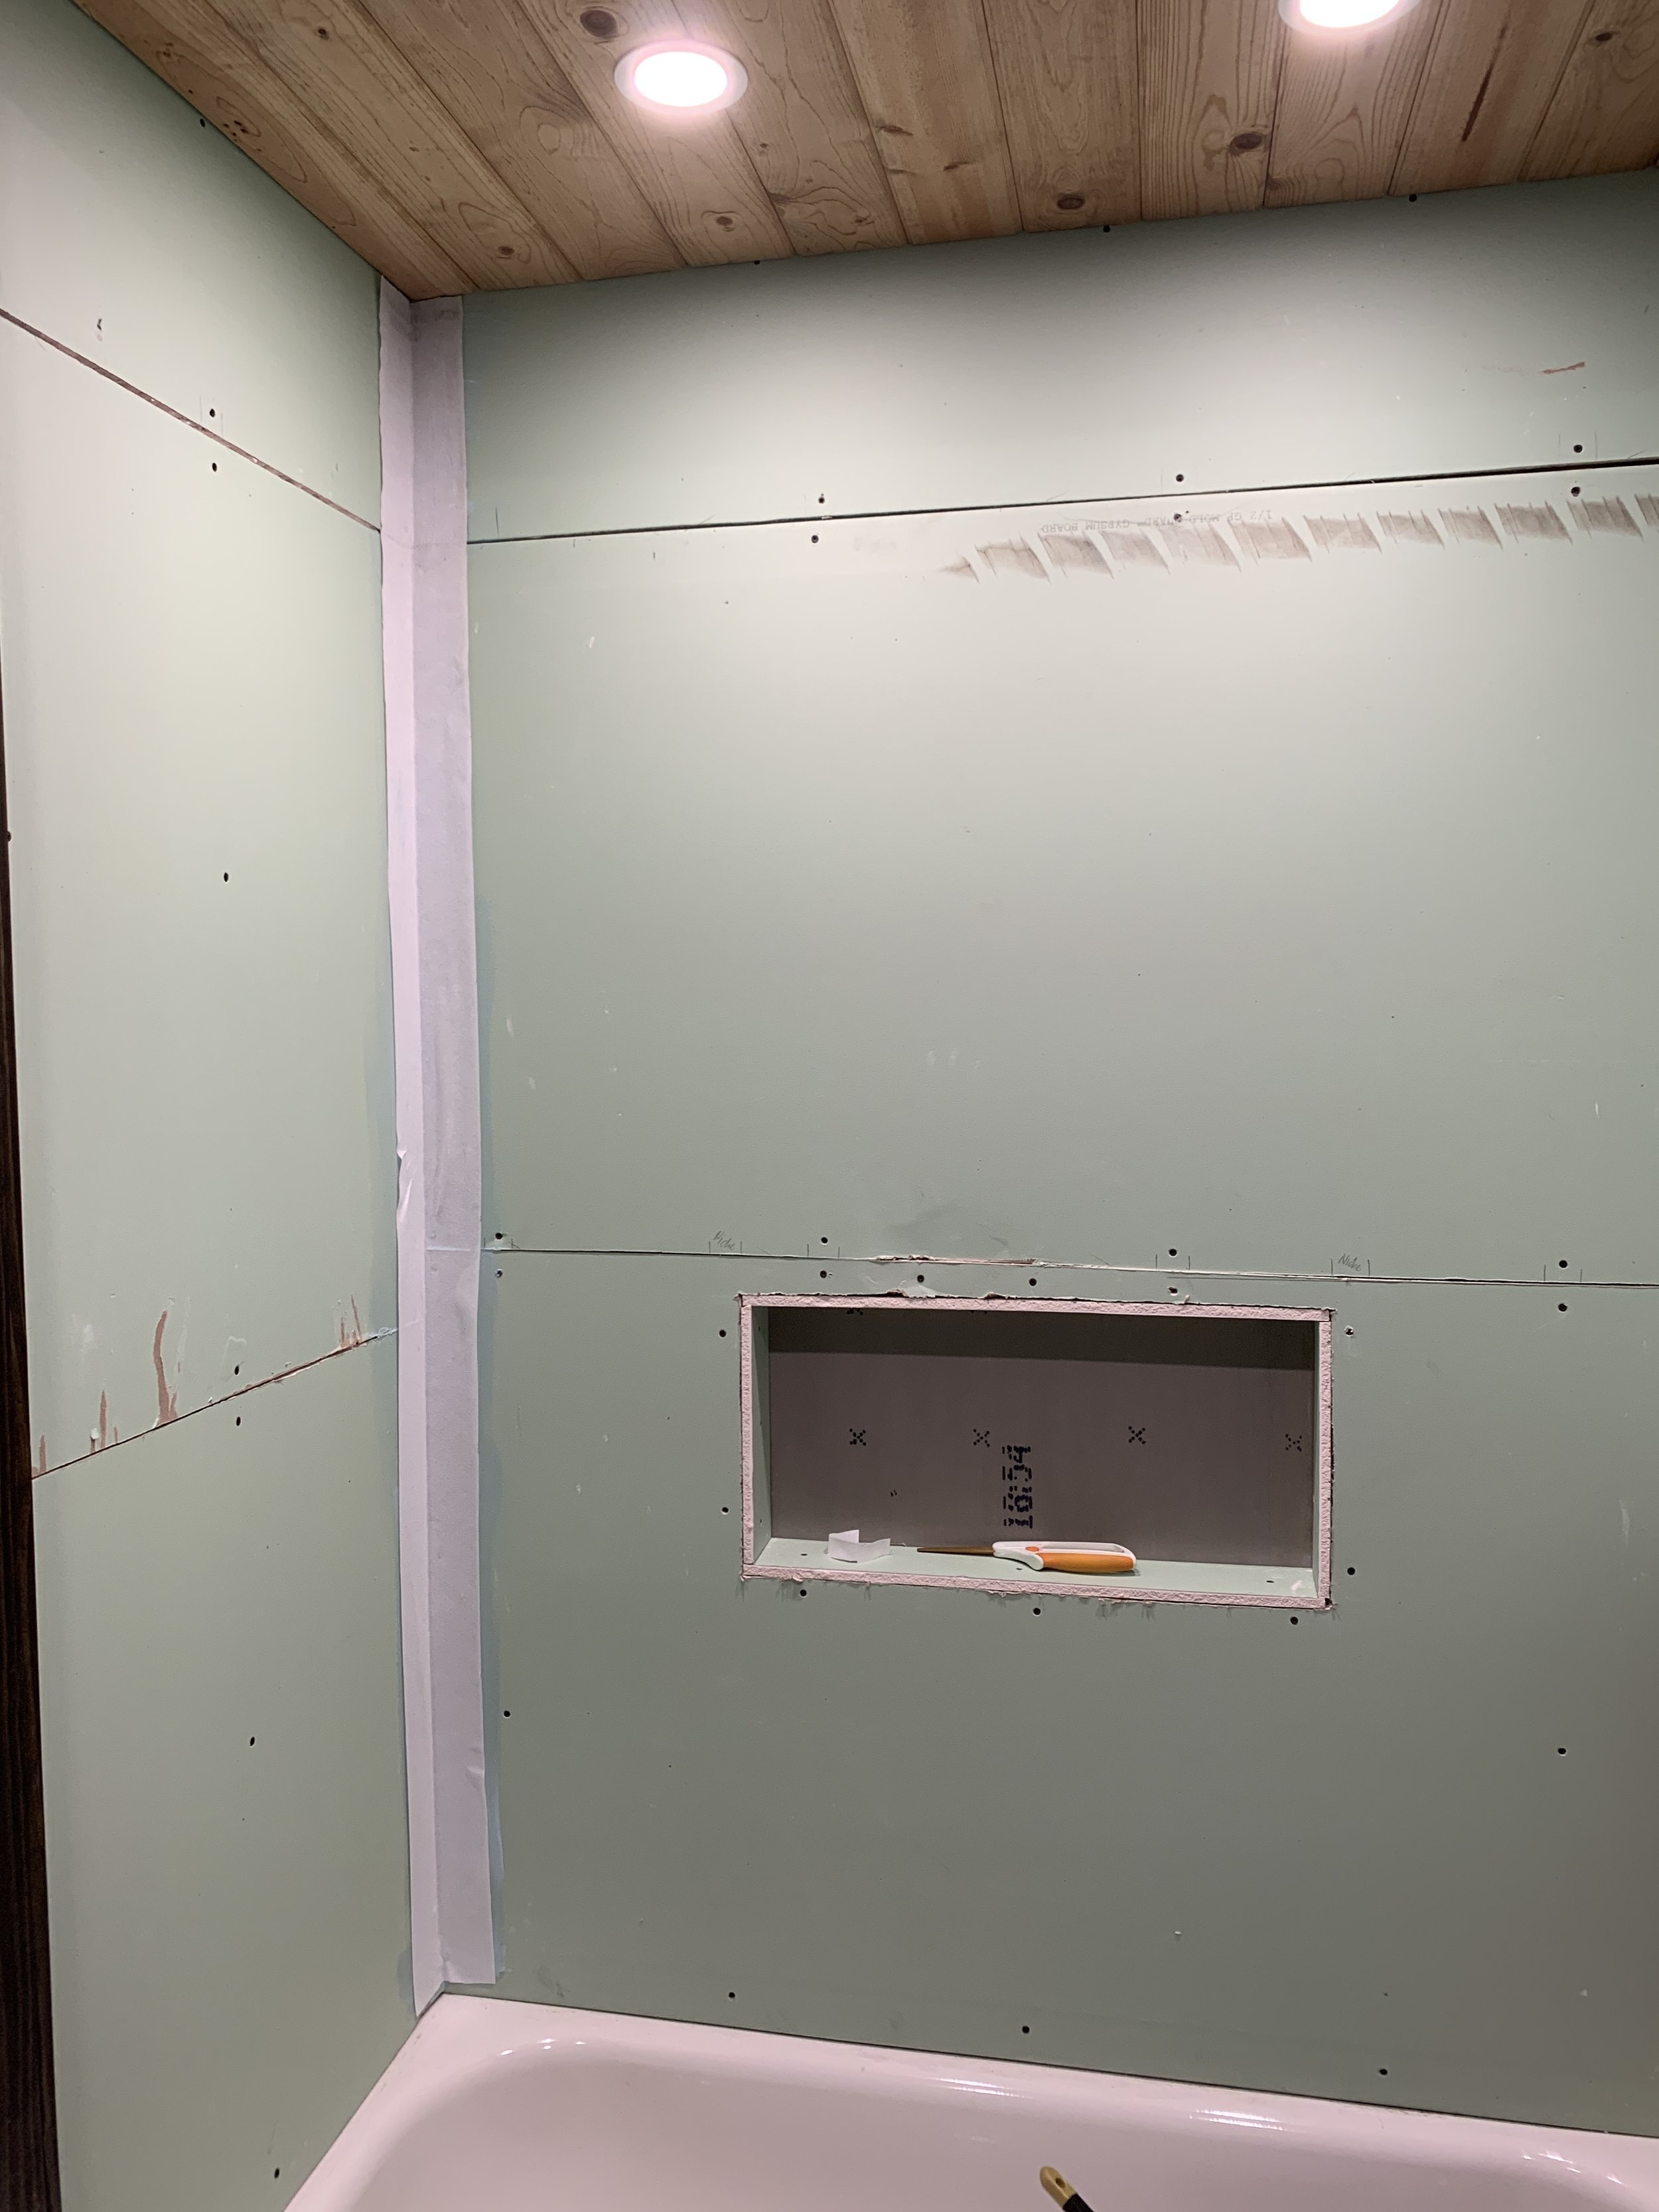
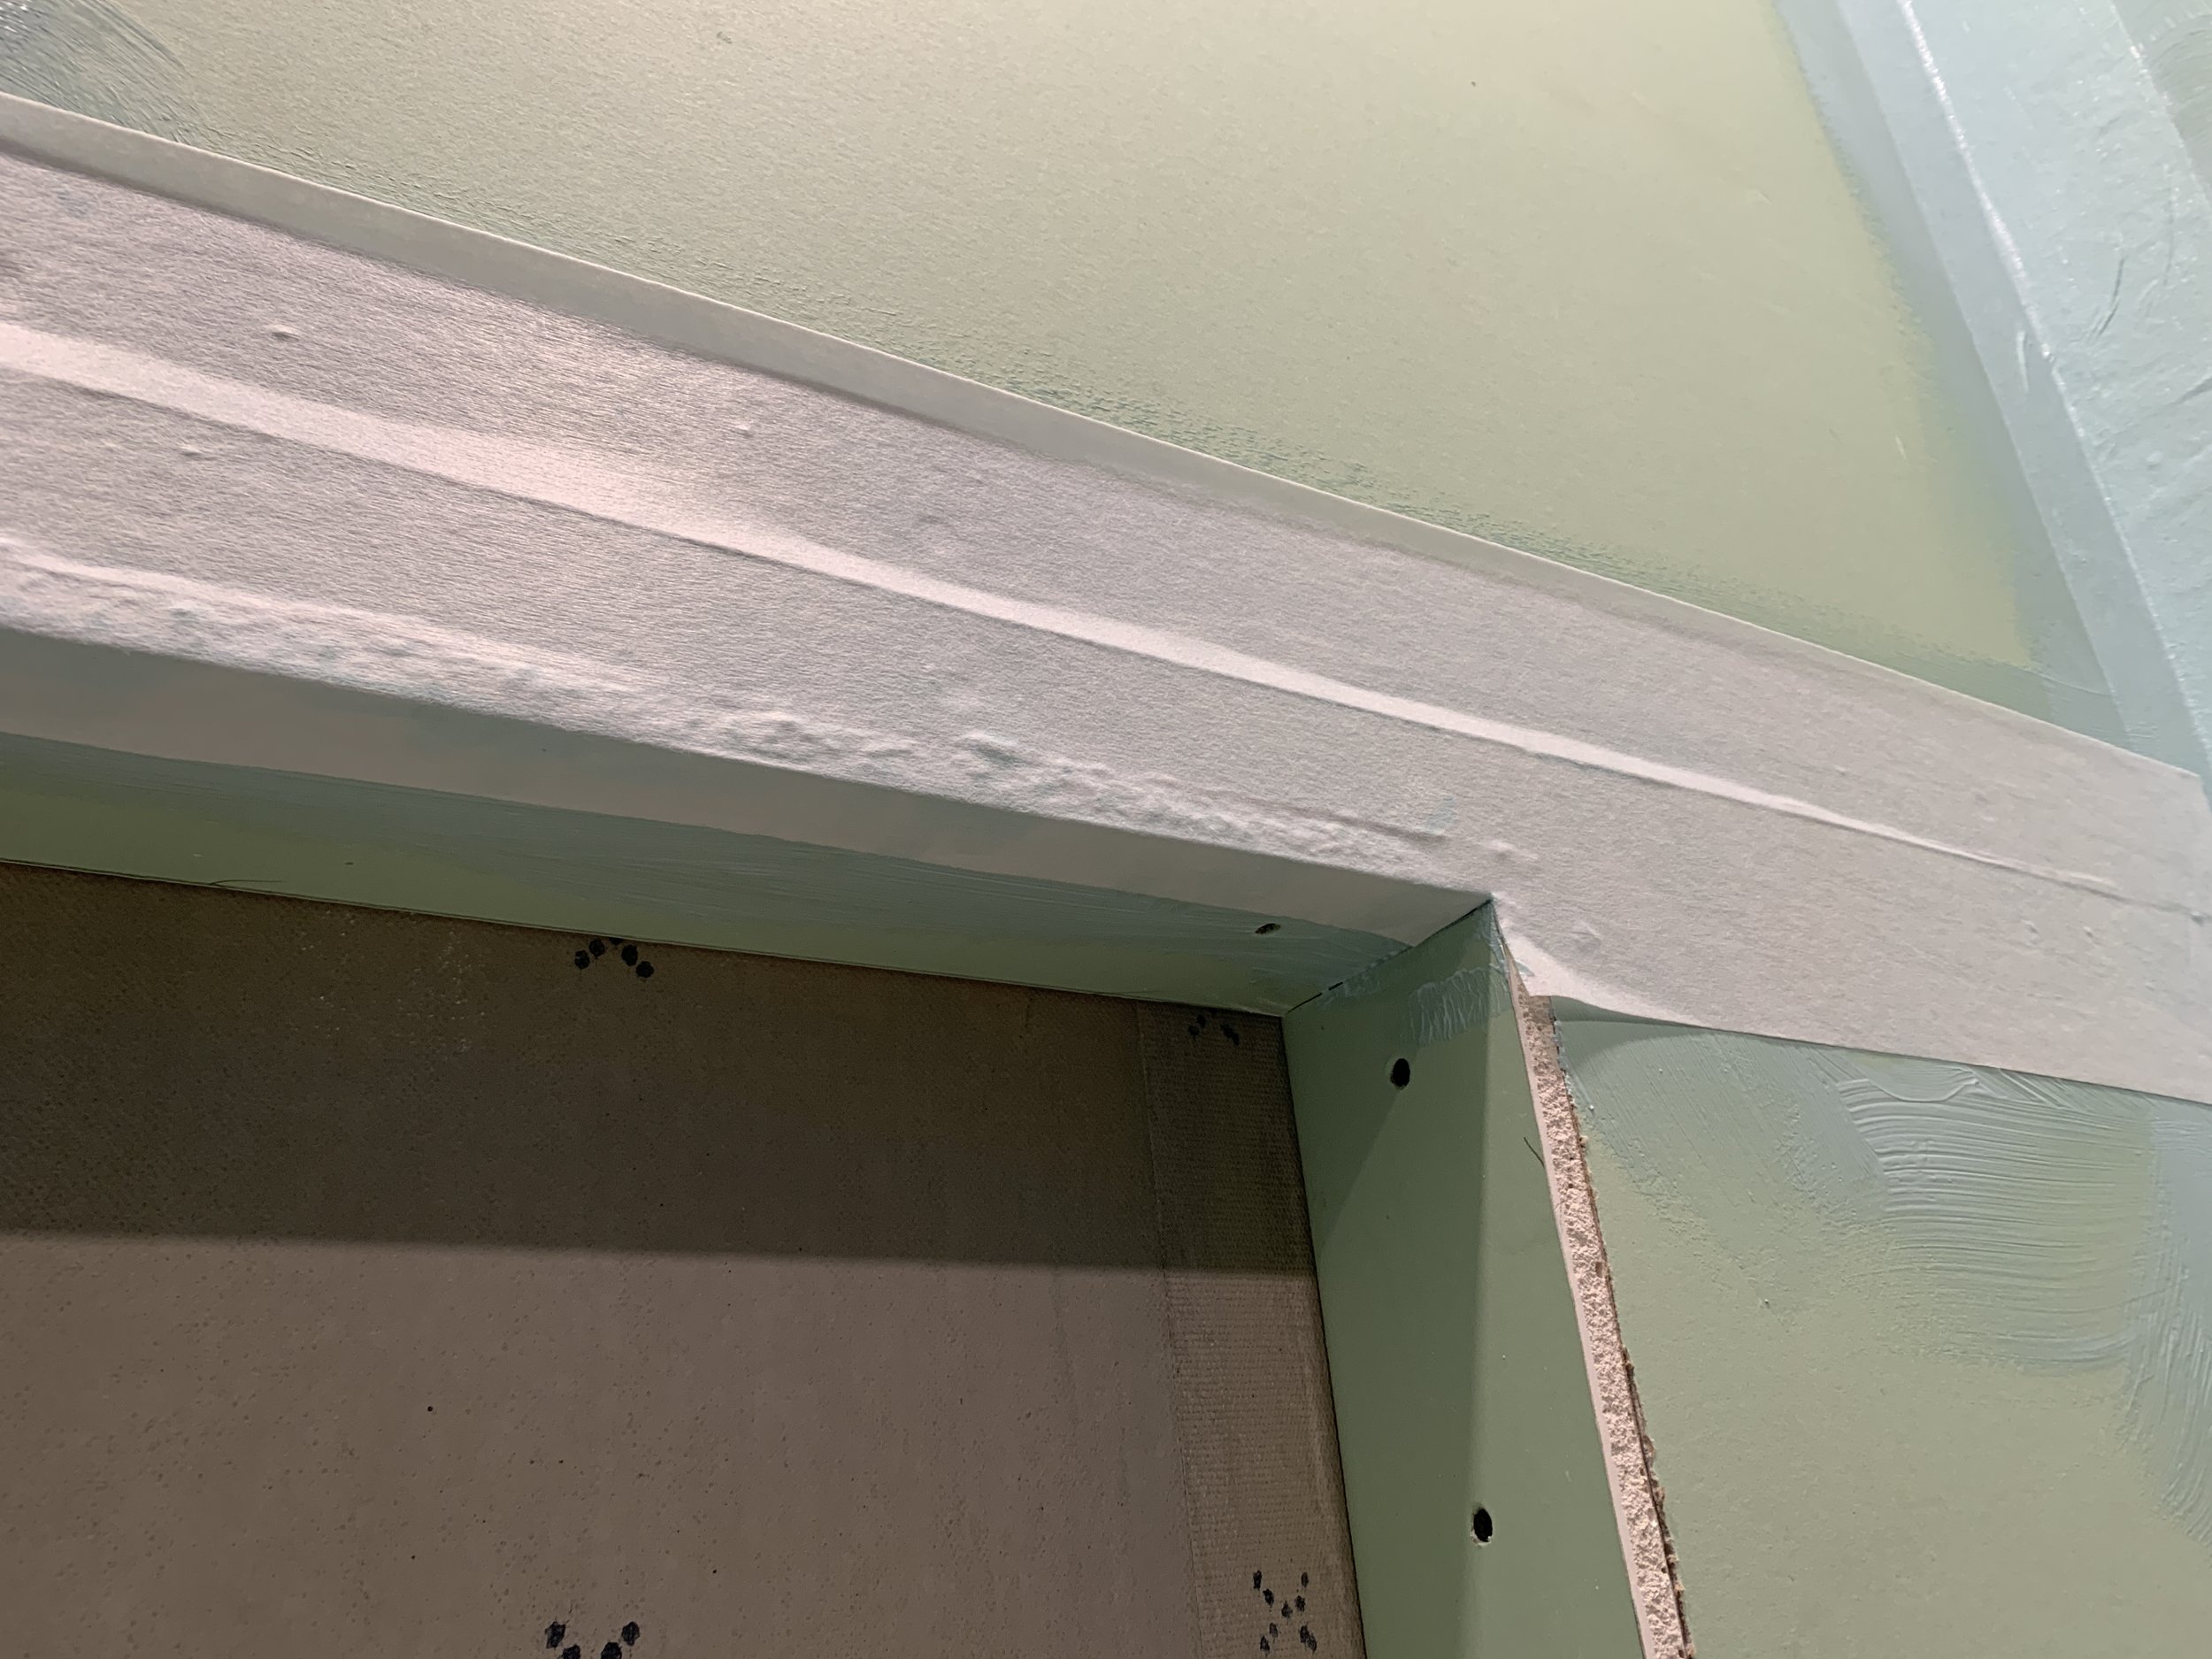
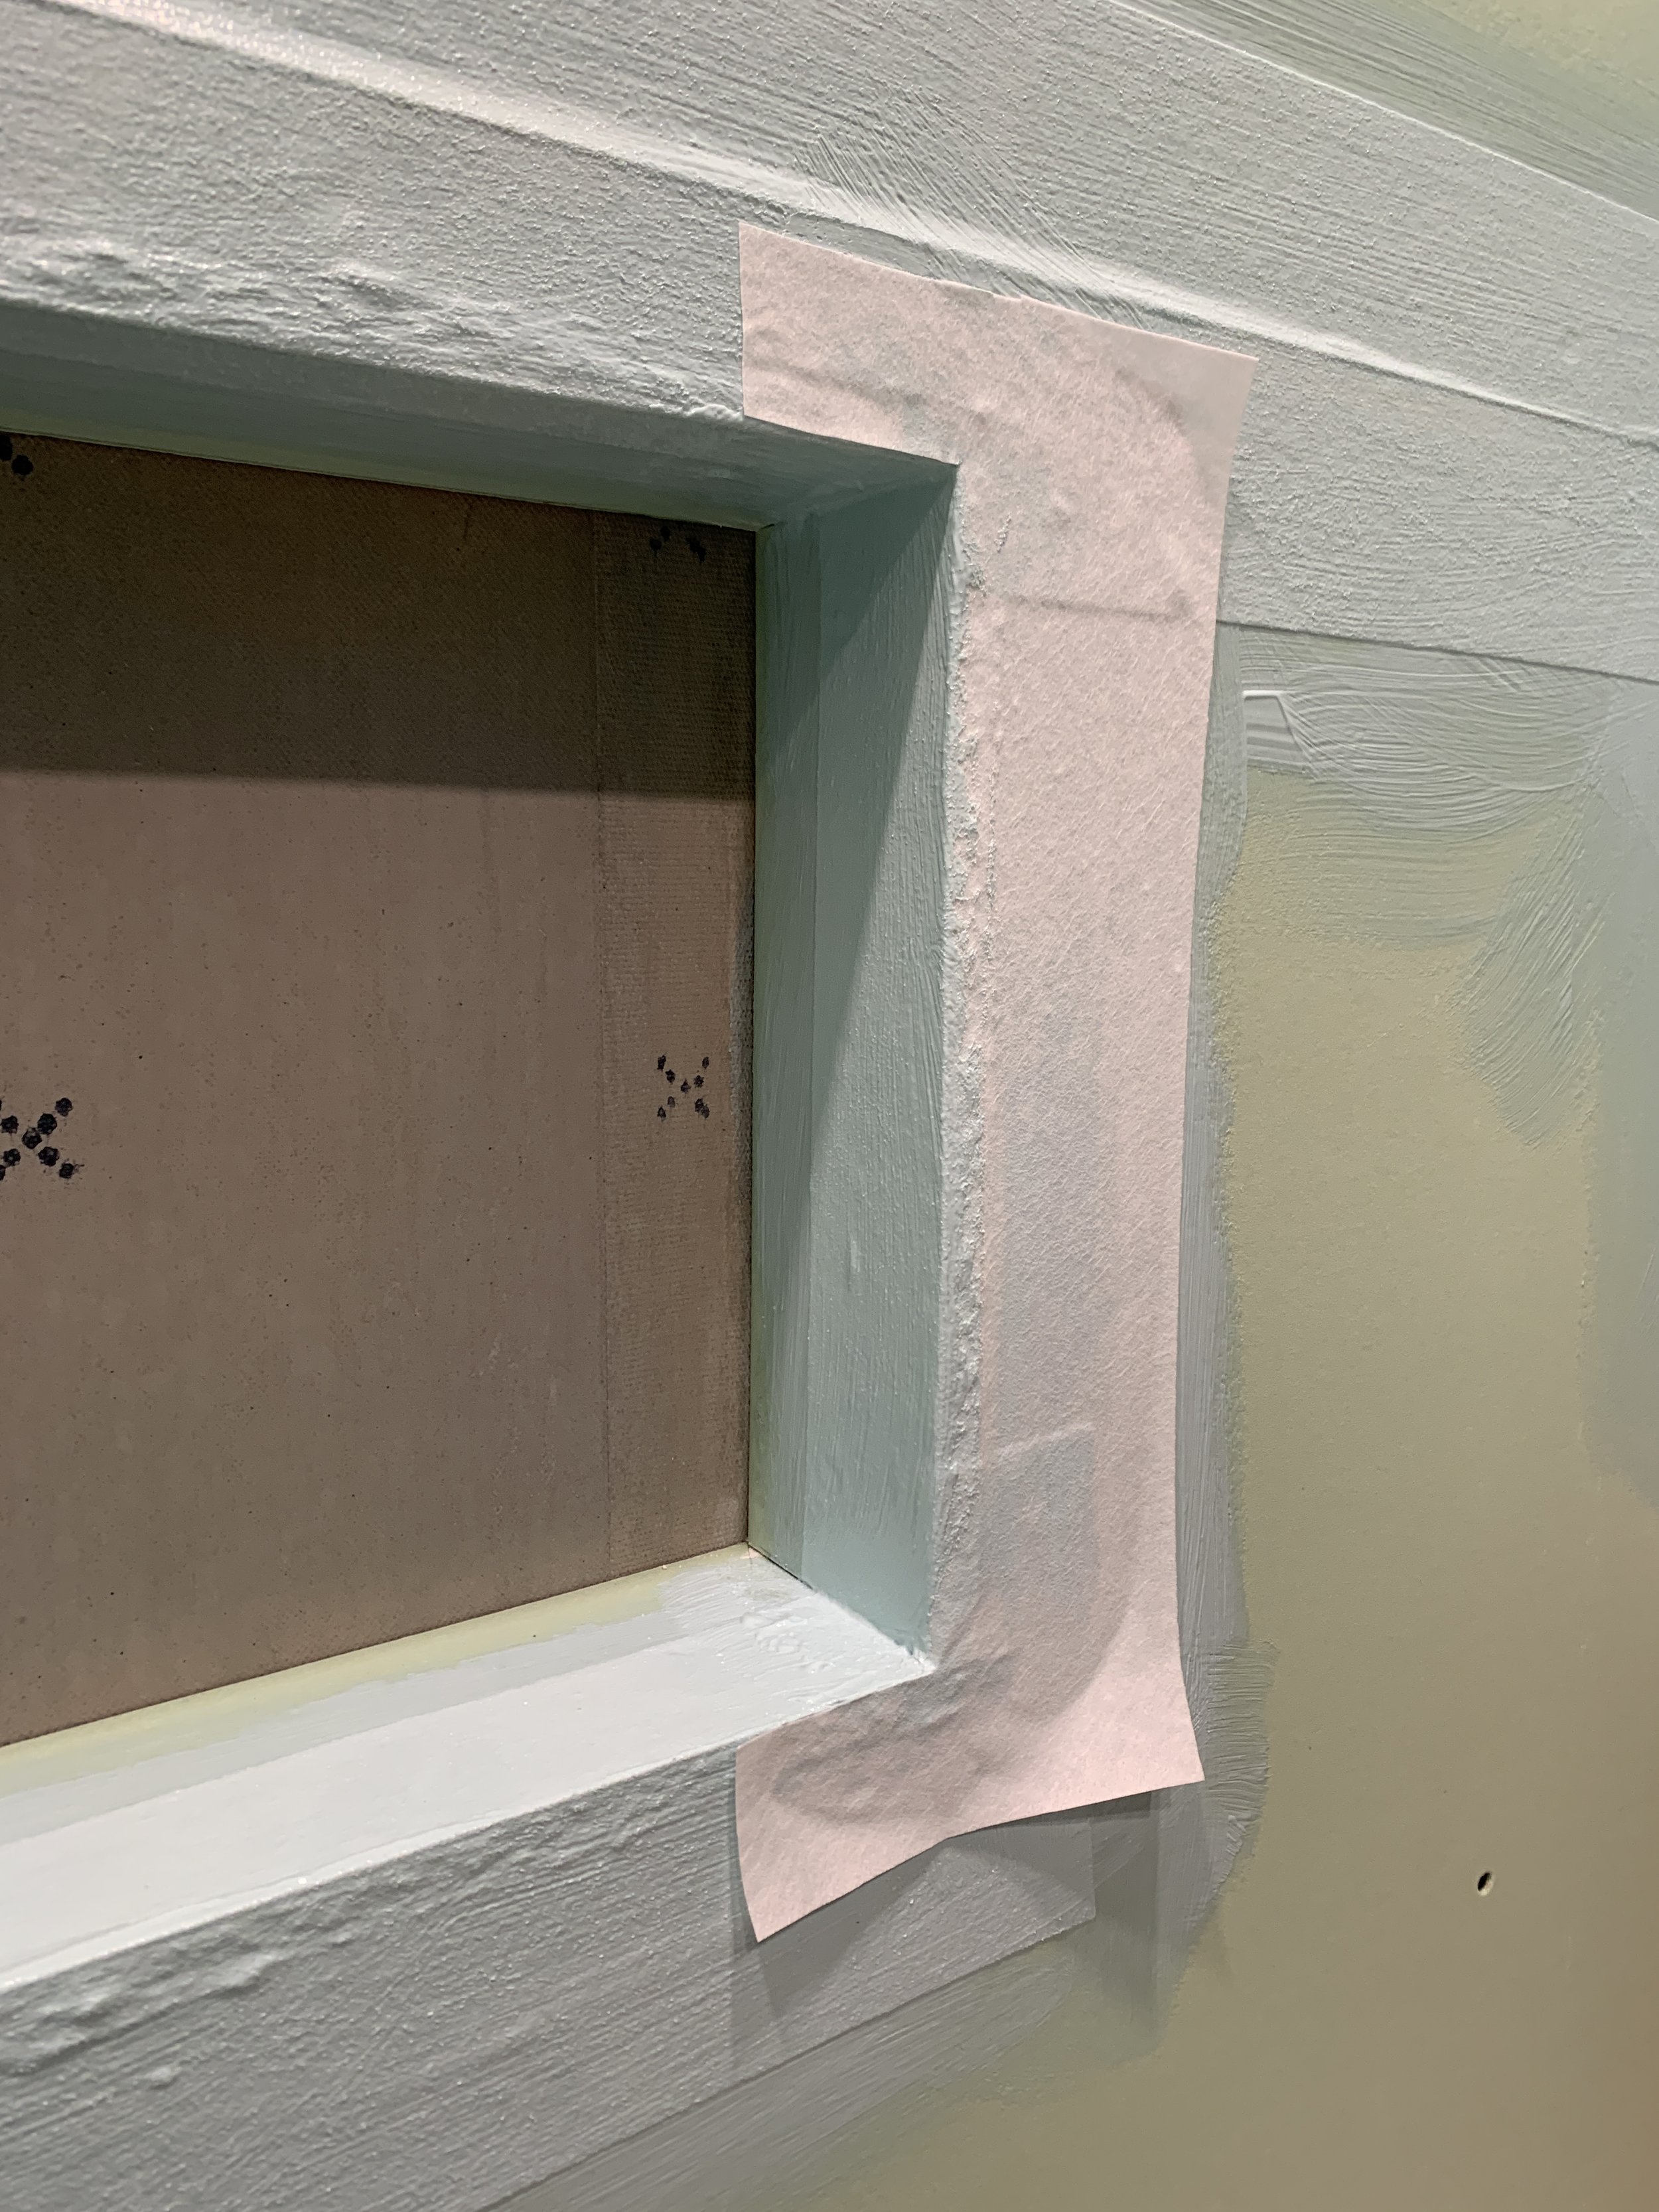
Adding a custom shower niche
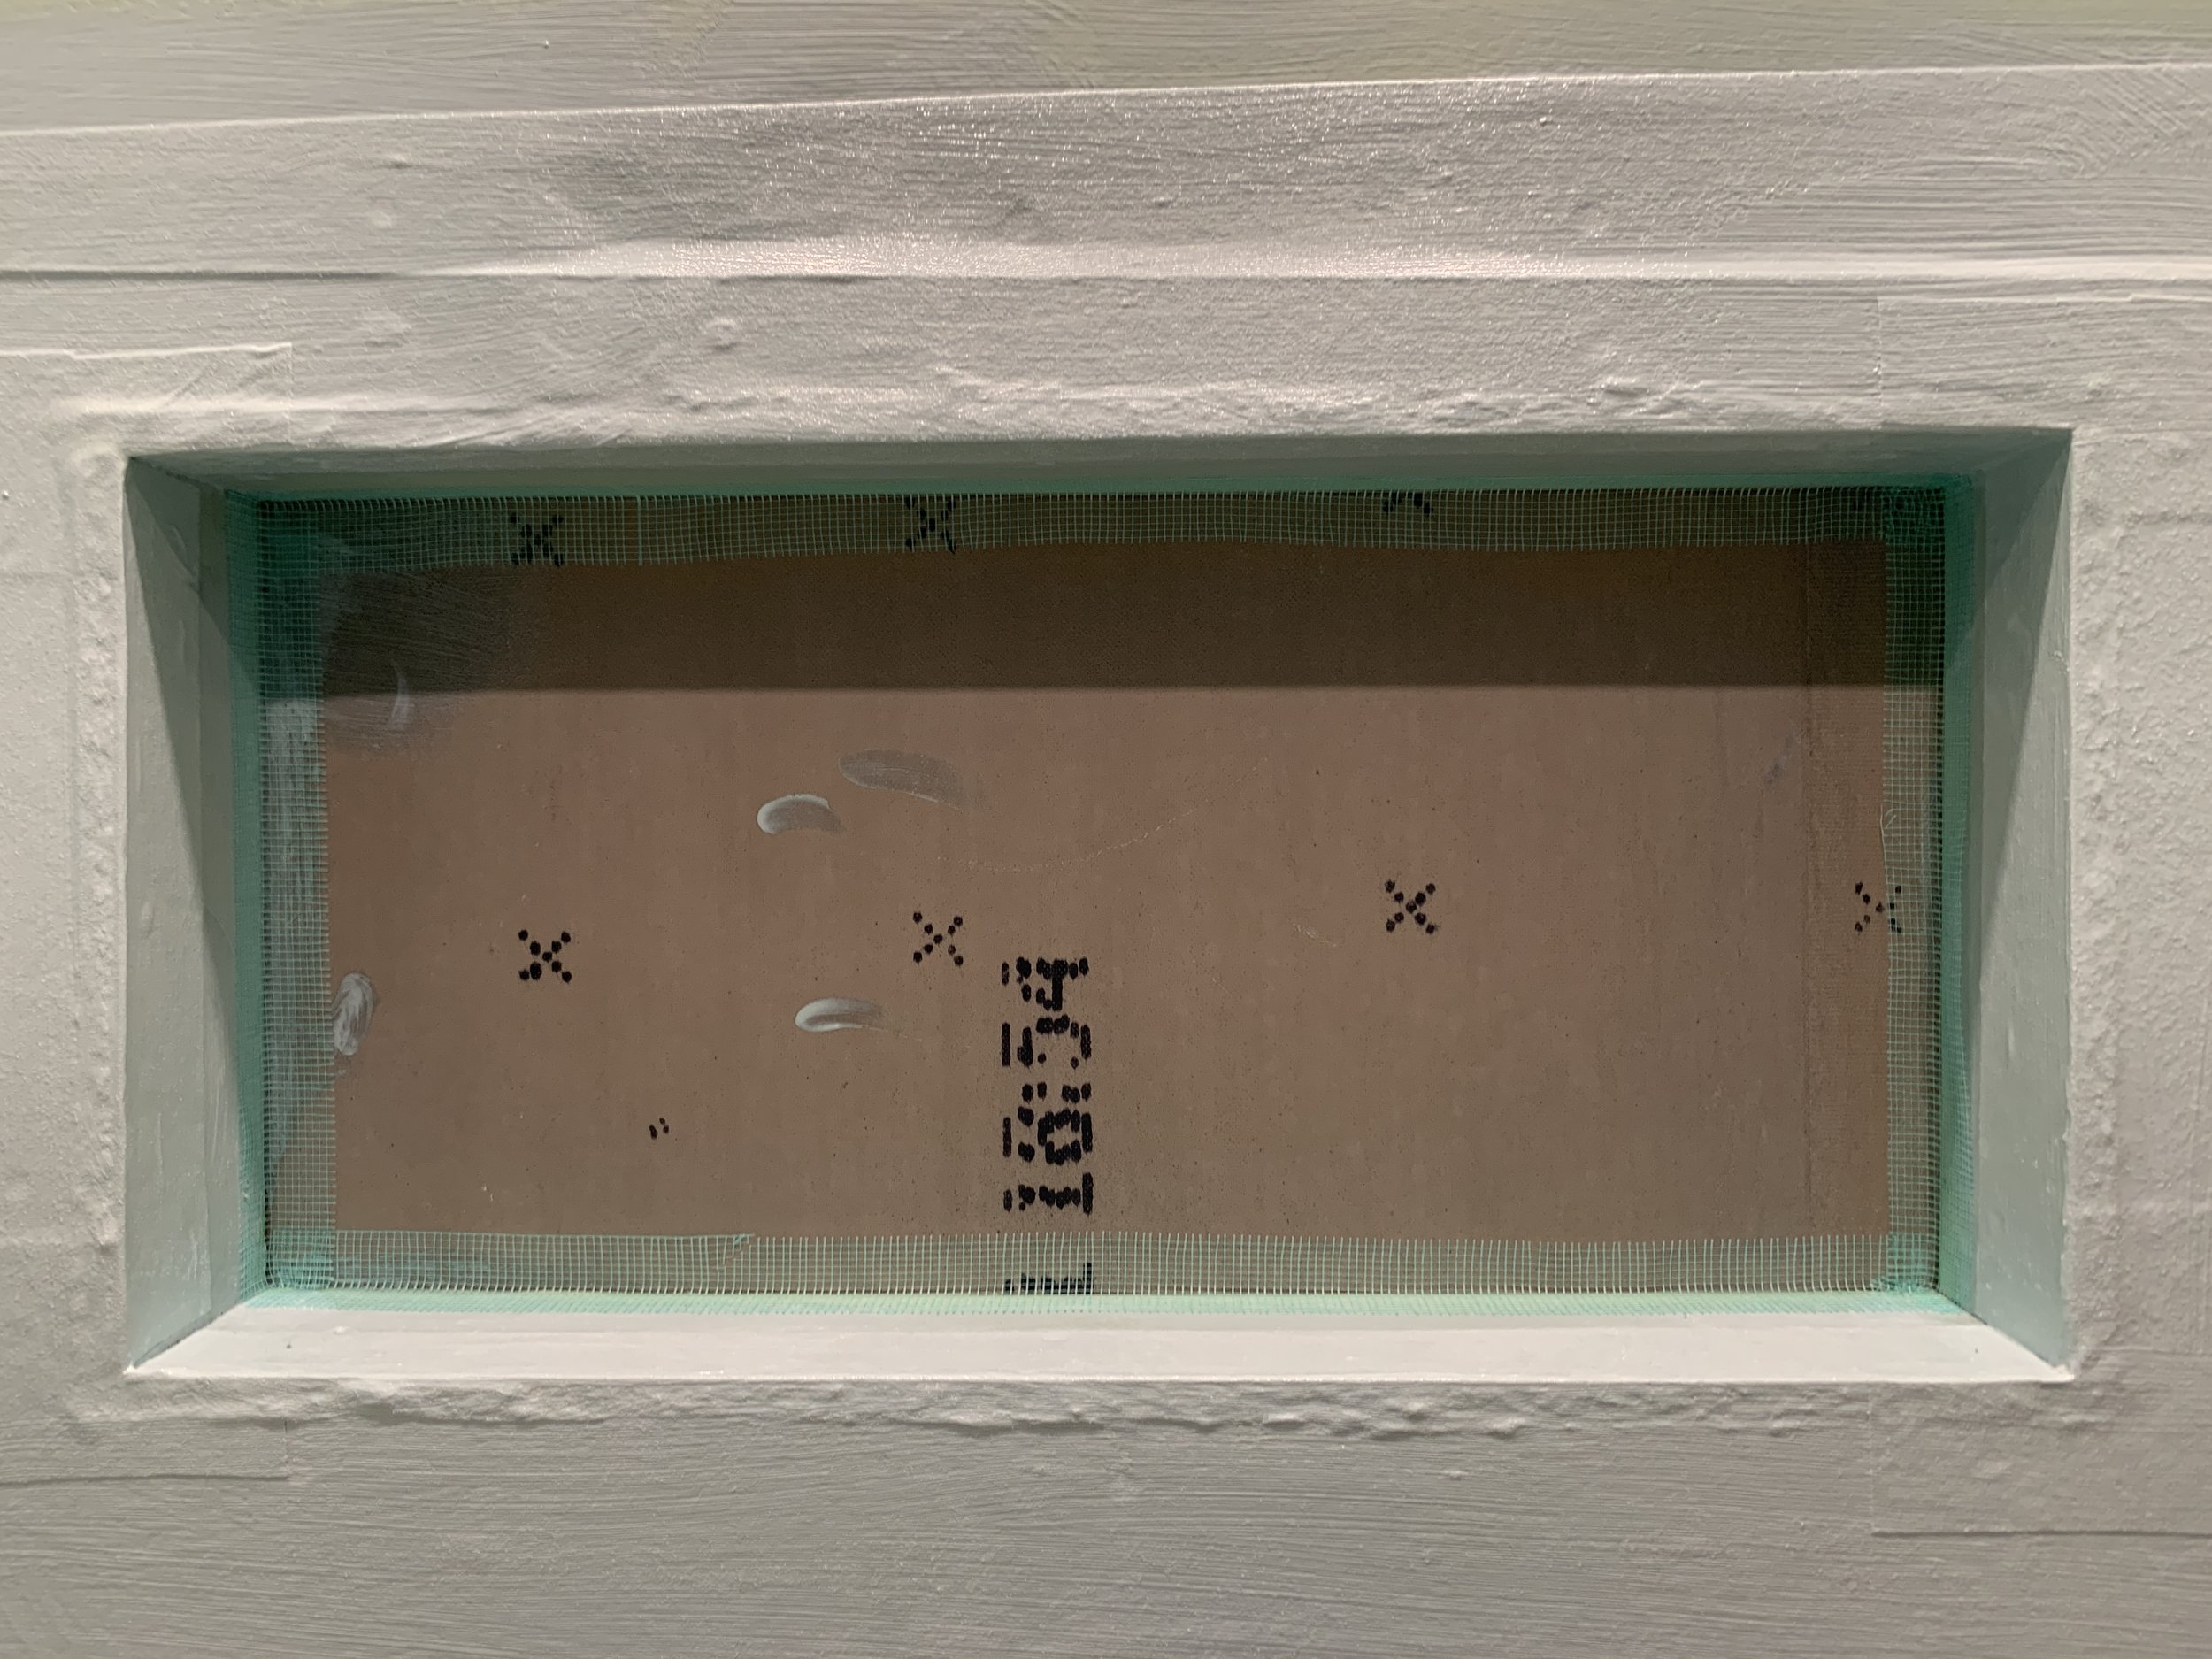
Shampoo, conditioner, soap ... those things you need to actually take a shower and have to make space for. In our pre-reno shower/tub, there was no set space for these necessities so they were always just precariously teetering on the shallow edges of the tub, fighting for adequate space and constantly falling into the bathtub/shower floor. Even though it is such a simple thing, I might be the most excited for the addition of a new storage niche – AKA, the fancy tiled hole cut into the wall to nicely store the things so they don’t attack you mid-shower. It’s a symbol of my favorite design combo: form and function – and I am SO PUMPED we’re finally going to have one in this space.
You can buy pre-fab shower niches ready for install, but they’re fairly expensive for what’s basically a hole, and you have to have the perfect conditions for it (like studs that cooperate with the size and placement you’re looking for). We decided to build our own, saving a ton of money and customizing it to an exact size that will allow us to seamlessly integrate it into the wall without having partial tile slivers all over the place. If all of our math is right (please, pray for us as we won’t know for sure until we get the rest of our tile in and start officially installing it) it should look like one seamless-looking tile wall that just happens to have an inset area, with no breaks in the tile design/layout.
The math
For our 3x12” vertical straight stack tile plans, our finished shower niche should be 12” x 22-1/8”, meaning our inner 2x4 frame structure is 16-1/4” tall x 26-3/8” wide. (We started with the finished size we wanted the niche to be (1 row of 12-inch-tall tiles tall x 7 3-inch-wide tiles wide, with 3/16” grout lines in between) and added the thickness of the drywall, mortar and tile layers.
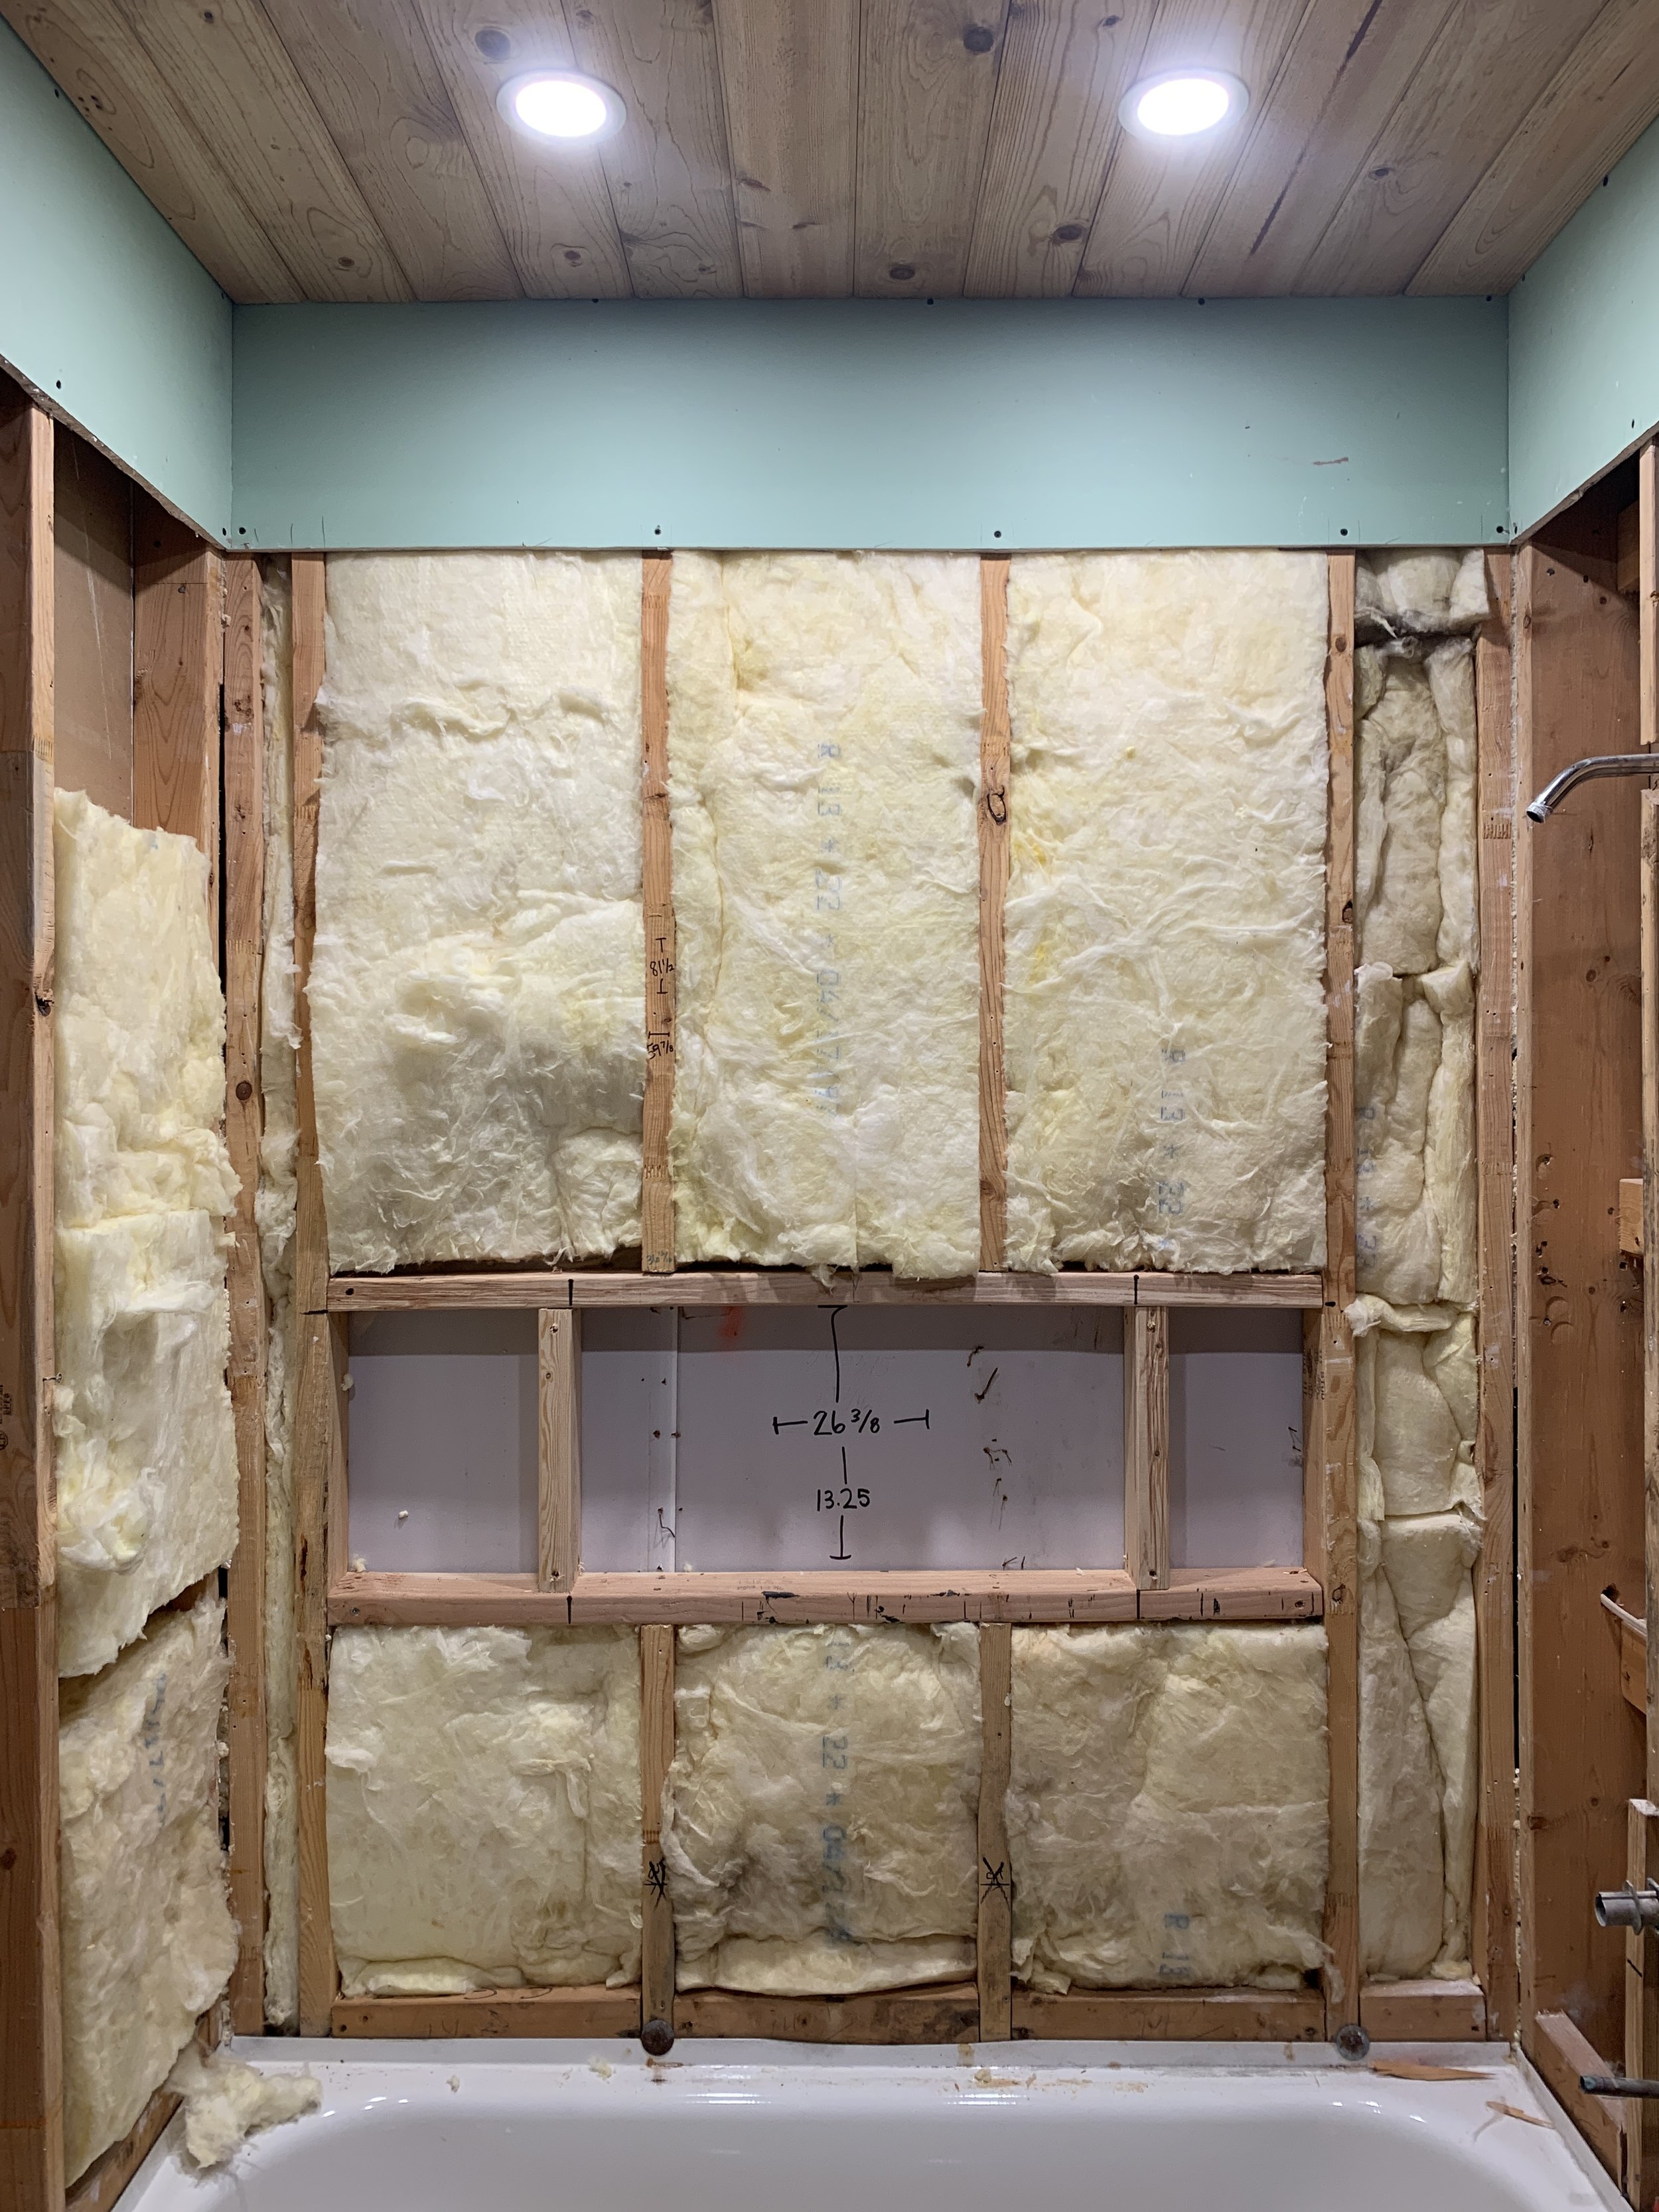
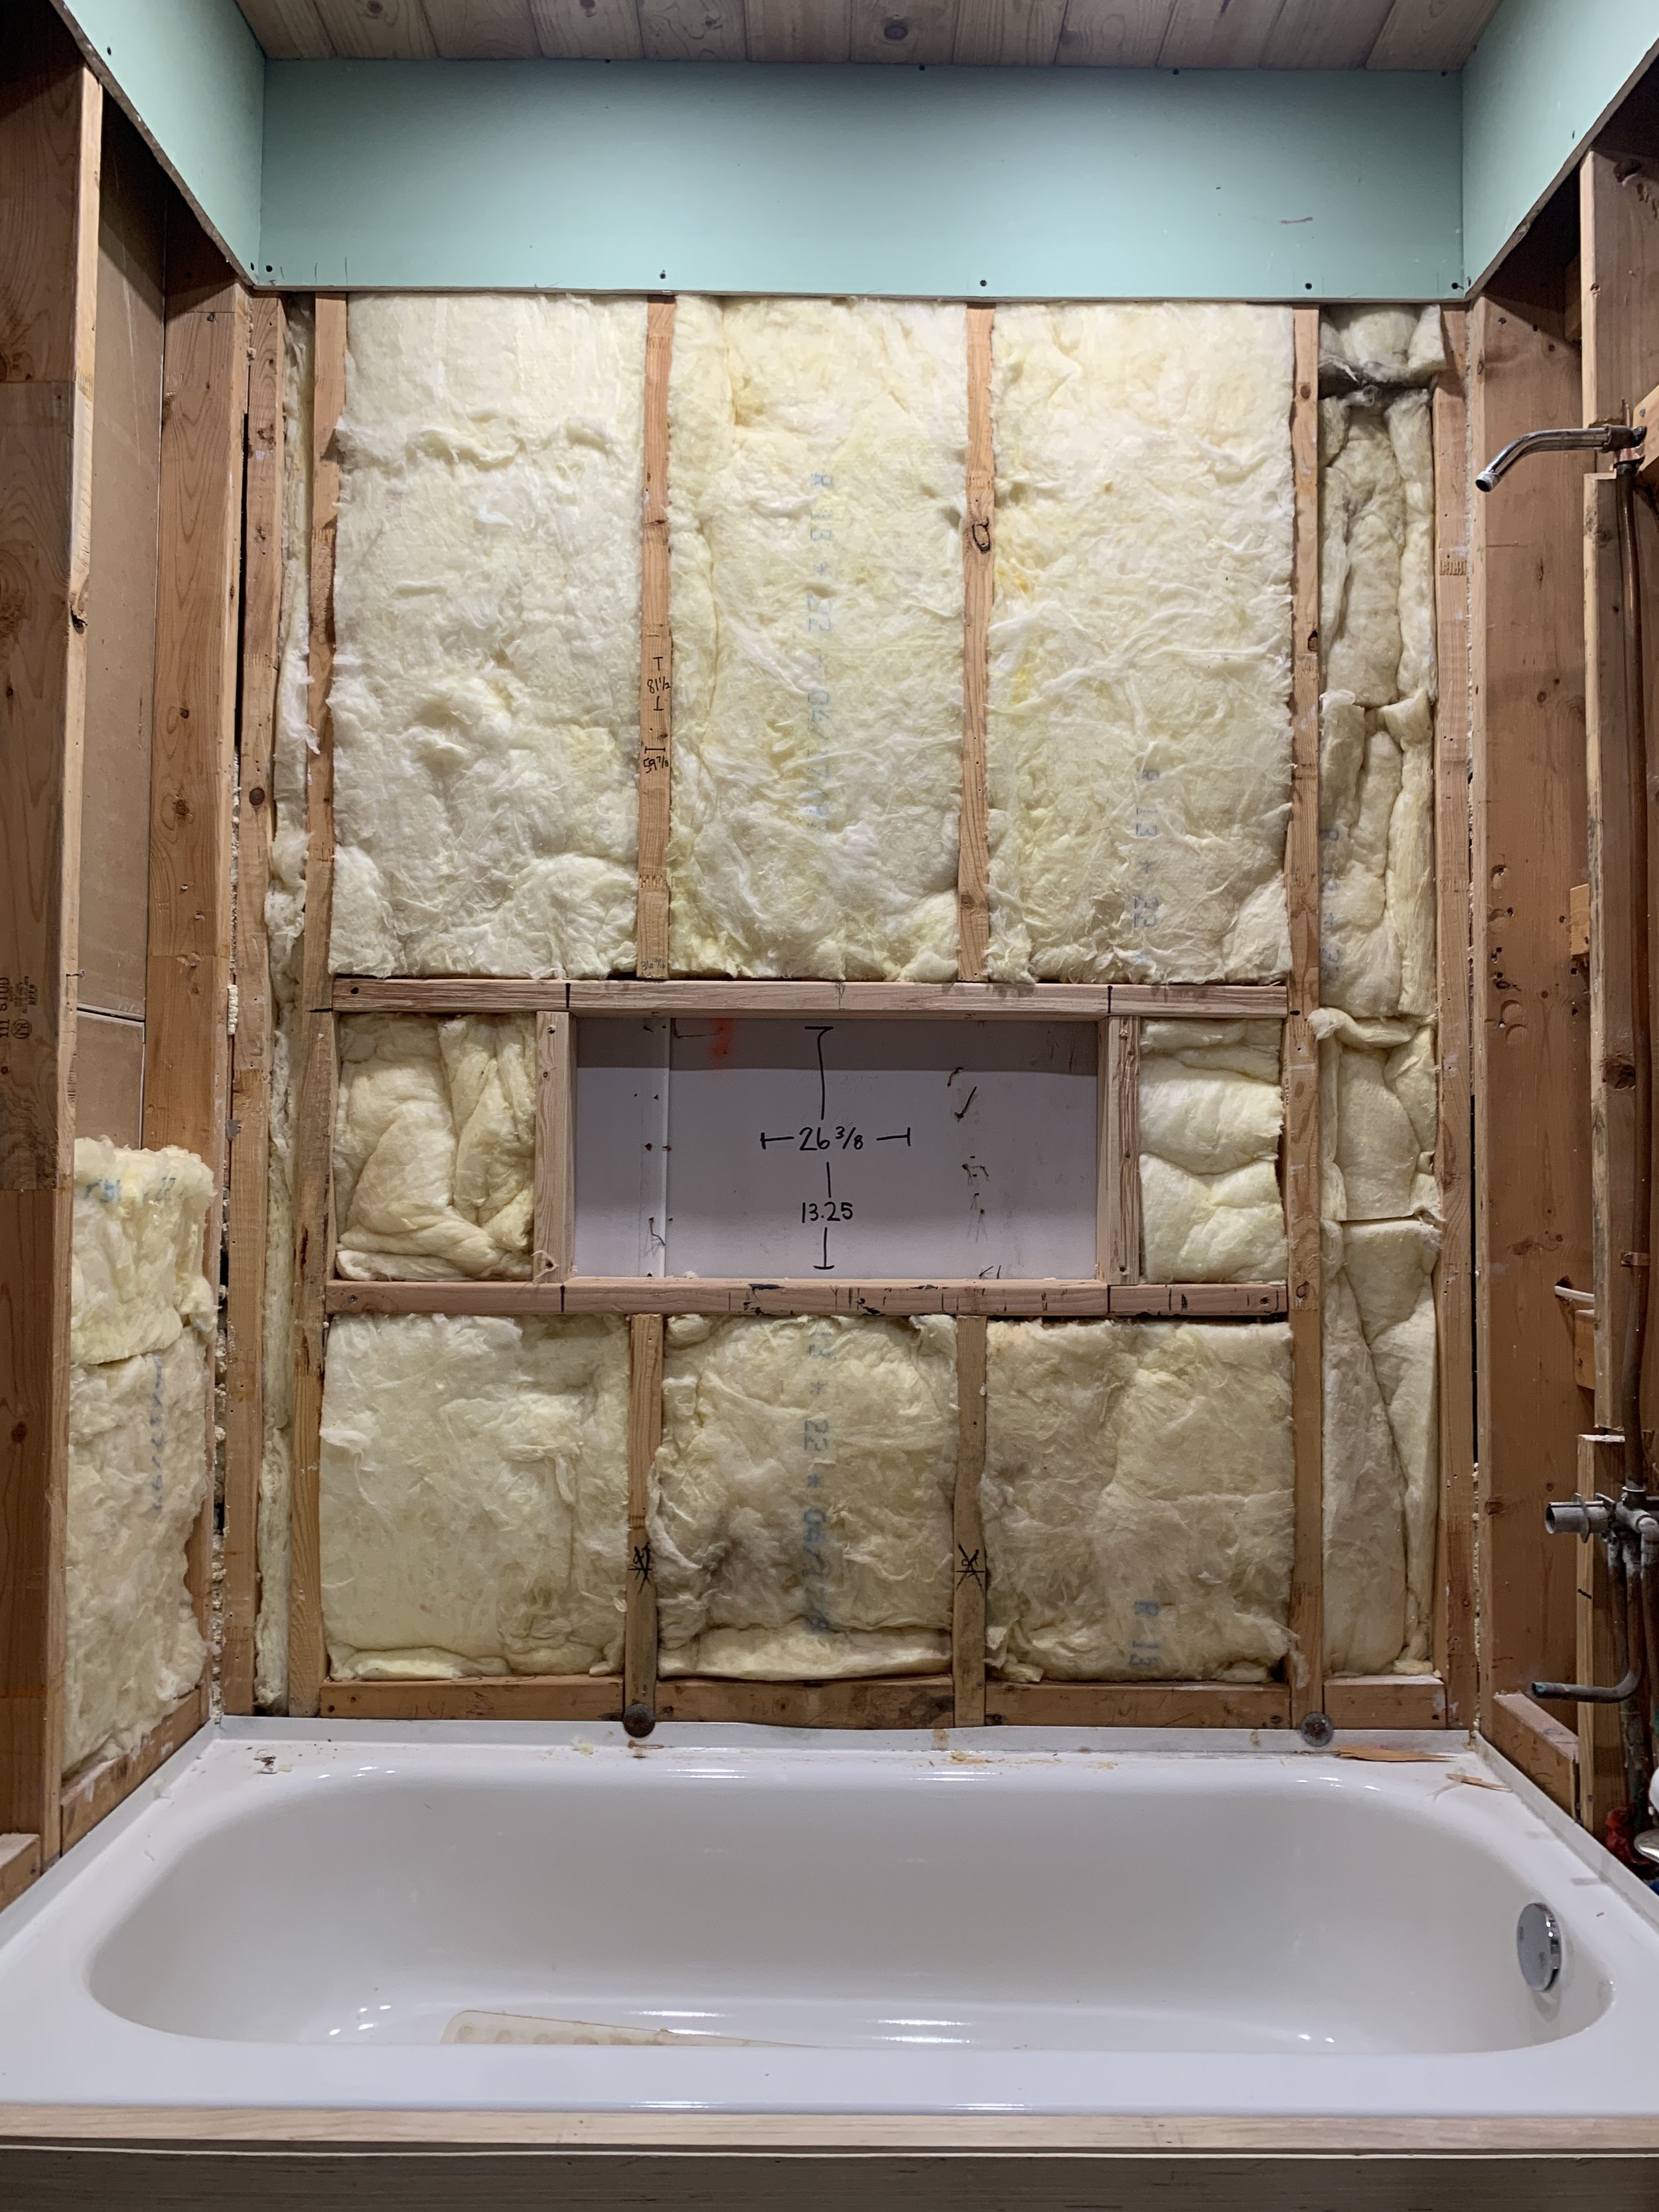
We used a Sawzall to cut into our wall studs and screwed in new 2x4s, making sure to angle the bottom one slightly down in the front so water doesn’t sit on the sill and cause problems later.
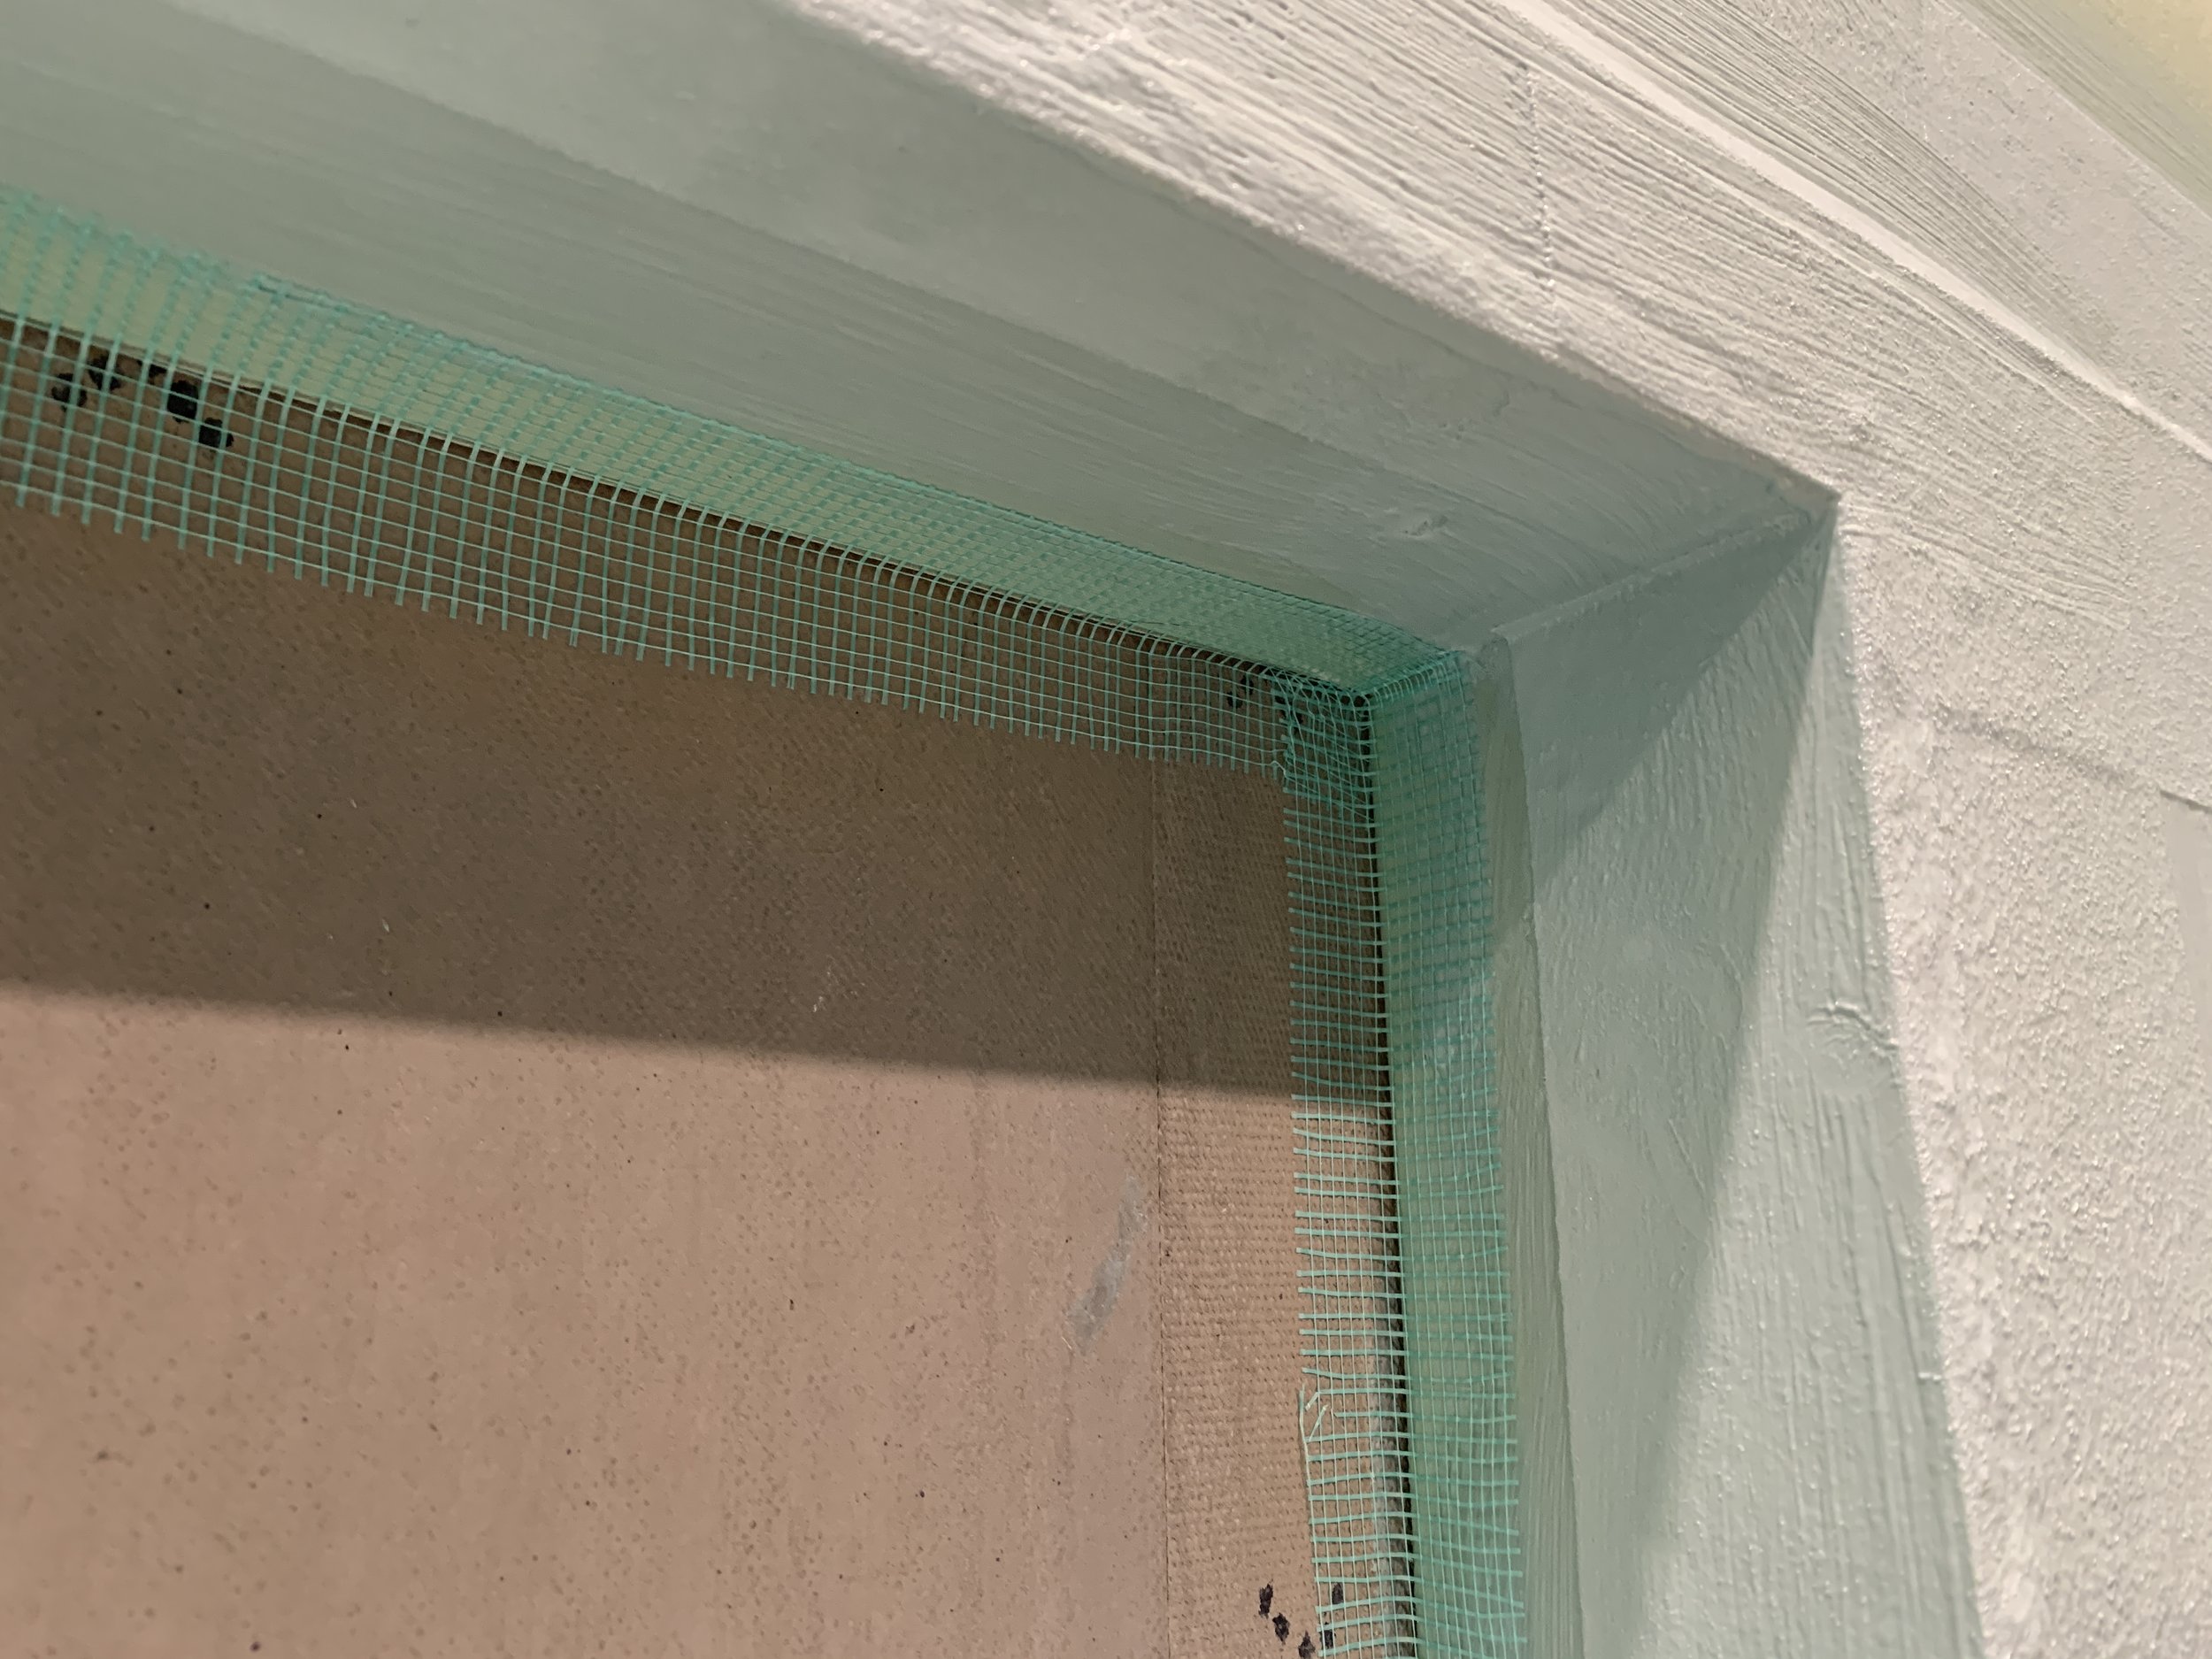
Because the back of our niche was the backside of the exterior wall (and for some reason wasn’t drywall, but instead some thin type of board), I added 1/4”-thick cement board to the back of the niche as a waterproof layer to tile over later. We could’ve used the same green drywall we added tot he rest of the shower, but we wanted to maximize our storage depth while keeping it waterproof. (I added the cement board after I drywalled the shower walls, but before I drywalled the 2x4 insides of the niche.)

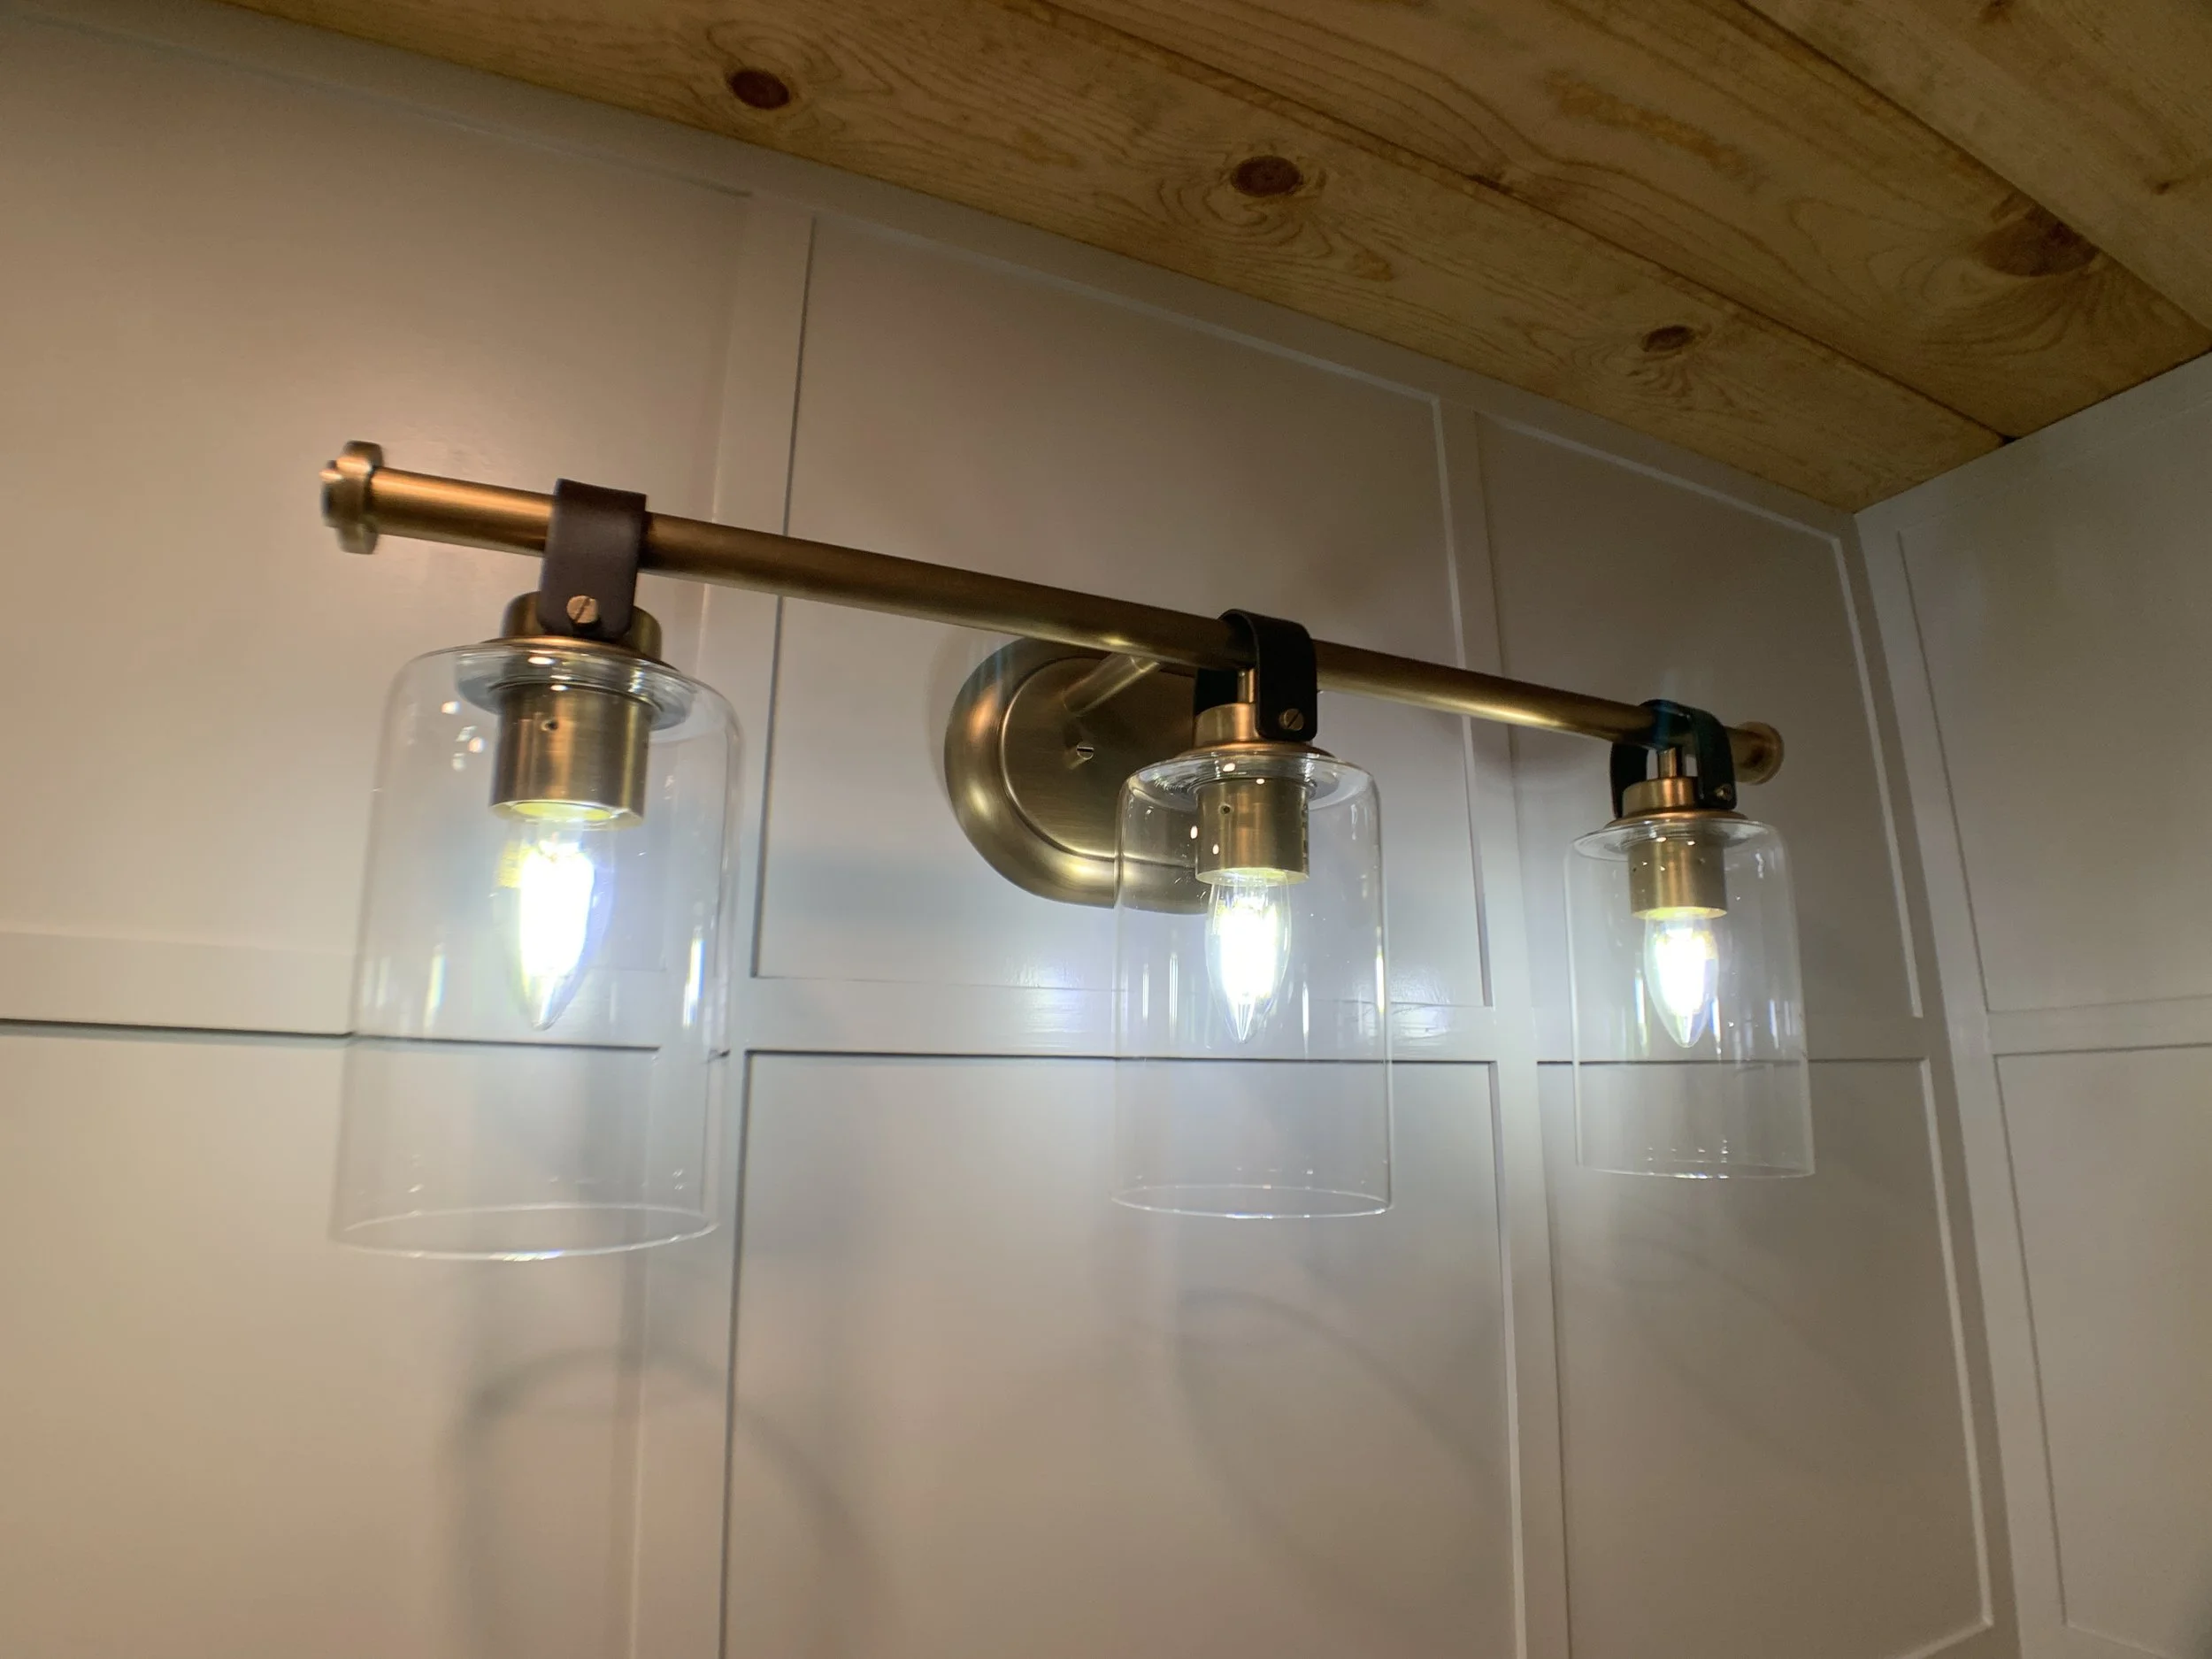
Vanity Electrical
This week I also hacked into another wall to move the junction box for the vanity light. With the previous style of light, the offset junction box was hidden under a big horizontal plate.
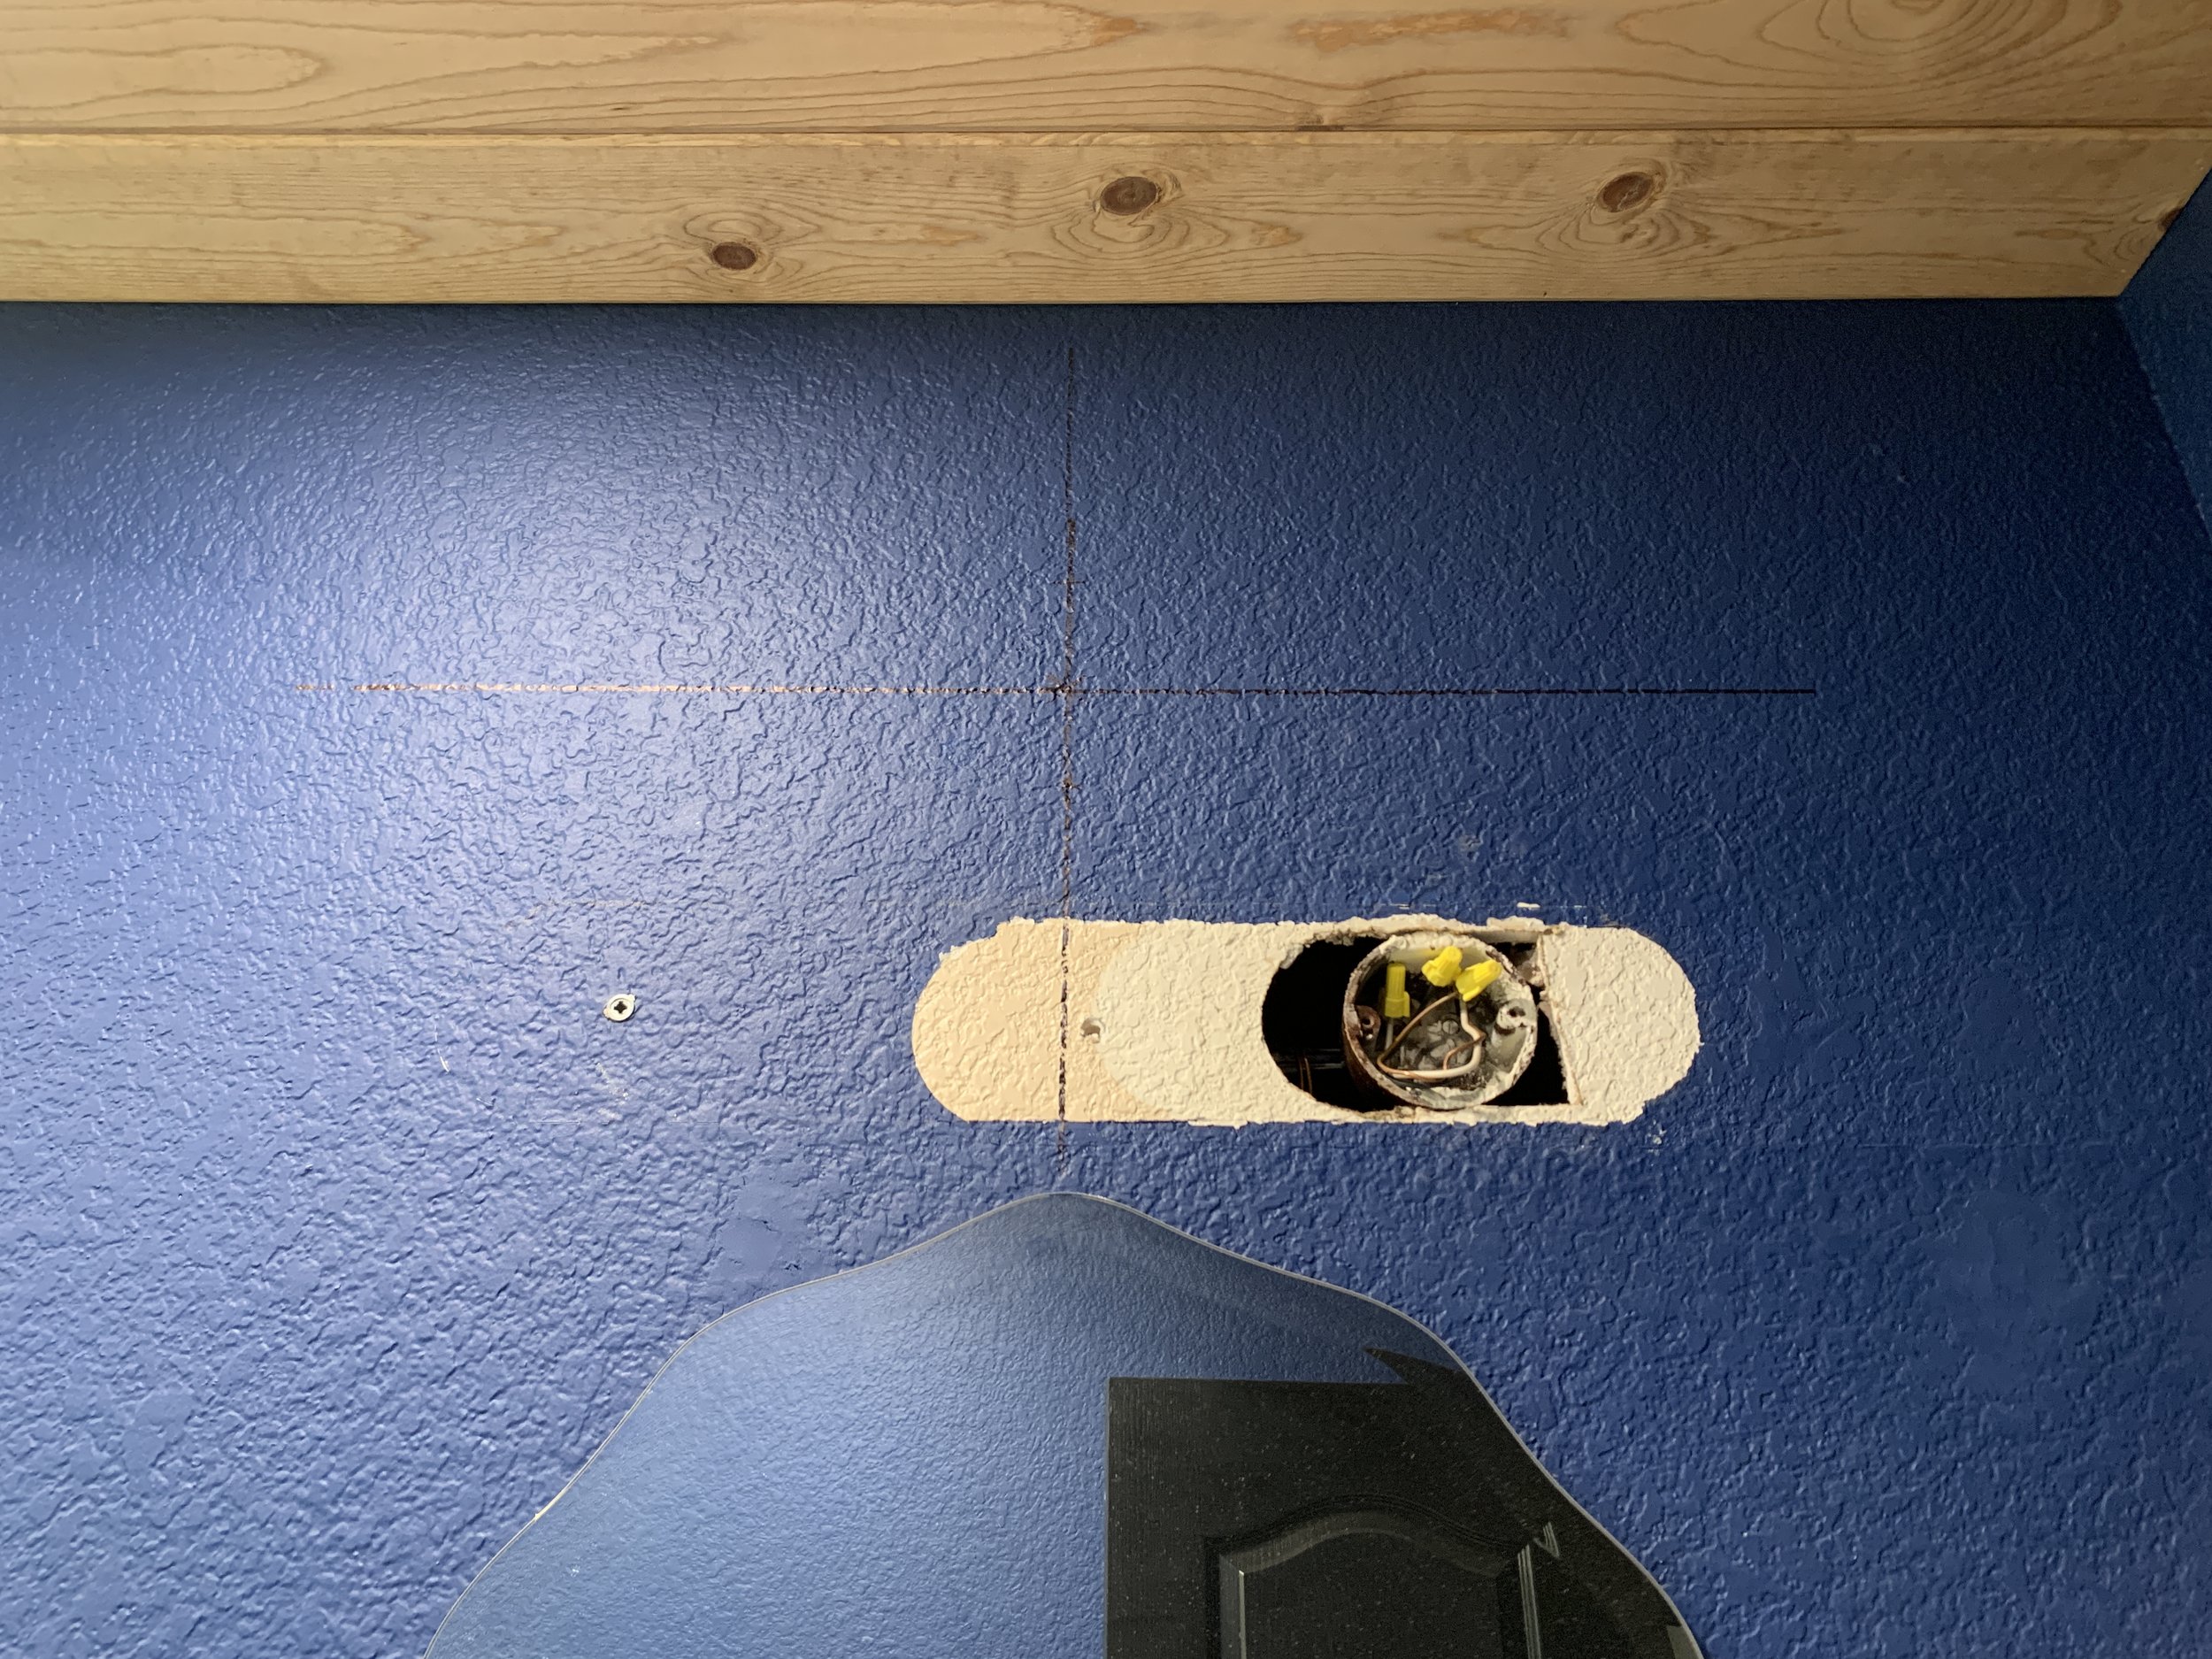
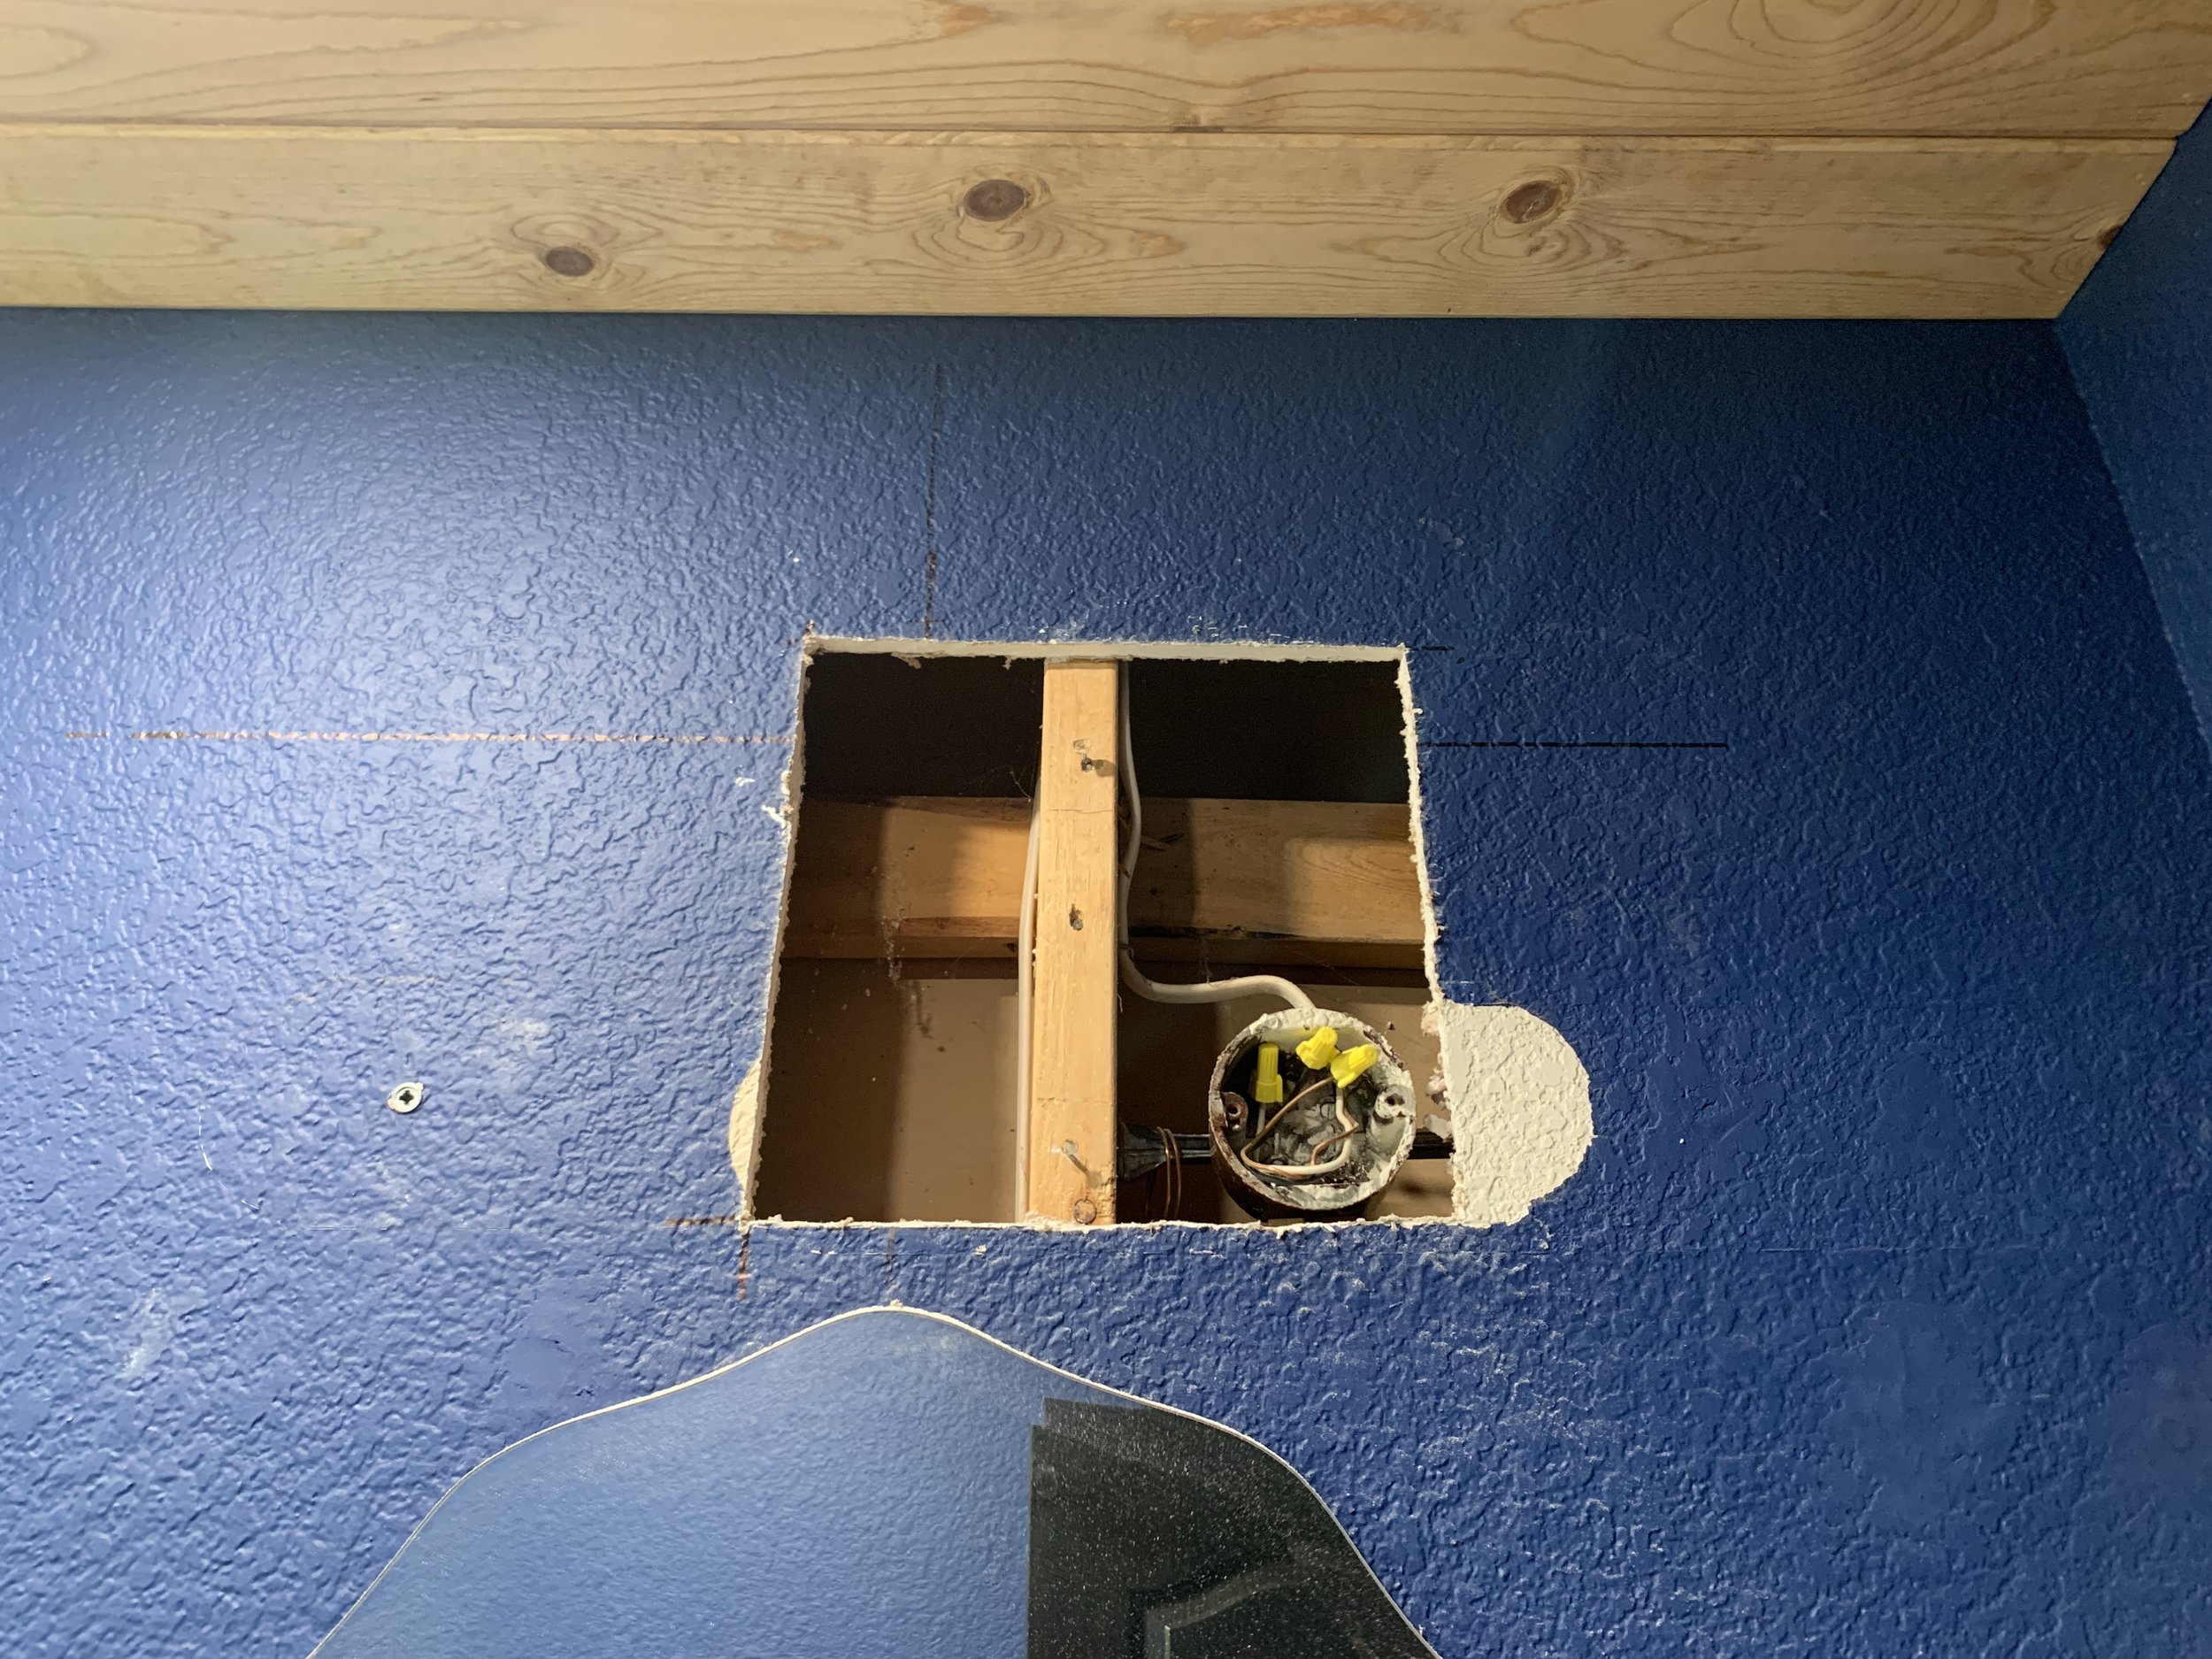
With the smaller mounting plate of the new light we’ll be installing we needed to move it left to be centered with the sink and mirror, which also gave the opportunity to move it higher up the wall while I was at it.
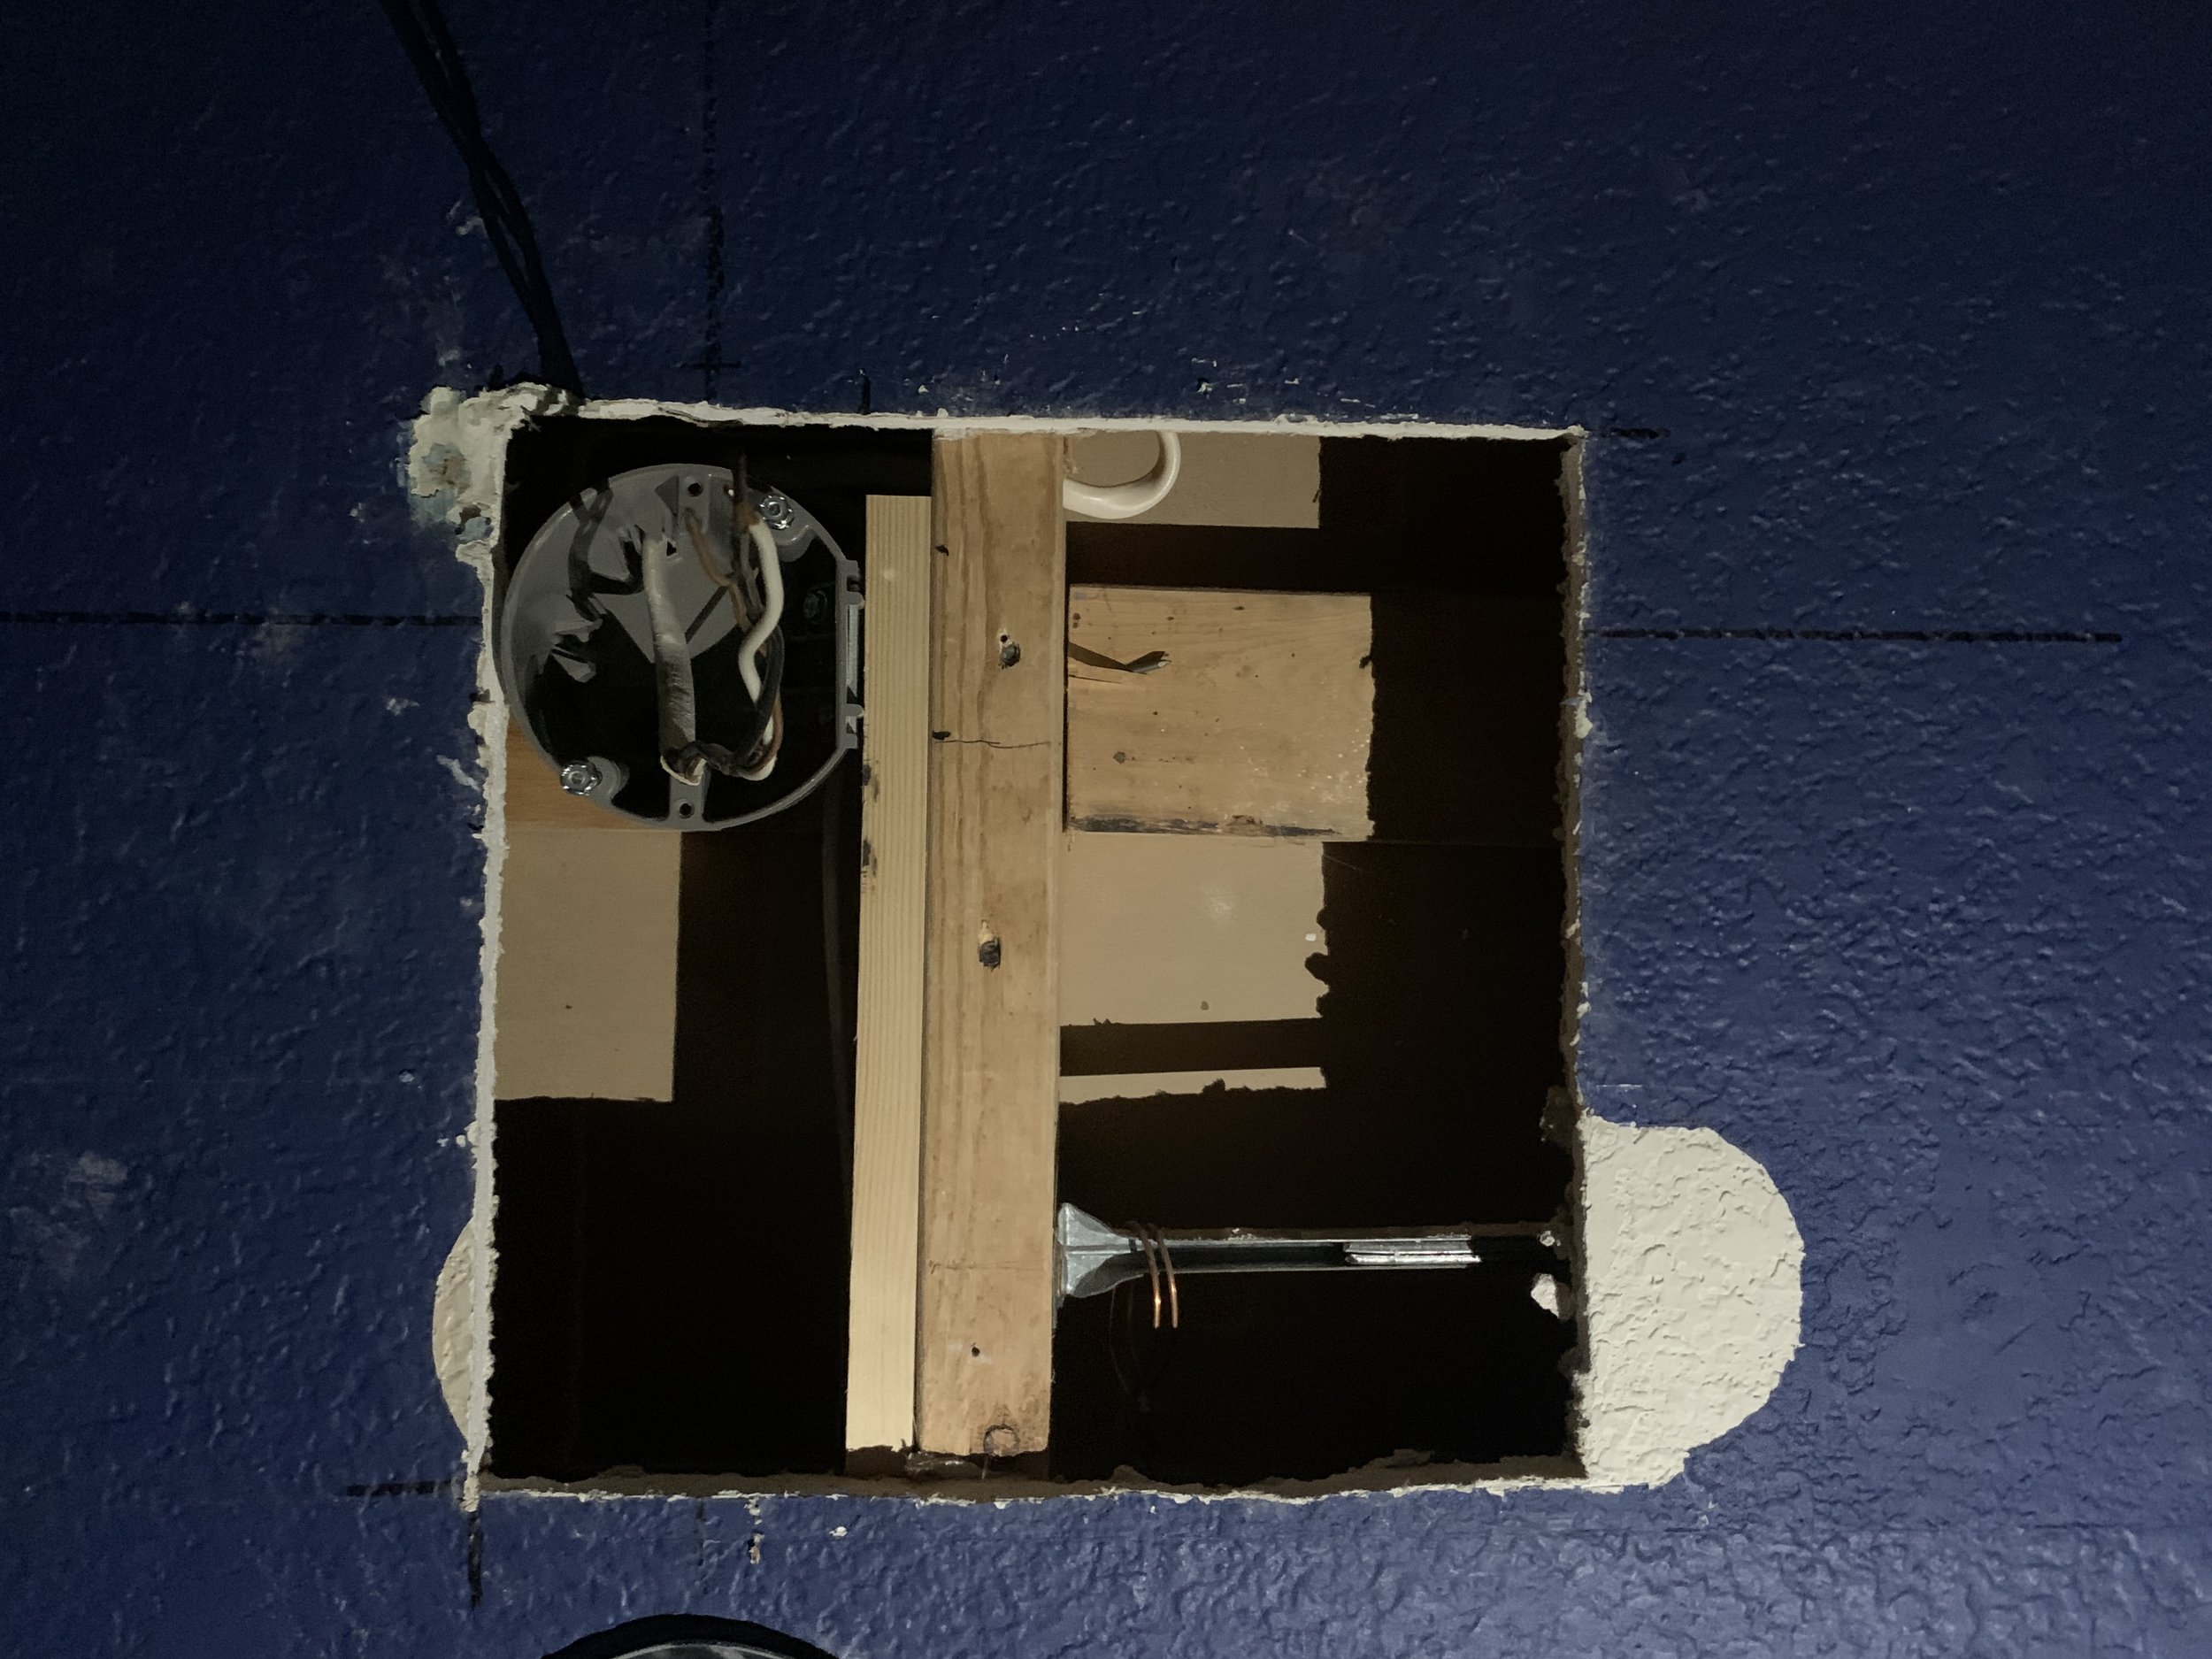
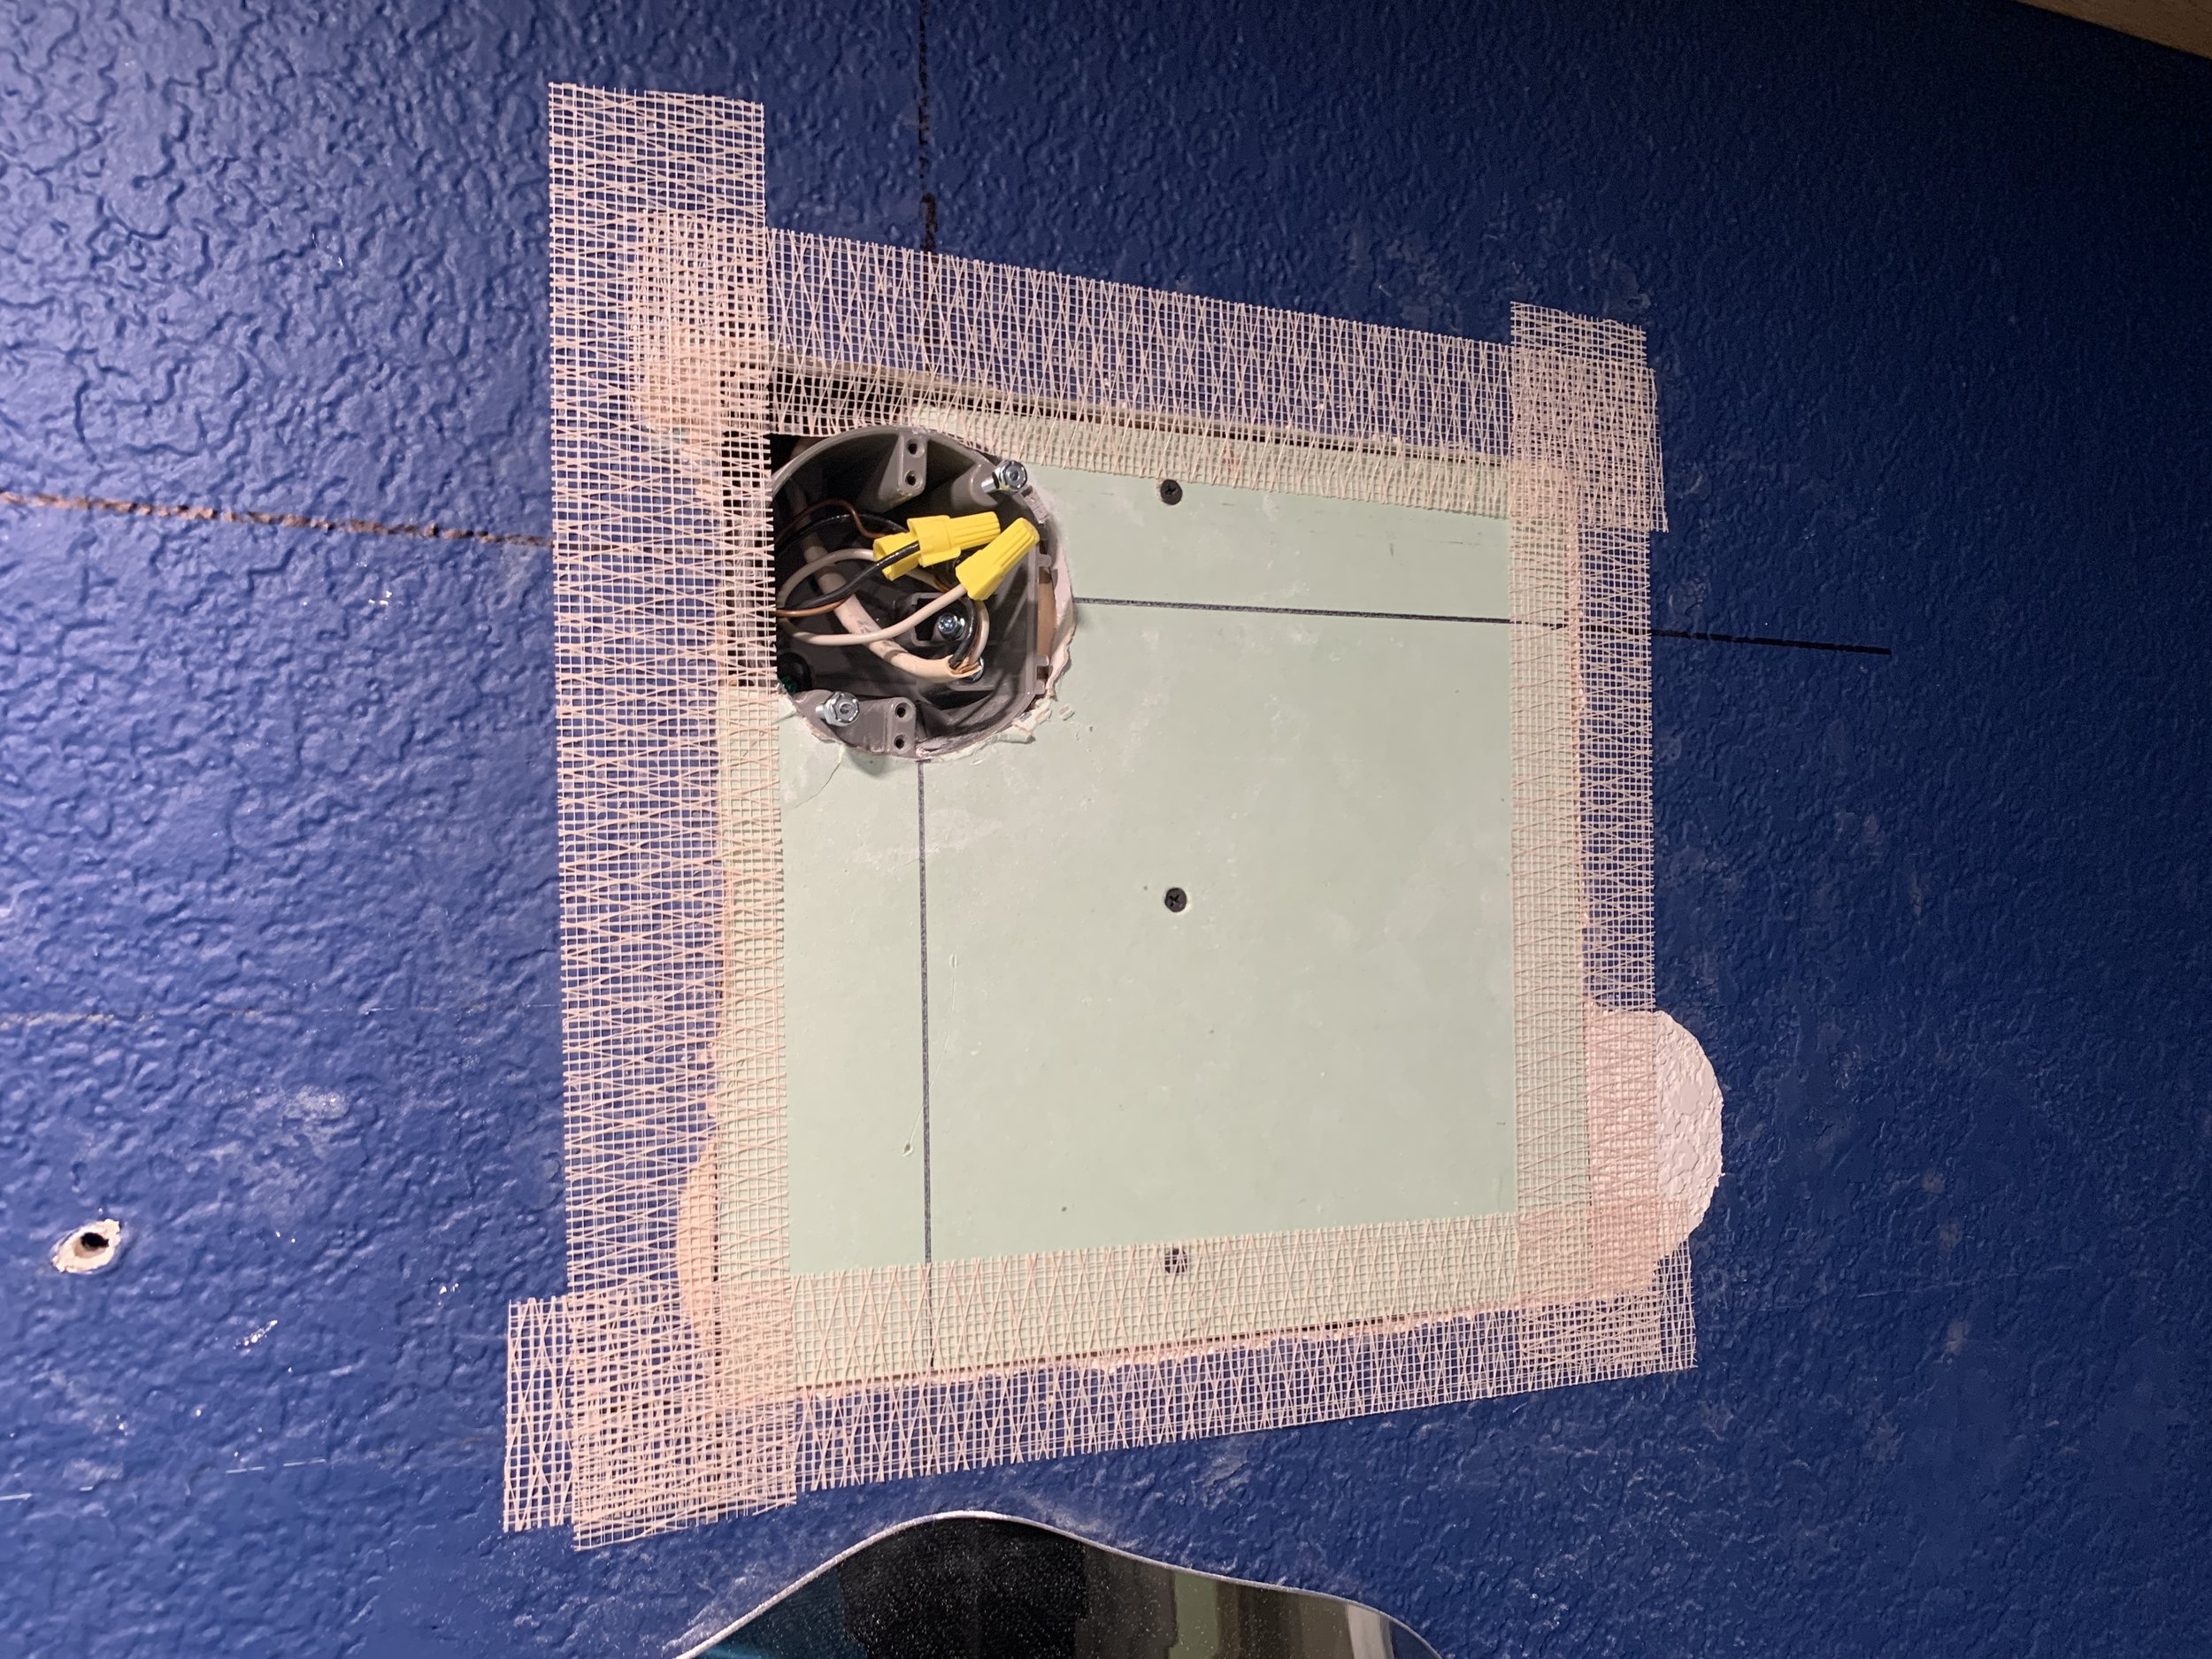
Now it’s centered in th mirror, and much higher up on the wall – about halfway between the top of the mirror and the ceiling.
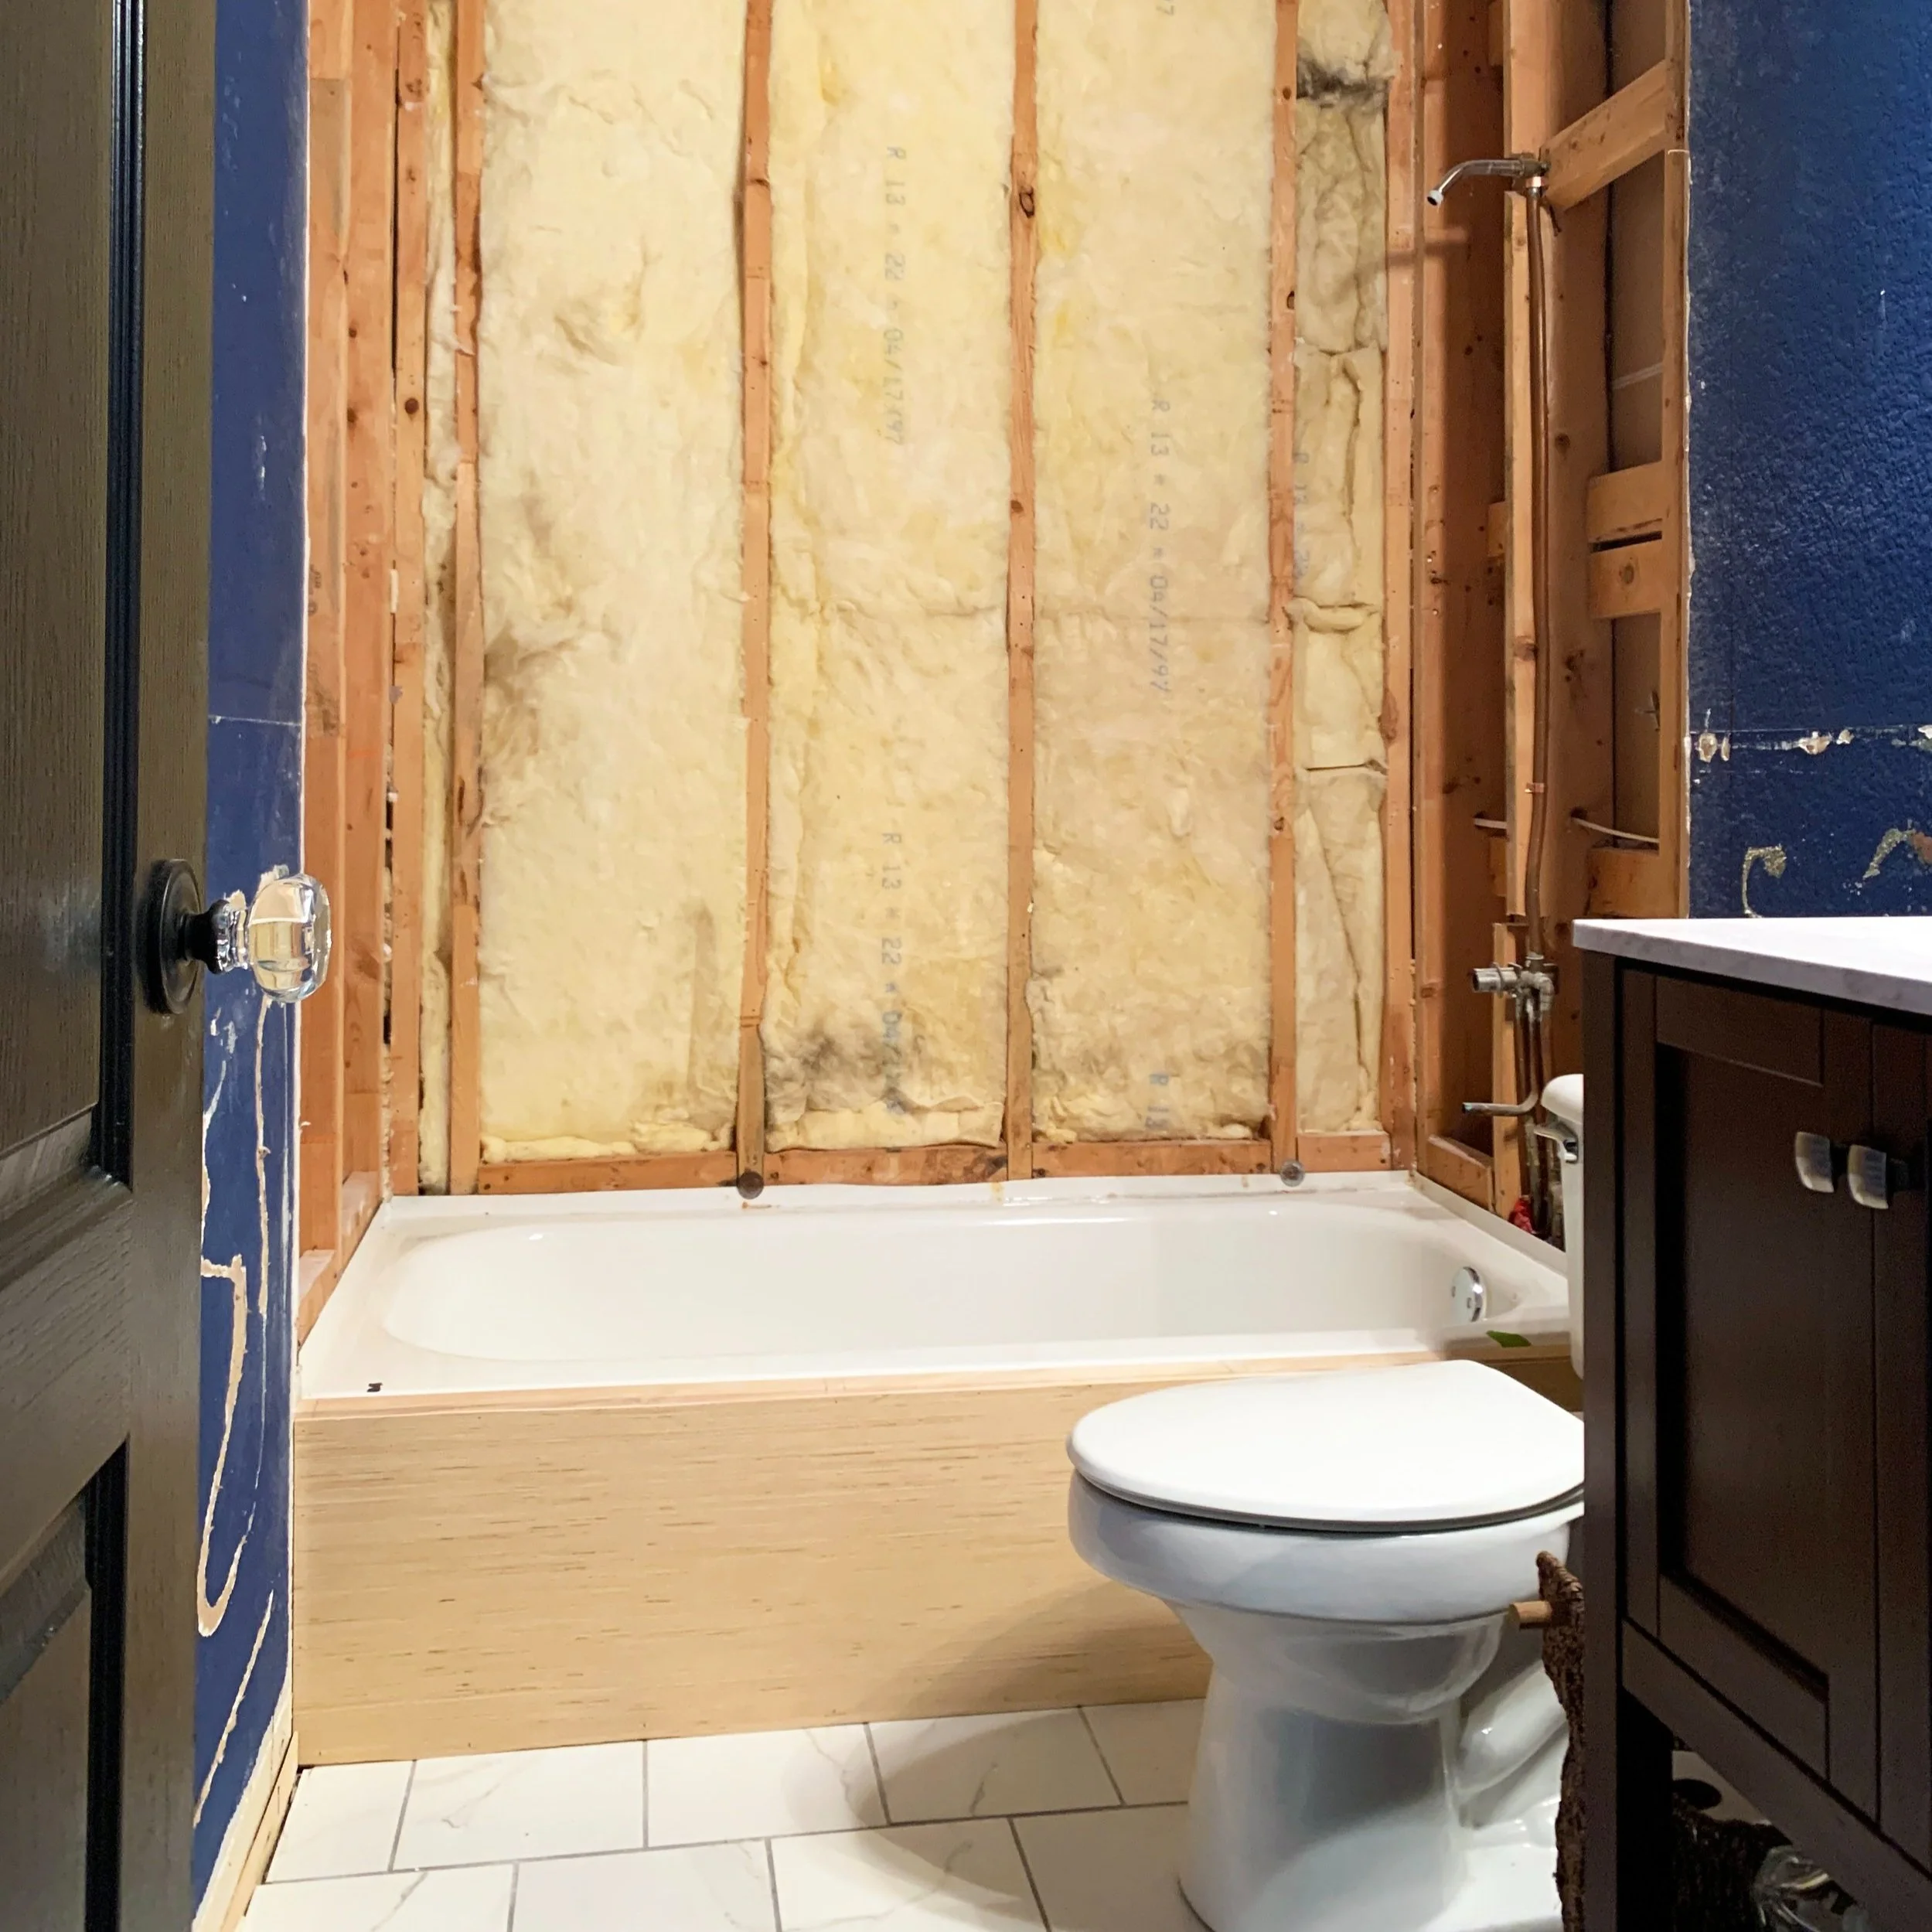
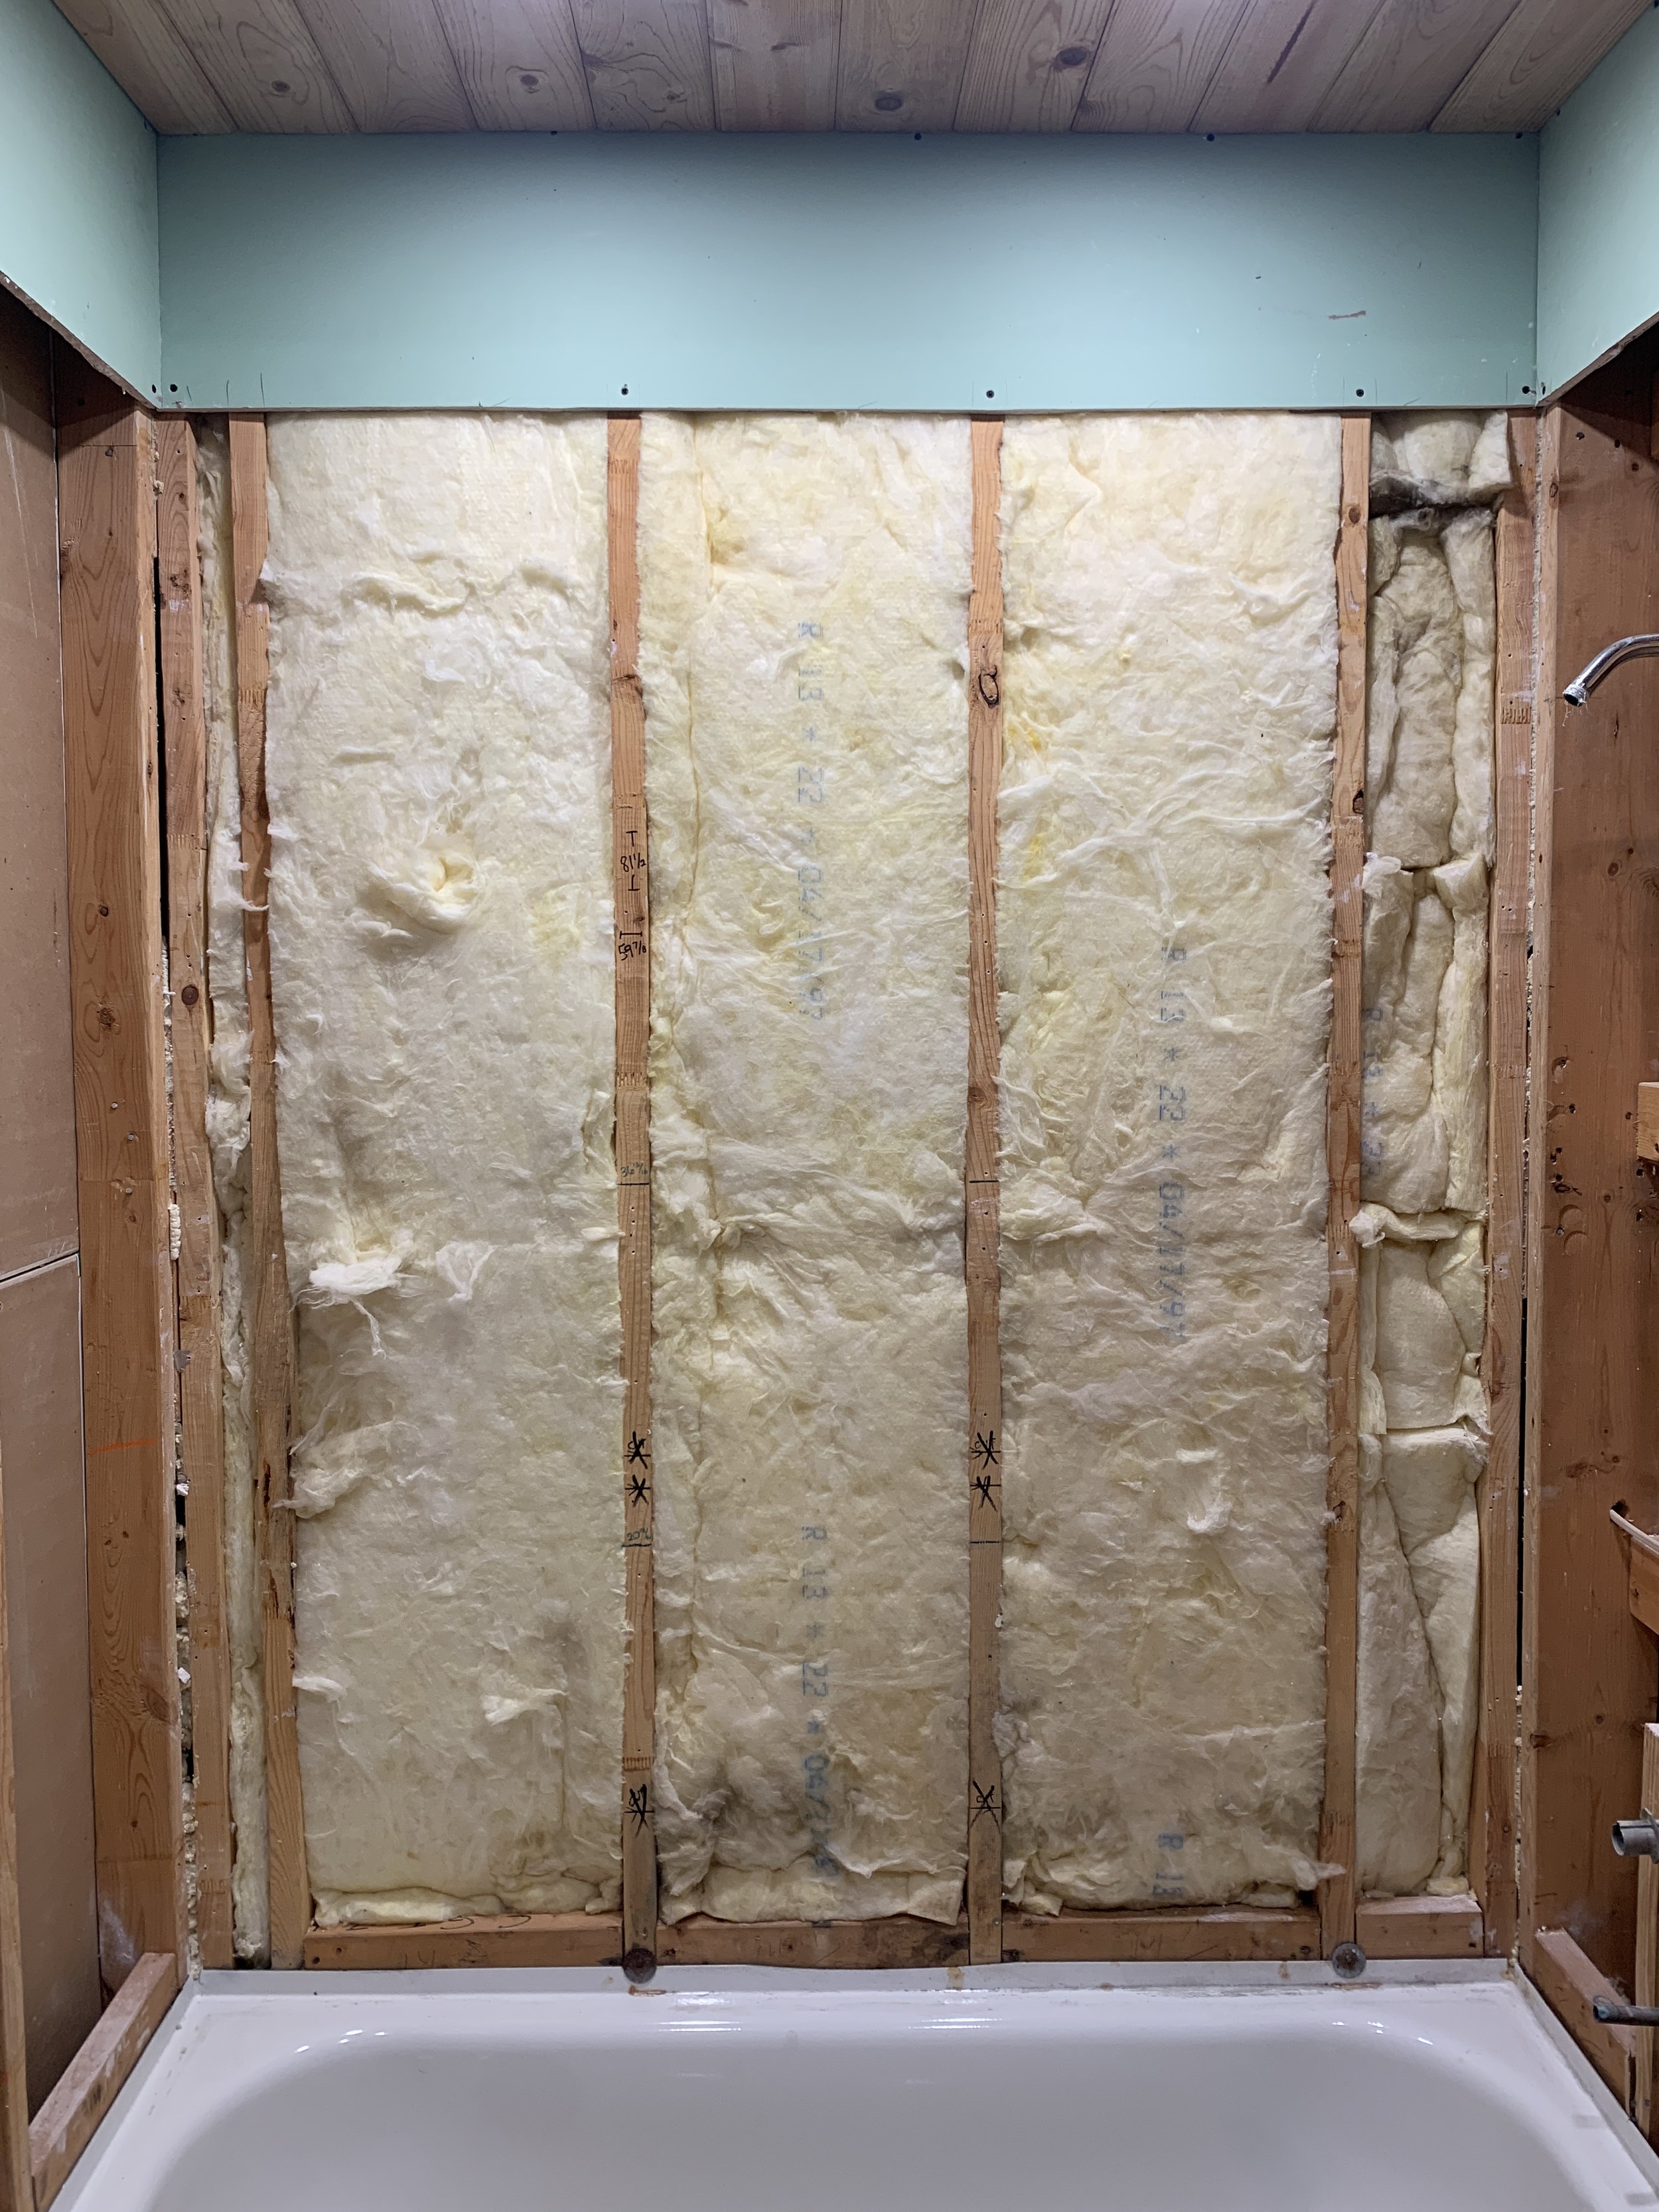
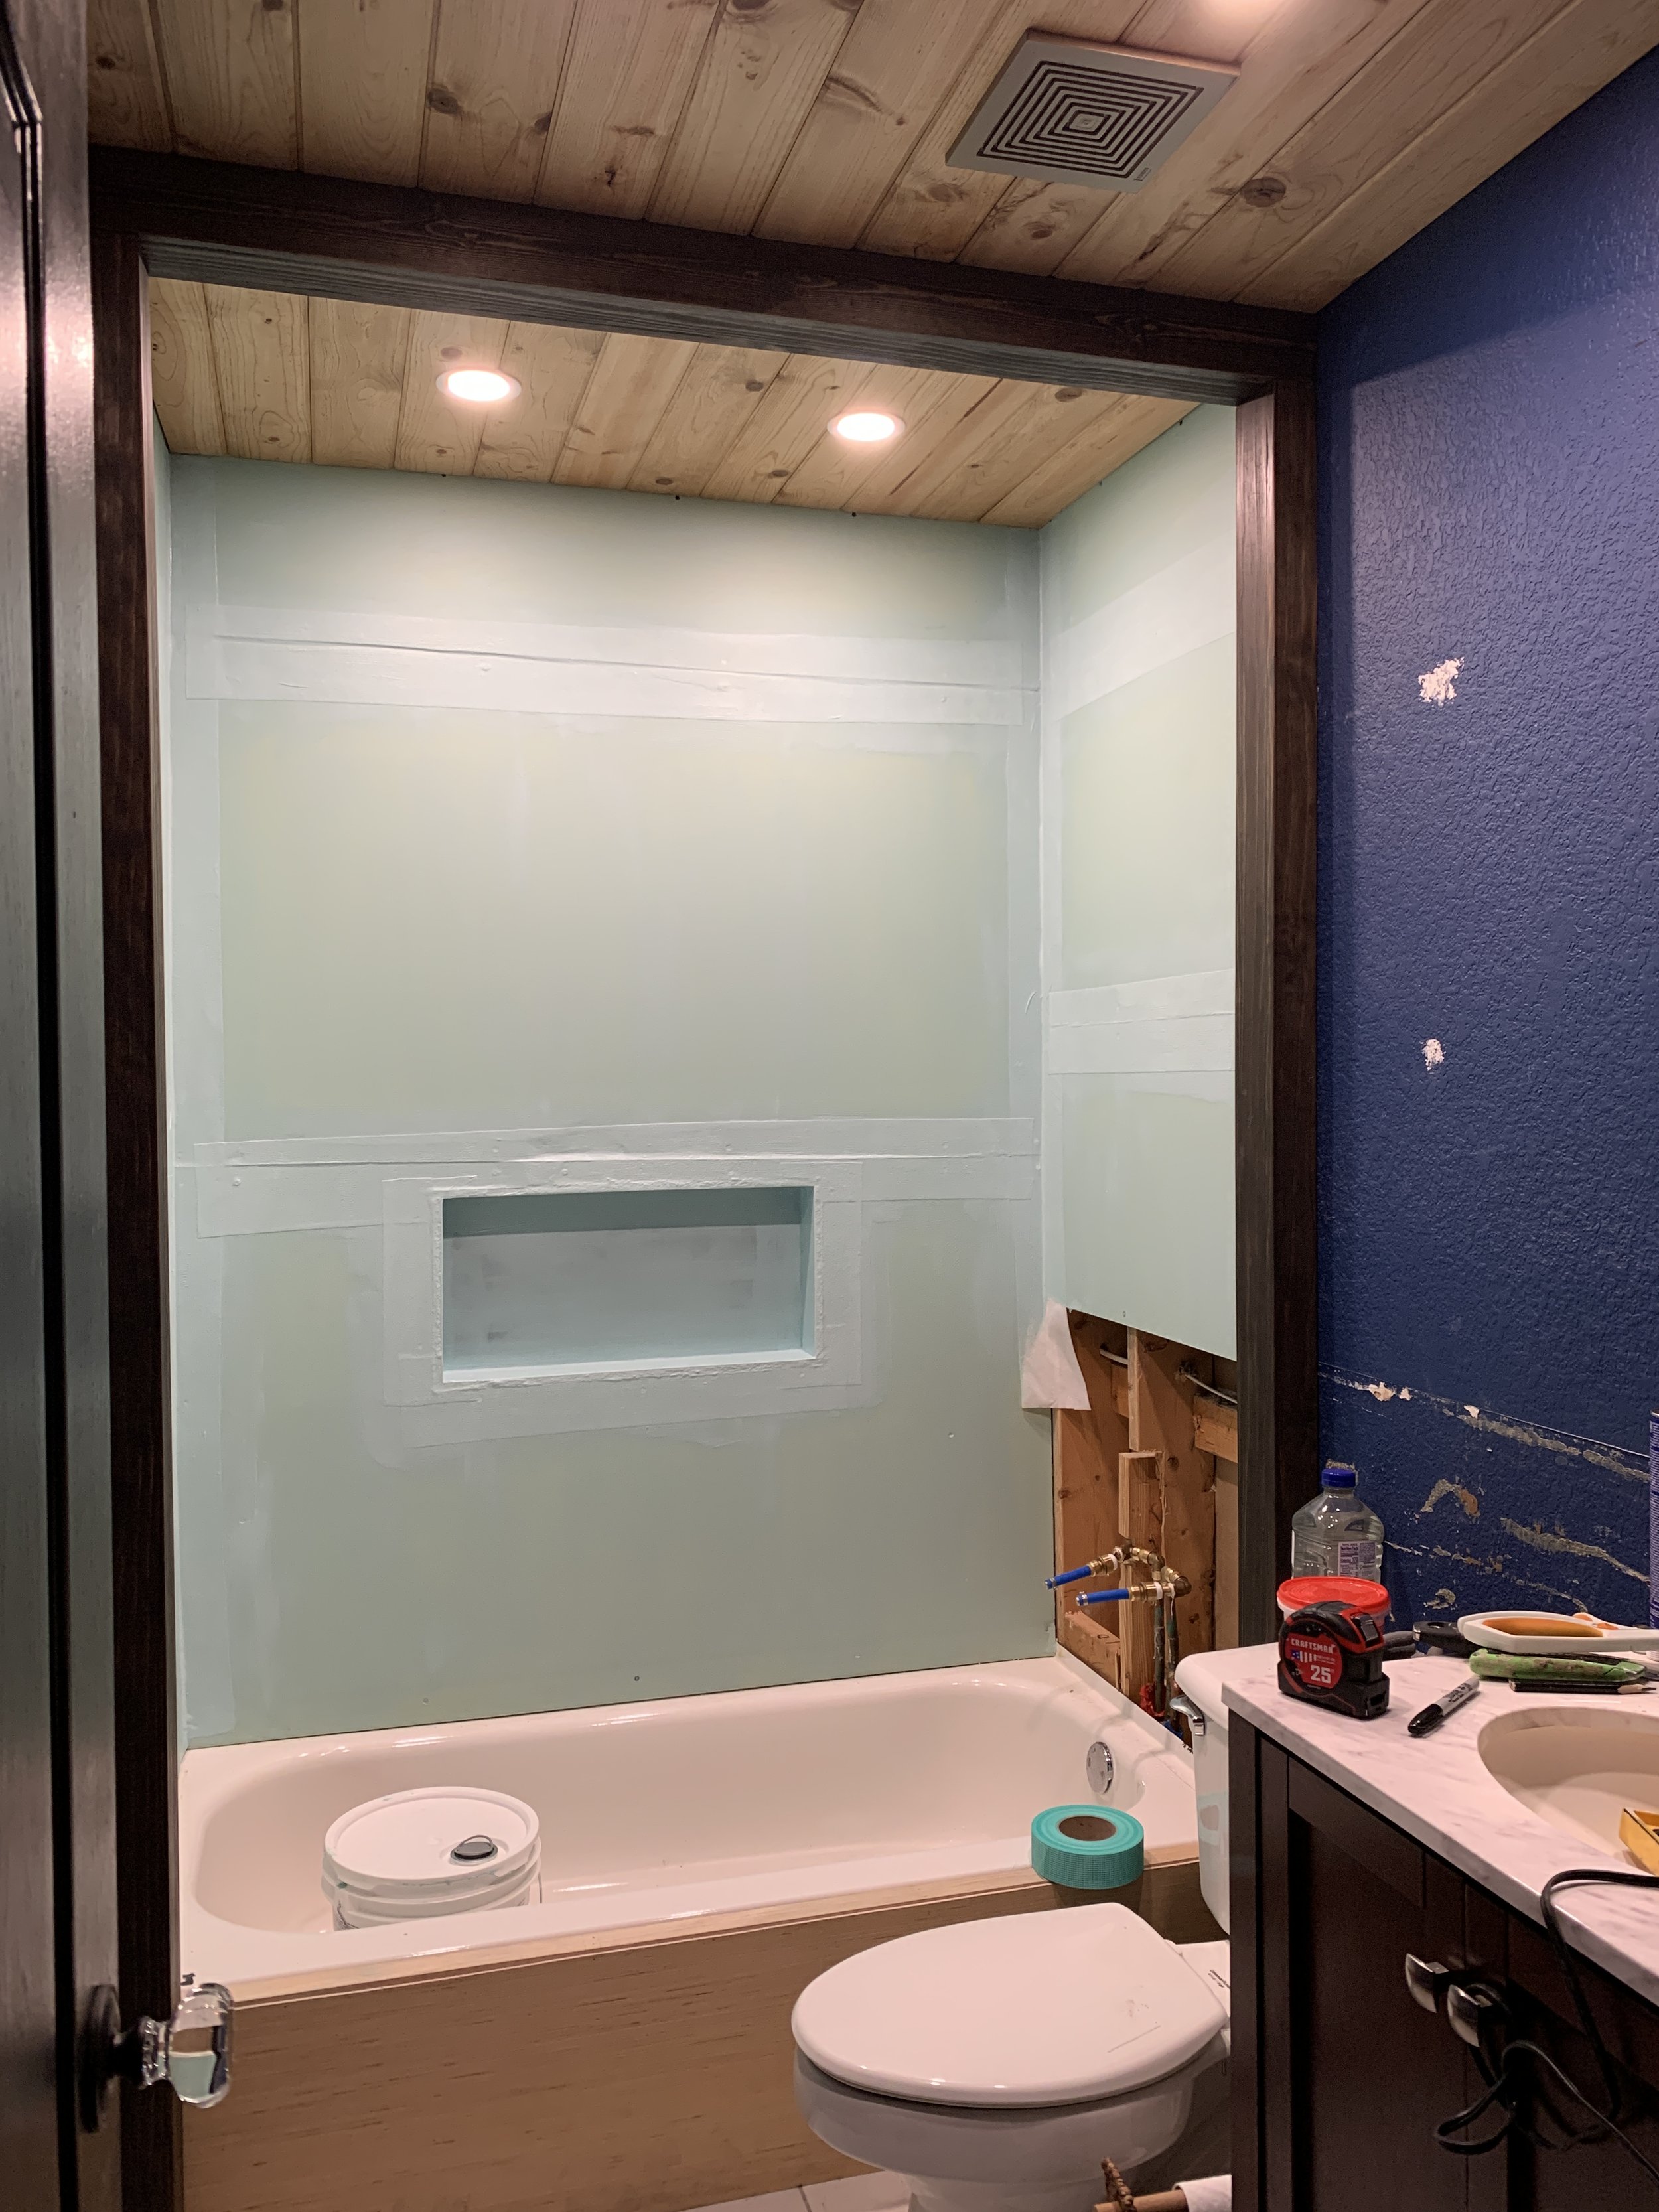
Drywalling the shower
Using drywall screws and the green waterproof mold-resistant drywall, I closed in the shower walls, making sure the screw heads were countersunk into the drywall a bit so the tile lays nicely over it later.

Plumbing the shower/tub
We’ve chosen an exterior-mounted combination shower/tub fixture, which means we don’t need the existing section of copper pipe currently inside the wall running up from the tub feeding the shower head. Instead, we need to get two plumbing lines (one hot, one cold) at the height we want our handles, spaced 150mm, or about 6”, apart.
This has been one major ugh of this renovation so far. Over the course of many hours and days we have used multiple configurations and plumbing fittings to get our two new water lines where we need them. I got them in the right spot the first time, but the issue is the temporary end caps keep slowly leaking. Not a huge deal since each threaded cap on the end sticks out beyond the wall and over into a waterproof tub, and they are just there temporarily to allow us to keep the water on to the whole house in between now and when we’re ready to mount the new shower/tub fixture (which is after we tile and grout). The problem here is I need to get all of the fittings leak-free so that I can finish closing up this section of wall with drywall so I can waterproof it and begin tiling the area so I can permanently fix the leaking areas with the actual shower fixture. The other solution is we turn the water off in the whole house in the meantime, which isn’t exactly an easy way to live over the course of who knows how many days/weeks.
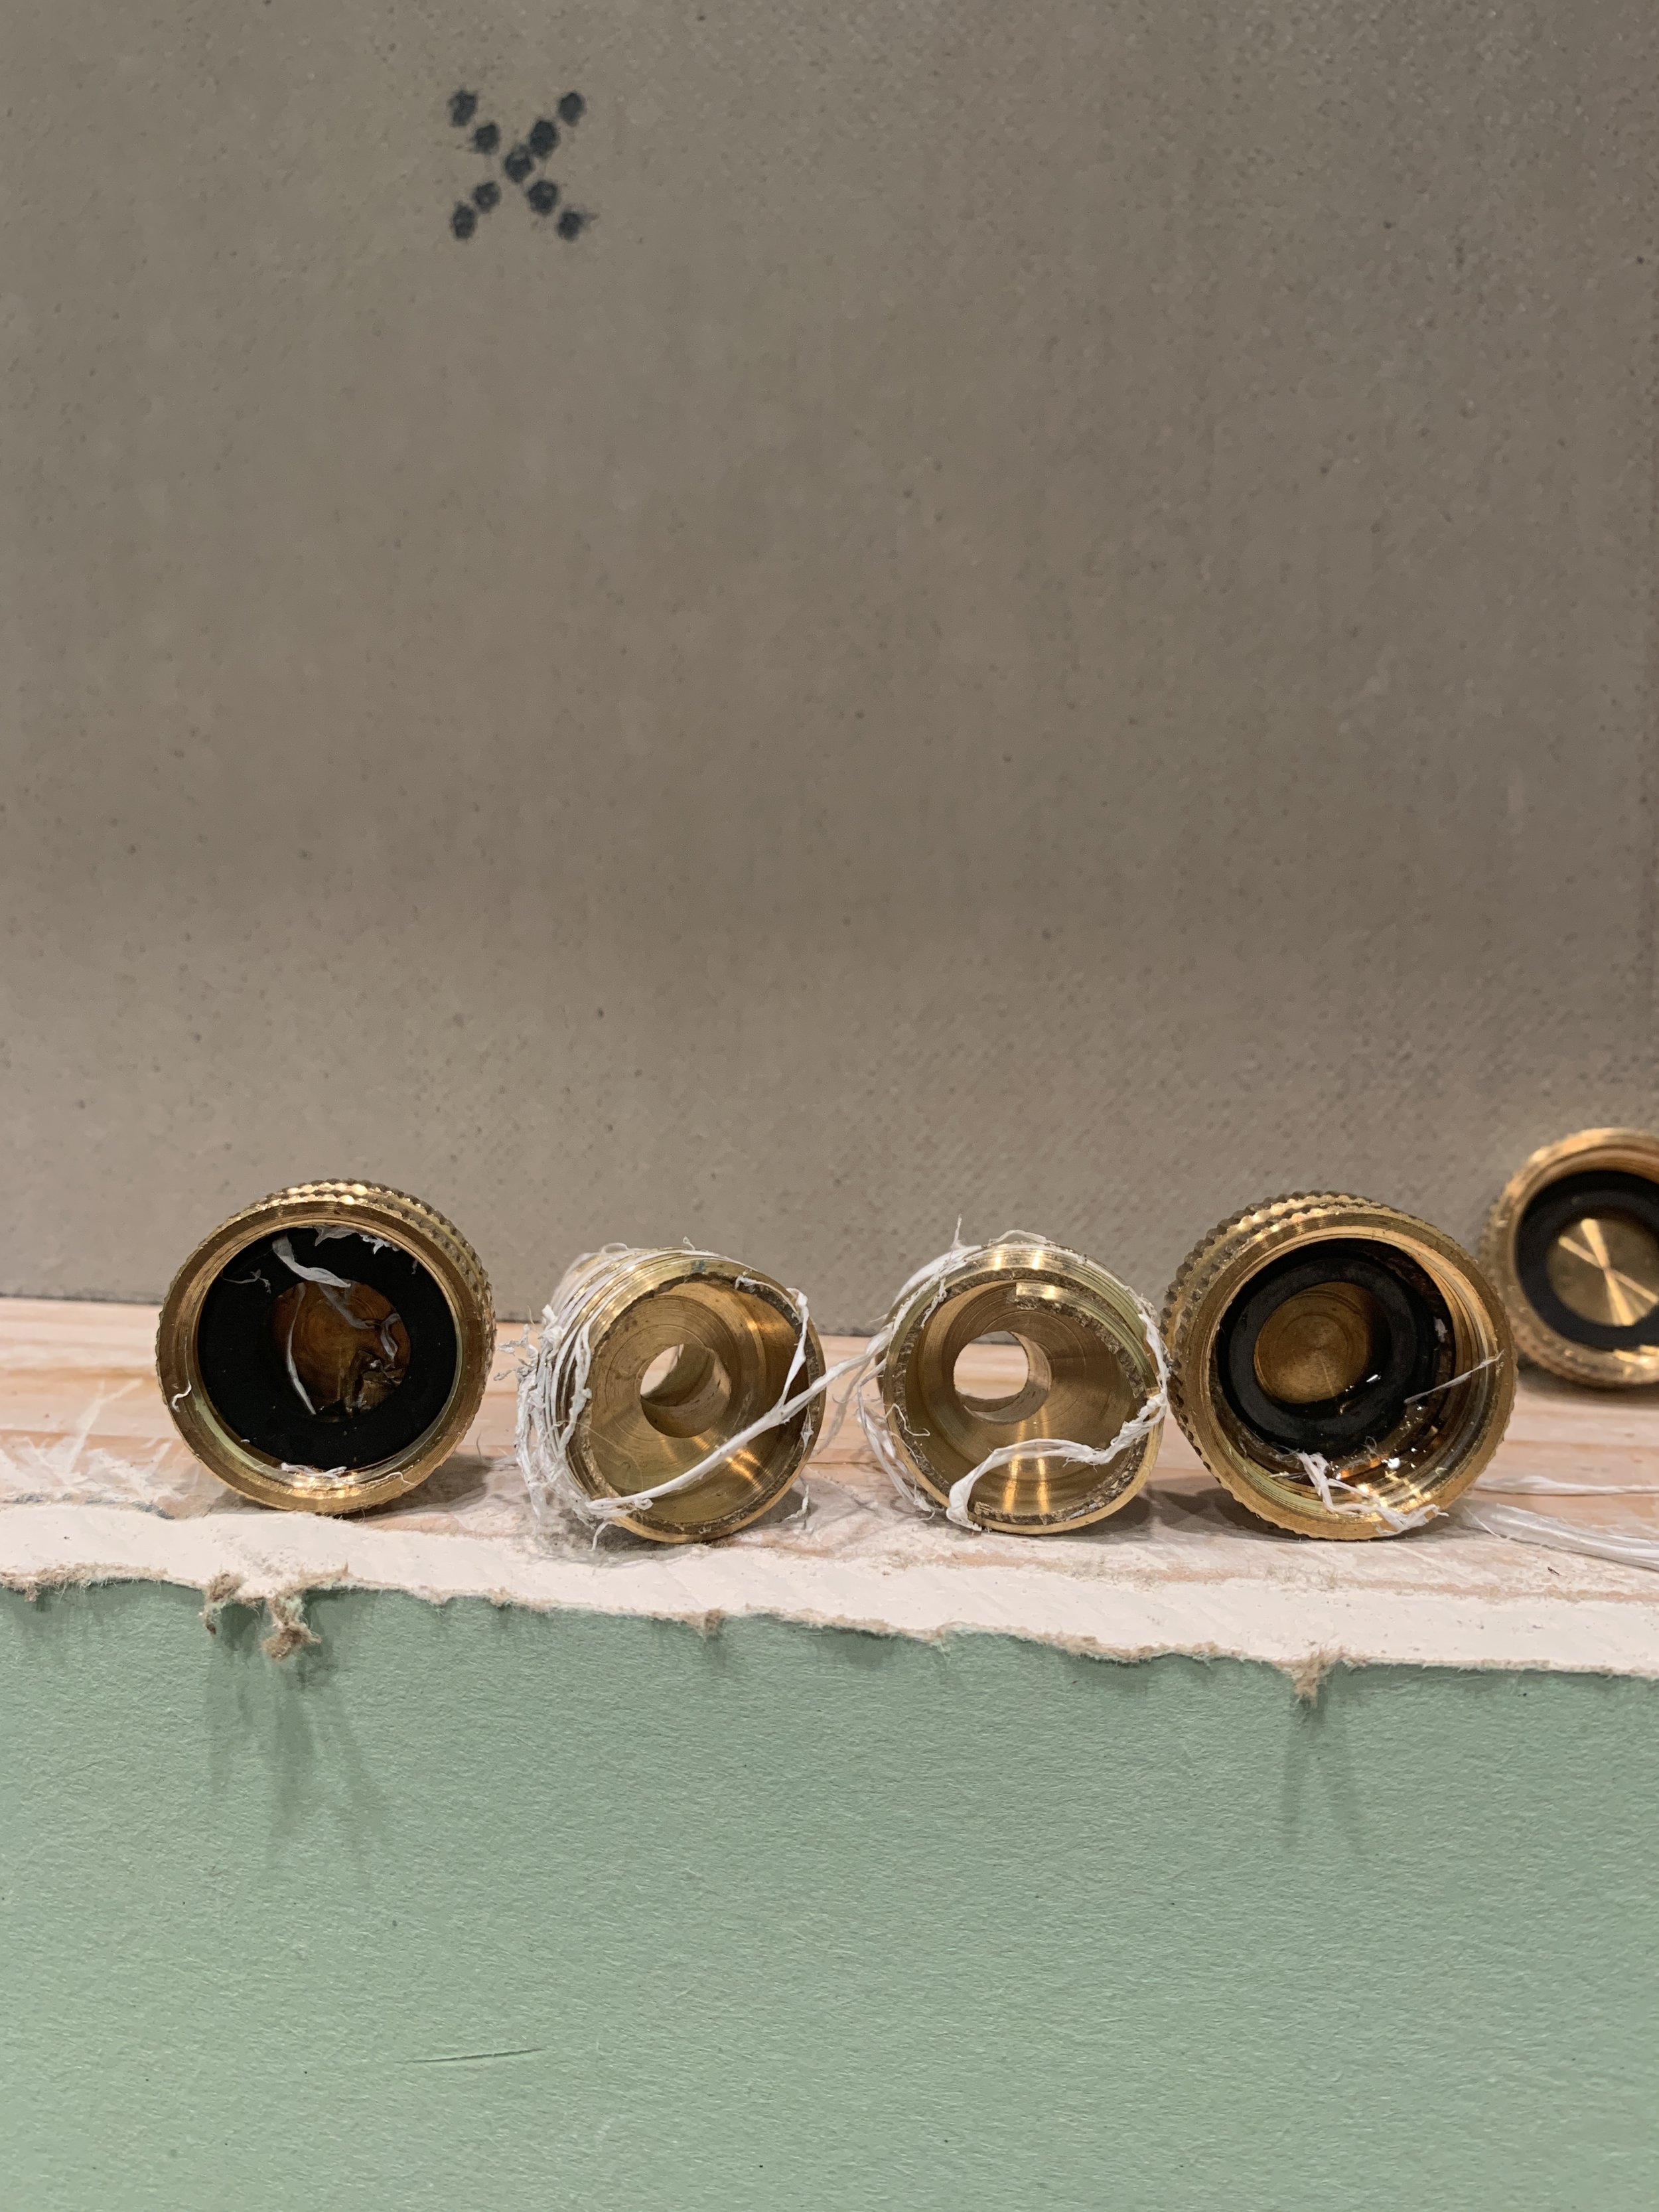
For the first iteration (shown below), I was able to get these leak-free, but that’s because I put the caps on without using the angle adapters, which seem to be the trouble makers each time.

These are the caps that I broke many times. The ones that screw on to the 3/4”side of the adapters we need to use to connect to the back of the fixture.

The silver lining is we successfully used Sharkbite adapters to transition from the existing copper to the new PEX pipe. Not a product plug, but Sharkbite fittings and adapters are the best thing ever. As of the time of this writing, I’ve gone through four threaded brass caps, four angled threaded brass adapters (and accidentally broken two of them), and the verdict is still out on a successful solution to this issue…
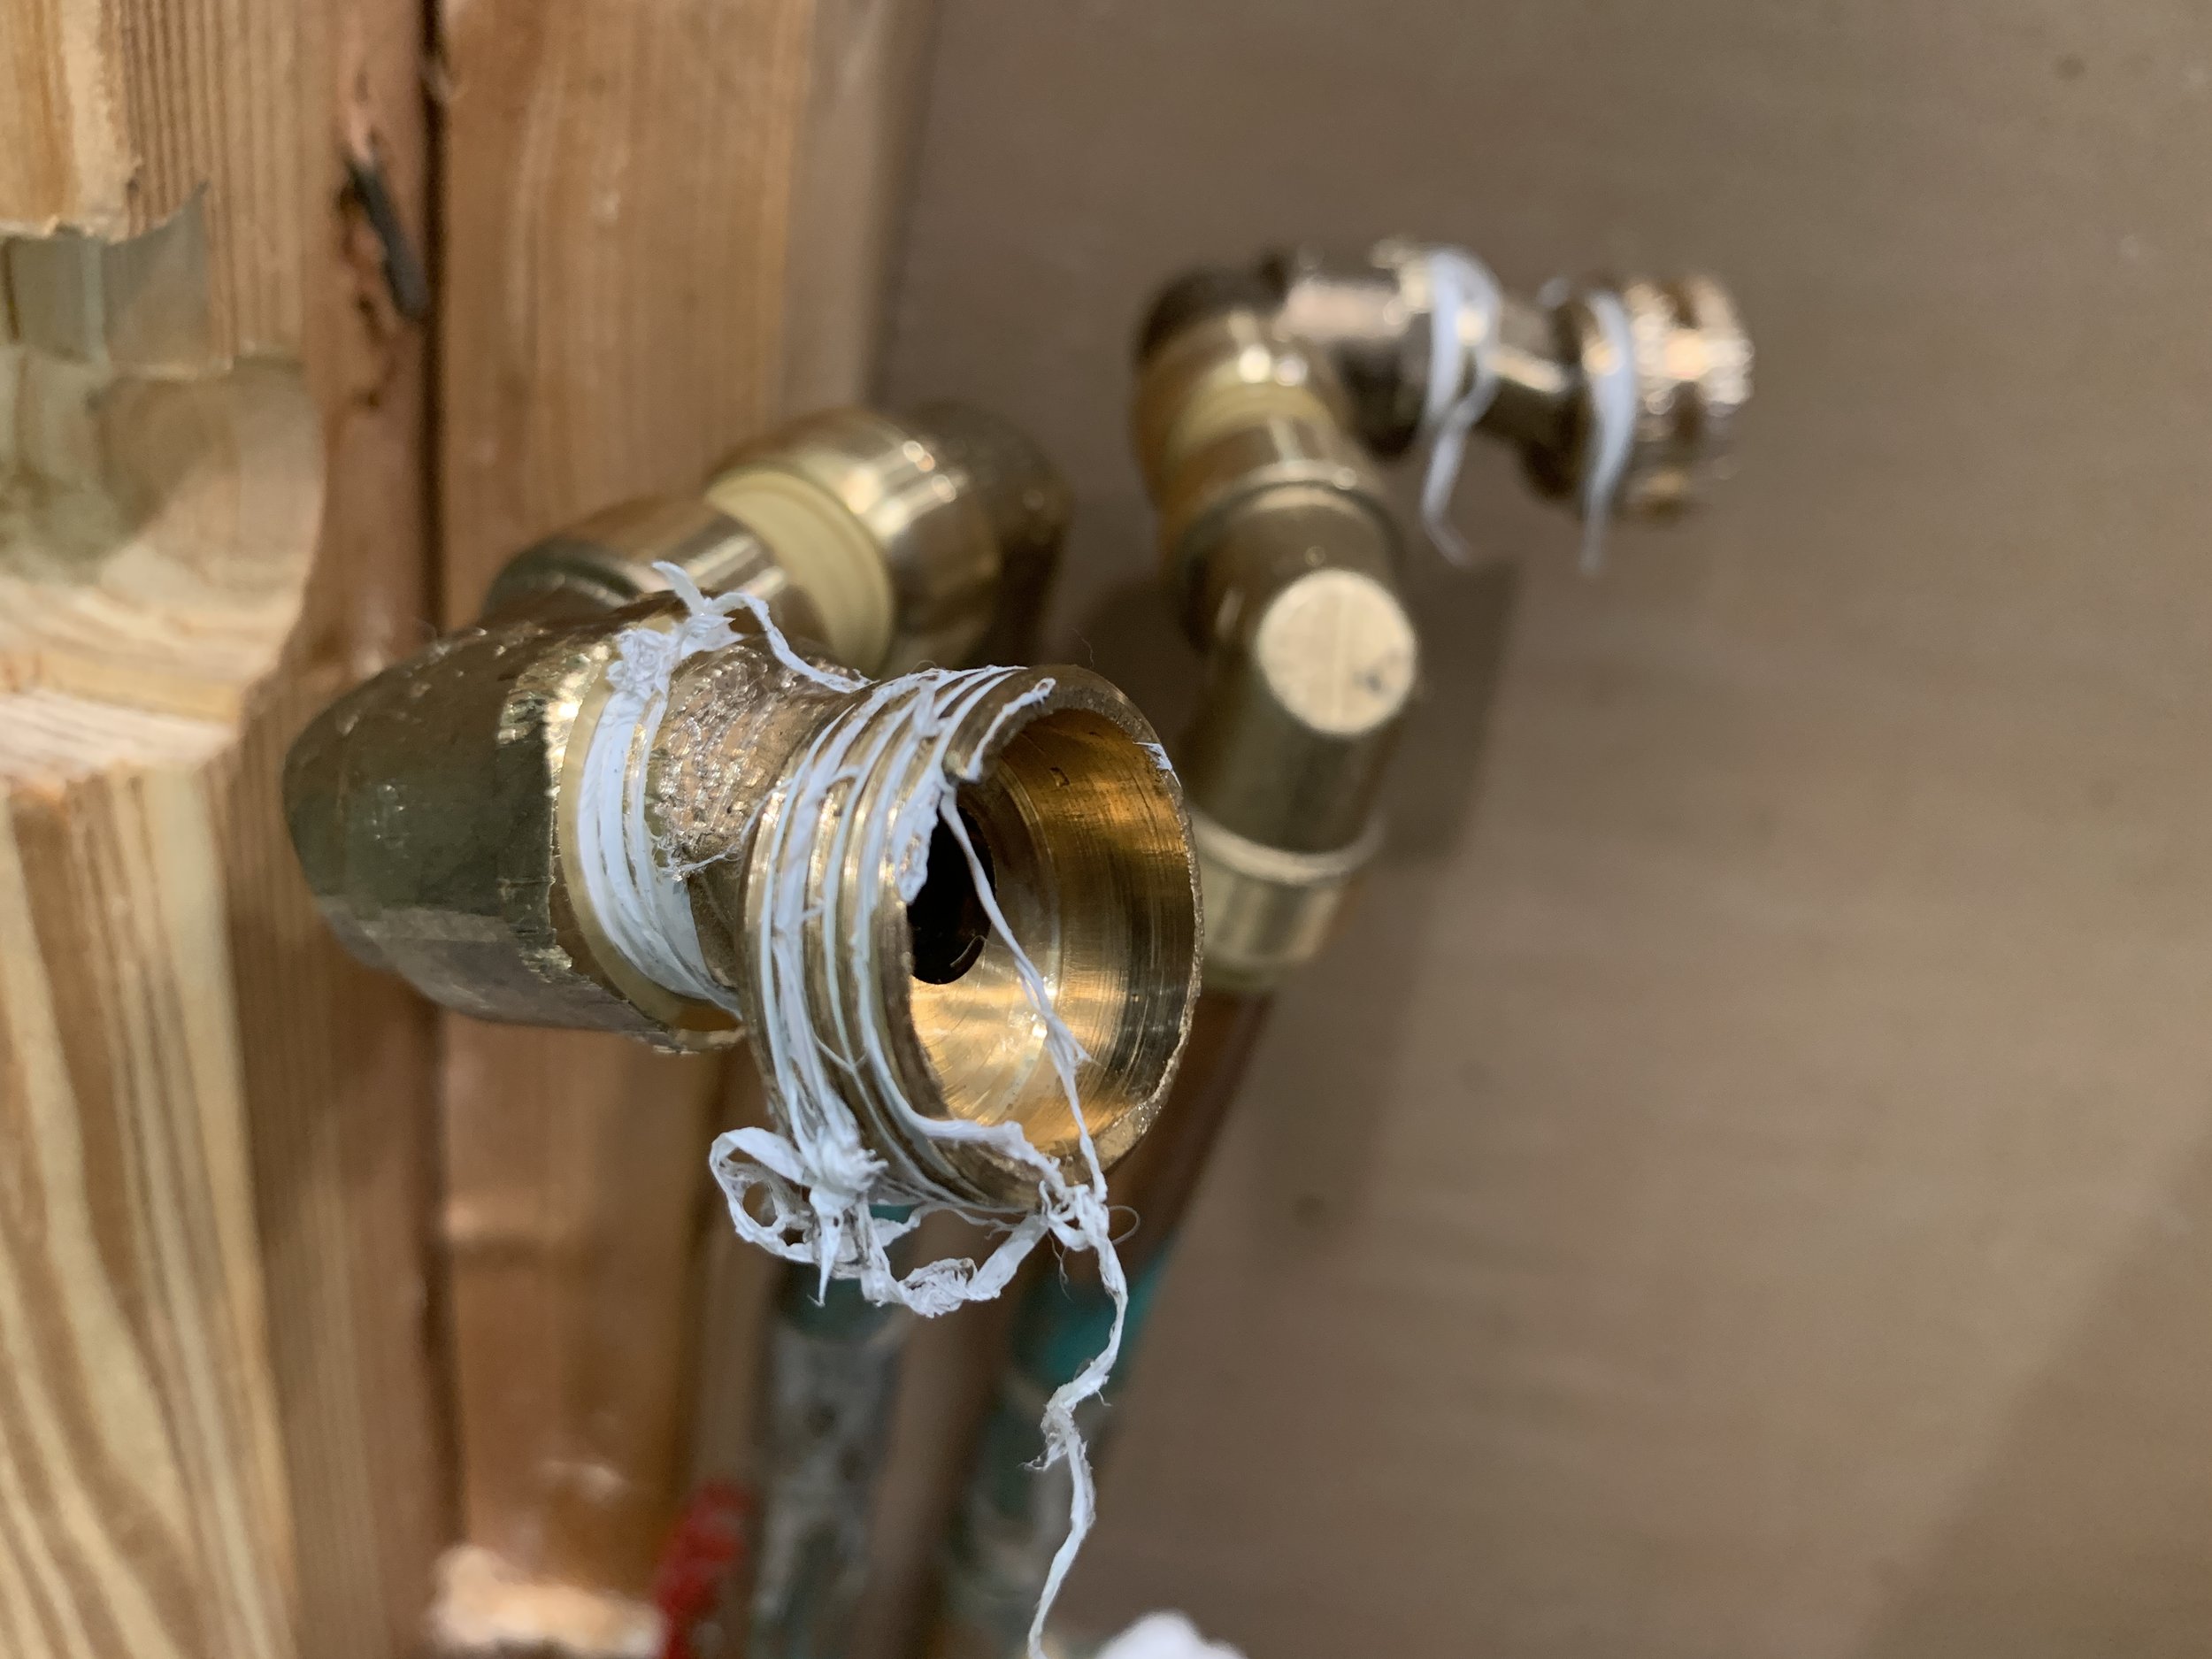
Wish us luck.
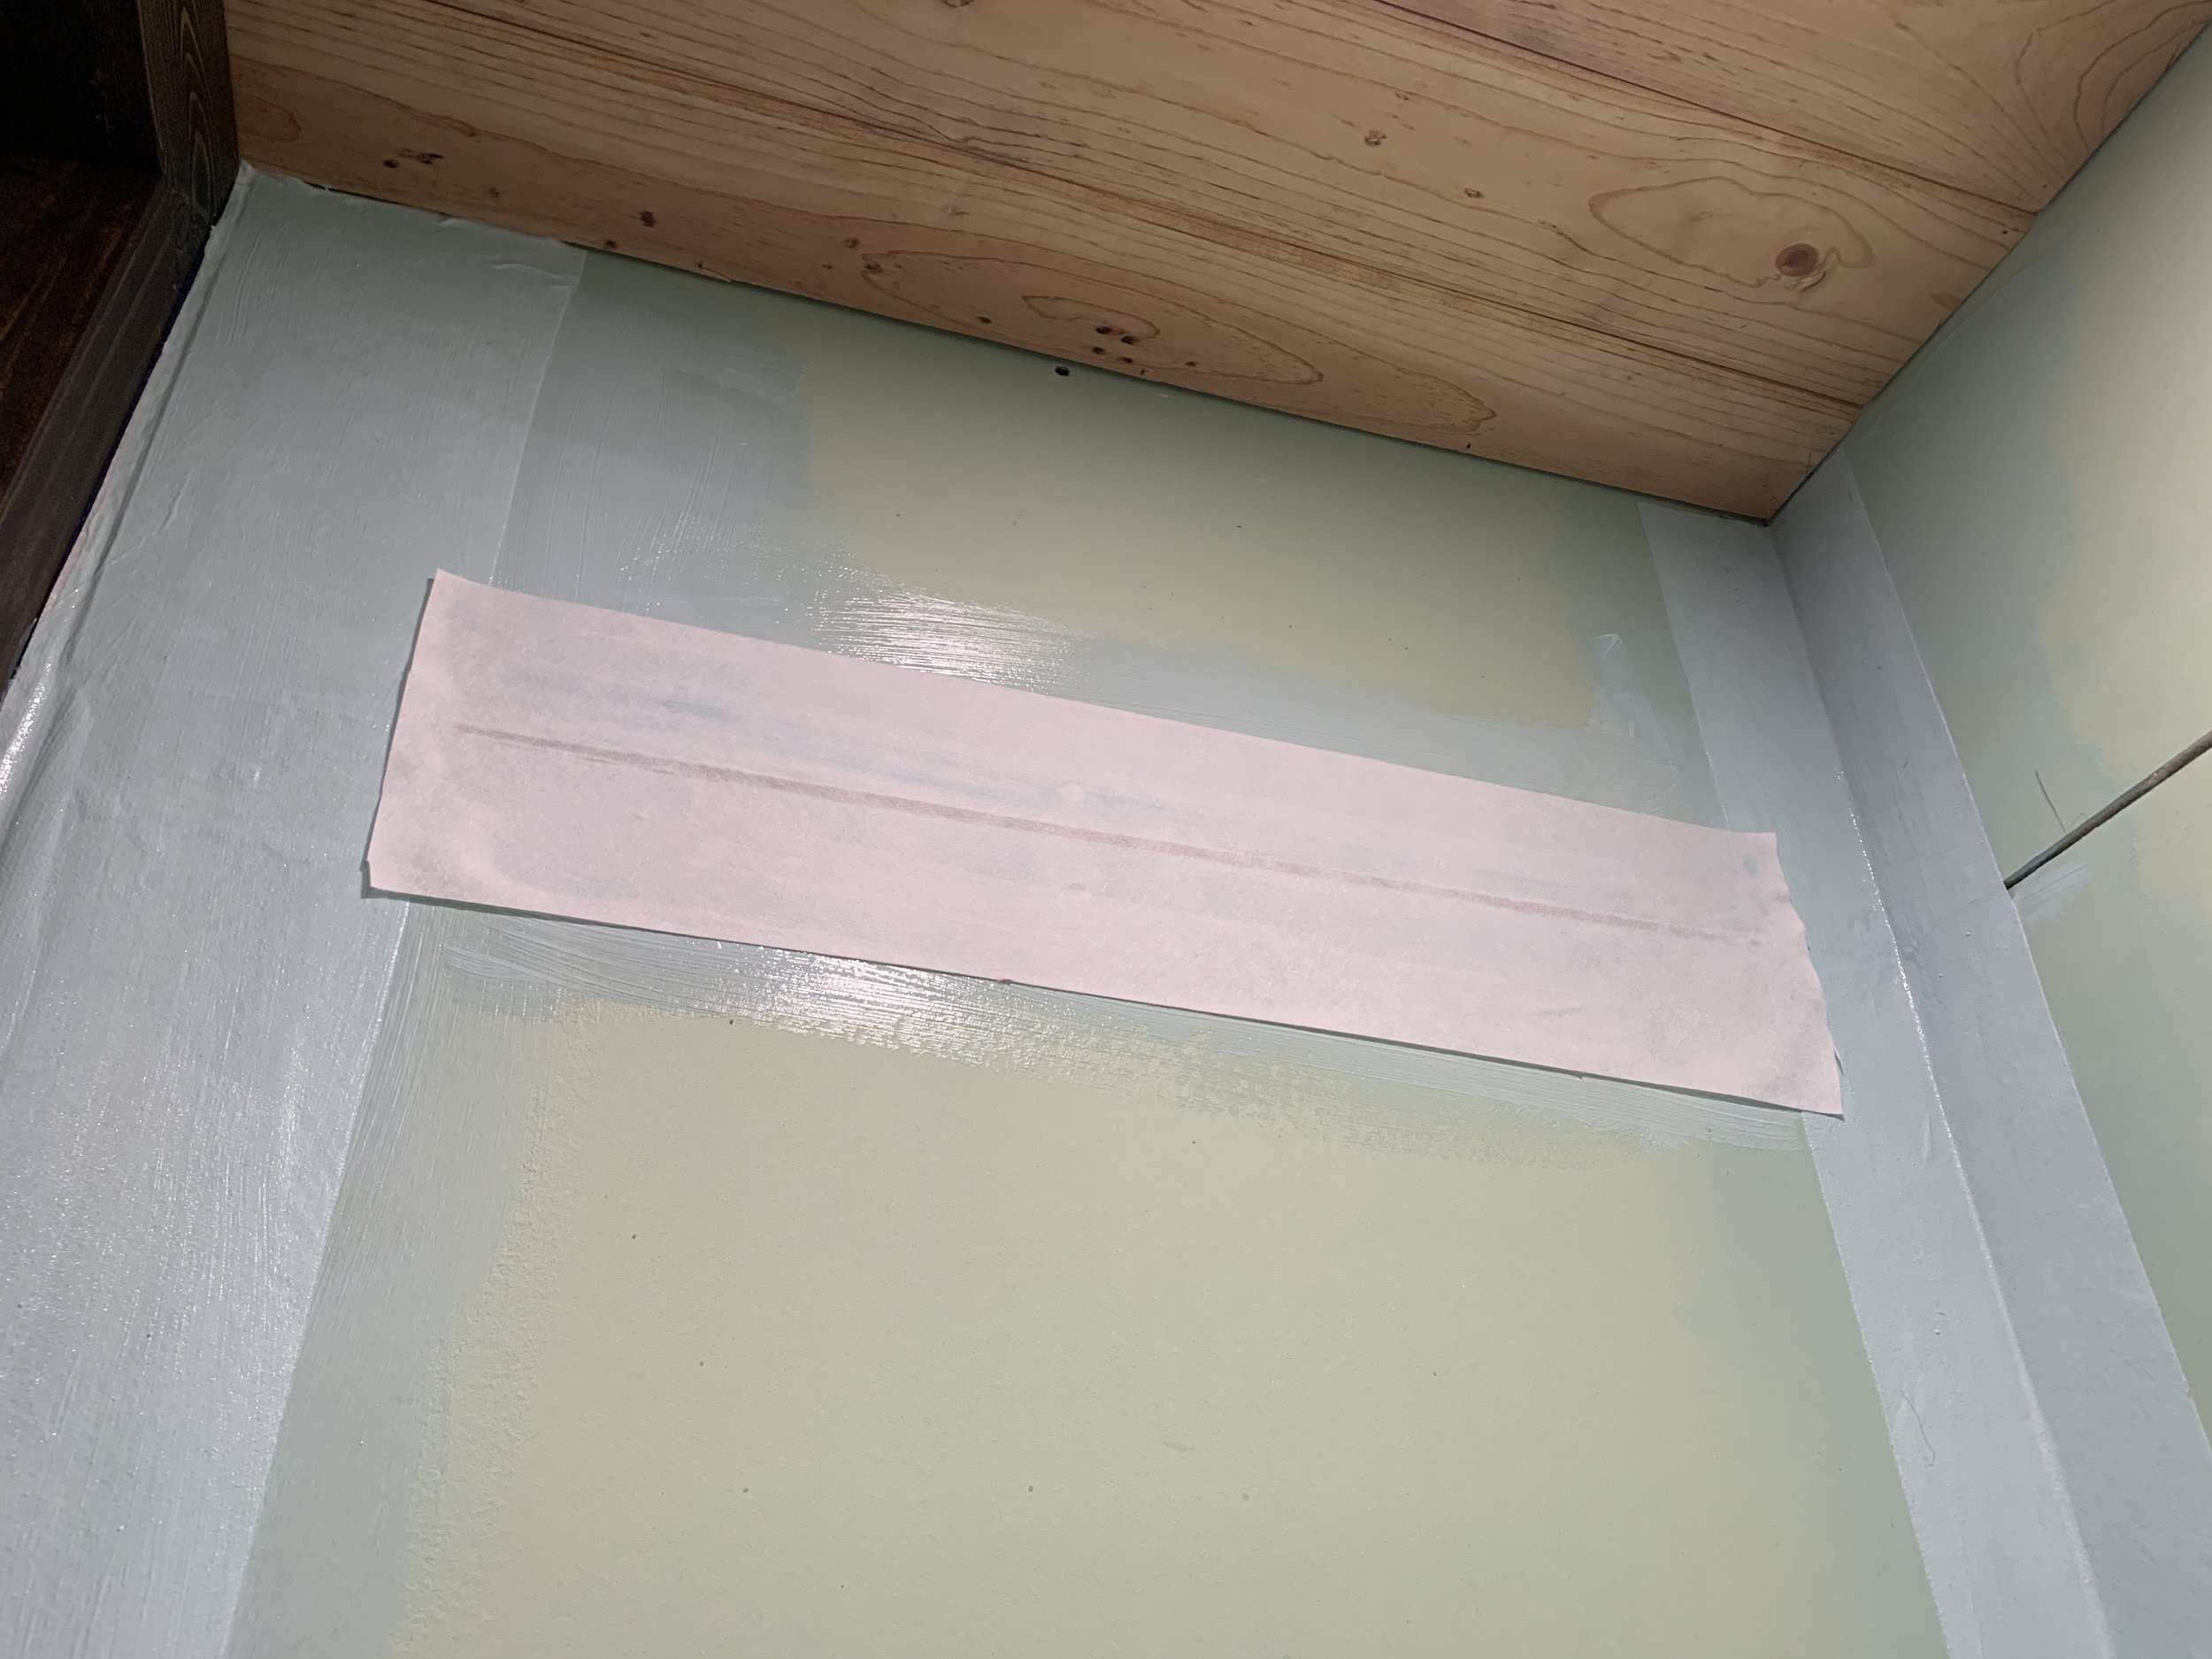
Waterproofing the shower
So far I’ve painted on one coat of Mapei Aquadefense, using waterproofing tape at the seams and corners where the drywall pieces meet.
The waterproofing tape looks and feels kind of like felt fabric, and since it’s not adhesive it’s held in place between layers of wet liquid waterproofing. It locks in place when the liquid dries.
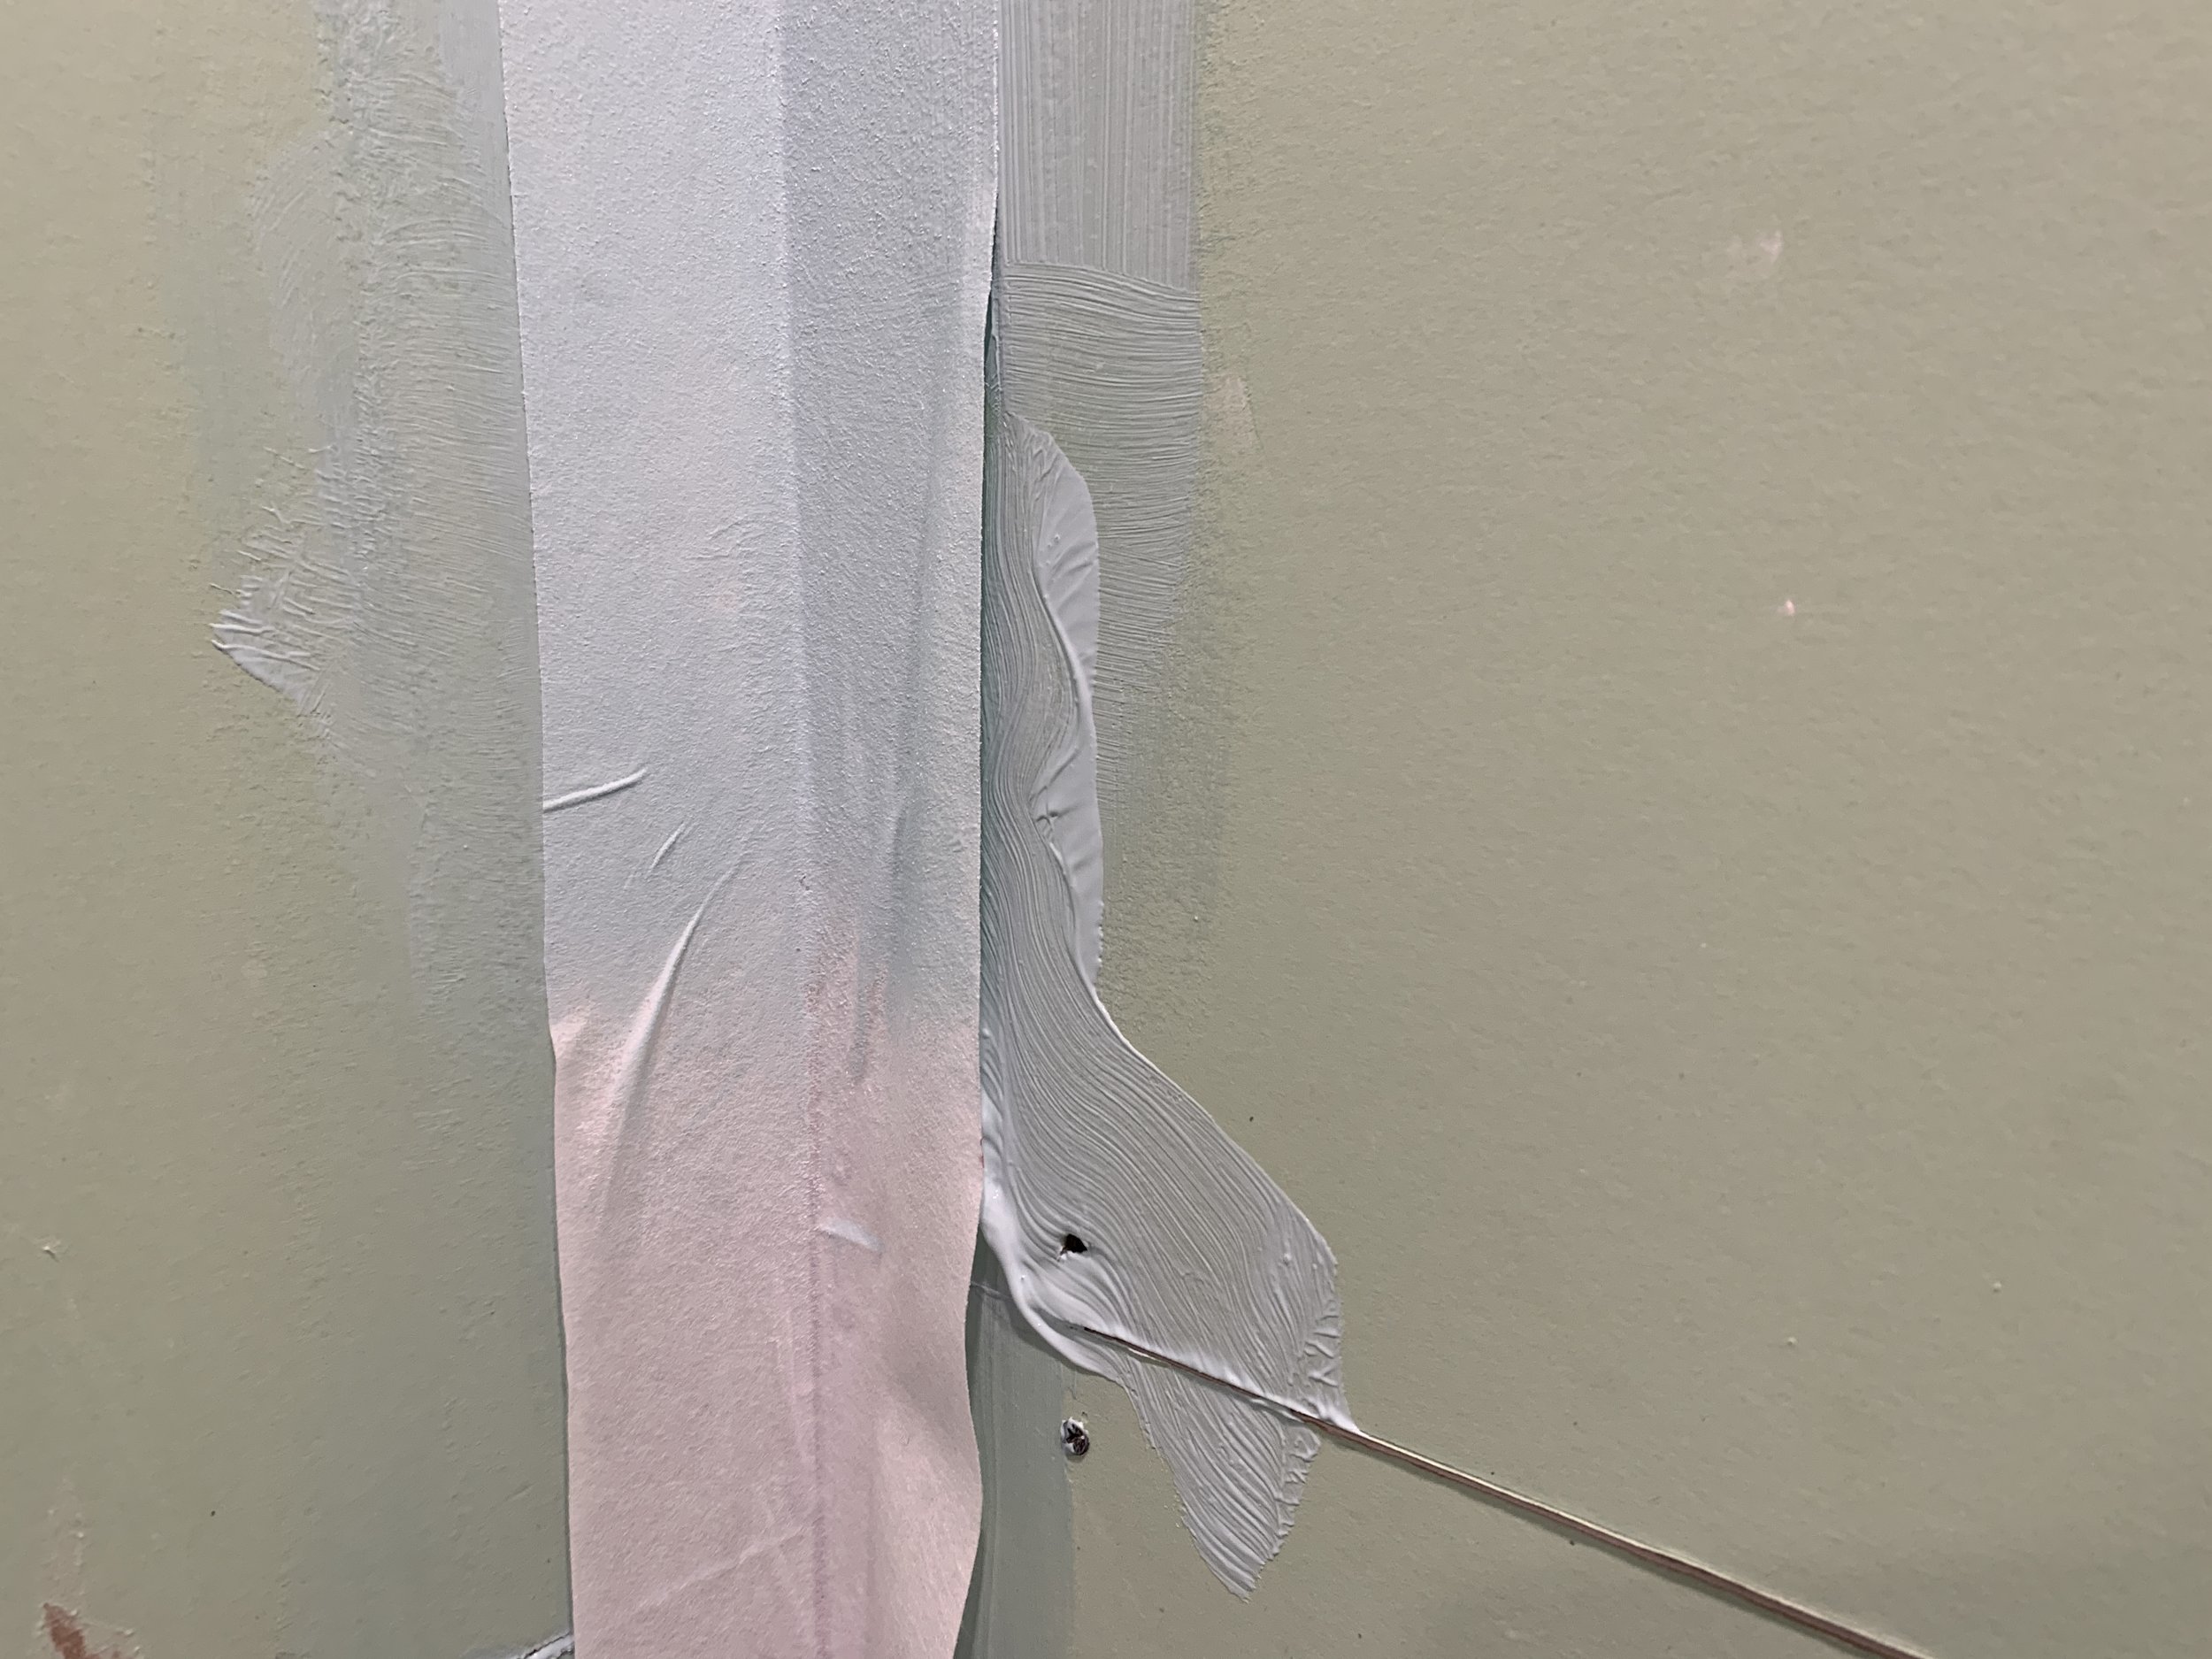
According to the package directions, each gallon of Mapei Aquadefense liquid waterproofing membrane covers about 60 sq. ft. For our size shower (about 77 sq. ft.) we should be using roughly all of a 3.5 gallon bucket when it’s all said and done, brushing on three thick layers with a brush.
Again, I’m feeling pretty accomplished so far, but I’m still seeing how much we’ve got planned that there is to do and hoping we can wrap up this slowly leaking plumbing quickly and have no more tile-related issues. Until then, I’ll move forward with the rest, working around the plumbing – which means a hole in the shower wall stays while the rest starts getting more polished.
This upcoming week I’m planning on working more on the shower plumbing – hopefully fixing the leaks – starting the wall moulding in the rest of the bathroom (finally covering up our ugly irregular wall texture!) as well as making over our existing vanity.
In addition to posting challenge updates here every Wednesday, we’ll be sharing our progress on Instagram, so make sure to follow along over there if you aren’t already. (And don’t forget to check out all of the other talented One Room Challengers tackling their spaces this season.)