DIY Built-In Wine Rack: How-To + The Reveal
This is part two of a series. Don’t forget to check out the part one.
Welcome back, y’all! Last week we shared the plan for the dust-collector zone that is the awkward area above the upper kitchen cabinets – transforming it from a weird unused space into much-needed storage to help us continue to declutter our counters.
Today we’re covering the complete how-to (so you can recreate it for yourself) plus the project reveal at the end.
Not into the how-to part? Skip ahead to the after.
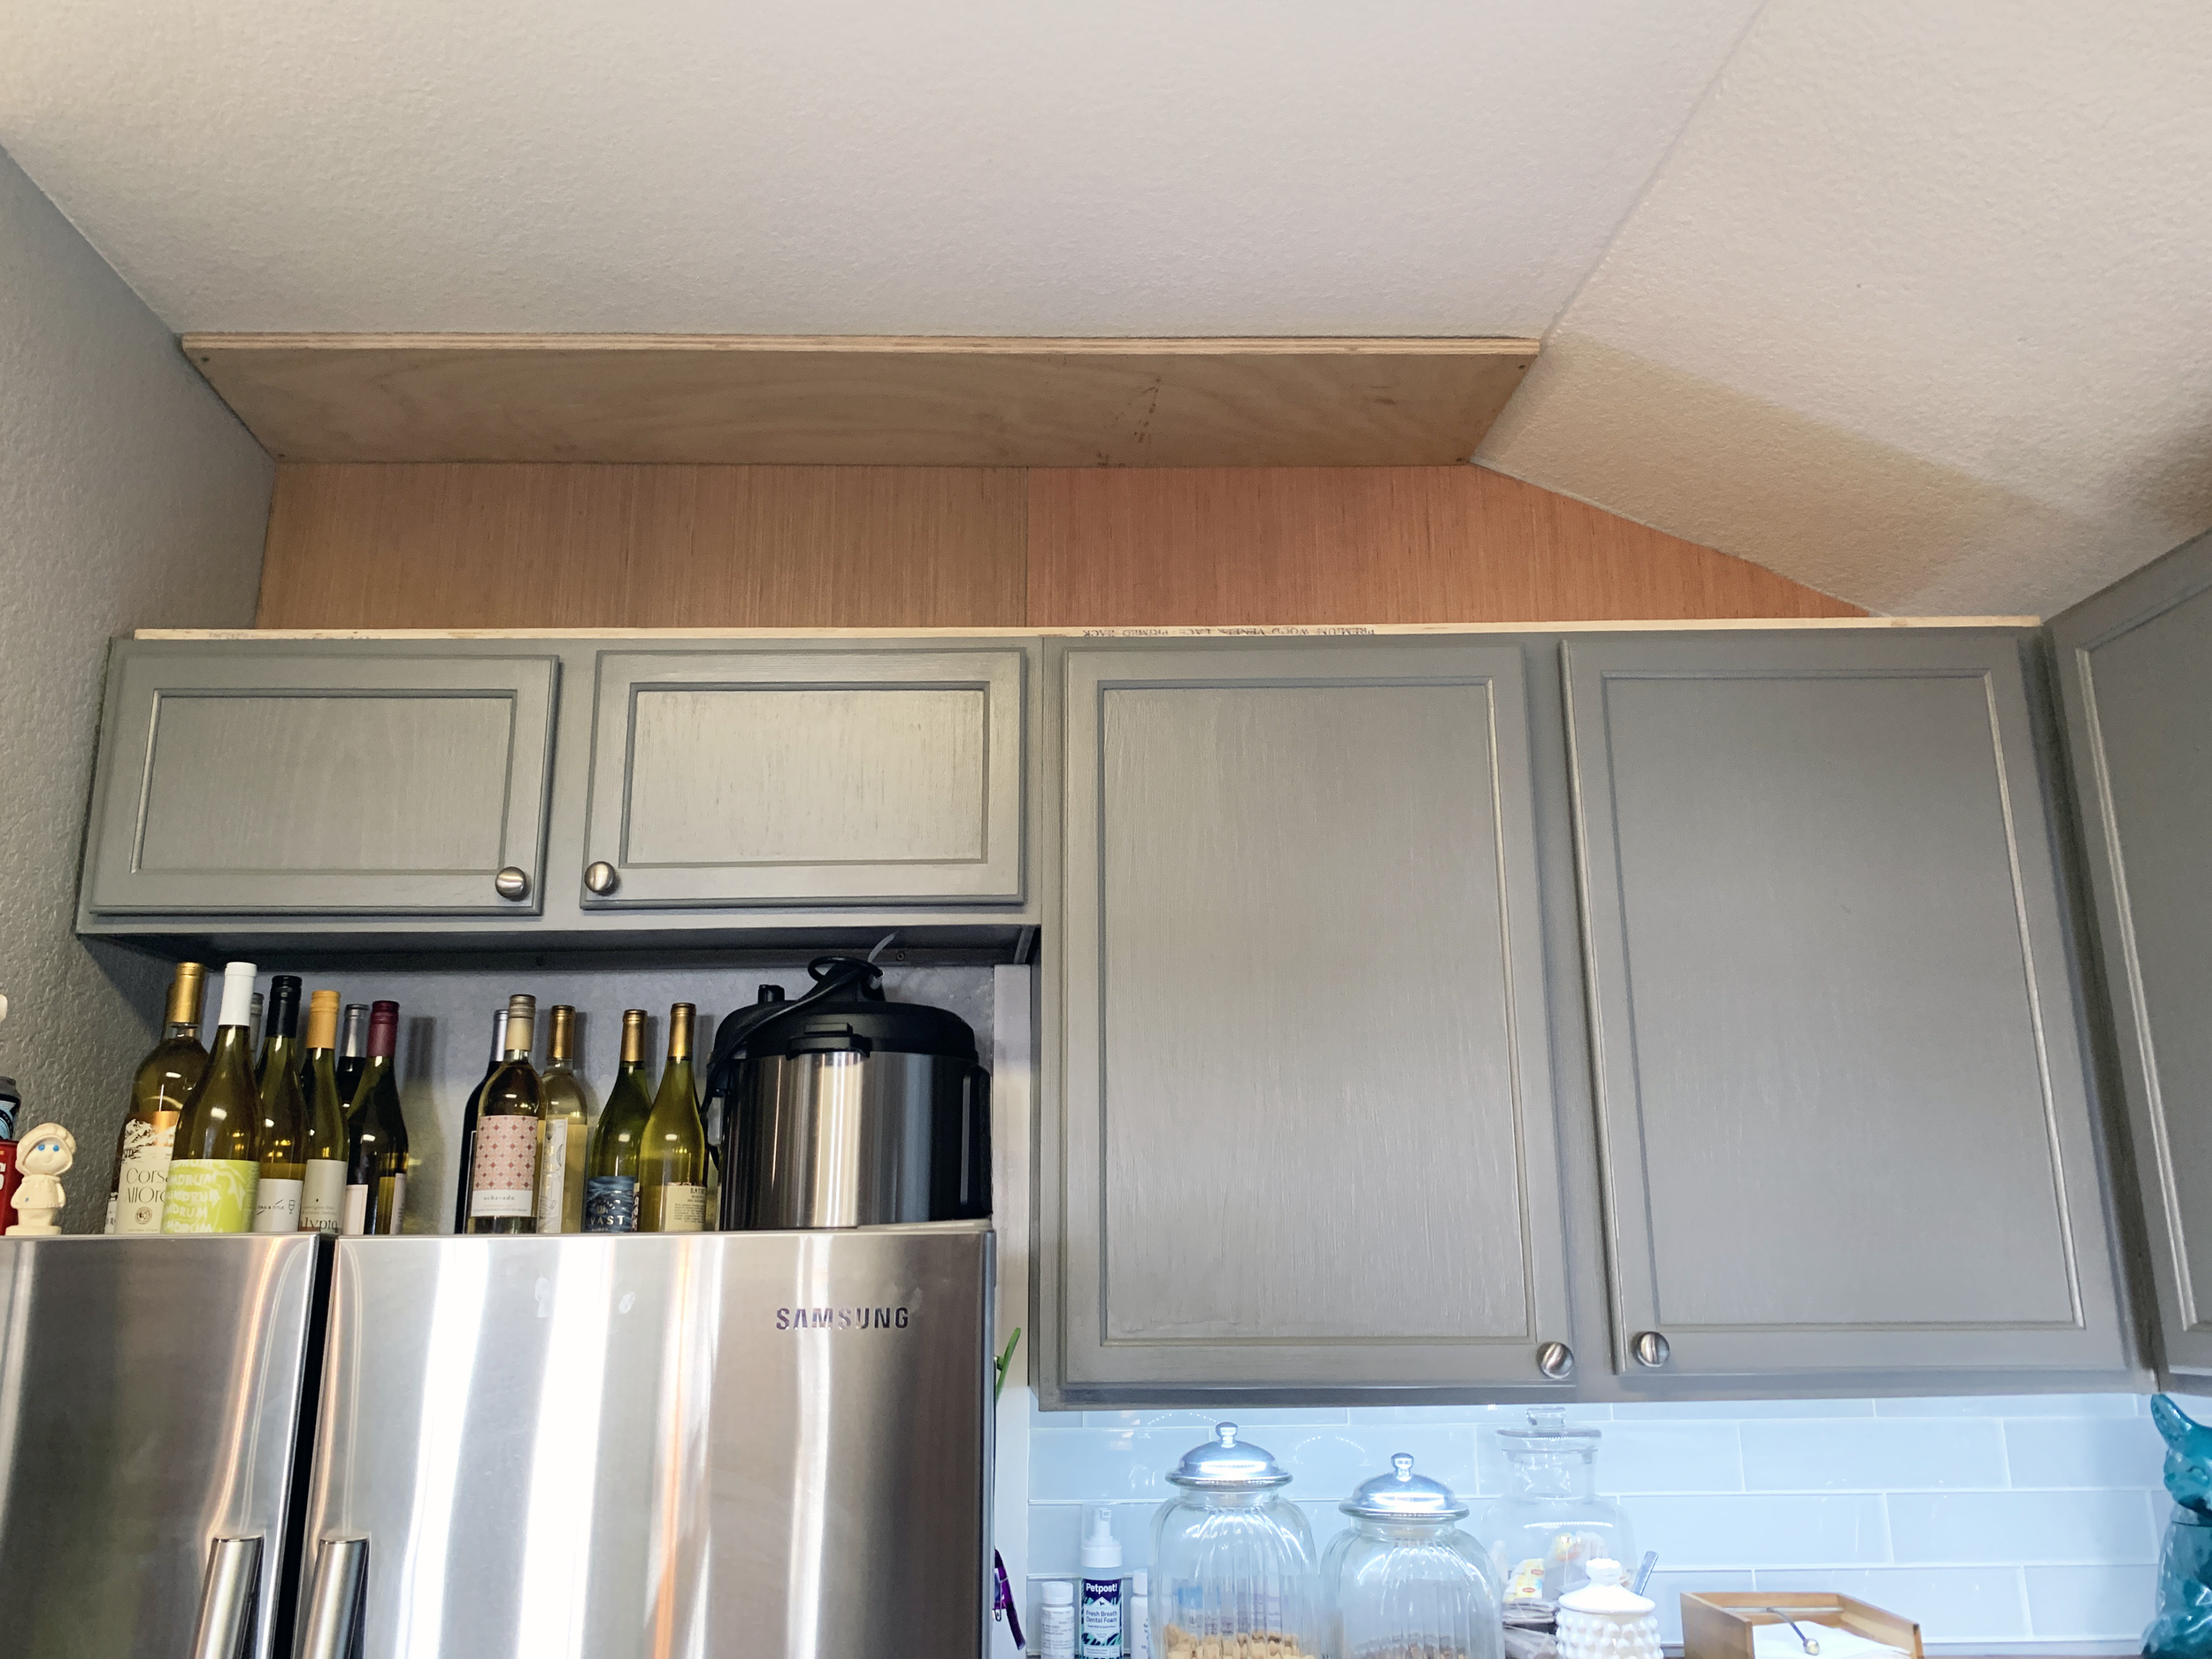
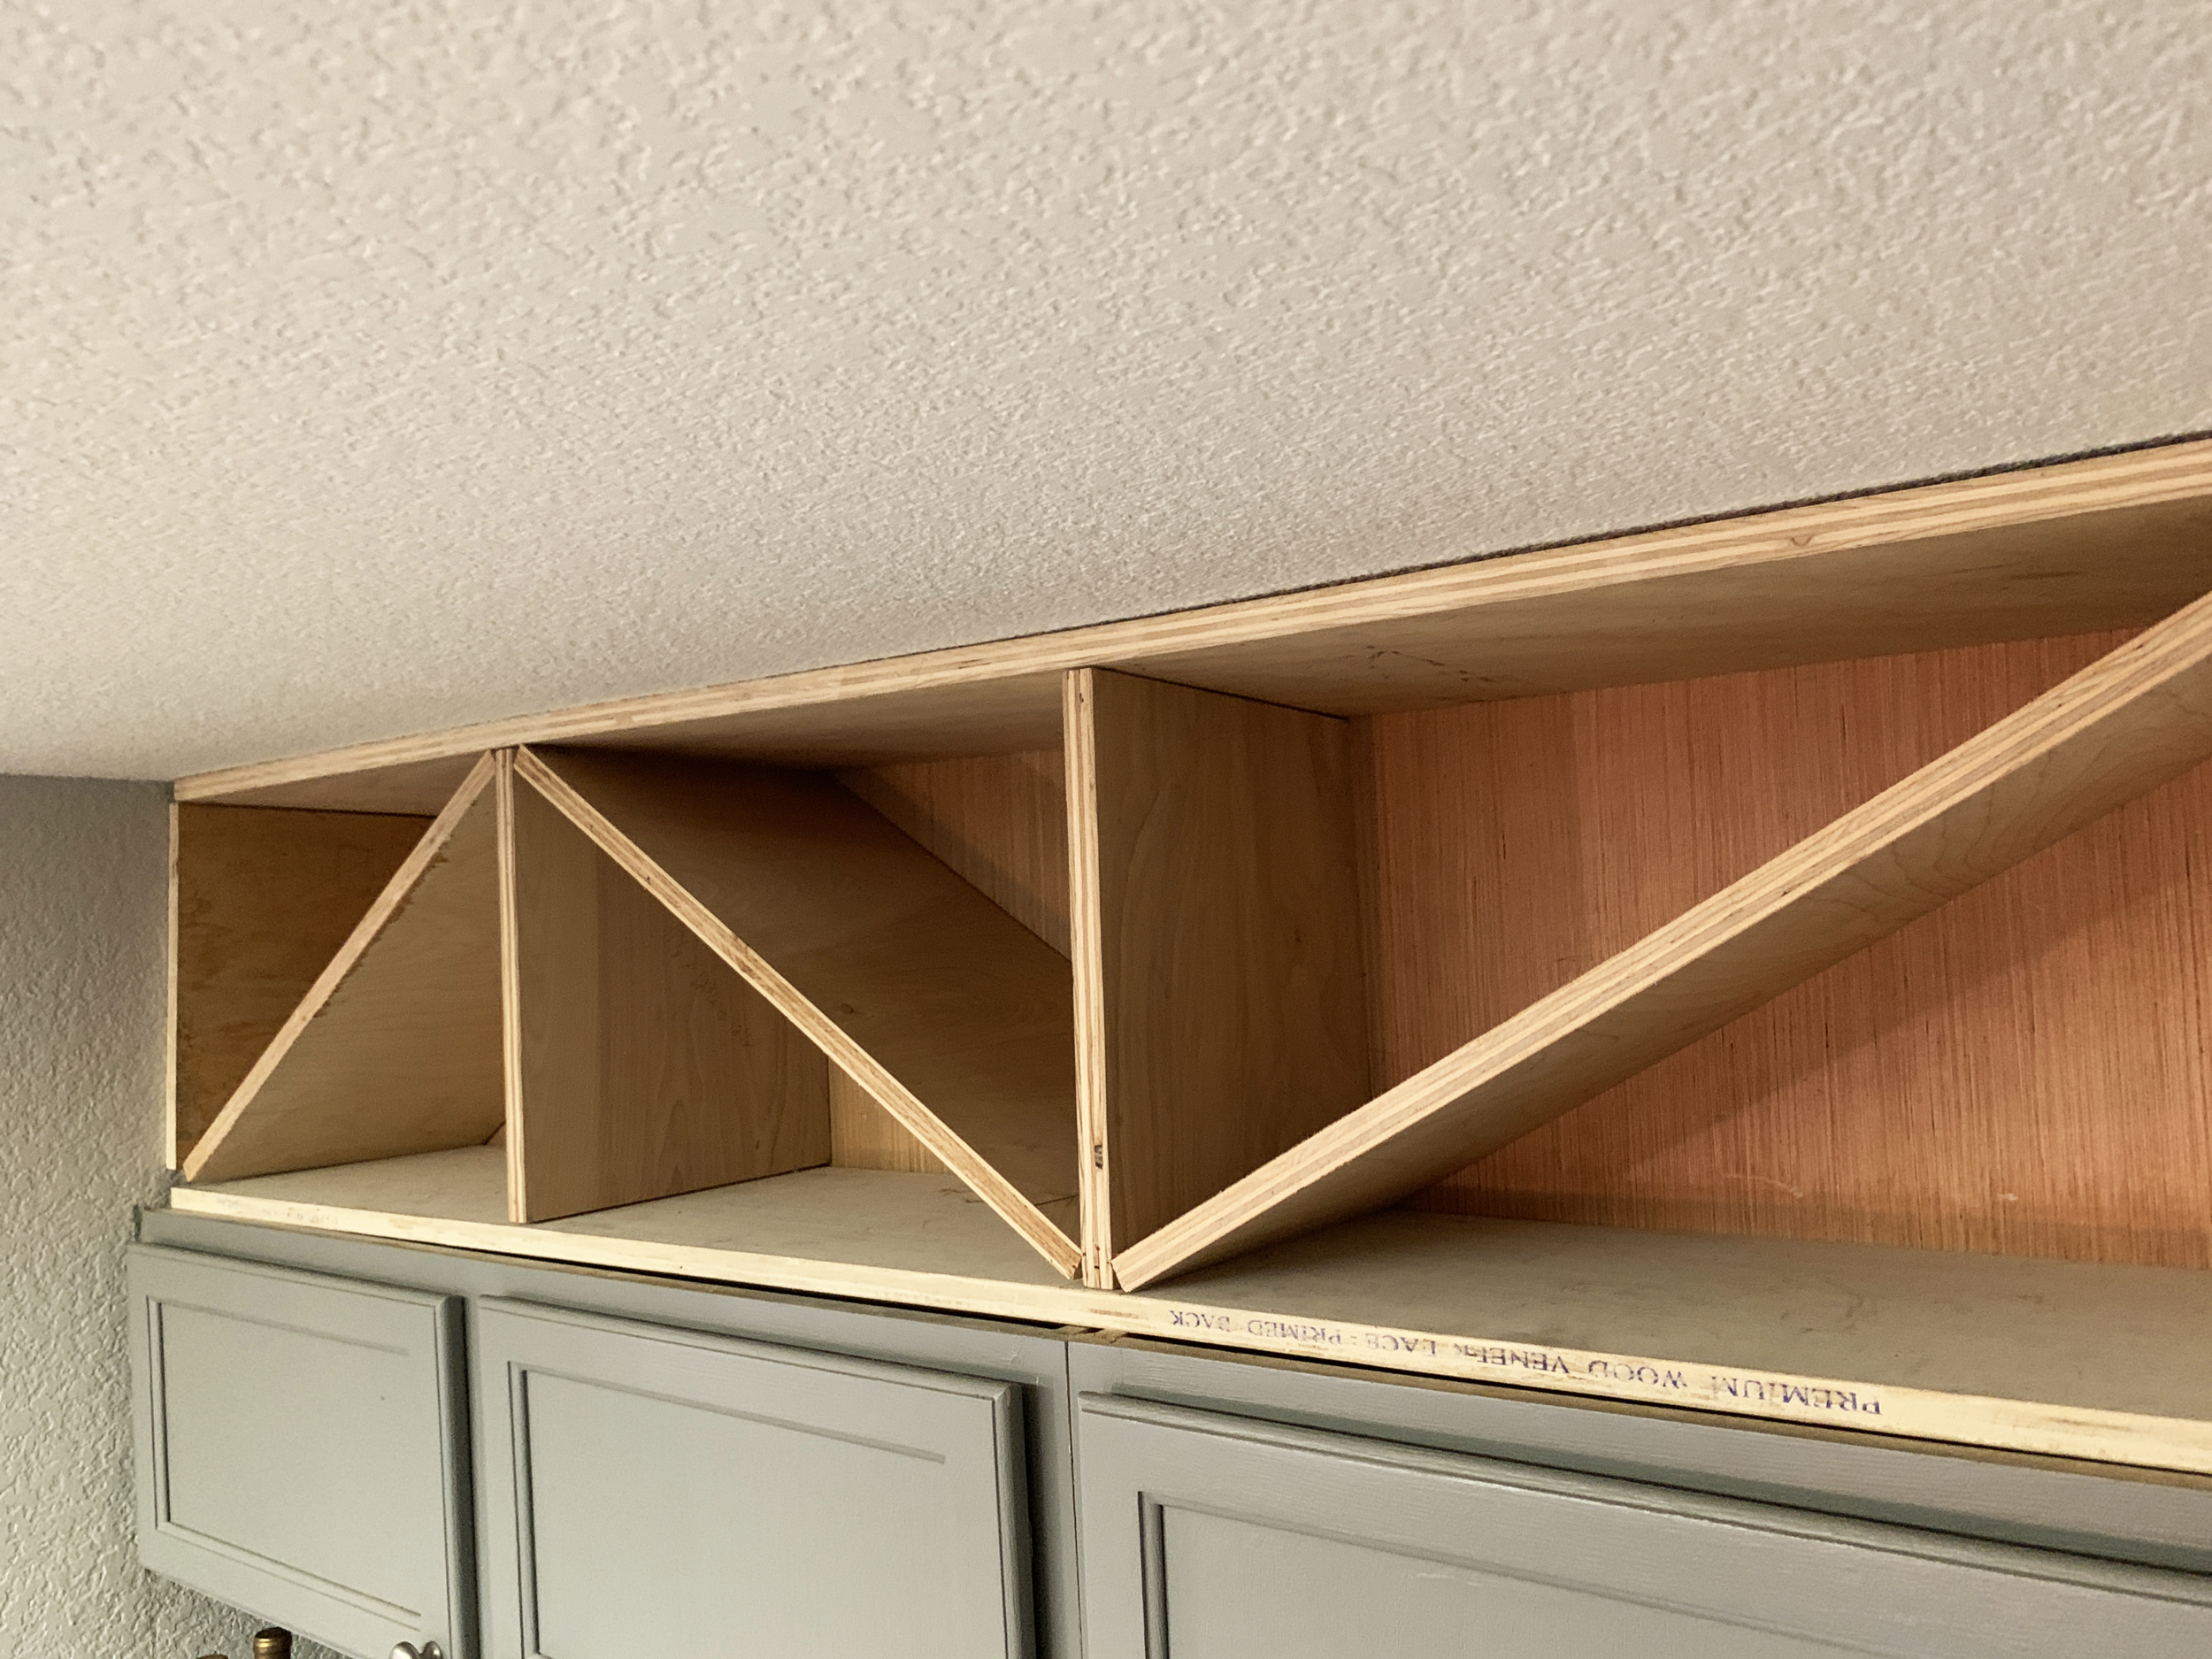
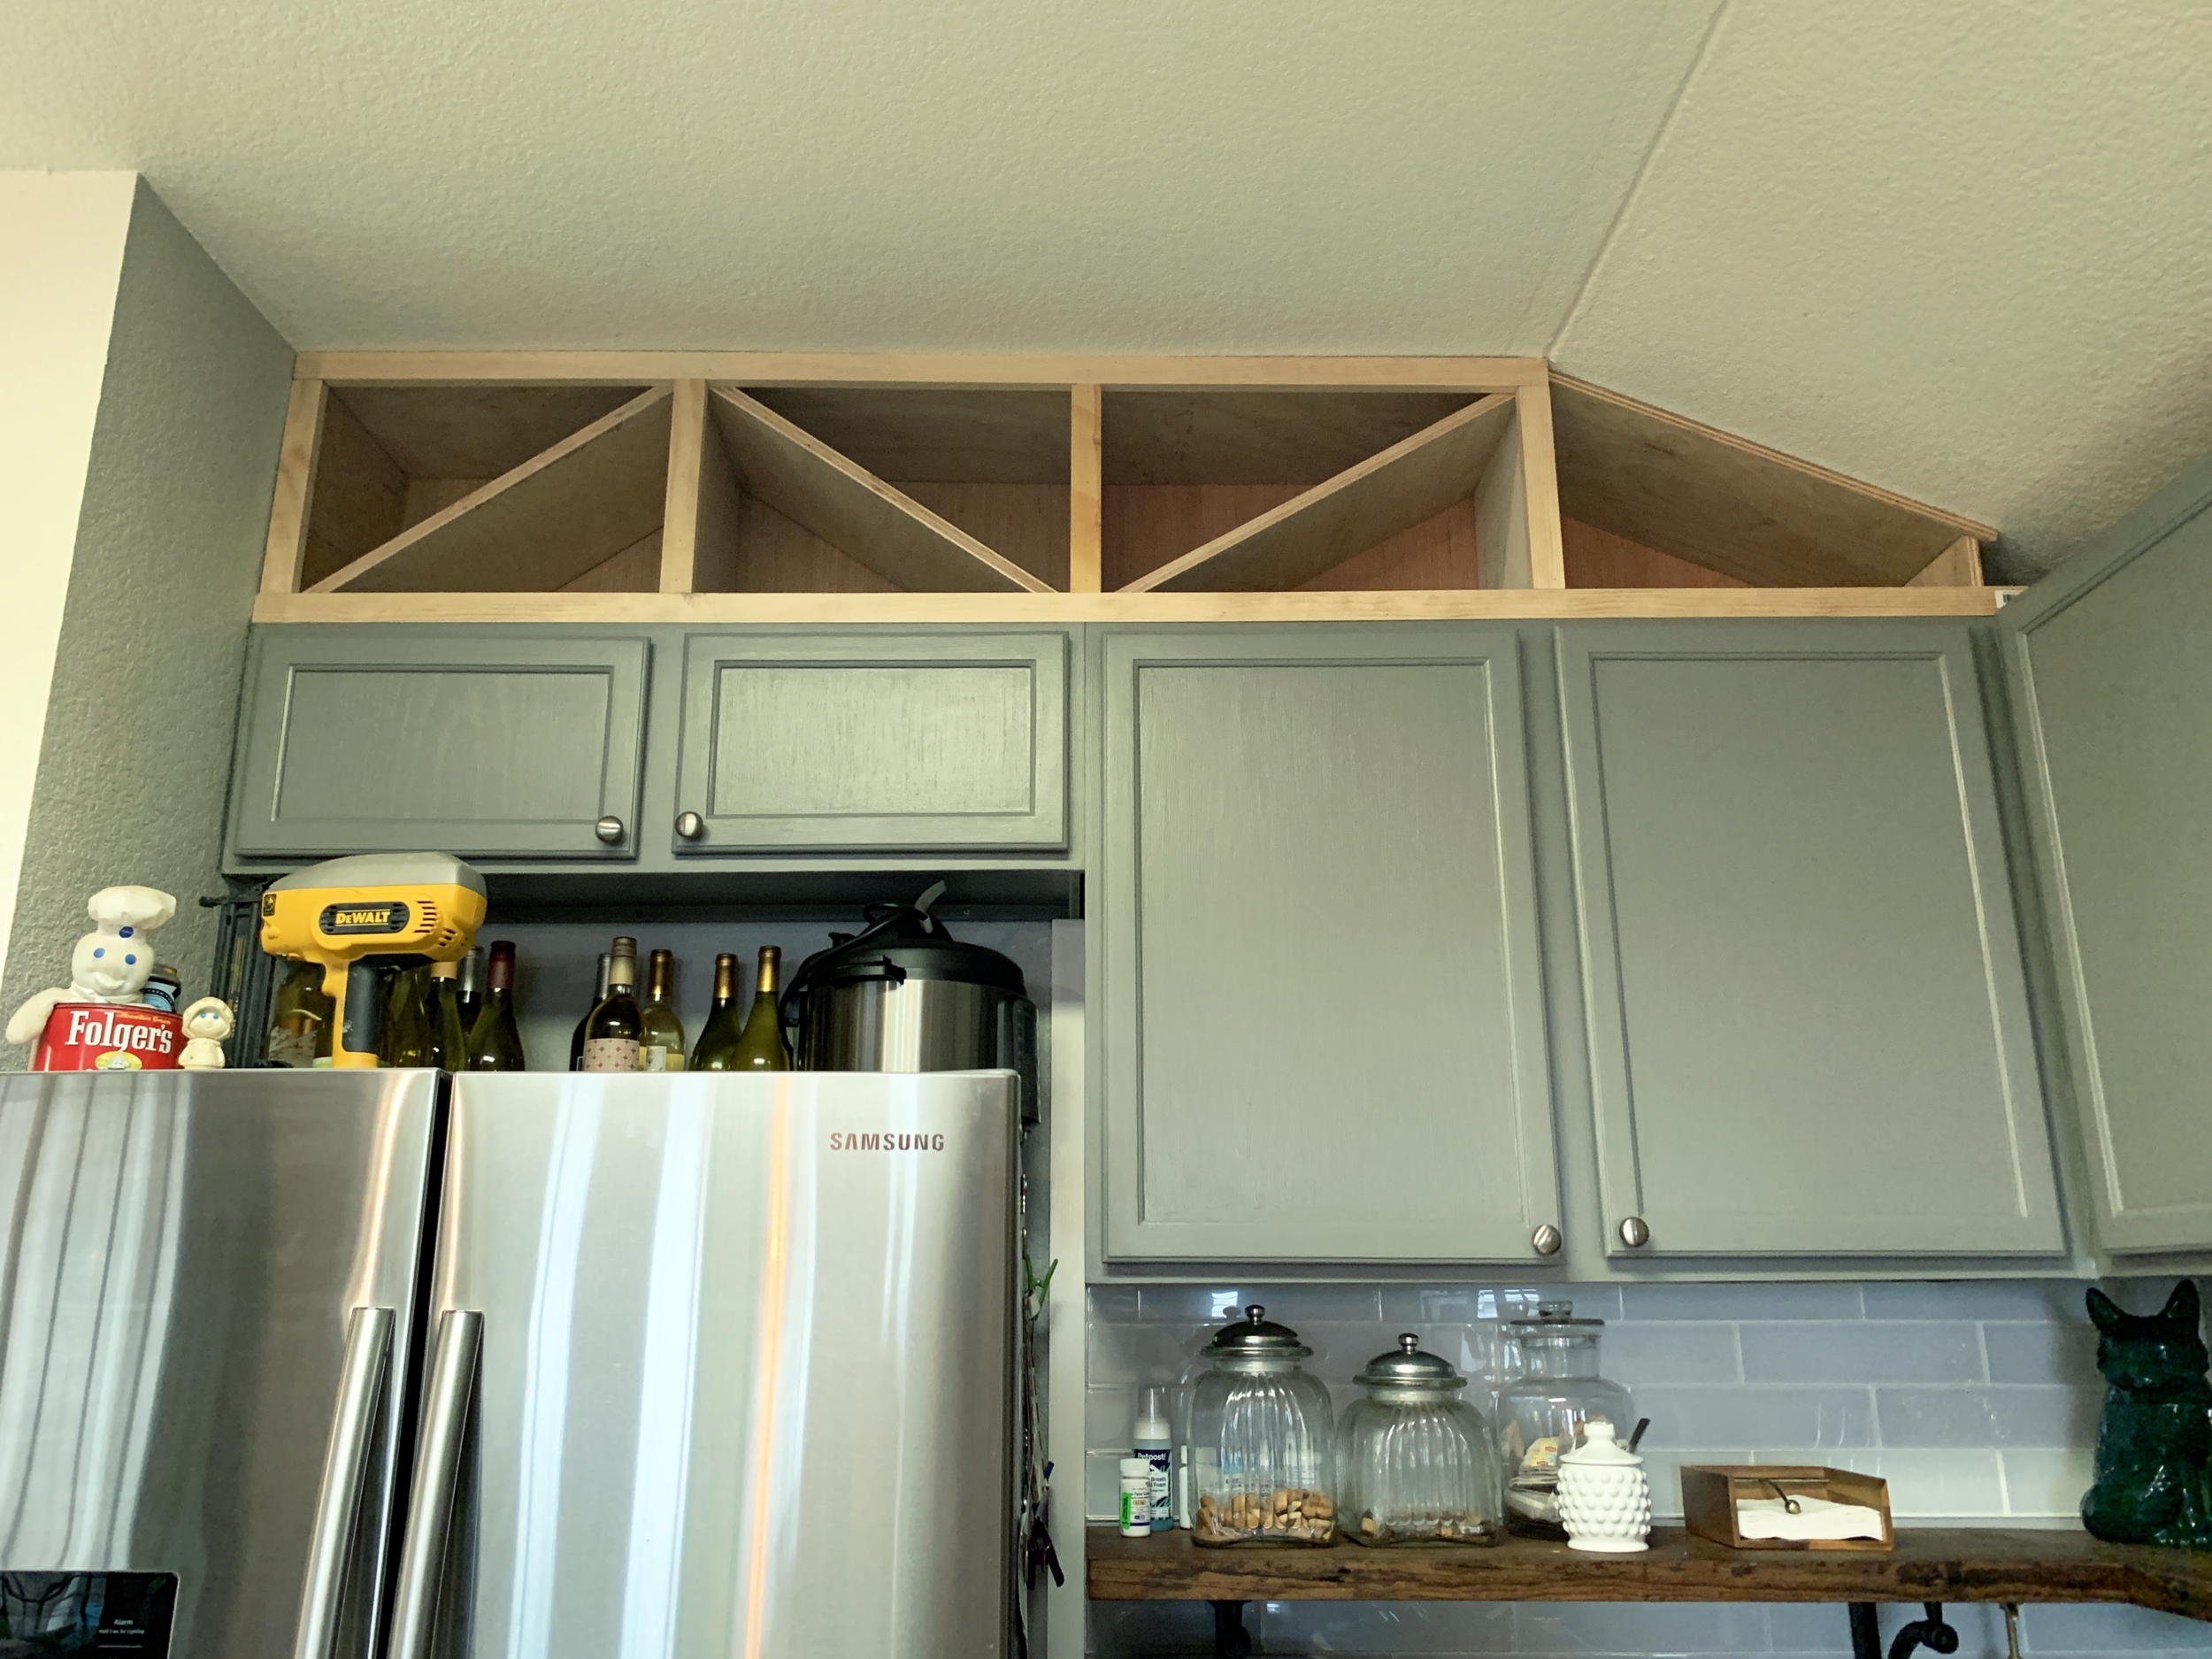
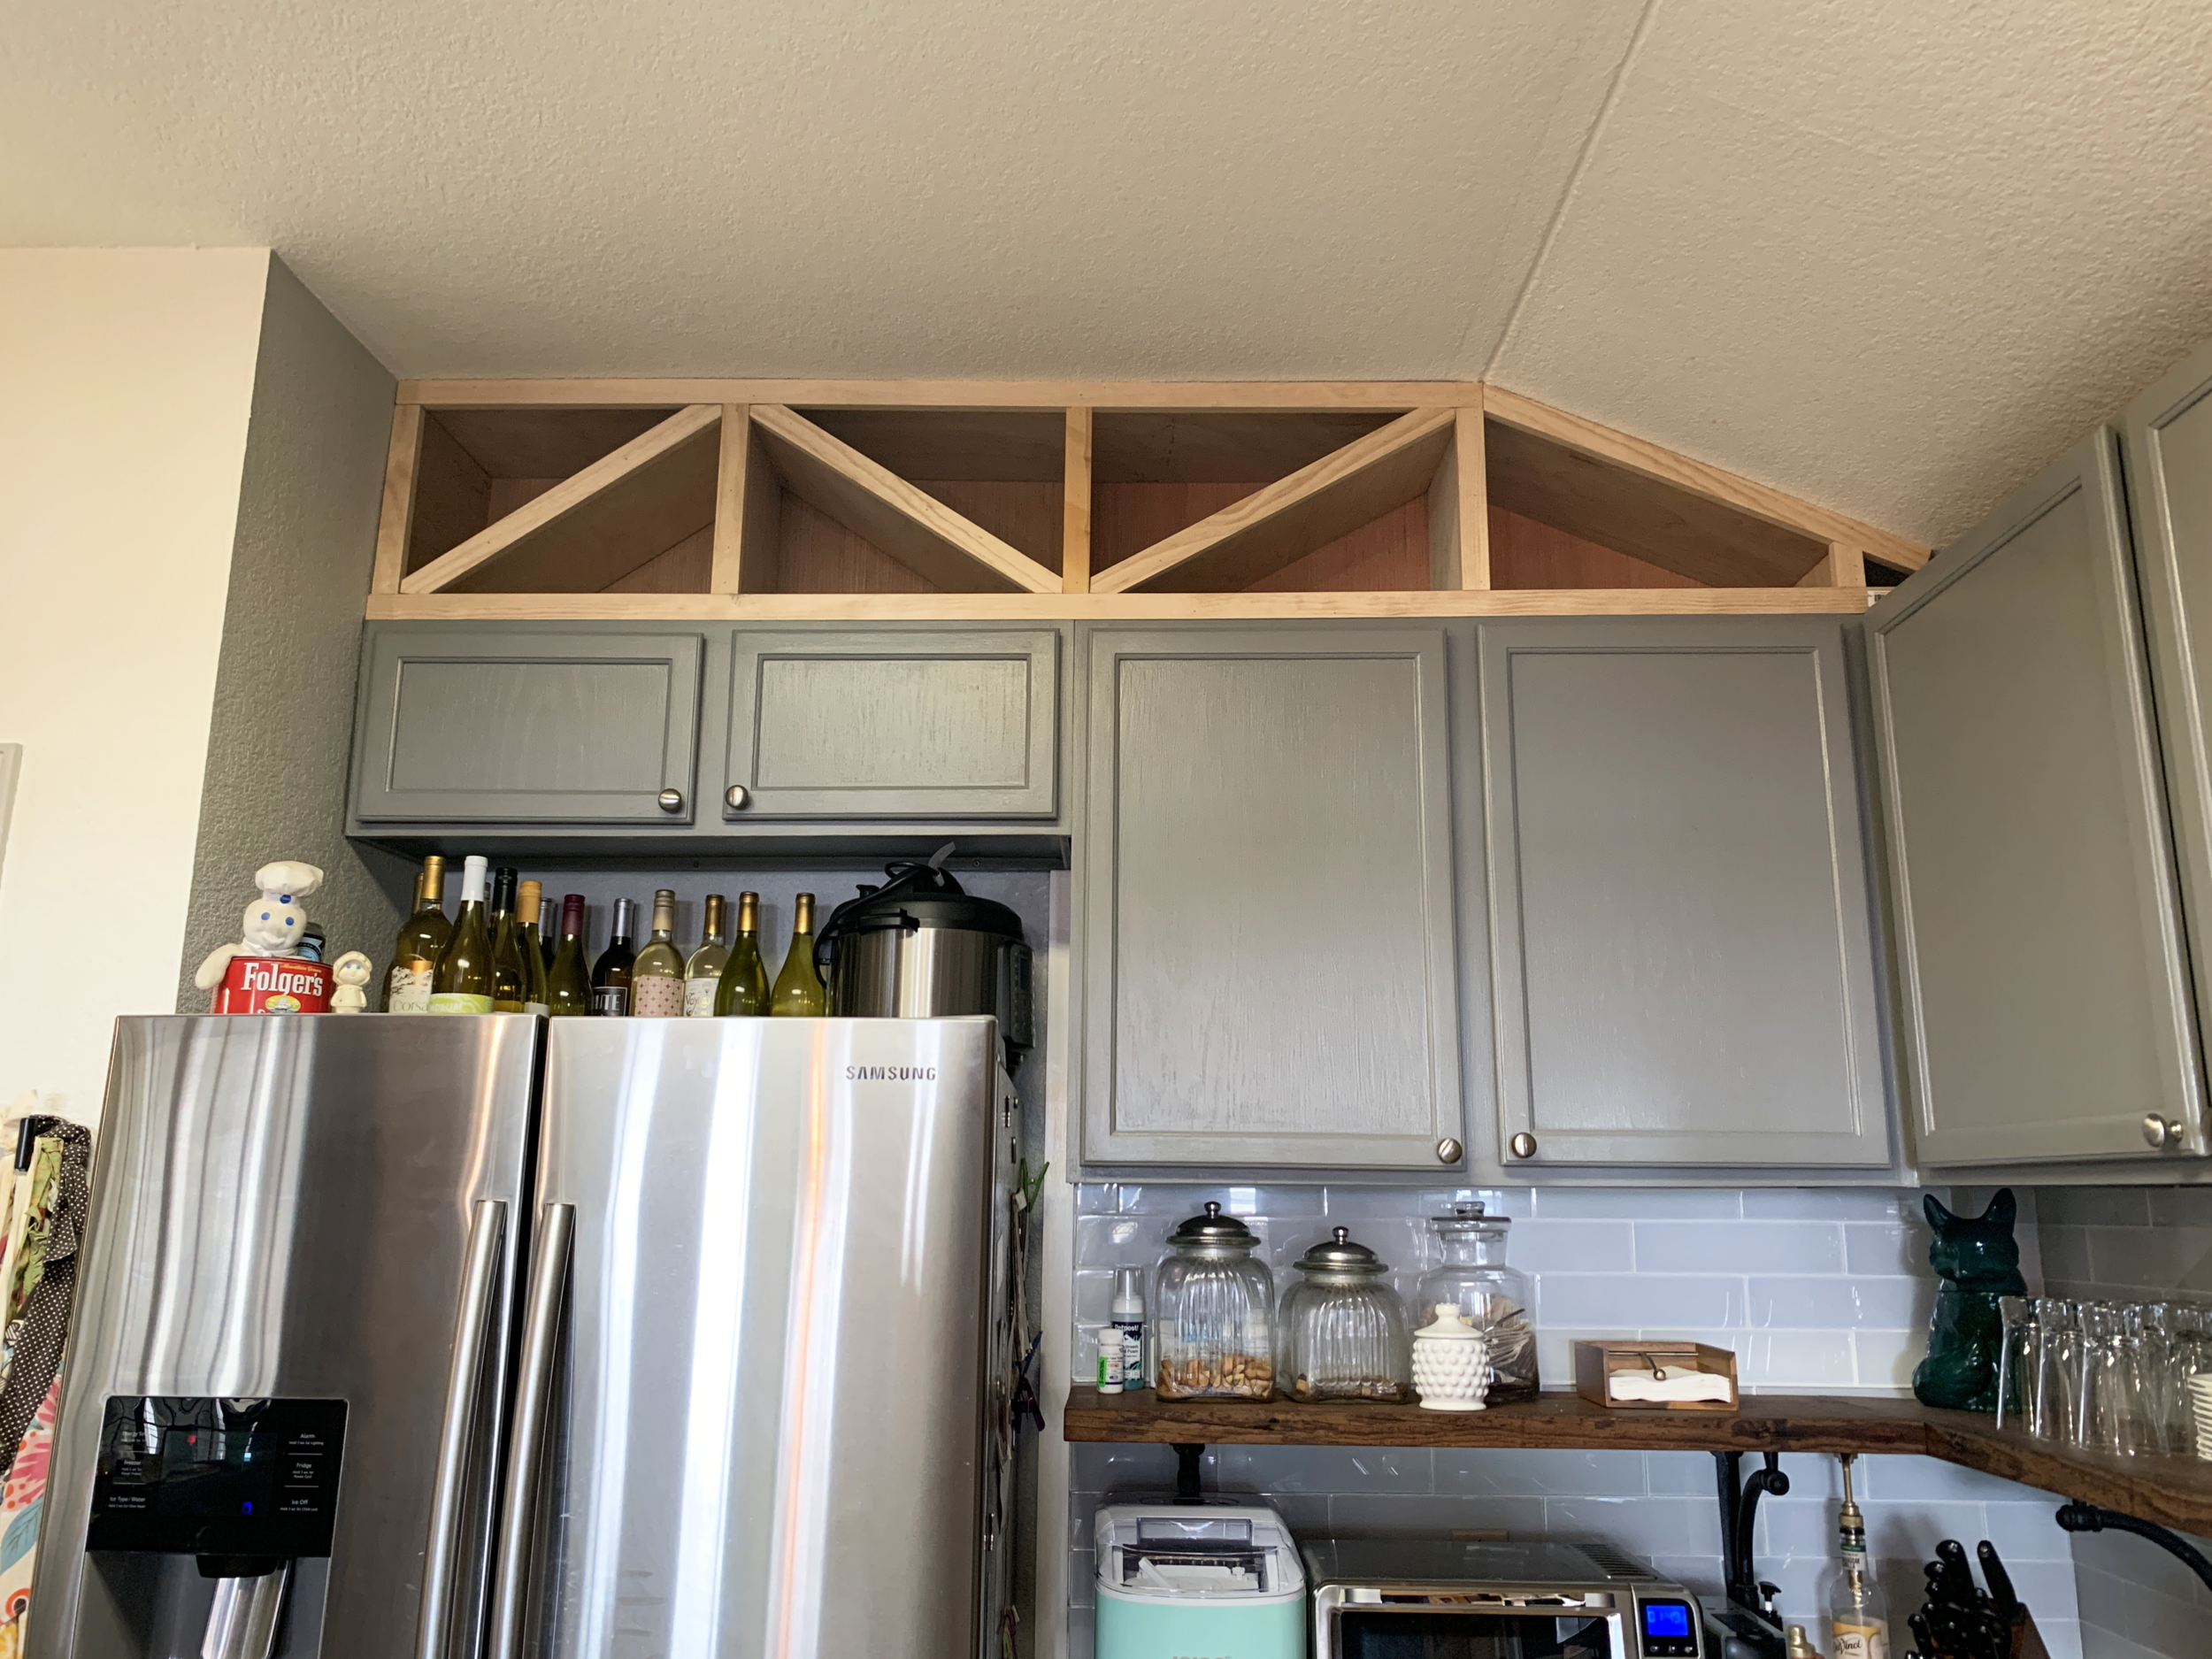
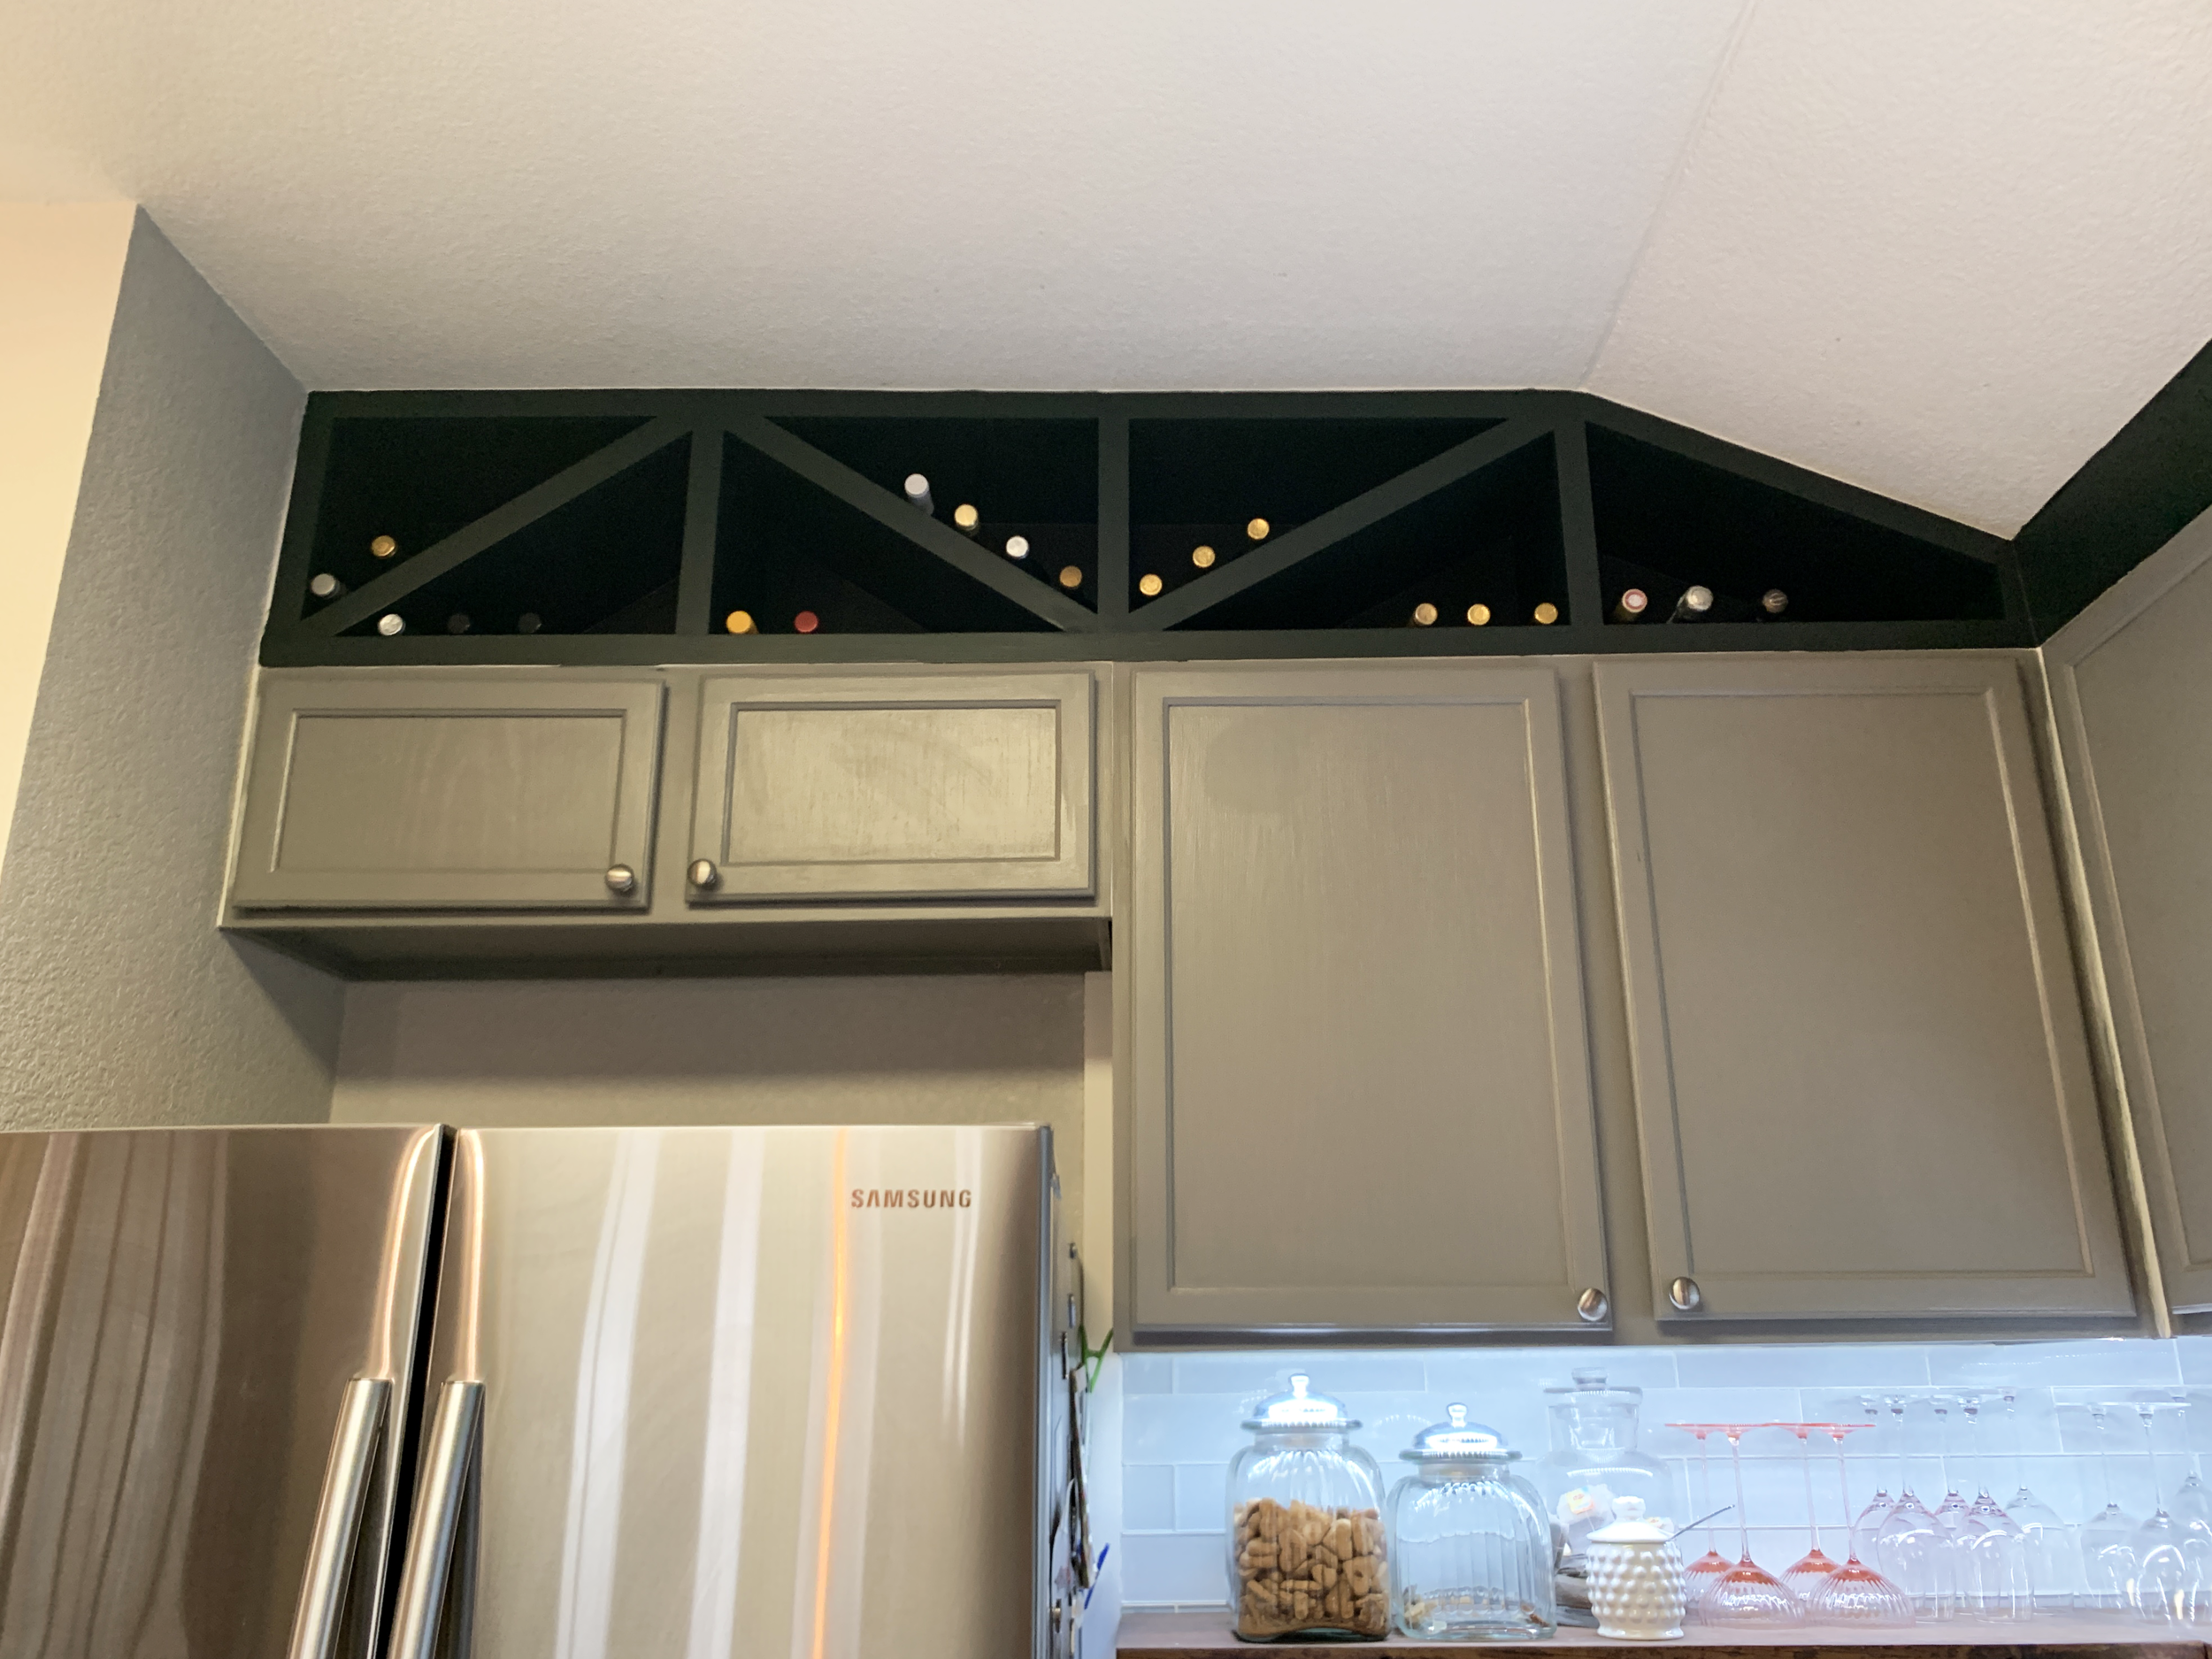
As a reminder, here’s what we’re starting with – a weird trapezangle (part trapezoid / part rectangle) on top of the cabinets:

Such a wonky-shaped hole that leaves much to be desired.
Some of the links on this page are affiliate links, meaning at no cost to you we may earn a small commission on the purchases you make through that click. Learn more.
Tools
Miter saw/chop saw
Circular saw (or table saw) – for cutting plywood
Drill + drill bits that match your screw heads
Nail gun
Electric sander + sandpaper of varying grits (down to about 180 grit for painting)
Level – I used a short level (shorter than the short vertical divider pieces)
Pencil
Tape measure
Stud finder
Speed square – for getting the vertical dividers at a right angle from the top and bottom of the rack
Angle finder – (you don’t need anything fancy, but this digital one we have is super nice!)
Step stool/ladder
Rubber mallet + hammer – for tapping dividers into place (you want them very snug!)
Putty knife
Caulk gun + lint-free rag
Materials
1/4” plywood for the back wall (not necessary for structure, but helps to hide the textured drywall and make it look more built-in) – we used two scrap pieces to cover our 14-3/8” x 81-7/8” space
3/4” plywood for the ceiling, base and dividers in various lengths – we used scraps leftover from old projects, each 11-1/8” deep x various lengths below
Left side: 12-3/8”
Top: 61”
Bottom: 81-7/8”
Ride side angle: 23”
Right side vertical: 5-3/8”
Vertical dividers: 14-1/4”, 14-1/8”, 12-5/16” (different lengths since our ceiling is not perfectly square)
Angled dividers: 22-1/8”, 22-1/8”, 23-5/16”
1x2s* for trimming out the face of the rack and hide the layered plywood edges – we used (3) 8’ boards (the kind that have a nice, clean, square-cut edge)
1x6s* for filling the small space above our other side of upper cabinets (not part of the wine rack) since the roofline is angled – we used (1) 1x6x8 and (1) 1x6x10
Long wood screws – for connecting 3/4”-thick plywood top to ceiling through drywall and into studs
Nails for nail gun – we used 1-1/2” and 2” lengths
Paintable wood filler
Paintable caulk
Primer + paint
*Reminders:
1x boards are actually 3/4” thick
2x boards are actually 1-1/2” thick
And to make it more confusing … 3/4” plywood is actually really 3/4” thick and 1/4” plywood is actually really 1/4” thick
Building the wine rack
The back wall
Though not necessary for structural support, I first nailed two pieces of 1/4” plywood to the back wall – making sure the wood grains were both running the same direction and the nails were around the perimeter and where the dividers were going to go – so the whole piece looks more finished in the end.

You can see here that the color and sizes aren’t perfectly aligned and tight around each edge as if it were one piece. While it doesn’t look super great here, because we’re painting this out and covering the edges and seam with a vertical divider, it’s a perfect way to use up those weird scraps leftover from old projects that are too small to do much with, but too large to really get rid of. (I know I always think, “one day I’ll be able to use this”… Today is finally that day!!)
The perimeter
After the back wall was covered, I installed the 3/4” ceiling piece first – screwing it into the ceiling studs with wood screws – so that it would be resting on top of the rest of the rack for additional support.
Then I used the nail gun to carefully nail one bottom plywood piece to the top of the cabinets, making sure to nail into the edge meat of the cabinets, and not into the middle of a cabinet where it’s much thinner and nails would show through.
note
It’s important to note here that the depth of the top, bottom and divider pieces are the total depth of your upper cabinet, minus the thickness of the wall plywood (1/4”) and the finish trim 1x2 thickness (which is actually 3/4”).
For example, for our cabinet that is 12-1/8” deep, our 3/4” plywood pieces are 11-1/8” deep to account for the added 1” thickness of the wall plywood (1/4”) and front finish trim (3/4”).
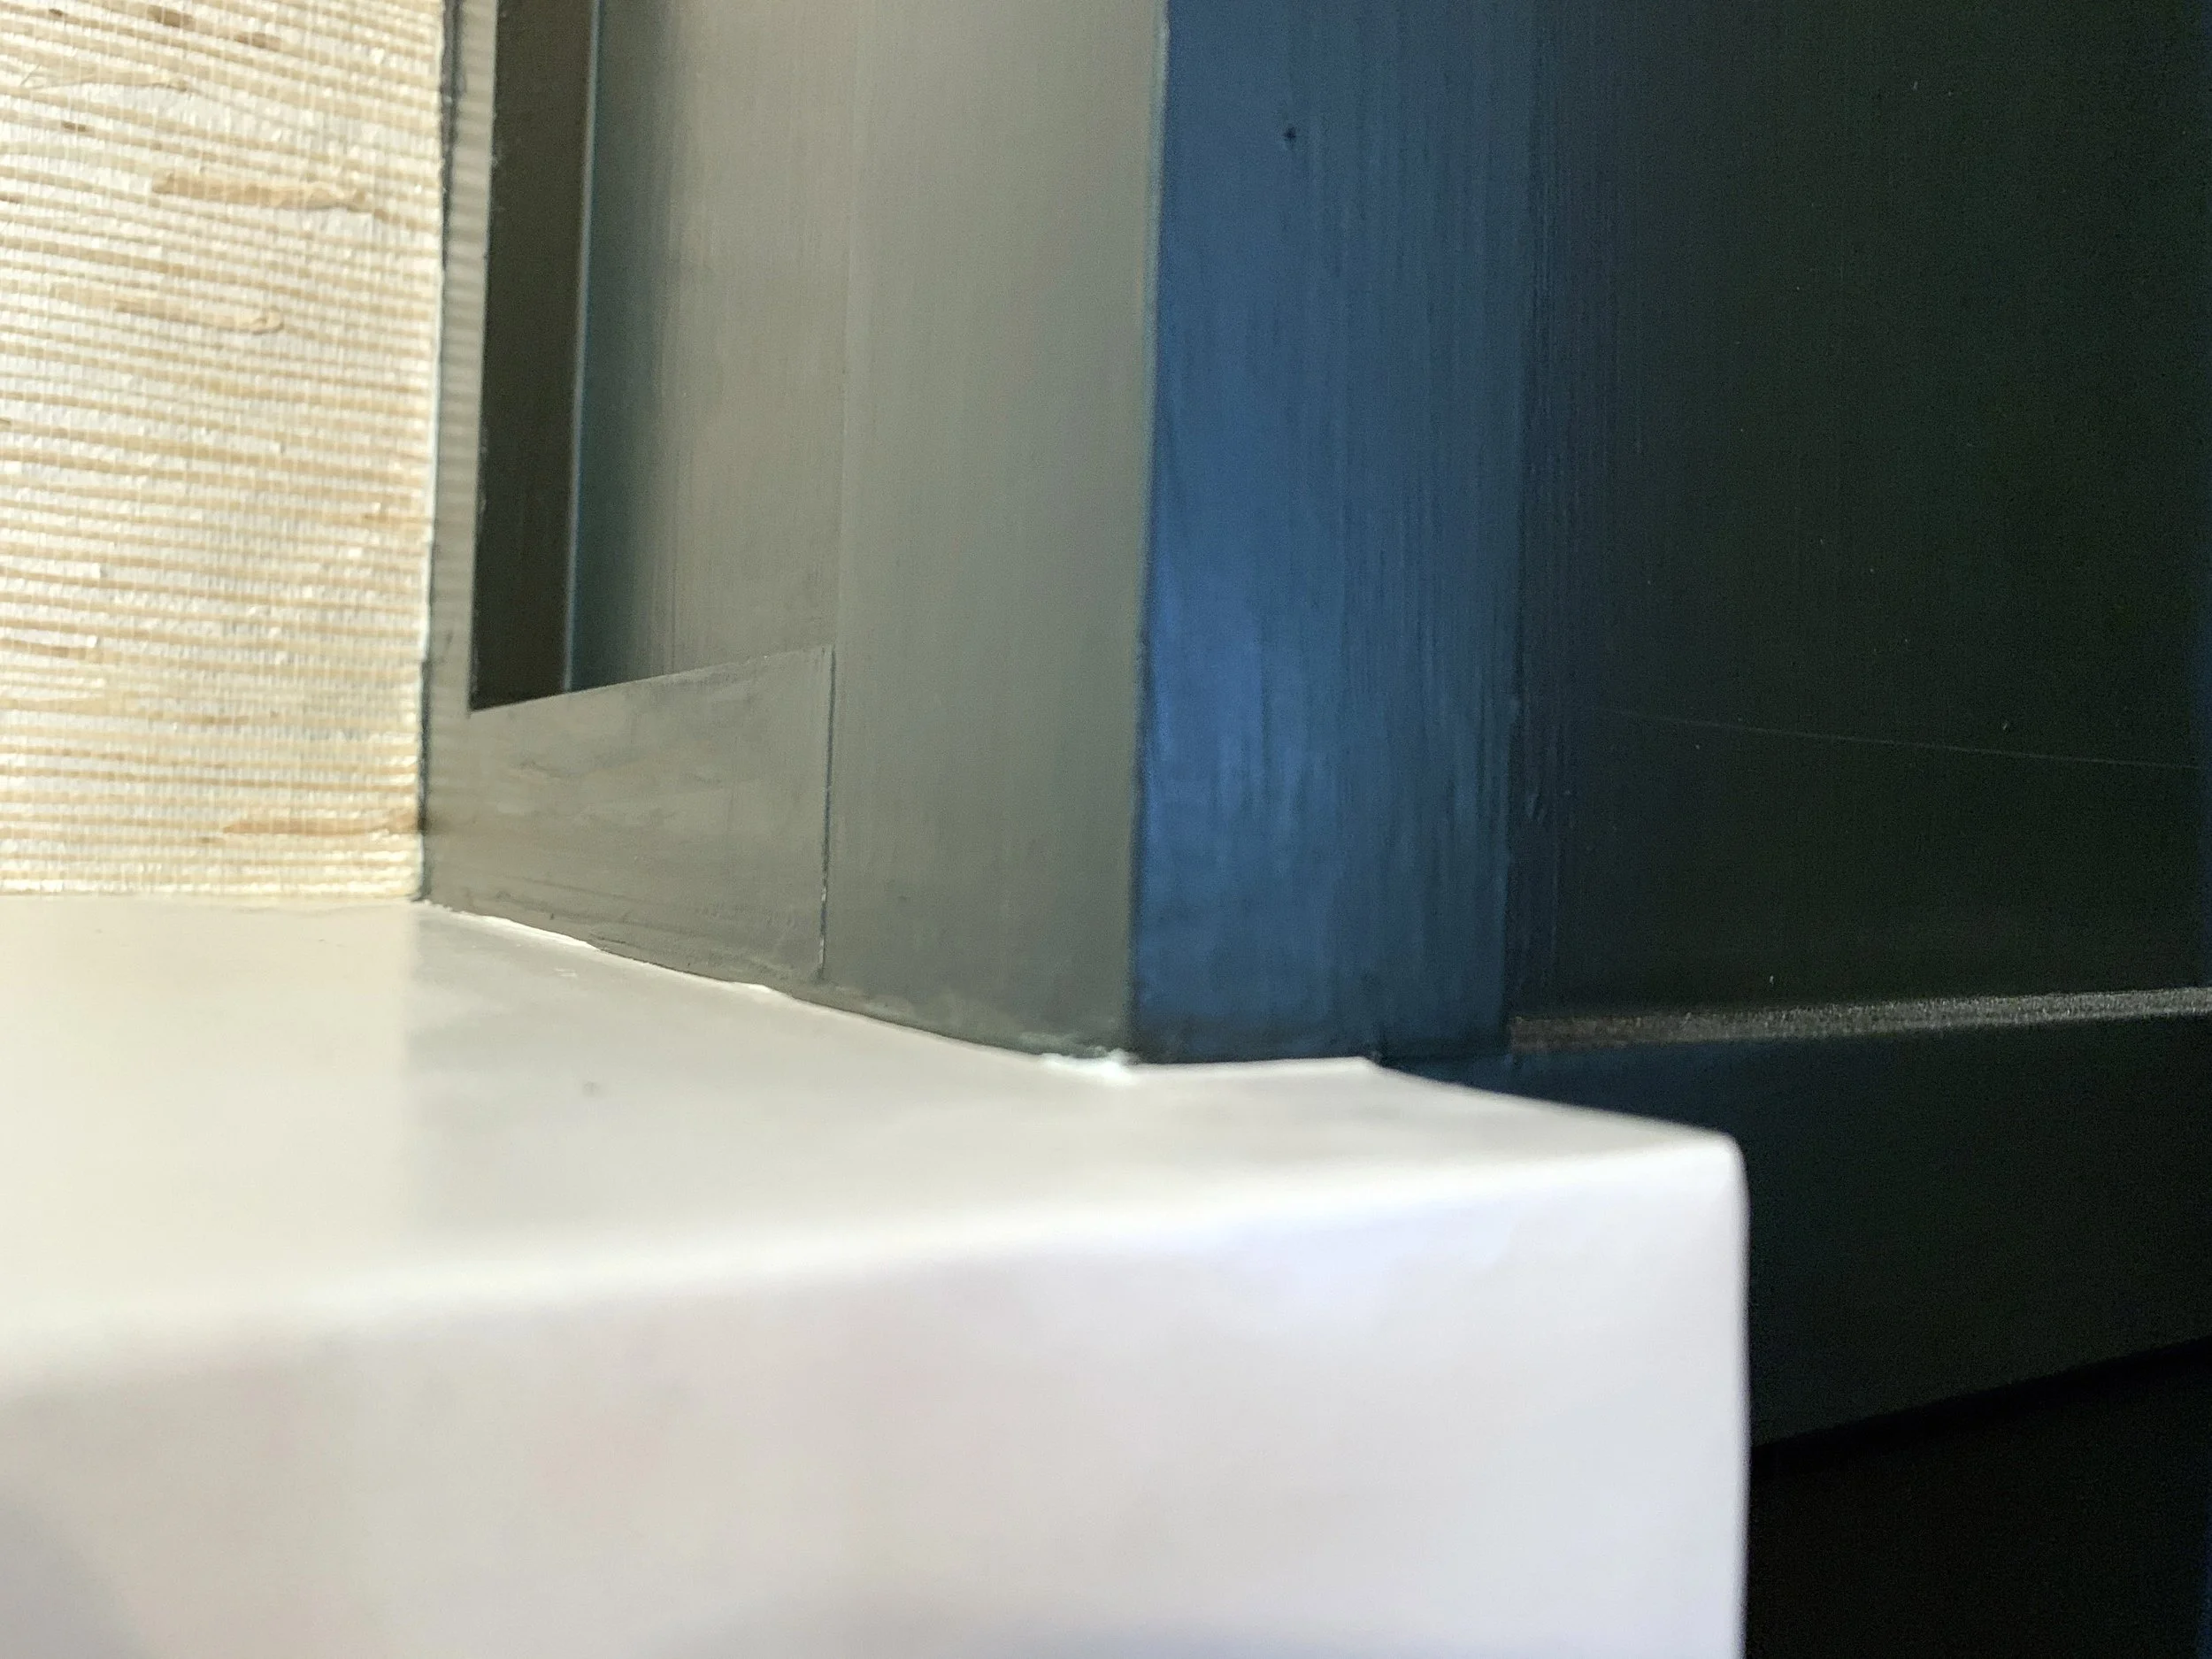
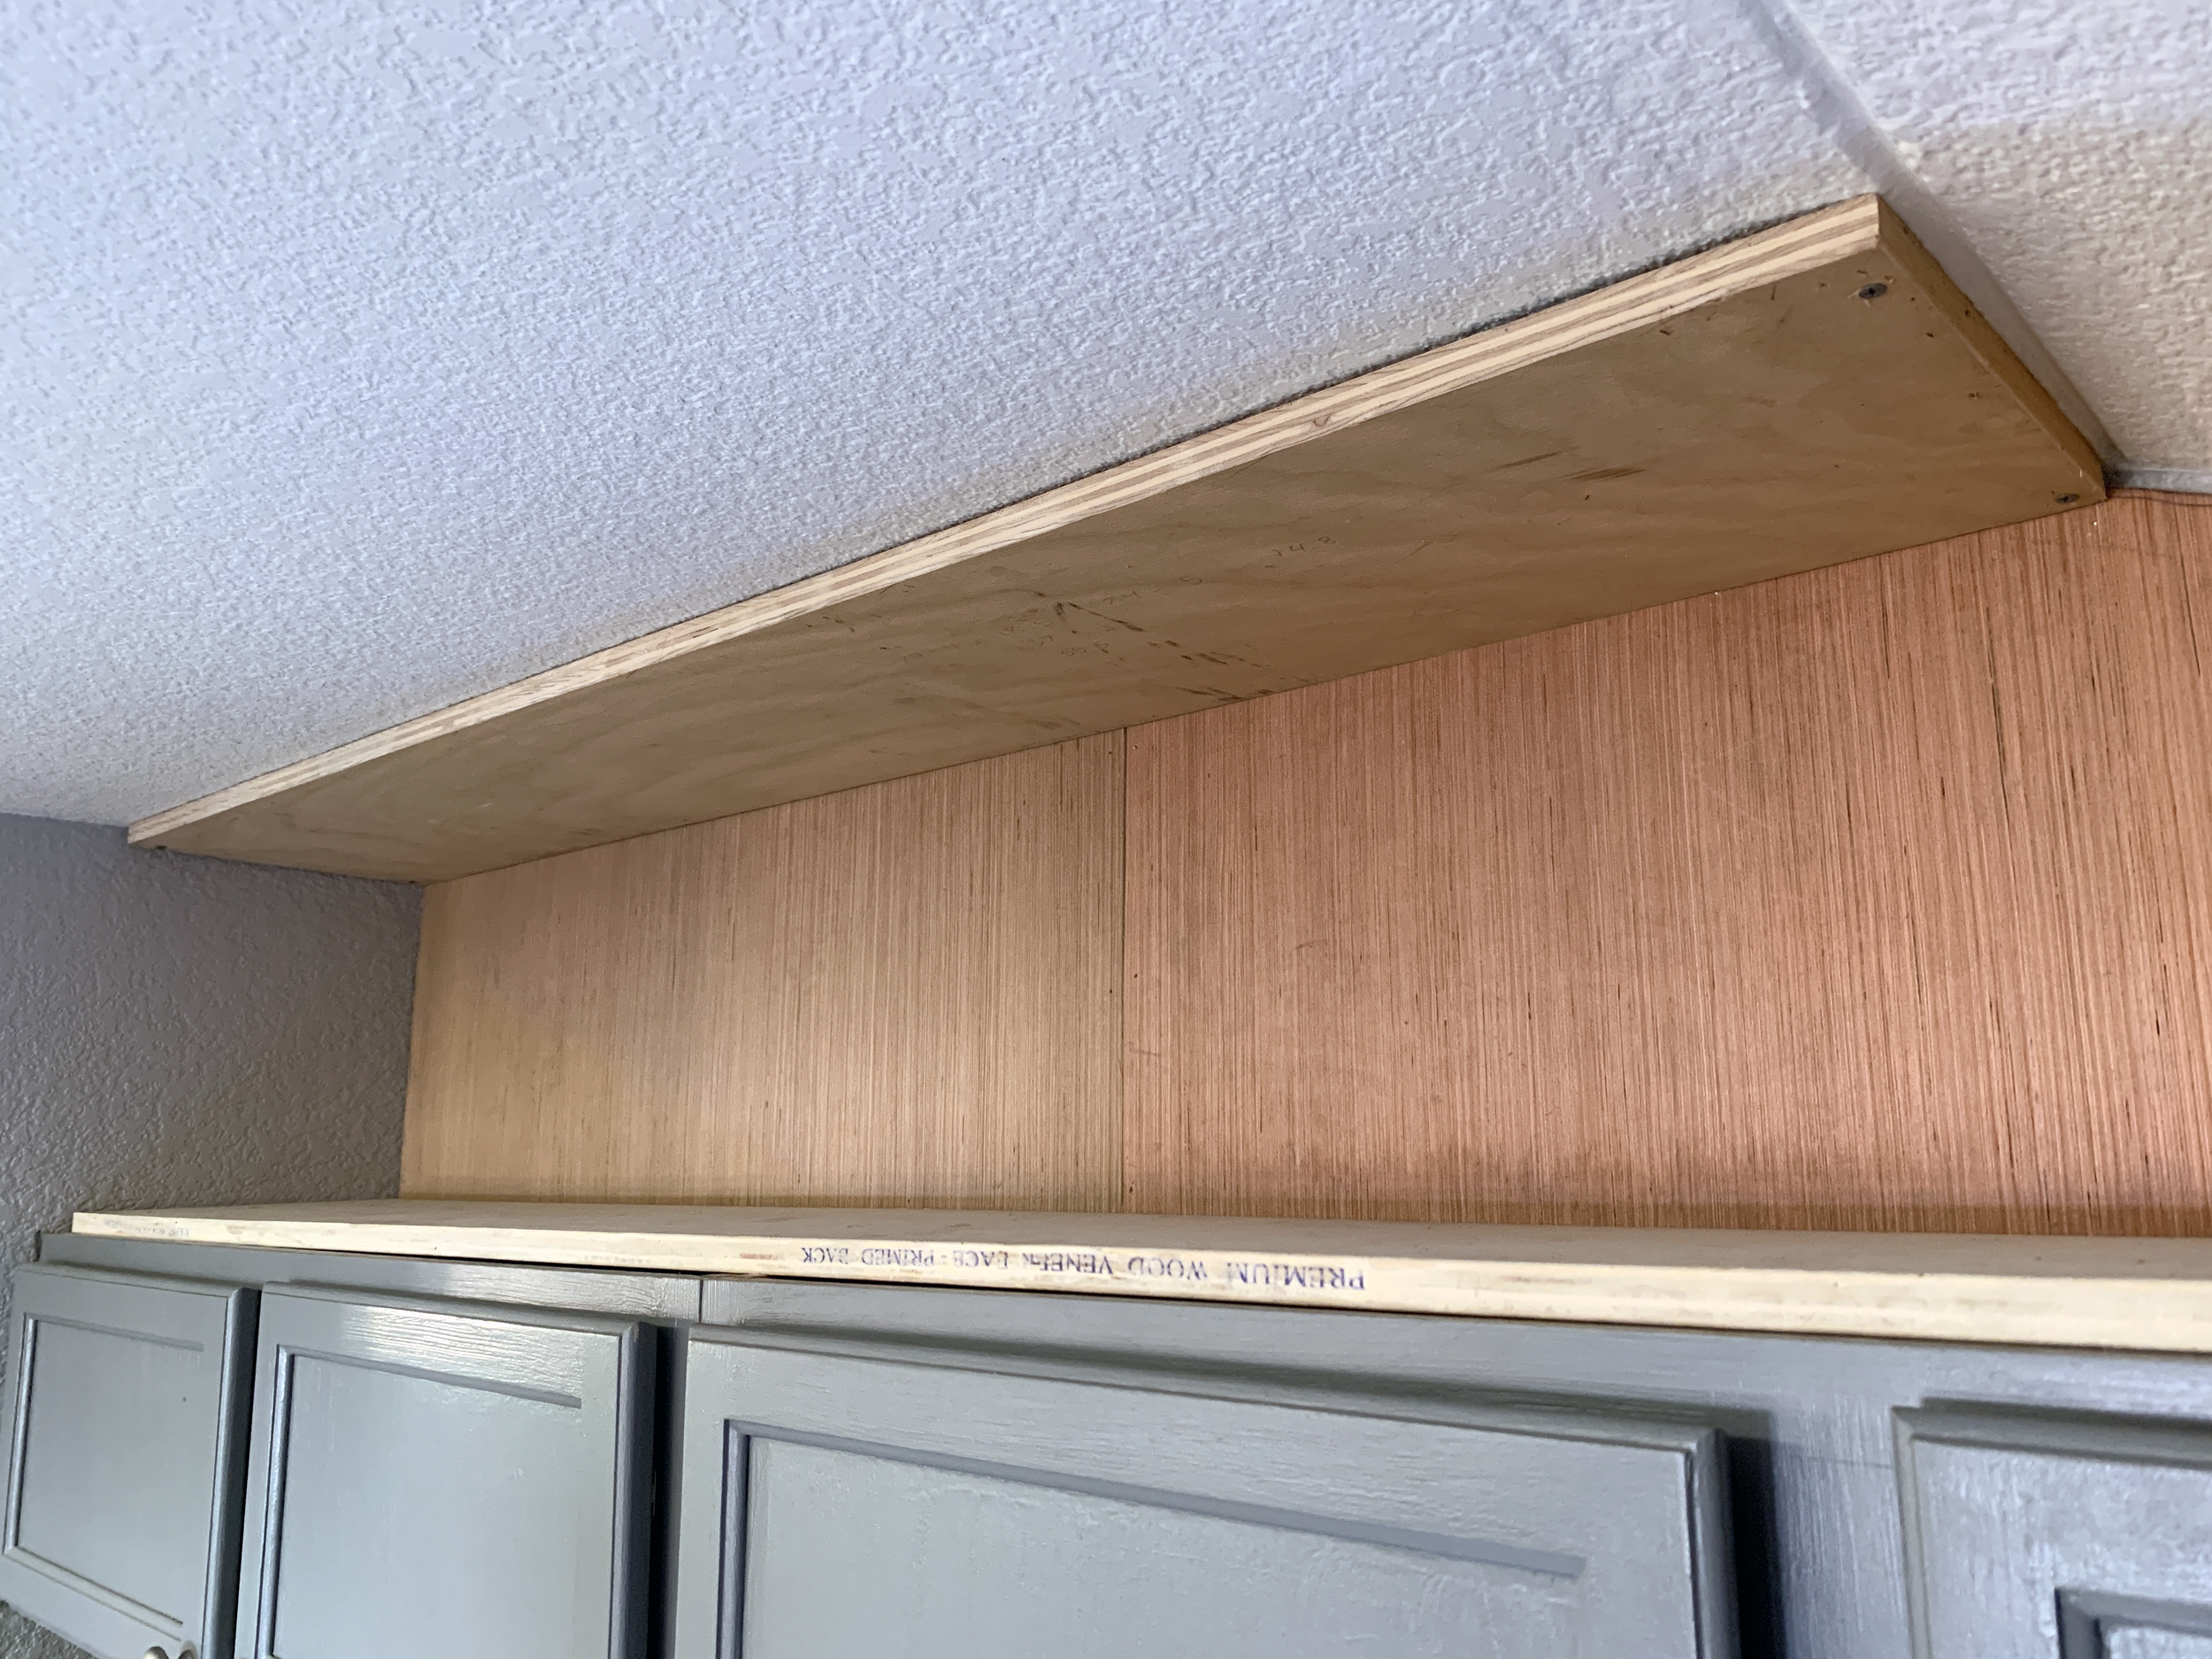
Where the top of the cabinet meets the plywood bottom of the rack should look like this (below) – where the rack is shallow by 3/4” (the thickness of the to-be-used 1x2” finish trim that is missing):

Side view of the top of the cabinet before the 1x2” finish trim is added on to the front of the rack.
The dividers
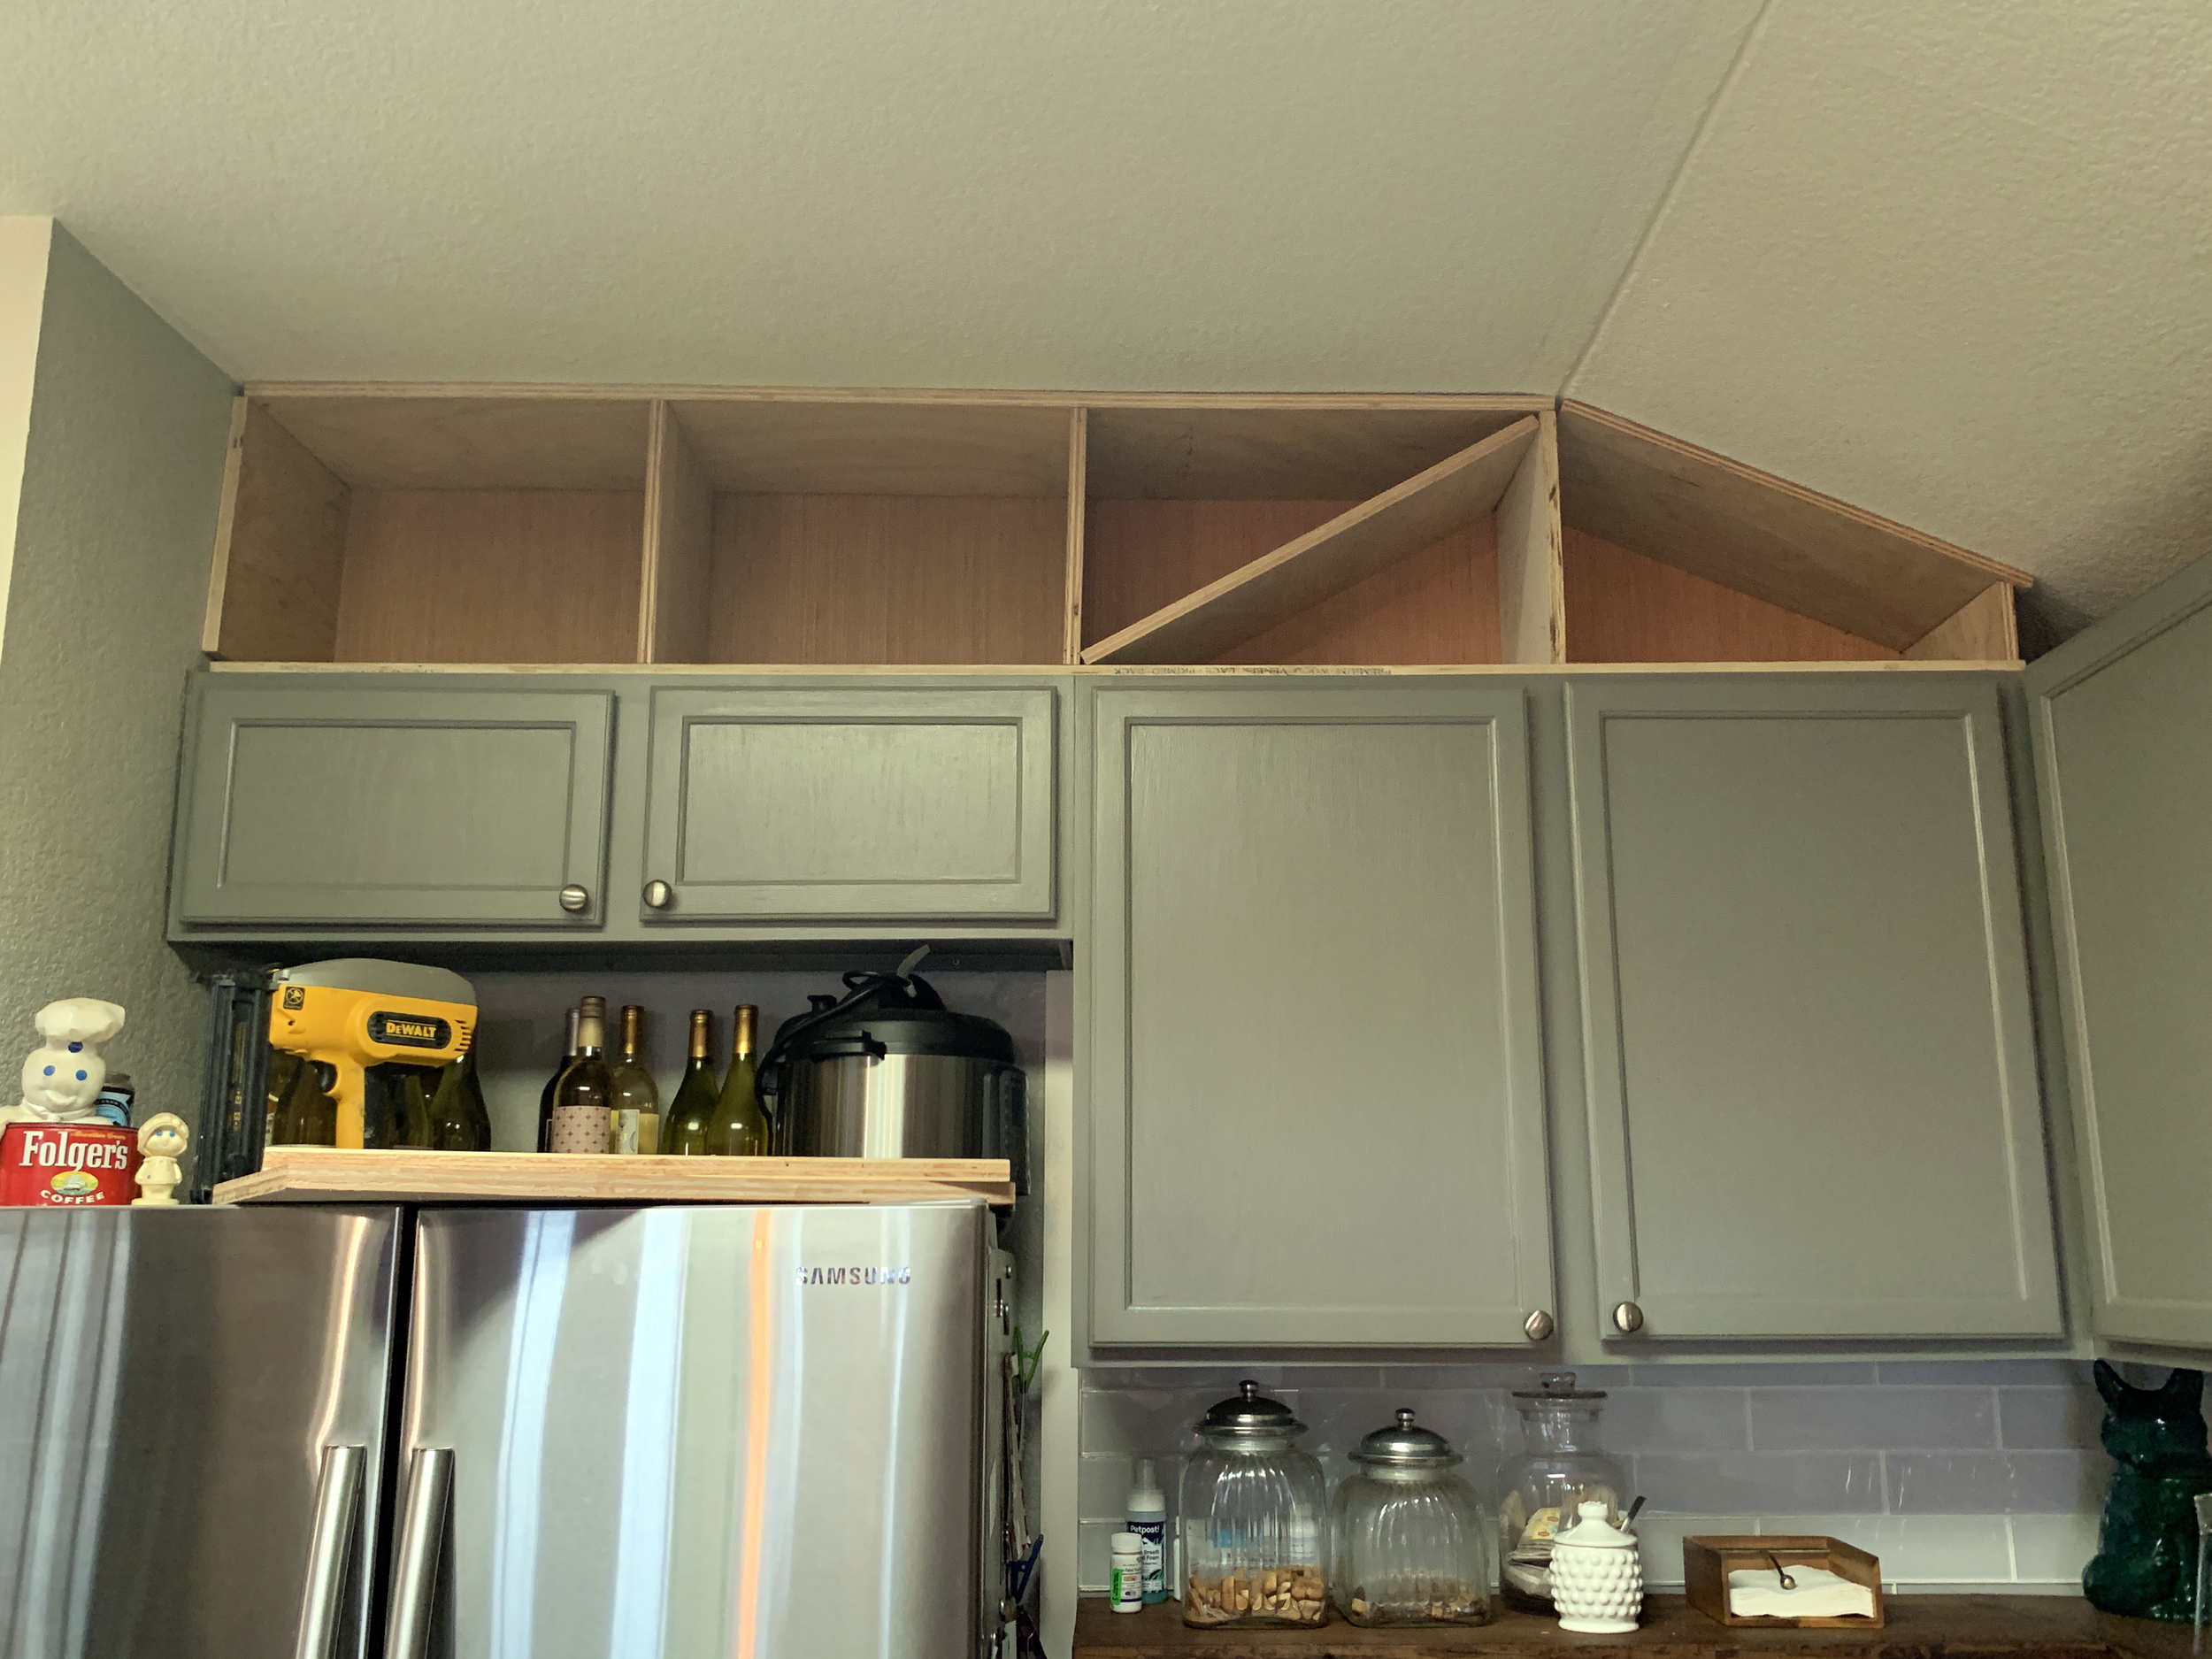
With the top and bottom firmly in place, I used our nail gun to toe nail the dividers in place, starting with the verticals. For a cleaner, planned-out look, I centered the vertical dividers with the centers of each cabinet (the vertical piece between the doors) and at the seam where the two cabinets touch each other. This helps the add-on wine rack feel more intentional with the cabinetry already in place.

A note on best laid plans vs. reality
In my planning and measuring stage everything seemed to line up nicely… In reality you can see in the photos above and below how the right-most vertical divider is actually a littler right of the cabinet’s center.
After eyeballing some options when I was at this step in the build I thought it would look cleaner to have the vertical divider line up at the right-most edge of our straight ceiling (where it starts to angle) rather than being perfectly in-line with the cabinet’s center, which would require a weird little extra baby horizontal piece at the ceiling to the right of the vertical divider before the ceiling angles.
This is, of course, is totally personal preference – I just thought what I went with would make for a cleaner look in the end where the angled ceiling piece met the straight ceiling piece, so that the angled ceiling piece mimicked the look of the to-be-installed diagonal dividers in the other cubbies.
You can also see here how the one divider in the very center covers up the vertical seam in the back wall panel. Once it’s all painted out you’d have no idea that’s two pieces of 1/4” plywood back there. (It’s just our little scrappy secret!)

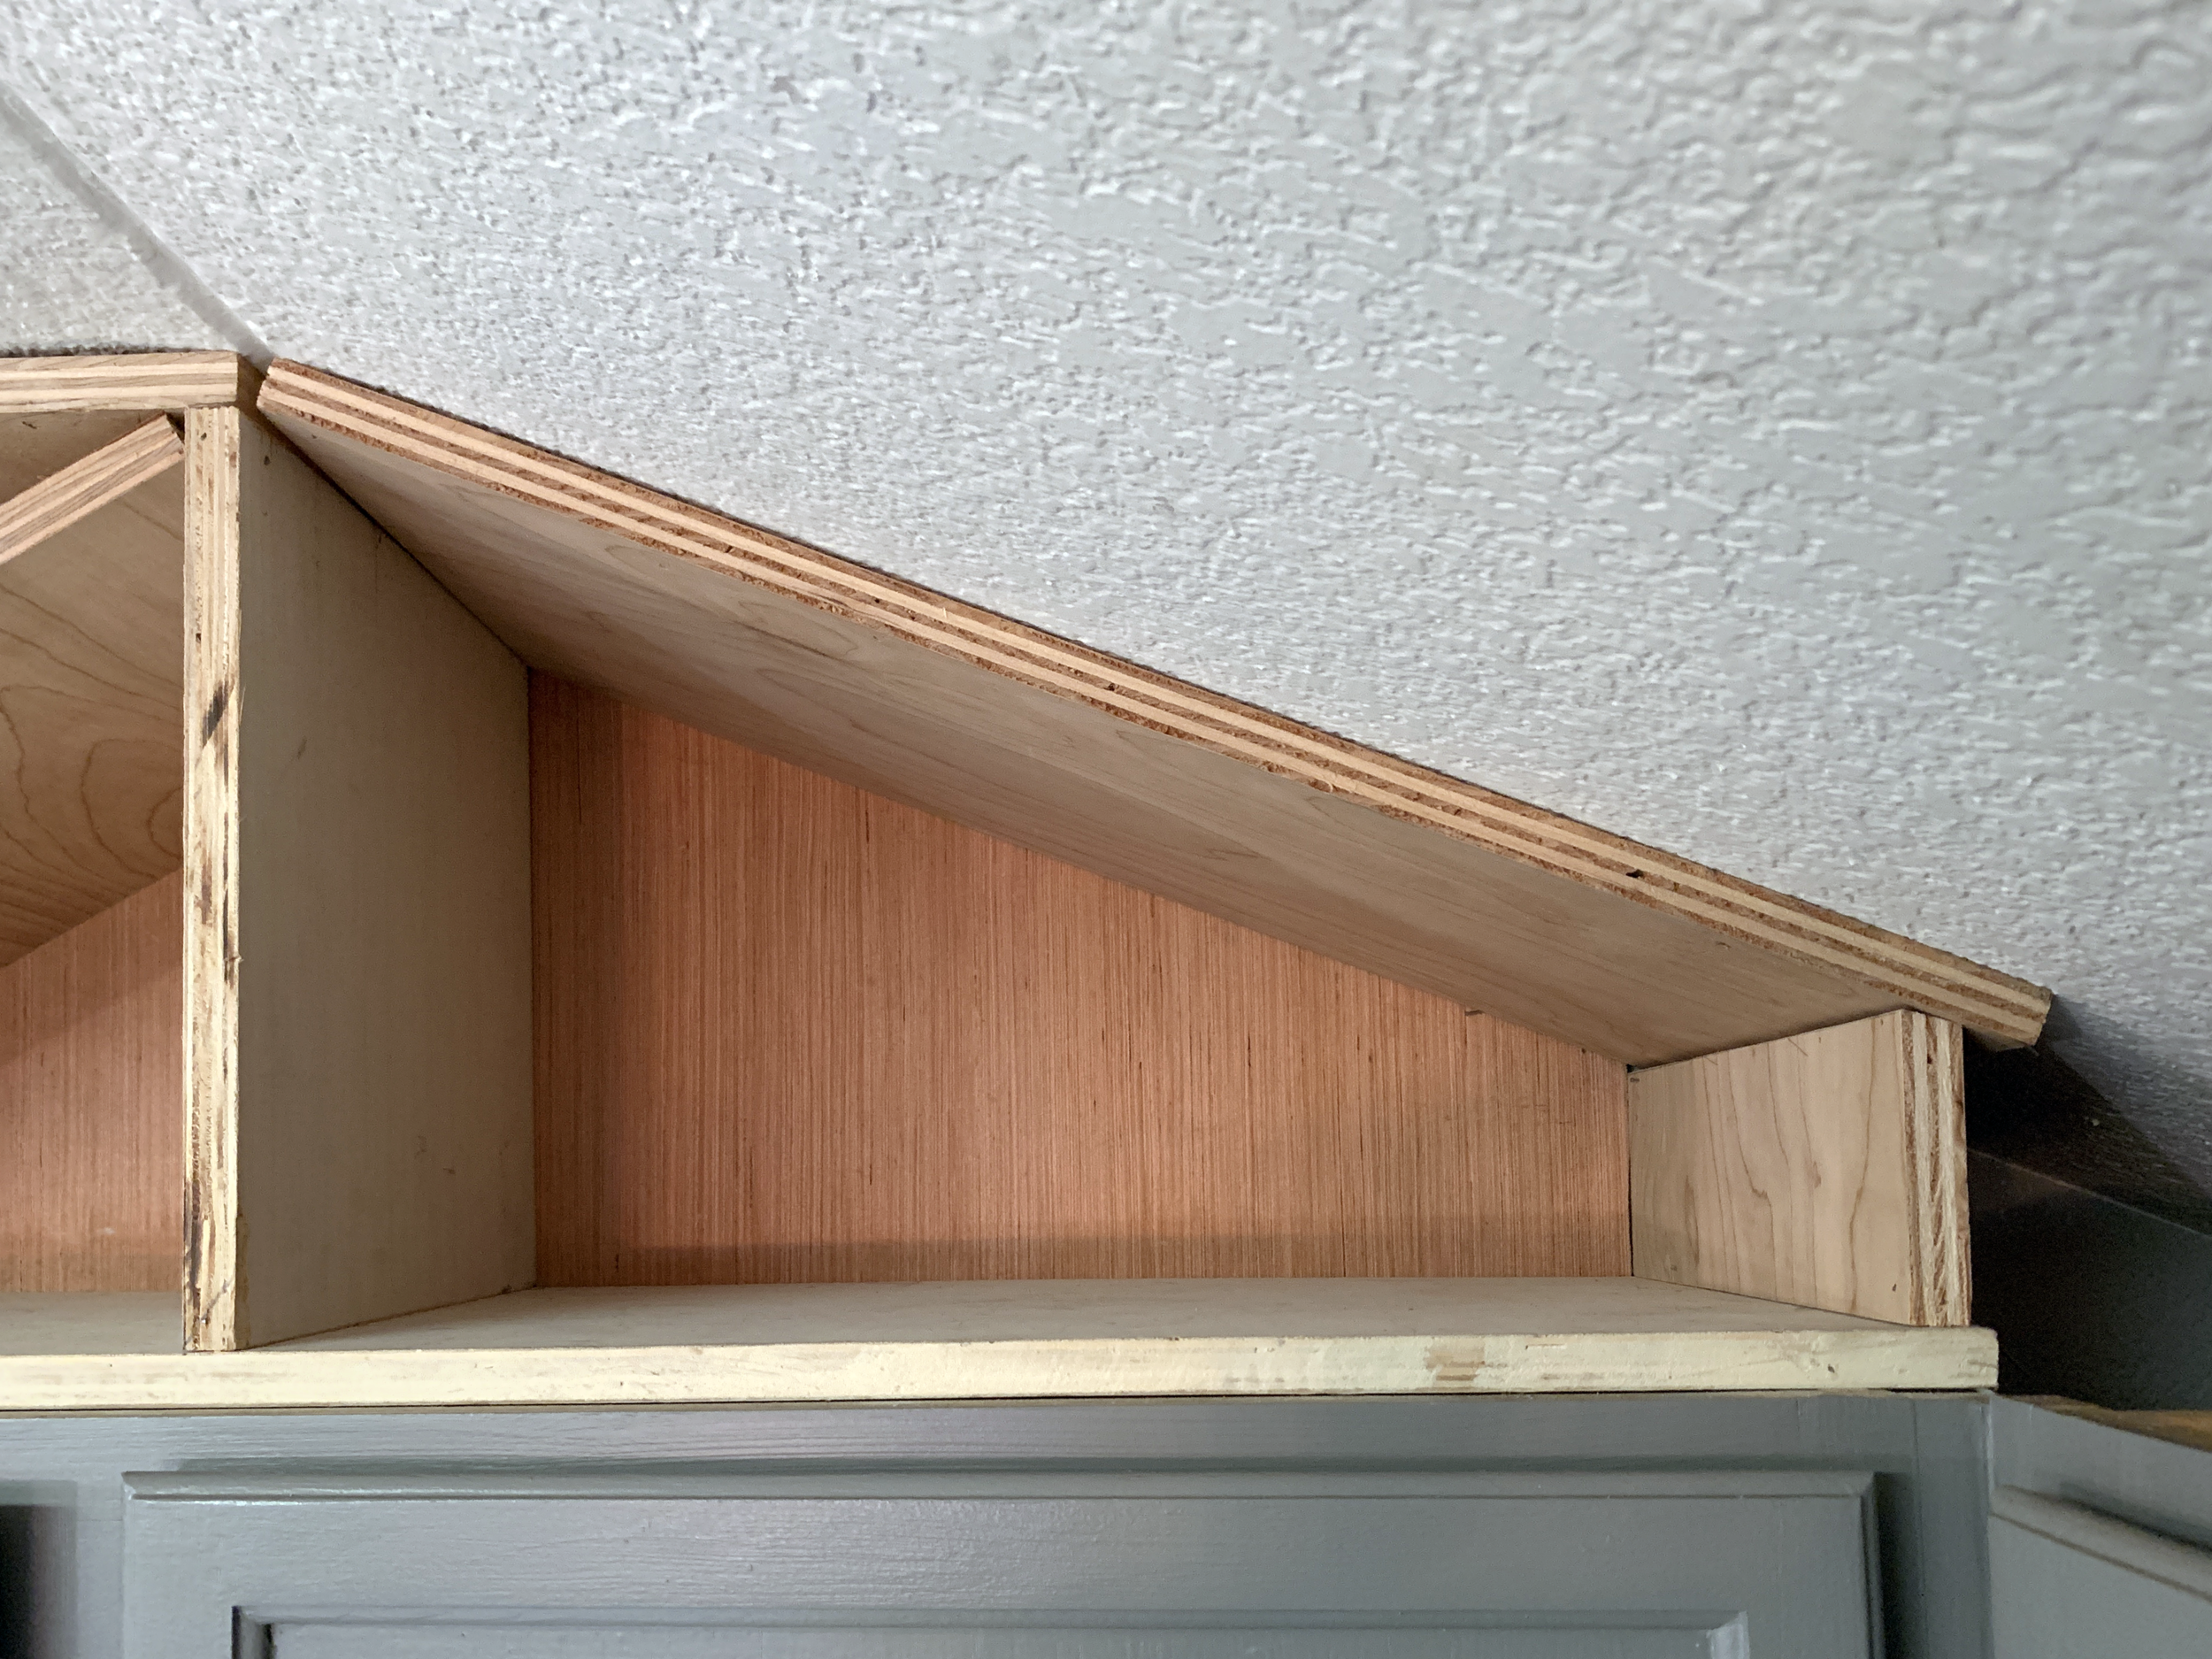
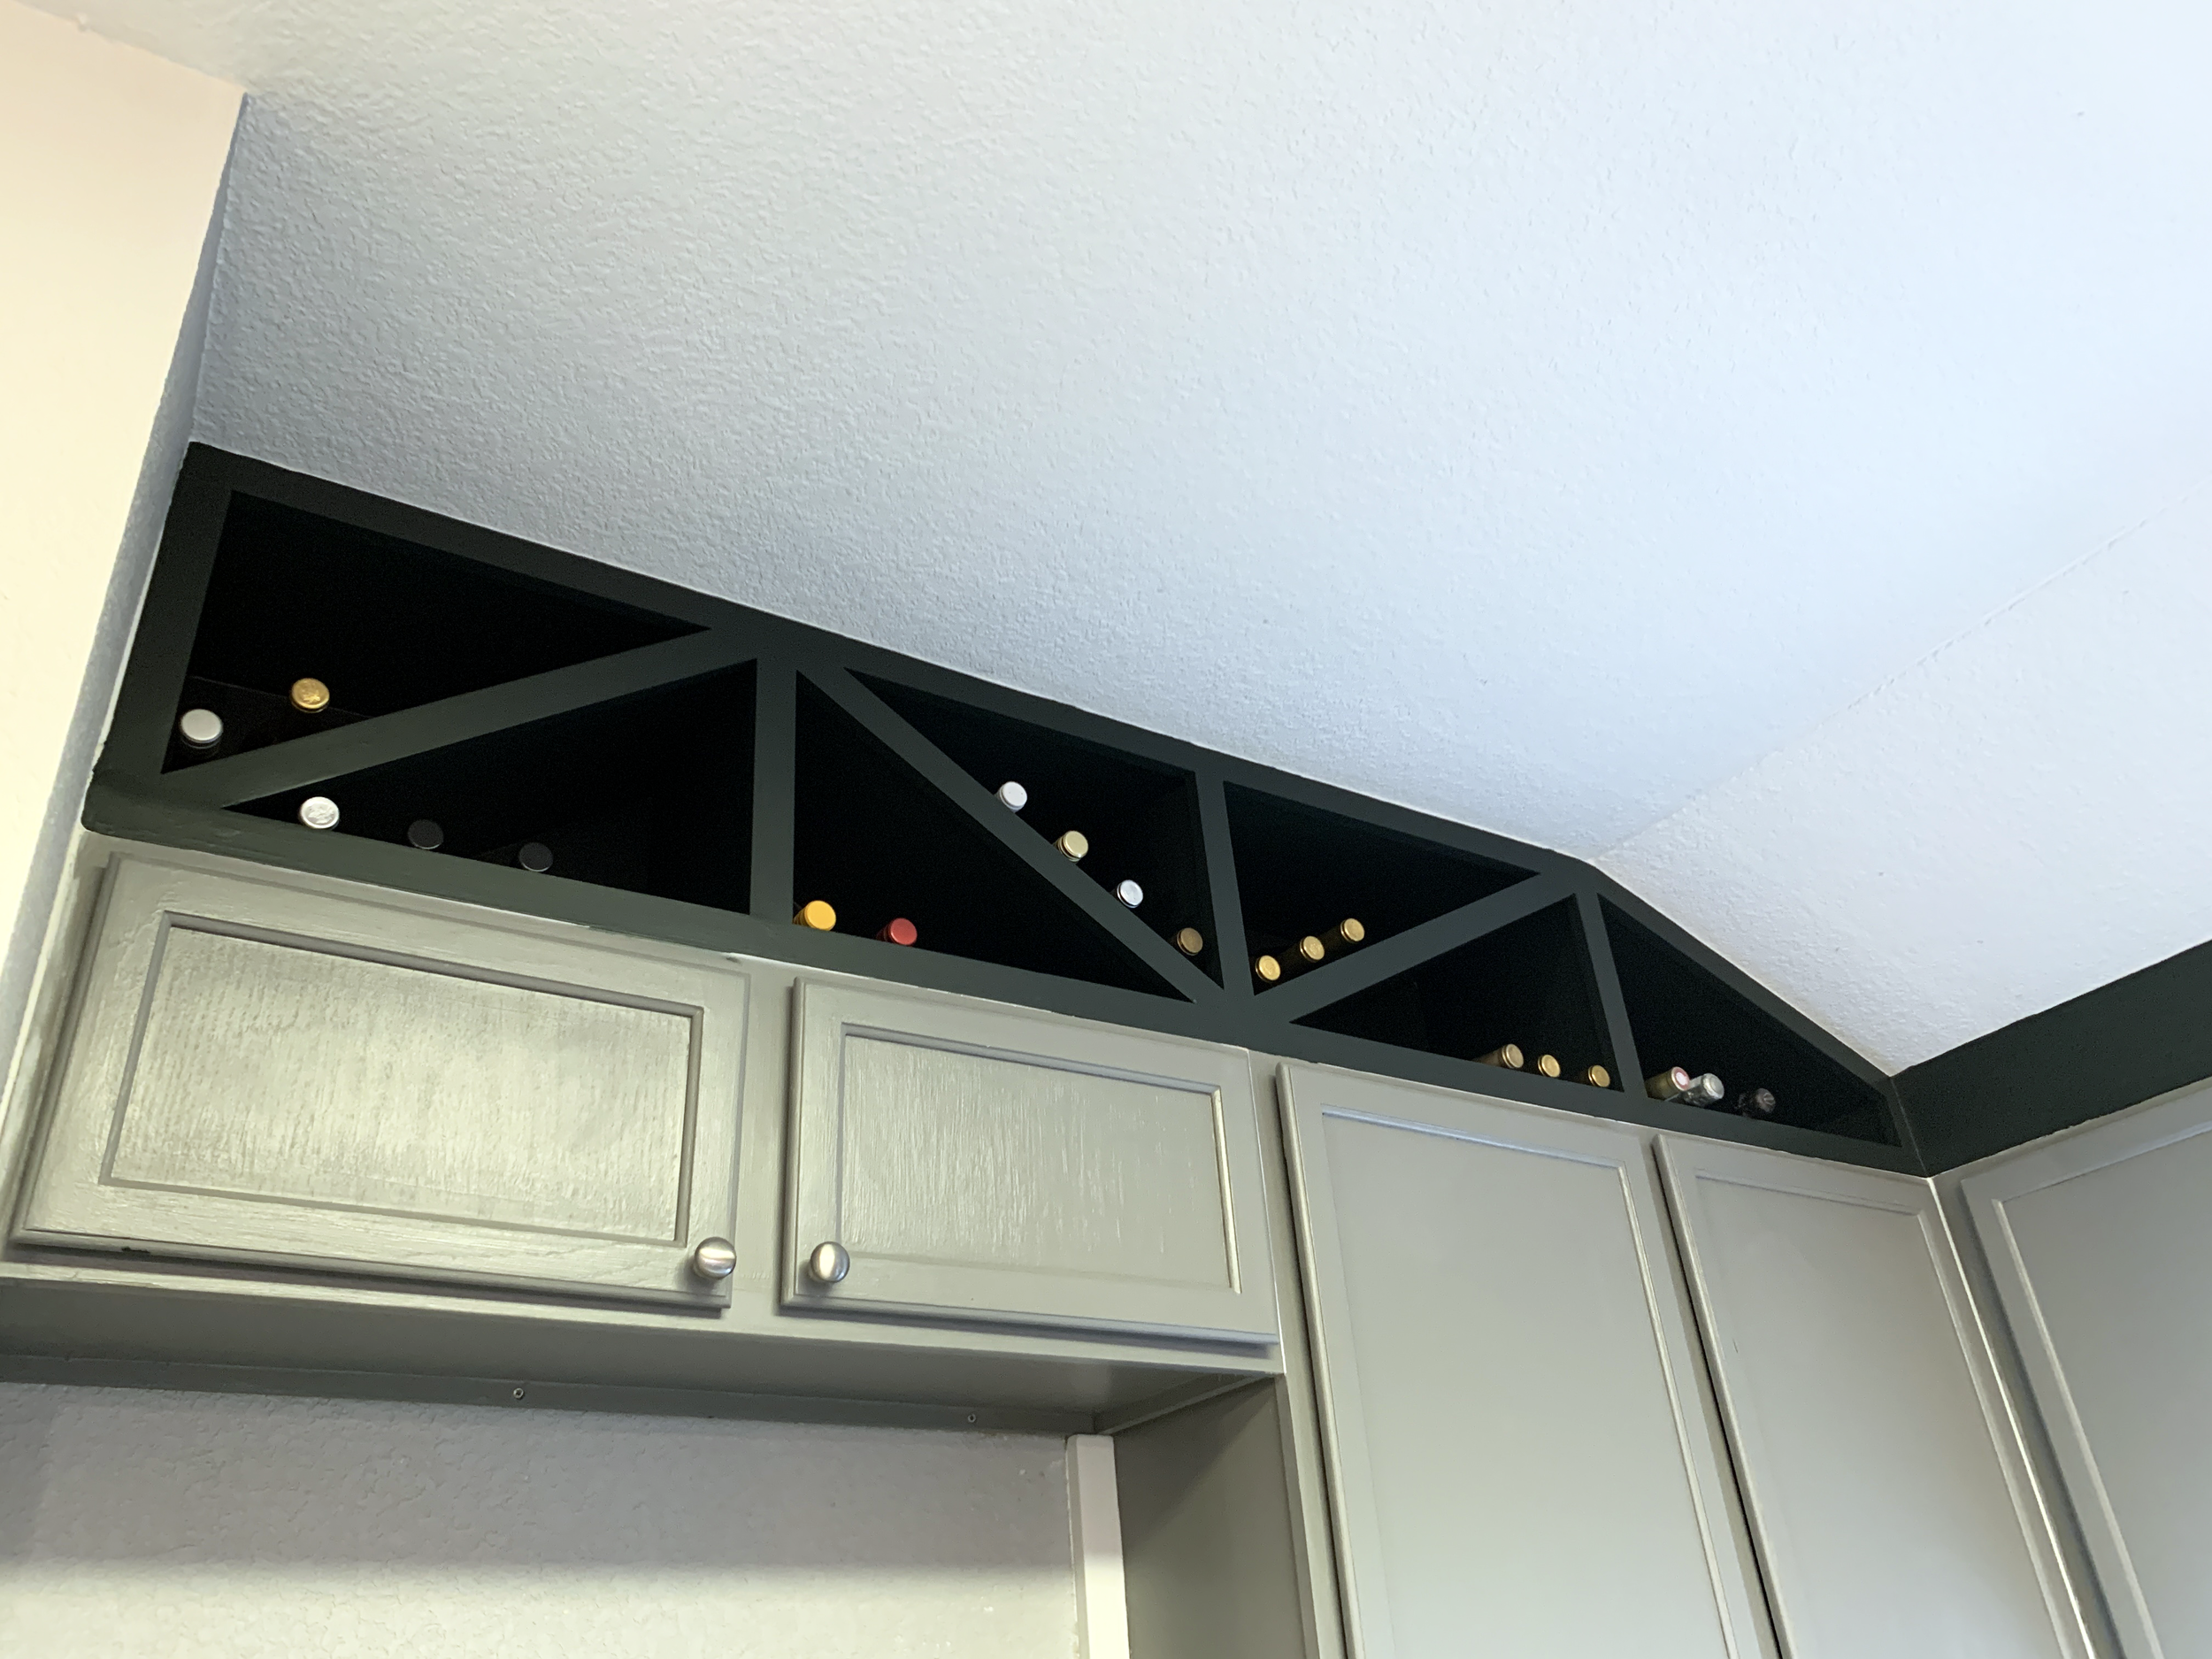
With the vertical dividers nailed in place, I measured for my diagonals and cut each of the pieces to length, installing them one-by-one before measuring for the next one.

If you were a real stickler for details (and how you really should do it if you were a professional craftsman and/or planning on staining these pieces where you won’t be using any caulk at all) these diagonal-piece side cuts could be made on an angle so they lined up perfectly square with your vertical dividers when in place. Since we planned on adding finish trim on the front and painting these out I opted to go the easier route and just make straight cuts, which leaves tiny little triangle-shaped gaps where the diagonal dividers meet the vertical dividers and horizontal pieces along the top and bottom.

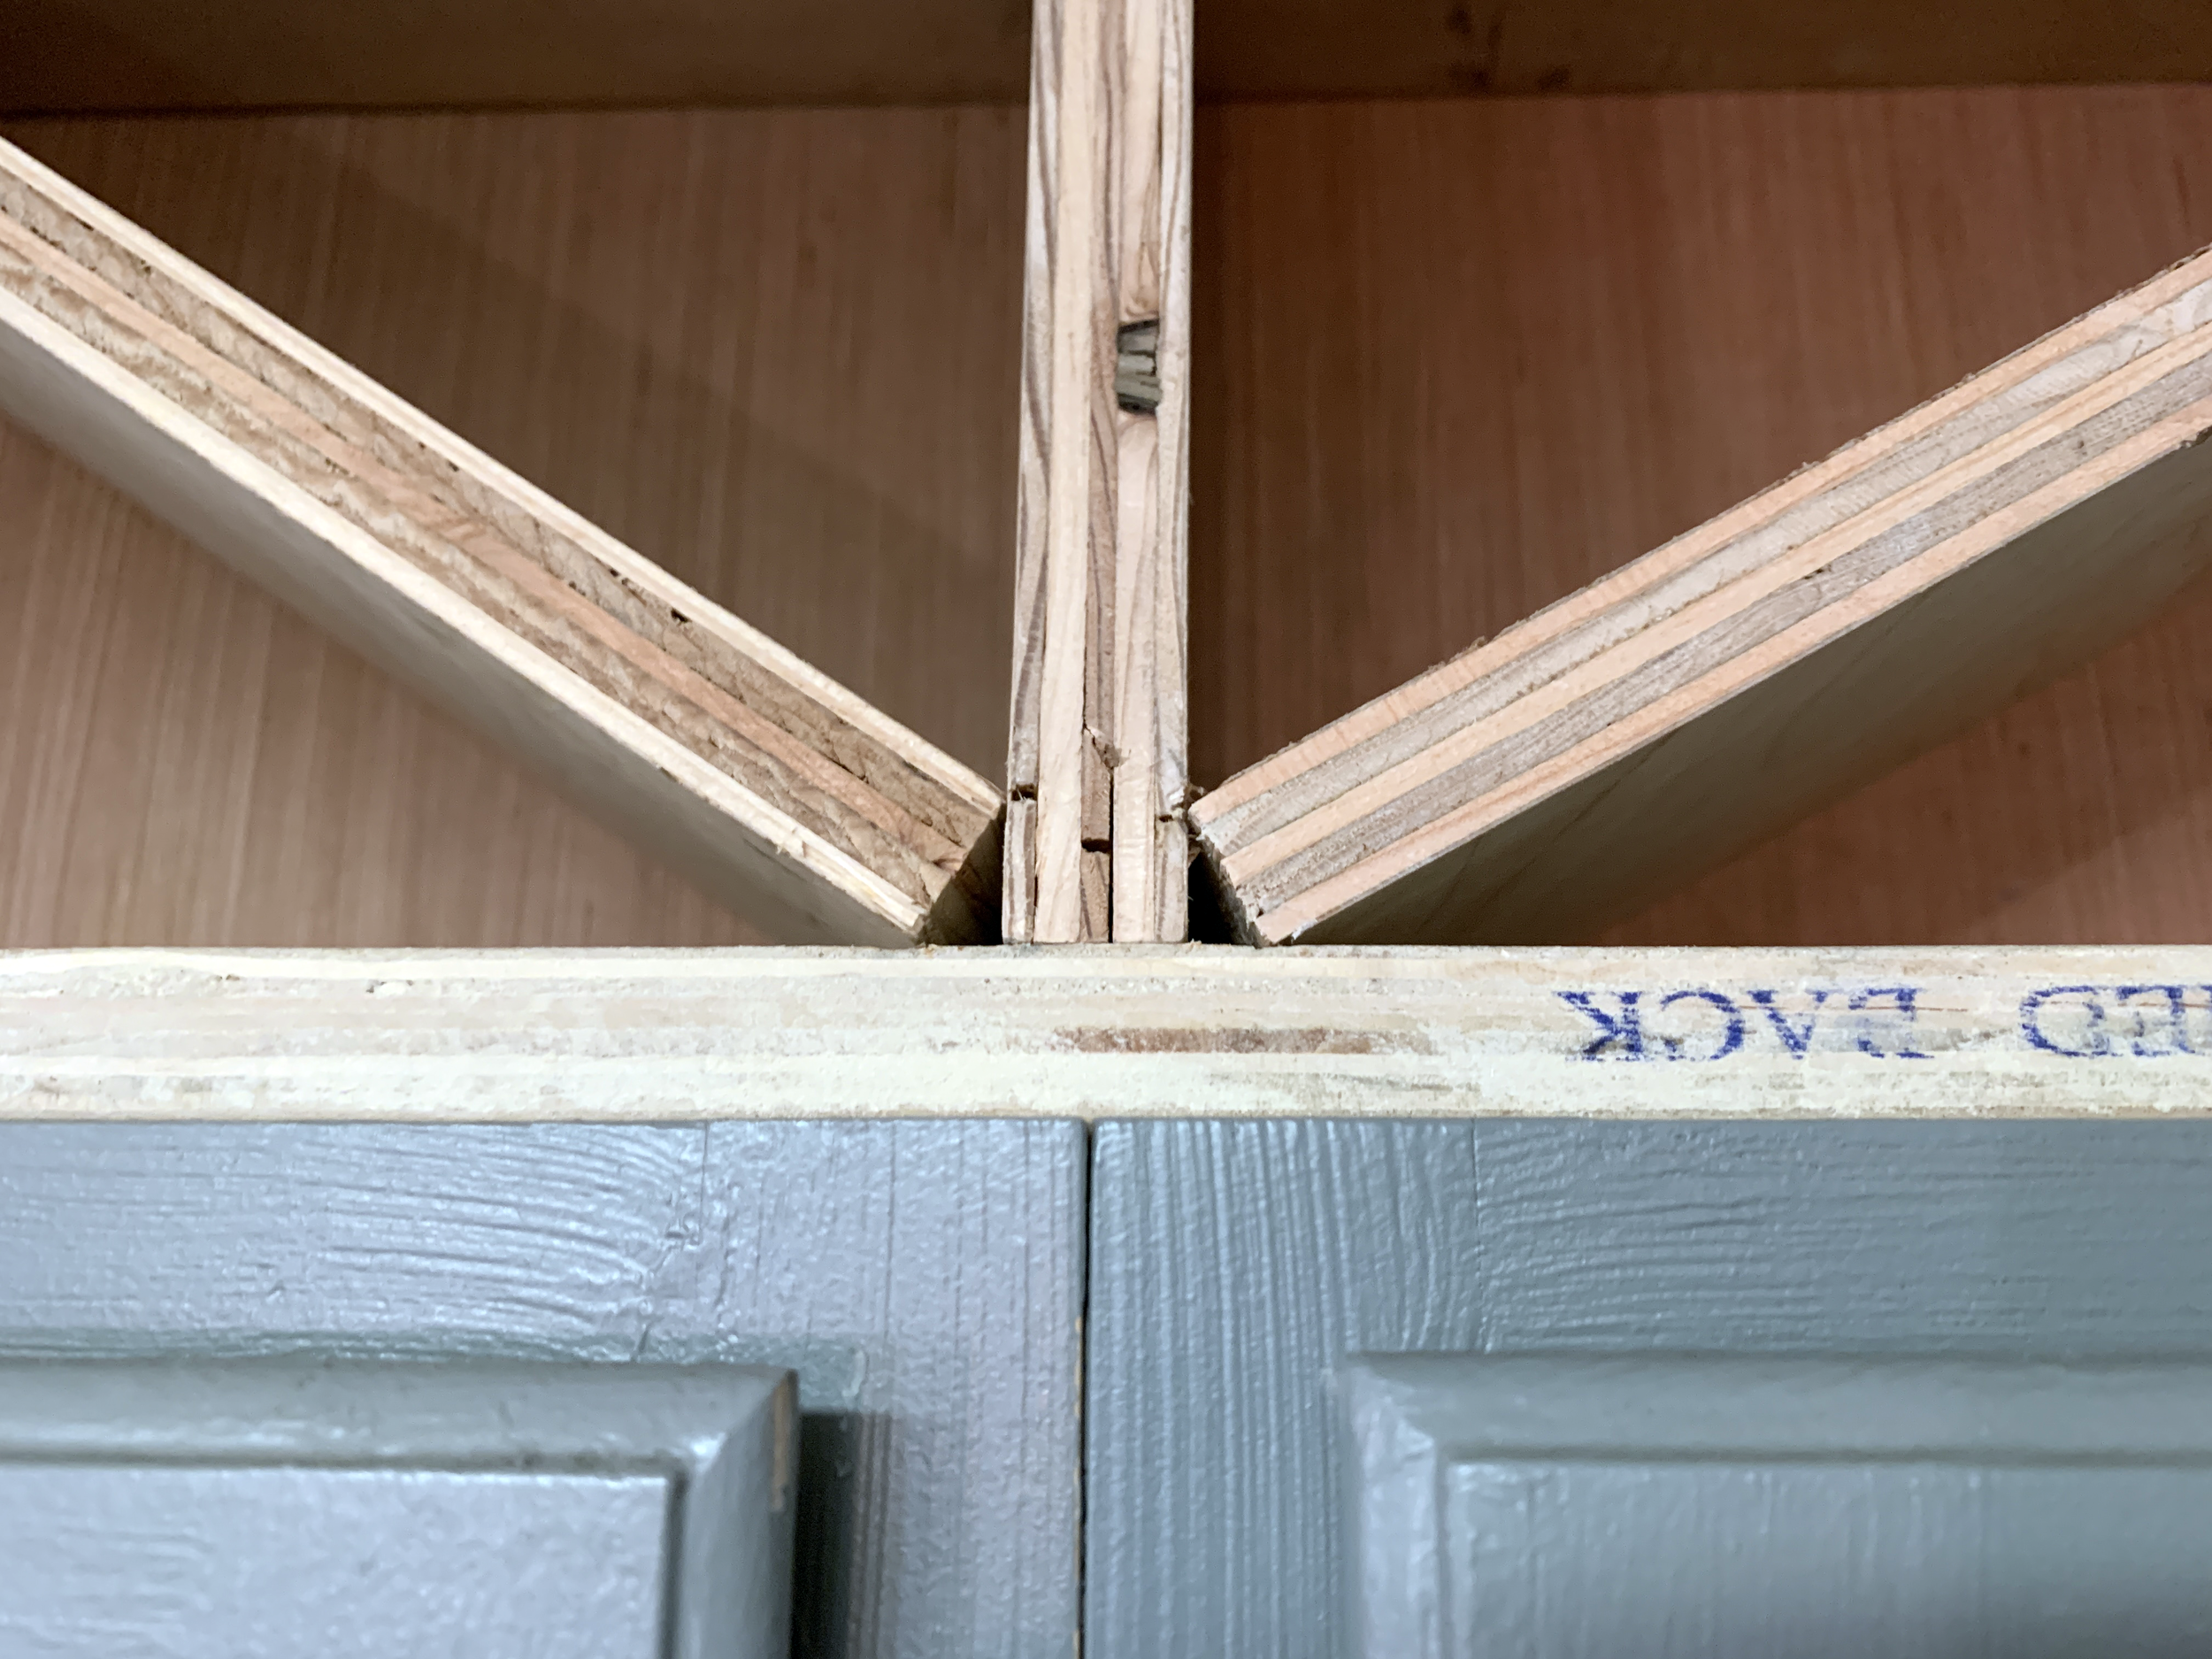
Having cut straight edges (and therefore having these little gaps where the pieces touch each other) make it extra important that these diagonal divider pieces be in there super tight against the verticals since the tension made by these diagonals leaning on the verticals is what holds up the diagonal “shelves”, and they’ll be supporting a decent amount of wine bottle weight.

I carefully used a rubber mallet to softly tap each diagonal divider into place until they touched the back wall and the fronts were in-line with the front of the cabinet that was already installed.
Tapping tip
If you need to give these a good hard whack to get them in line, use a scrap piece of wood in between the divider and your mallet to buffer the pieces and keep from damaging the edges of your build.
The finish trim
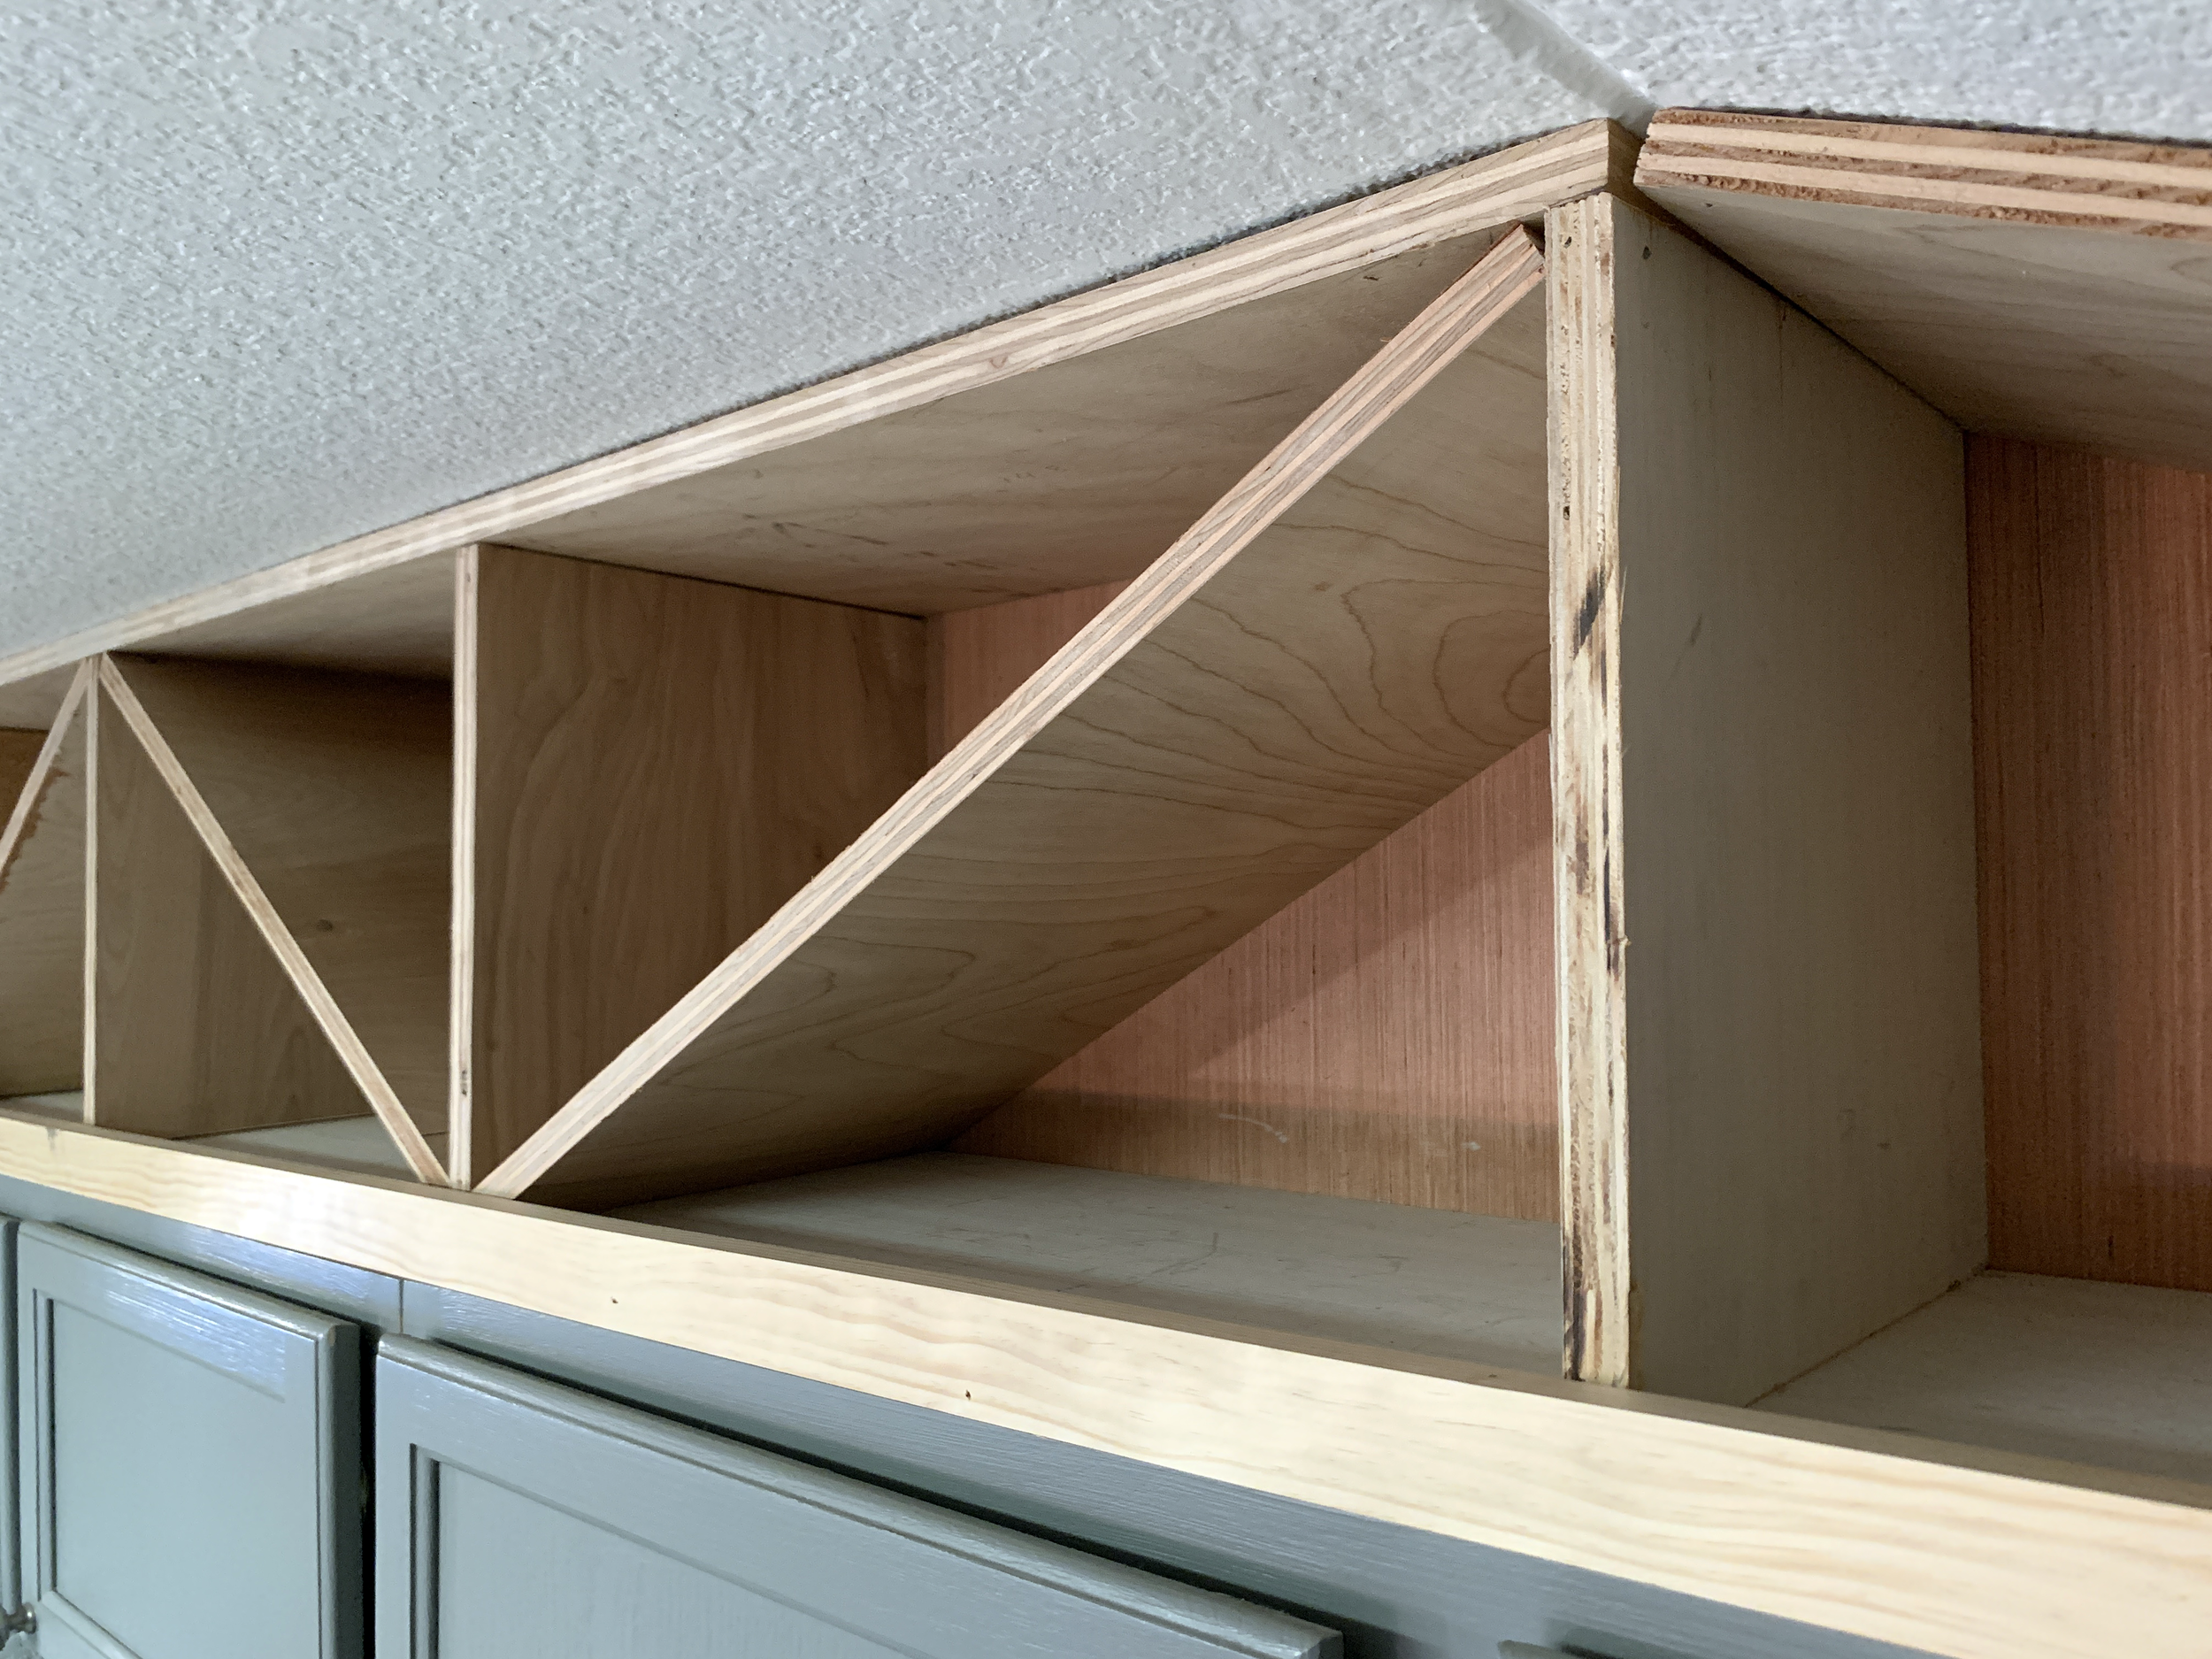
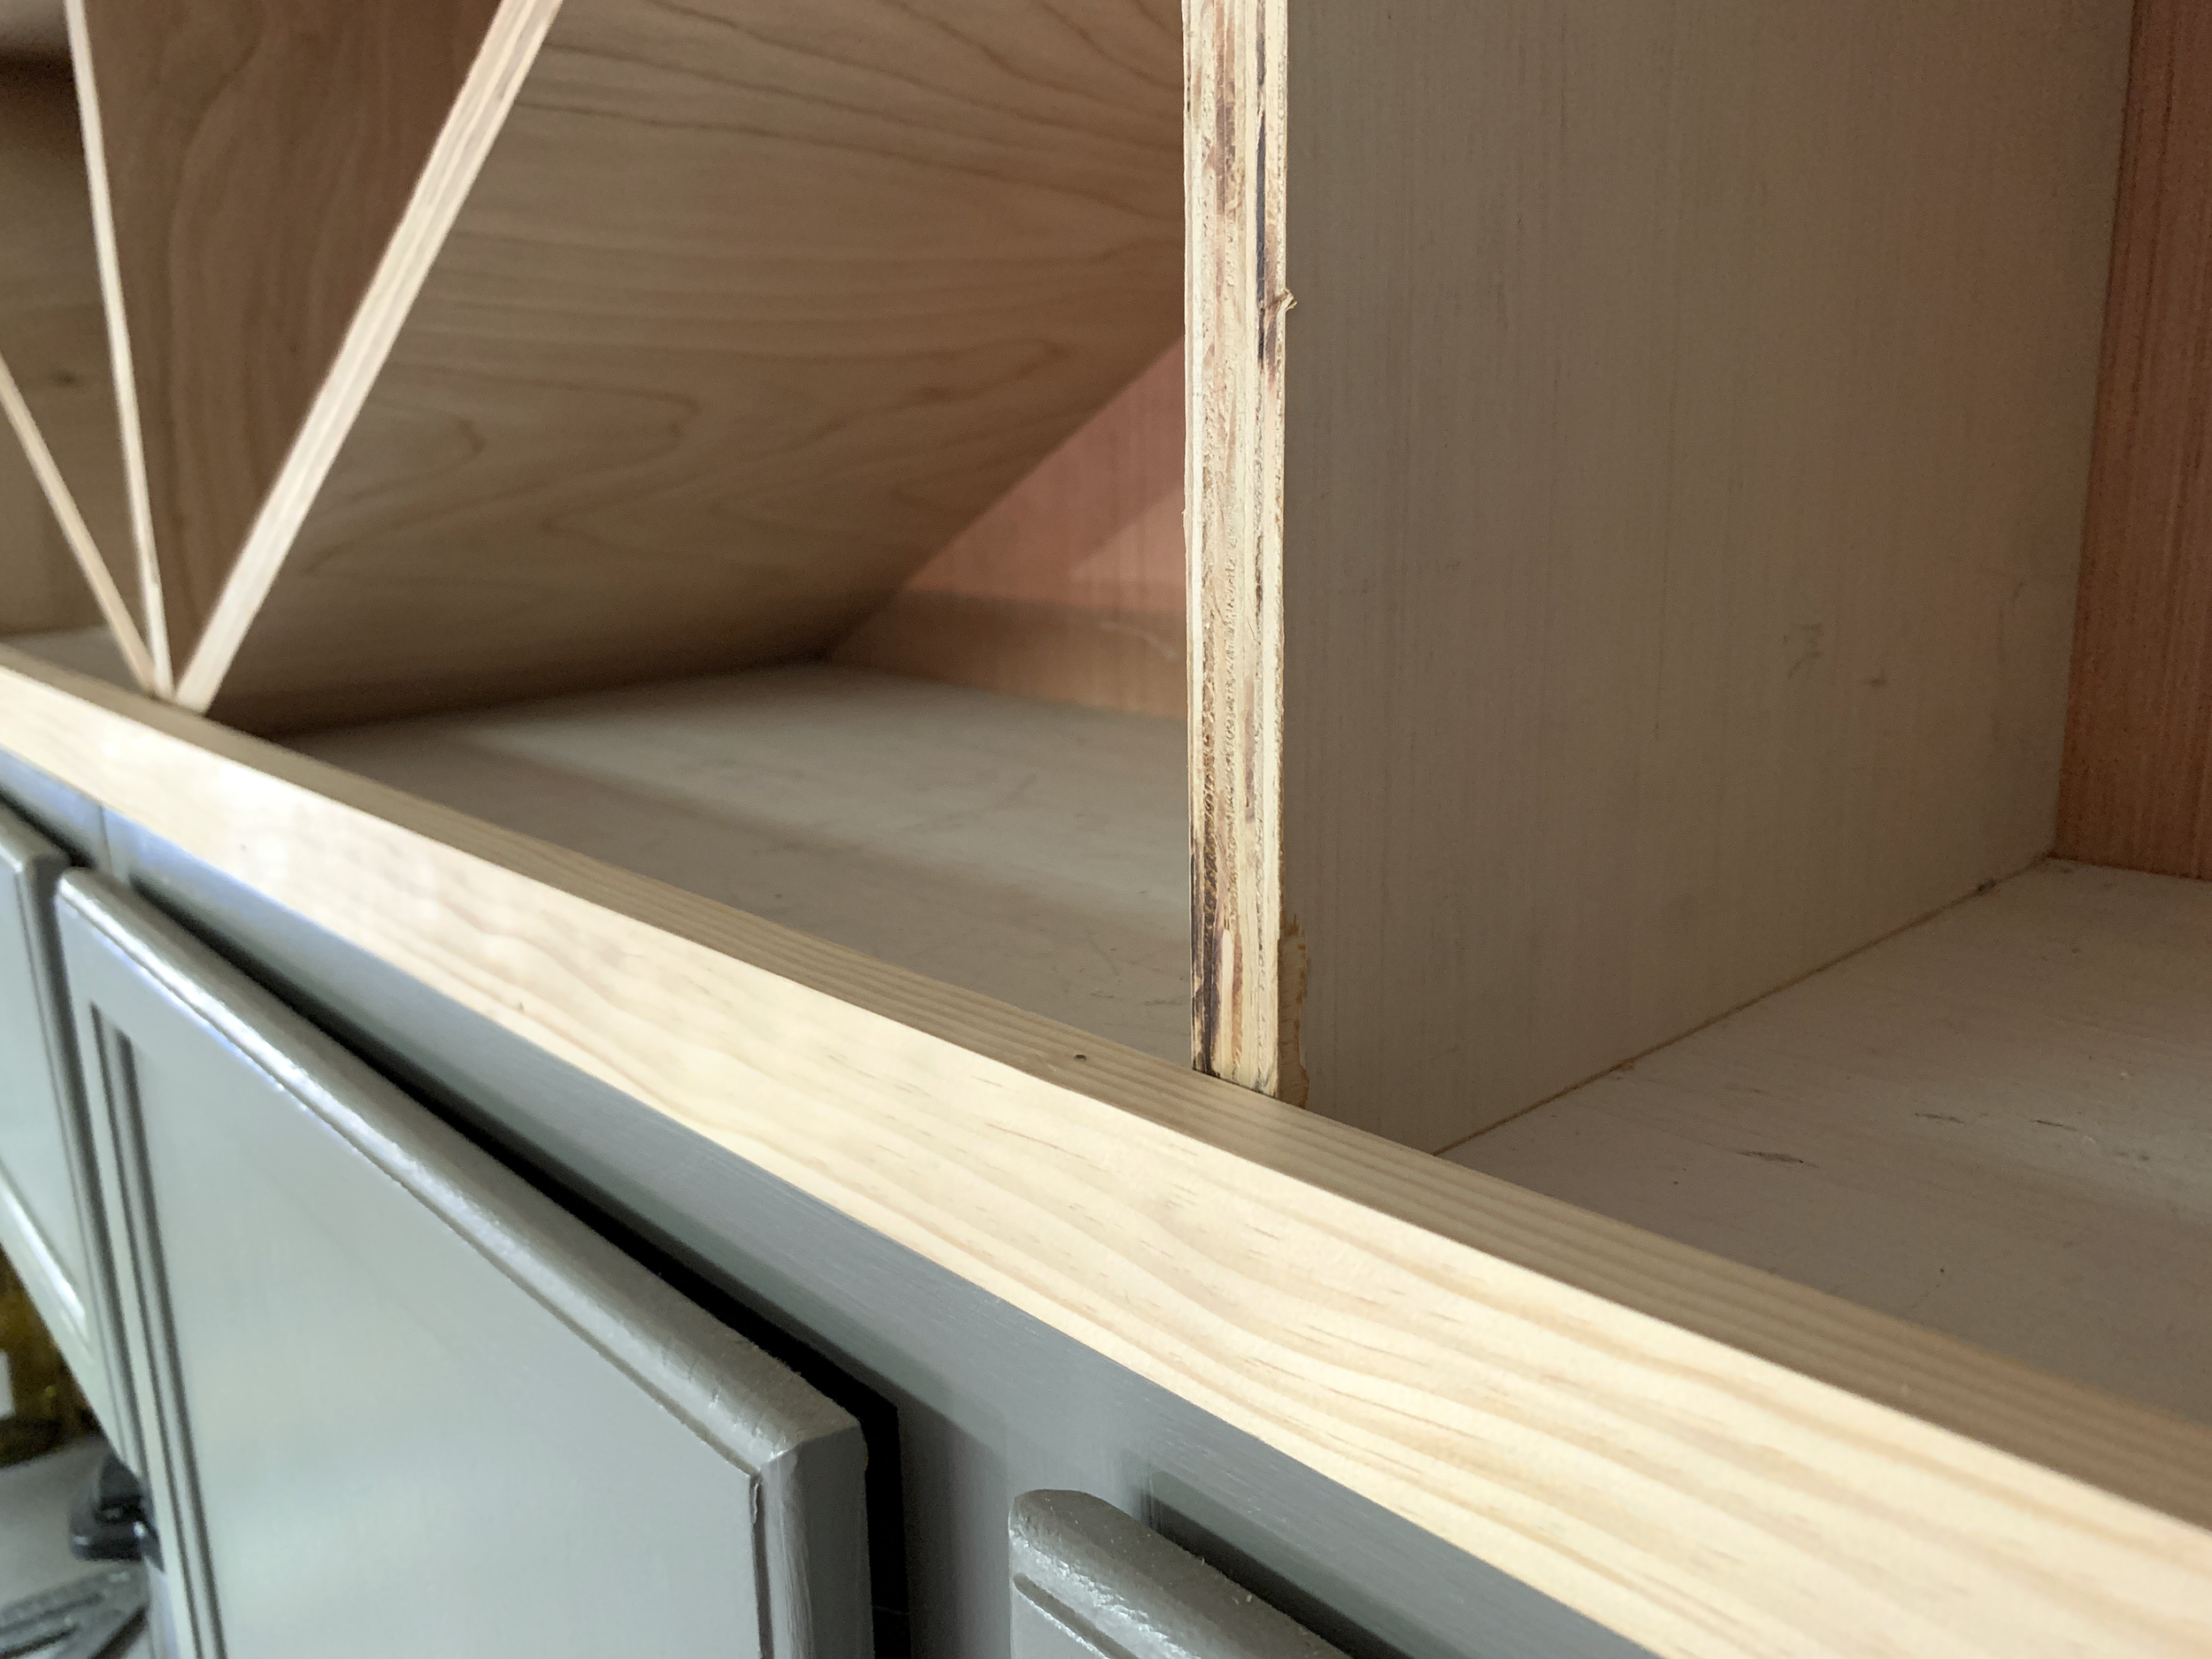
I began with the bottom horizontal piece – since that’s the one piece that you want to be flush with the upper cabinet’s frame and is used set the exact depth for the rest of the face trim – using our nail gun to attach the 1x2 to the front edge of the just-installed 3/4” plywood wine cabinet bottom as well as (carefully) down into the top of the kitchen cabinet frame (again, into the “meat” of the cabinets).

I also intentionally cut this bottom 1x2 long to give excess in what will be the empty hidden hole on the far right so I have something to nail into later when filling in the space above the other side of upper cabinets.
Then, I continued to cut and nail in the other 1x2 trim pieces – starting with the horizontal piece at the ceiling, followed by the verticals, and then the diagonals. For the diagonal trim pieces I used our miter saw to cut each end with two angle cuts to make the ends of the diagonal pieces fit tightly with the vertical and horizontal front trim pieces.

The horizontals are as tight up on the cabinet and the ceiling as I could get, while the verticals and diagonals are installed to be centered within the 3/4” plywood they’re covering/attached to. (This means there is a little lip created on either side of the 3/4” plywood divider pieces.)

Filling the gap above the other cabinets
Once our wine rack build was complete, I used two 1x6s (which is actually 3/4” thick x 5-1/2” wide), to fill the awkward gap above the other side of upper cabinets so polish everything off.
Because of the angled roofline, I knew I needed to cut the long side of the board back at an angle, and because we don’t own a table saw I set our circular saw at a 45-degree-angle and ran it along the long edge of the board as close to the edge as I could.
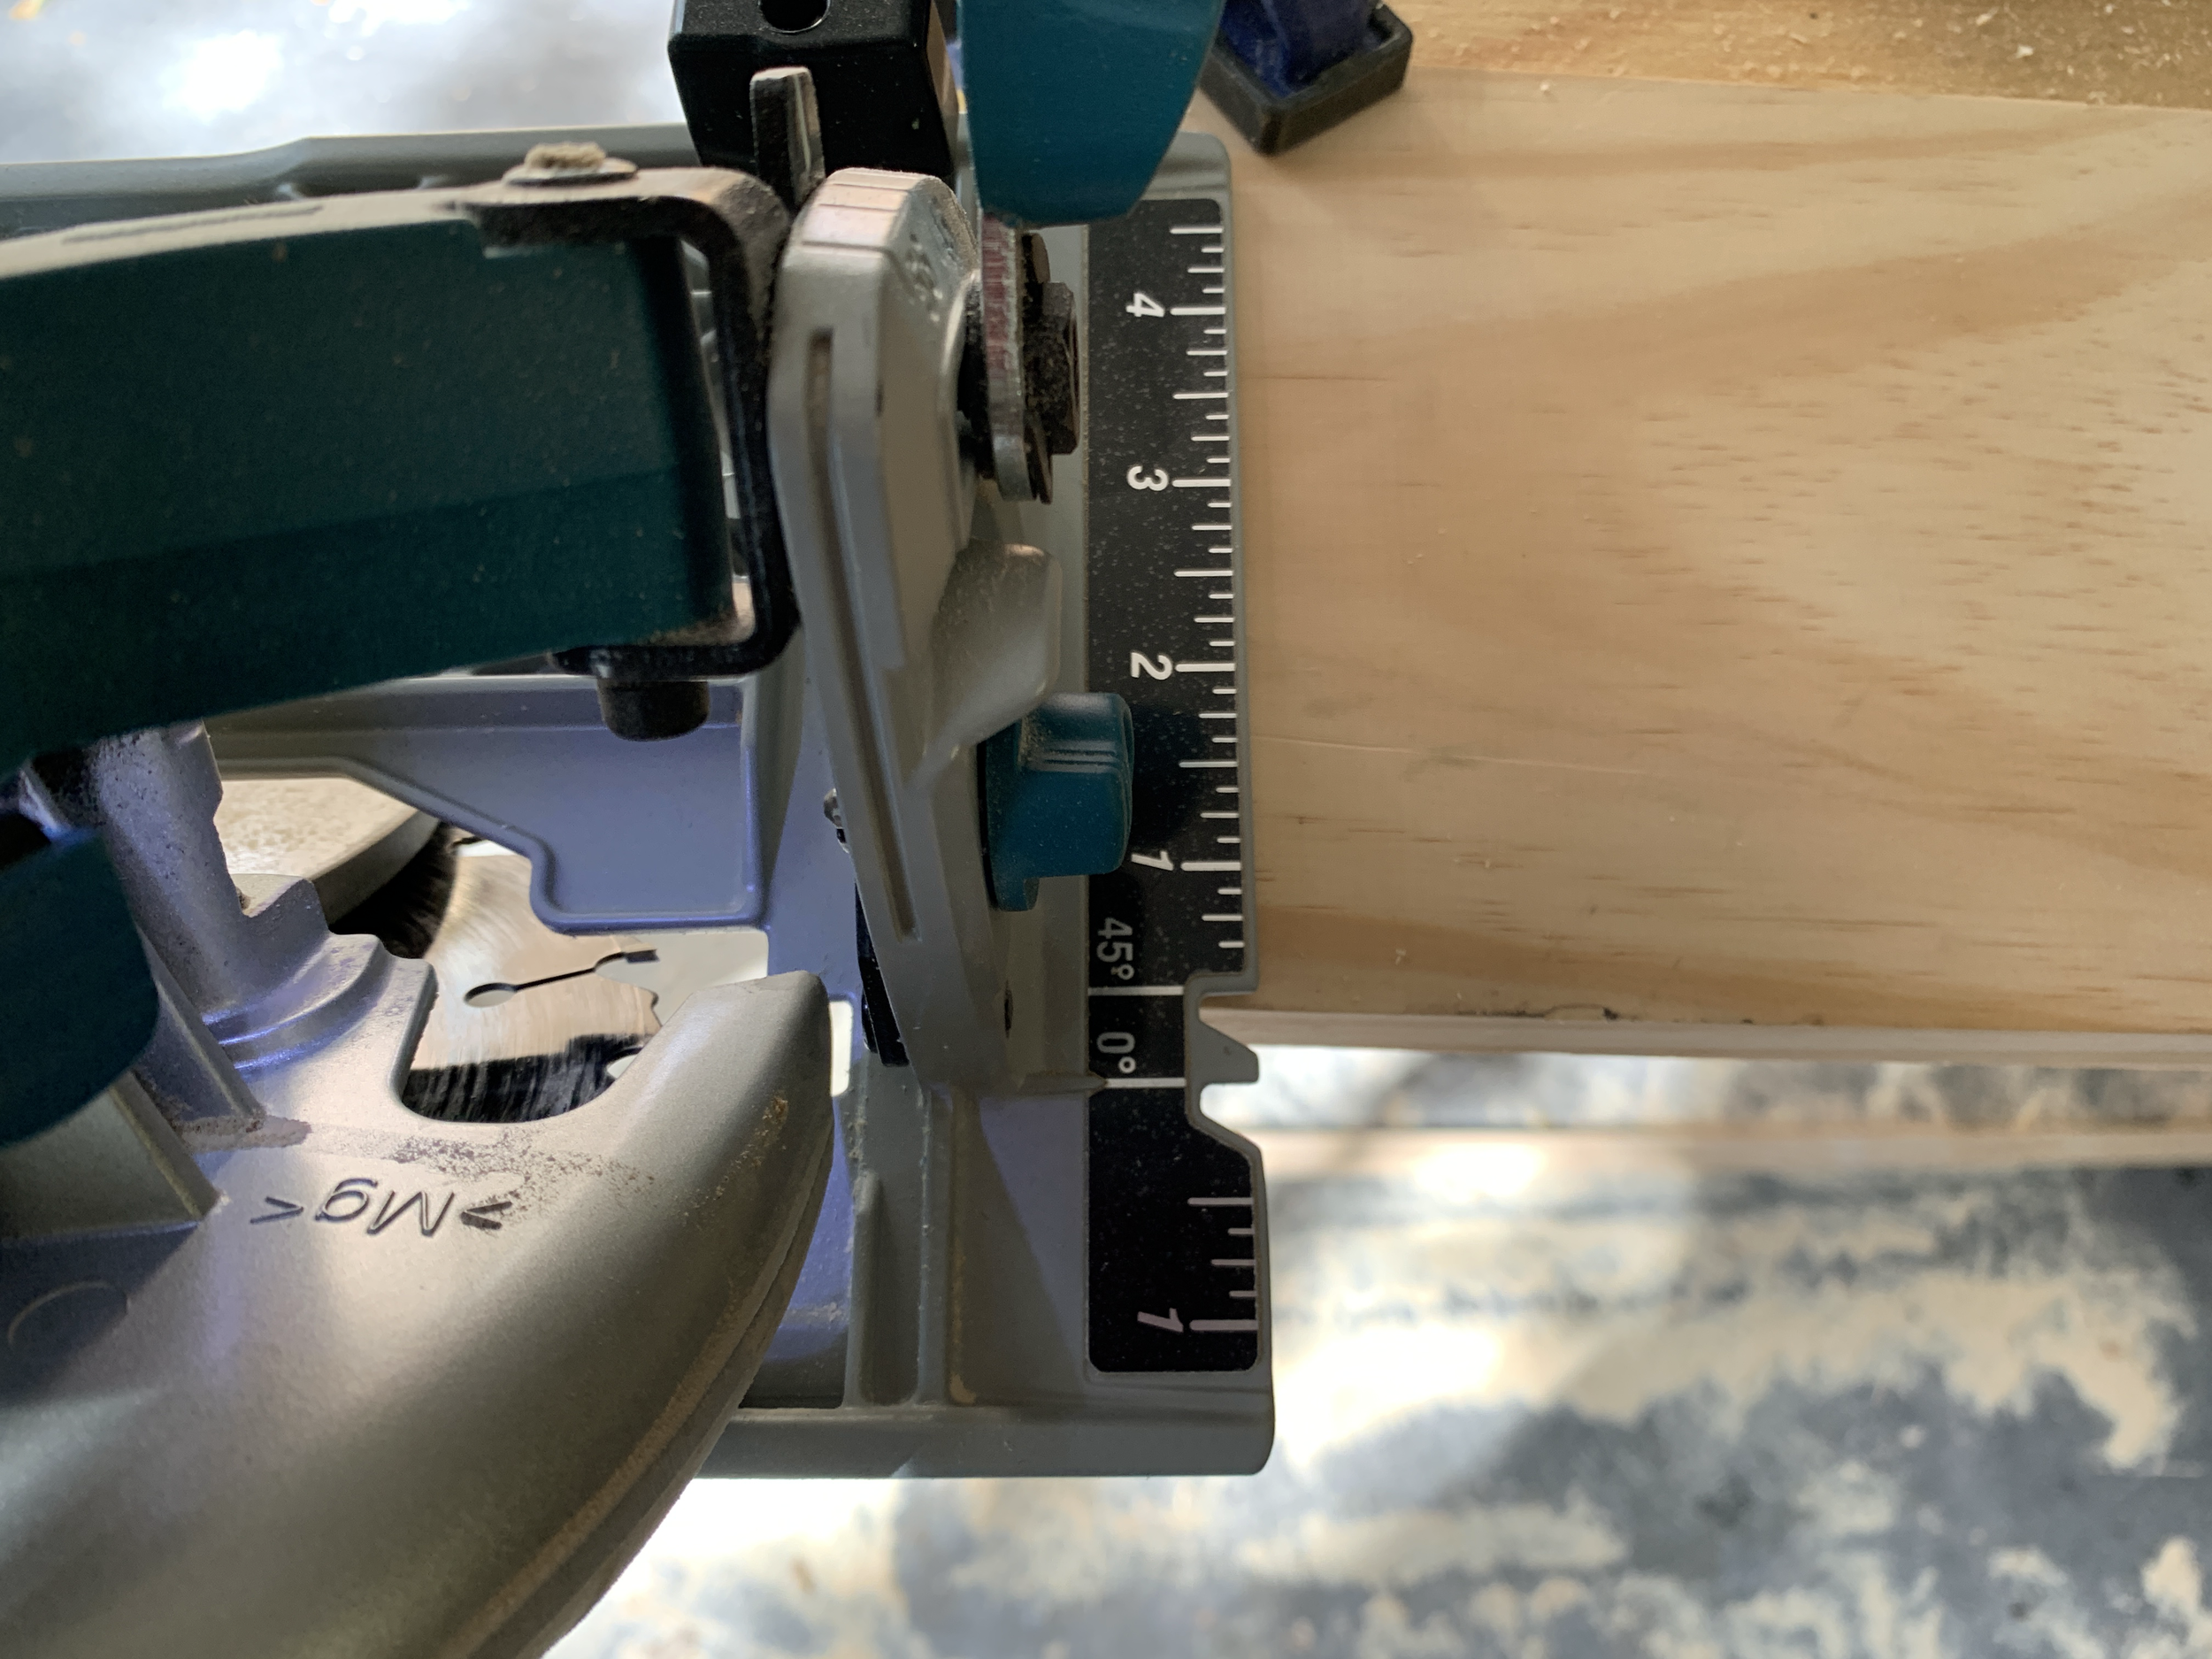
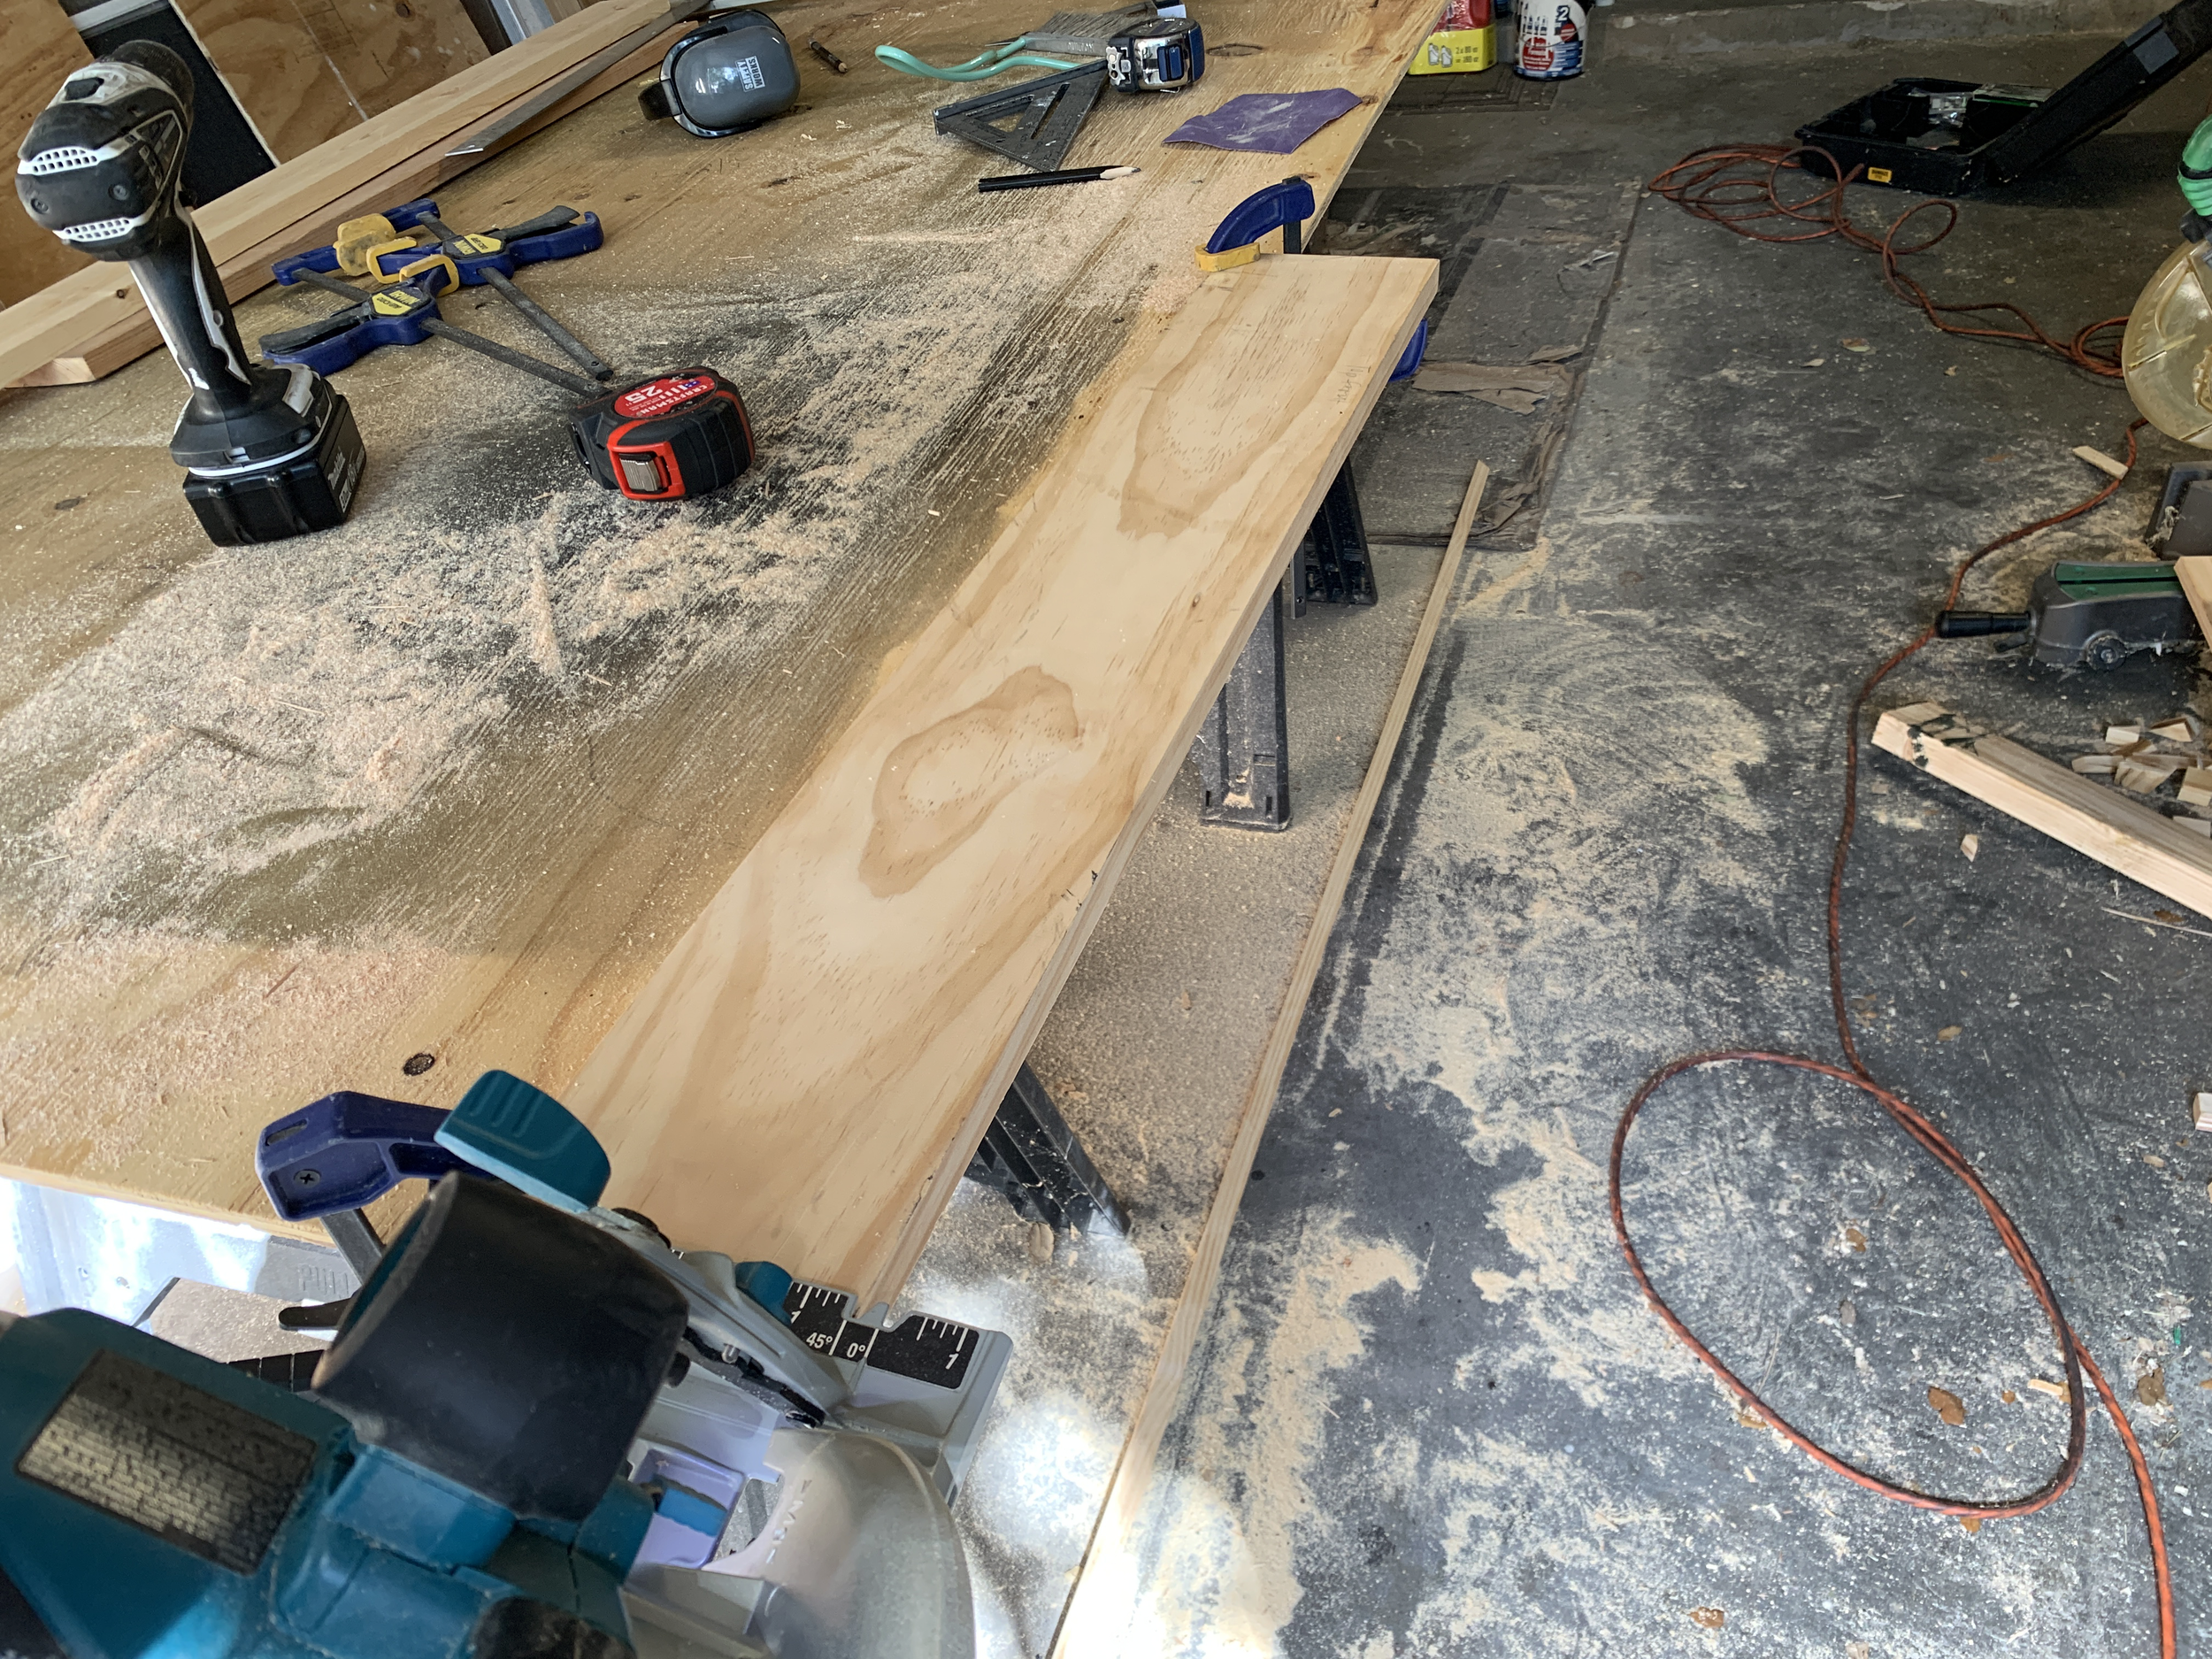
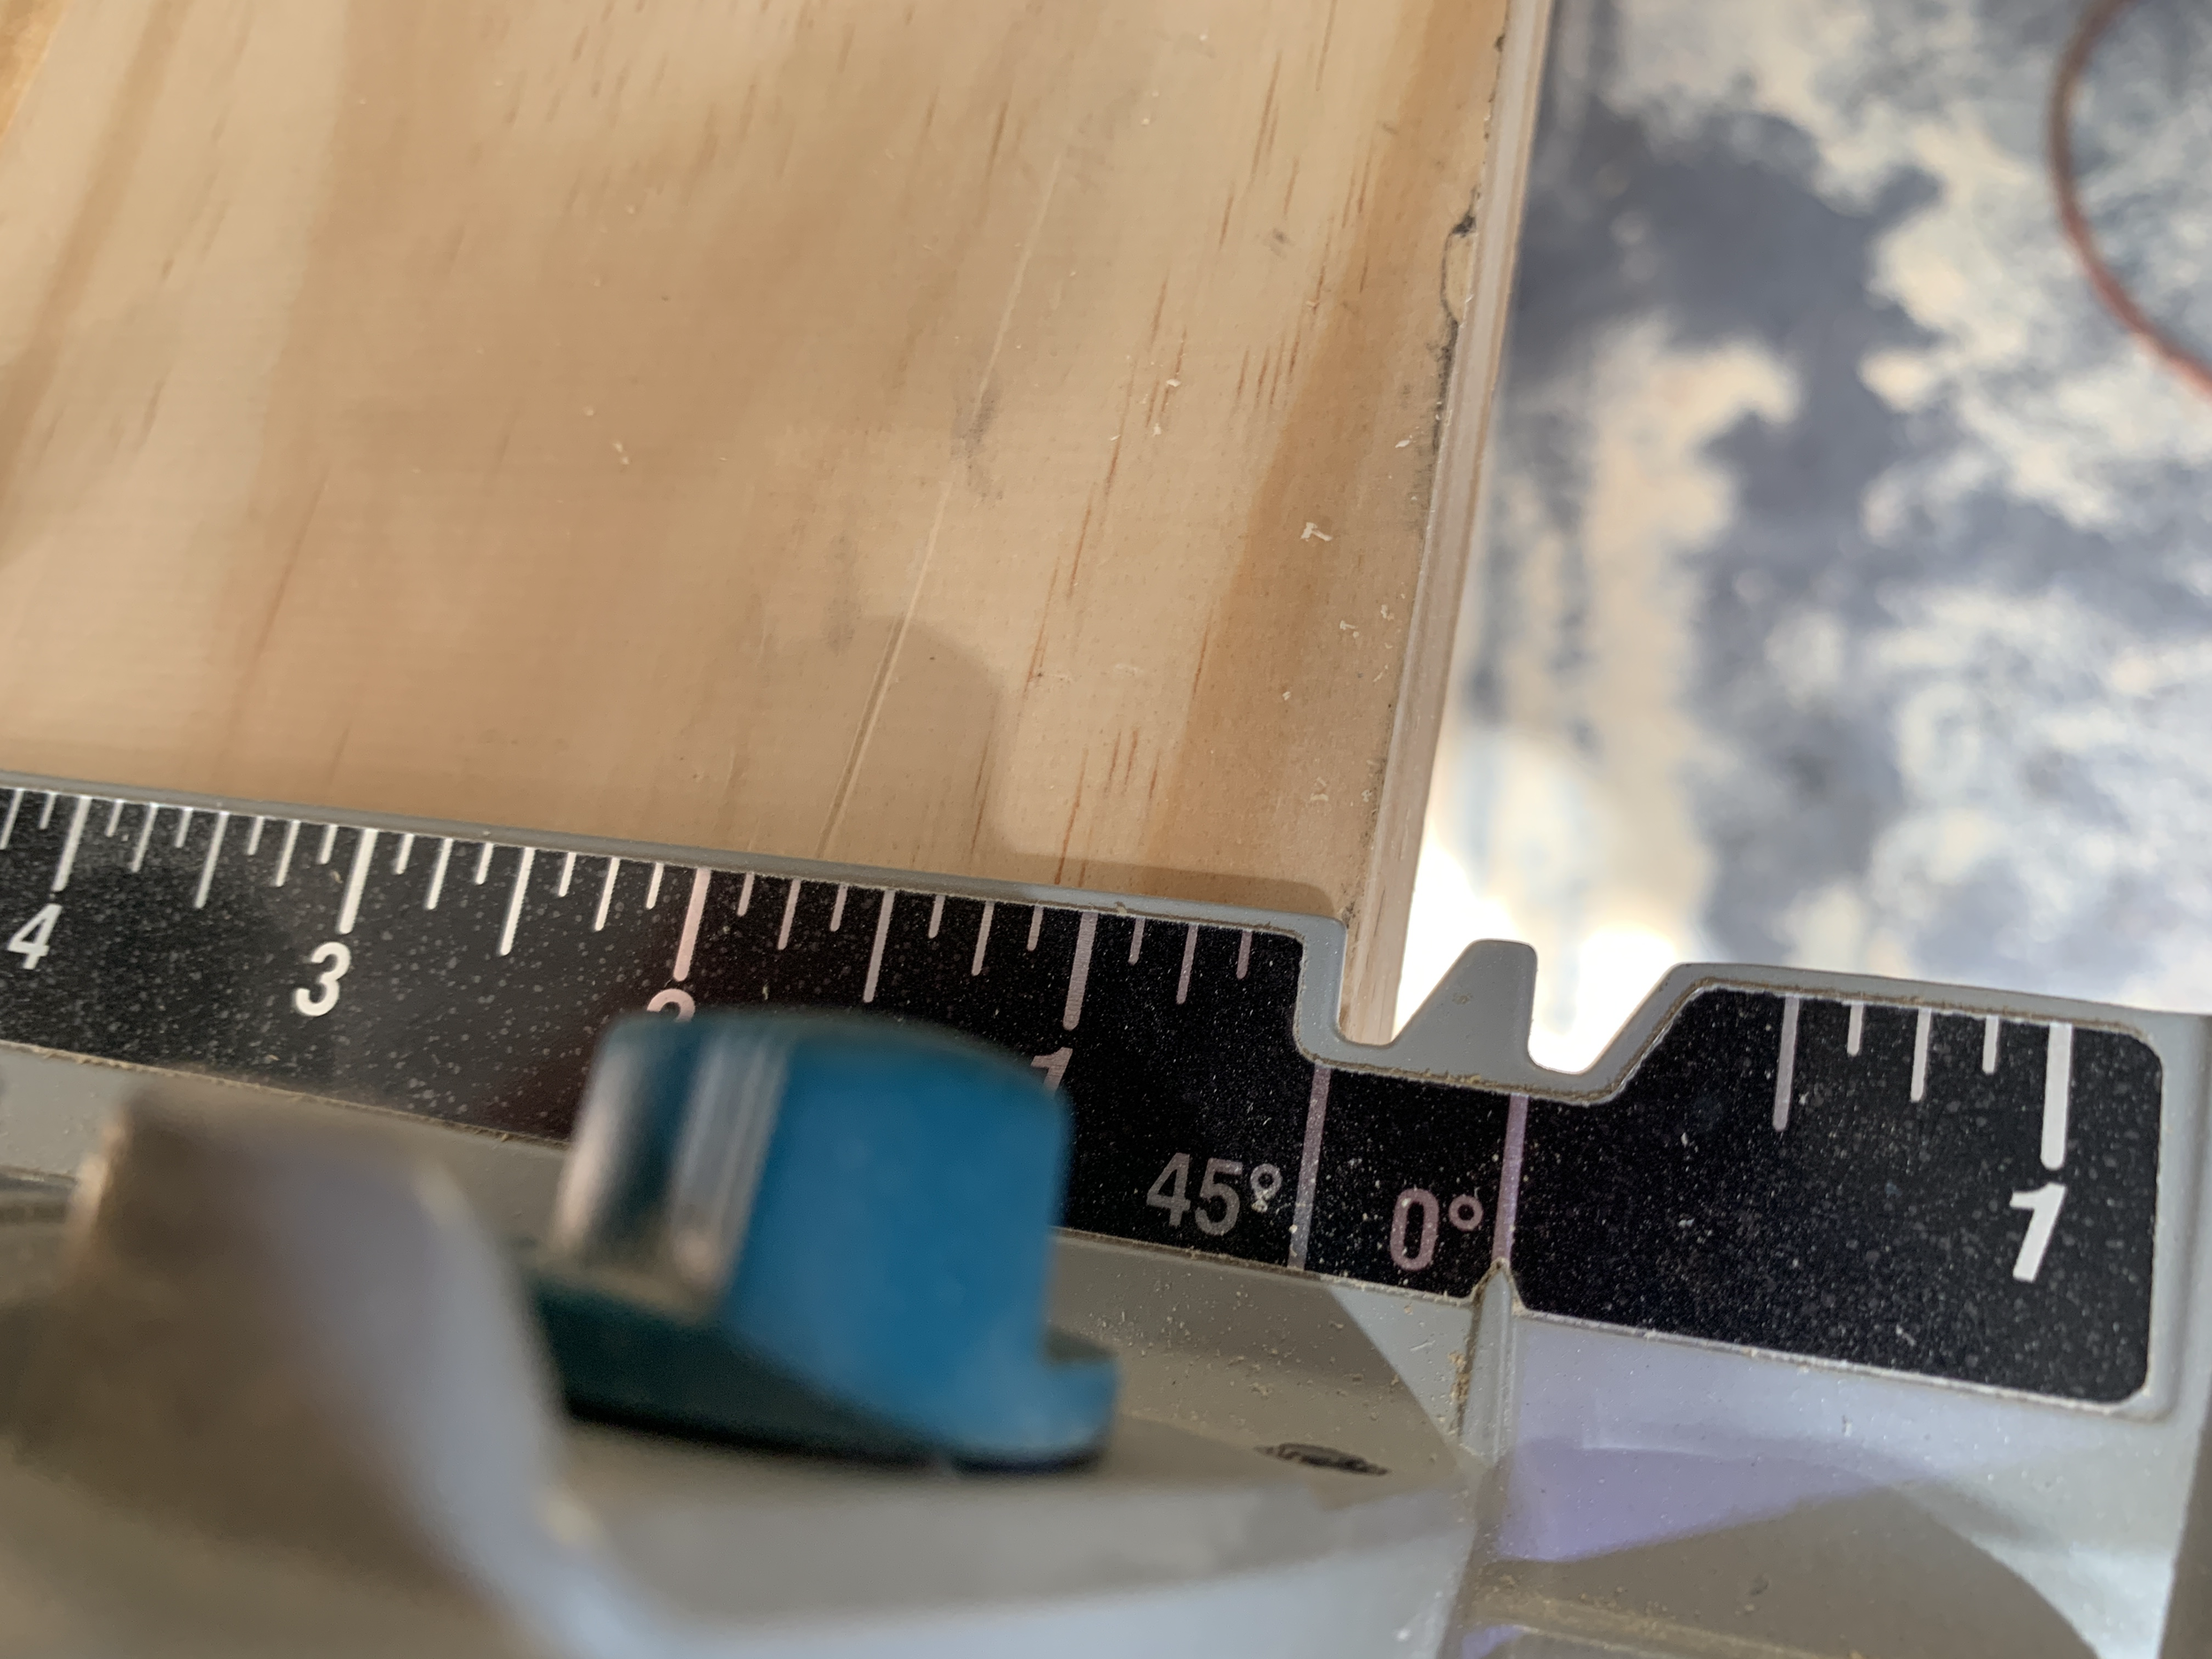
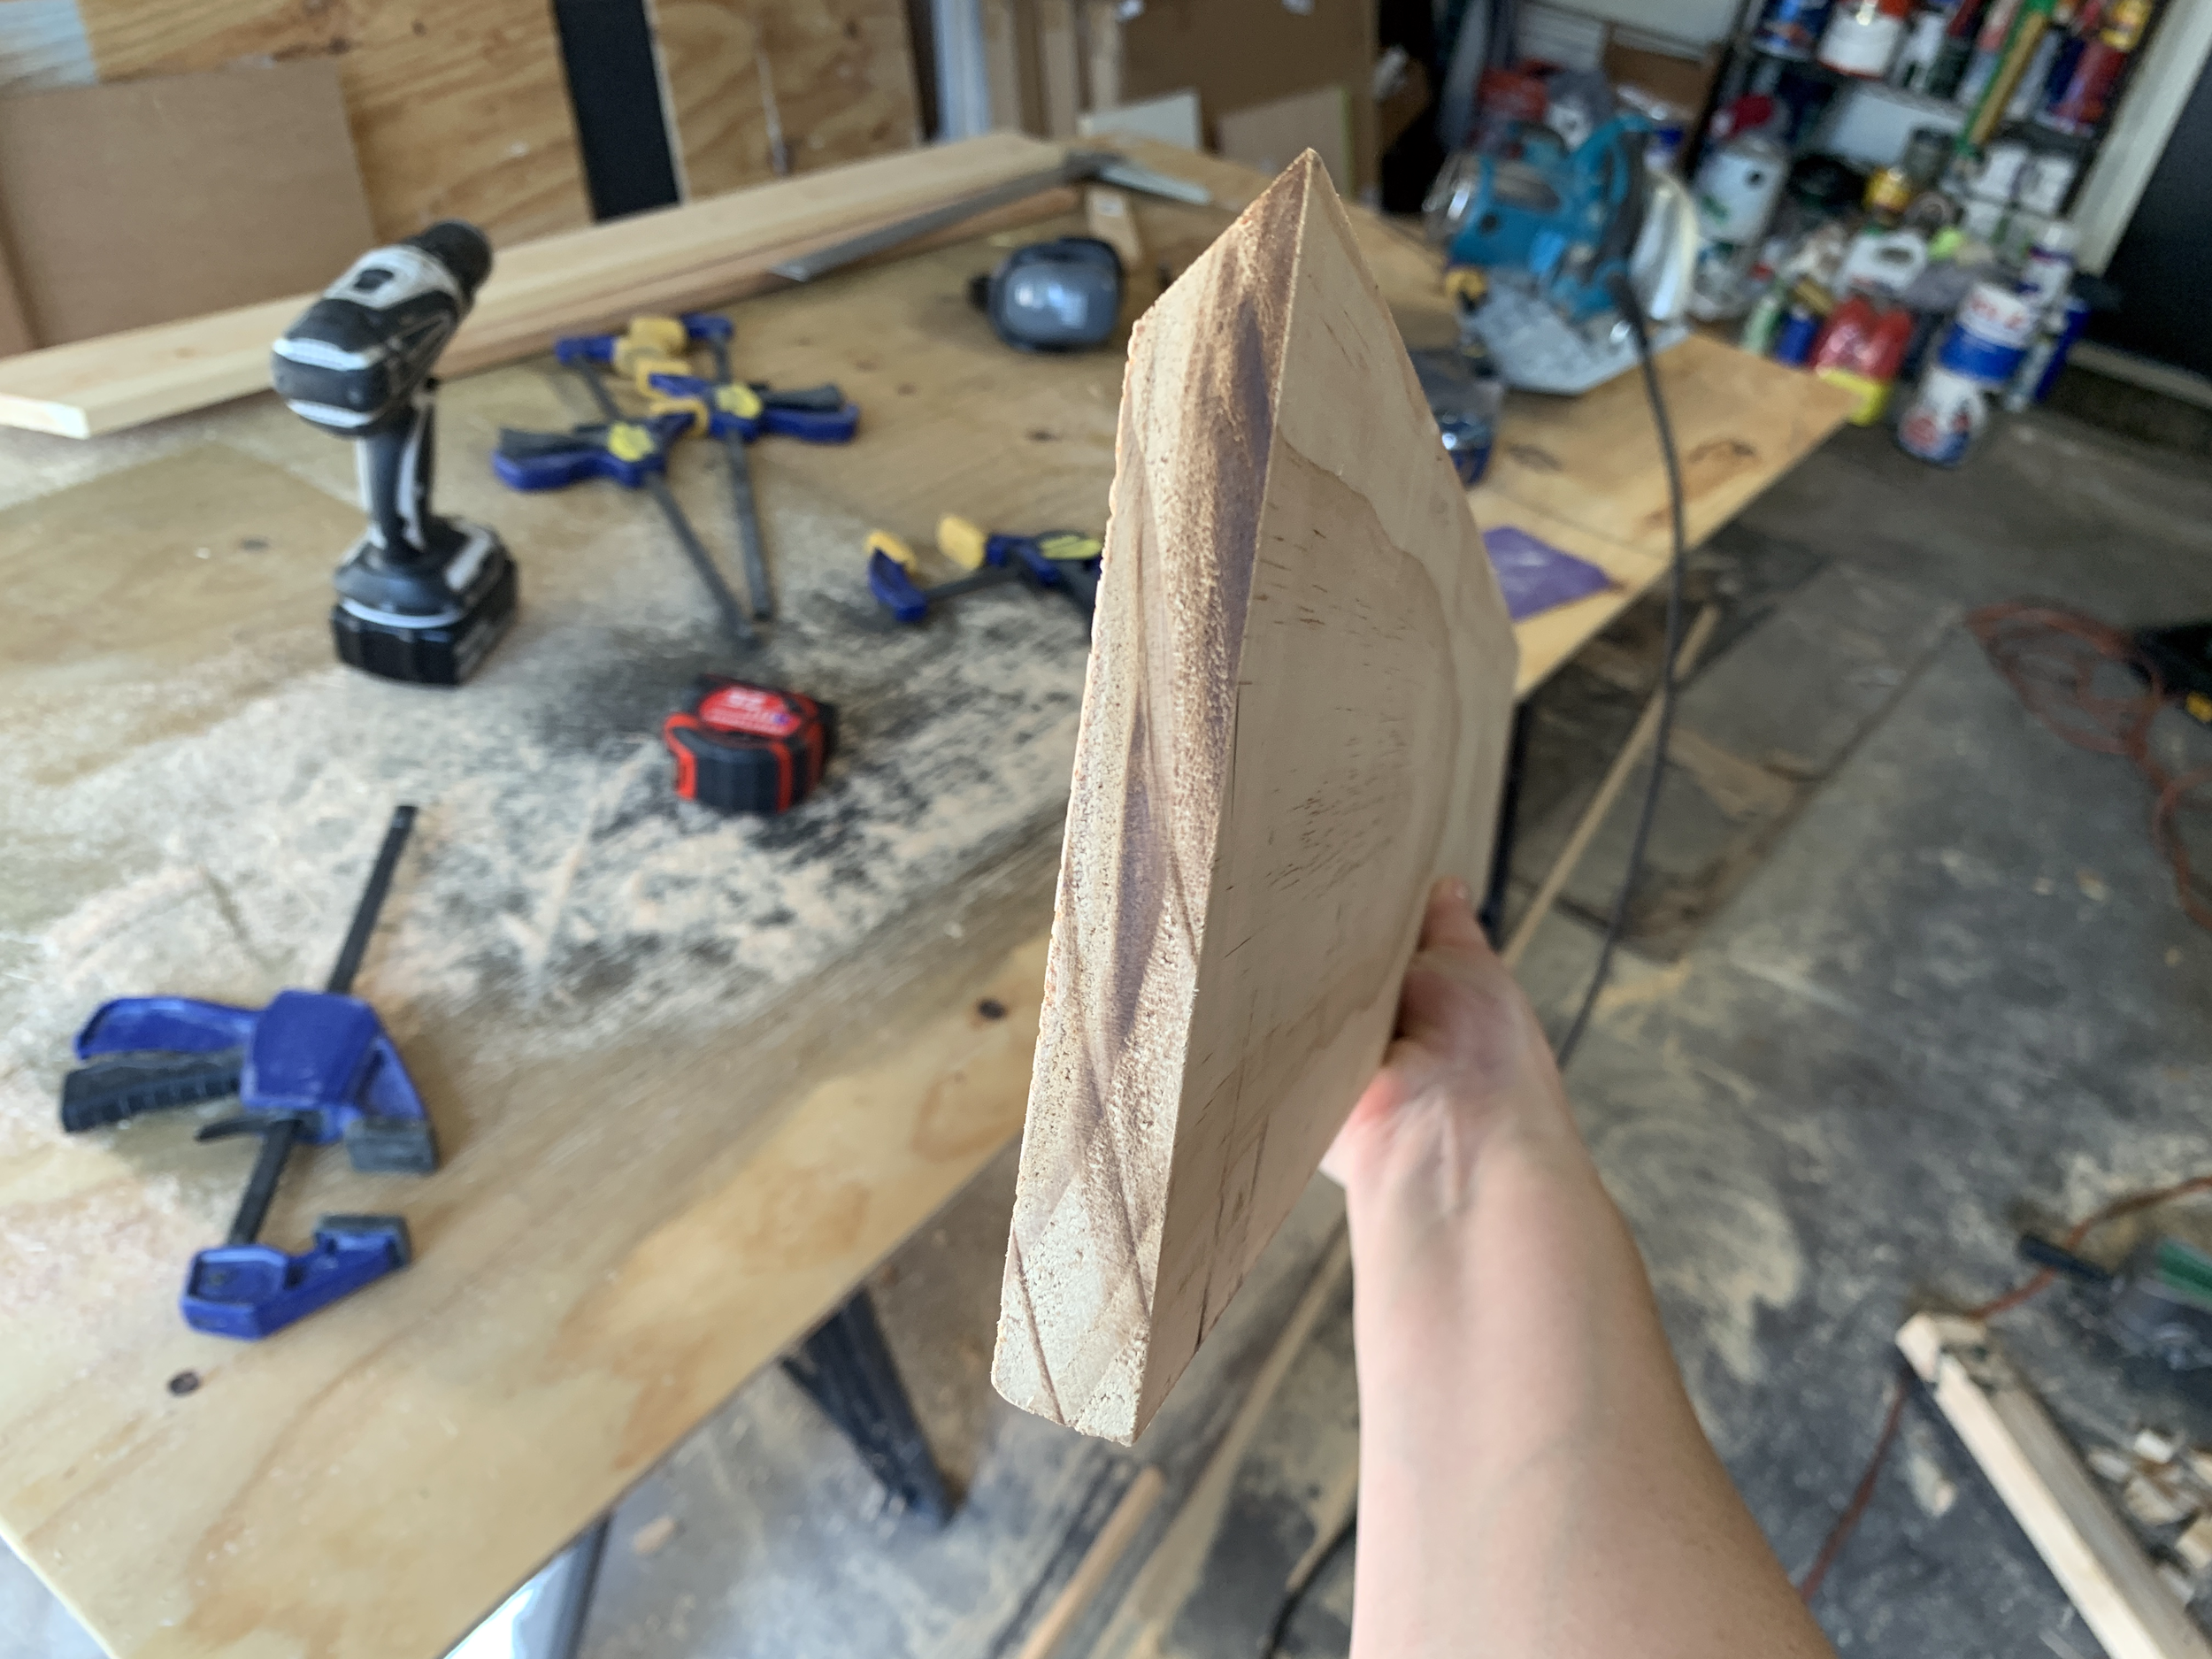
Since we needed two 1x6s to get the full cabinet length we needed, I also cut the short end of the boards at a 45-degree-angle (where they meet) to help conceal the seam. You could do straight “butt” cuts here and just line them up end to end, but the seam is much more noticeable that way.
I used the nail gun to nail the board up into the ceiling and down into the upper cabinet in multiple spots, and toe nailed the left side of the first board into the extra overhang I intentionally left on the right side of the wine rack (in the dead space now closed in by the two cabinet additions).

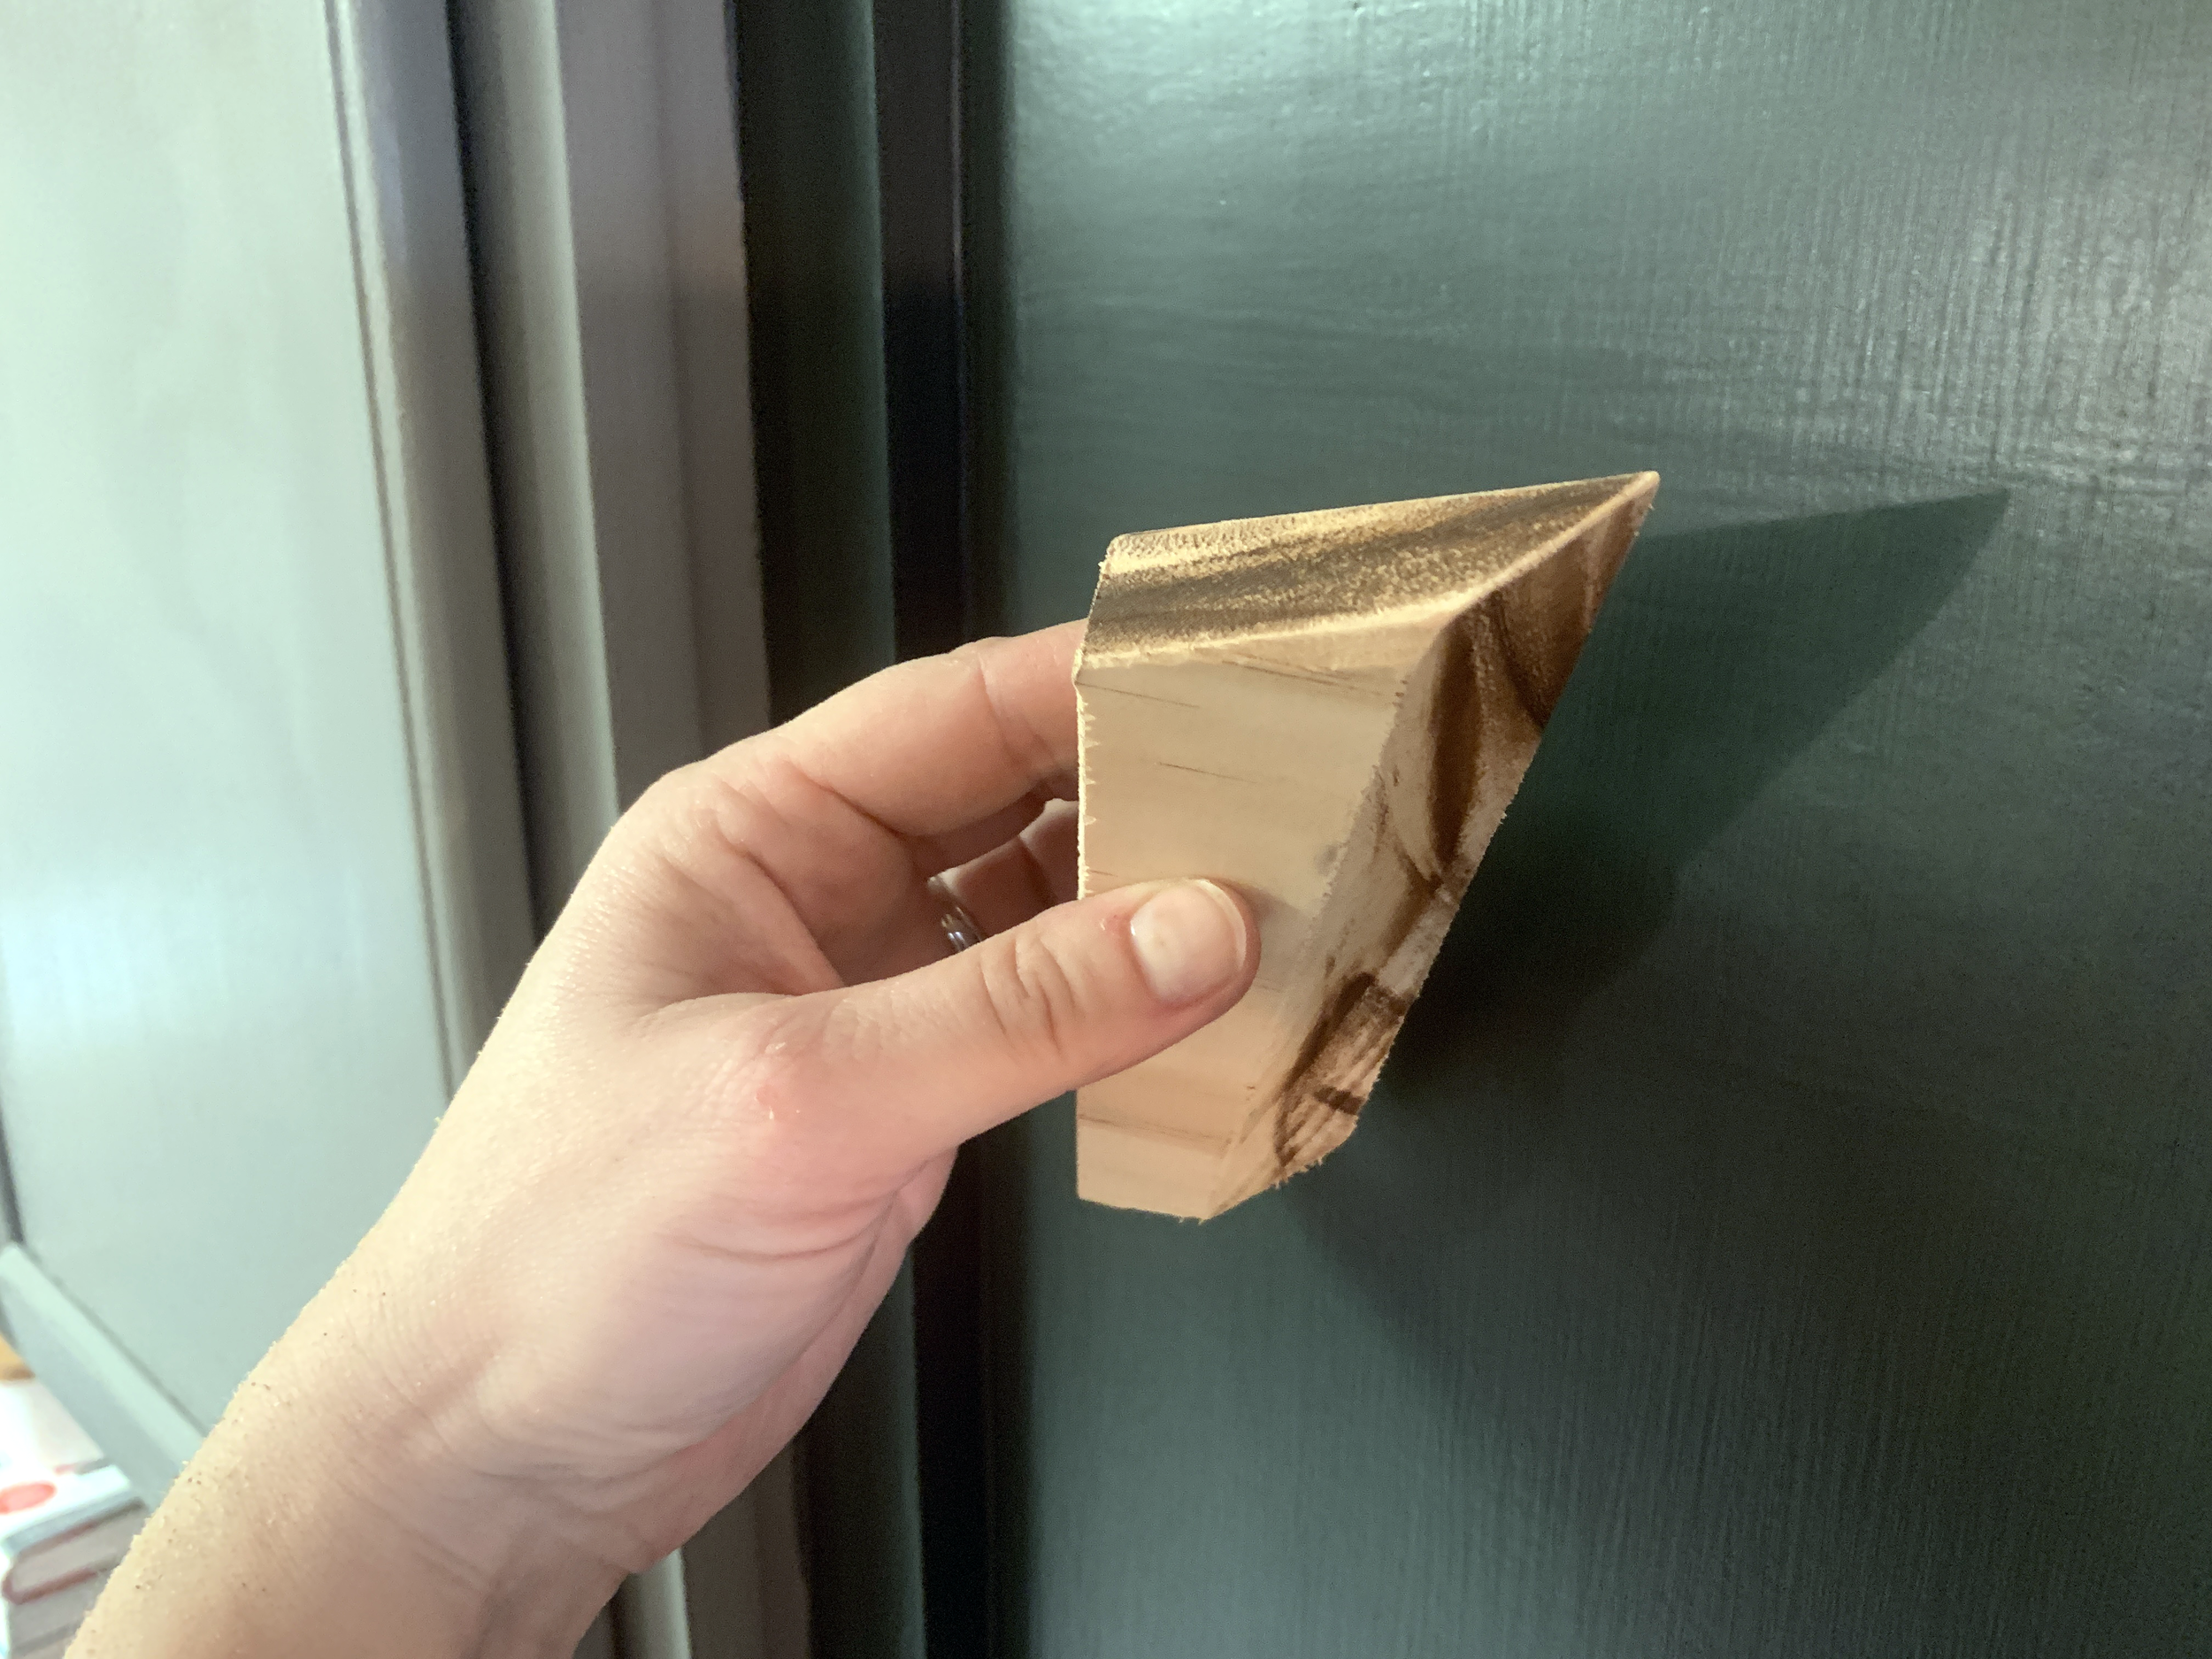
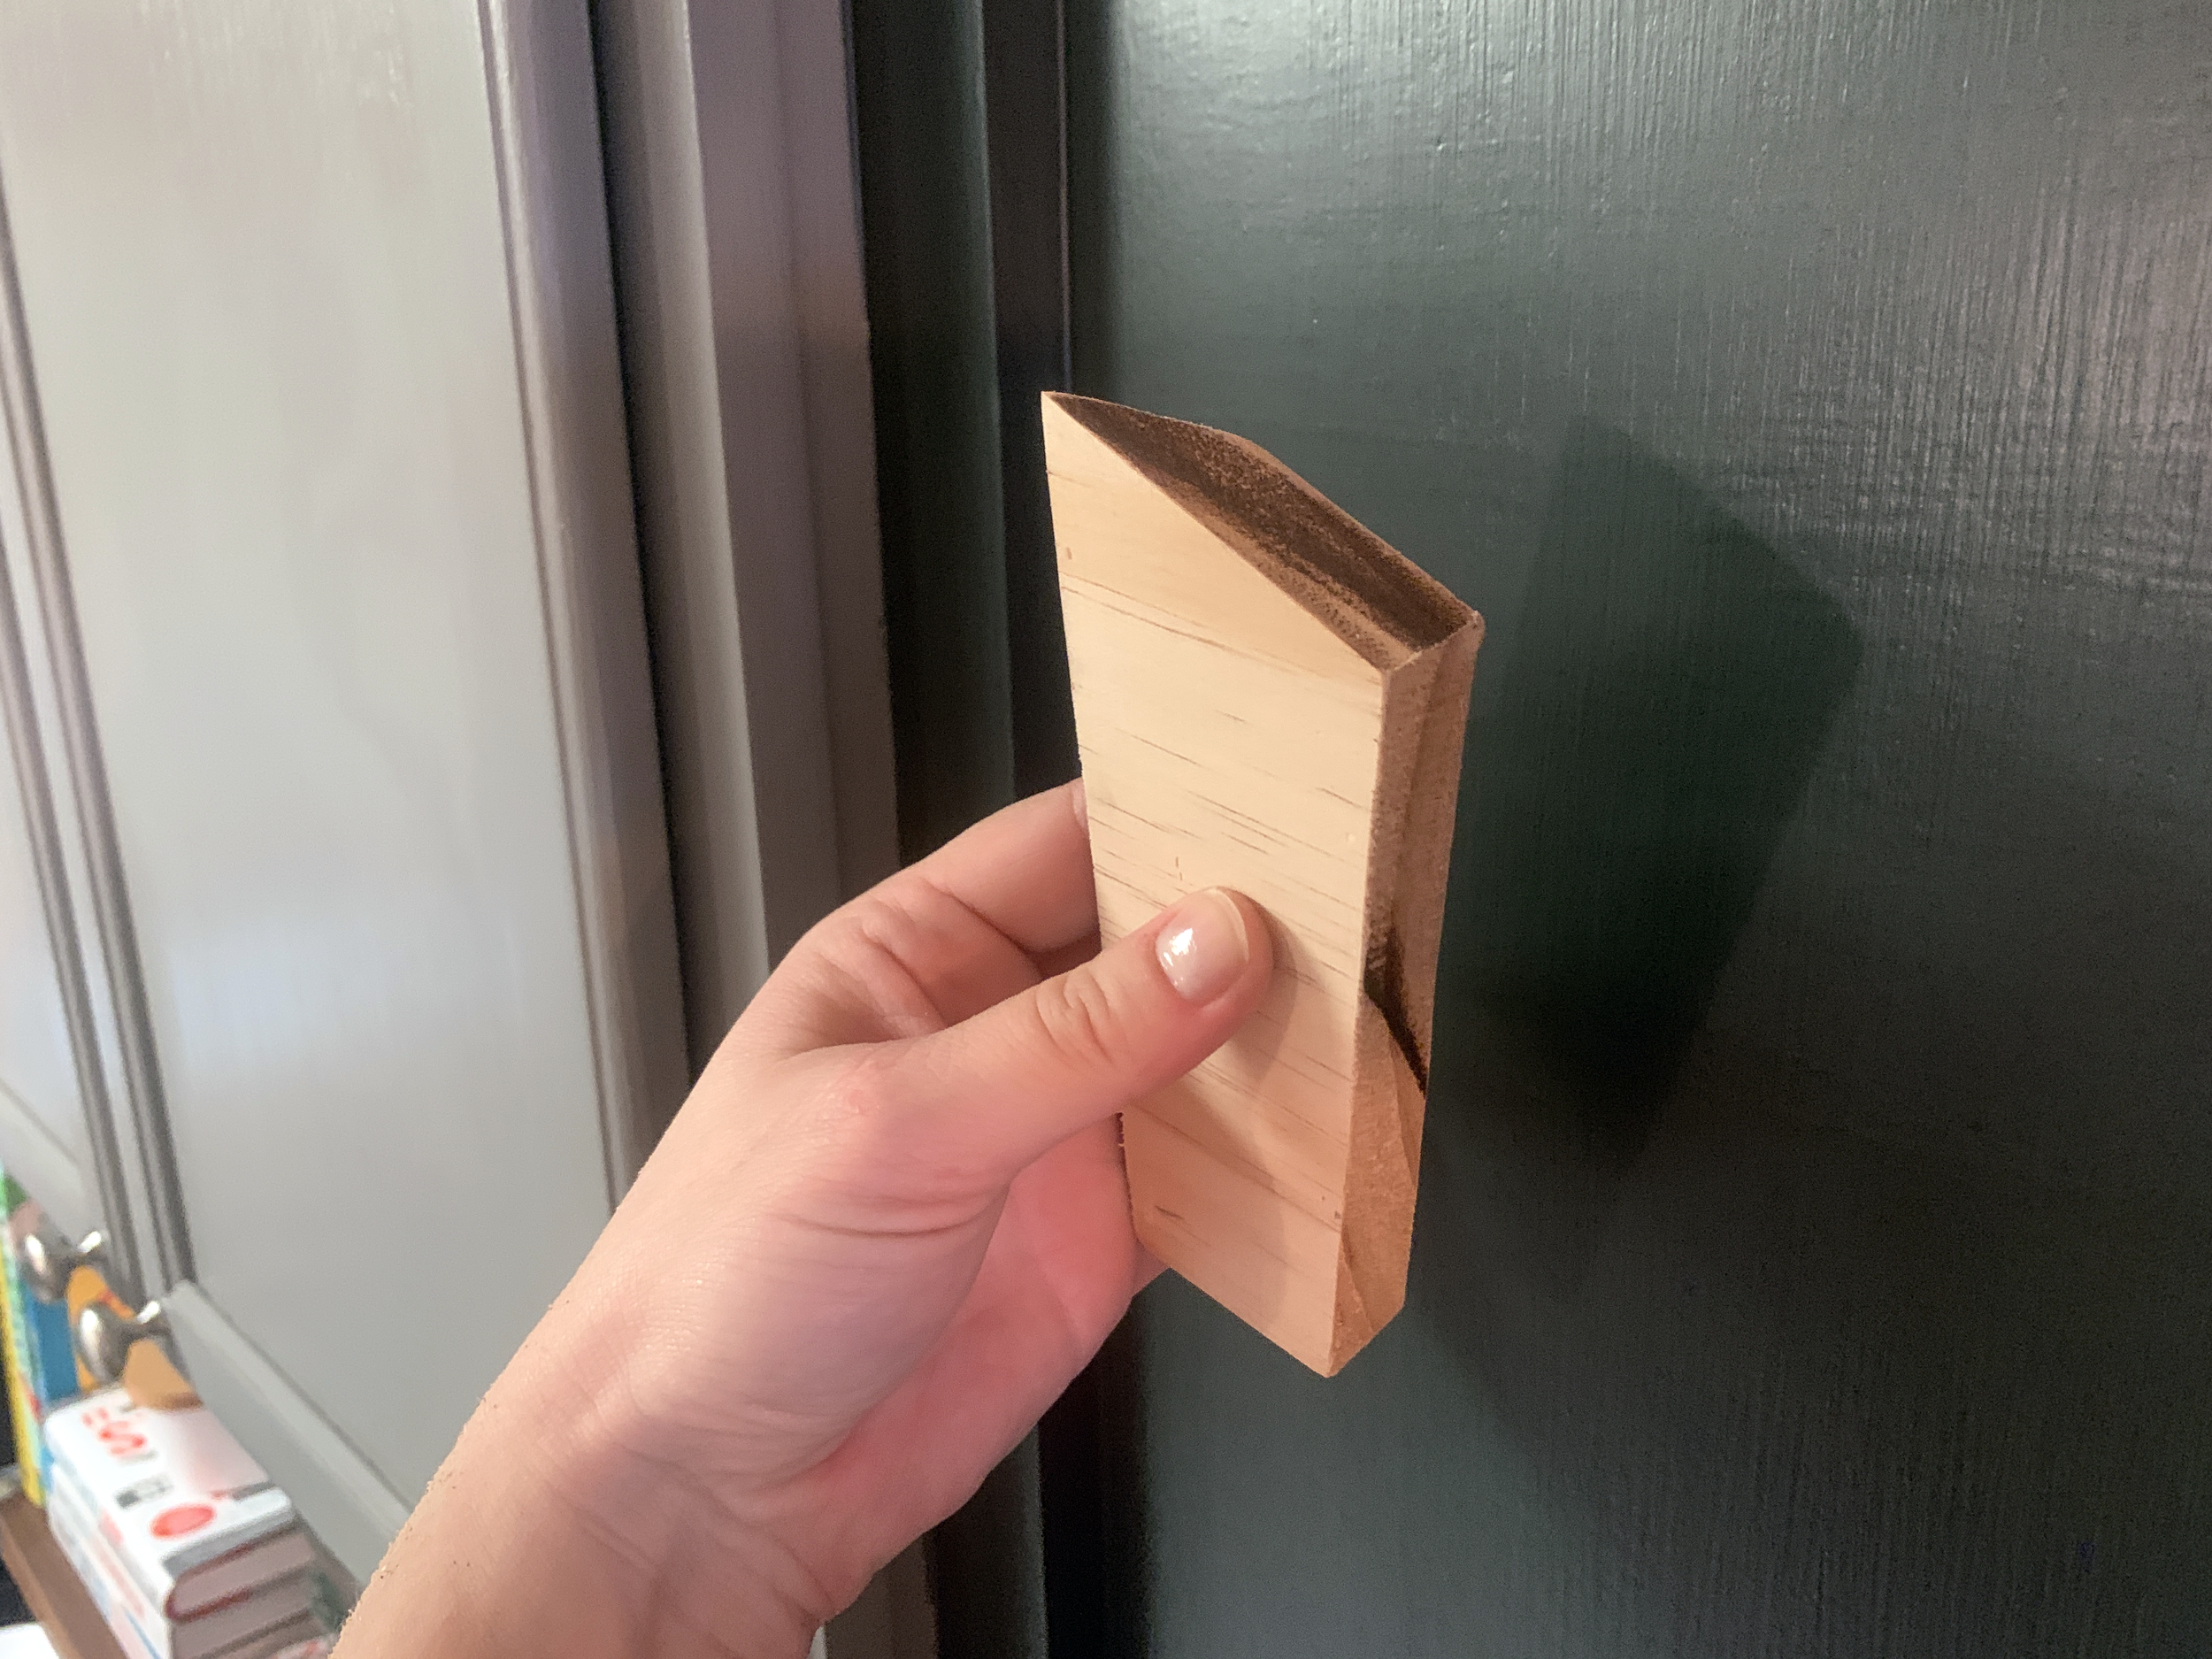
The second piece (at the side opposite the wine rack that touches the right edge of the upper cabinets, by the bar cabinet column) I cut a 45-degree-cut so this front piece and the about-to-be-done side piece made a nice cleanly mitered edge on the corner.

The combination of the ceiling angle and mitered edge made for a strangely shaped short “return” piece, but with the help of our angle-finder tool (and admittedly a few attempts) I was able to get this puzzle-pieced 1x6 just right.

Also, I feel like I need to stop here for a personal victory and shoutout that I somehow have nice-ish looking nails here. It basically never happens since I’m always doing projects … so they perpetually look like “man hands” to me. Small victories, y’all.
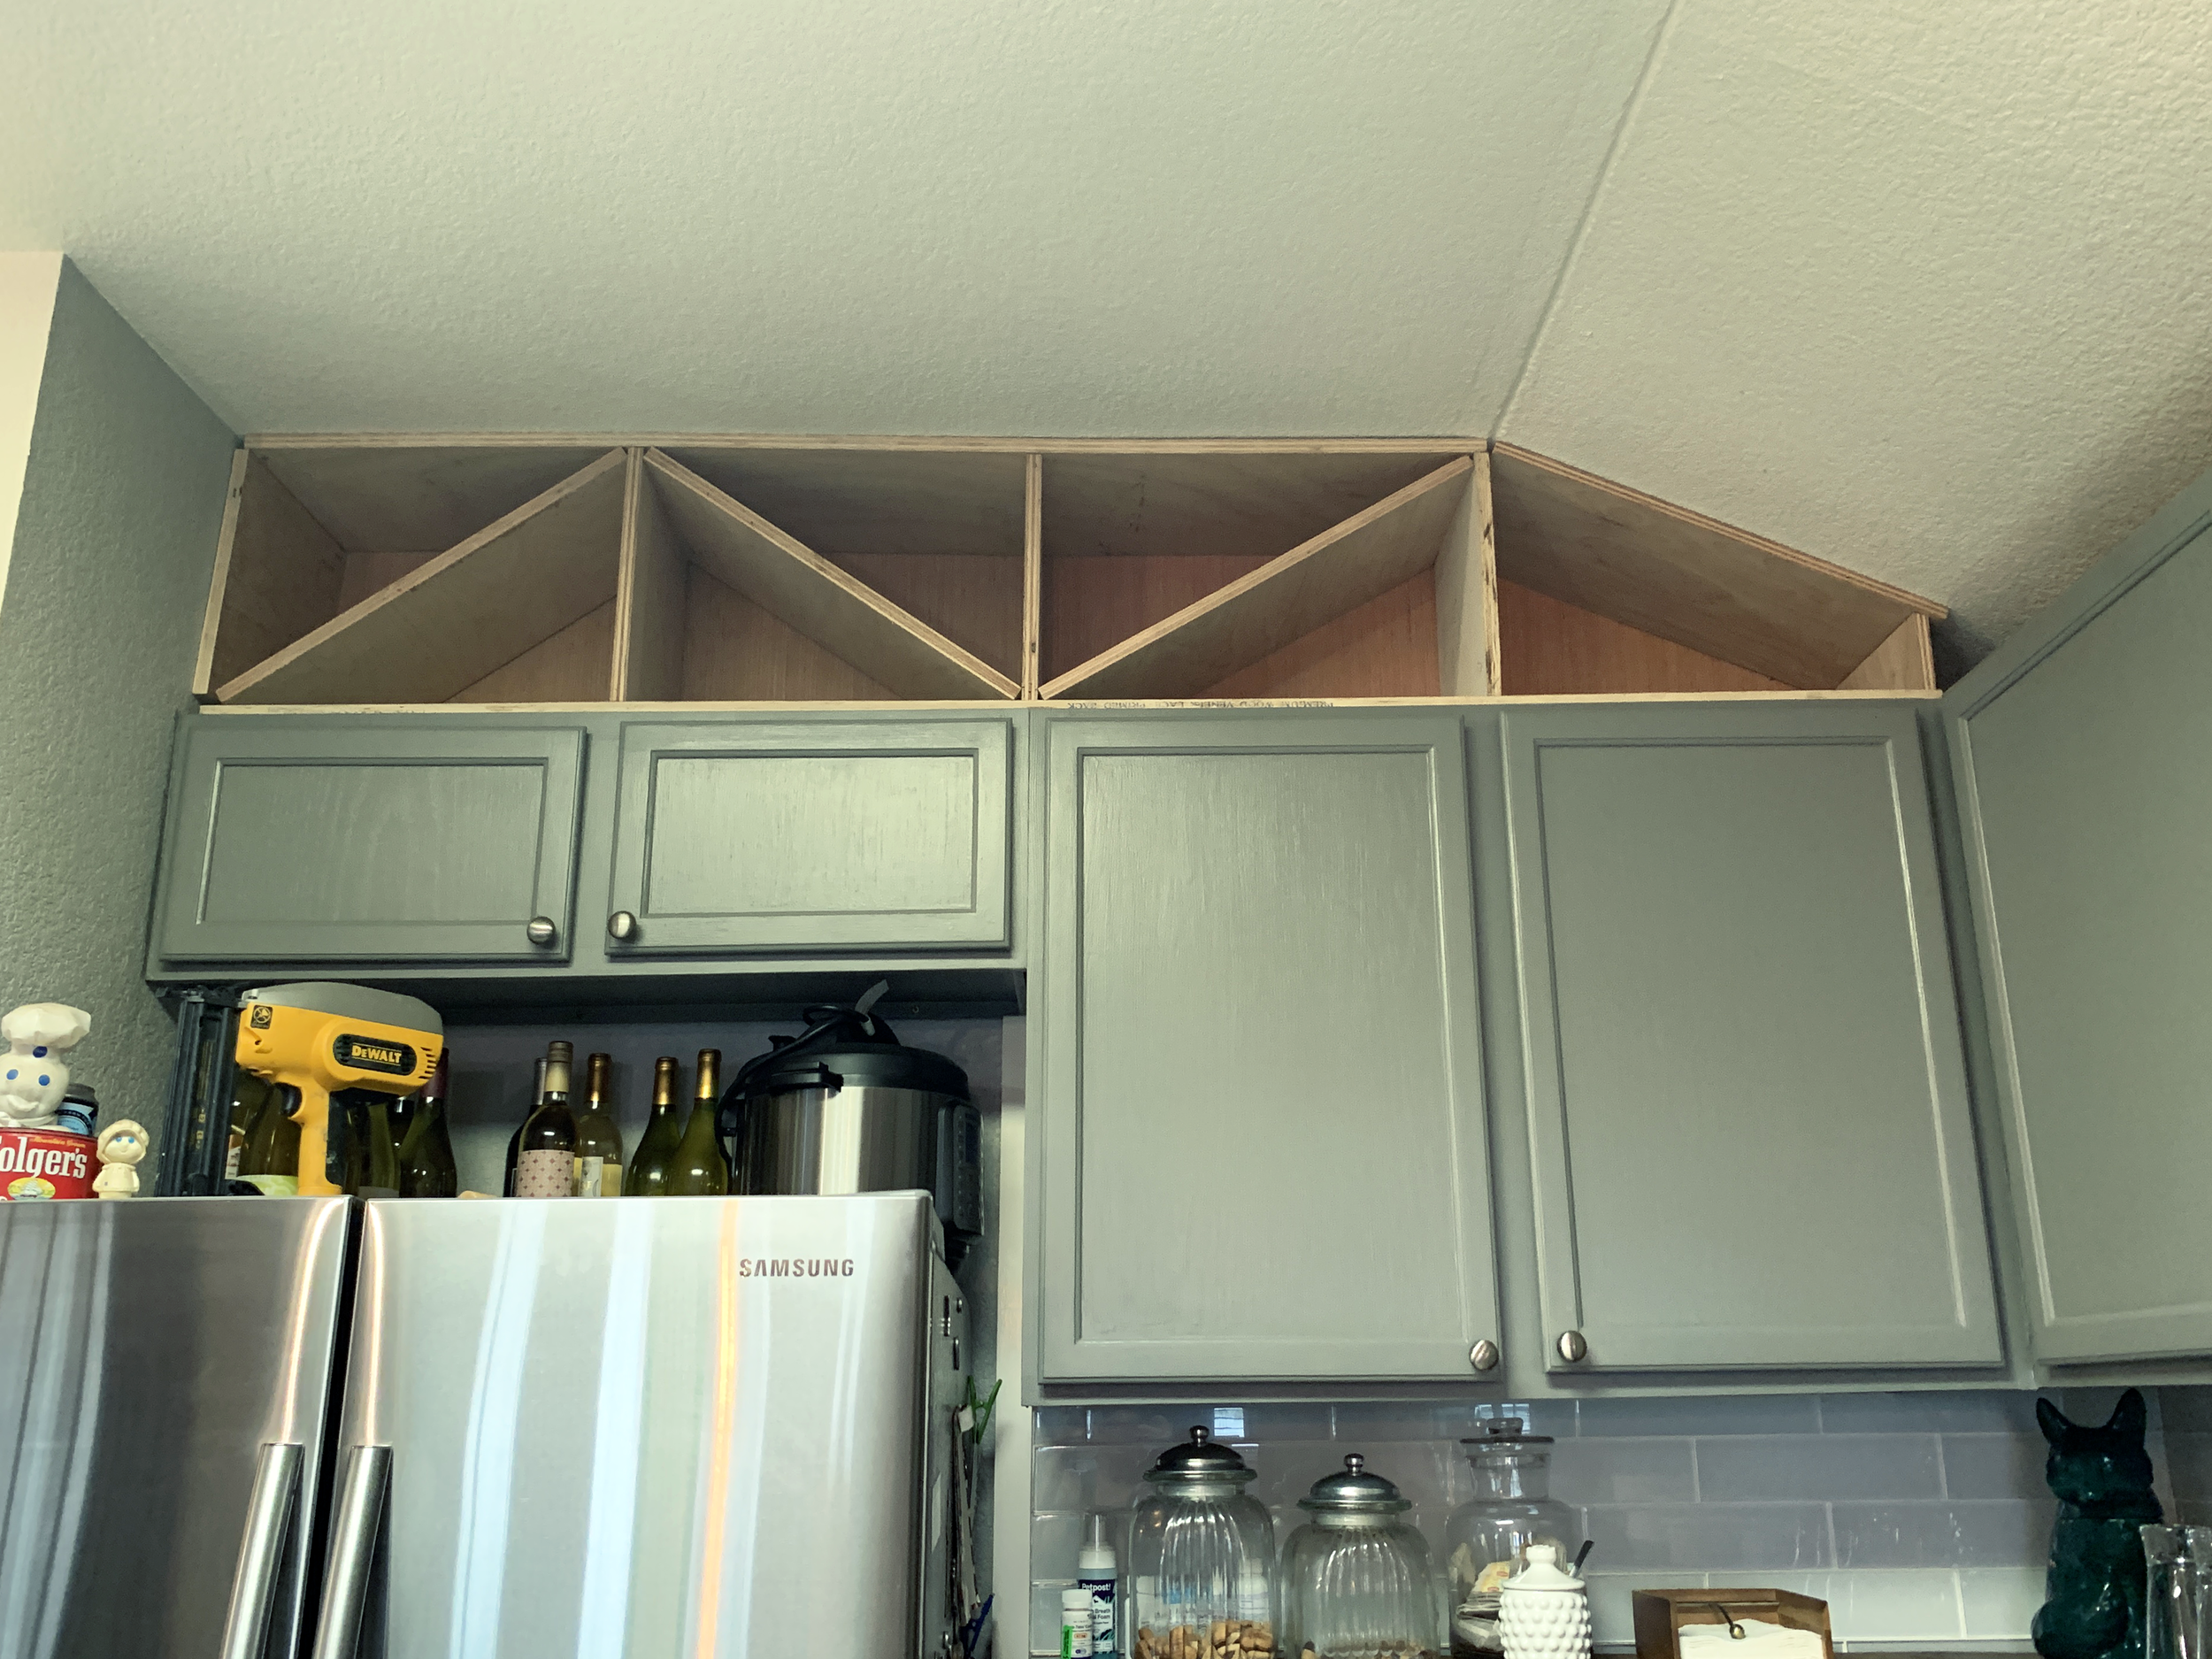
The (kind of) reveal
Just filling in these kind of small spaces and taking our “cabinets” to the ceiling really draws the eye all the way up to the ceiling and makes our kitchen feel SO much taller since the top of the cabinets don’t have an abrupt end at a lower level. We highly recommend this (relatively) easy project to give your kitchen the feeling of more space without actually adding on an addition or literally raising the roof – not to mention adding always-coveted storage to your place!


Using the extra paint leftover from our bar cabinet build, I was able to paint (after wood filling and caulking, of course) the new wine rack and cabinet extension. Unfortunately with the current paint shortage (thanks, COVID) I haven’t – until very recently – been able to get the paint I need to paint out all of the kitchen cabinets for one seamless look. That’s a project and blog post for another day, and one I cannot wait to do and share with you all!
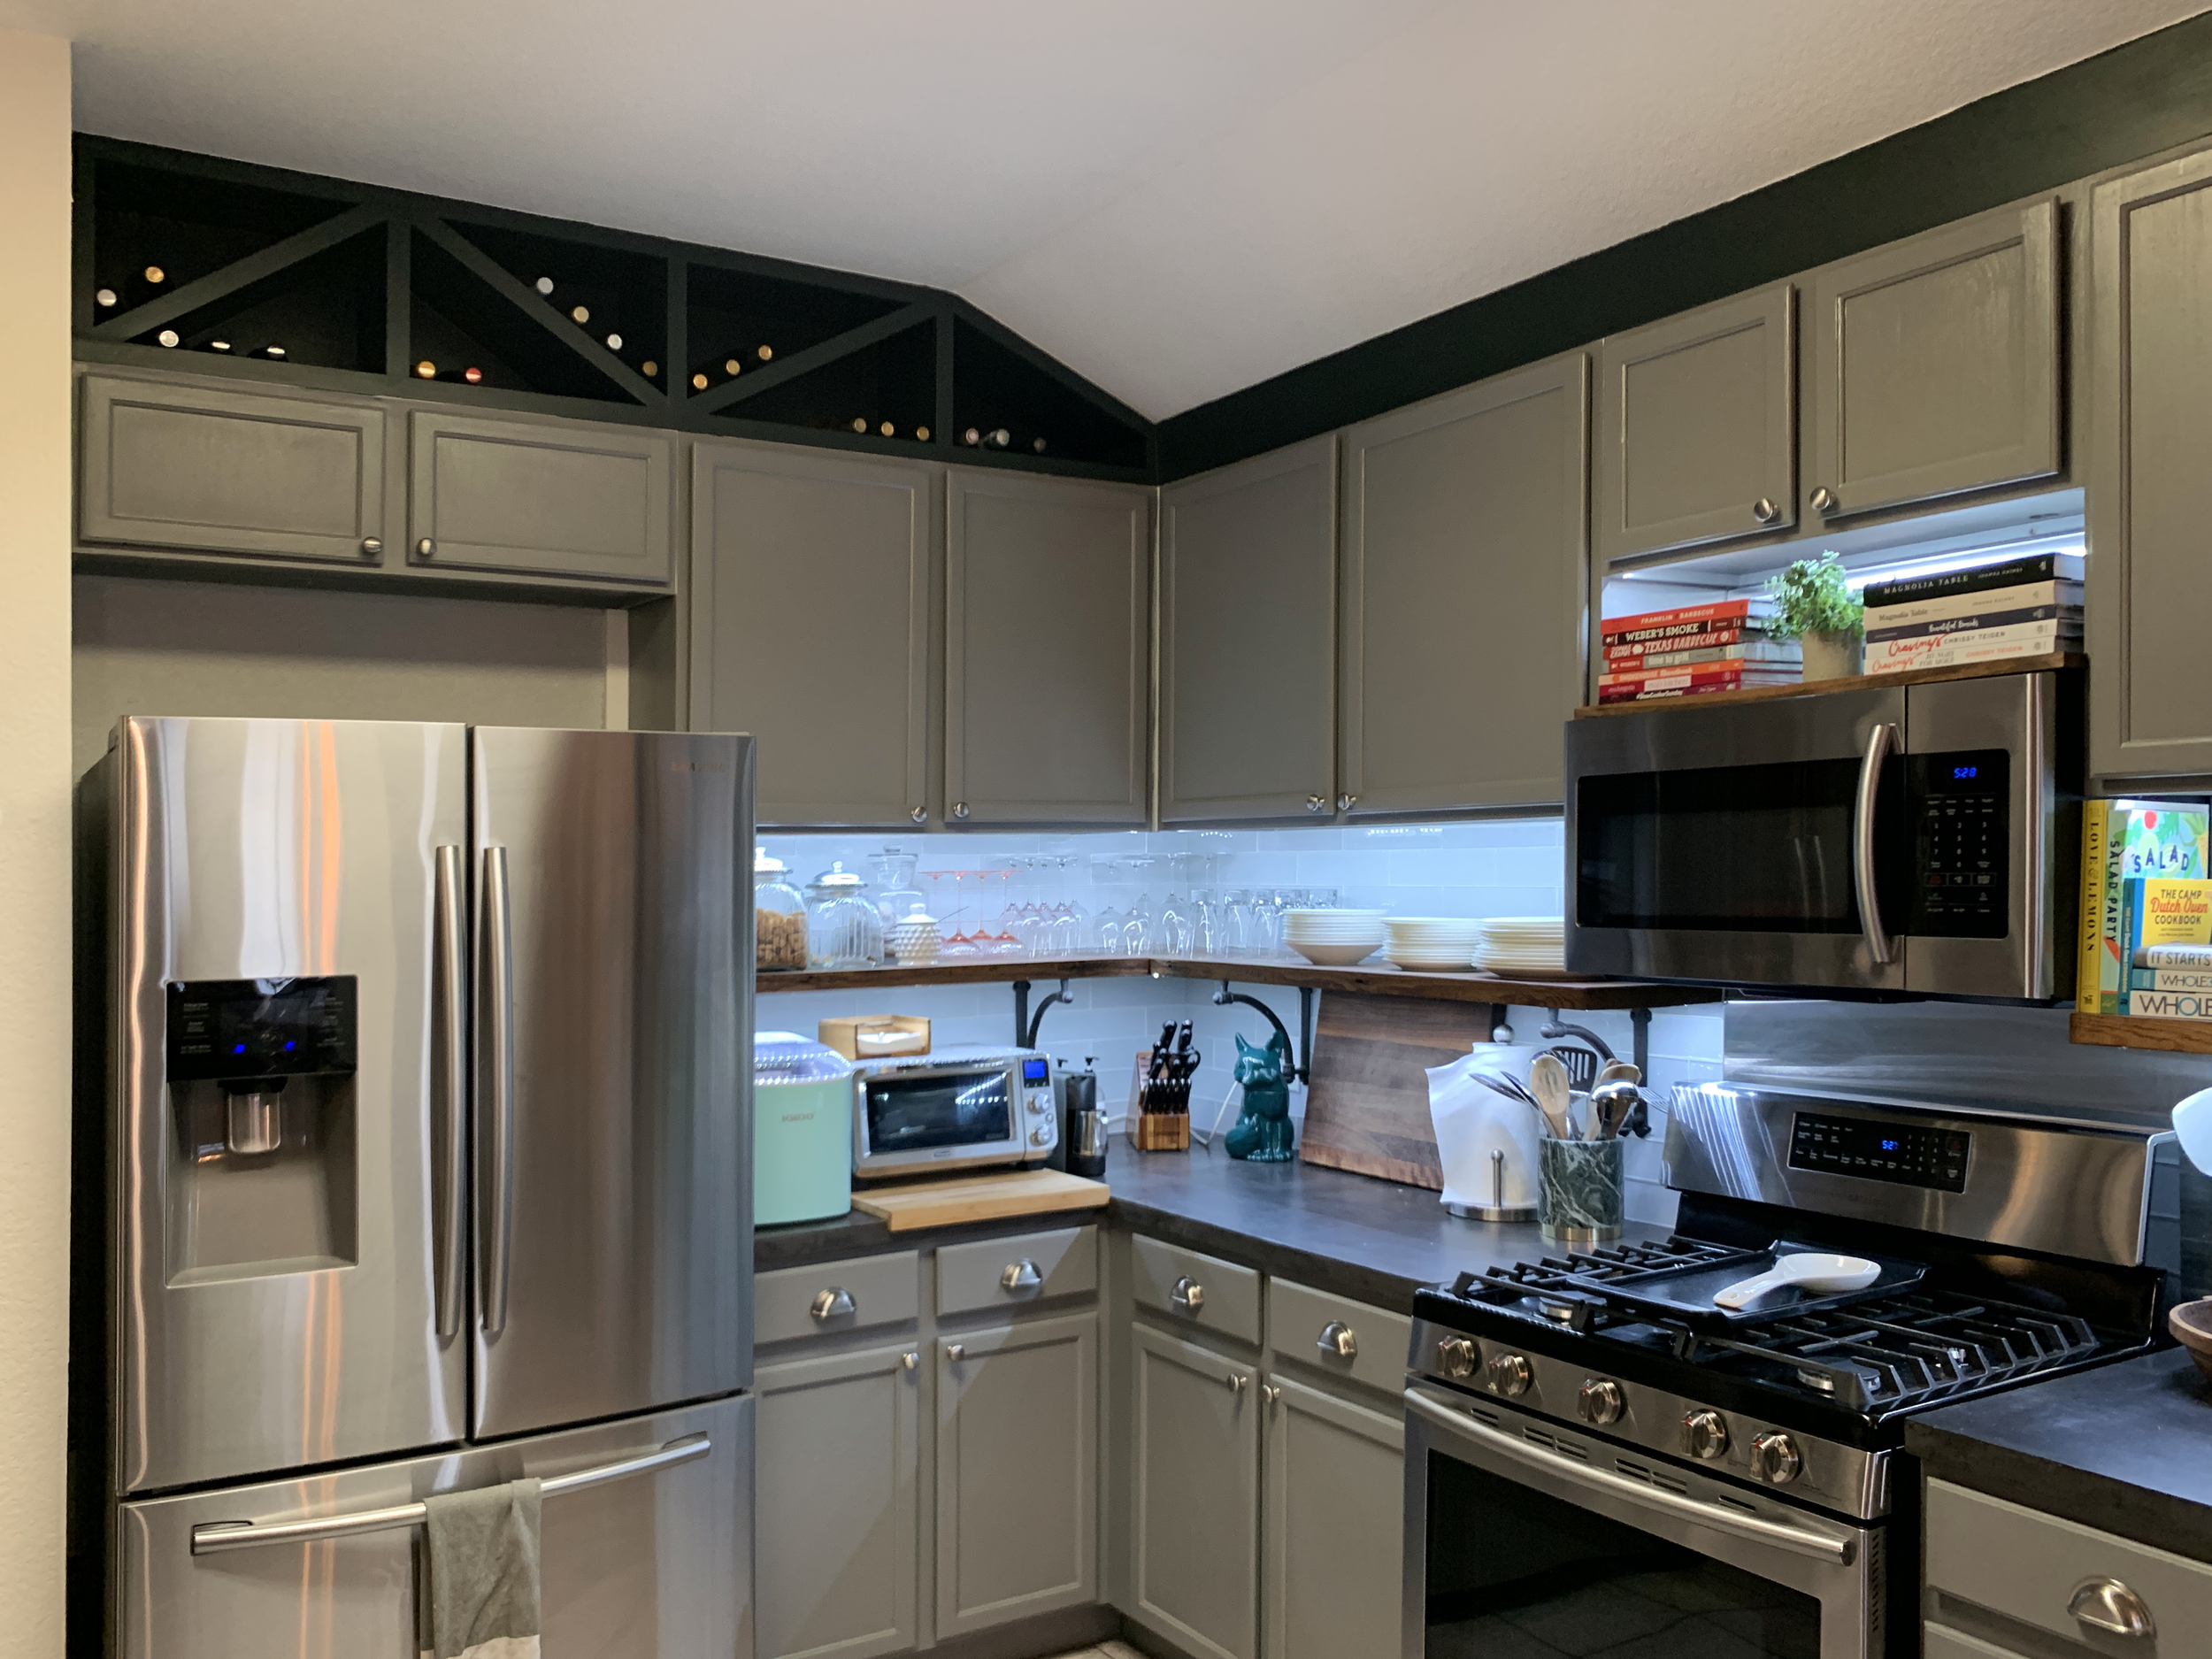
Looks a little choppy now, but just imagine all of the gray cabinets dark green!
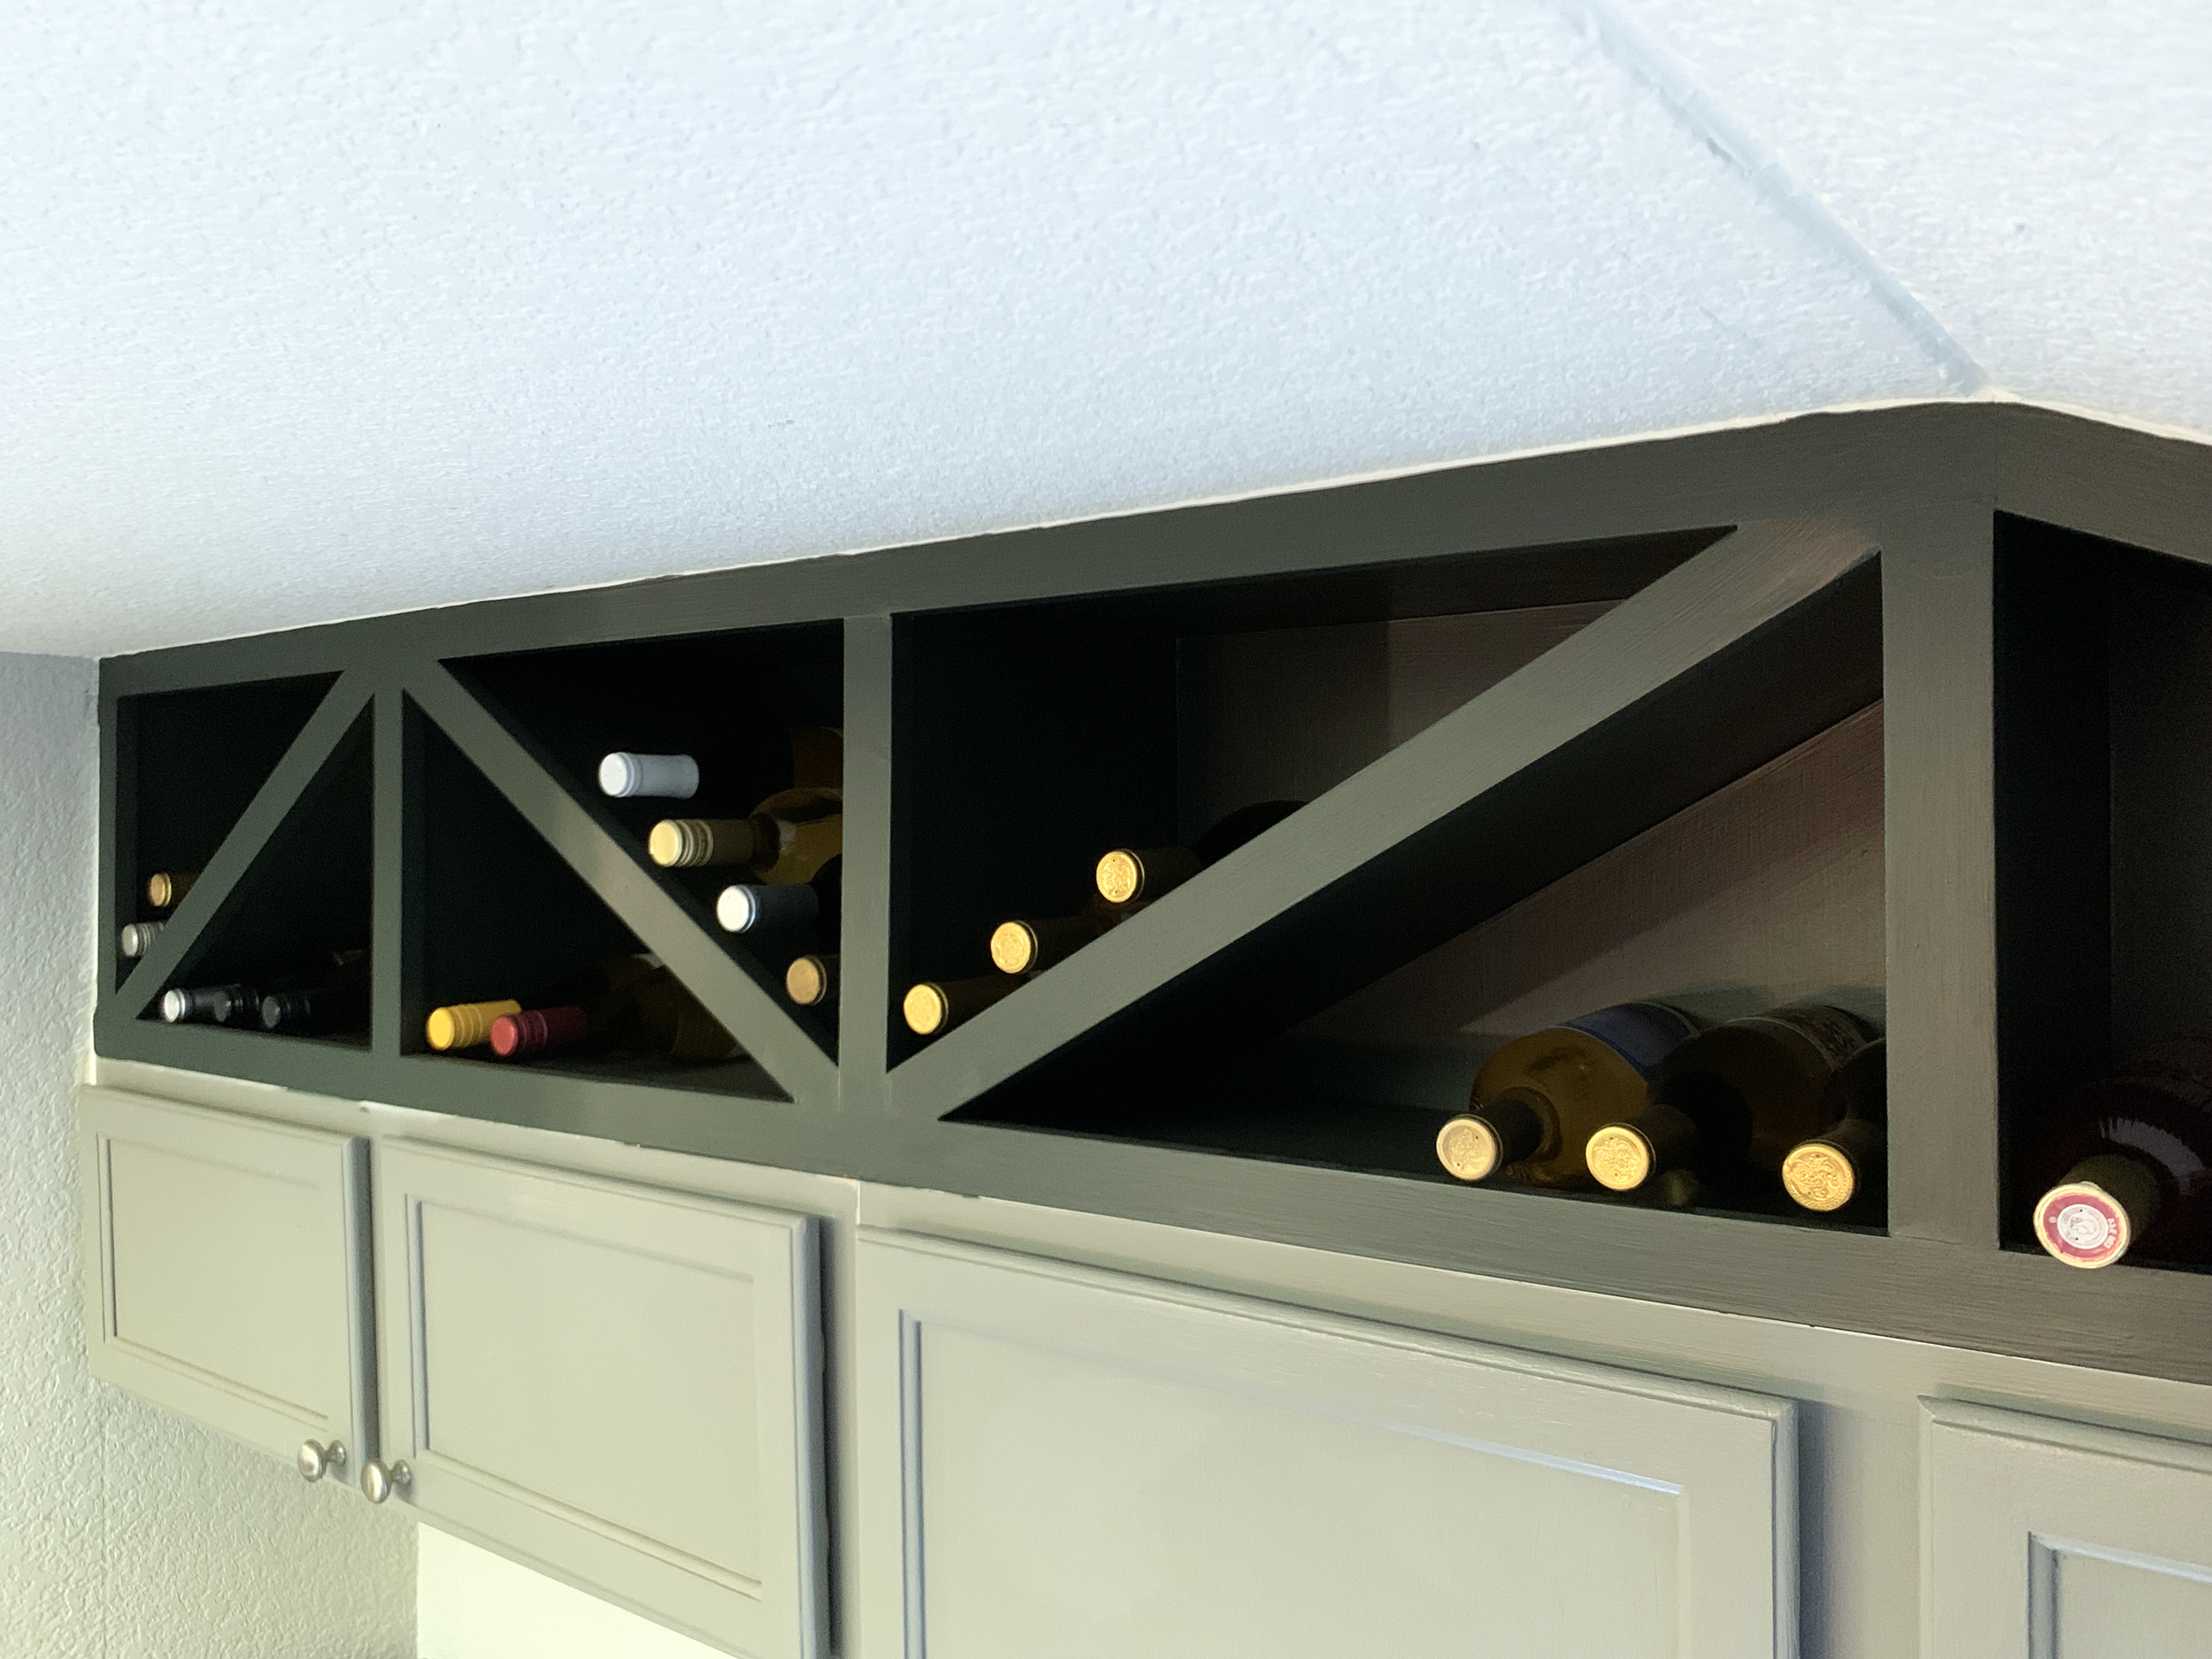


(And if you’re wondering why I’ve got bottles in every cubby versus all in one or two, I’ve decided to add some order to my storage – organizing them by type and from driest to sweetest to make it easier to shop wine depending on my mood.)
Coming up (hopefully somewhat soon) I’ll be starting to prep and paint all of our kitchen cabinets, meaning we can get rid of our under-construction hodgepodge-look and we’ll finally be sharing the truly finished product with you.
Do you have an awkward/small space somewhere you can repurpose into useable functional storage?