DIY Built-In Bar Storage Part 2: Cabinet How-To
This is part two of a series. Don’t forget to check out part one of the series and the overall bar cabinet plan.
Hey y’all, welcome back! Last time we shared how we built floor-to-ceiling columns that flank the left and right of the cabinet build we’re sharing today.
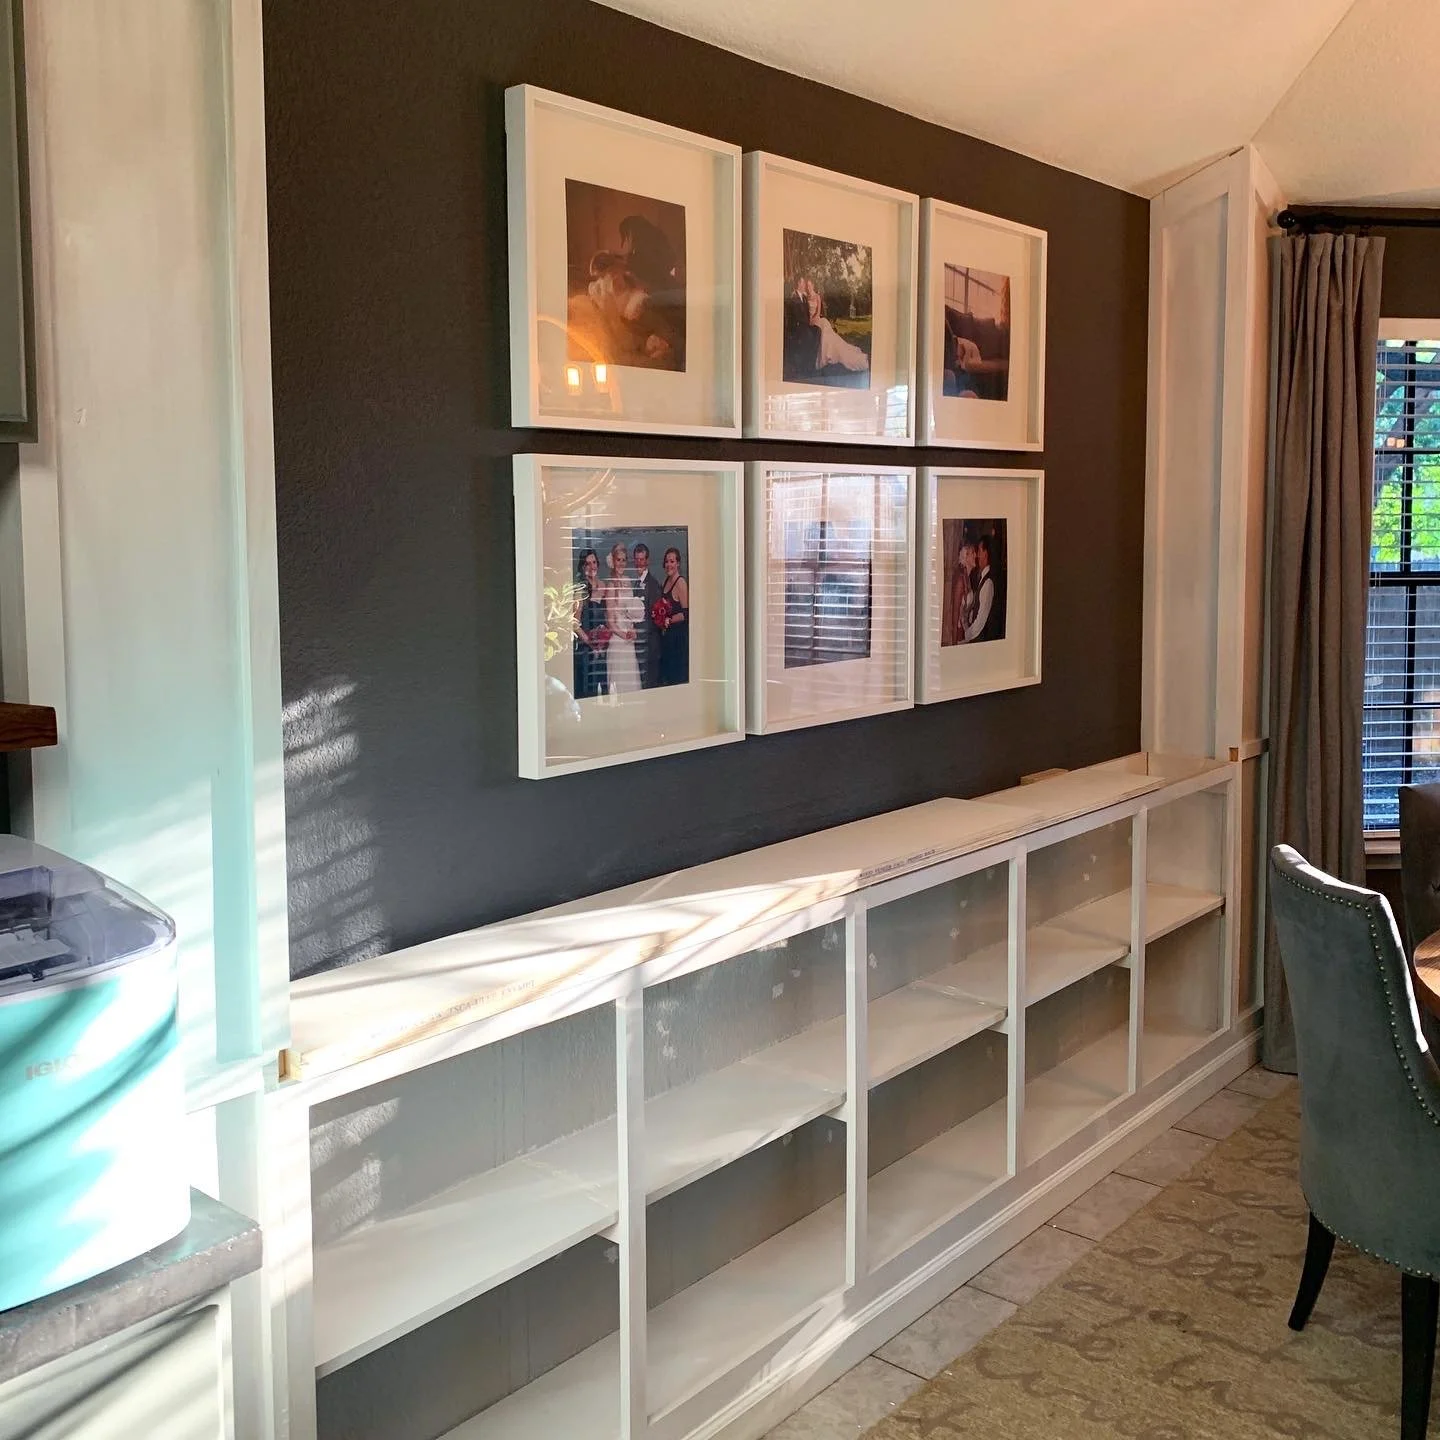
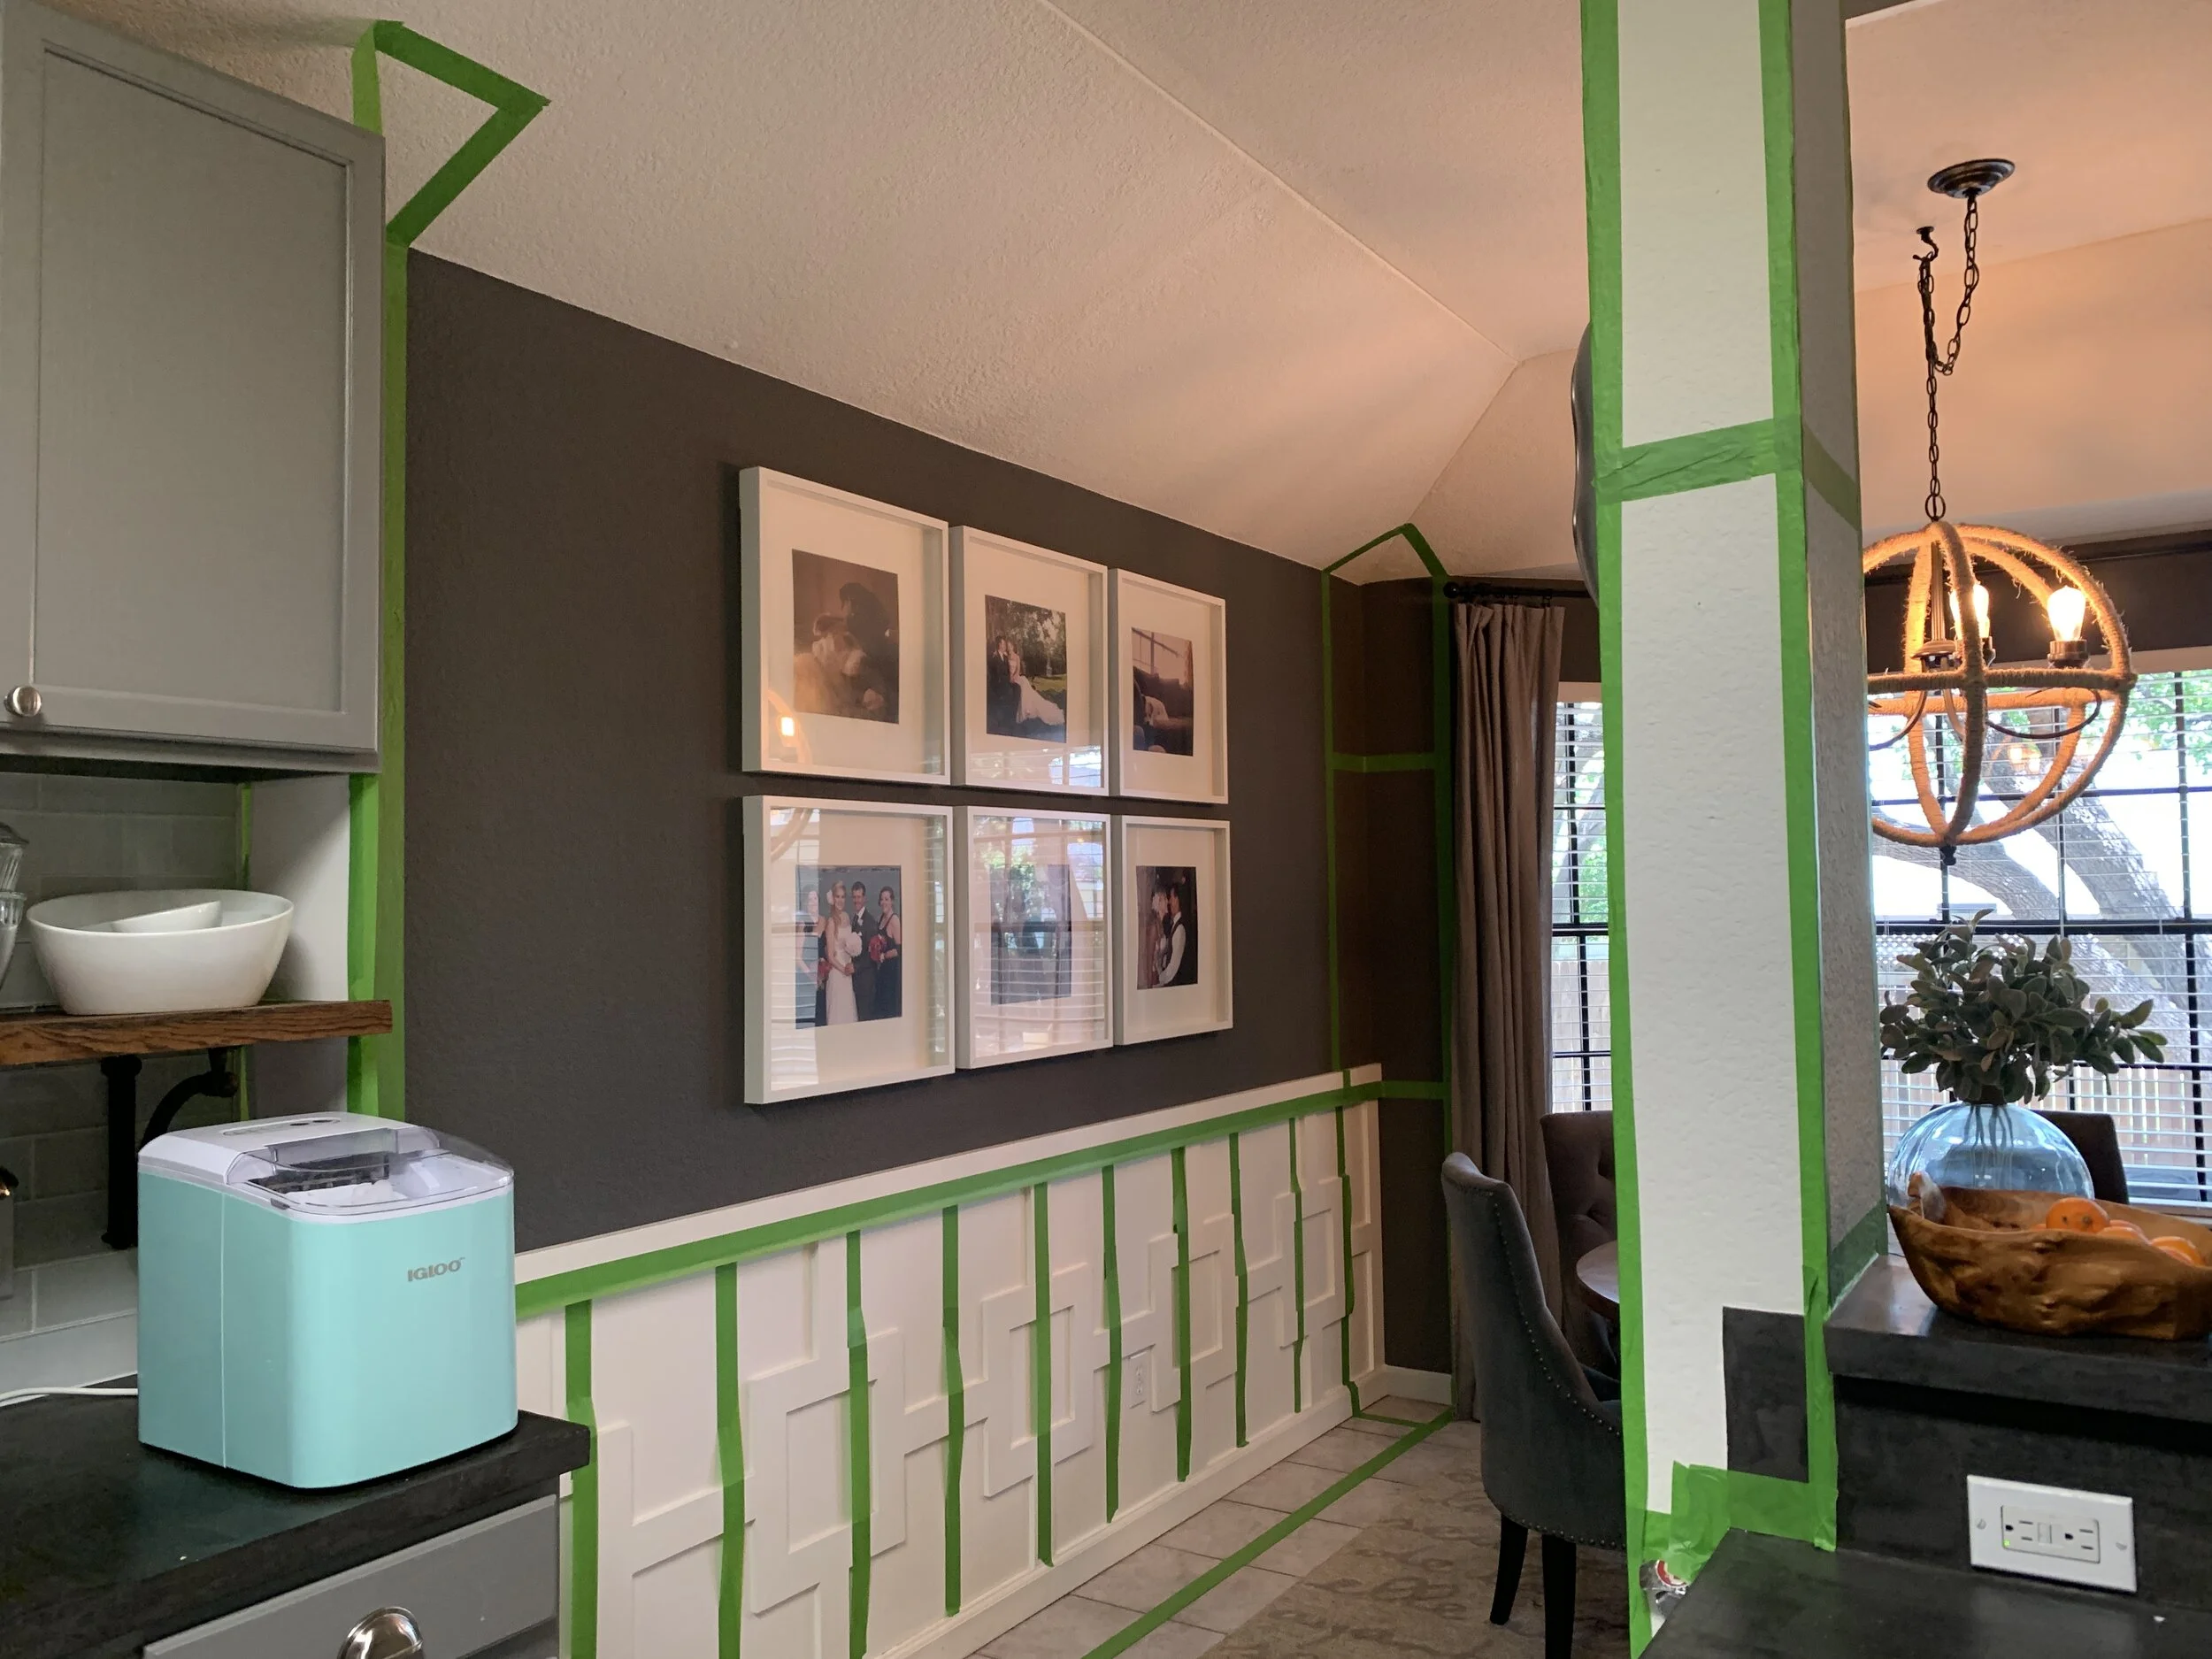
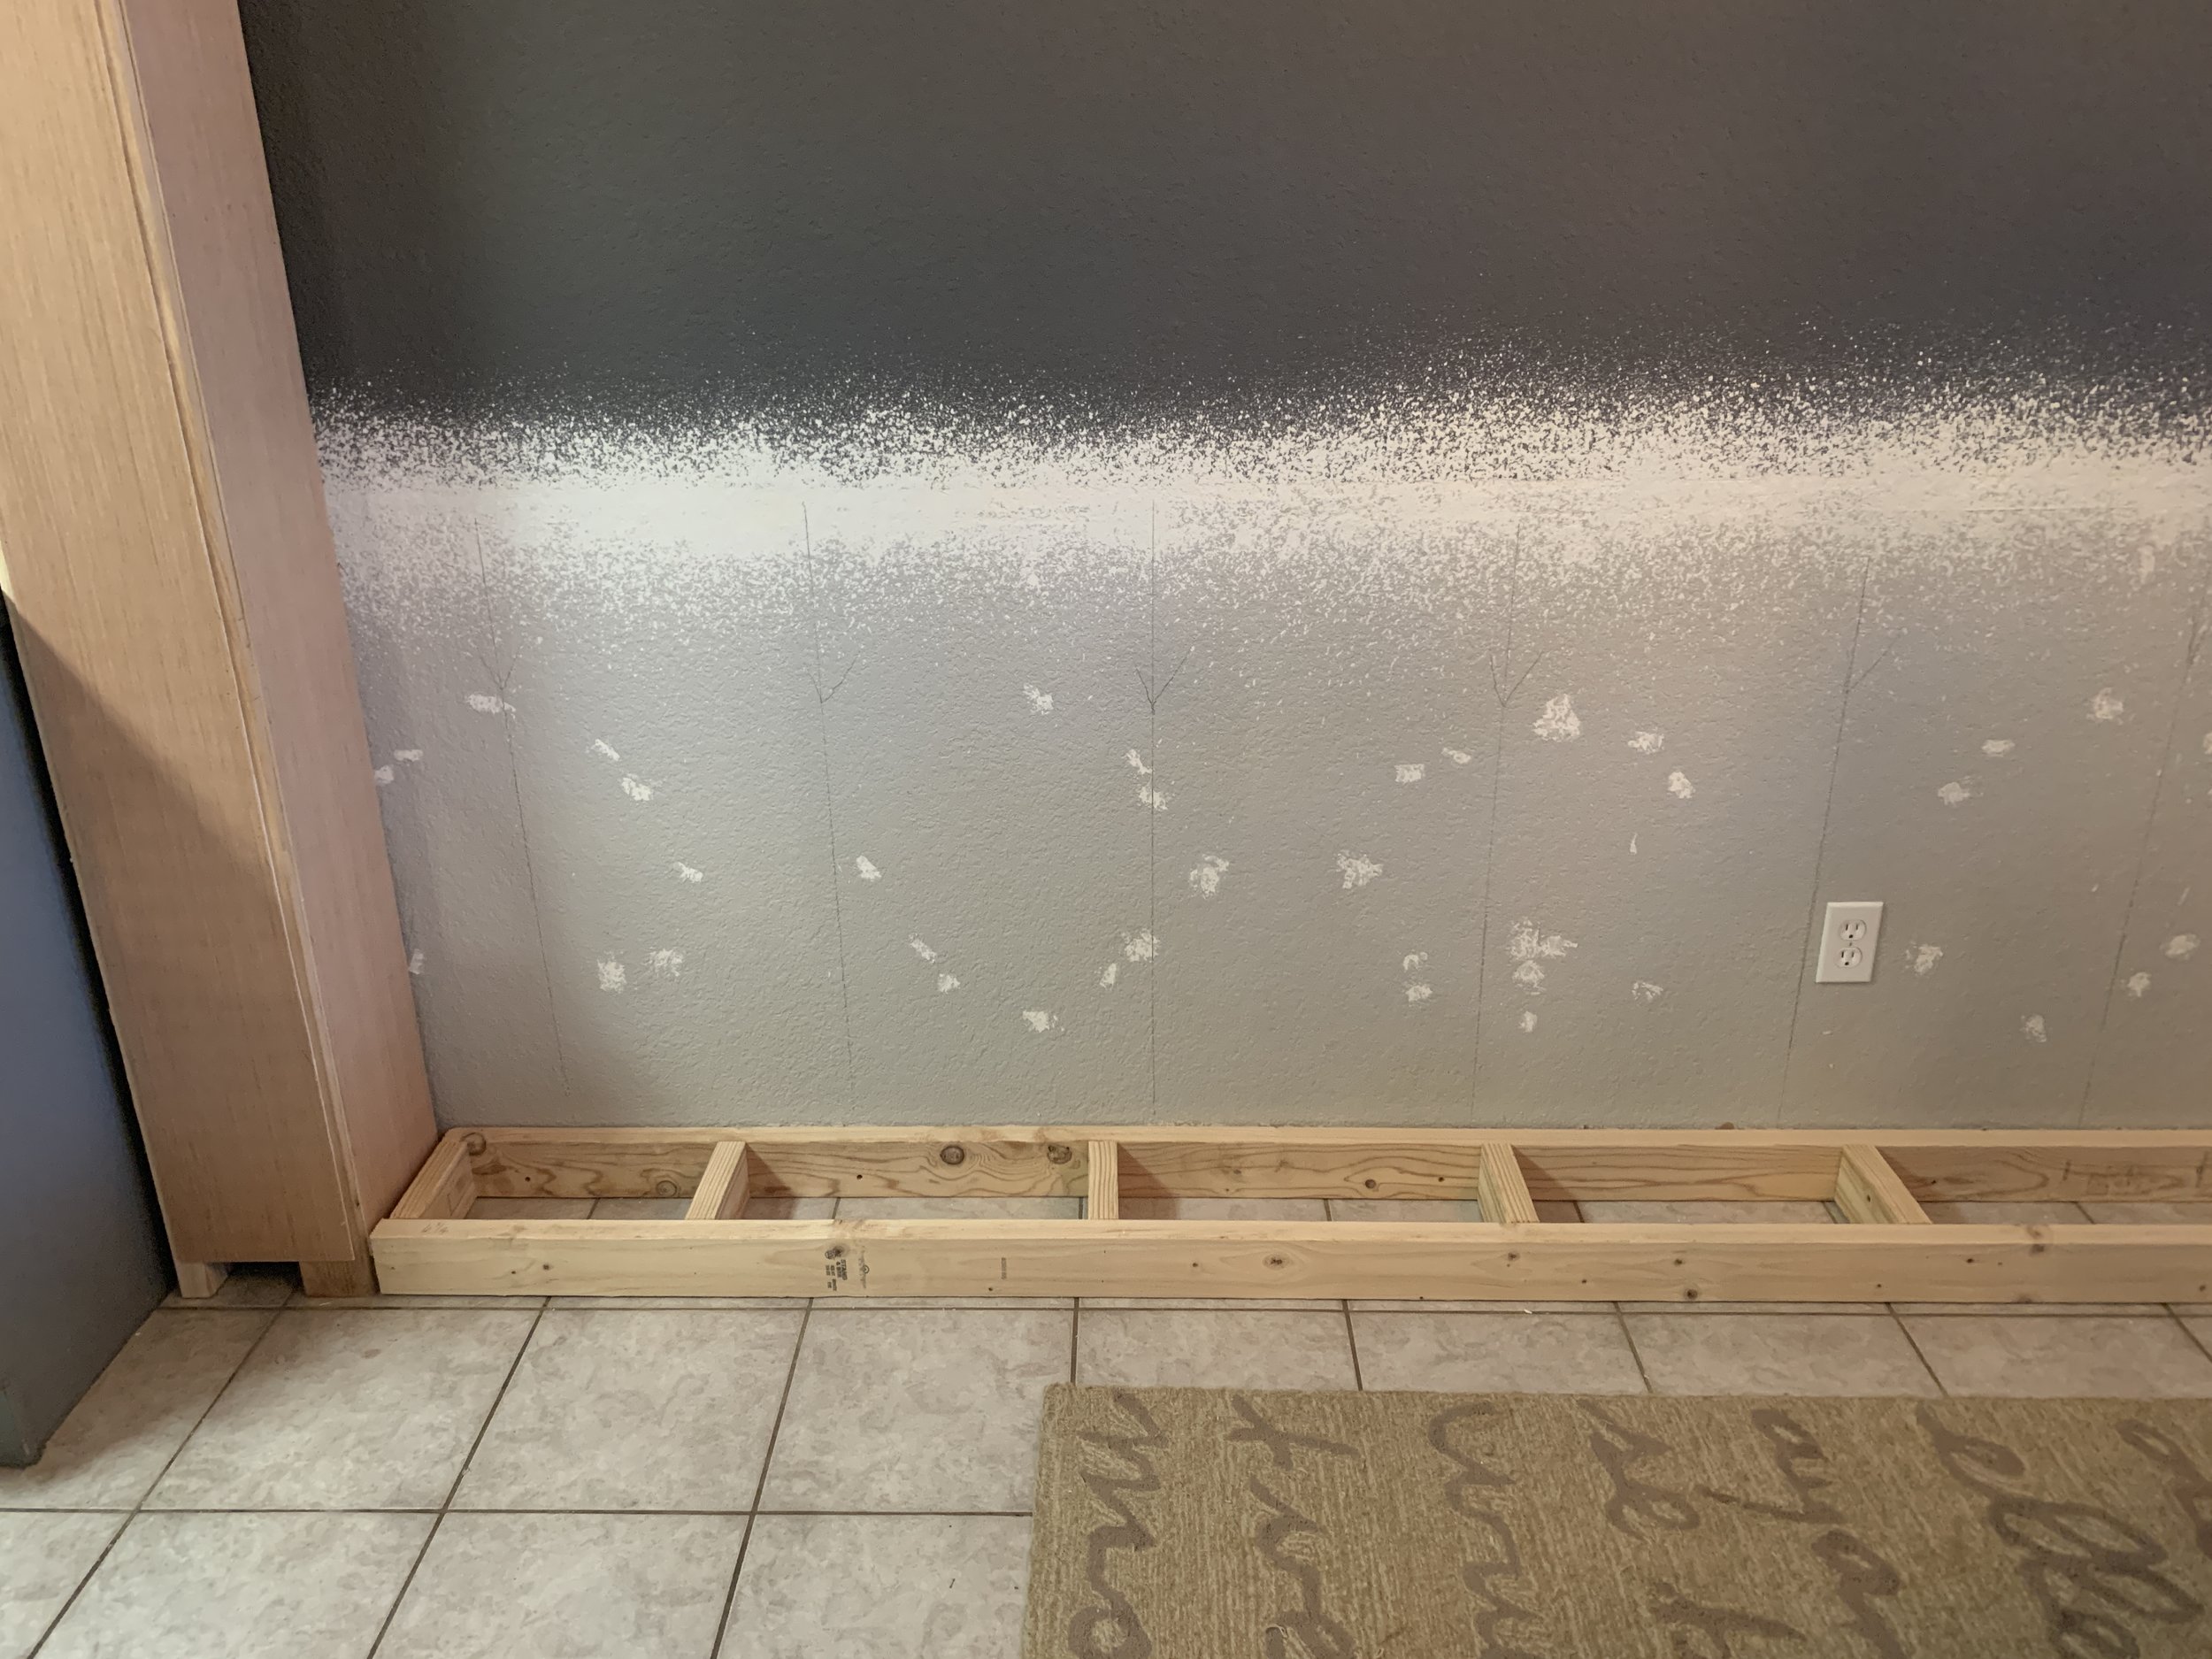
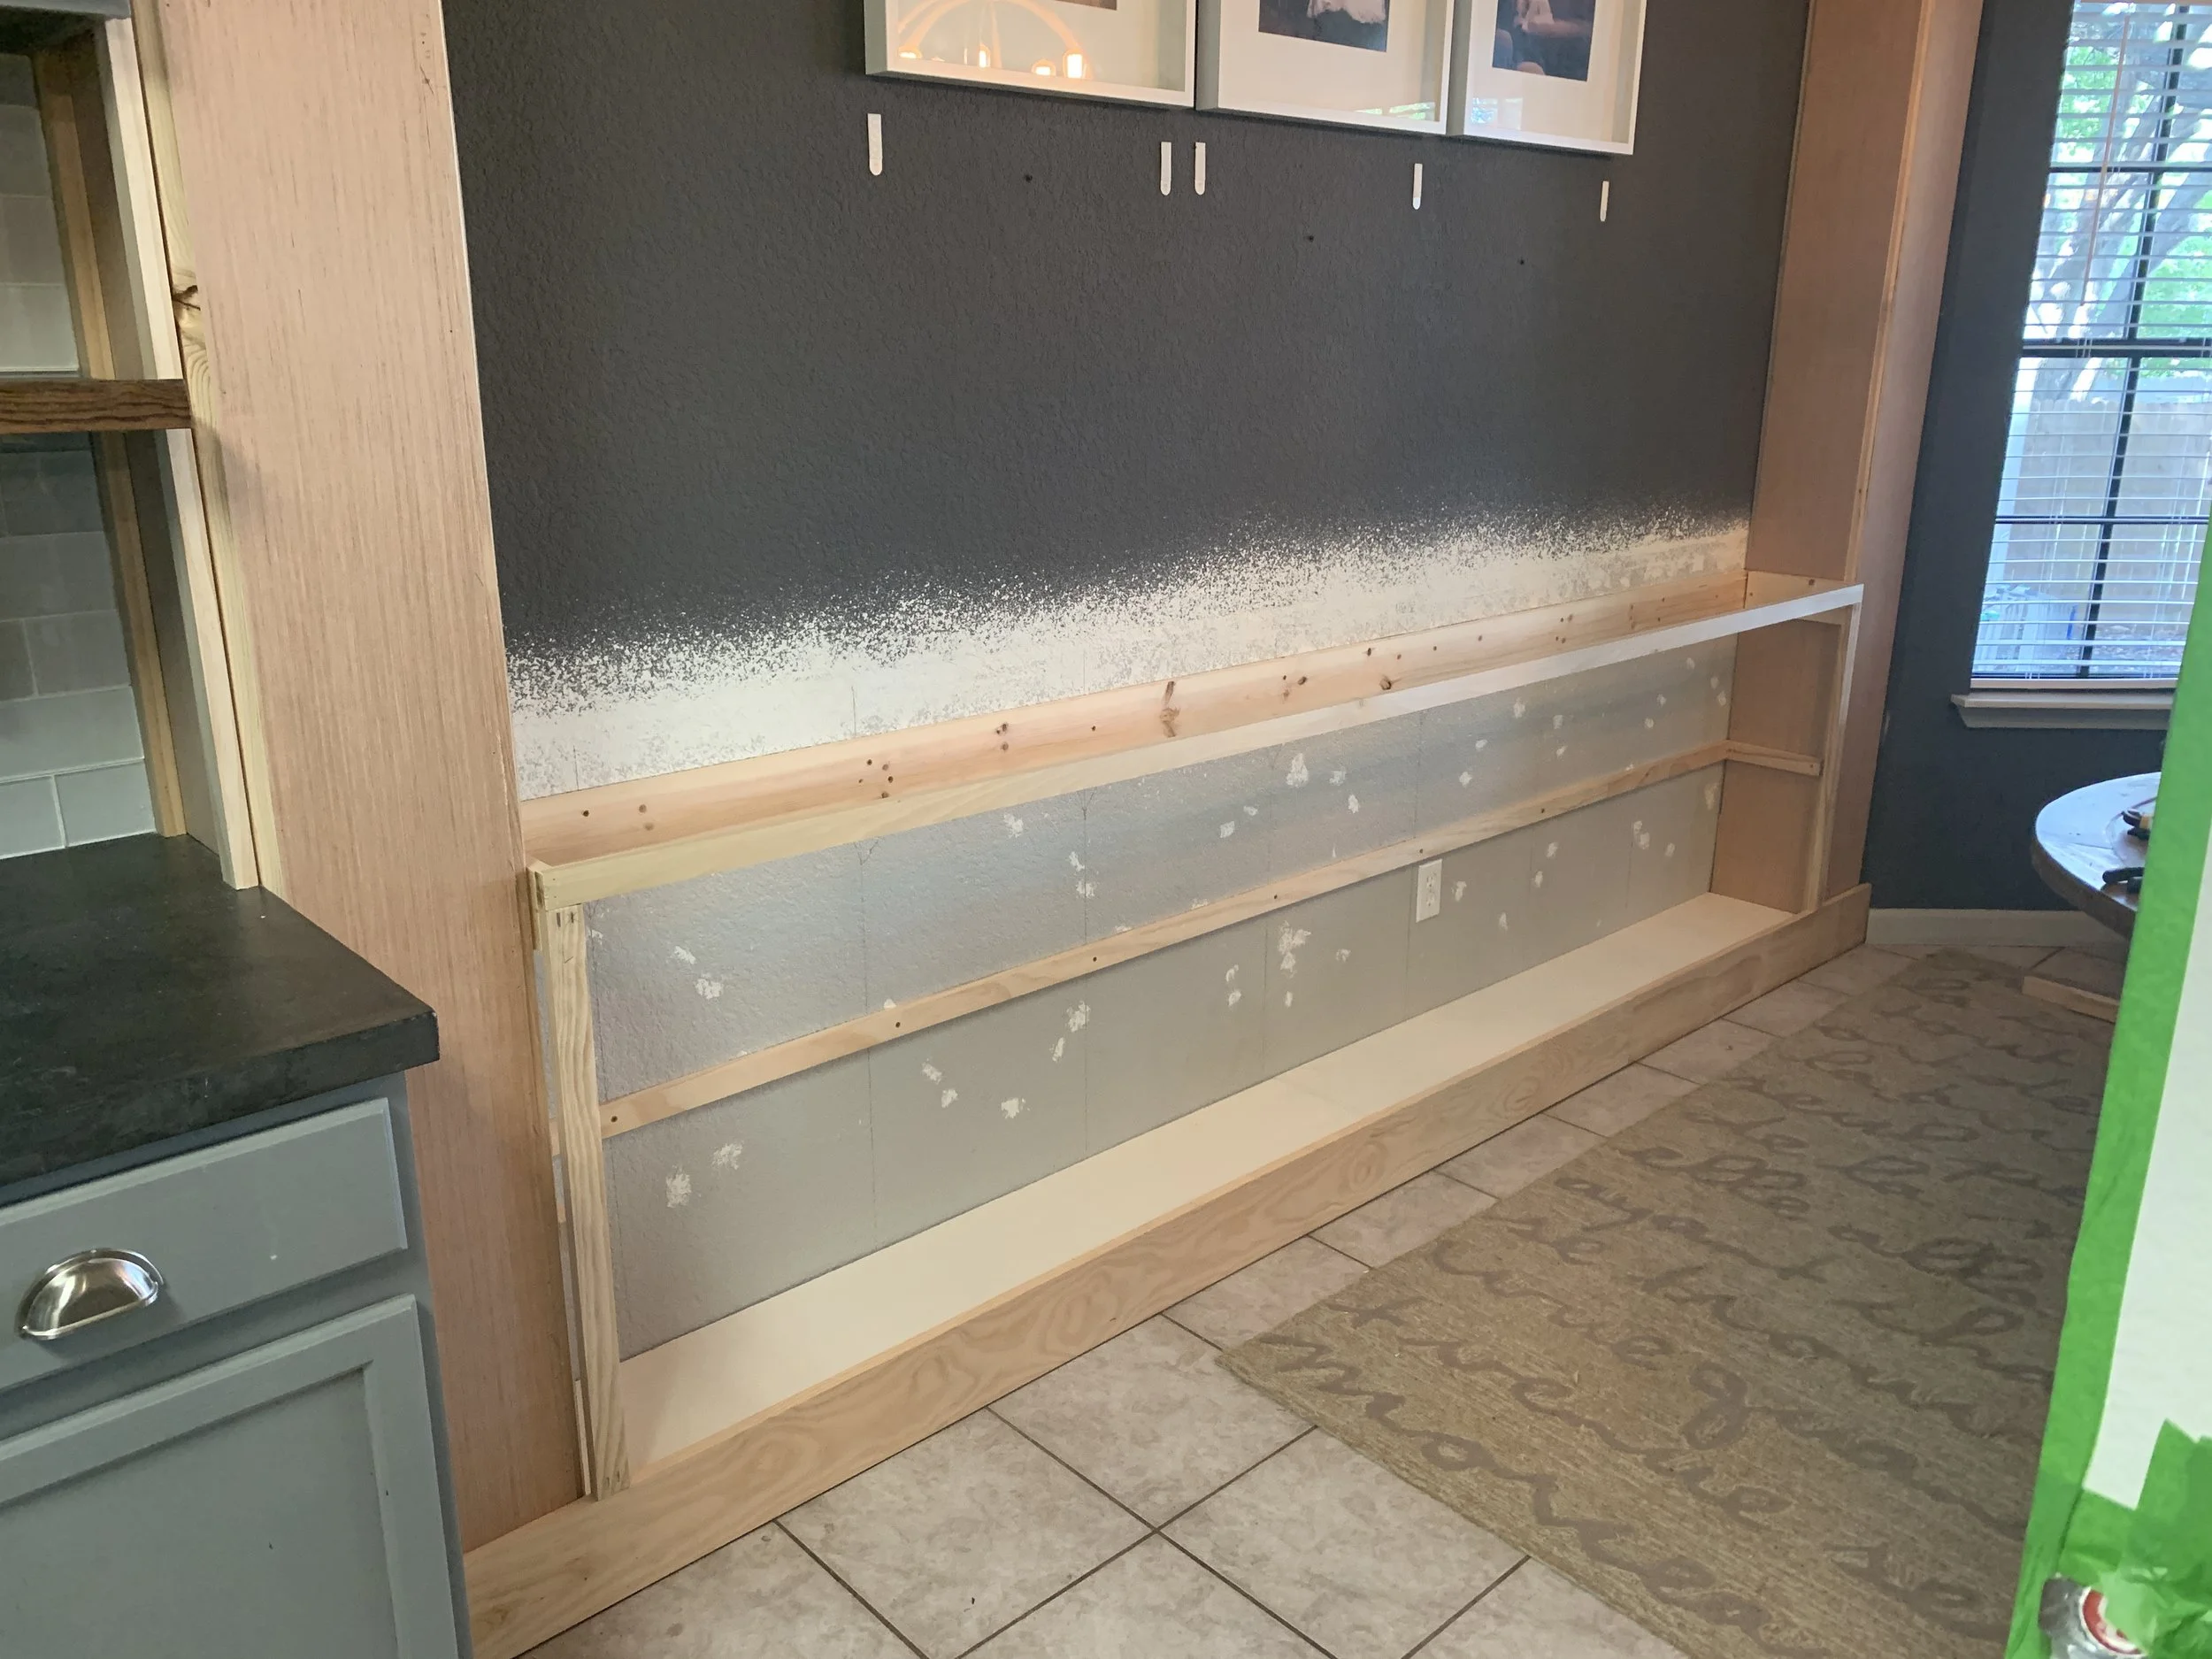
As a refresher, here’s what the space looked like where we left off last time:


Some of the links on this page are affiliate links, meaning at no cost to you we may earn a small commission on the purchases you make through that click. Learn more.
Tools
Kreg jig
Miter saw/chop saw
Circular saw (or table saw) – for cutting plywood
Drill + drill bits that match your screw heads
Nail gun + nails
Clamps – we like the Irwin one handed bar clamps
Electric sander + sandpaper of varying grits (down to about 180 grit for painting)
Level – we used a 4-foot level and a little one (shorter than the cabinet’s interior depth)
Speed square
Pencil
Tape measure
Putty knife
Caulk gun + lint-free rag
Materials
2x4s* for framing cabinet base – we used (2) 8’ and (2) 10’ boards
1x2s* for the front cabinet face and and shelf support – we used (2) 6’, (2) 8’, (1) 10’ and (1) 12’ board
1x4s* for countertop support – we used (1) 10’ and (1) 6’ board
1x6s* for lower front cabinet face/baseboard support – we used (2) 1x6x8s
4x8’ sheets of 3/4” plywood – we used 1 for the cabinet base and shelf
Wood shims
Kreg screws – 1-1/4” for connecting 1x2s
Long wood screws – for connecting 1xs and 2x4s to the columns and to the wall through drywall and into studs
Paintable wood filler
Paintable caulk
Primer + paint
*Reminders:
1x boards are actually 3/4” thick
2x boards are actually 1-1/2” thick
And to make it all even more confusing, 3/4” plywood is really actually 3/4”
Building the Cabinet
The base
First we built the base out of 2x4s, nailing the short cross-pieces into what would be the wall-side piece first. Then we flipped the wall-side board (with the cross-pieces attached) around, nailed the front part of the base on to the other end of each cross-piece, and then screwed the wall-side piece into the wall studs.
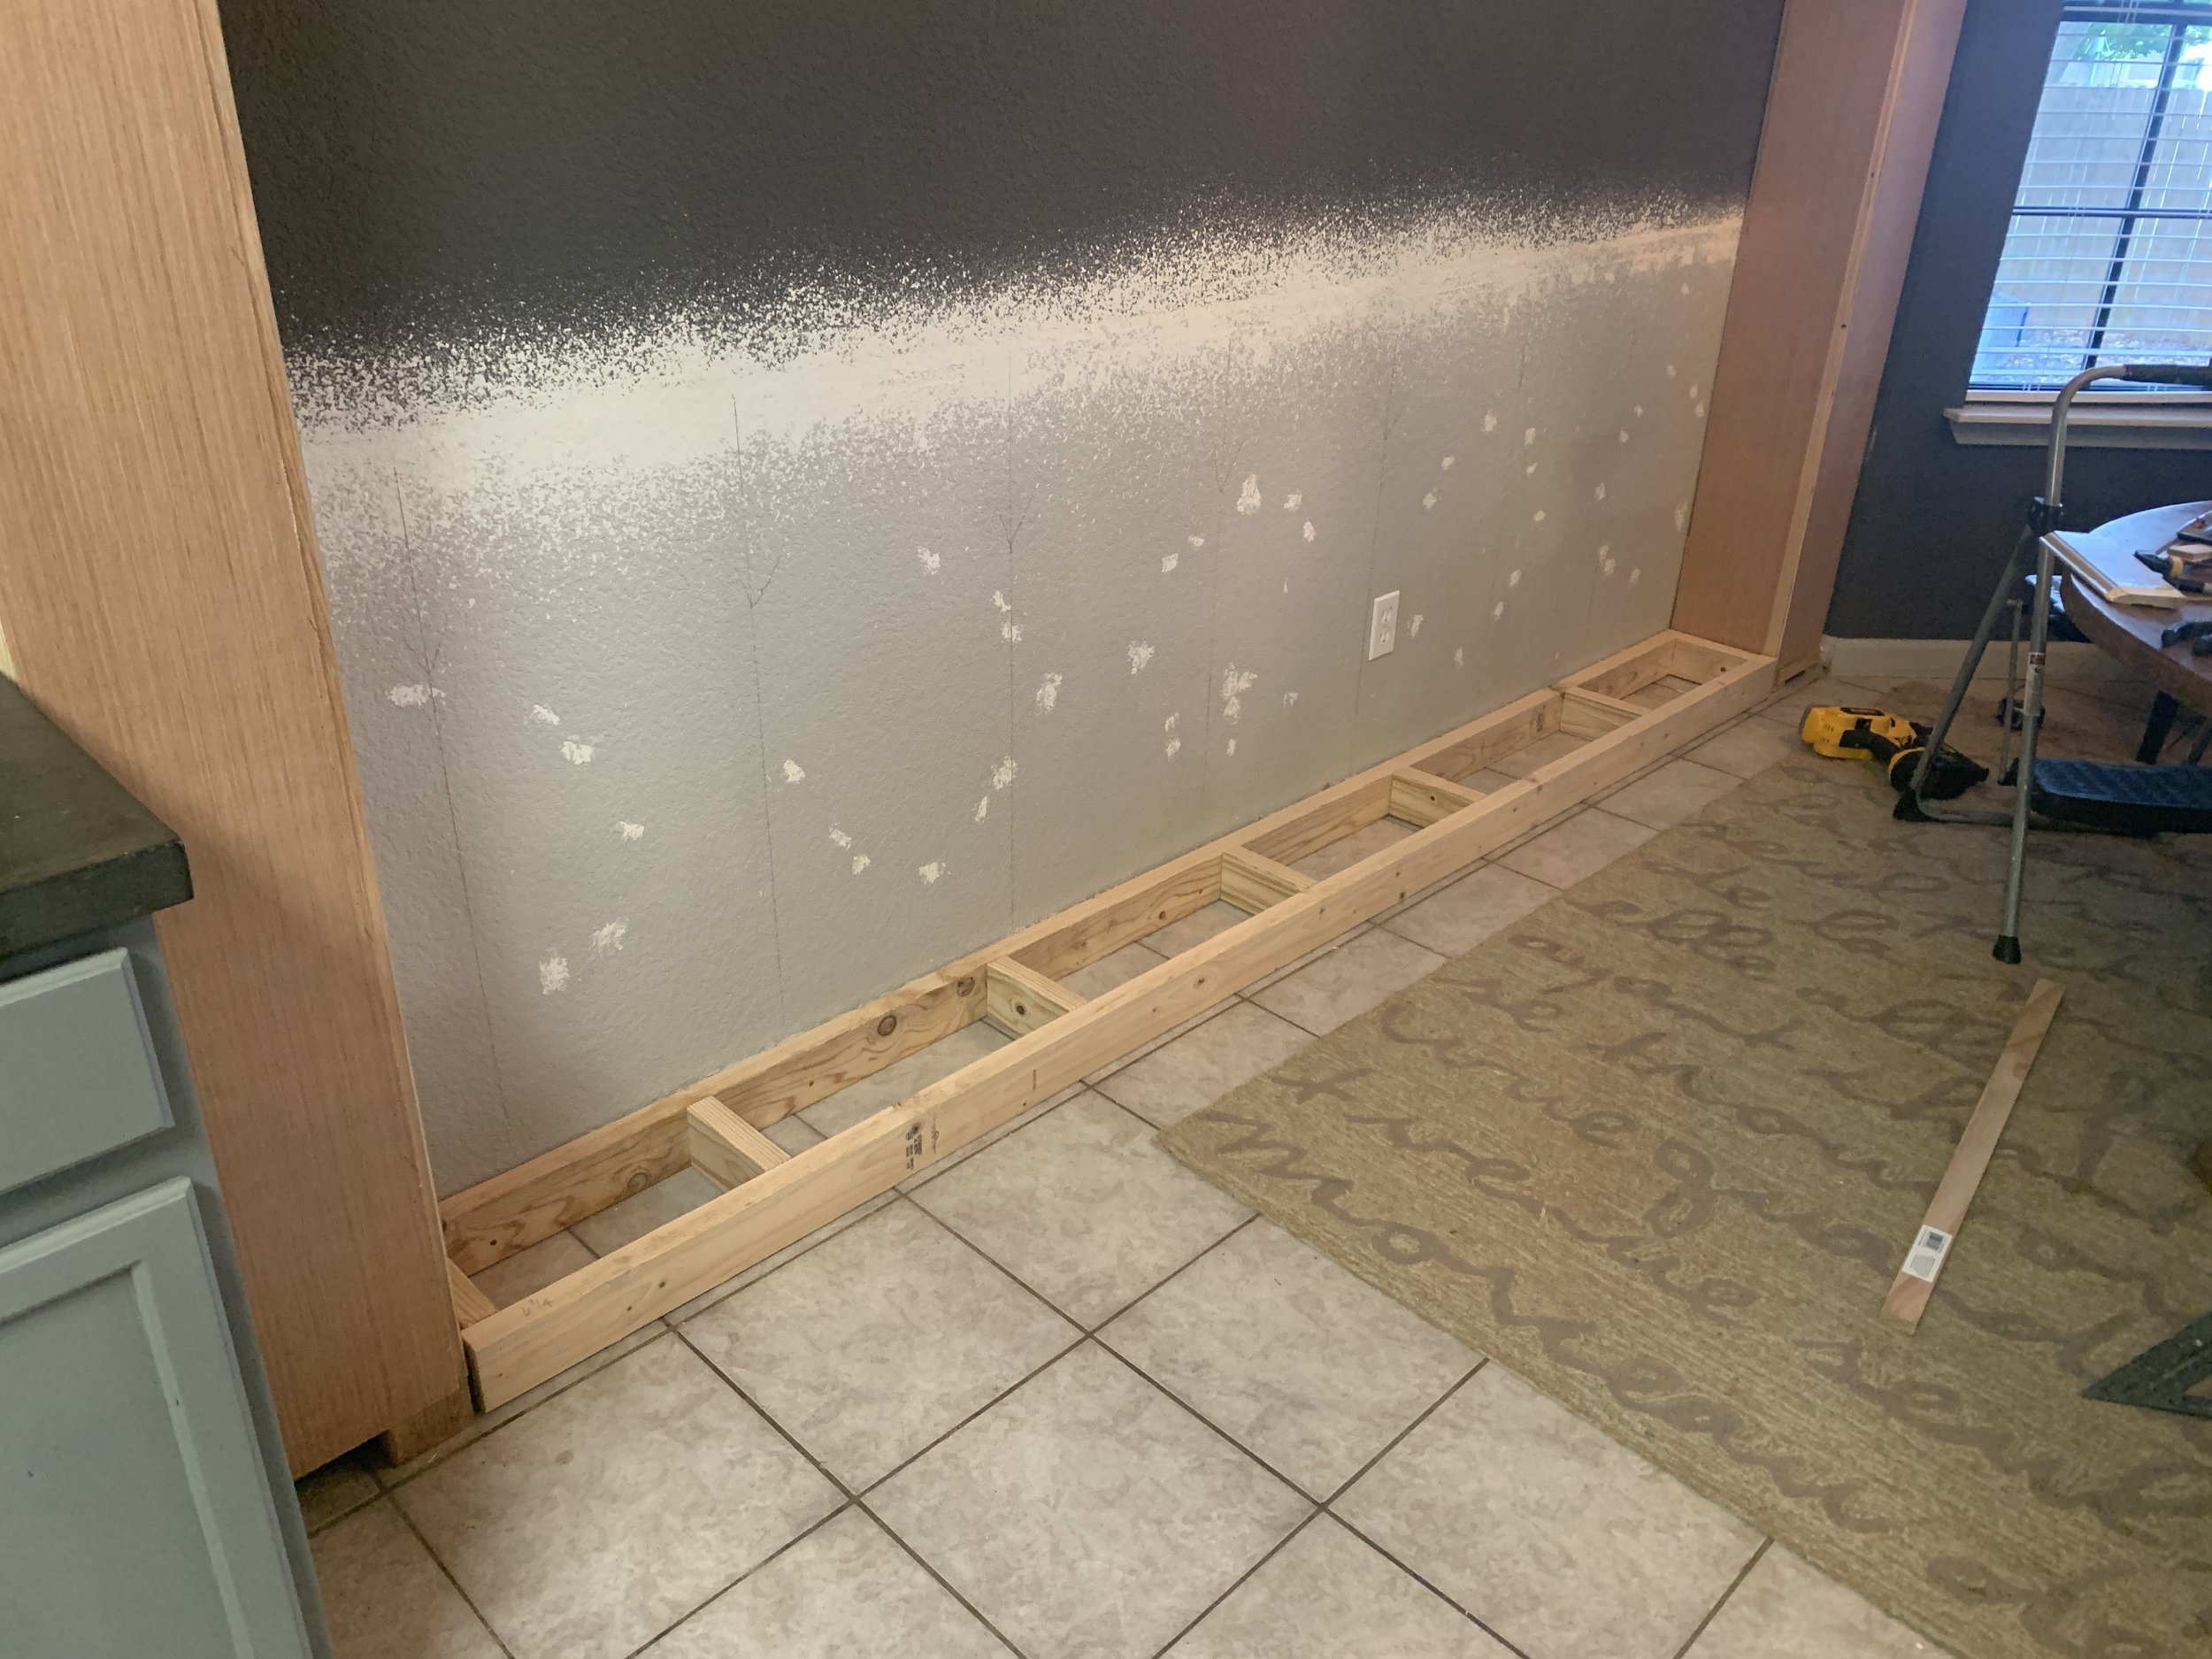
We used wooden shims to shim the base to be perfectly level before using wood screws to secure the cabinet base into the side of each column. Note: If we were using a Kreg jig instead of a nail gun to secure the cross-pieces to the long pieces – due to shallow cabinet depth vs. long length of the drill and Kreg bit – we would’ve done this opposite, Kregging the cross pieces into the front first, then into the back piece before screwing the wall-side long board into the wall.

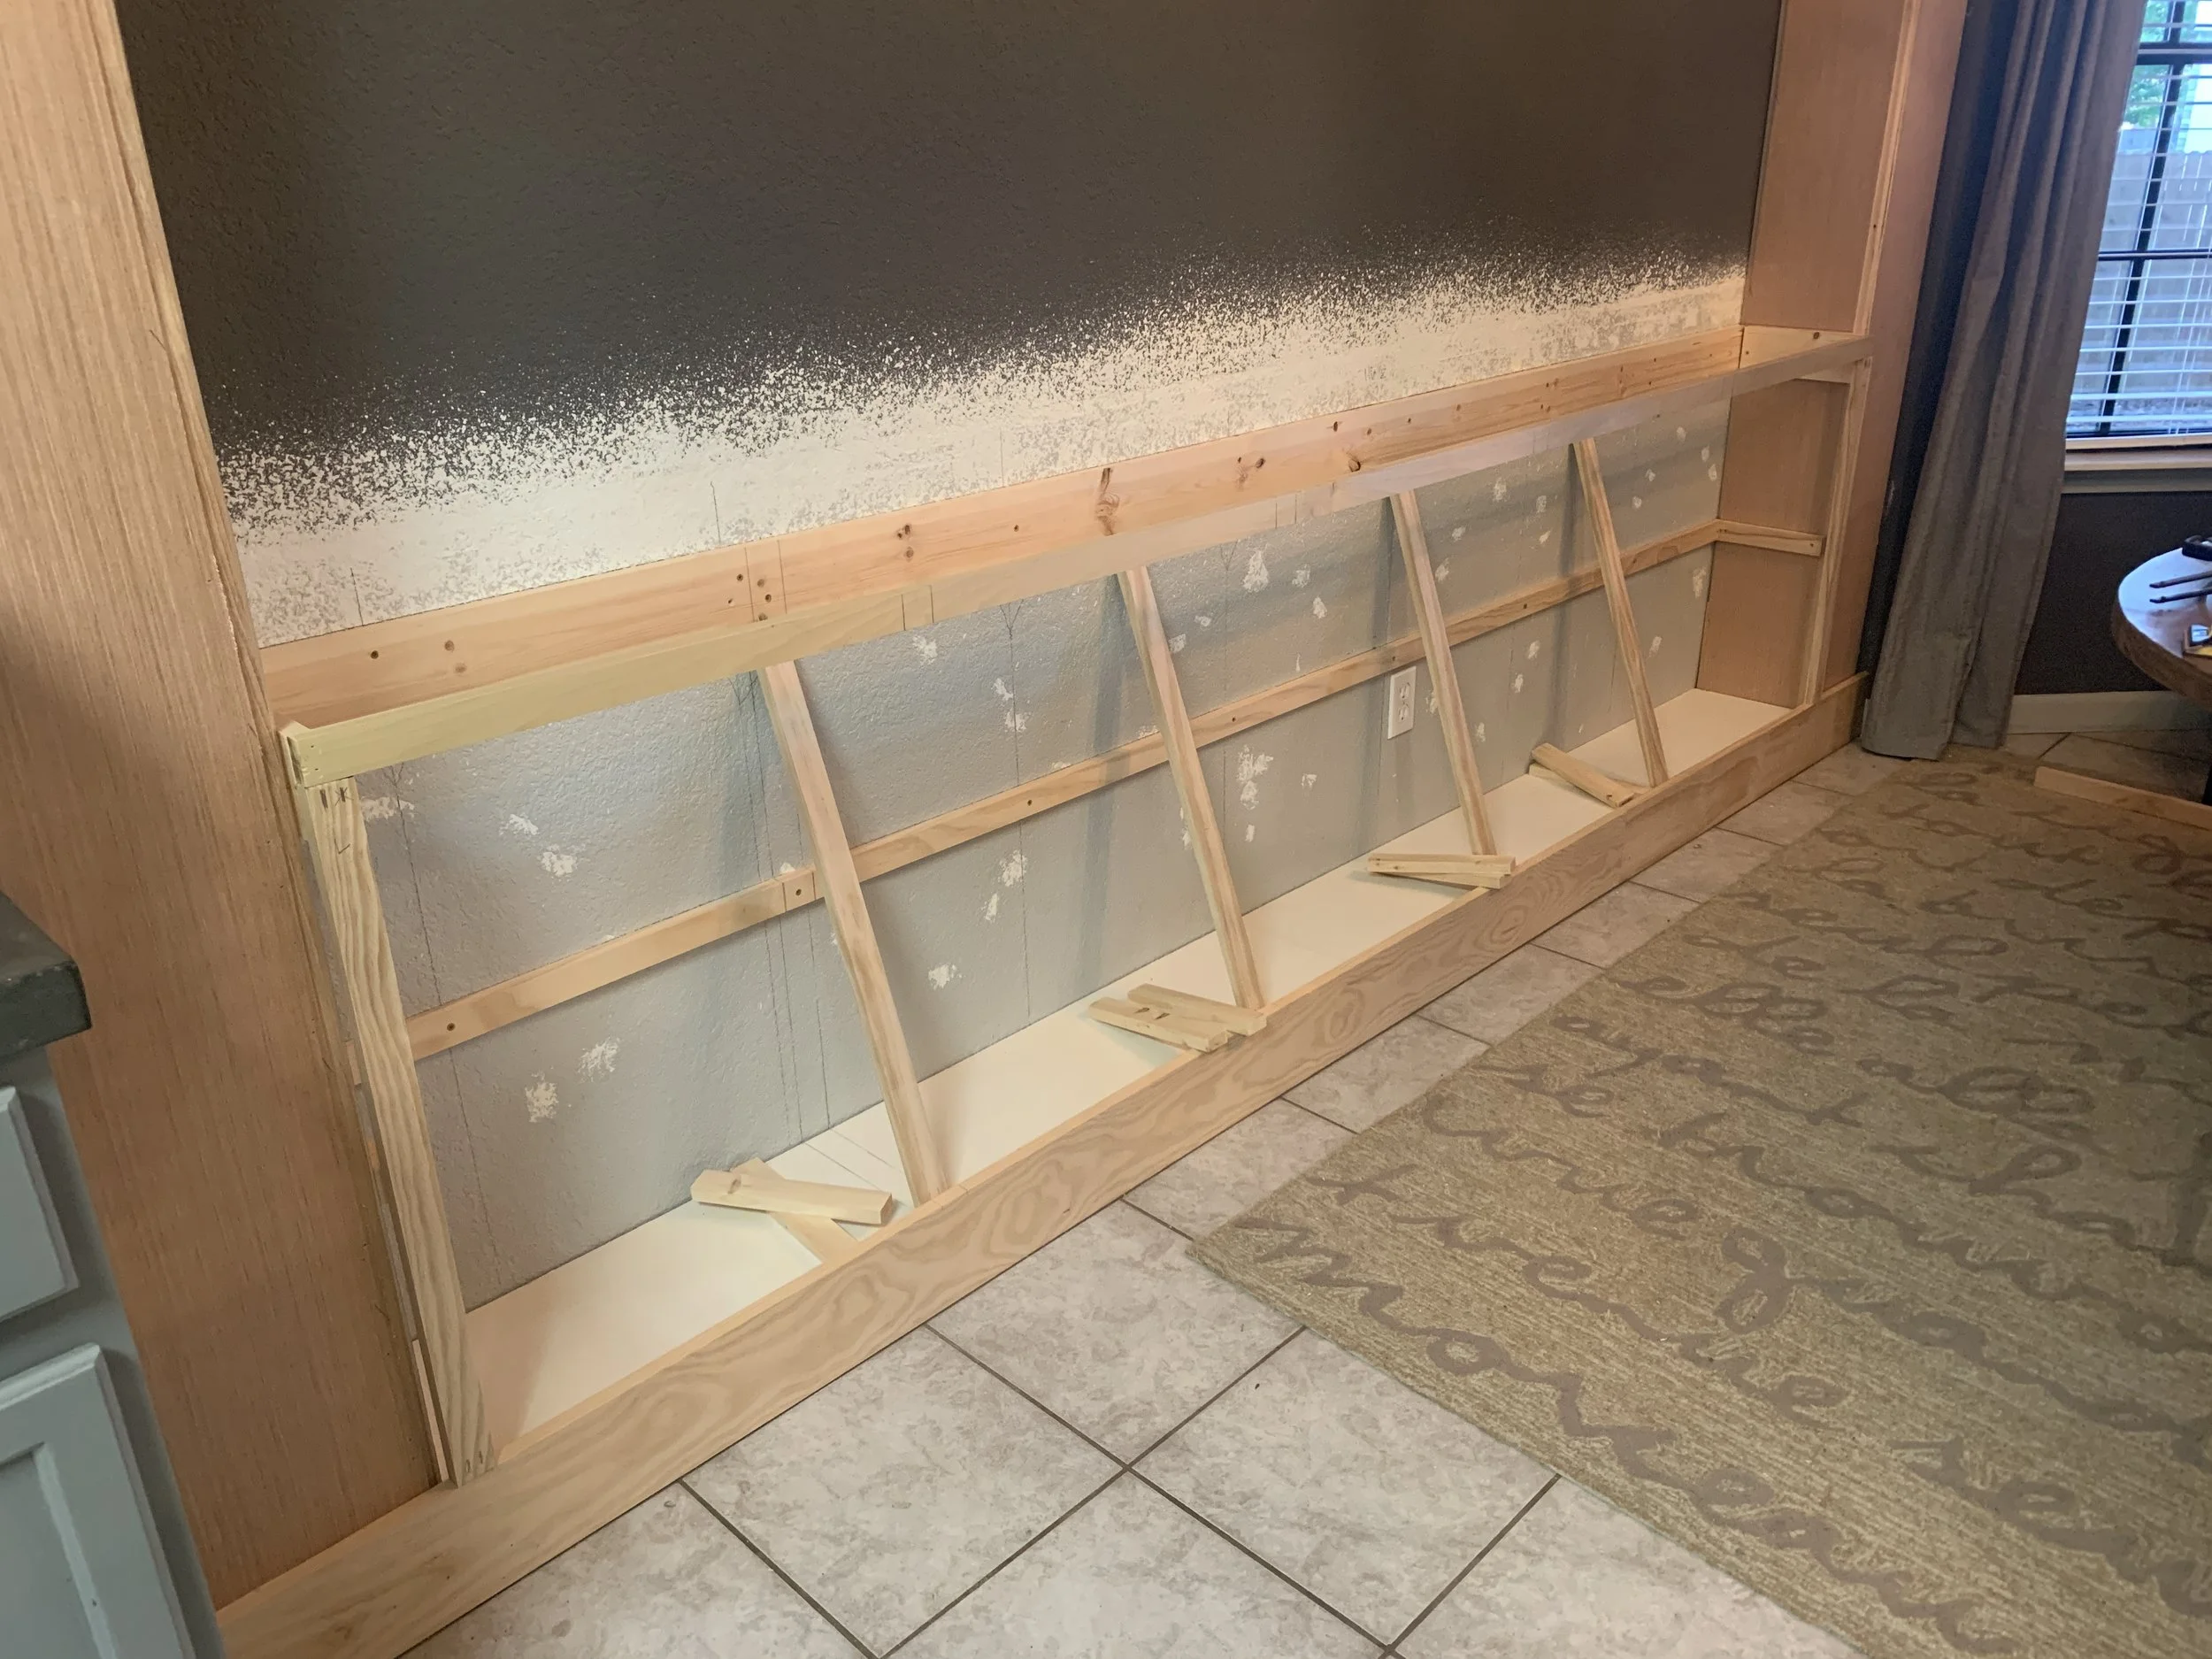
The shelf + countertop supports
Using wood screws, we screwed two 1x4” counter-height ledger boards into the wall studs and 2x4 support structure of the columns we’d already built. (We only has to use two 1x4s because our wall is longer than 10 feet wide.) It’s super important here to make sure these are level on the wall and along the columns (or side walls if you’re not going into columns), as this will be what dictates the countertop, and important these go into studs and not just drywall. We used our existing kitchen cabinets to set the height of the top of our ledger boards at 34.5” from the floor. The top of these ledger boards will set the cabinet’s height and be the bottom of the countertops, so plan that height accordingly.

We used the same technique and install method to screw in our 1x2” shelf support ledger boards down the wall about half way between the counter ledger and the top of our 2x4 base. This height matters less since this is personal shelf height preference, however they also need to be completely level to keep the shelf/shelves from being wonky. (We used our tallest bottle to determine the shelf height to make sure we could at least enough room to store bottles as tall.)
Turning it into a functional cabinet
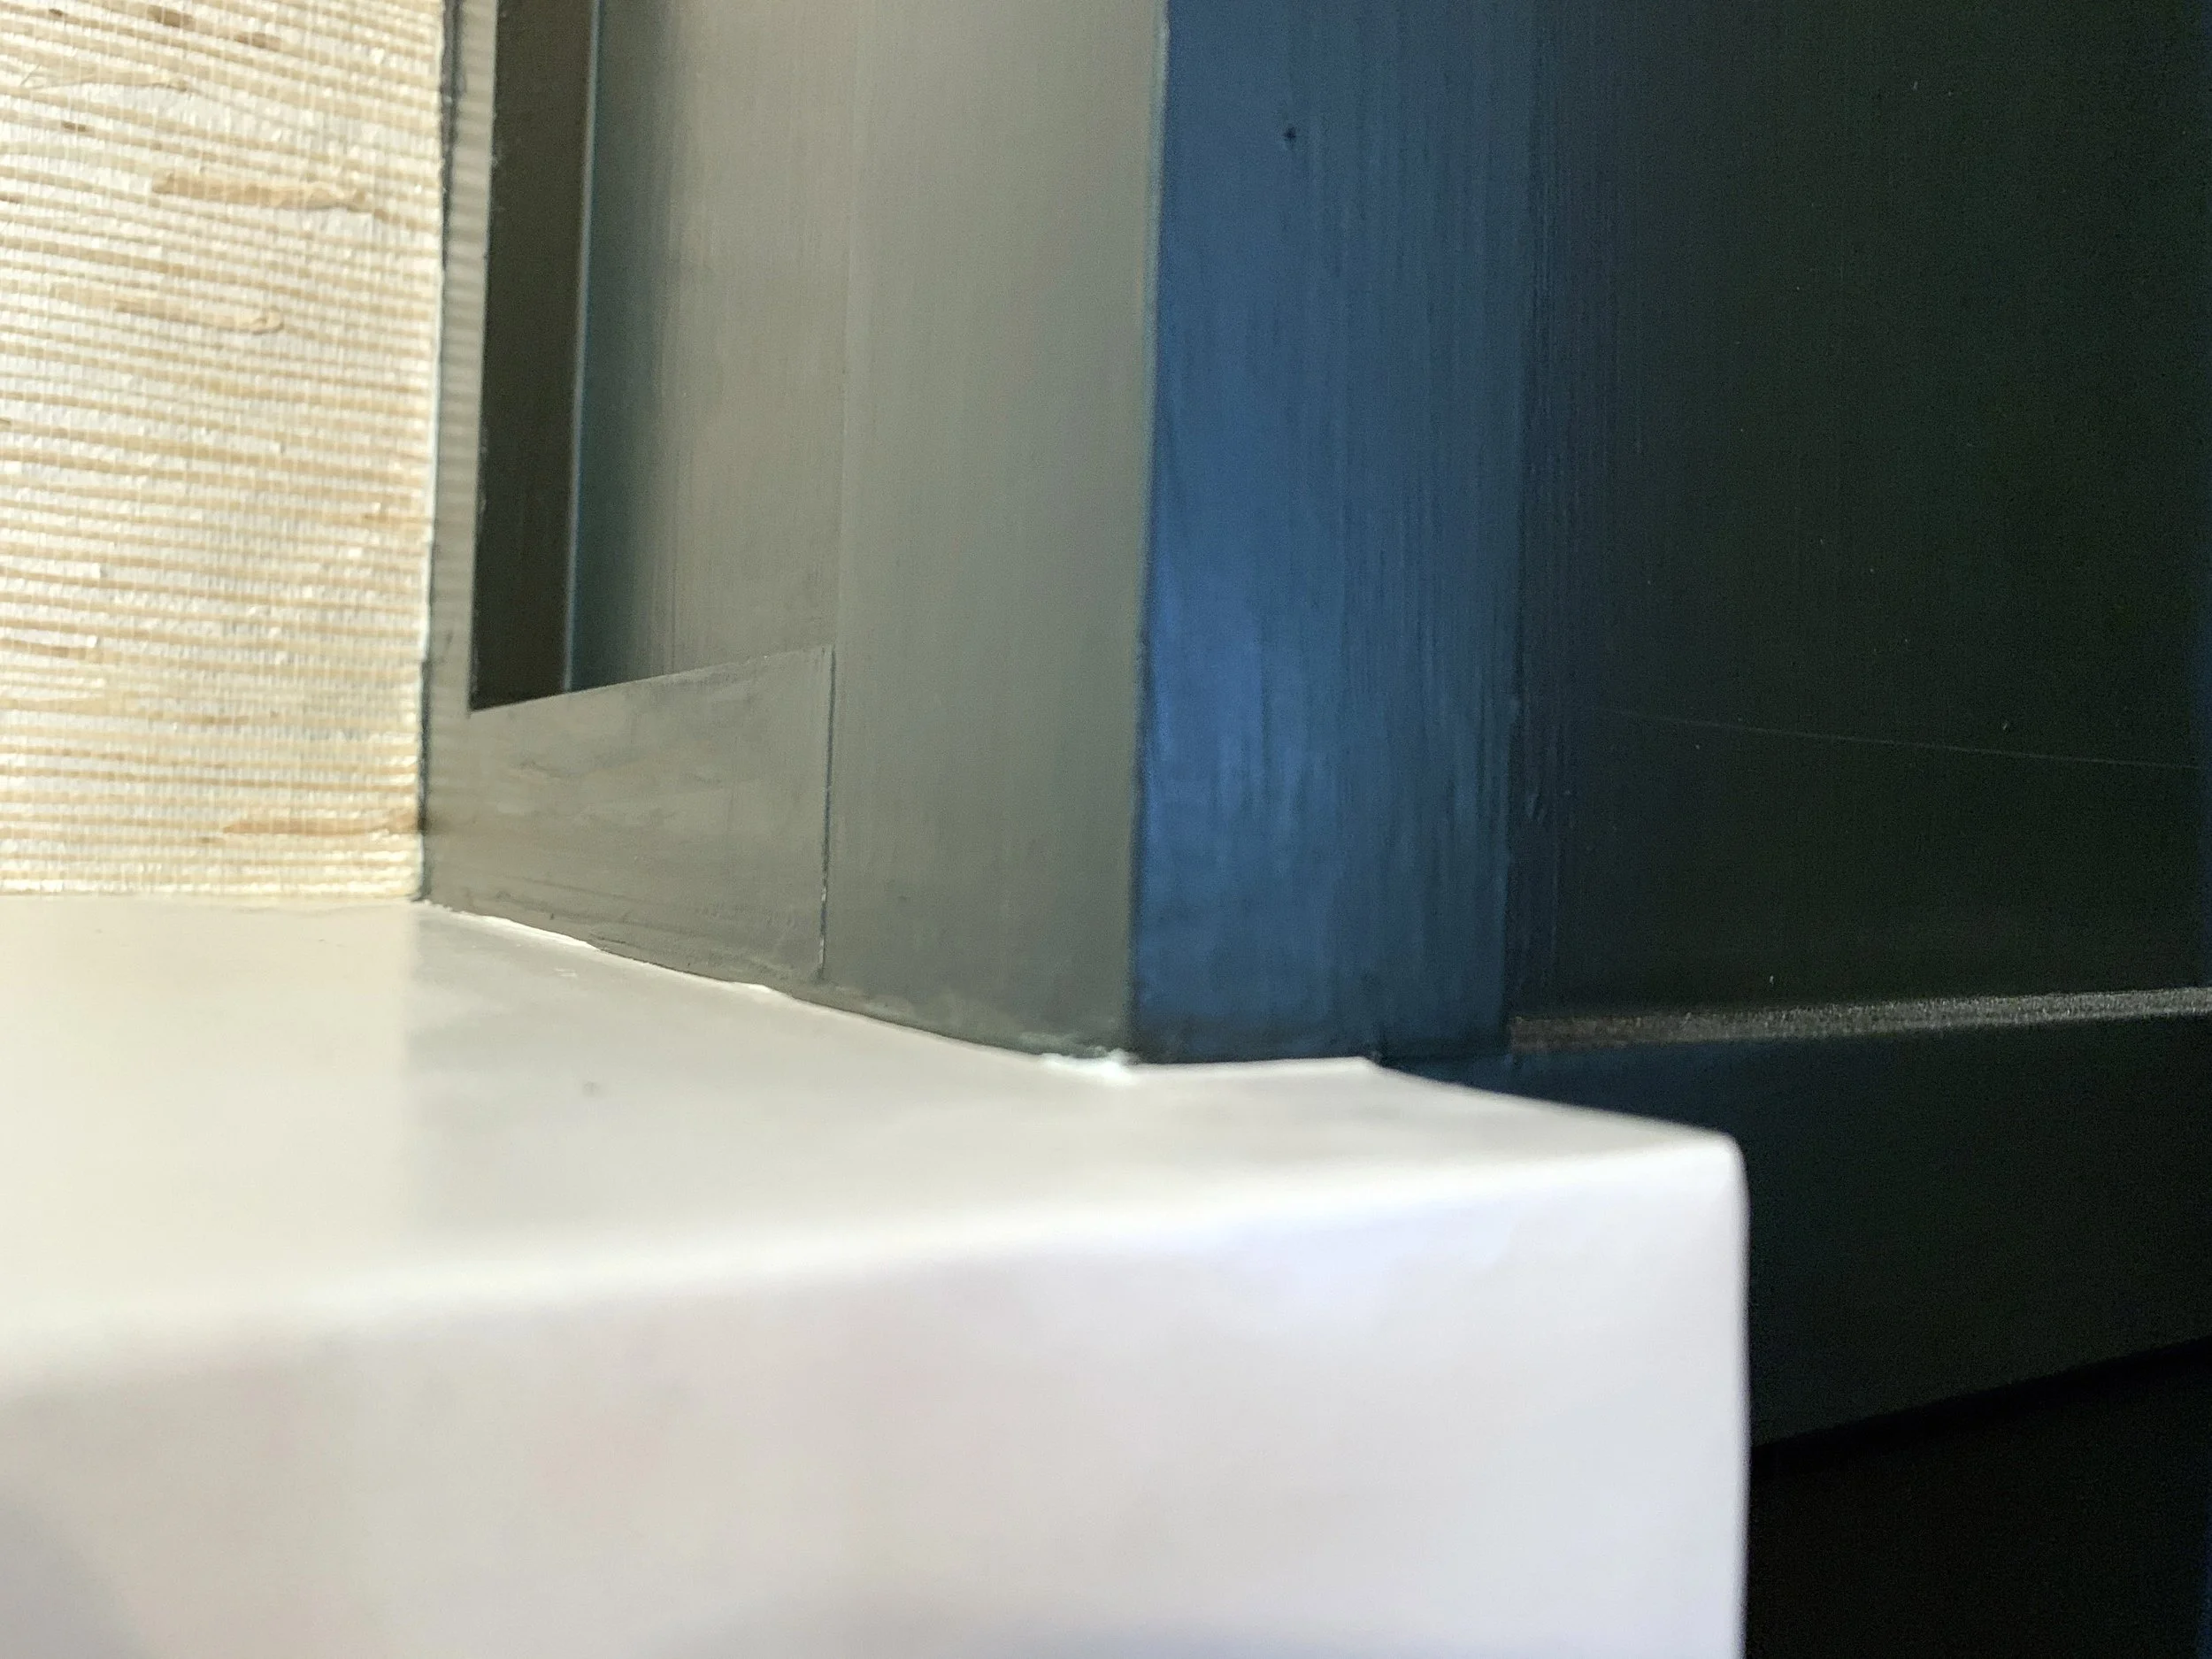
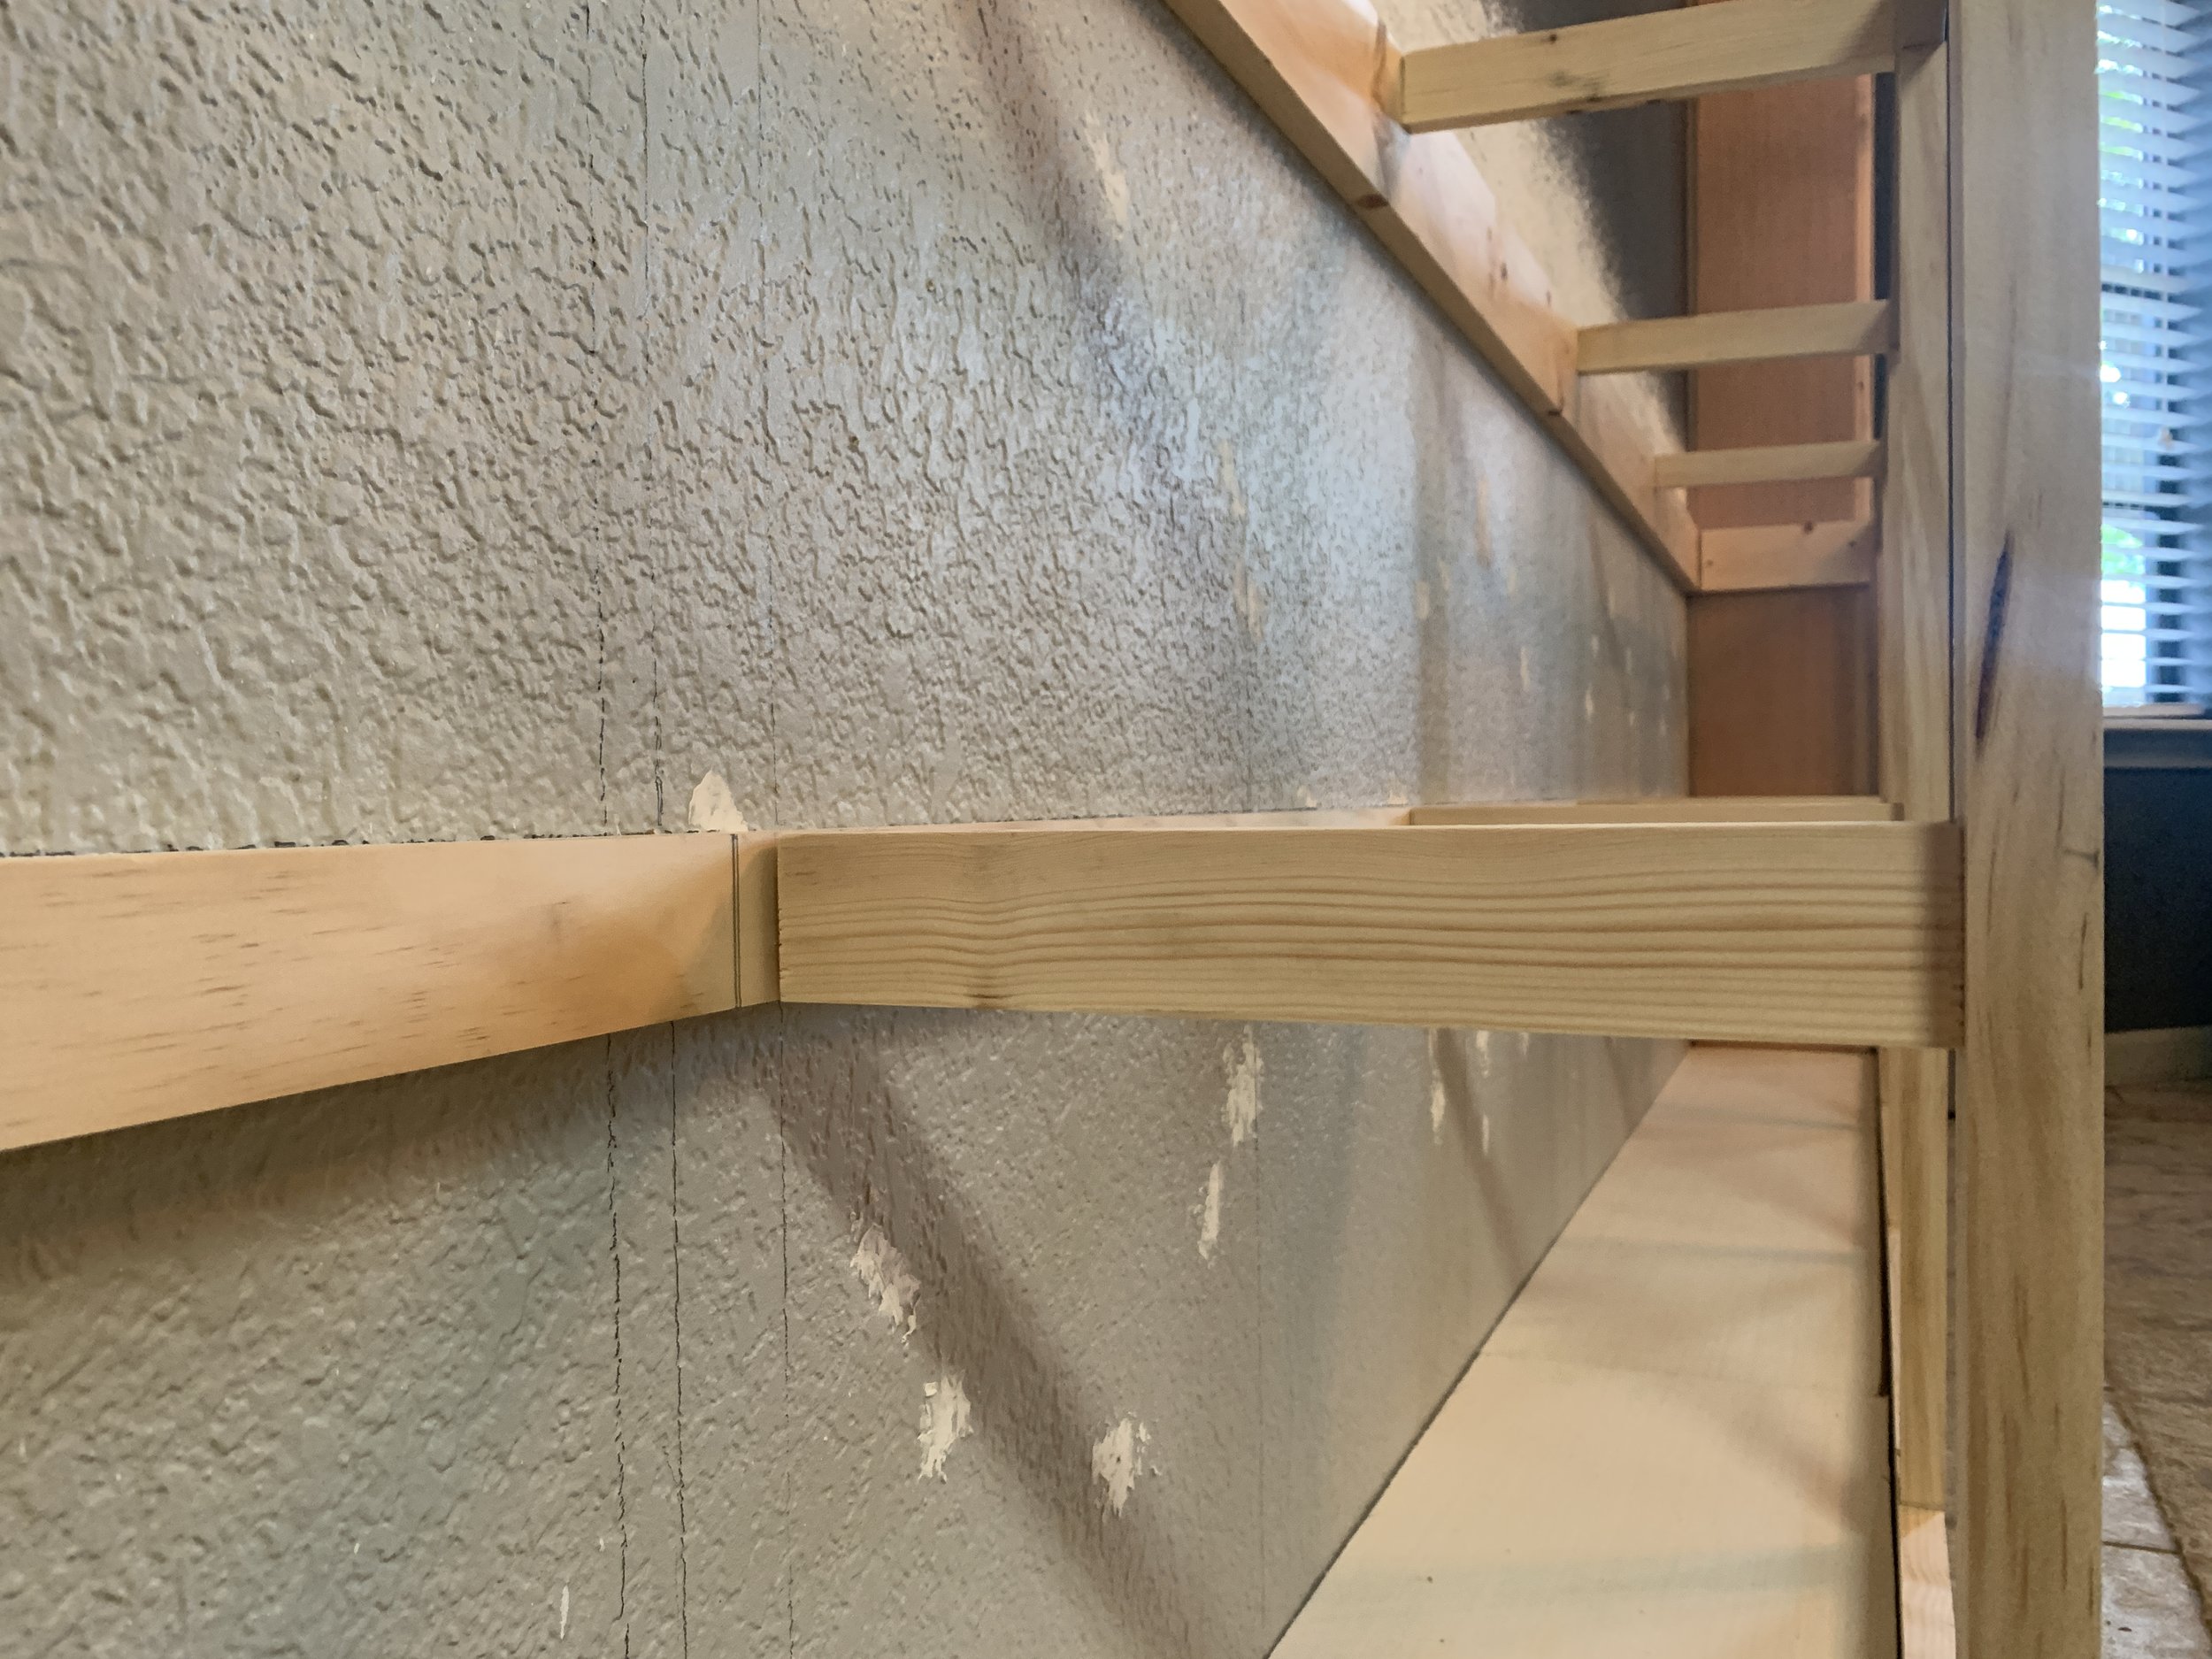
With our counter and shelf ledgers in place, we used our long level and nail gun to nail a 1x6 along the bottom cabinet face (into the 2x4), so about 2” stick up above the 2x4 base. The top 2” of this 1x6 is what makes the bottom of the cabinet face, and the bottom 4” will give our approximately 4” tall baseboard something to nail into and make sure the baseboard sticks out more than the cabinet instead of looking sunk into the face of the cabinet. (Later, we’ll just run our baseboard along the floor/bottom of the 1x6, and nail it straight into the front of the 1x6.)
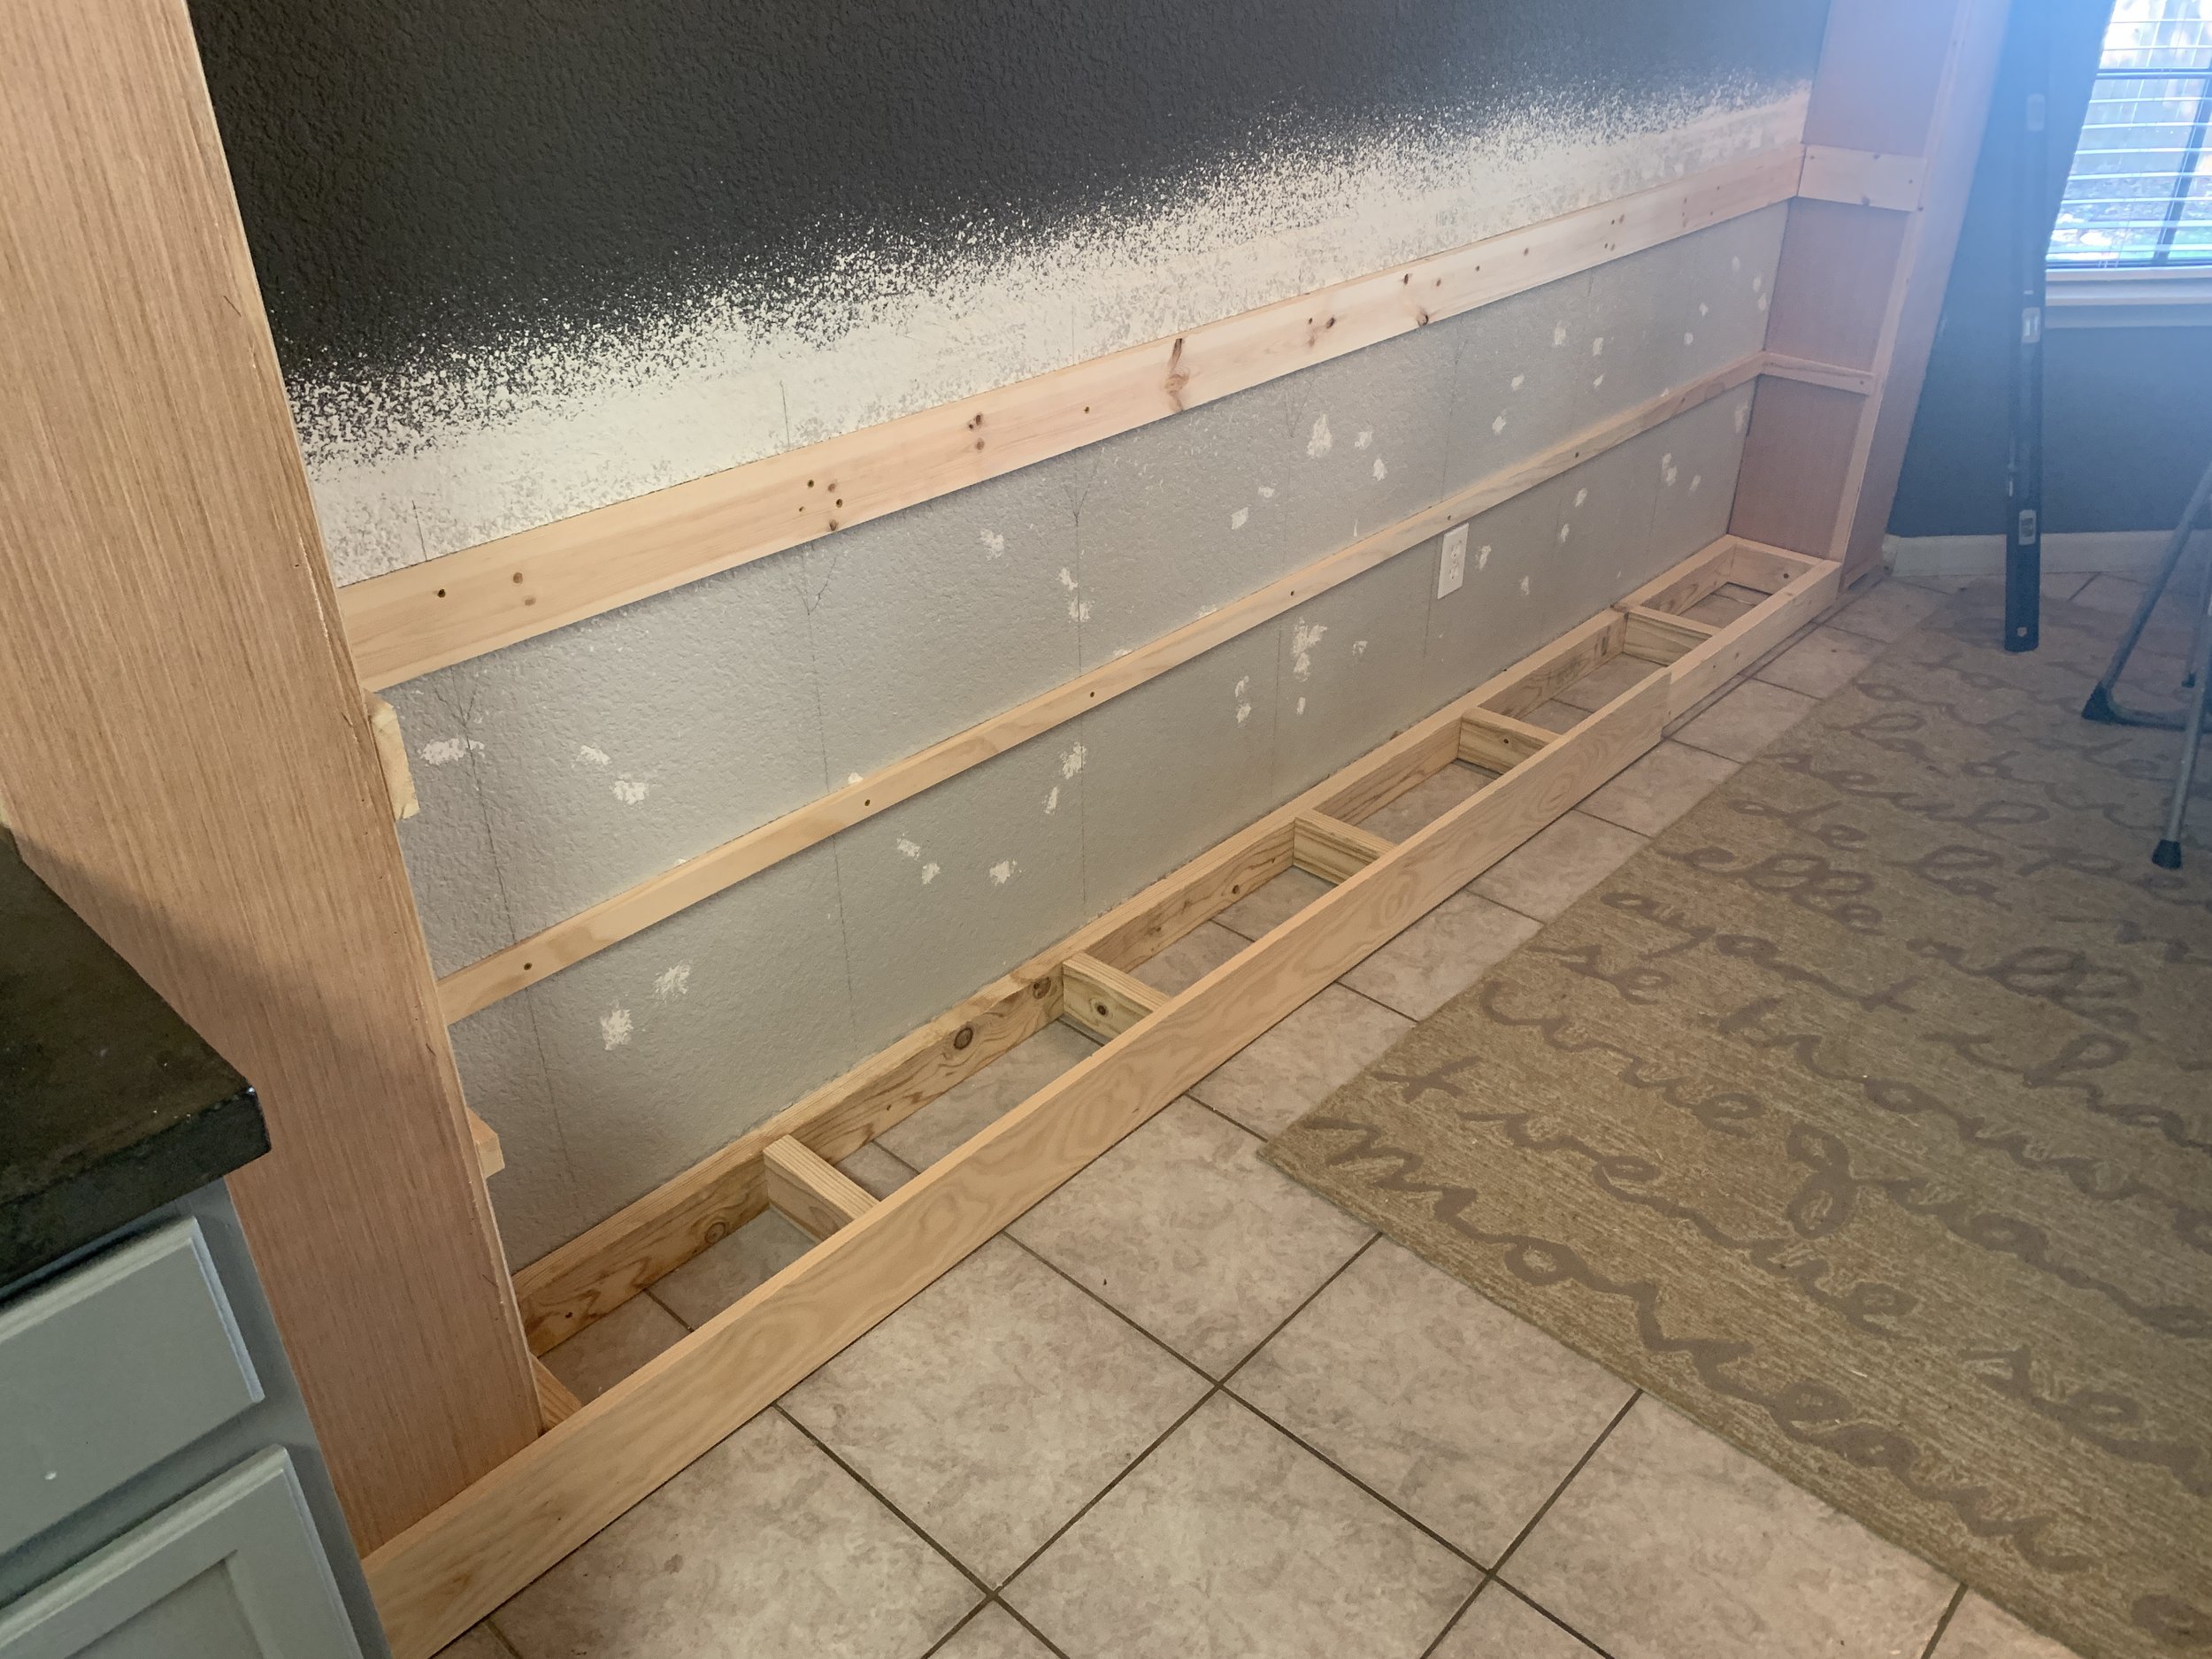

Then we cut and nailed 3/4” plywood to the top of the 2x4 base to make the cabinet floor. Our cabinet is so long we did this in two pieces with one seam in the middle centered on top of one of the cross-pieces. Note: You could put in the floor of the cabinet before installing the 1x6 in the step above, but we decided to start the cabinet front first in order to make measuring for our cabinet floor easier and the measurements more exact (since 2x4s are usually a little rounded on the edges and makes it a wee bit more difficult to be as precise here).
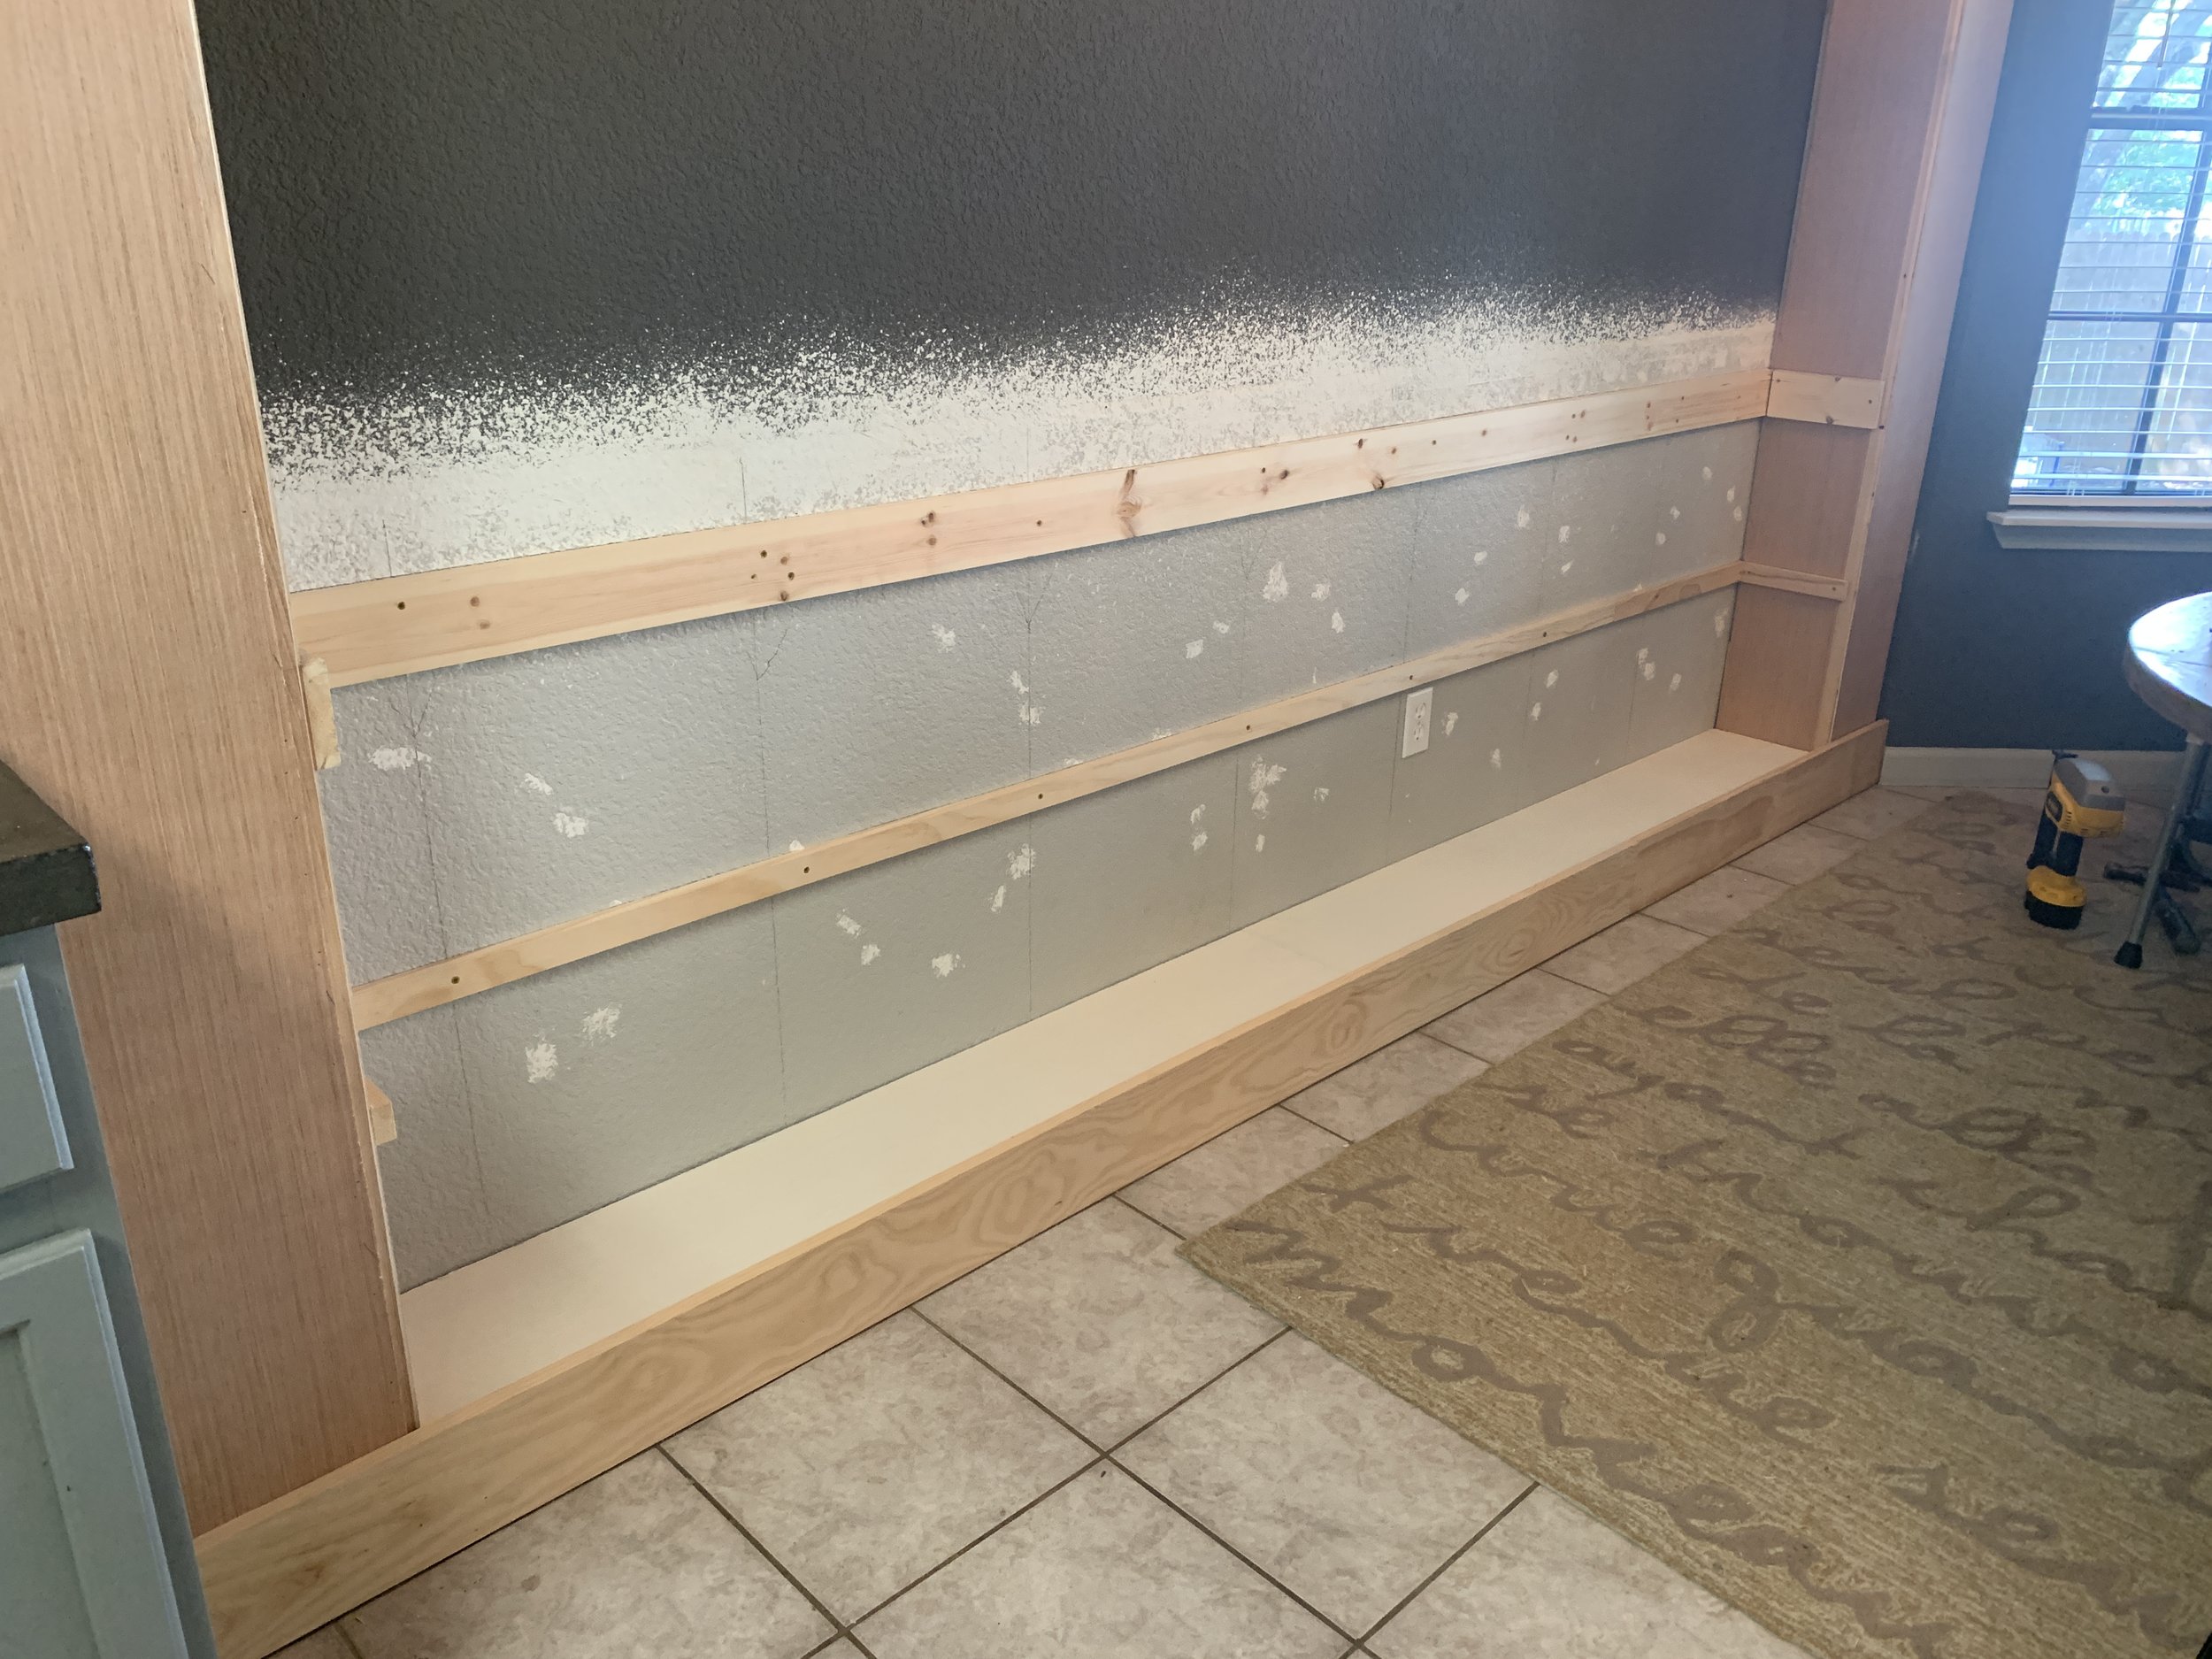

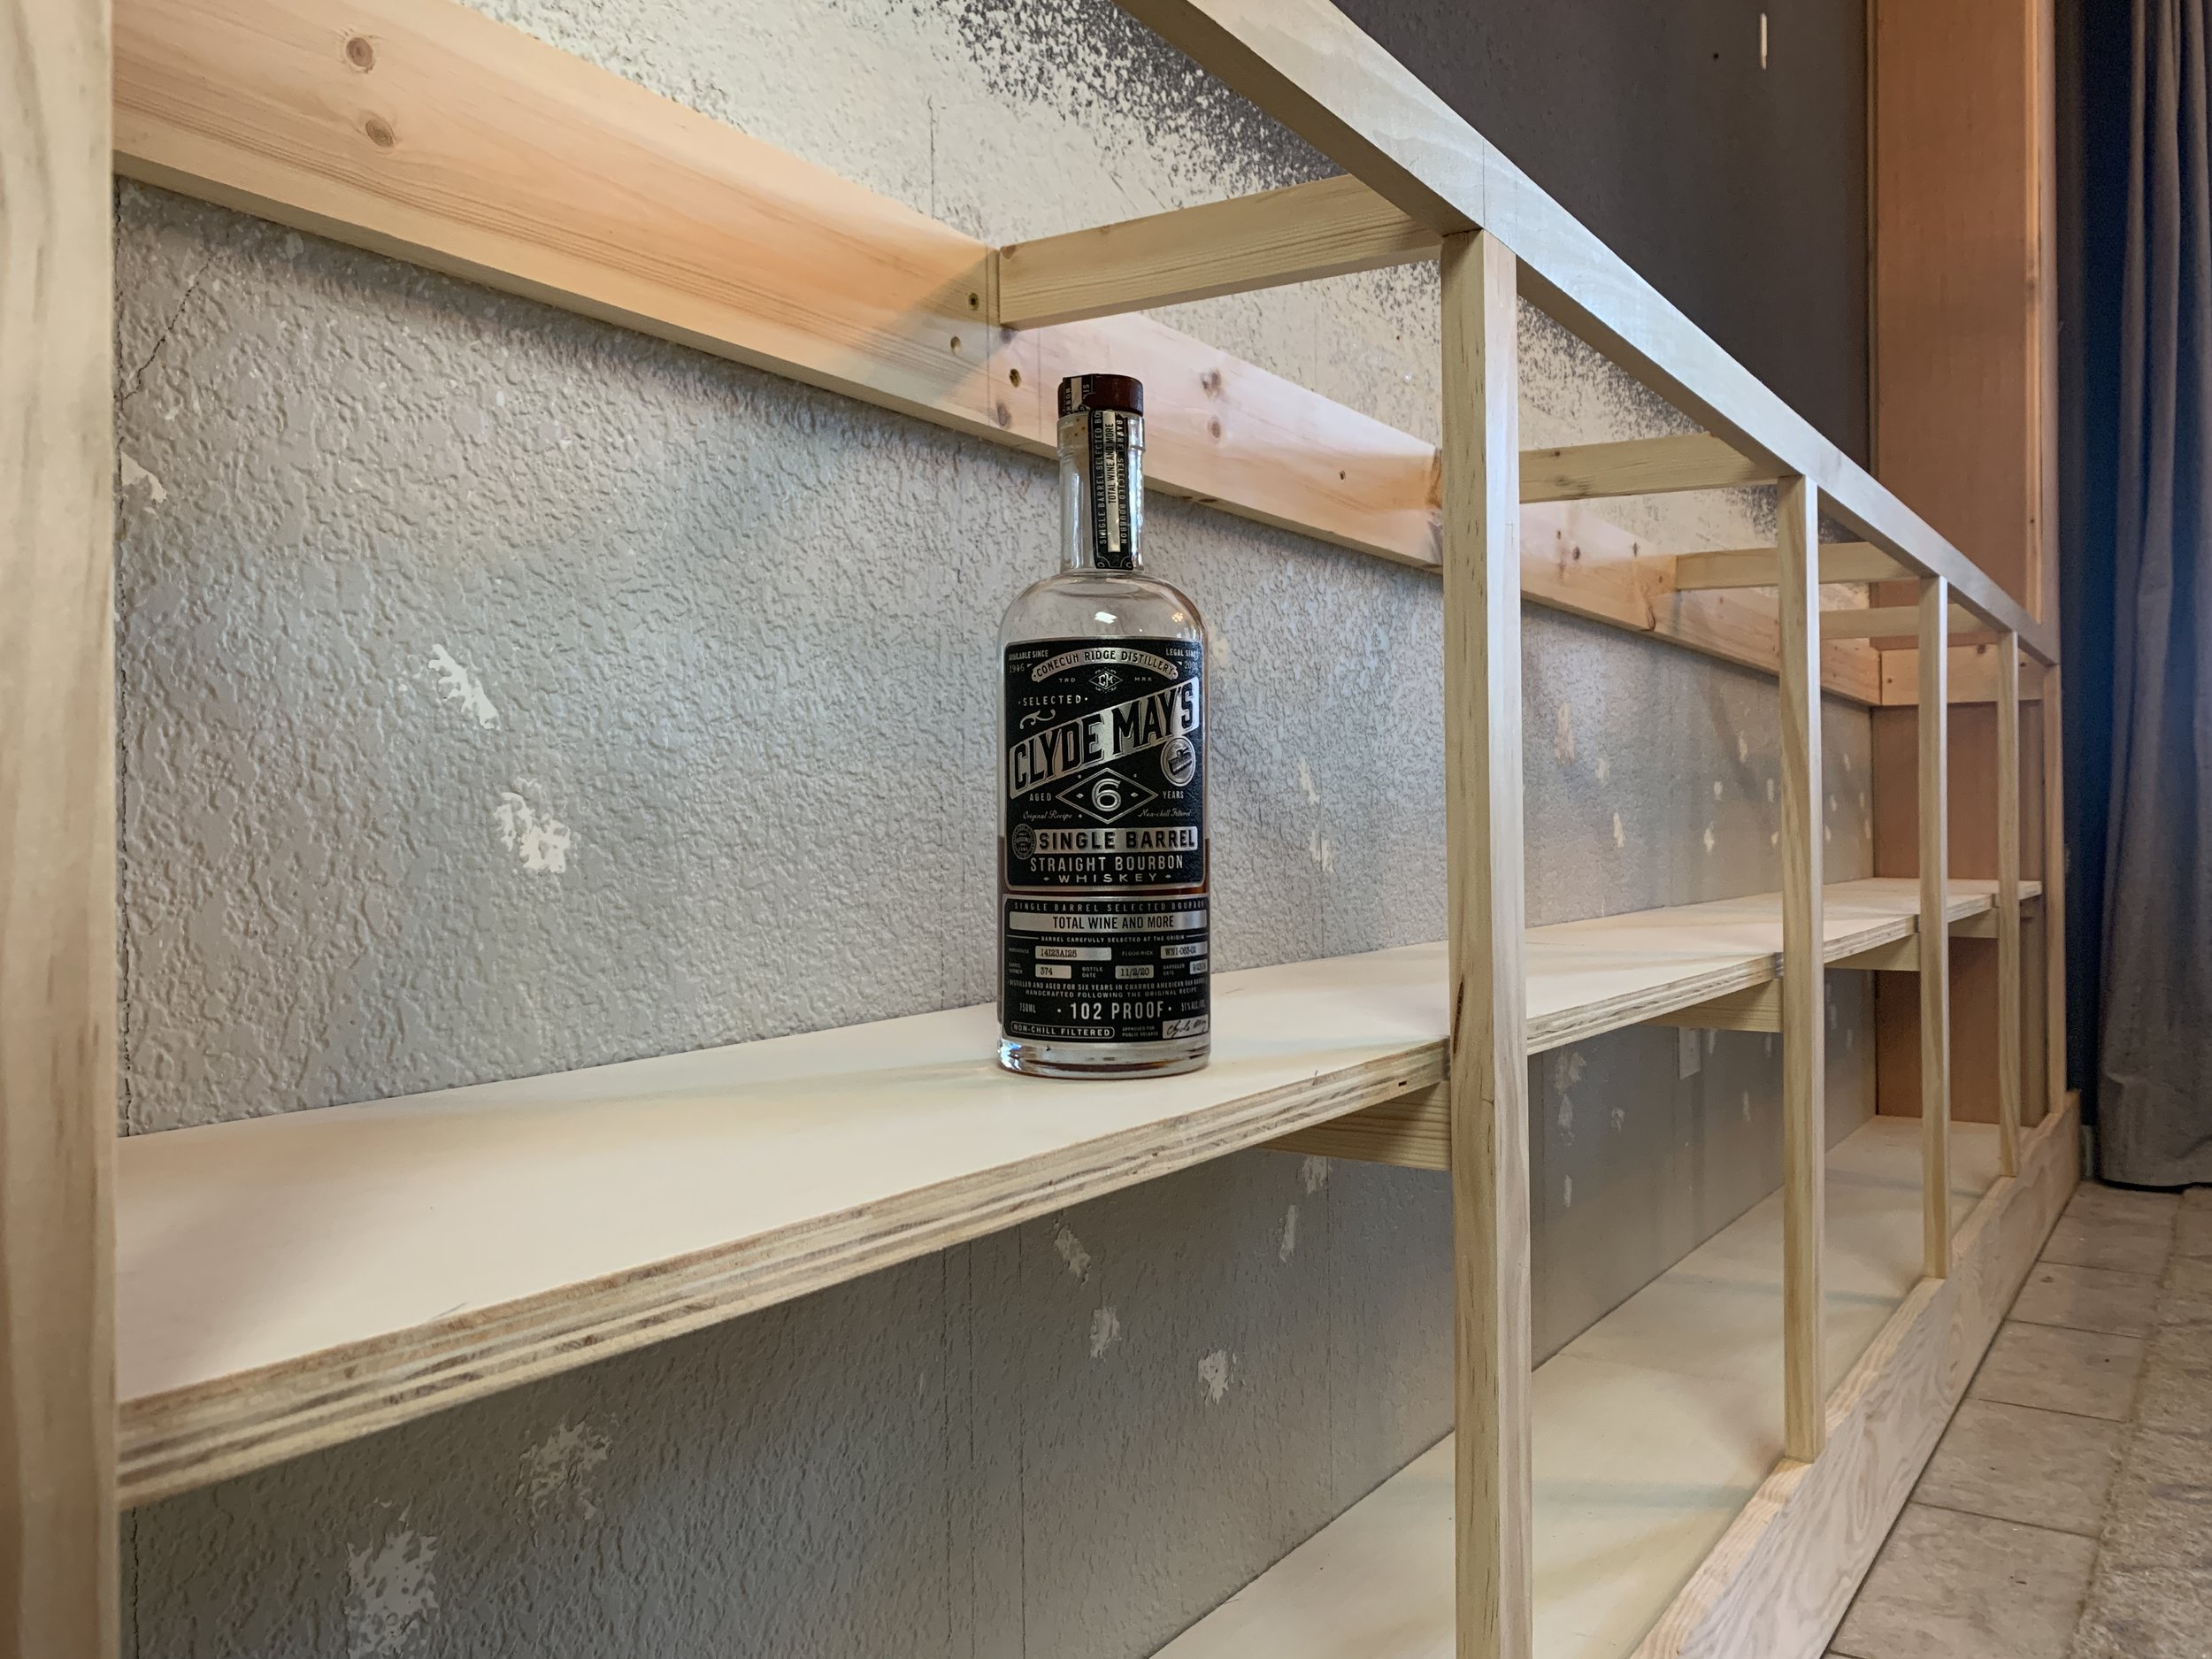
With the main structure complete, we nailed one long 1x2” (for the cabinet front top) into the front ends of the counter-height side ledger boards so that they were the same height/flush with the ledger boards.
Then we measured and cut our vertical cabinet front pieces. They should be all the same length – if everything is square – but the main thing is you want the top 1x2 to be straight and parallel to the 1x6 bottom piece and to keep the top board from sagging, etc., which might mean your vertical pieces are a little different in length. We have 6 vertical pieces total: one on each cabinet end by each column and four evenly spaced throughout the middle which make up the five cabinet door hole sections. Because the space from the dining room chairs to the cabinet front is so tight, we designed our cabinet to have 10 doors total – each hole/section will have two approximately 10” wide doors (meaning, they will swing out to about 10” into the room).
With the vertical cabinet fronts cut, we measured and cut eight cross counter and shelf support 1x2s (two going into the back of each of the four vertical divider 1x2s – one at counter height and one at shelf height).
We drilled two pocket holes in each end of the horizontal cross-supports and attached them to the back of the front vertical dividers (centered) before installing the vertical dividers (again because our cabinet depth is too shallow to fit the drill with the Kreg jig drill bit with the verticals already installed). Even though we filled these pocket holes with wood filler so they looked more finished at the end, we placed the pocket holes on the right, window-side of the support to help better hide any wonkiness from the most-viewed kitchen side of the cabinet.

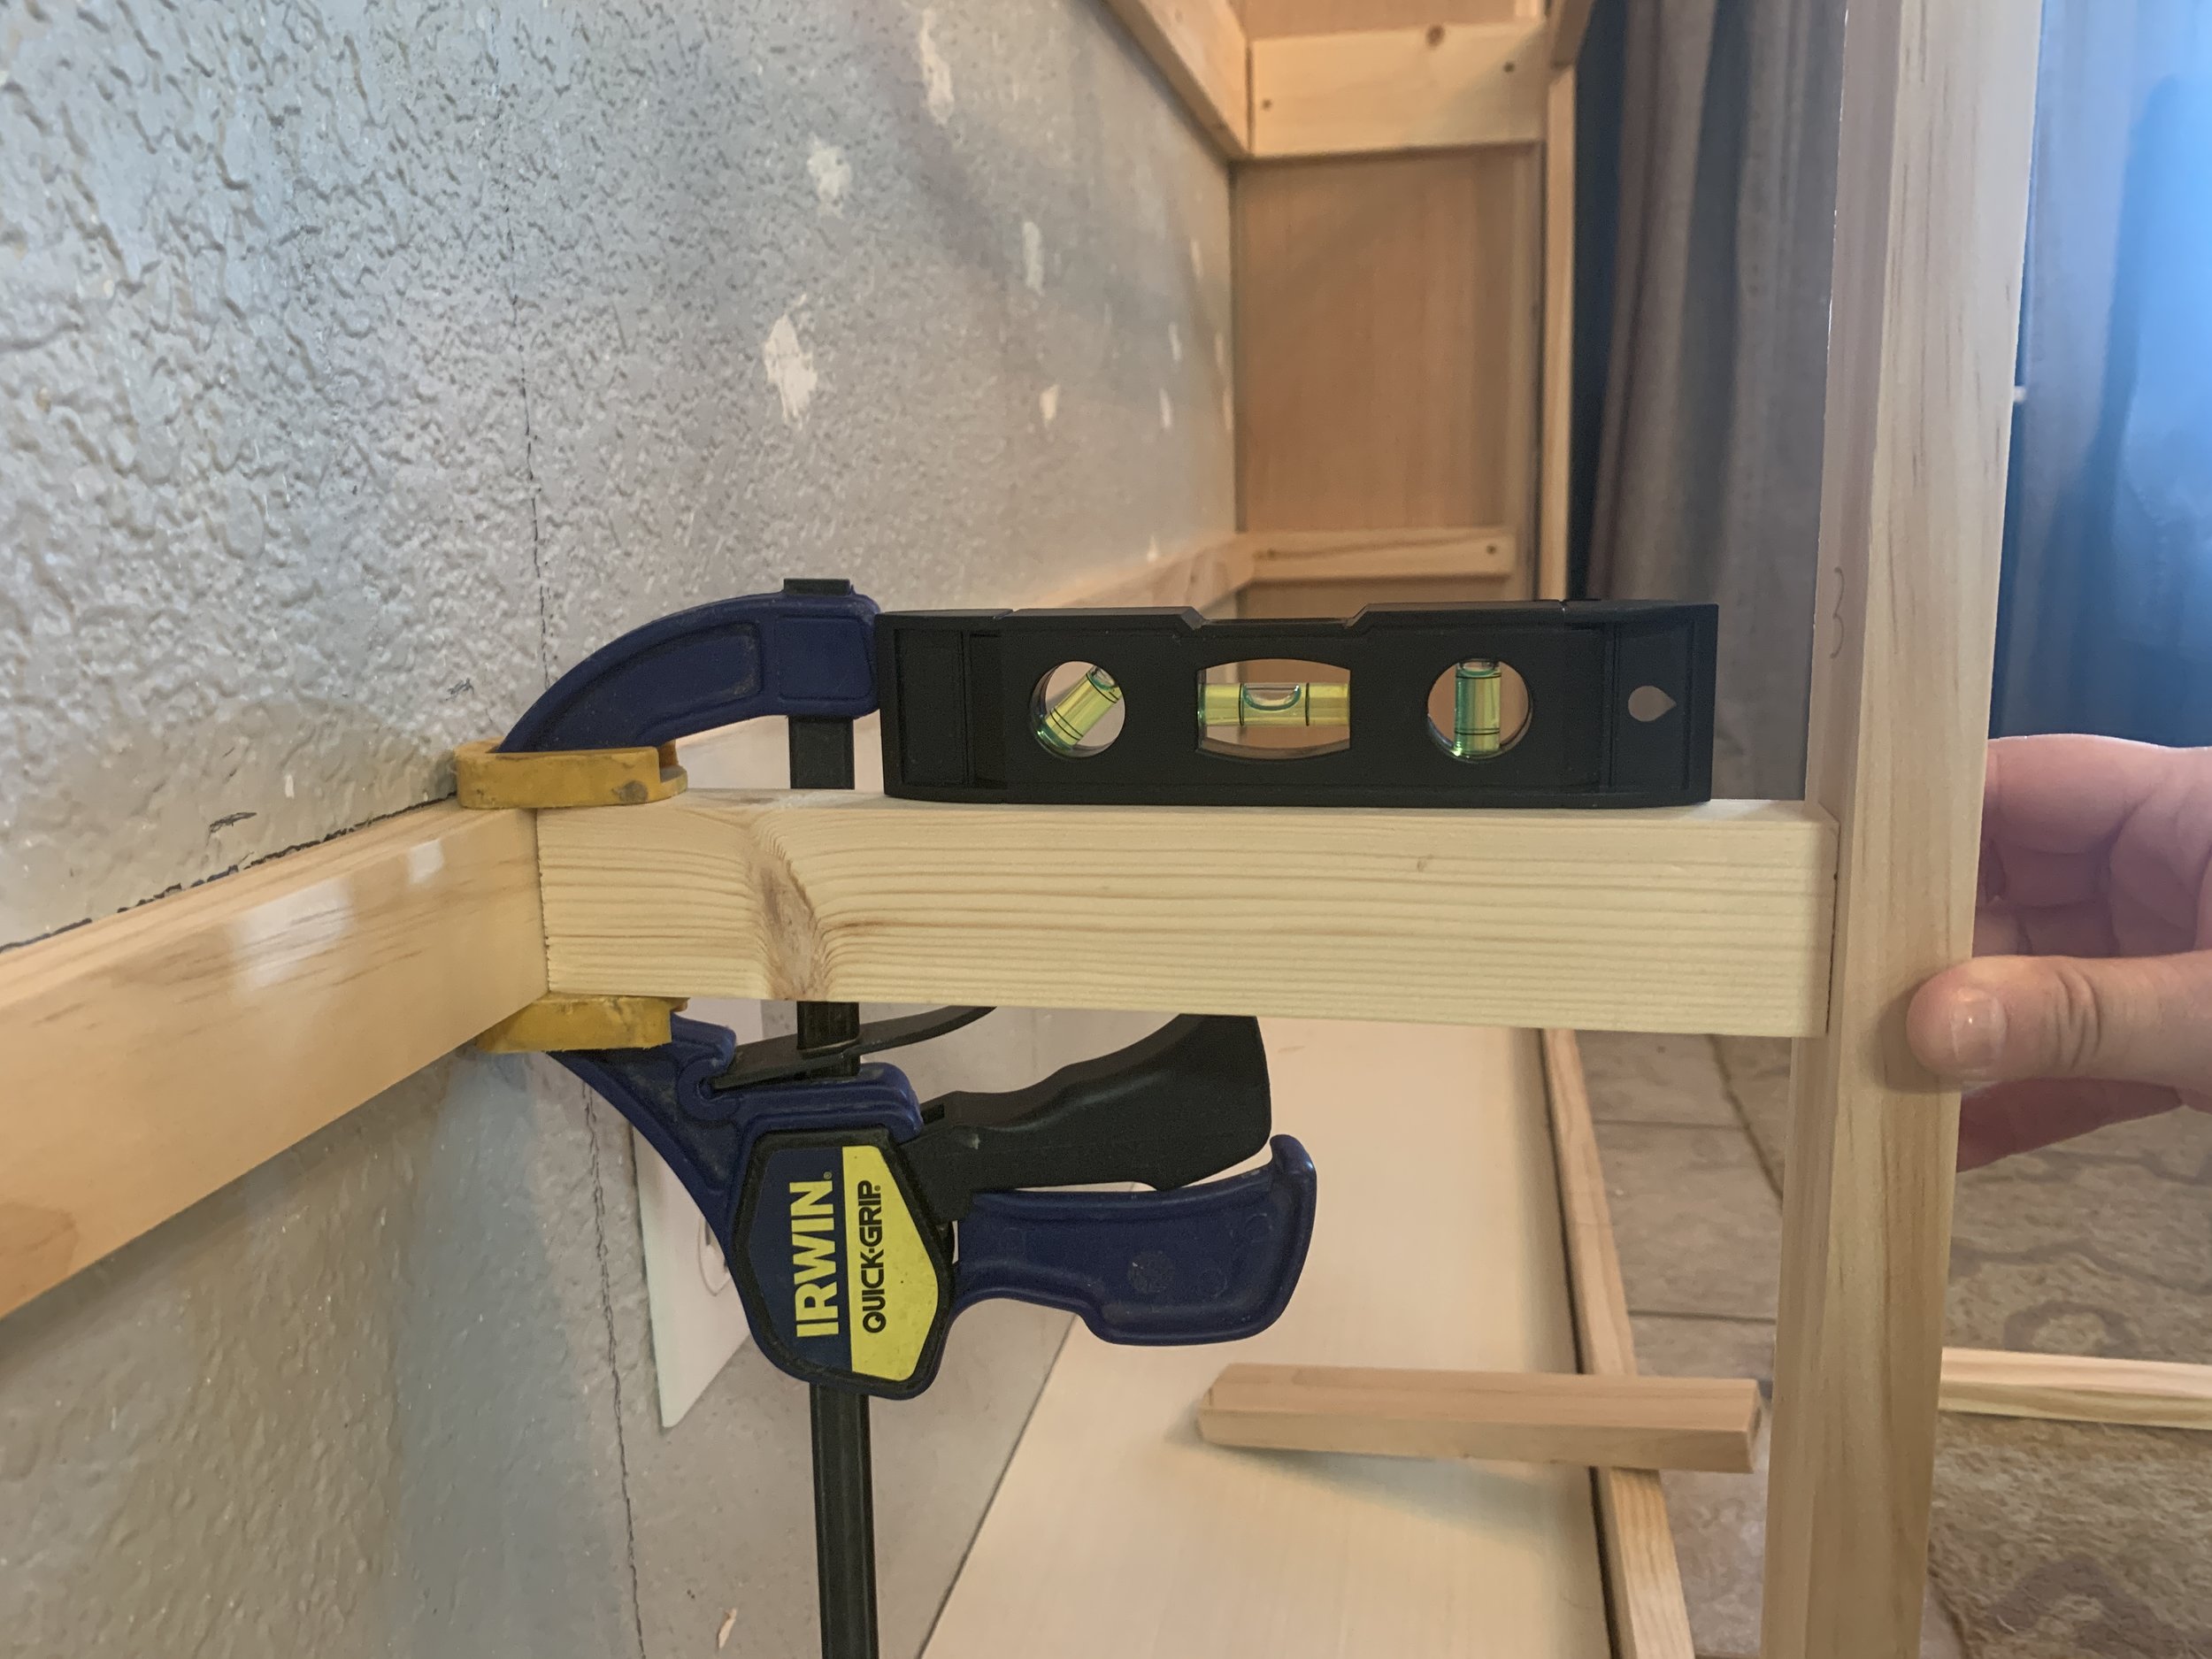
Using clamps and a level, we loosely Kregged the horizontal shelf and counter cross-supports (already Kregged into the back of the vertical cabinet front pieces) into the wall ledger boards.
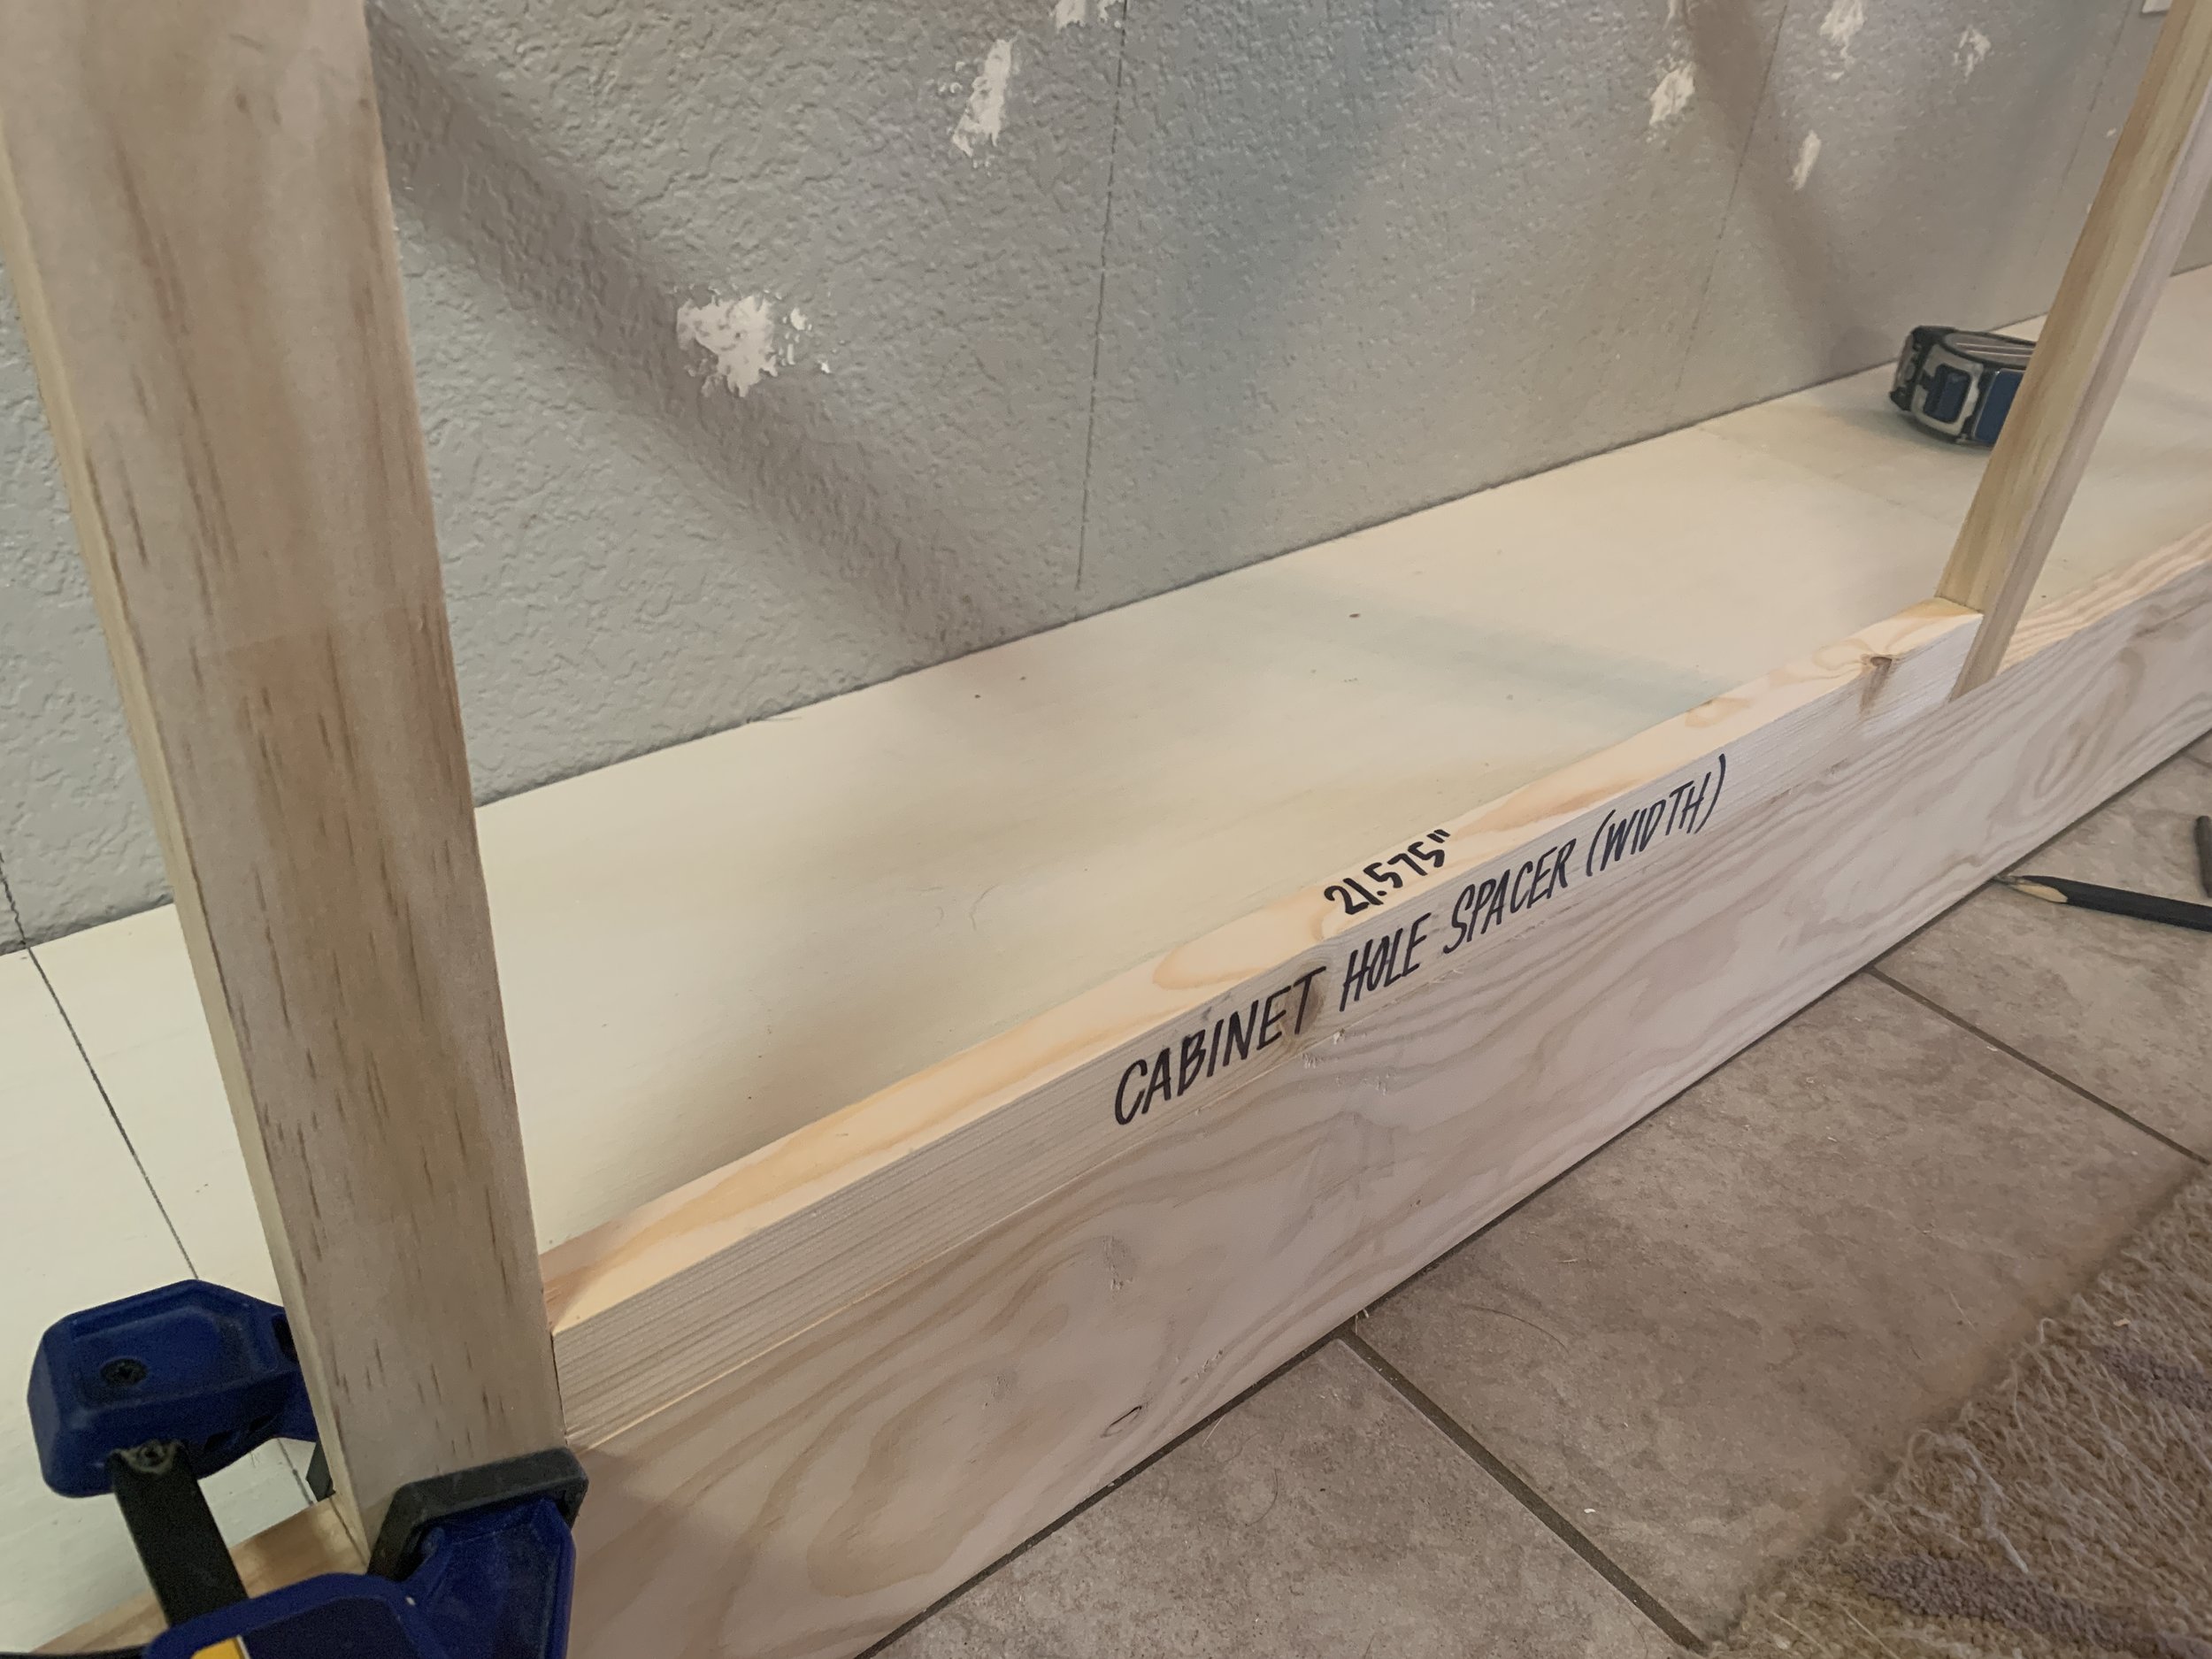
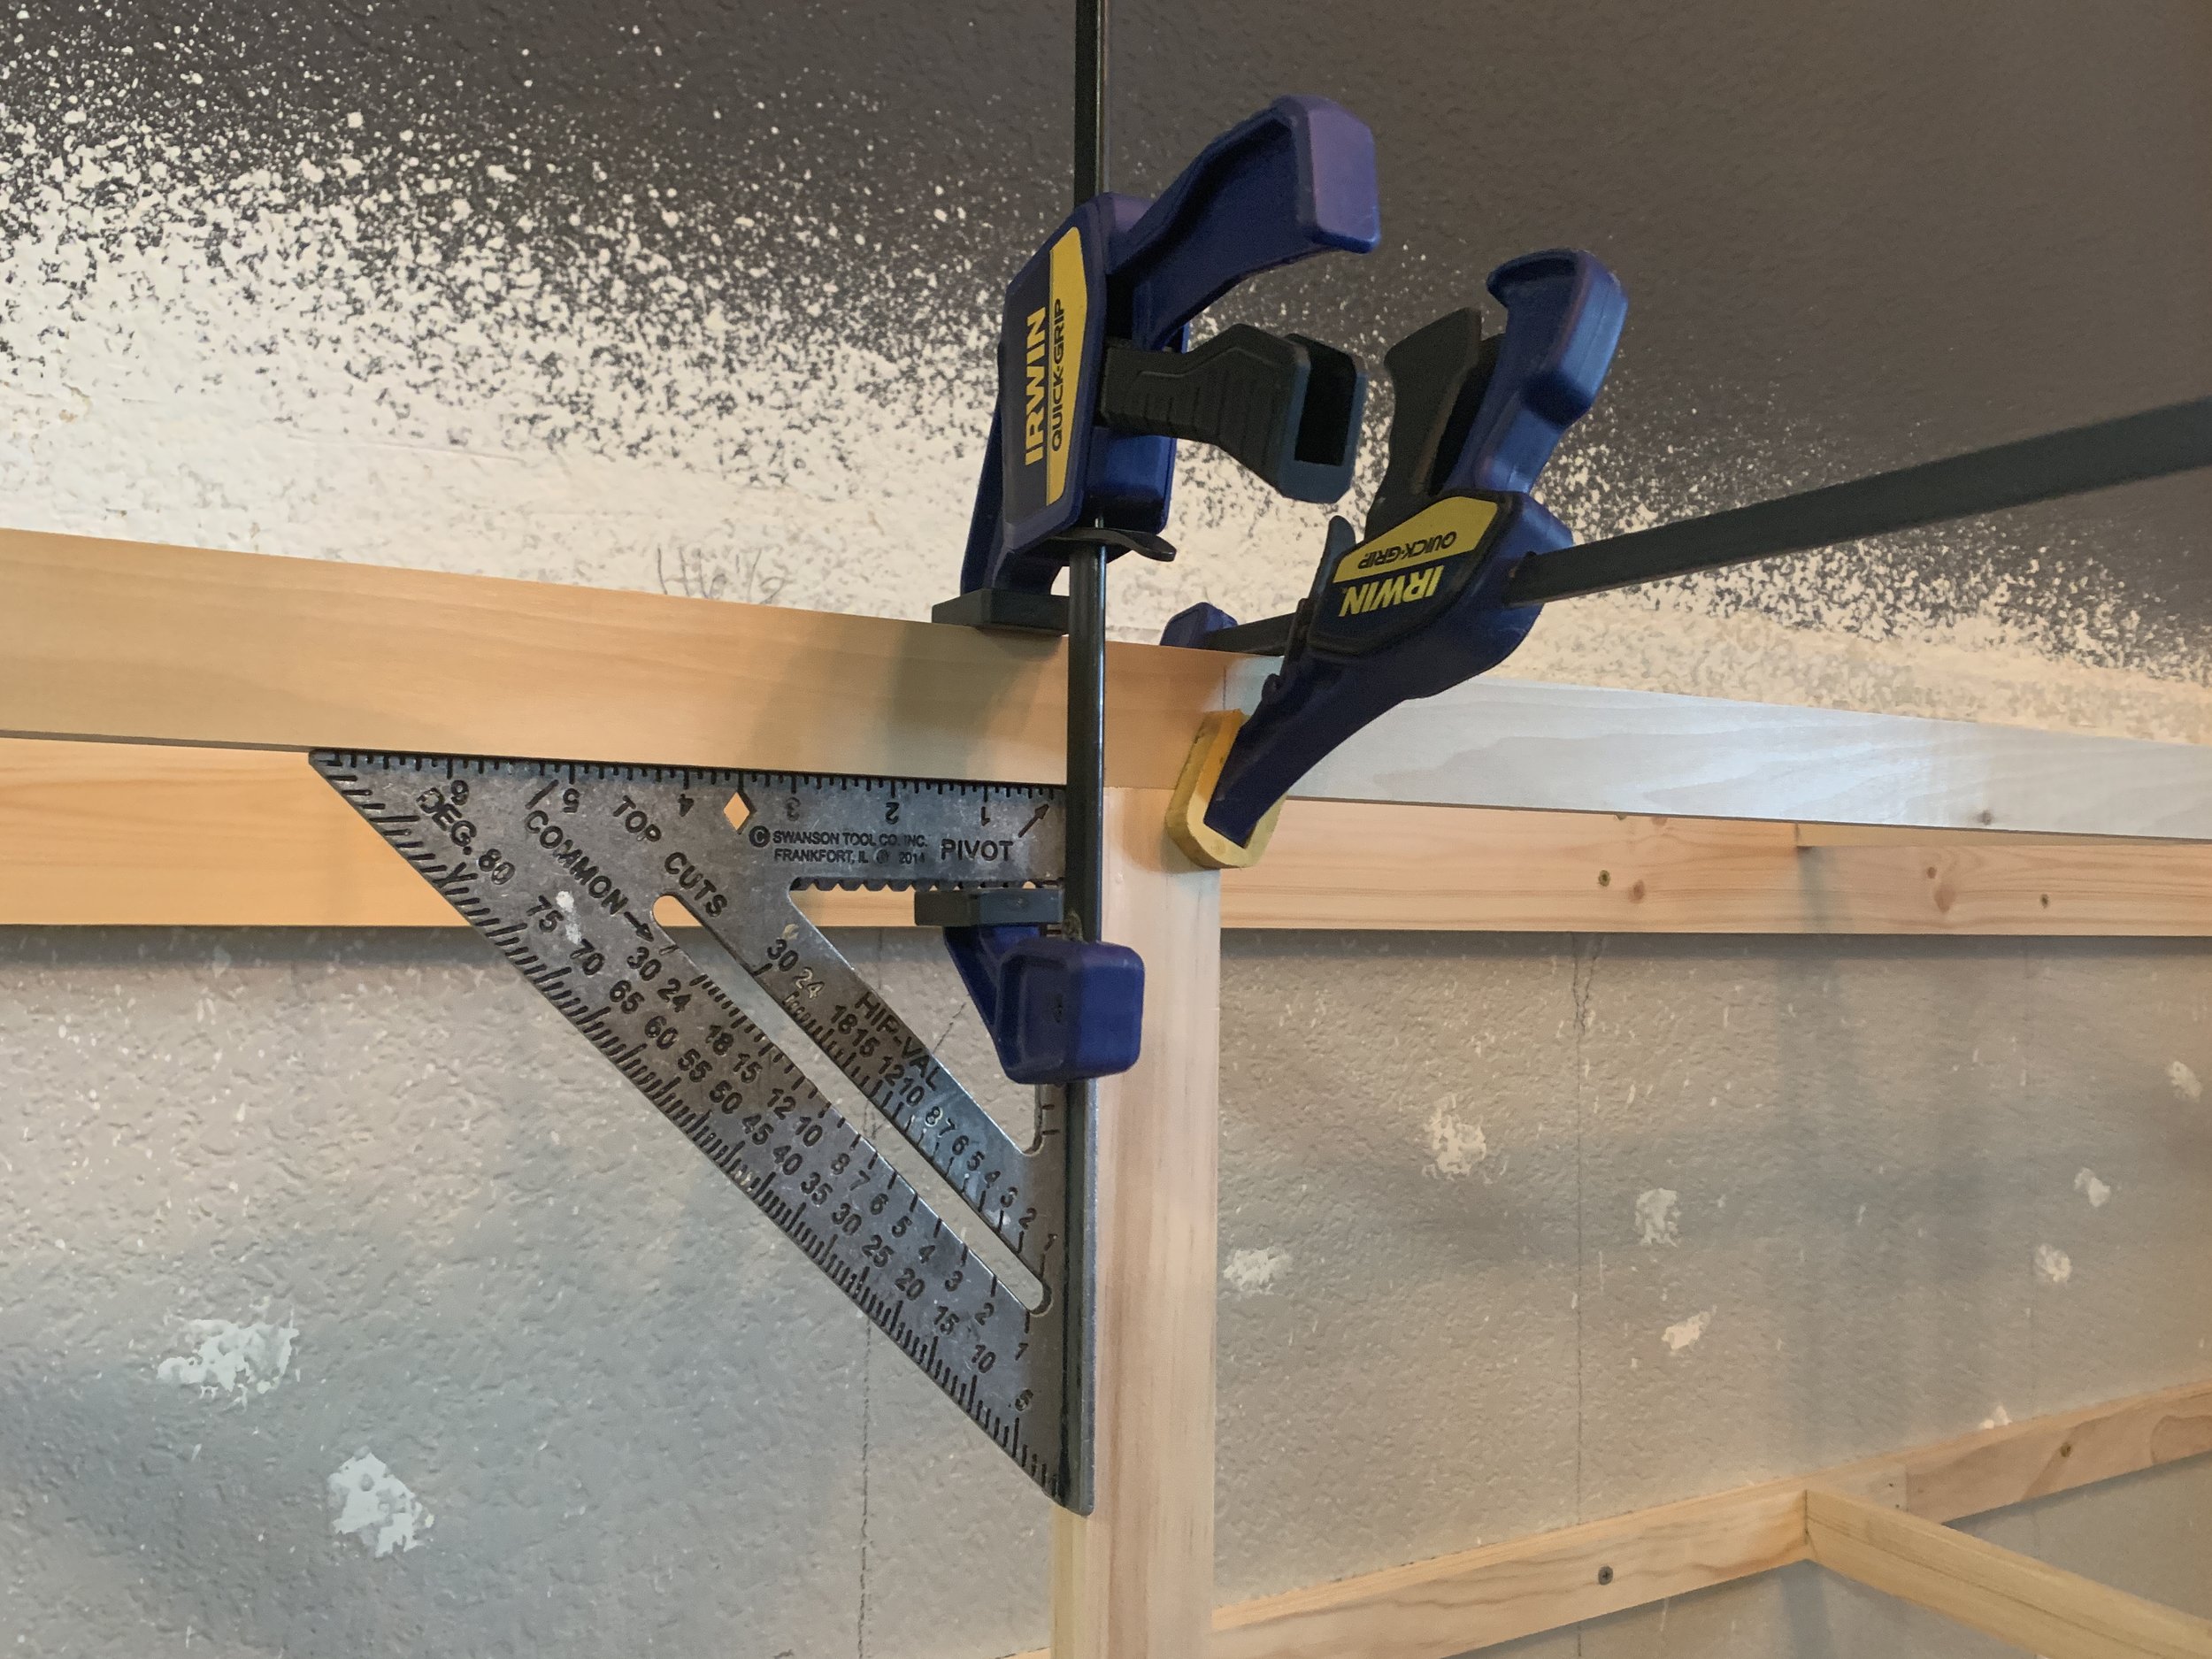
To help set all of our spacing, we did the math and cut a wooden spacer the width of each cabinet door section to make installing the vertical cabinet dividers easy and consistent. Using a speed square, clamps and our wooden spacer, we Kregged the vertical supports into the top front 1x2 cabinet face and cabinet bottom face 1x6.

With the horizontal cross-supports and cabinet front in place we cut and dropped in 3/4” plywood to make the shelf inside the cabinet. To make this easy and take advantage of our plywood, our shelf is made of five sections with each seam placed centered on top of the shelf supports. After we had our shelf pieces dropped in place, we went back in and tightened the Kreg cross-support screws on the wall/ledger board-side, and then nailed the shelf pieces into the cross supports.

That’s it for the cabinet part of the build!
Coming up next in this cabinet build series, we’ll be sharing the custom cabinet doors – how exactly we determined the right size, plus how we built and installed them. Then later we’ll cover how we did our white concrete counters, wallpapering, in-cabinet lighting, and of course share the full reveal!