DIY Faux Barn Wood Fireplace Mantel
Do you have a builder-basic, thin, or just plain boring fireplace mantel? Or maybe you’re just looking to add that hefty barn wood beam look to jazz up your fireplace. Look no further – we have the perfect budget-friendly DIY solution.
Years ago not long after we bought our house we wanted to give our home some character by giving the thin white mantel more presence and up the contrast with our white limestone and didn’t have the budget to get a large chunky solid piece of reclaimed wood. Using cedar fence pickets and a little stain we were able to get the look quickly (and on the cheap) and went from this to that:

Our project list
Cedar fence pickets – We used both 5-1/2” and 3-1/2” wide pickets, and they come in both 6- and 8-foot lengths.
It’s important to choose pieces that are long enough/longer than what you need after you cut off the little dog ear angles on the top of the pickets.
Cedar 2x2s
Saw – We used chop saw. A miter saw would be even better, but any saw where you can good a good clean straight cut will work!
Sandpaper
Level
Tape measure + Pencil
Nail gun + nails
Wood stain + lint-free rags – We used Minwax’s Jacobean stain
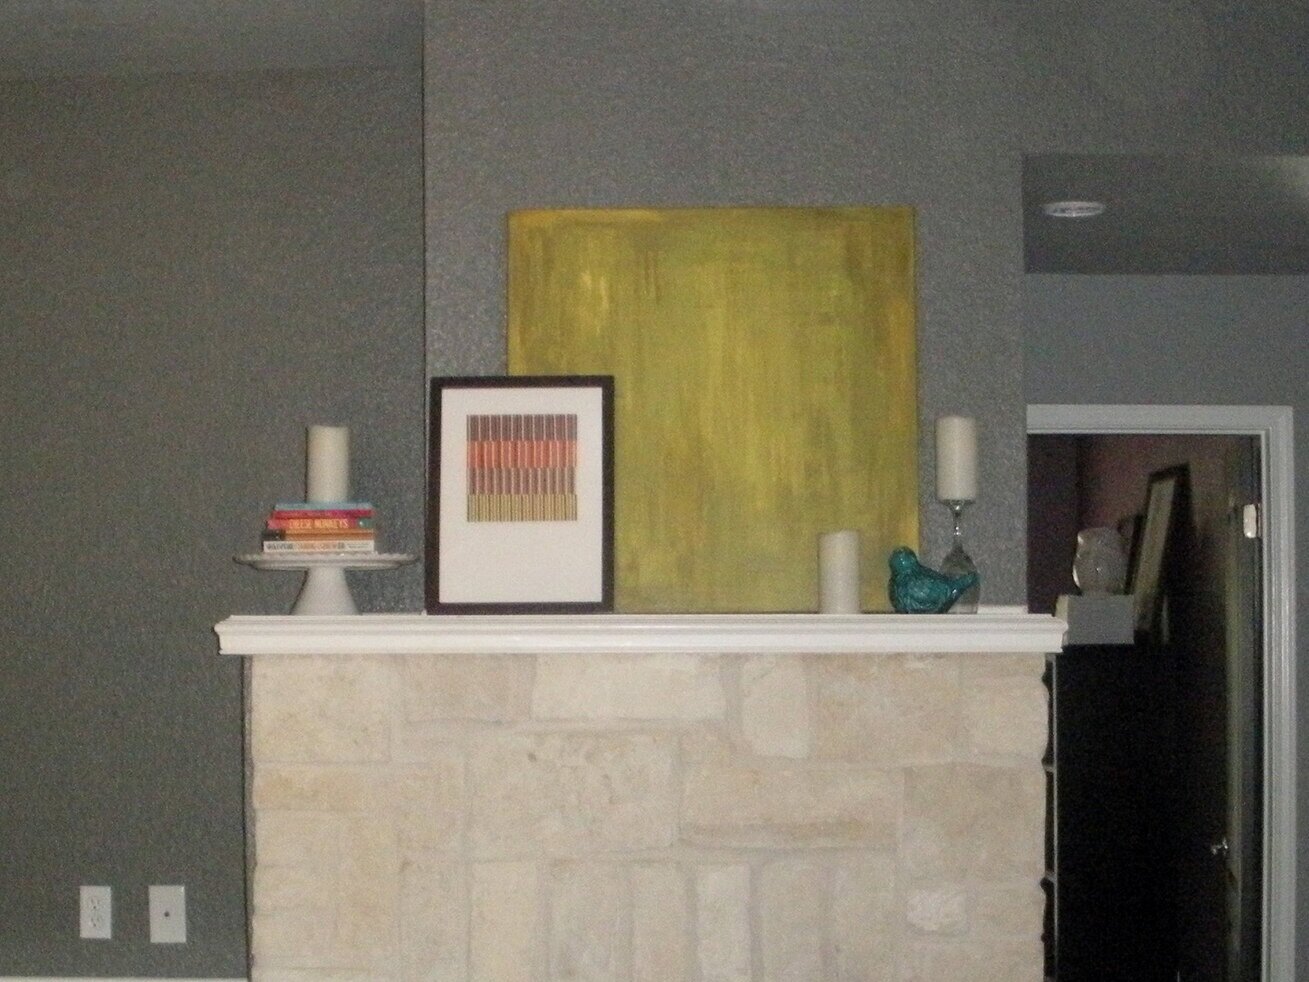
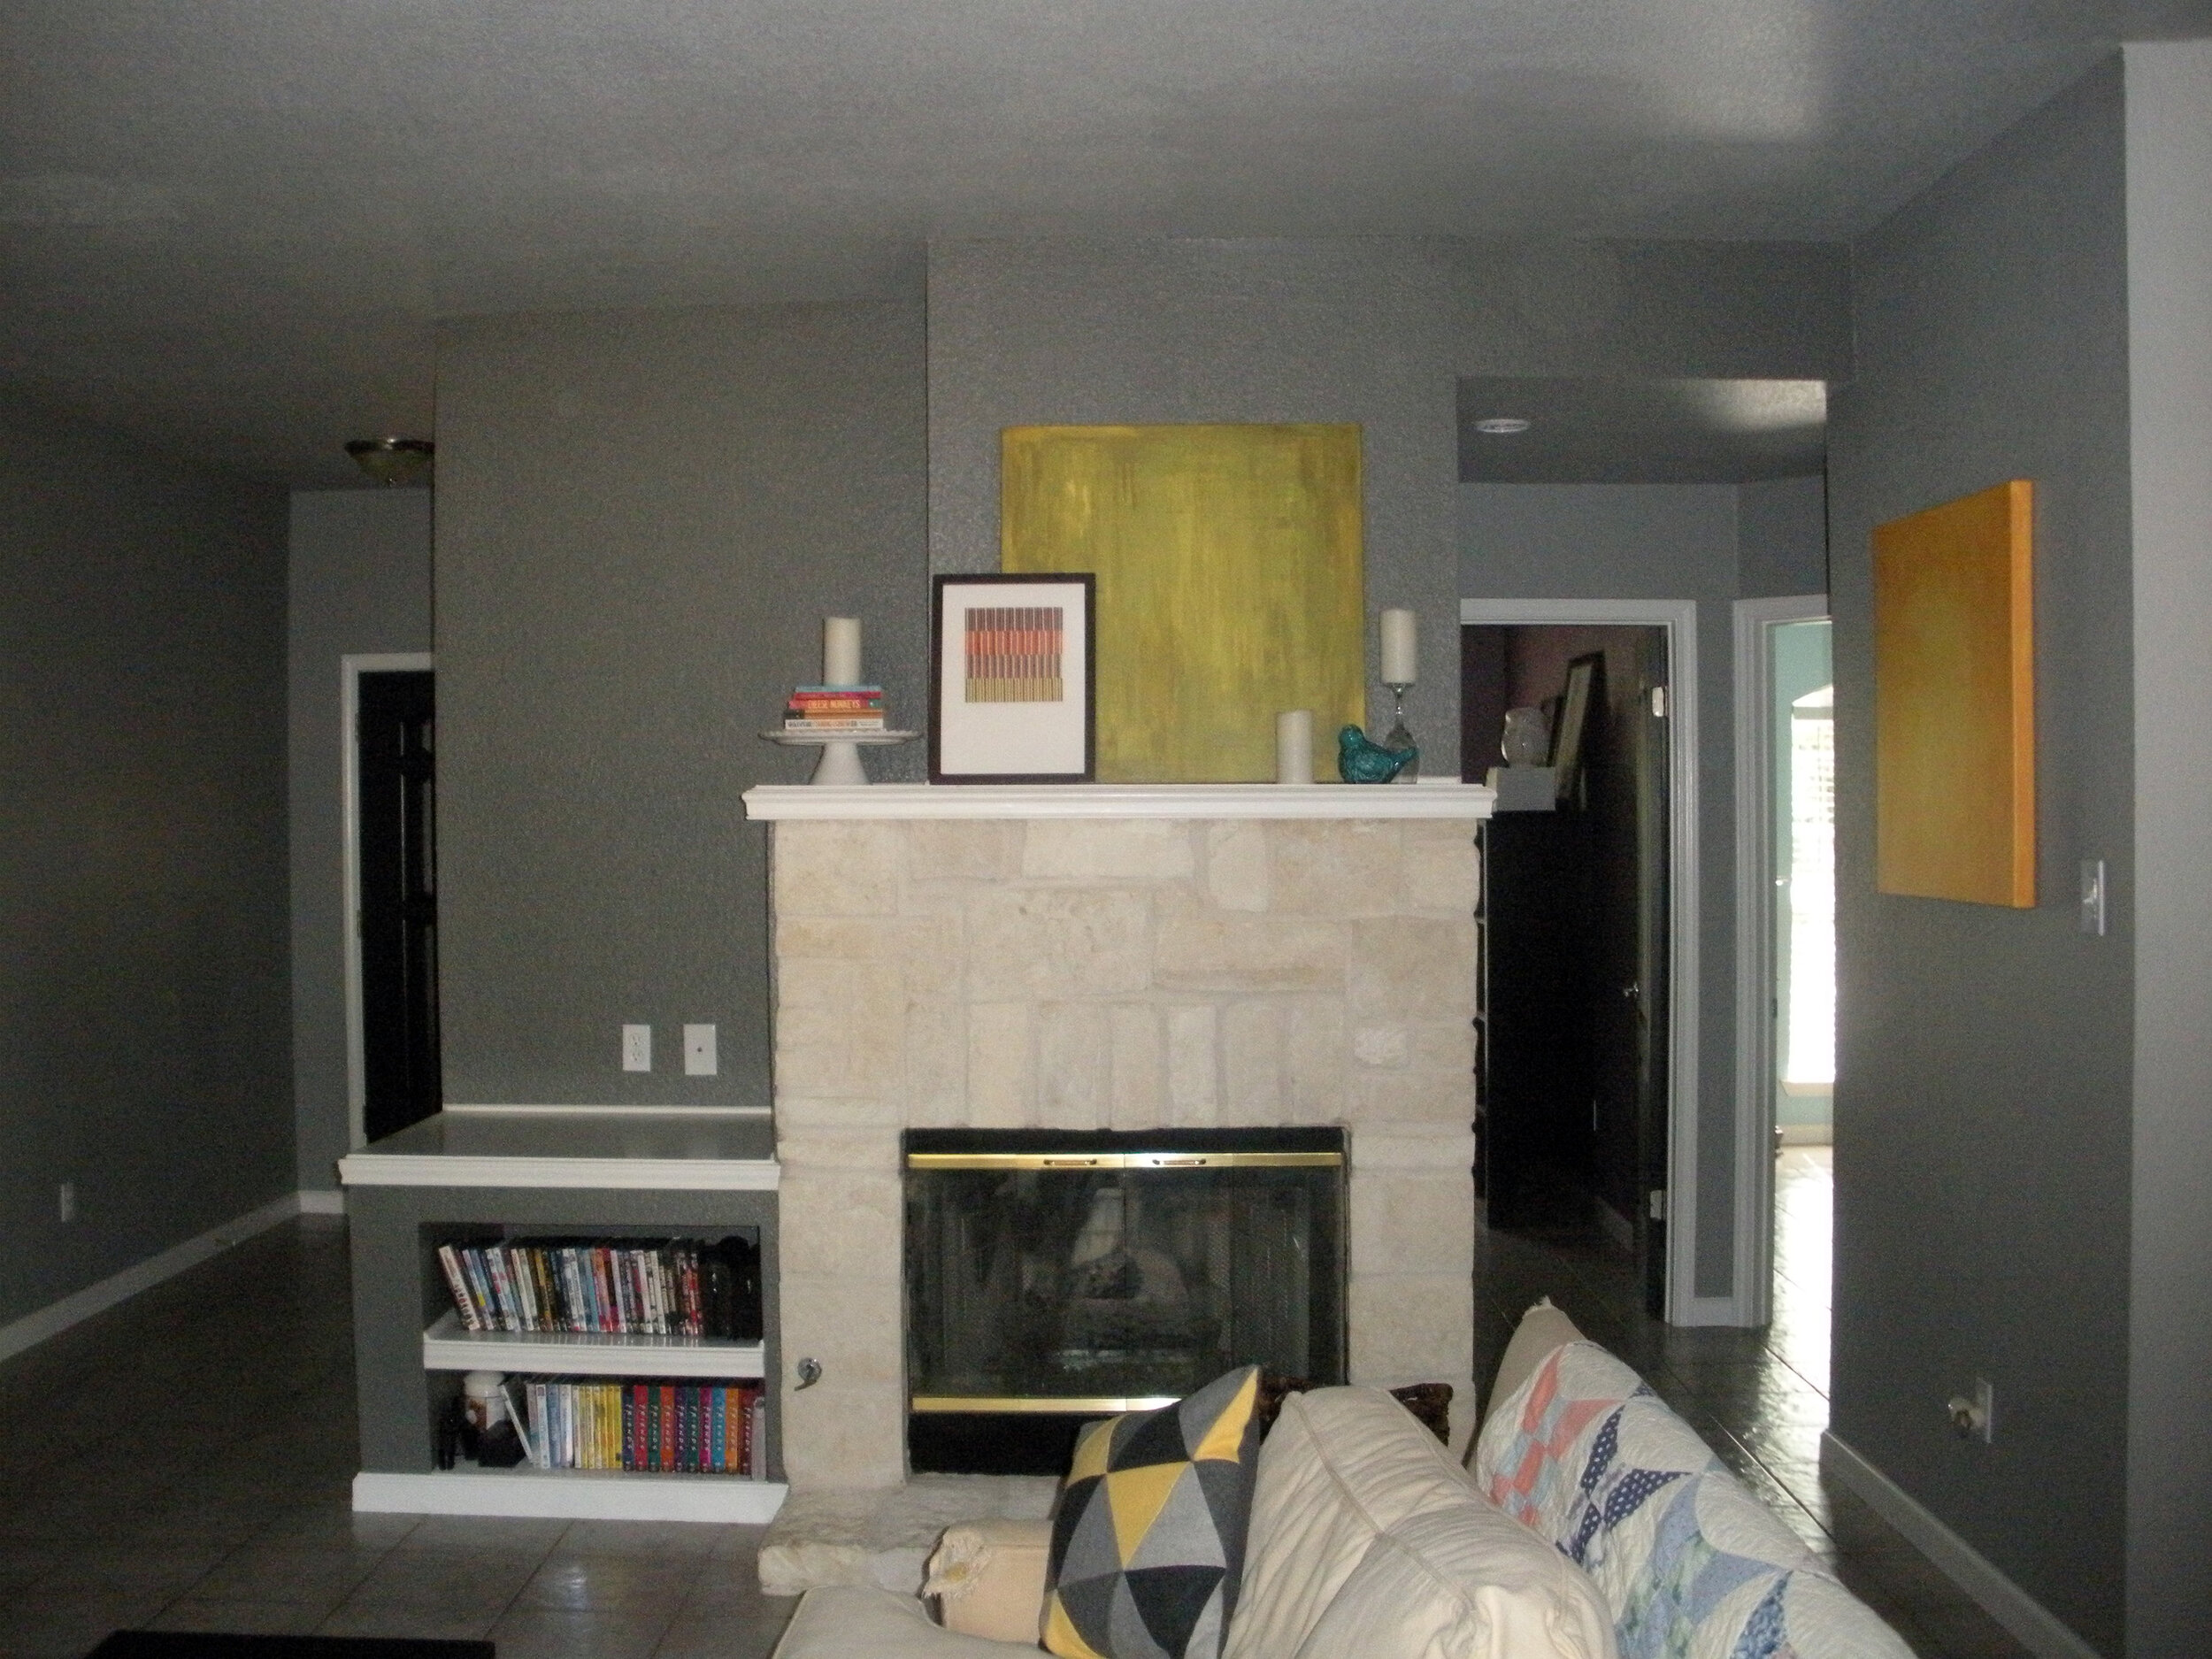
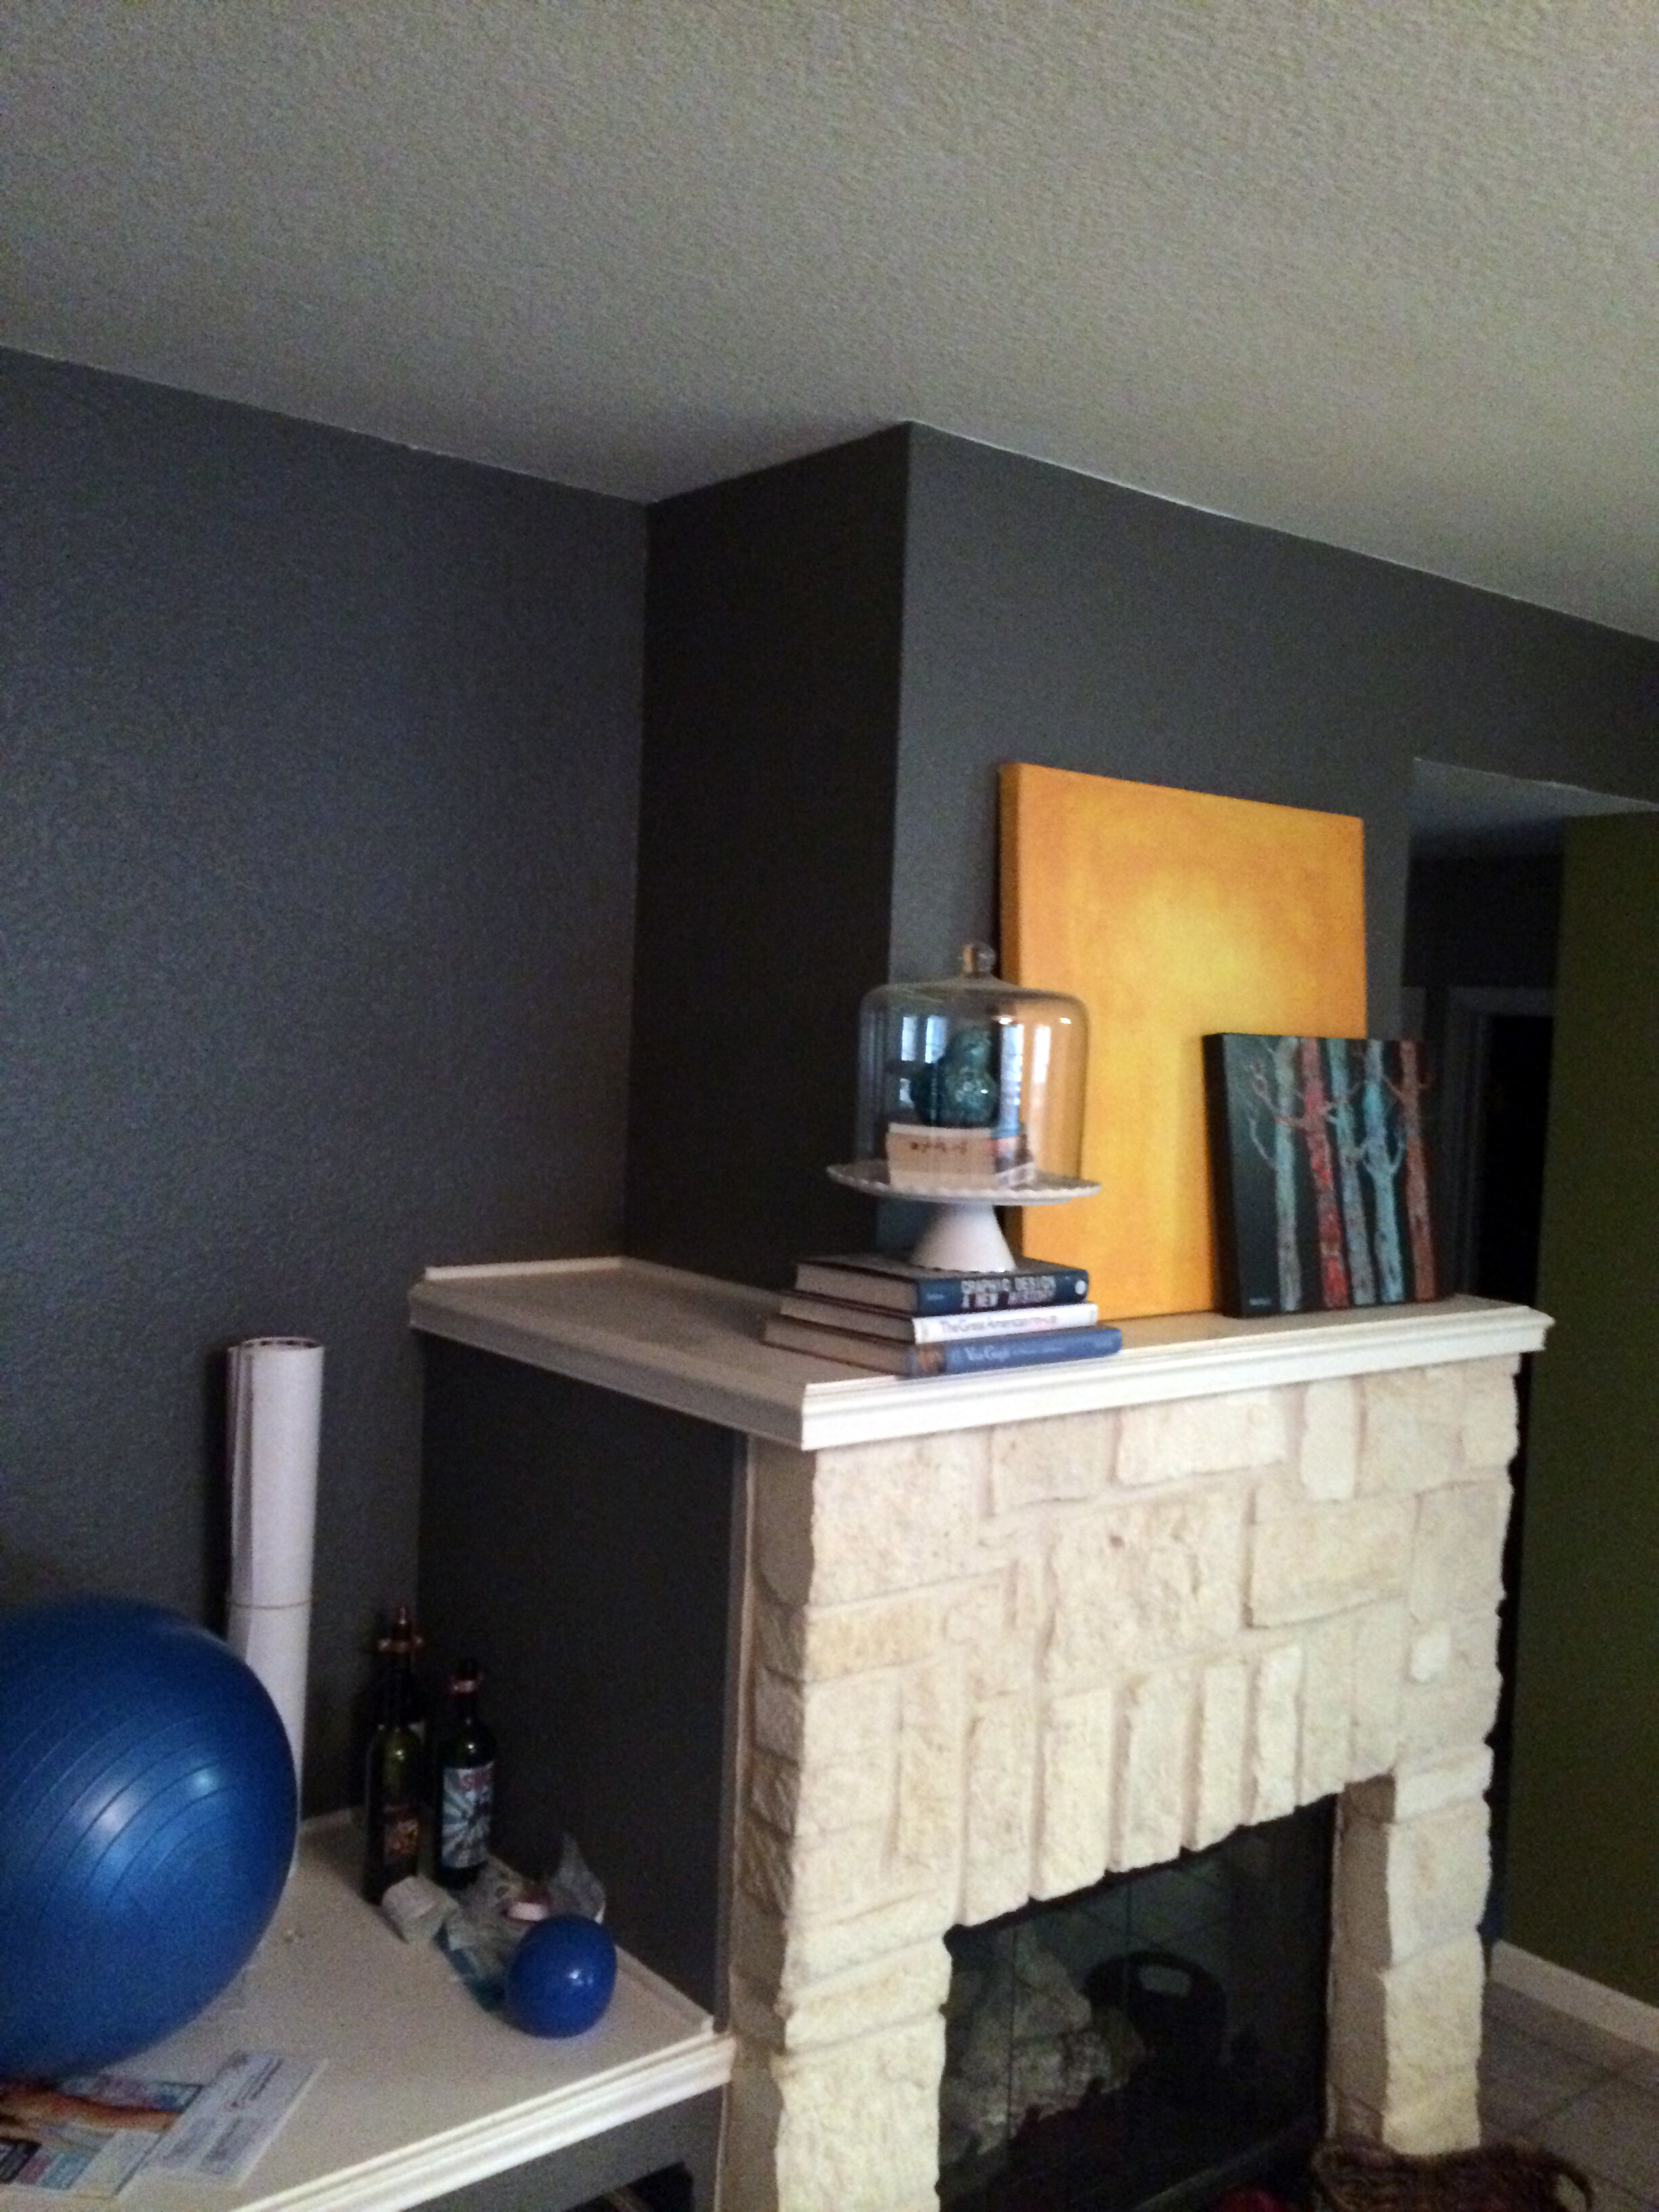
Before
Before, our mantel was thin (about 2-1/2” tall), not very deep and kind of blended in with the limestone fireplace because of the size and color. It made styling it a little bit of a challenge because it was so shallow, especially relative to how tall and wide the wall area above it was.
During
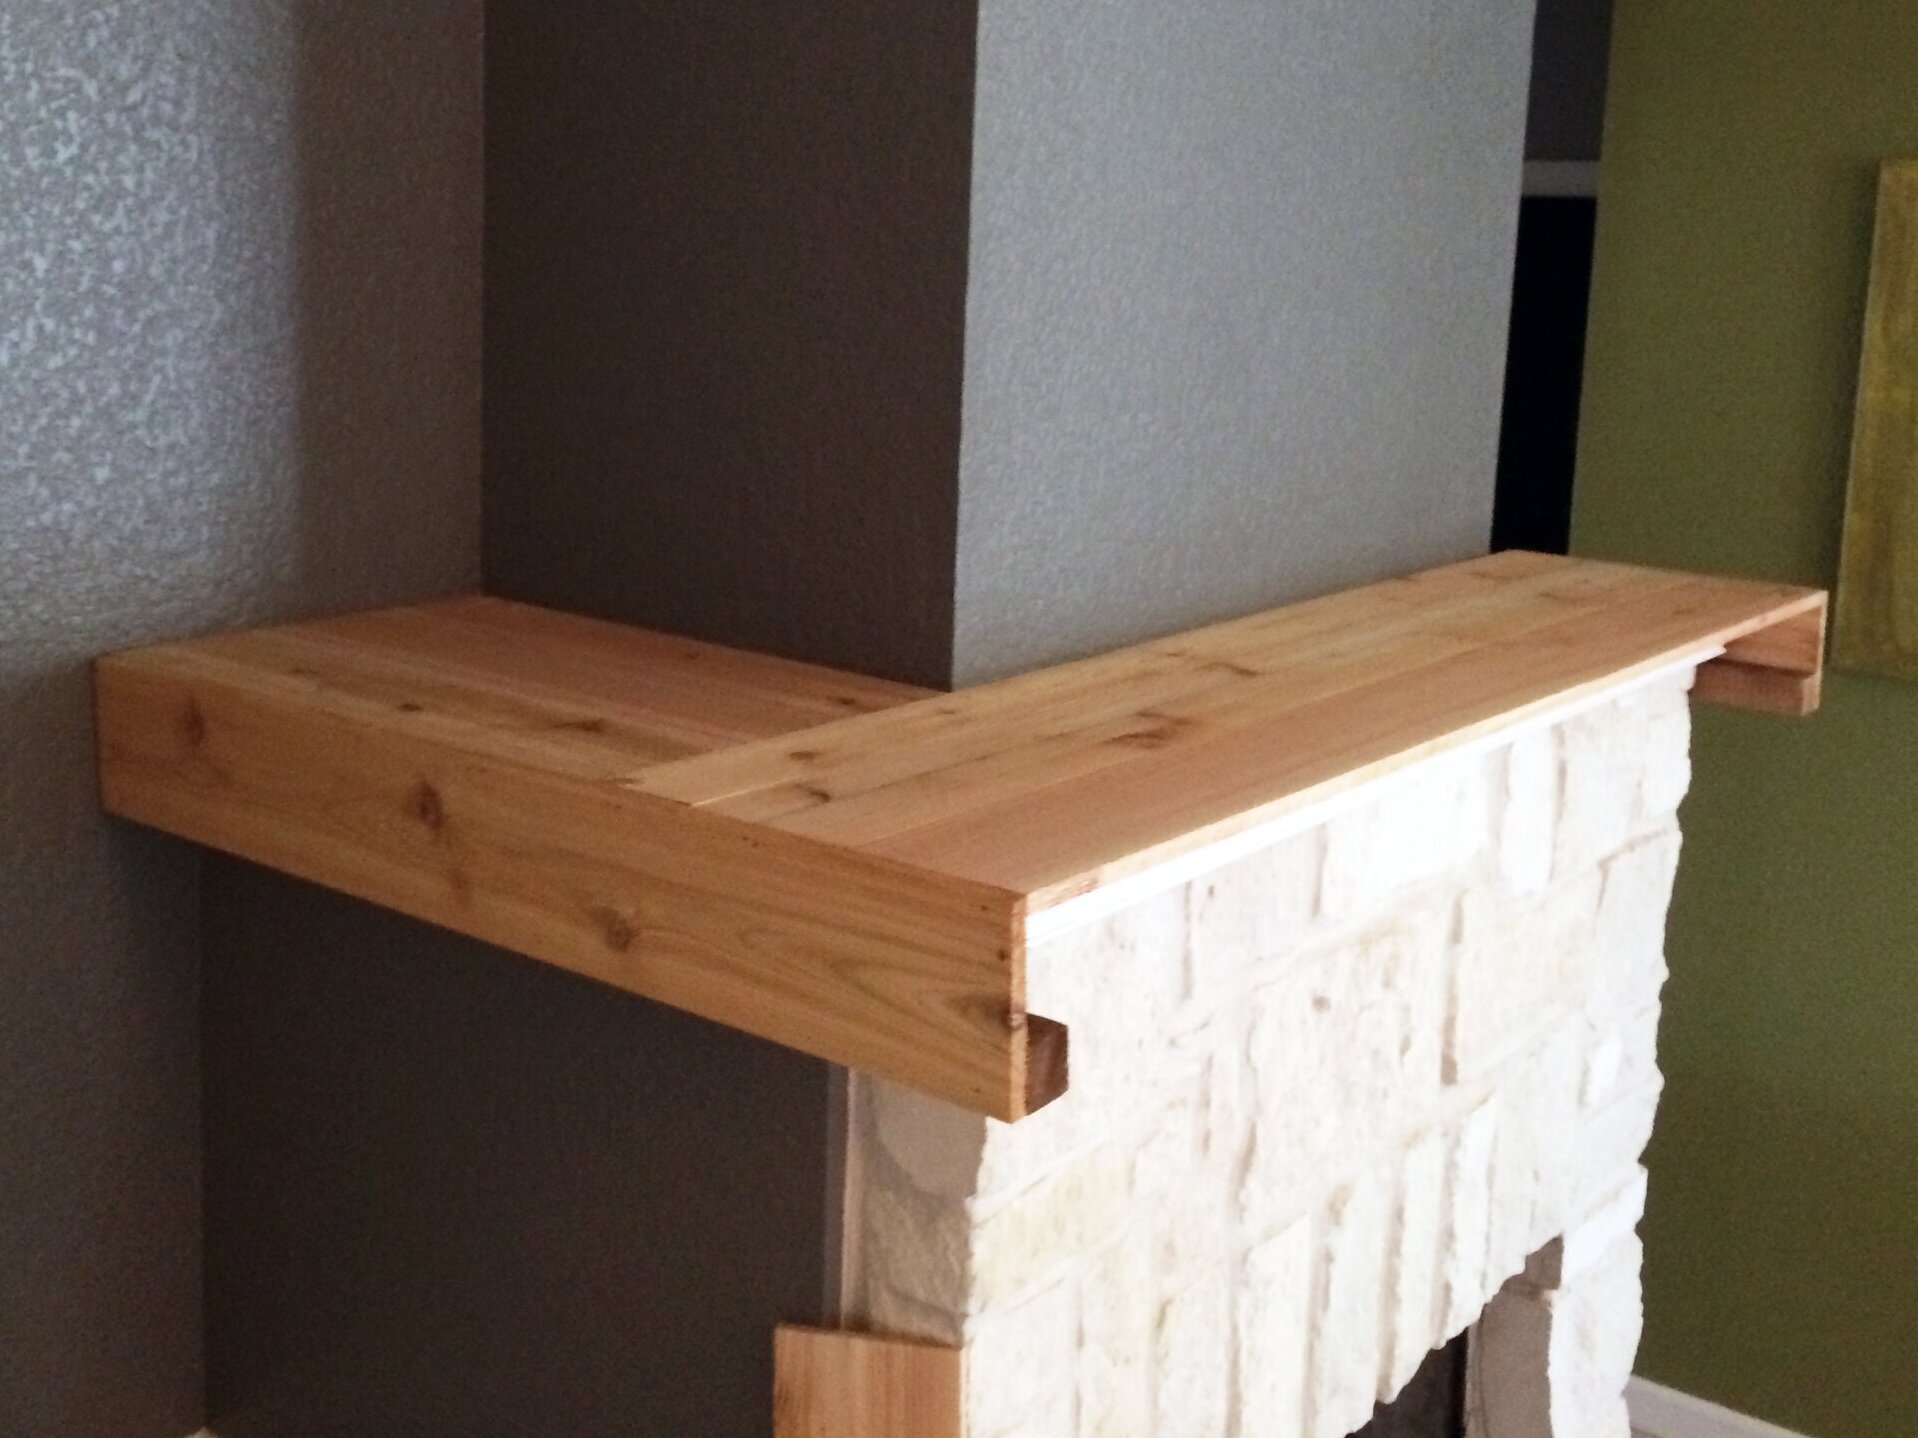
First, we took measurements of our mantel to figure out what size pickets and how many pieced together we needed to cover our mantel, starting with the front edge making sure it was covered with one full picket.
We used 5-1/2” pickets for the front face and sides of the mantel (this sets the height/thickness of your “barn wood” beam), a combination of 5-1/2” and 3-1/2” pickets to fill in the top, and 2x2s to fill in the underside of the mantel to give the fence picket wrap some weight and thickness so it feels more like one solid piece of barn wood and not just a wrap.
Because we had pieces of quarter round along the wall that would prevent us from getting the pickets to touch the wall we removed those prior to install.
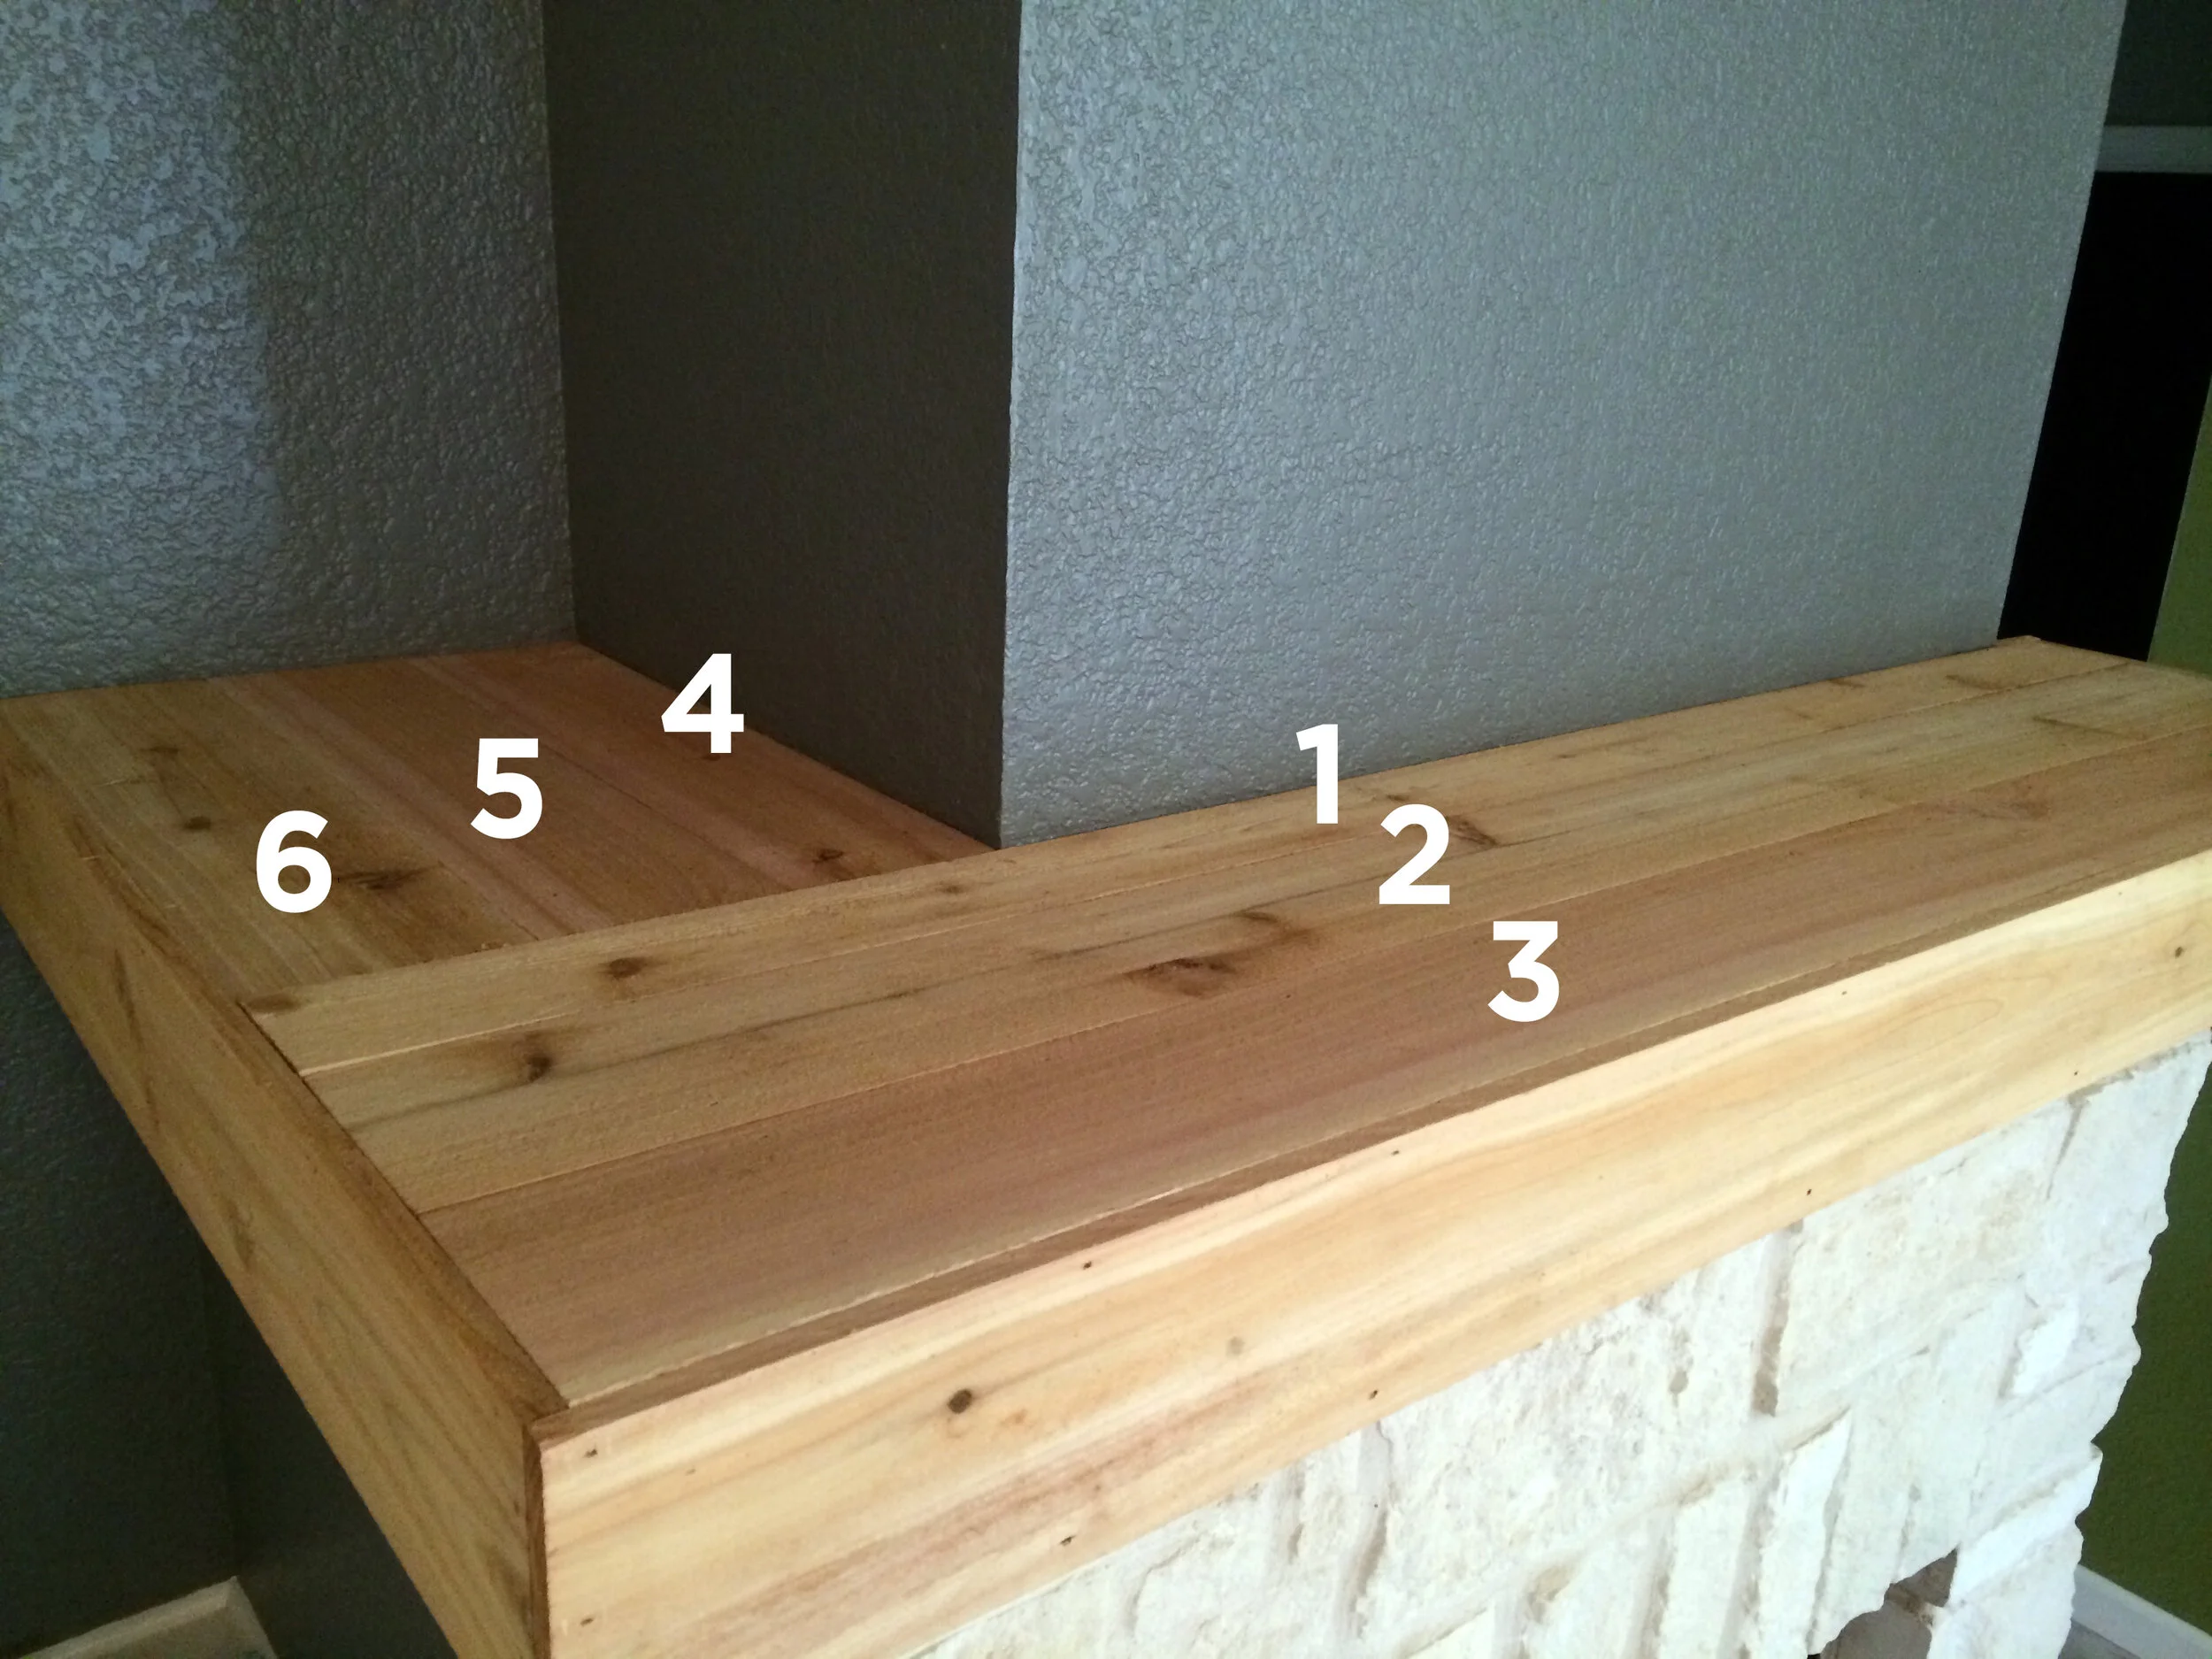
For install, we nailed the top pieces on first to set the final width of the mantel, starting with the long wall-side piece and moving outward toward the room, making sure we got each board as close and tight to the previous one as possible to minimize the appearance of seams. Then, we filled in the remaining top pieces, starting at the side wall and moving out.
With the top six boards nailed in place, we carefully nailed a 2x2 (cut to length) to each face picket (also cut to size) so that it was flush with the skinny edge of the picket on the ground, before we attached the combined 5-1/2” picket and 2x2 to the mantel as one unit.

With the front and side face pieces prepared with the 2x2s (on the bottom, so it kind of makes a little ‘L’), we nailed the side face pieces on through the top edge of the face pieces and the thin side of the already-installed top pickets so that each face piece was level and flush with the already-installed top pieces.
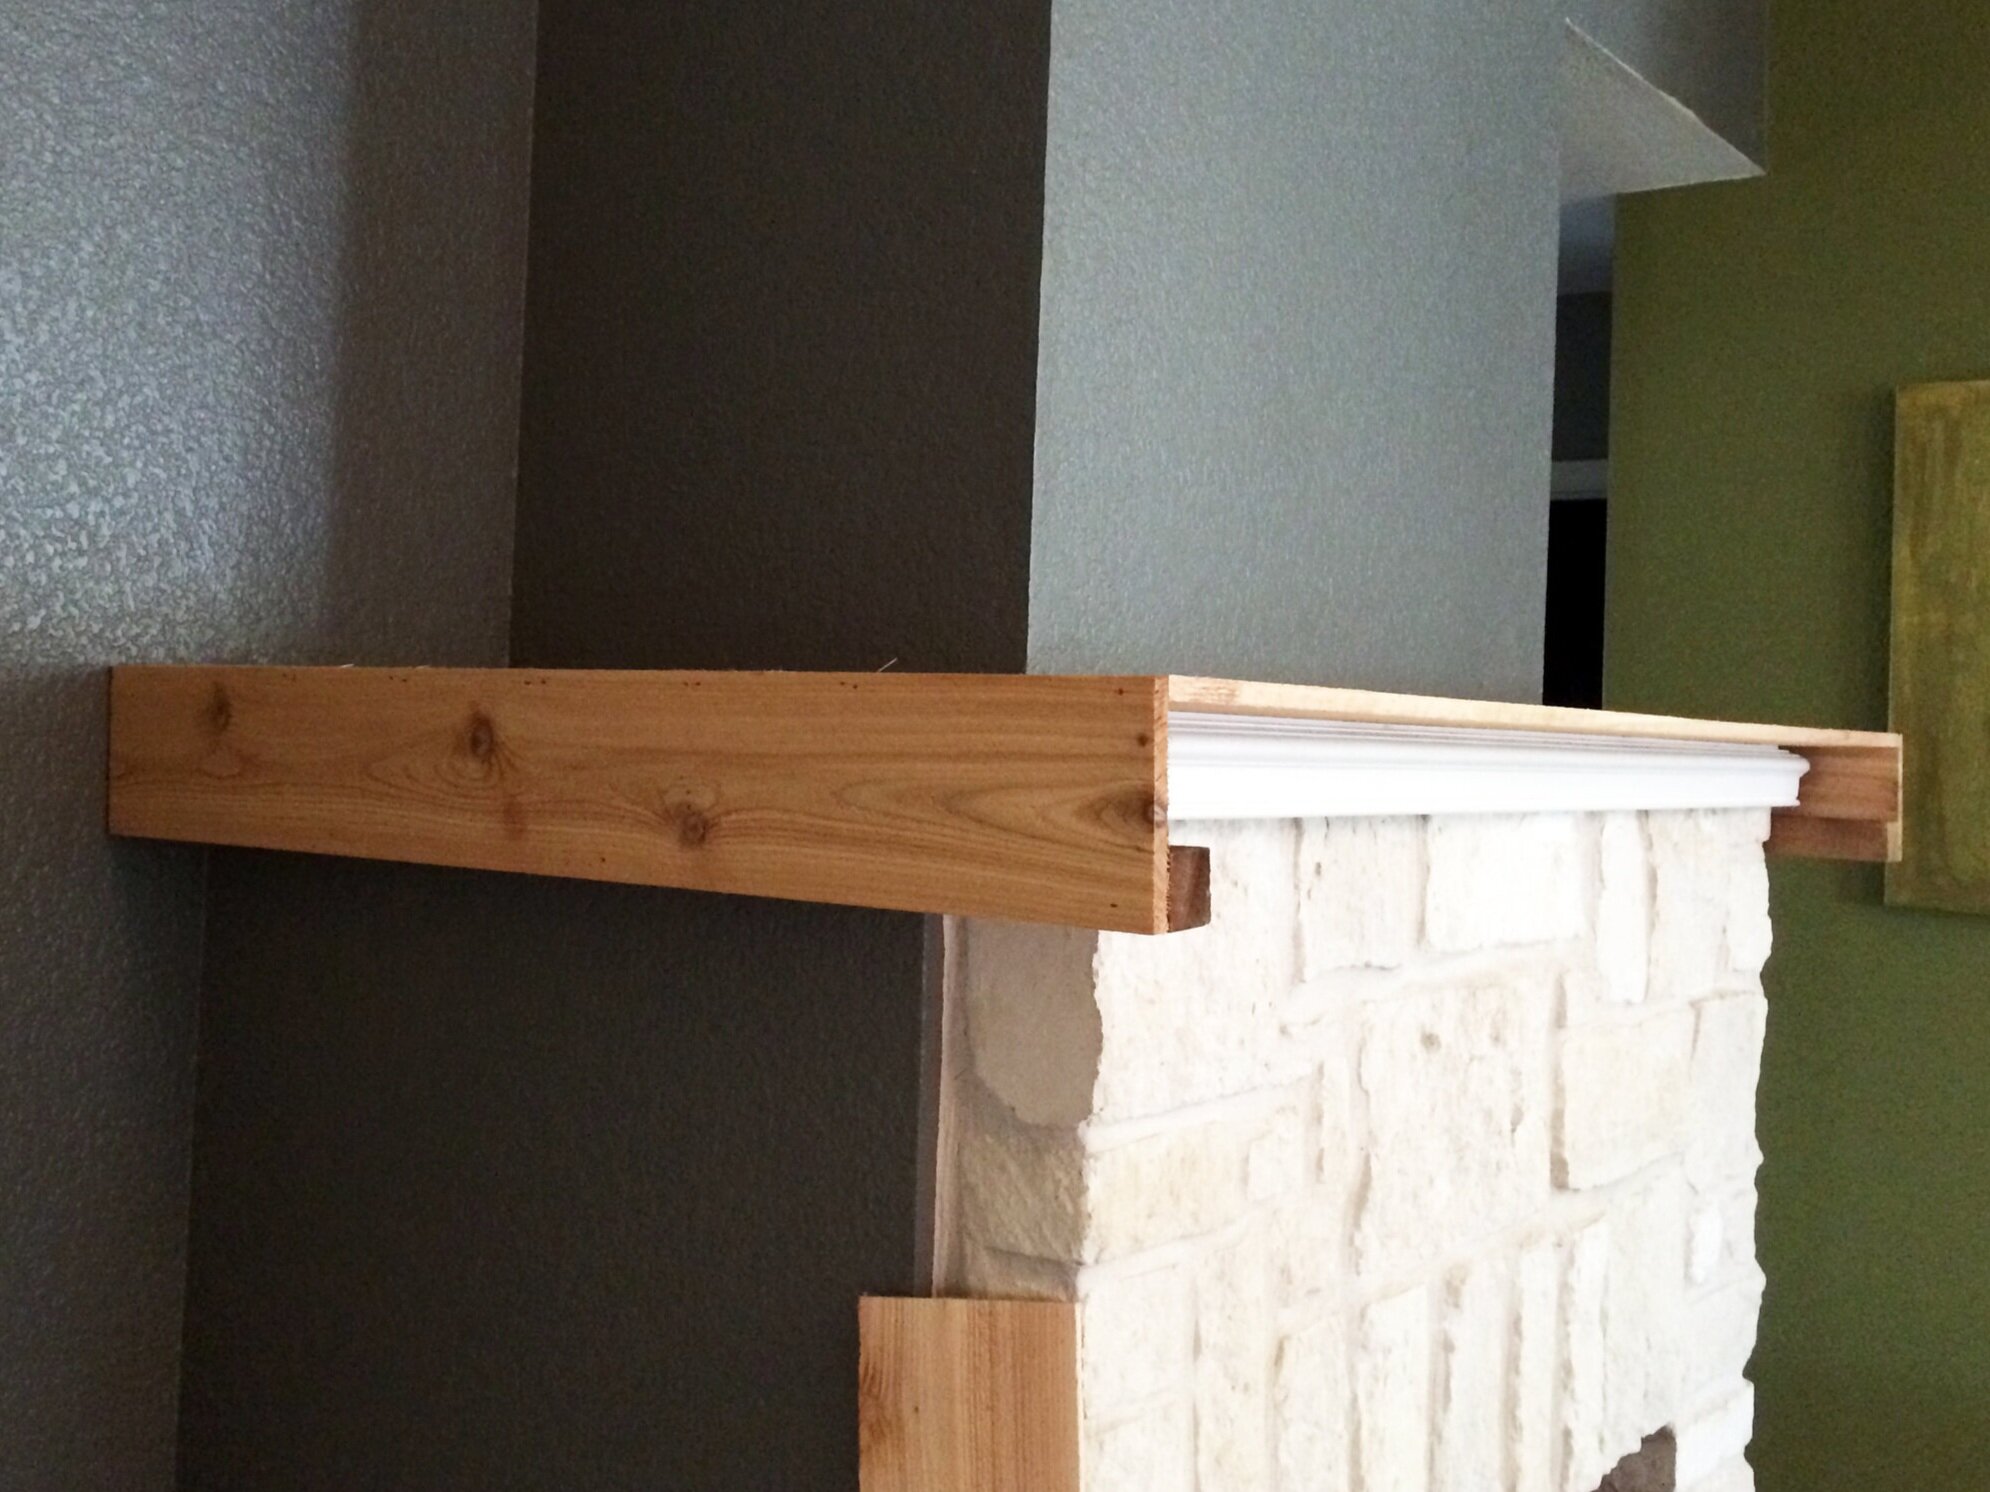
We repeated the same install process with the front face board, only we stacked two 2x2s deep since we extended the mantel depth more than we did the sides so there was a bigger gap to fill. The side face pieces flex a little bit when they’re only nailed in along the top which allowed us to align the corners with the front face piece.

With everything nailed in place, we sanded the pieces down to take off any really rough splintery pieces and help smooth any irregular transitions between boards. Then we vacuumed all the dust and carefully stained the wood mantel a rich chocolate brown by hand with a lint-free rag.
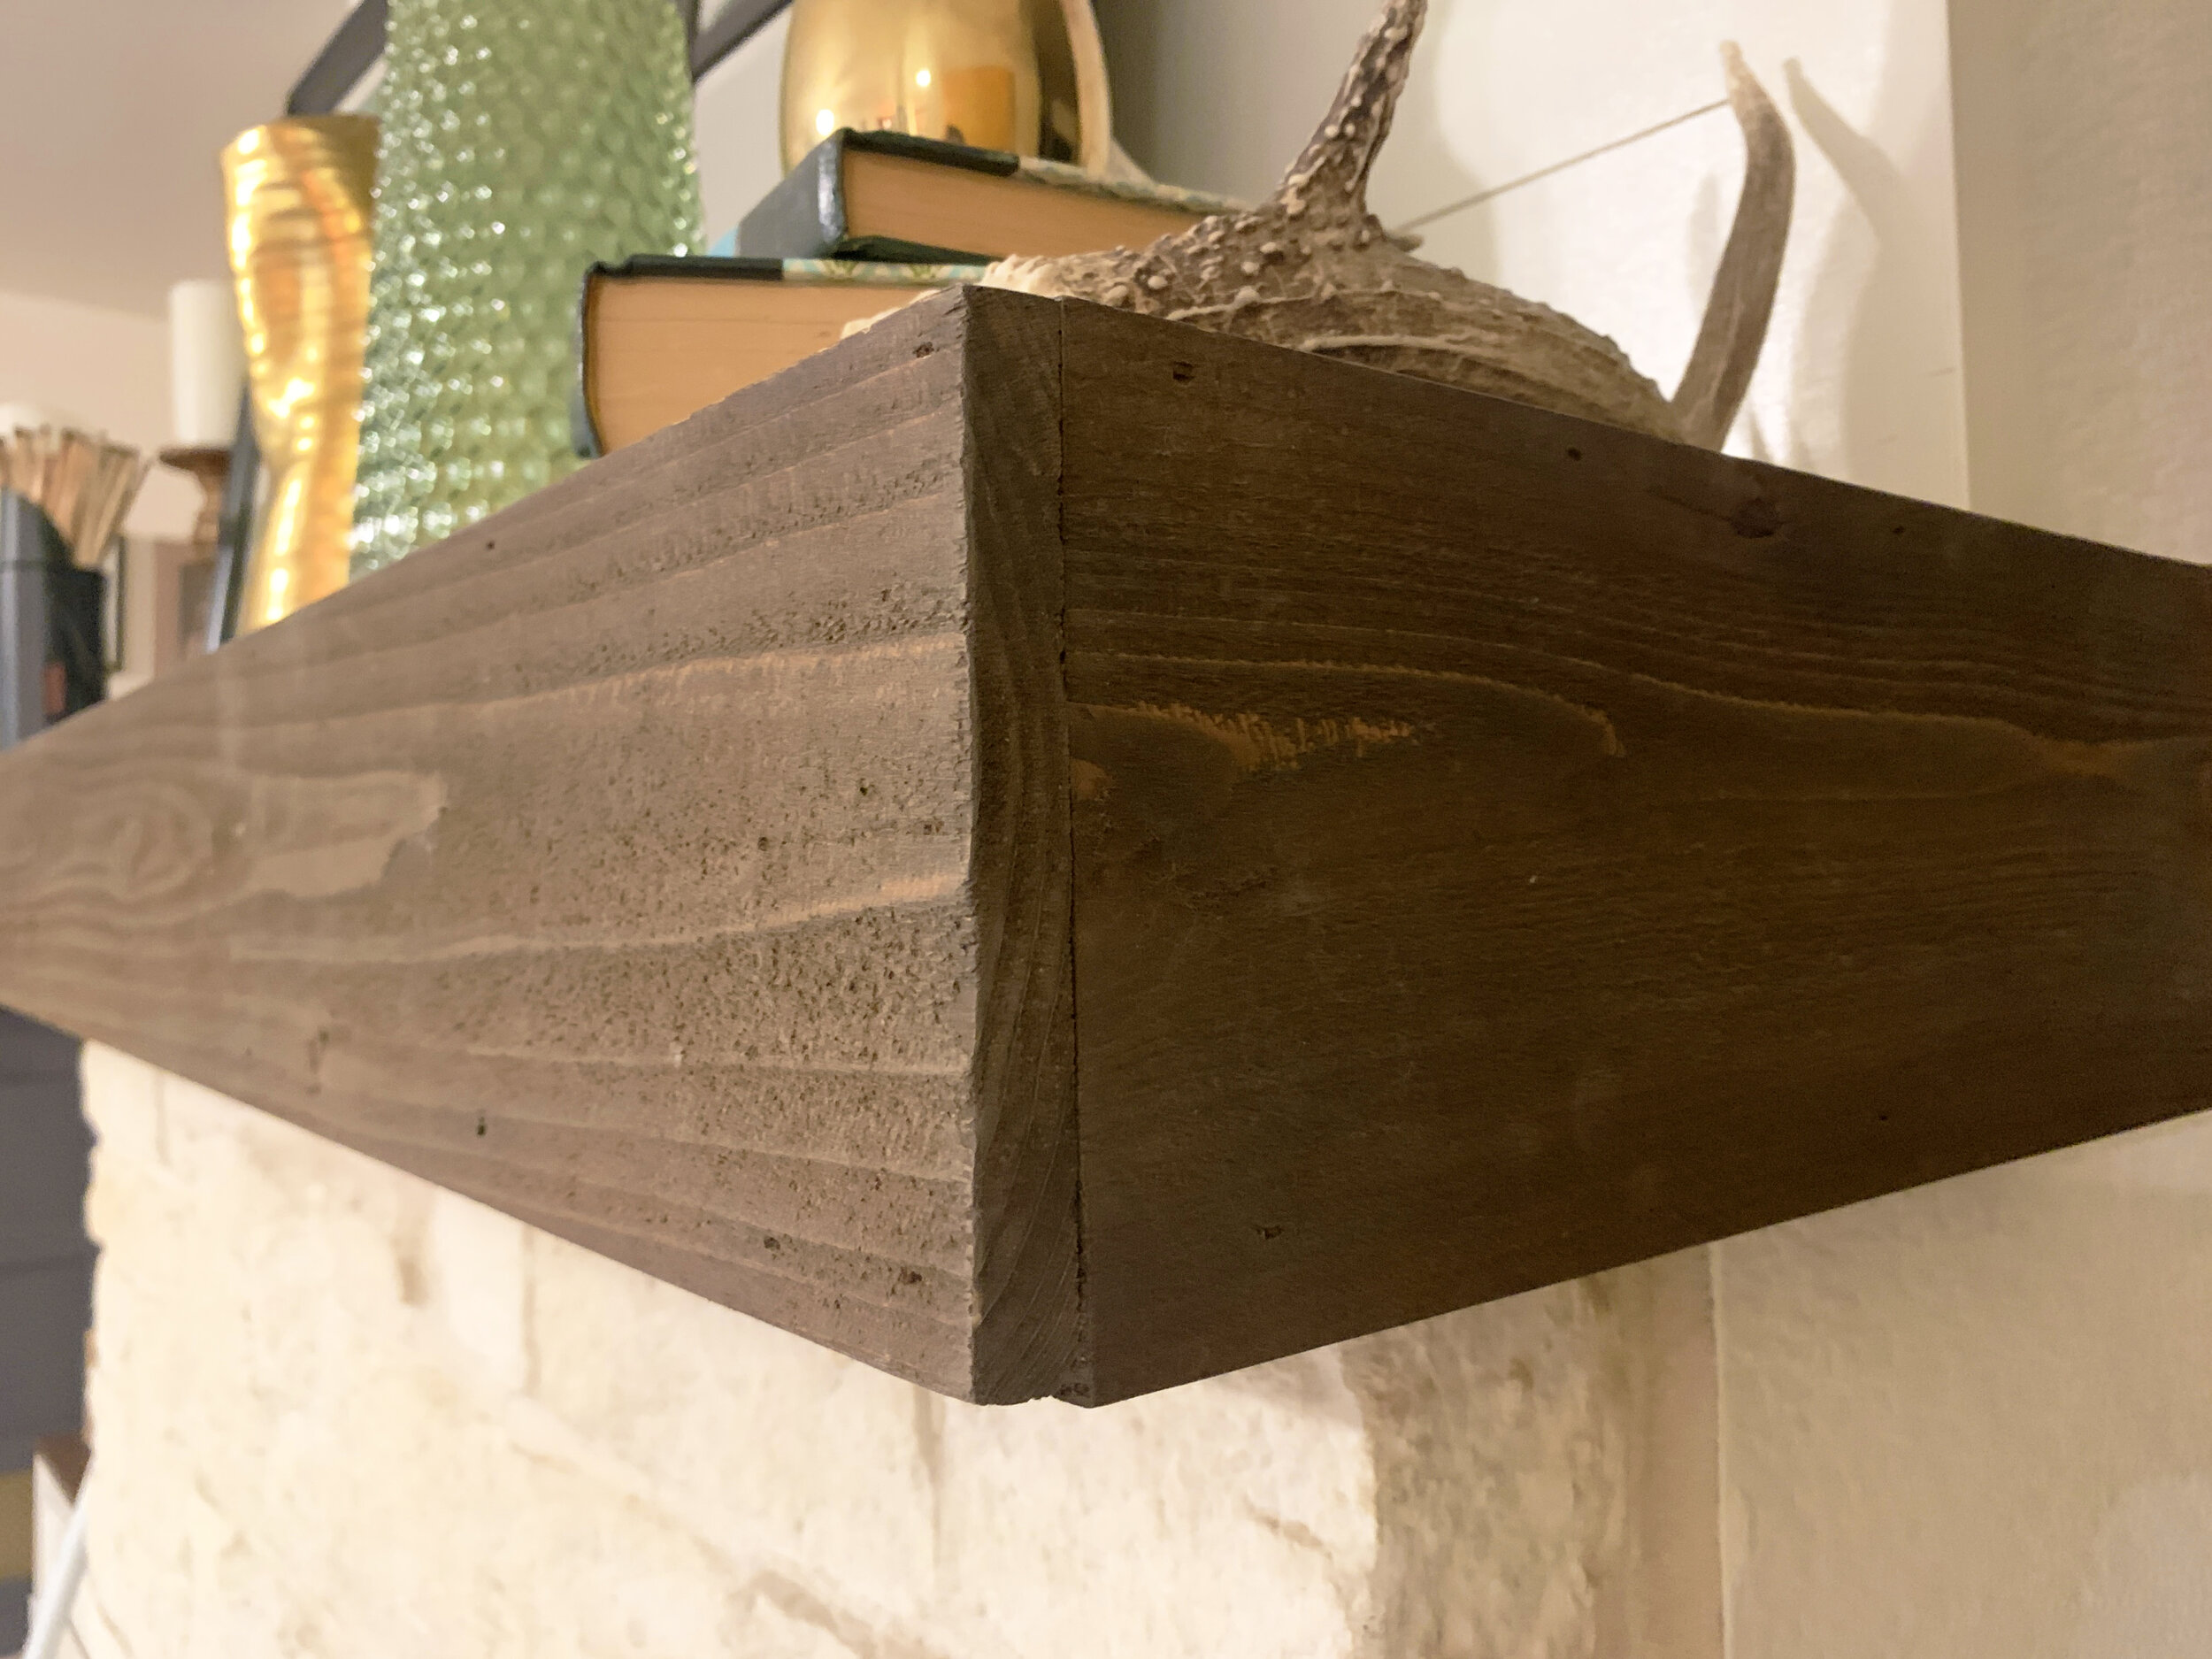
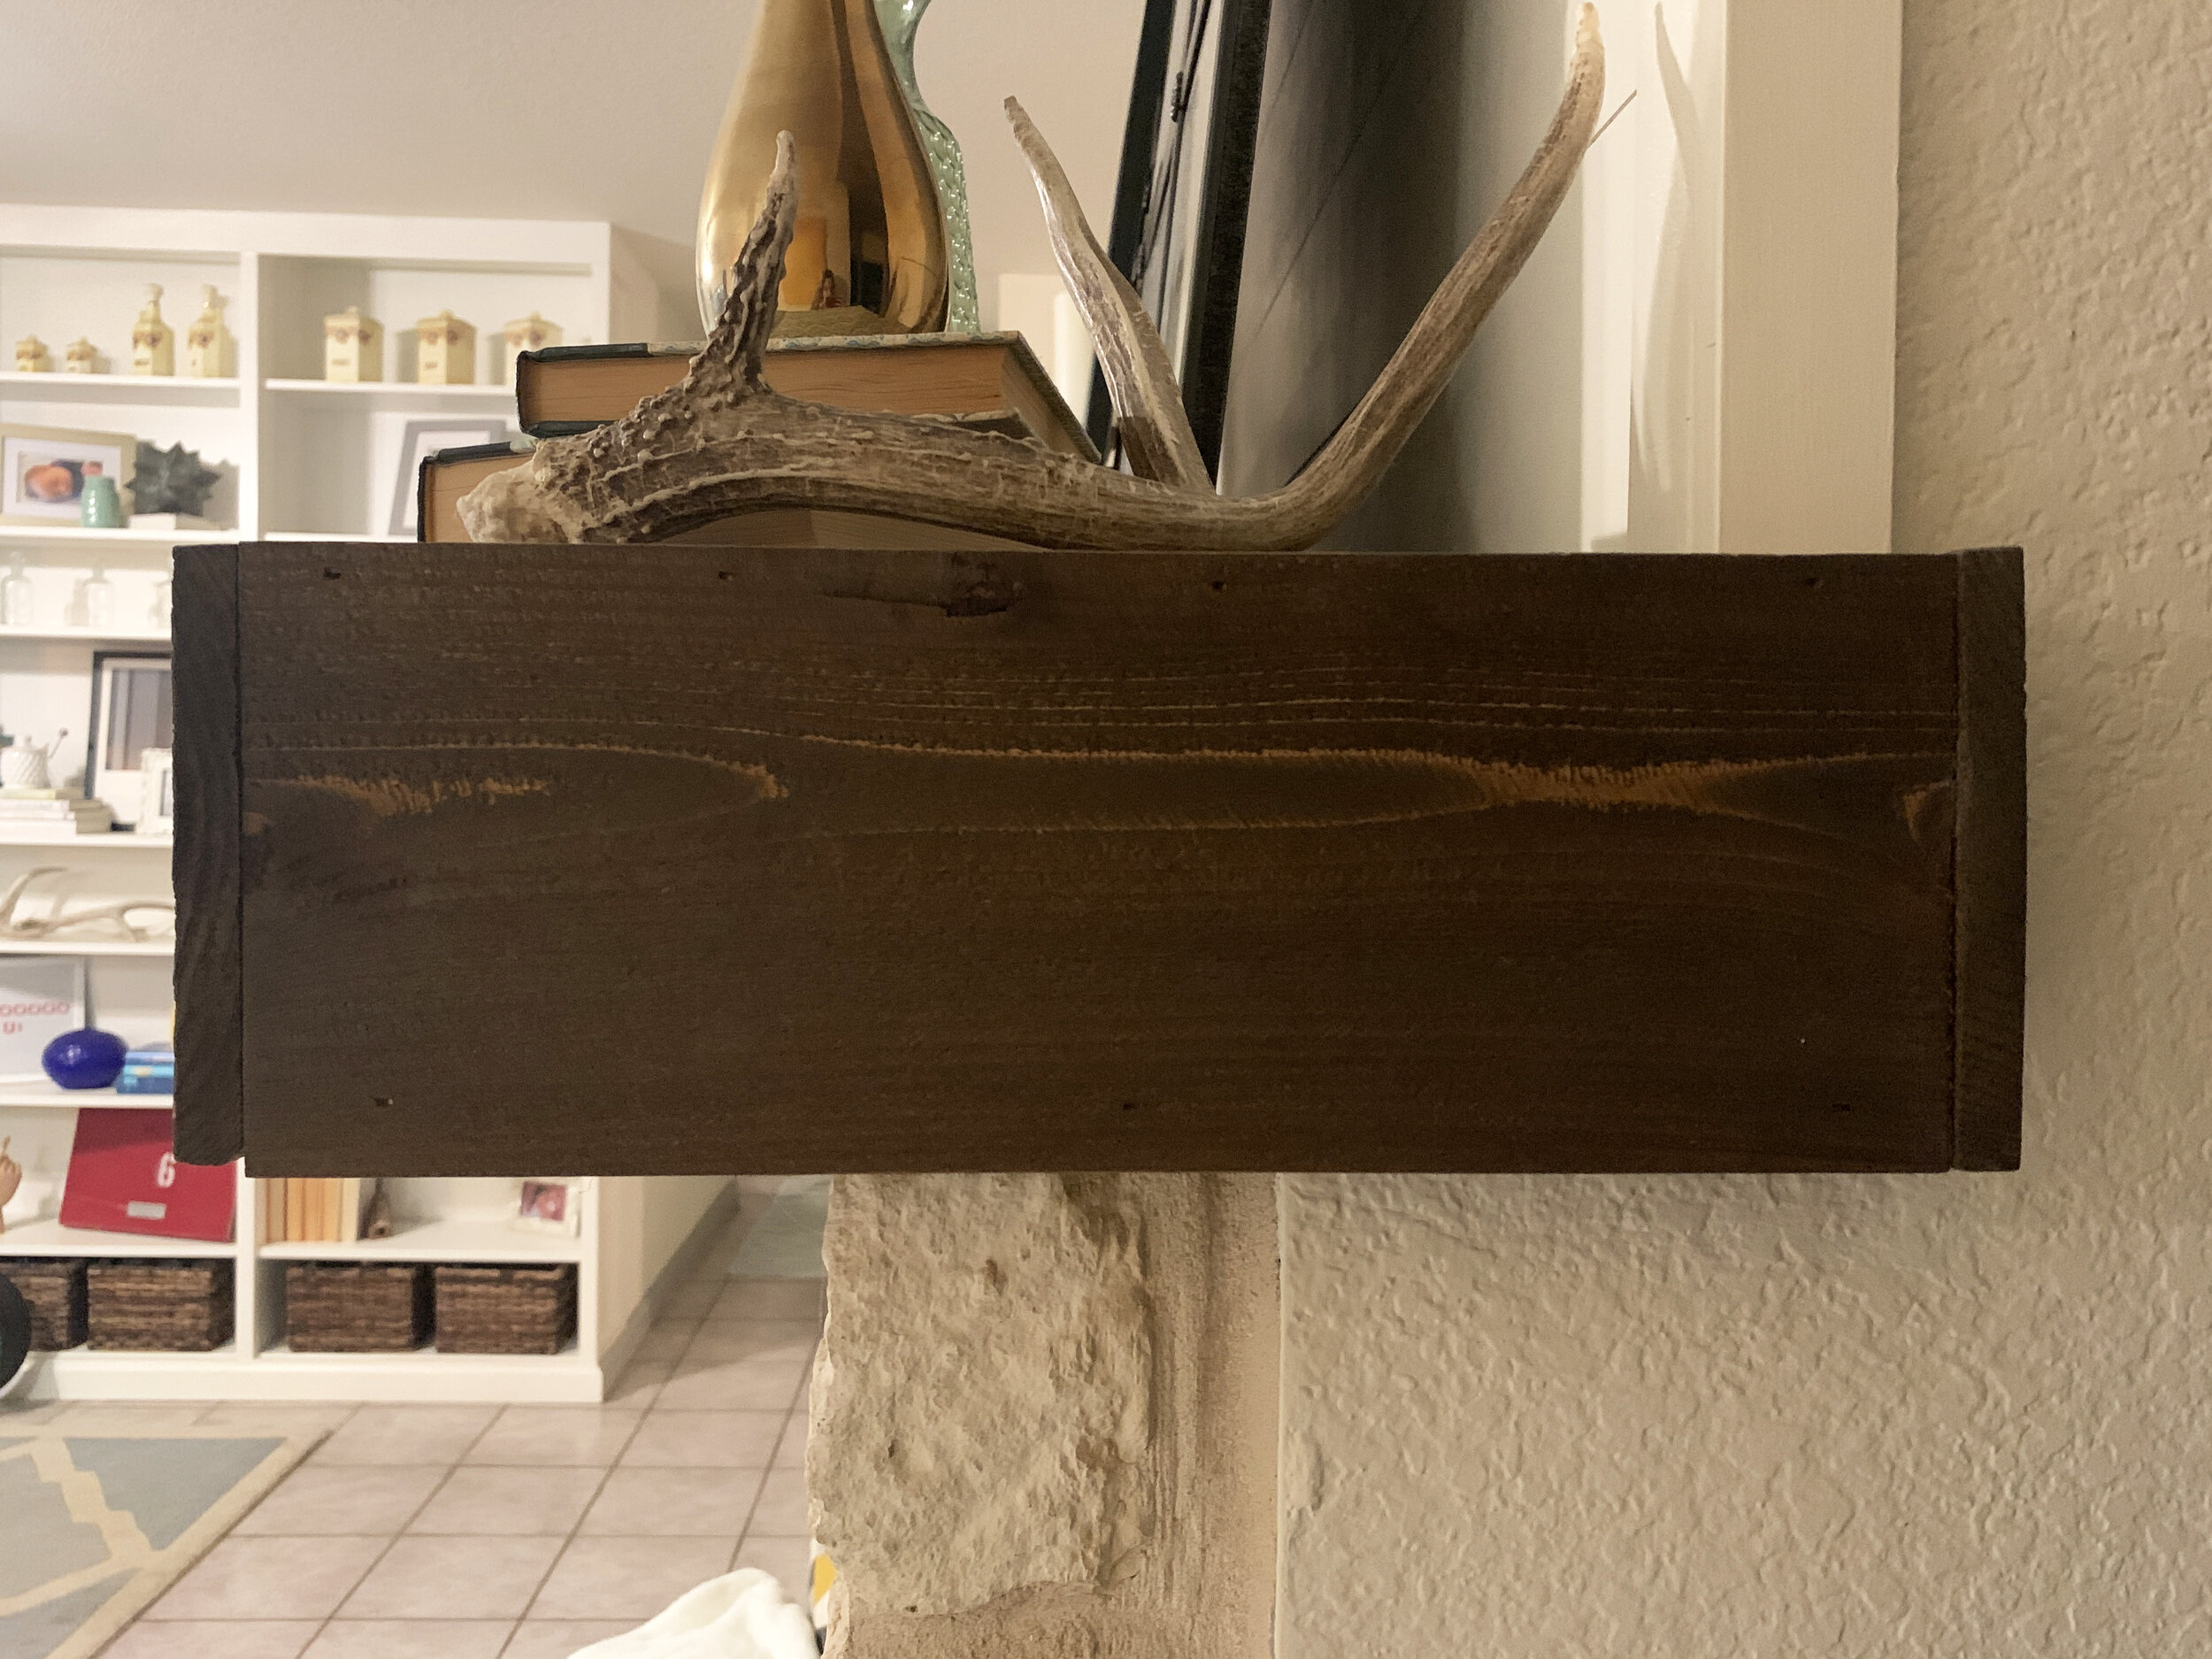
After
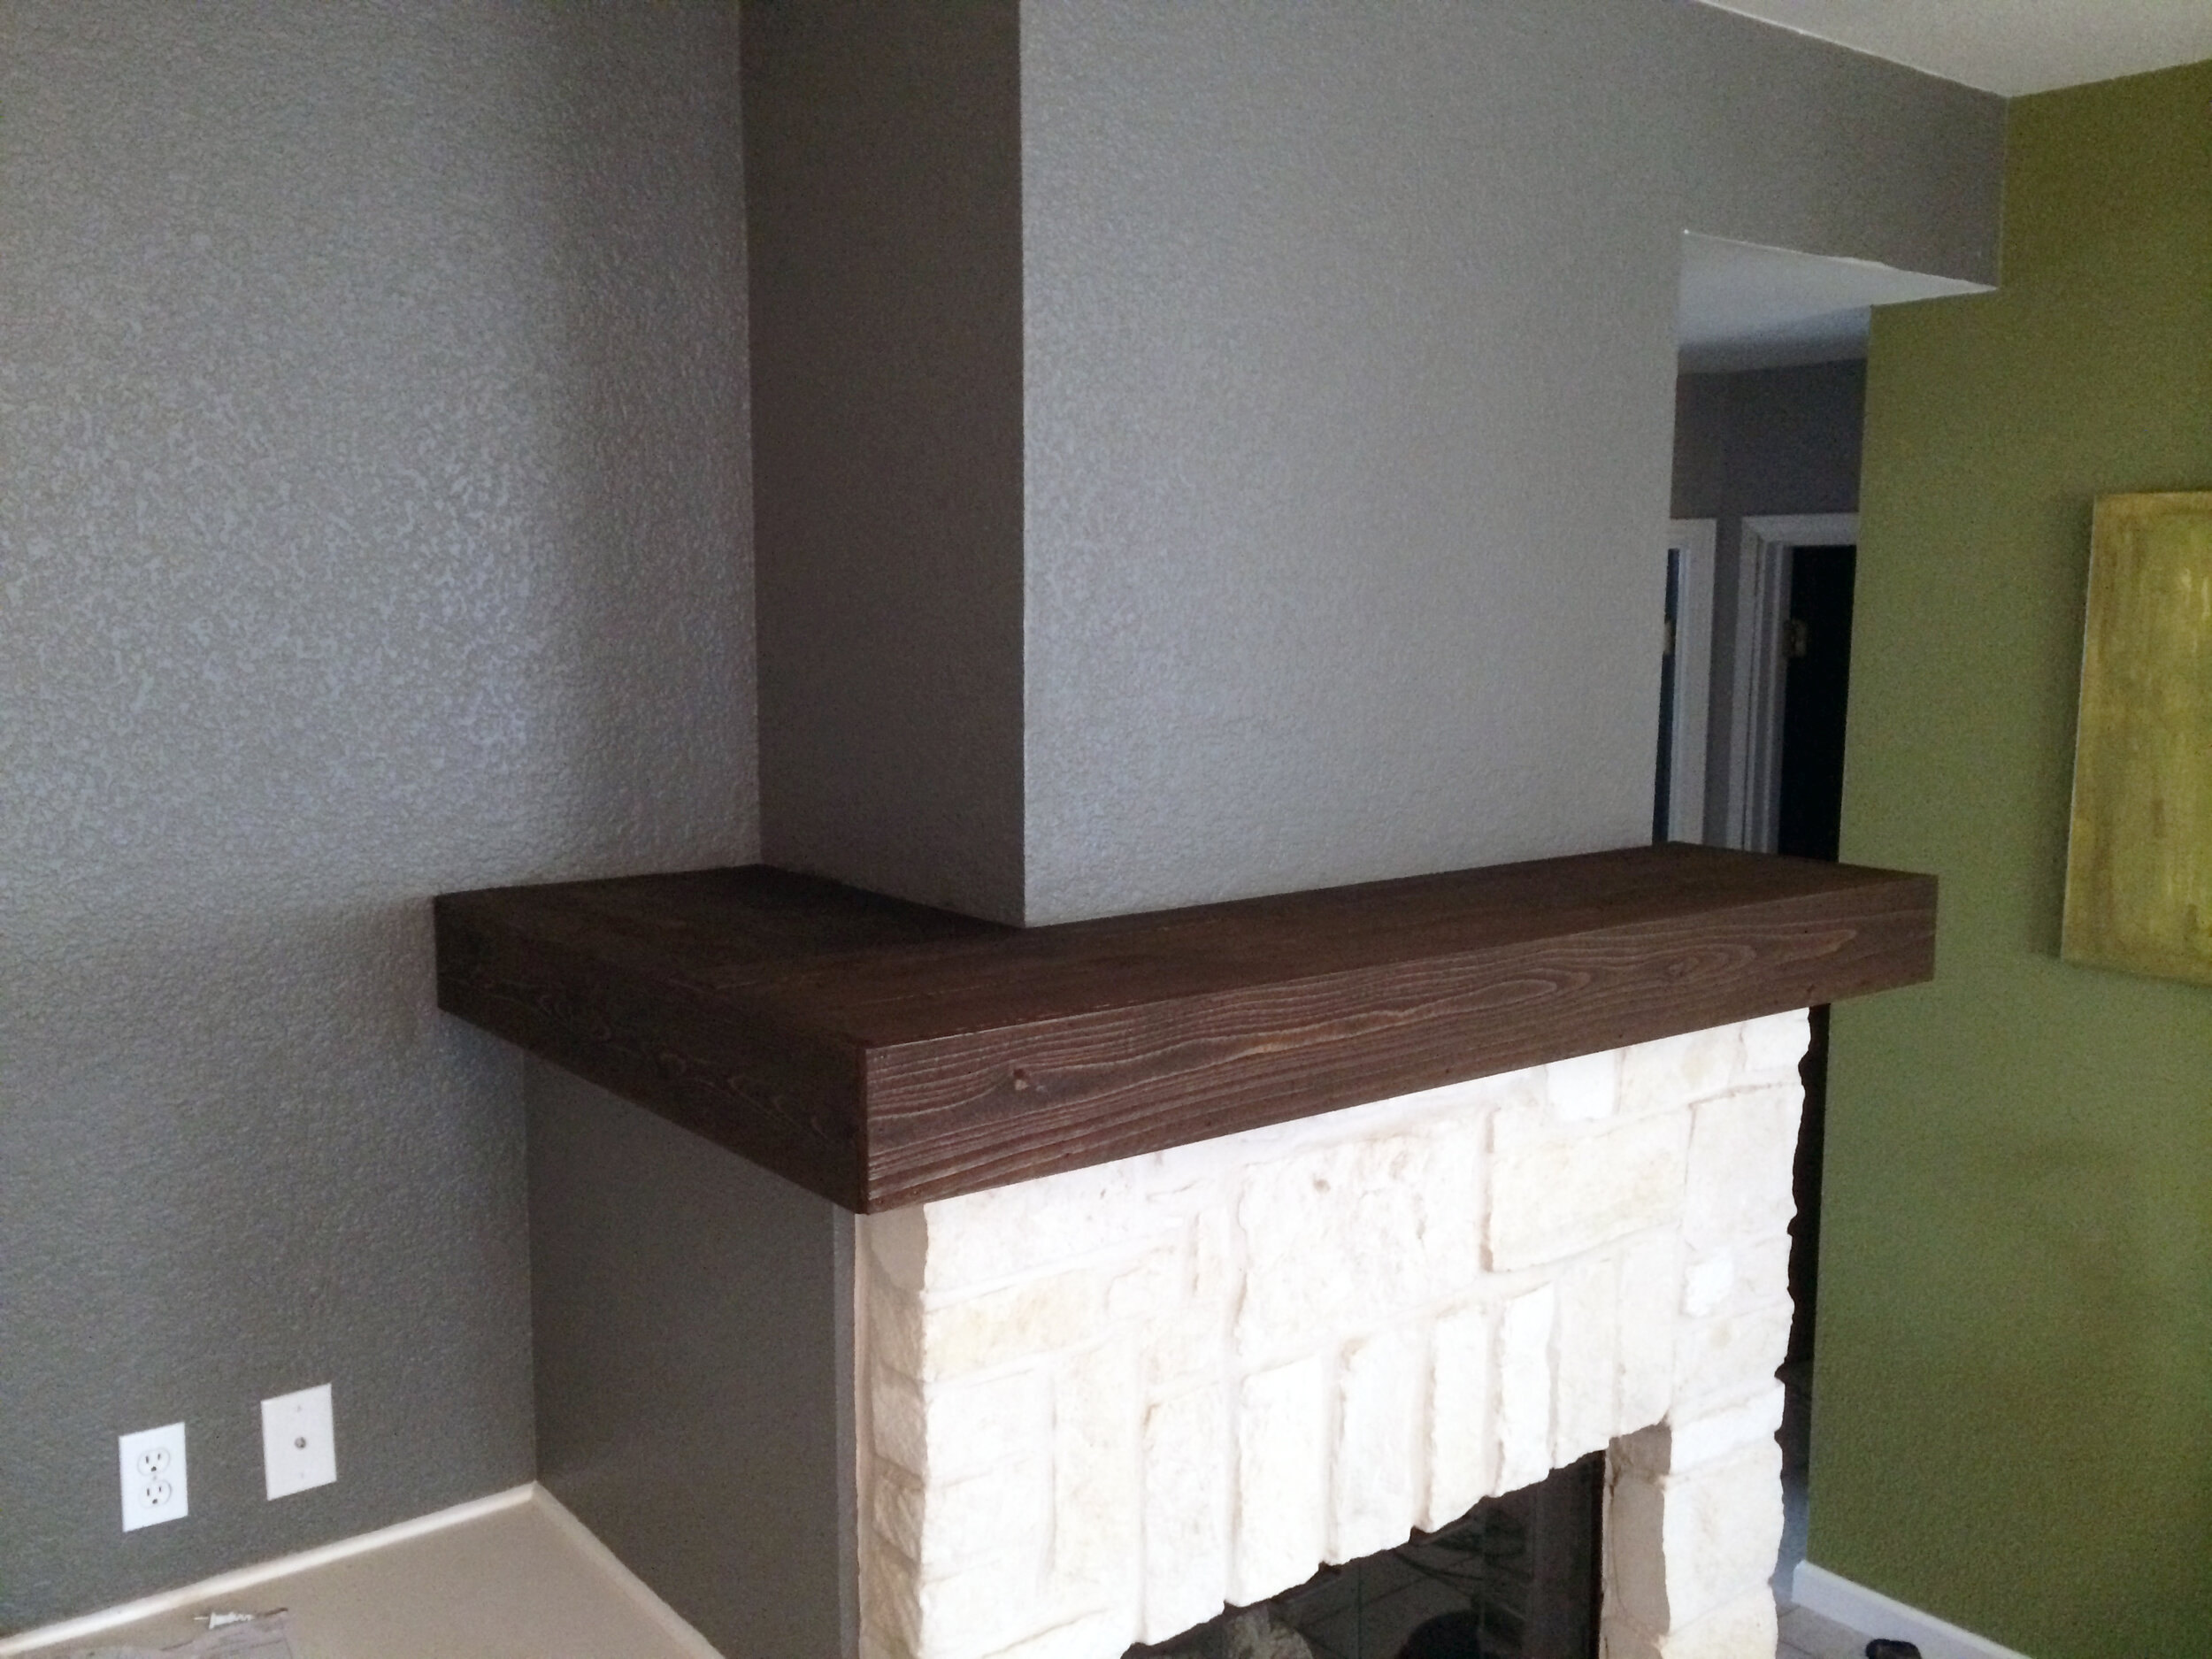
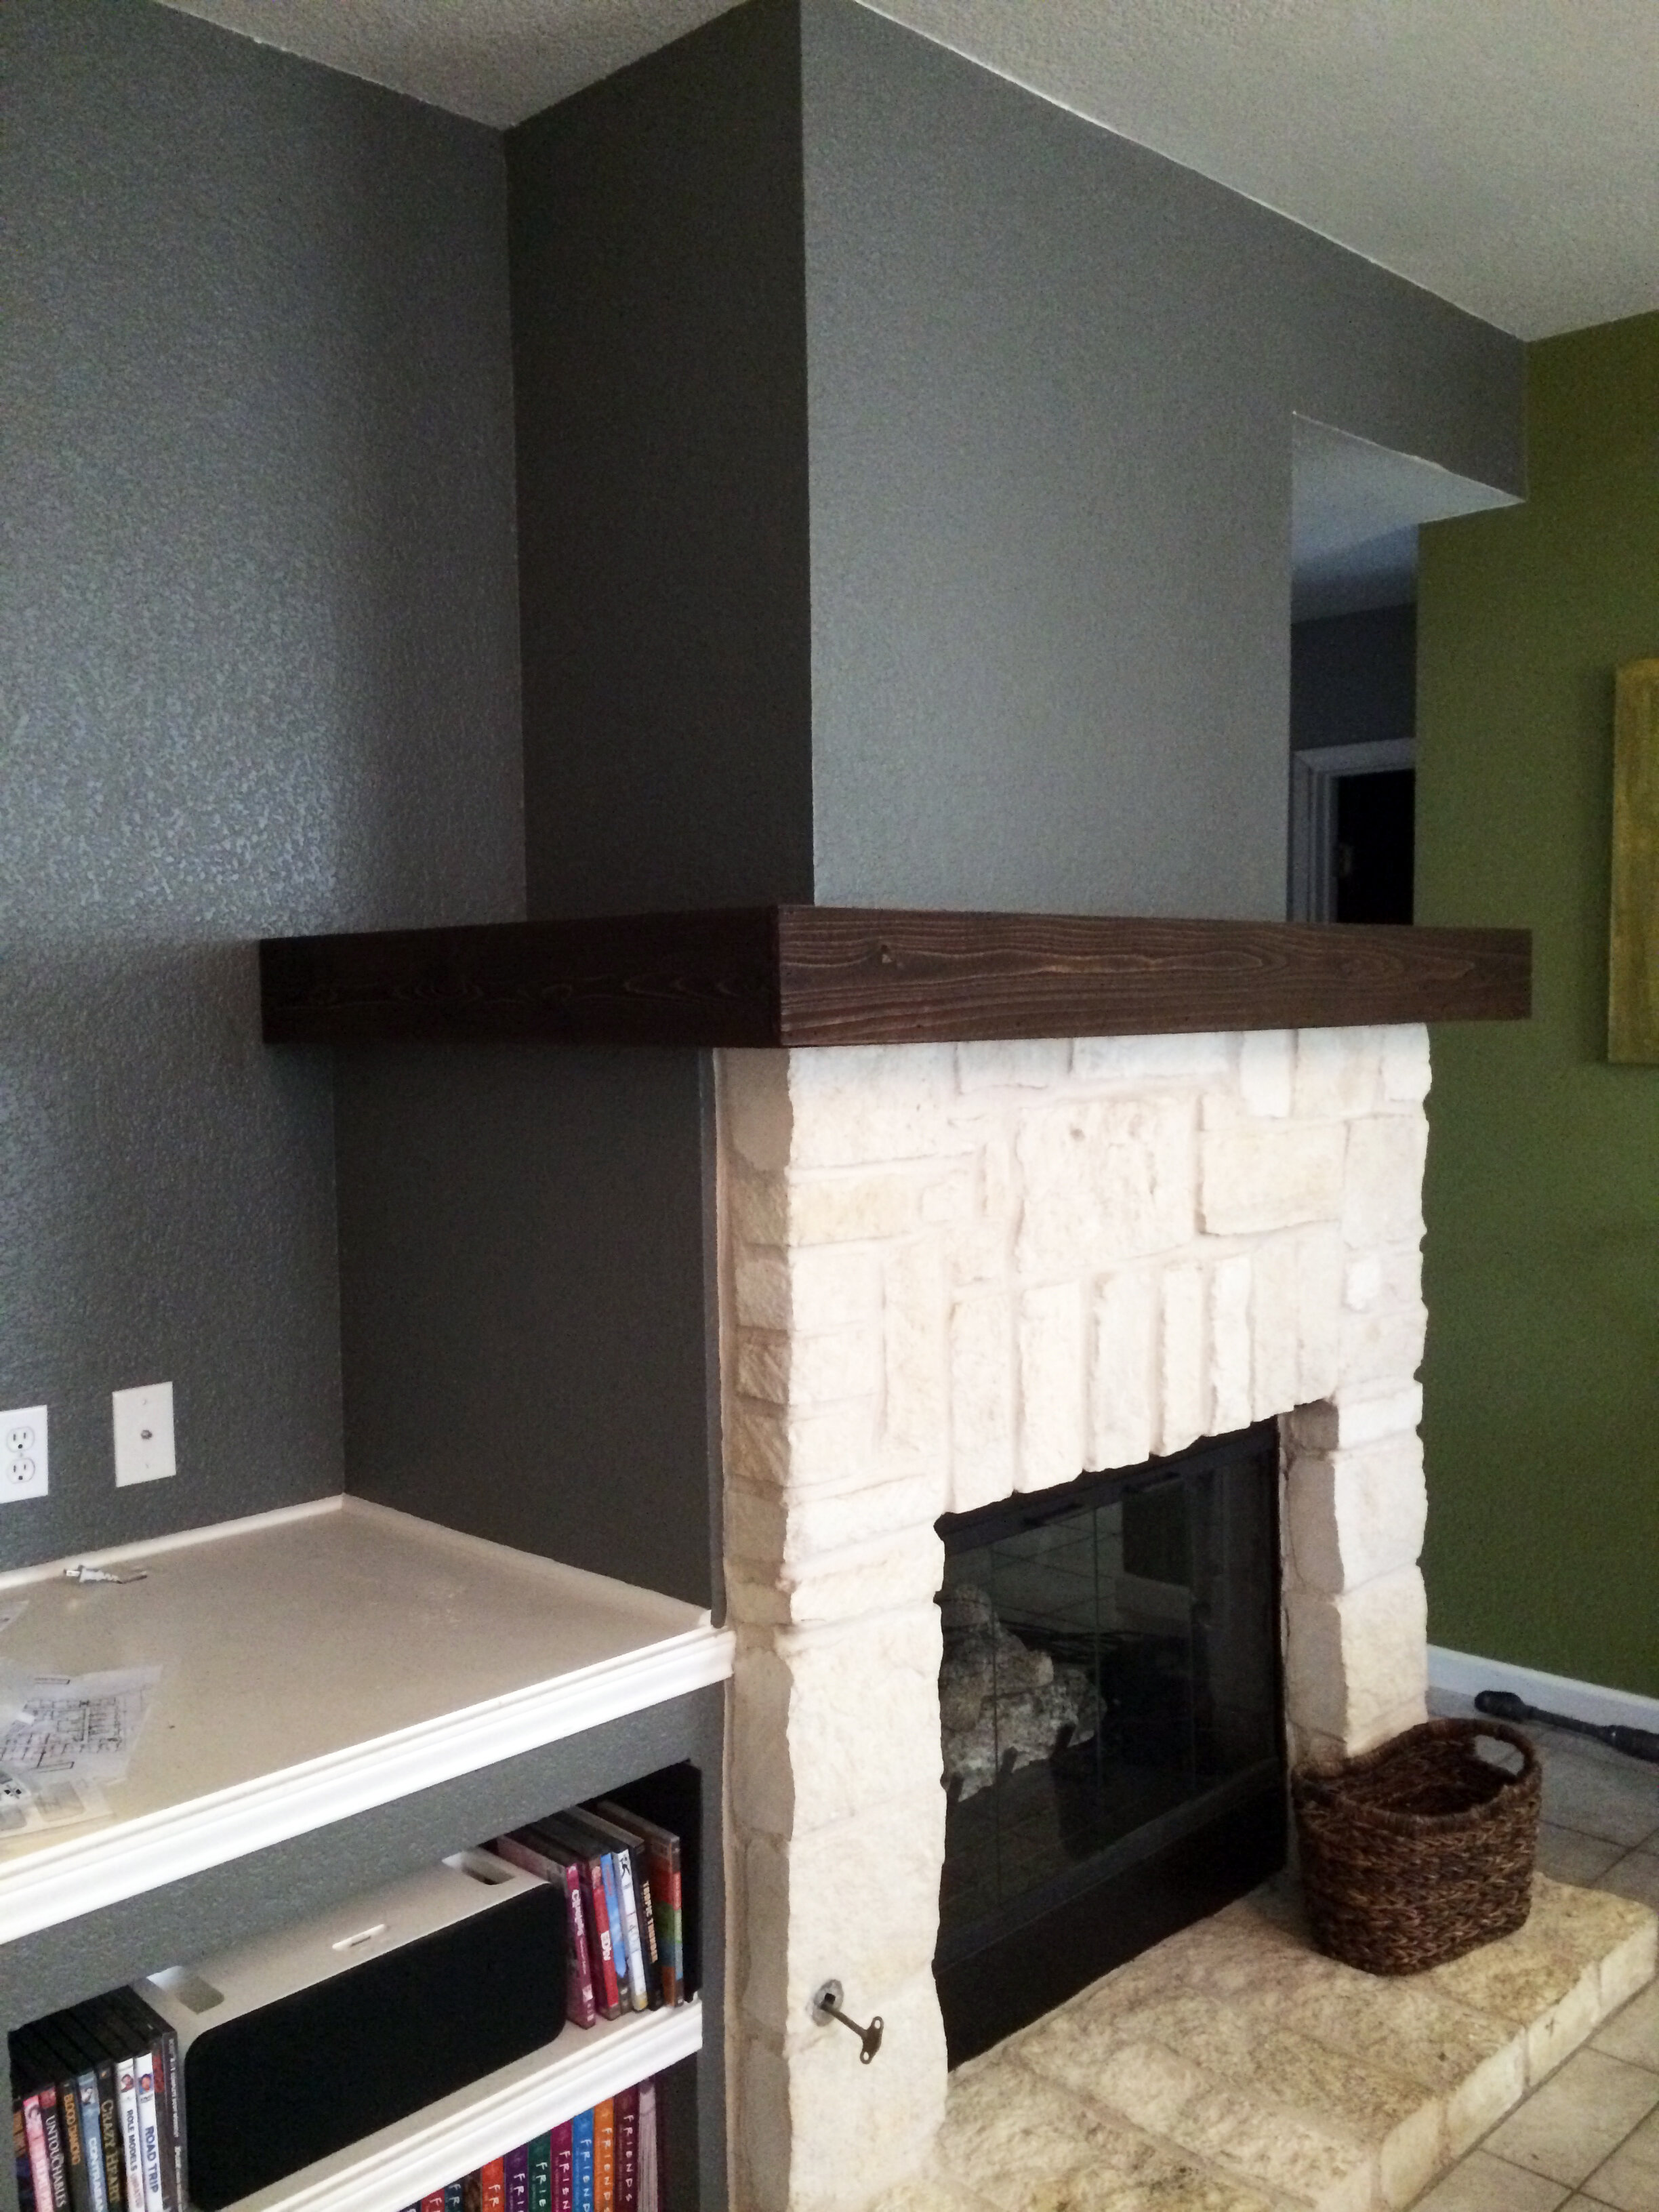
You can see after years the mantel itself hasn’t changed at all. The dark stain looks the same today as it did then and the mantel itself has held up and all of the boards are all still in place. Current photos below show how the blunt corner seams and underside look really close up.
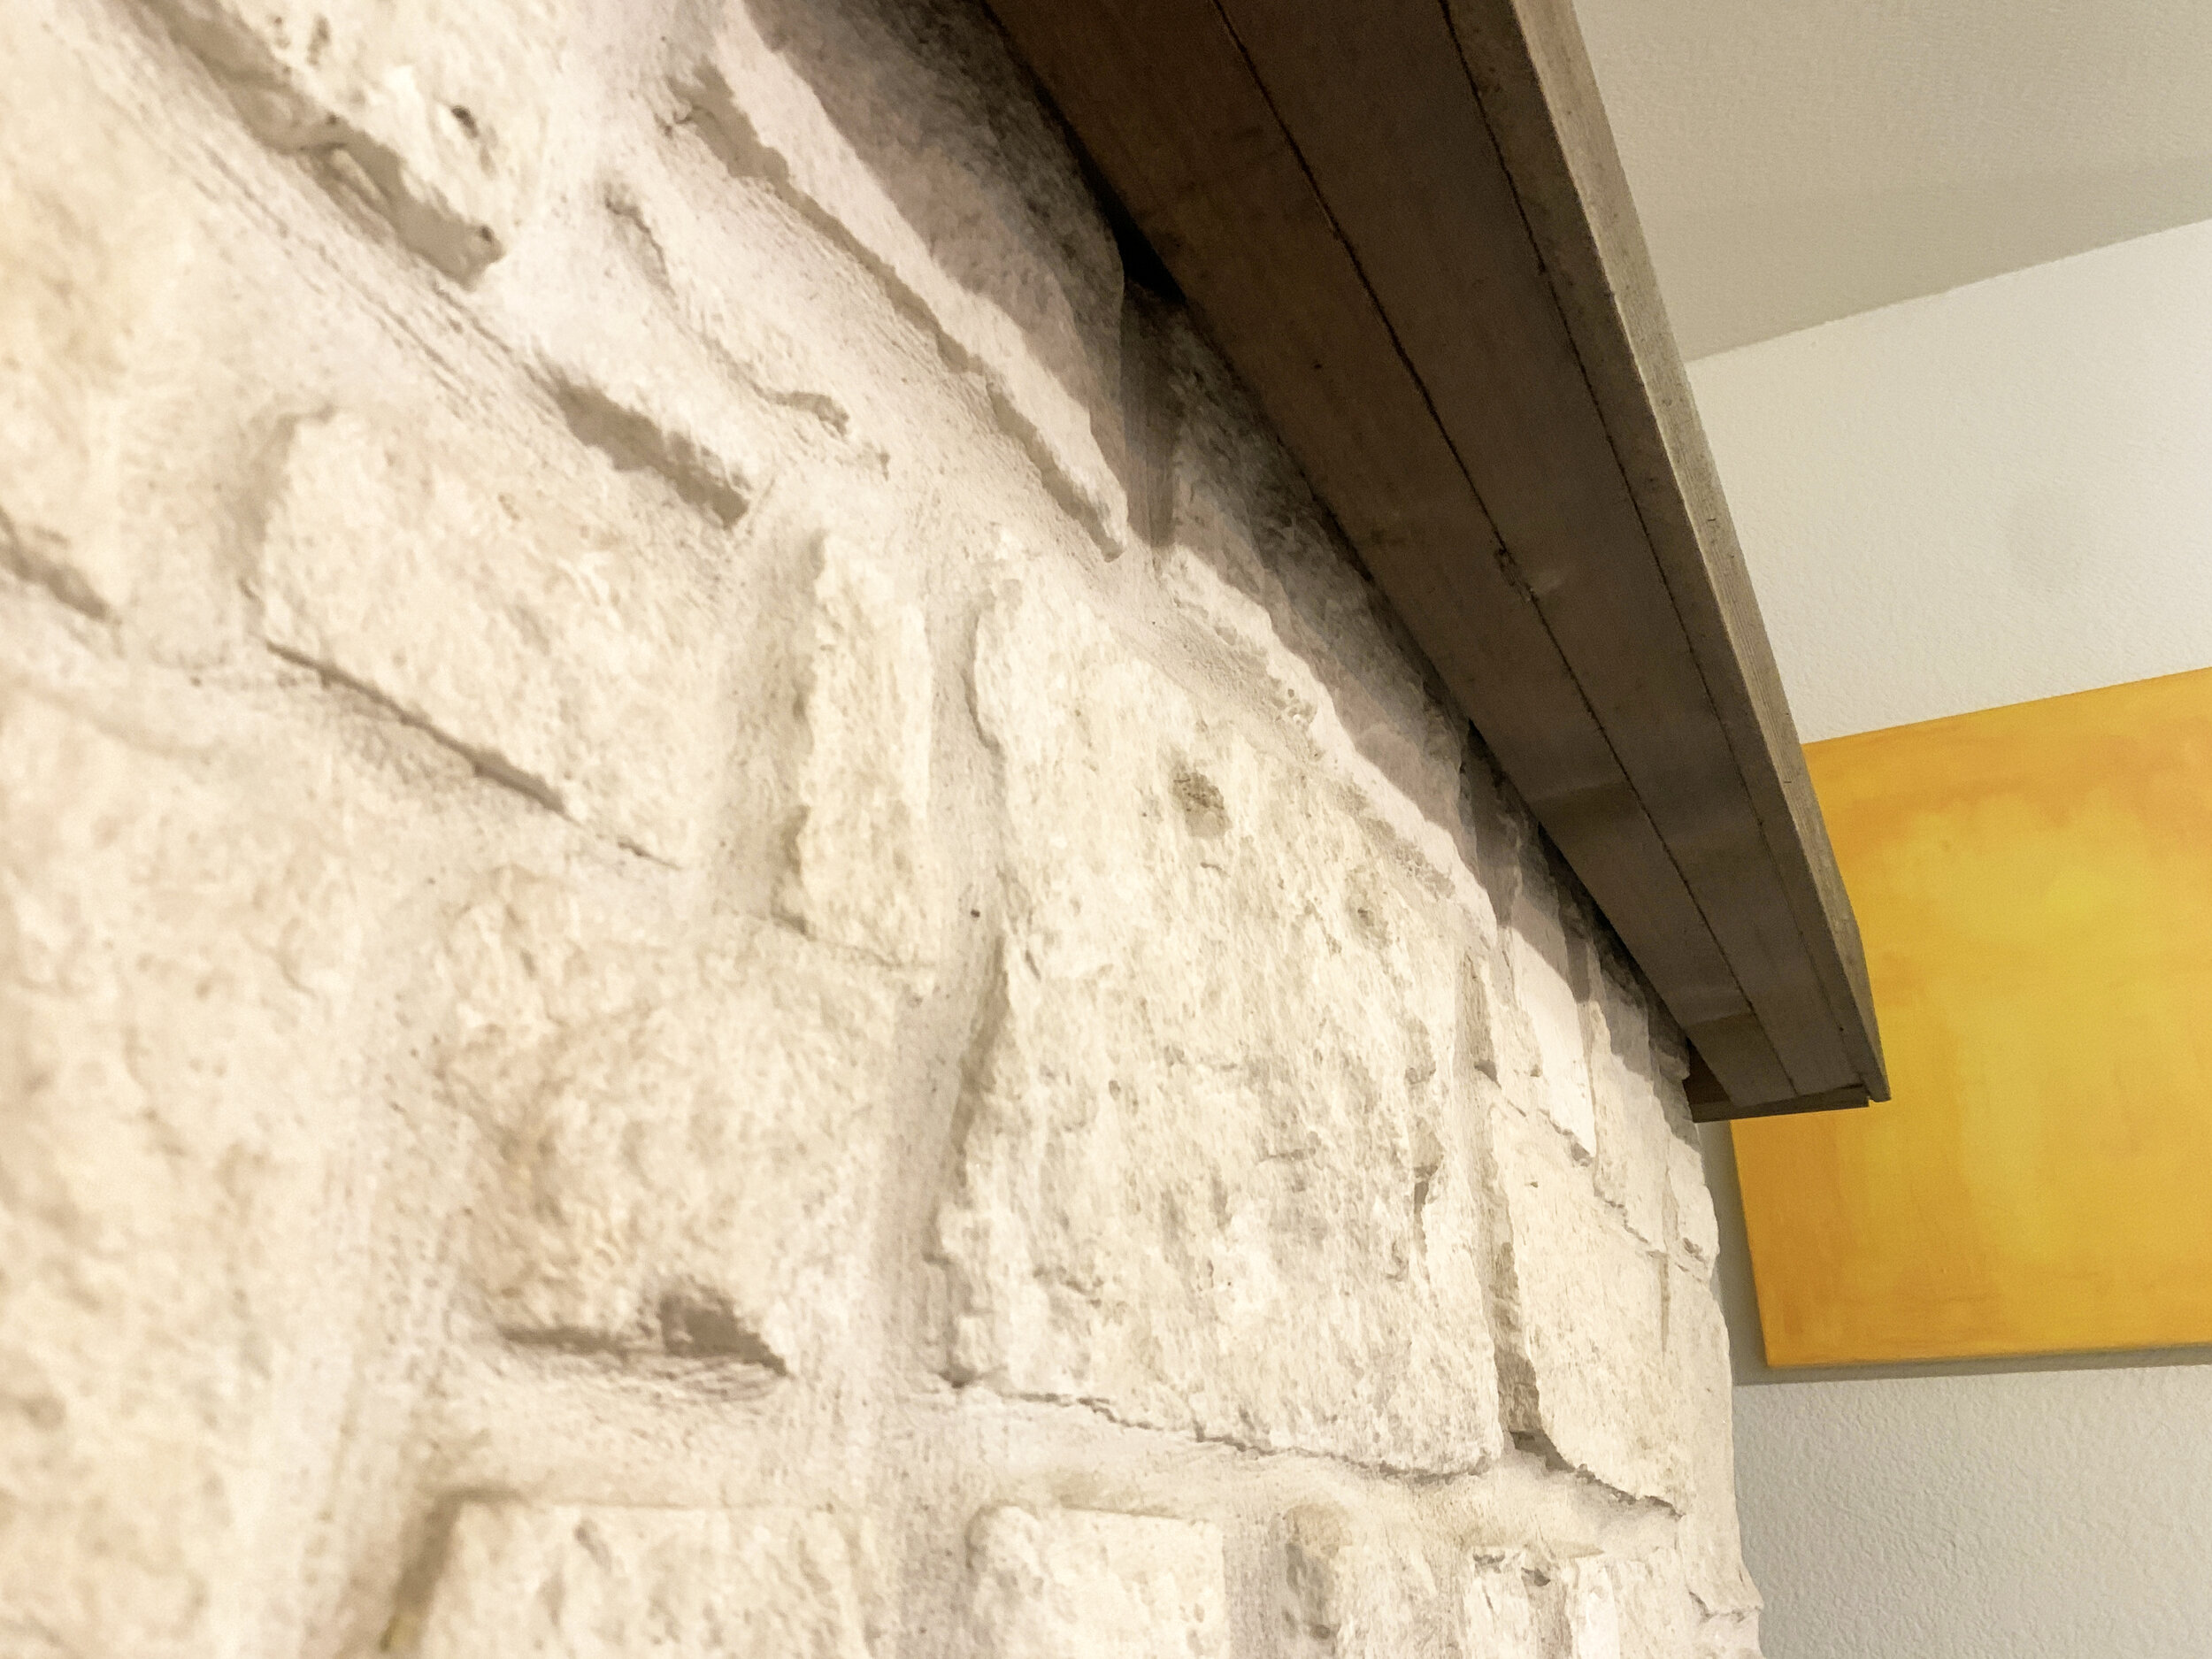
Even though the seams don’t look near as noticeable in person as in the photos above, there are some extra steps you could take to make it look even better.
Tips to make it even better
It looks great and we are really happy with how it looks. If we were to rebuild it again from scratch today with the tools we have now, there are a couple things I might consider doing to make it look even more realistic, like:
Age the wood.
Before staining (or even before nailing in place) I would take out any frustrations you might have and whack the wood pieces with a hammer, chains, whatever you have laying around, and take a sander or other tools to it to help age and distress the wood. It would help give the mantel even more texture and character. I would probably not distress the top too much (if at all) to keep the surface pretty even for styling items, especially since ours is pretty tall and at our height we’re not looking down on the top of the mantel at all. No matter how distressed it is, I would try and remove and really rough snags to avoid it attracting dust and lint in the longterm.
Miter the pickets.
Or, at least just the corner edges of the face pieces where the pickets meet each other so the corners don’t show the hard-cut butt joins. This would make it look even more realistic and like it’s really one large beam.
More fireplace goodness on the way
We’ll be following up soon with additional posts detailing how we got rid of the awkward wall notch above the mantel and added a modern farmhouse shiplap look, and how we created the built-in cabinet from scratch to the left of the fireplace.


