How to Style Your Mantel
This is one part of our home that really makes it feel cozy – the soft natural limestone, the smooth clean shiplap, the warm wooden mantel – and that’s even without having a fire lit. It is front and center in our living room and really is the heart of this home. It’s no surprise this is one of my favorite (and easiest!) spots to decorate, even if we don’t ever use it for fires.
Whether you have a fireplace or not, a mantel is the perfect place to showcase some of your favorite pieces and really let your style shine.

It may not look it, but there’s a general formula we follow to successfully styling our mantel throughout the year. The objects can vary – and mine do by season – but the basic principles below stay the same each time. You want the overall styling to feel balanced, but I choose to not go perfectly symmetrical so it has a little more interest and feels more casual and lived in (since our home isn’t formal). One thing you’ll always want to keep in mind as you style at home are the size and material of your mantel. Pieces should always work with the size and scale of your space and the pieces you choose to display might and likely will vary if your mantel is made of, for example, stained wood instead of say a natural stone or painted stucco.
Today’s post is meant to be a general guide to get you the best look for your style and situation. Feel free to tweak and adapt to fit your taste.
Start with something large
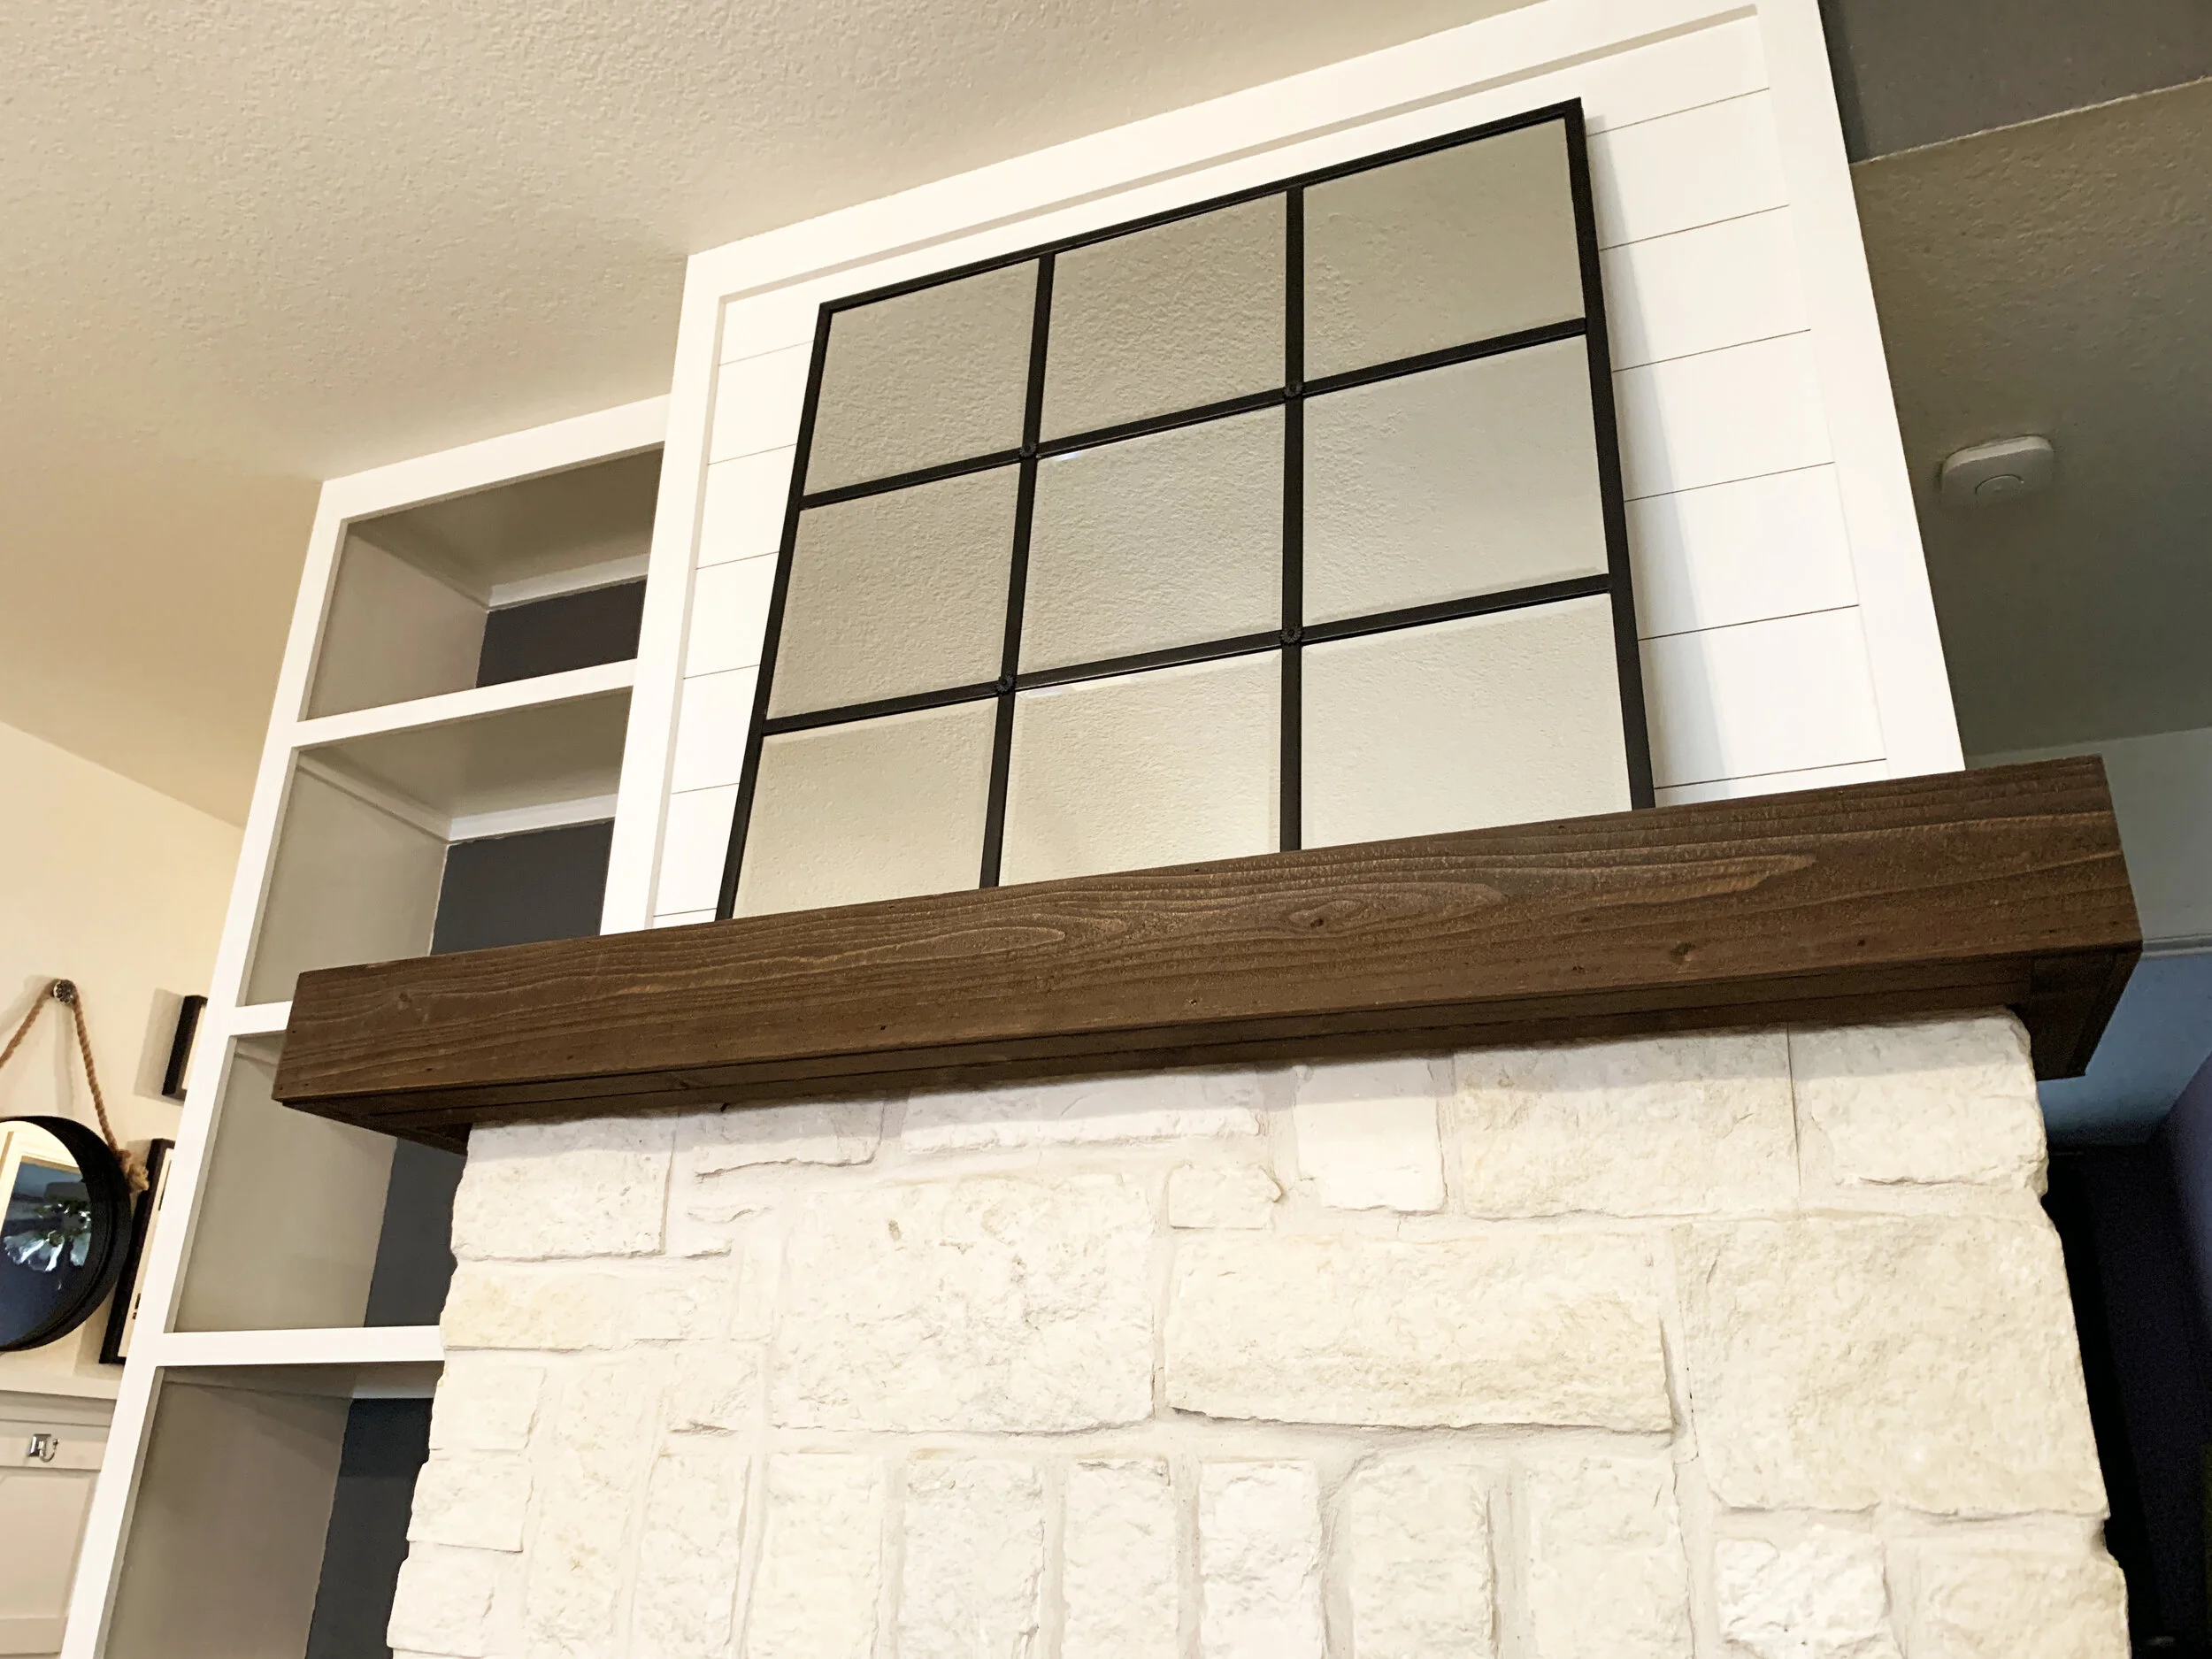
This will be your base and is important to anchor the space. Of course the size will vary based on the size of your mantel and ceiling height, but you could use anything – a mirror (round, square, etc.), a large piece of art, or even a wreath – for this. (In fact, in the fall and early winter we relocate the magnolia leaf wreath that’s typically on our front door from January through summer and hang it on this mirror for some added depth and texture.) We use our huge homemade mirror (about 36x36”) that we lean against the wall, to help bounce light in our living room which helps make the space feel bigger, and it’s neutral so it’s a great base that works year-round. (A plus since this thing weighs a ton!)
If your mantel is on the shallow side, you could even hang your anchor piece on the wall to save yourself a little depth instead of leaning it.
Add height
I prefer to not go higher than my anchor piece – partly because the anchor is already so tall there wouldn’t be much room to go higher and still give good height contrast, and partly because it would likely dominate the anchor piece and throw off the balance. This could be anything tall – a piece of art you love, a tall vase full of greenery, candlesticks, etc. The important thing to note here – and moving forward – is contrast is your friend. Obvious contrast in height, shape and texture are important for visual interest.

Add an organic element
Or more than one, if they’re different sizes. This adds softness, texture, life and movement to what could otherwise feel hard and geometric. Think of anything not manmade – flowers, sticks, cotton stems, branches from your yard, feathers, etc.

Layer, layer, layer
Everything on your mantel should be “connected” to something else – we don’t want any sad and lonely stragglers! Slightly overlap pieces to bring them to the party. The candlesticks below work as a set – the one on the left is connected through its mate on the right that’s overlapping the art print. The yellow-brown color of the wooden candlesticks also play off of similar colors in the artwork.
Some pieces you could use to layer include artwork, candlesticks, vases, books, antlers, love letters, children’s drawings, family photos, etc.

Lose the intervals – vary your heights
Remember when we talked about contrast earlier? This is another one of those. Intervals mean going sequentially – say, from tallest to shortest or shortest to tallest – like a set of stairs. They’re functional in some cases (like stairs), but they can be fairly boring in design. Keep things interesting by obviously varying the heights of your items. If you can draw an imaginary horizontal line and things are the same height, make adjustments. Remember, contrast, contrast, contrast.
My favorite trick to give items a little lift are books. While we do have books that we read – or plan to read – in the house, my favorite books are beautifully patterned hardcover books I find at Goodwill for cheap! (The one time I most definitely encourage judging a book by its cover.)

Create a color story
I like to make sure none of the pieces are “left out”, and just like spacing, that also includes color. When choosing your styling elements, you want to make sure there’s not one awkward standout piece that feels like the odd man out. If you want it to be the focus, then by all means go with a contrasting color, but we humans like to make sense out of order by finding patterns – which means finding irregularities – and that works against us if we’re trying to have one cohesive design setup.

Lastly, if you’re not happy with it, just keep playing around with objects and placement until you find what appeals to you.
You can see in the photo above – my final mantle – the six tips in action I used to create the look.
Something large
Something tall
An organic element
Layers
Varied heights (without intervals)
An analogous green + blue + yellows/golds/warm wood tones color story
Hopefully this little guide will help demystify styling (what’s probably) a big architectural focal point in your home and – if you aren’t already – get you started on finding your own styling style!