The Cameo Camper Renovation: Installing a Brass Kitchen Faucet
Hey y’all – sorry it’s been a minute since I’ve posted on the blog. Do you ever have something on your to-do list, then all of a sudden you look up and it’s a month later and you still haven’t done it? Yikes!
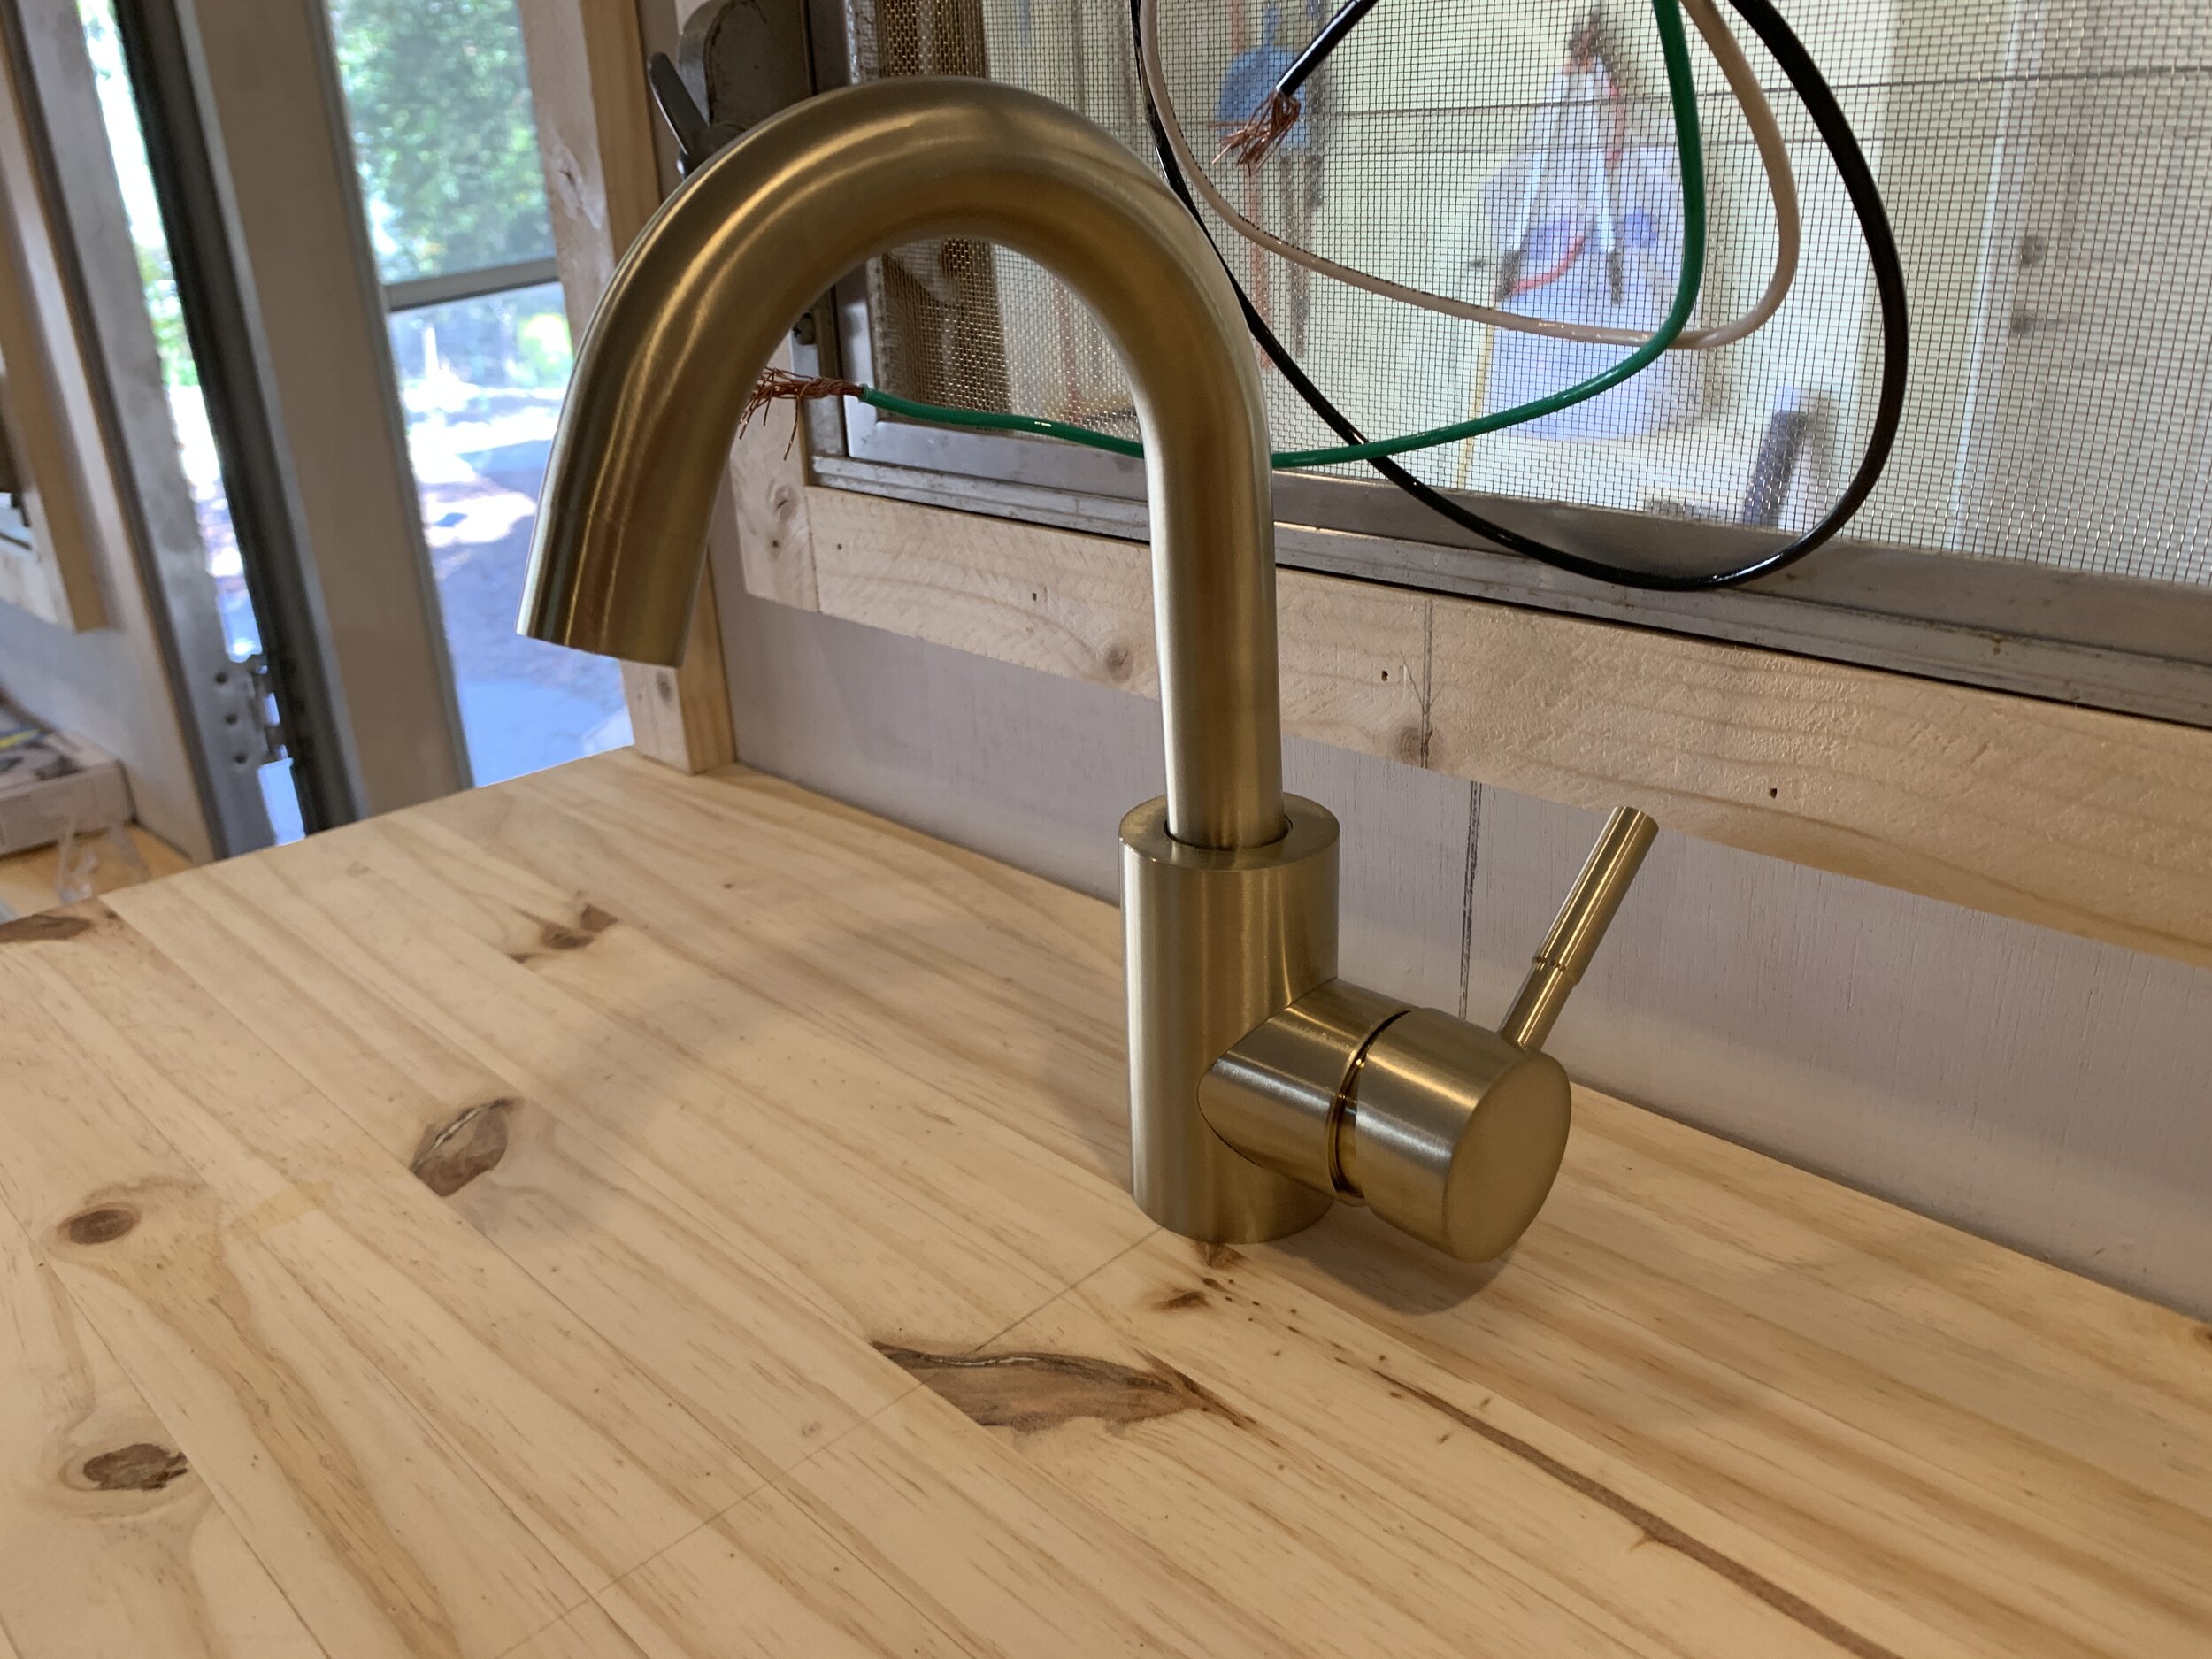
Today we’re back and sharing how we installed our brass kitchen faucet. I feel like this is the kind of stuff that gets a bad rap for being a difficult, overwhelming DIY home (or camper) improvement project. Today I’m here to hopefully dispel that myth so you feel confident to swap out that old busted faucet you’ve got, or – if you’re like us and are starting from scratch – install a brand new one for the first time without having to call out a plumber. AND we wanted to share that this faucet isn’t an “RV” faucet, meaning you can install any faucet you want (read: more/attractive options) as long you have a separate water pump up the water line from the faucet. (We’ll cover all that more in detail down the road in a more robust camper plumbing post.)
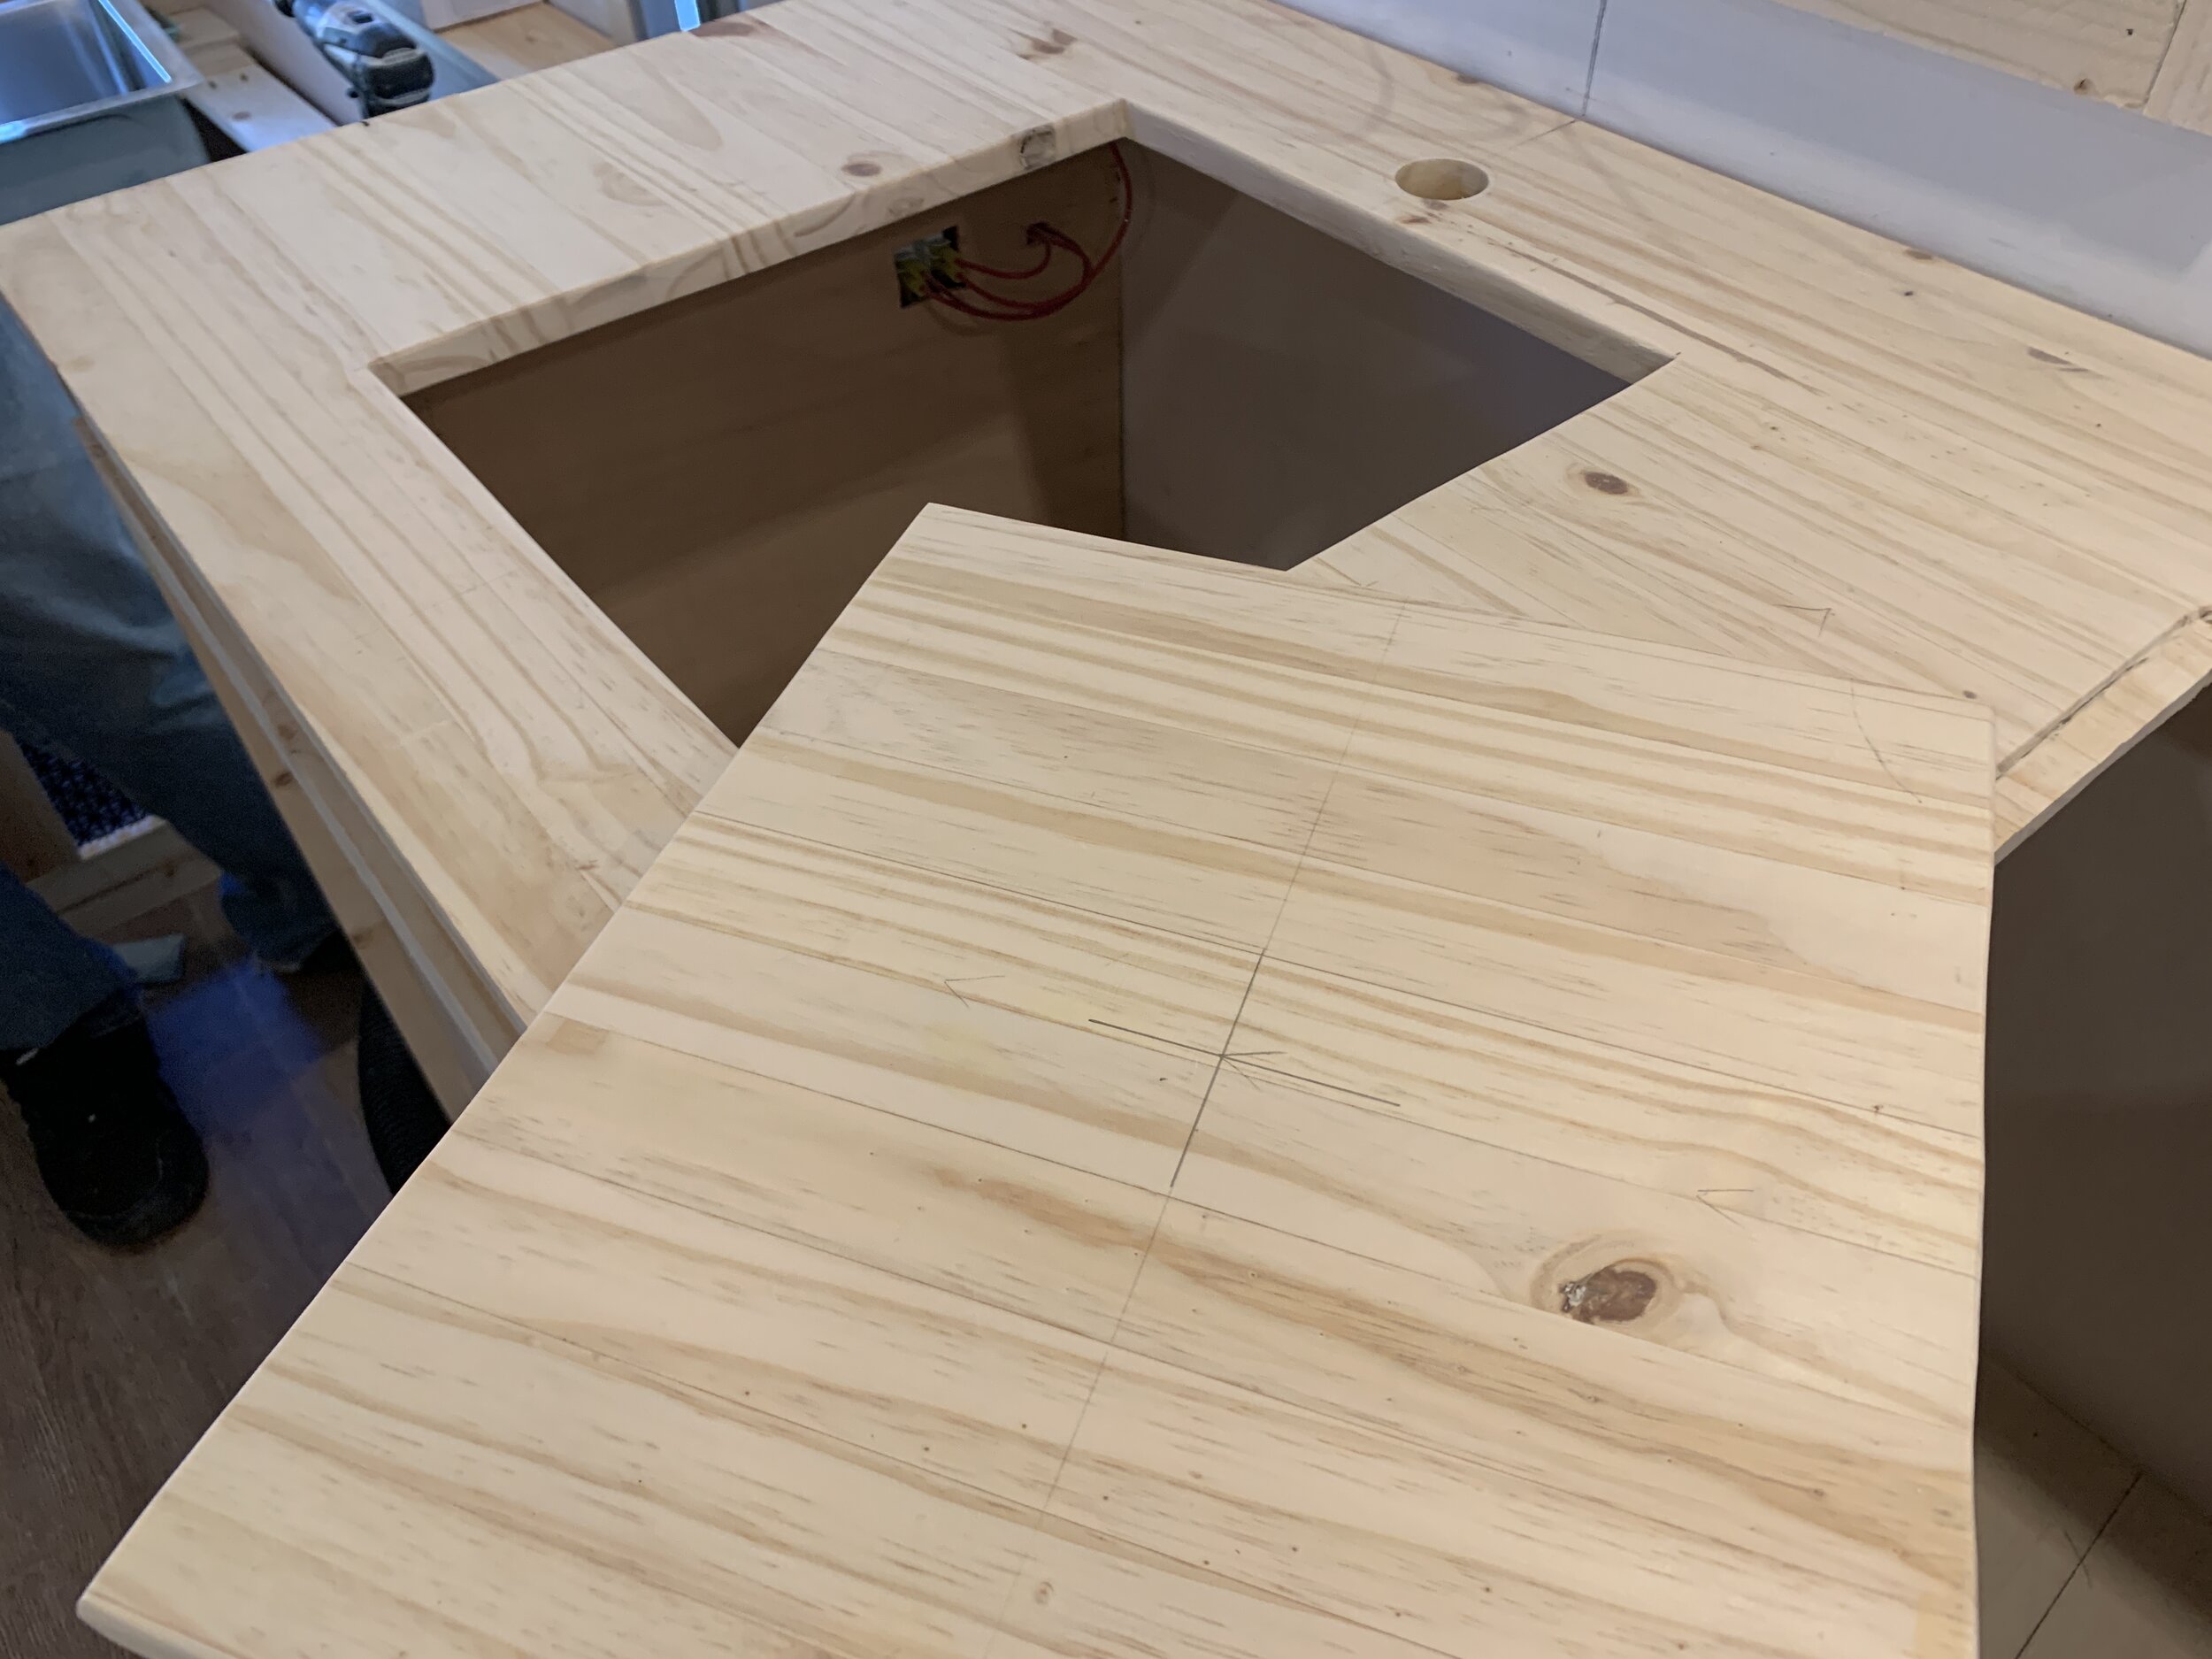
While not quite a prequel necessary to install a faucet, if you missed how we installed our under-mount kitchen sink – complete with a snazzy countertop lid that basically doubles our usable counter space when we’re not using the sink for sink-type things – you can find it here.

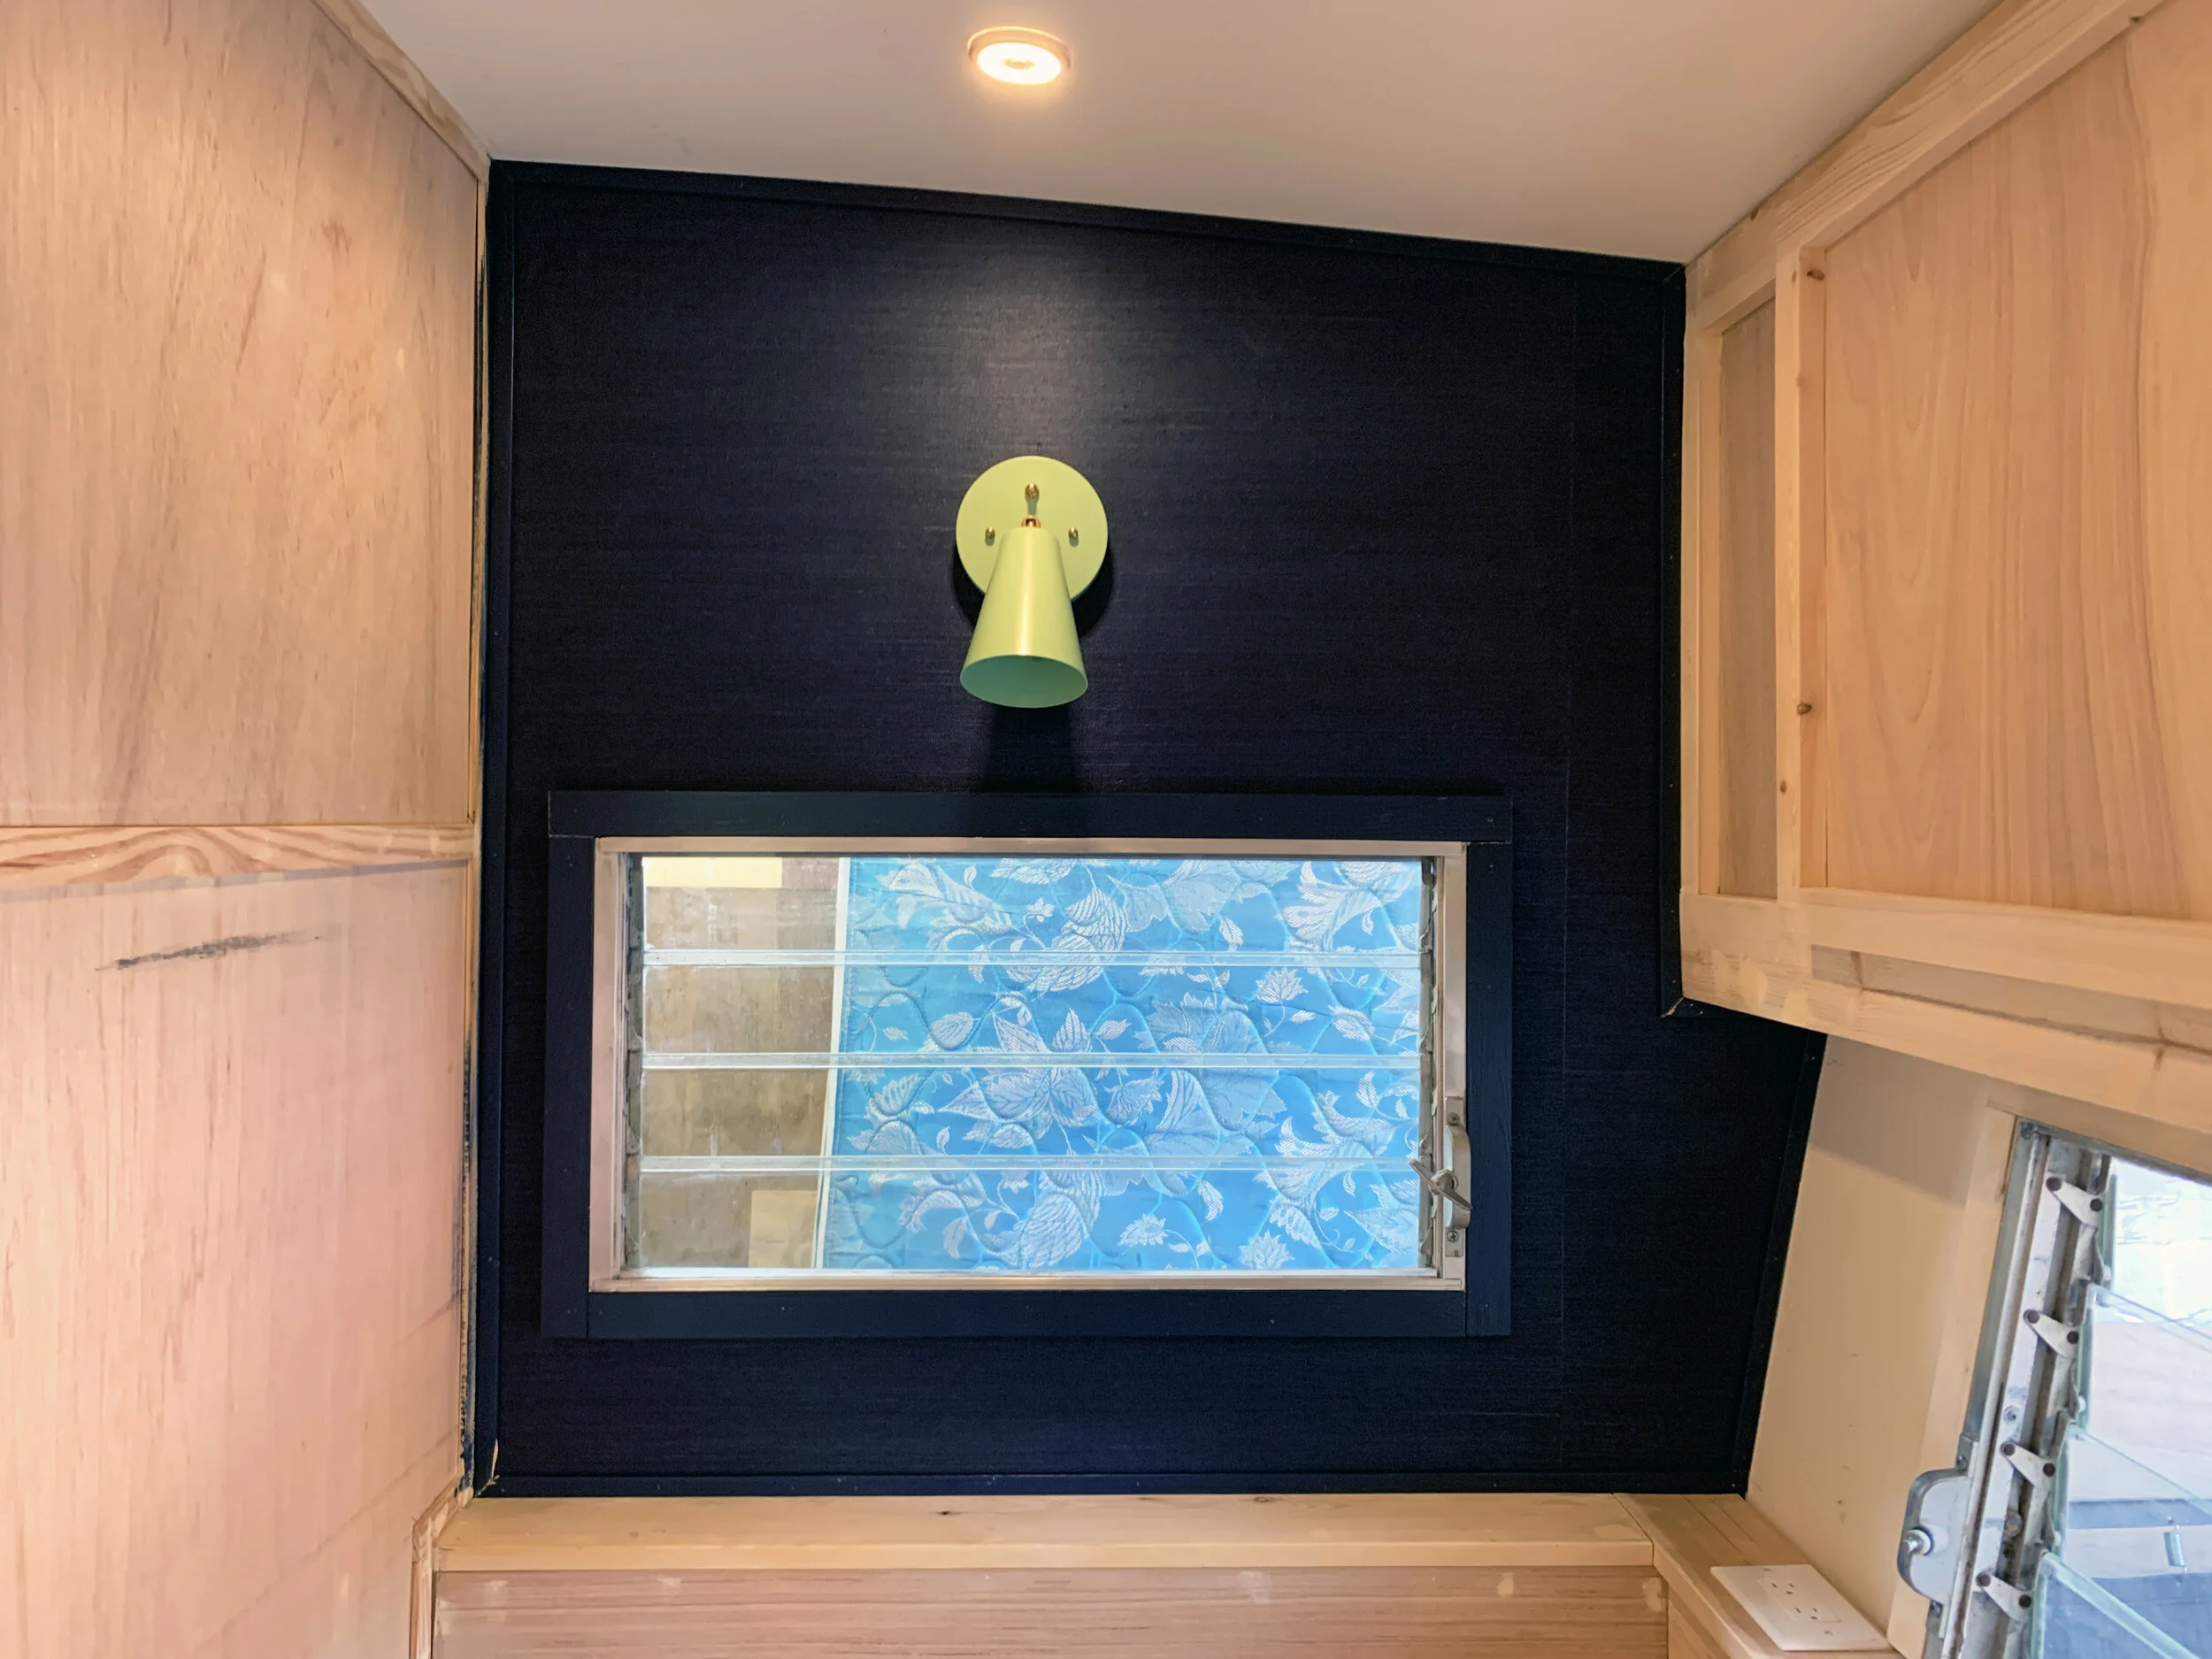
Our faucet has been installed since April and plumbed since May (boy, how time flies), and though we haven’t really used it a whole lot (since we still haven’t quite completed our gray water storage tank install), it’s safe to say we LOVE our brass faucet (and sink setup) so far! It’s the perfect size/proportion for a small (98-square-foot) camper and the faucet spout is able to swivel 360 degrees, so it’s great for moving it to the side and out of the way if needed for a little added counter space when the lid’s in place. Plus, it packs a big design punch for a such small little thing, and we like that around here.
Our brass kitchen faucet install shopping list:
Drill
Hole saw – to cut your counter for the faucet. Our faucet required a hole between 32 and 47 mm diameter, so we used a 1.5” hole saw. We only cut one hole based on our style of faucet and personal taste since we didn’t want to use the wide/oblong deck plate that was included, and we custom-made our counters so it didn’t come pre-drilled with three holes like some pre-fab counters do.
Teflon plumbing tape – it may or may not come with the faucet, but it’s a good thing to have around just in case you ever need to work on any surprise plumbing.
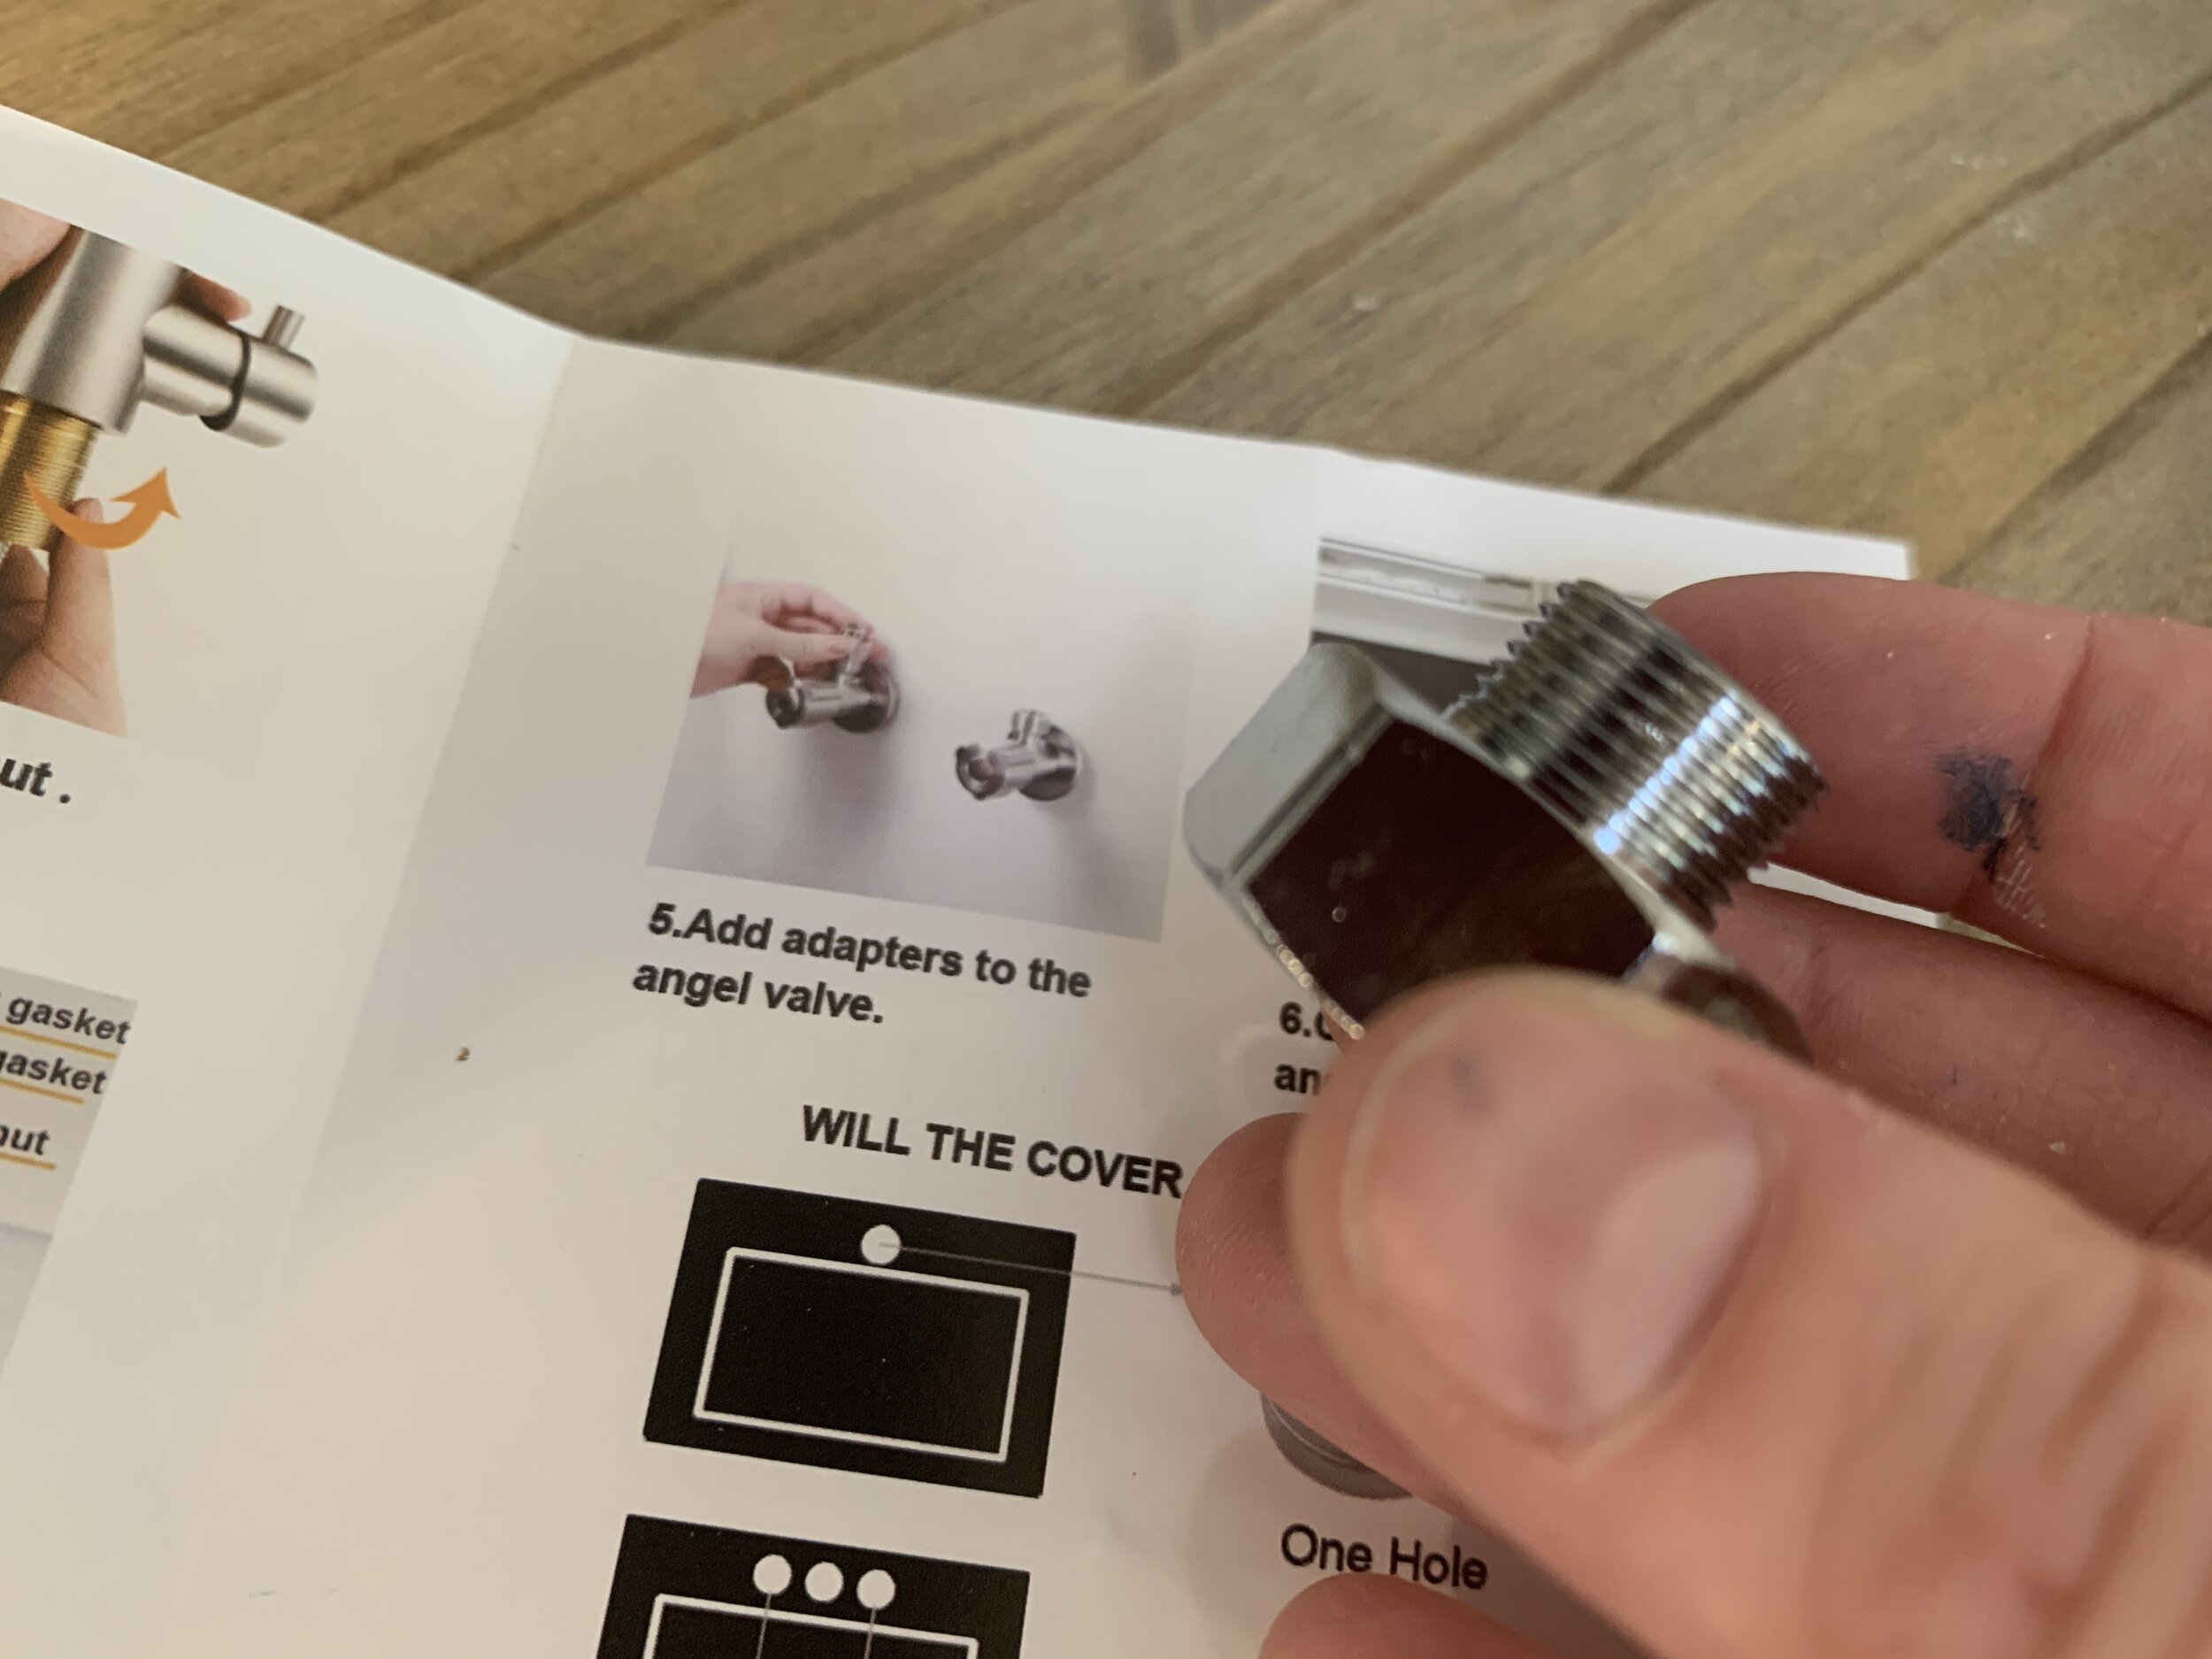
Faucet – ours came with pretty much everything we needed, but if you use a different faucet you may also need:
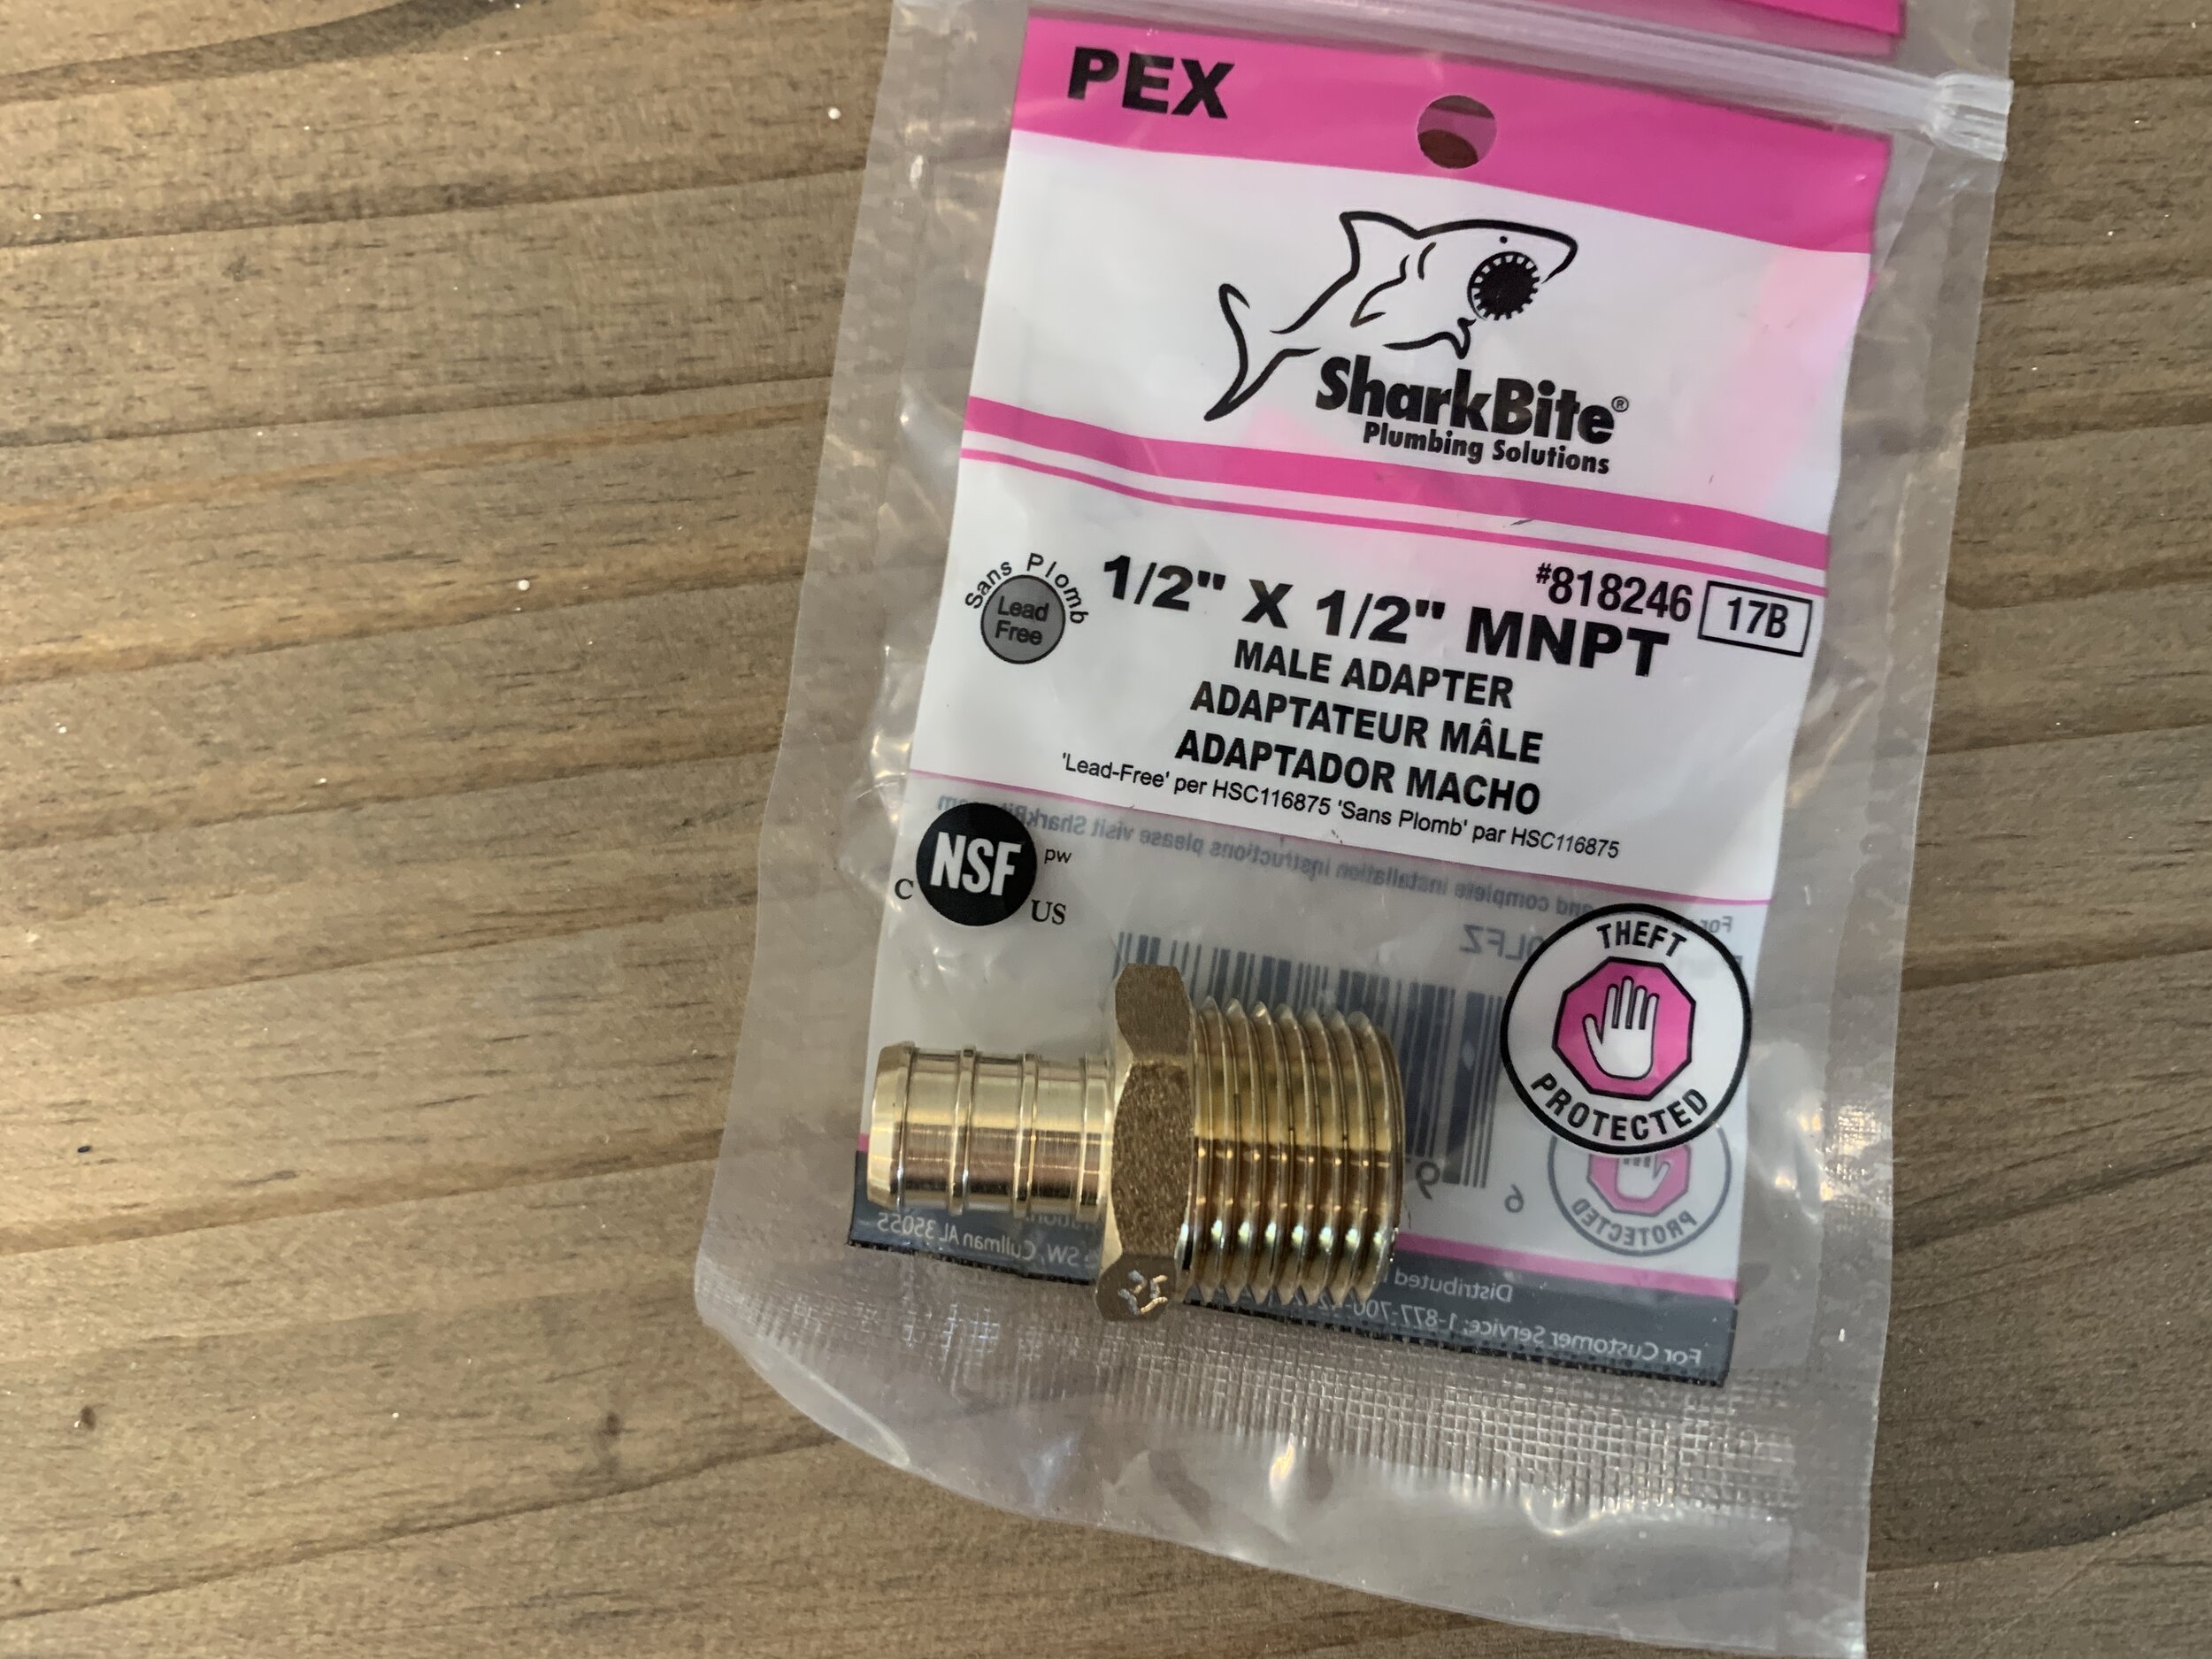
(2) Adapters for your plumbing hot/color lines to your plumbing. We have PEX water lines throughout our camper, so we used the included adapters like these to transition from the standard size threaded hot/cold water lines to our brass PEX adapter’s size.
(2) PEX adapter fittings – you’ll only need these if you’re hooking up to PEX too
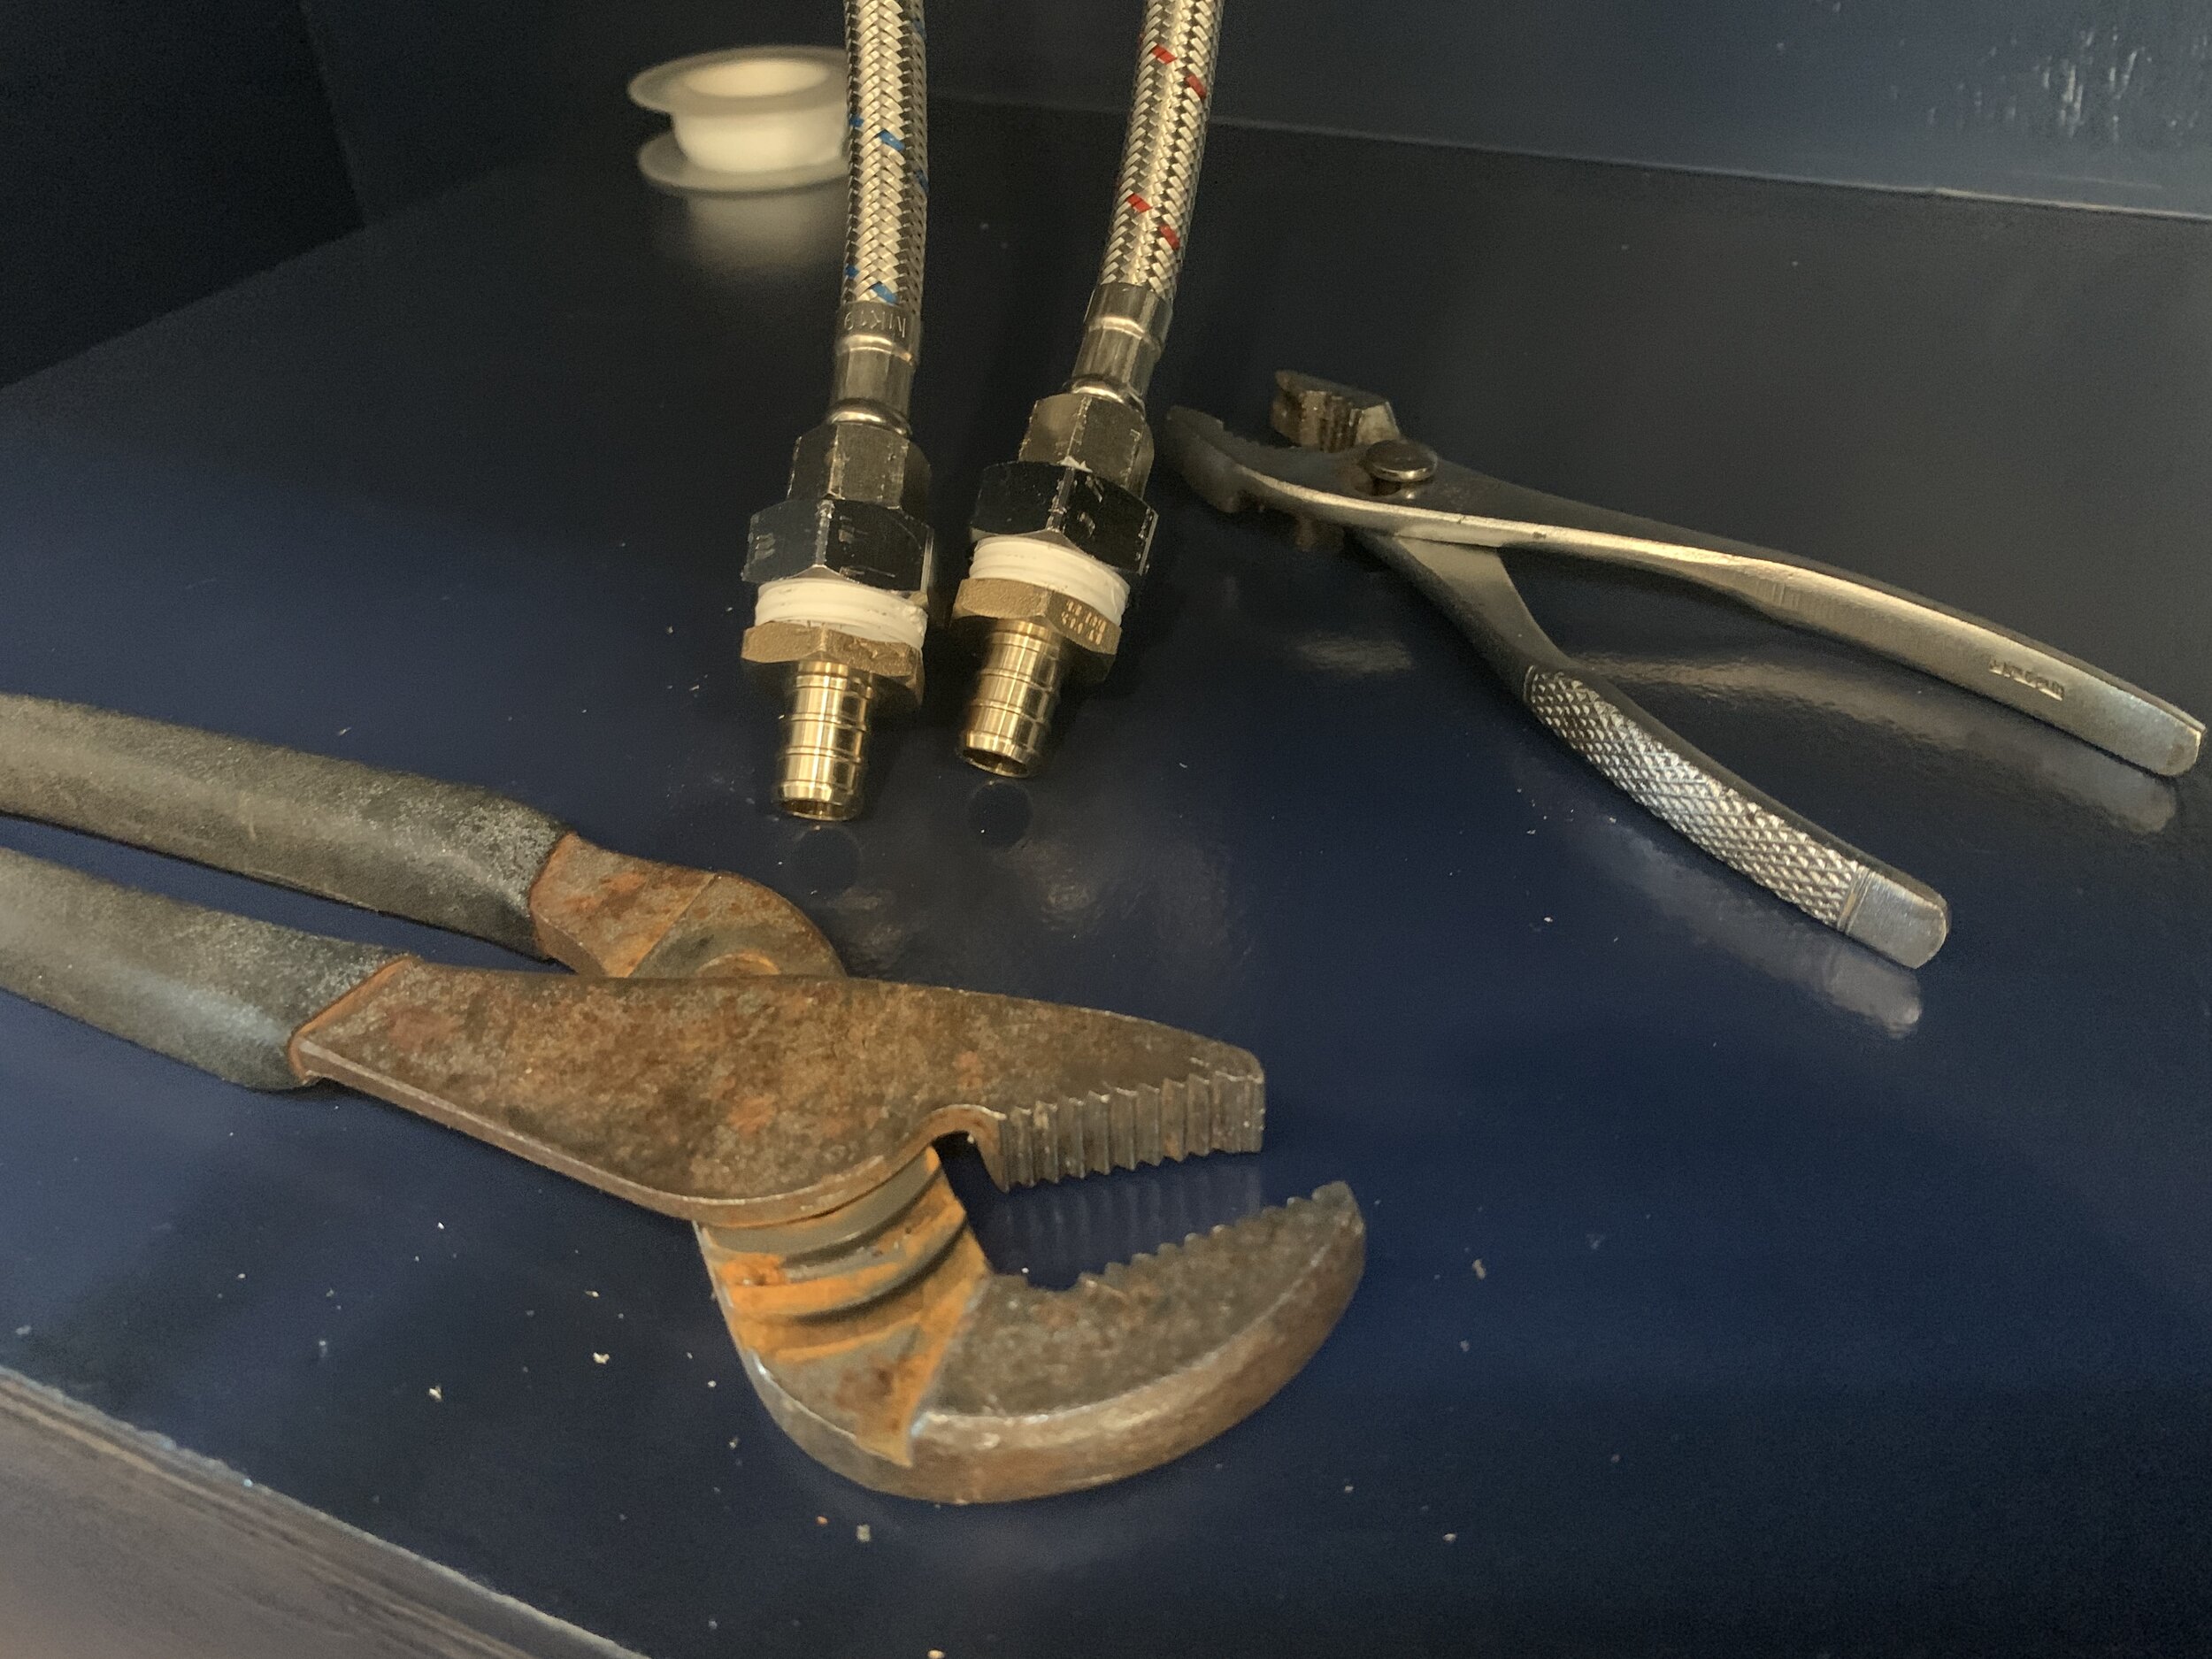
(2) Pliers – I like to use offset pliers for this, but it doesn’t really matter as long as they’re big enough to get a good grip on the plumbing adapter fittings on the ends of the hot and cold lines.
Drilling the faucet hole/prepping your countertop
First, we found the exact placement for our faucet – centered in the window/under the overhead accent light. We also made sure when we planned our faucet placement that it was far enough from the wall so that the handle could move all the way back without hitting the wall (so we could have the full water temperature range).

We used a 1.5"” hole saw - the hole should be big enough to get the inner plumbing bits through the countertop, but be smaller than the finished base of your faucet.
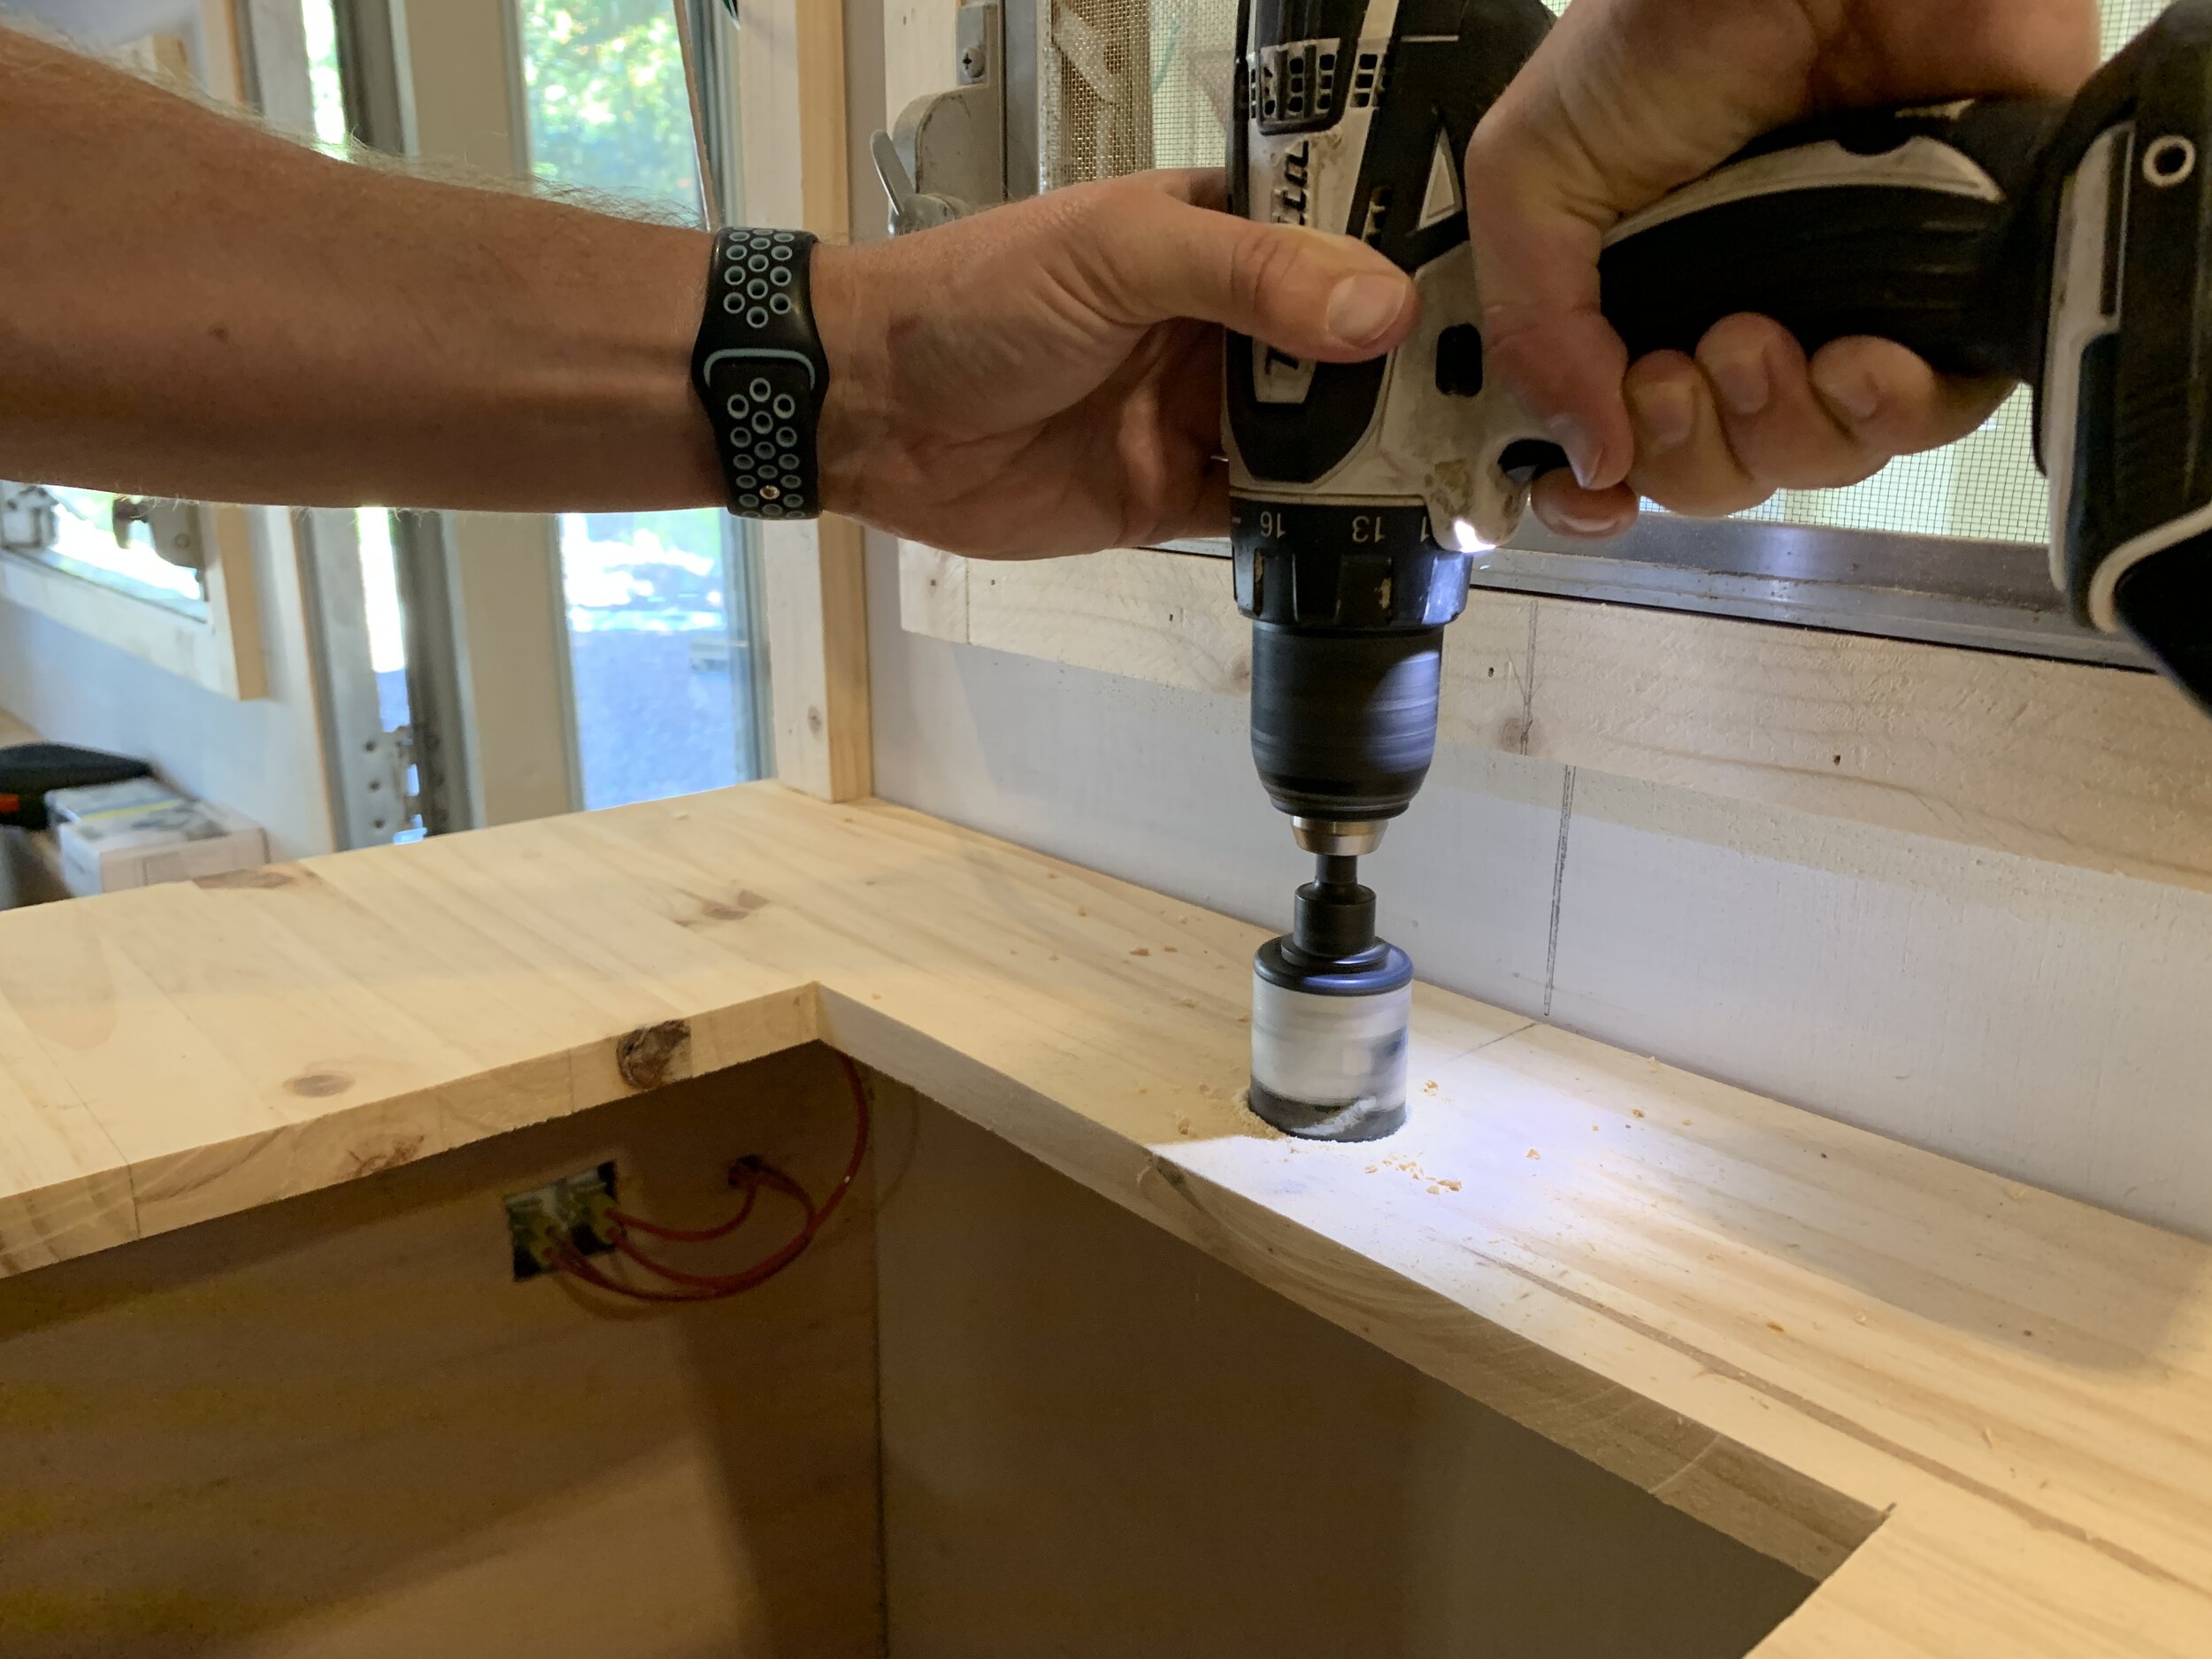
For more detail on how we prepped our countertops for our sink/faucet, check out this post.
Installing a kitchen faucet
This part is pretty straightforward if your countertop hole is sized and placed properly.

We followed the instructions that came with our faucet, which can basically be summed up as:
Decide if you want to use any deck plates that came with the faucet and set in place on top of the counter.
From the top of the counter, slide the braided hot and cold water lines coming out of the bottom of the finished faucet through the hole in the counter.
Using the provided threaded clamp ring and and any washer(s), pull the hot and cold lines through the washer/ring and screw the threaded ring onto the bottom of the faucet from underneath the counter, making sure to keep the faucet above the counter aligned with the sink how you’d like.
Tighten the washer as tight as you can by hand to keep the faucet locked in place.
Plumbing a kitchen faucet
Once the faucet is securely installed to the counter following the steps above, you’ll need to add any adapter fittings as needed to connect to your water lines (in our case, PEX) and prepare a watertight seal at each metal on metal connection.
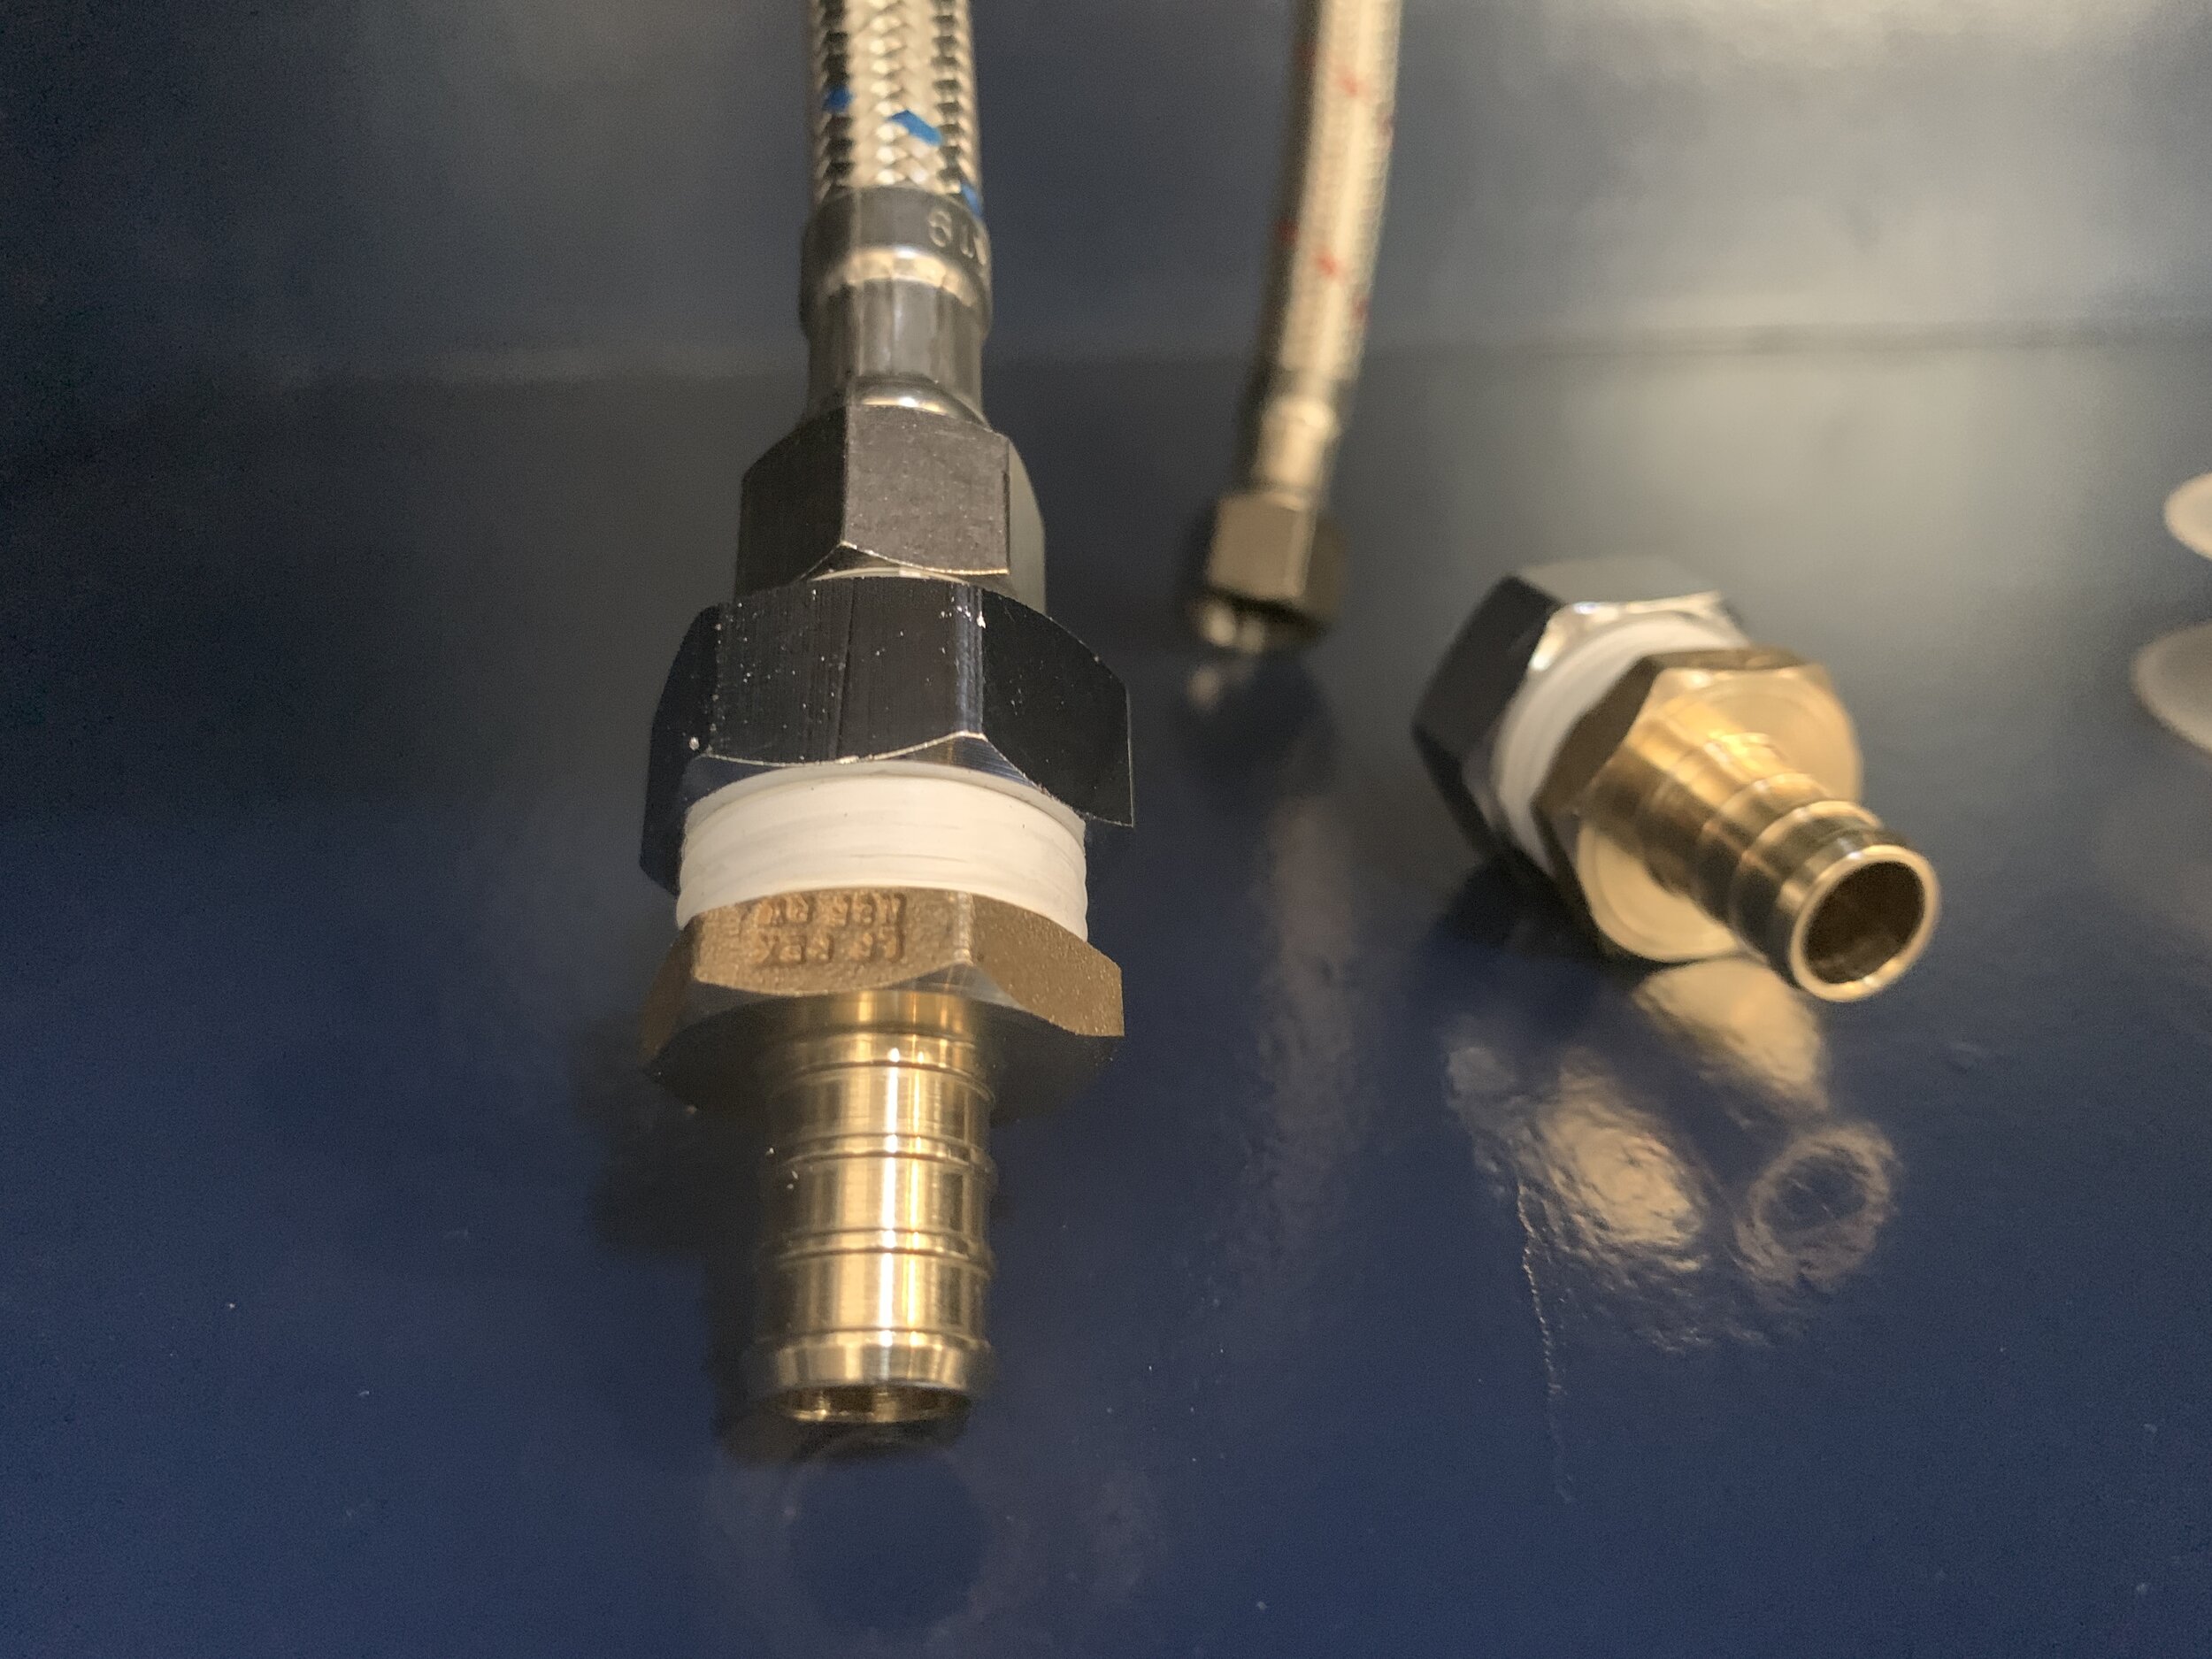
(In the photos below you’ll notice both silver and brass fittings – the silver ones are the adapters that came with our faucet and the brass are SharkBite adapters made to connect this size/type of threaded silver connector to our PEX water lines using crimp-on SharkBite rings, which you’ll also see in the photo with the blue colored water line. We’ll get to PEX plumbing in more detail in a separate post when we share our whole plumbing setup.)
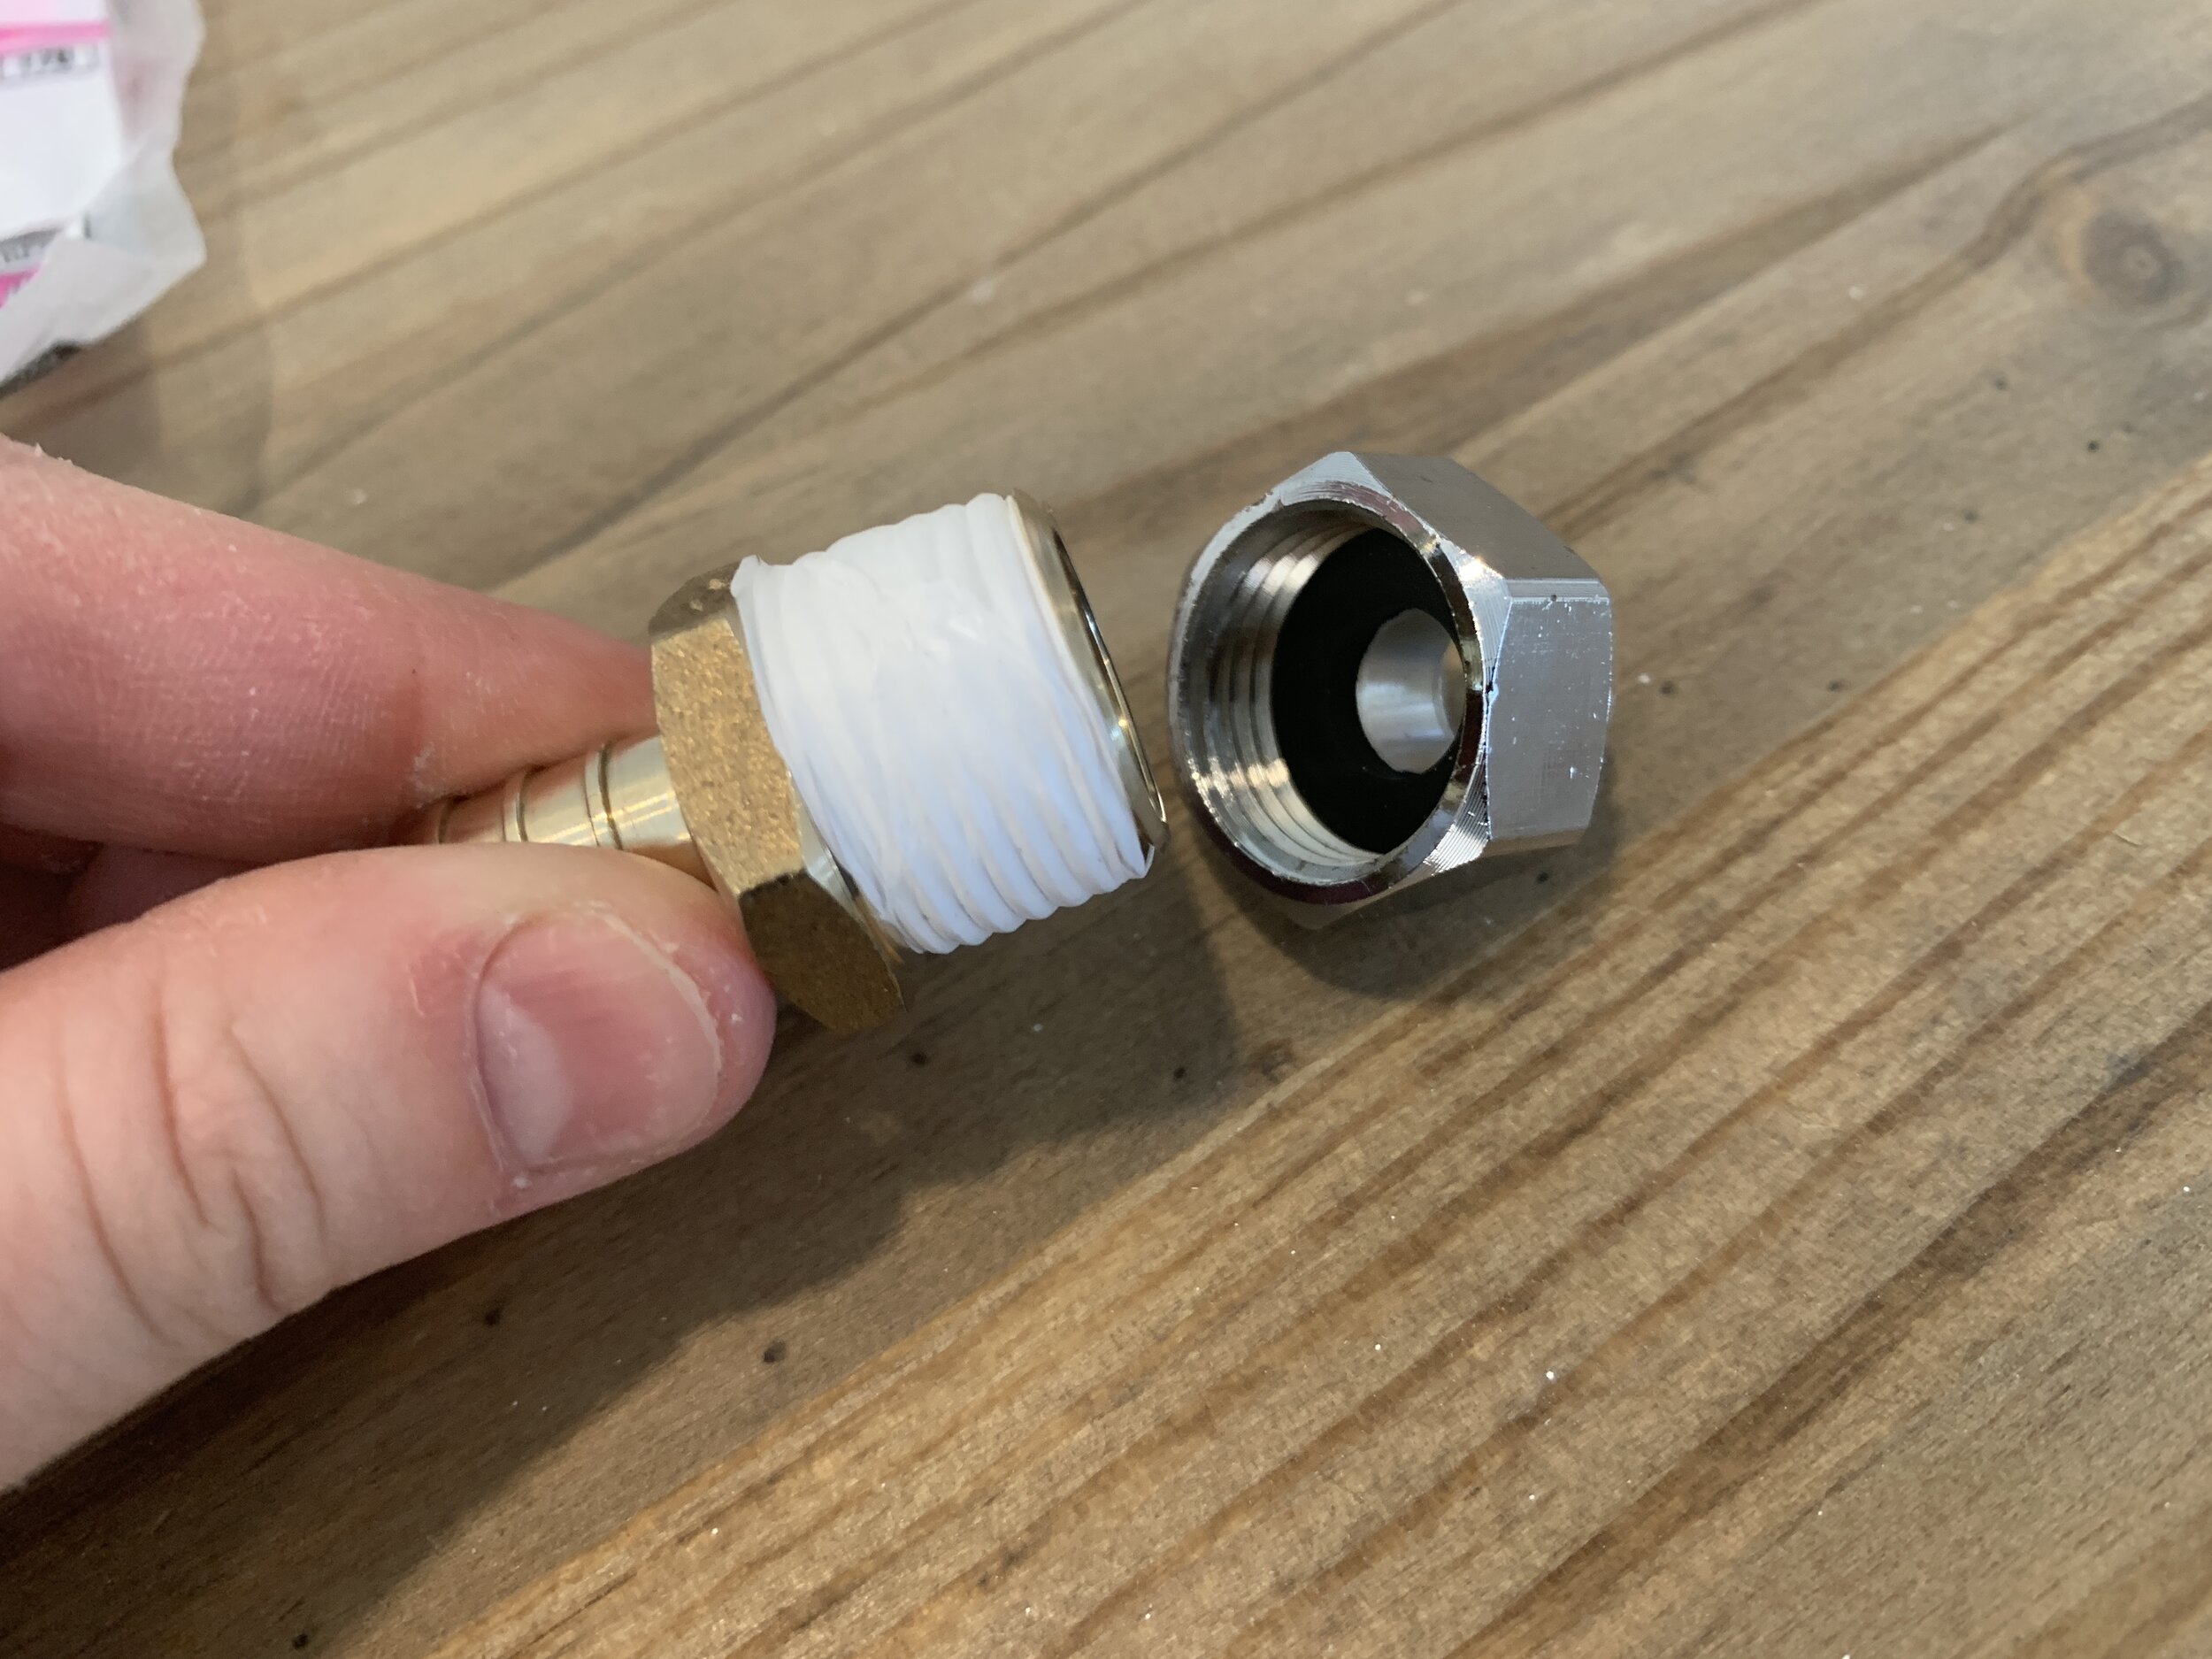
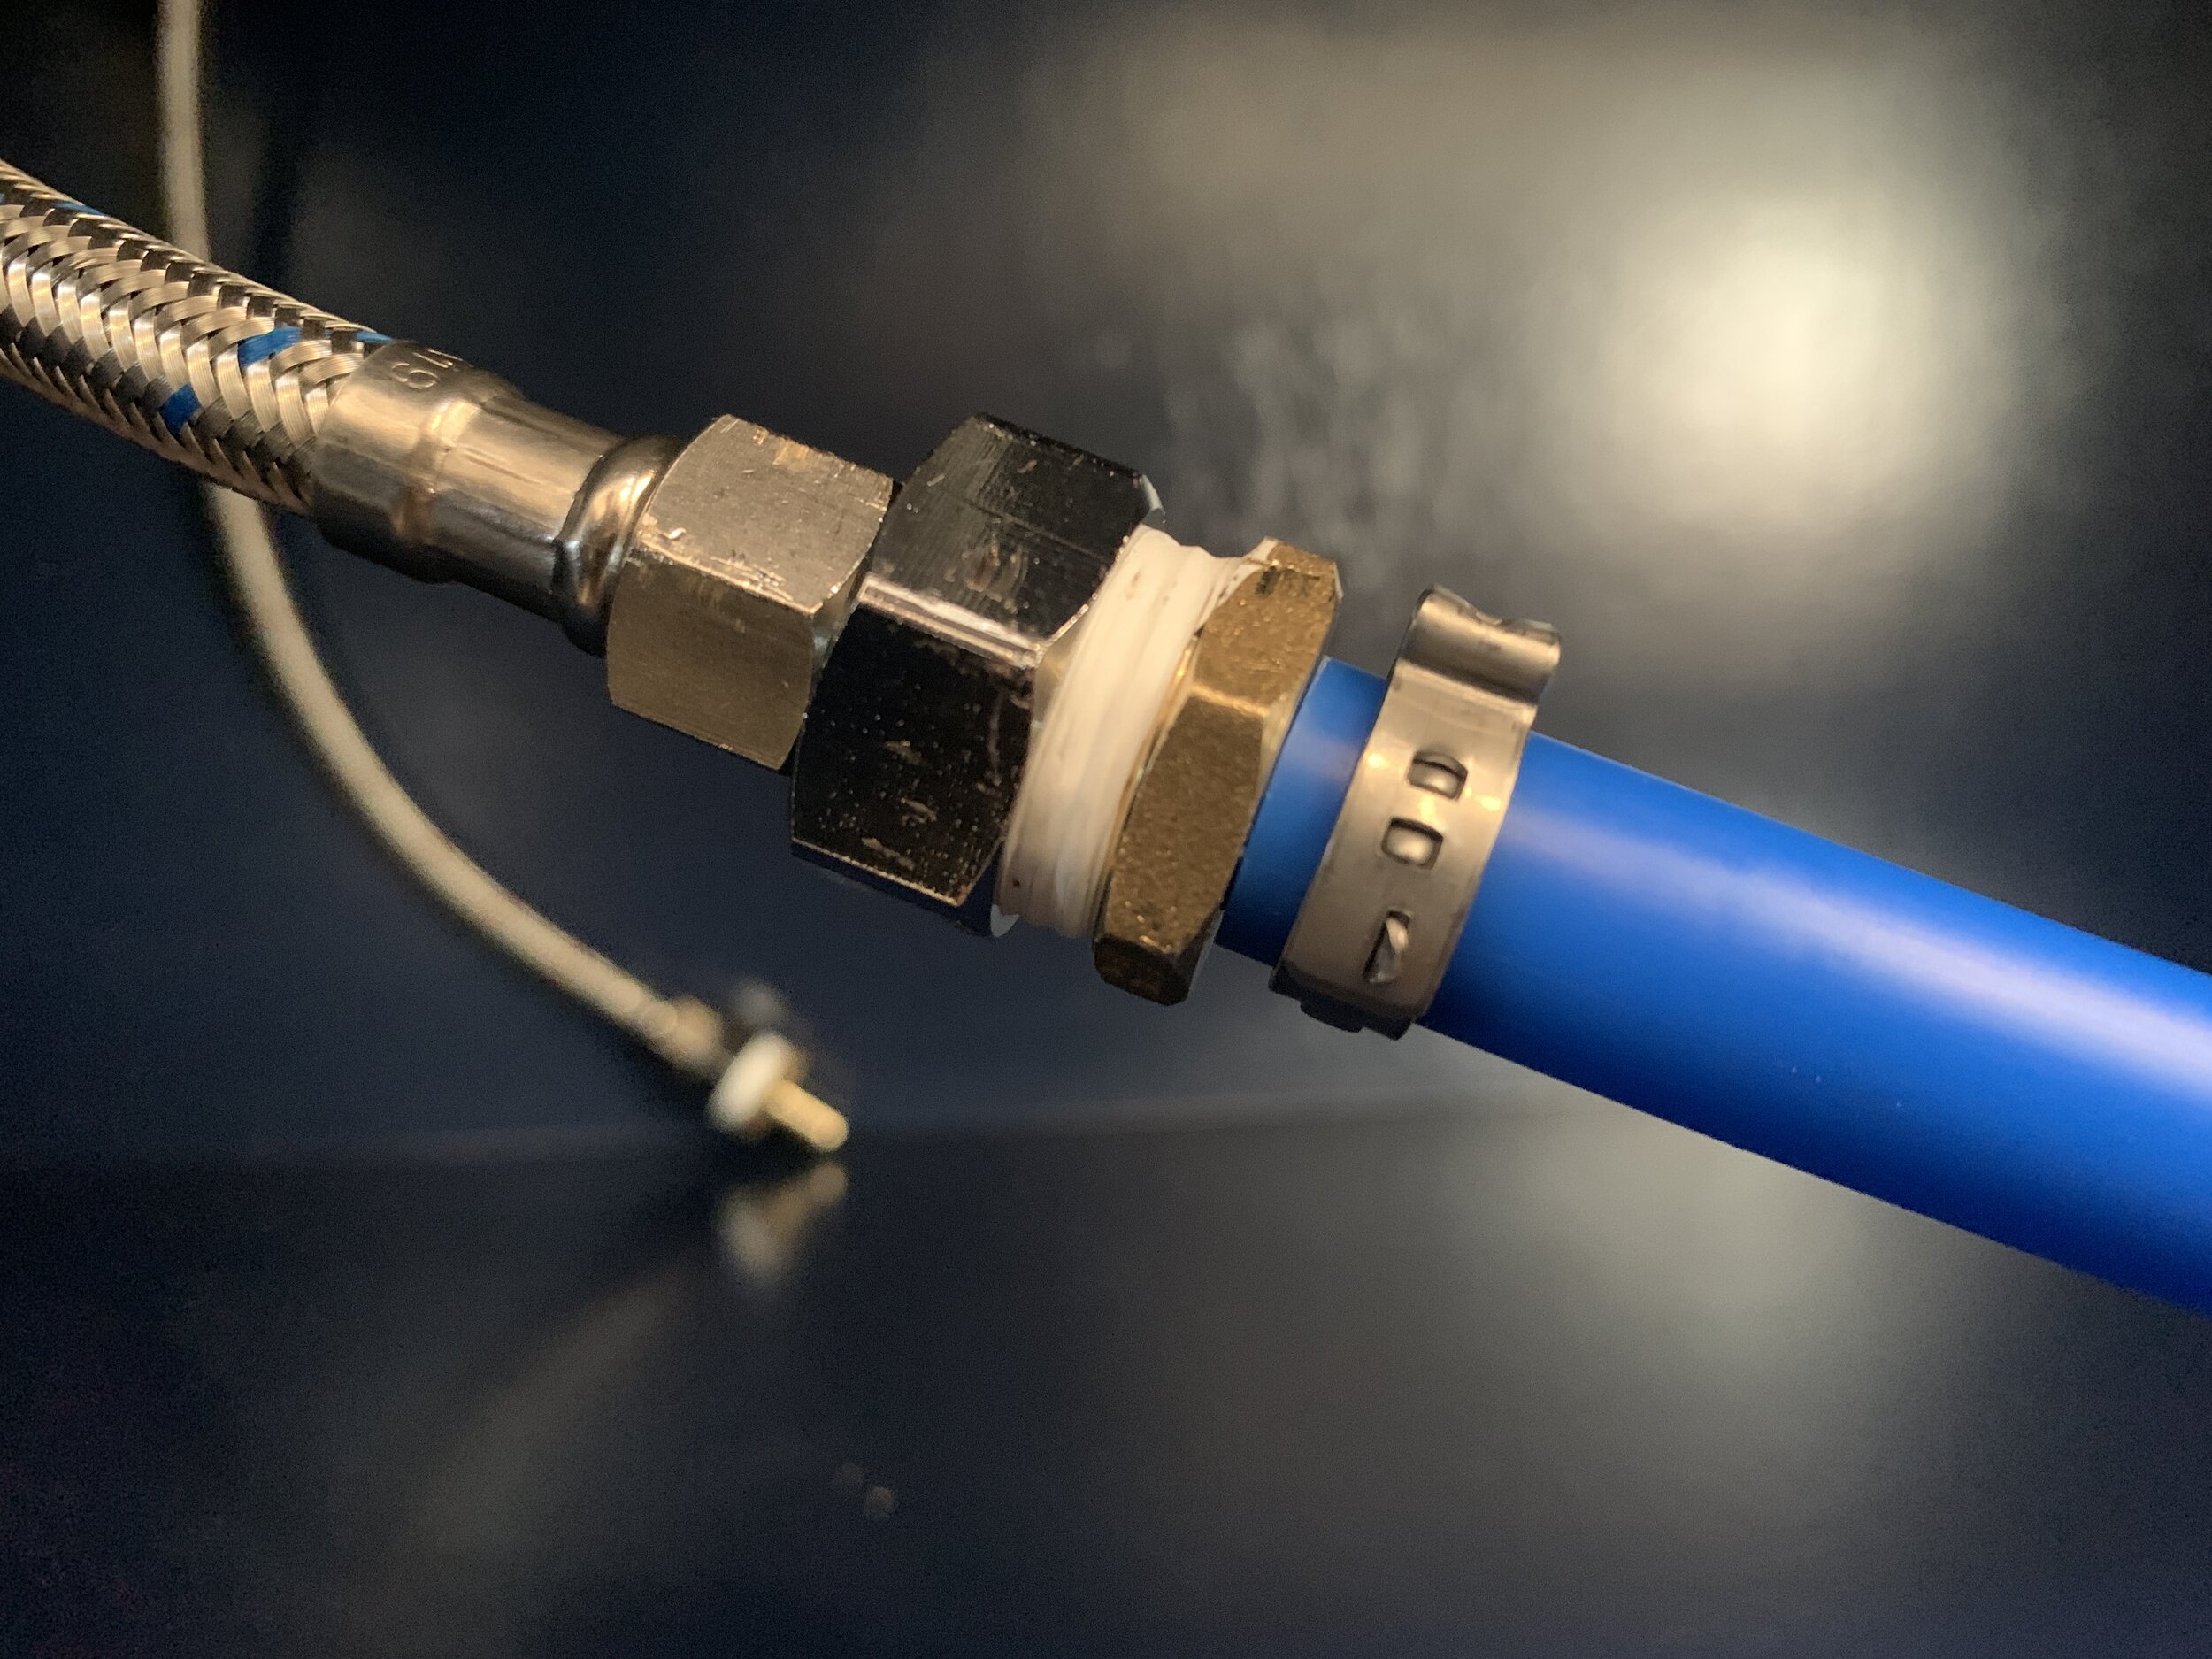
Being careful not to block the fitting opening, wrap the teflon tape around the outside threads of the male* fitting(s) that will be screwed into the female* ends of the hot and cold faucet lines. About three layers around should do. Tear the tape by hand and push the torn edge of the tape down on the threads so that it’s not blocking the fitting opening.
Remember: Any metal-to-metal plumbing connections needs to have teflon tape to make a nice watertight seal.
To make it easiest on yourself, it’s best to wrap the teflon tape in the direction you will be screwing into the fitting (clockwise if you’re looking into the threaded hole-side of the fitting) so it doesn’t unwrap while you twist the fittings into each other – and remember: righty tighty, lefty loosey!
Screw the adapters/fittings together by hand and then tighten with two wrenches at the hexagon-shaped part of the fitting to get a super tight connection.
Test your plumbing and check for any drips. Tighten any connections as needed.
*Note: Male fittings are the ones that go into another fitting. Female fittings are the ones that other fittings go into. For example, if you were the little Dutch boy who had to use his finger to plug a hole in the dyke, your finger would be the male fitting and the hole in the dyke would be the female fitting.
That’s it! It goes pretty quick and easy and is a great way to give your sink a quick update.

Are you loving the small touch of brass as much as we do? What do you think of the finished kitchen sink look? Is there a DIY faucet install in your future? We’d love to hear your thoughts in the comments below.