The Cameo Camper Renovation: Upholstered Convertible Dinette Cushions
Hey y’all! Today we’re going back in time (a bit) and sharing our finished upholstered dinette cushions. Using the original gaucho bed cushion as our inspiration, we came up with a custom design that quickly and easily takes our U-shaped dining area to a bed in just a few minutes.
If you’ve missed the posts most-related to this one, you can find them here:
Dining table build (part 1)
Table leg + install (part 2)
Dining Table to bed (before the upholstery)

Full disclosure: We did not upholster our own cushions, so I don’t have all the nitty gritty photos of the sewing along the way – Nick’s wonderful mom upholstered these for us and they look amazing! This will be more of a final cushion photo reveal, complete with detailed digital mockups of our cushion sizes and their layout, showing how they work together in sitting and bed form, plus links to all of our materials used.
Our Upholstered Dinette Bed Cushion Shopping List
Cushion foam – we bought 3 pieces for our dinette area
Upholstery-grade fabric – we used just under 8 yards of this fabric, and love it!
Thread – in matching fabric color
Serrated bread knife
Sharpie
Tape Measure
T-square/ruler/long level
Planning tHE CUSHION LAYOUT + DIMENSIONS
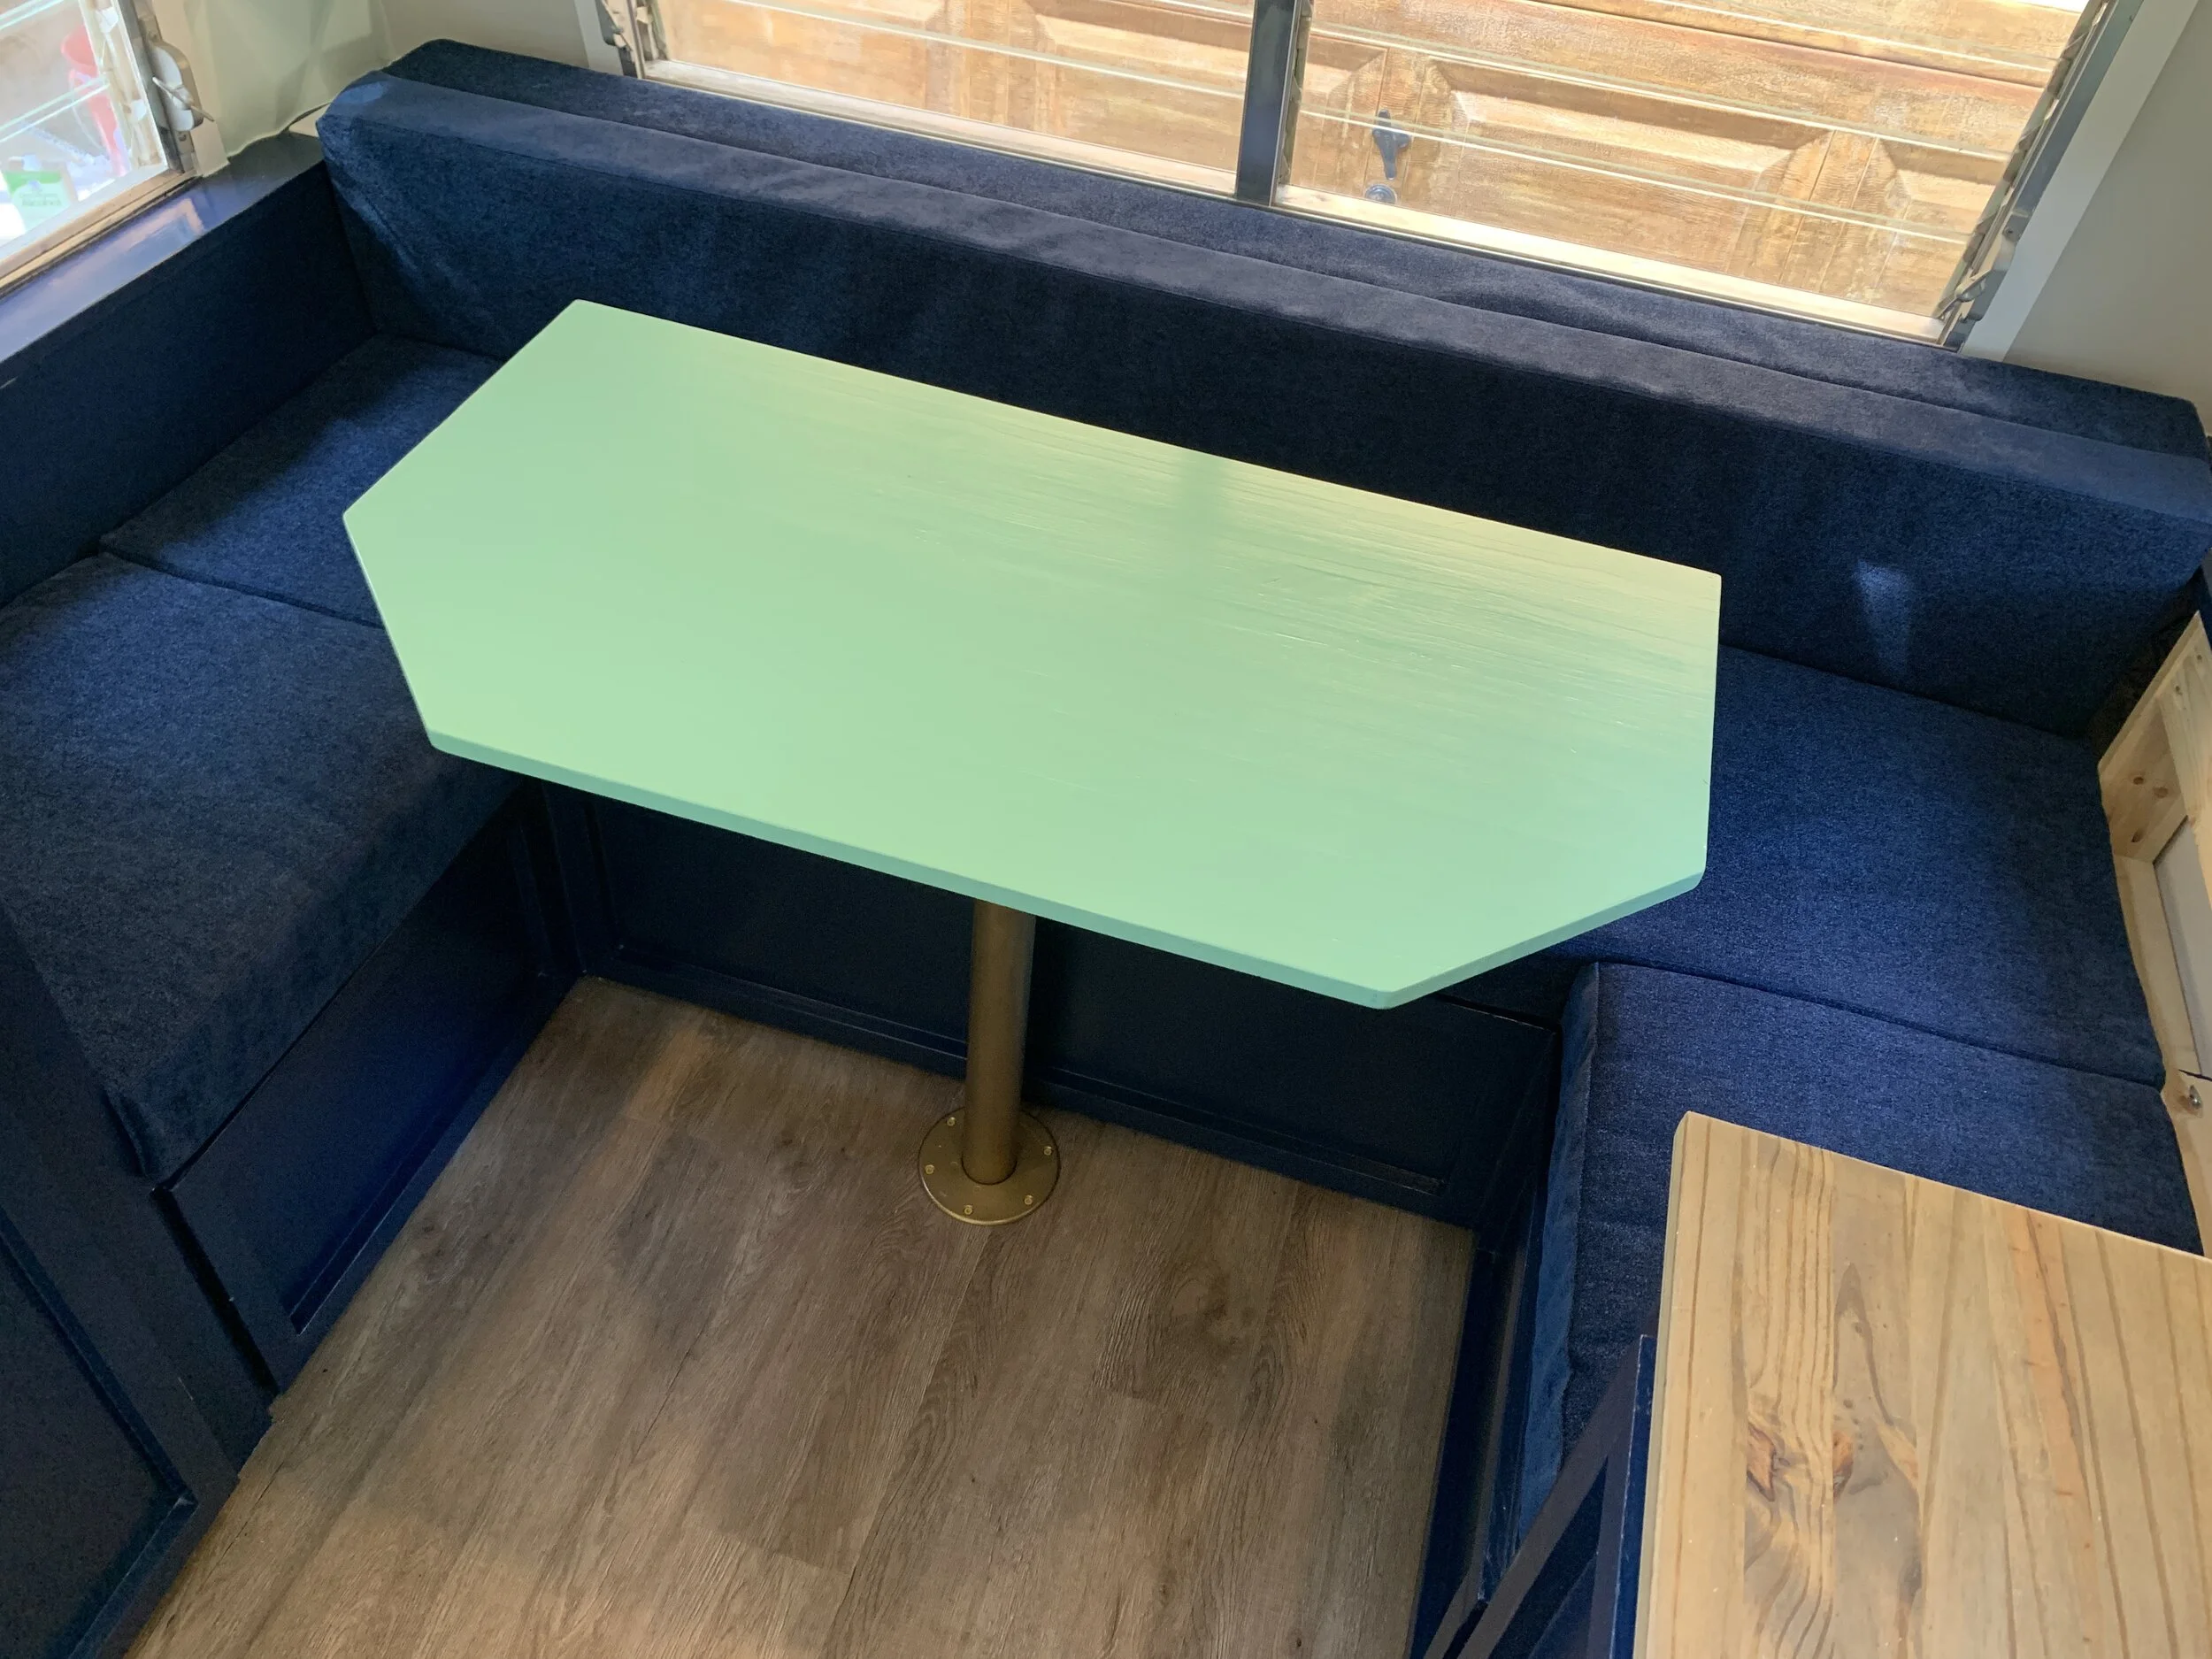
If you remember way back, the area in the back of the camper was a couch/bed and the dinette was in the front of the camper. Since then, we’ve moved the dinette to the back for more space. The area now known as the dining area used to look like this:
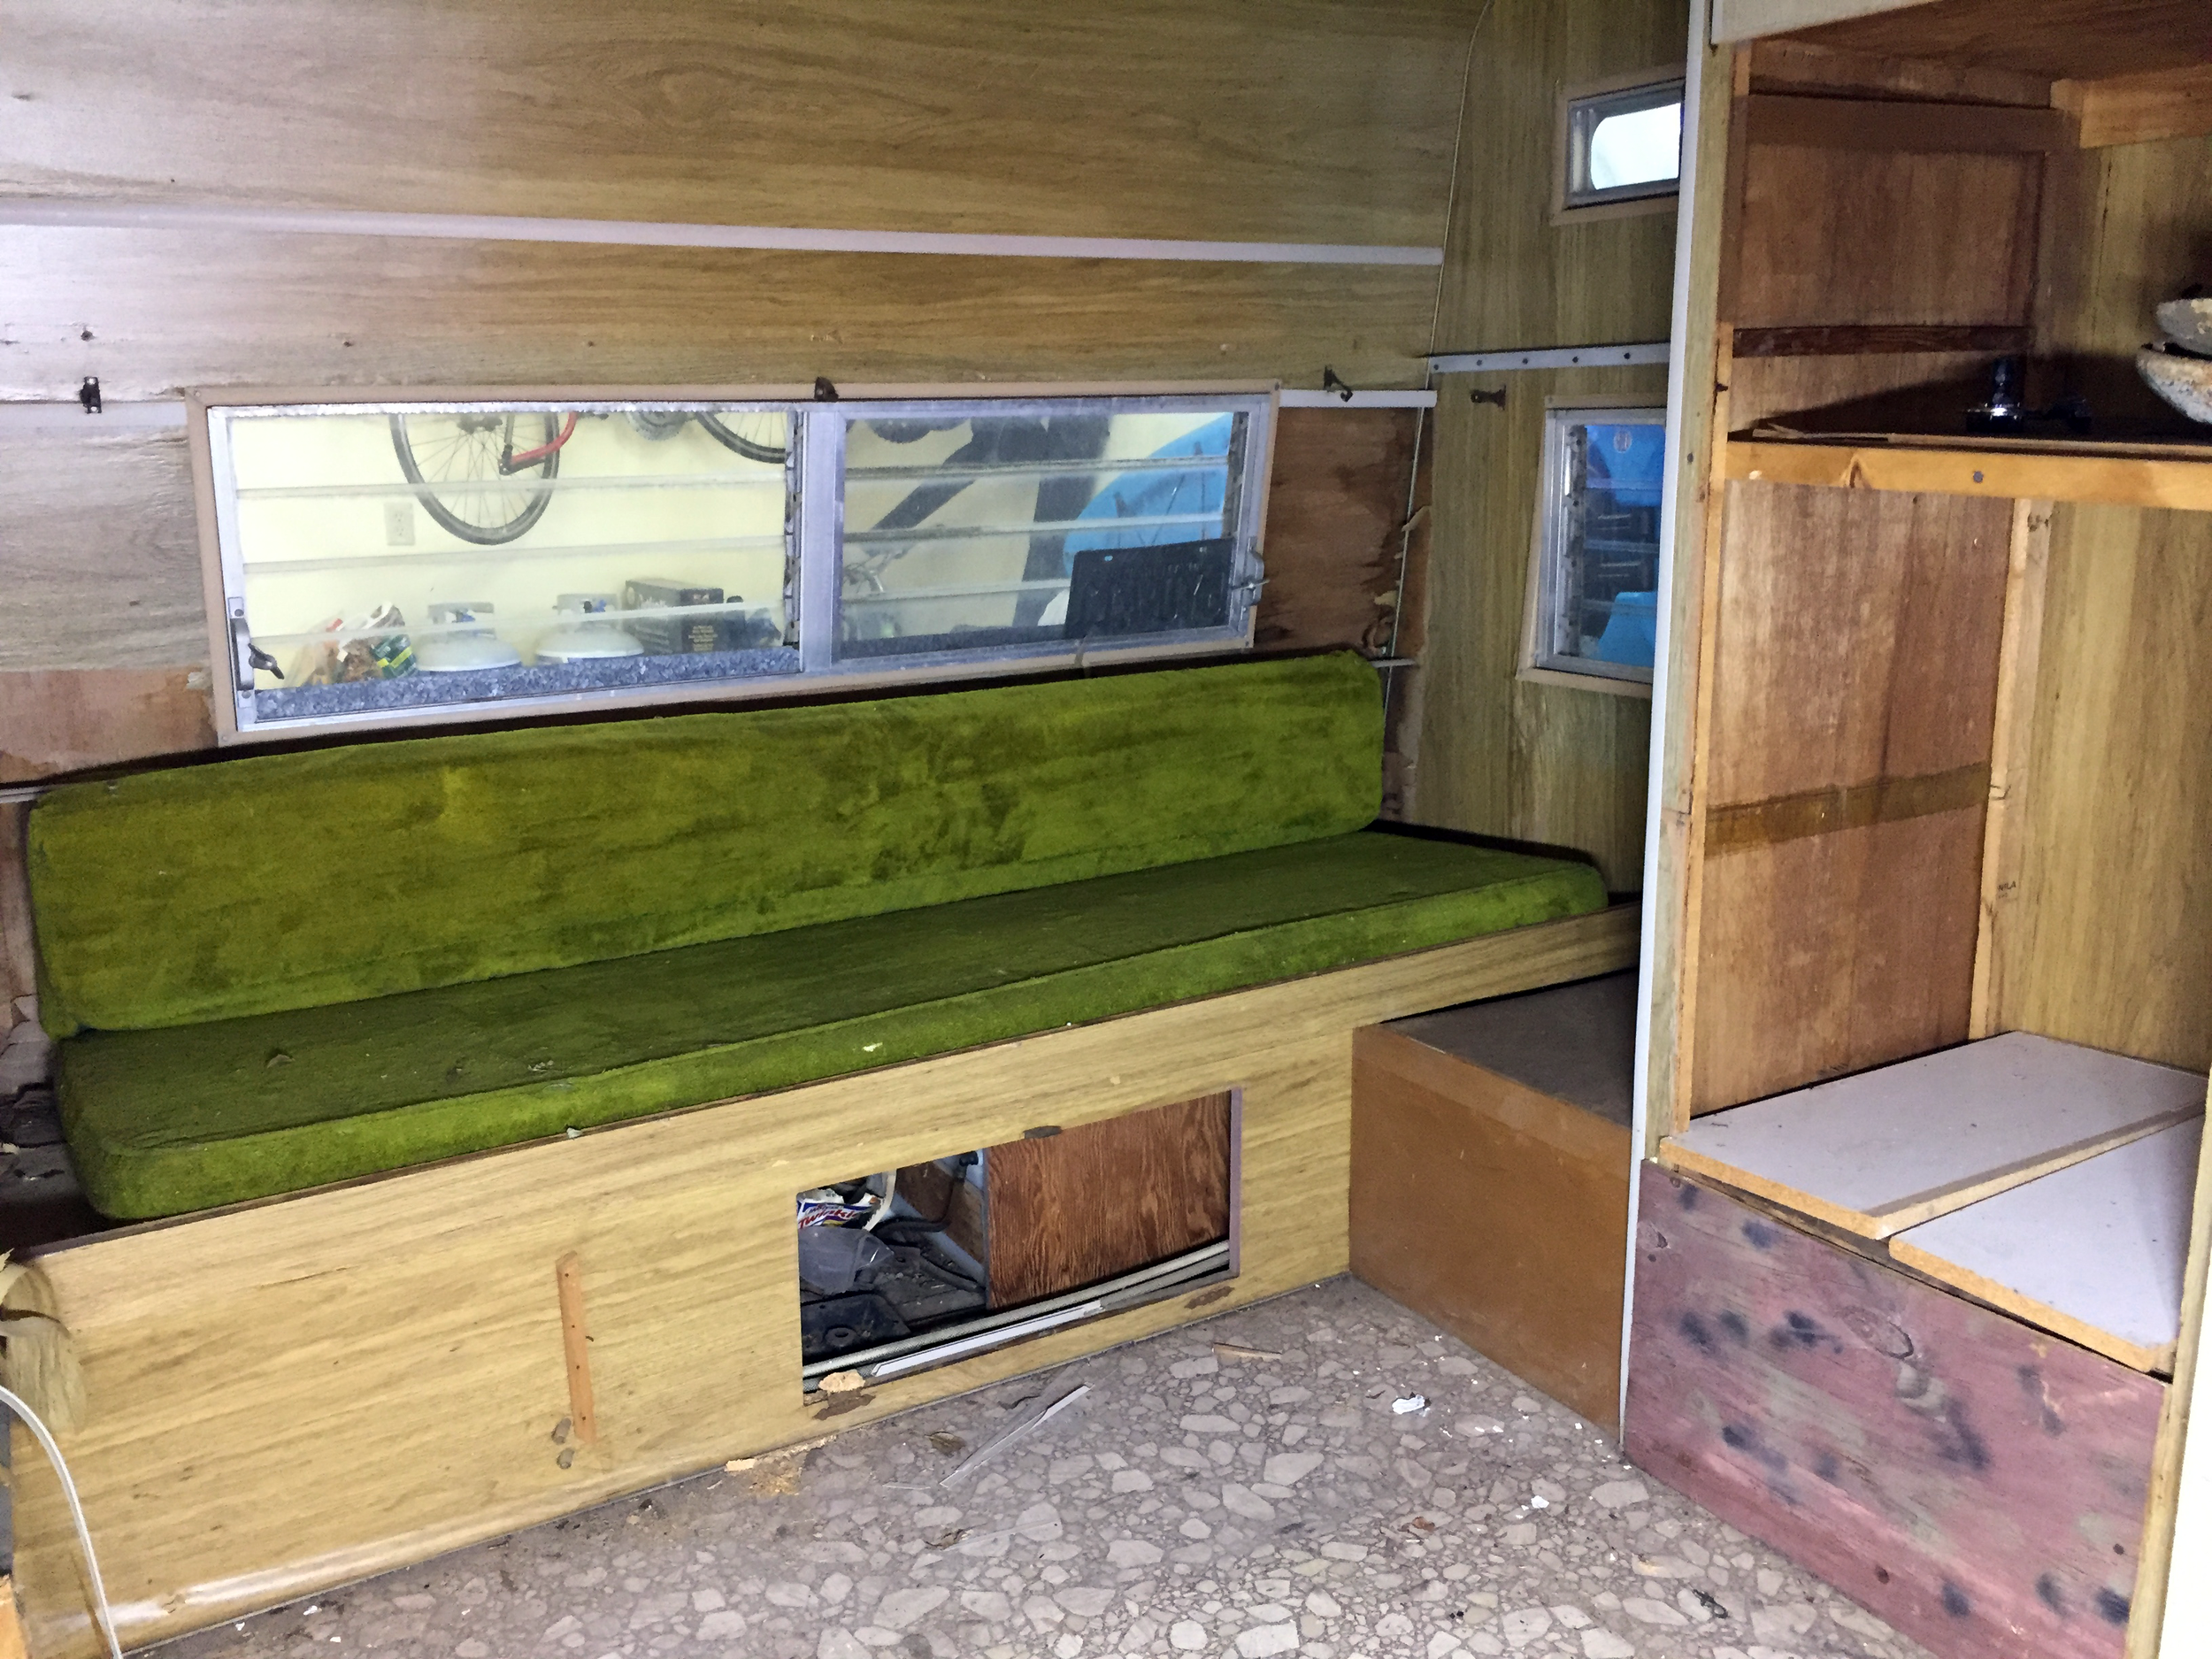
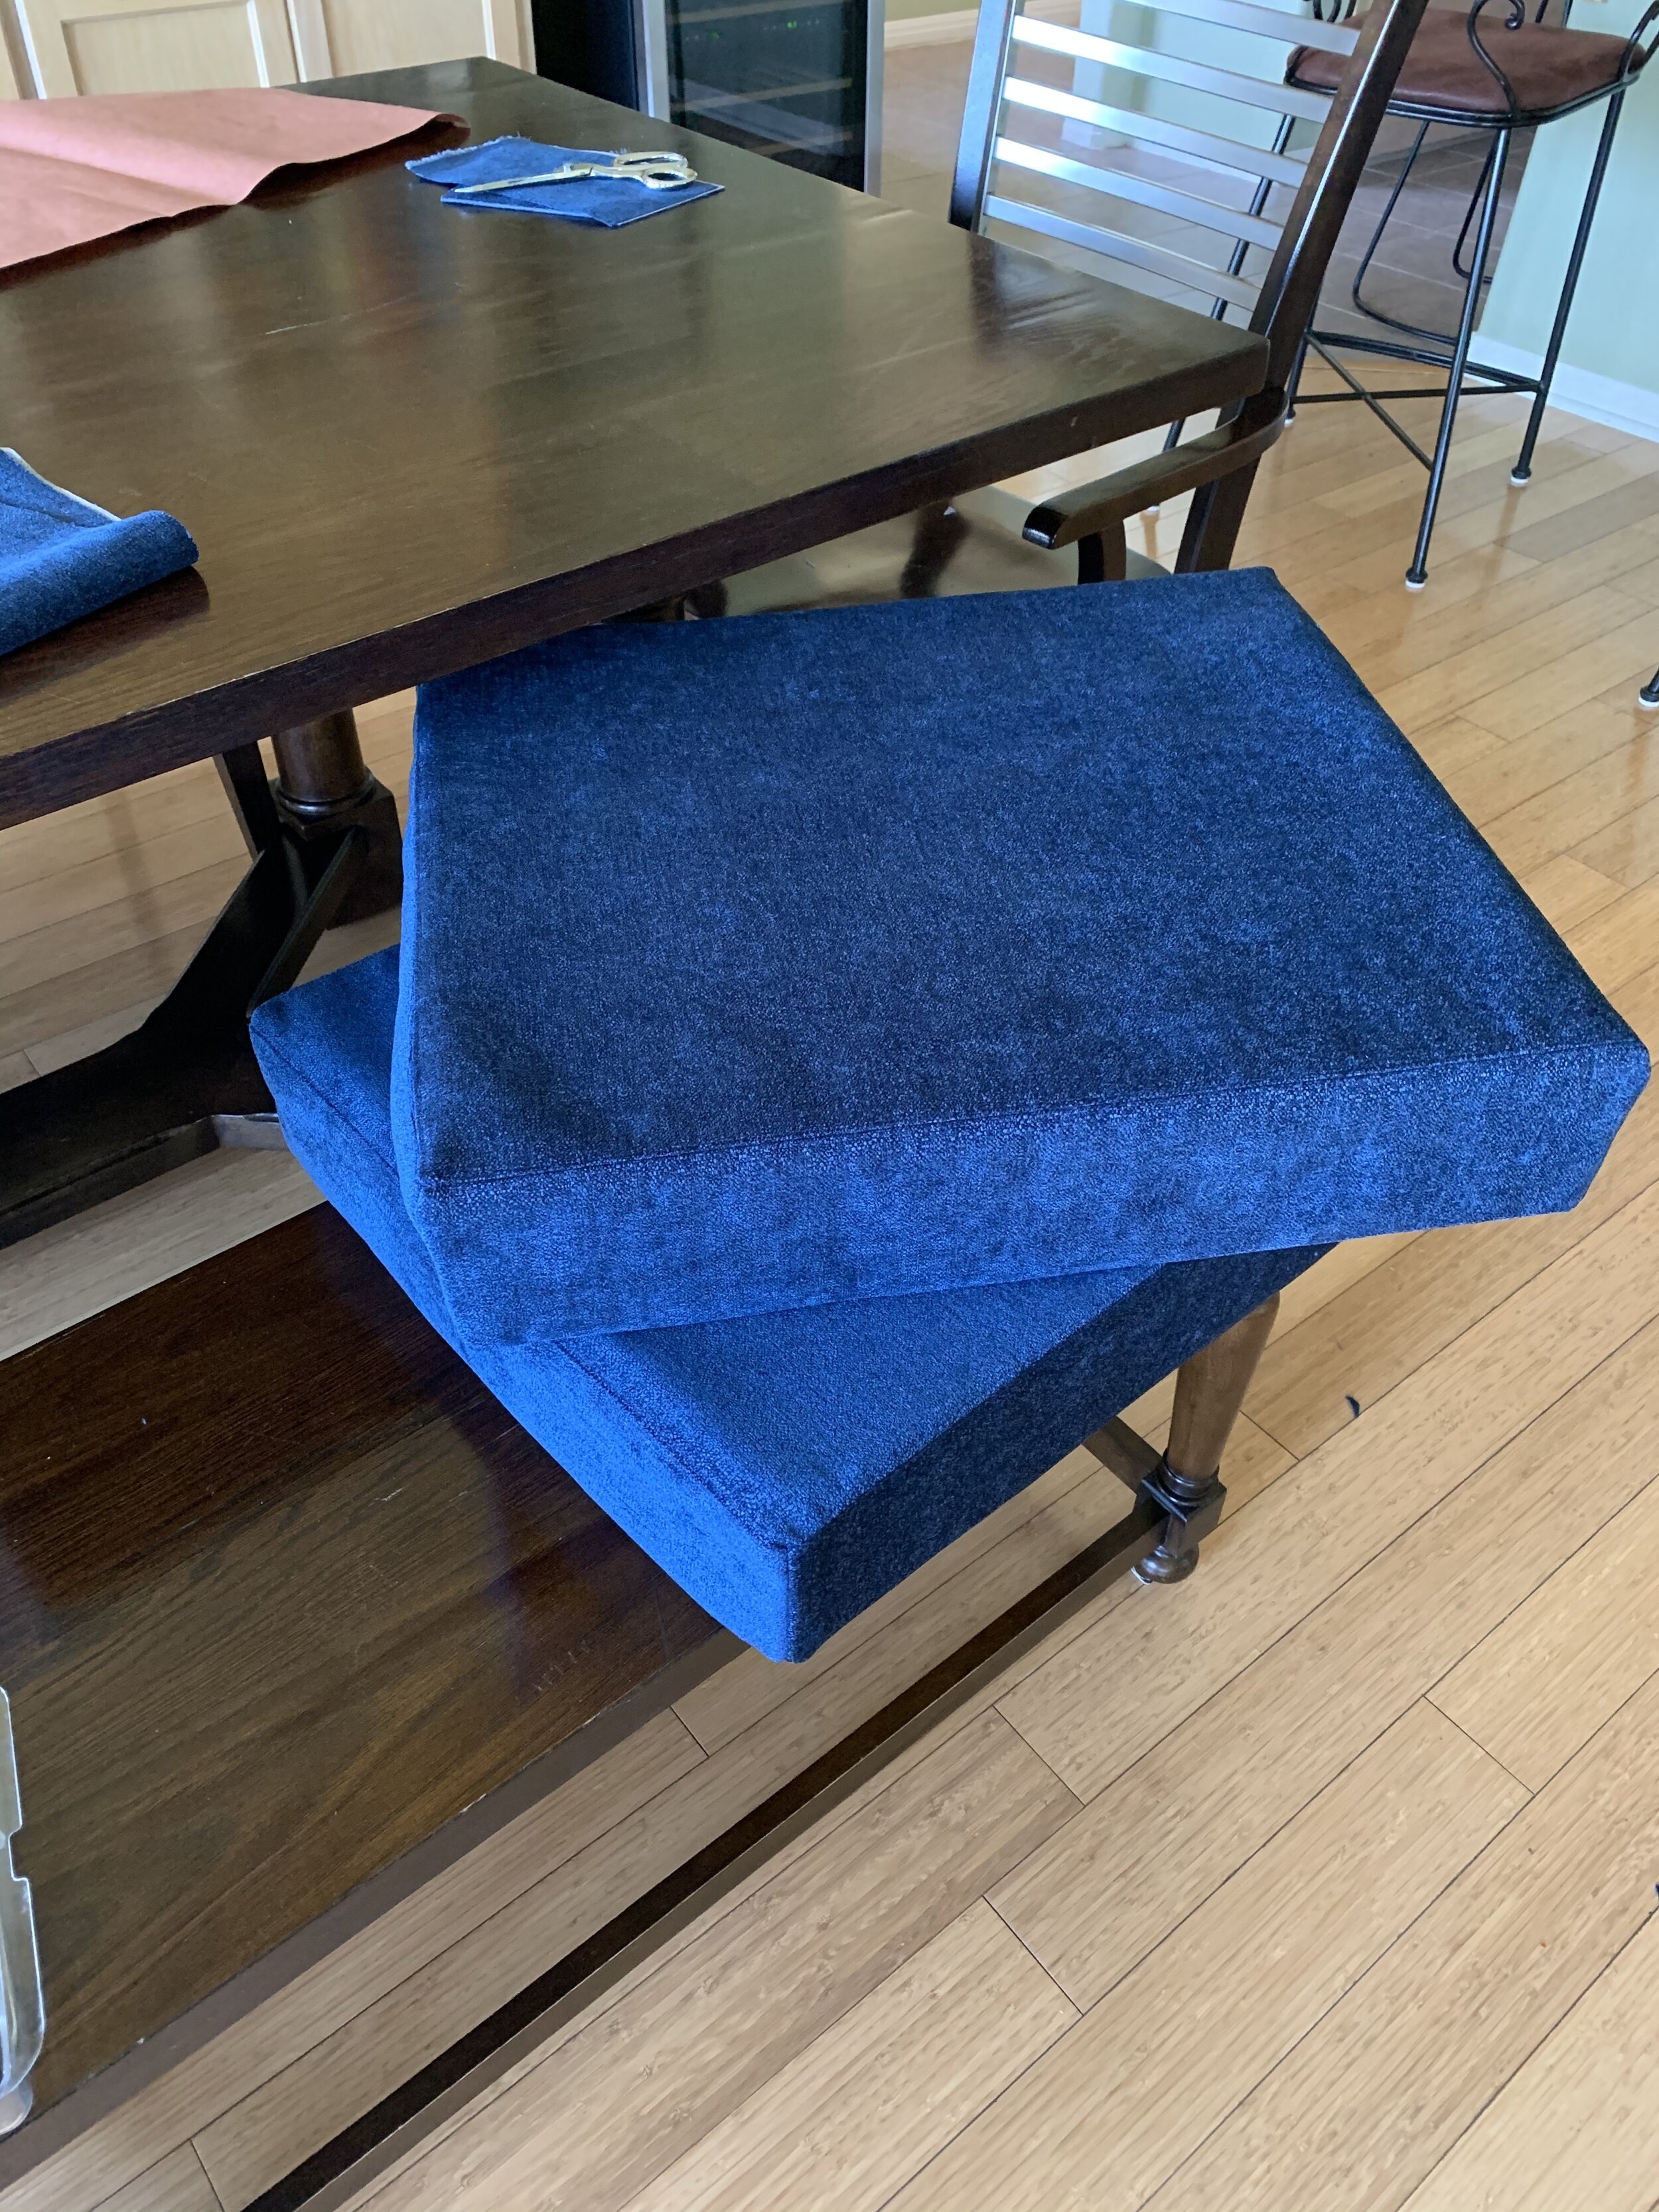
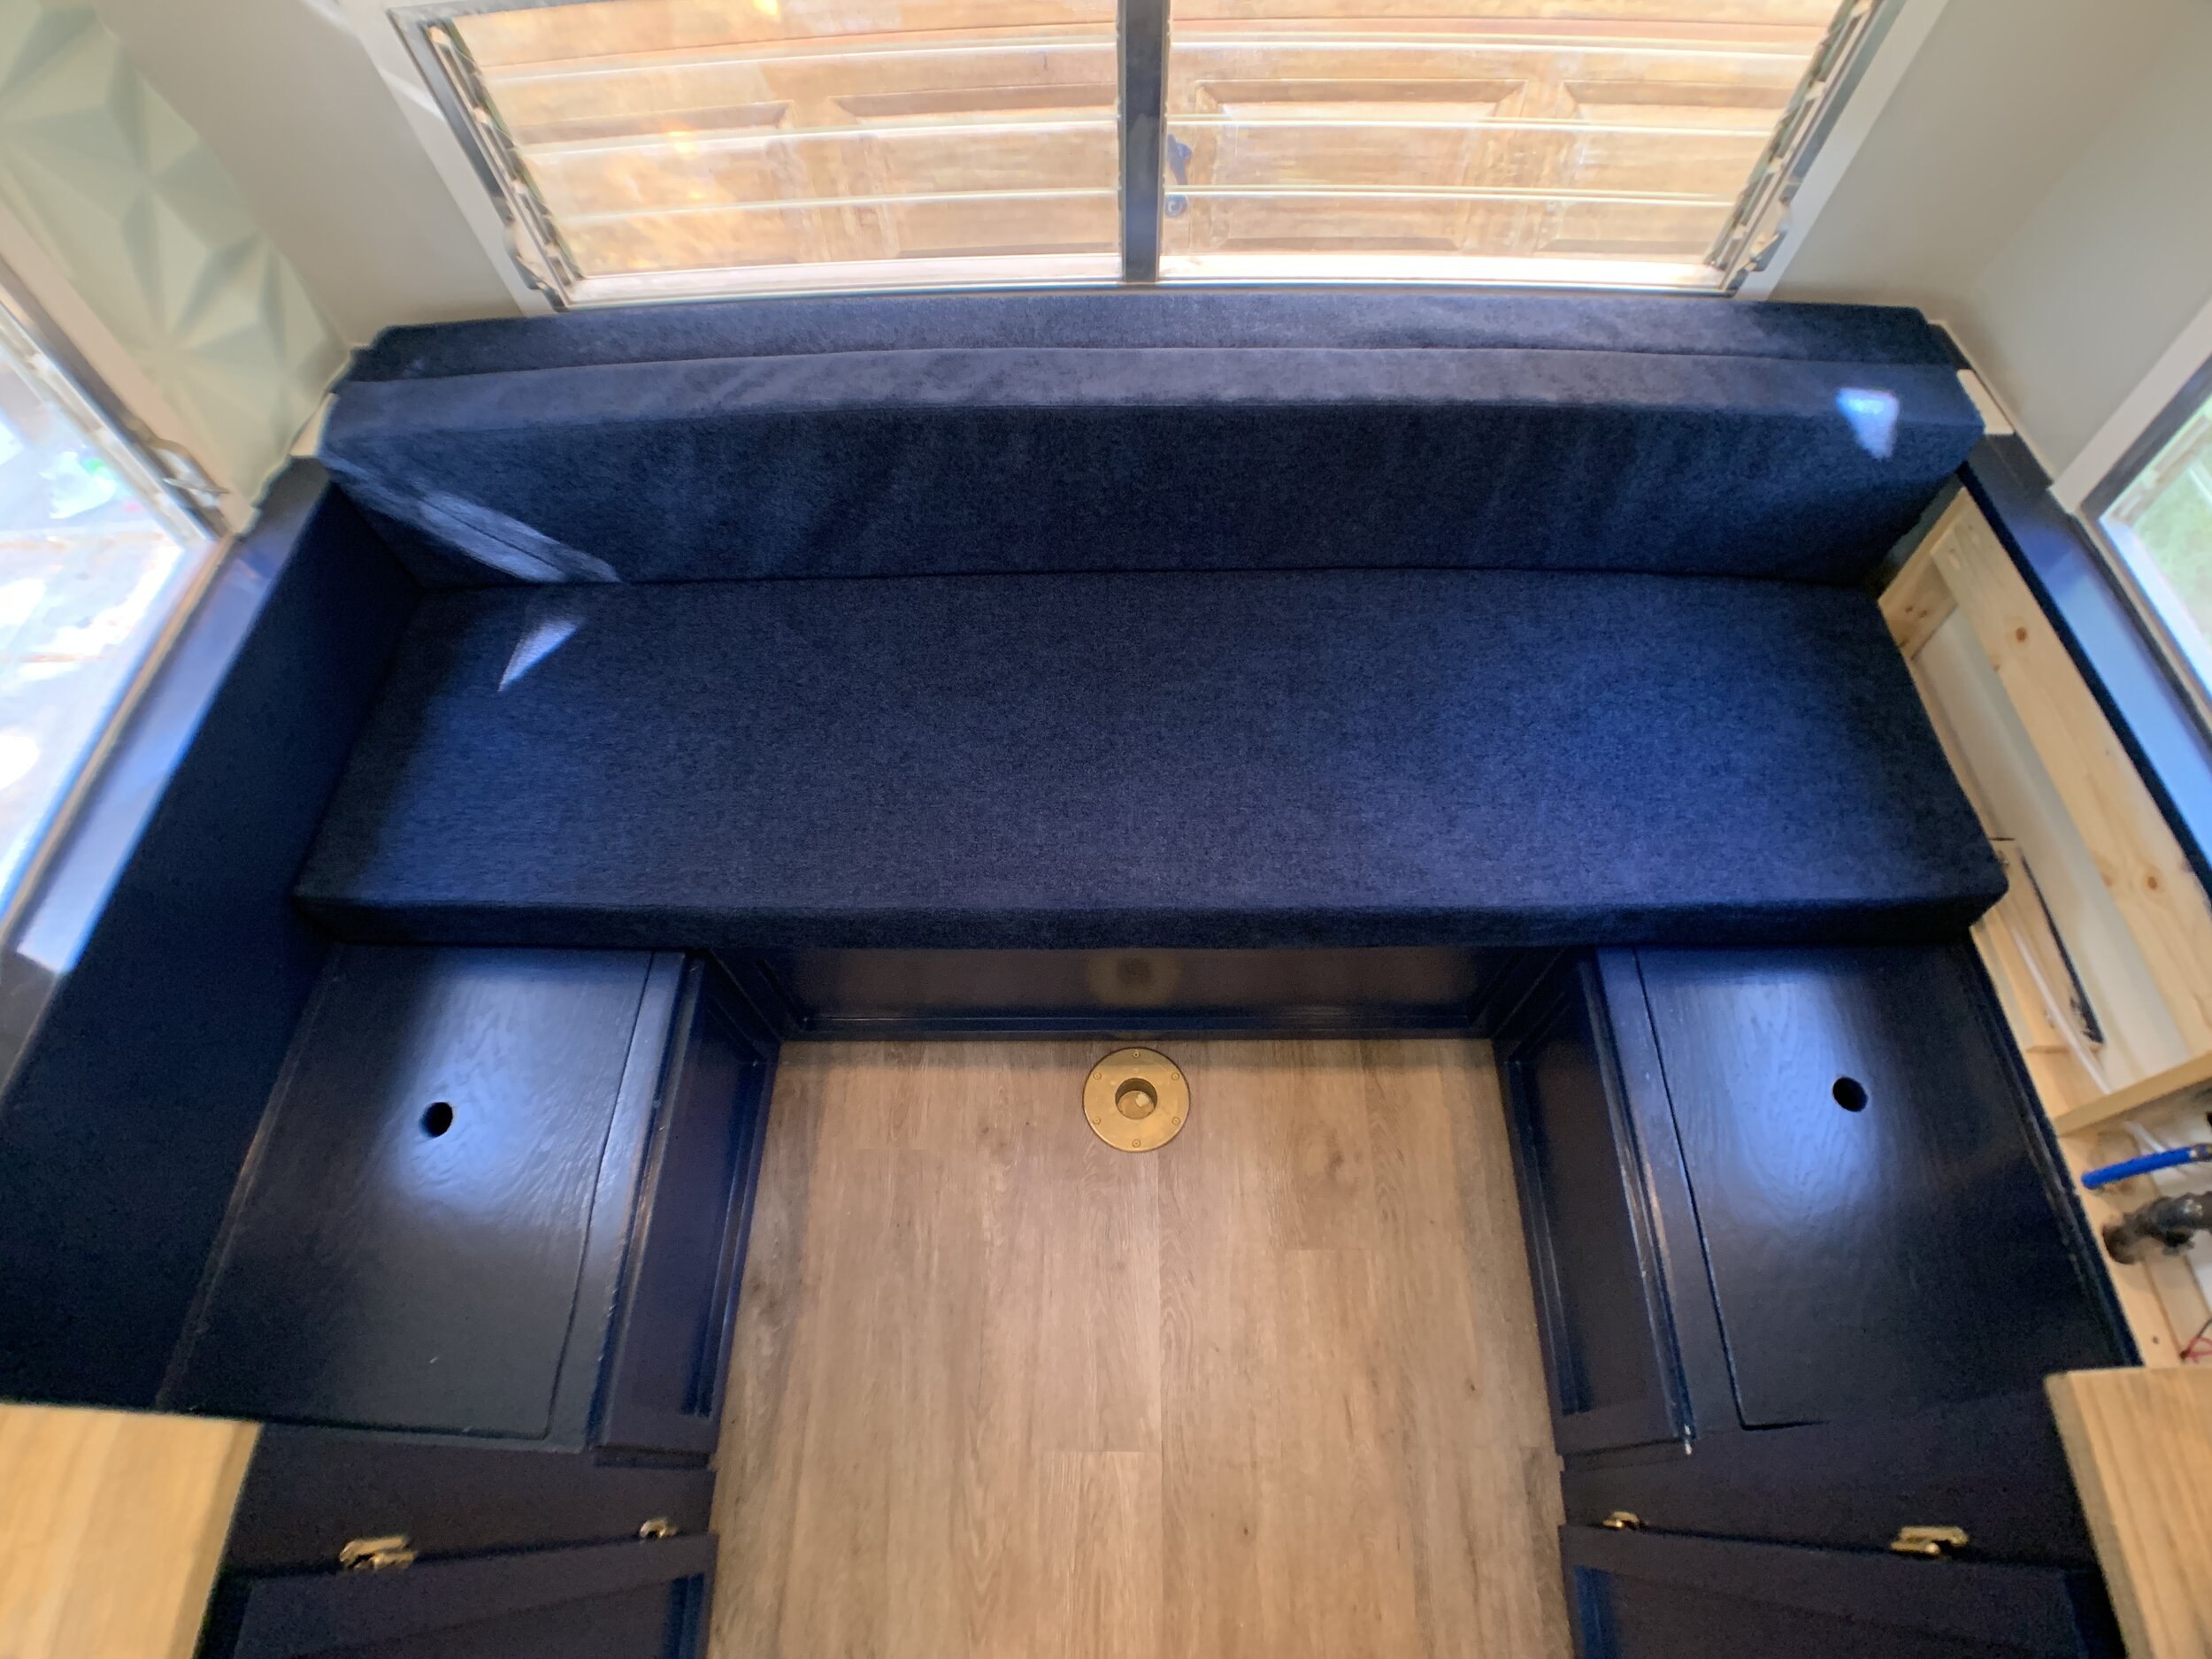
Using the original green gaucho bed cushion (basically the camper equivalent of a futon mattress) as our main design inspiration, our new U-shaped dinette-to-bed padding is made up of 5 foam cushions. There are 3 long main cushions that run parallel to/along the back wall of the camper – 2 that are sewn together on a long edge and used as a double-thick backrest – and 1 that is the seat. Then there are 2 square-ish side seat cushions we’ve been calling the “wings”. We opted not to add backrest cushions on the sides once we saw these 5 cushions in the space, because we knew I’d be accessorizing with accent pillows, which would just cut into booty room on the side benches and would shorten the headroom when laying down (or be 2 more cushions we’d need to store somewhere).
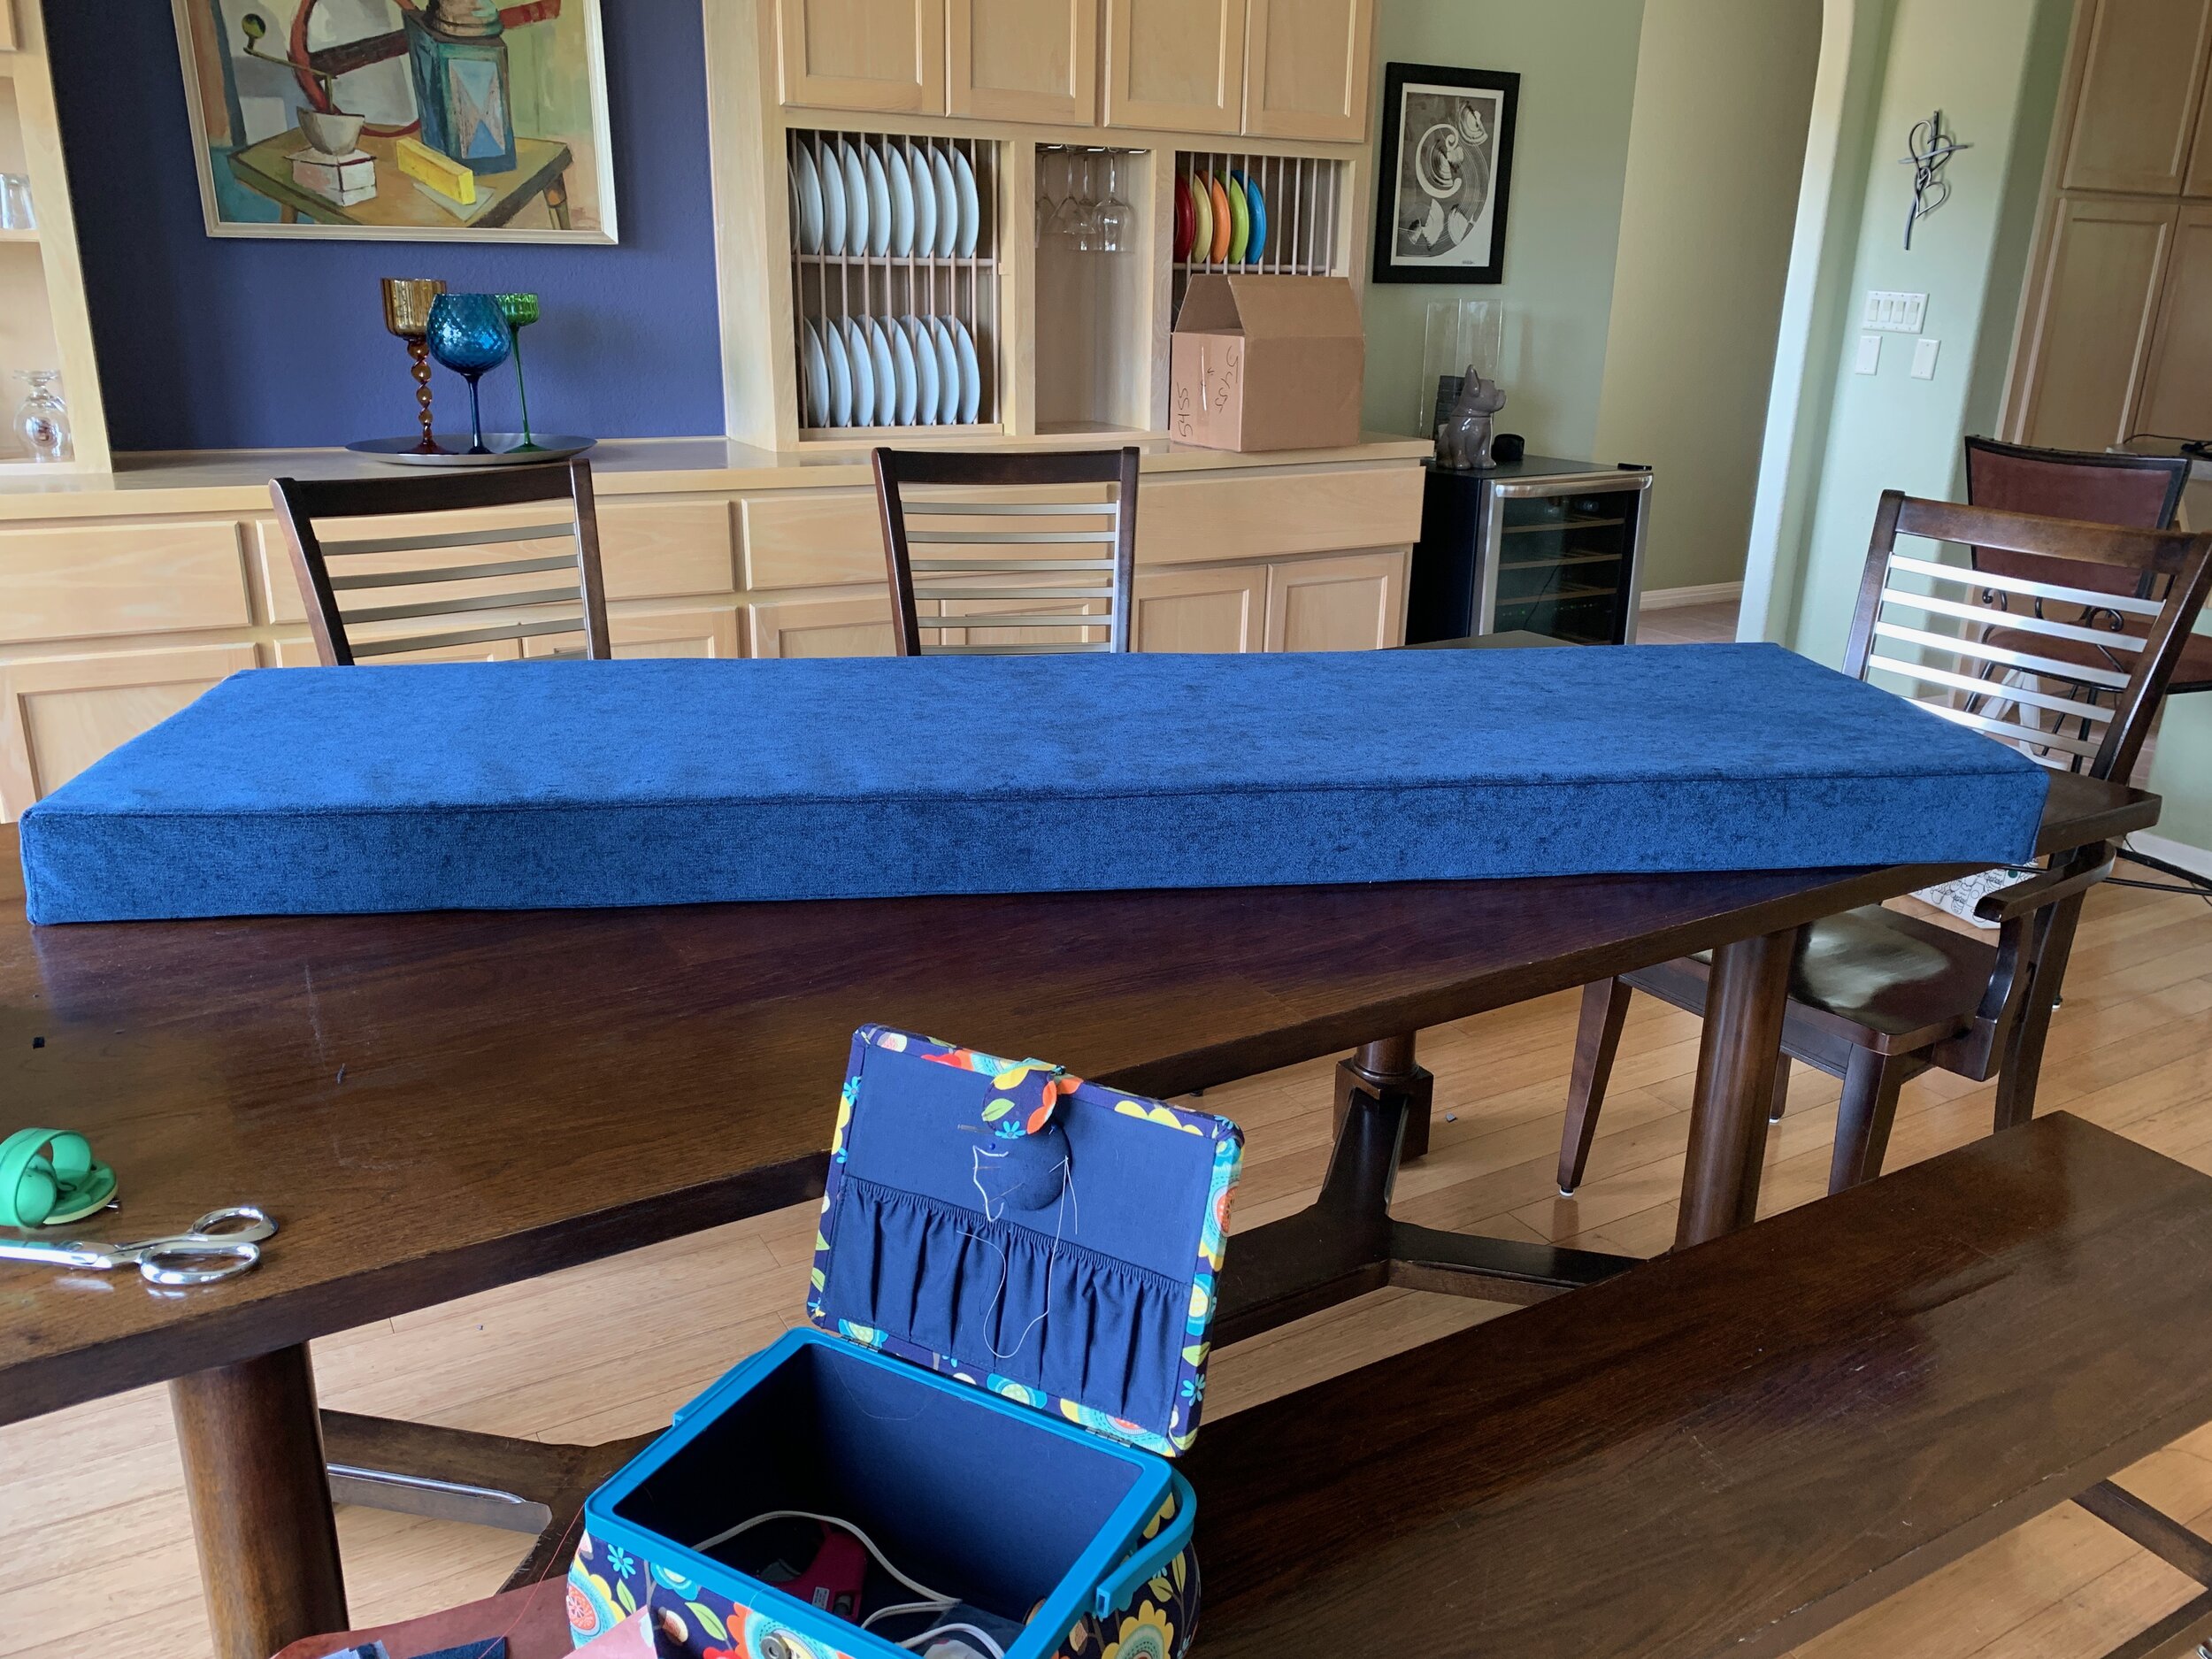
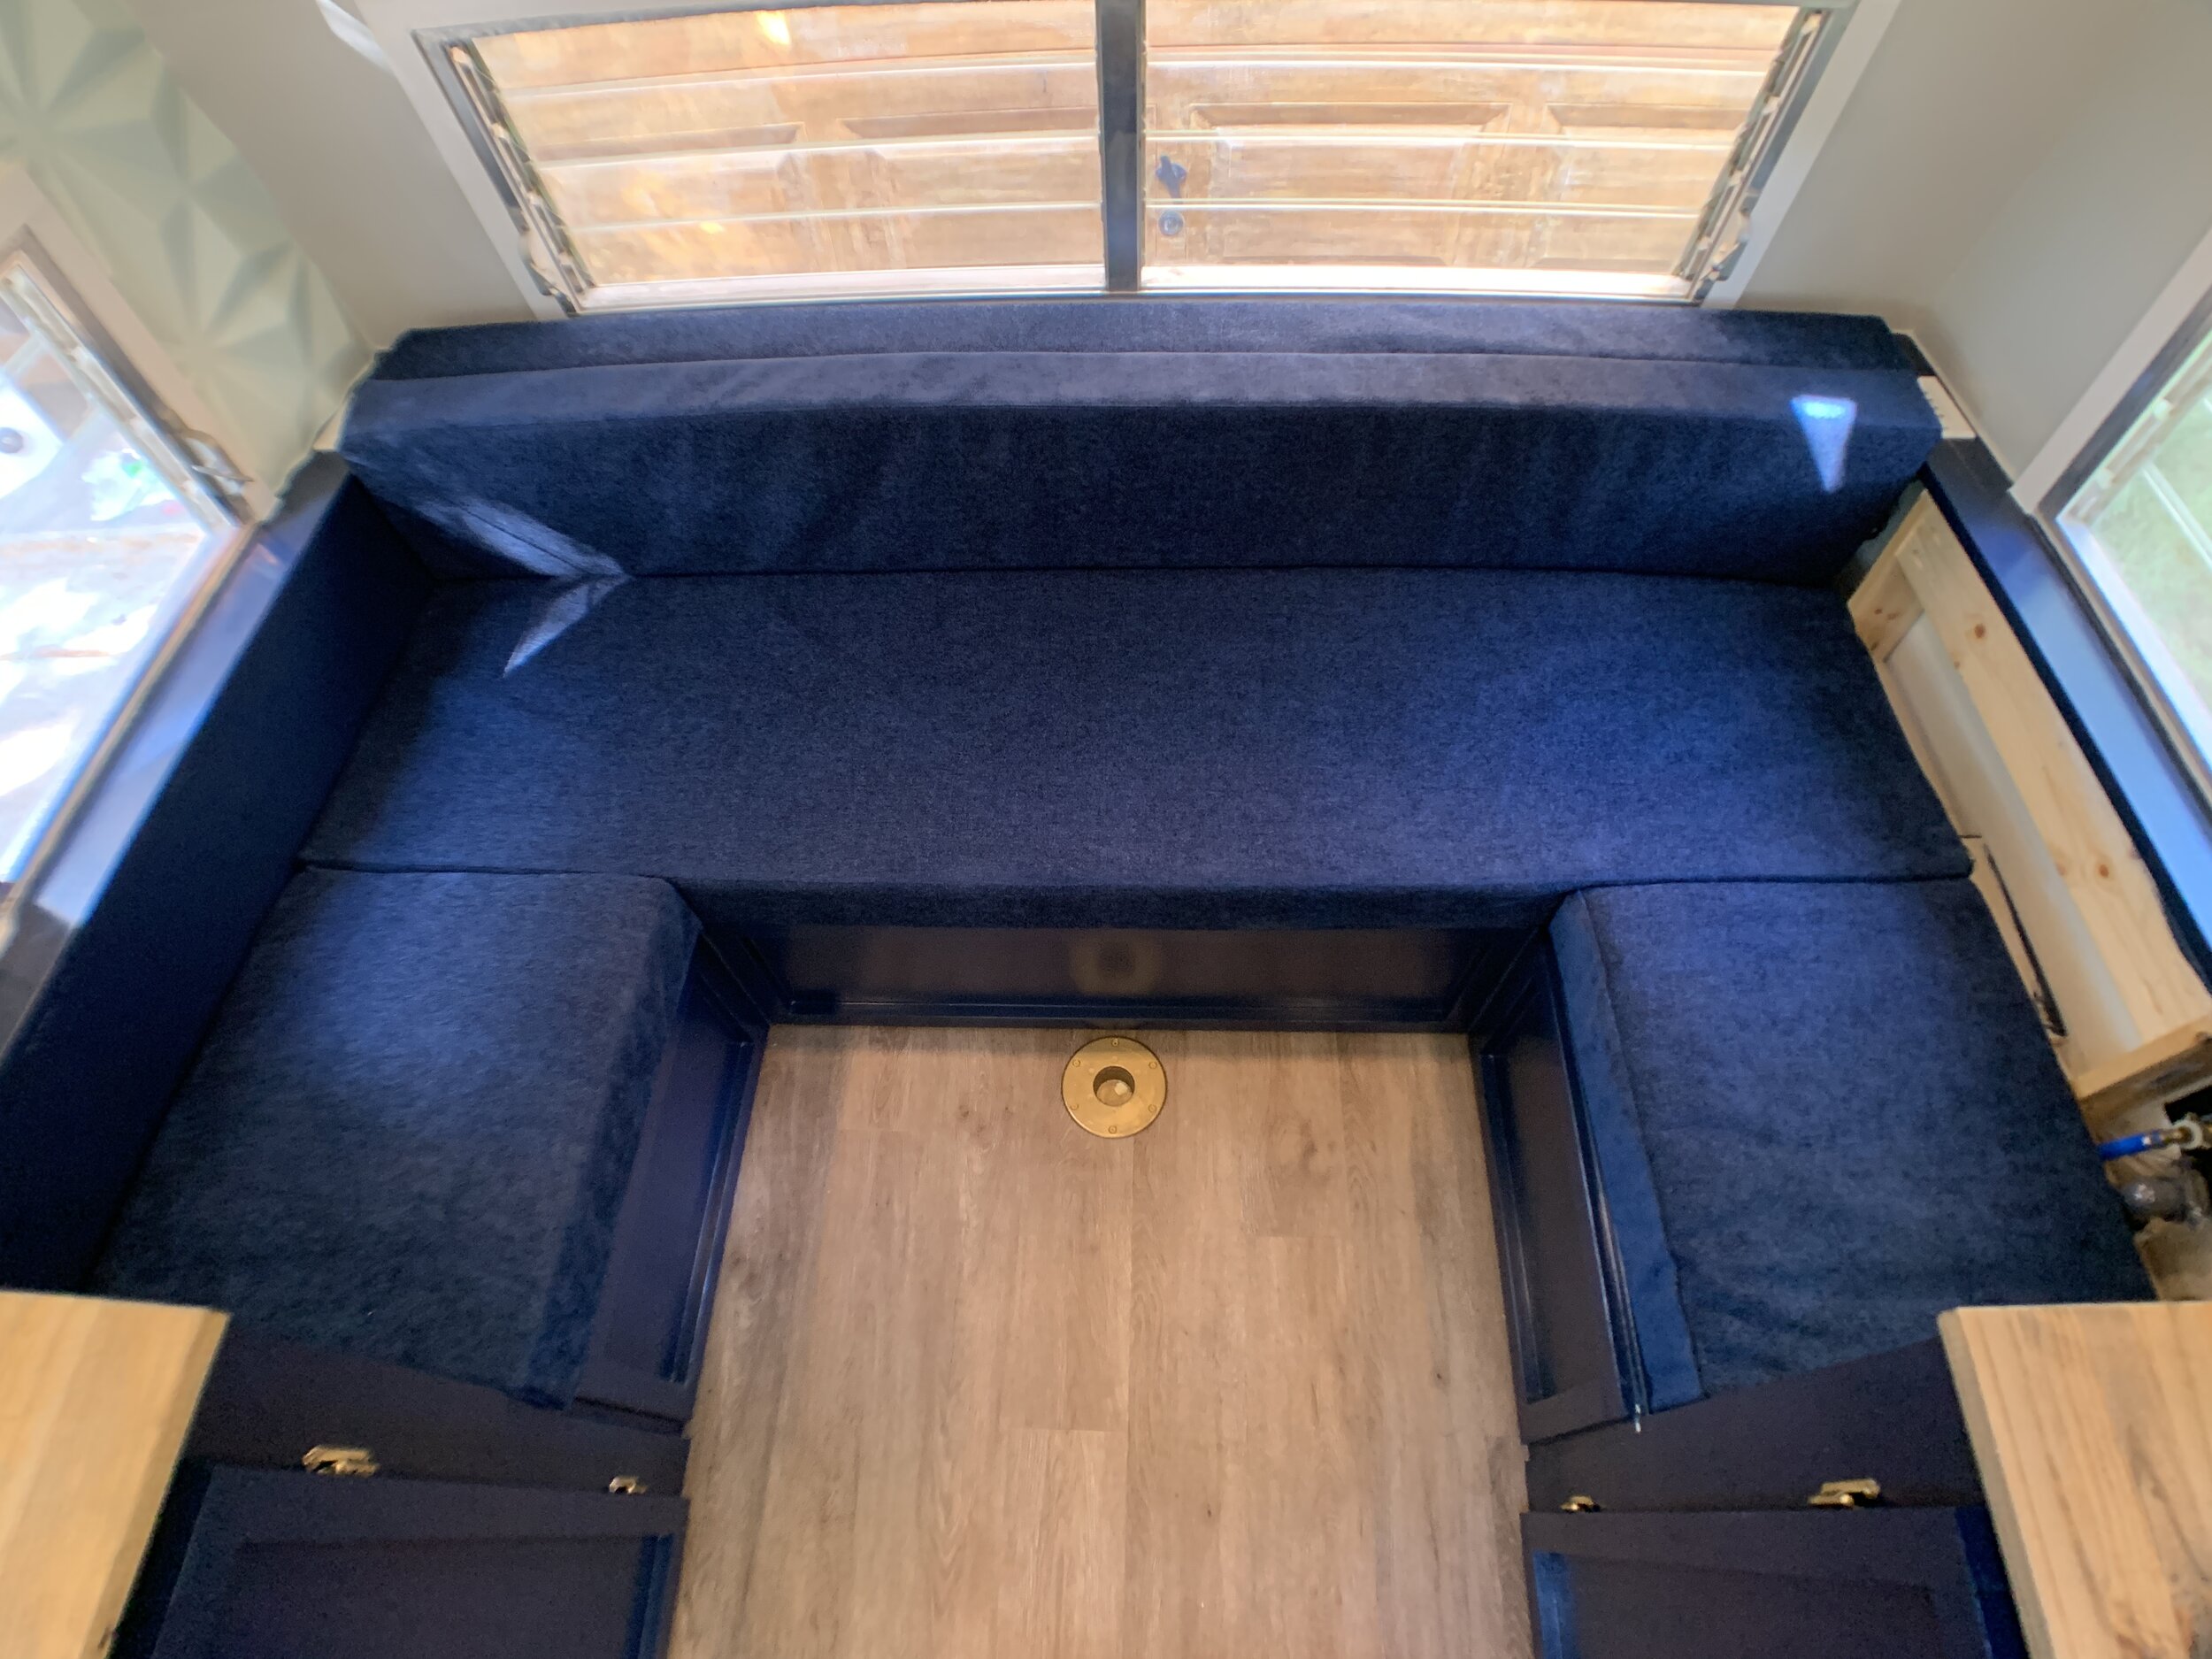
In seated, bench form the cushions are arranged like this, with the vertical backrest cushions sewn together along the top corner edges where they touch (like a hinge):

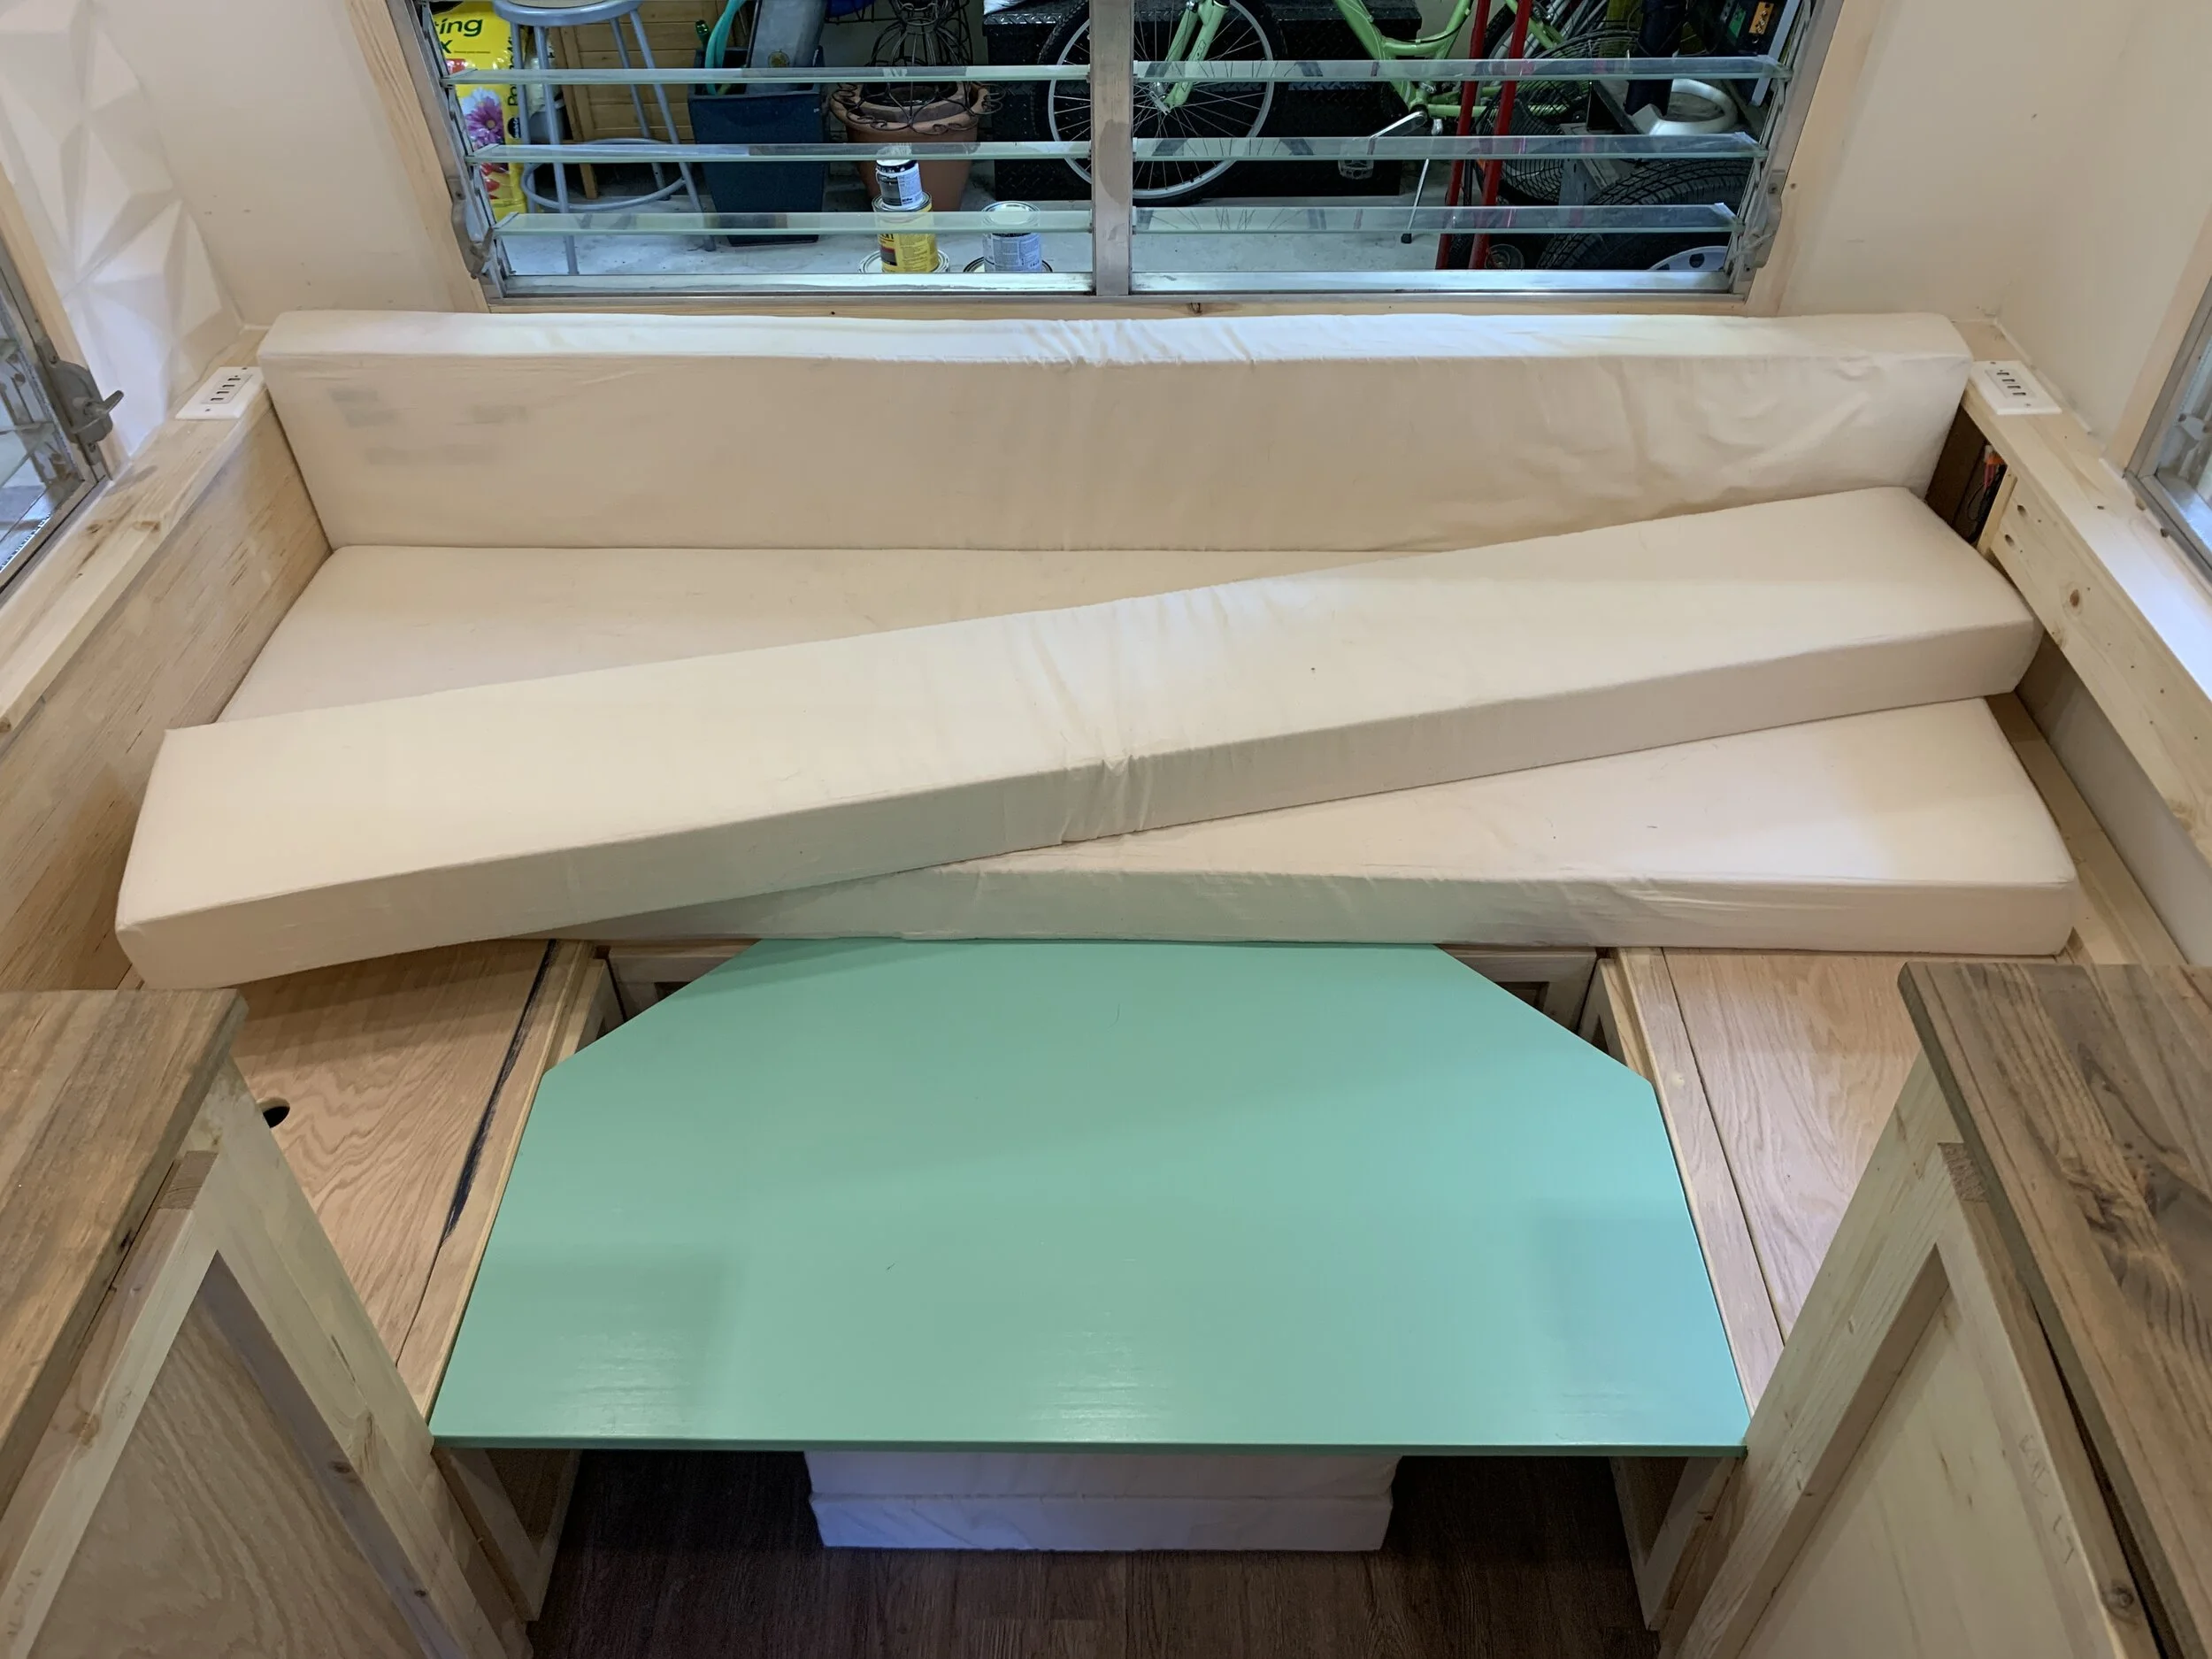
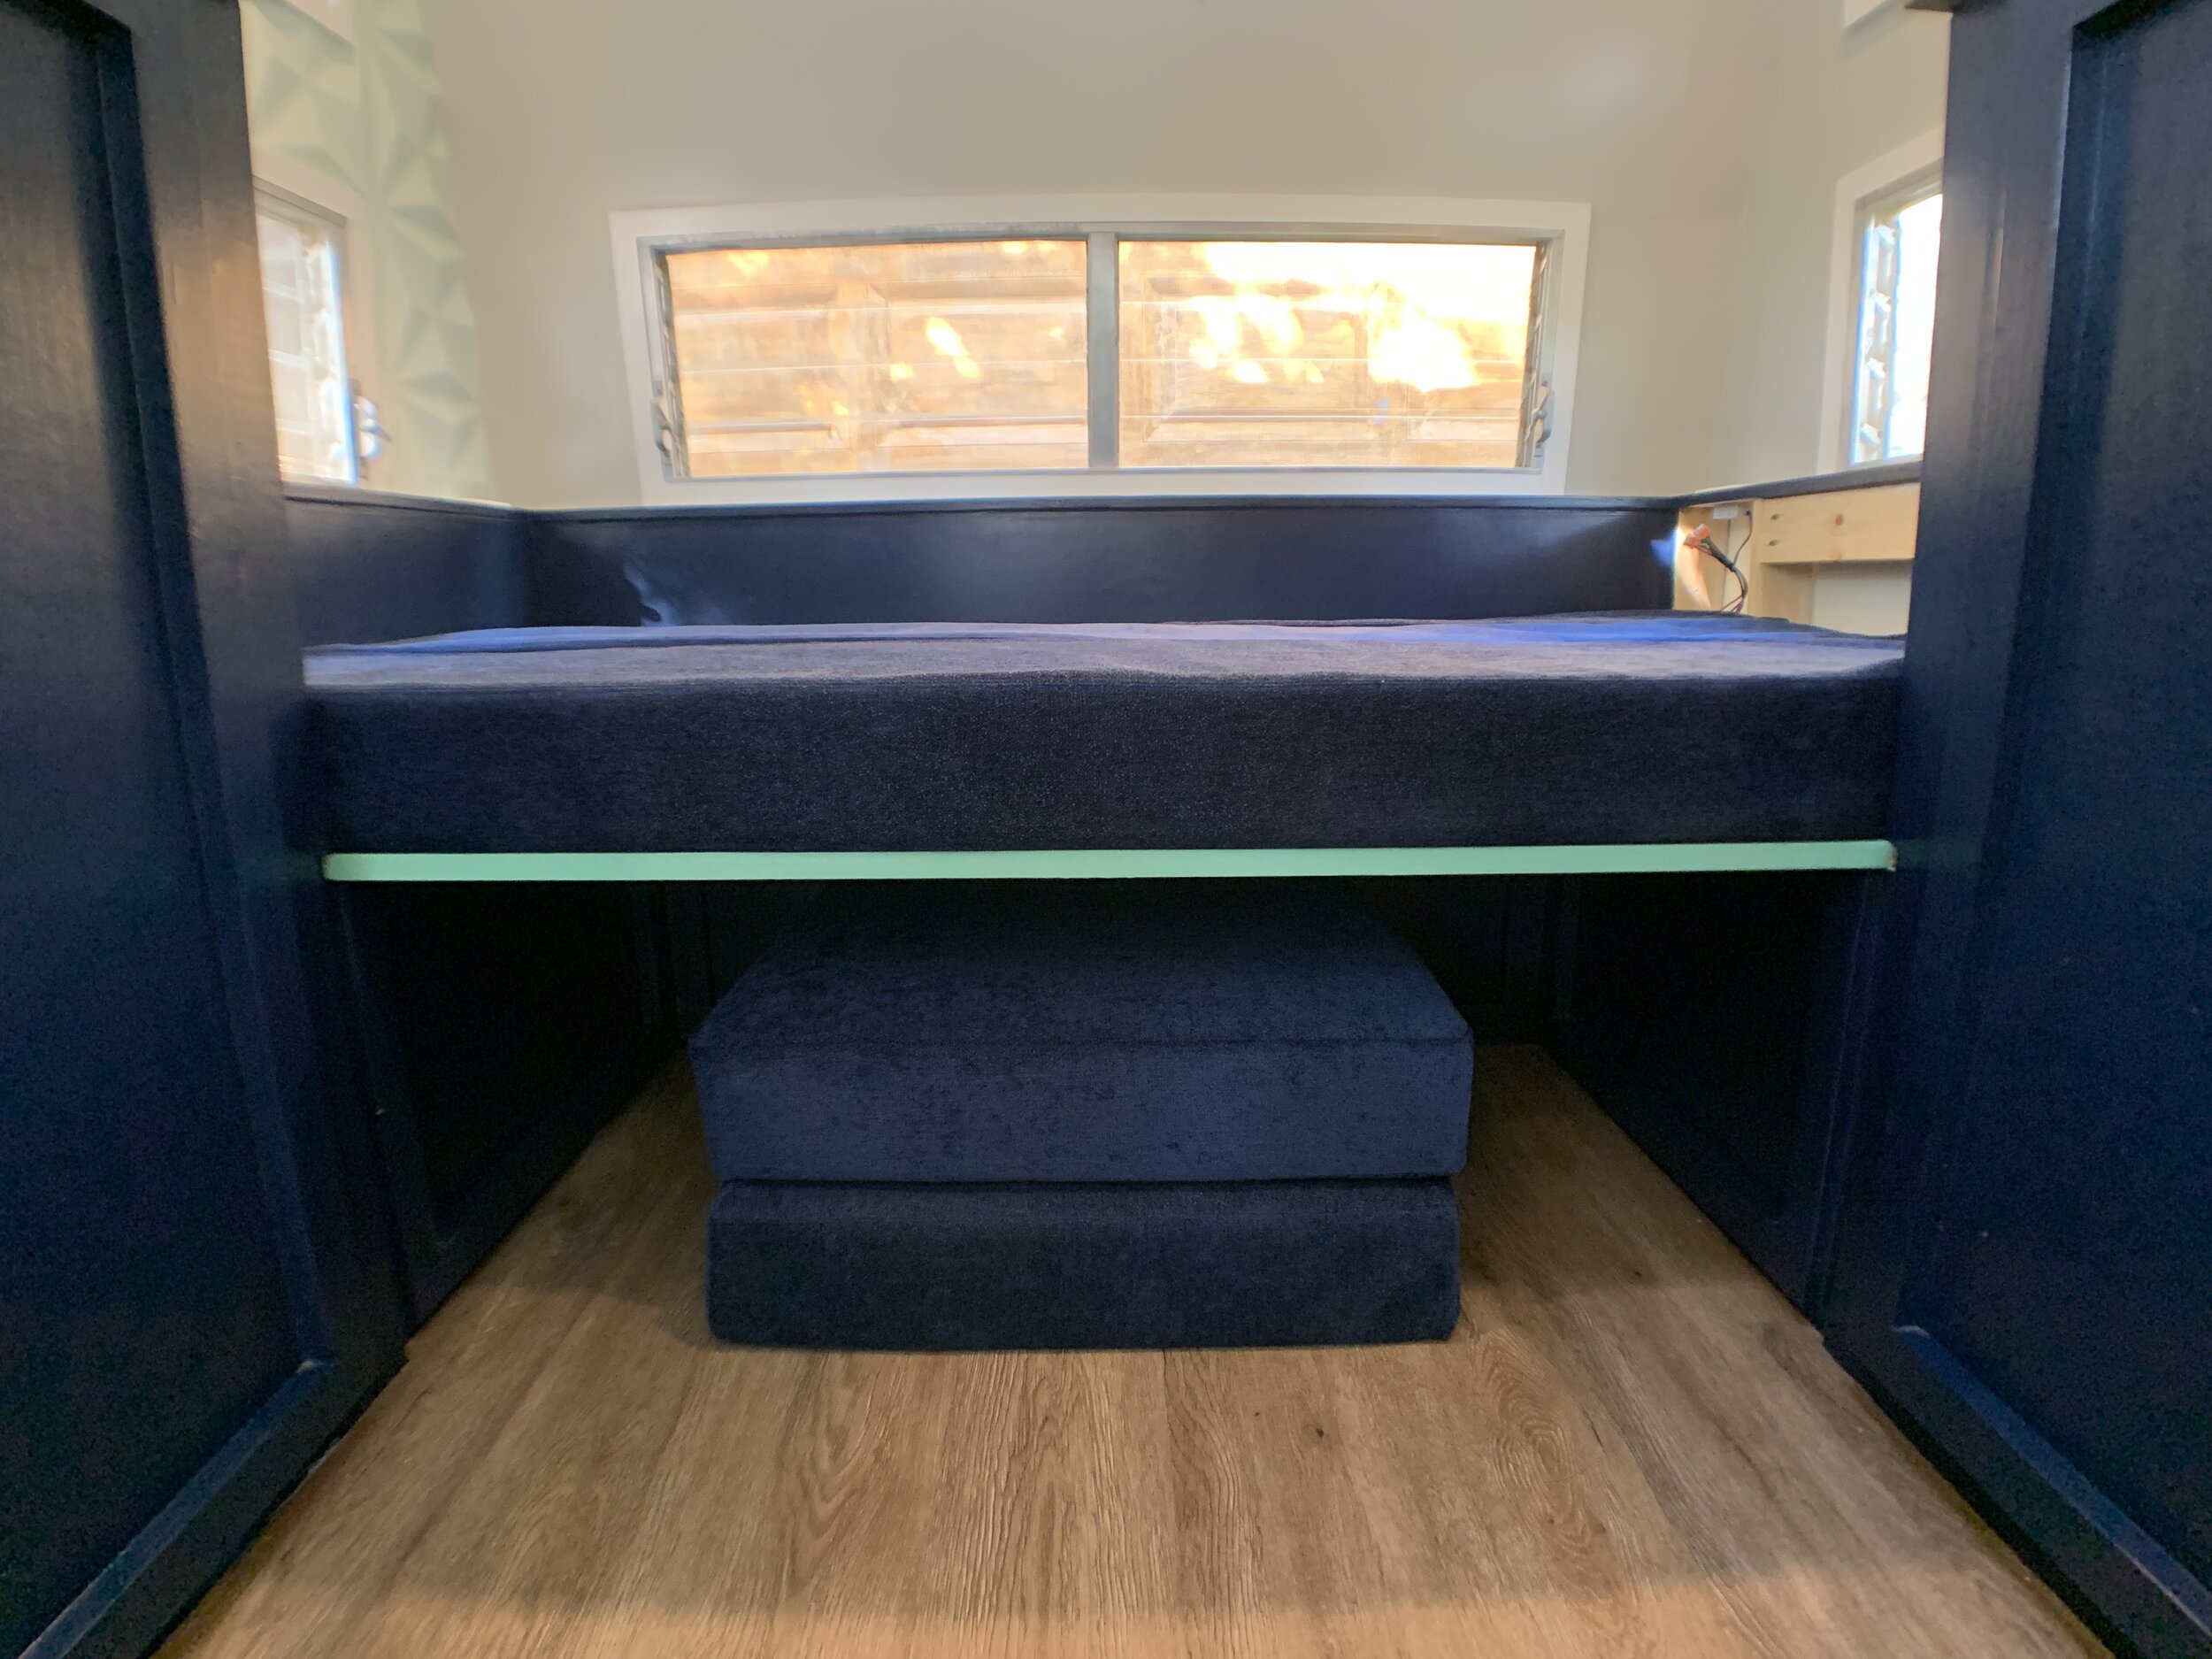
Dinette area cushions in seated bench form – (left-side backrest removed to show cross-section of cushion configuration)
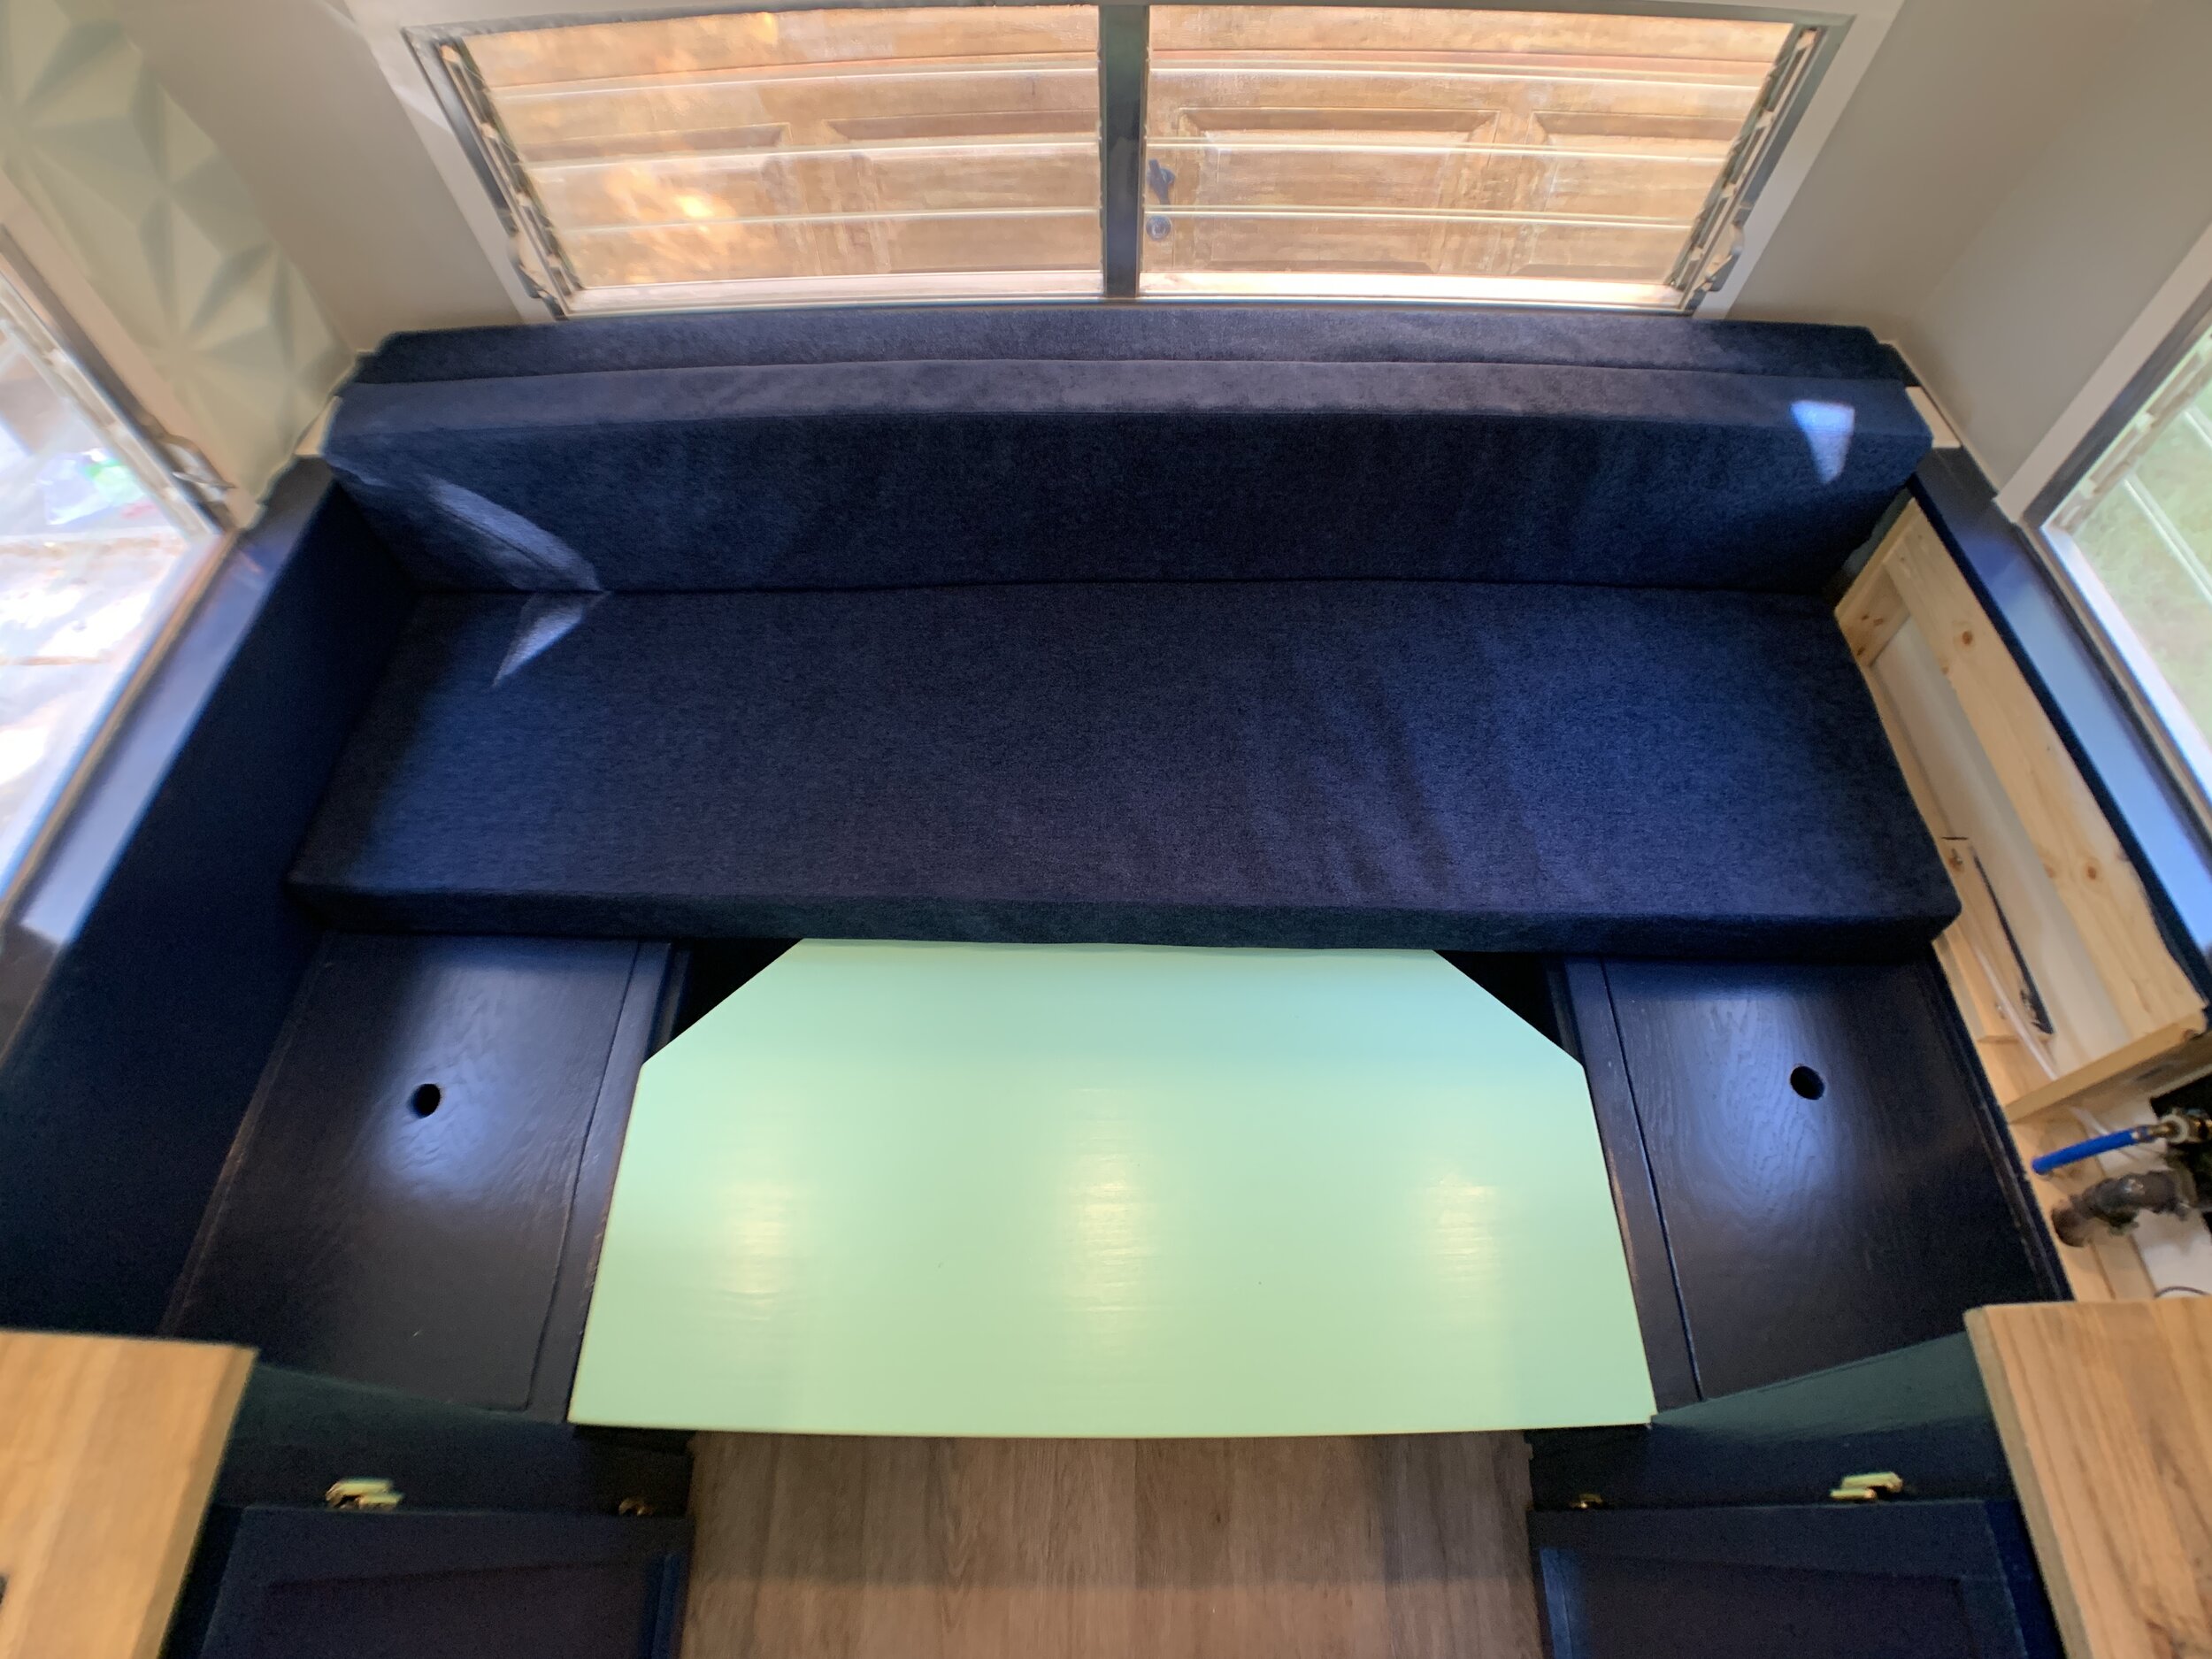
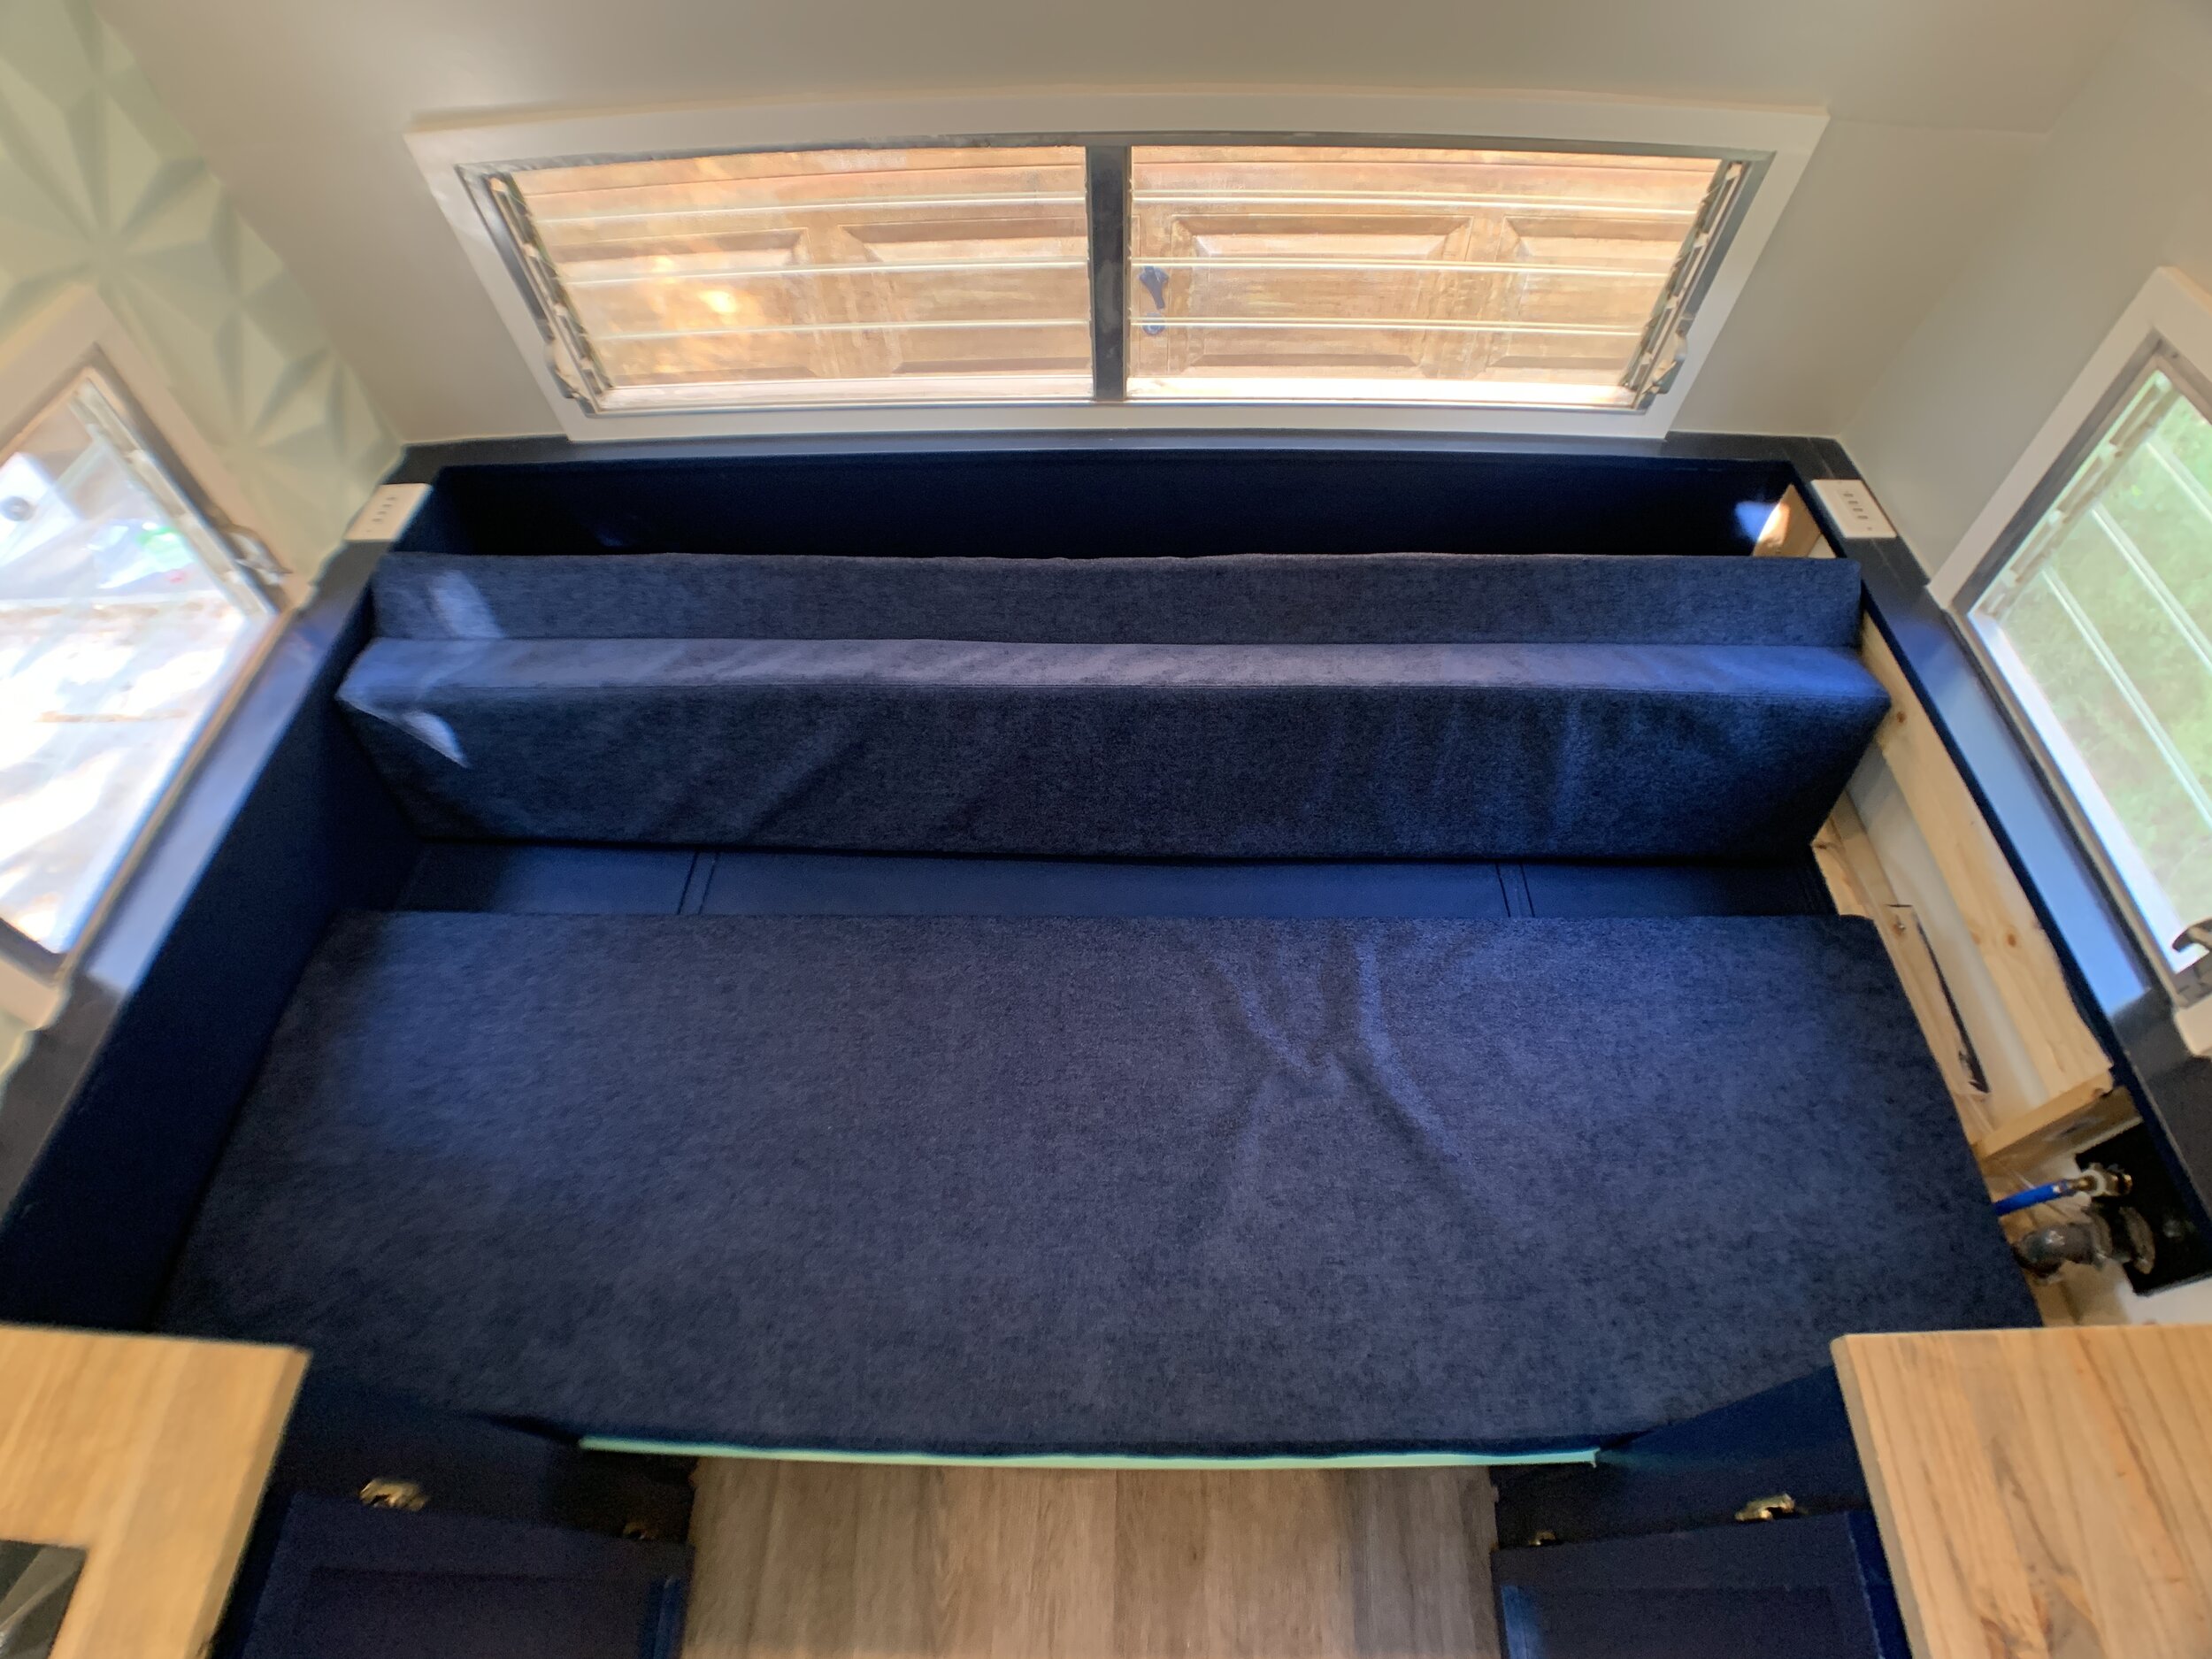
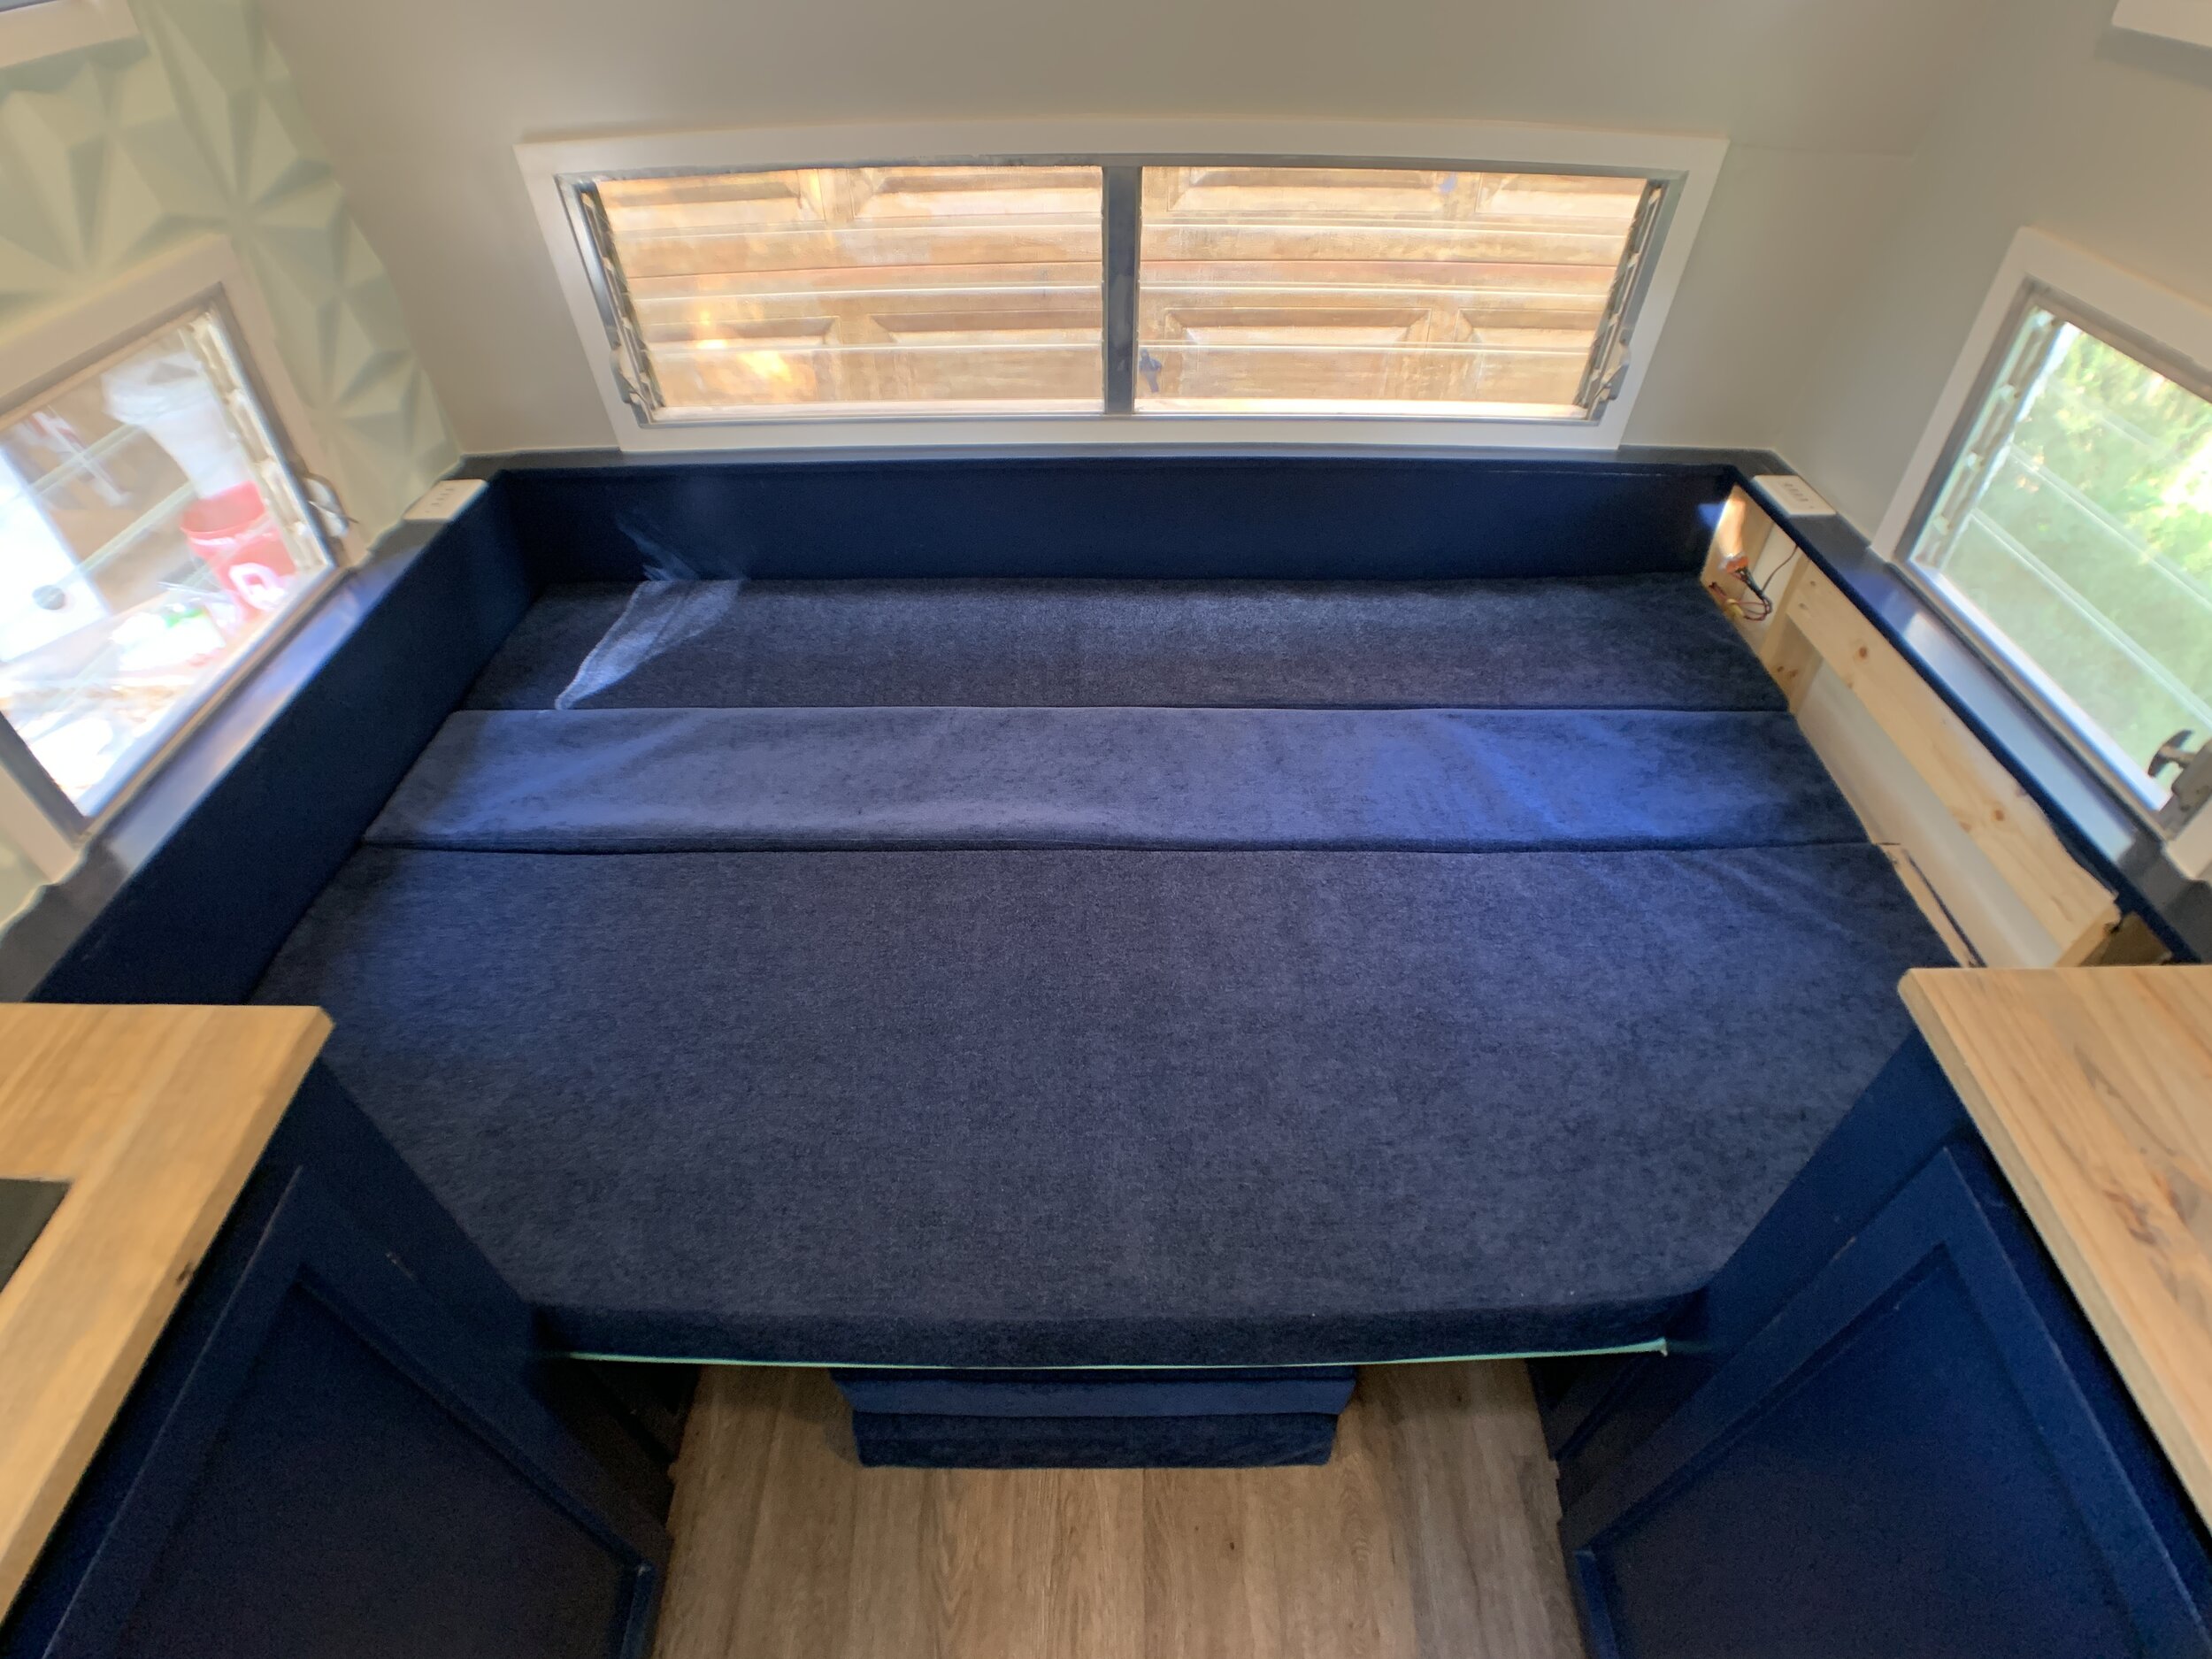
In bed form, the 2 “wing” cushions are completely removed and stored below the bed (or in a cabinet) and after the table top is placed on the wooden support trim, the 3 long full-width cushions get pulled forward to make a mattress. (Check out this post to see detailed step-by-step photos of how the area transitions into a bed, before the yellow and aqua cushions were sewn together to hinge on their long edge.)

Dinette area cushions when converted to bed for sleeping – (left-side backrest removed to show cross-section of cushion configuration)
Making a gaucho-style cushion that doubles as seating and bedding definitely requires some math, but if you know the foam thickness and the space you have to work with you’ve got everything you need to size cushions. Our cushion sizes in the above diagrams are based off of using 4” thick foam and a U-shaped bench with the following dimensions:


Figuring out our cushion dimensions - AKA math time
Based on our bench dimensions (above), we calculated our cushion size.
(Keep in mind nothing is perfectly square in our camper, so for the sake of easy explanation I’ve rounded our numbers to be nice and even, when in reality they’re a 1/4” give or take. Don’t worry, the cushion math I’m sharing with you now checks out and will work the same if you’re lucky enough to have a perfectly symmetrical camper.)
The goal is to have the height of both backrest pieces plus the depth of the wide seat to be equal to the overall width of the bed area you’re trying to make so you have a tight fit and the cushions don’t separate (so you’re not sleeping in a crack).
Because our long bench seat along the back wall is an extra-deep 26” (to store a spare tire underneath), we knew we’d need 2 pieces of 4” thick backrest foam to bring the finished seat depth to a standard 18” – (26 - 4 - 4 = 18”) – which is also the seat depth of our “wings”.
Then to figure out what height(s) the doubled-up vertical backrest foam pieces needed to be (without sticking up over and blocking the back windows) we took our wooden seat back height of 12.5” as-is for cushion 1, and for cushion 2 subtracted our seat’s foam thickness. For us that meant 12.5 - 4 = 8.5”. That leaves cushion 1 at 12.5” tall and cushion 2 at 8.5” tall.
(We could’ve just done them both at 12.5” and subtracted the 4” thick foam from the seat depth instead of one of the backrest pieces, but at the time we were planning on trying to attach all 3 long pieces together into a Z-fold, plus we didn’t want the front backrest cushion to slouchily lean forward on the top from the bottom pressure of the seat cushion, so instead we chose to have the seat cushion underneath the front backrest cushion to prop it up and prevent the forward fall over time.)
Since we knew the goal was to have the height of both backrest pieces and the depth of the wide seat equal to the overall bed width, we checked our work and knew our 12.5 + 8.5 + 22 = 48” math had worked out. (We also dry fit them in place after we cut them down and before we upholstered them.
The two wing seats are easy since they’re just the dimensions of the wood “wing” seat.
So that’s how we planned the cushions to fit perfectly for both sitting and sleeping. Now to make reality match the theory.
Making the cushions
Let the foam settle
After our foam came in the mail, we immediately unrolled them so they could expand and flatten out. It’s super important to get them out of the shipment packaging ASAP so they aren’t permanently wonky and let them grow to their final size.
You can see how crinkled and relatively flat they were when we first removed them from the plastic, and then how well they recovered after laying out on the guest bed for a few days.


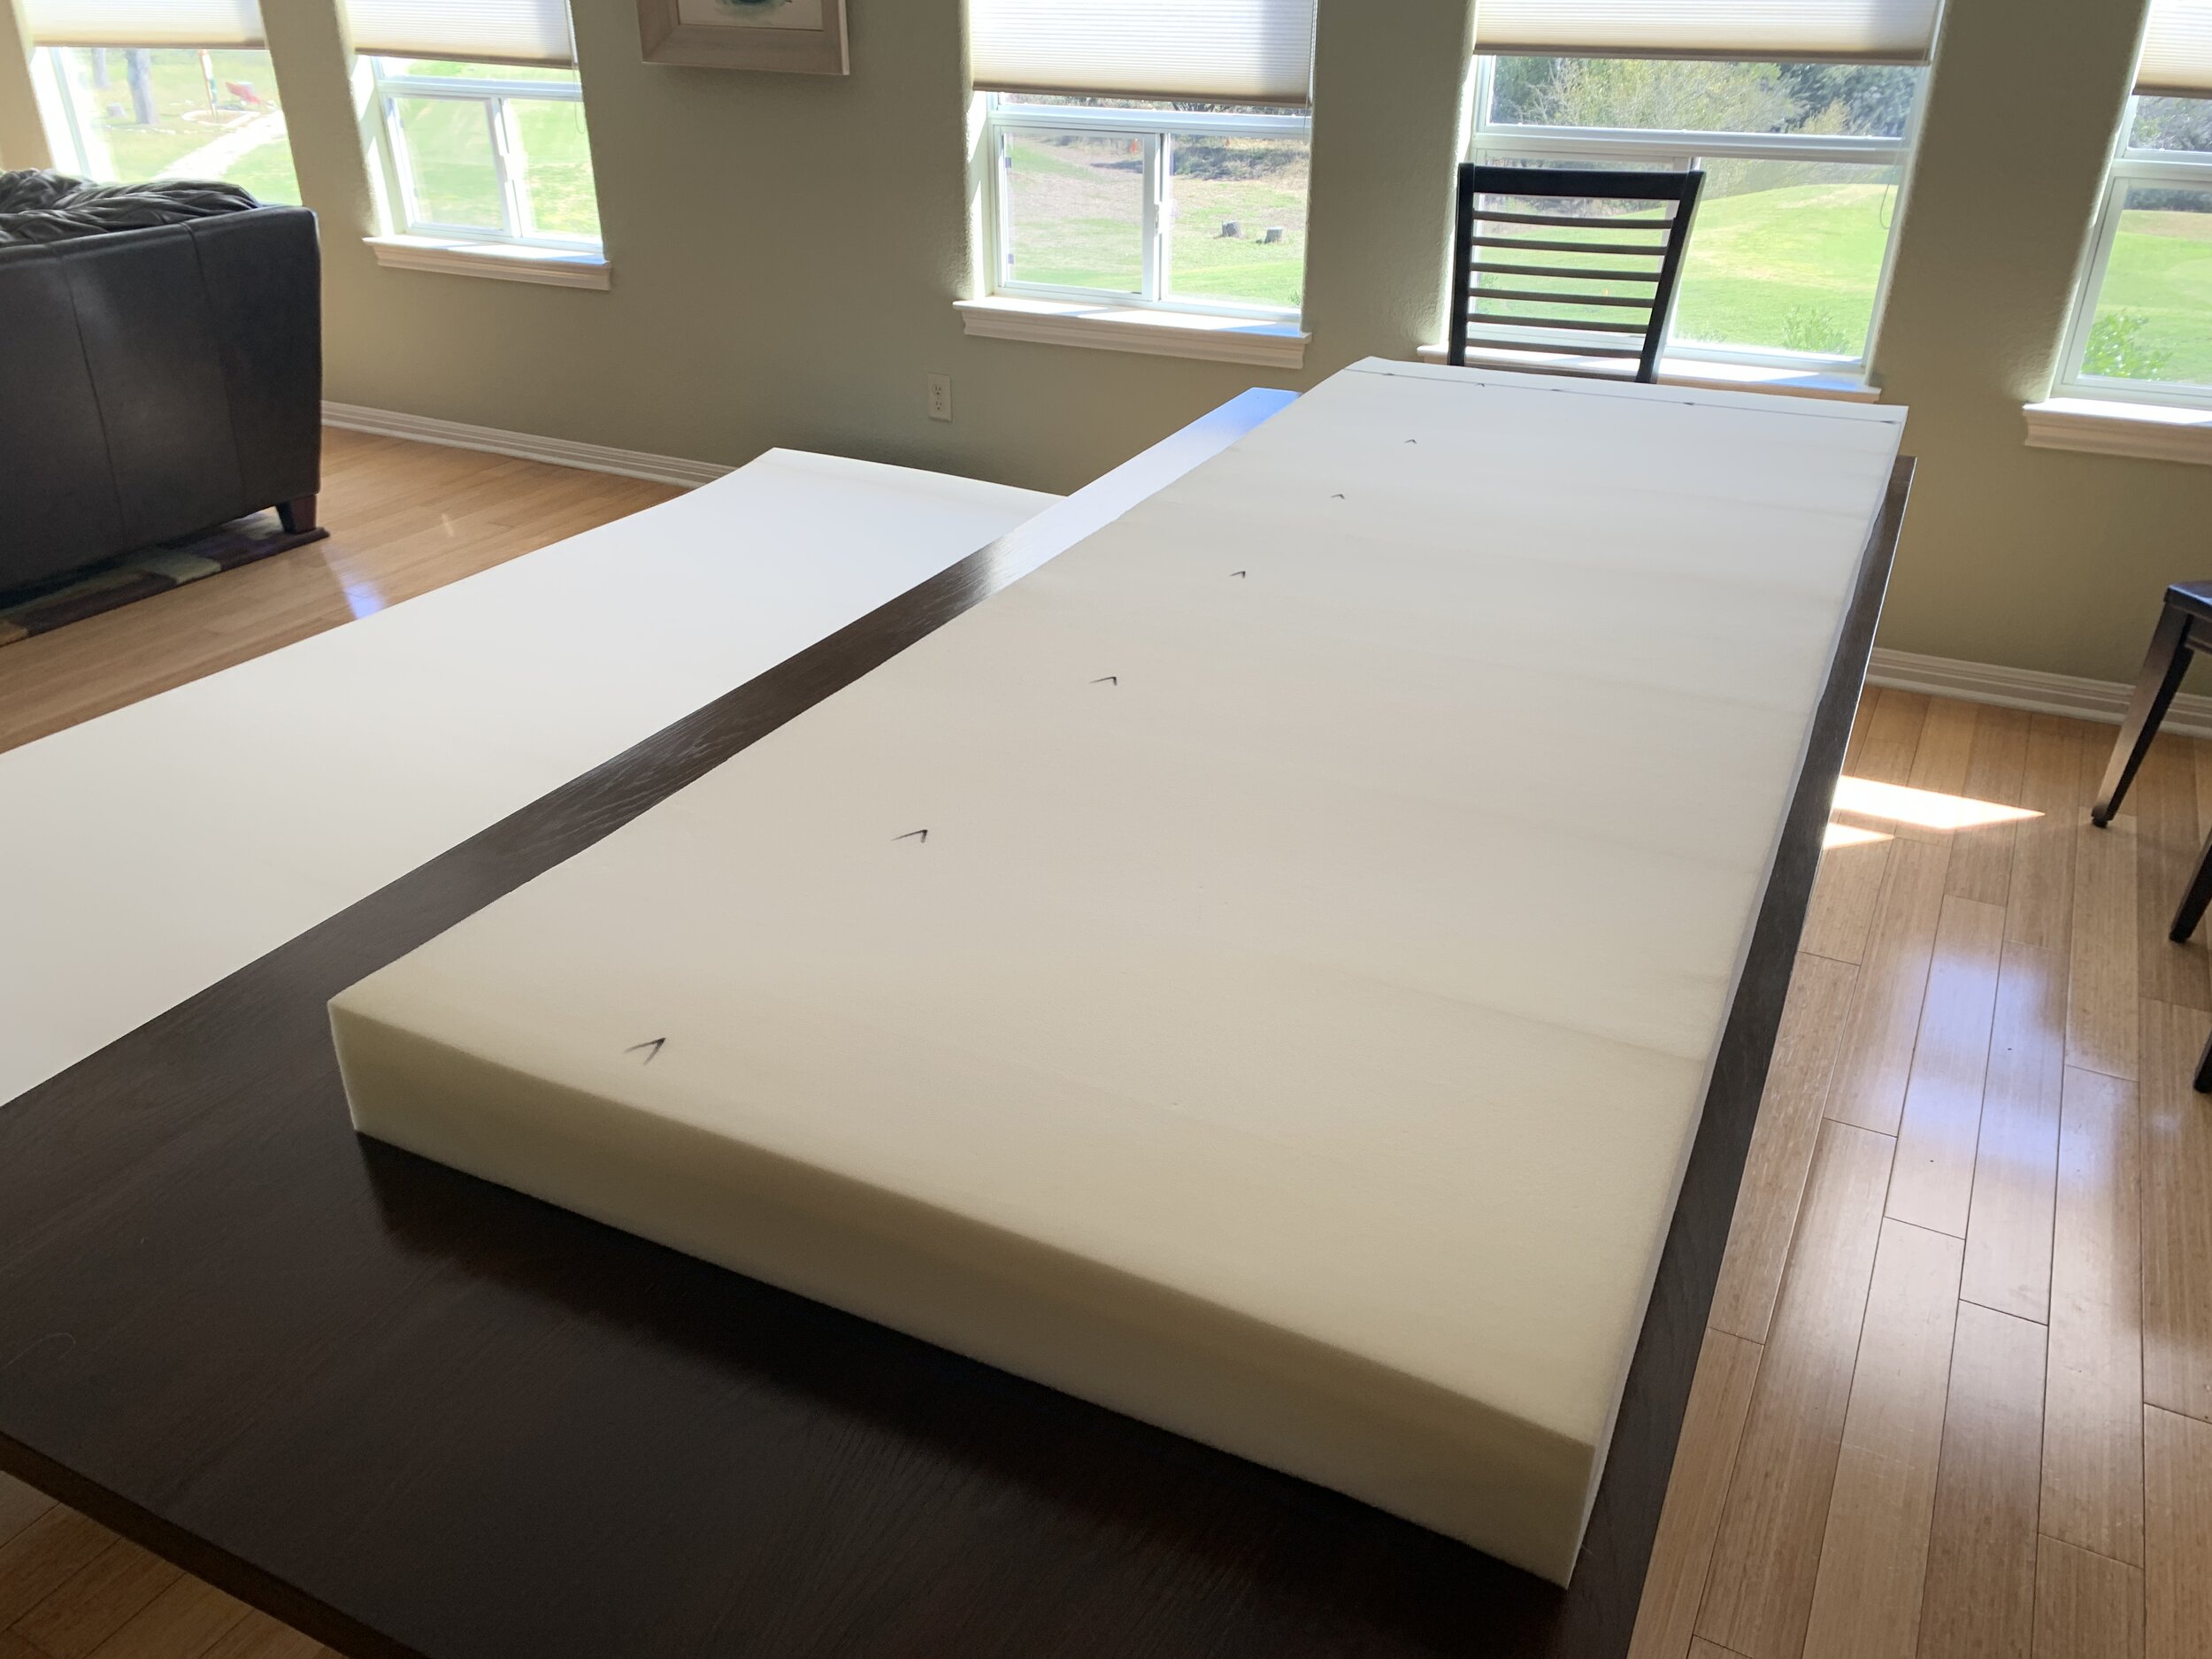
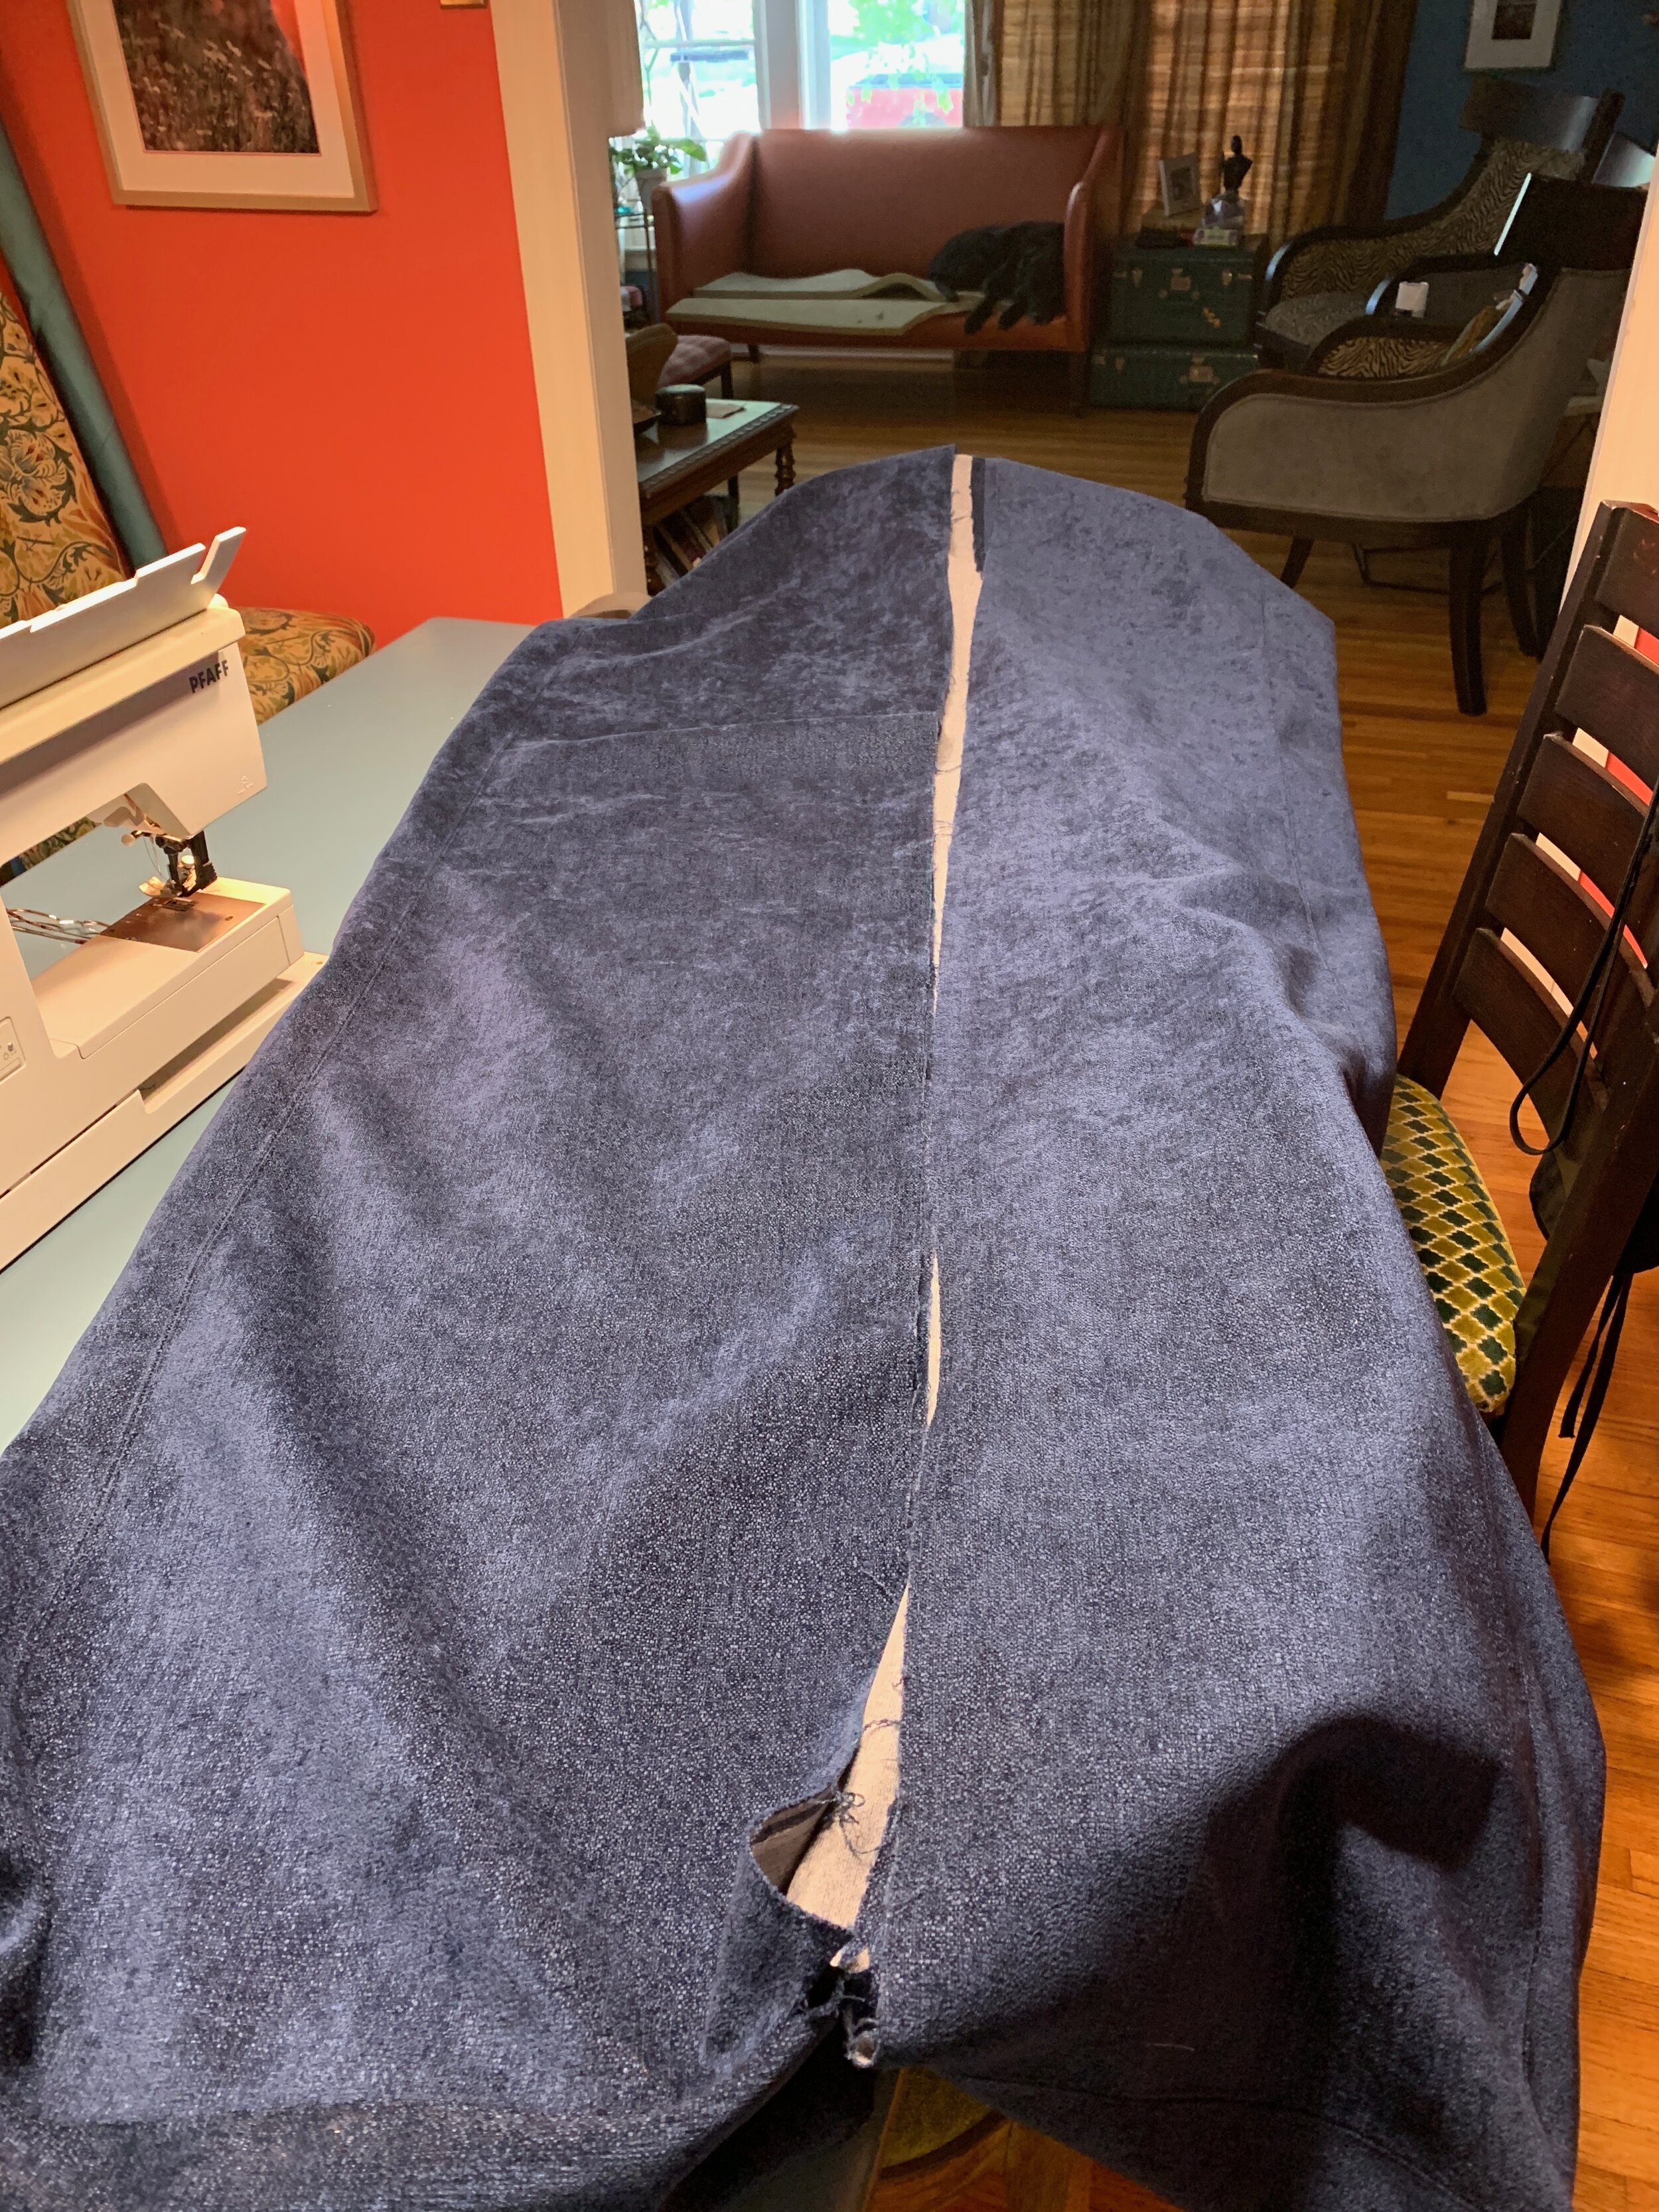
Cutting the foam
After our foam was fully expanded, we brought them over to Nick’s mom’s house and cut them out with a serrated bread knife. This was pretty simple – much easier than I was anticipating – made even better by a long table to keep the long cushion foam manageable while I measured, marked and cut. After measuring out the length and width on one side with our tape measure, I used our T square and long 4’ level to mark straight lines the whole way down, carrying the line over the corner to help me maintain my vertical cuts. It’s important to keep the knife blade perpendicular to the foam so you don’t have a wonky angled edge, because that will definitely show later (unless you’re going for an angle).
It’s also important to hang the cut side off of the edge a little while cutting so you don’t hack into your mother-in-law’s table! (This is not a do as I say thing – I didn’t make any cuts into the table, thank goodness!)
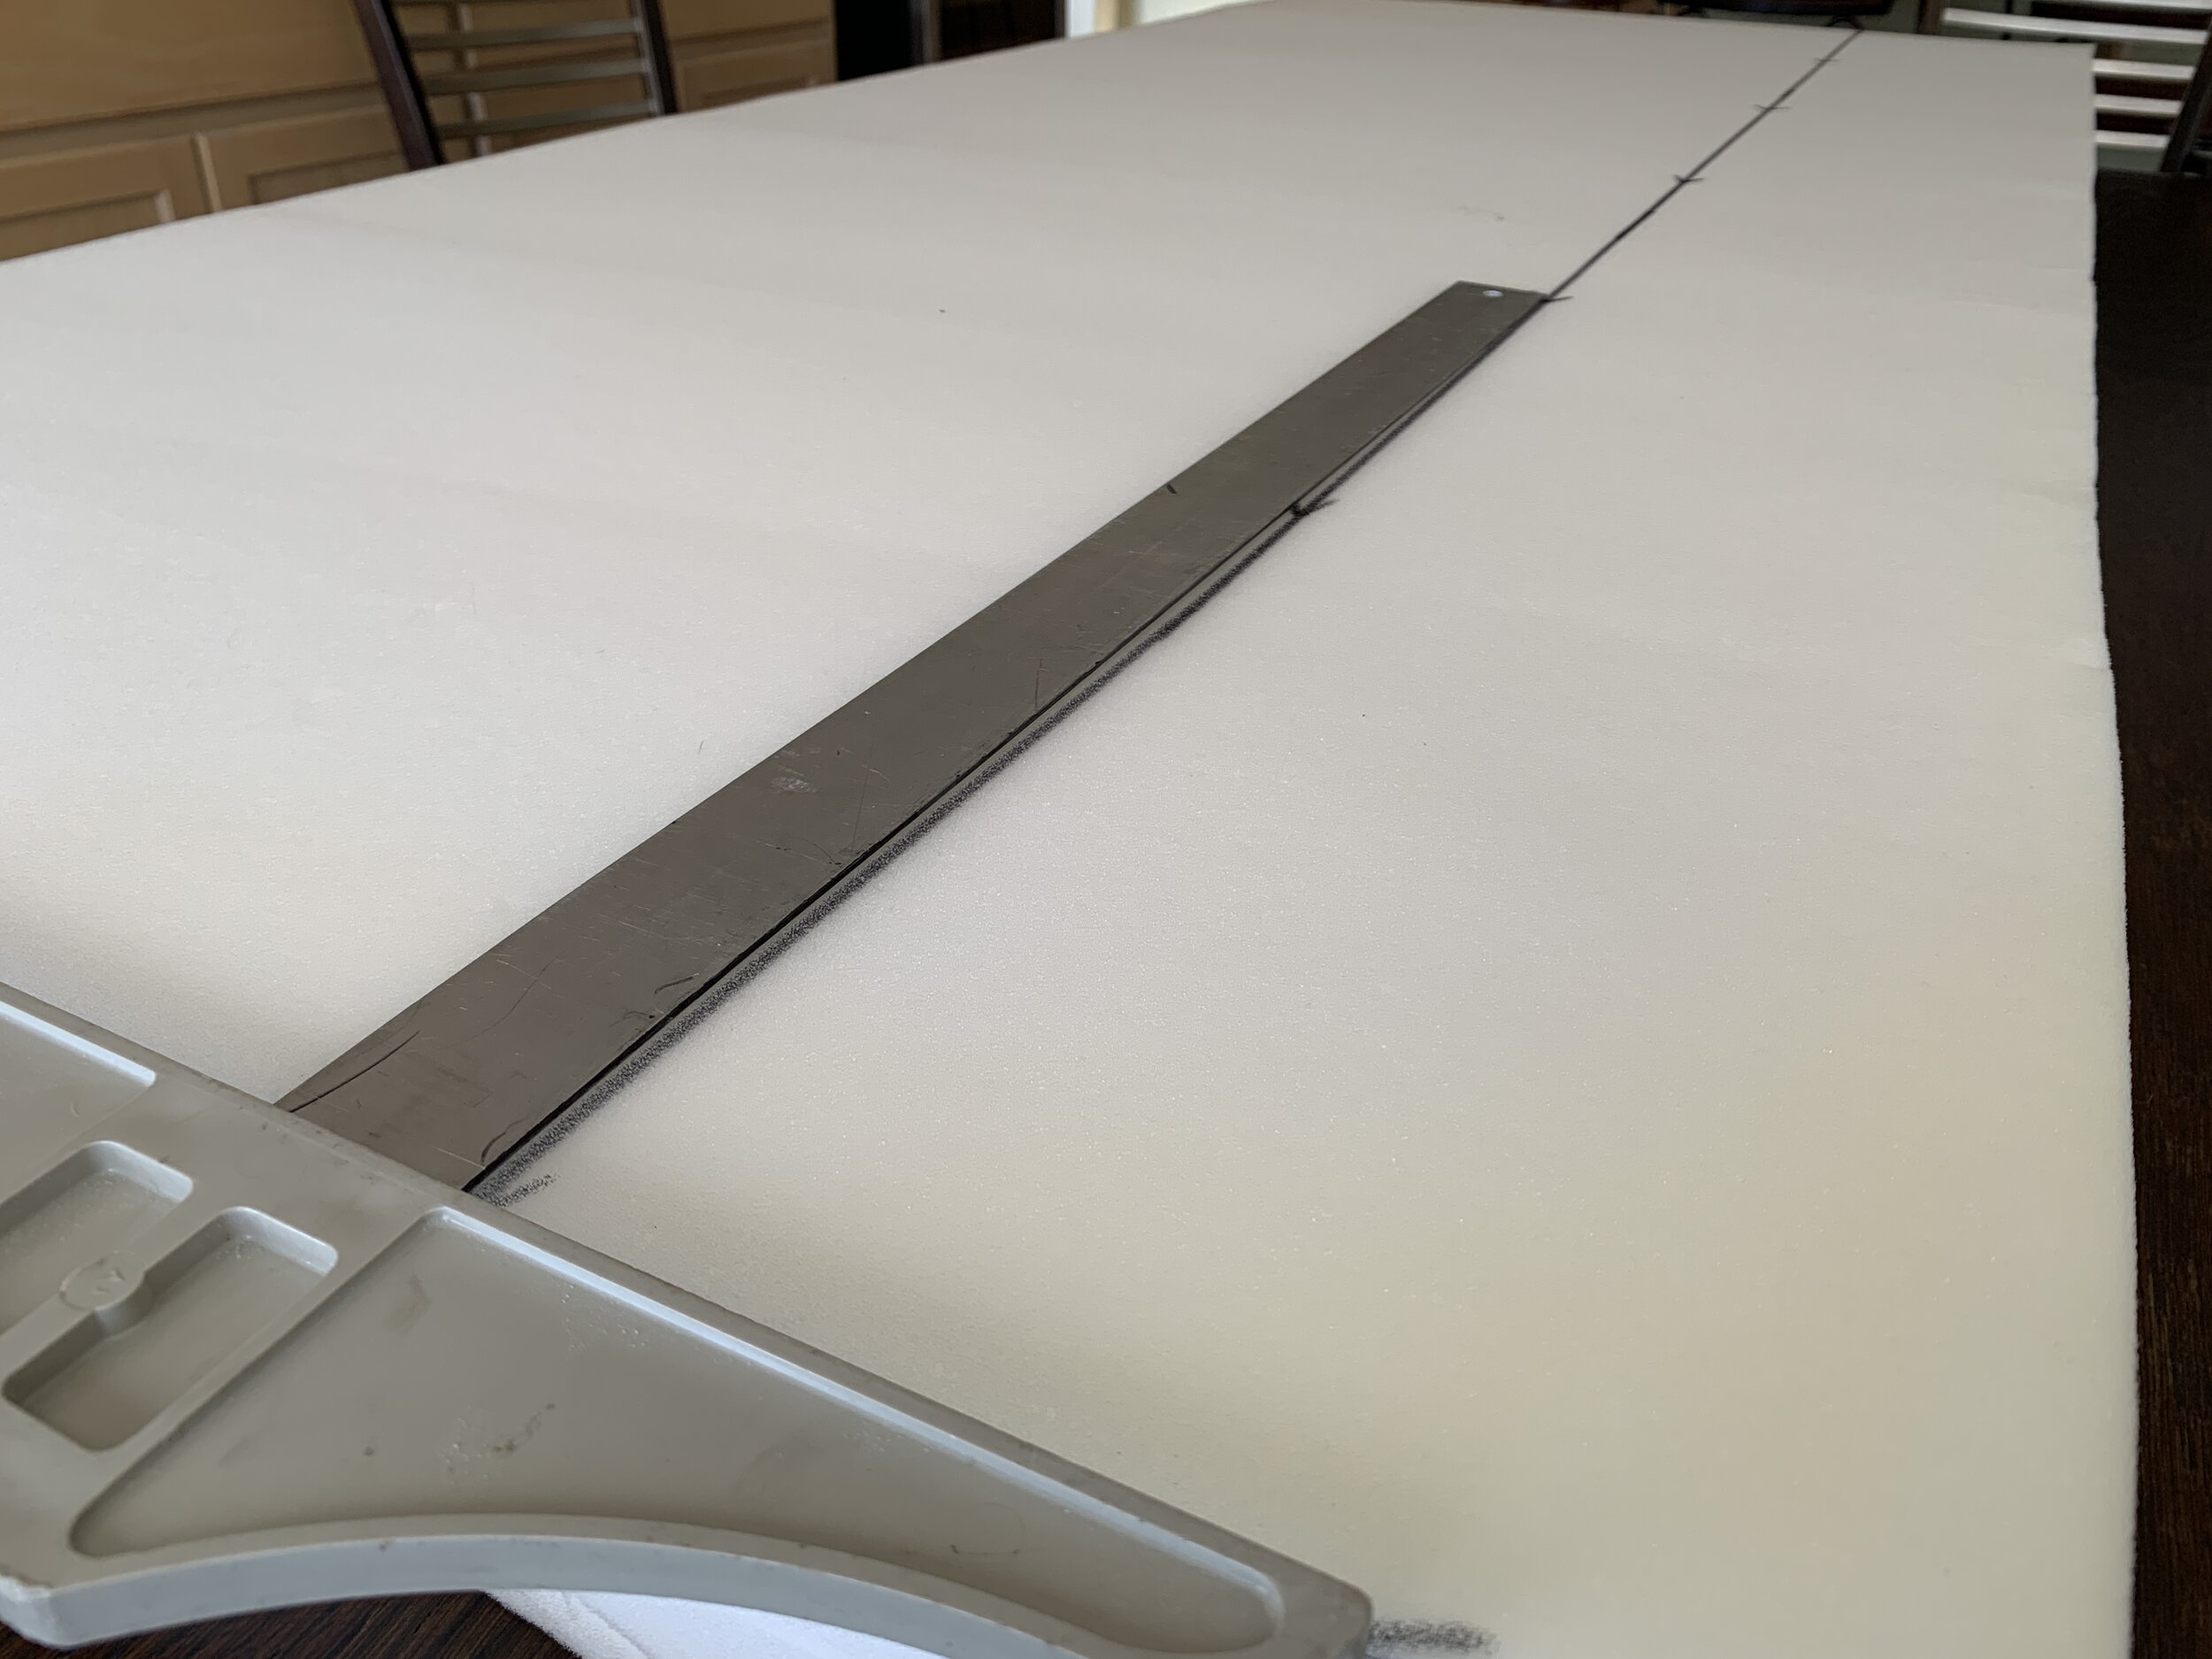
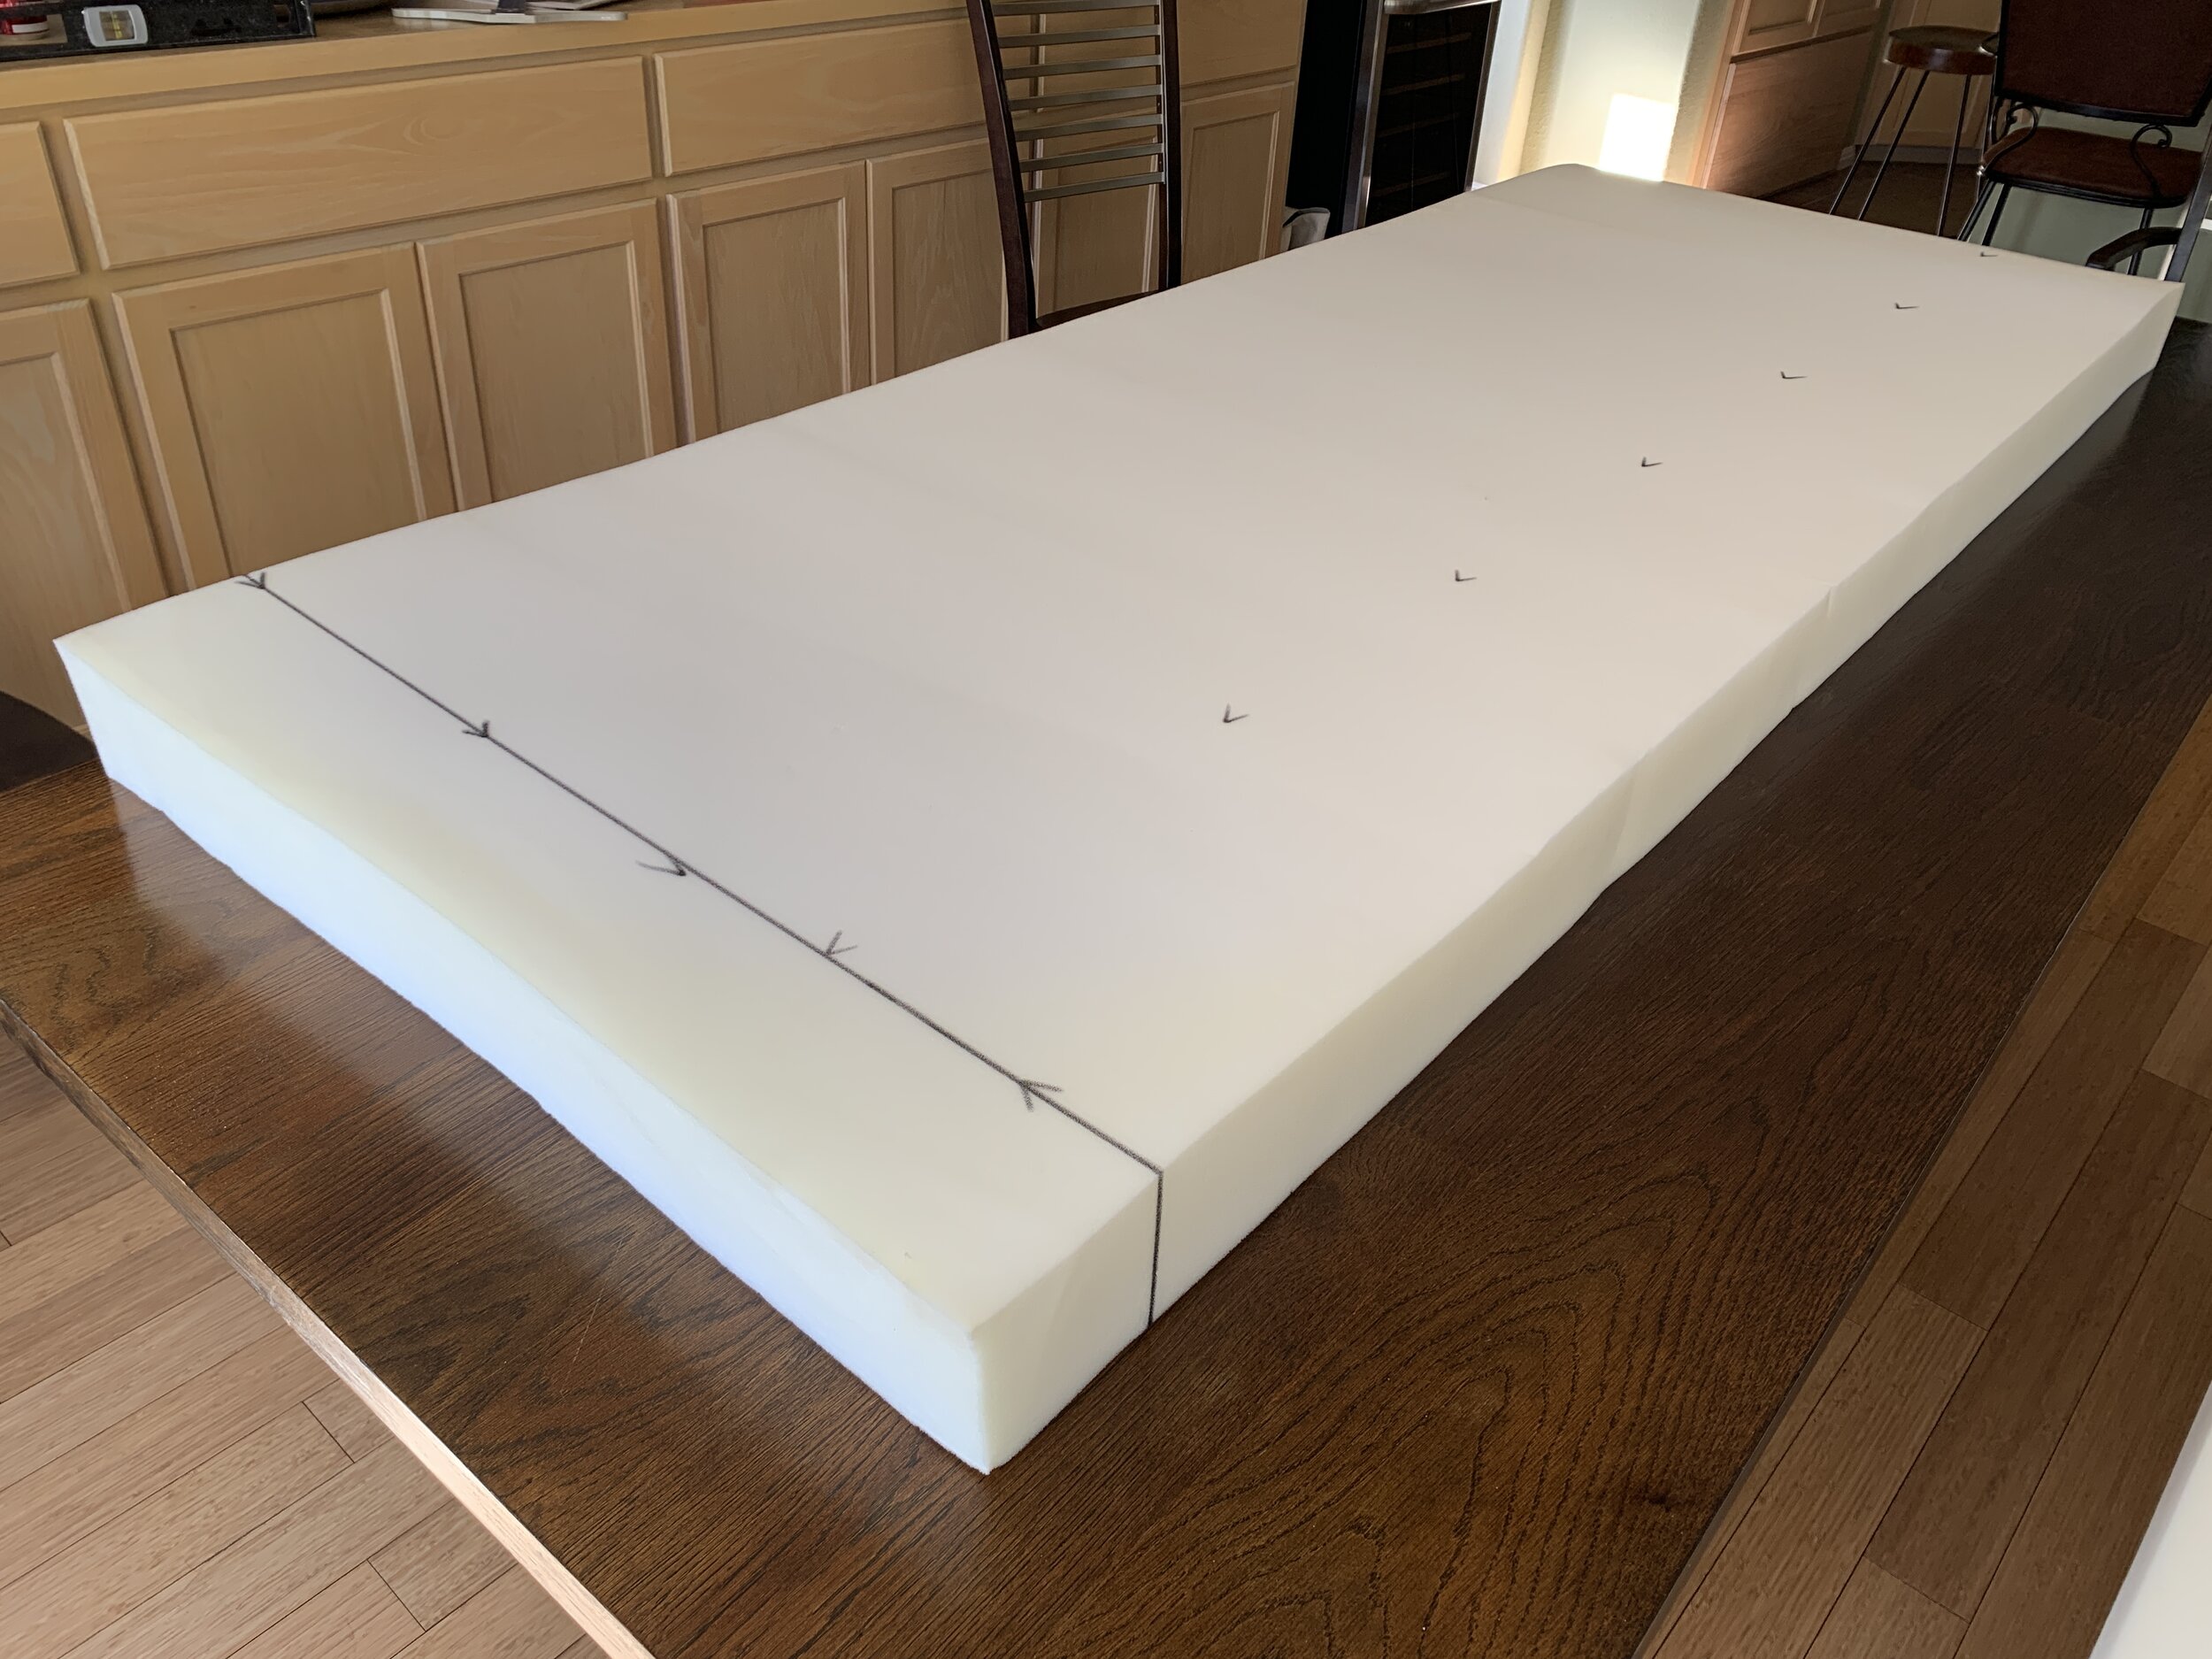
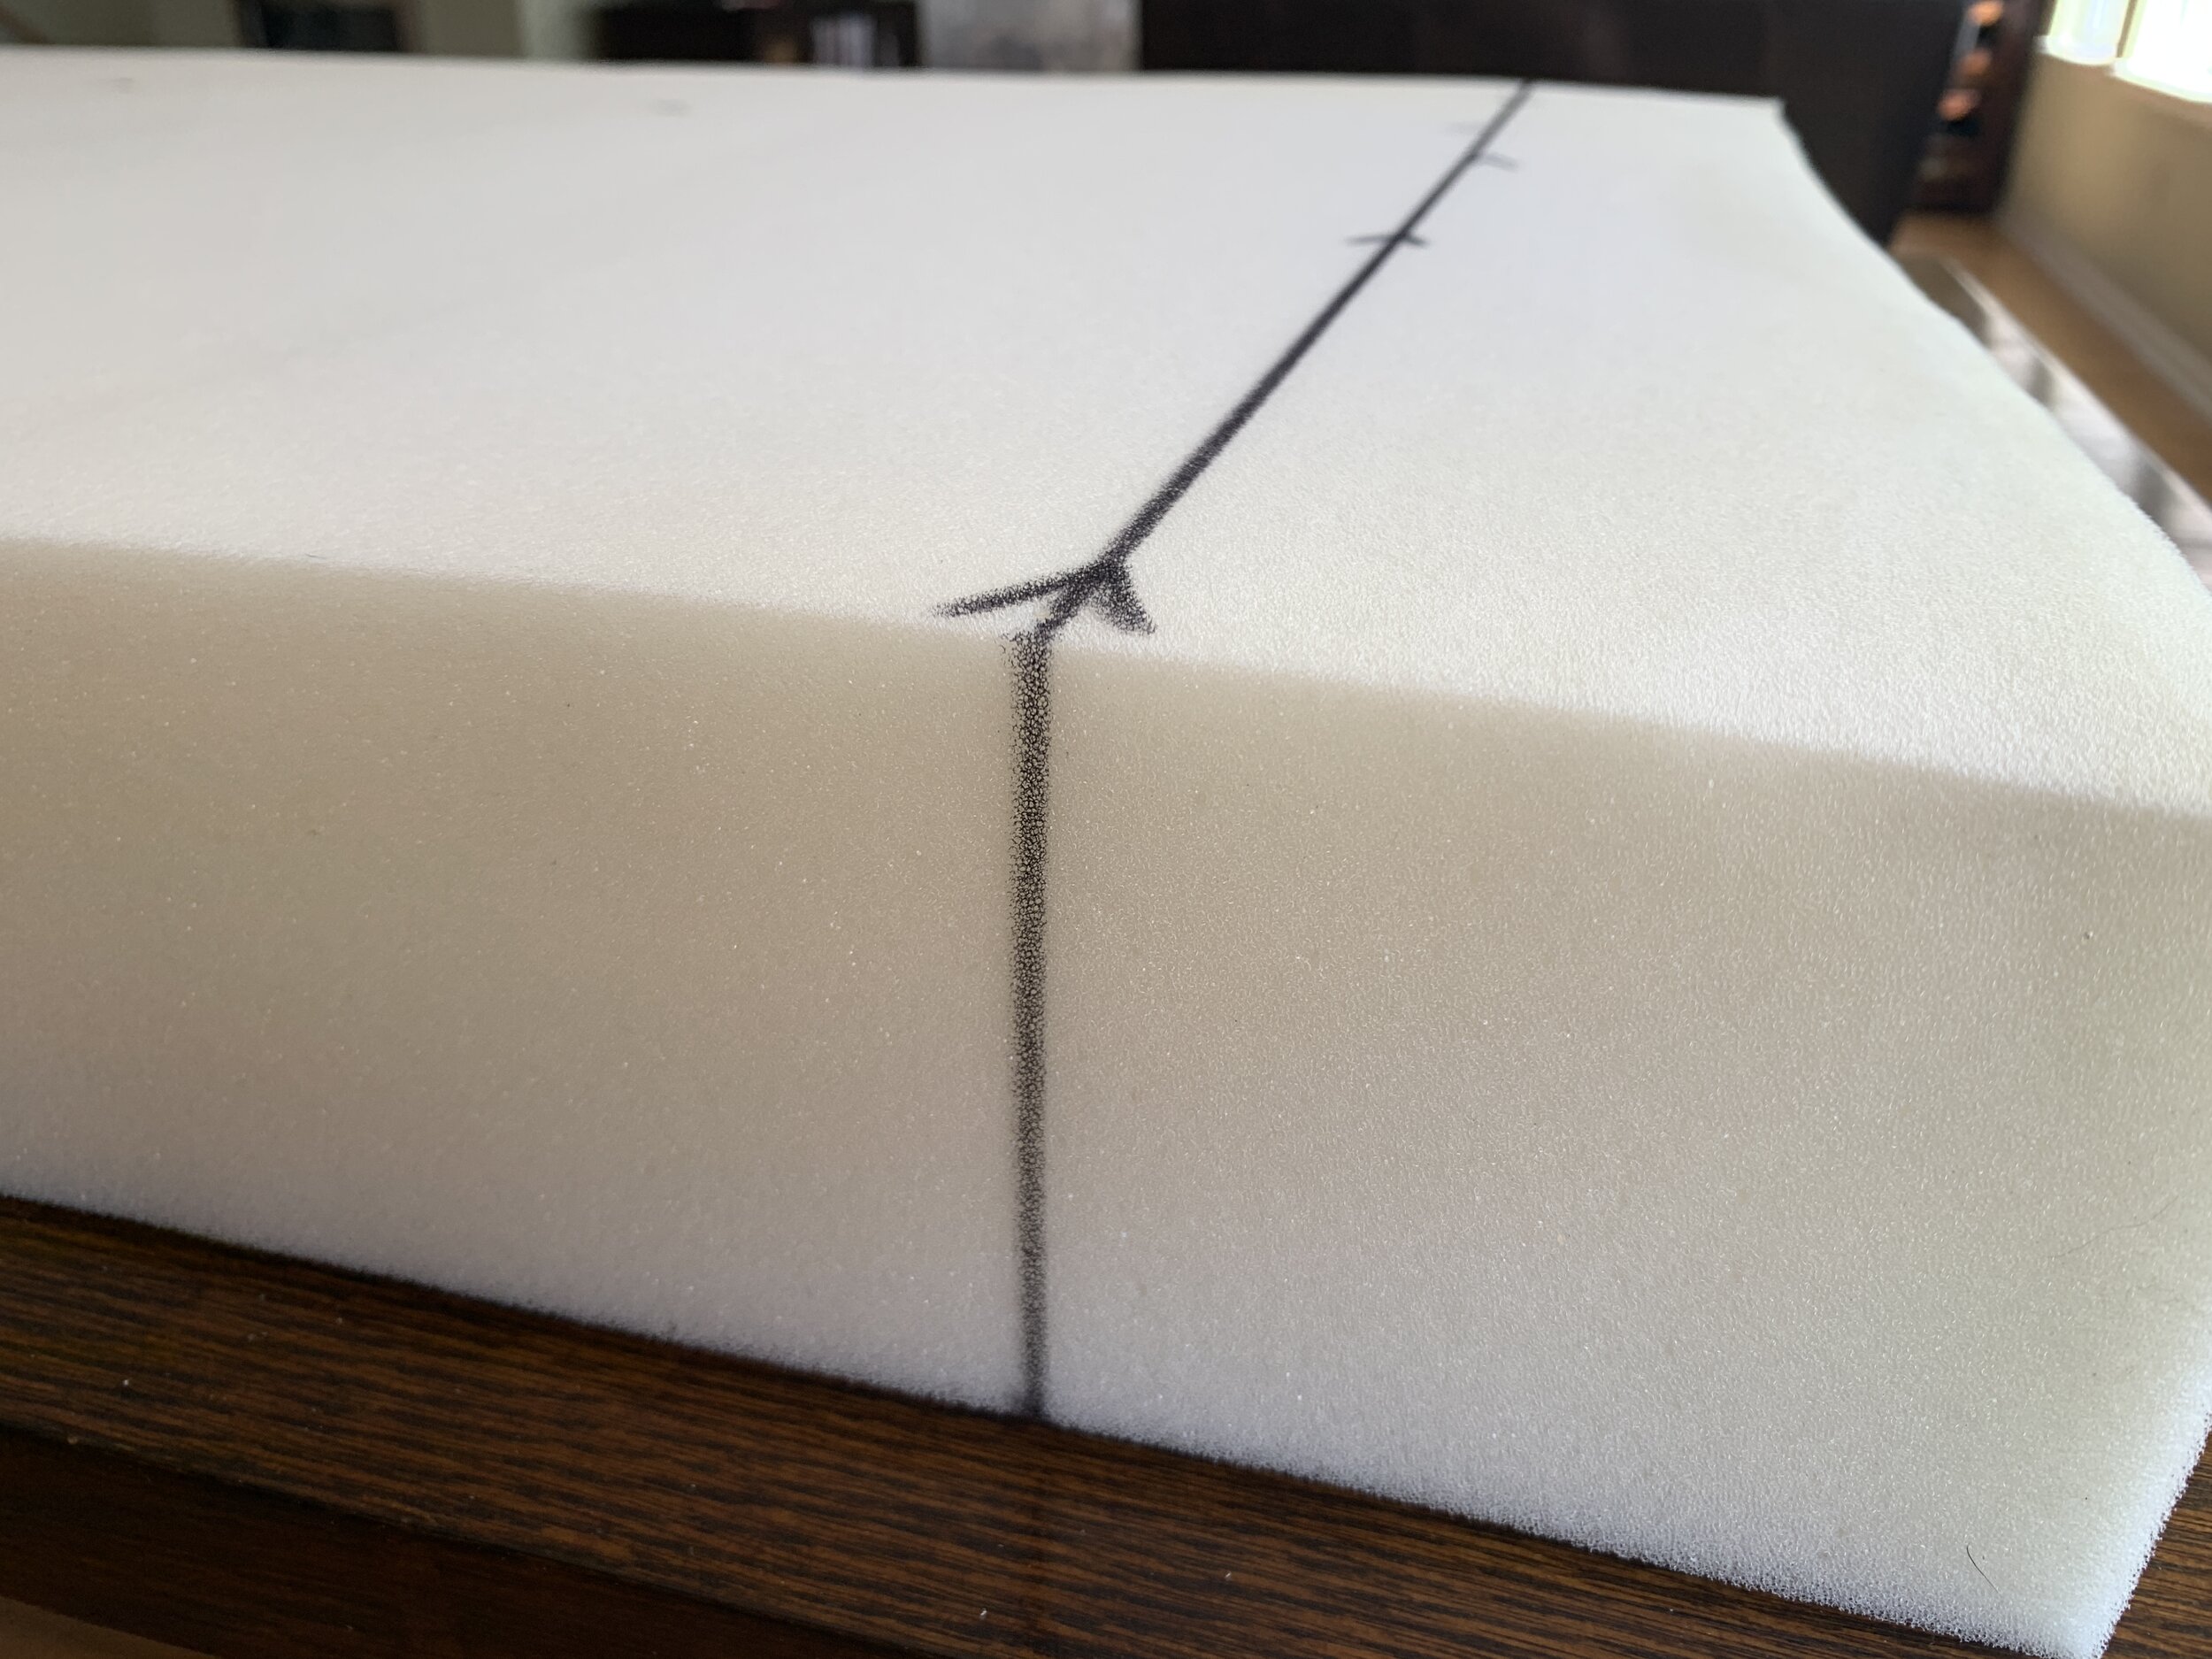
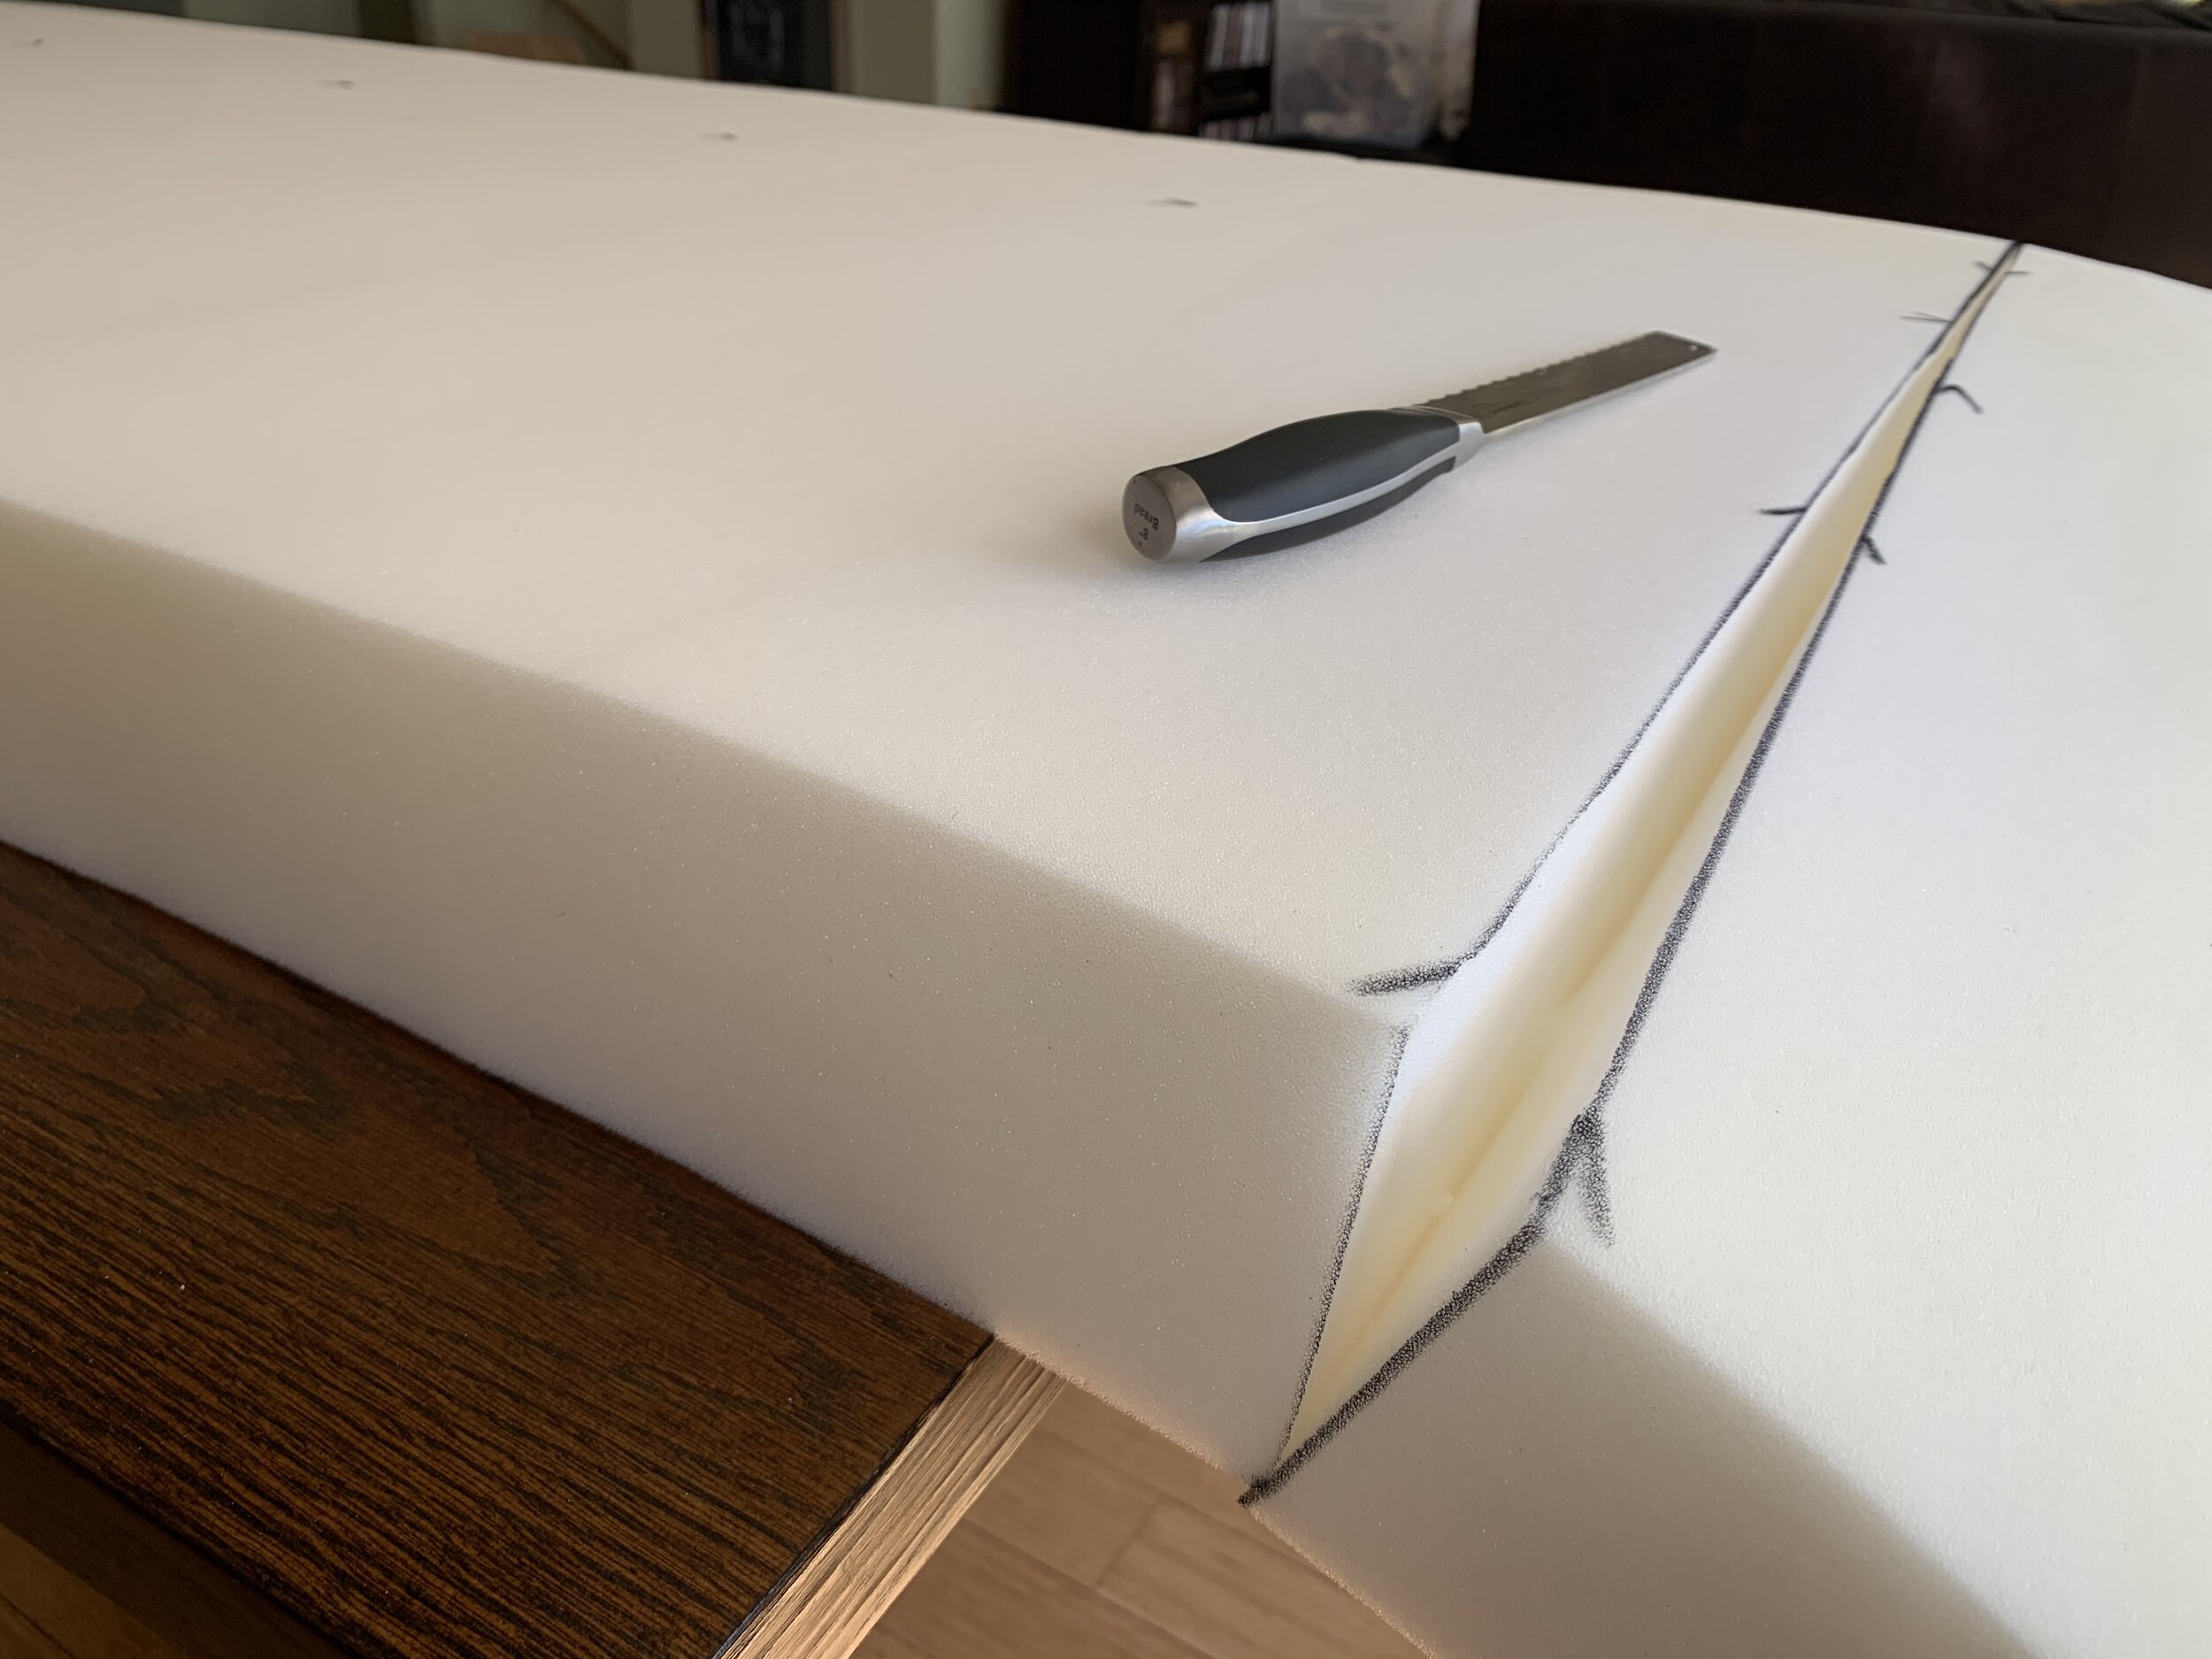
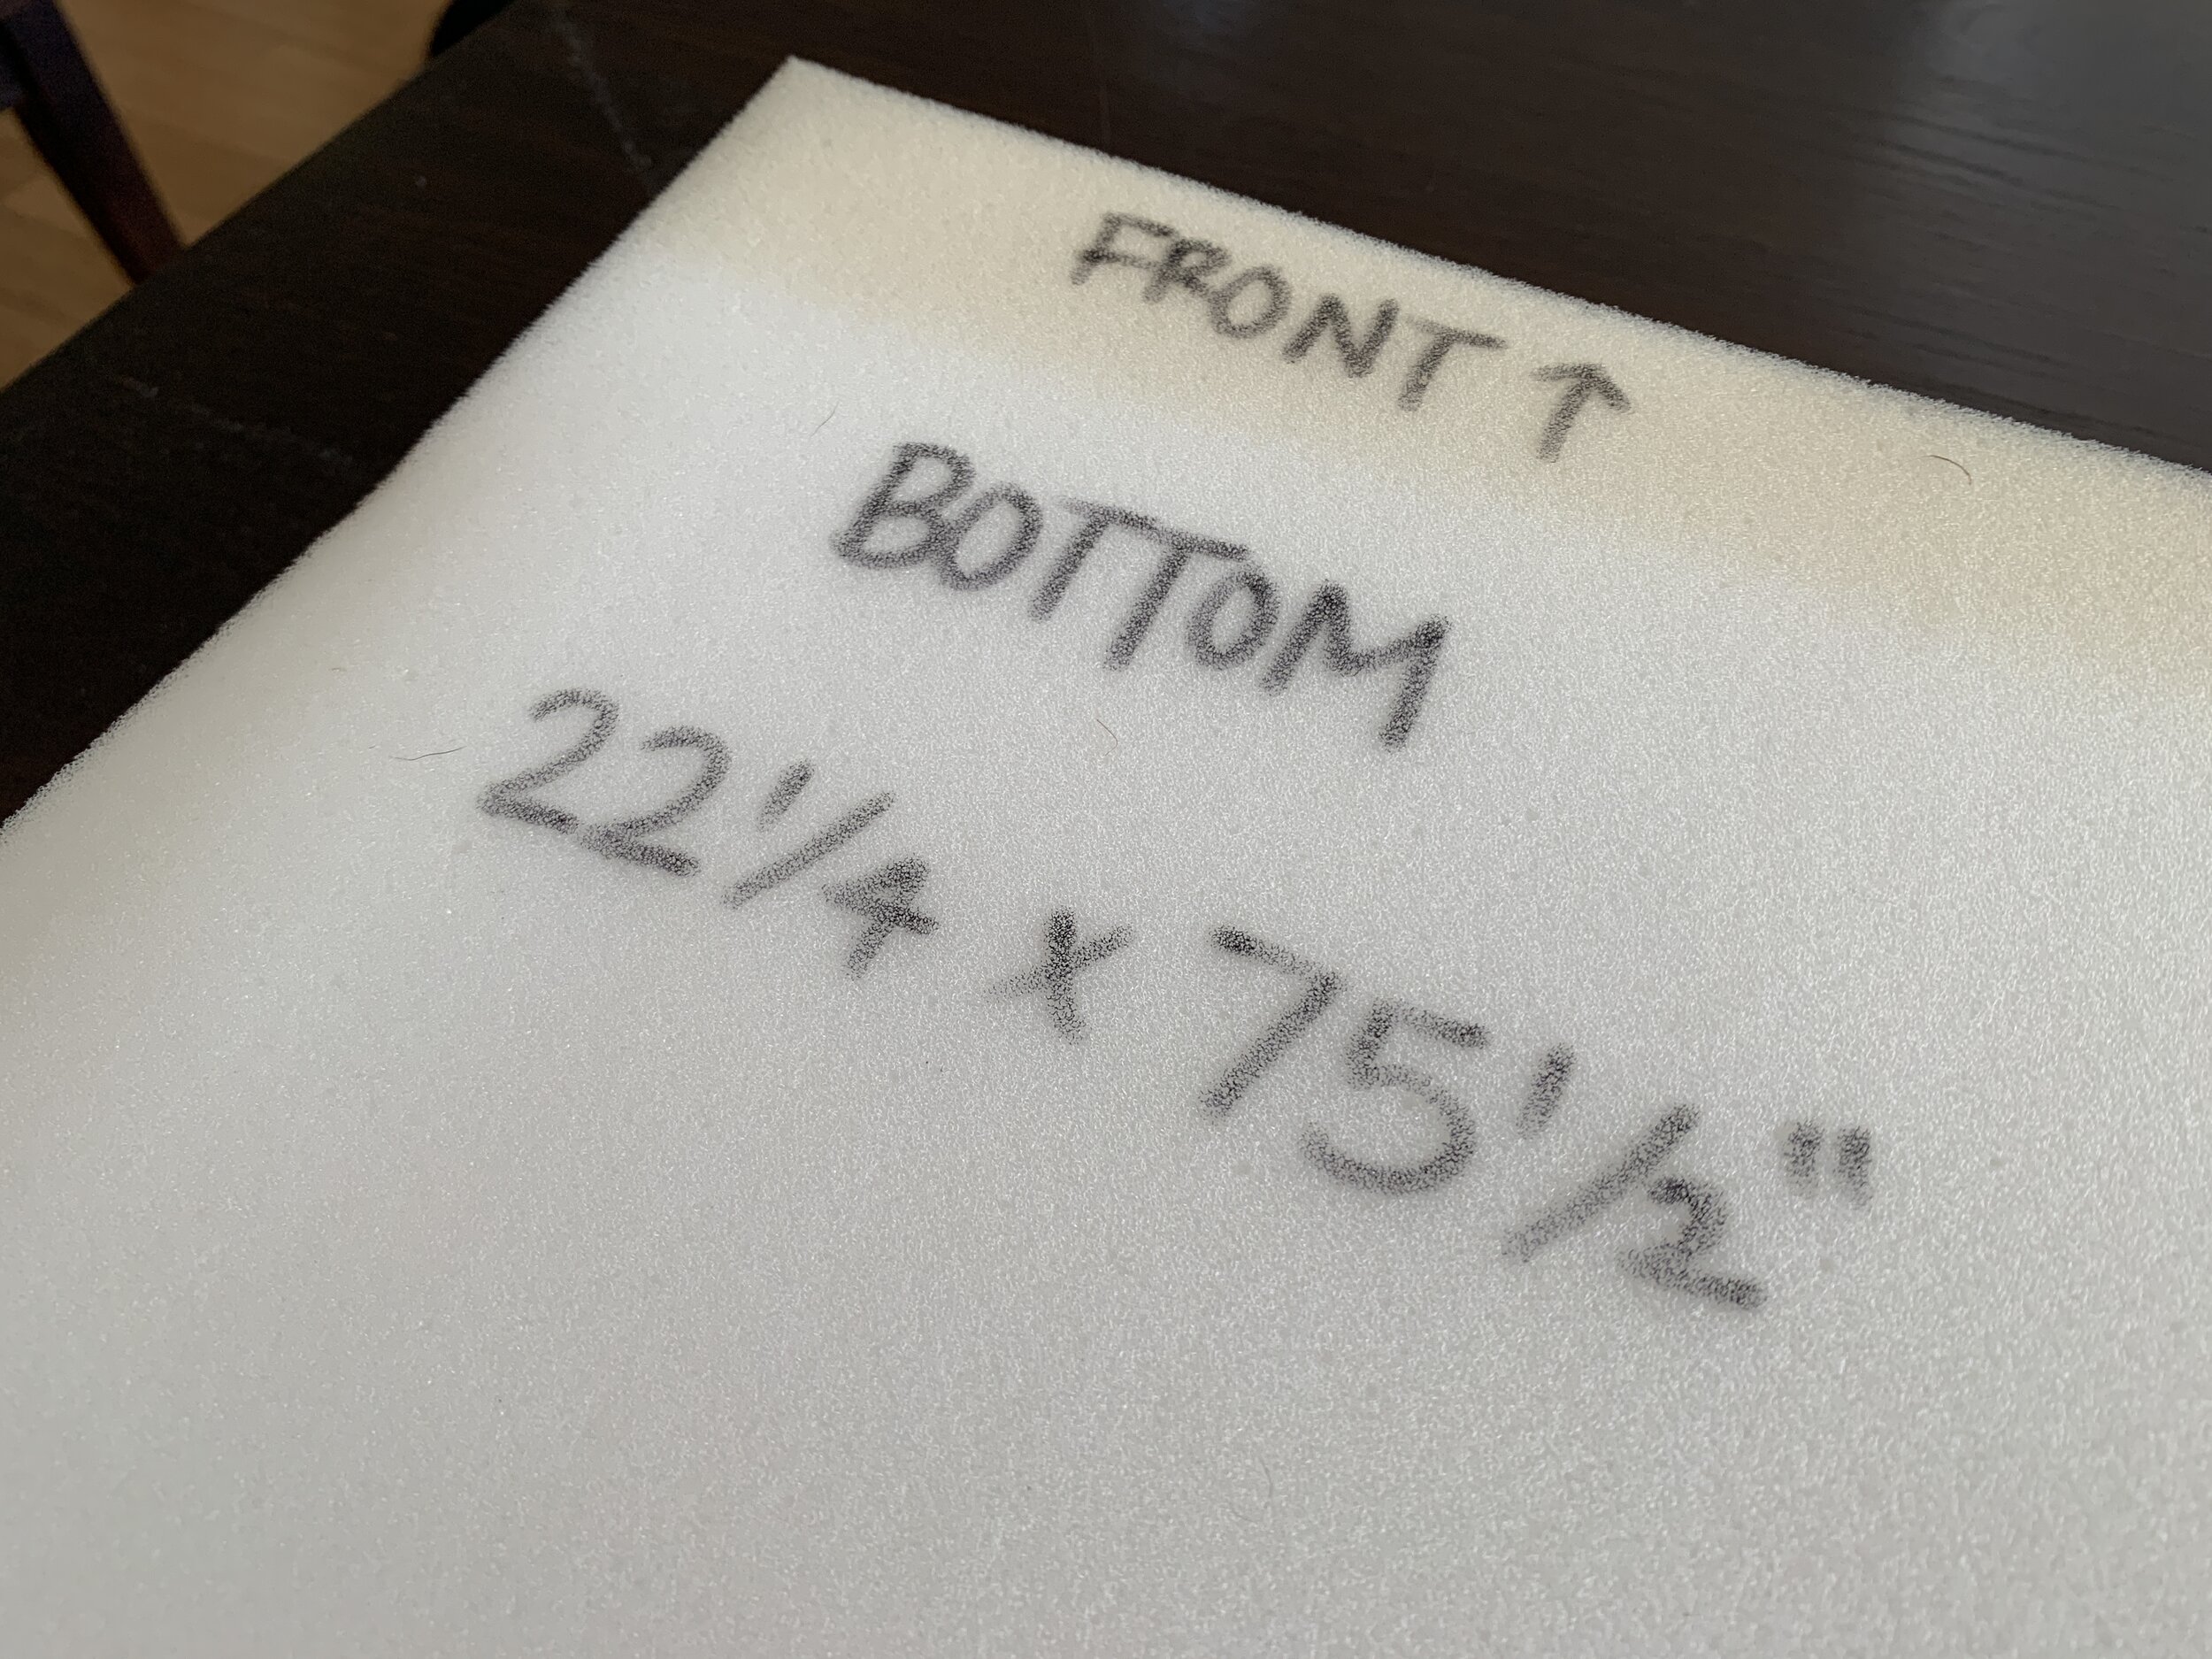
With long controlled knife cuts – moving from one end to the other – it took me about 3 passes to carefully cut all the way through the foam. I found it easiest to use one hand to cut and my thumb and fingers on the other hand to kind of spread the cut apart so I could see down inside the foam on passes 2 and 3 to make sure I was maintaining and nice, clean, vertical all the way down and through the foam. If there are are minor ridges in the foam it won’t show up later, especially if you do a muslin layer and/or have dark upholstery fabric – both of which we did. This also is why it was okay that I added the dimensions and bottom/front labels to each of the cushions as a guide for my MIL to use when assembling the covers.
The inner lining
Before my MIL sewed the final covers, she used muslin fabric to make an inner encasement. She did this for a few reasons: We thought this would help protect the foam a bit, it made the final fabric slide onto the foam much easier and it gave her a practice run of sorts for templating and measuring for seam allowance before she was working with the real (more expensive) fabric.

You can kind of see my cushion labels through the muslin above. Don’t worry – it’s completely hidden by our real fabric.

And if you were wondering … Yes, these cushions are dog-approved!
Upholstering the cushions
First off, we LOVE the fabric we chose. It’s got a really nice texture – not scratchy at all – and has the same luster you’d get from a velvet, only with more durability – a must for a camper – and there’s no nap you have to worry about during sewing which helps save on fabric quantity/cost too. Nick’s mom said the fabric was super easy and great to work with – due to it having a backing that keeps the weave from stretching, which is how you can tell it’s a high-quality upholstery-grade fabric. You can tell in the photos that depending on the light it ranges from looking vibrant blue to navy to a dusky gray-blue which I love.
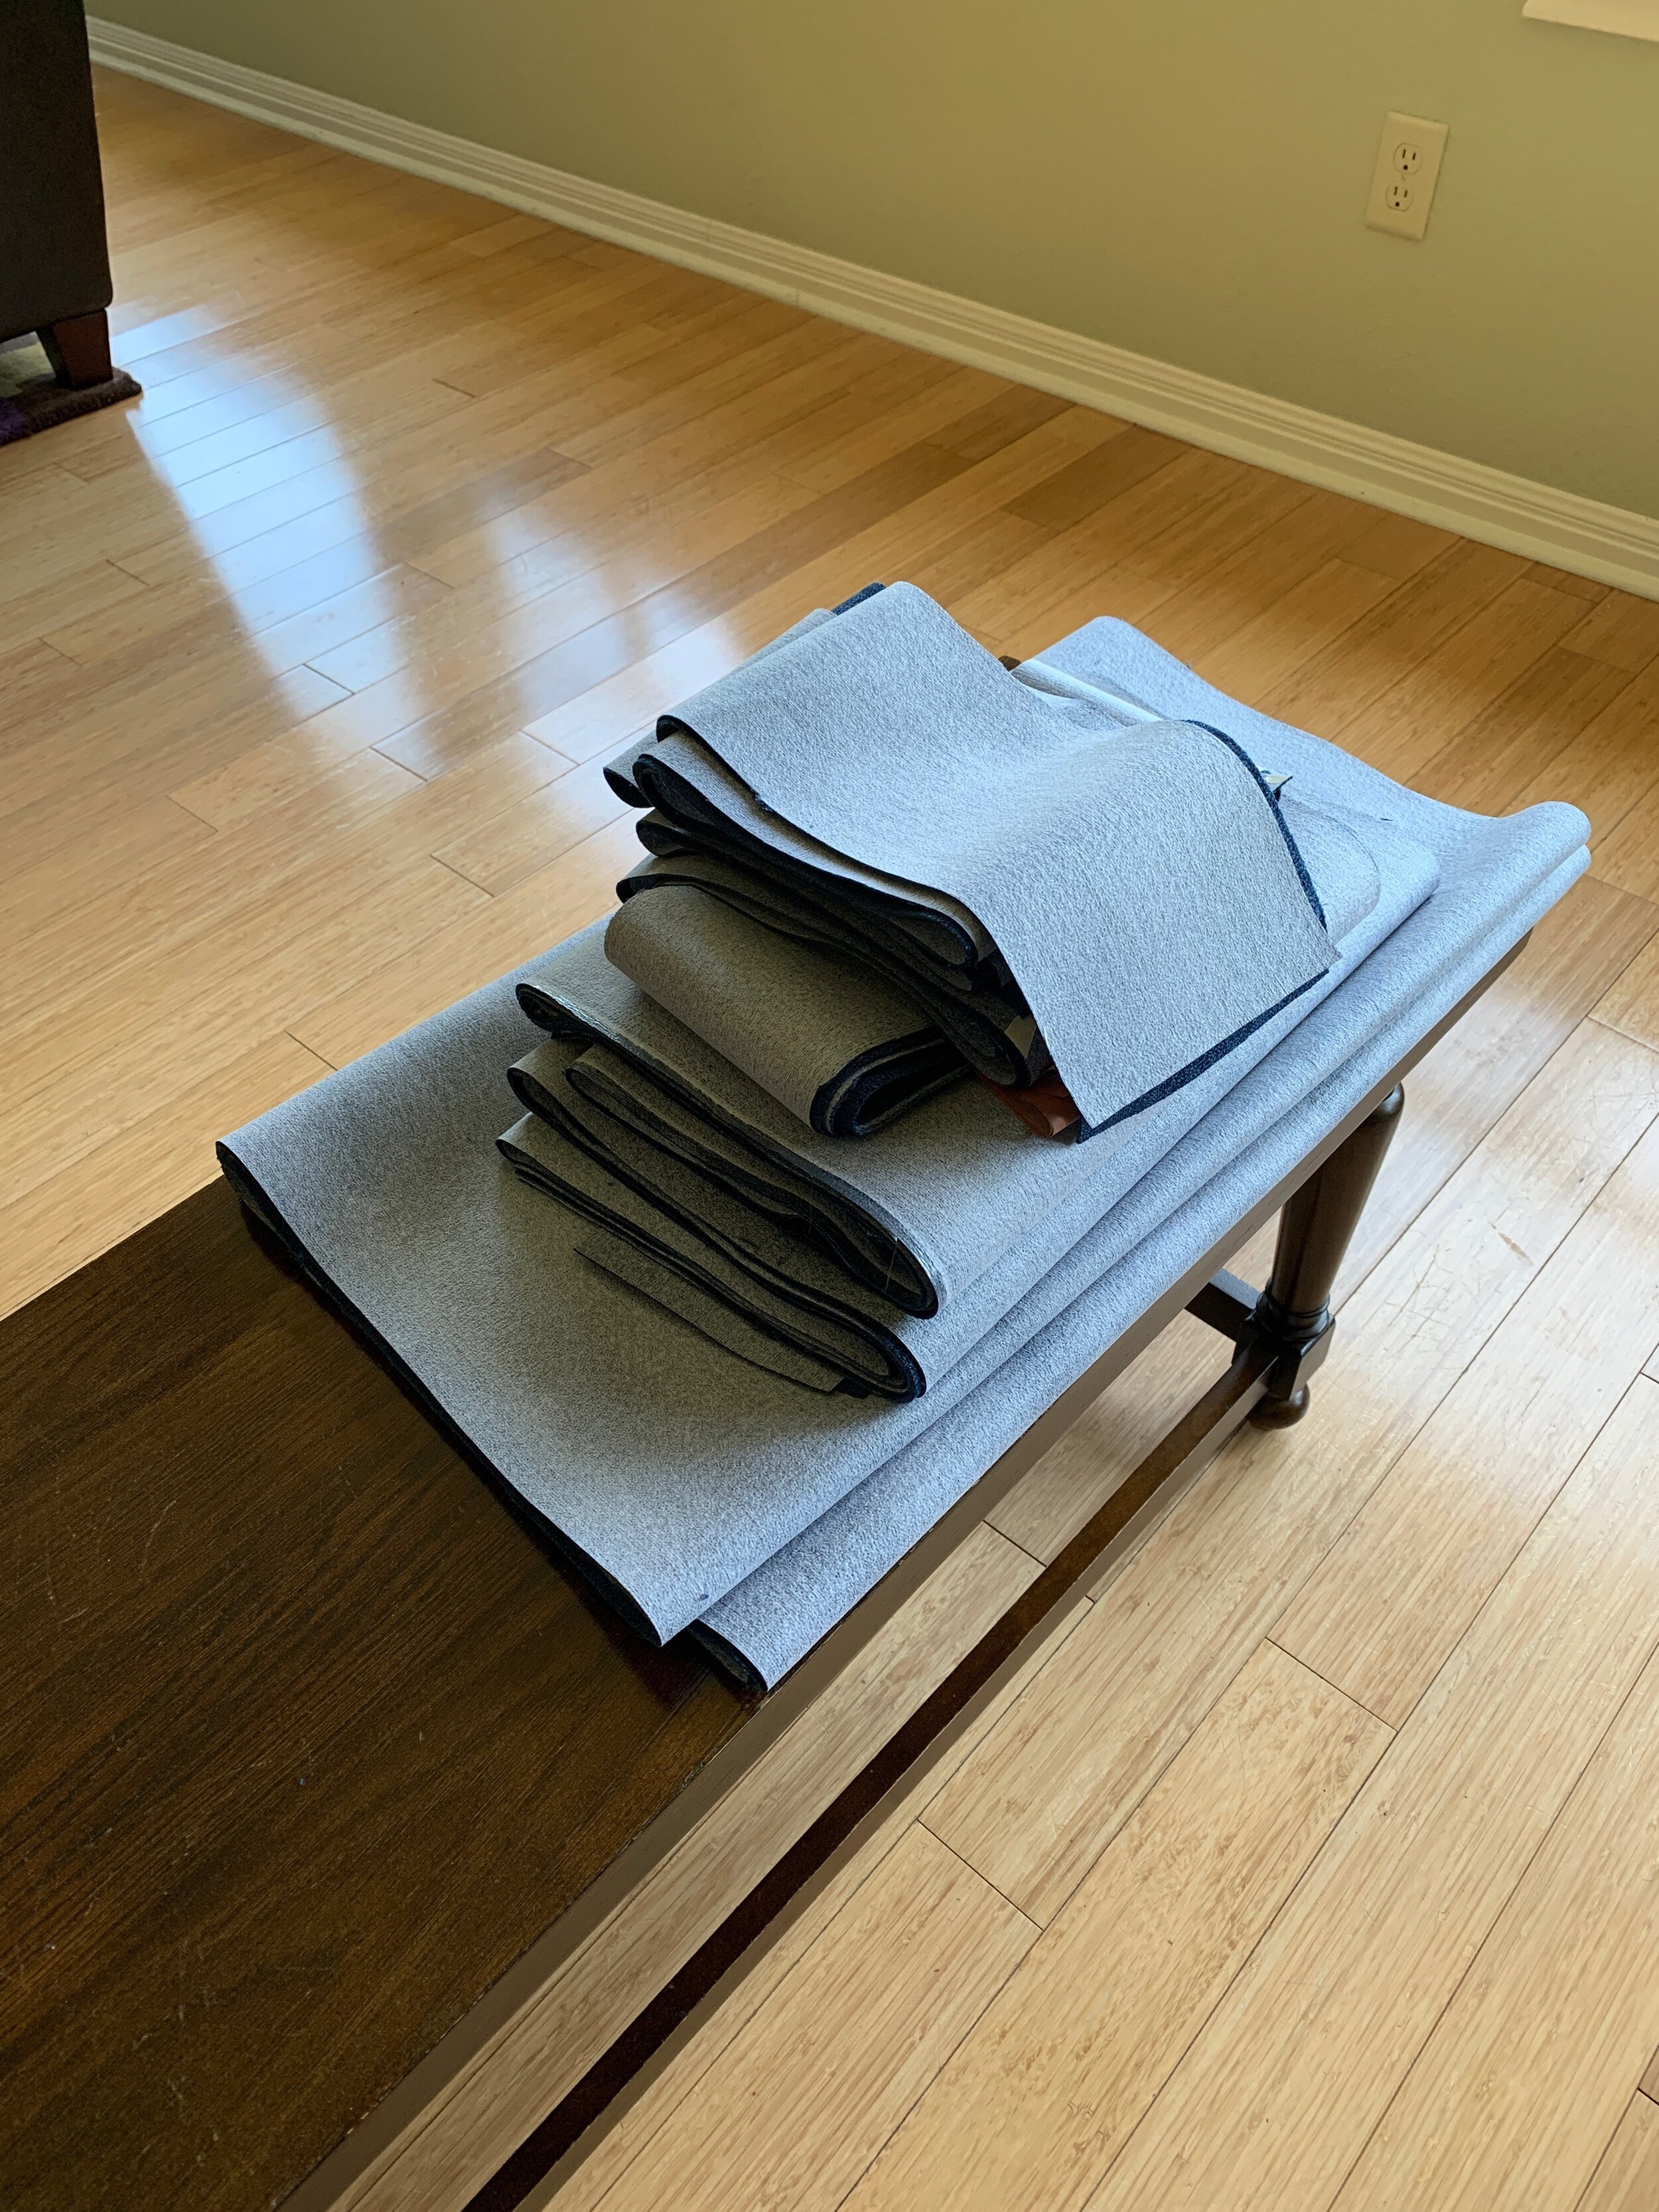
Because Nick’s wonderful mom upholstered these for us, we don’t have a ton of nitty gritty photos, but we know she first cut the fabric into strips (that make my little inner OCD monster oh so happy to see neatly stacked in the photo below), then started sewing up a storm. Everything was sewn by machine, except for one edge on each cushion where she slid in the foam before stitching it in by hand.
We opted not to add piping/welting along all of the edges mostly because it was so dang expensive to have made (and we didn’t want to put Nick’s mom through making it), and would’ve required an insane amount more of fabric. We also thought it might interfere with a nice bump-free bed so it was an easy decision to make after I tallied up the cost of the project both with and without piping. (For our cushions, we would have needed 36 yards of piping alone!)
Here are some progress shots she sent me along the way:
Plus a new bonus sketch to help further clarify how the panels were sewn together. From my understanding, she machine-sewed all of the seams for the yellow and aqua double back cushions from the diagram above, stuffed the foam into each, and then open hand stitched the "hinge" seam where the yellow and aqua cushions meet.

How the two long back cushions are sewn together.
We ordered 8 yards of fabric – which happened to perfectly be a full bolt of the 54” wide fabric we chose – and ended up with very little scrap. So little scrap, that all that’s left fits neatly folded in a gallon-sized Ziploc bag, which Nick’s mom gave back to us.

Dang she’s good.
The finished dinette cushions
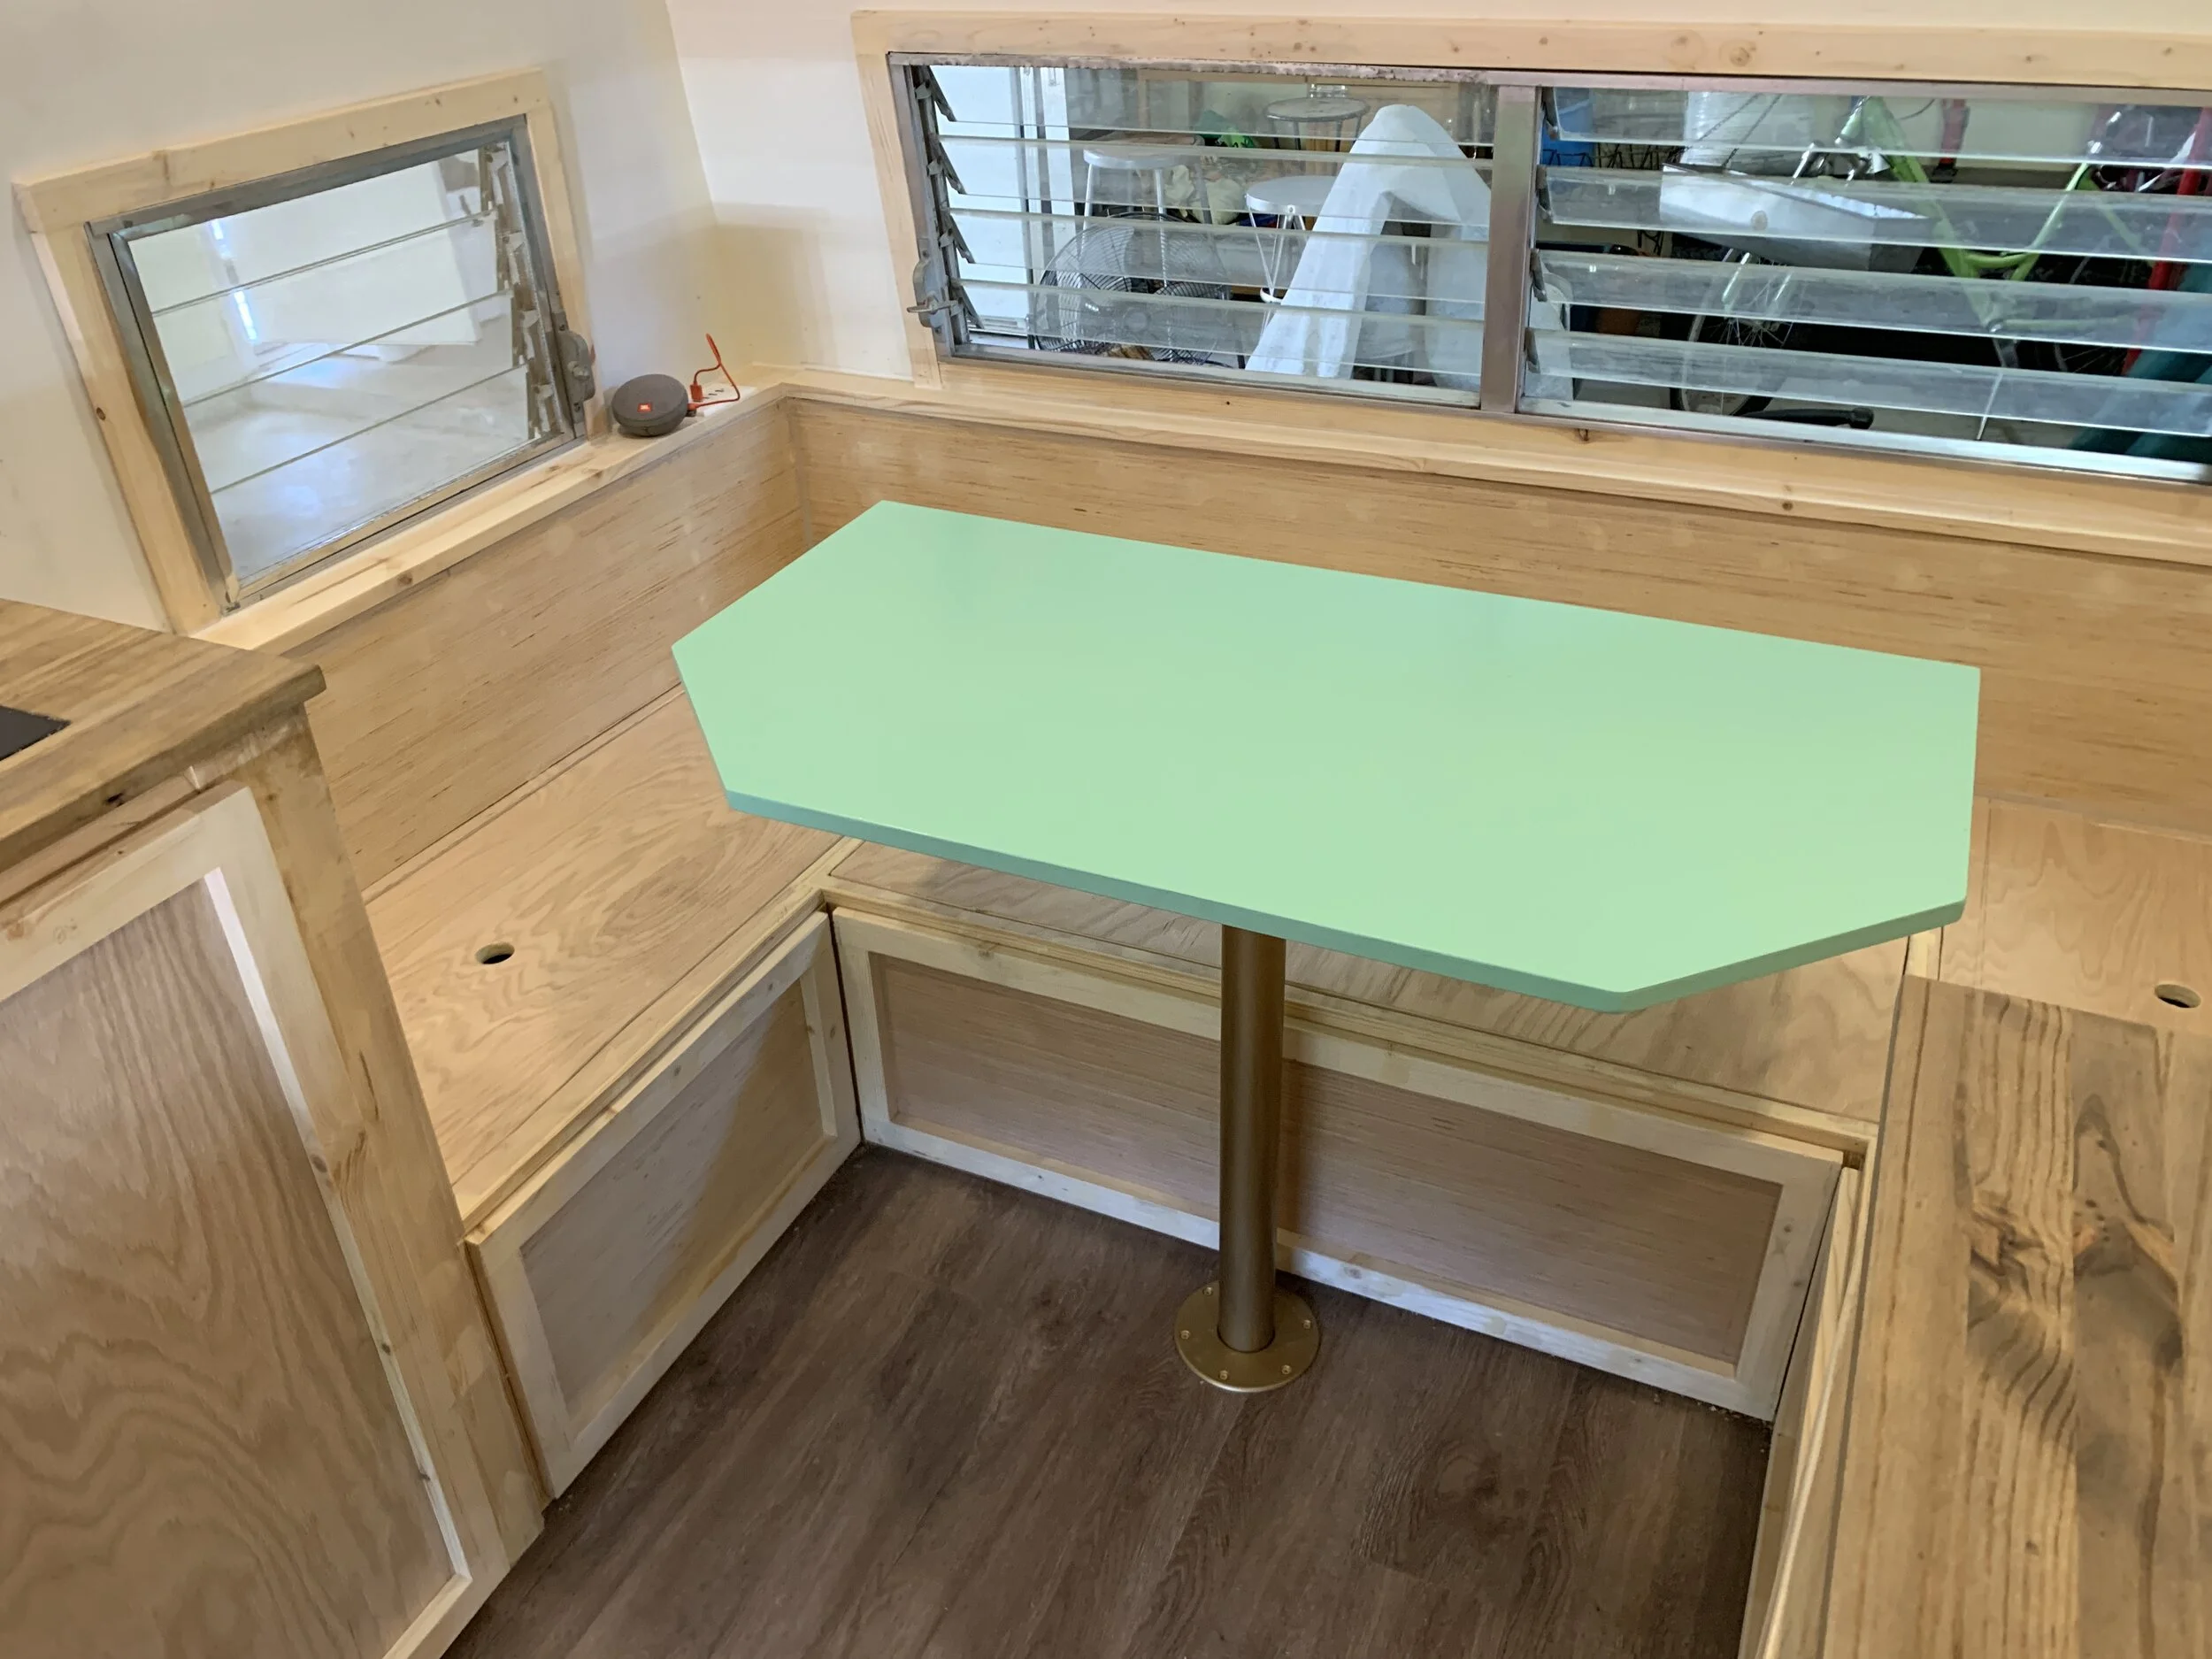
So you’ve seen the diagrams and dimensions, found out another use for a bread knife, and how my MIL is a total badass, so all that’s left is to see how it looks and transitions from a dining area to bed in reality. (Apologies for the missing right wooden backrest … we were still working on the plumbing hidden inside when these were taken. It’s since been installed and painted.)
And one last shot to show a better angle of the way those double-backrest cushions are attached so that they kind of hinge during transition.

We’ve gone camping once since their completion and it was really comfortable. So far, we’d recommend it all – the foam and the fabric – as great materials for both sitting and sleeping. Next is accessorizing the area with the really fun stuff to help add even more comfort and some more color!
And lastly, I cannot have written this whole post about our cushions without sharing what’s been repeatedly popping up in my mind the entire time.
Because after all, the cushions are the essence of the chair.