DIY Built-In Bar Storage Part 3: Cabinet Doors How-To
This is part three of a series. Don’t forget to check out parts one, two and our overall bar cabinet plan.
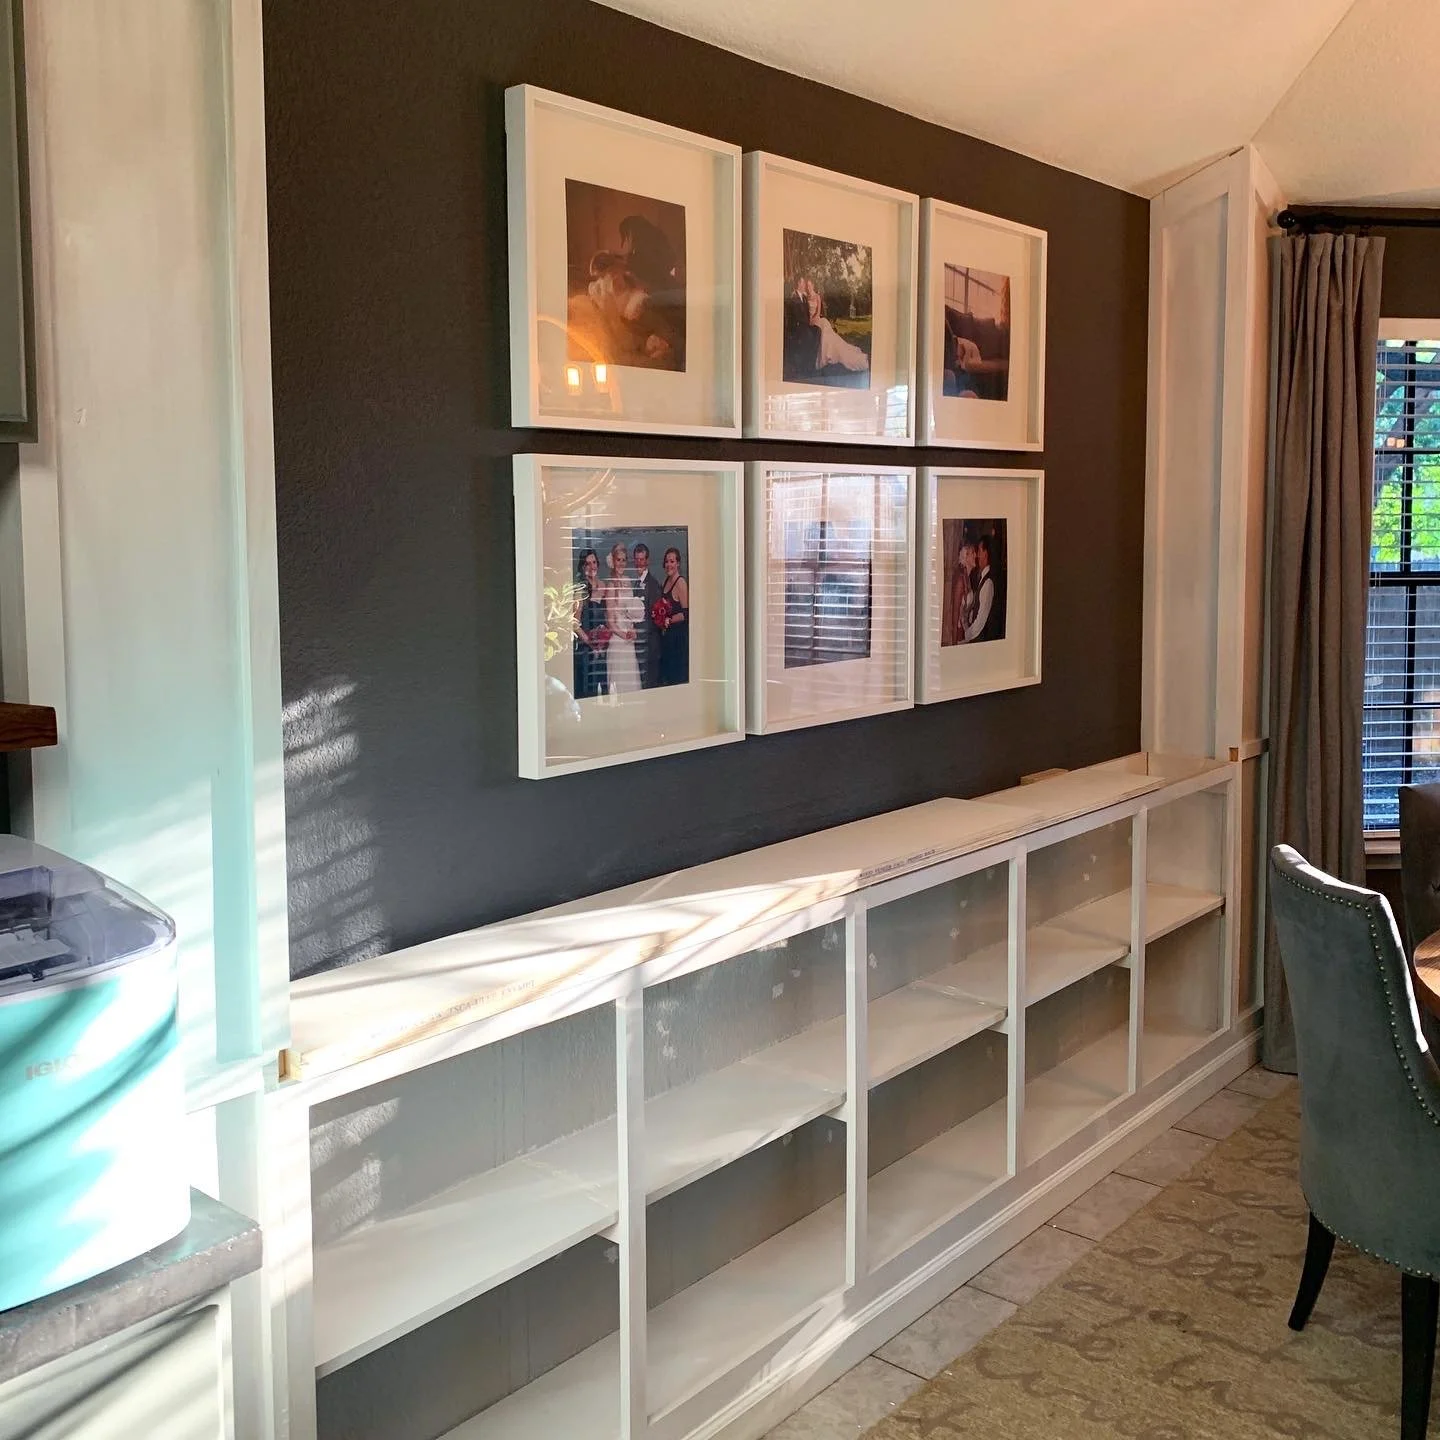
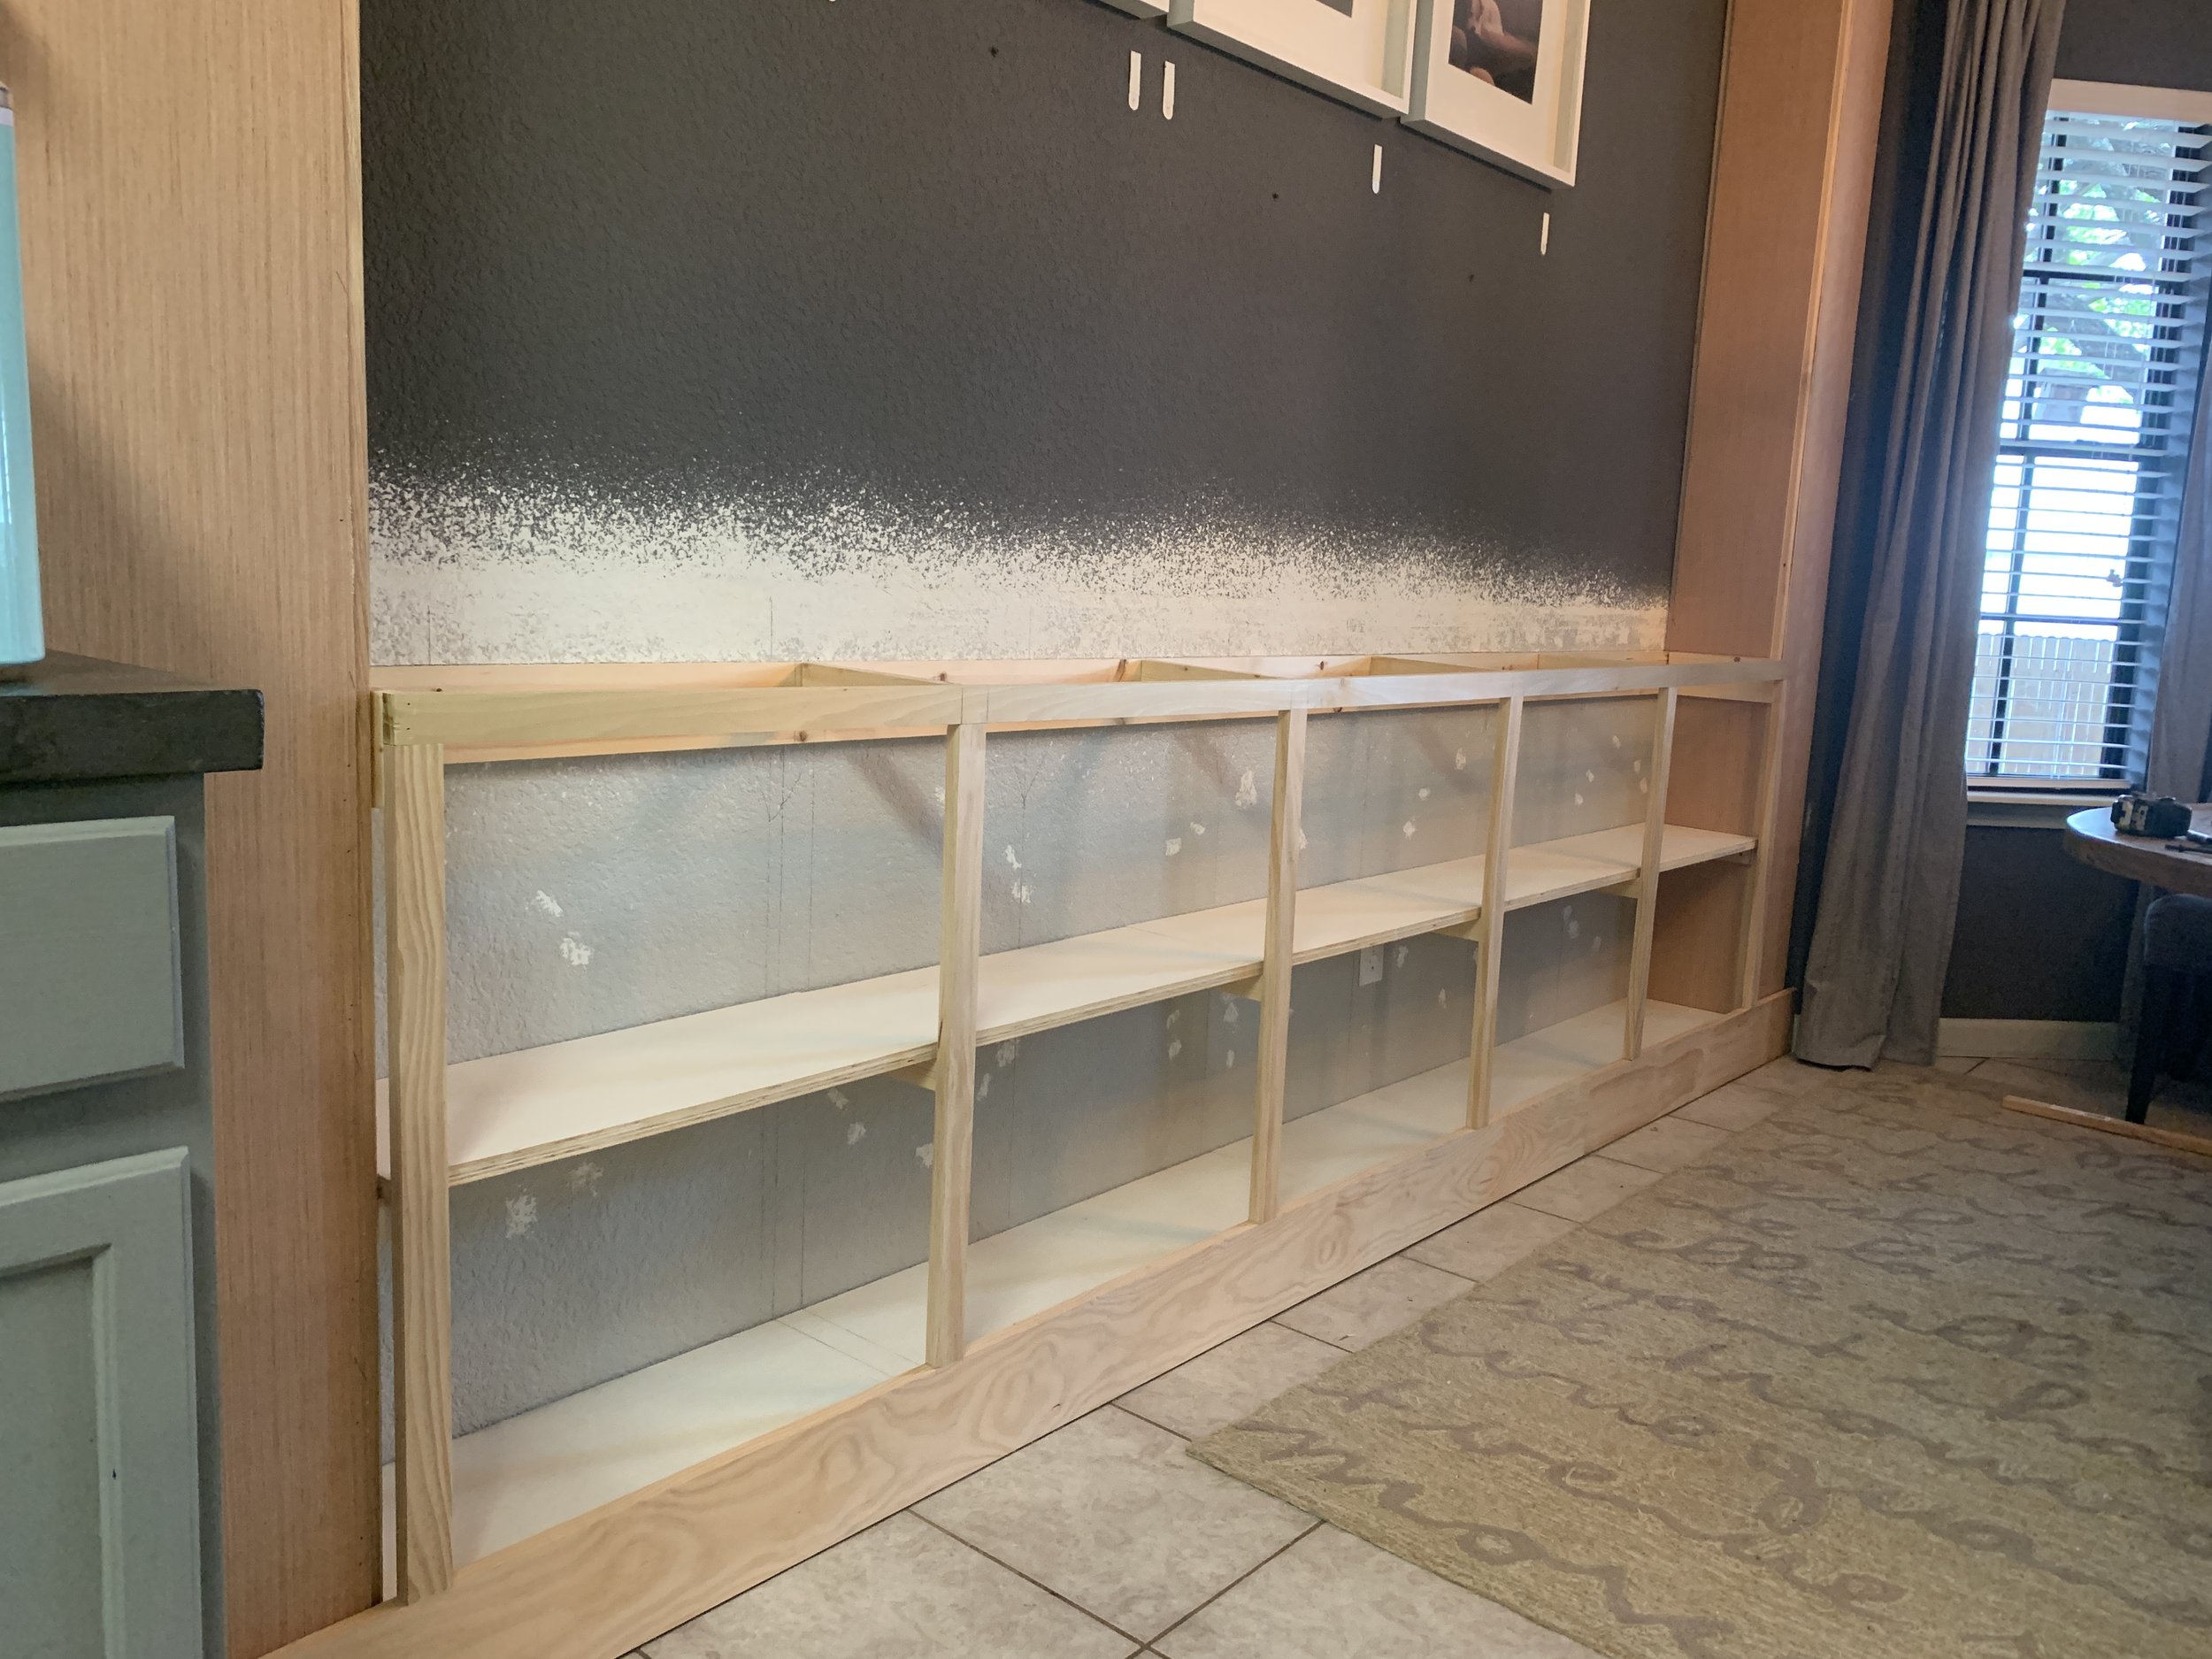
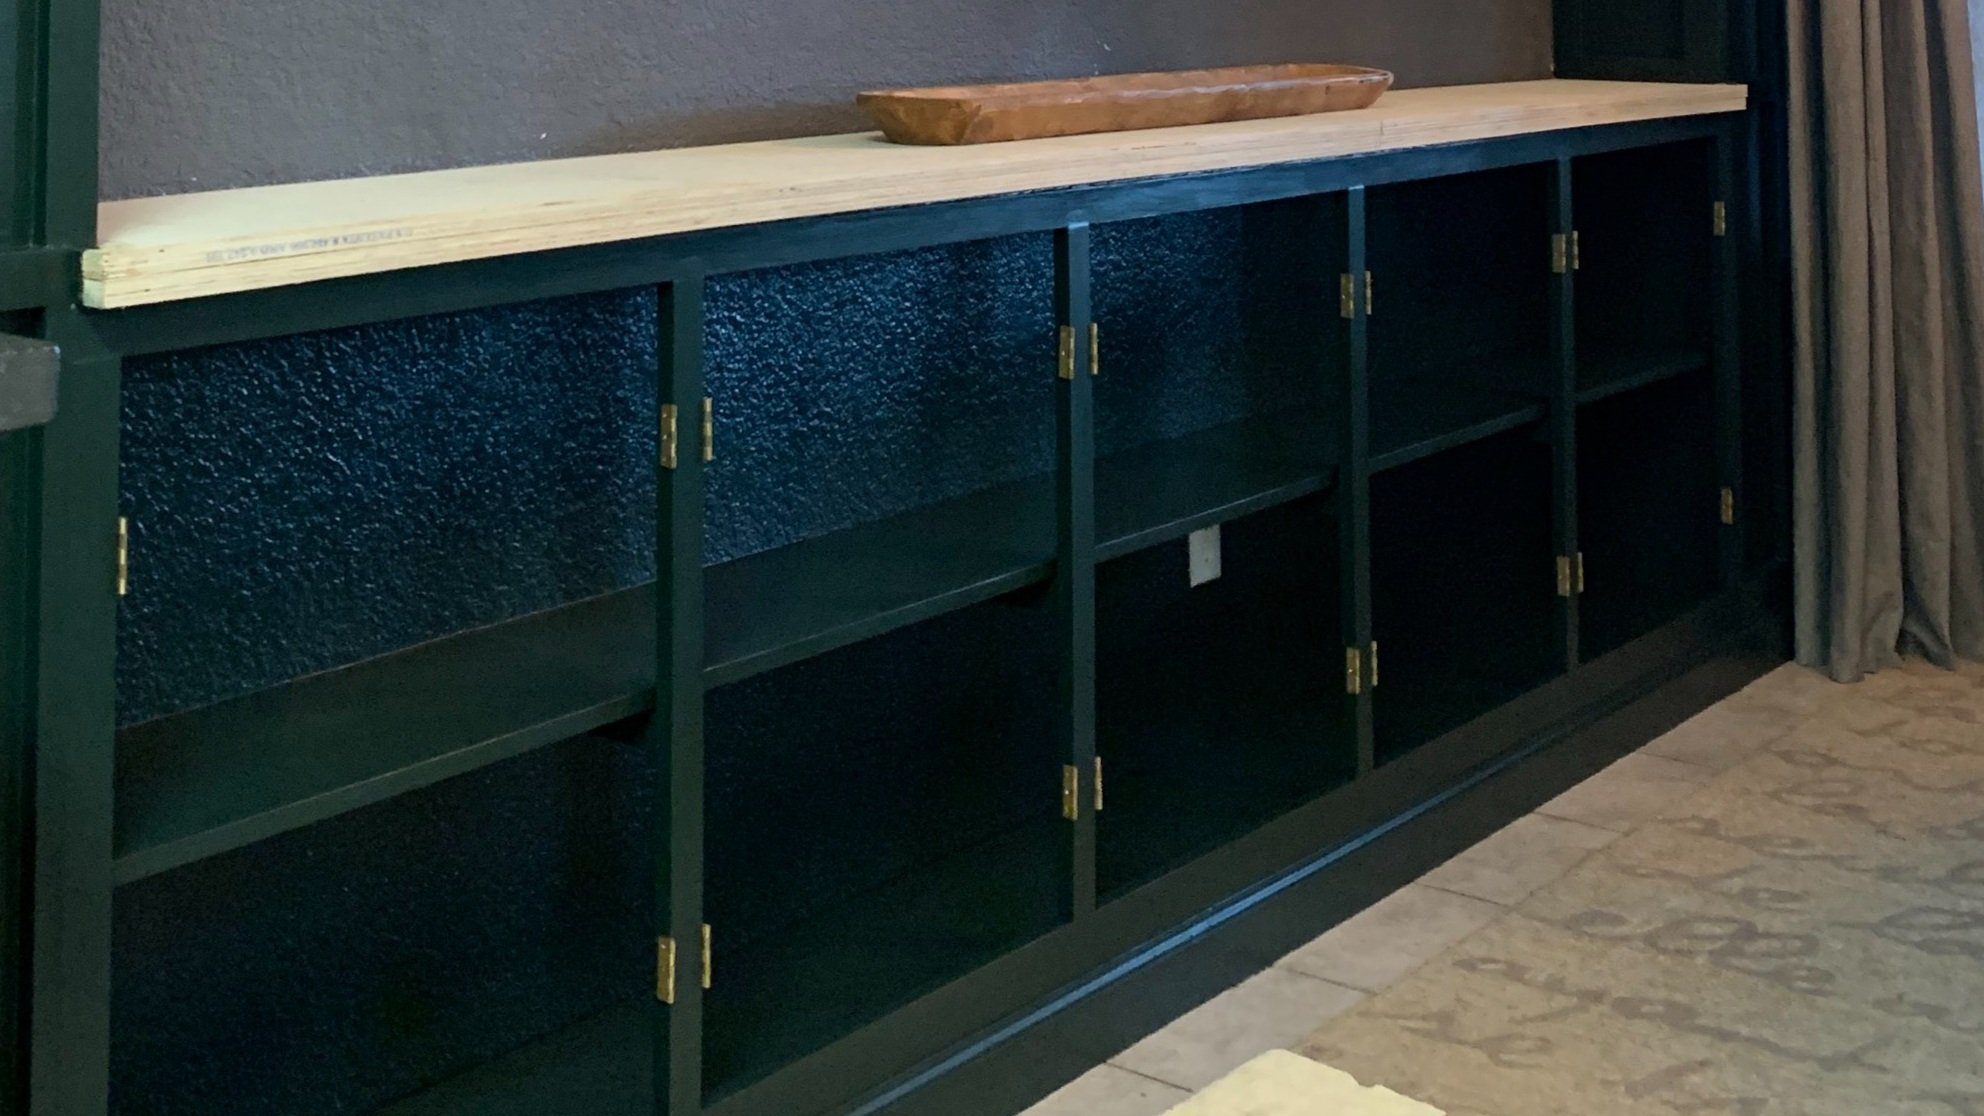
Last time we shared how we built the shallow, space-saving bar cabinet in our dining room, turning 10 inches of wasted space into 20 square feet of additional storage. Today we’re sharing how we built and installed our brass metal-front, inset, shaker-style cabinet doors.
Here’s what our cabinet looked like at the end of the last post:
Some of the links on this page are affiliate links, meaning at no cost to you we may earn a small commission on the purchases you make through that click. Learn more.
Tools
Kreg jig
Miter saw/chop saw
Drill + drill bits that match your screw heads + a bit just smaller than the screws that come with the hinges + a bit just larger than the mounting screws that come with the door handles
Staple gun – we recommend an electric one
Clamps – we like the Irwin one handed bar clamps and for a Kreg right angle clamp for getting clean 90-degree corners
Electric sander + sandpaper of varying grits (down to about 180 grit for painting)
Level – we used a 4-foot level
Speed square
Pencil
Tape measure
Putty knife
Caulk gun + lint-free rag
Calculator + notepad – optional I guess, but no was we would know our correct cuts without doing lots of math
Scissors/tin snips – to cut decorative sheet metal
Hammer
Thick gloves – to protect your hands while cutting the sheet metal
Cabinet door handle template – optional, but makes installing handles easier – you could also make your own!
Materials
1x2s* for cabinet door frames – we used (10) 8’ boards
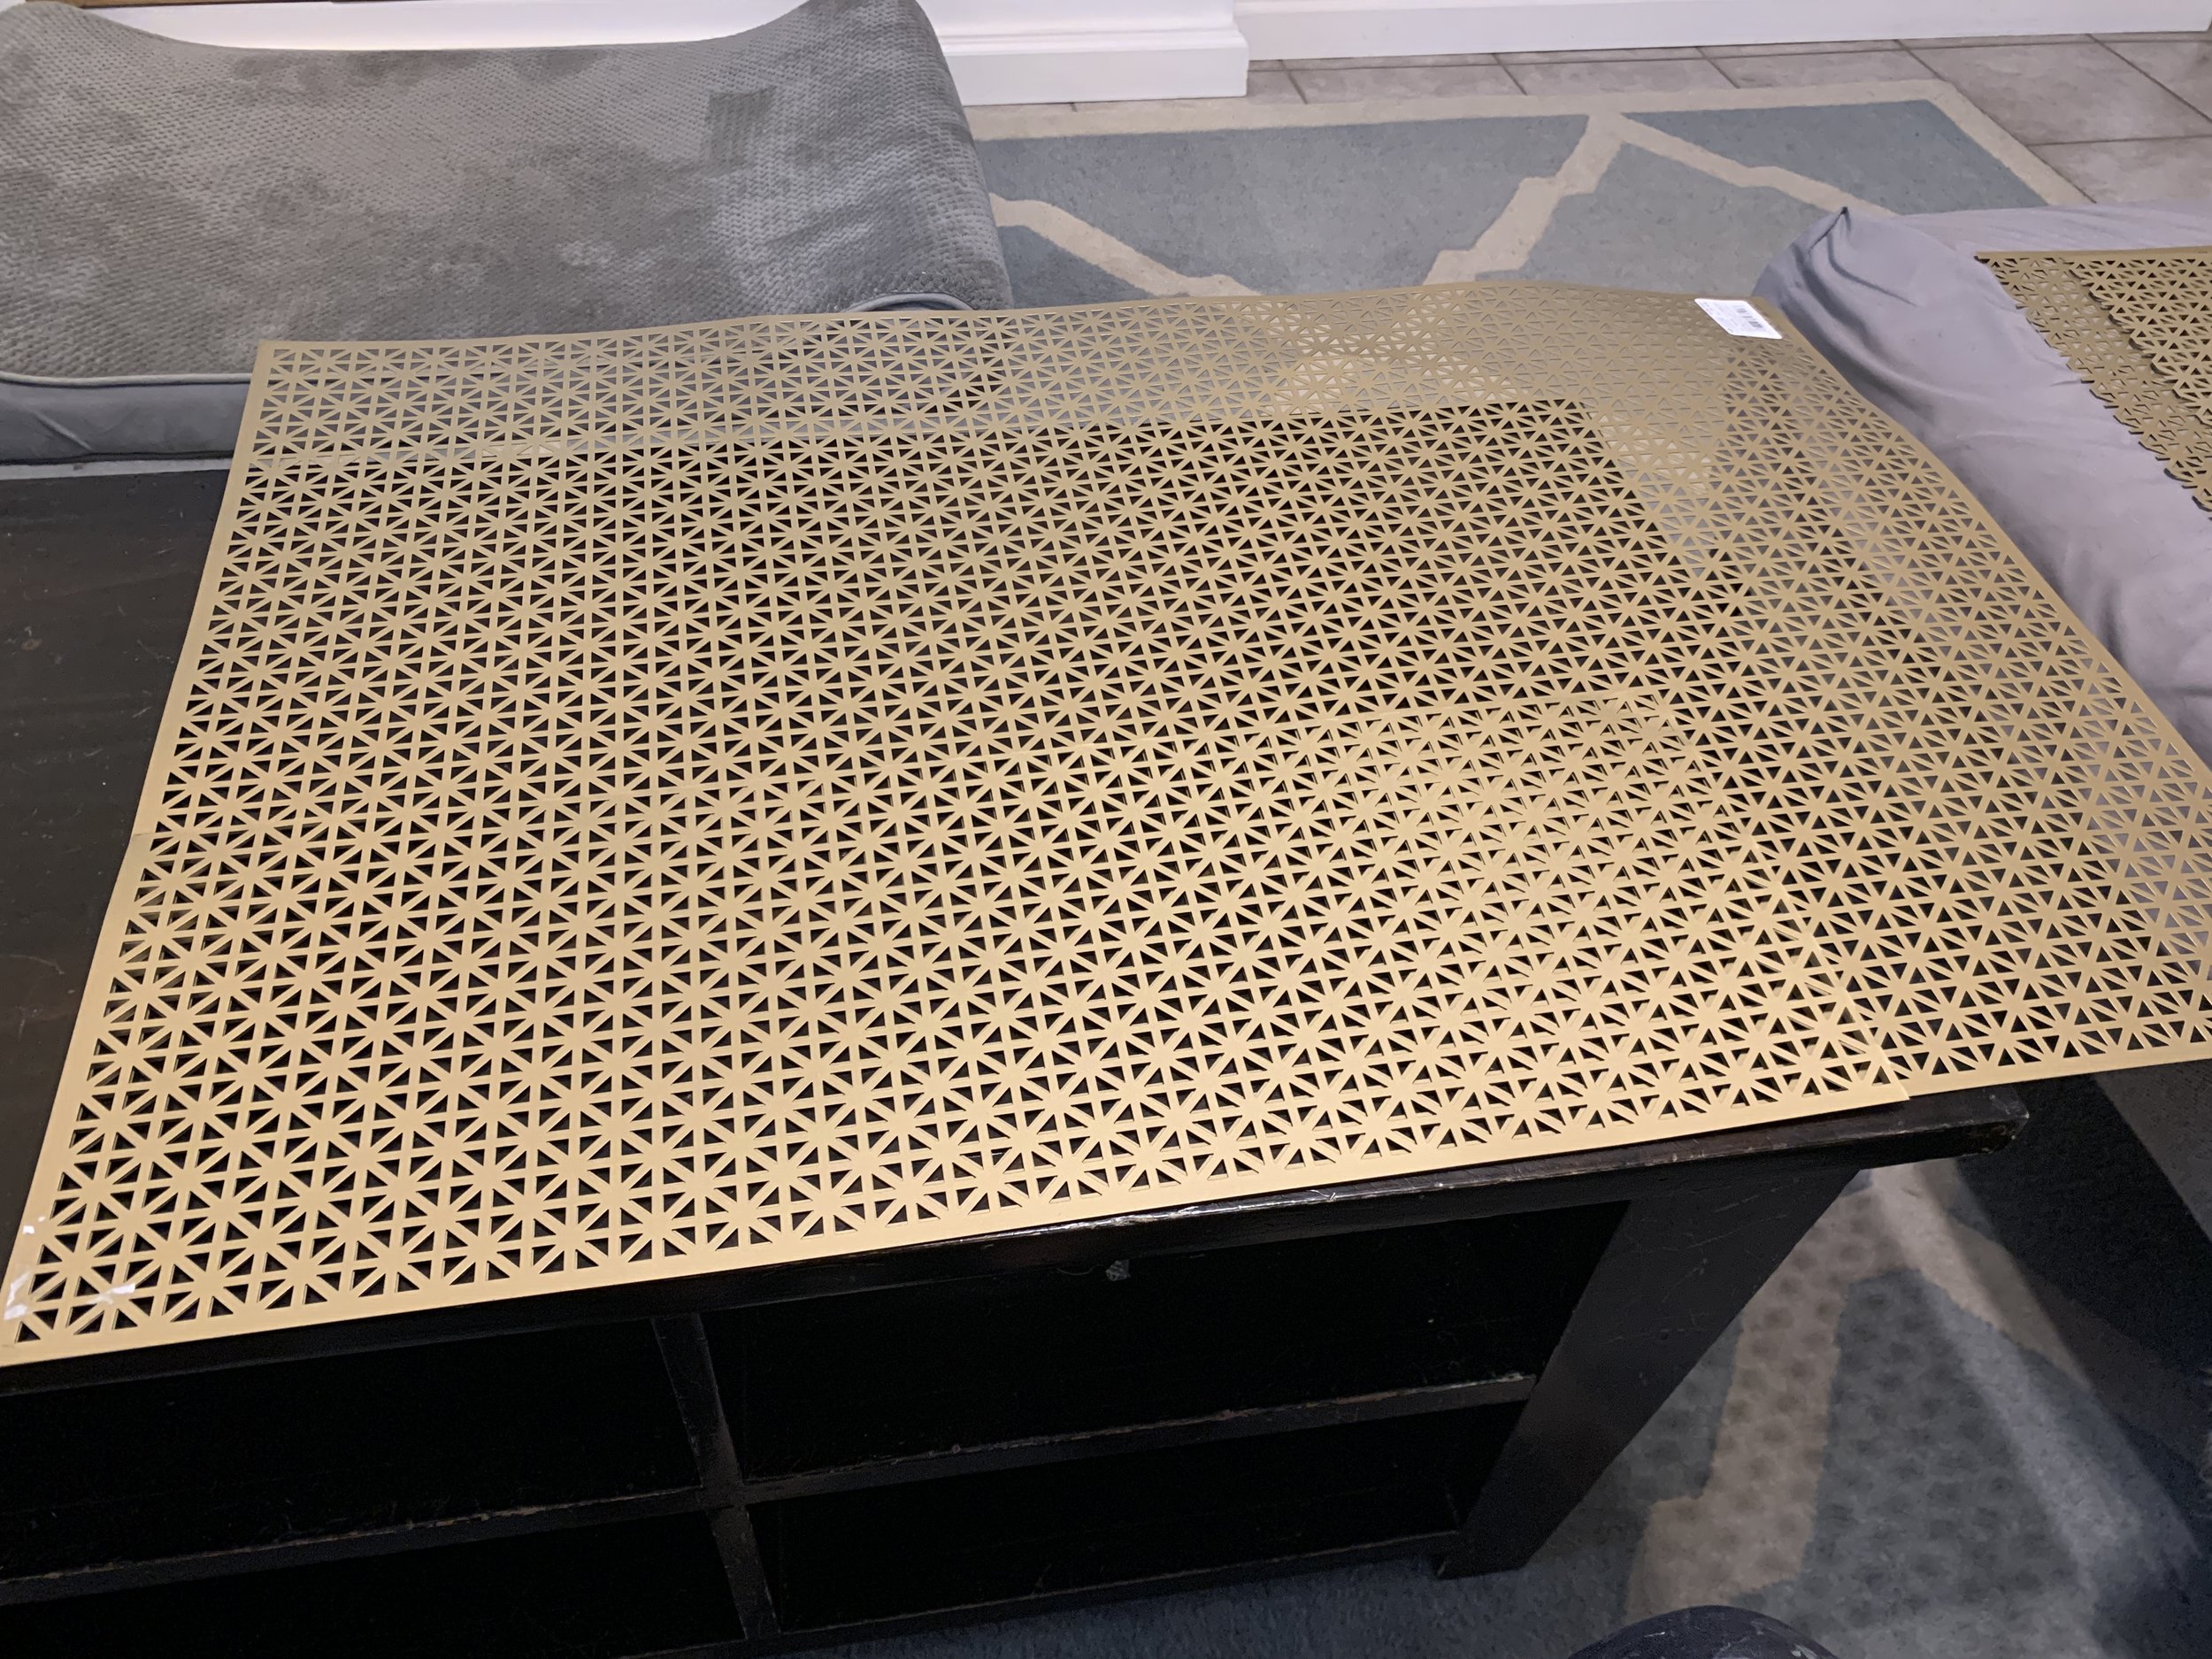
(5) 24x36” gold colored aluminum decorative sheet metal sheets in the Union Jack pattern – we’ve gotten them both here and here before (depending on availability and price)
20 hinges with matching screws – we used 2” brass butt hinges – each door needs two hinges
10 handles – we used these modern rectangle brass pulls in the 3.78” length
Kreg screws – 1-1/4” (for connecting 1x2s)
Staples – 1/2” or so (no longer then 3/8” since it’s going into 1/2” thick wood)
Wood shims – optional, but helpful to help get the doors in the right spot during install
Paintable wood filler
Paintable caulk
Primer + paint
*Reminders:
1x boards are actually 3/4” thick
2x boards are actually 1-1/2” thick
And to make it all even more confusing, 3/4” plywood is really actually 3/4”
Building the cabinet doors
Planning the size
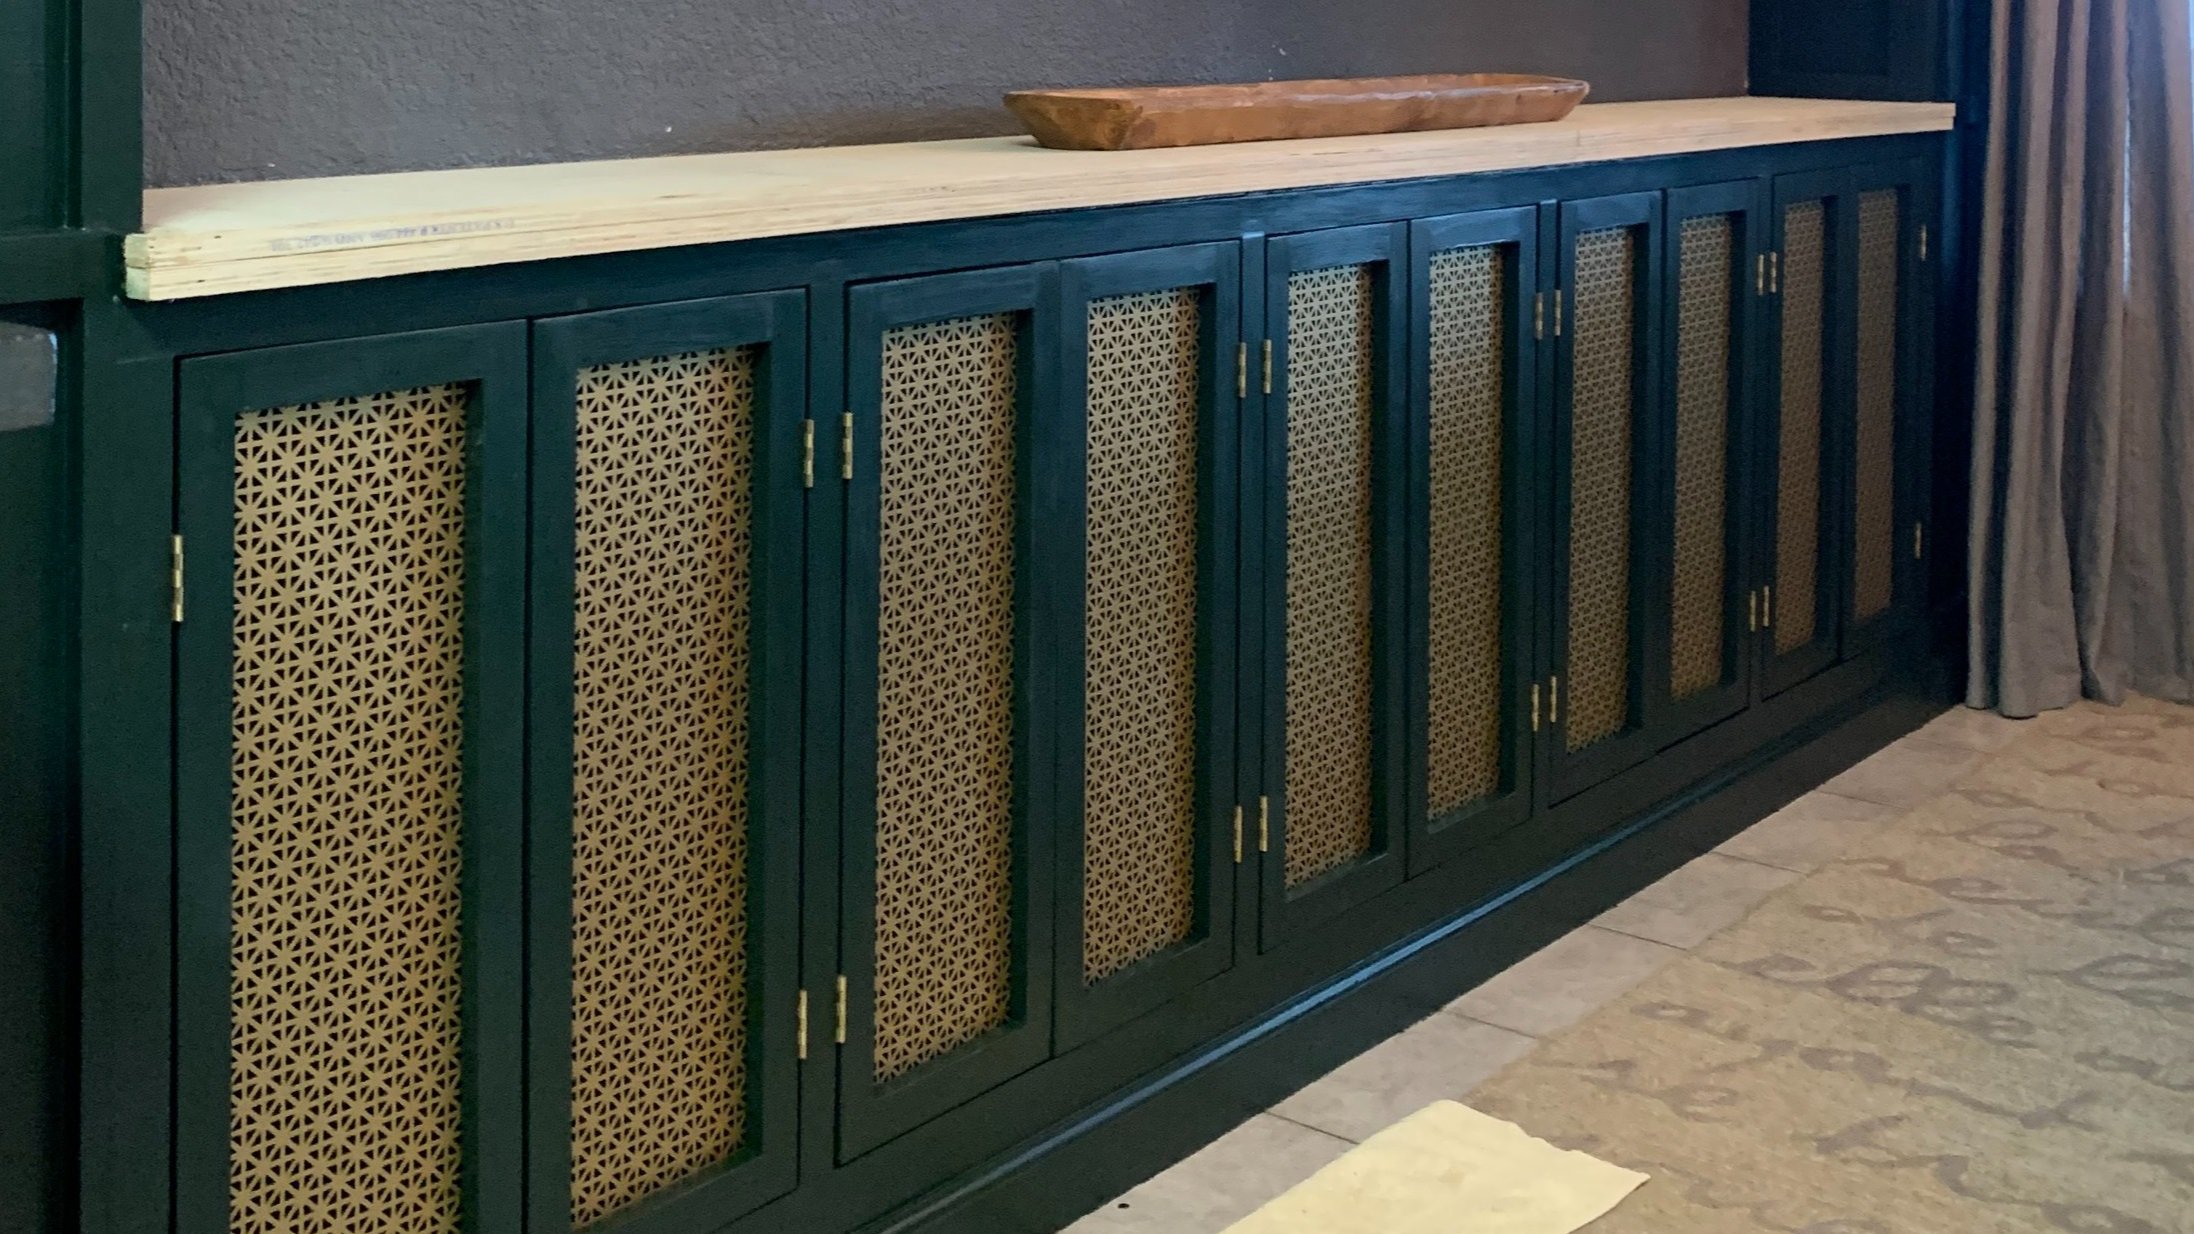
Because of the limited depth in this area we knew we wanted to have shaker-style inset cabinet doors (that are flush with the cabinet face), rather than full- or partial-overlay doors (that stick out more than the cabinet front and overlap the front of the cabinet frame). We also decided to go with brass “panels” rather than wood for the main portion of the doors to add a little extra interest, texture and to break up the color.
First we created some mock door frame pieces to figure out our spacing and to test the inset door look. Just so you don’t have to do the same, the final calculations we went with are below!
To calculate each cabinet door size, we first took each cabinet door section’s height (26 7/8”) and subtracted 1/8” (to have a 1/16” gap on top and a 1/16” gap on bottom). We worked with the height first, because we made our doors so the side vertical pieces (called “stiles”) run full height, with our top and bottom horizontal pieces (called “rails”) fitting inside the two vertical pieces.

Then we took each cabinet door section’s width (21.5”), divided it by two (since we want two doors per section), and subtracted 3.25” to account for the width of the two vertical 1x2 “stiles” (at 1.5” each/3” total), the hinge-side gap, and the gap needed between the cabinet doors. So for a cabinet door section that’s 26 7/8” tall x 21.5” wide, the final size for each of our cabinet doors is 26.75” tall x 10.5” wide total, which requires cutting two 26.75” pieces and two 7.5” pieces per door.
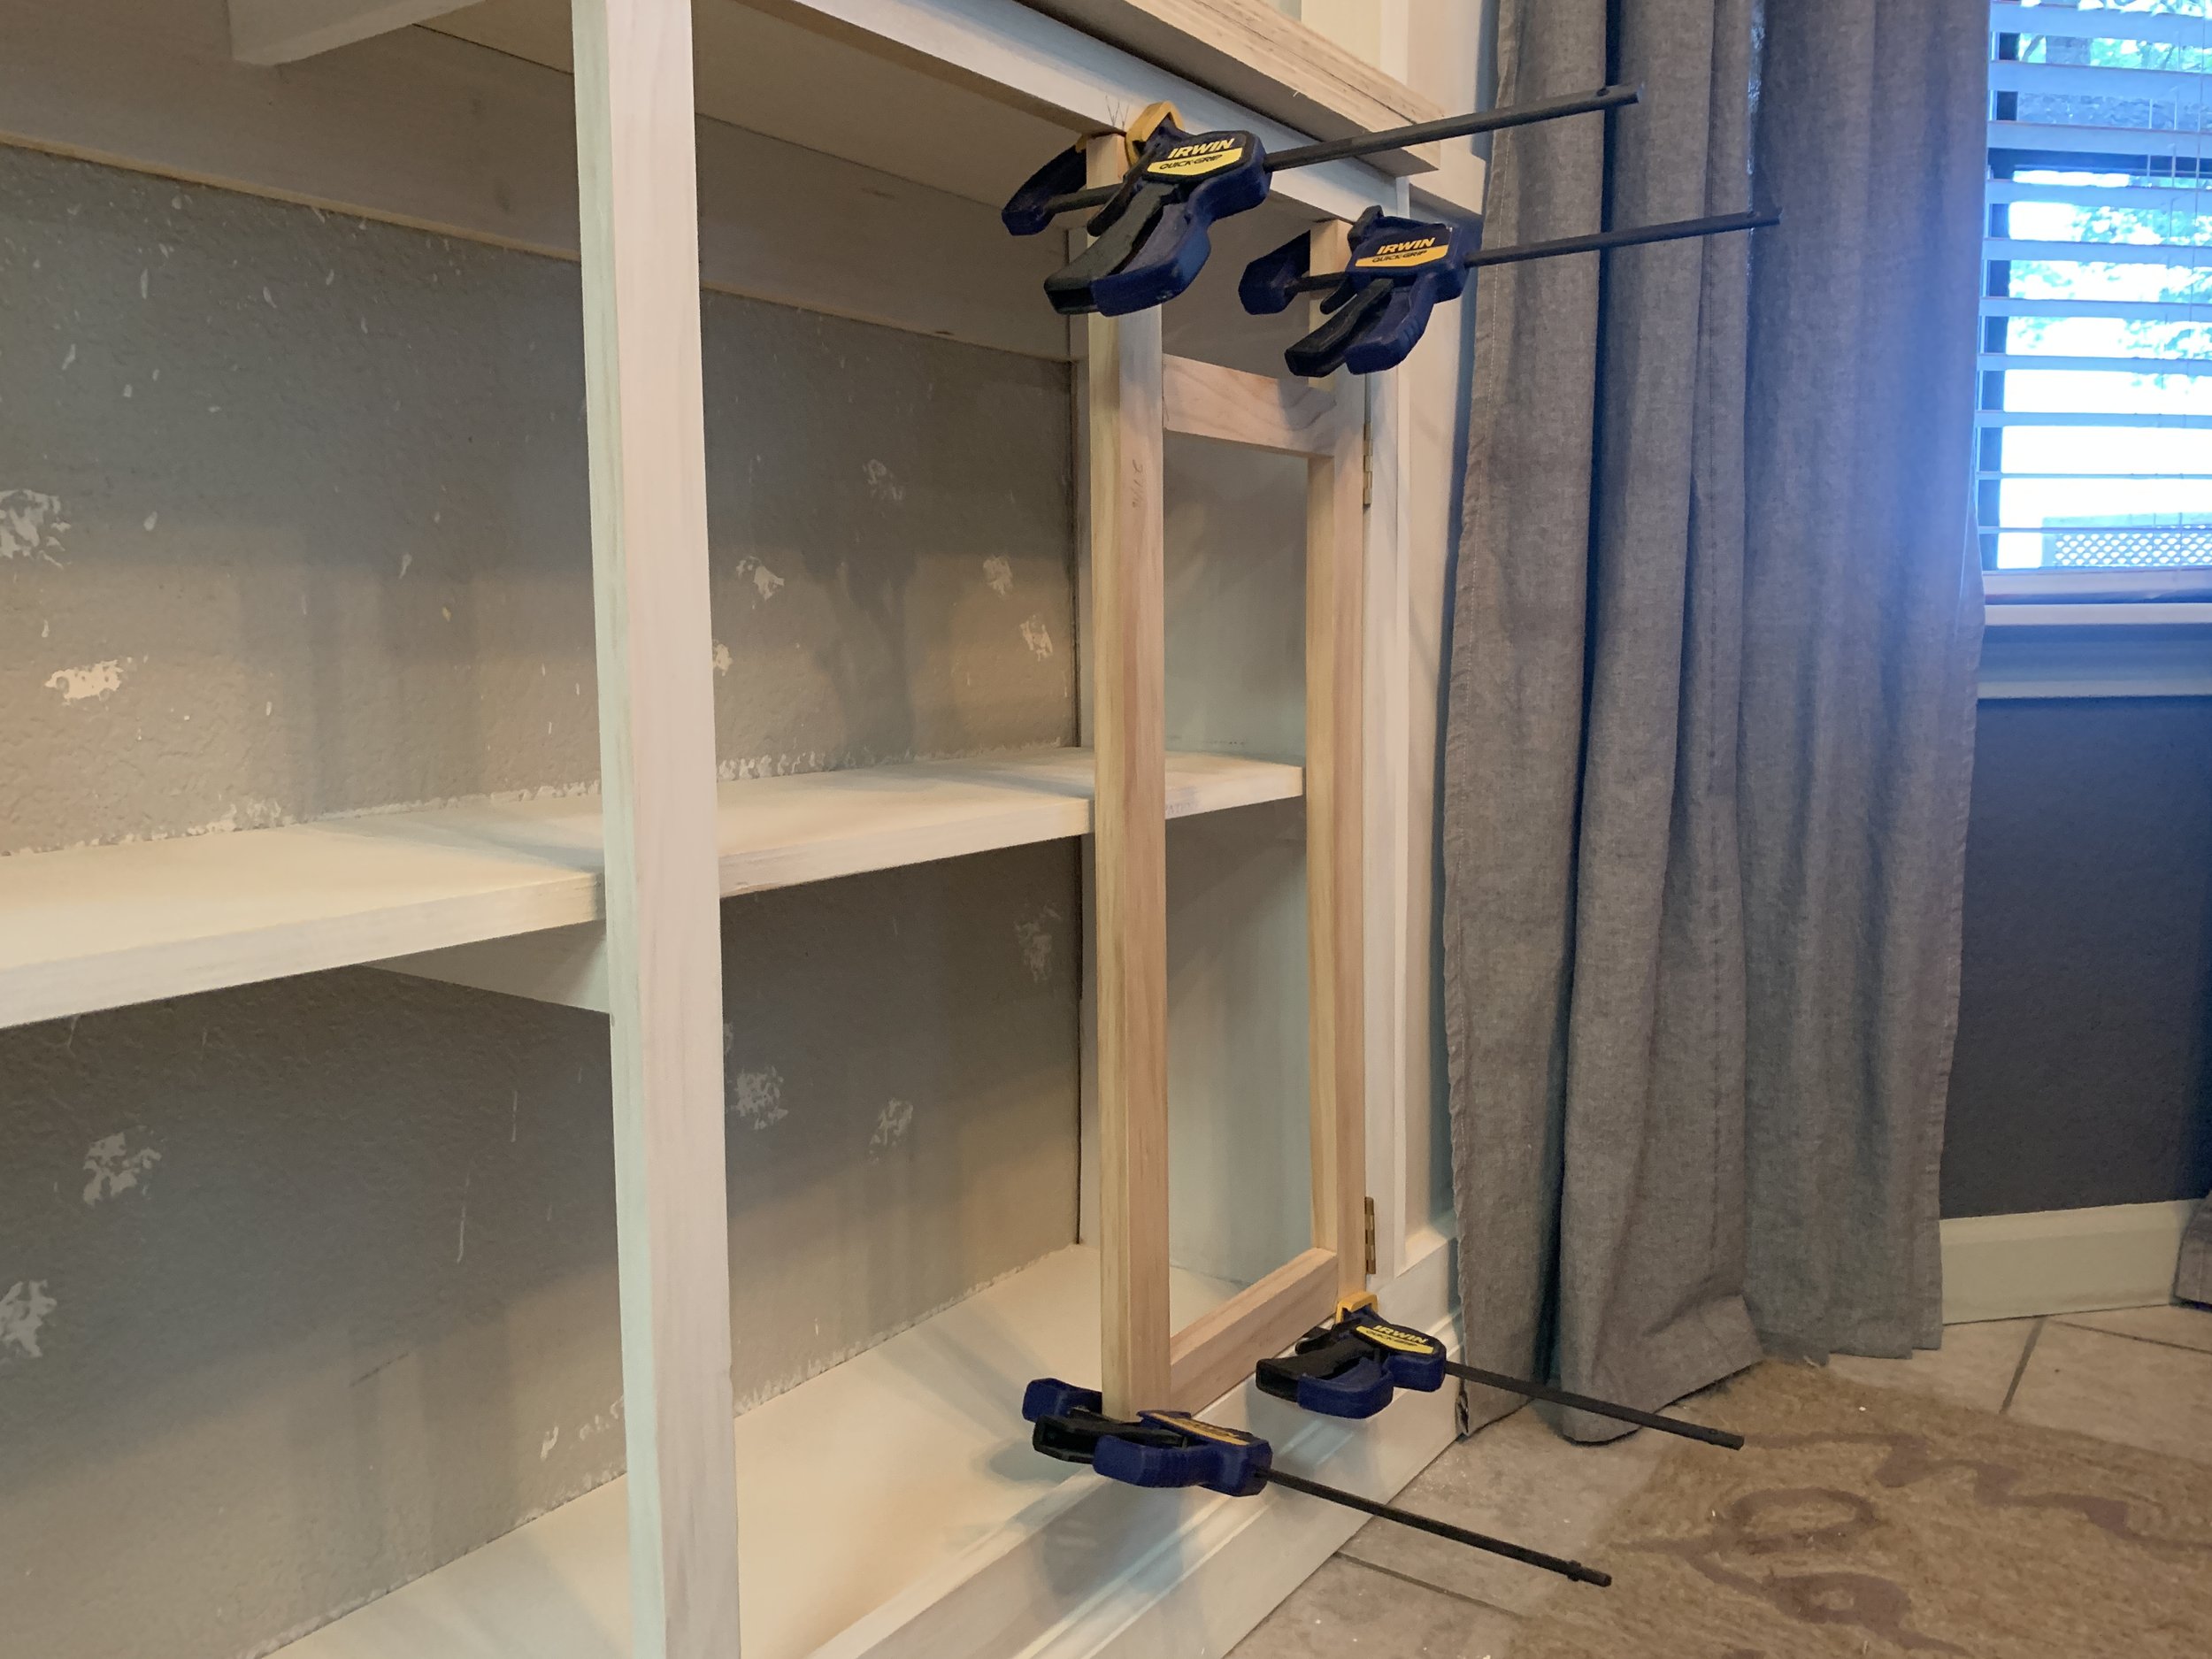
Building the doors
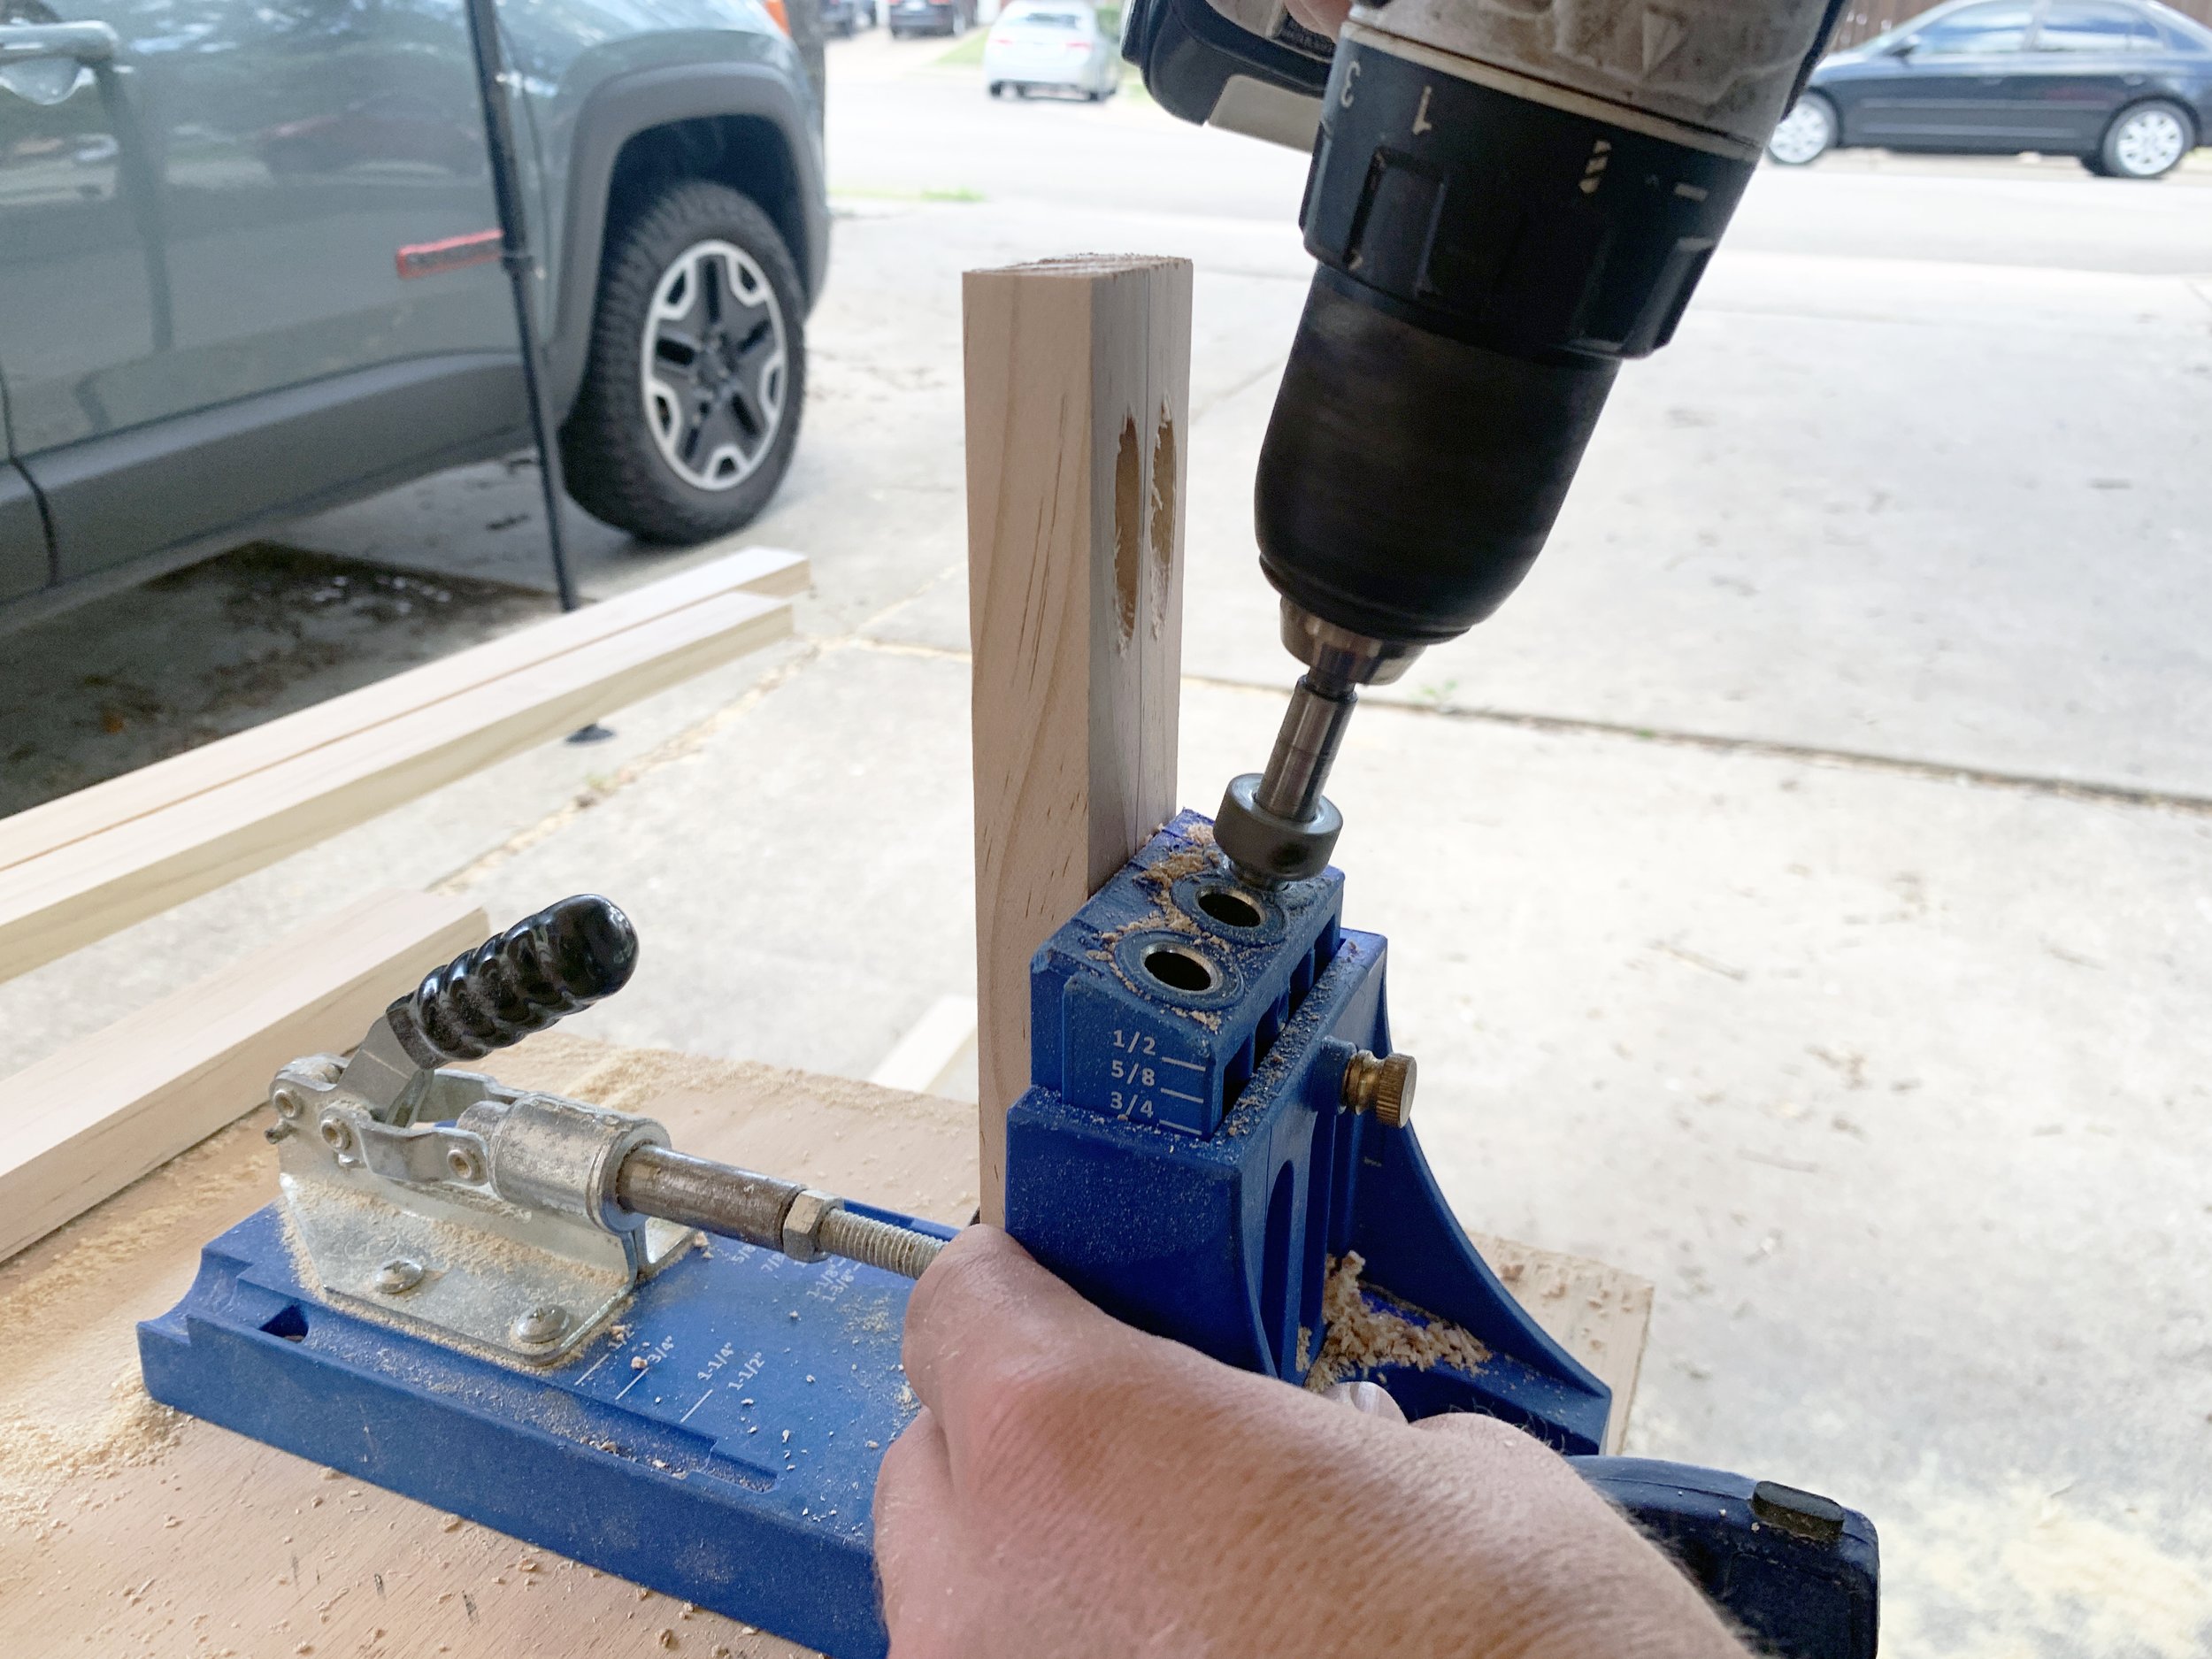
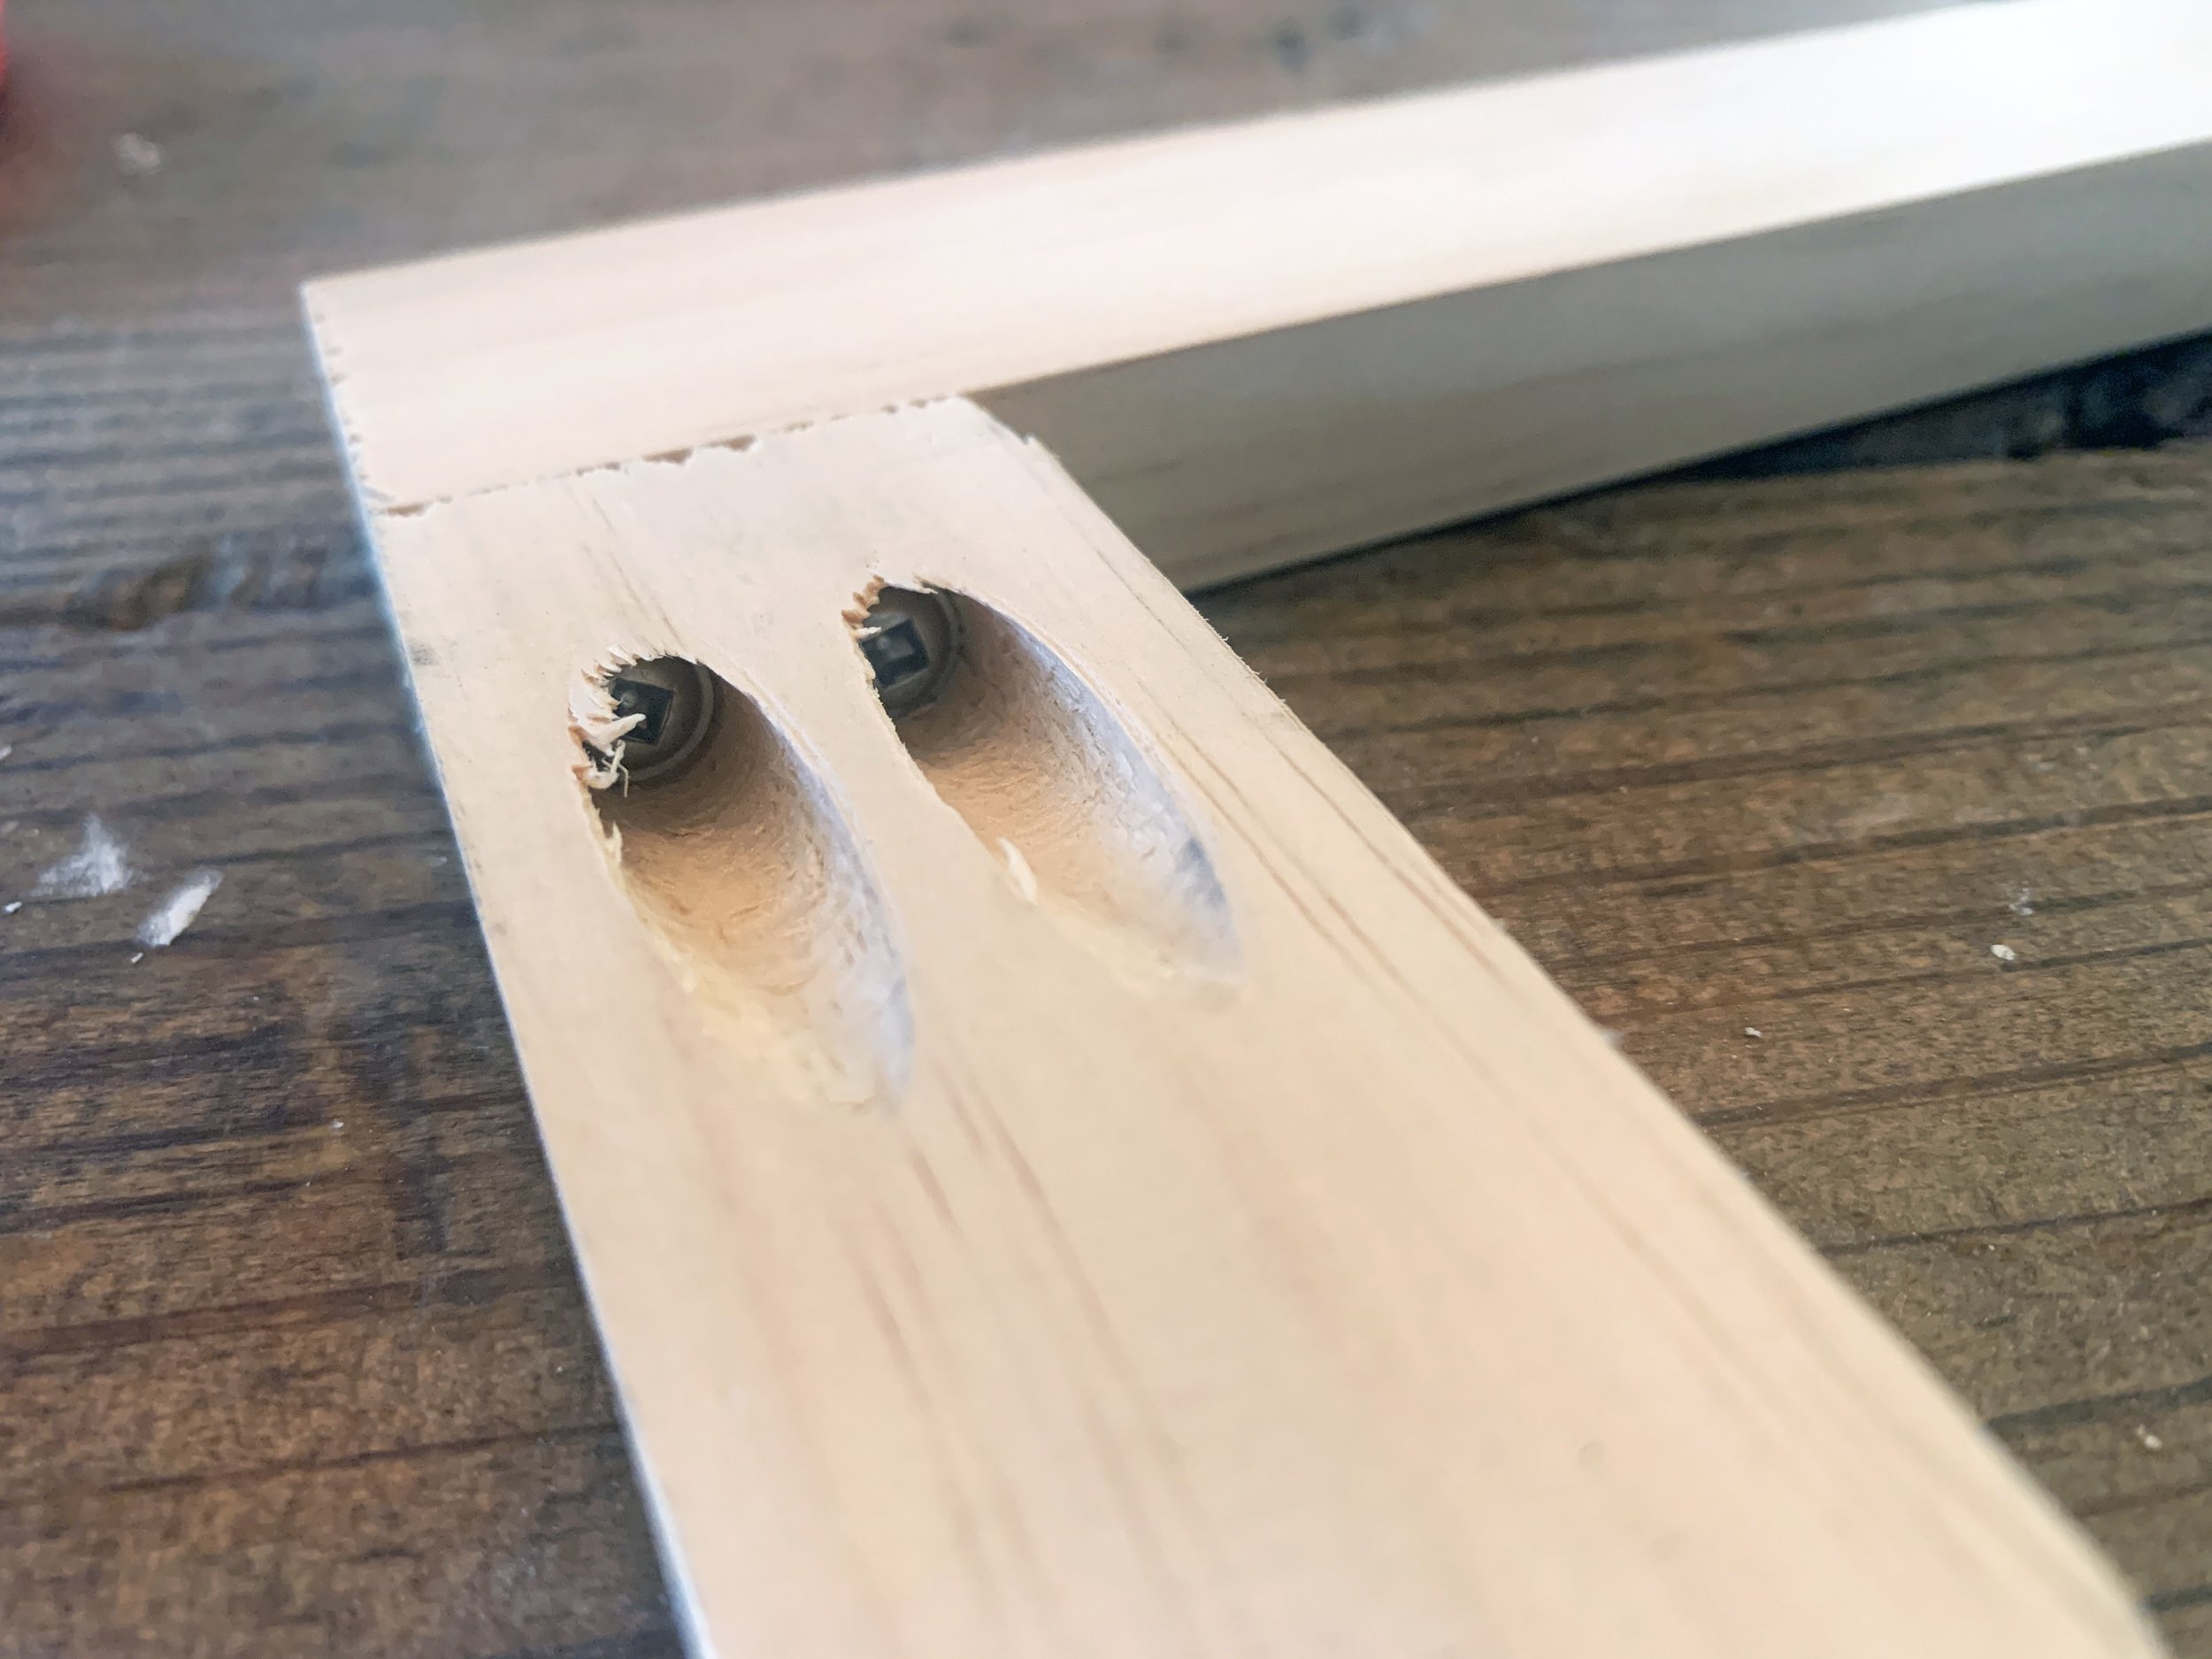
With our lengths cut, we used our Kreg jig to make pocket holes in the backside of the short ends of the horizontal rails and used clamps and a speed square (placed in the inner corner) to screw the pieces together at 90-degree angles. In our experience, it’s super important to work on a flat surface here and use both right angle and Irwin clamps at the same time to keep the 1x2s perfectly straight, which keeps the doors from twisting and hanging weird when you get to installation.
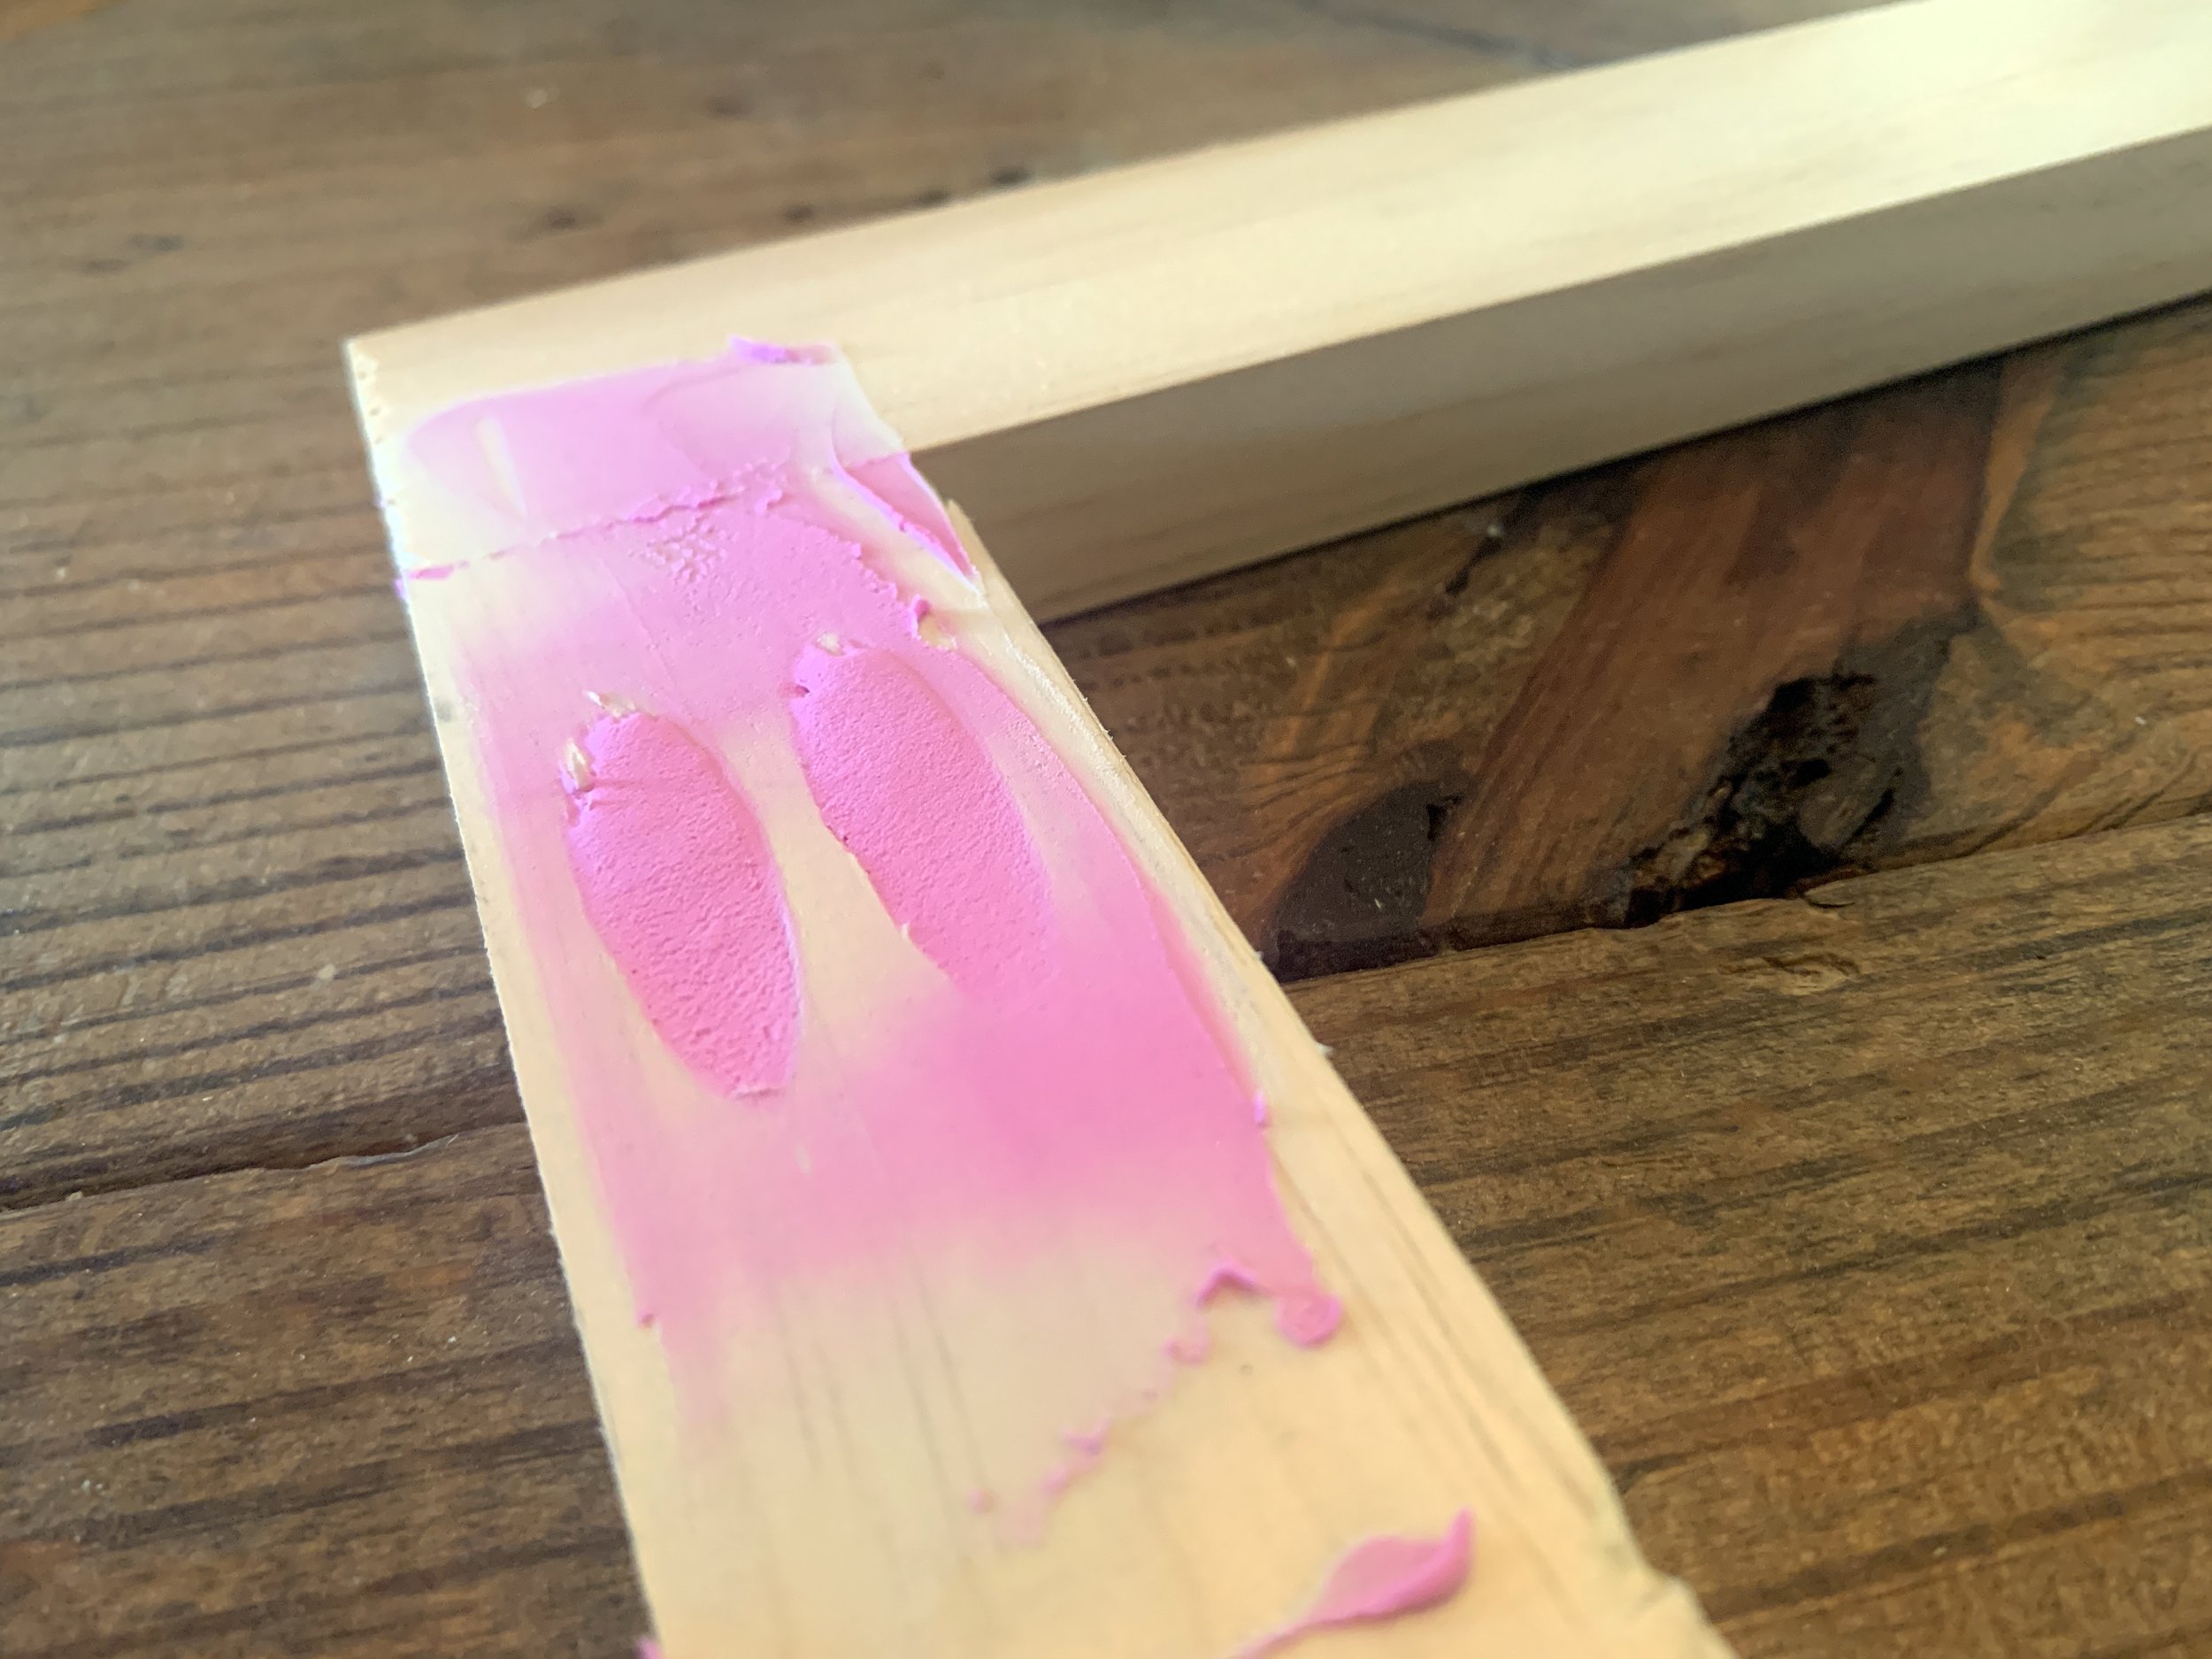
We used wood filler and a putty knife to fill the pocket holes and joint seems and, when dry, sanded the door frames smooth.
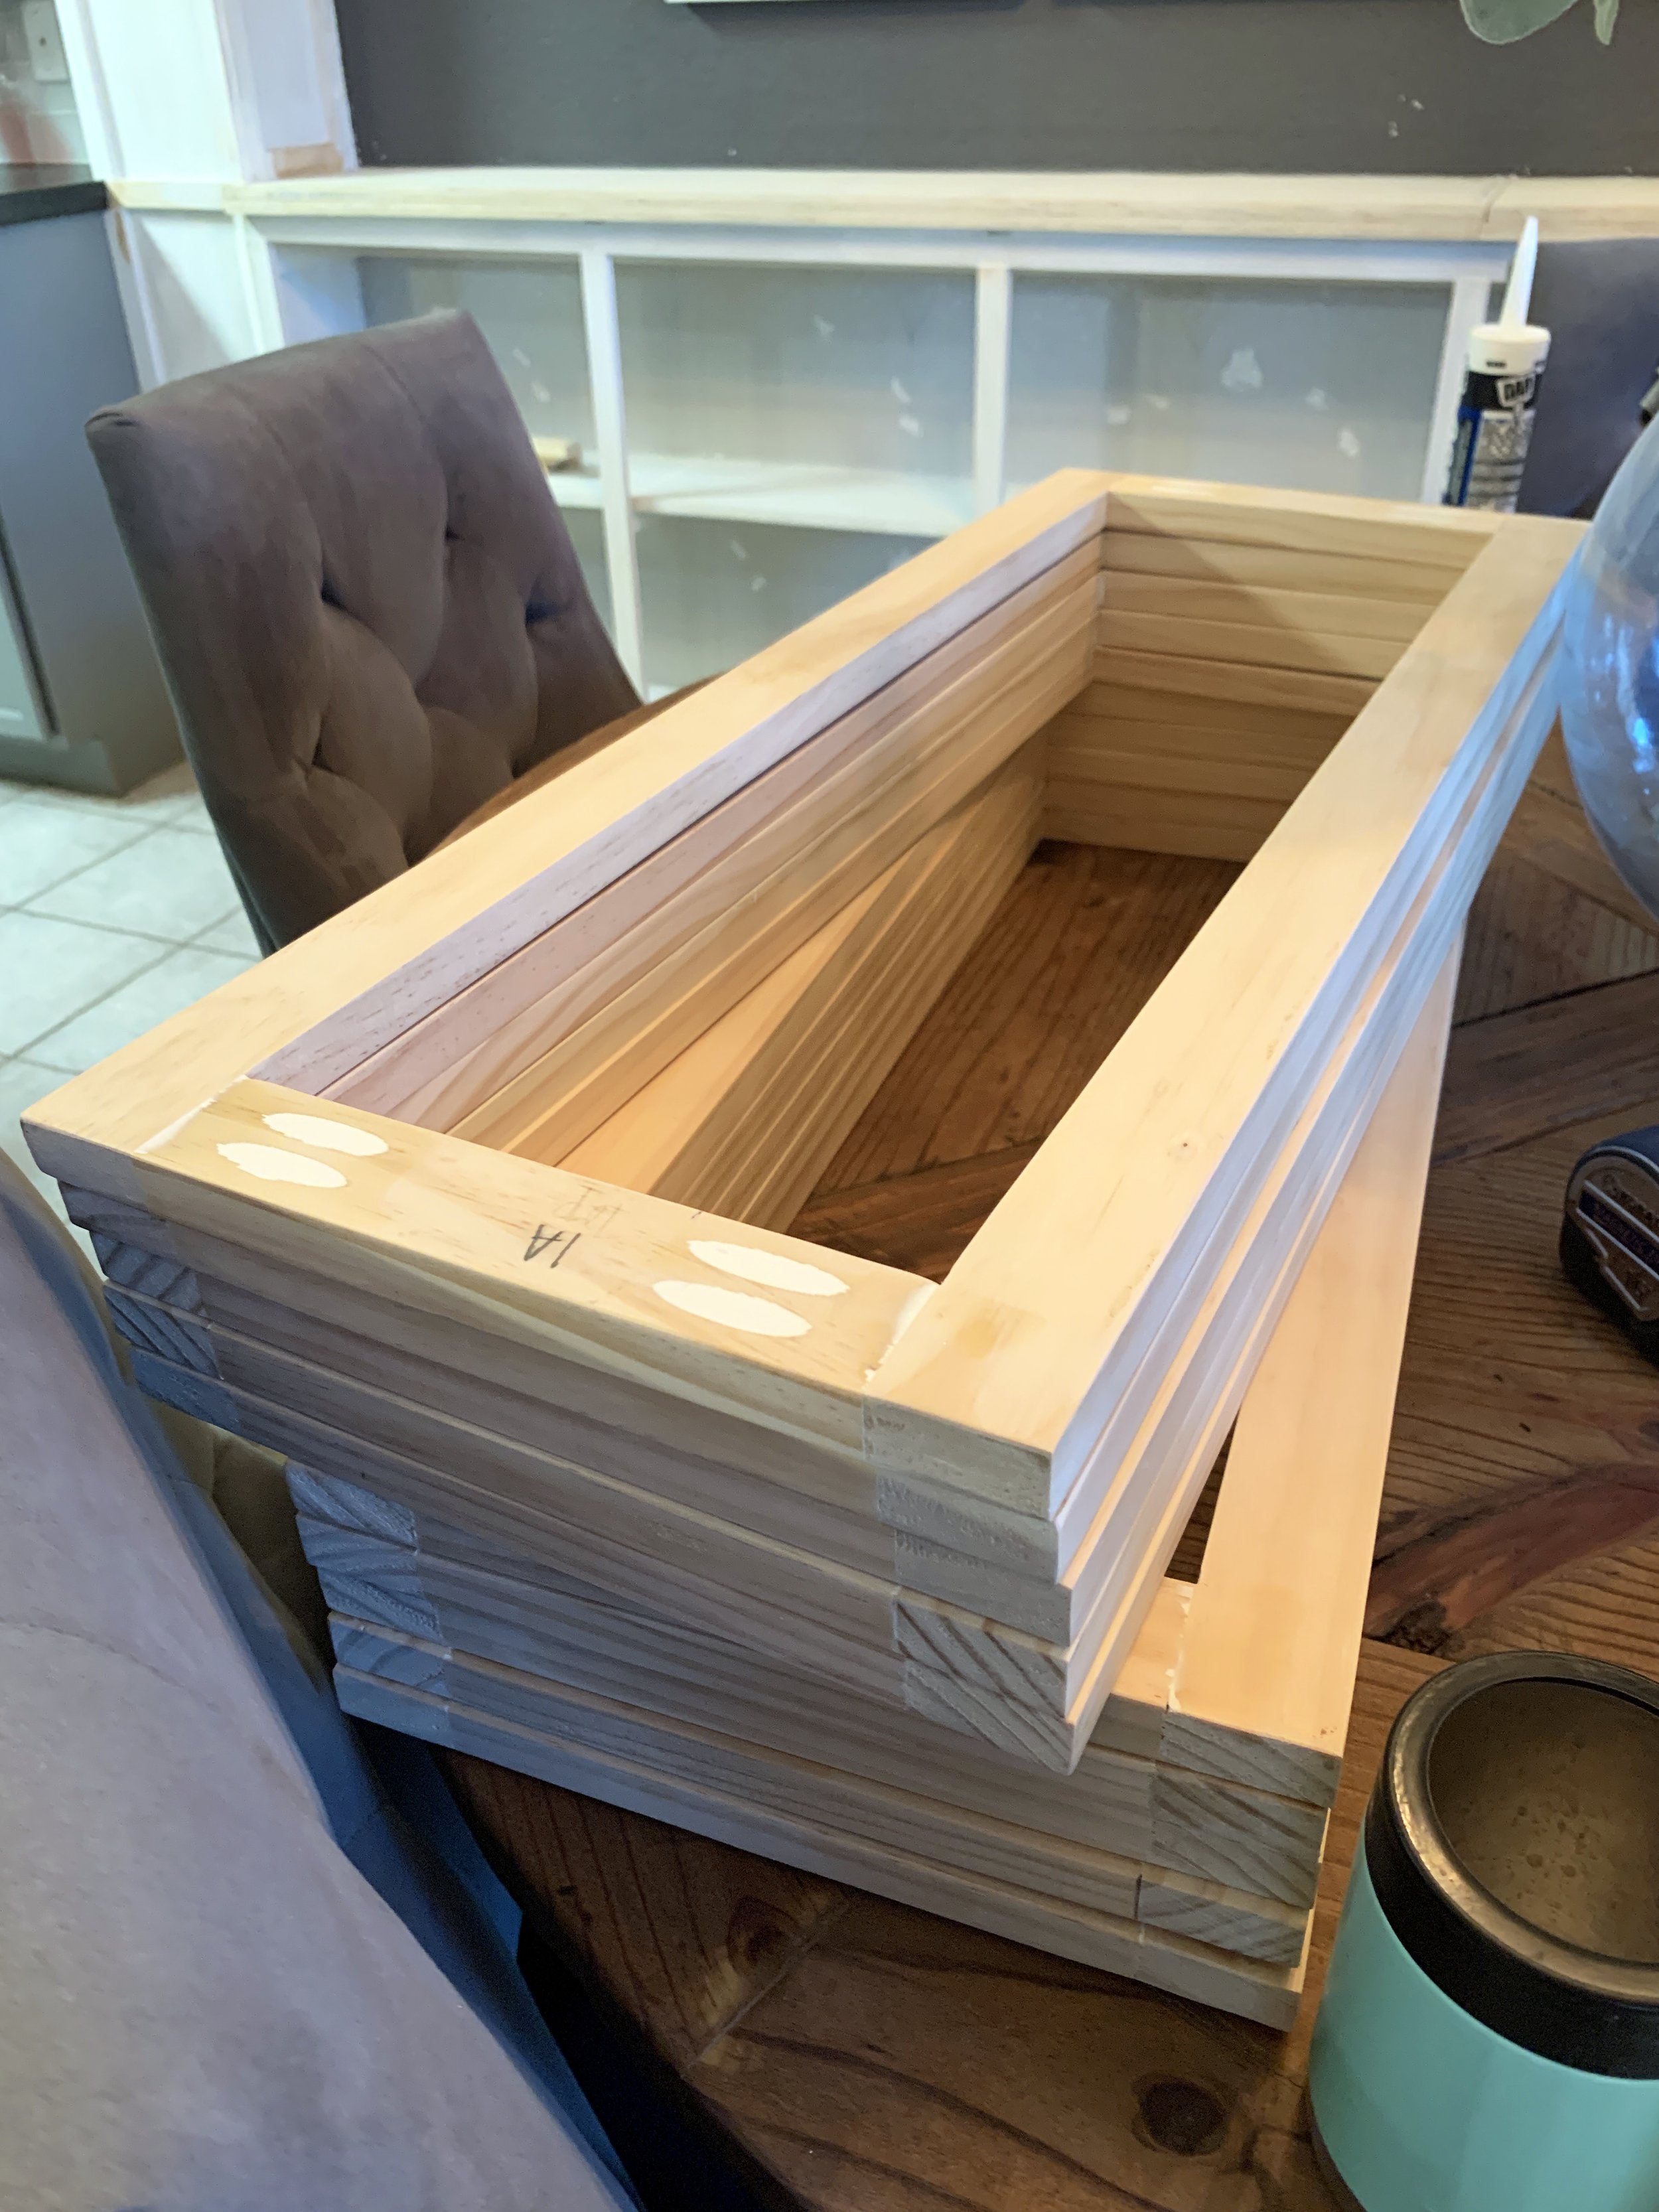
Once our doors were sanded smooth, we thoroughly cleaned and painted them before installing the metal panel that takes them from just hollow frames to actual doors.
Attaching the metal door panels
Wearing thick gloves (for safety) I used scissors to cut our decorative metal screen a little smaller than our total door width. To keep the look clean and more finished, I cut at a part in the design so the metal was smooth on each edge (versus through the angles where the cut edges would be jagged), and made sure to line up the cut panel for my first door in each door pair when planning my cuts for the second so I was cutting my pattern in the same spot each time. This makes it so the door panel pattern will be symmetrical.
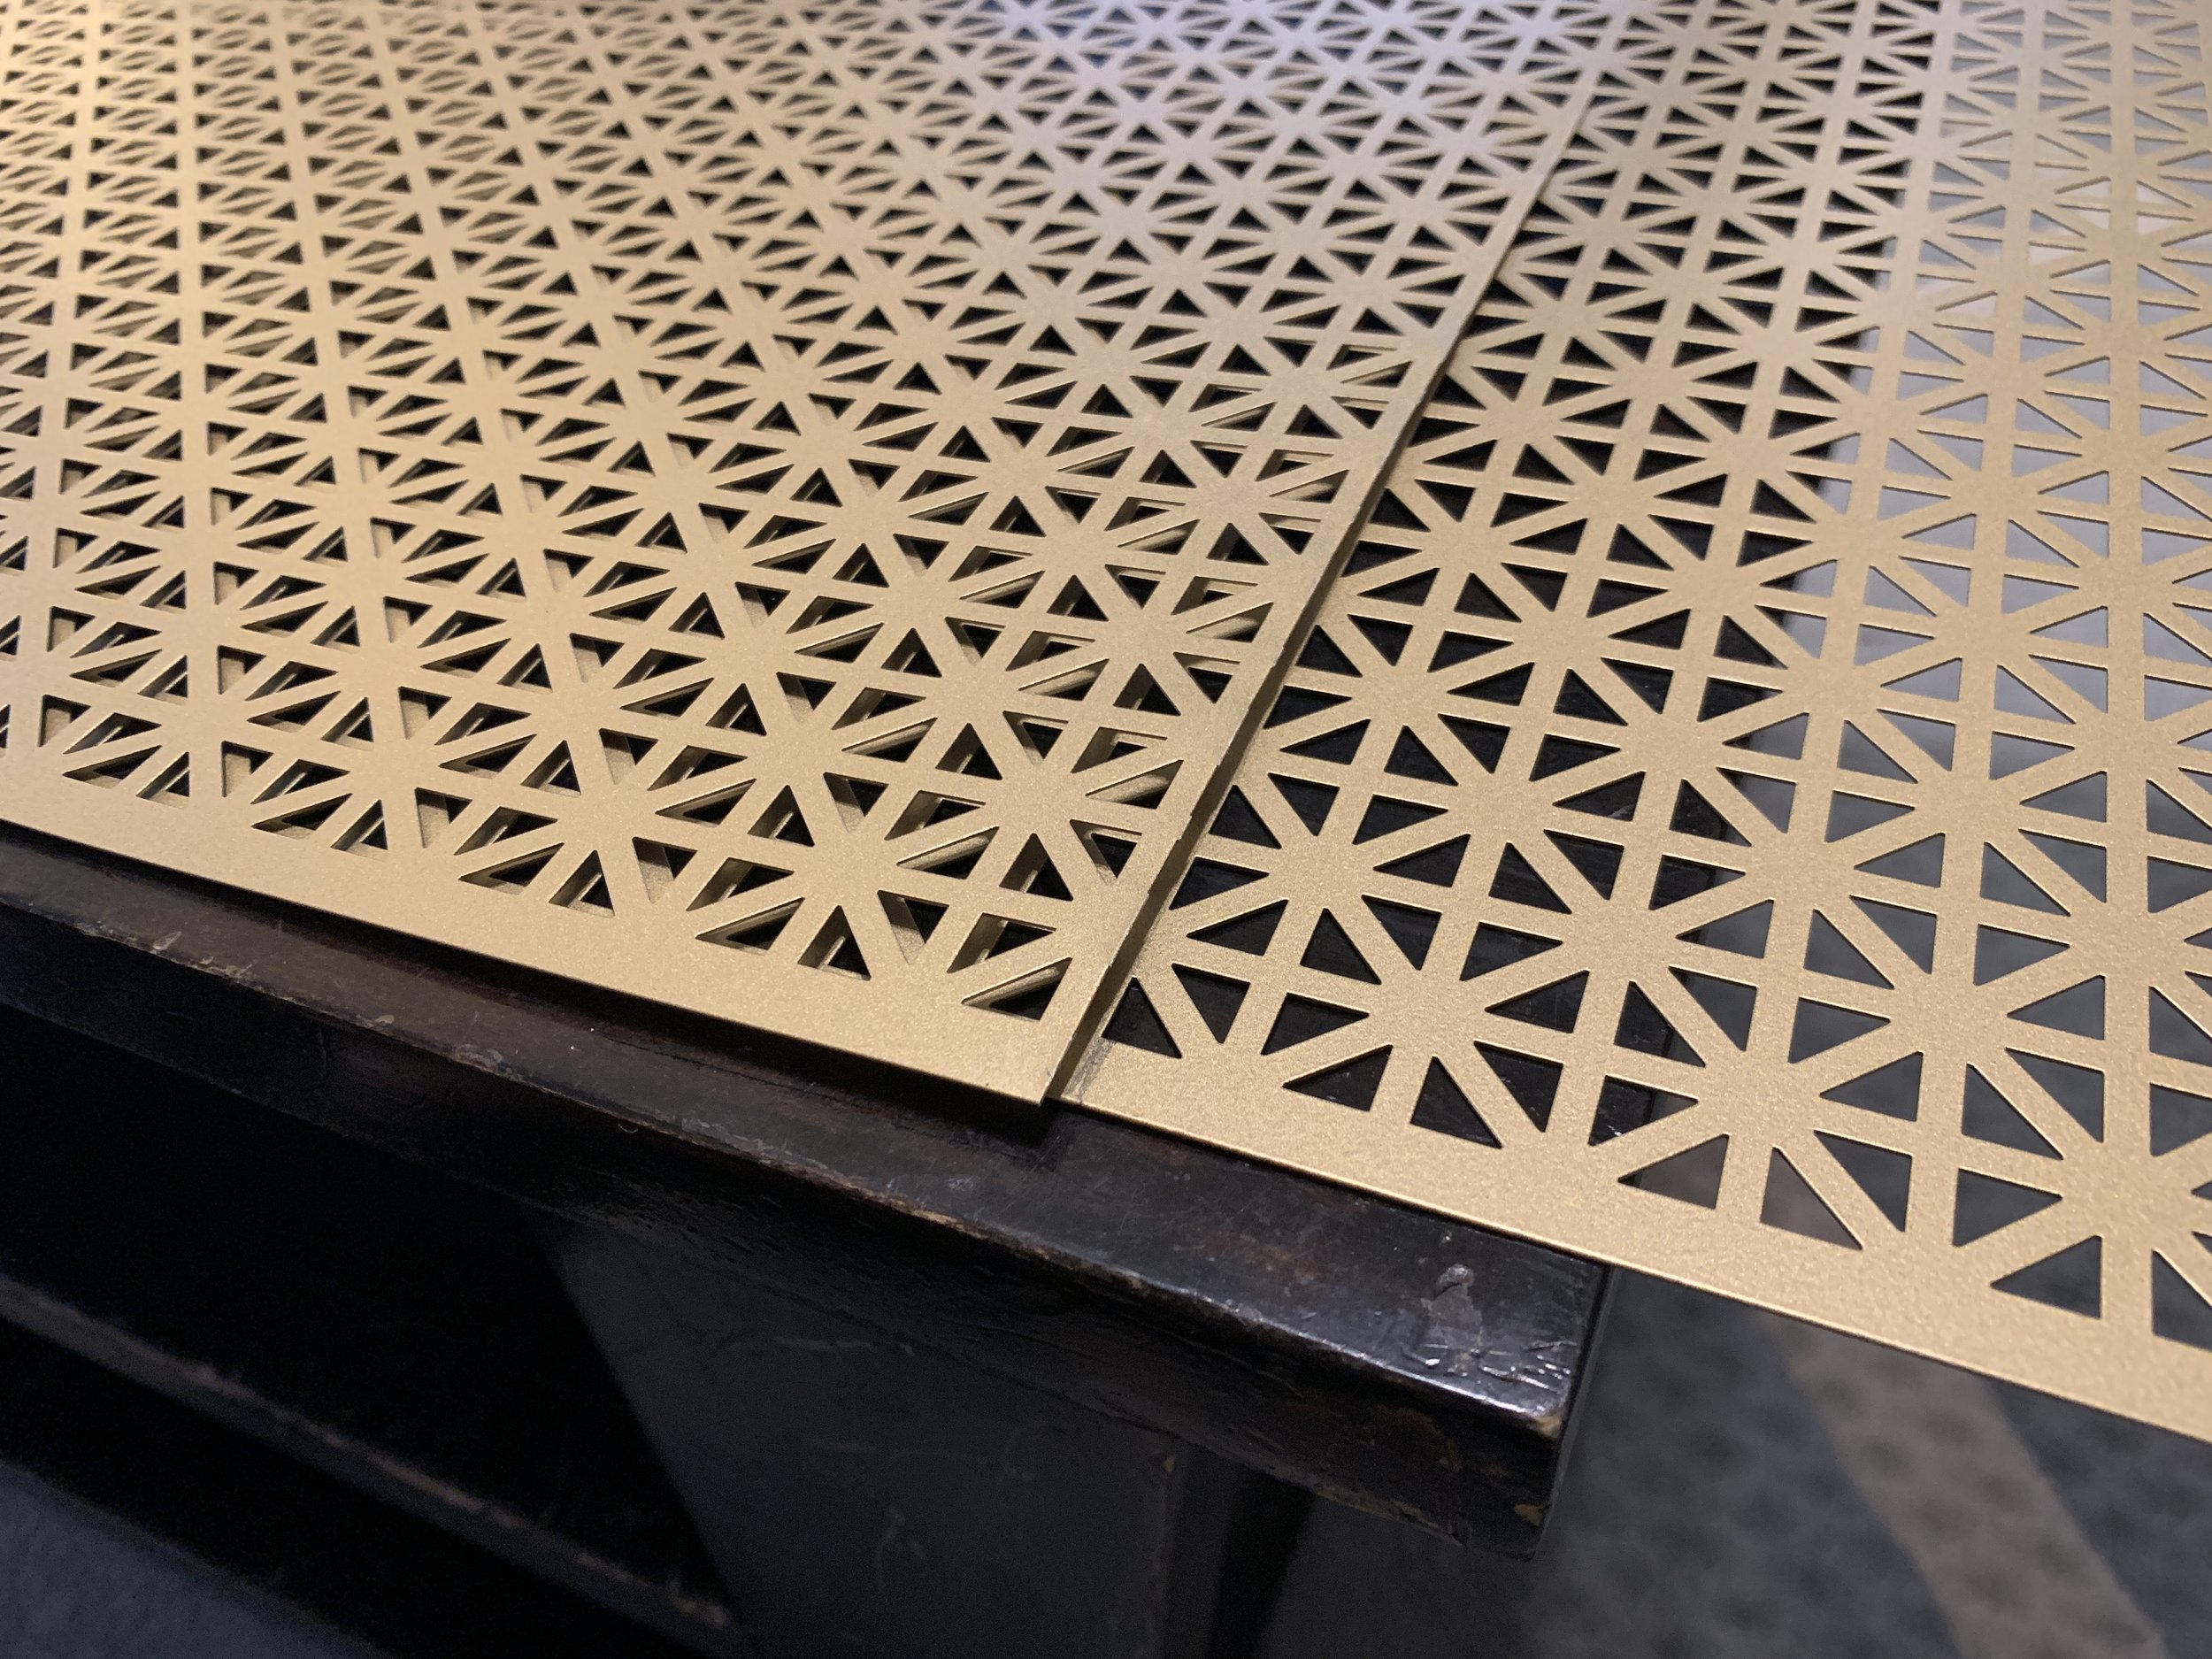
Then I carefully used an electric staple gun to firmly attach the metal along the edges to the back of the wood door frames, using a hammer to gently tap in any staples that didn’t go in all the way.

Installing the cabinet doors
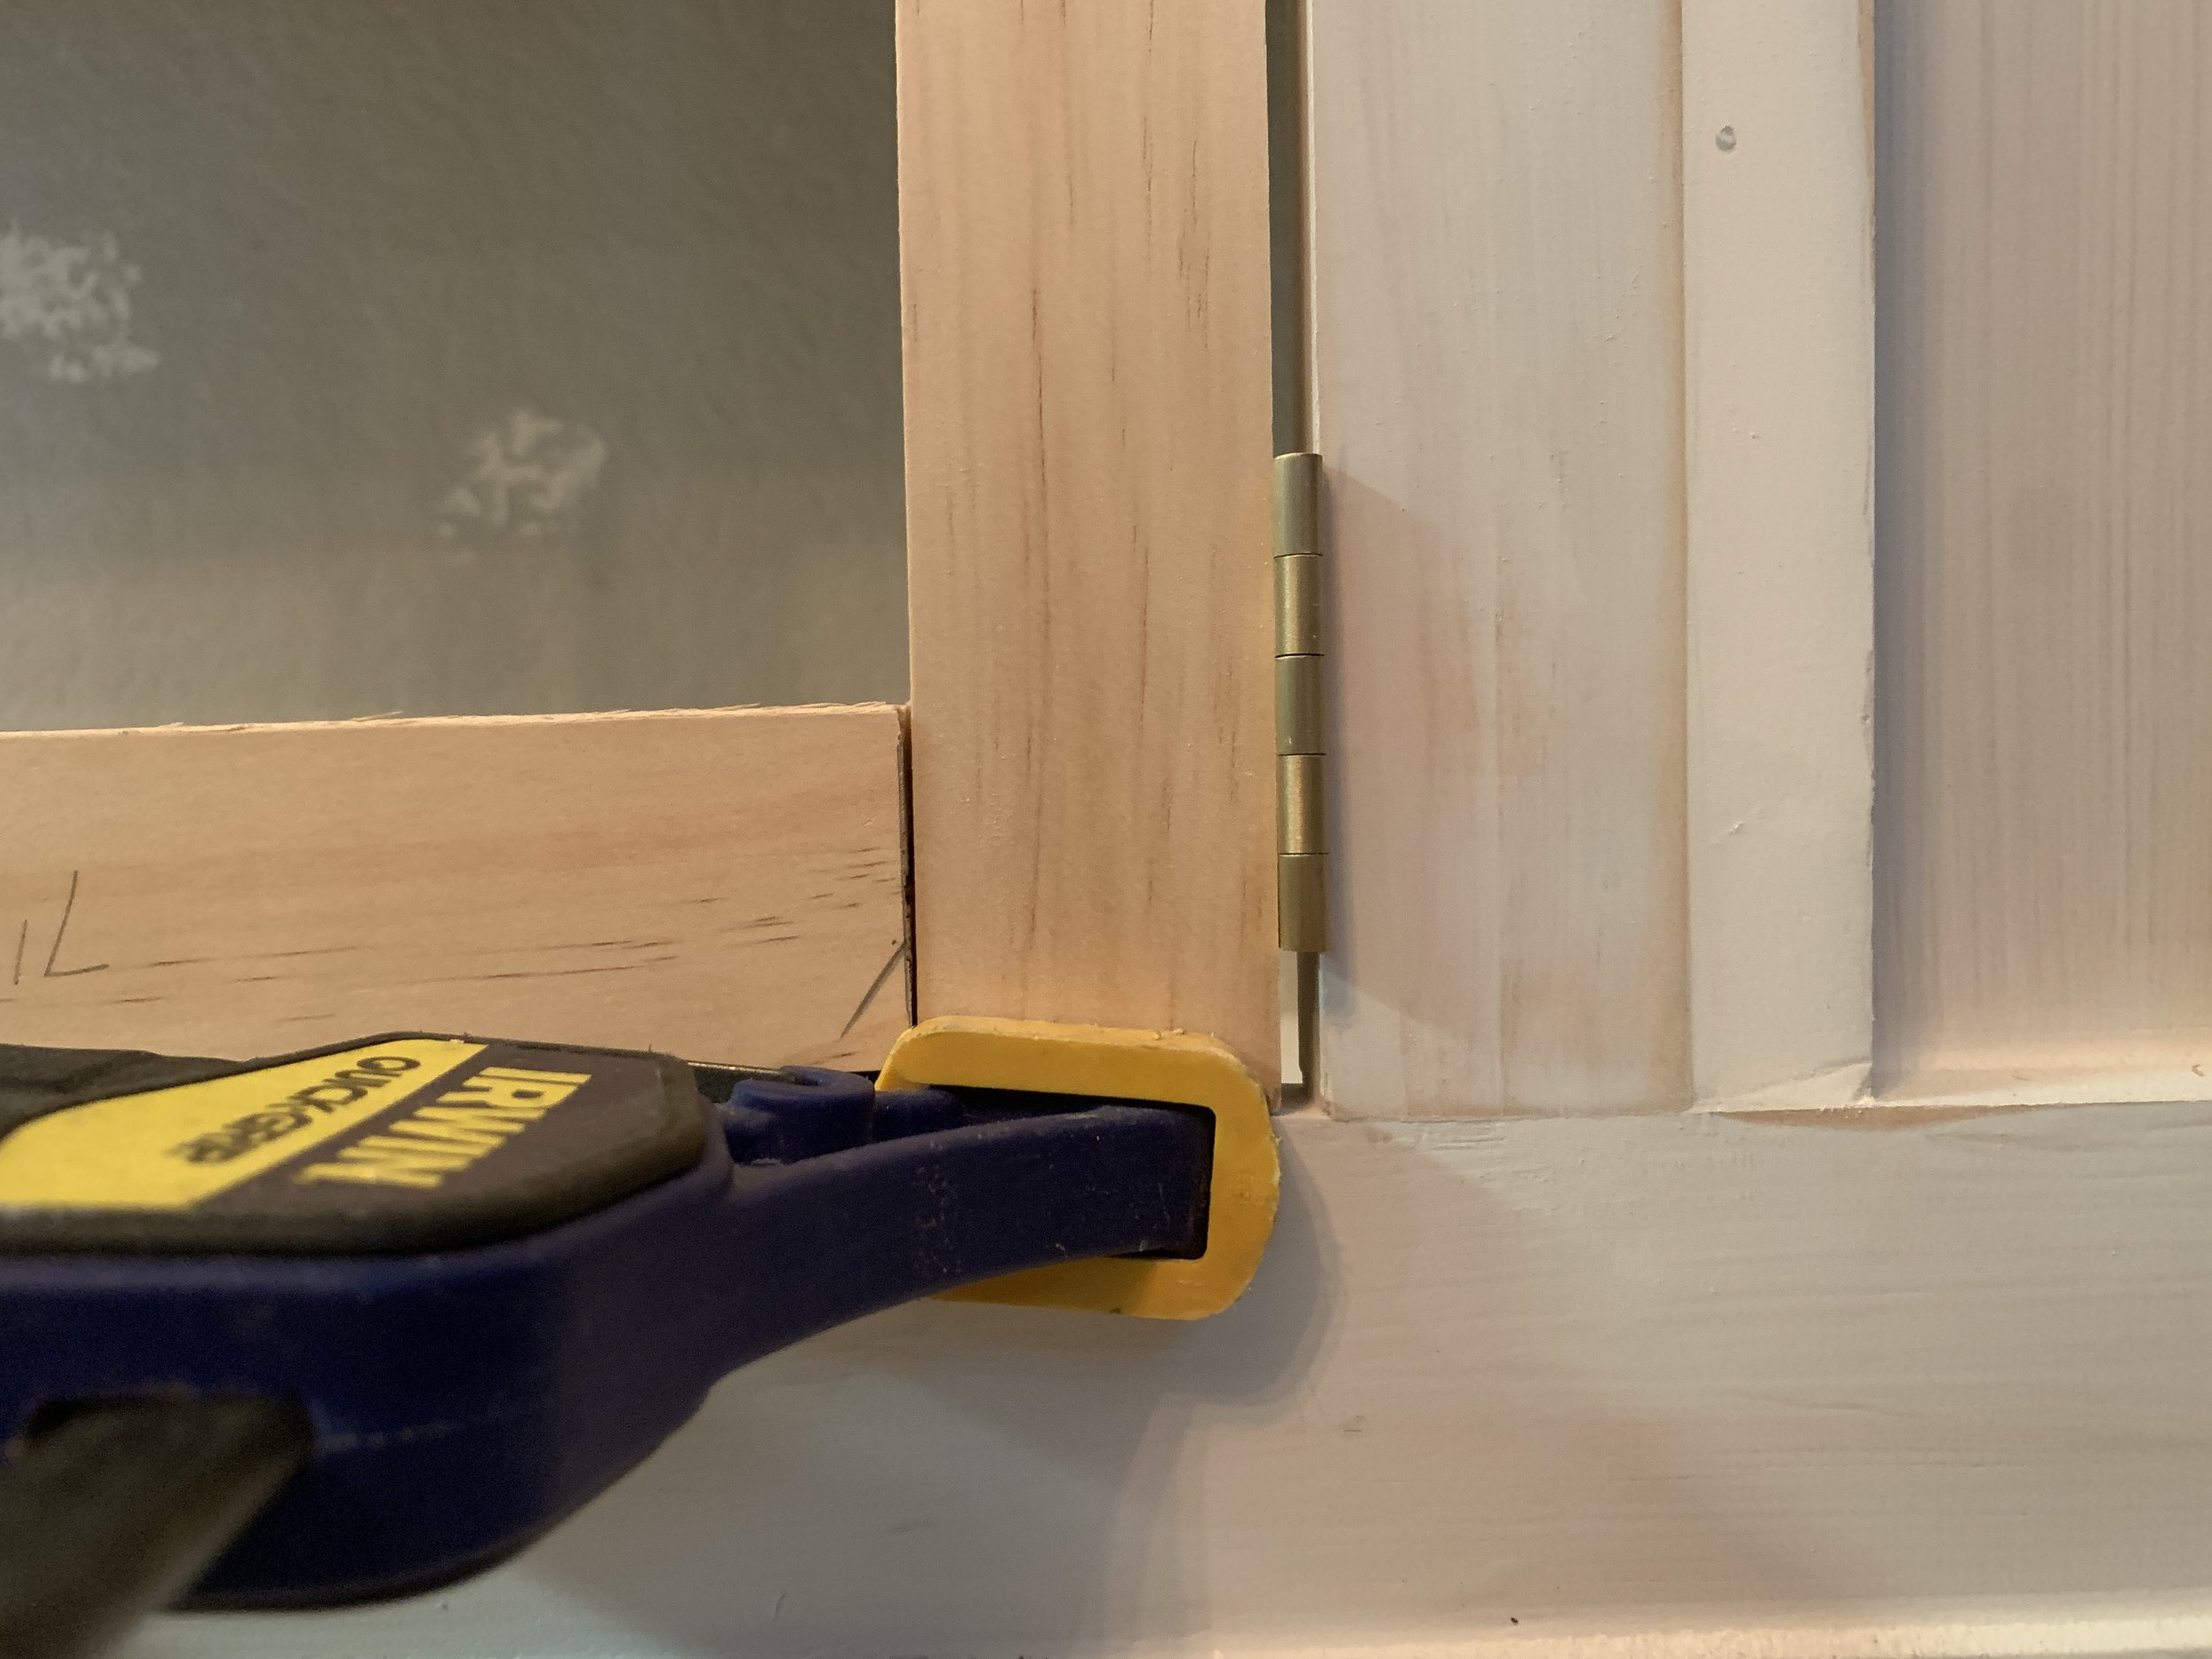
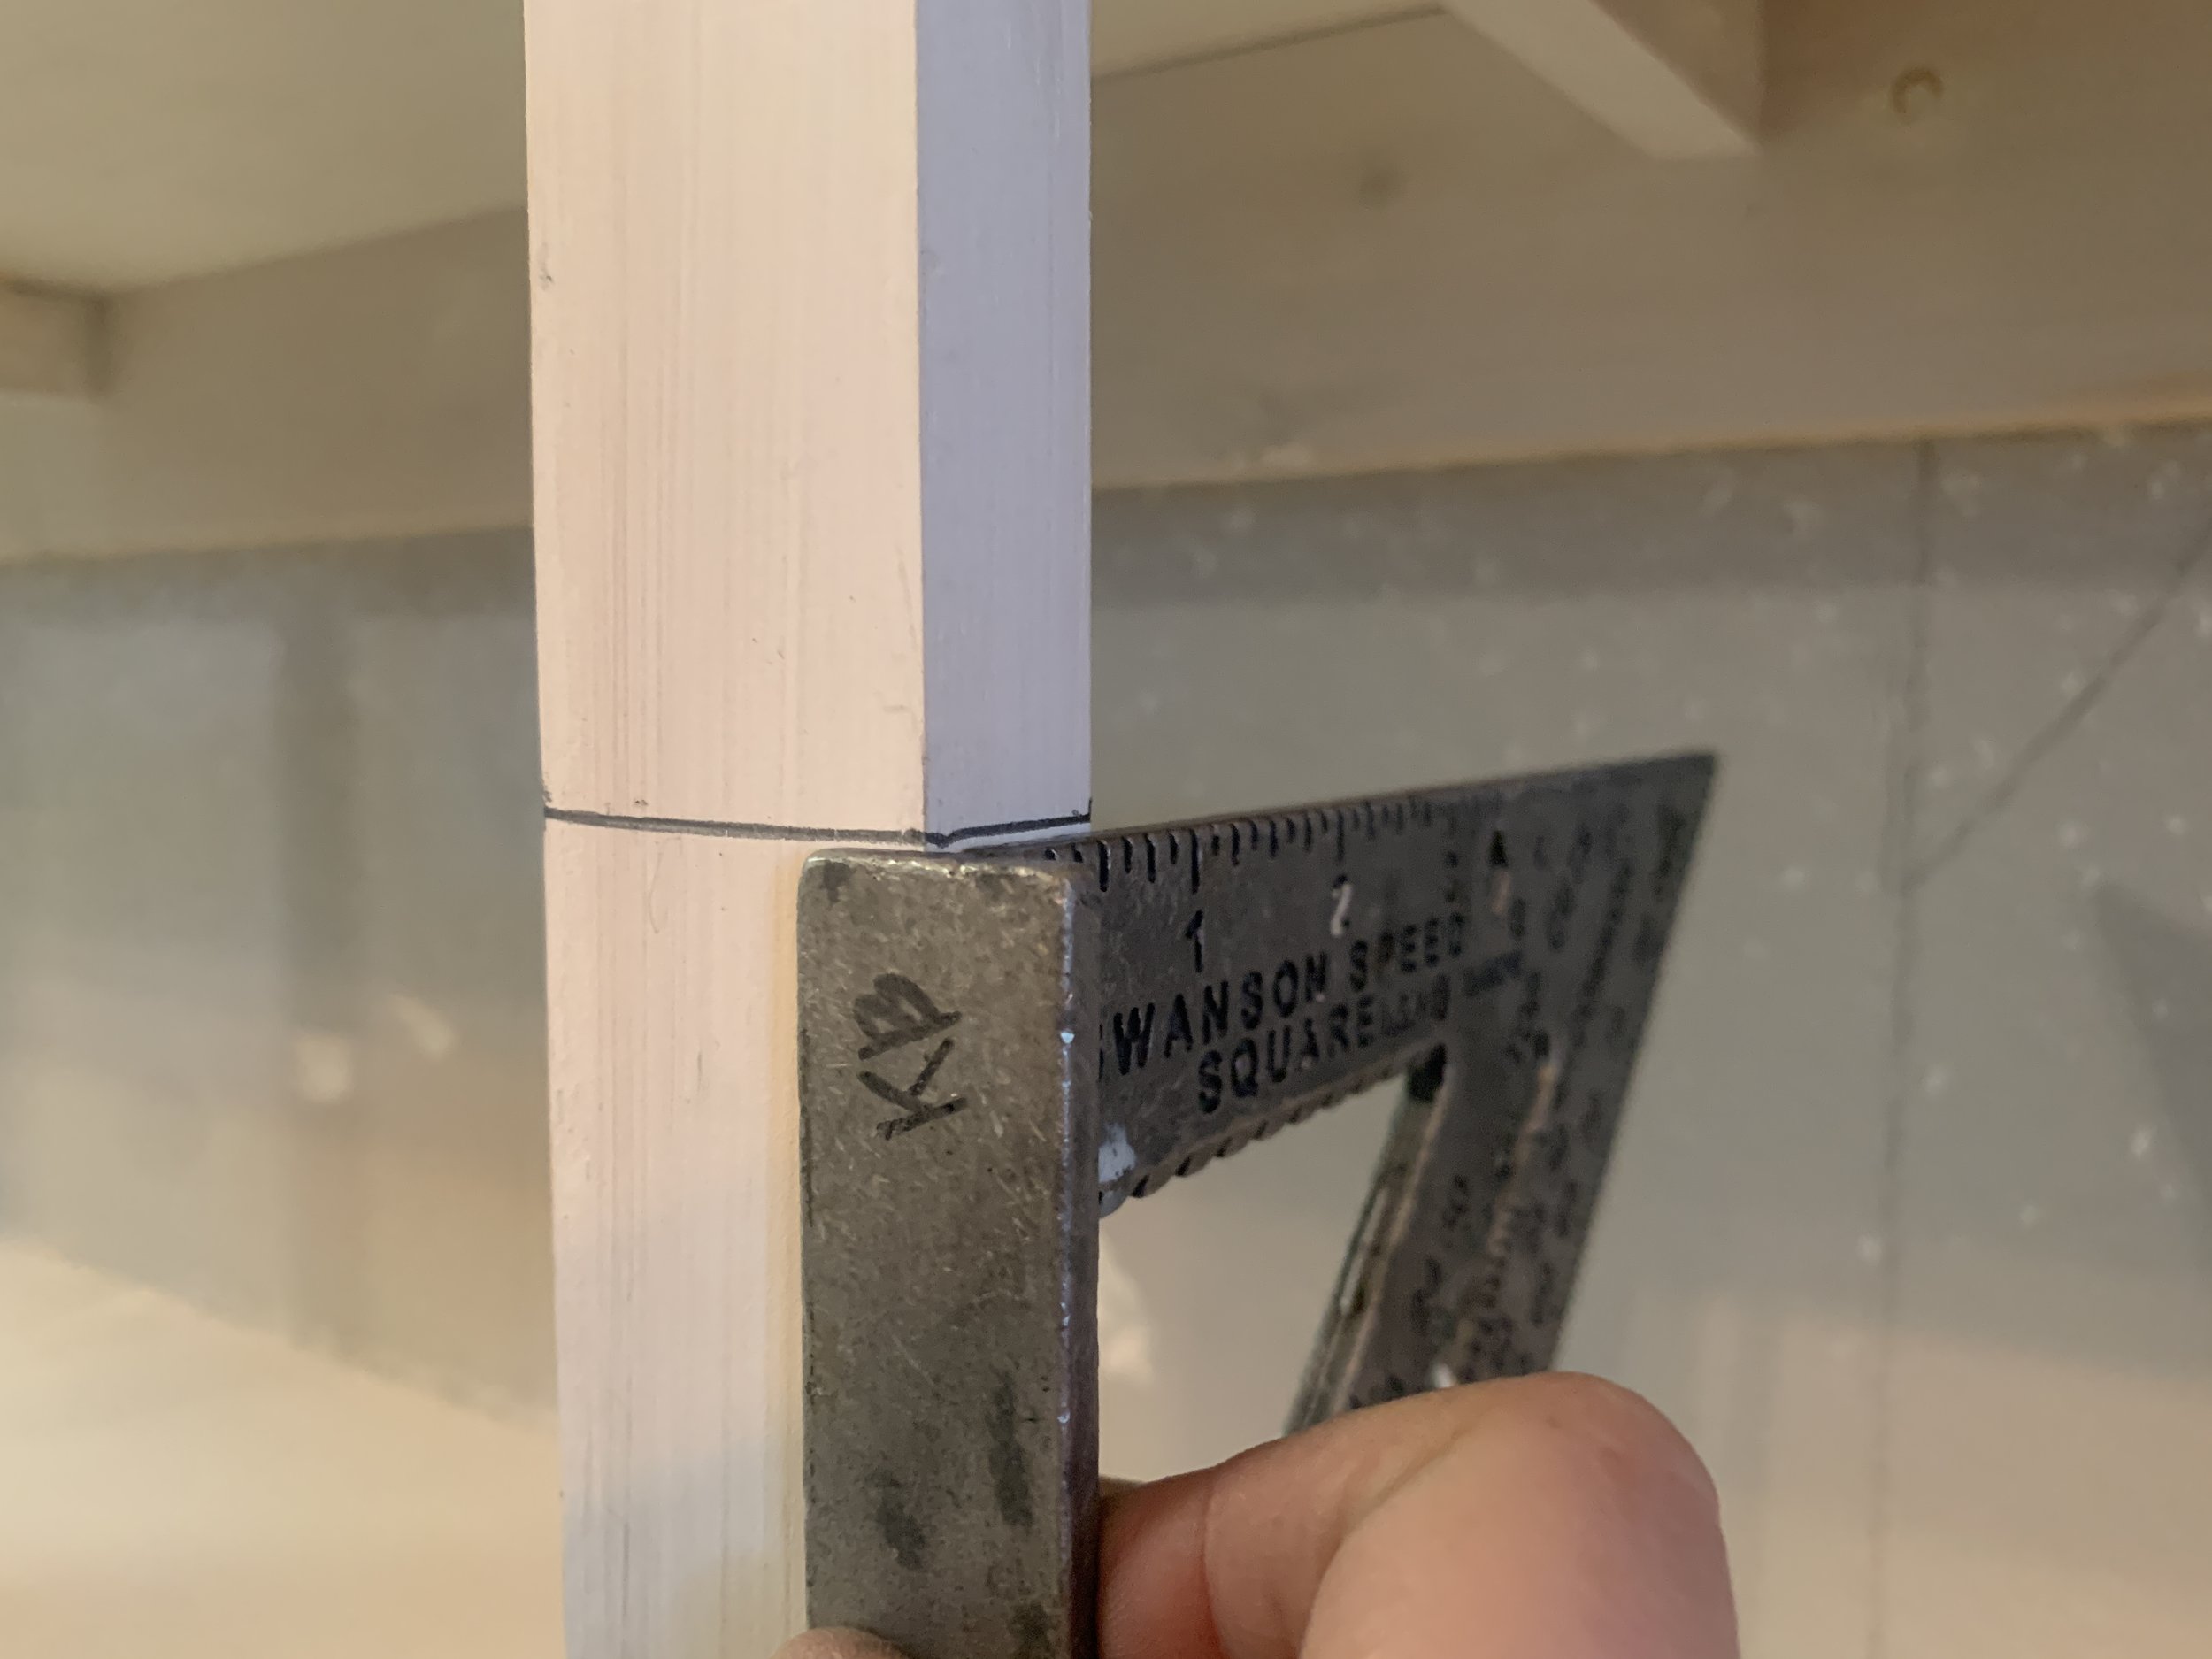
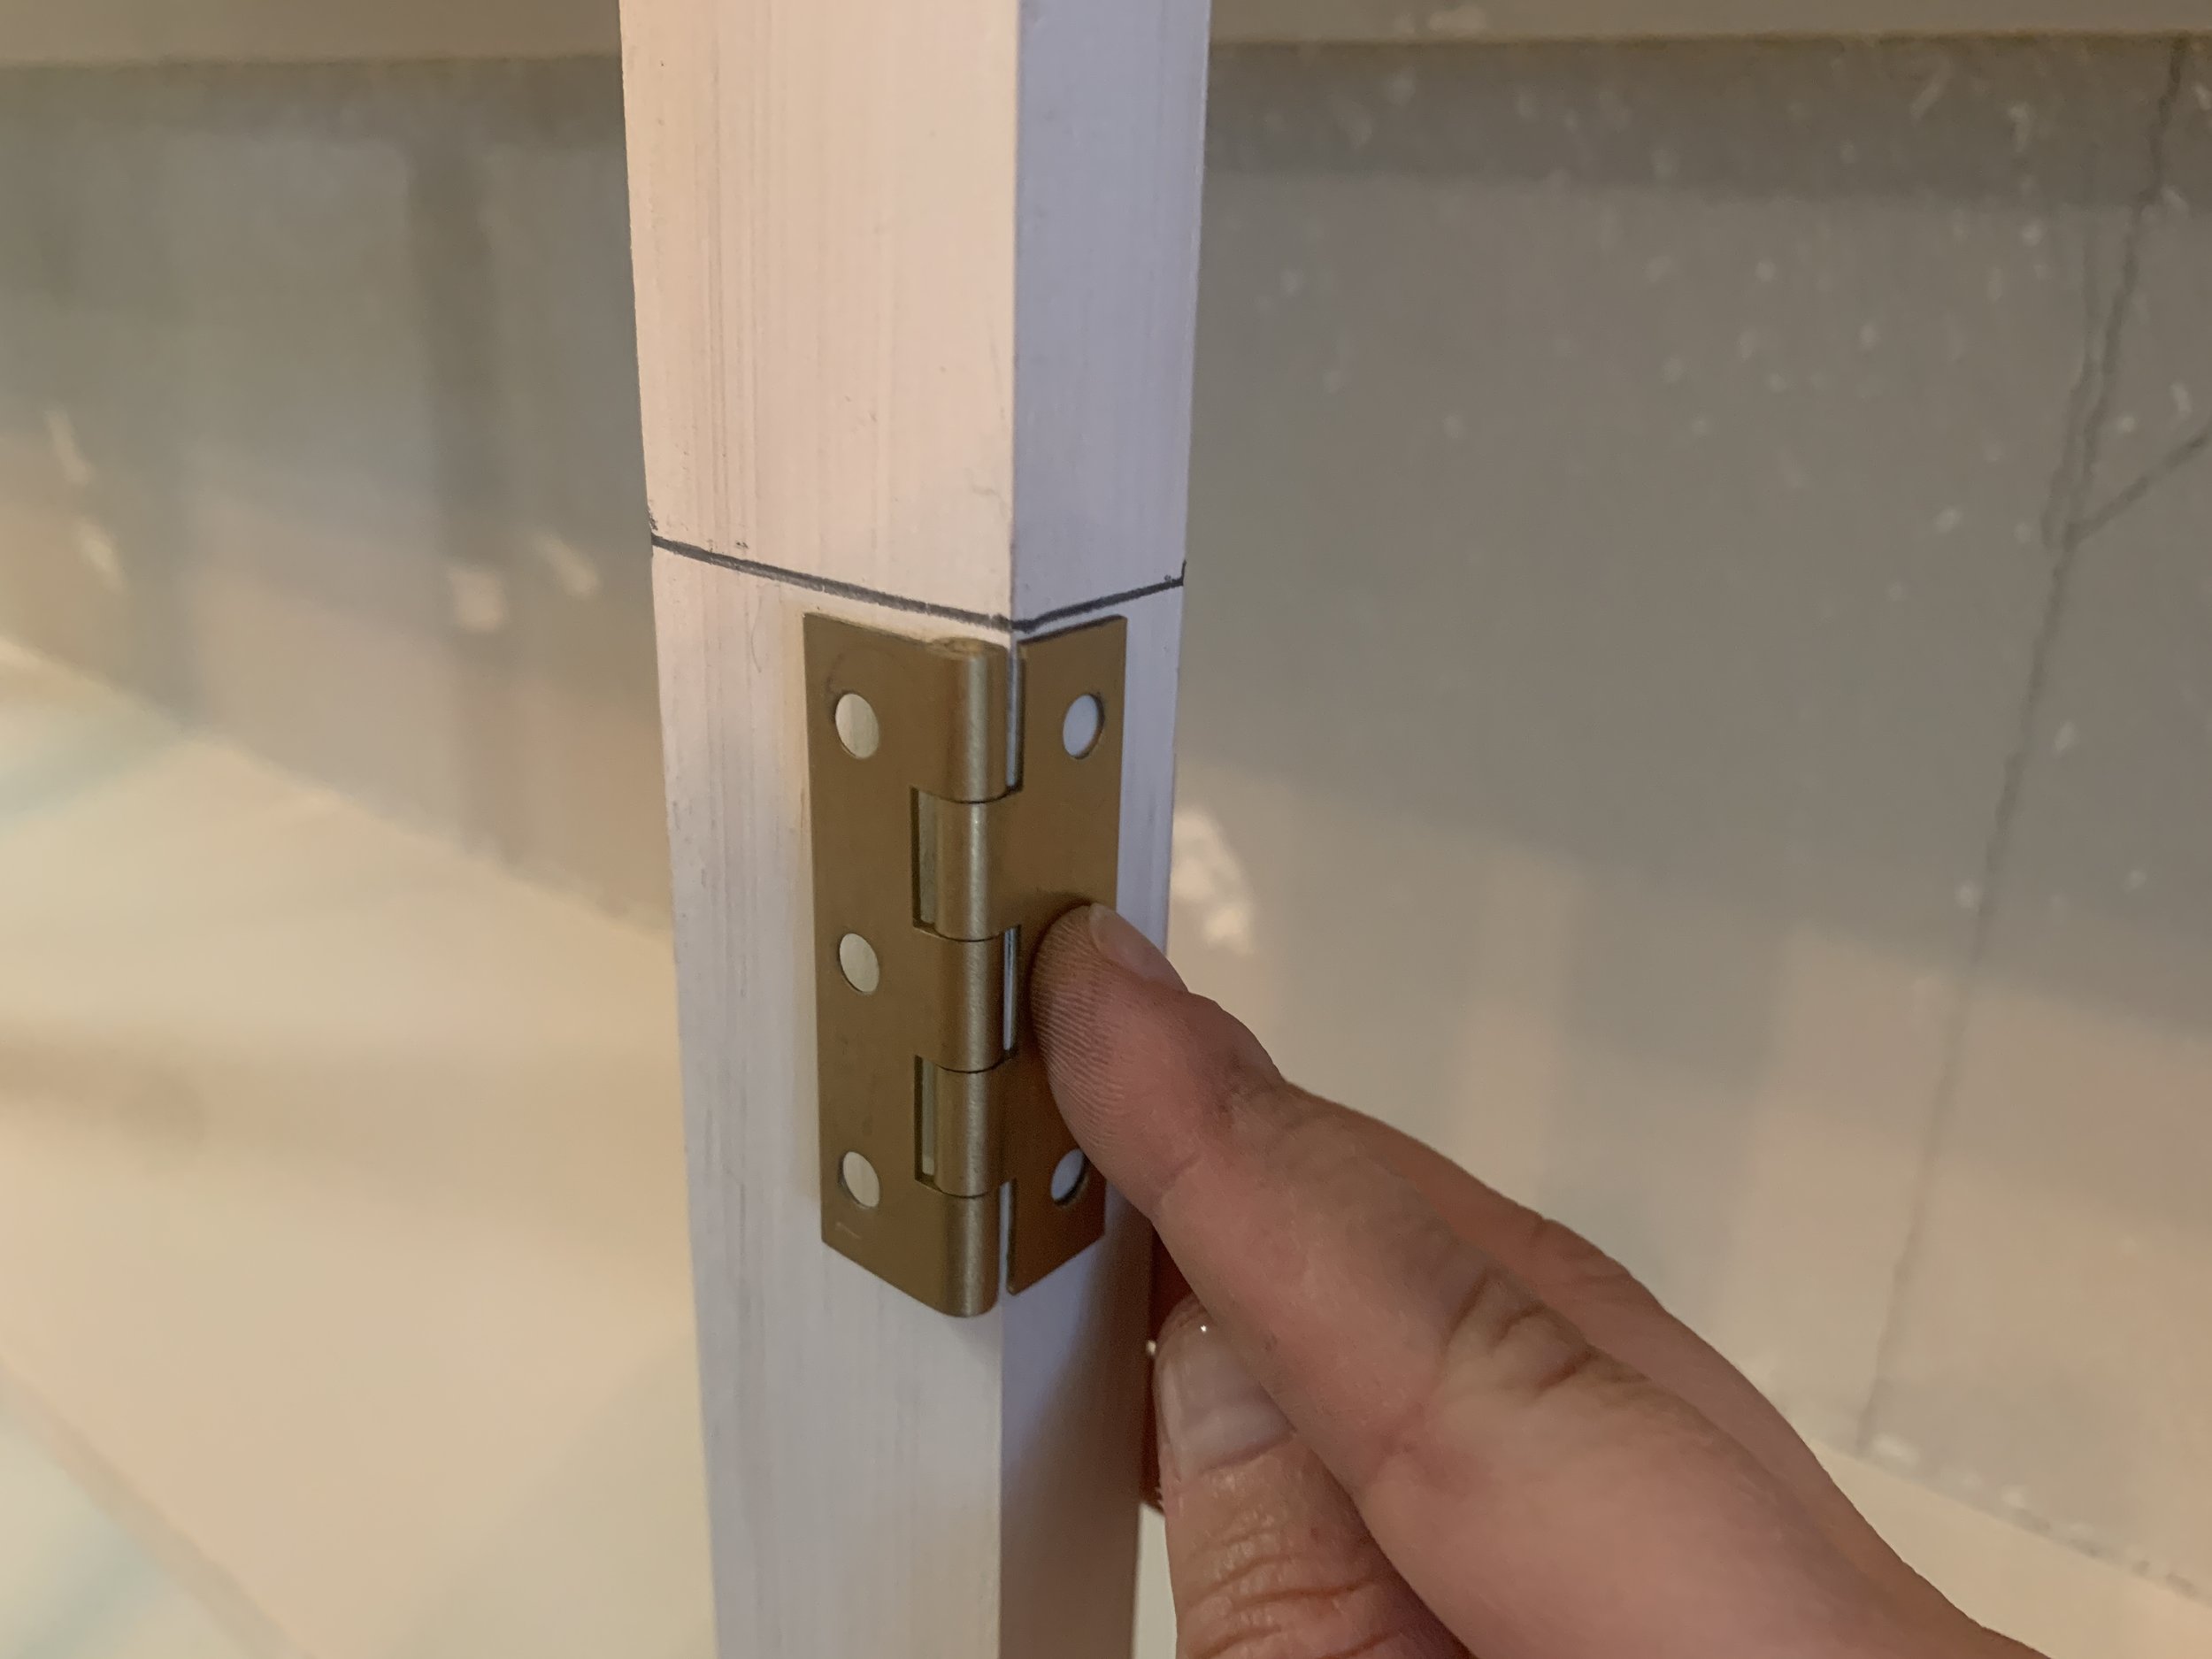
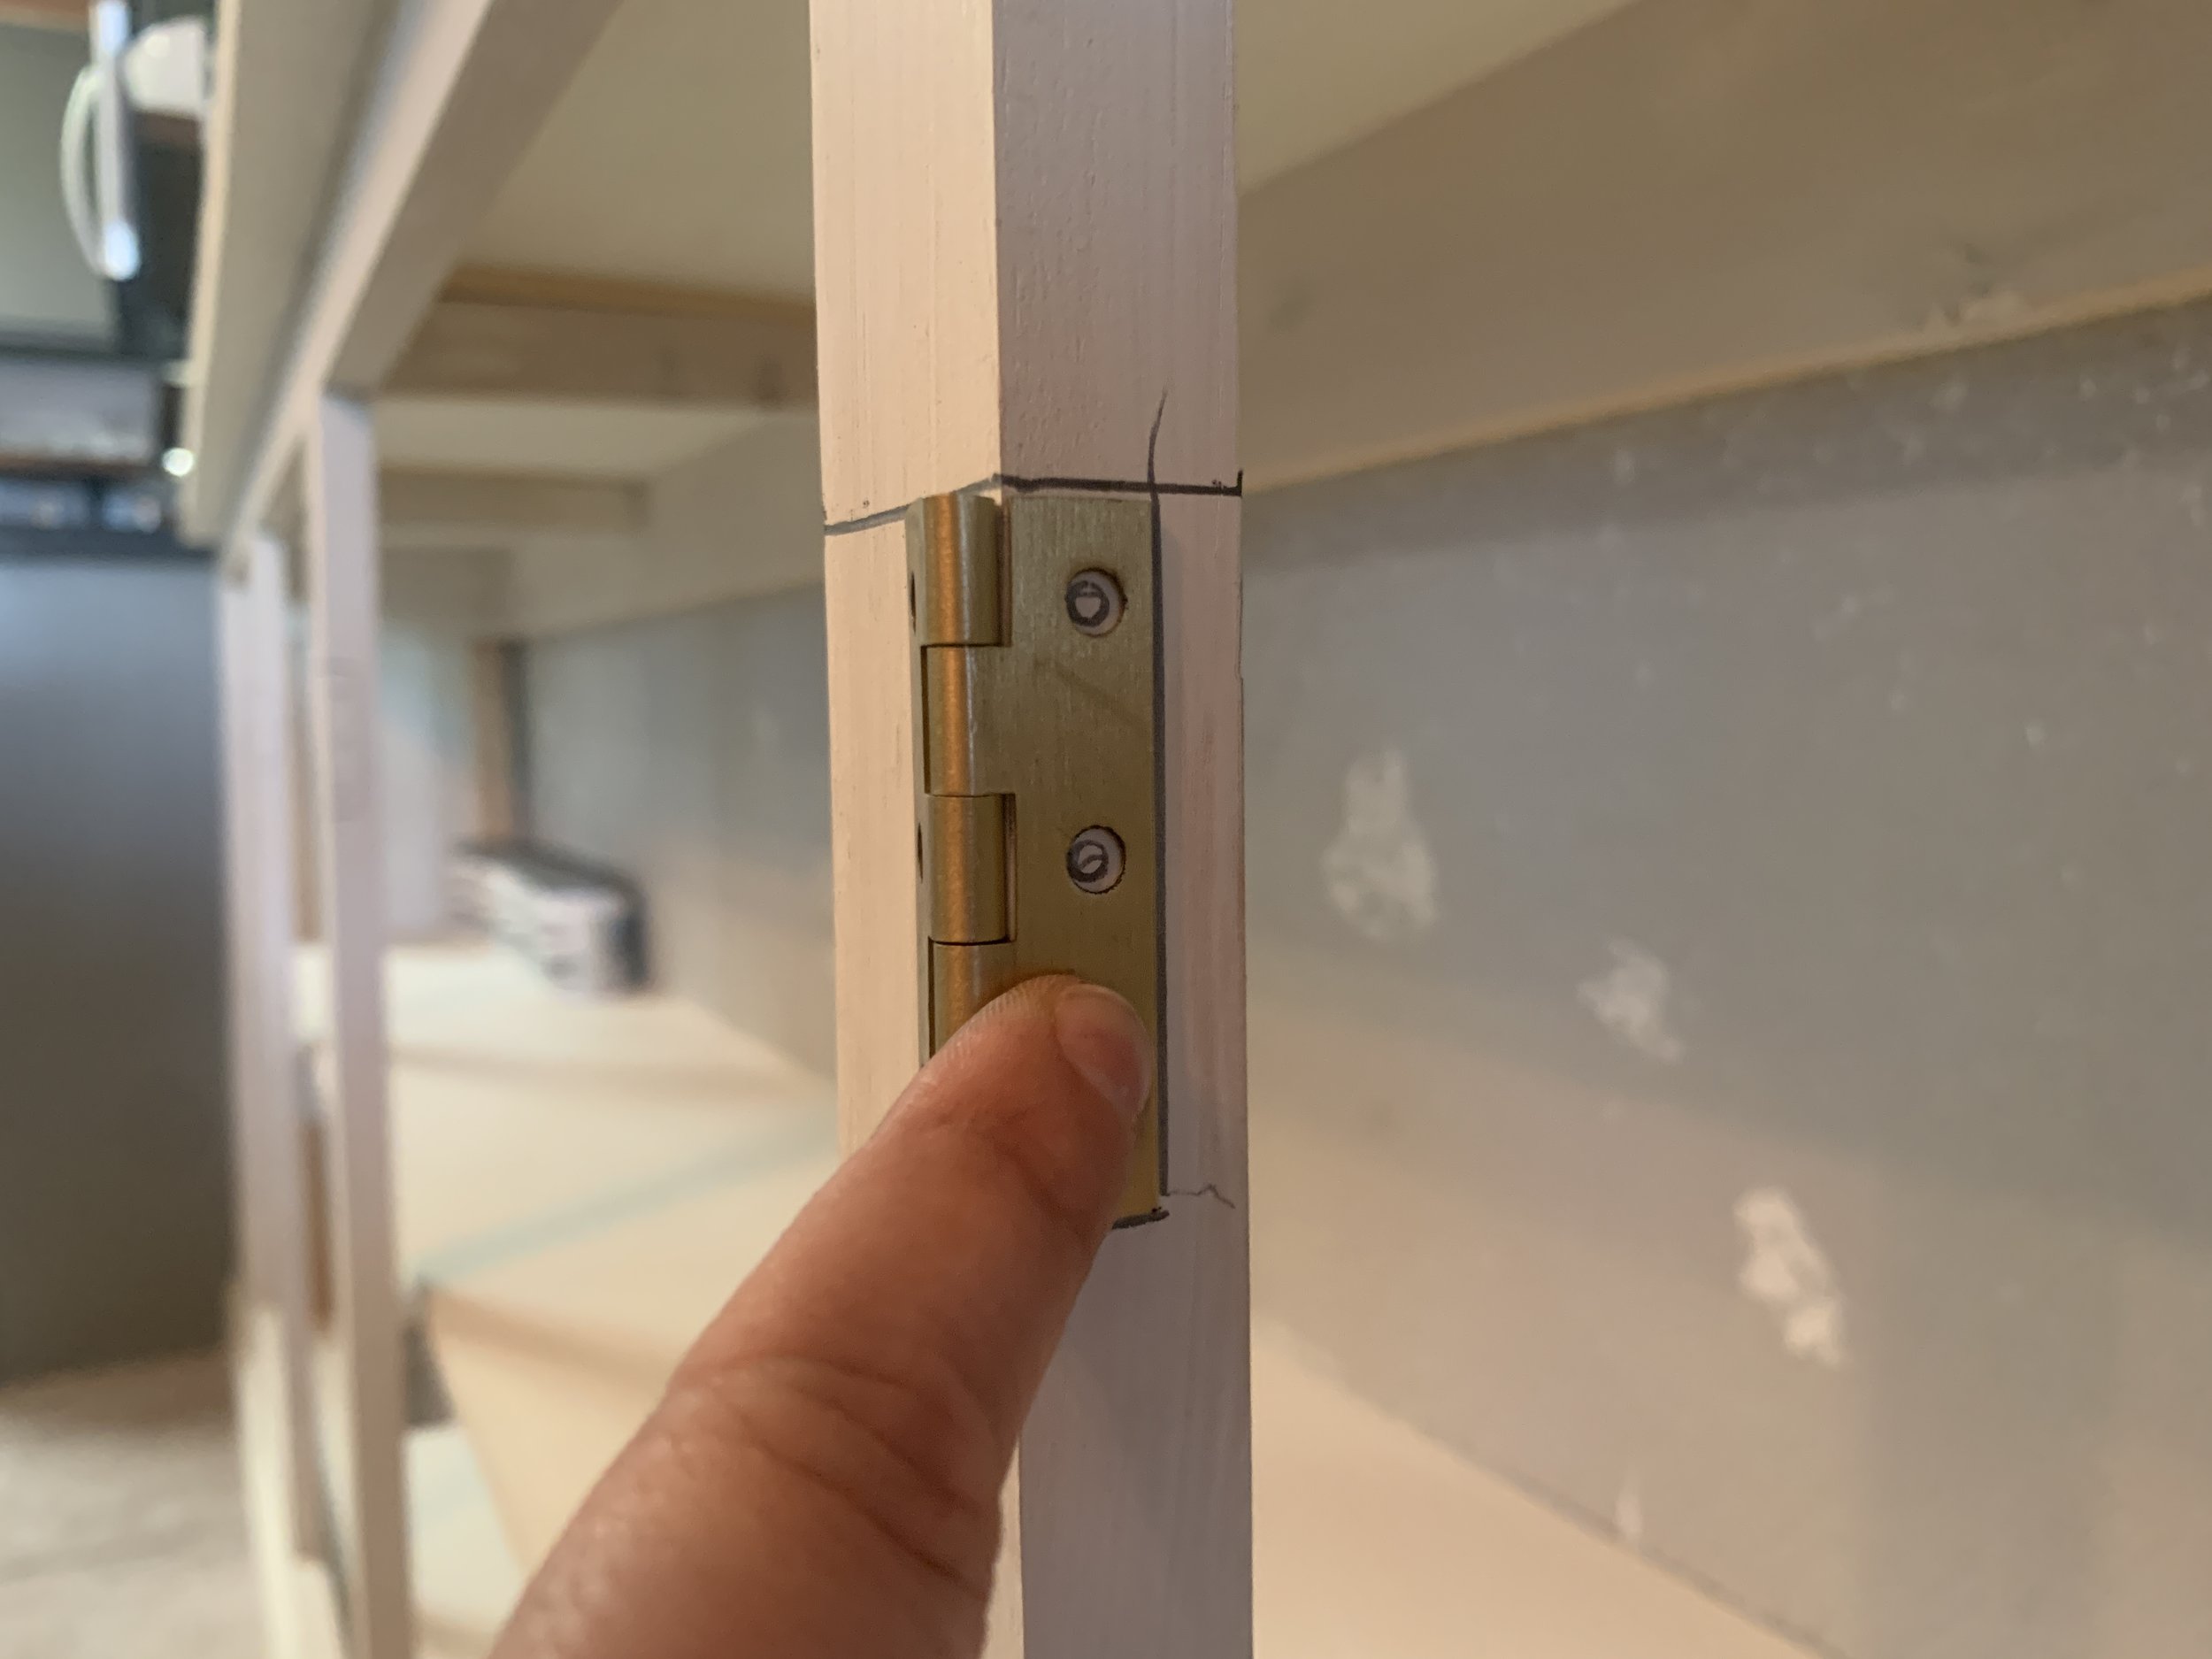
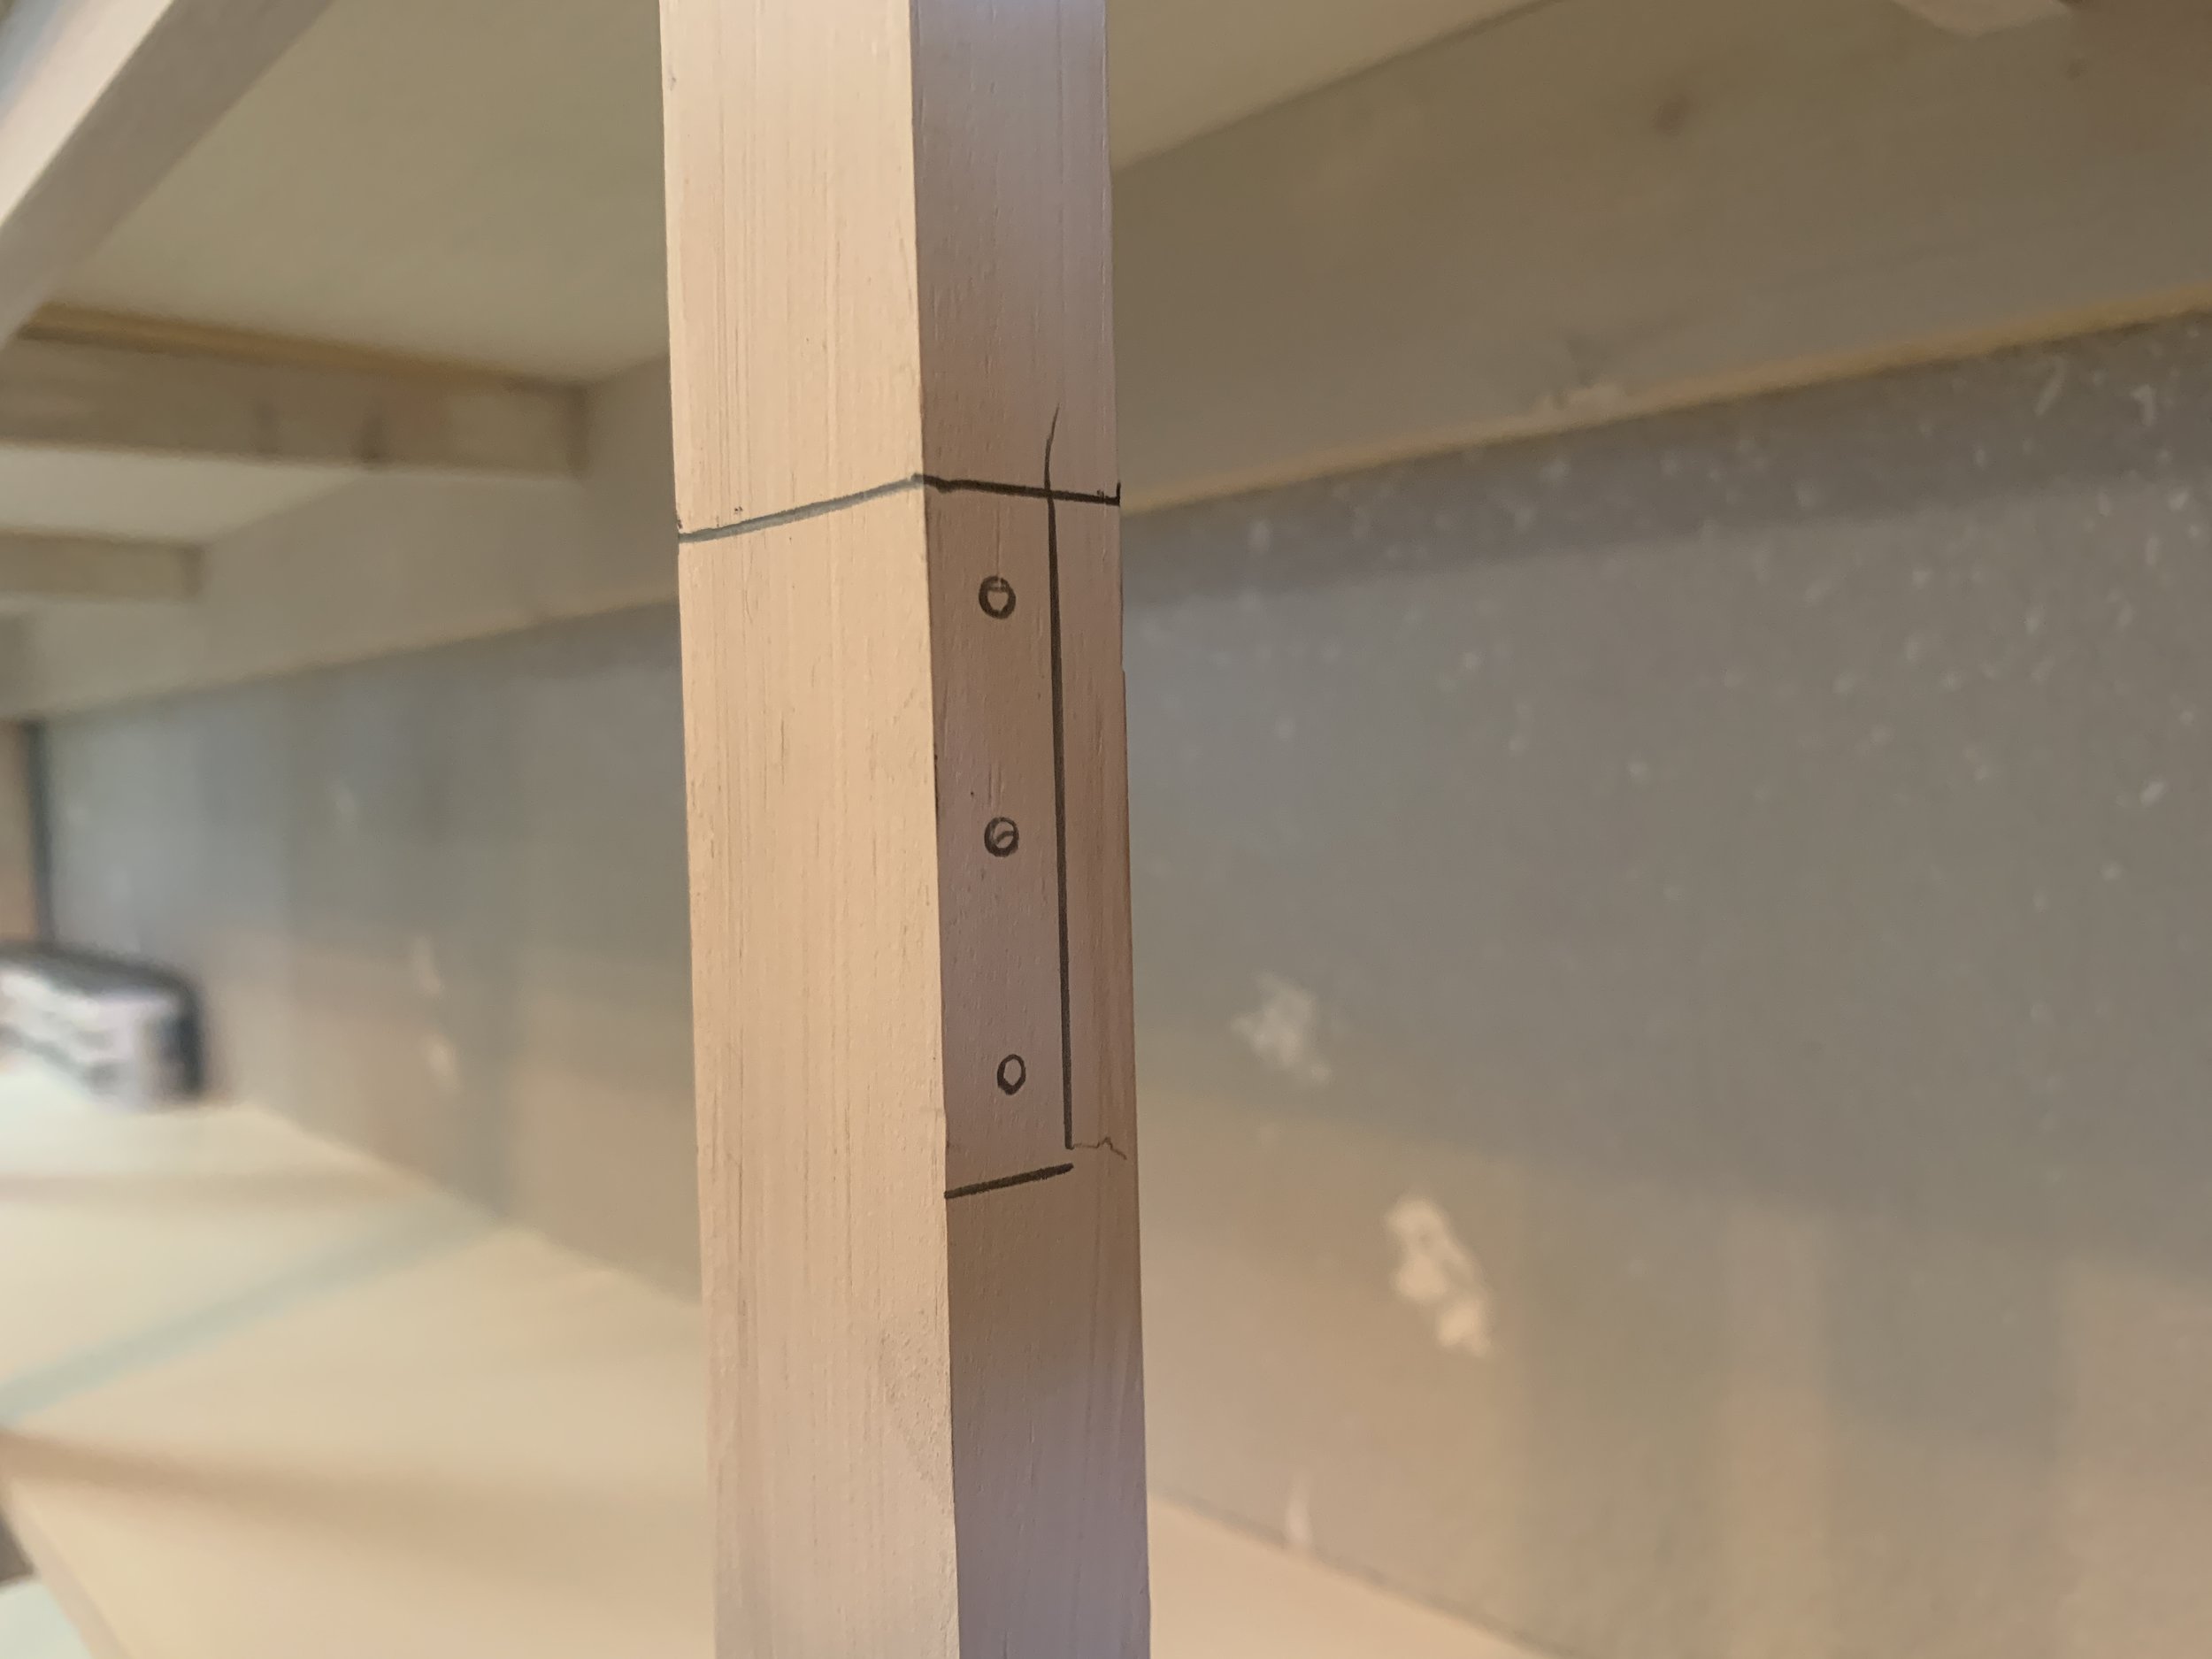
Since our doors are inset (meaning the front of the cabinet doors are in line with the front of the cabinet face), we used 2” butt hinges, placed 4” from the top and bottom edges of the cabinet door openings – the top of the upper hinge is 4” away from the top of the door opening and the bottom of the lower hinge is 4” away from the bottom of the door opening. Because nothing is ever perfectly square, to keep our hinges in a nice line with each other, we measured and marked out just one set of hinges on the cabinet frame, and then used our level clamped to the cabinet front to set placement for the other sets of hinges.

With the top and bottom edges of our hinges marked out on the front of the cabinet face, we used a speed square to continue our hinge markings around the sides of each vertical support, pushed a hinge as far back as it would go on the support to set our hinge’s depth, and traced the screw holes as guides for pre-drilling. It’s important to note here you want your pre-drilled hinge holes to be smaller than the hinge screws so they’re in there nice and tight. Pre-drilling these keeps the wood from splitting, and also gives you a guide later once you’ve painted over your pencil marks.
Note
Our hinges stick out from the cabinet face slightly. We could’ve pushed them back farther into the cabinet to make the front of the hinge flat along the cabinet front, but it would’ve made the gap around the door a little bigger, which we didn’t like. If you do decide to push your hinges back more into the cabinet you will have to account for the extra space from the hinge being a little wider when building your doors – i.e.: thinner doors/different measurements than we shared for this project earlier in this post.
Once our cabinet doors were complete and our cabinet was painted, we installed the hinges to the vertical cabinet dividers, then used the half-installed hinges to line up and install the cabinet doors so that the door fronts were flush with the front of the cabinet.
Installing cabinet door handles
With the doors installed, we used a handle template to consistently mark out our drill holes for the handles, then used a drill bit just barely larger than the screws that came with the handles. The hole should be large enough for the threaded part of the screw to go through easily, but smaller than the size of the screw head so the screw doesn’t go all the way into the hole. After our holes were drilled, we popped the screws through the holes from the back of the door and screwed them into the back of the handles.


What are you thinking of the little sneak peeks of the finished cabinet so far? Don’t worry there’s still plenty more to show, including what the room looks like with a brand new rug, since I accidentally spilled a BIG blob of paint on it!

Oops.
Coming up we’ll be sharing how we made our white concrete countertop, hung our wallpaper, planned for wall art, and of course, the full reveal!