The Cameo Camper Renovation: Twin Bed Storage + Gas Bedlifts + Lid Rebuild
Today’s post is an improvement + continuation on something we’ve already covered. If you missed how we built the twin day bed base in the front of the camper, check it out here. (This post builds on that one.)
If you follow us on Instagram you might already know from a while back since the initial build of the twin bed, I accidentally broke the slatted lid – another thing in this renovation that was tested (and obviously failed) by my hiney.

The old/original twin bed led/mattress base. (There should be two more slats up in the upper left area.)
::: Sigh :::
Today we’re covering the much sturdier (and much recommended so far if you’re building something similar) replacement lid/mattress base, and how we installed the gas springs that hold it up when we need to get into the storage spaces below. We’d actually already installed the hinges on the old lid, but had to reinstall part of them again with the new lid/mattress base. Since we hadn’t blogged any of the gas spring lifts yet, we’ll be sharing the full shebang here in this post, along with measurements we figured out that worked for us. One time my being behind on sharing with you has been beneficial! Wahoo!
Our twin bed lid/mattress base shopping list
(1) 4x8’x3/4” sheet of plywood
(1) 1x4x8 – for the handle
(1) 1x2x8 optional* – for the handle – *Note: Since we built this lid we might leave this piece off to allow the mattress to move a bit more
Tape measure
Circular saw (or table saw)
Miter/chop saw
RV Bedlift Kit – It’s important you get the correct kit size for your bed’s size. At the time of our purchase/this posting, the seller says they do not make a kit for twin beds and to not install them for side-opening bed storage, but we got the “DOUBLE/FULL” size to experiment and they’re working perfectly for our side-access twin bed. I guess you could say we’re rebels like that.
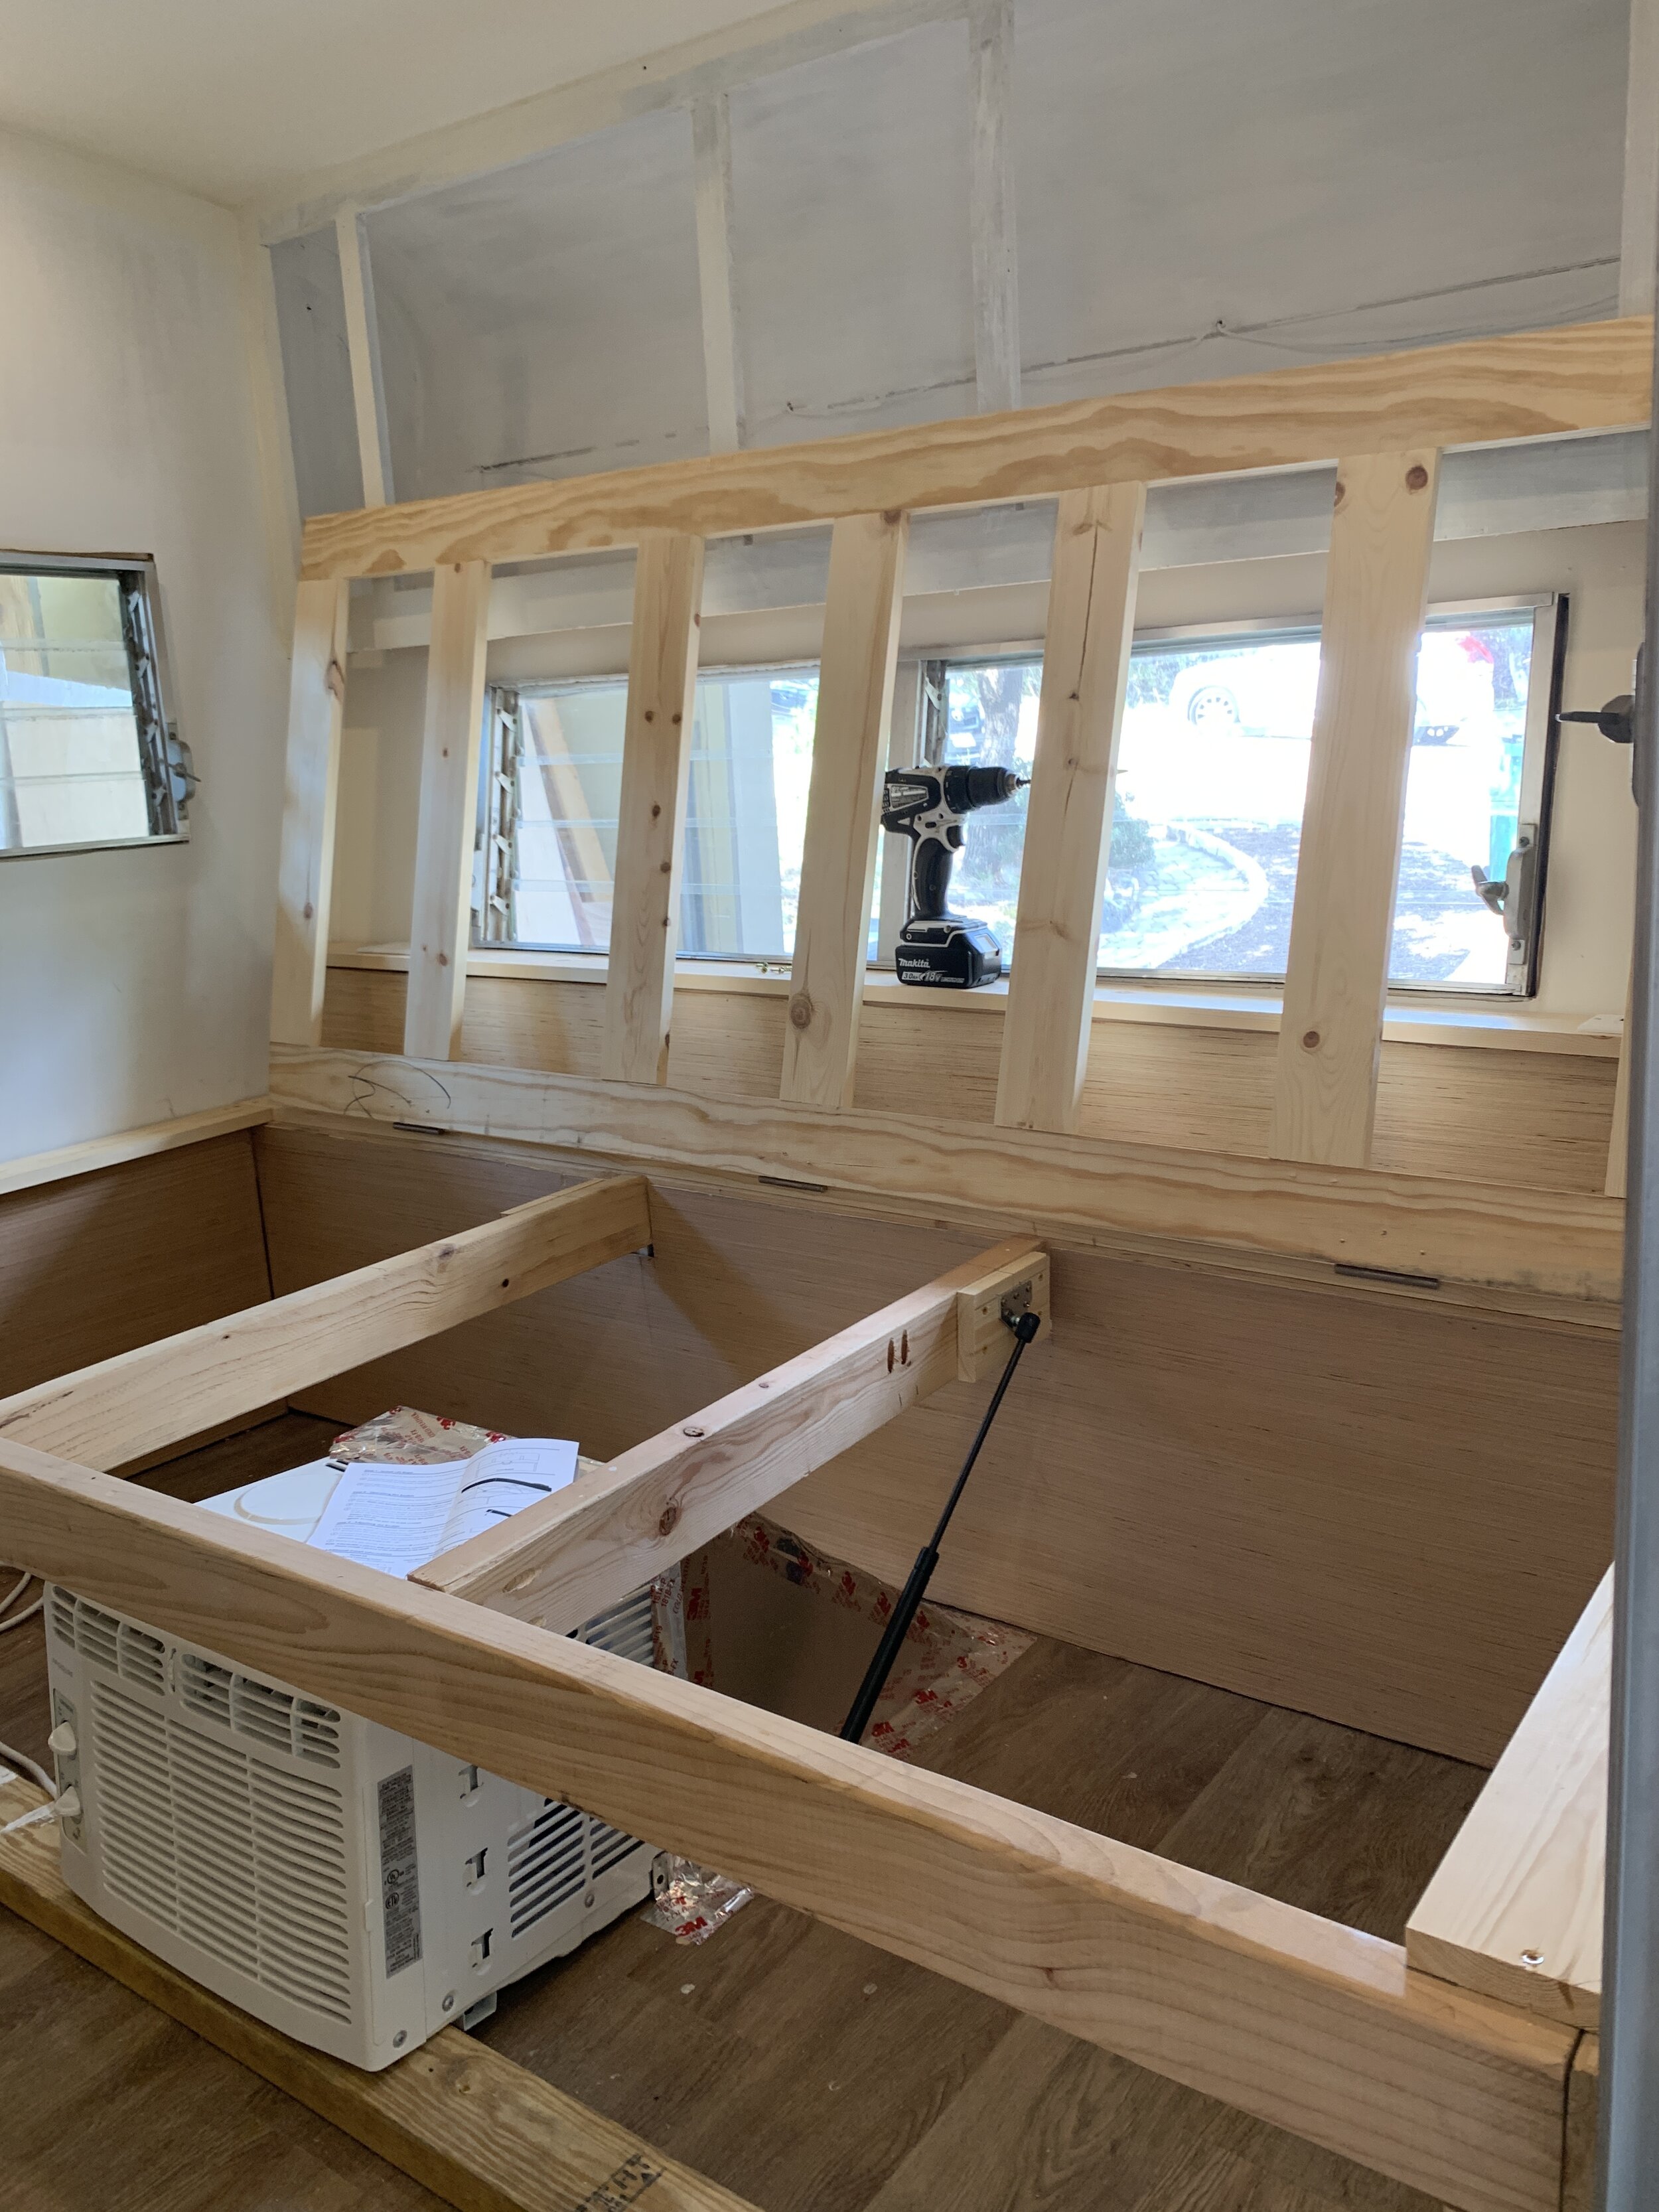
This kit in particular comes with full instructions to make a platform bed from scratch. We already had made our bed base and had very different dimensions and needs, so we used the directions as a more of guidelines and made adjustments for our specific setup.
Another note about the gas springs – they will not close without the weight of a mattress on top, so don’t clip them in until you’ve got a mattress to test it. (If you do snap them in, you can carefully pry them out with a little flathead screwdriver.)
Drill
Hole saw – we used our 1.5” hole saw, but just about any size should do
Wood screws
Drill bit with head to match screw head type
Sander + sandpaper
Paintable latex caulk
Primer + paint
Adhesive felt tape (optional, but nice to help pad the lid so it doesn’t bang against the base)
Building the storage lid/mattress base
I’m talking about the thing you lift to get into your storage areas underneath the mattress. Y’know, the thing I broke. Here’s what it used to look like, pre-booty, and what we’ve rebuilt in its place:

The mattress platform/lid
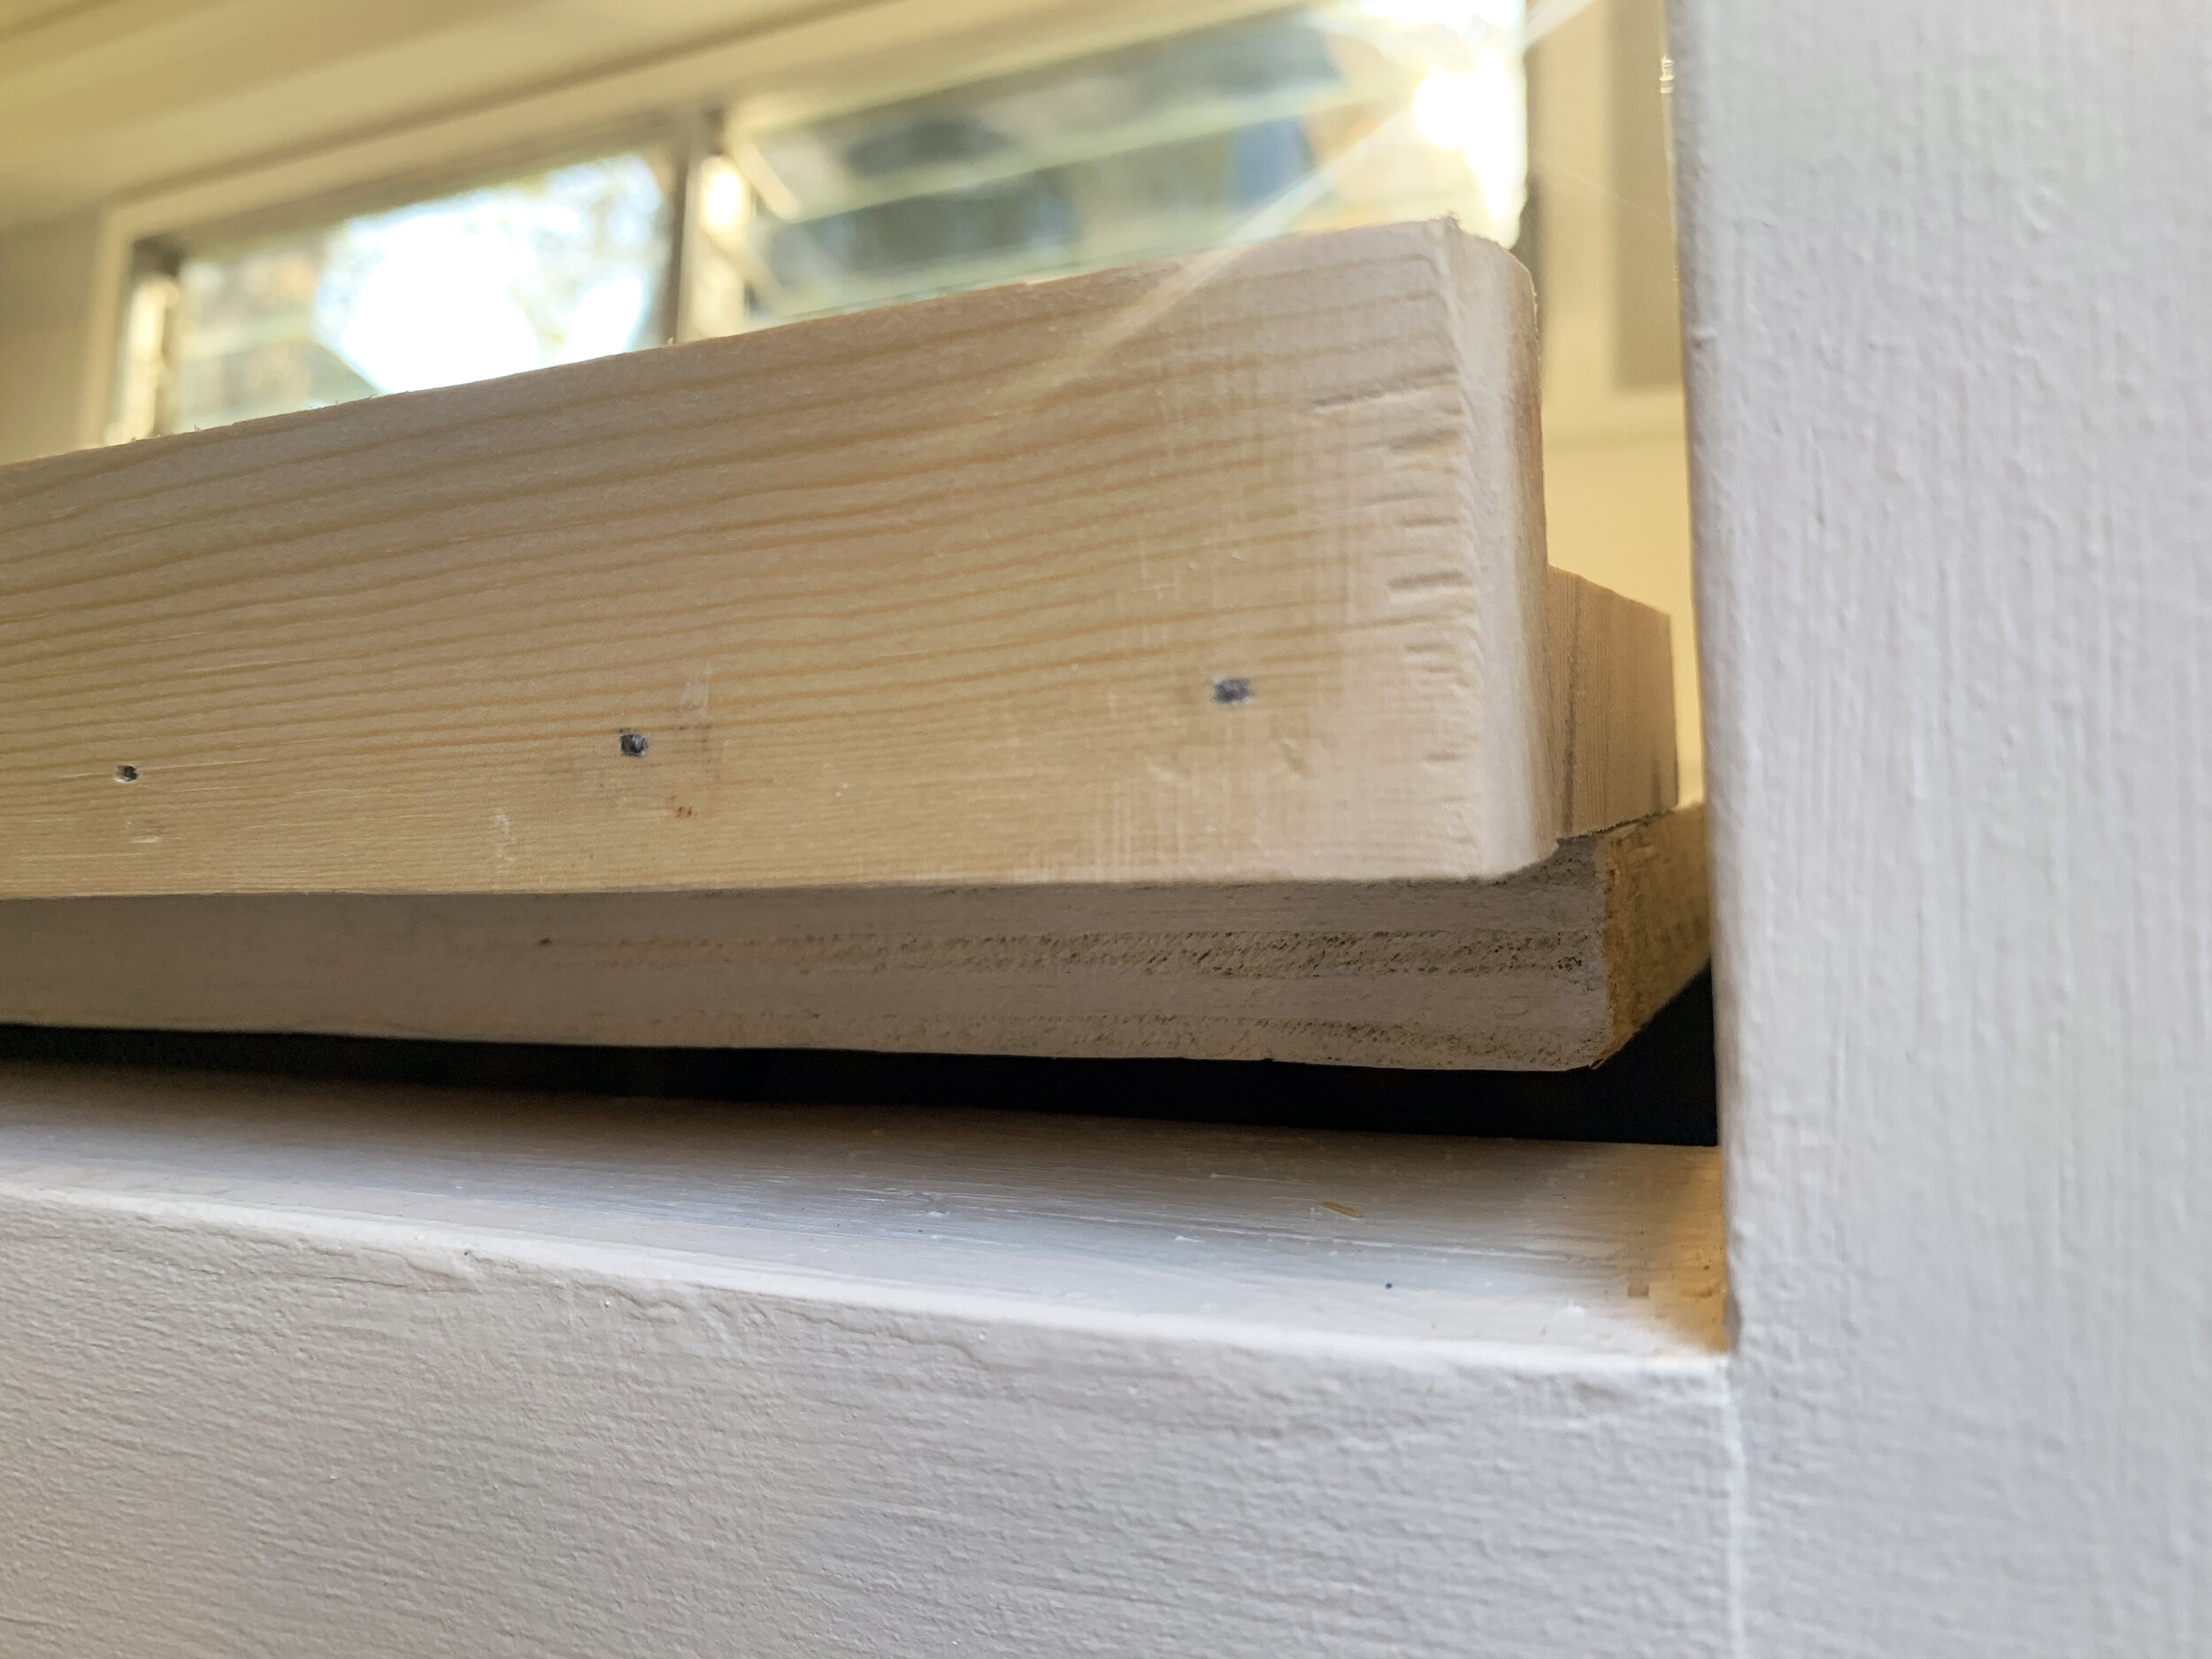
To start, we took our measurements for the entire area, then subtracted about an inch or so to make sure it would leave a small gap around each side to avoid scraping the headboard/footboard/side arms when the storage lid/mattress base was in the upright position. We used the hinges to dictate the gap size on that side, and used our circular saw to cut it out of 3/4” plywood.

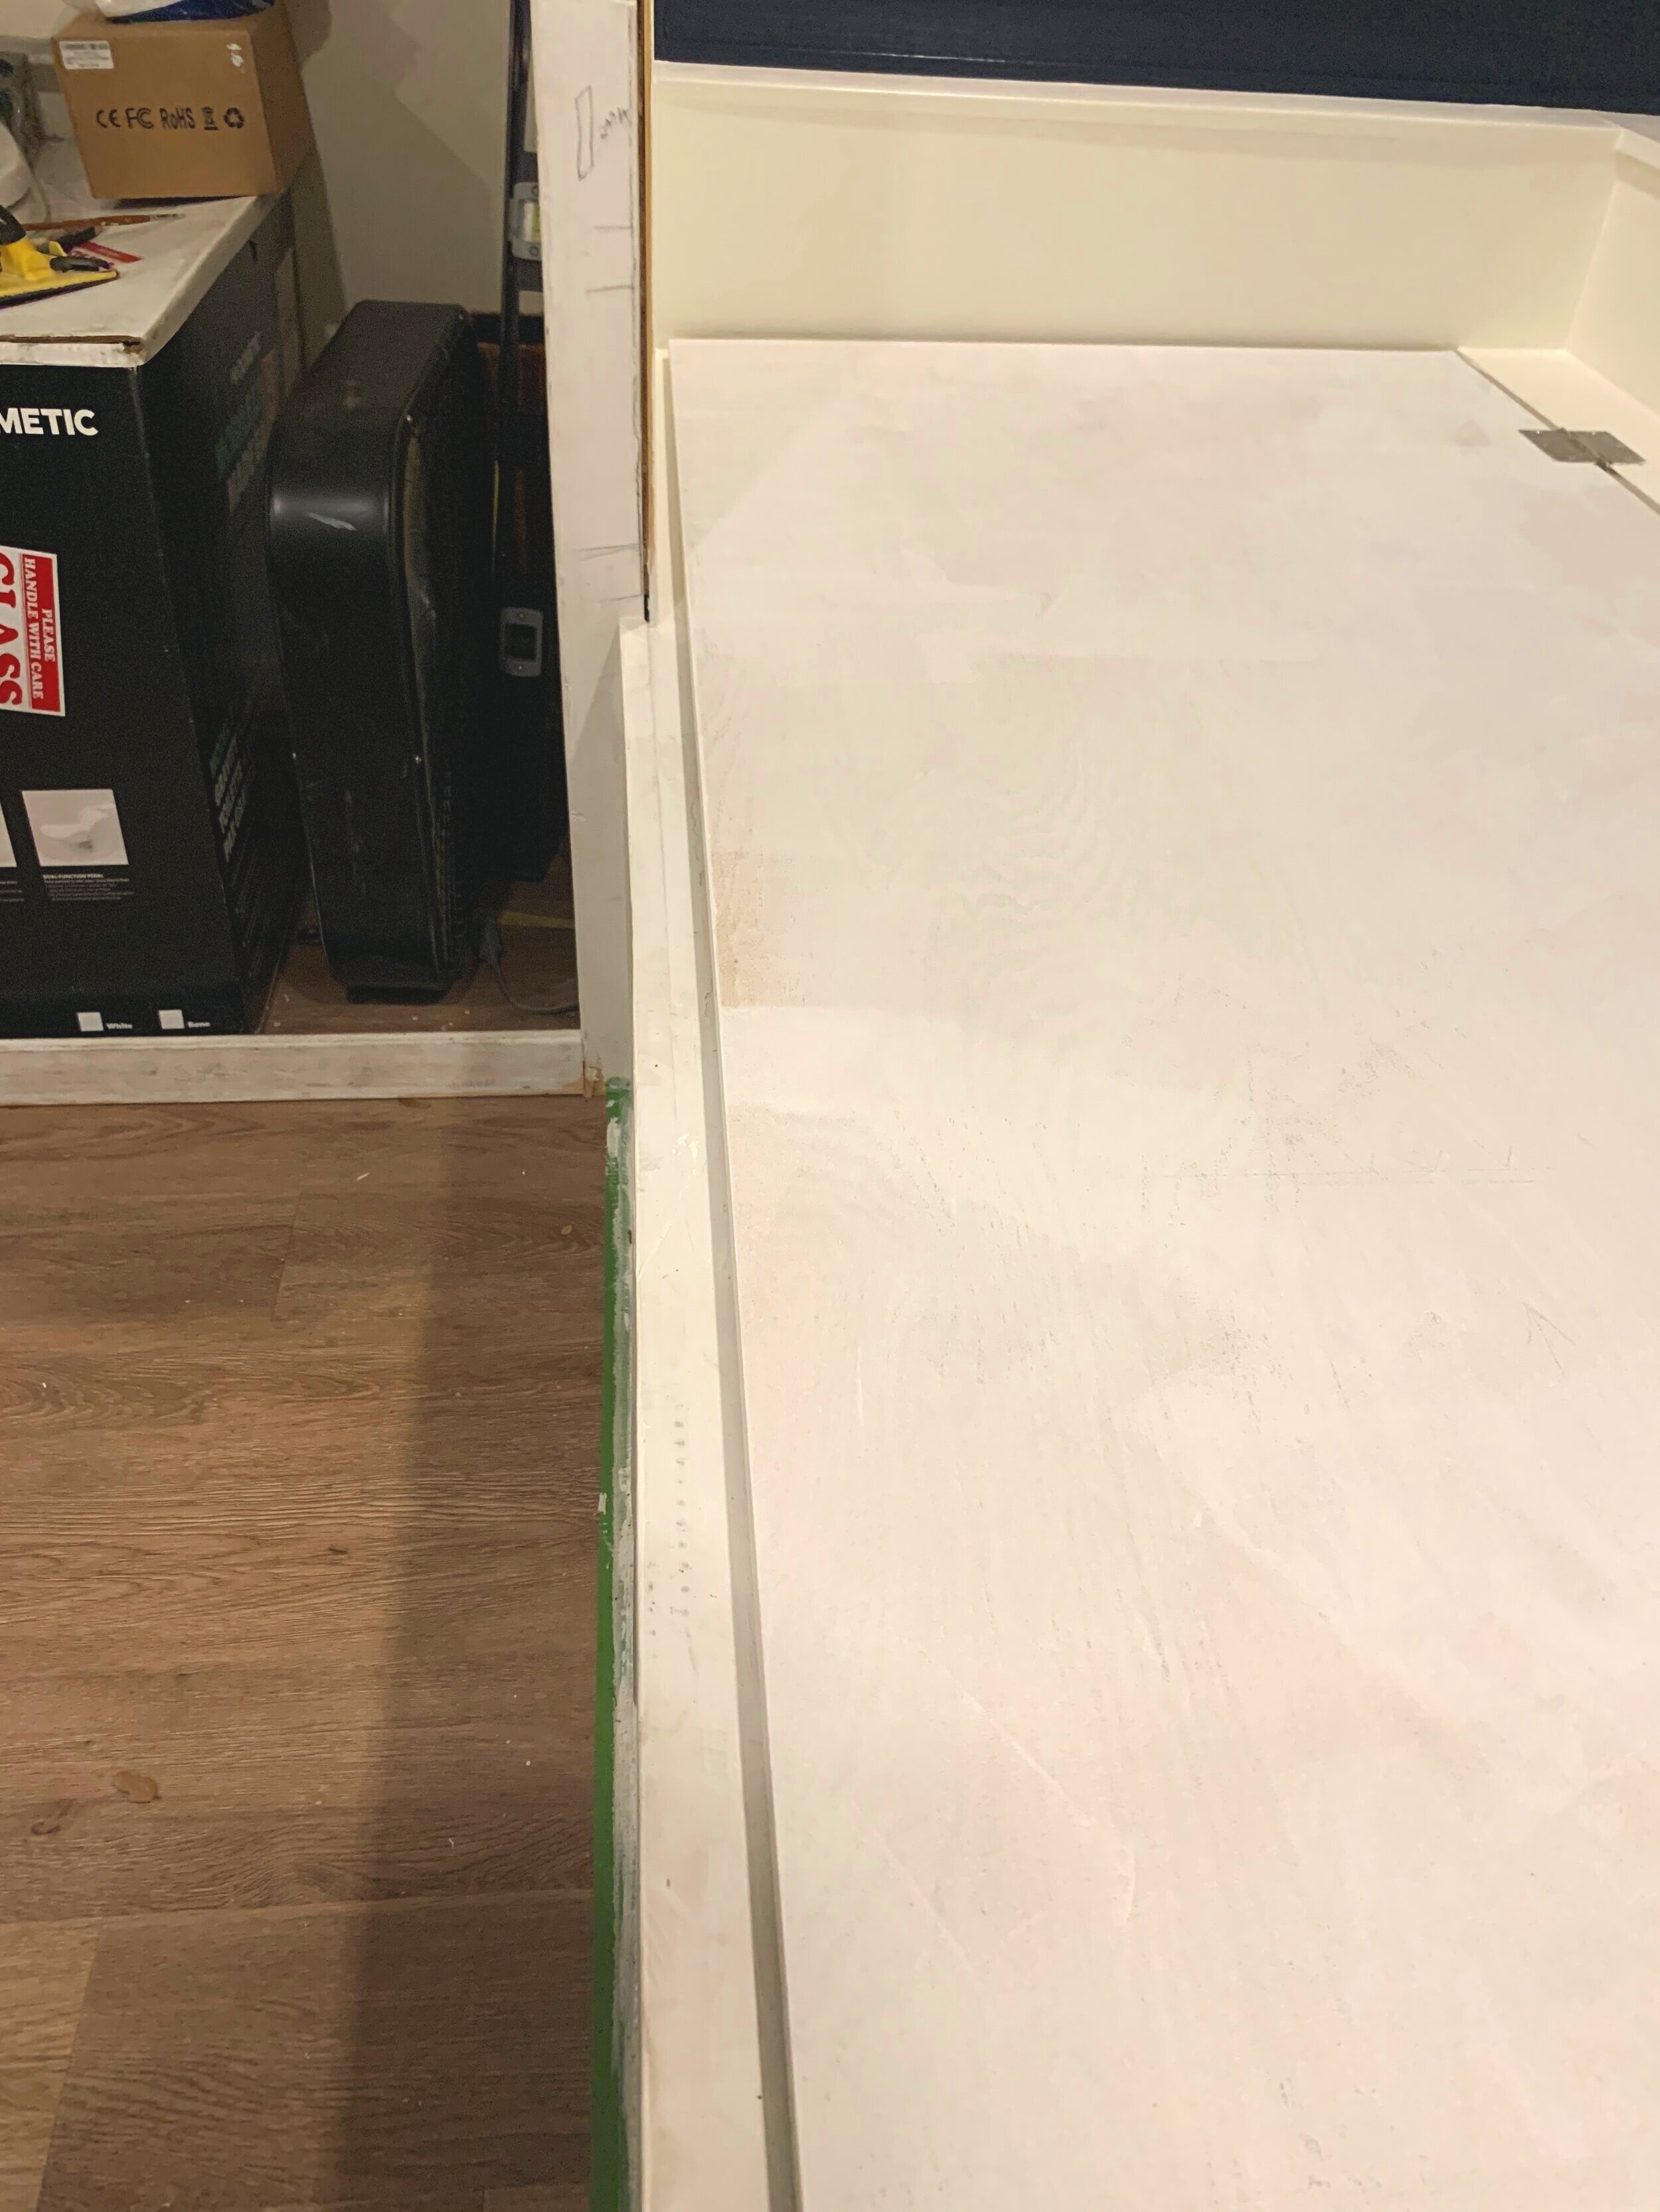
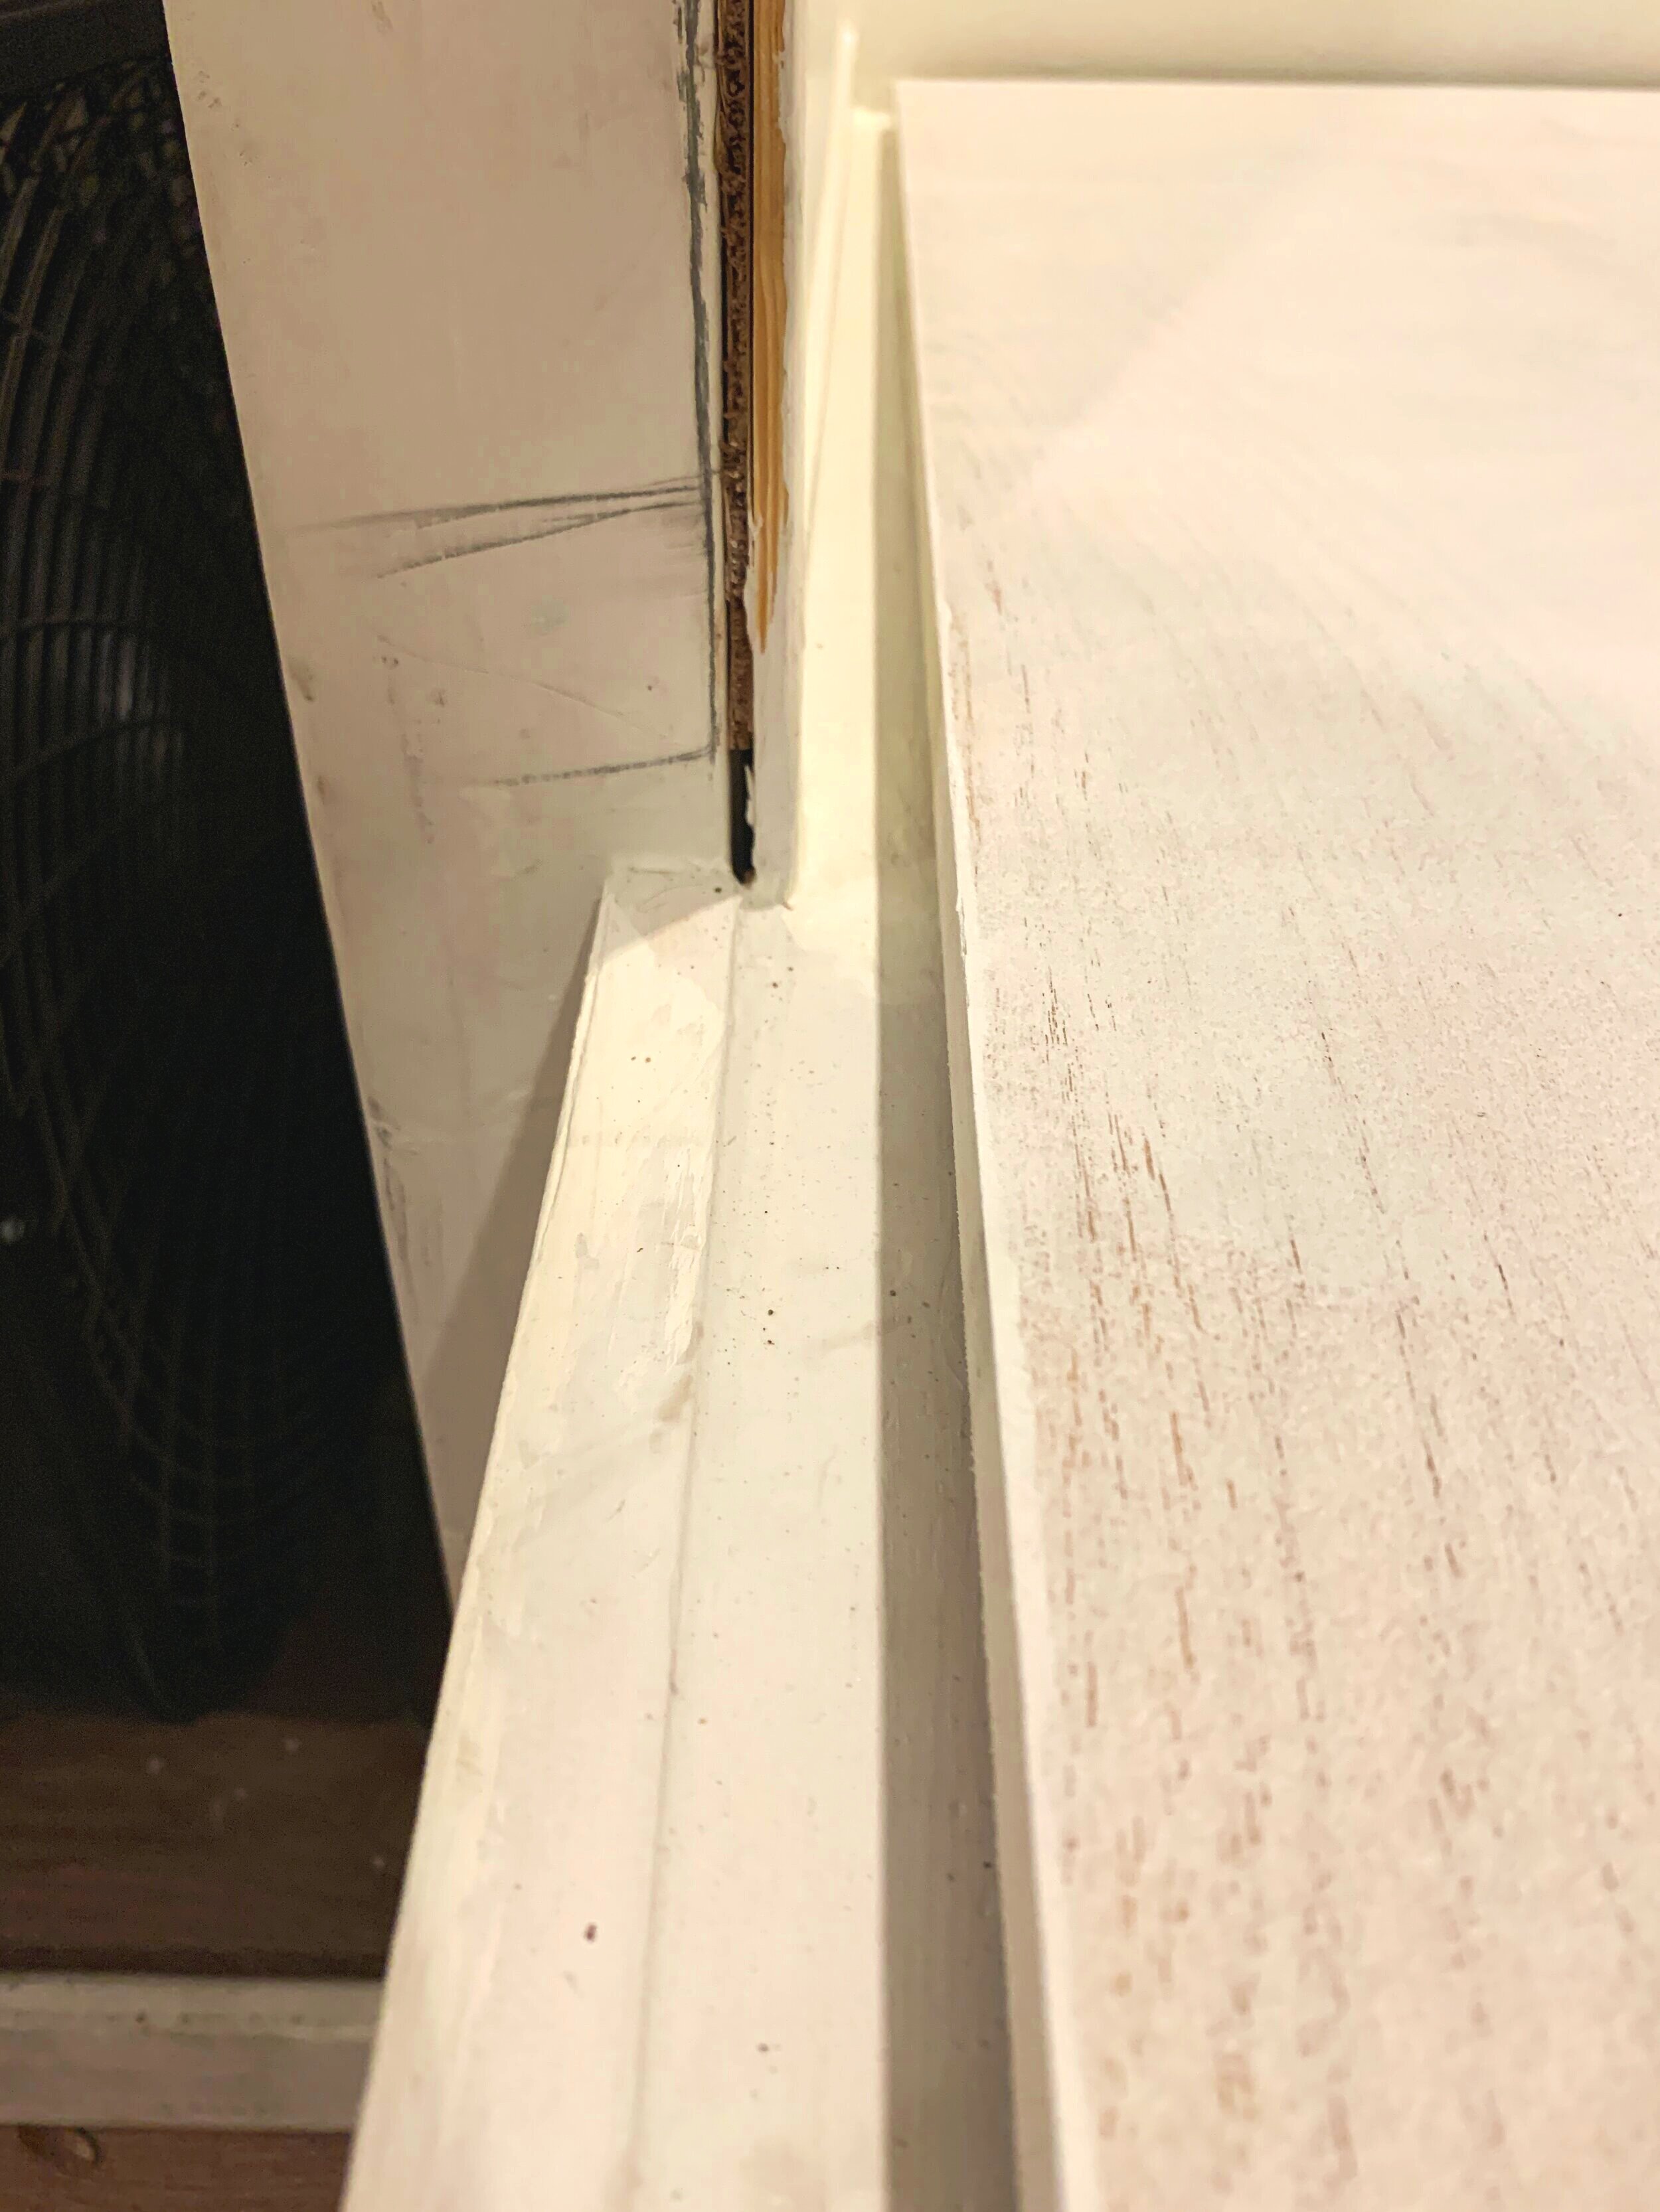
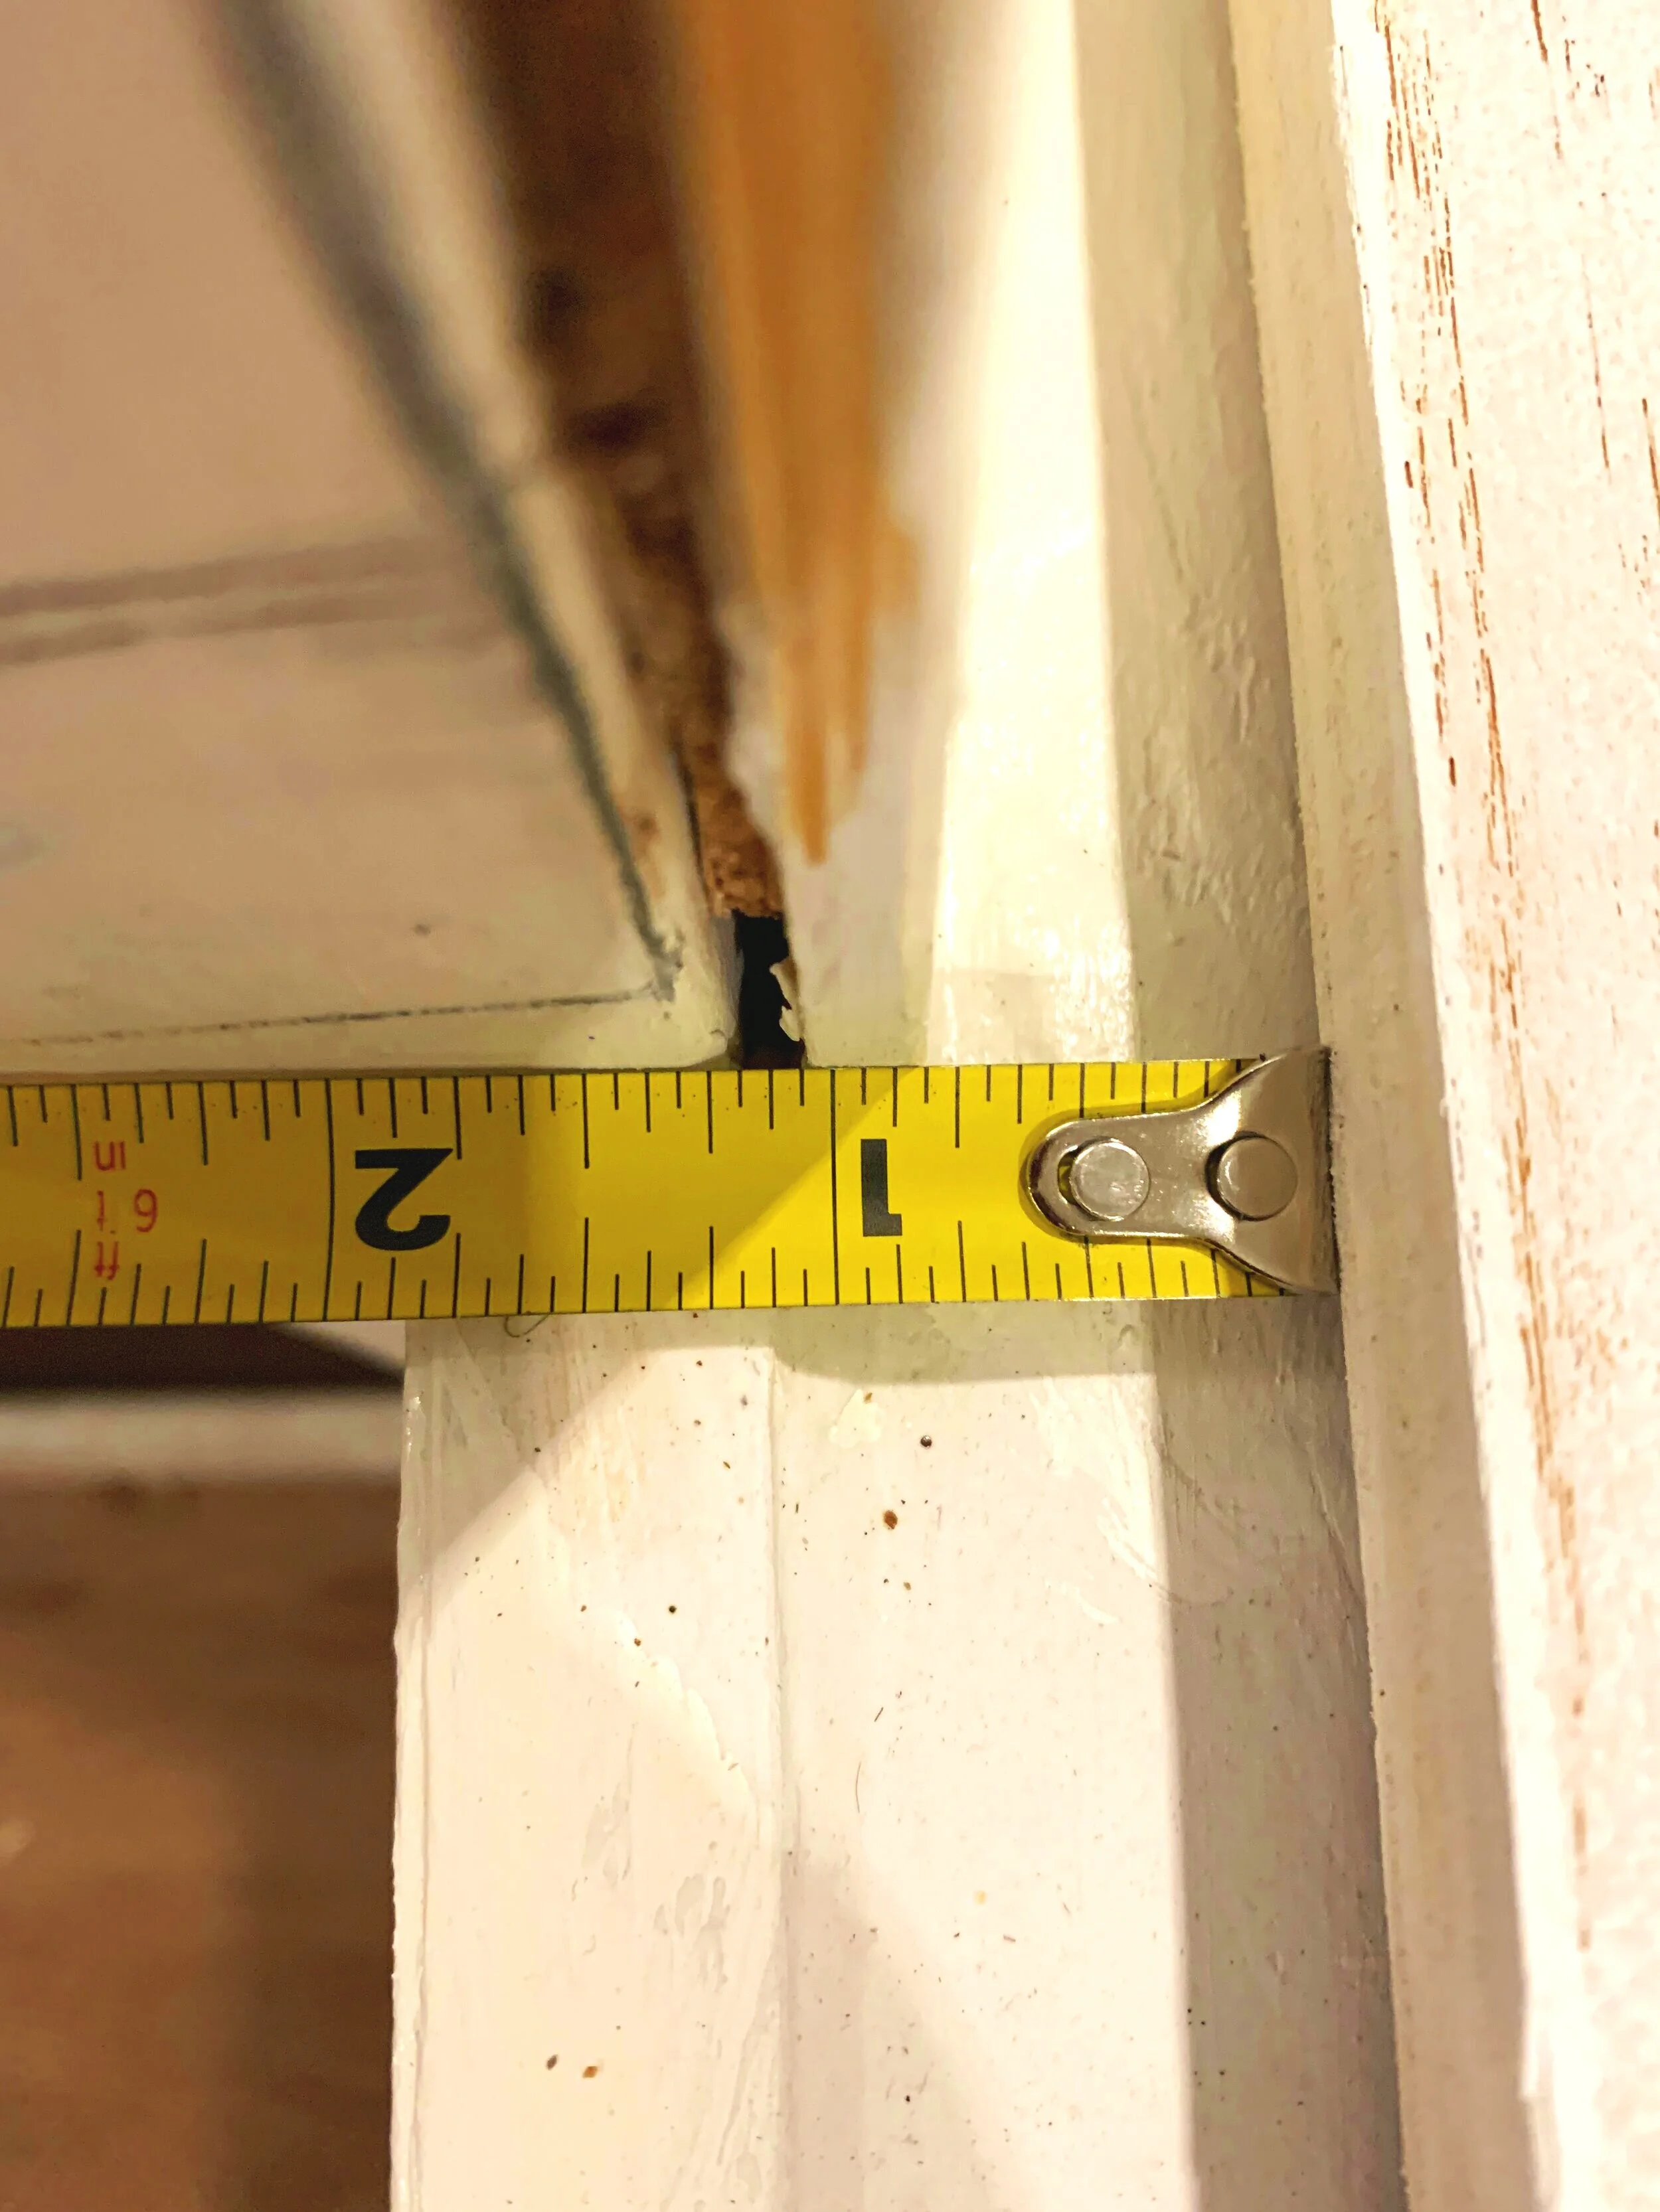
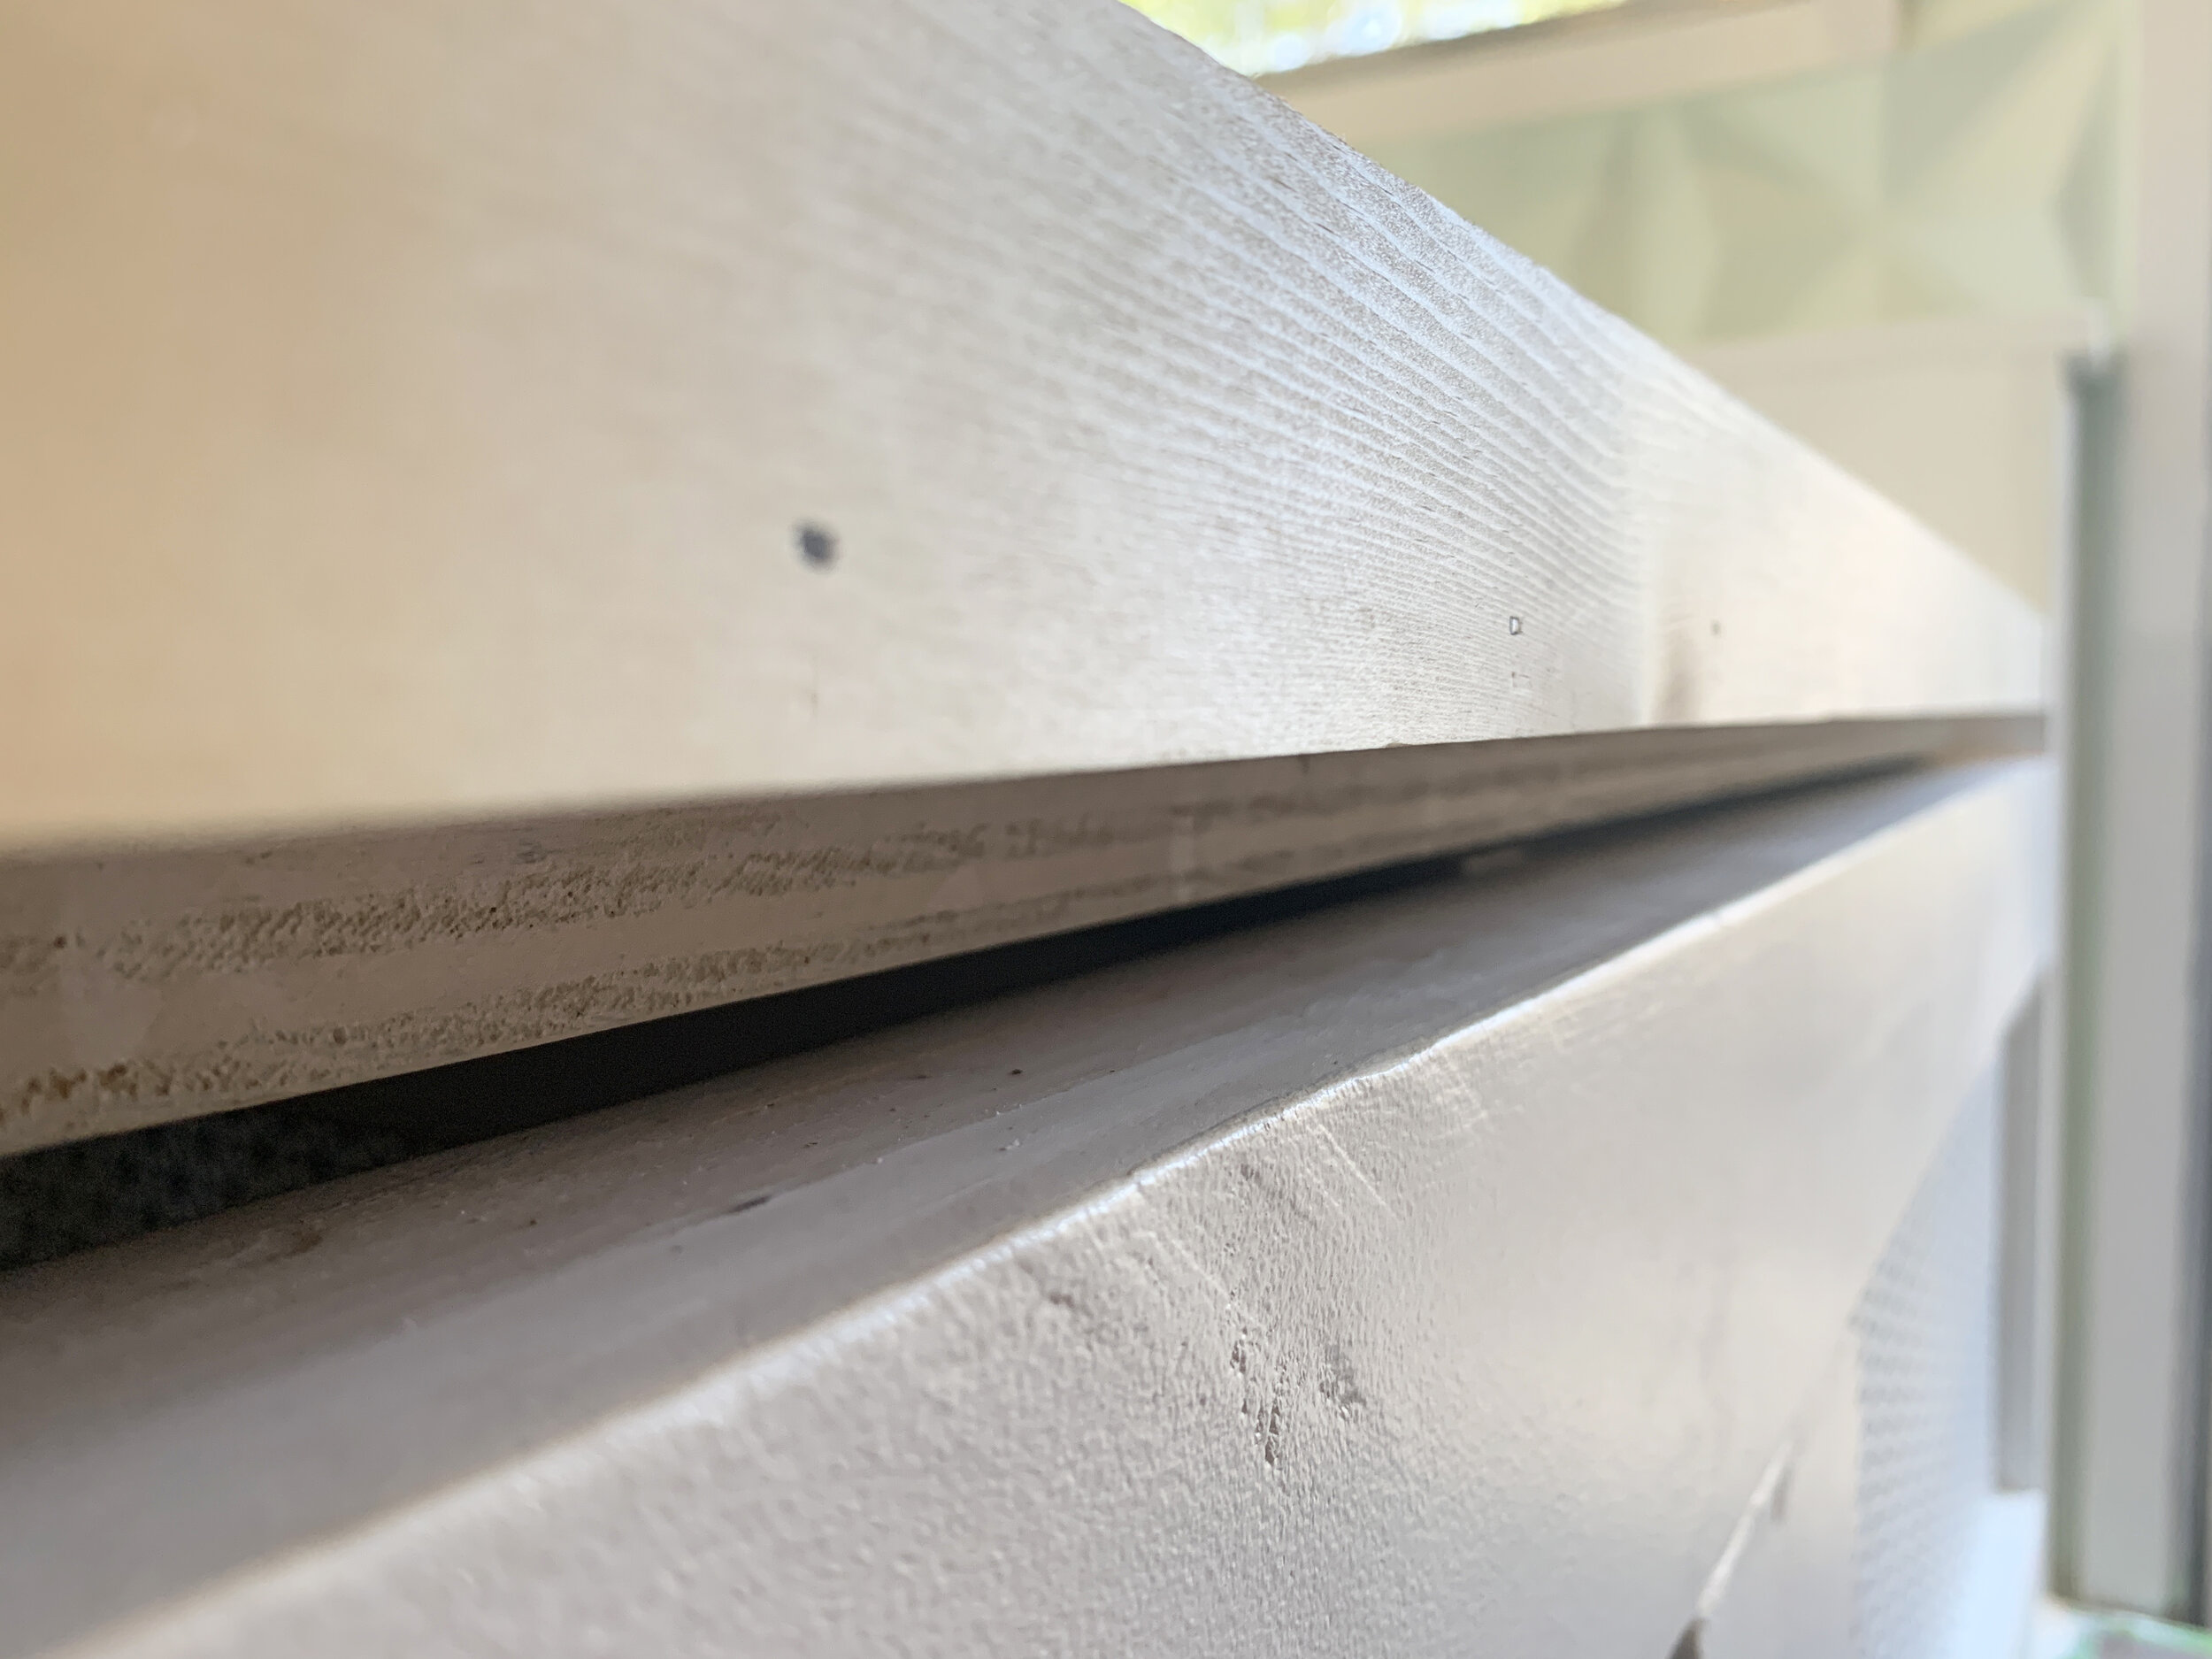
We left the front edge of the plywood lid about a 1-3/4” shy of the bed base to account for the handle, which put the plywood lid about 3/4” from the right shower wall.

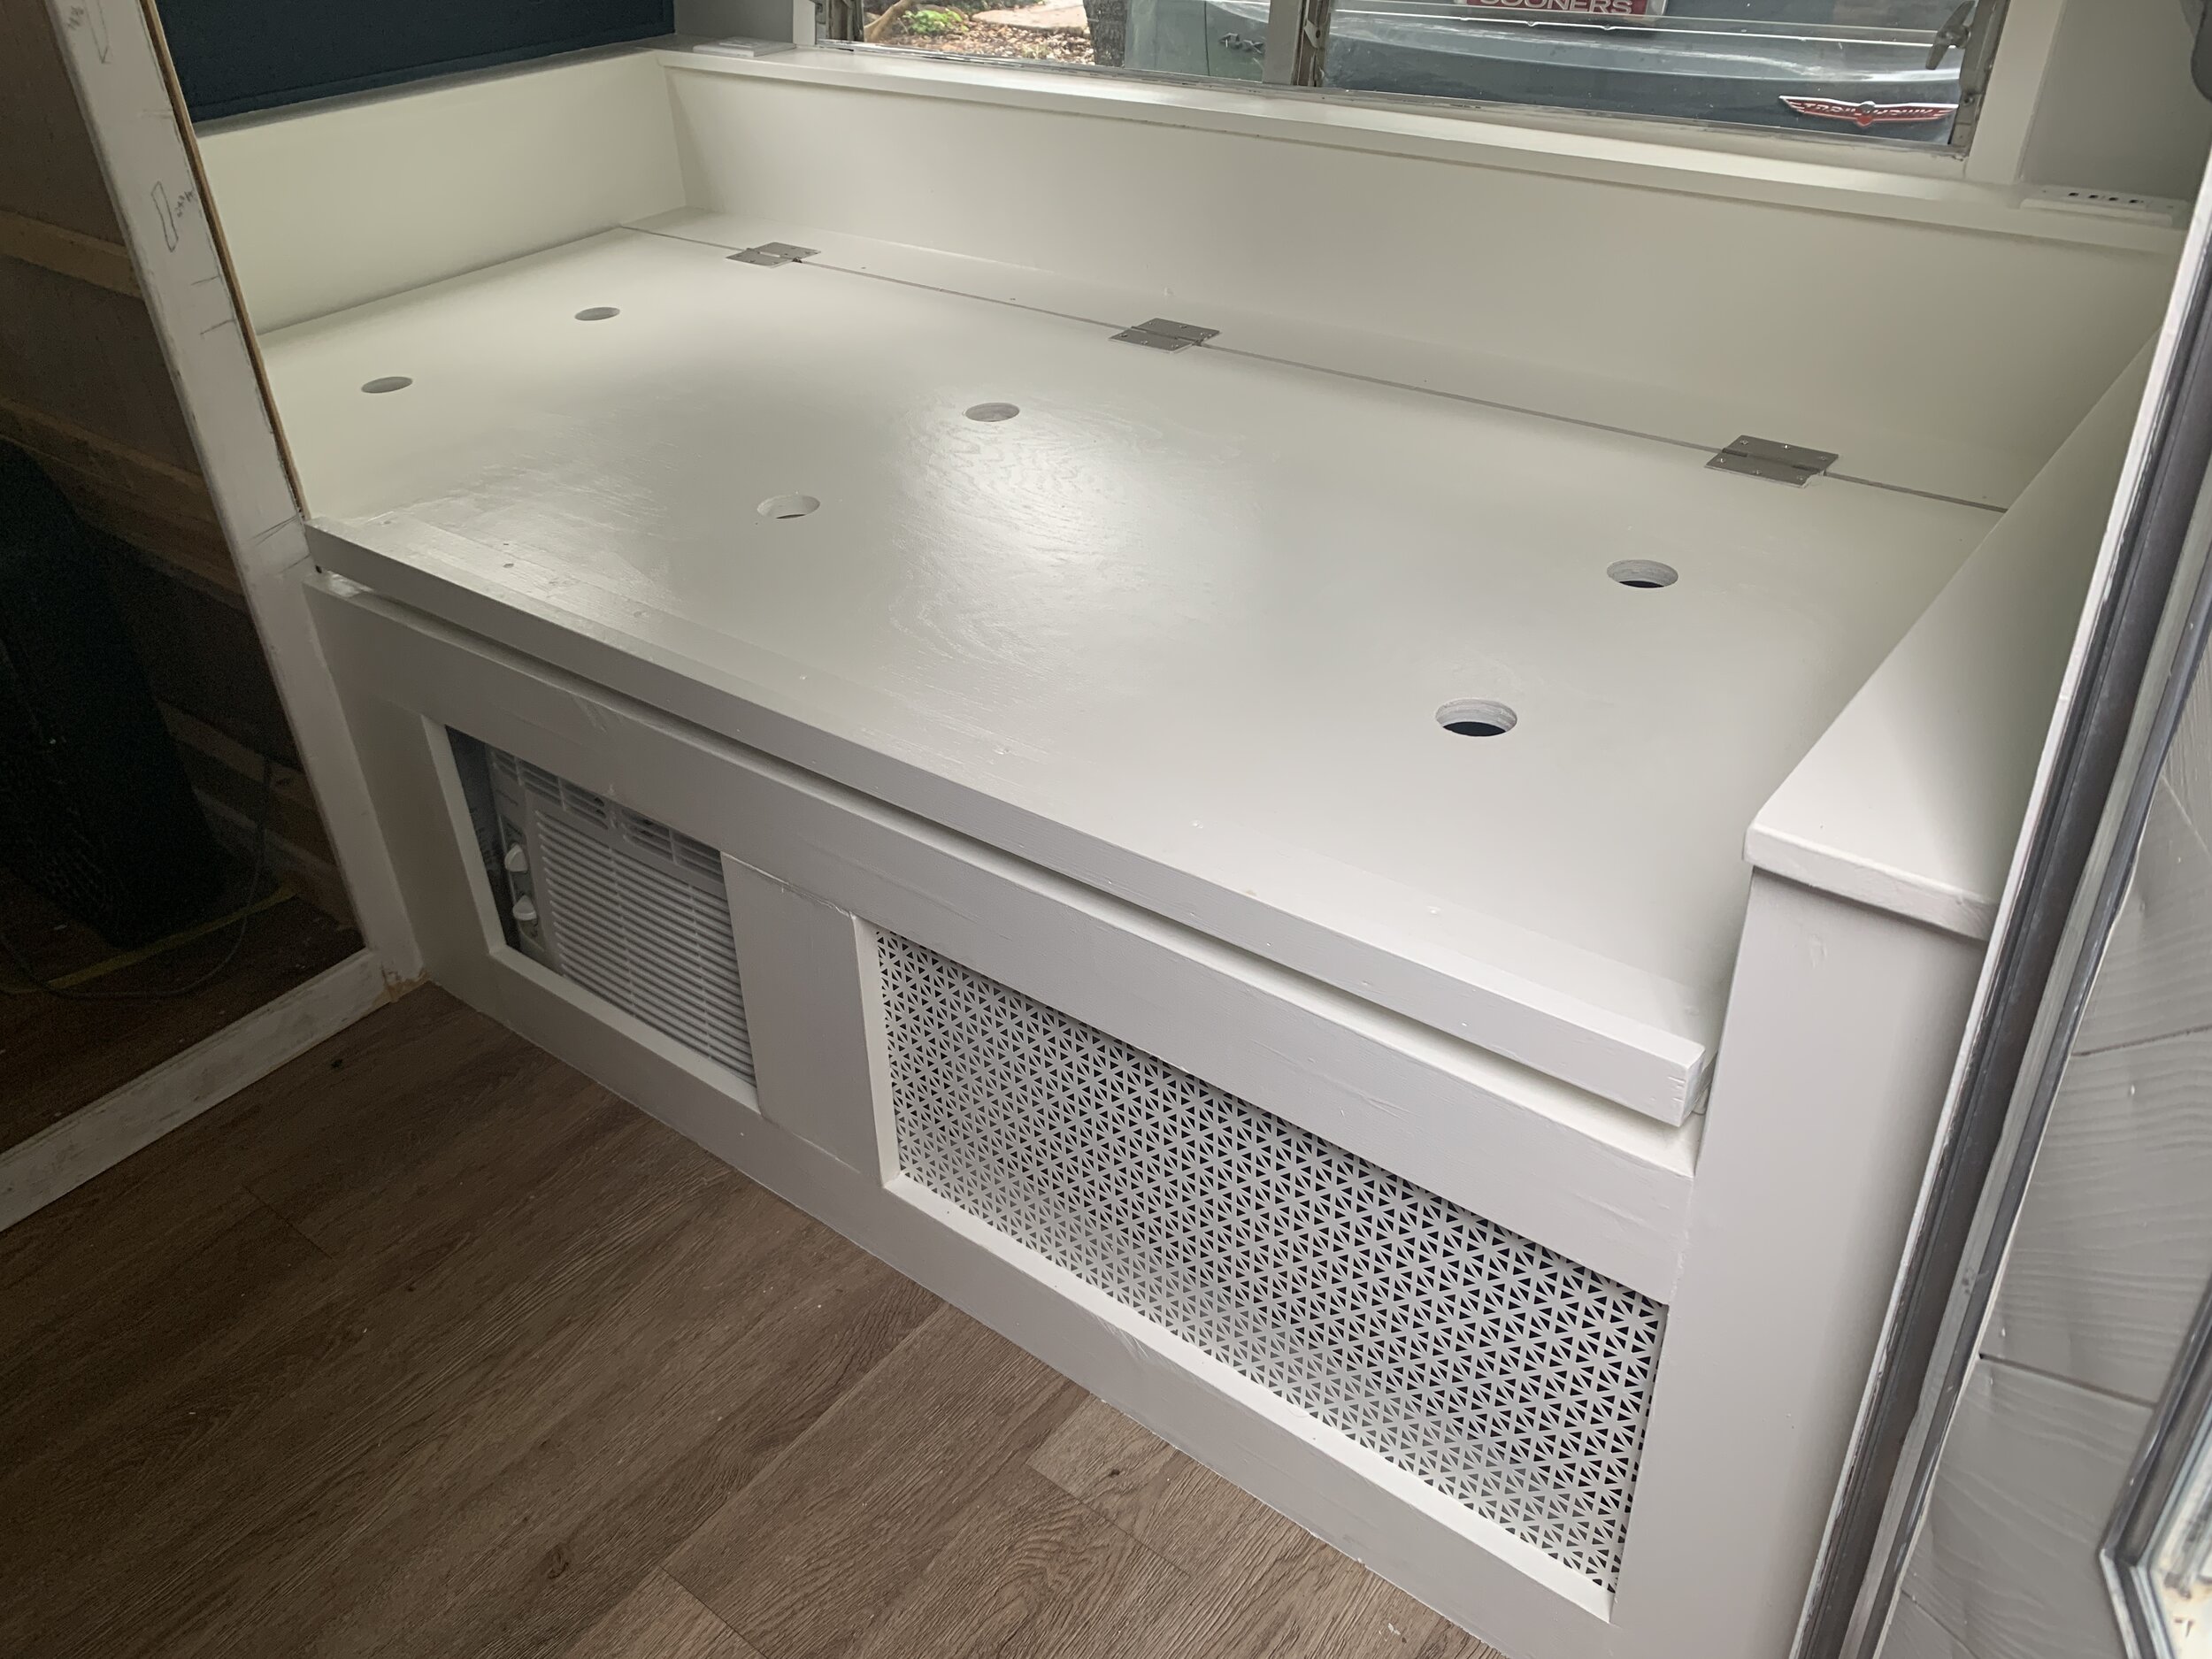
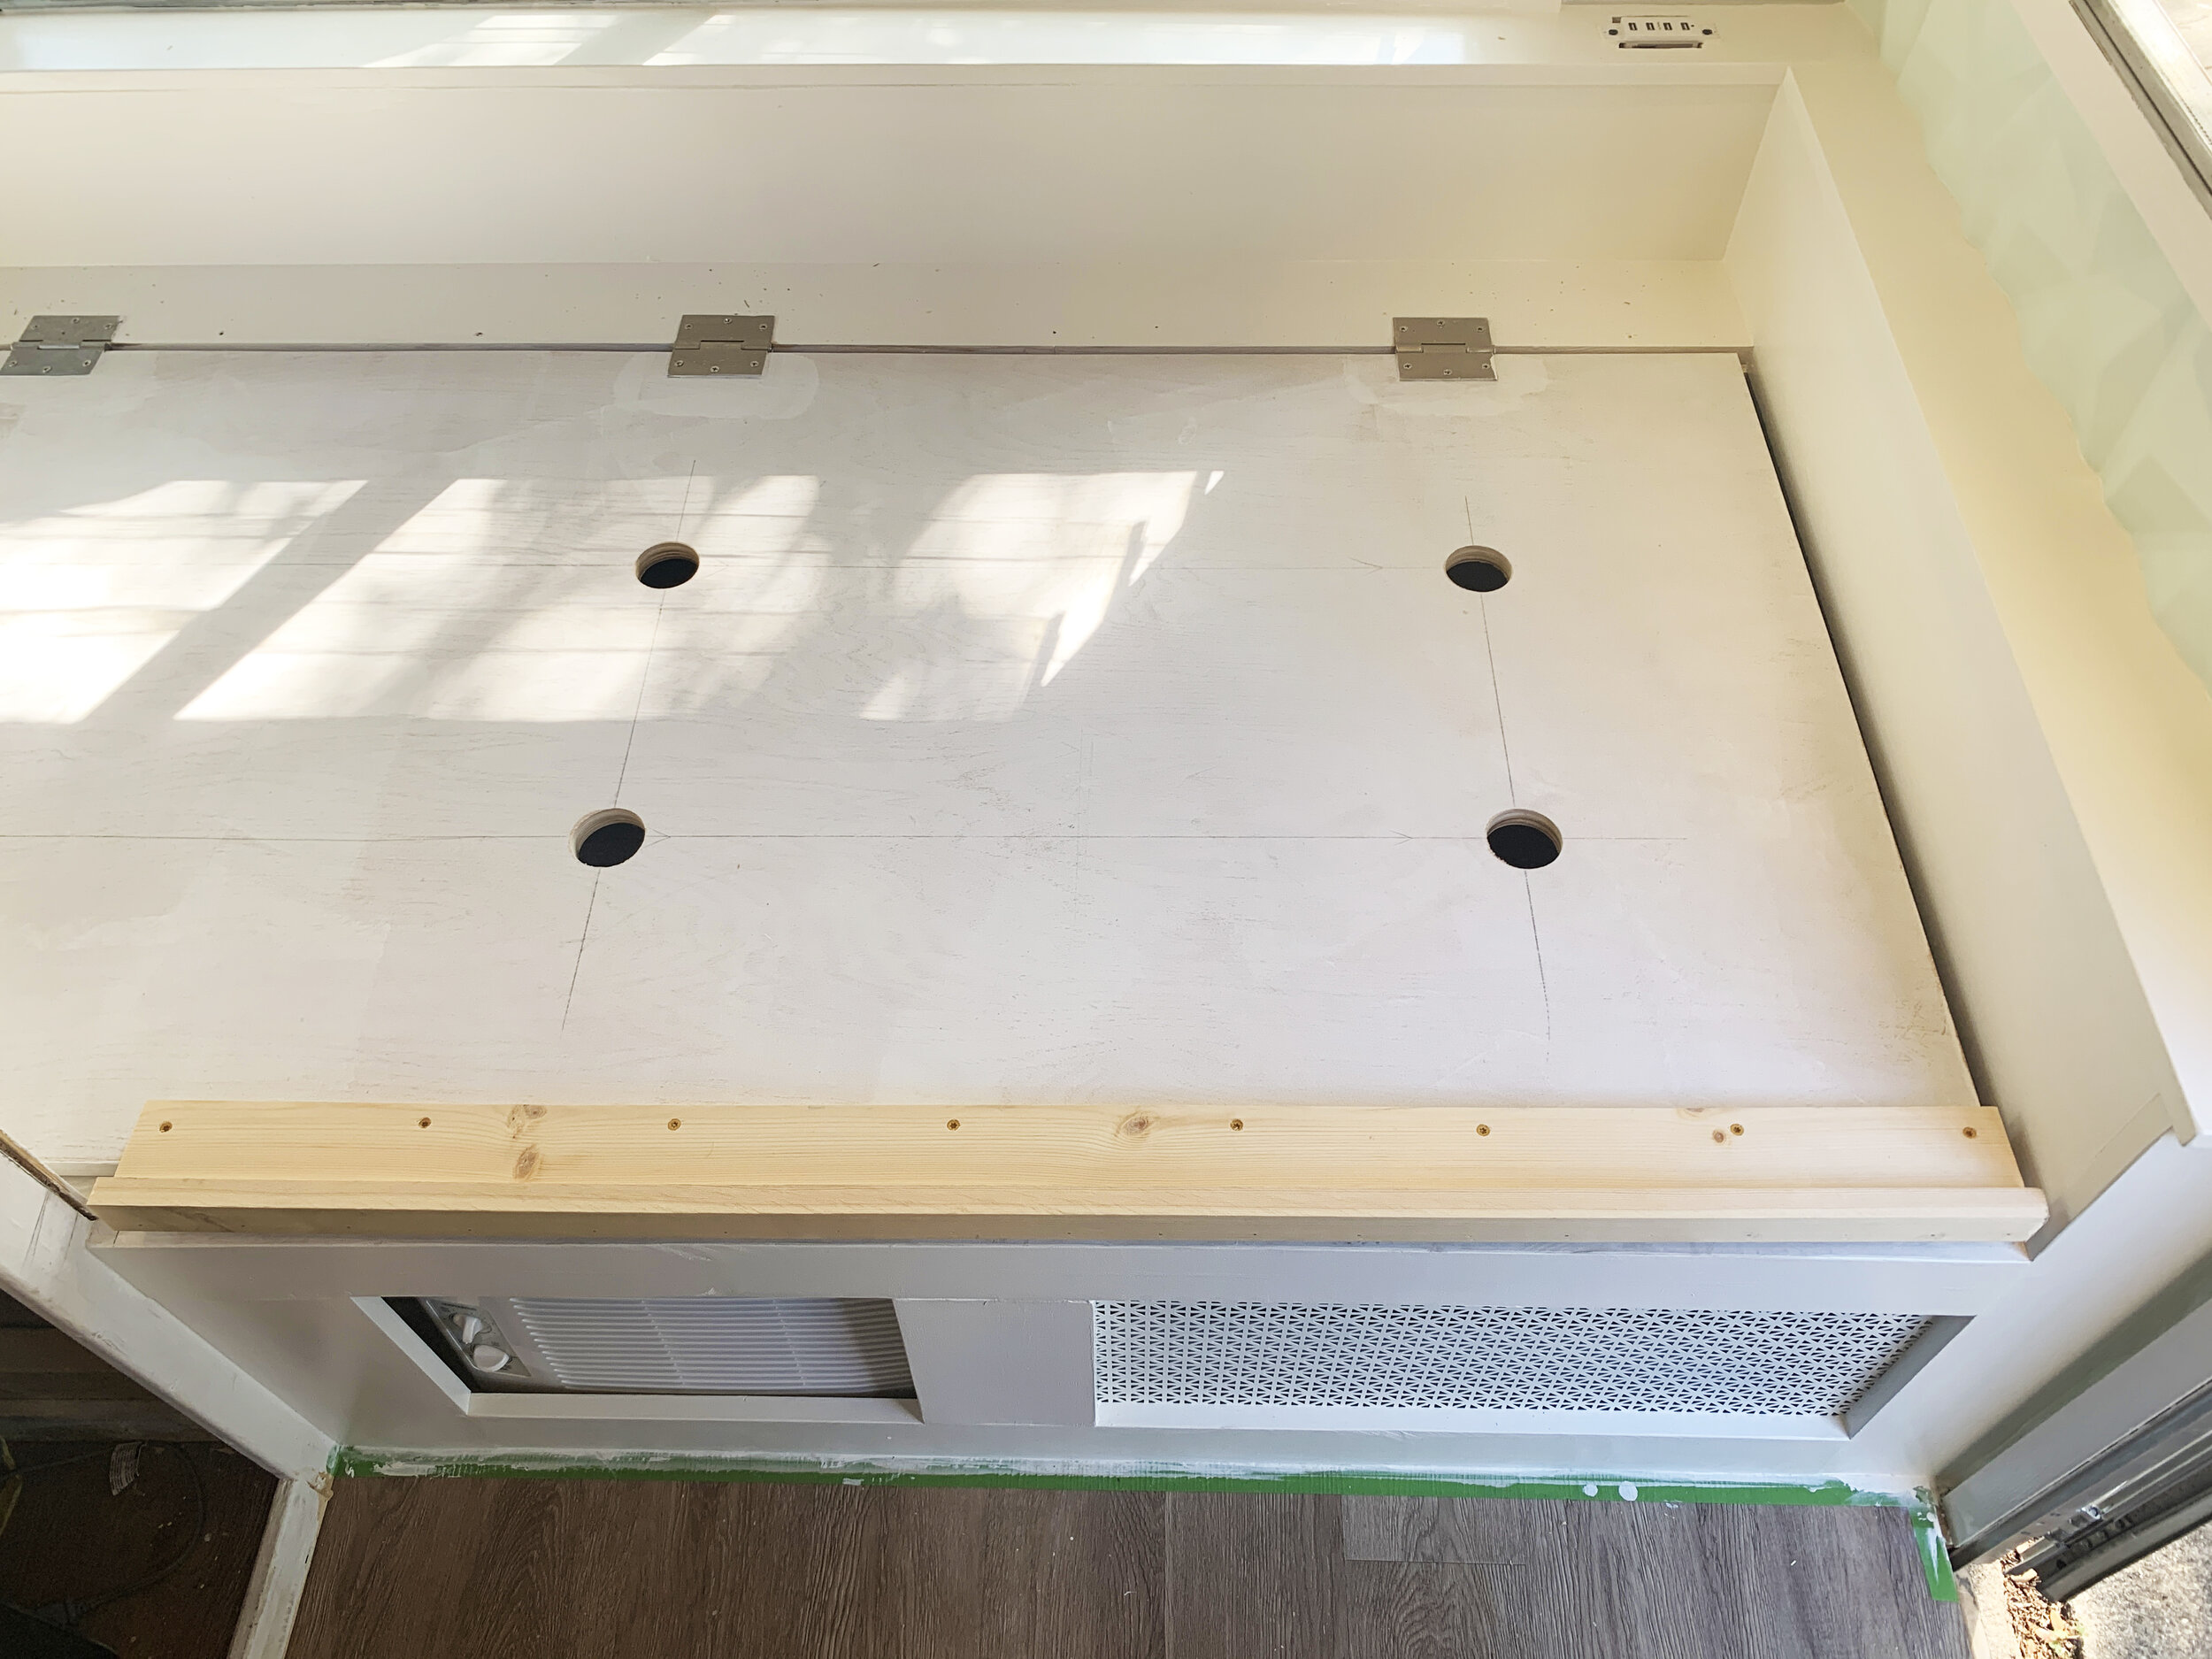
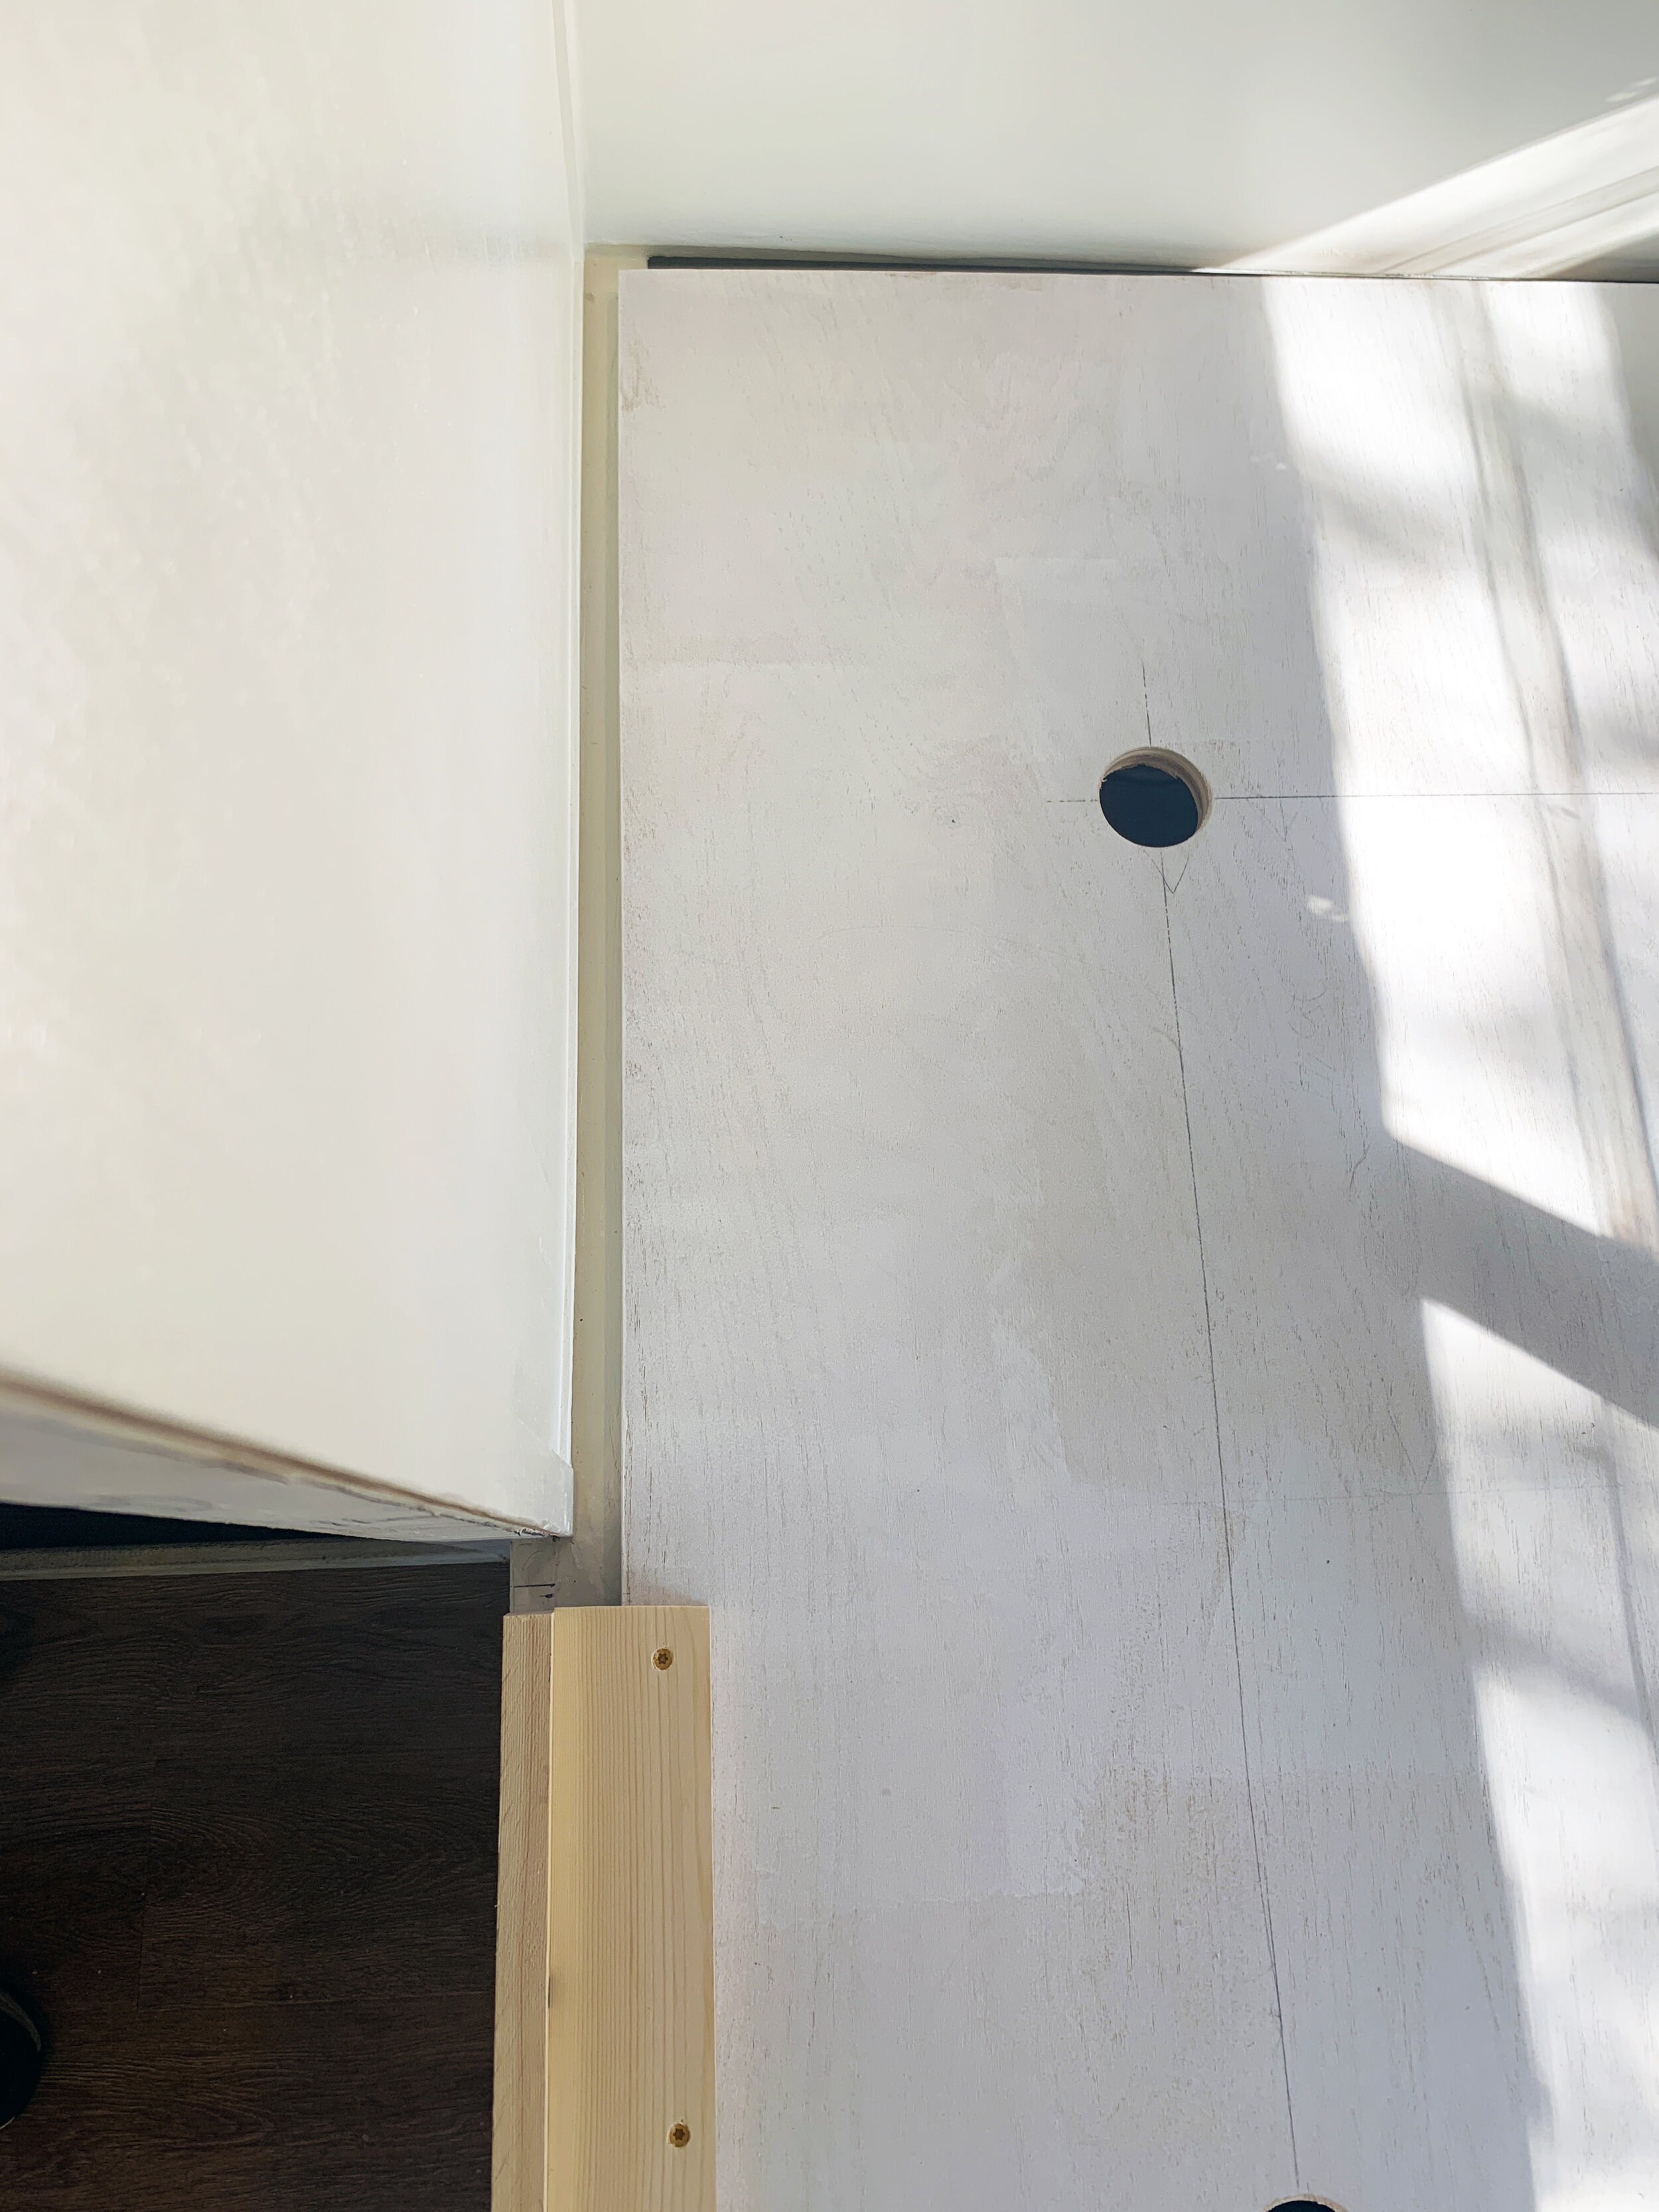
The holes
It’s important in a solid lid like this (vs. one made of slats) to drill holes to allow for airflow. No airflow holes in the plywood means it could hold moisture/condensation from weather changes, body heat, etc. and cause mold to grow between it and the mattress.
We picked up this handy mold-prevention tip from a fellow camper renovator on Instagram! (Apologies I cannot find our exact source!!)
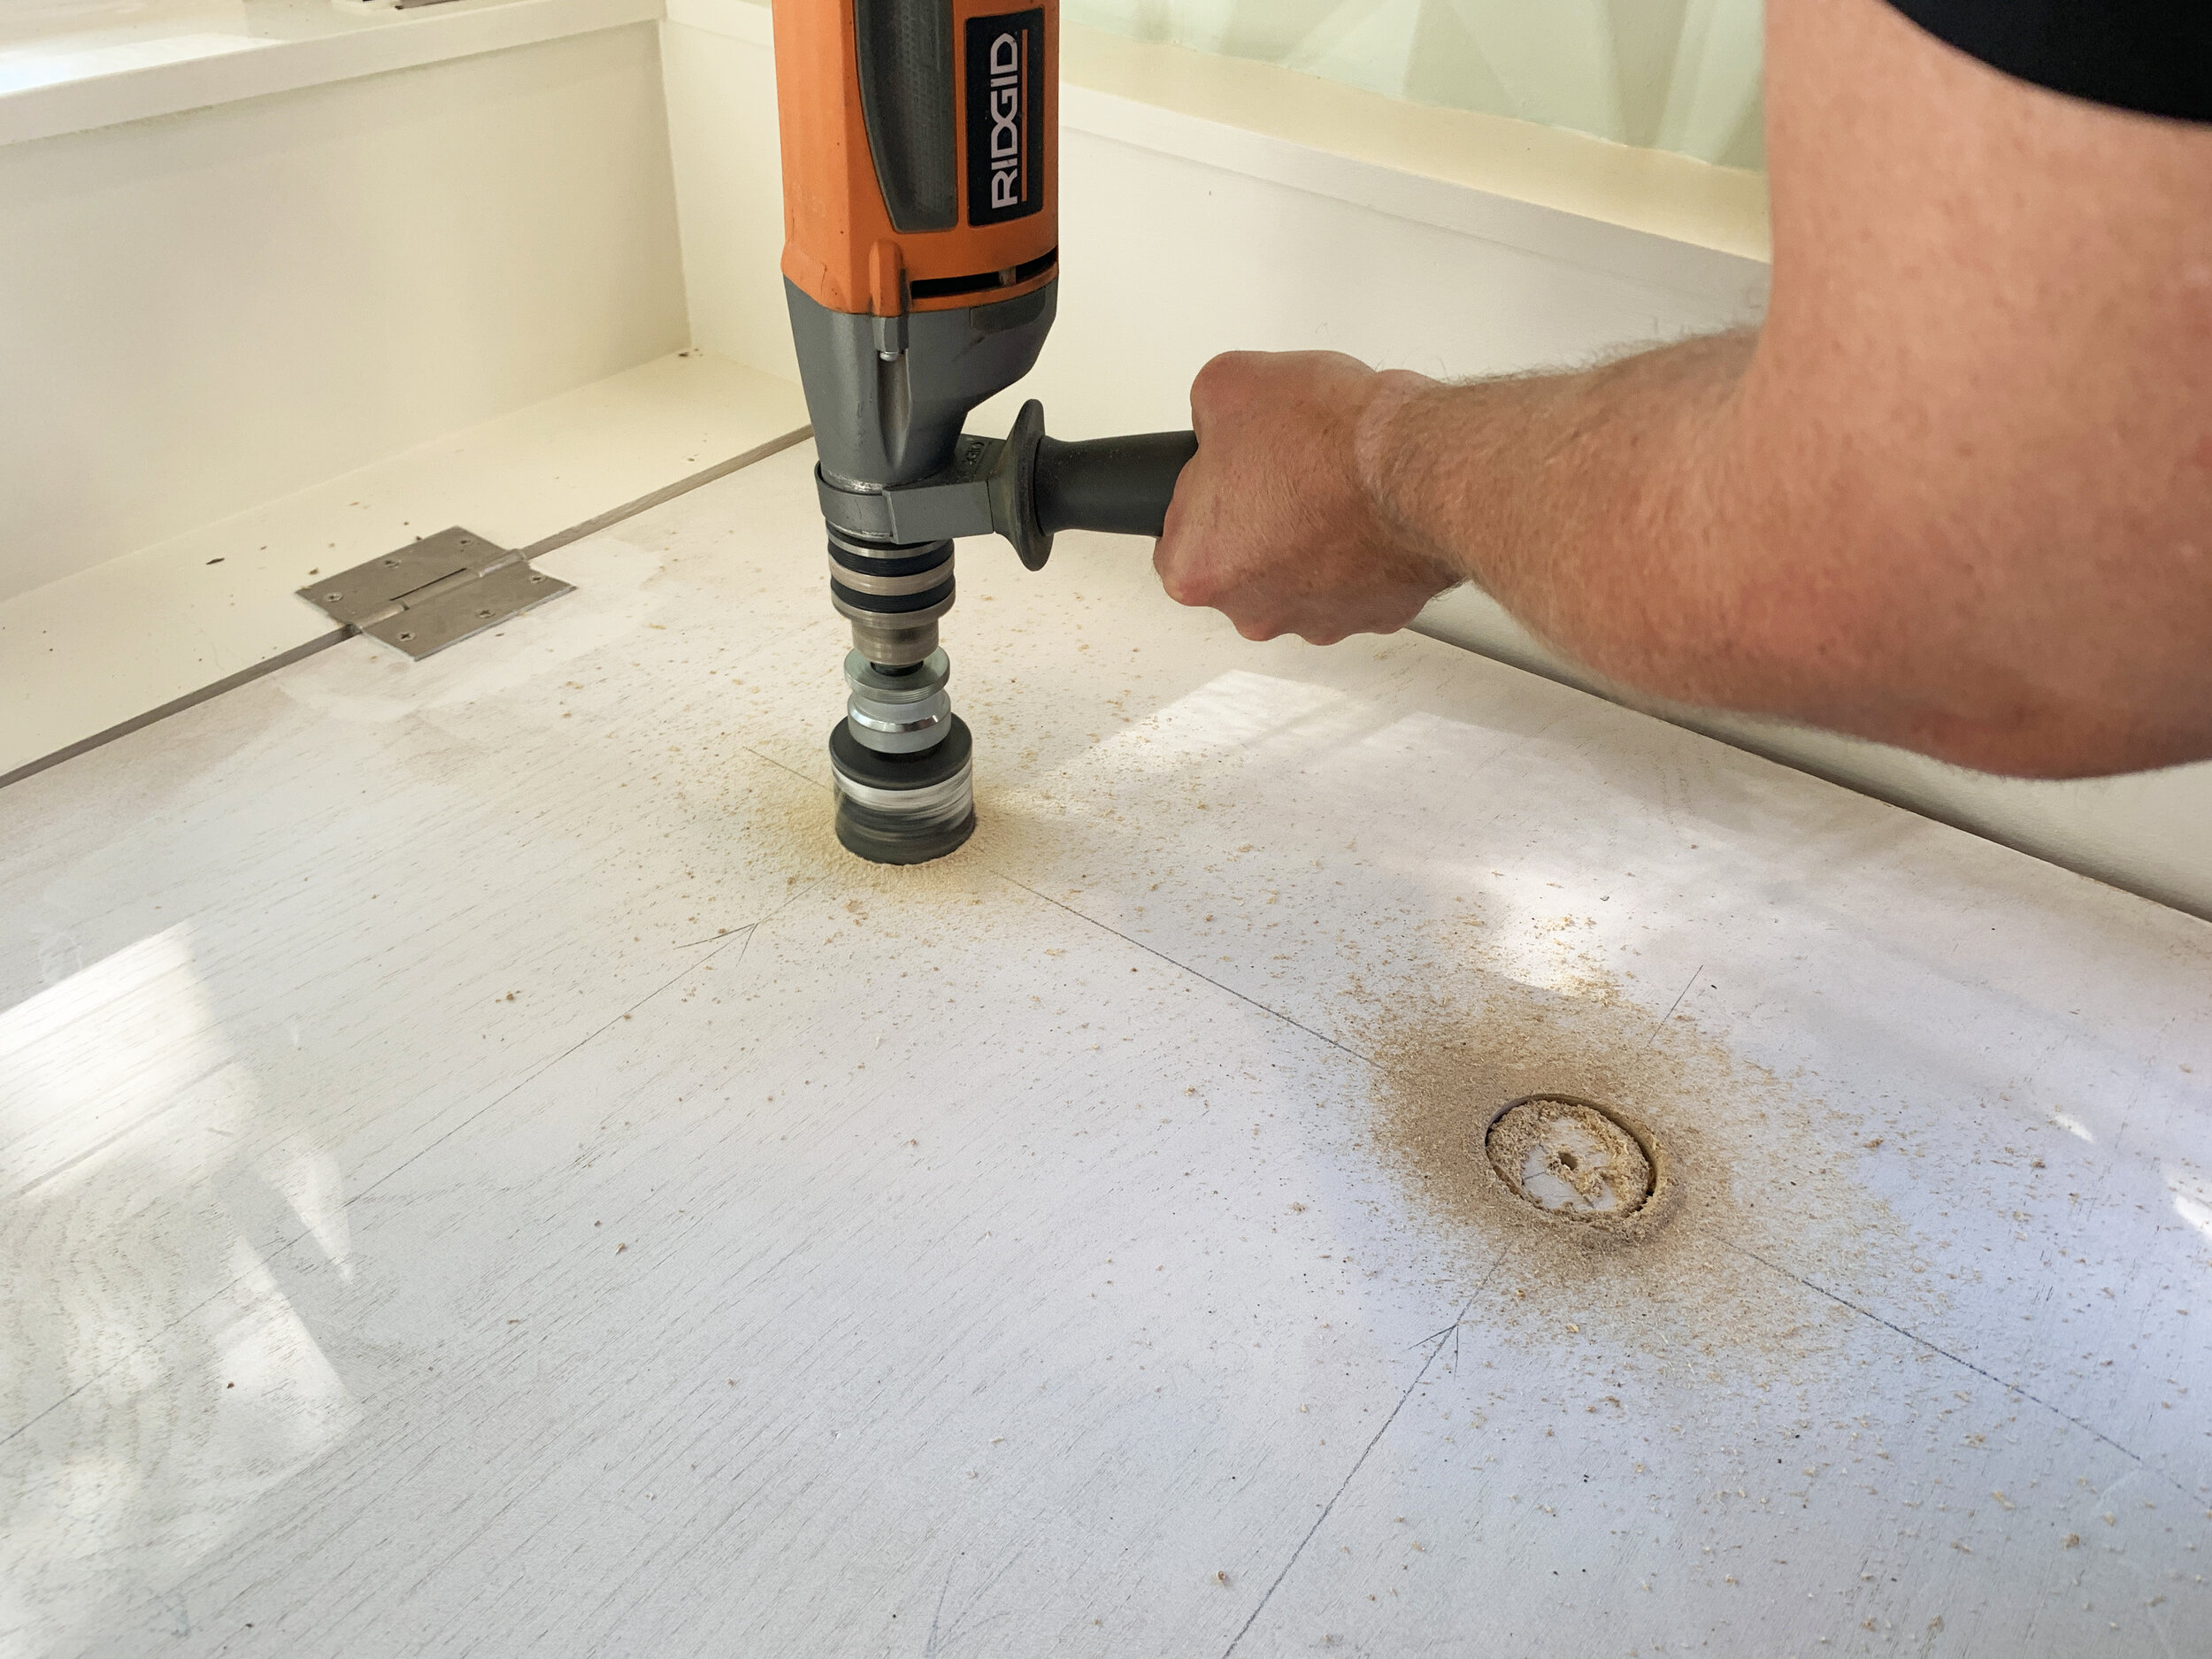
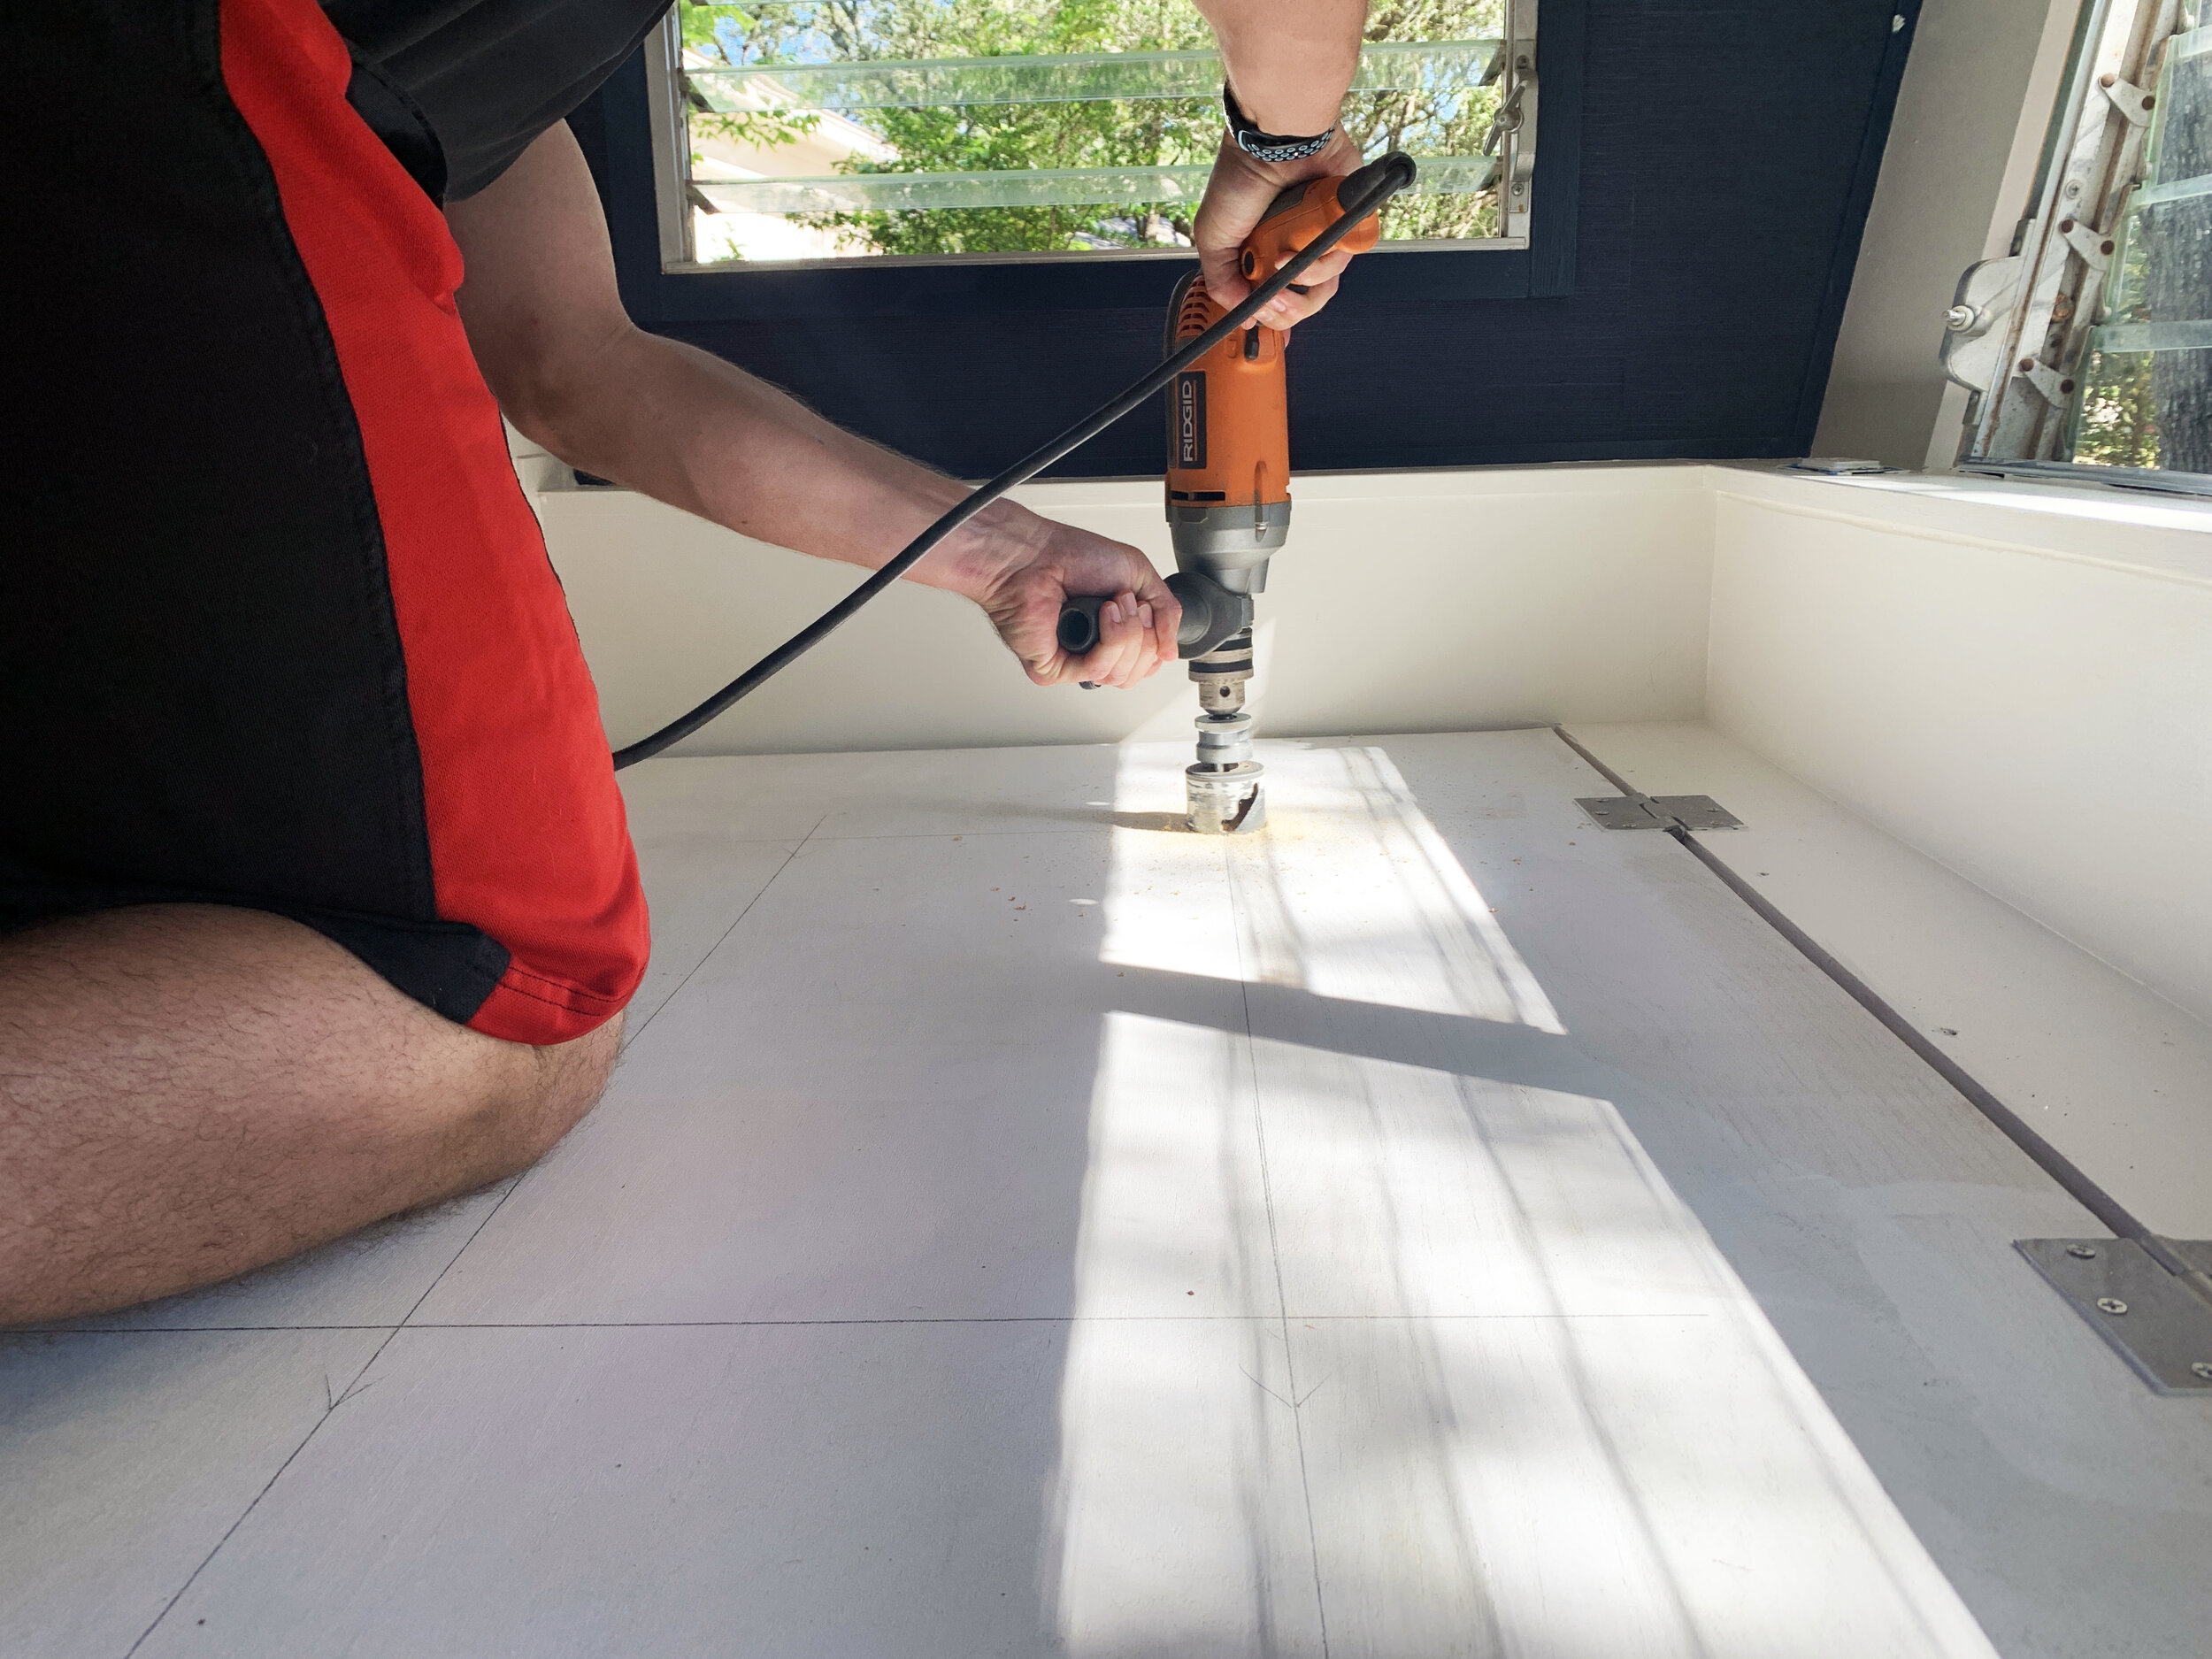
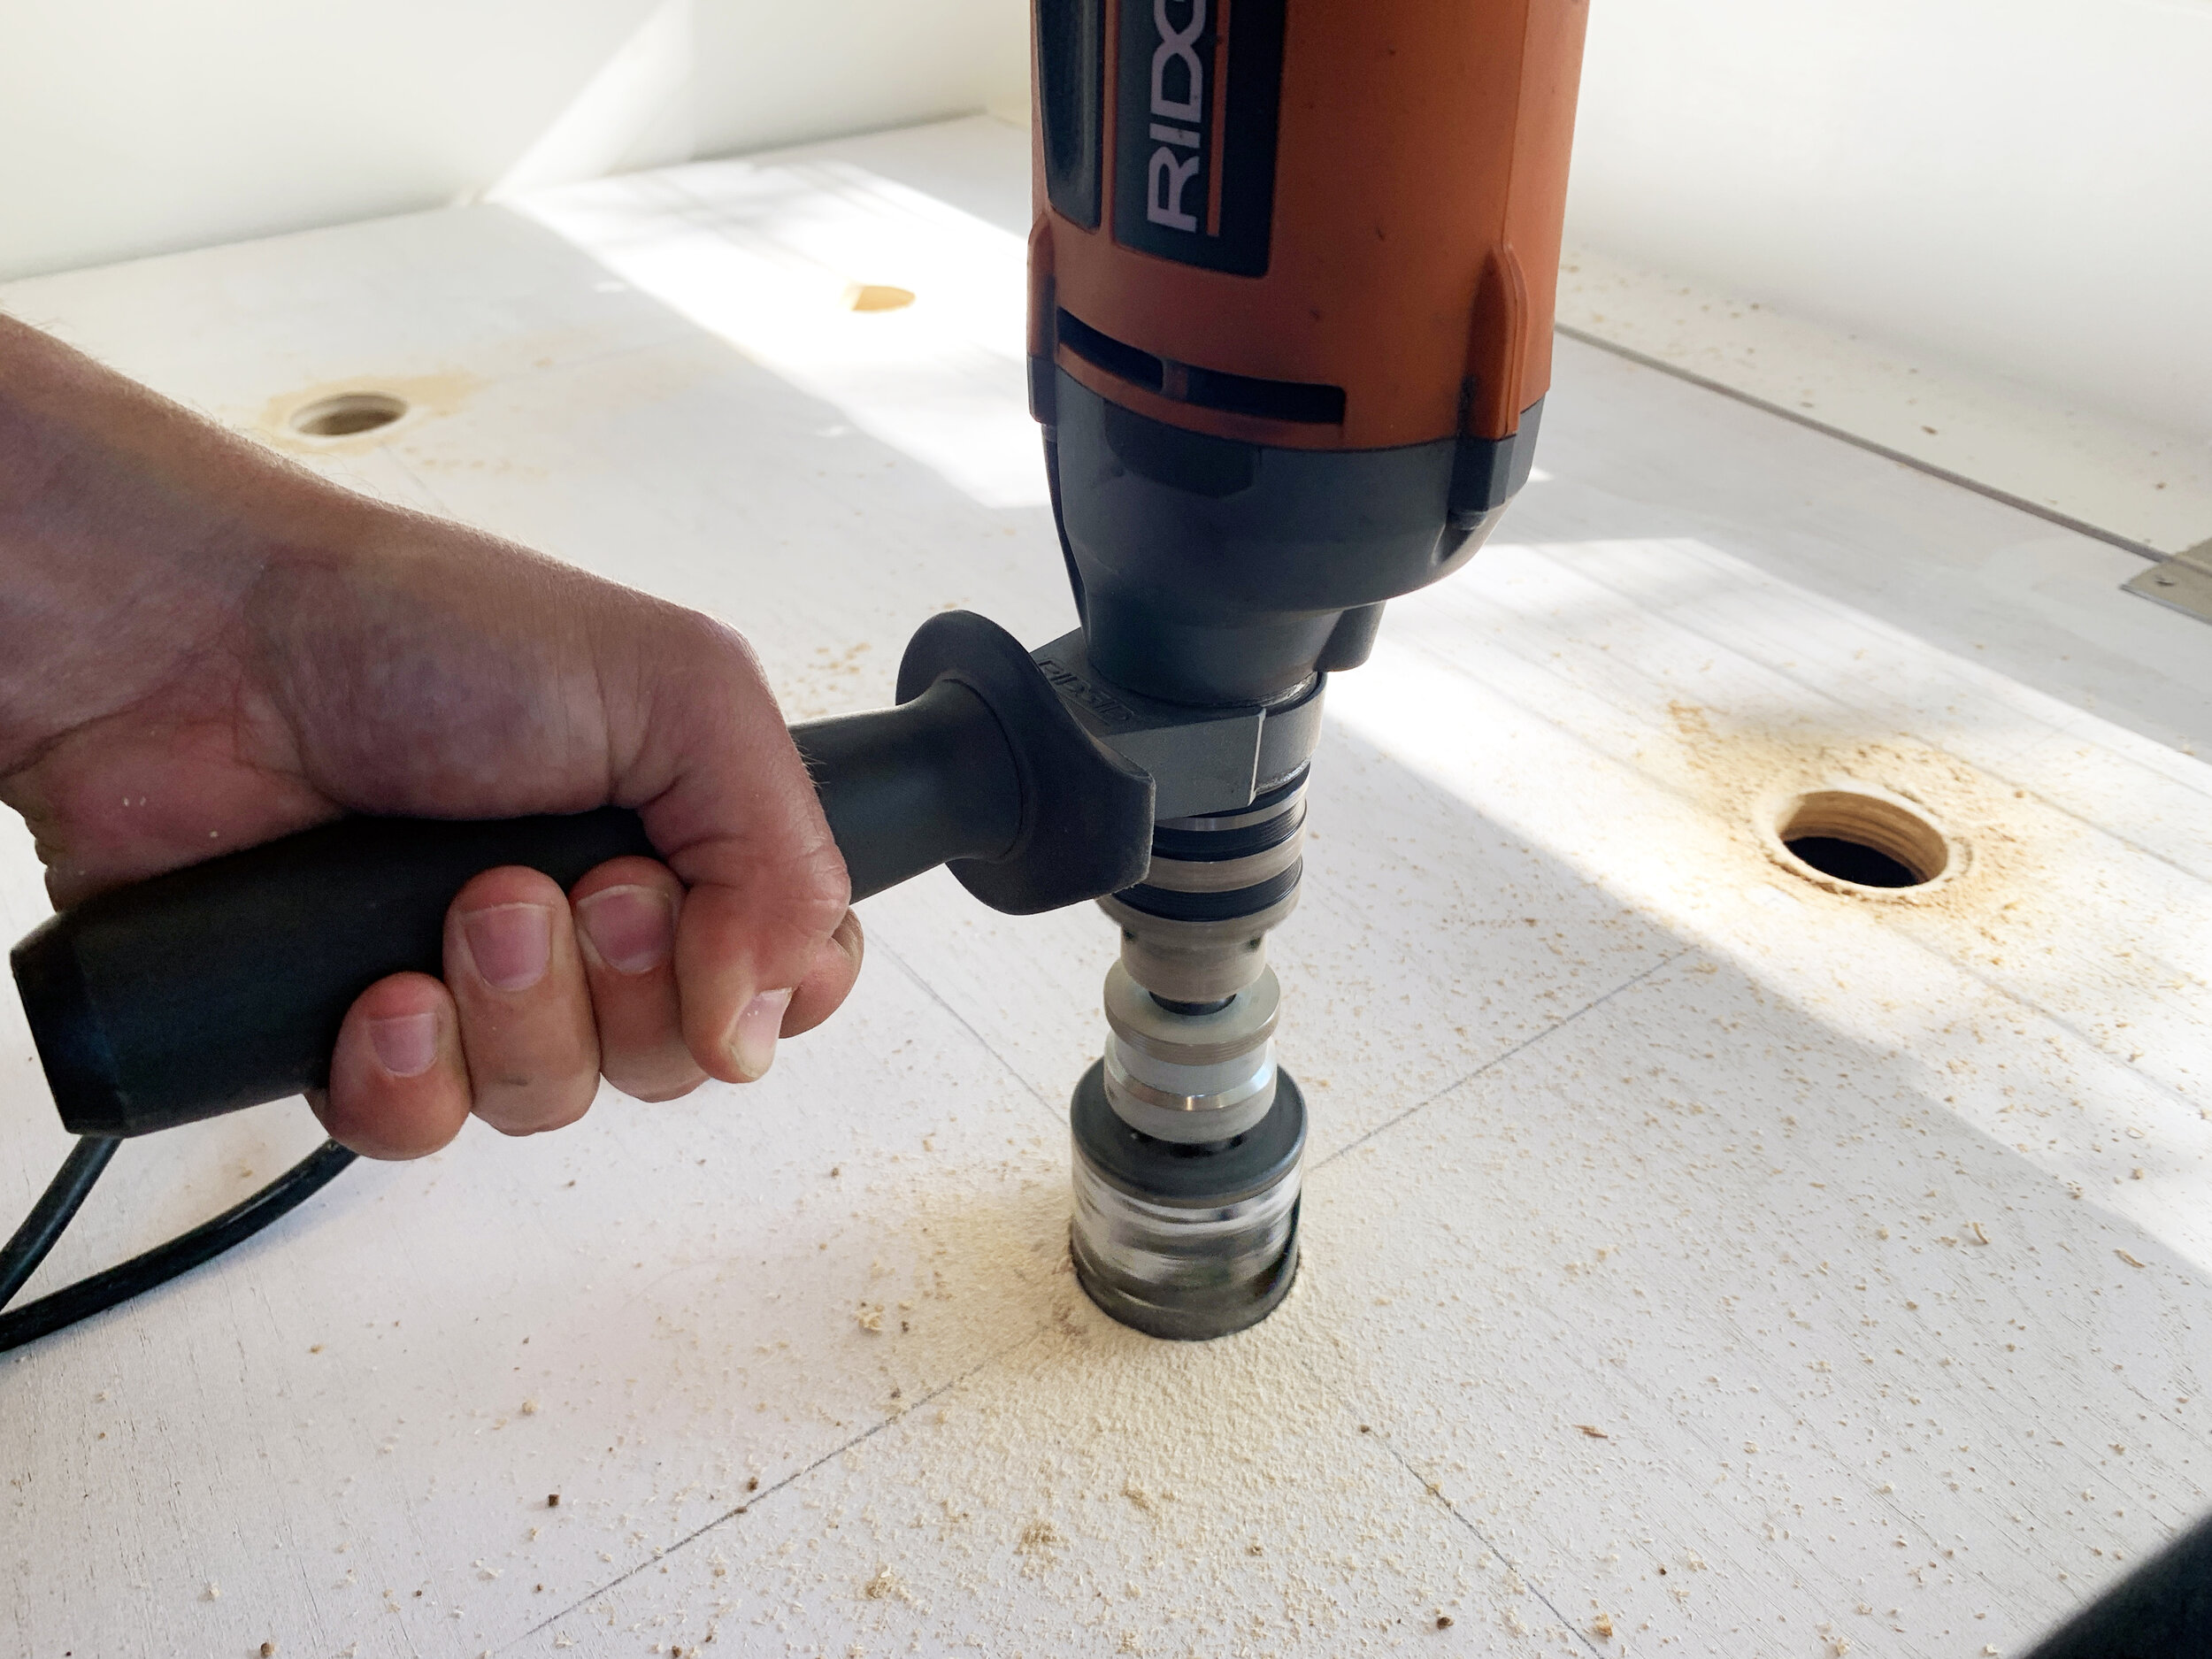
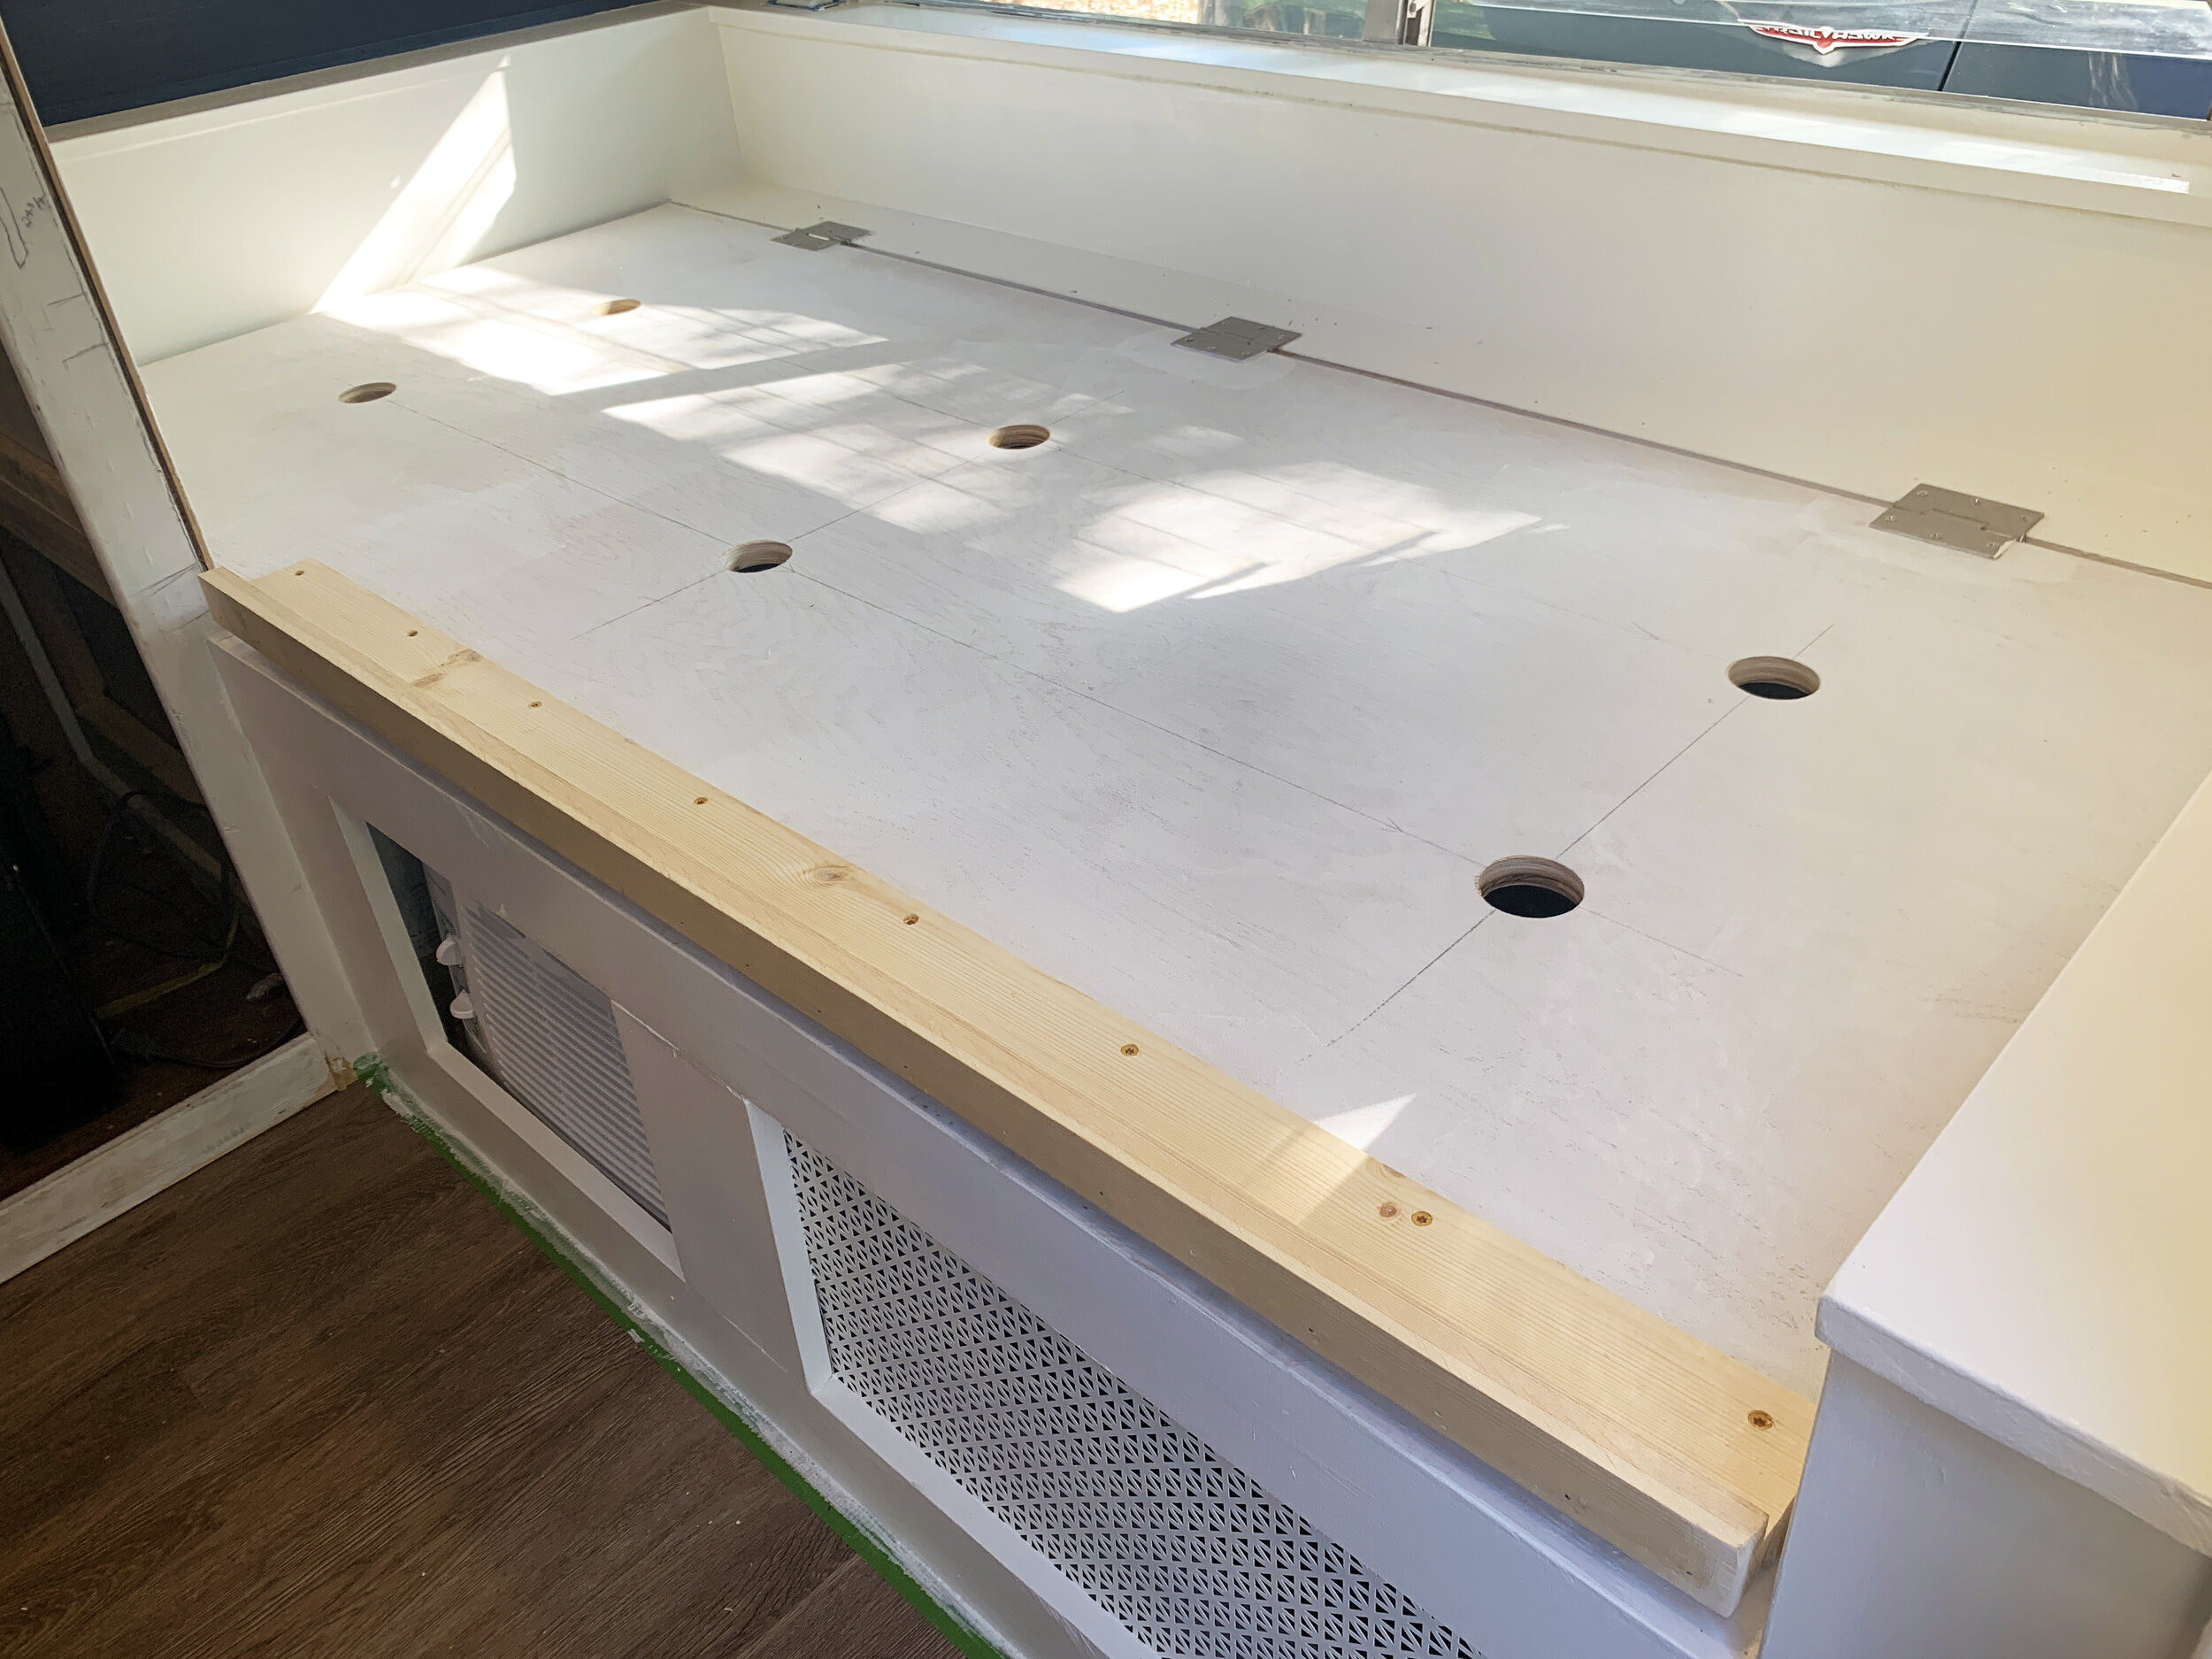
We’re not exactly sure what number of holes is best for what amount of surface area of lid (other than noting it’s probably best to not perforate it like a piece of swiss cheese so it compromises the strength of the mattress base), but we used a 1.5” hole saw and a drill to drill six holes in the lid – two for each of our three storage cubbies underneath.
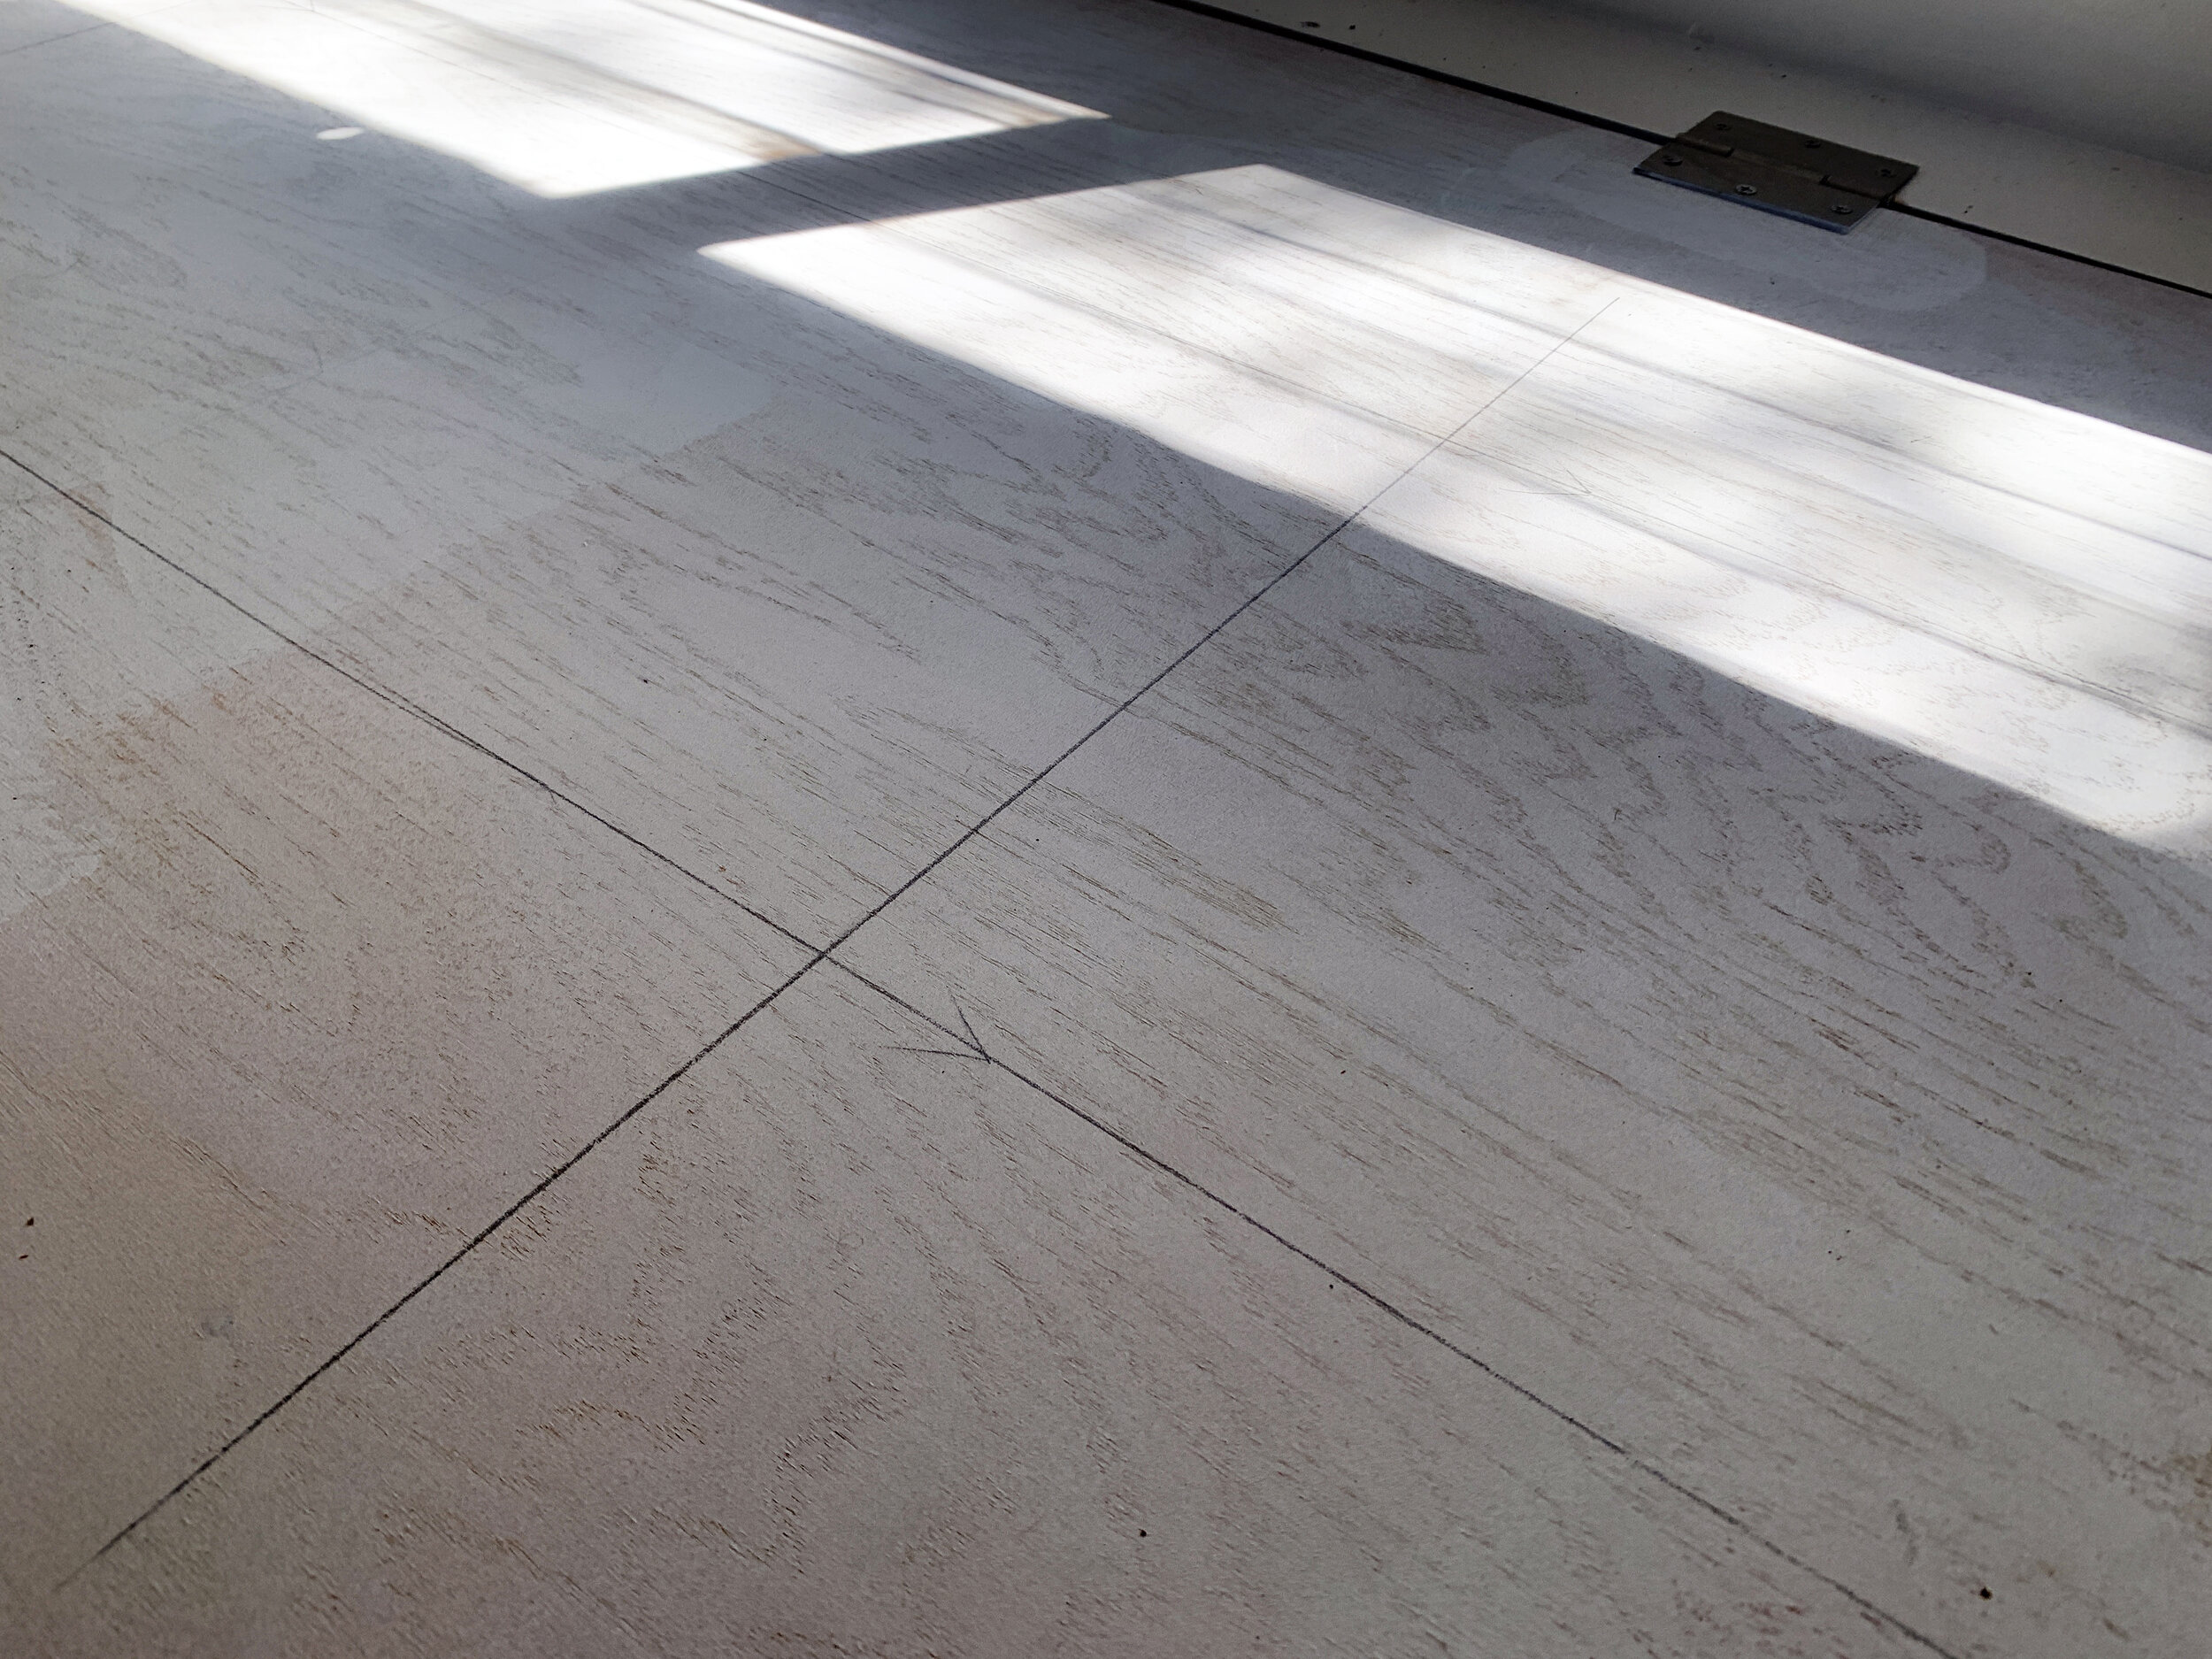
Because I am somewhat of a perfectionist, we quickly marked out a grid using our 4’ level to keep our holes in alignment, though it certainly is not necessary and will only be seen when the lid is in the upright position.

Quick tip:
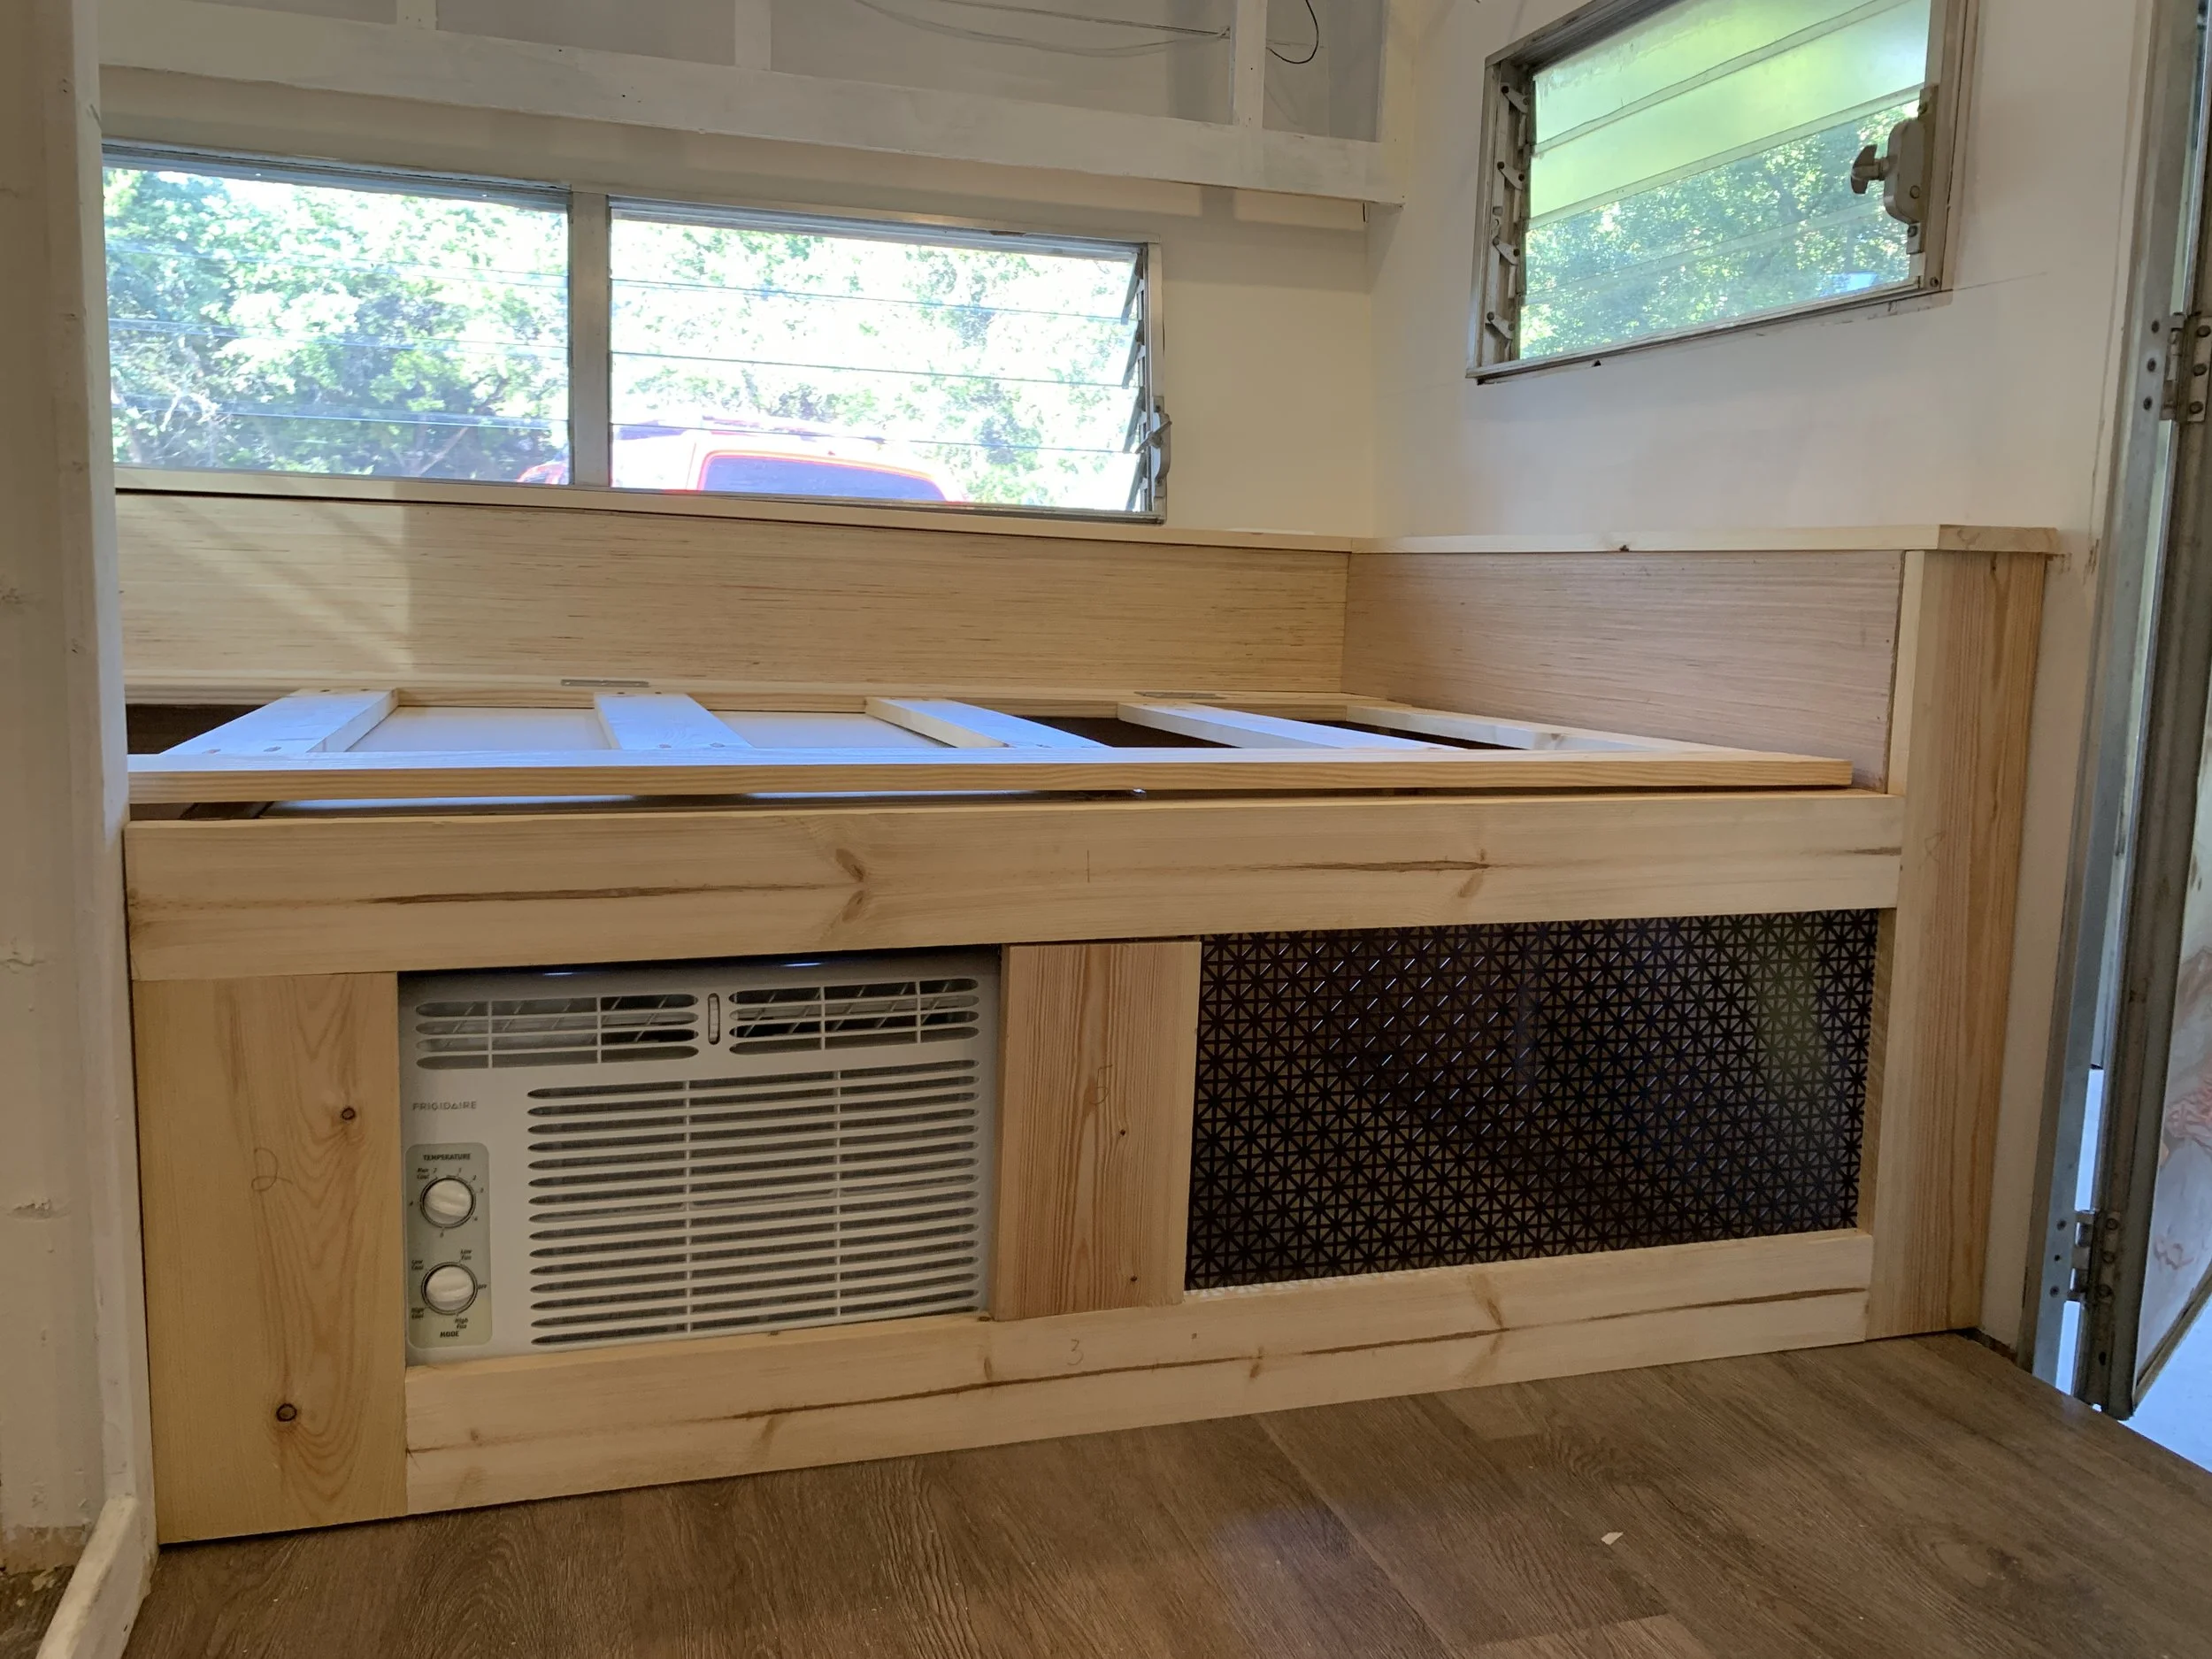
If, like us, you have an air conditioning unit underneath the bed, use a piece of cardboard (or something) to cover up the vent to keep sawdust out of the unit.

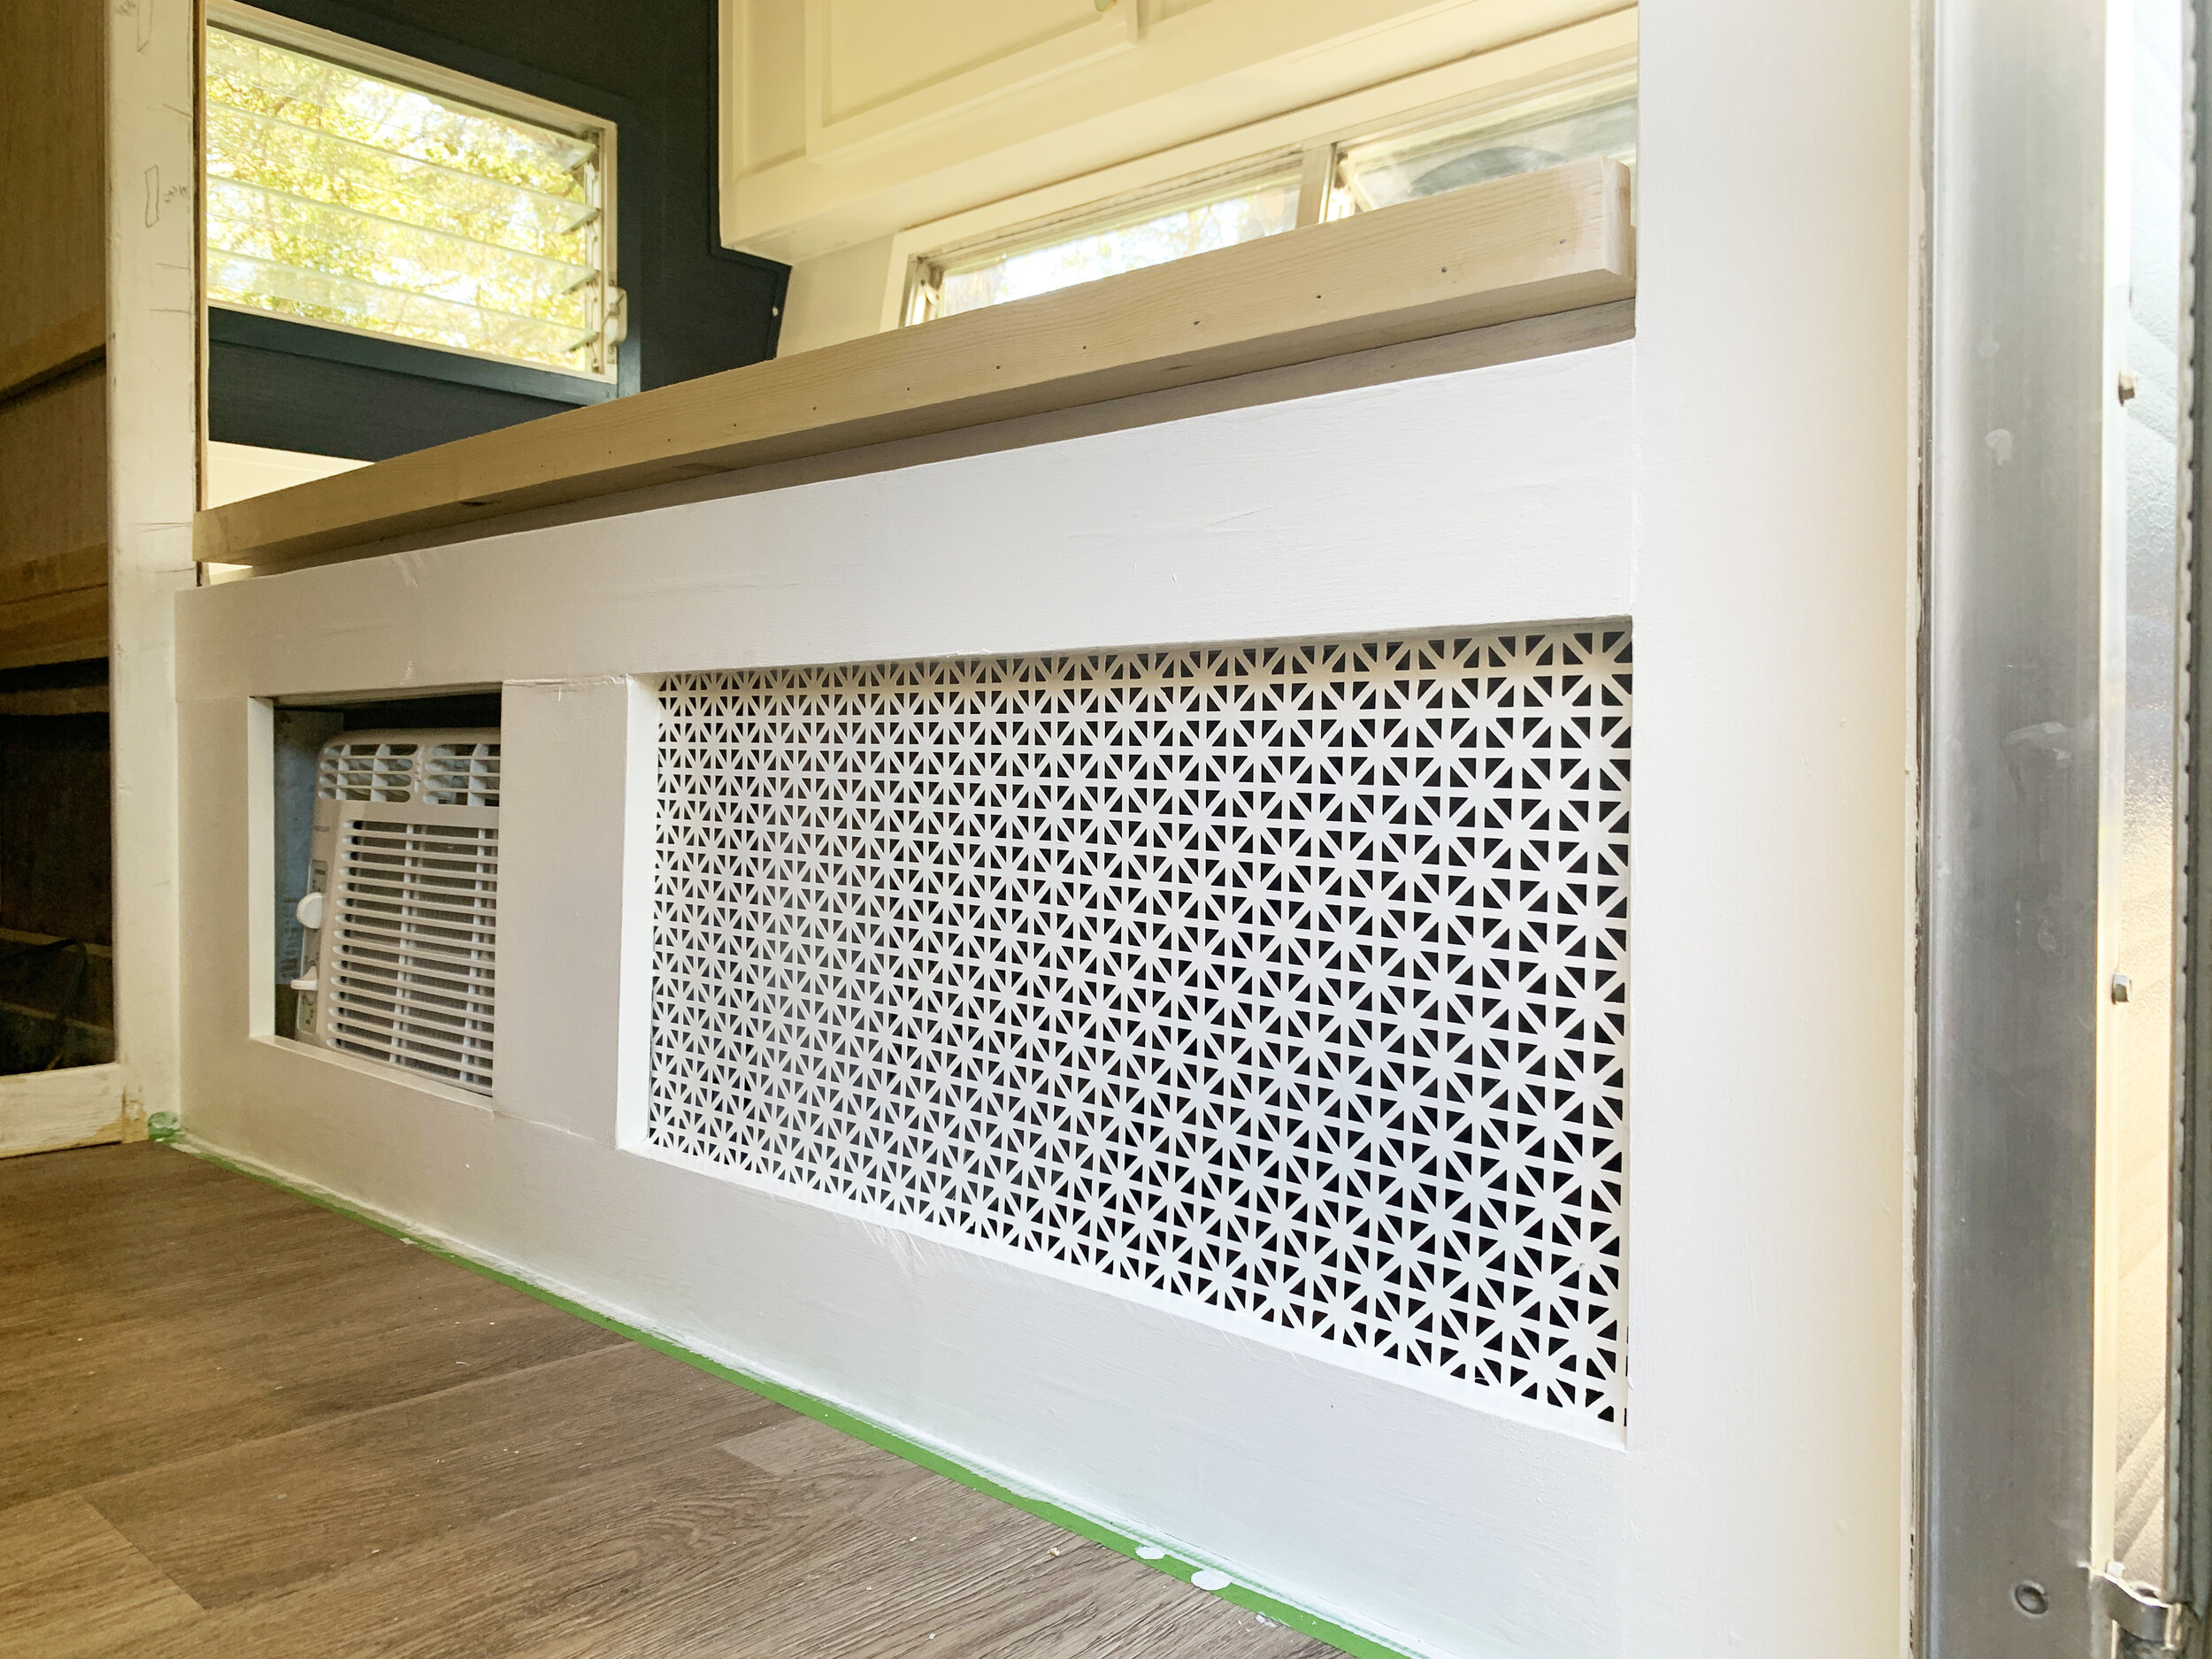
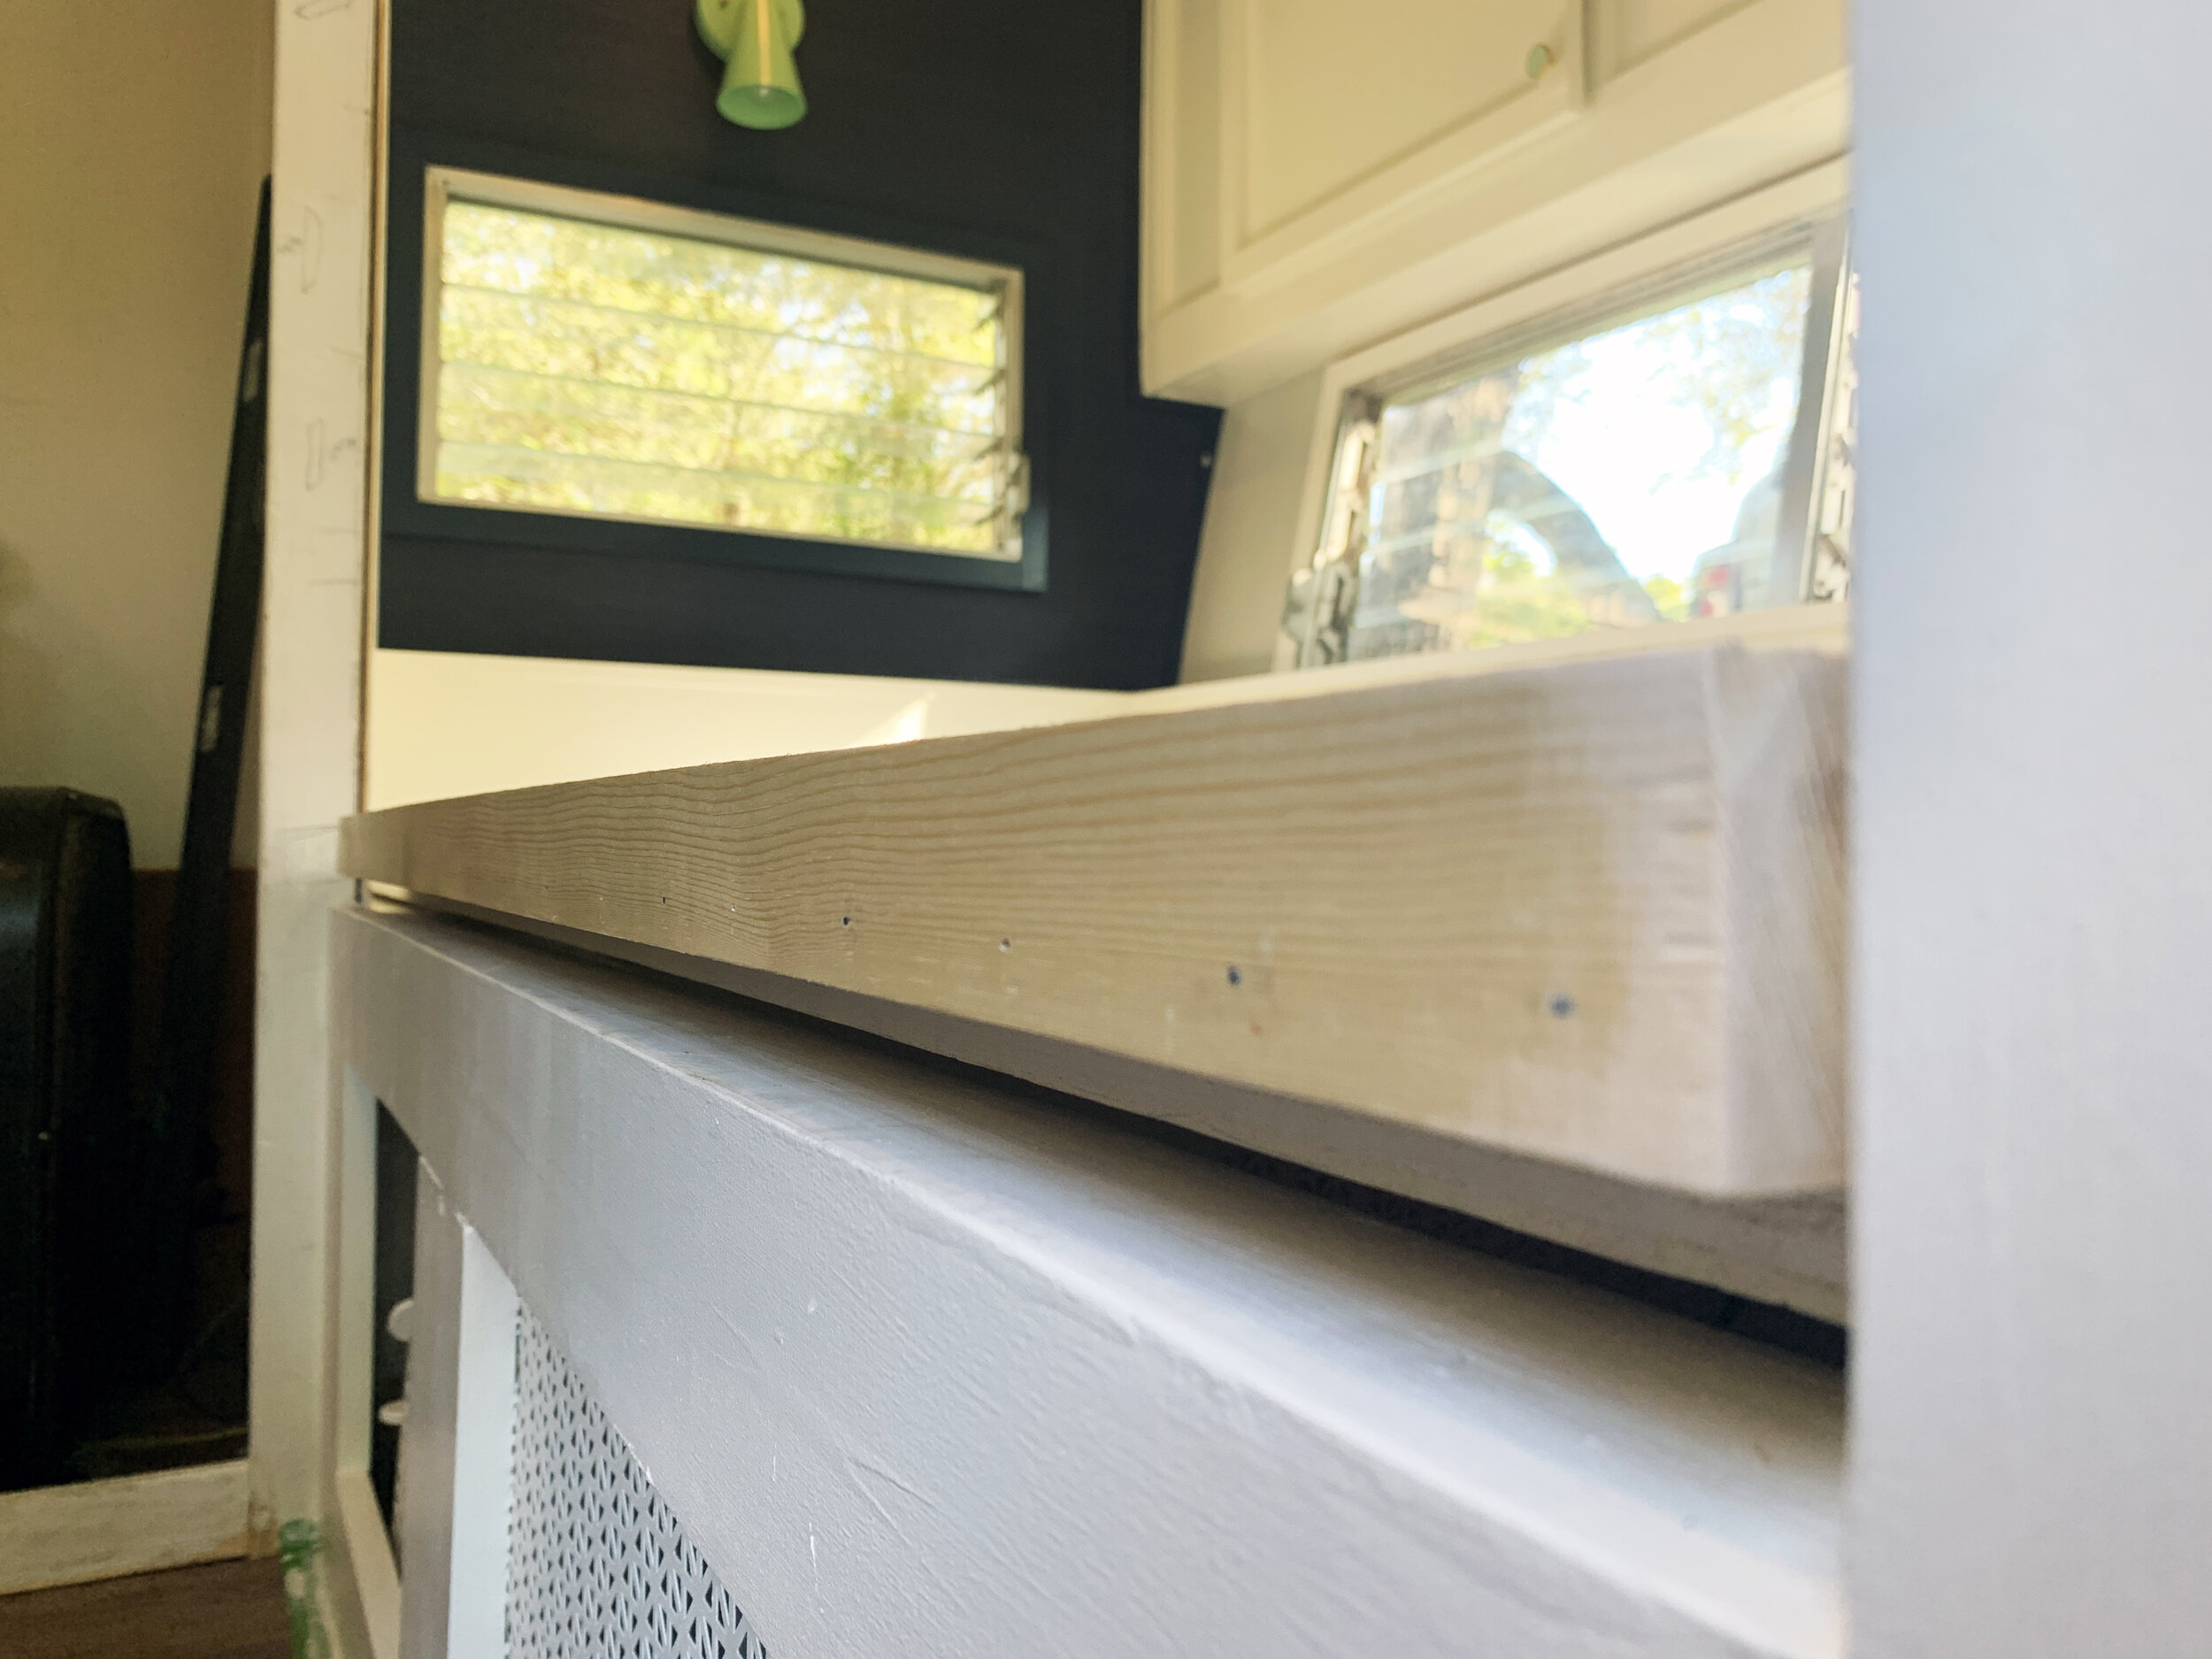
The lid handle … and what we would do differently
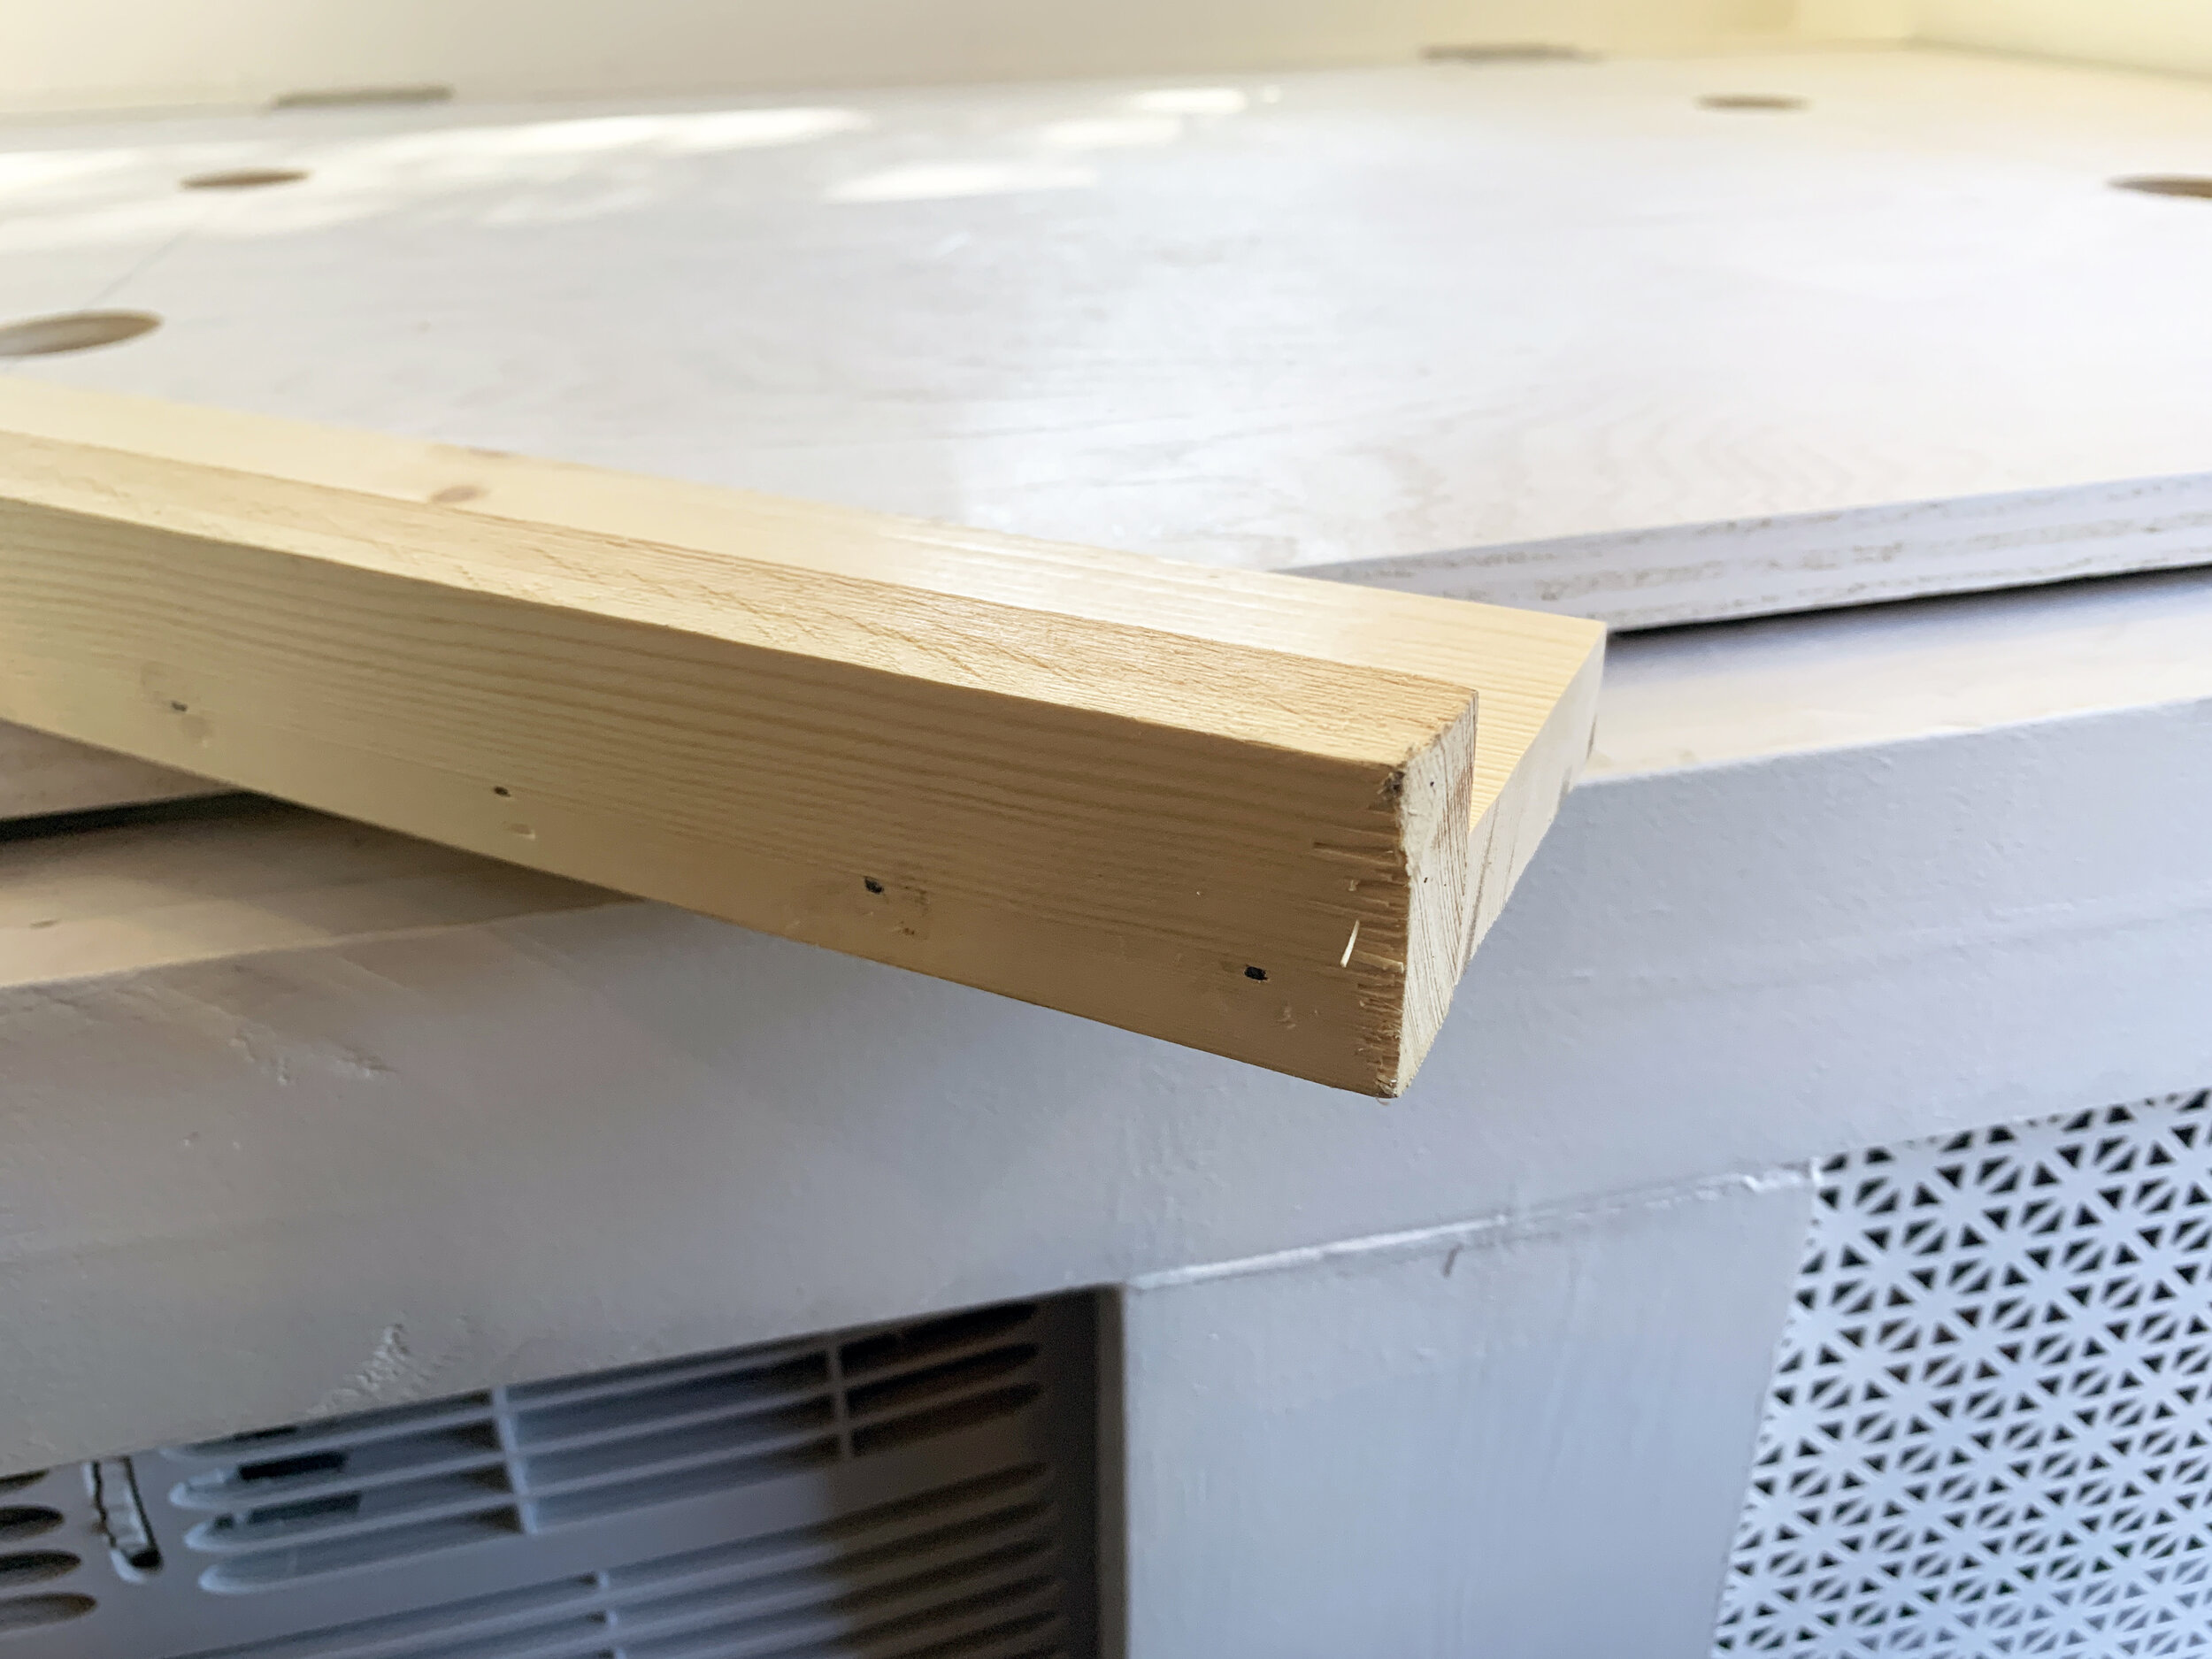
To have a handy (and pain-free) way to open the lid to access the storage areas, we added a little lip to the exposed edge of the plywood lid so we could safely and easily get our fingers under it without them getting pinched. To make the edge more comfortable when sitting on the daybed as a couch, we built it so the front of the handle was even with the front of the bed base.
To build our lid’s wooden handle, we first nailed a 1x2” piece of lumber (the long-side up) as a vertical lip on the edge of a 1x4 so that it made a little L-shaped piece that was even on the bottom. Then we screwed the 1x4” piece (now with a 1x2 connected to it) to the top of the lid’s long edge, to help hold the mattress in place. We screwed the handle in place so that the front of the lip was even with the front of the bed base.
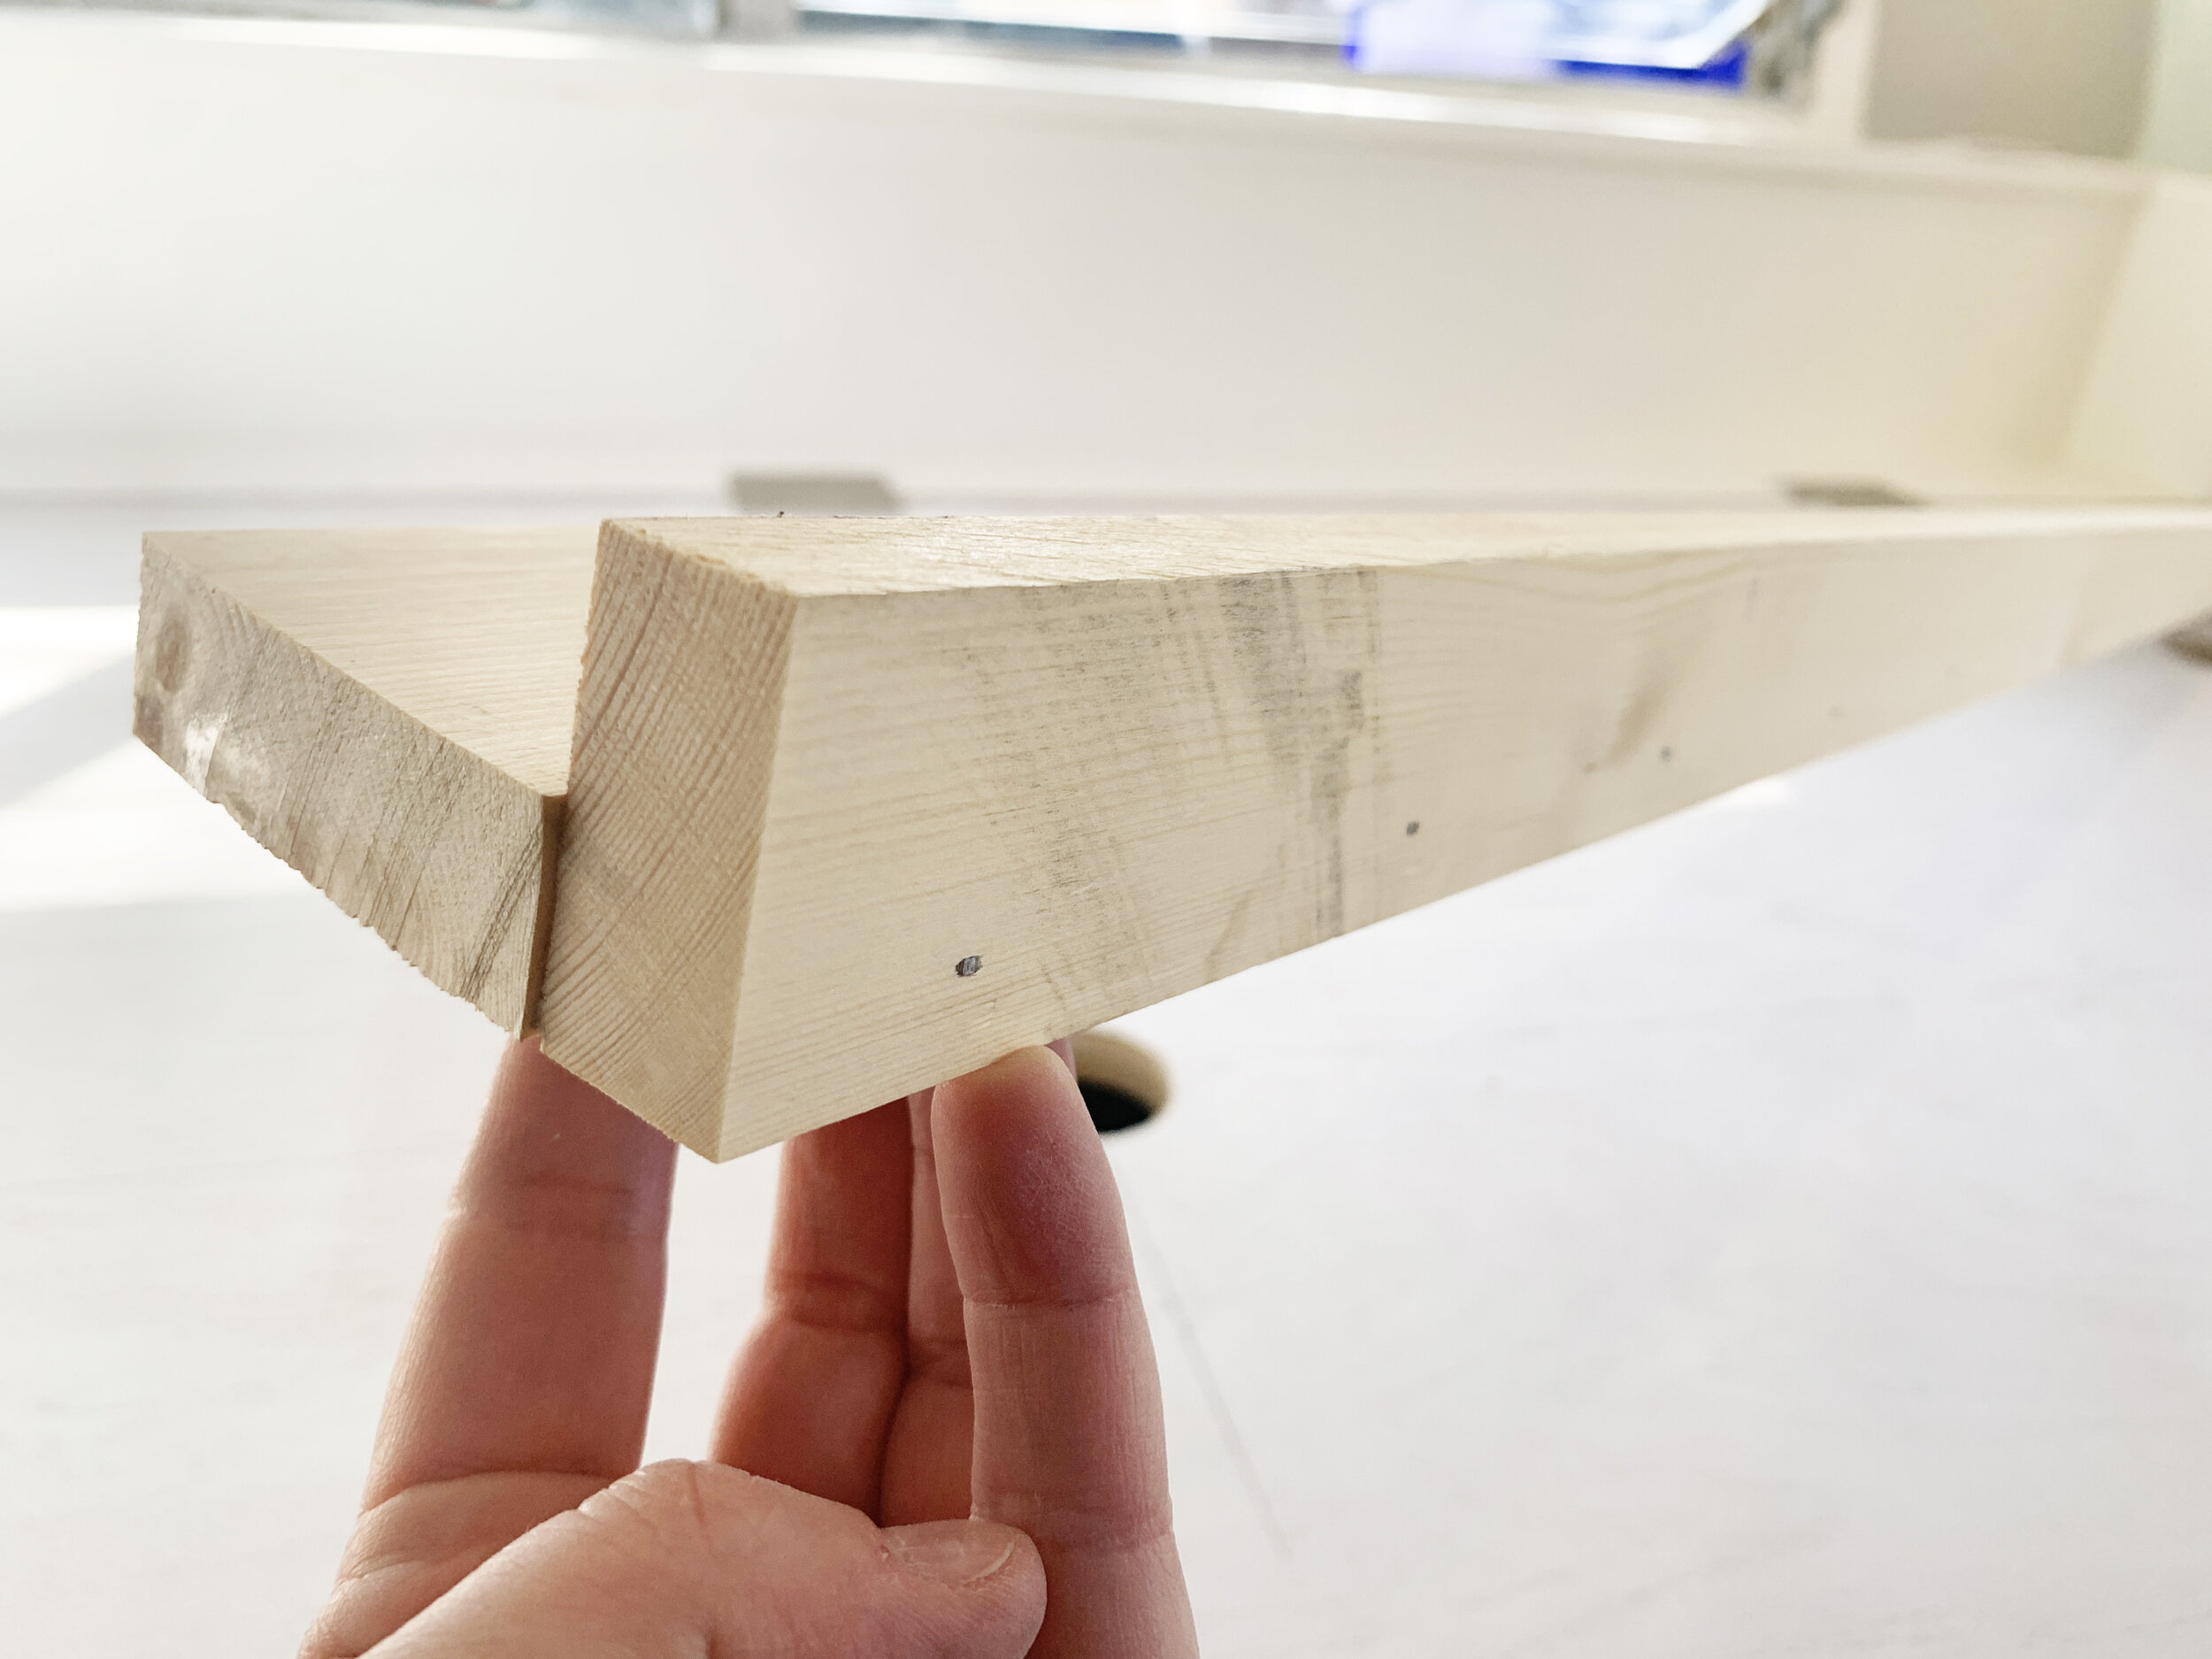
What we would do differently with the handle
If we were to build it again, we would leave the vertical lip 1x2” piece off entirely, and instead just have a 1x4 (or maybe even a 1x6) screwed into the lid so that the edge of it is even with the front edge of the bed base.
Why you ask? Turns out we don’t really need the vertical 1x2” lip to help keep the mattress from shifting around (probably because of our shower location), and when we open the lid to get to the storage areas underneath we have to lift the mattress up over the vertical lip because the combination of the mattress’ height and the angle of lid opening pushes the mattress out and away from the backrest a little bit and the vertical lip keeps the mattress locked in place too well, where the lid can’t fully open, unless we hoist the mattress up over the lip as we raise the bed.
So at some point down the road we’re probably going to unscrew the current L-shaped handle and just reinstall a plain ol’ 1x4. Le sigh.

Attaching the new lid to the base
We used three basic “no-squeak” door hinges (the ones we had already installed and been using with the old slatted lid) to attach the new lid to the bench’s base along the long backrest of the twin bed – one in the center, and the other two measured out the same distance on either end, a few inches in from the edge.
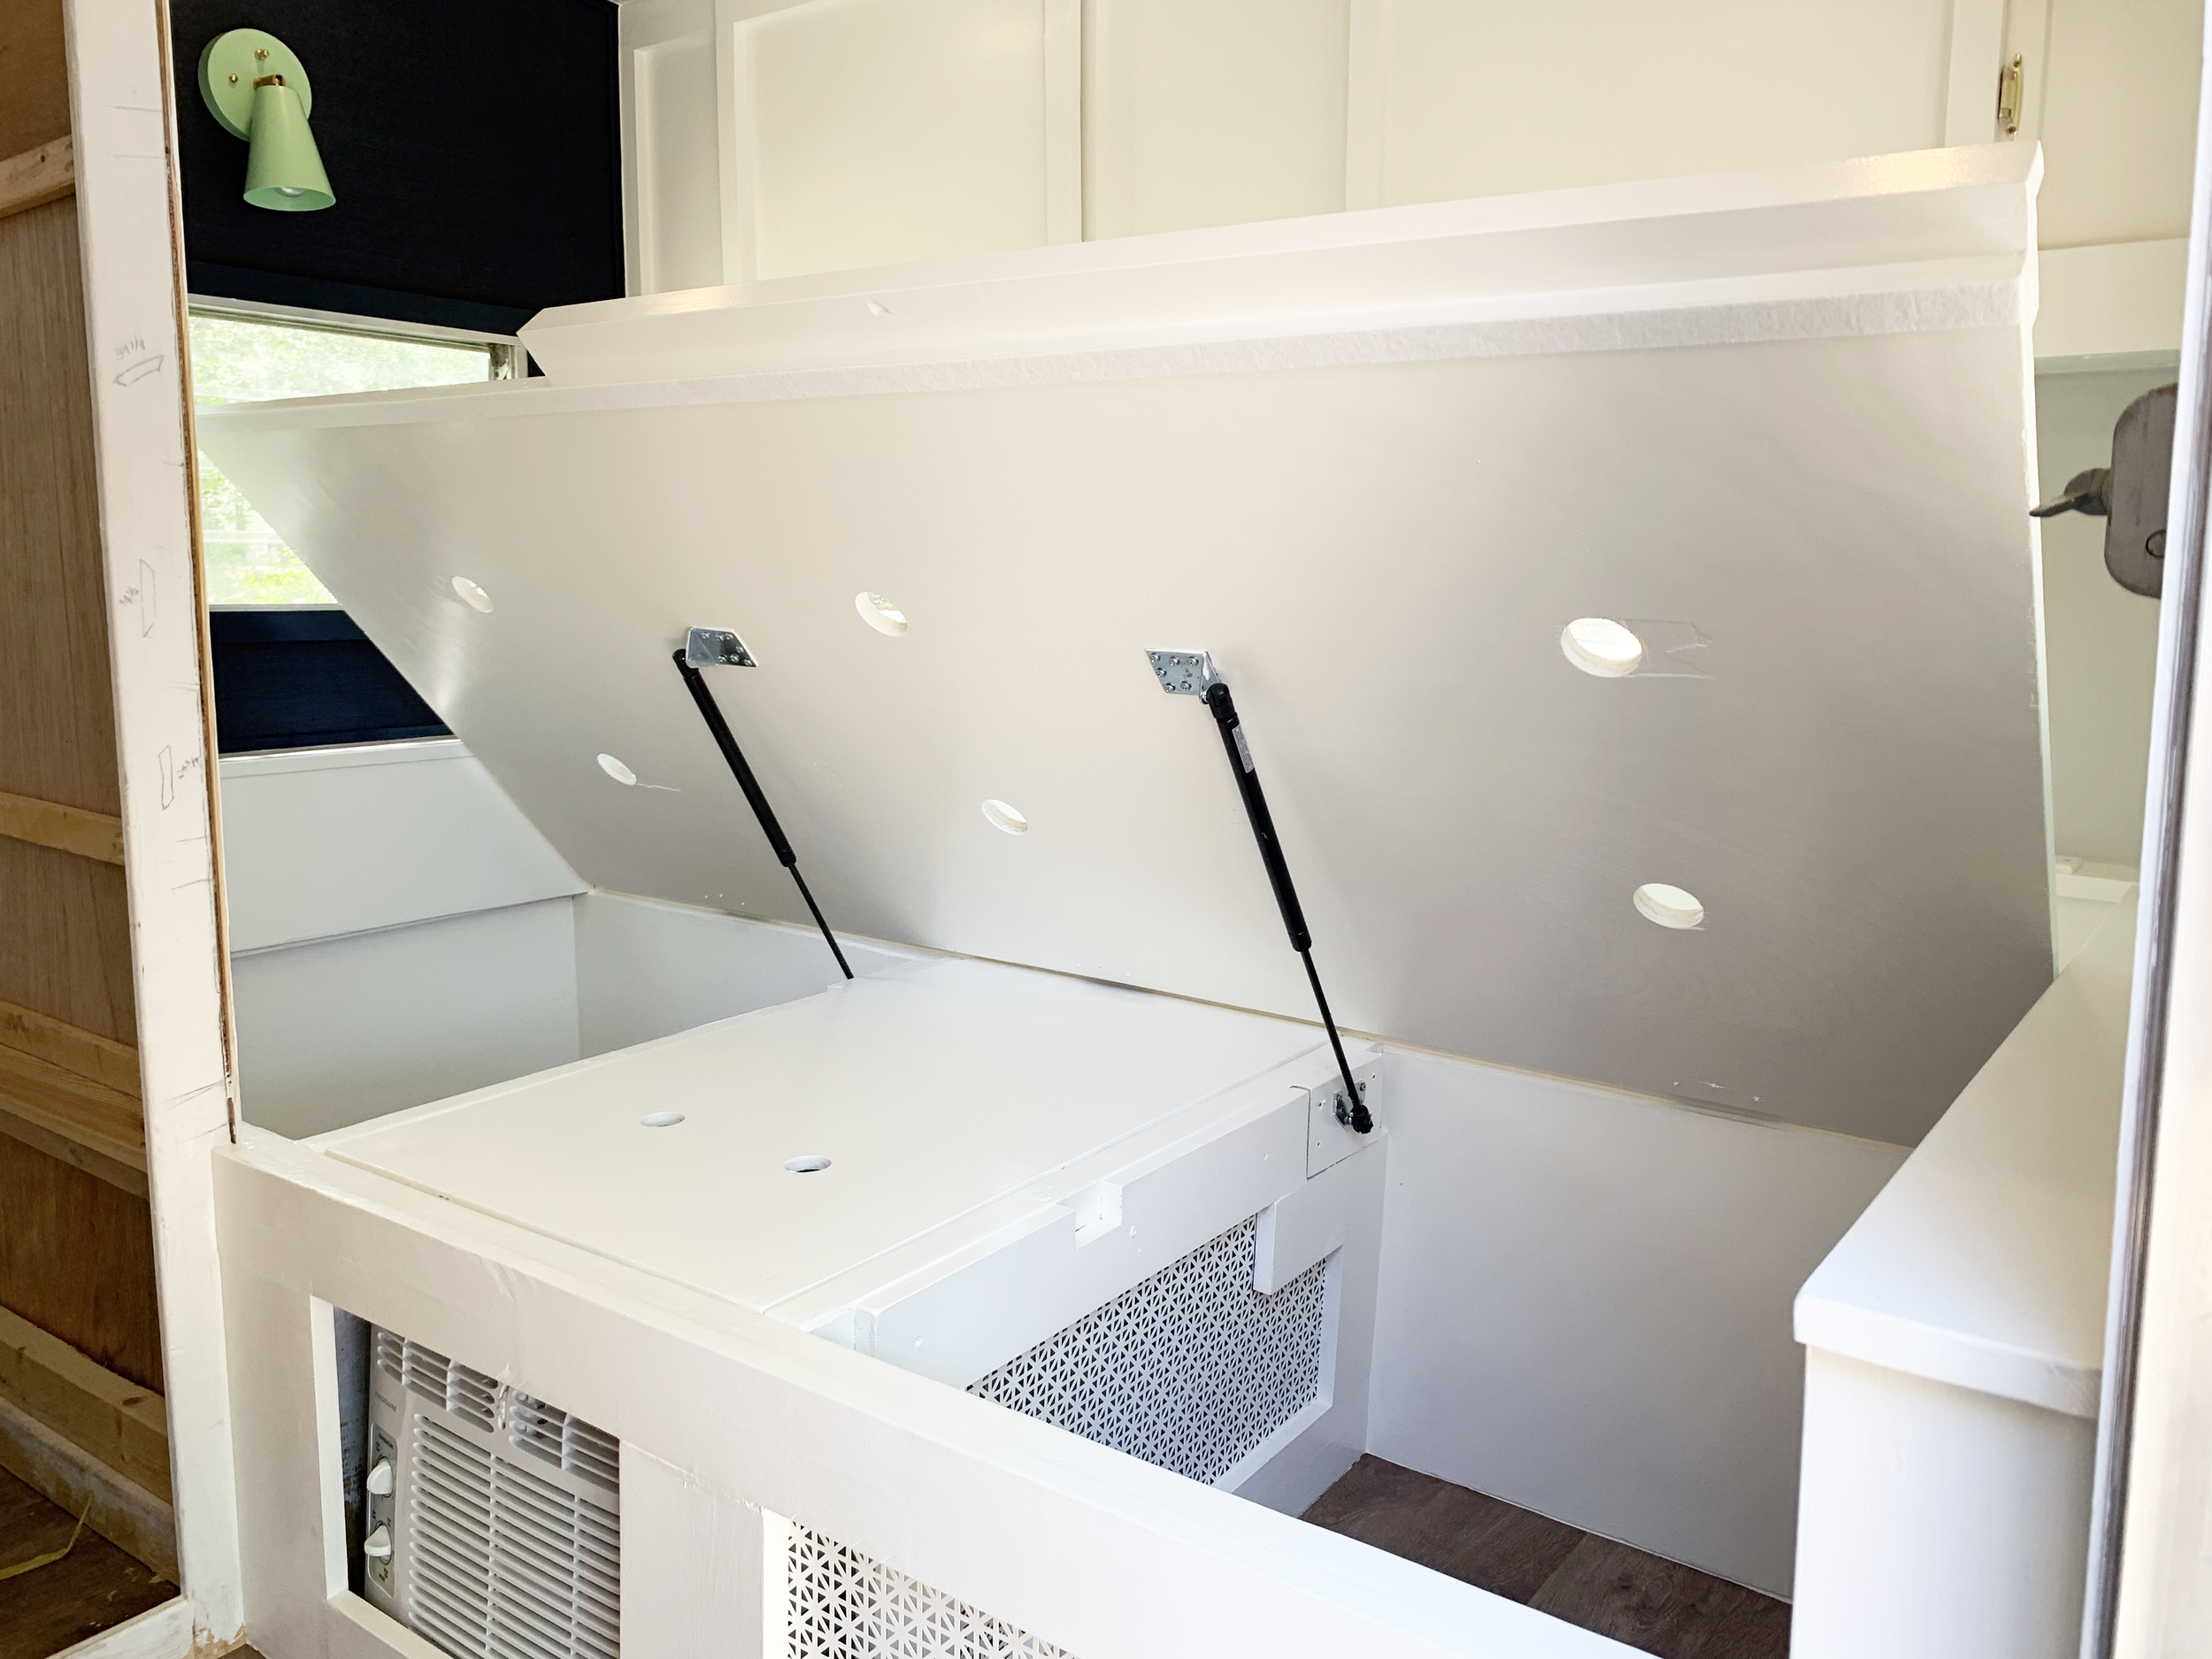
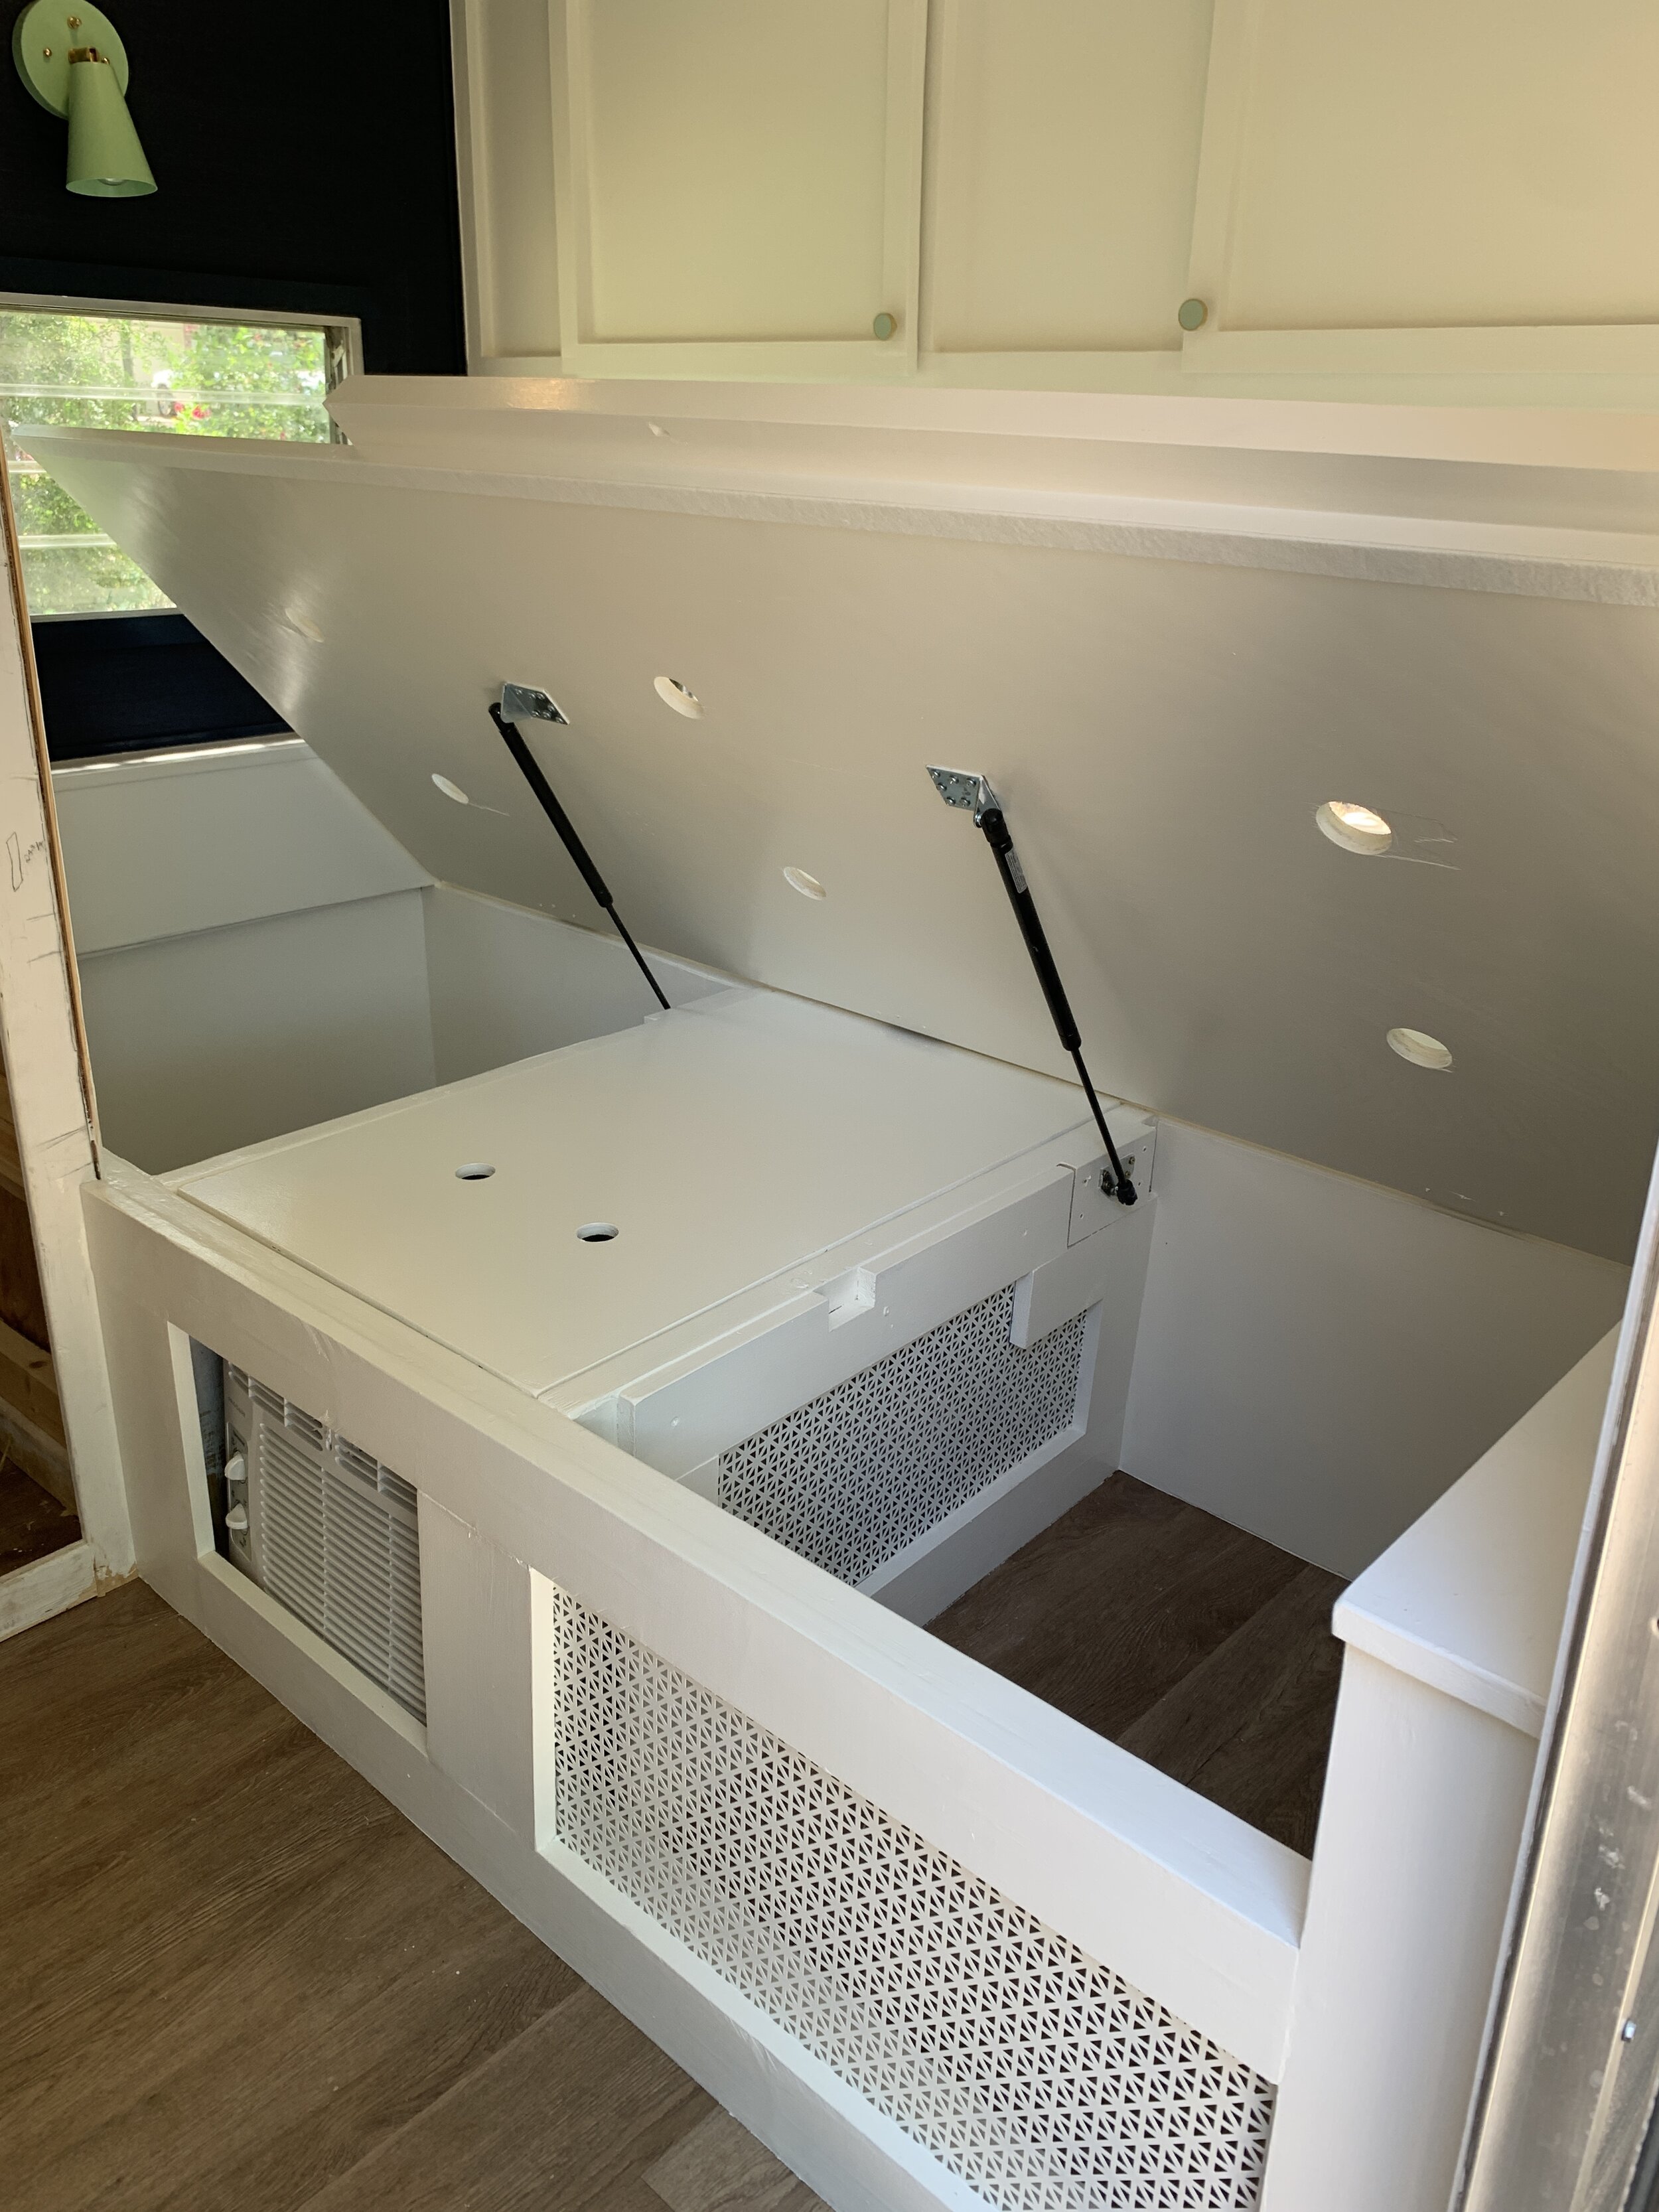
Installing the bedlift
Note: These gas springs require weight from the mattress to be able to collapse, meaning - you cannot simply pull and push them by hand to “close” and “open” them.
So according to the directions, these springs should not be used for side-accessible beds and instead should only be used so that you’re accessing the storage from, say, the foot of the bed (vs. the side). Well, if you haven’t figured it out already we’re kind of rule breakers.
Does being told it “can’t” be done make anyone else feel like they have to prove them wrong?

Really I’d say we’re kind of curious and just crazy enough to try stuff knowing we might fail – sometimes real hard – and have to take a little trip down the alphabet until we find a solution that works for us.
Thankfully, I’m here to tell you that we were able to successfully breakdown the platform bed build (looking back now many months later I don’t even know what I did to translate it) and install instructions included with the bedlift kit and MacGyver them into a placement that worked for our side-accessible twin bed.
Measurements
These gas spring placements are what we used for a standard-size twin bed (38x75”), made to open from the long side.
I can’t speak to what placement will work for other bed sizes, BUT they seem to be “accepted” sizes by the bedlift kit manufacturer, so they should be included in the instructions of the kit.
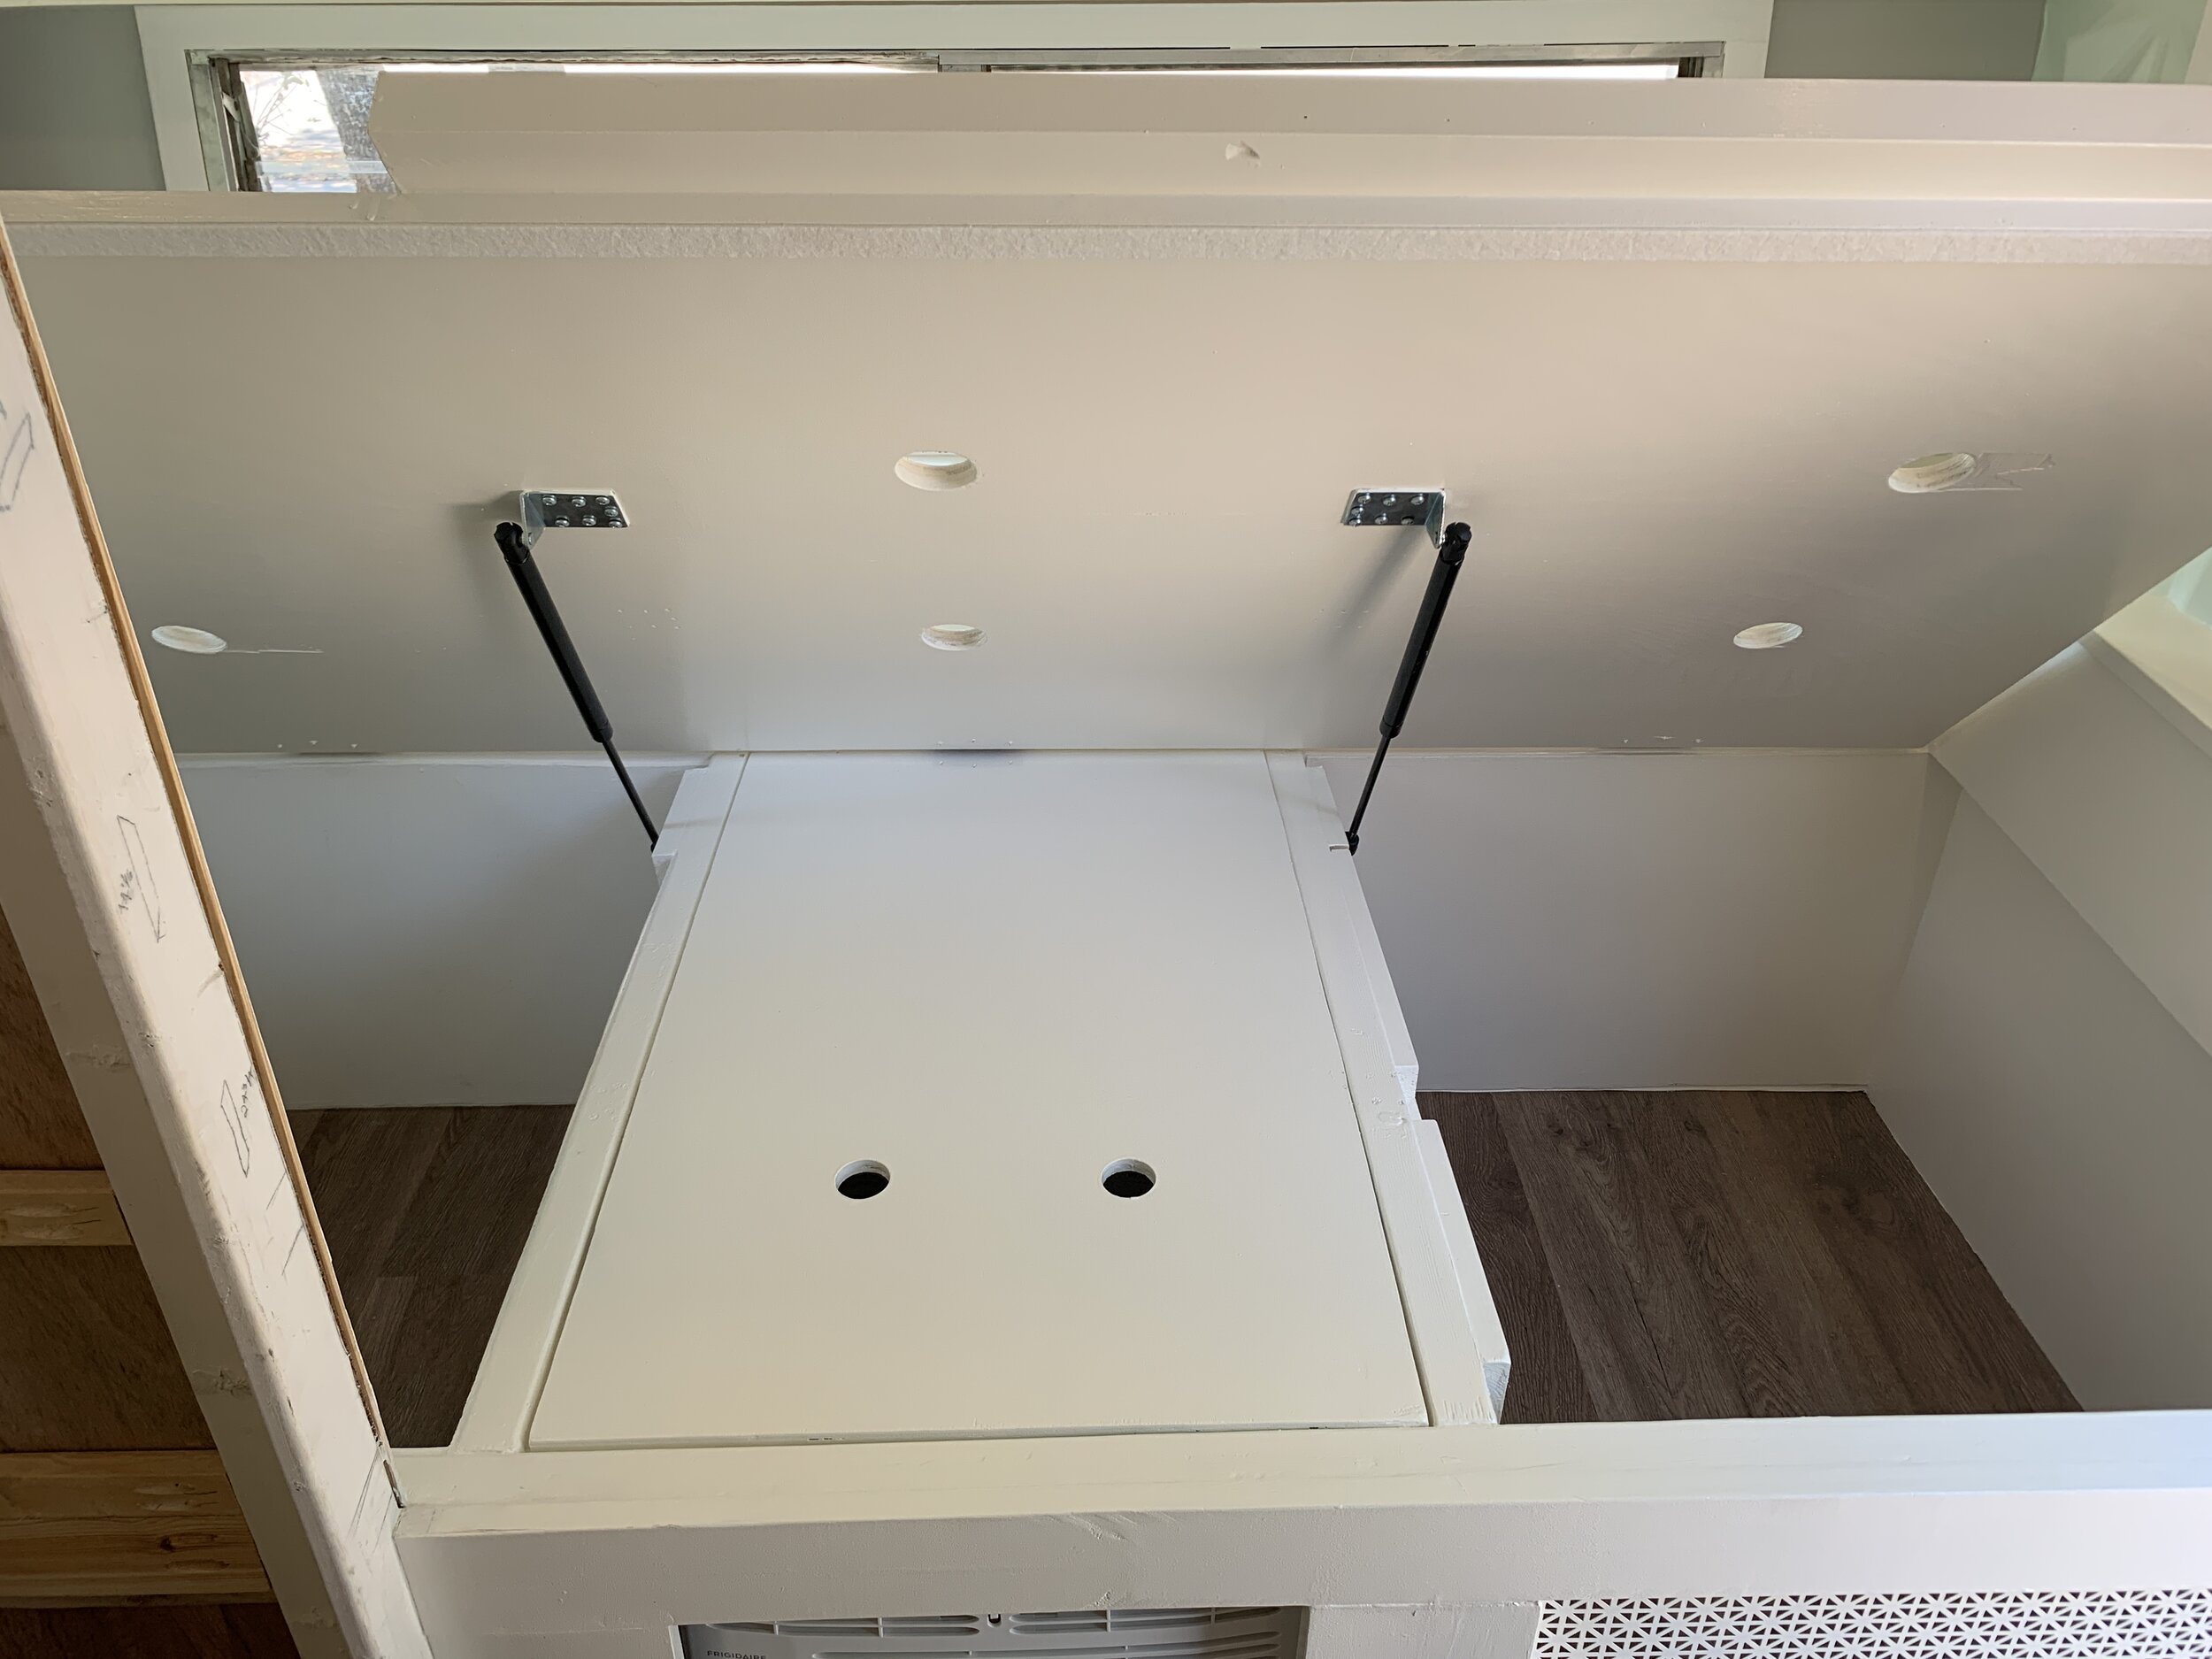
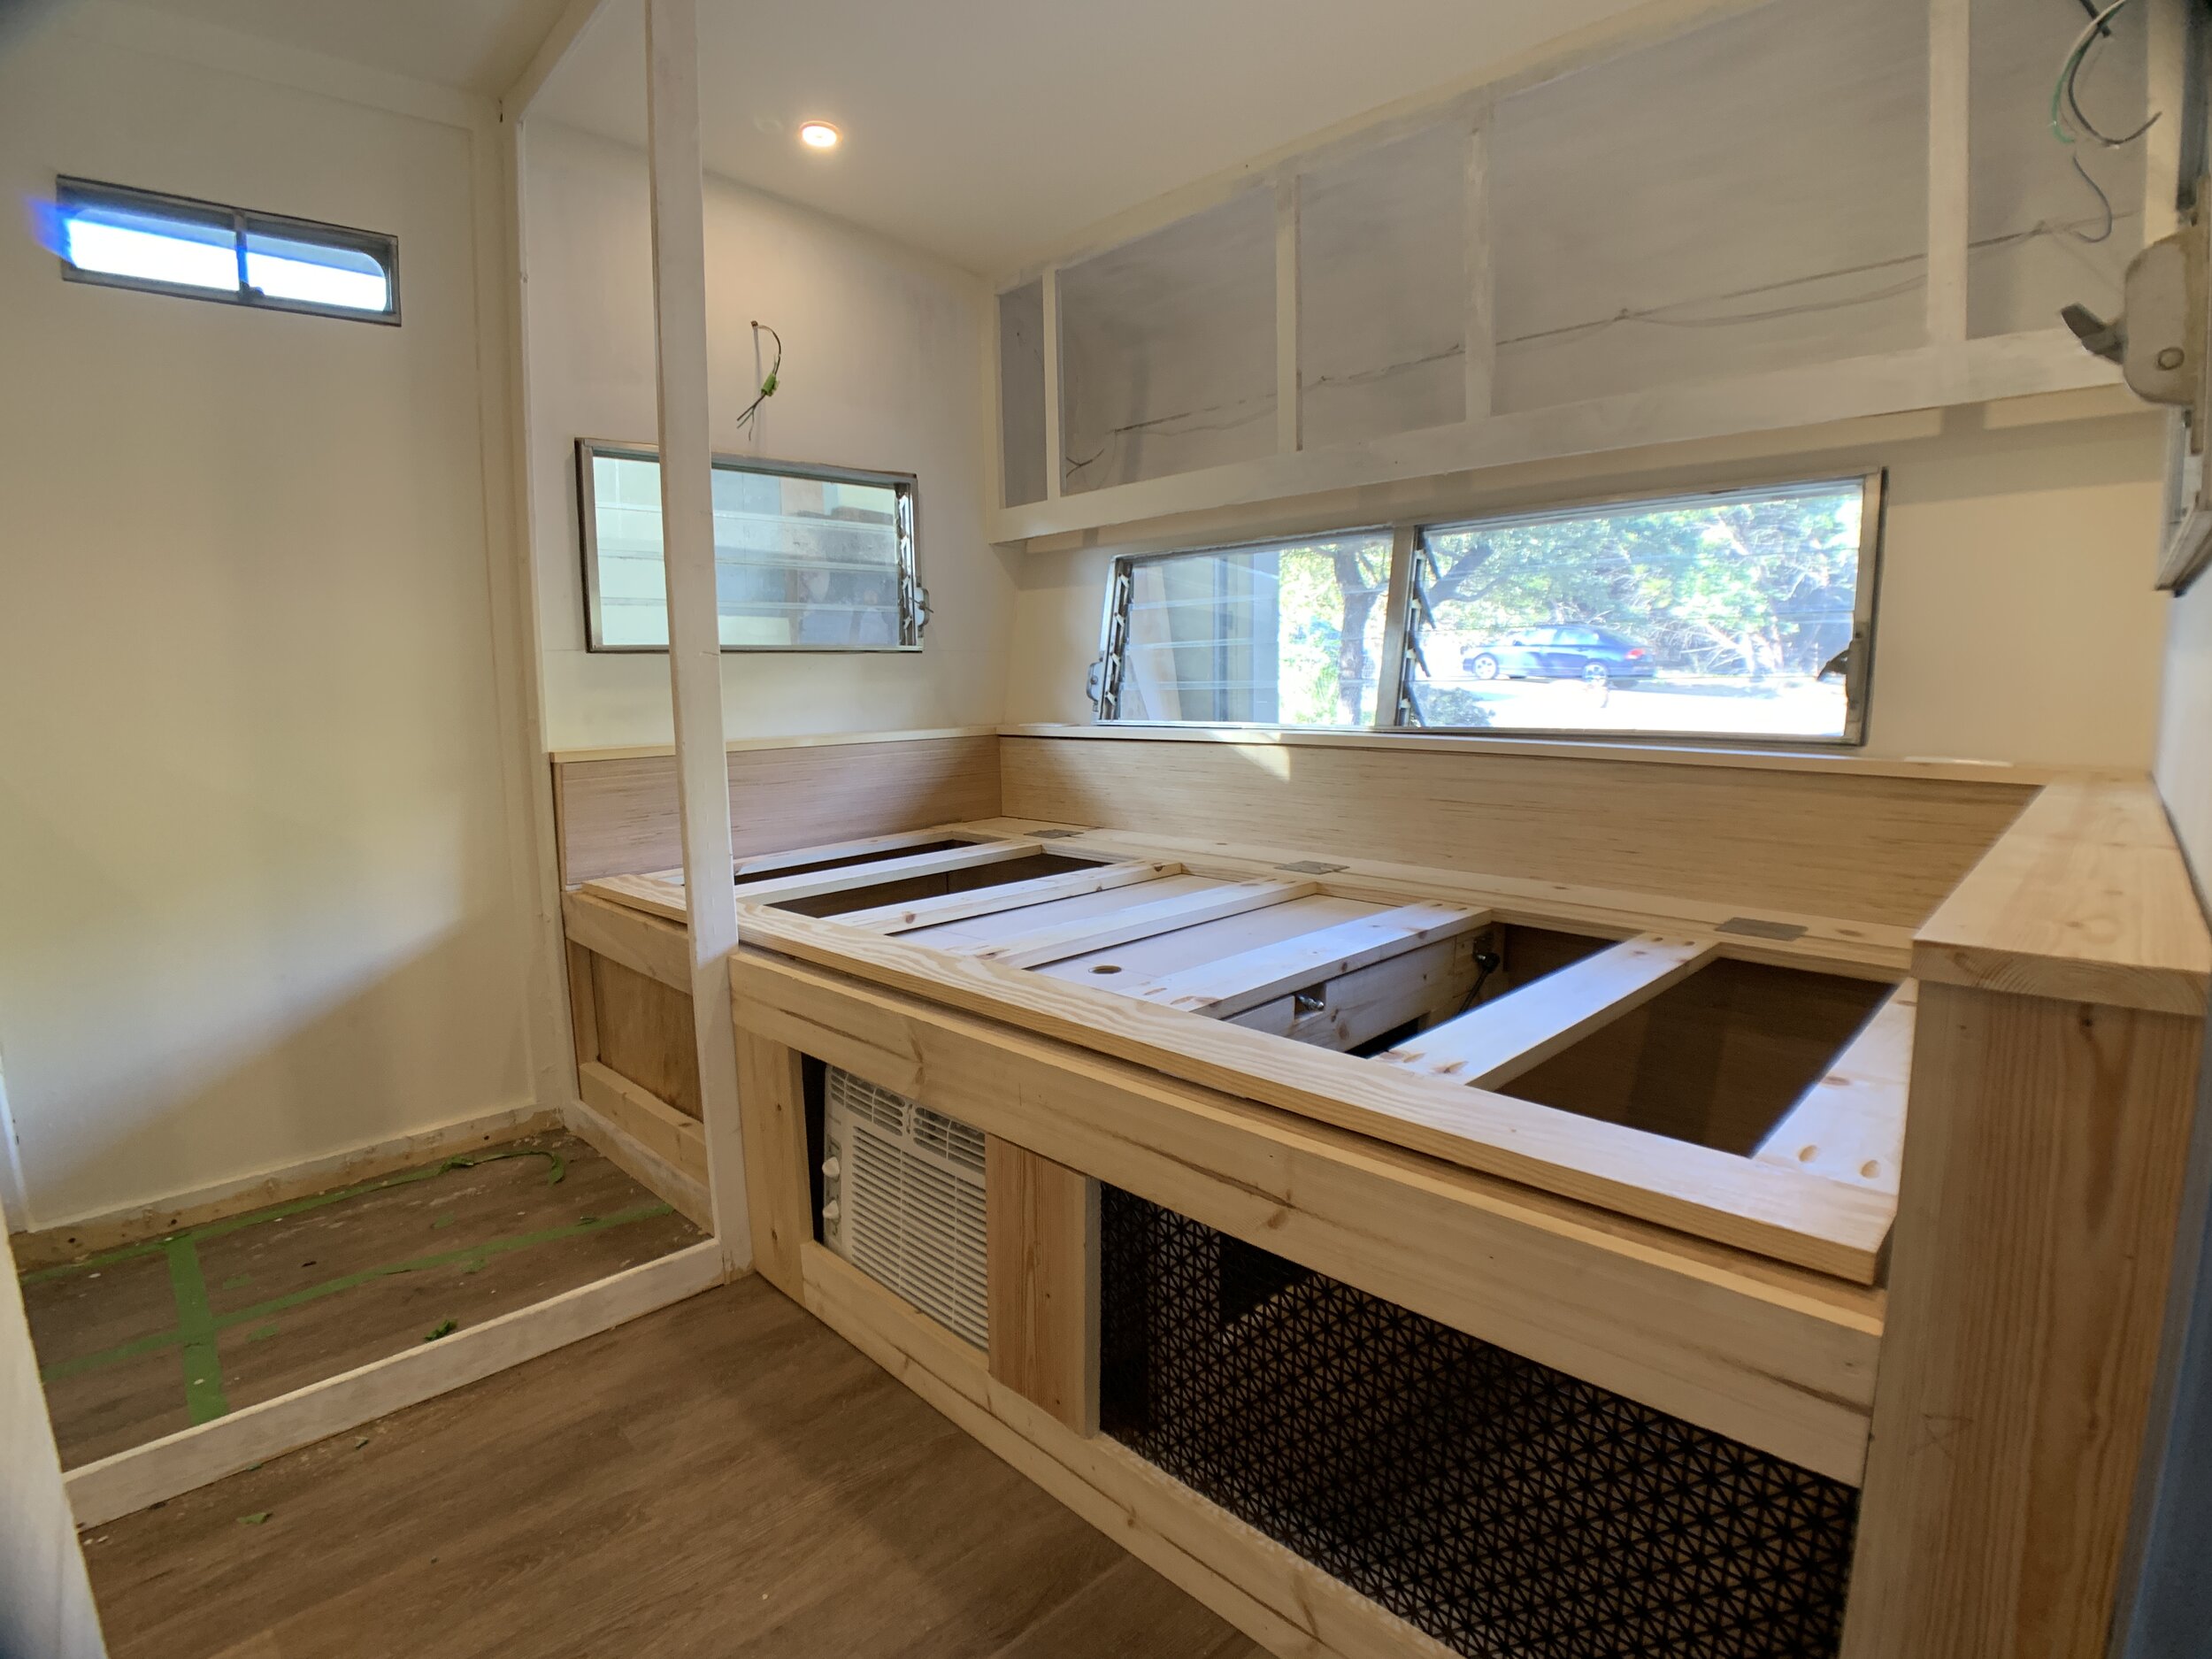
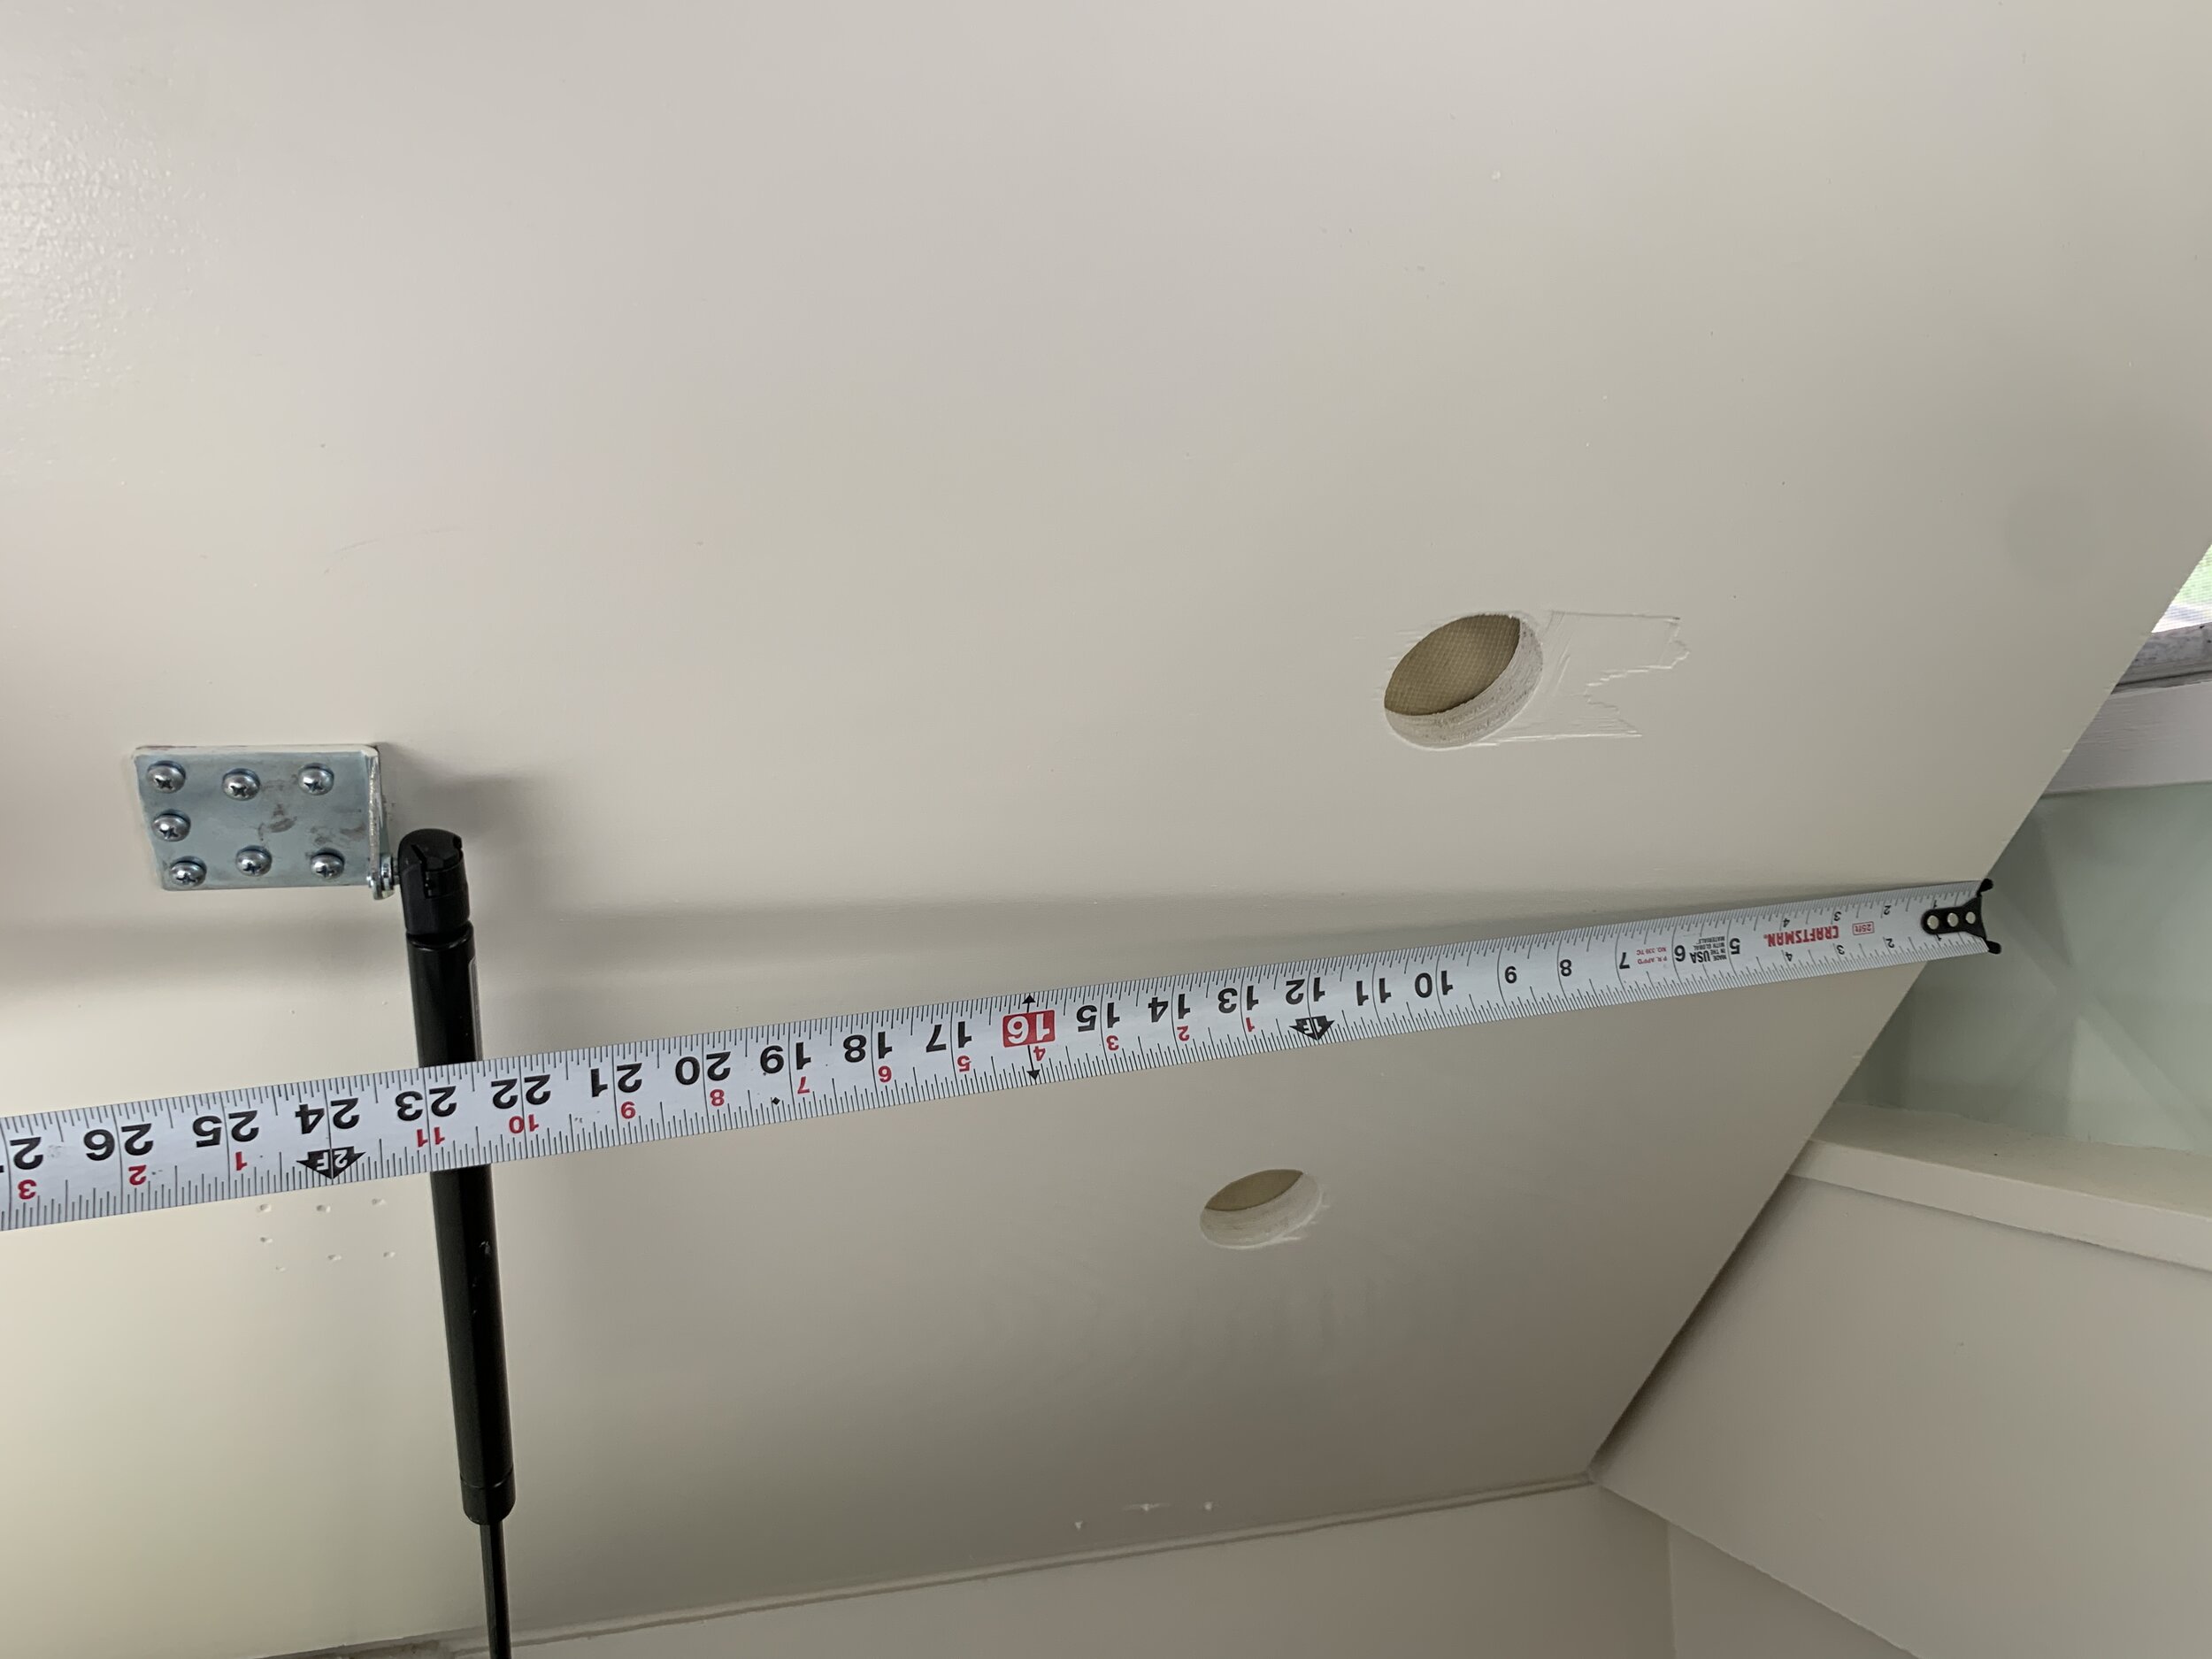
If you recall from our twin bed base build a while back, we cut some little notches into the top middle area of our storage dividers for the gas spring mounting brackets to nest into when the lid is closed. (This is when I’m thankful that we had the slatted lid at first, because it allows us to have a kind of “X-ray” view into the area we can no longer see into when closed now that the lid is solid. So please bear with us as we toggle back and forth between the slatted and solid lid for some of these shots to help show and tell.)

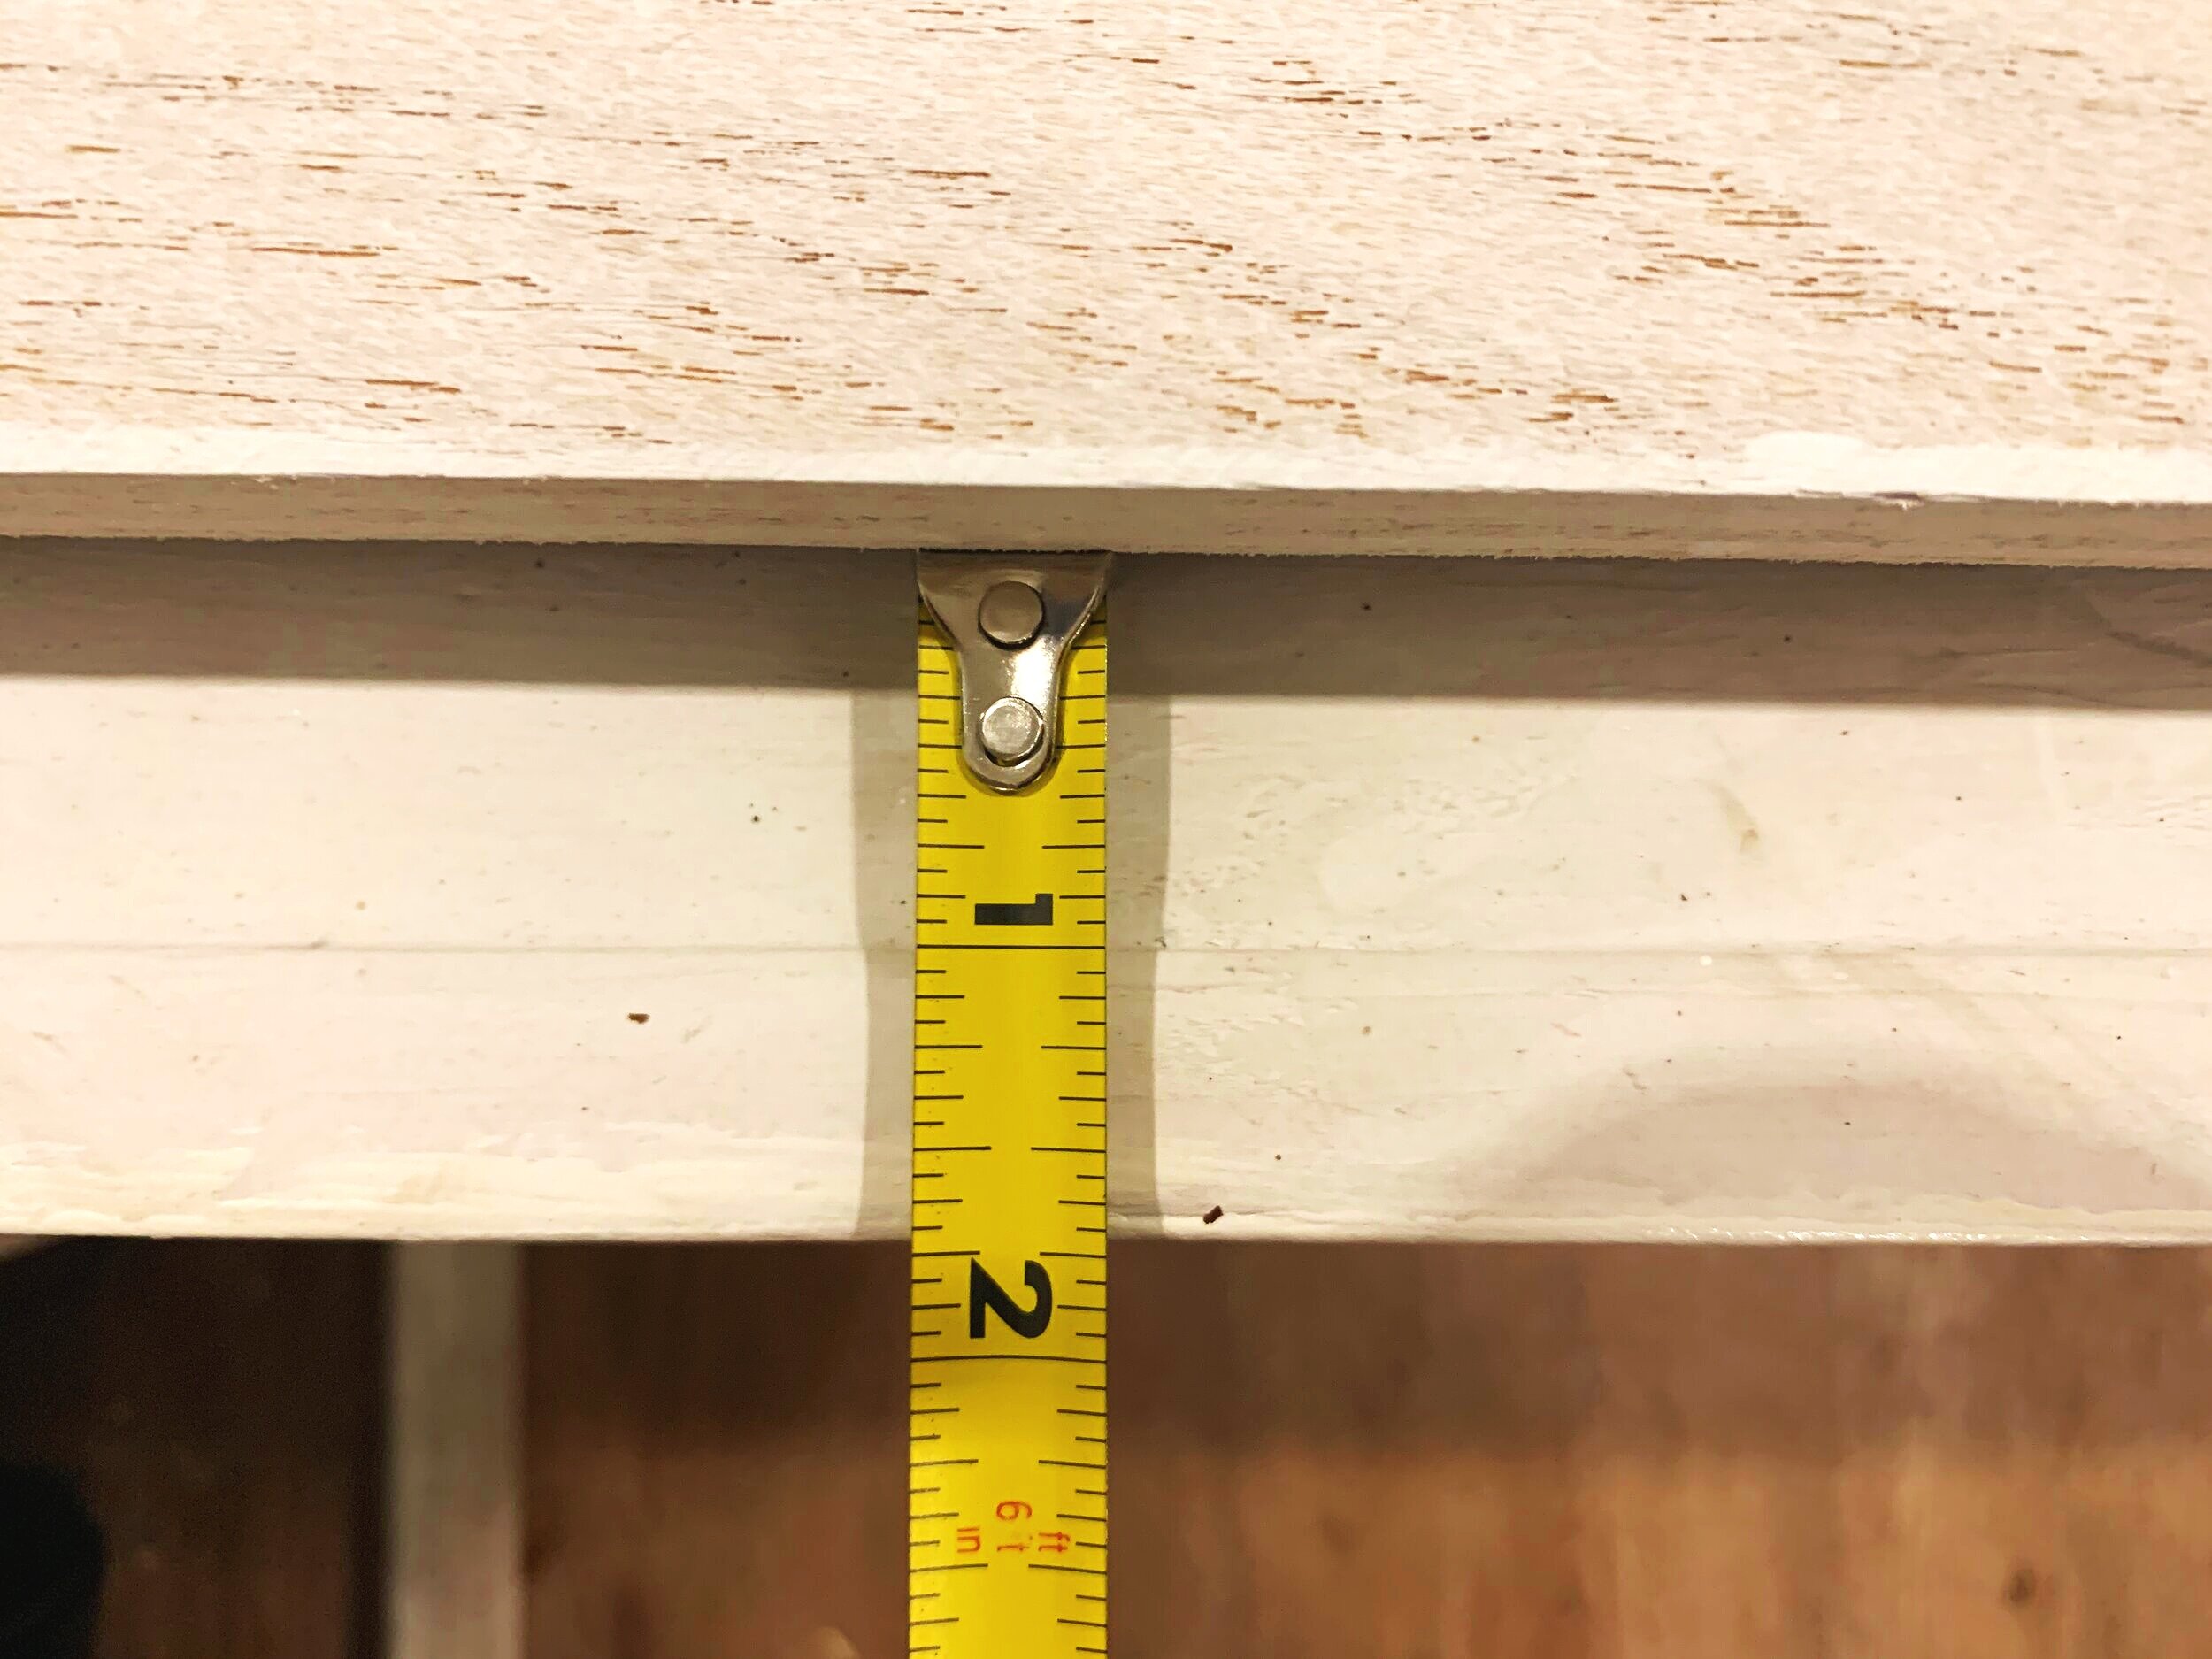
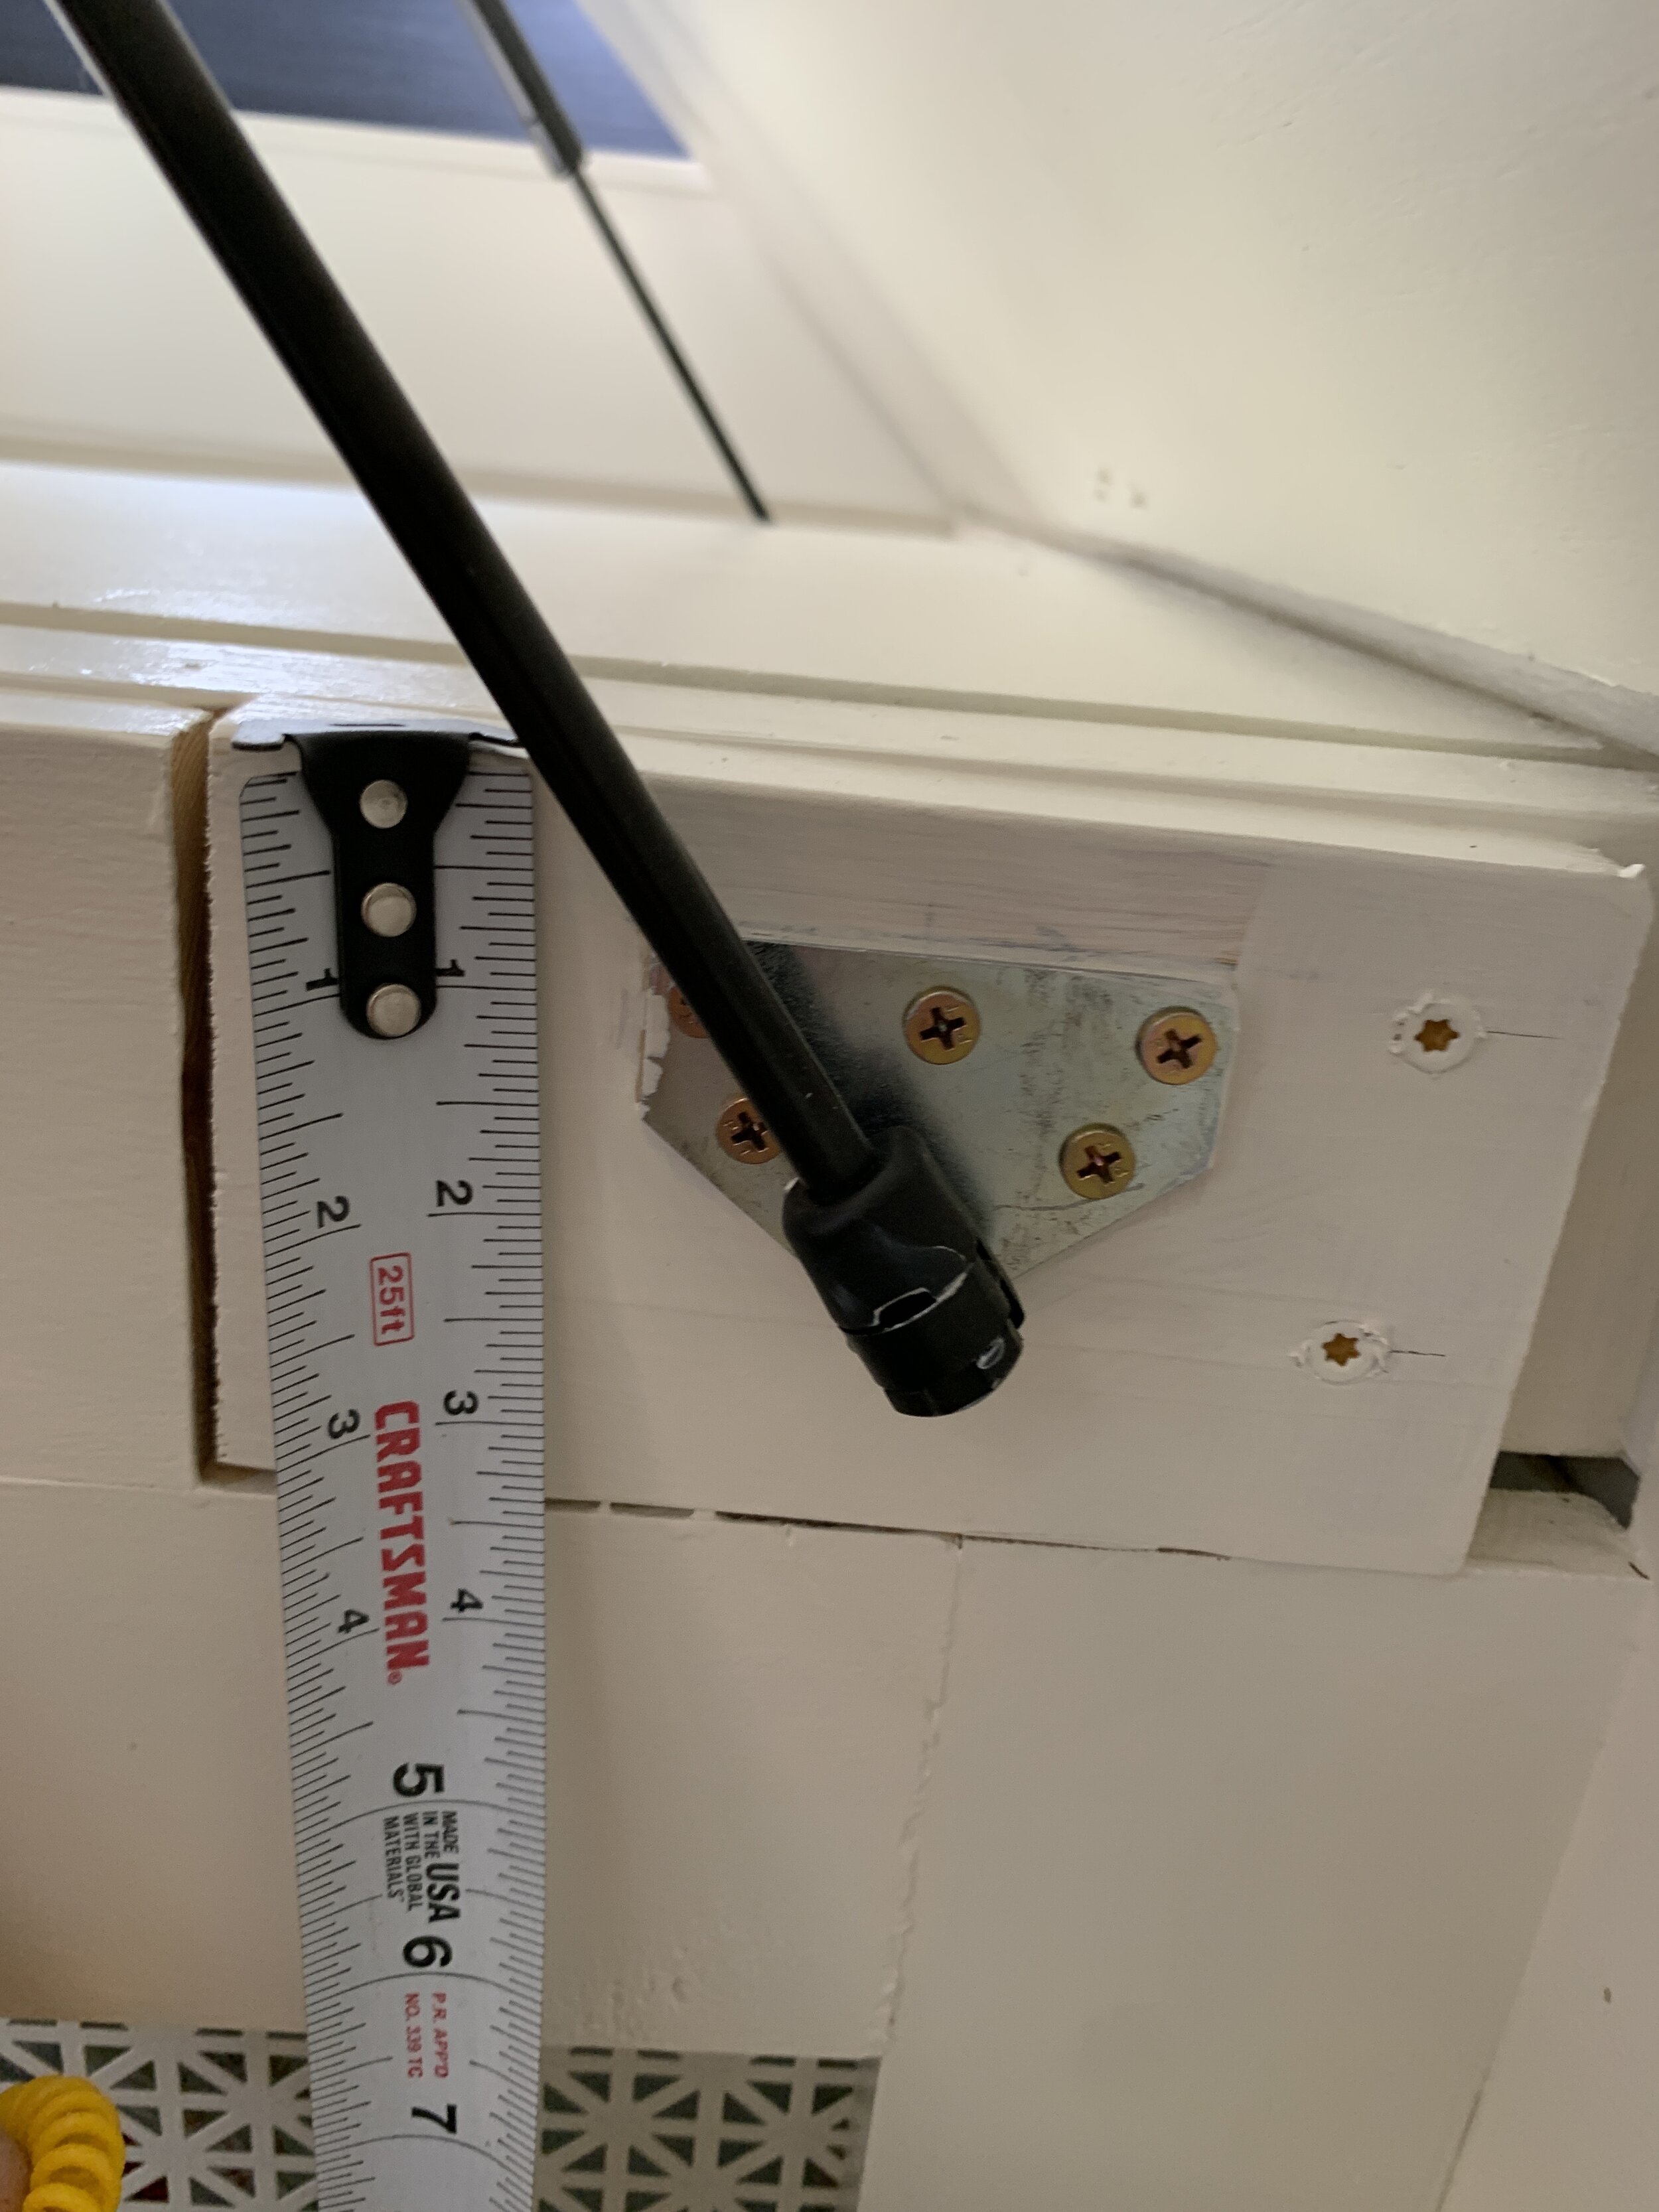
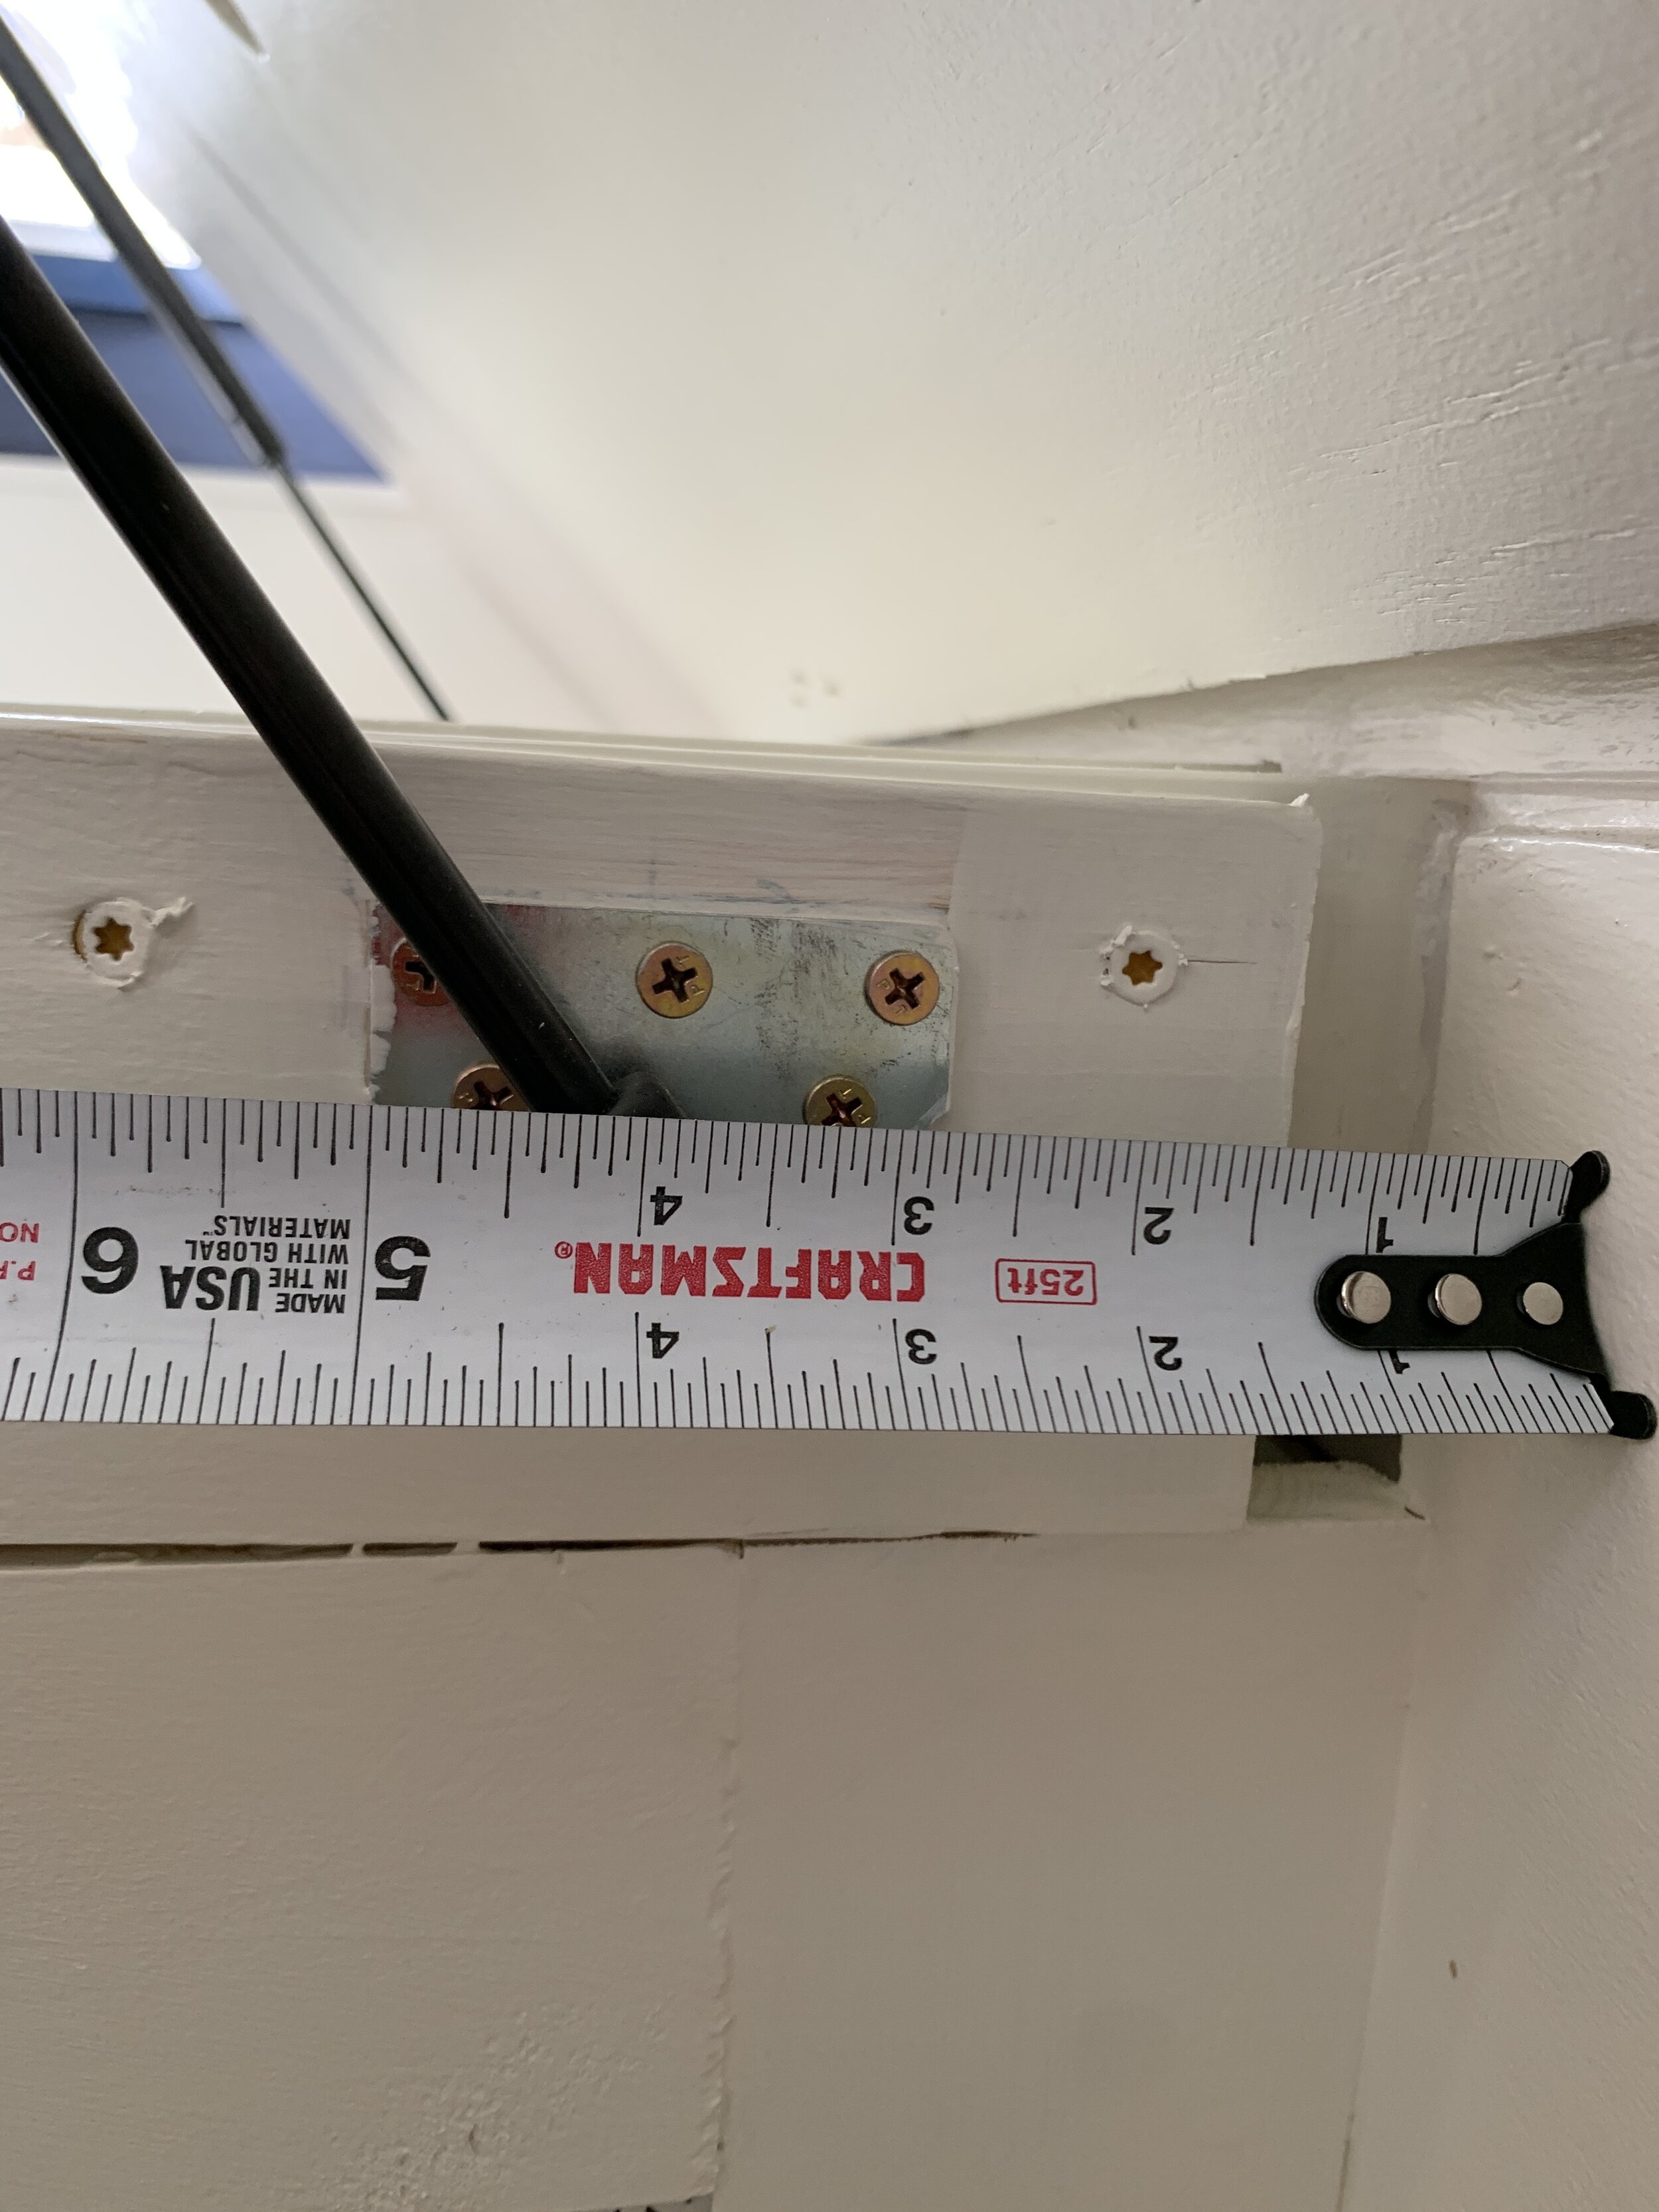
The bottom twin bed/base-side connection brackets for the gas springs are placed 2-3/4” from the back of the bed.
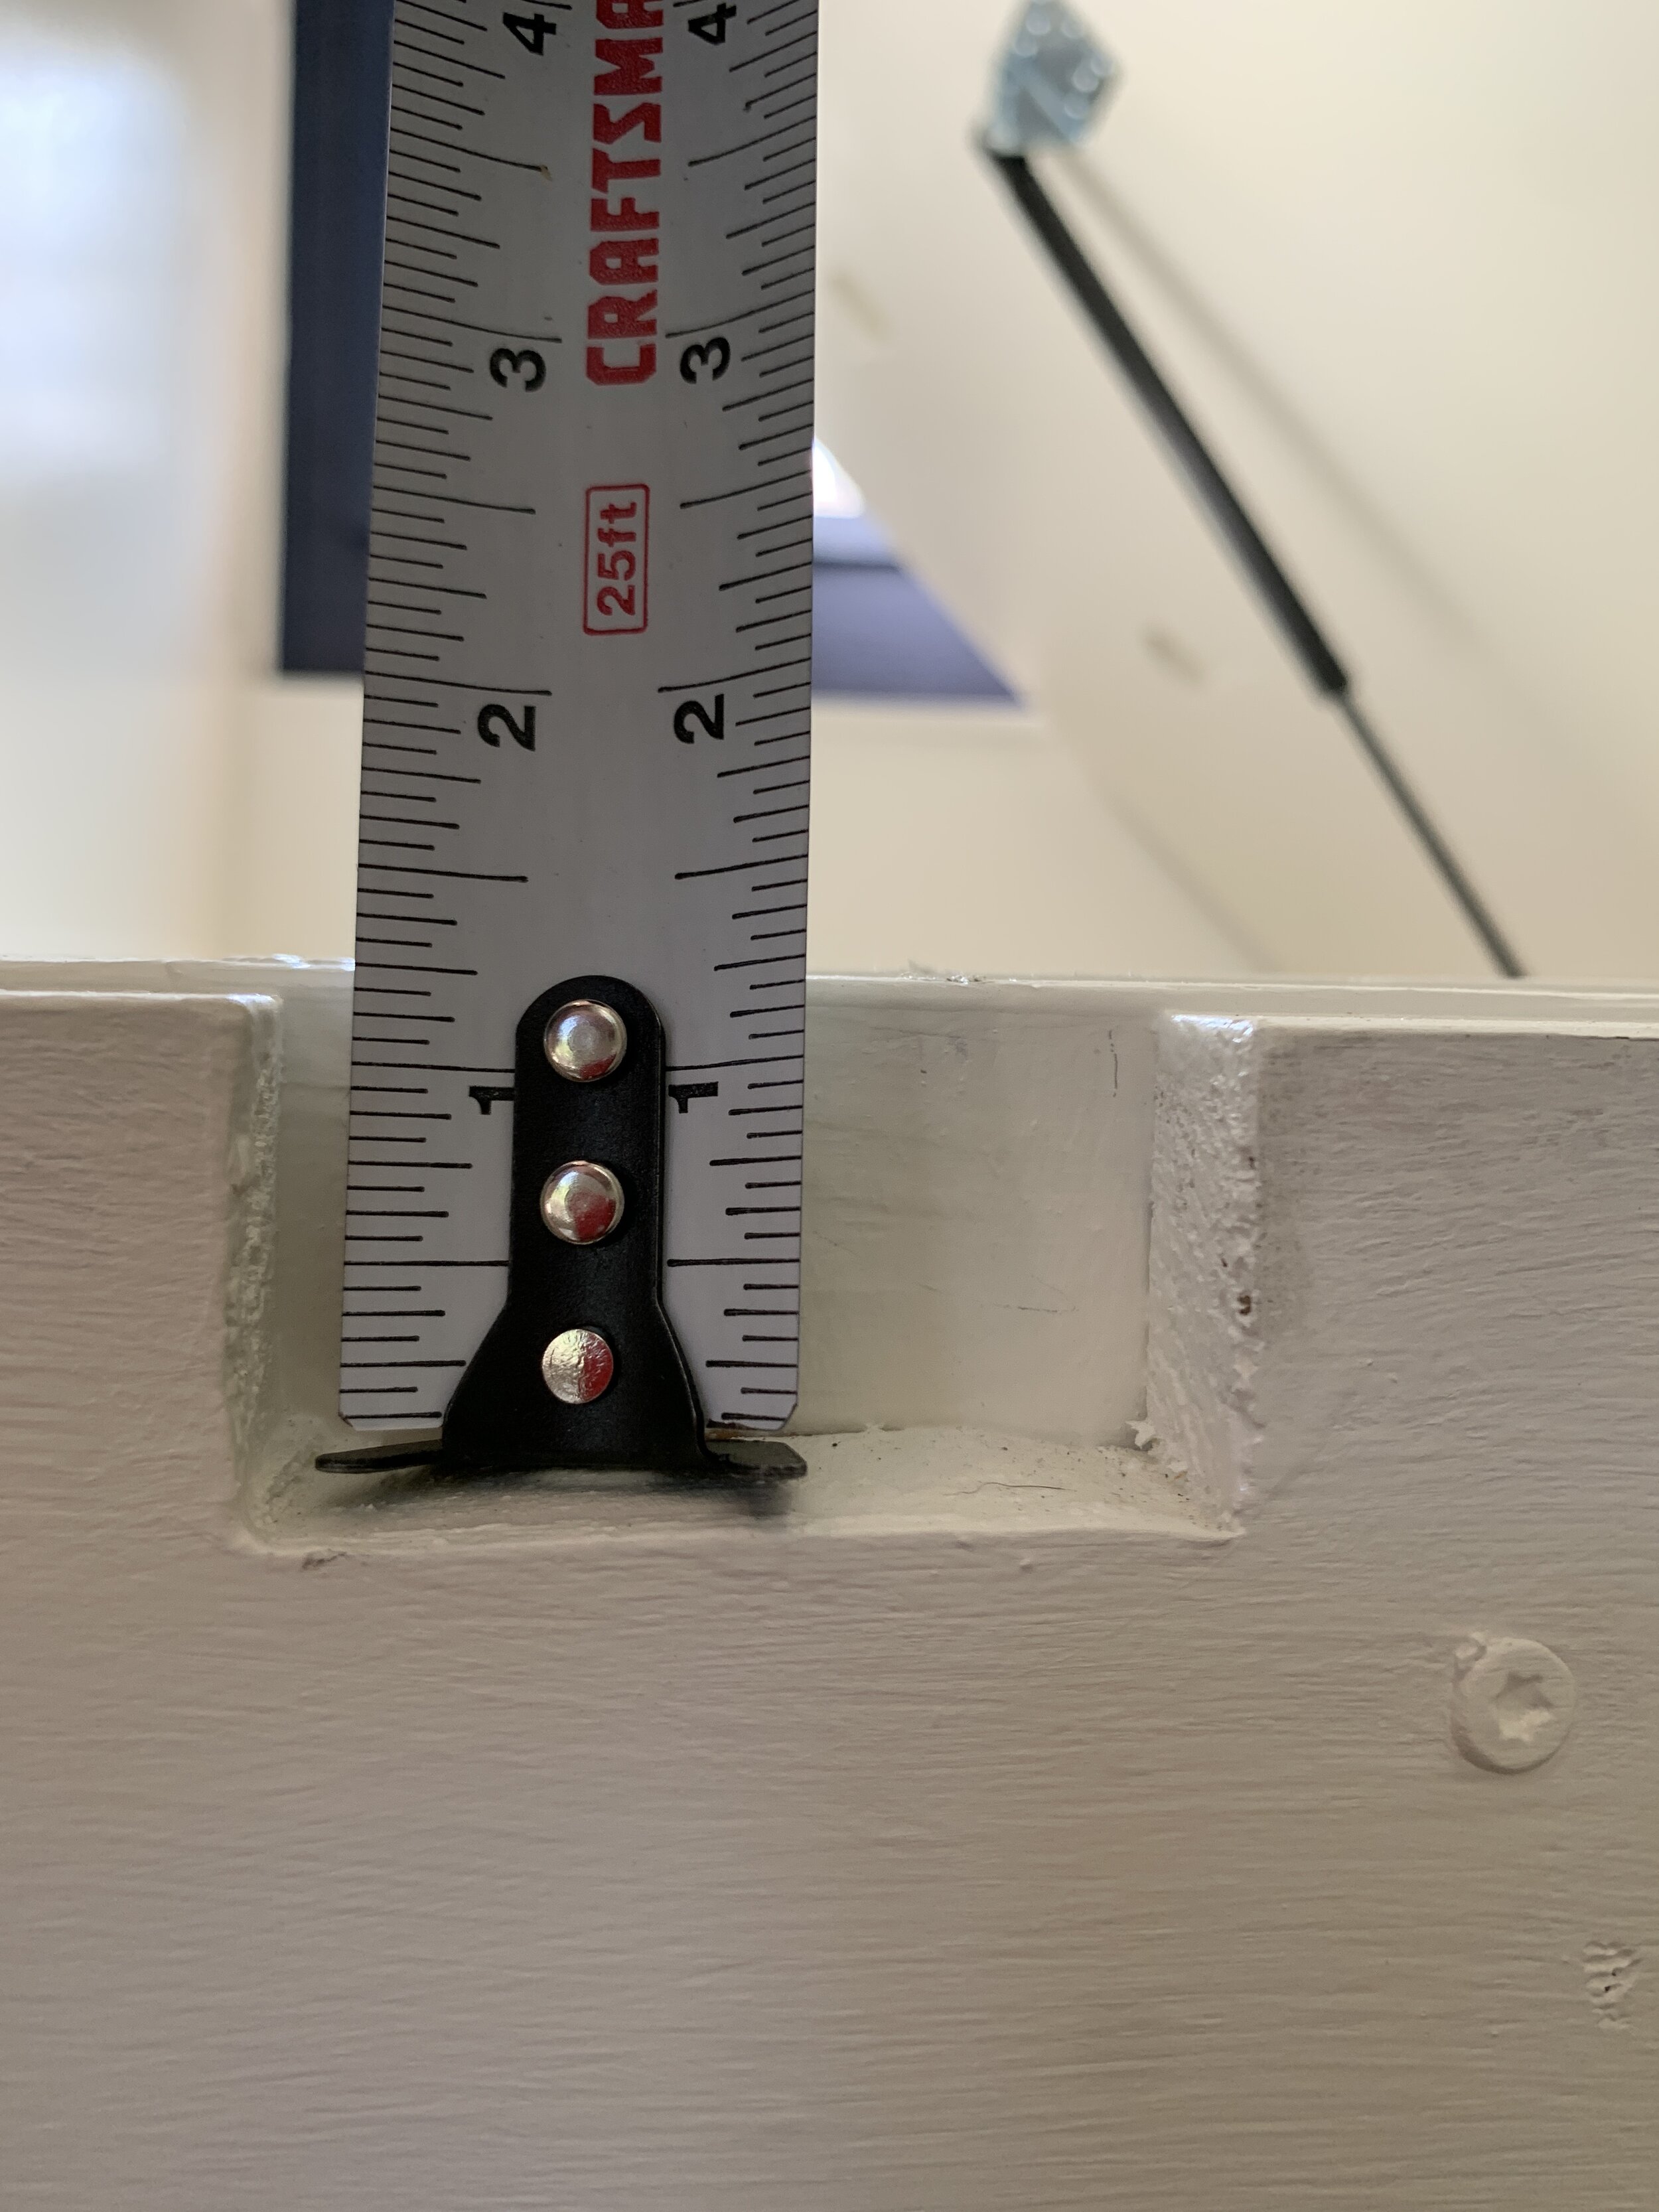
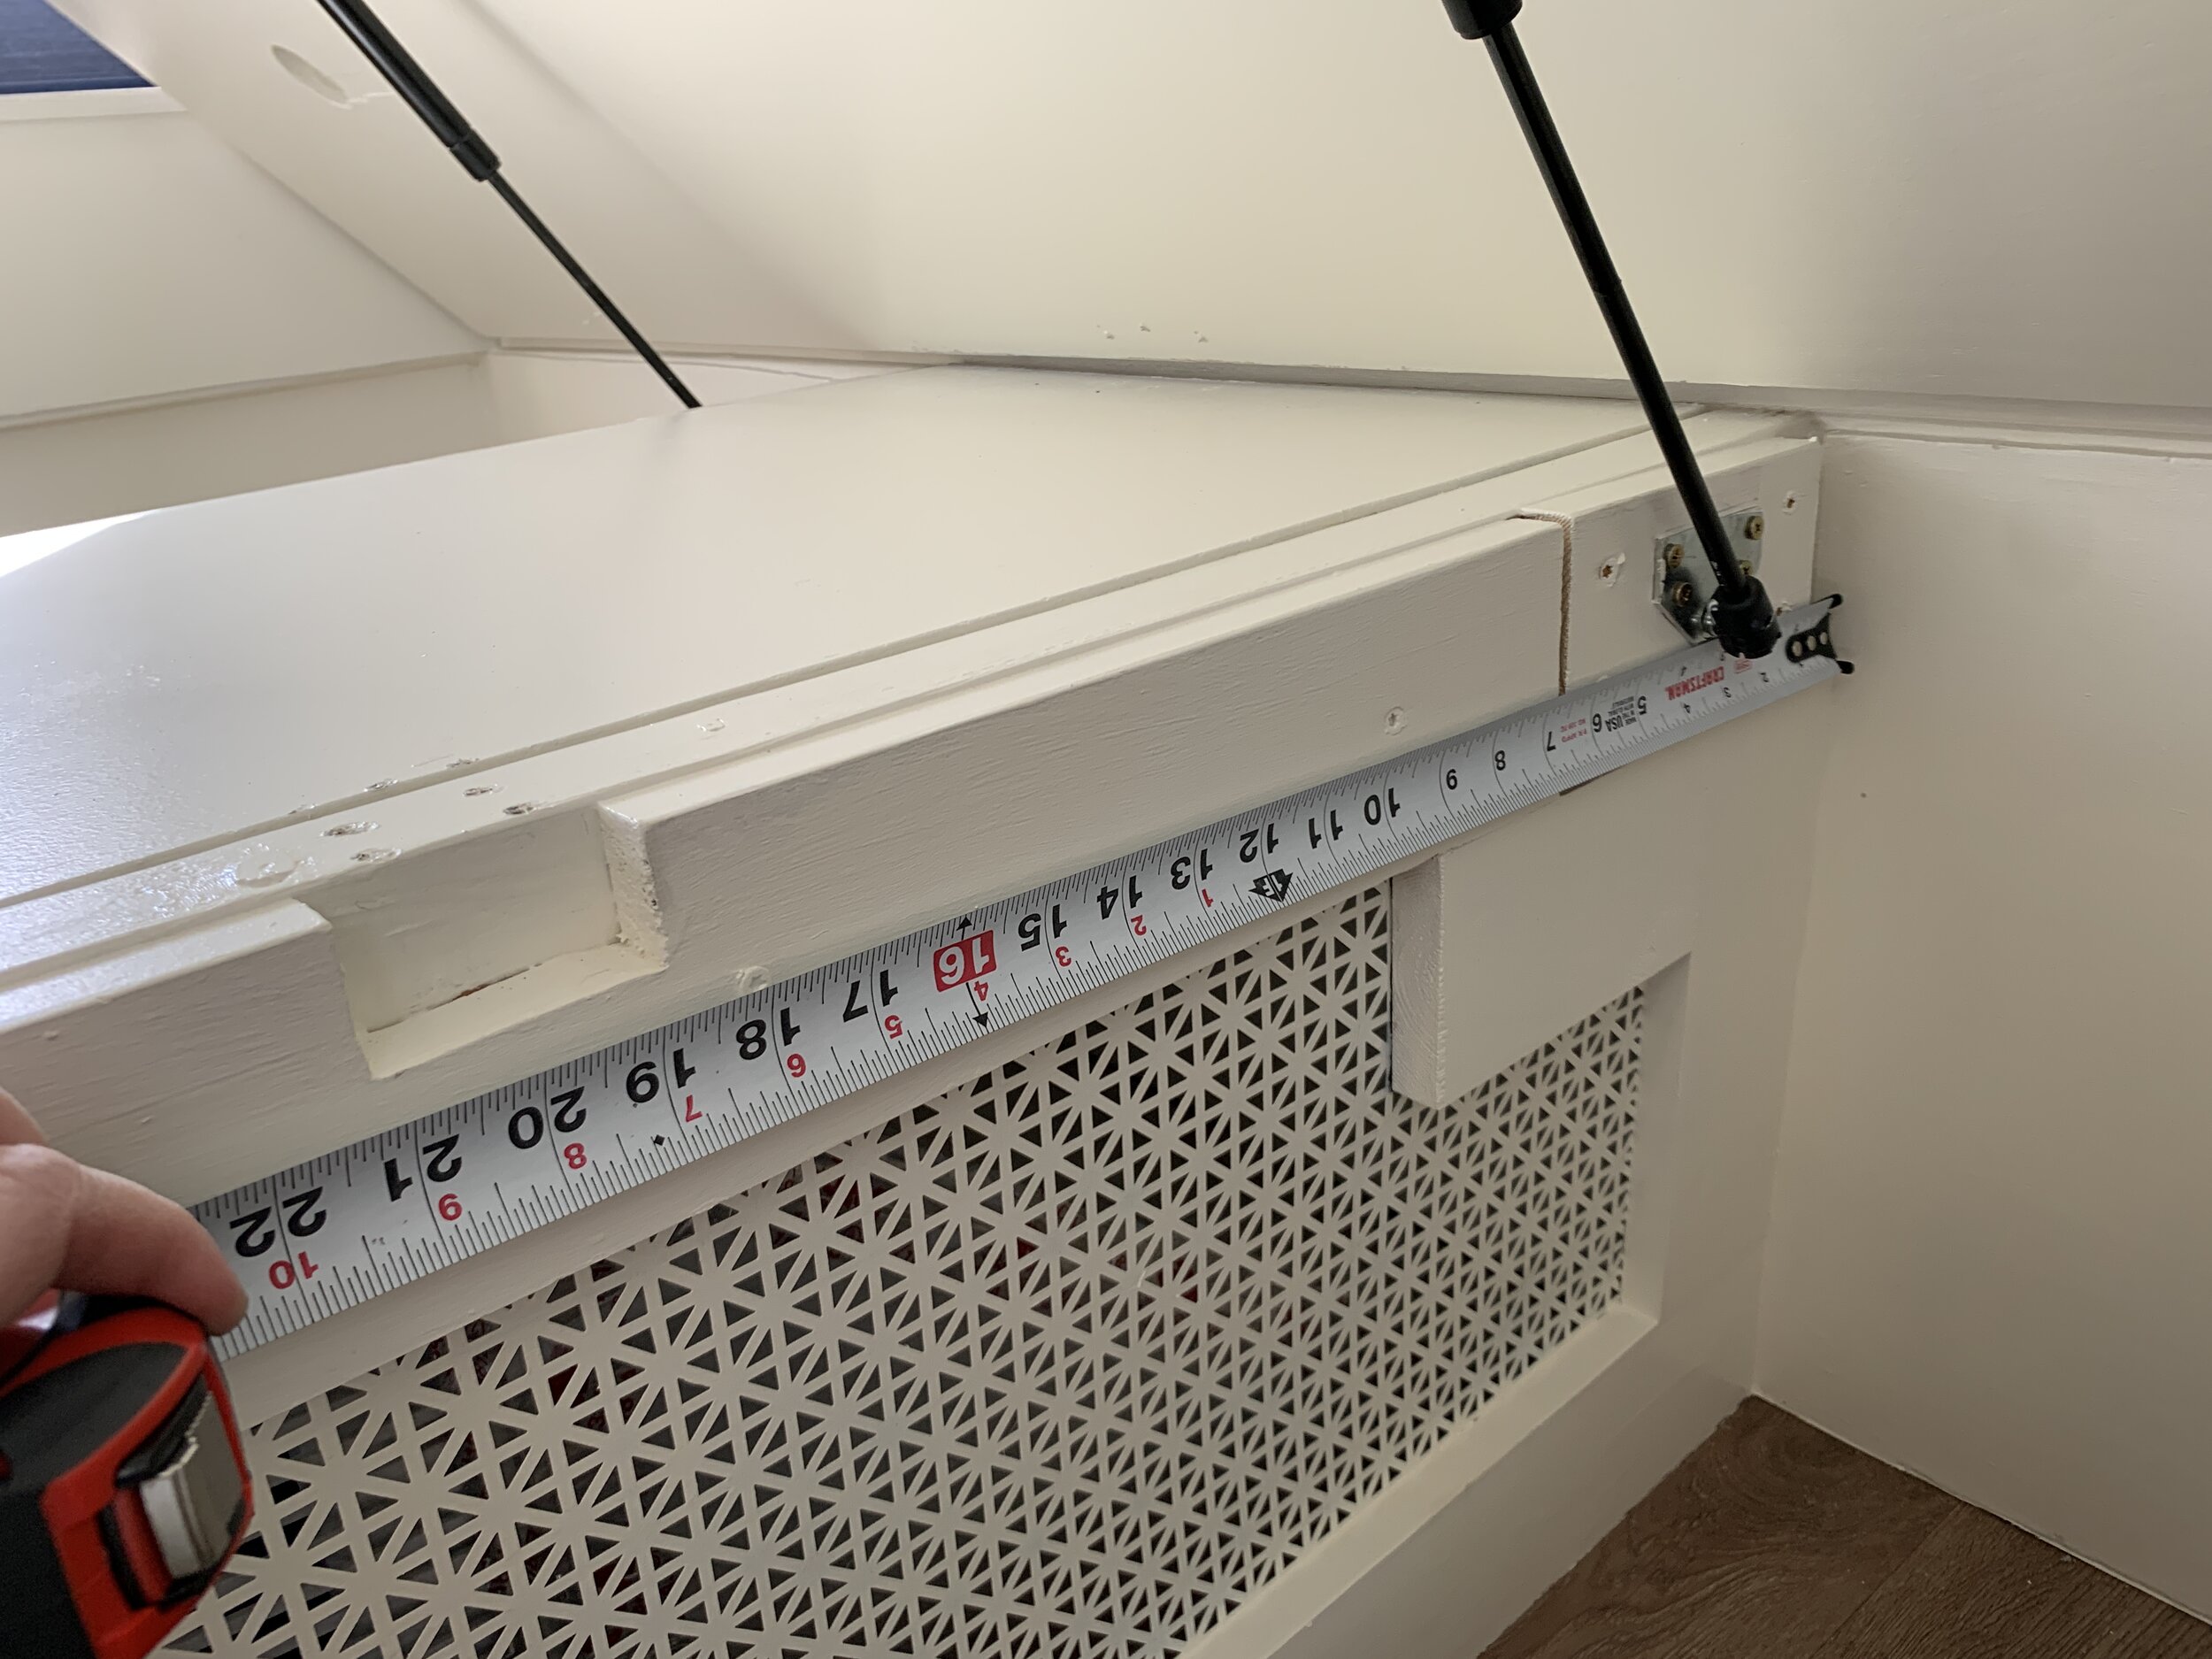
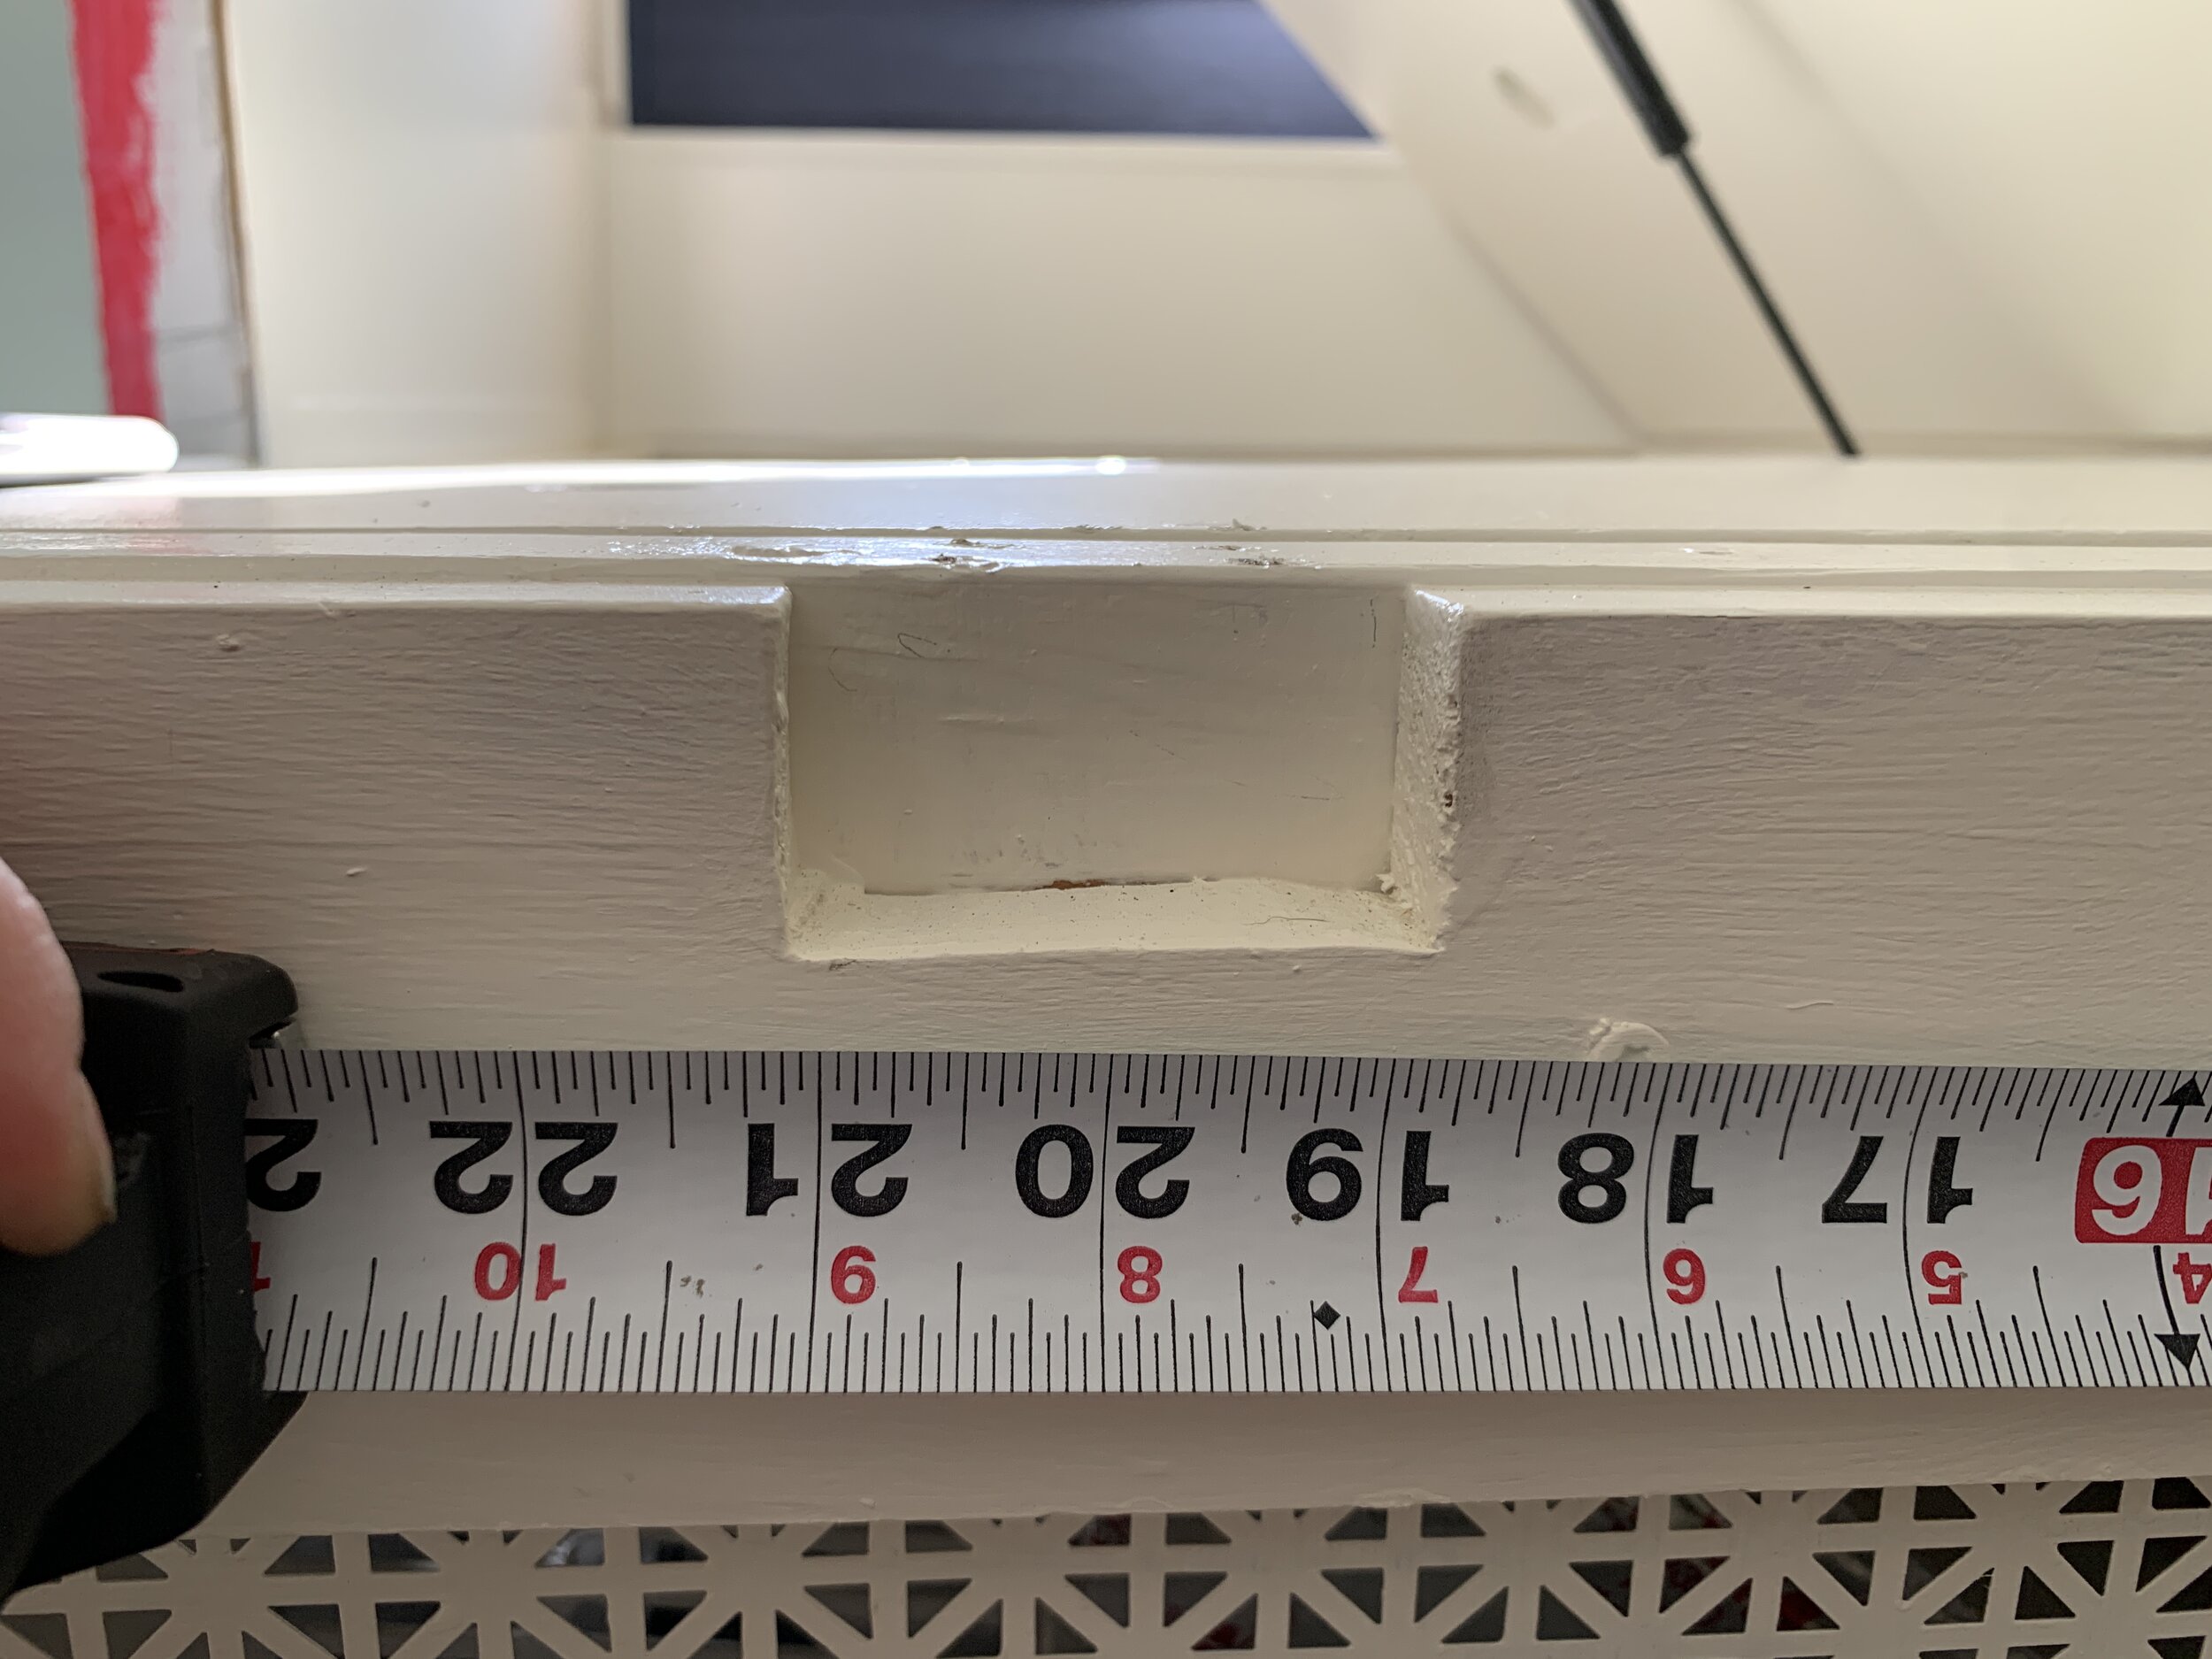
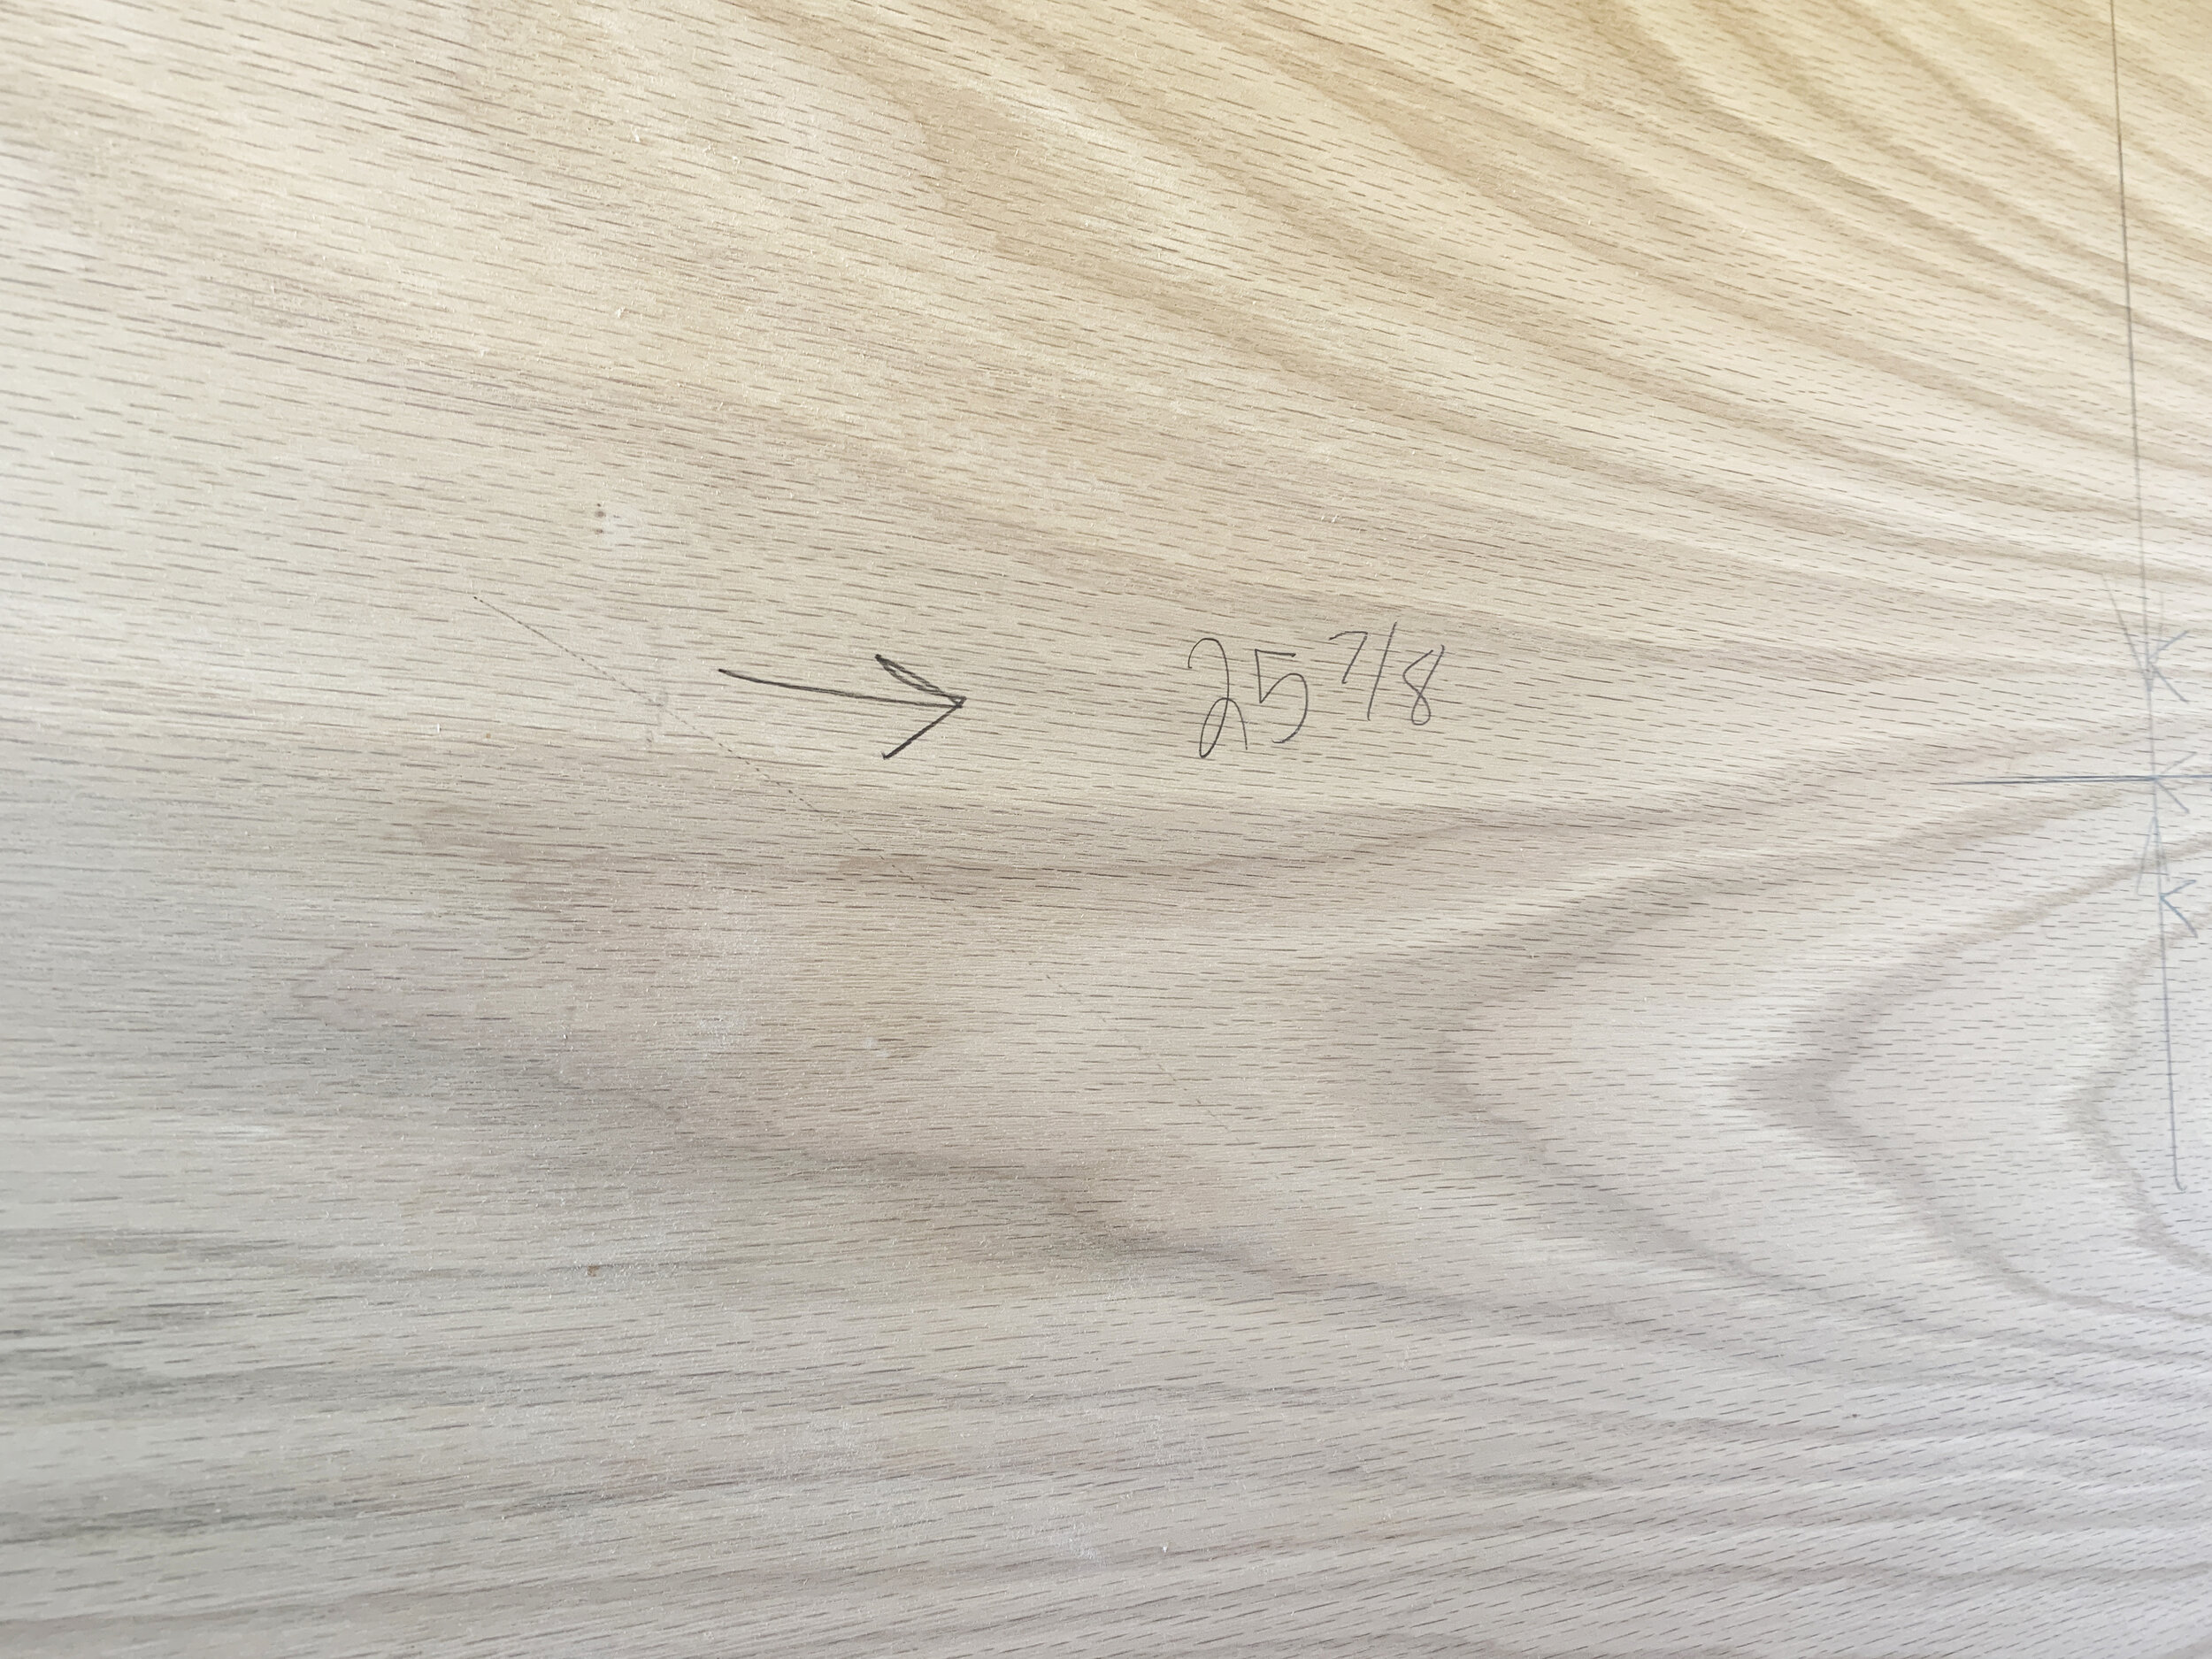
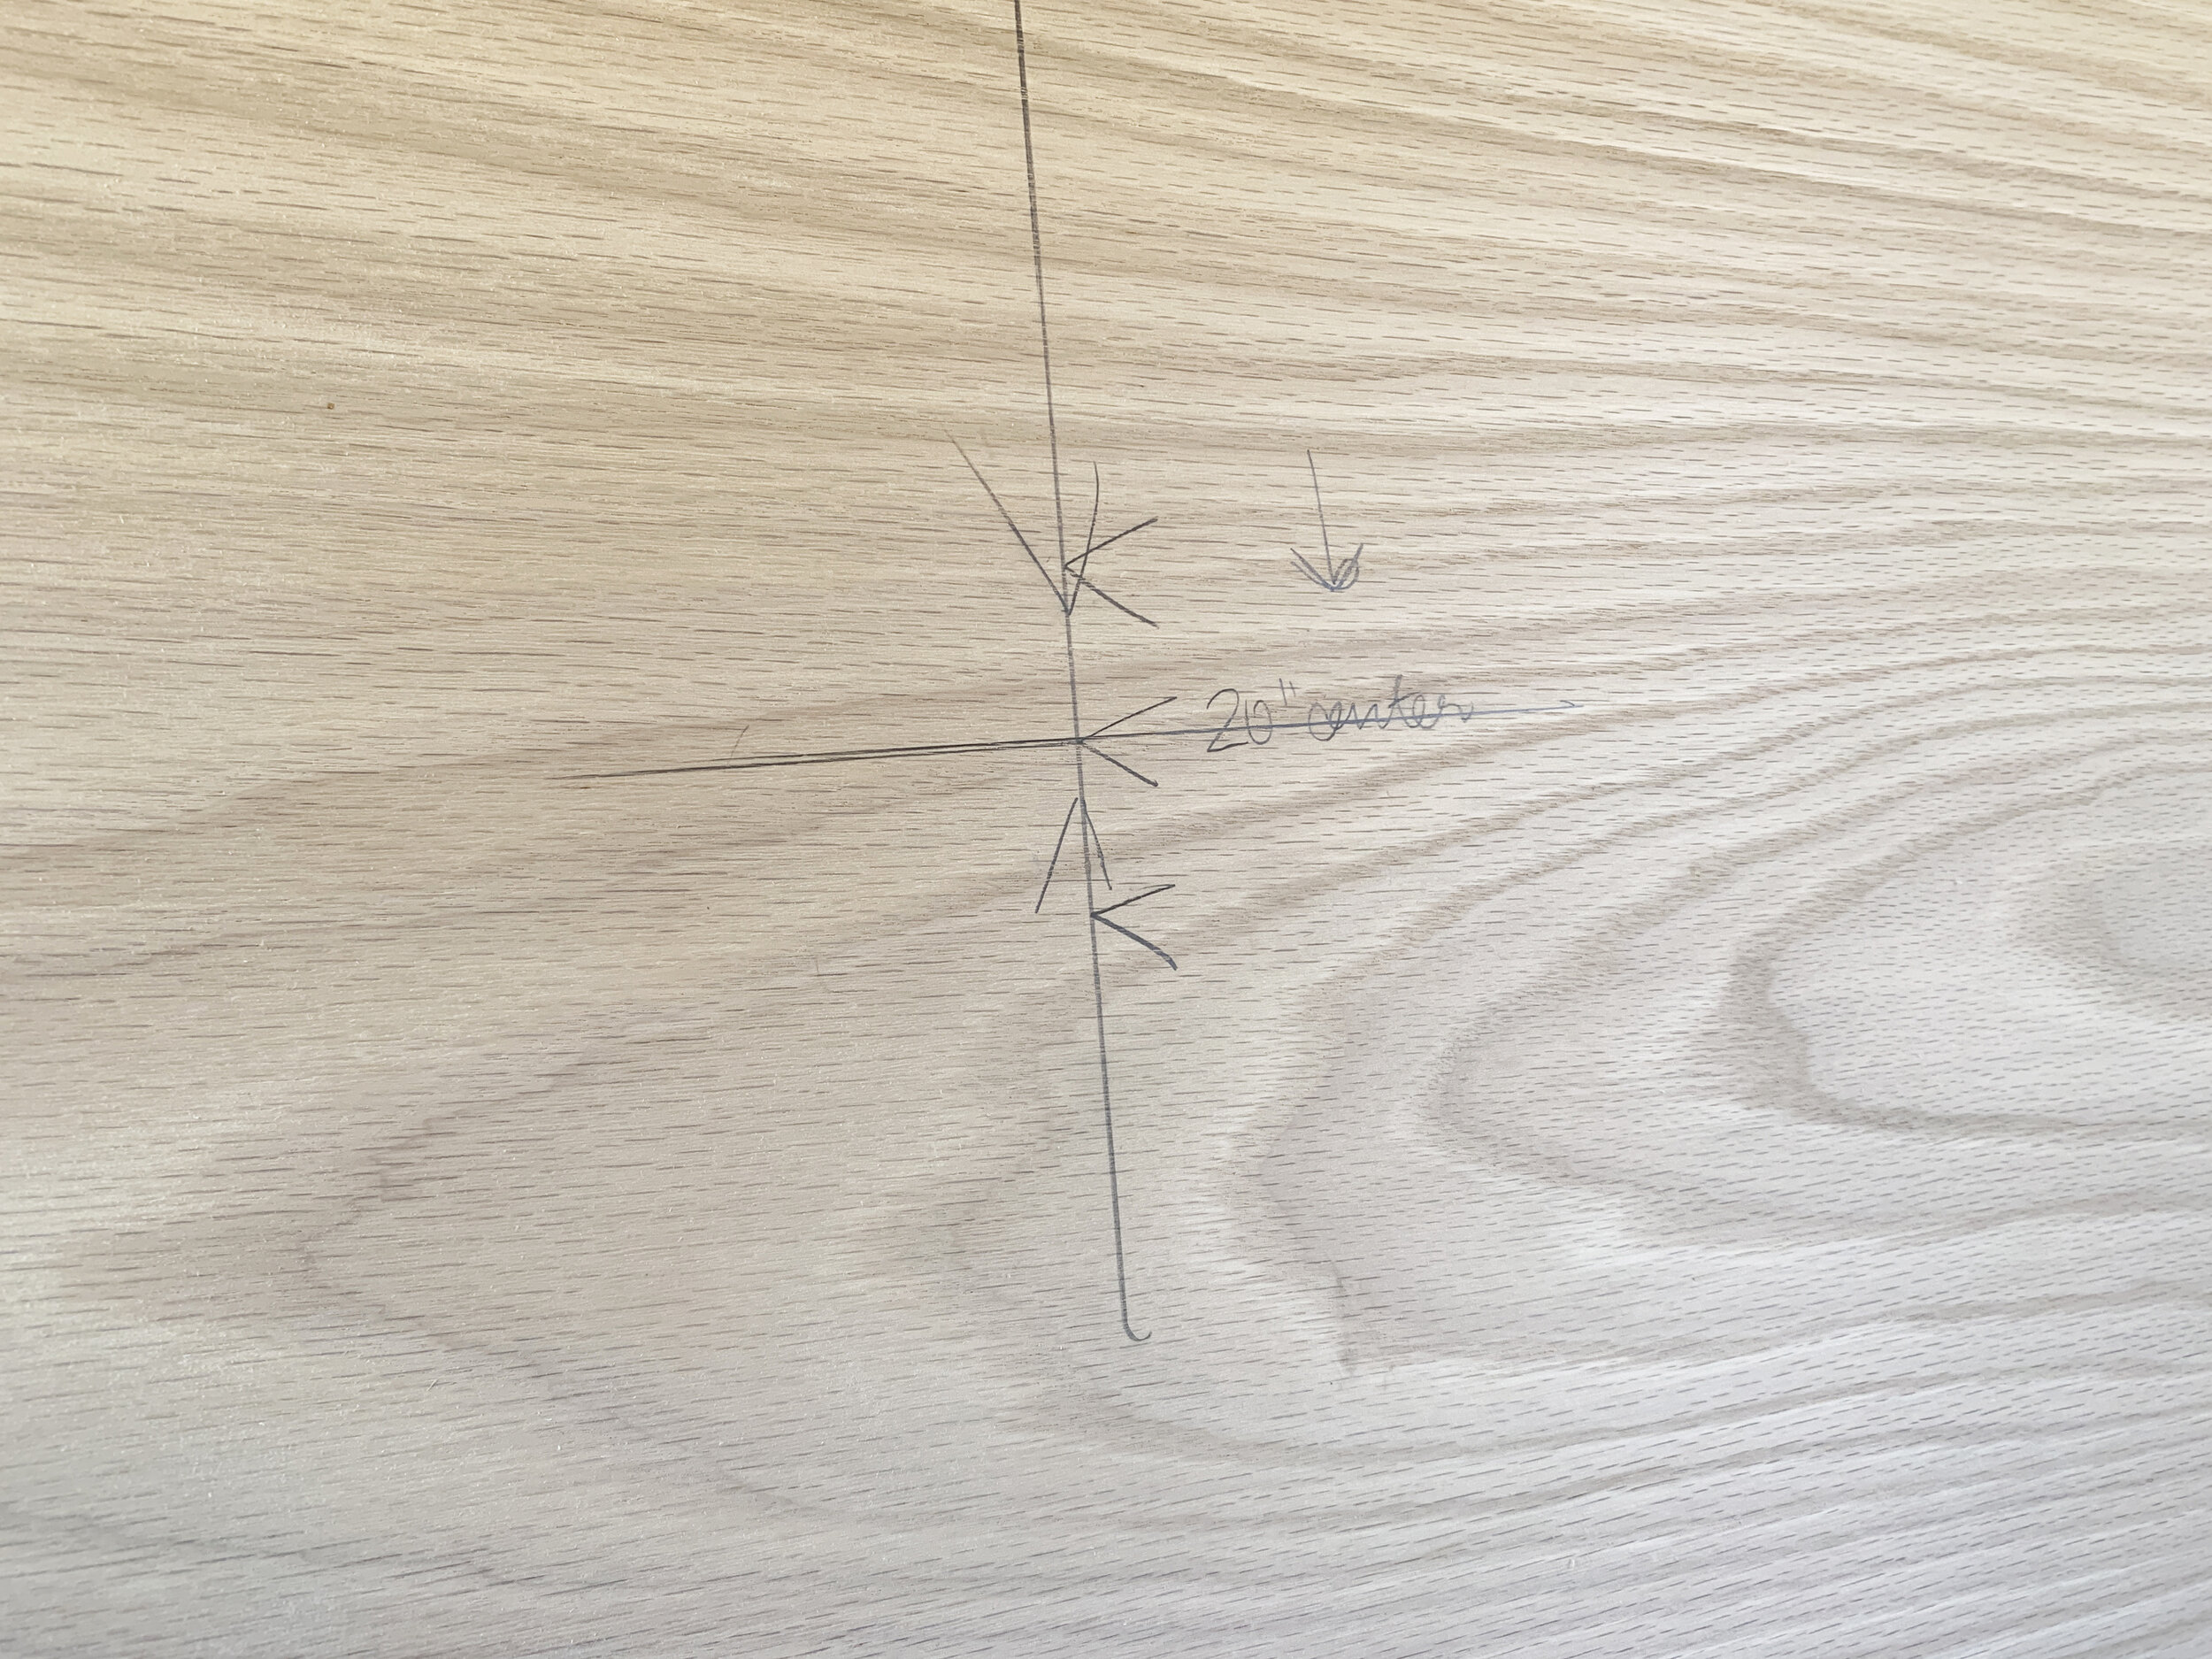
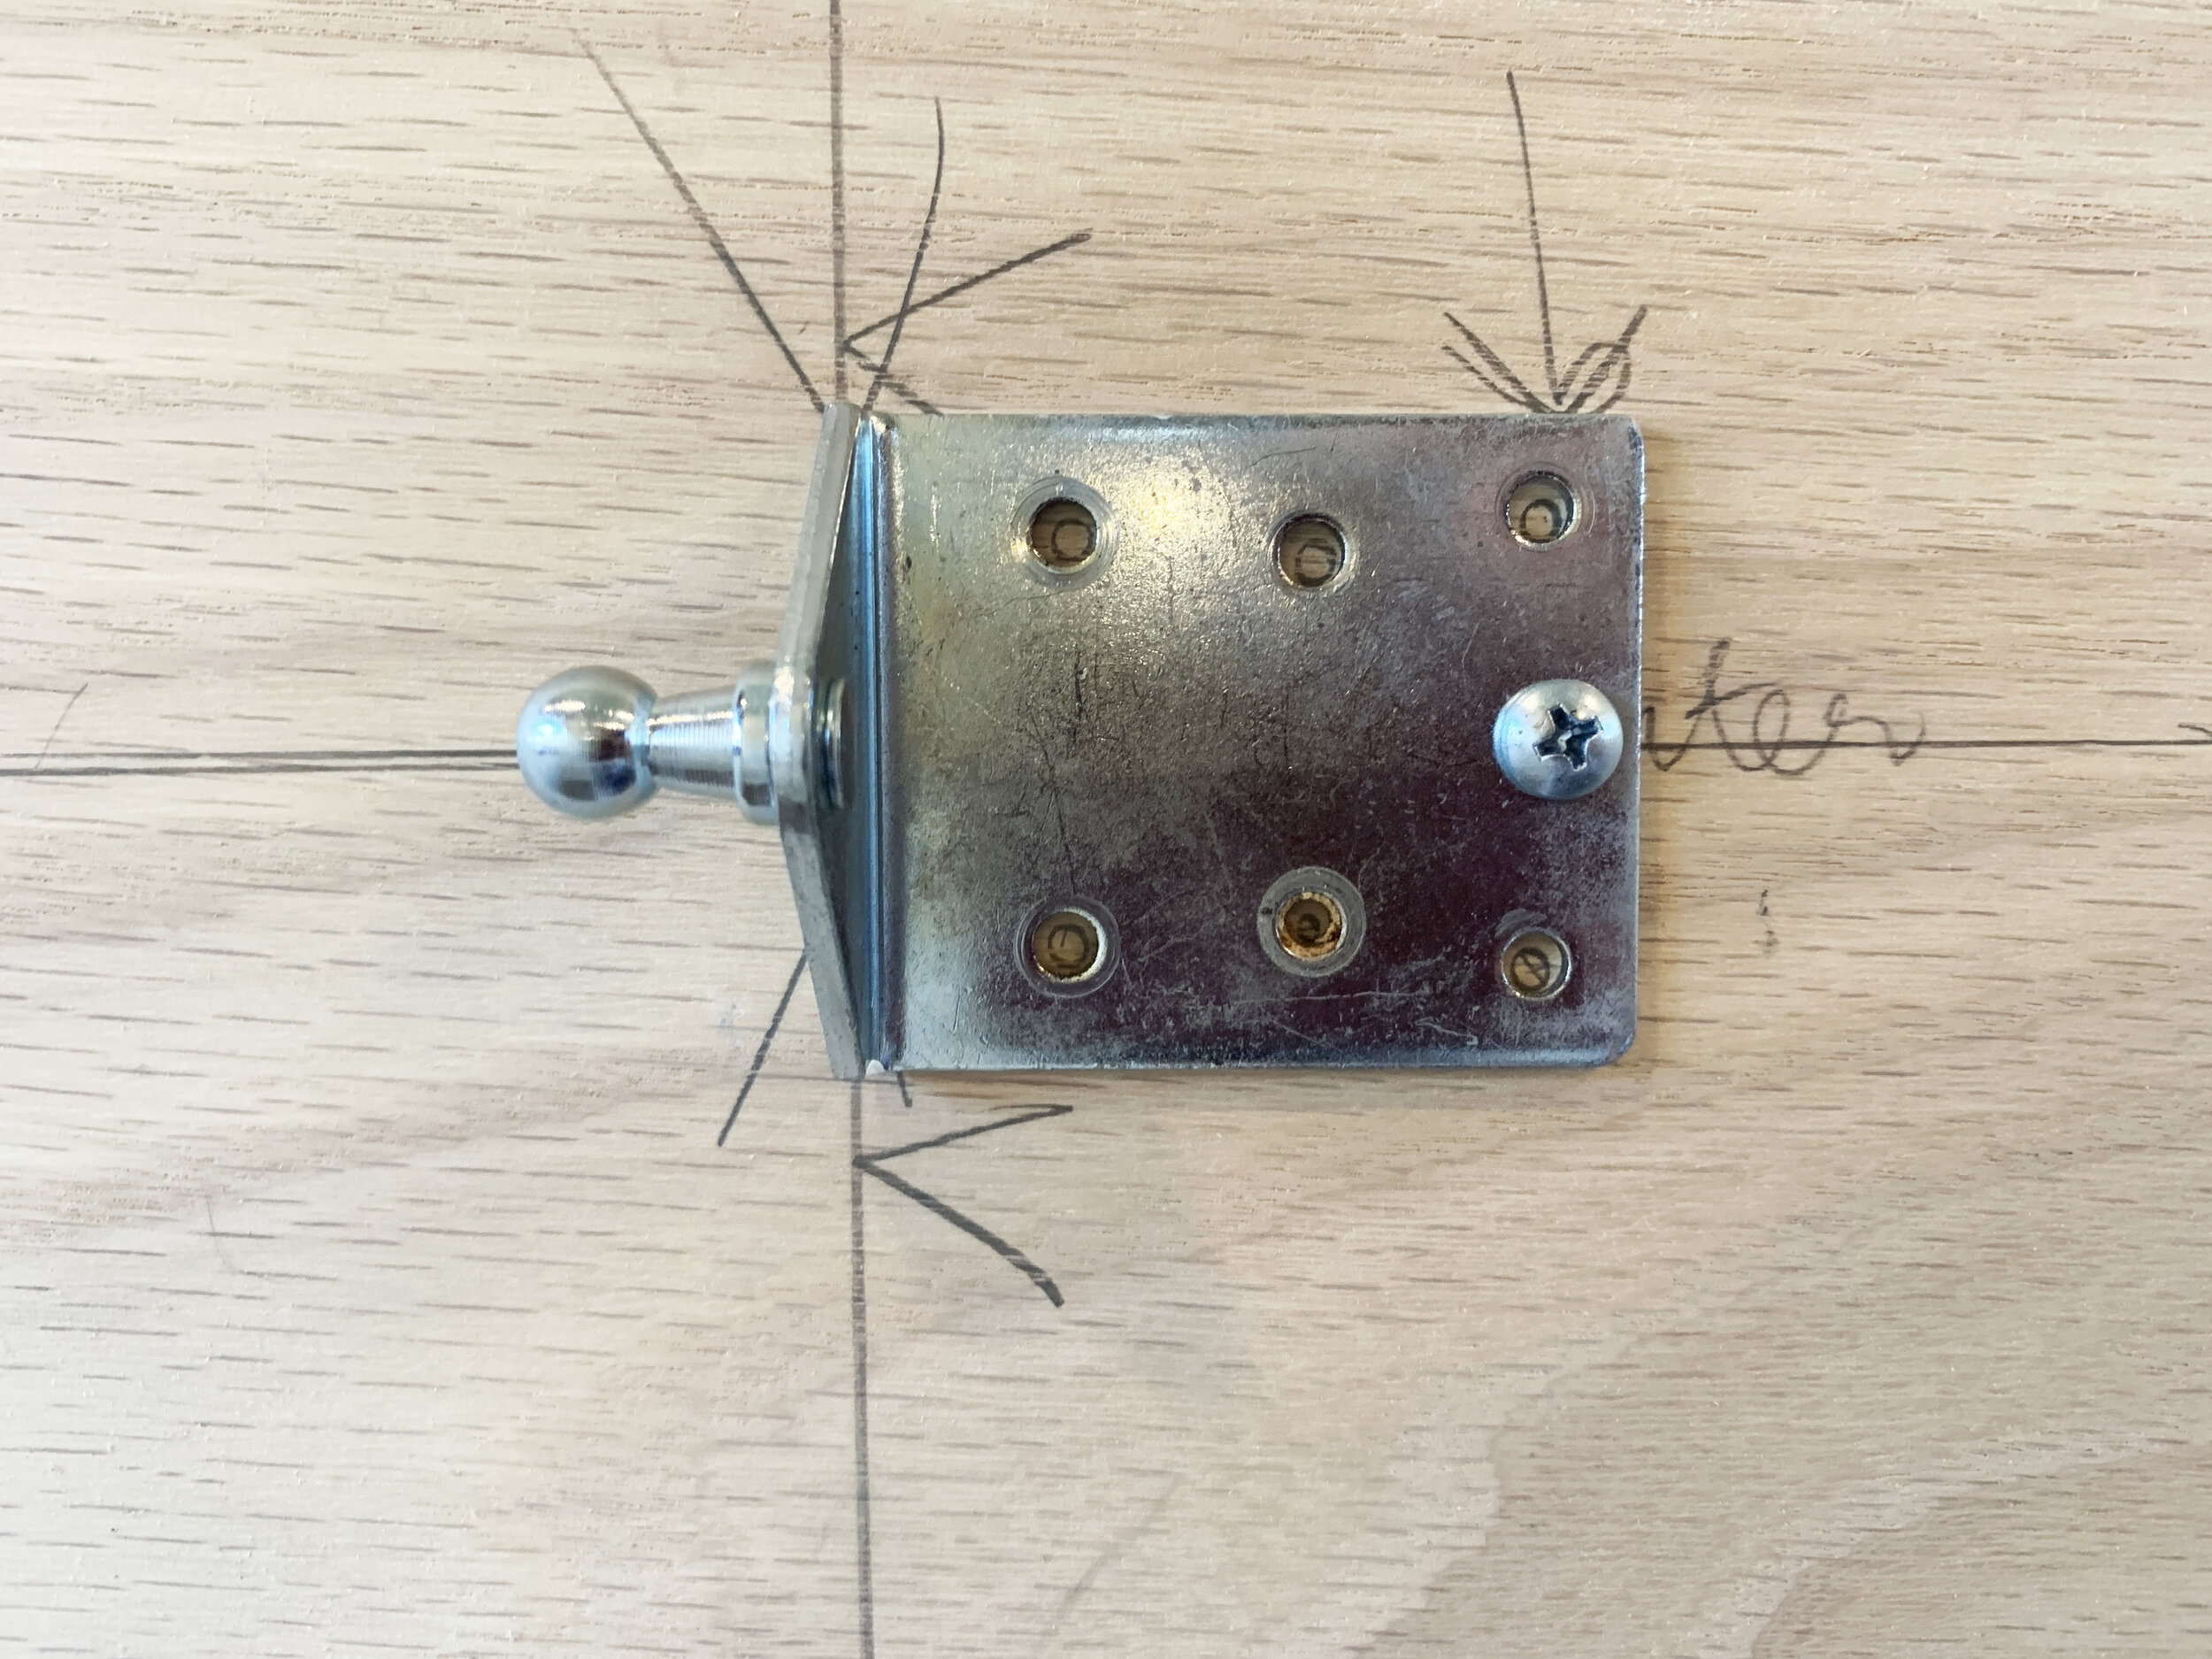
The top/lid-side connection brackets for the gas springs are 19-1/4” from the back wall of the bed and 23-1/2” from the sides (or, headboard and footboard) of the bed – or – if you’re measuring the lid only, the center of the bracket is 20” from the hinge-side and the outer edge of the bracket plate is 25-7/8” from each side of the lid. The small notches we made in the bed base for the lid brackets to go into to allow for the lid to close all the way are 2-1/2” long, 1-1/4” deep, and start 19-1/4” from the back wall of the bed.
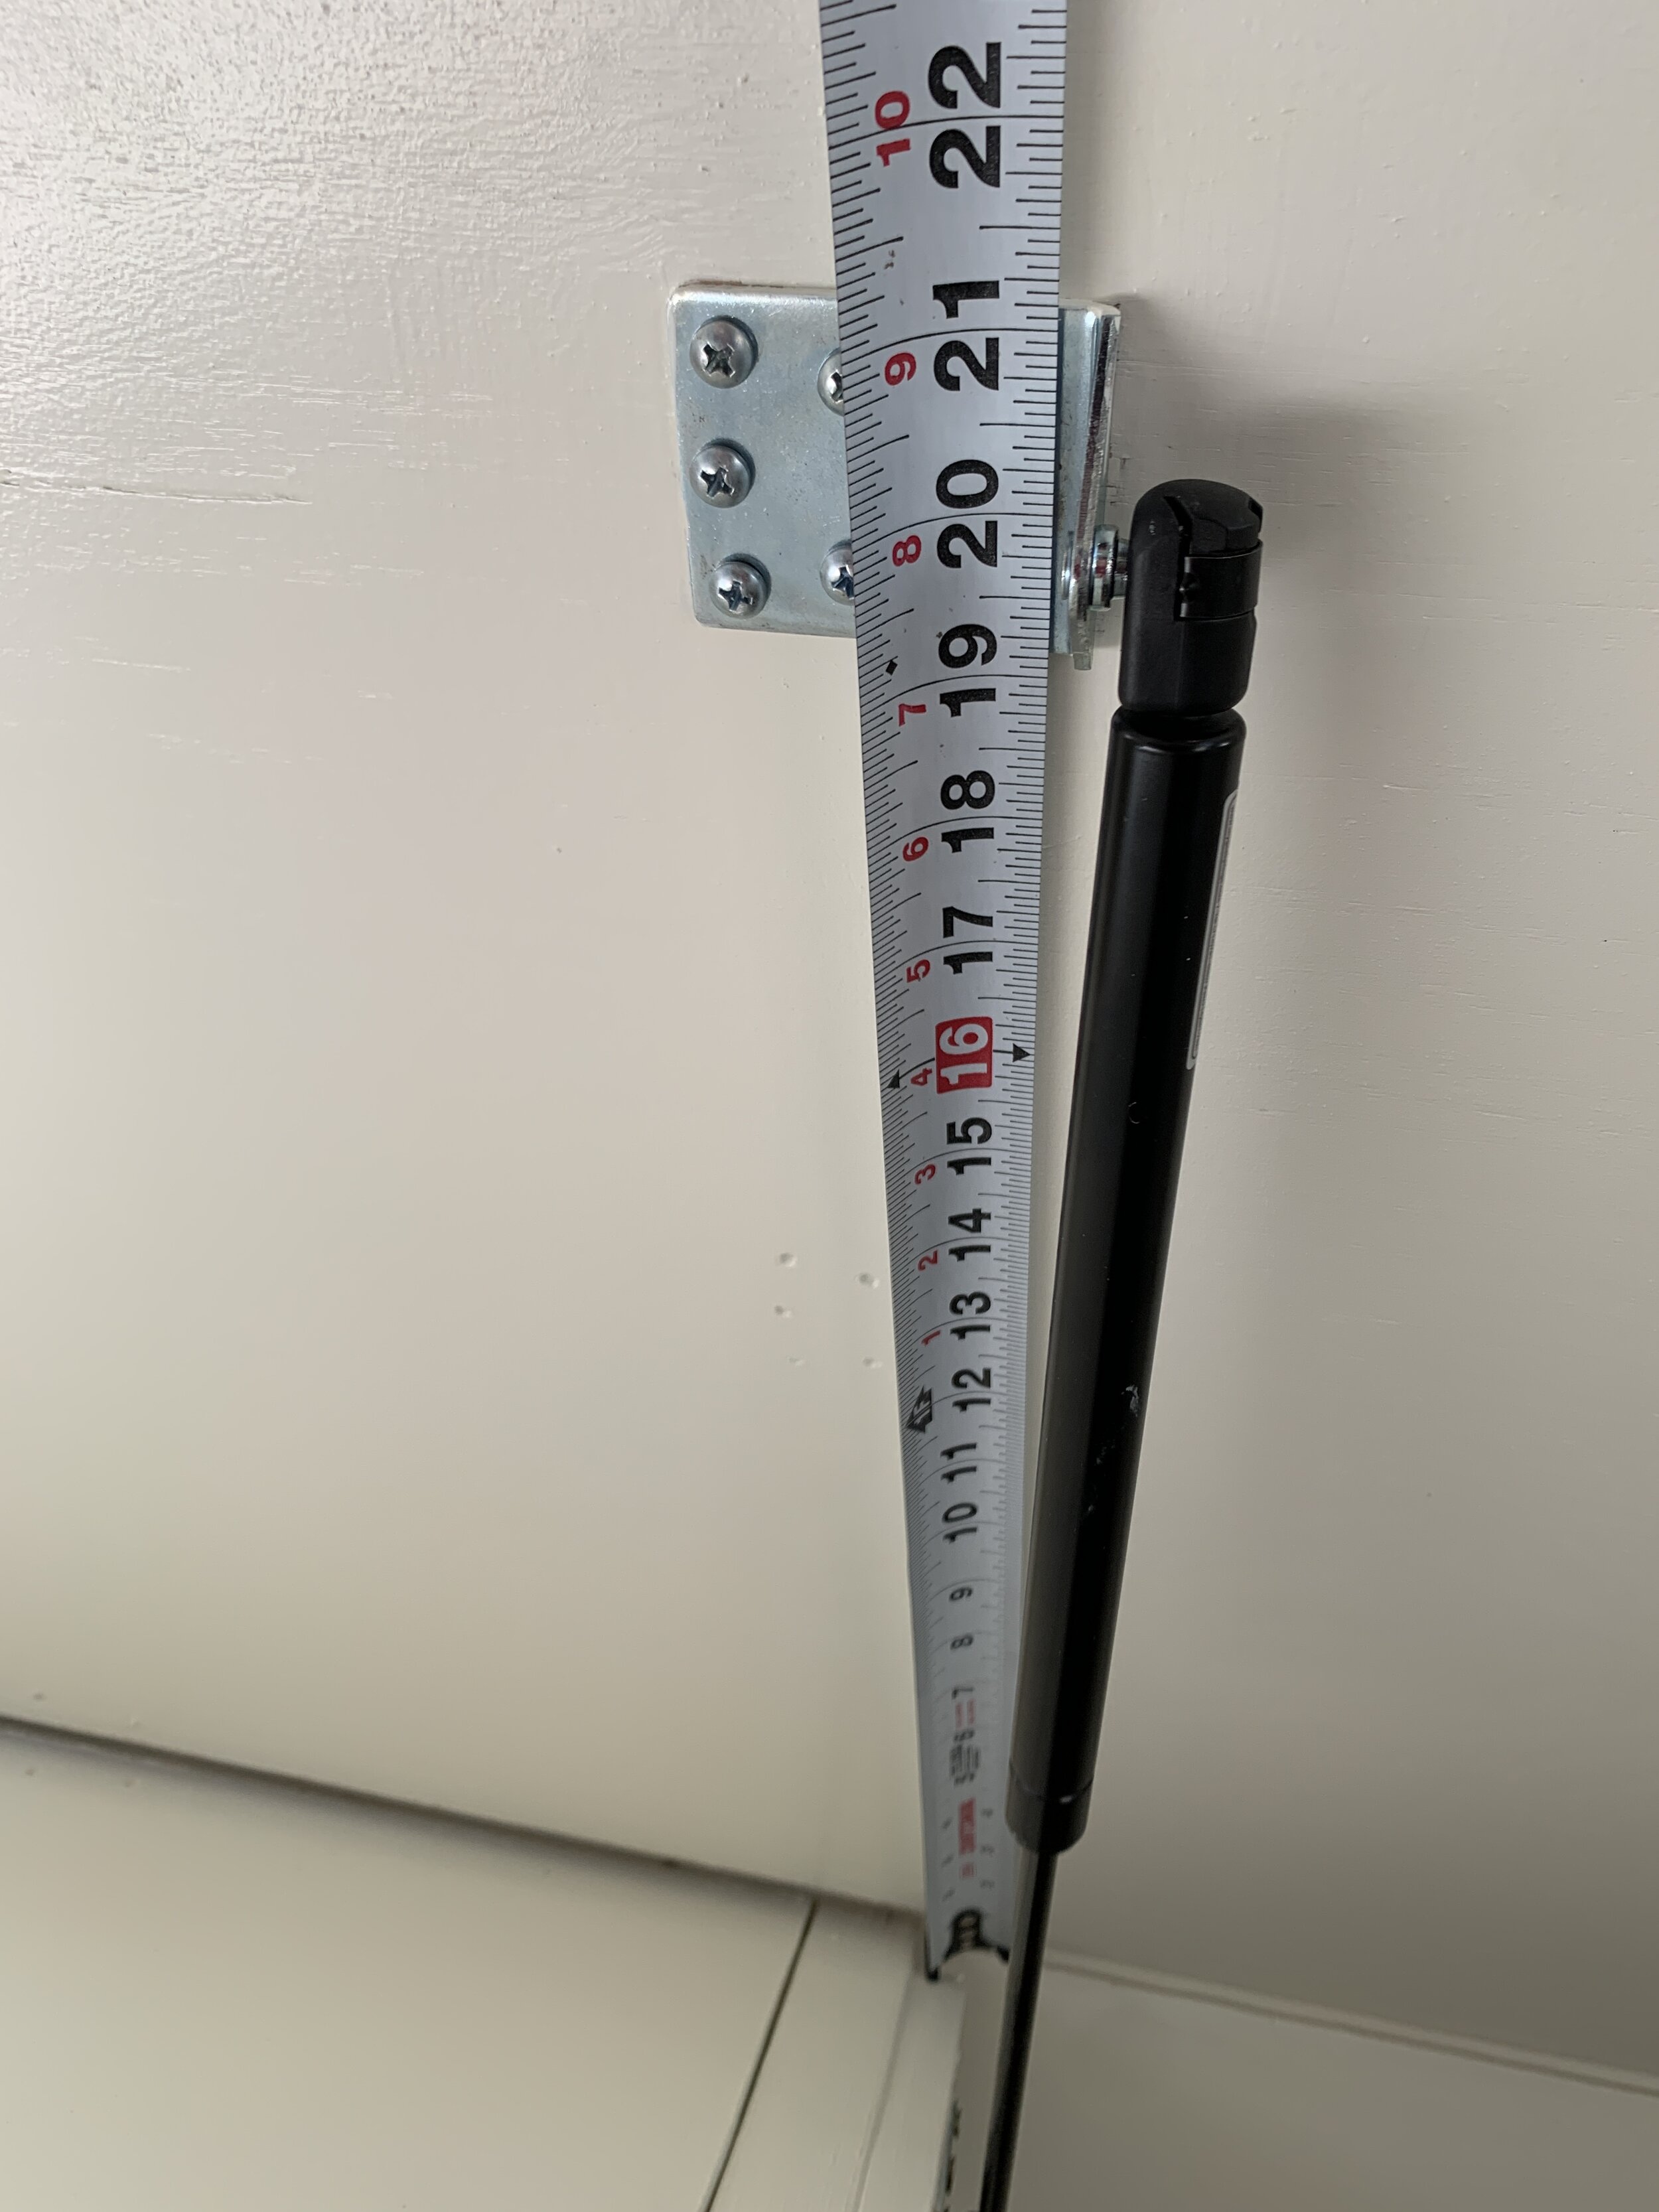
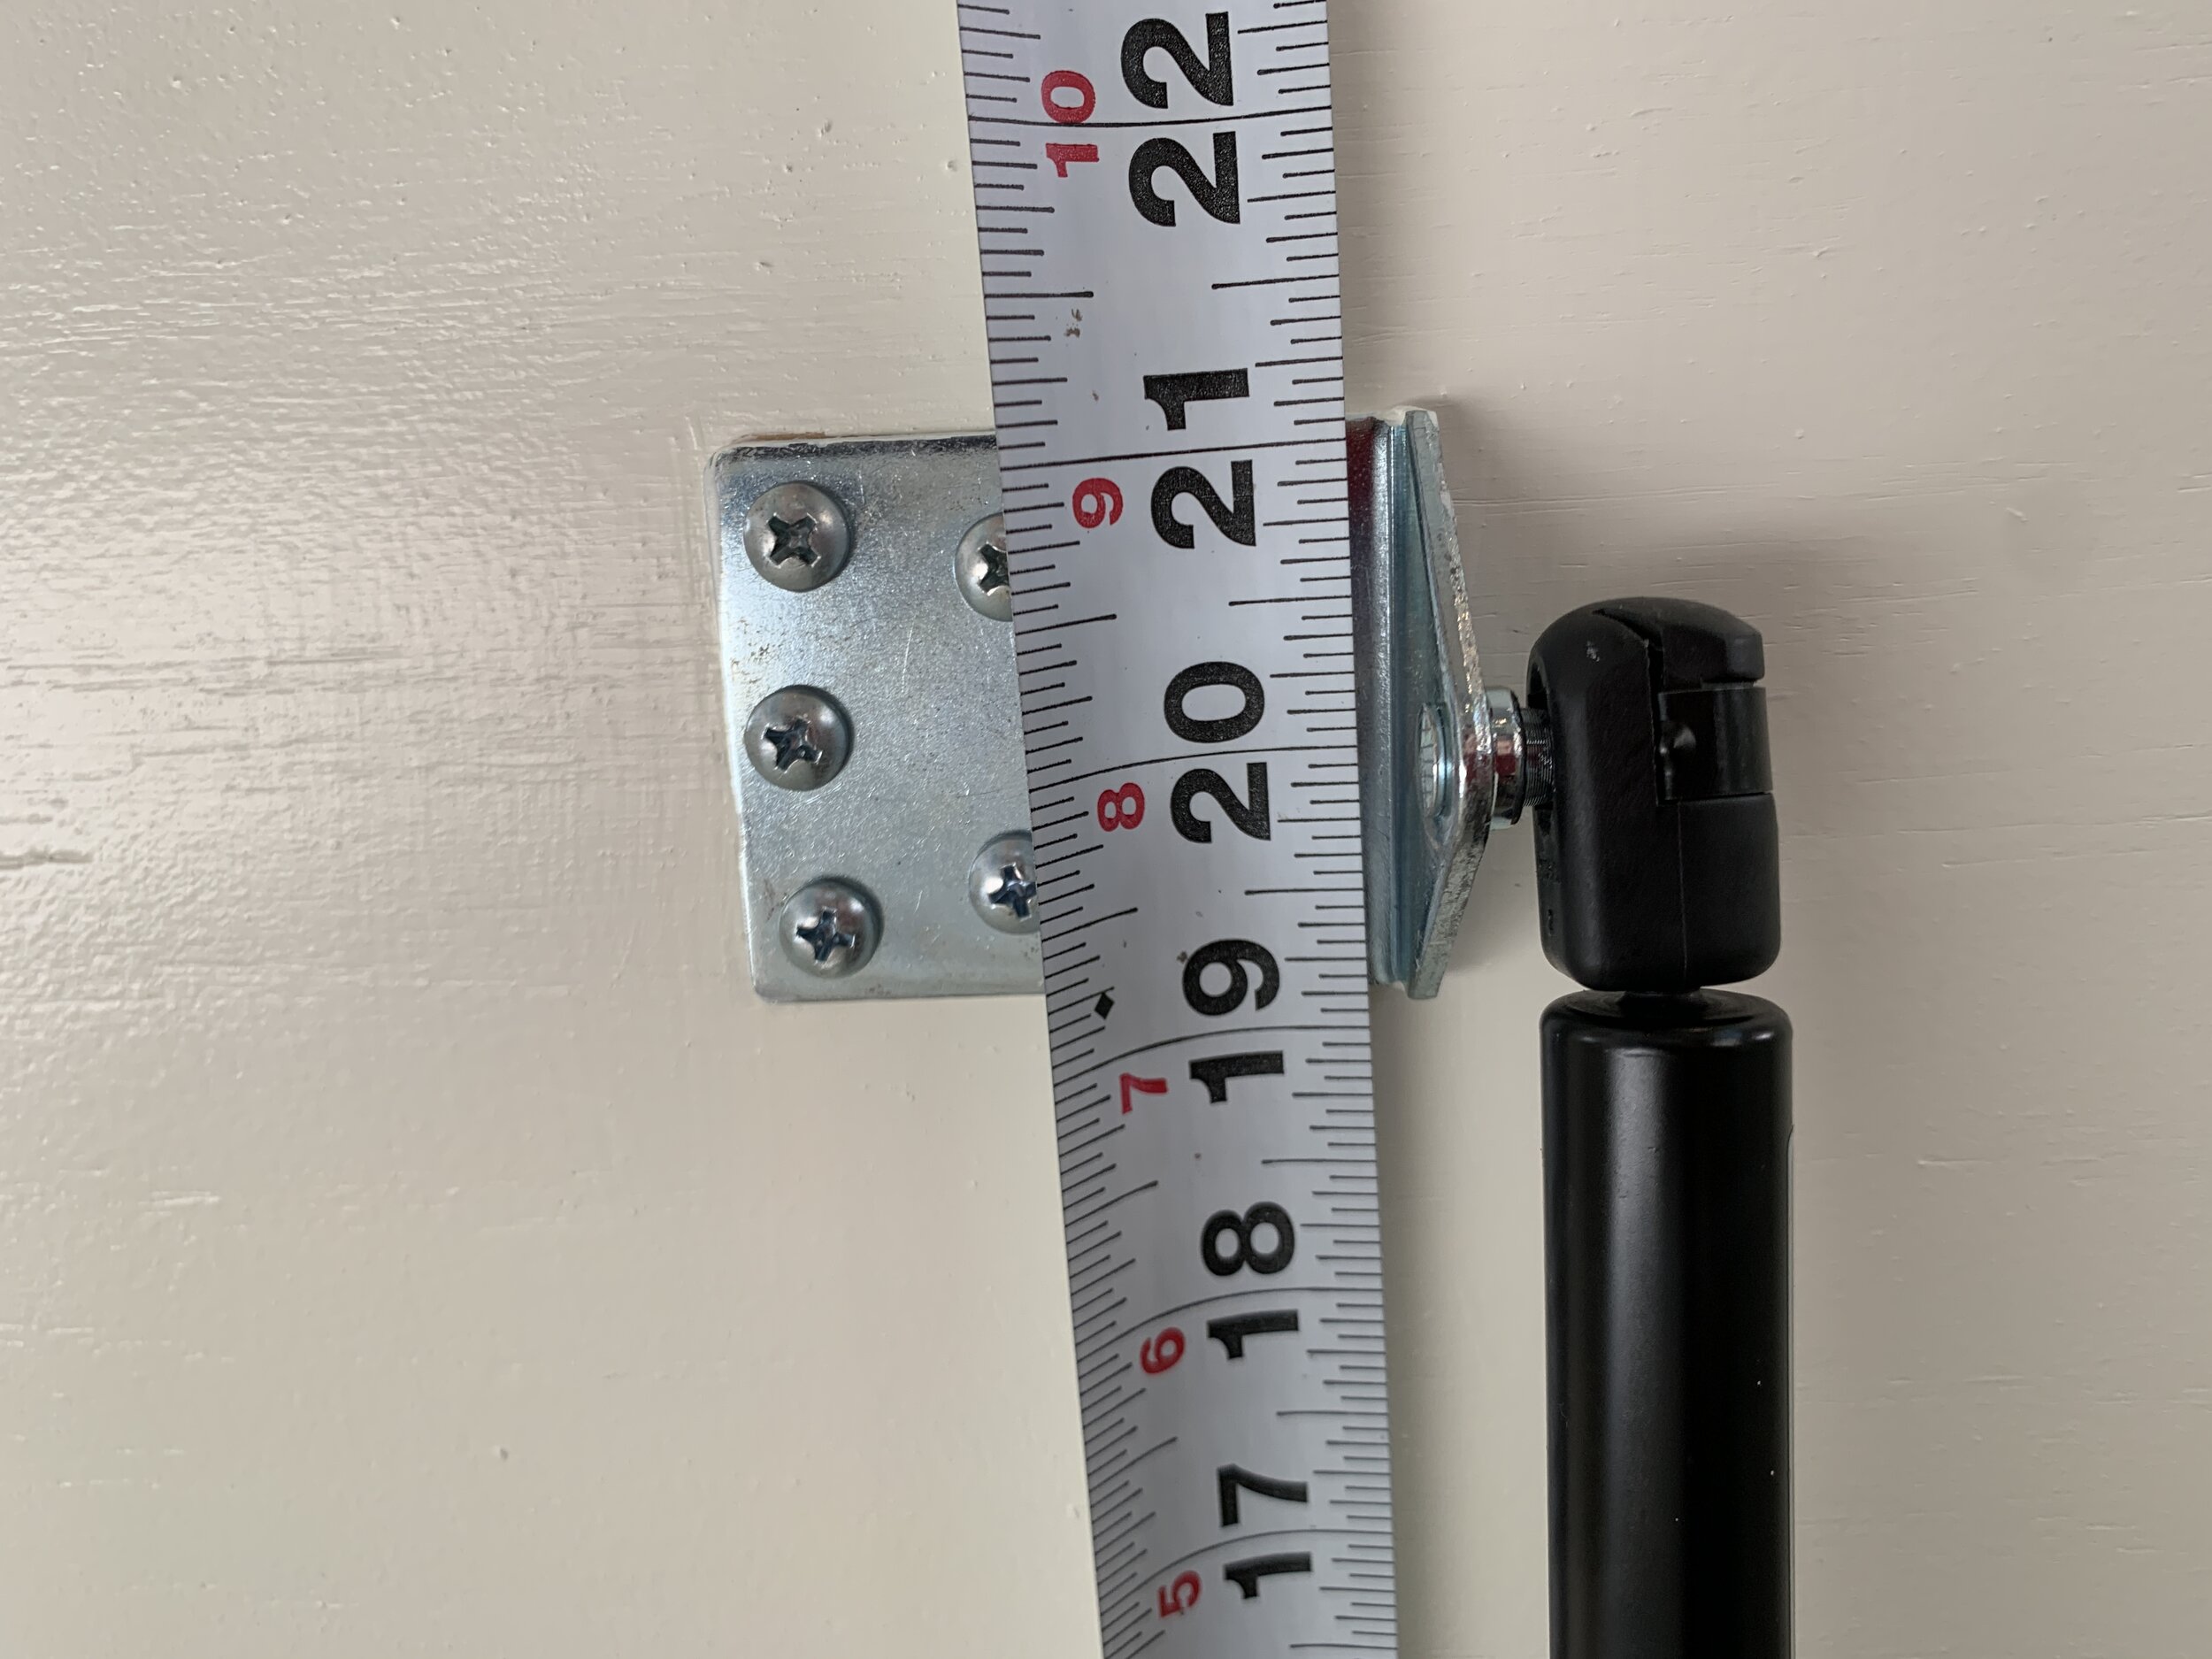
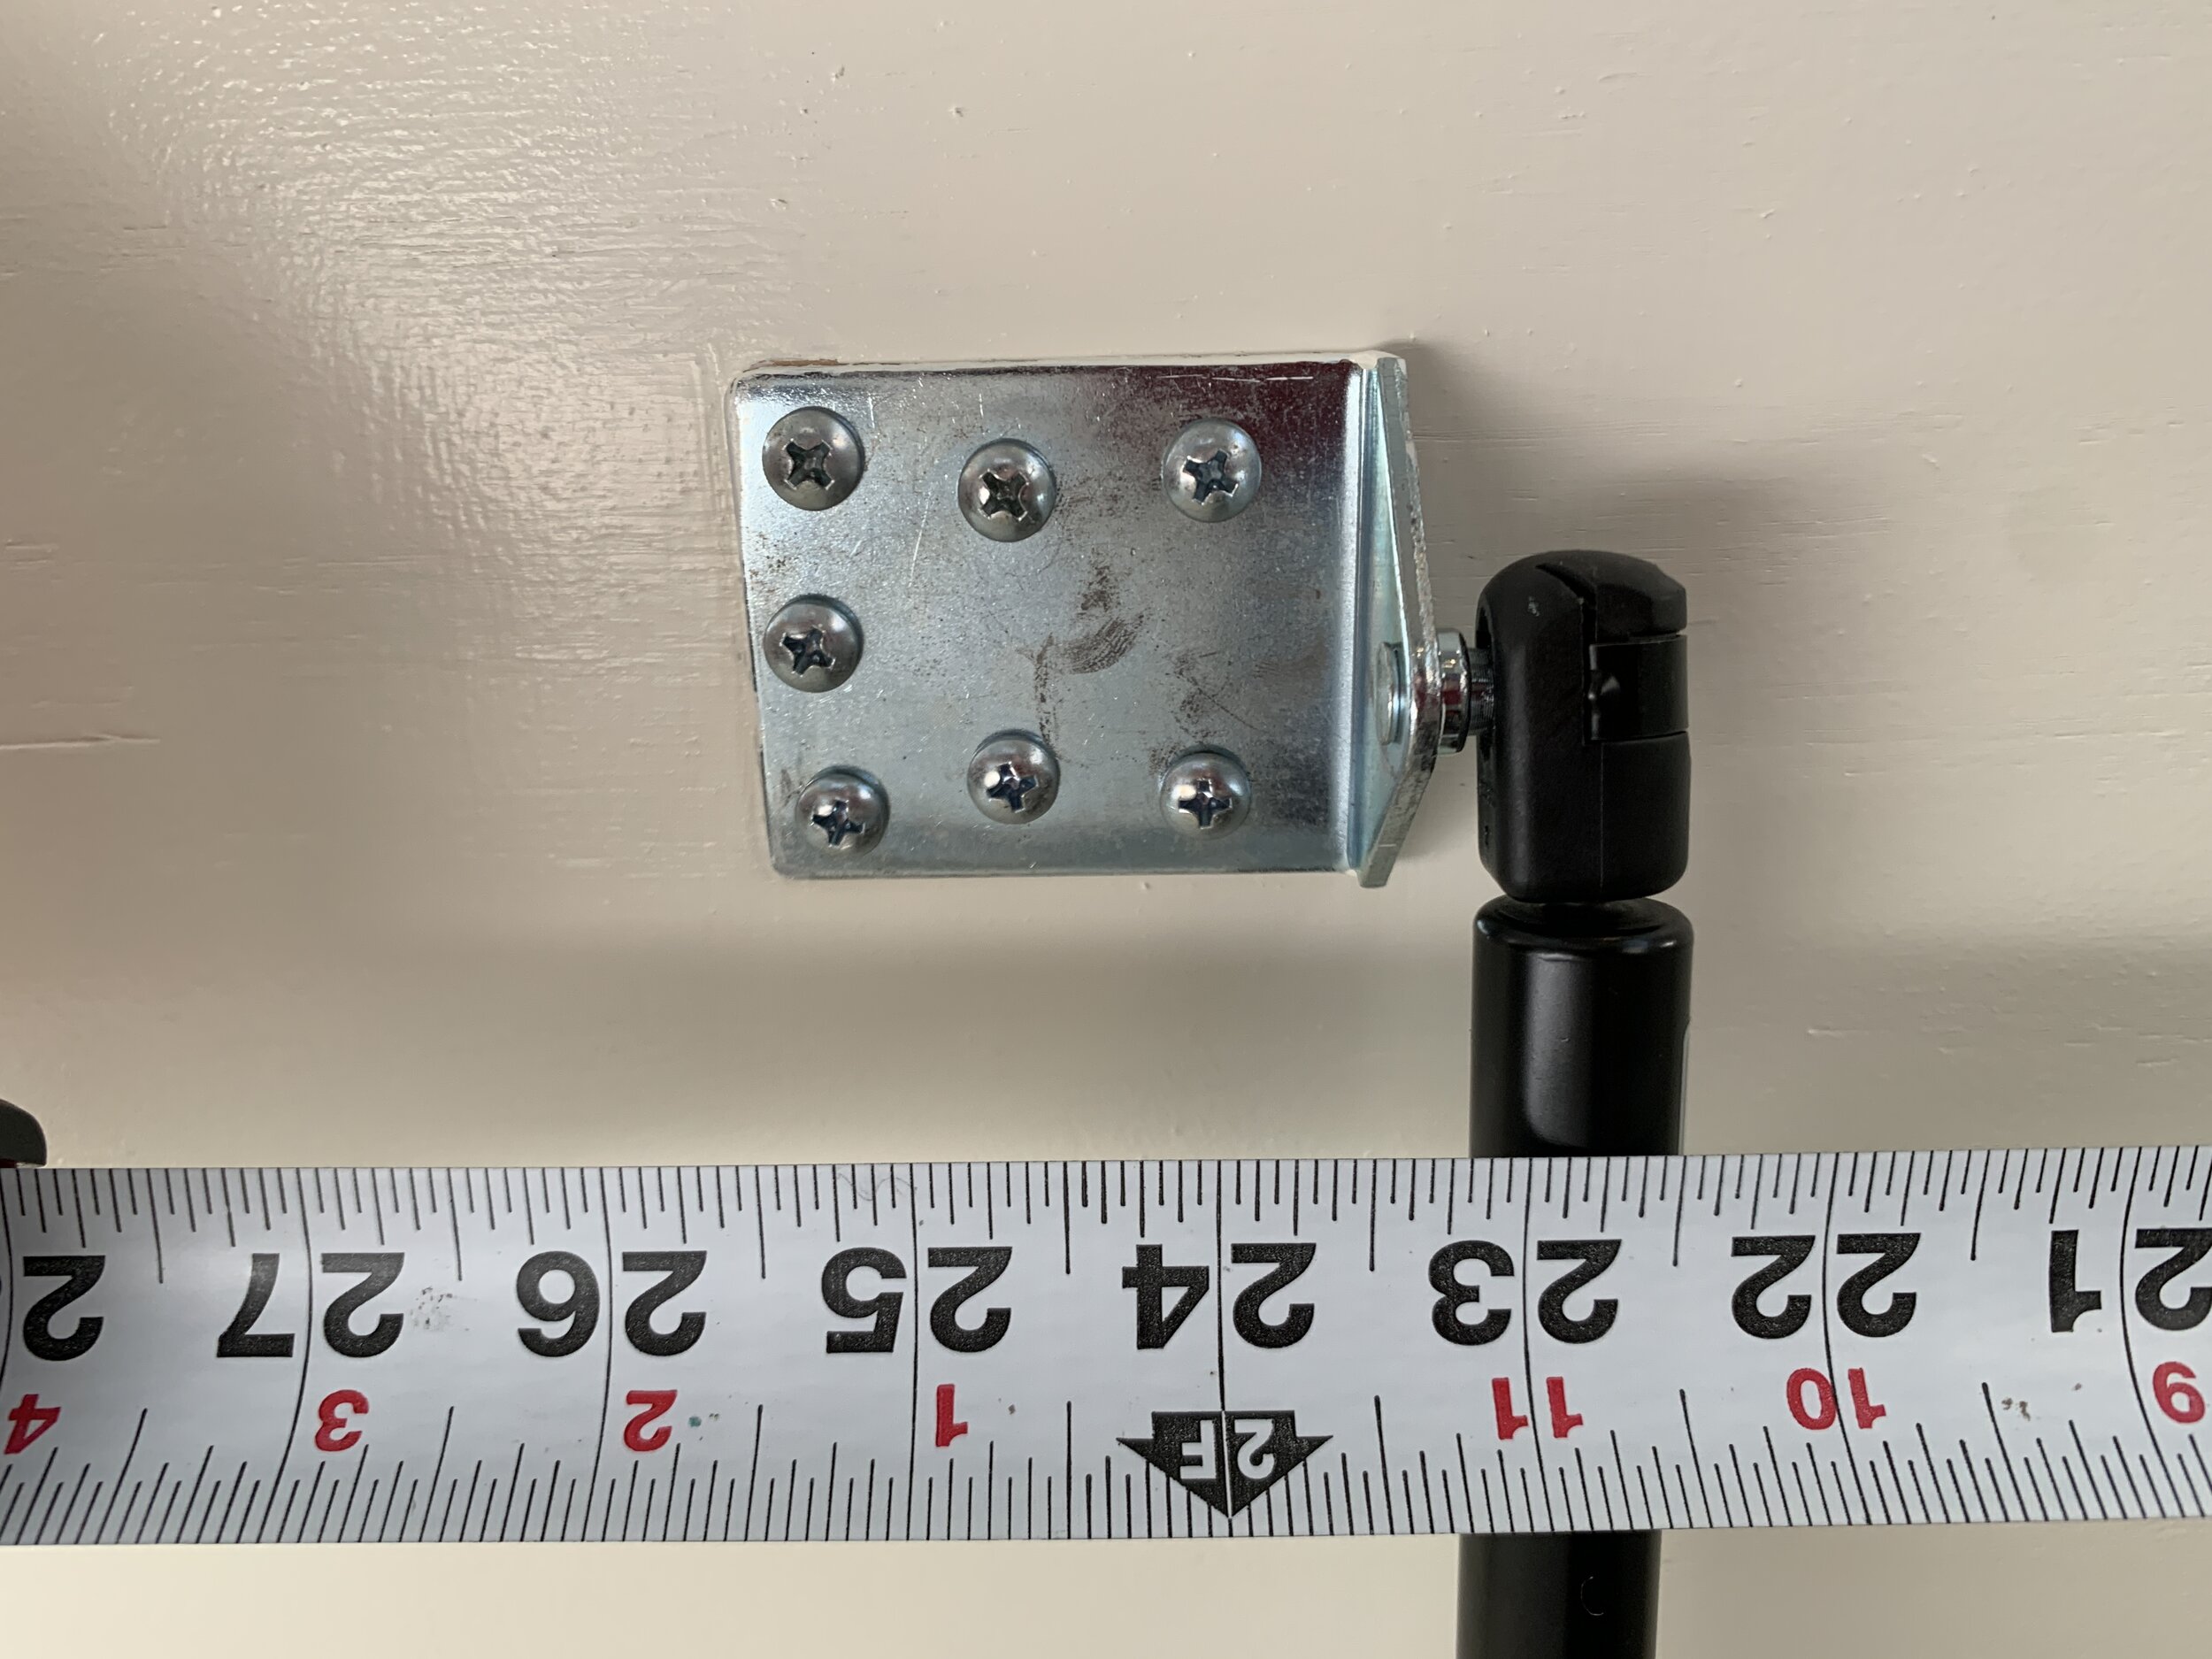
Notice the lid-side brackets are installed with the “nobbies” (an official term, obviously) facing toward the outside ends and not to the center of the bed.
You can see in a couple of the photos below I initially measured from the outside handle-side of the lid and not the hinge-side and had to remeasure and install. (So where you see 20” with an arrow pointing down, it should be measured 20” from the bottom, so that the arrow is pointing up.) Nothing a little wood filler can’t and didn’t fix.

Per the kit’s directions, if the bedlift is too difficult to operate, relocate the lower, bed base-side set of brackets back toward the hinges to relieve some pressure from the springs, allowing them to fully compress.
The instructions say the optimum operating angle is 45°-55°. At our measurements, the lid opens about that range, stays up and fully closes with little effort.
Finishing
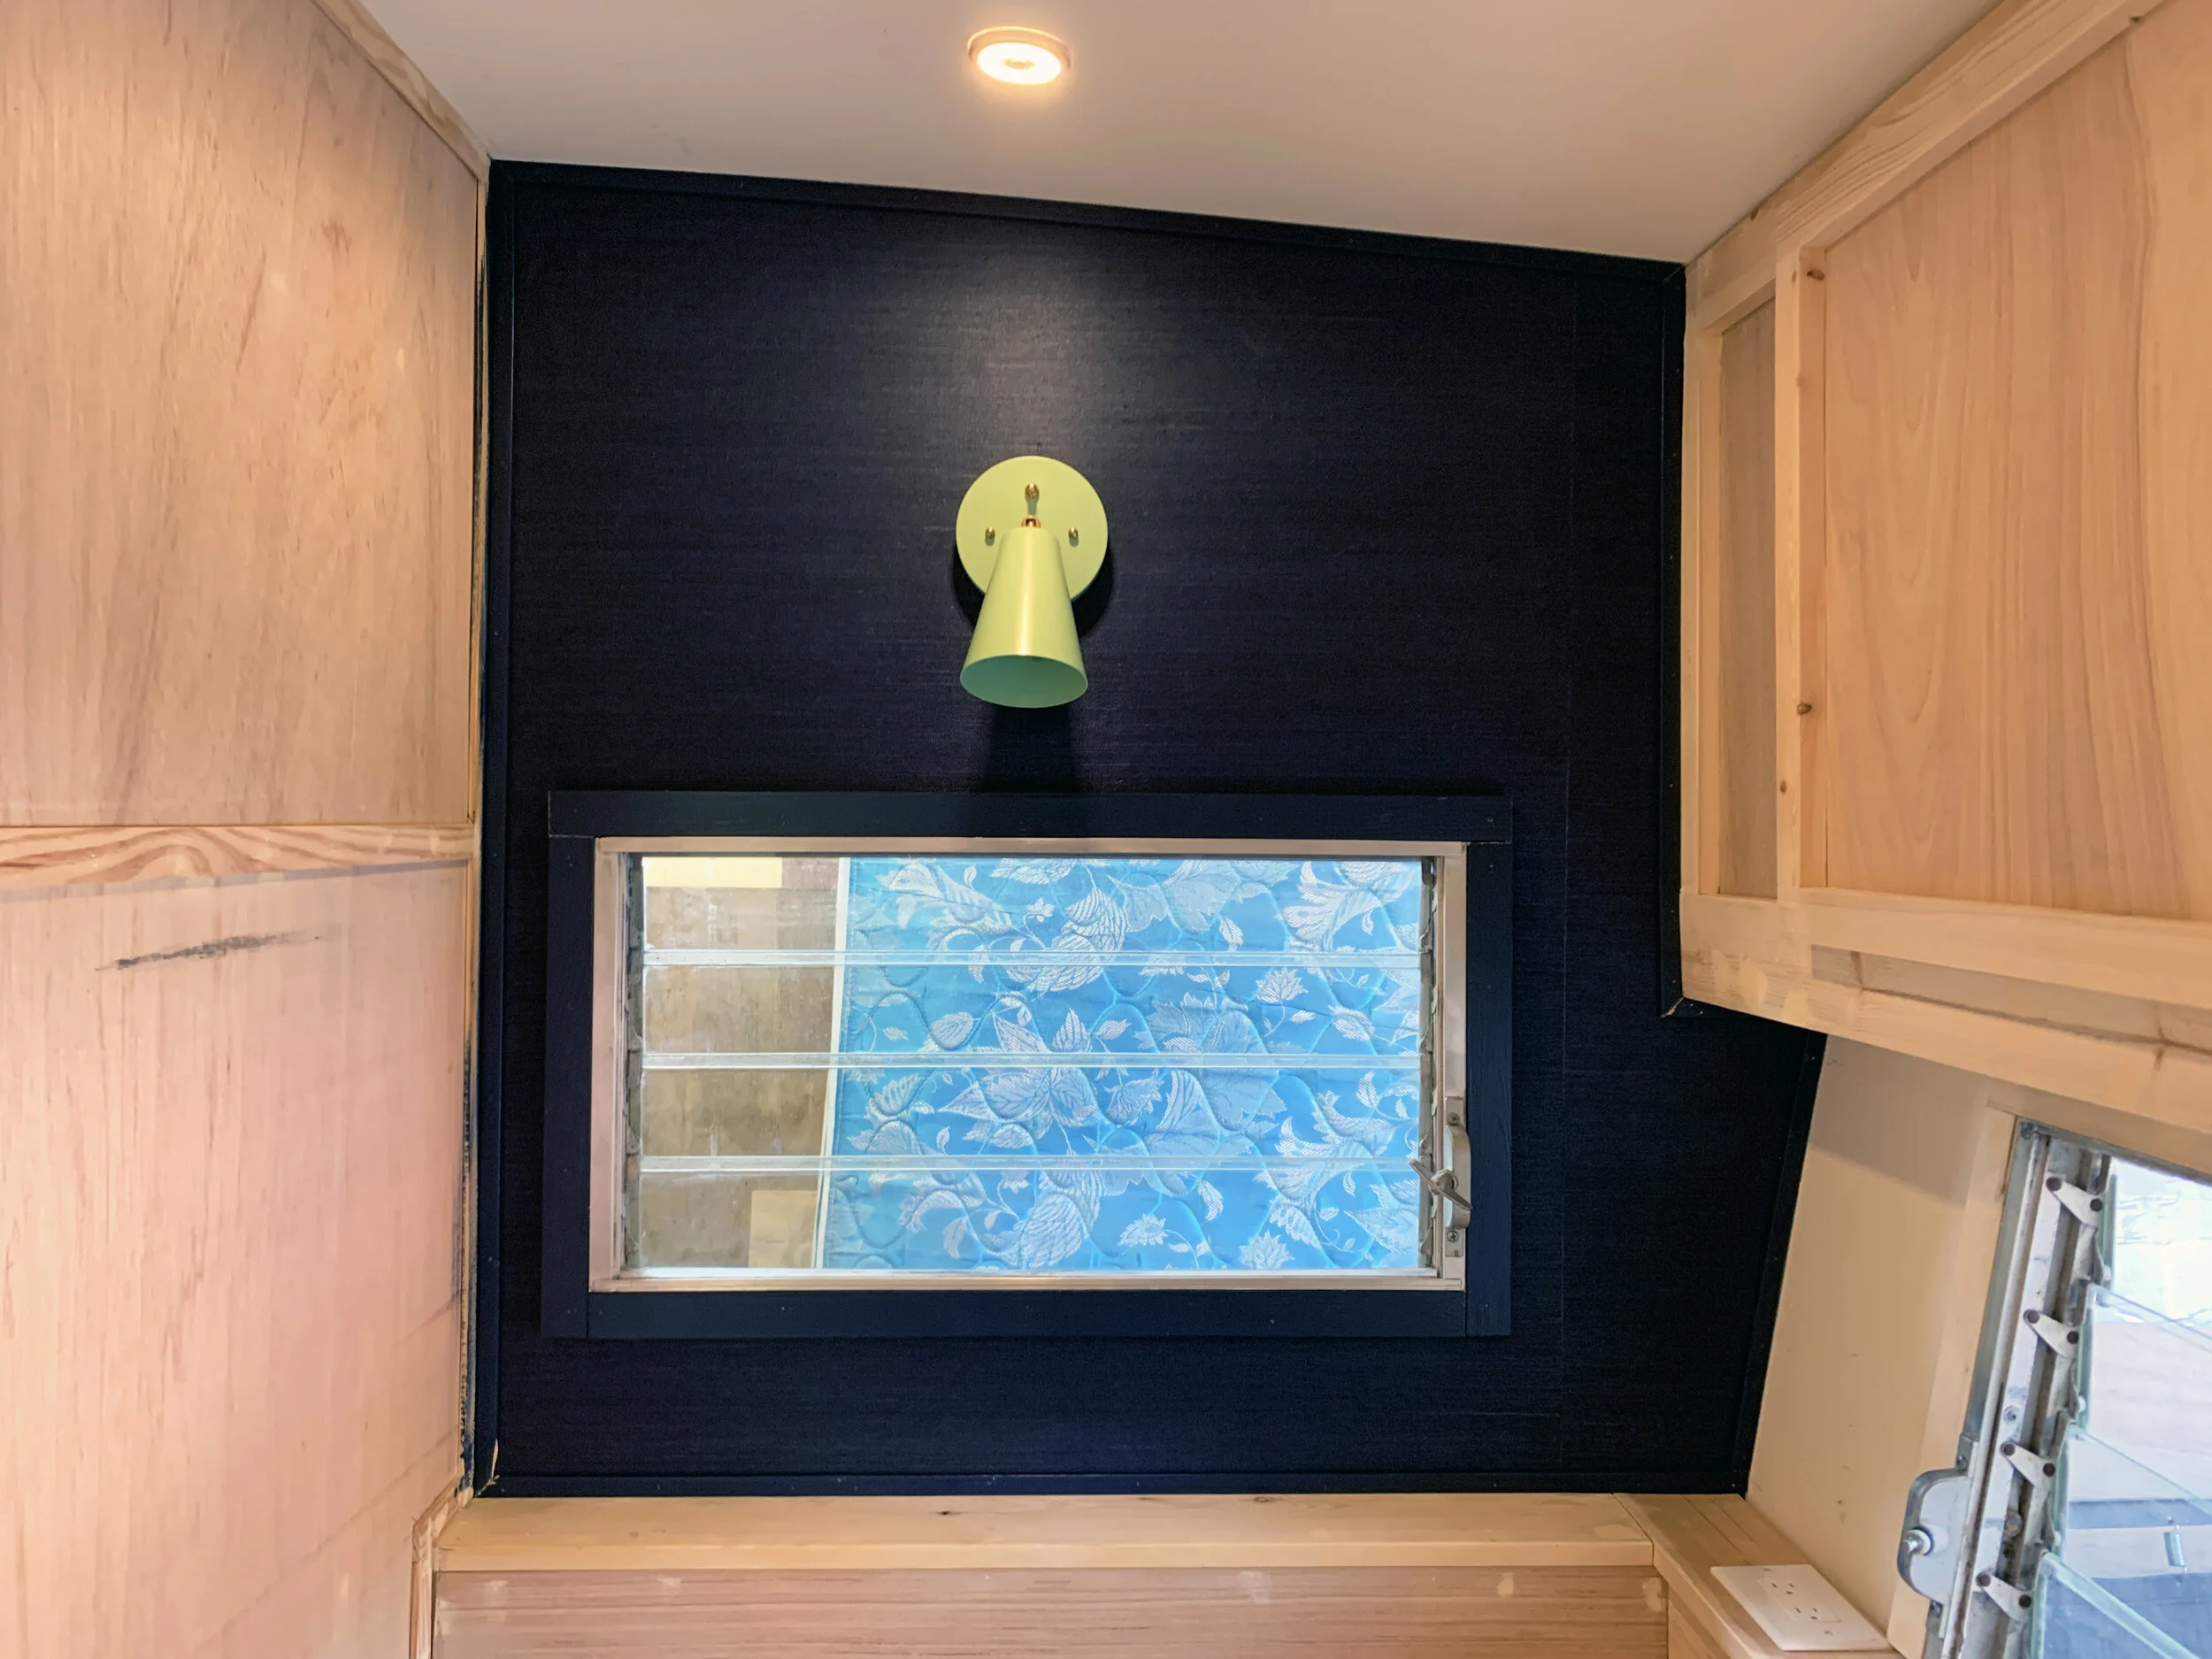
With the new lid made and installed, we sanded it smooth, caulked the seams, filled the incorrectly installed bracket holes, and primed and painted it to match the bed – Behr’s Swiss Coffee, color-matched by Sherwin Williams in a semi-gloss finish.

We also added a strip of white adhesive felt to the underside of the lip to help give it a little padding where it rests on the bed base.

How it’s working so far … and a note about the seasons
We LOVE the stronger, solid lid and gas bedlifts and overall it’s been working great with a standard twin-size inner spring mattress. It’s been so nice to be able to easily access storage without having a mattress resting on the back of our necks while we rummage around!

Compared to most of the year when it’s a comfortable to – let’s be honest – down right sweltering temperature here in Texas, we’re now in winter, when it’s pretty chilly out. (It’s been in the 30s off and on and we actually got a good 4-5” of snow just last week!) We’ve noticed the added weight of multiple/heavier blankets this time of year (and especially if we use a heavier, memory foam pillow) causes the lid to slightly close on us if we’re not mindful to completely open the lid as much as it can. Previously, with lighter linens we’ve been able to just lightly lift up on the lid handle and it would practically open (and stay open) on its own.
Not a big deal, just something to be mindful of when you’re choosing your mattress type, linens and pillows.

(The above link will download a PDF of the bedlift kit directions we worked off of to place our brackets. It includes the full platform bed build that we did not follow.)