The Cameo Camper Renovation: Building the Dinette Bench
UPDATE:
Don’t forget to check out this post about our custom dinette-to-bed cushions for this bench. It has some new diagrams with bench and cushion dimensions that might help make more sense of what you’re about to read in this post!
Hello again! This post has been a looooong time coming. I know it’s been built for a little while now (we framed it before we even had insulation and interior walls!), but we wanted to make sure to finish (mostly) sharing our cabinet series before we got sidetracked onto something else. I say mostly because we still need to paint the cabinetry and install the gorgeous hardware (and then share it with you lovely folks, of course).

If you’ve been following along, especially on Instagram, you’ve likely seen our dinette/bench area hanging out in the background of some of our photos. Today we’re finally going to share the build and I could not be more excited. This area (and really all of the areas, I suppose) is a brainchild of ours that was much discussed and may or may not have (okay, definitely did) plague me while trying to go to sleep many nights. What can I say, I’m a crazy, can’t-sleep-until-the-problem-is-solved kinda gal.
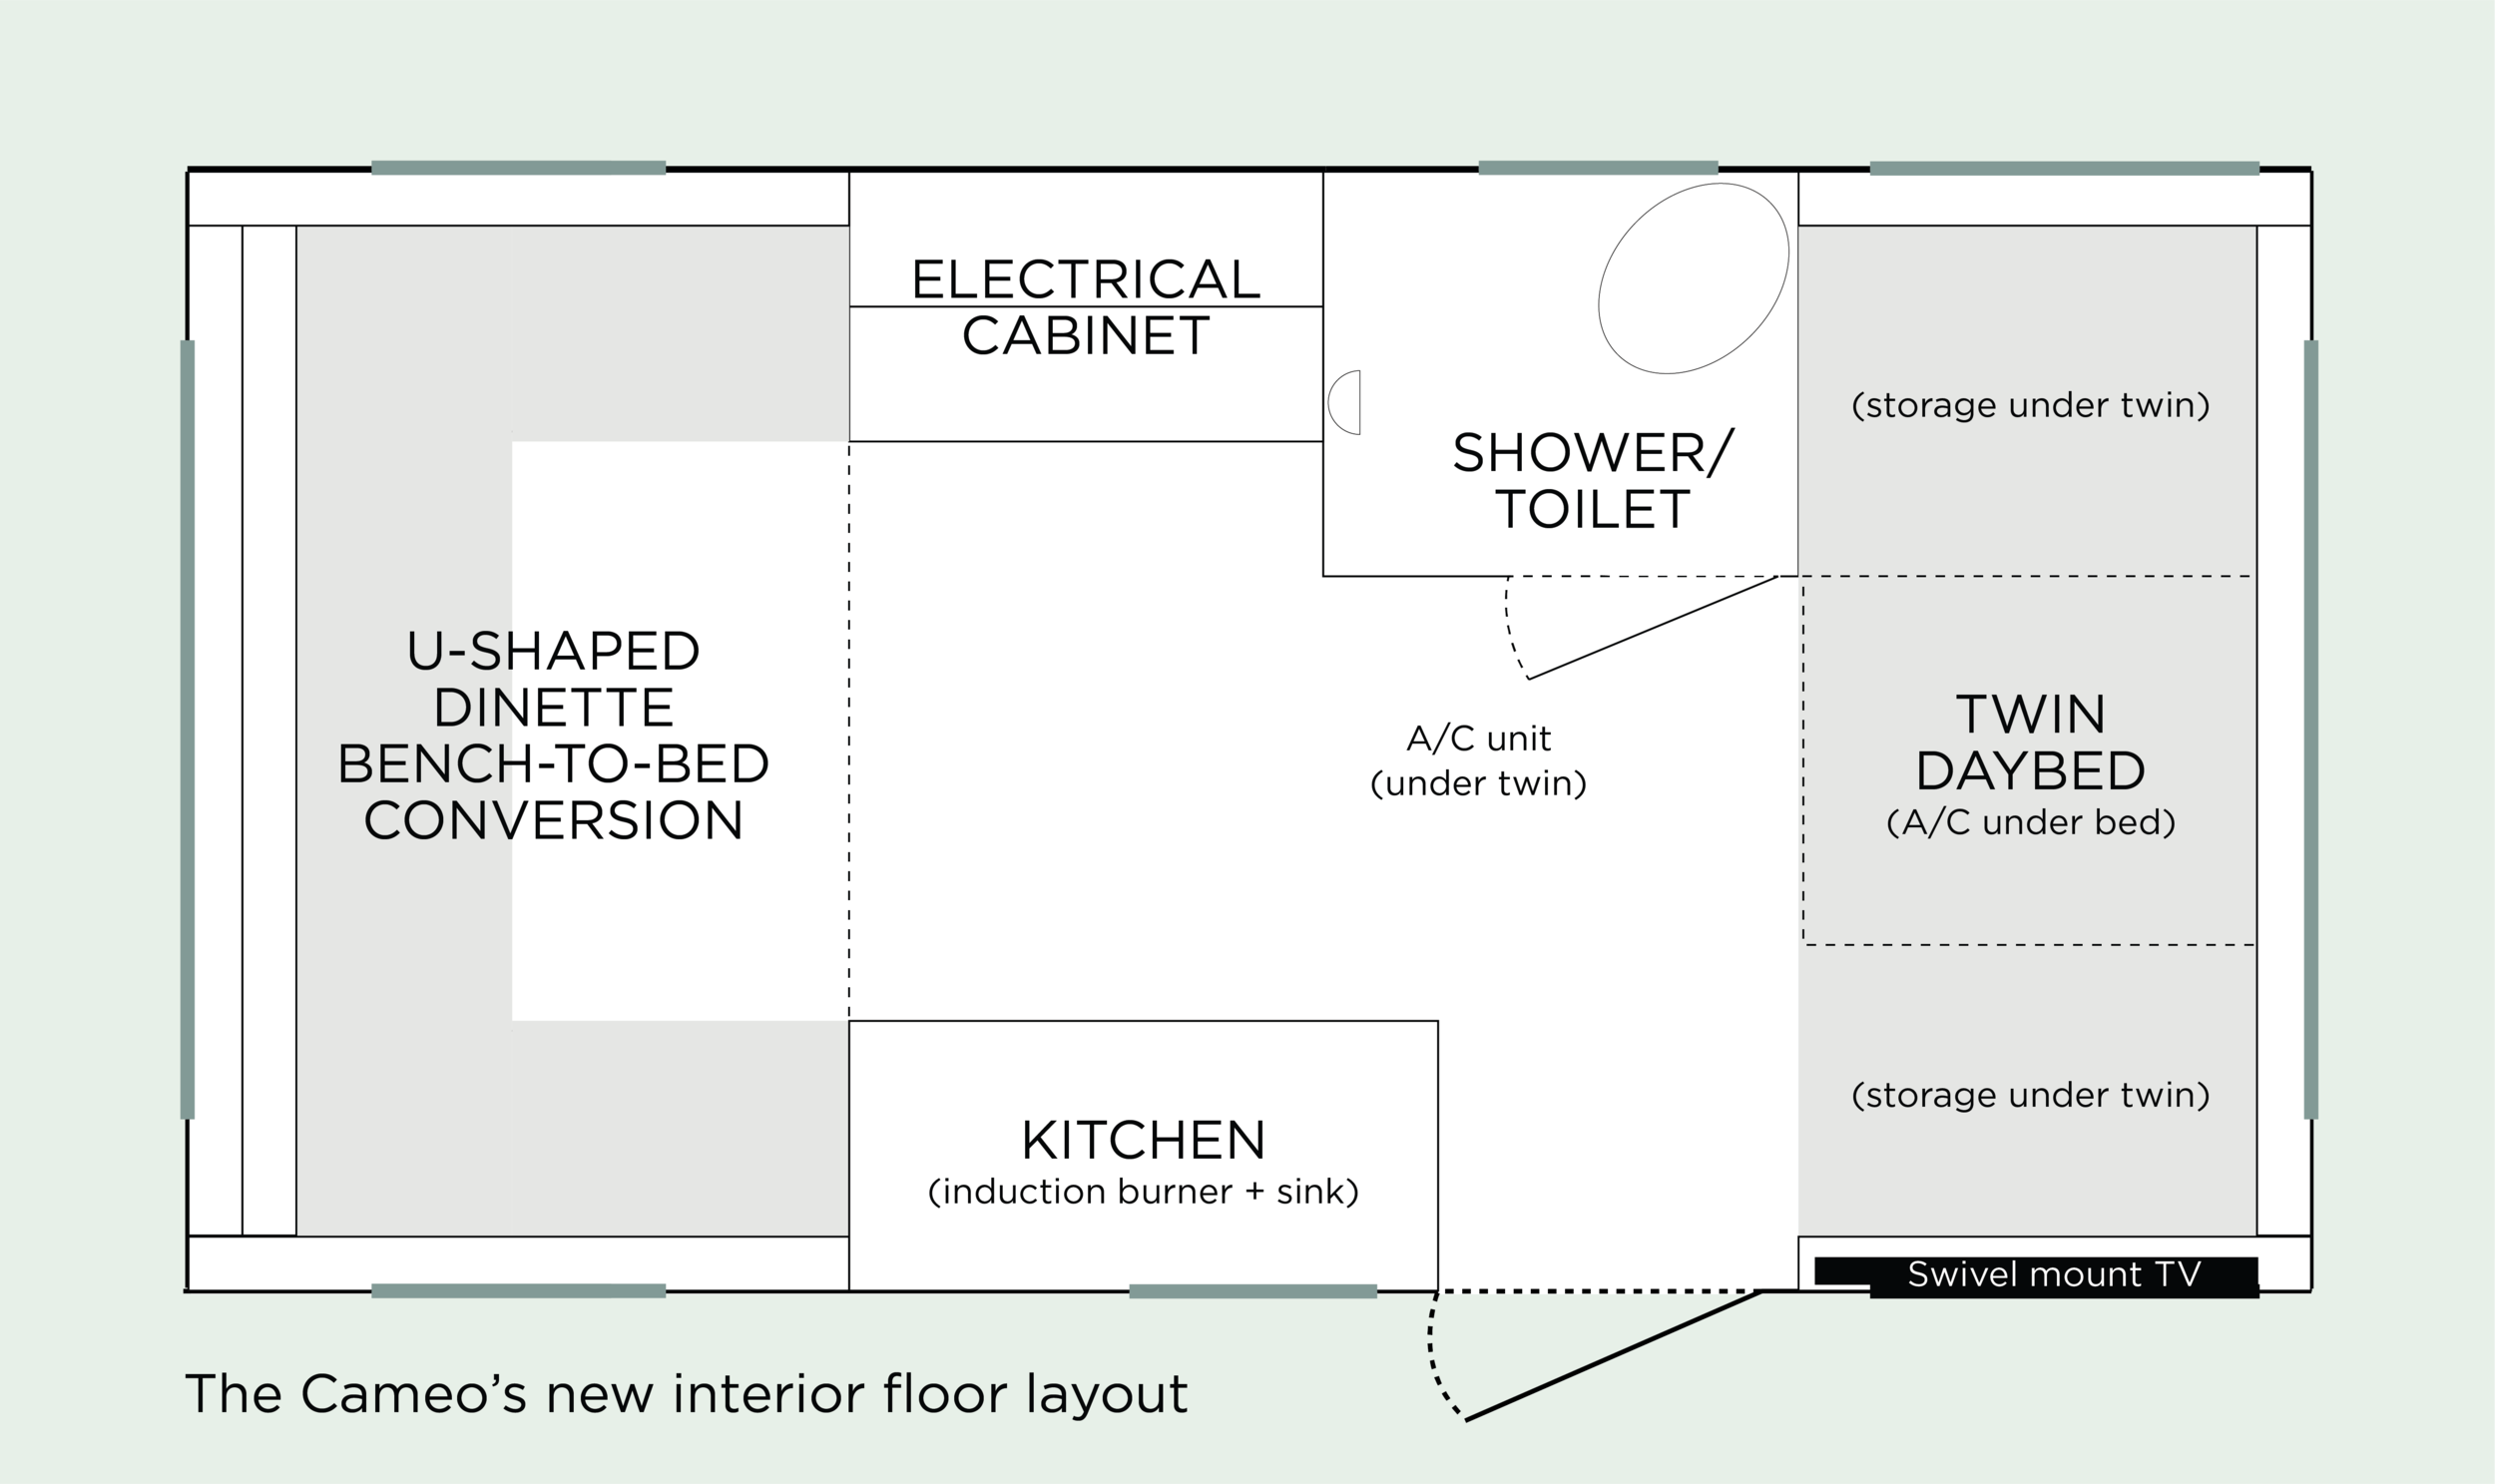
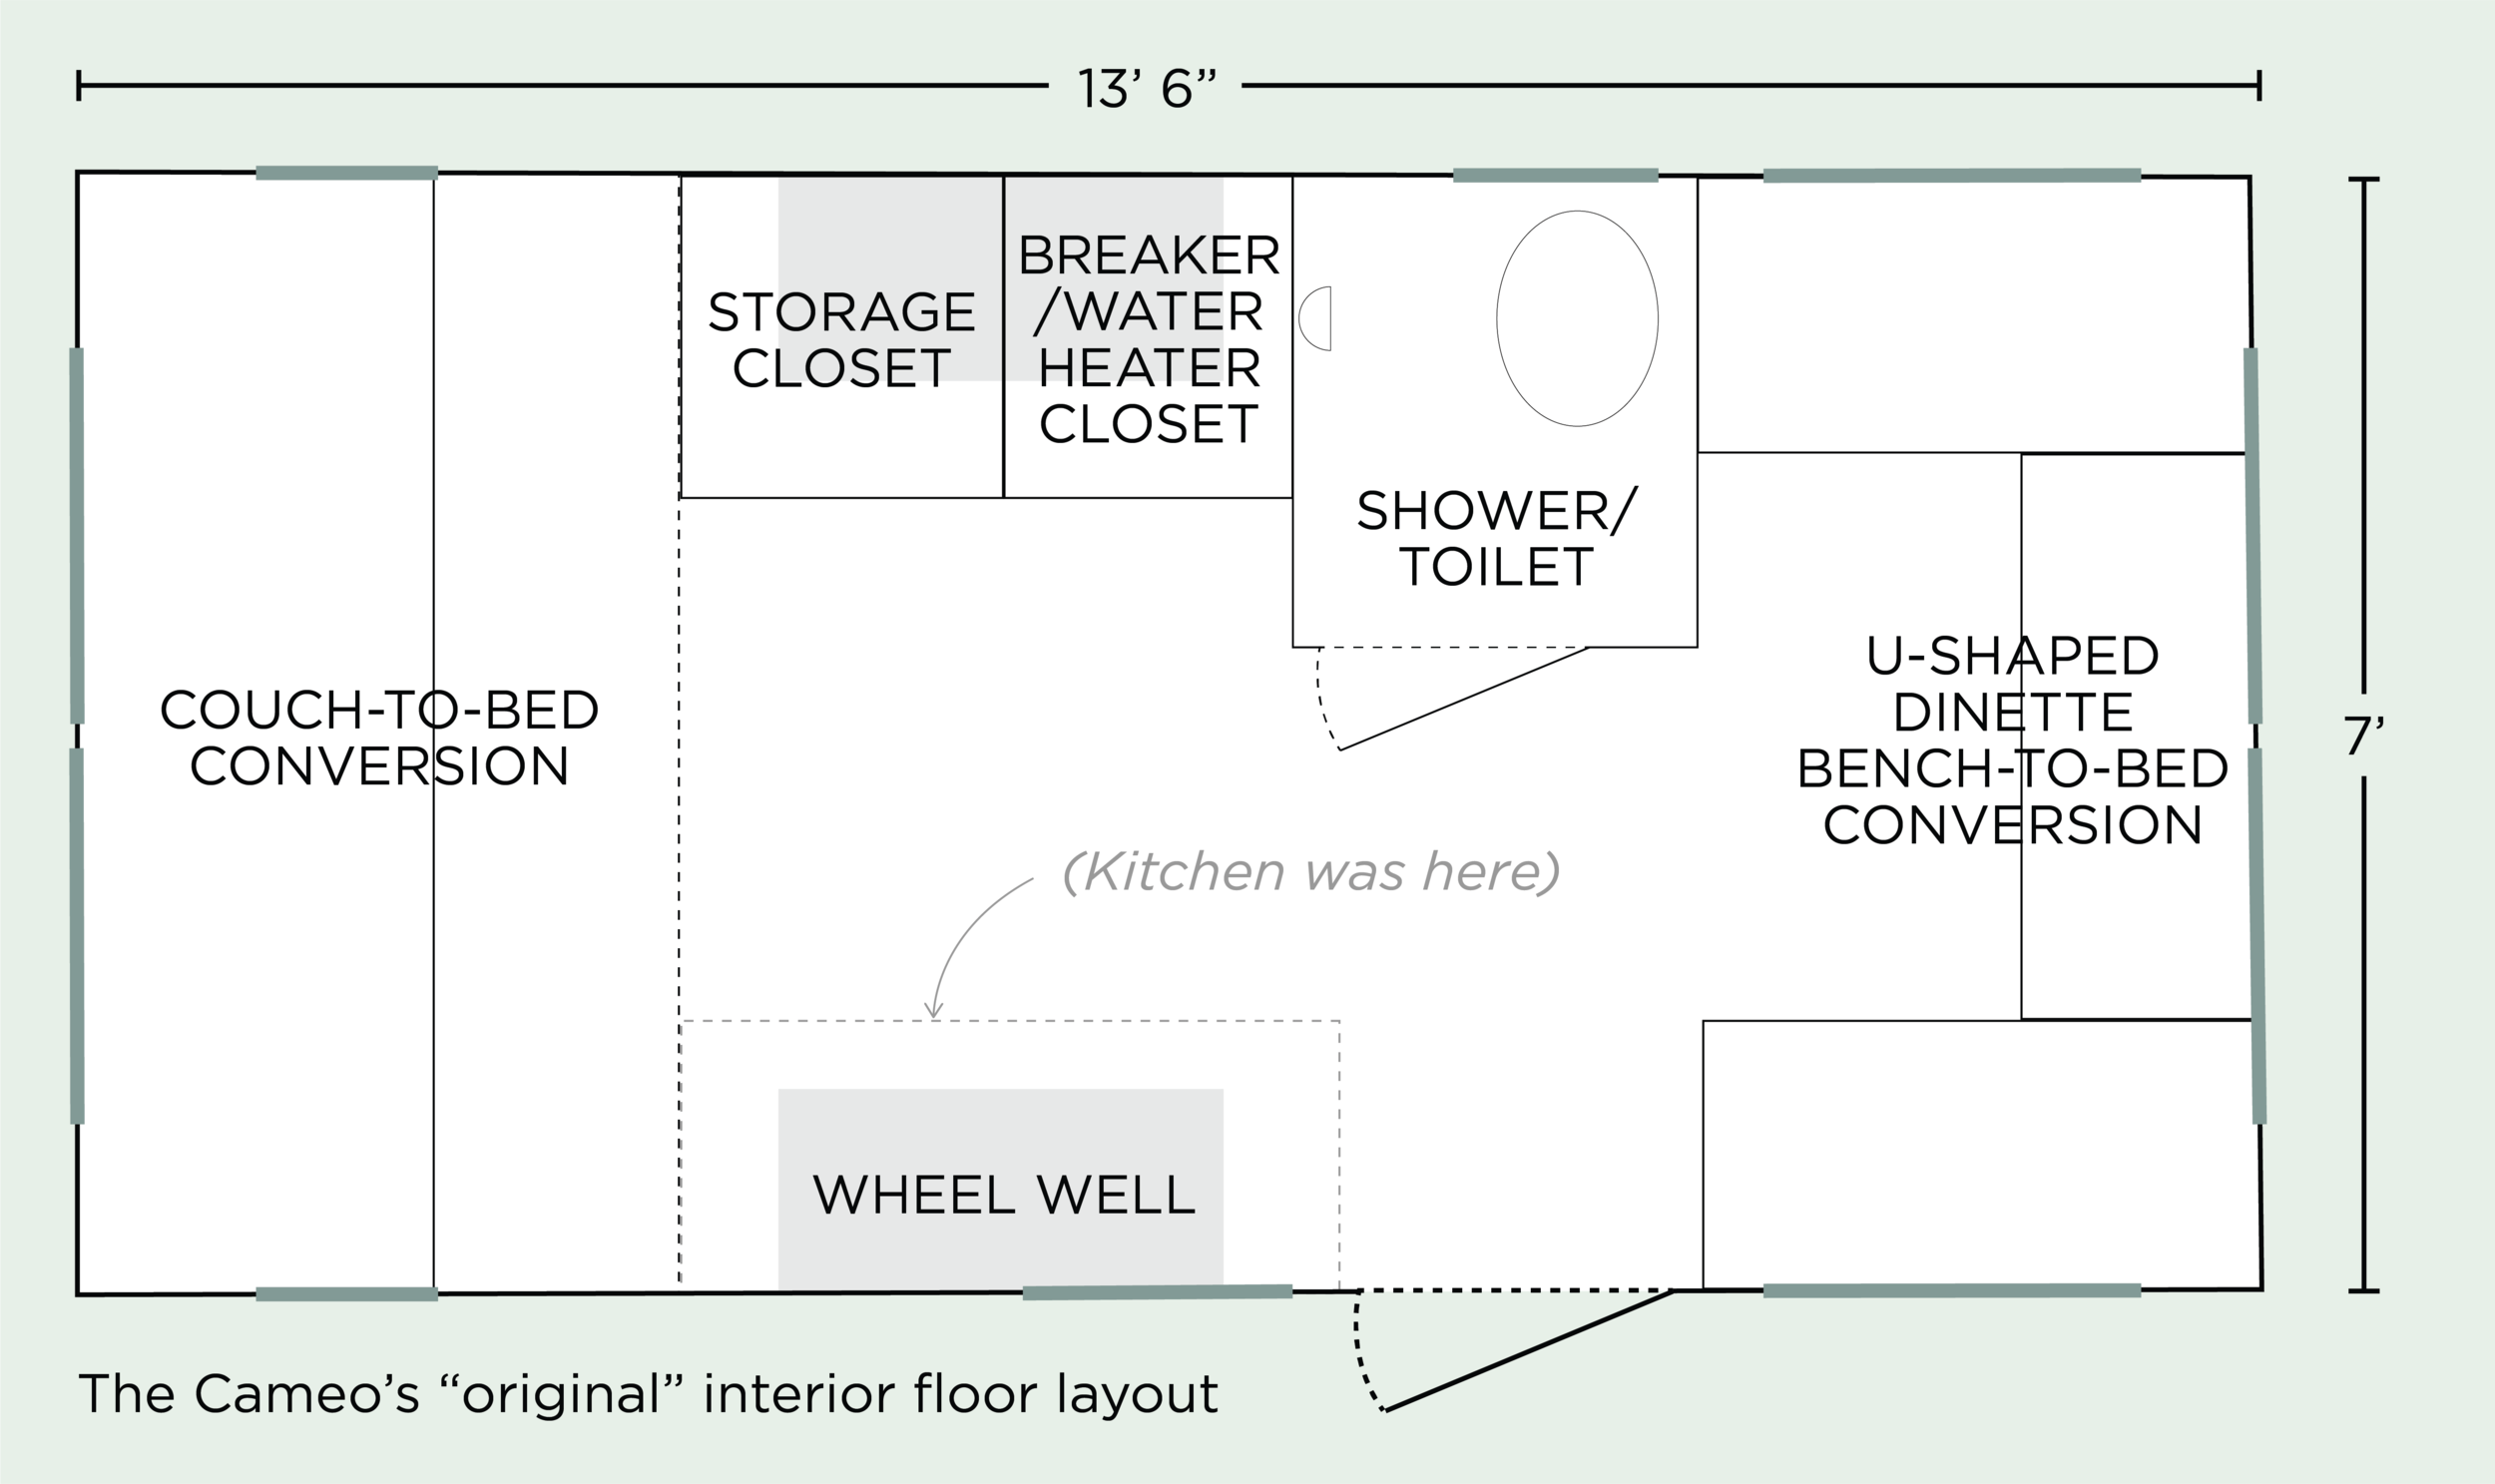
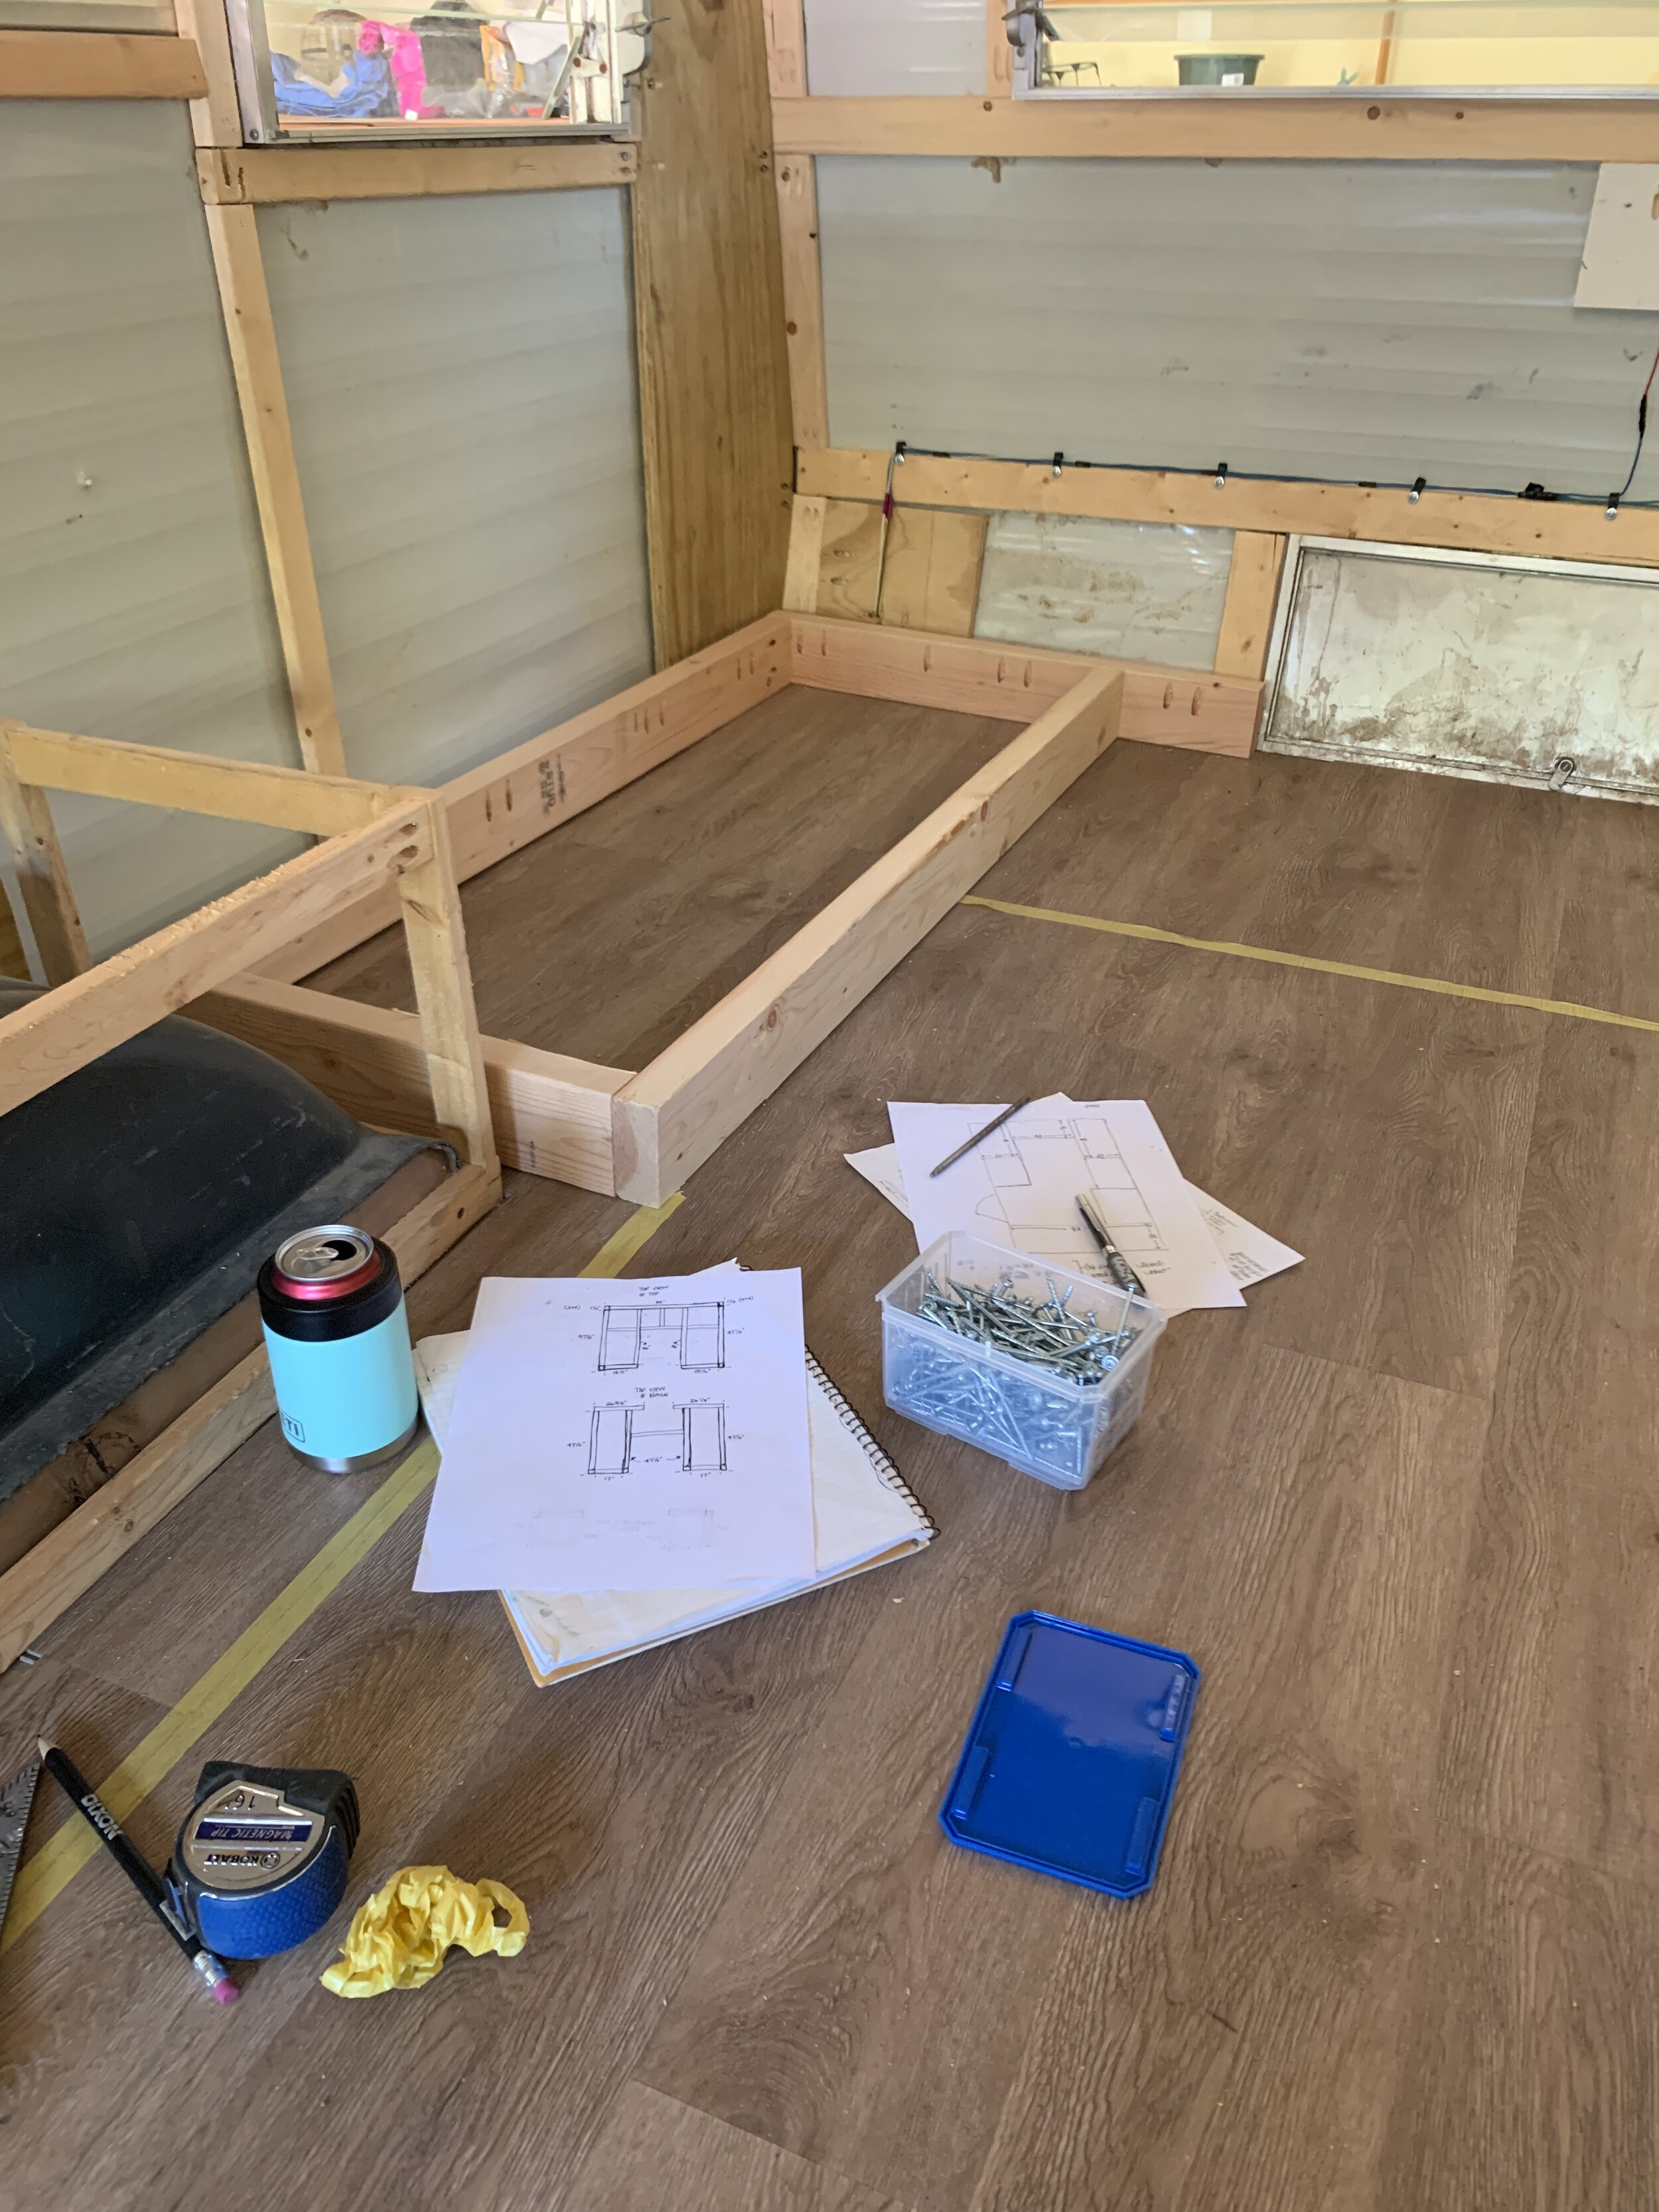
We ultimately decided to swap the front and back areas of the interior, putting a permanent twin daybed in the front, and putting a convertible U-shaped dinette-to-bed in the rear so we’d have a bigger “entertaining space”. As with everything, we measured and taped and re-measured and re-taped our space plan before building anything inside.

Building the U-shaped dinette bench
Building the main frame
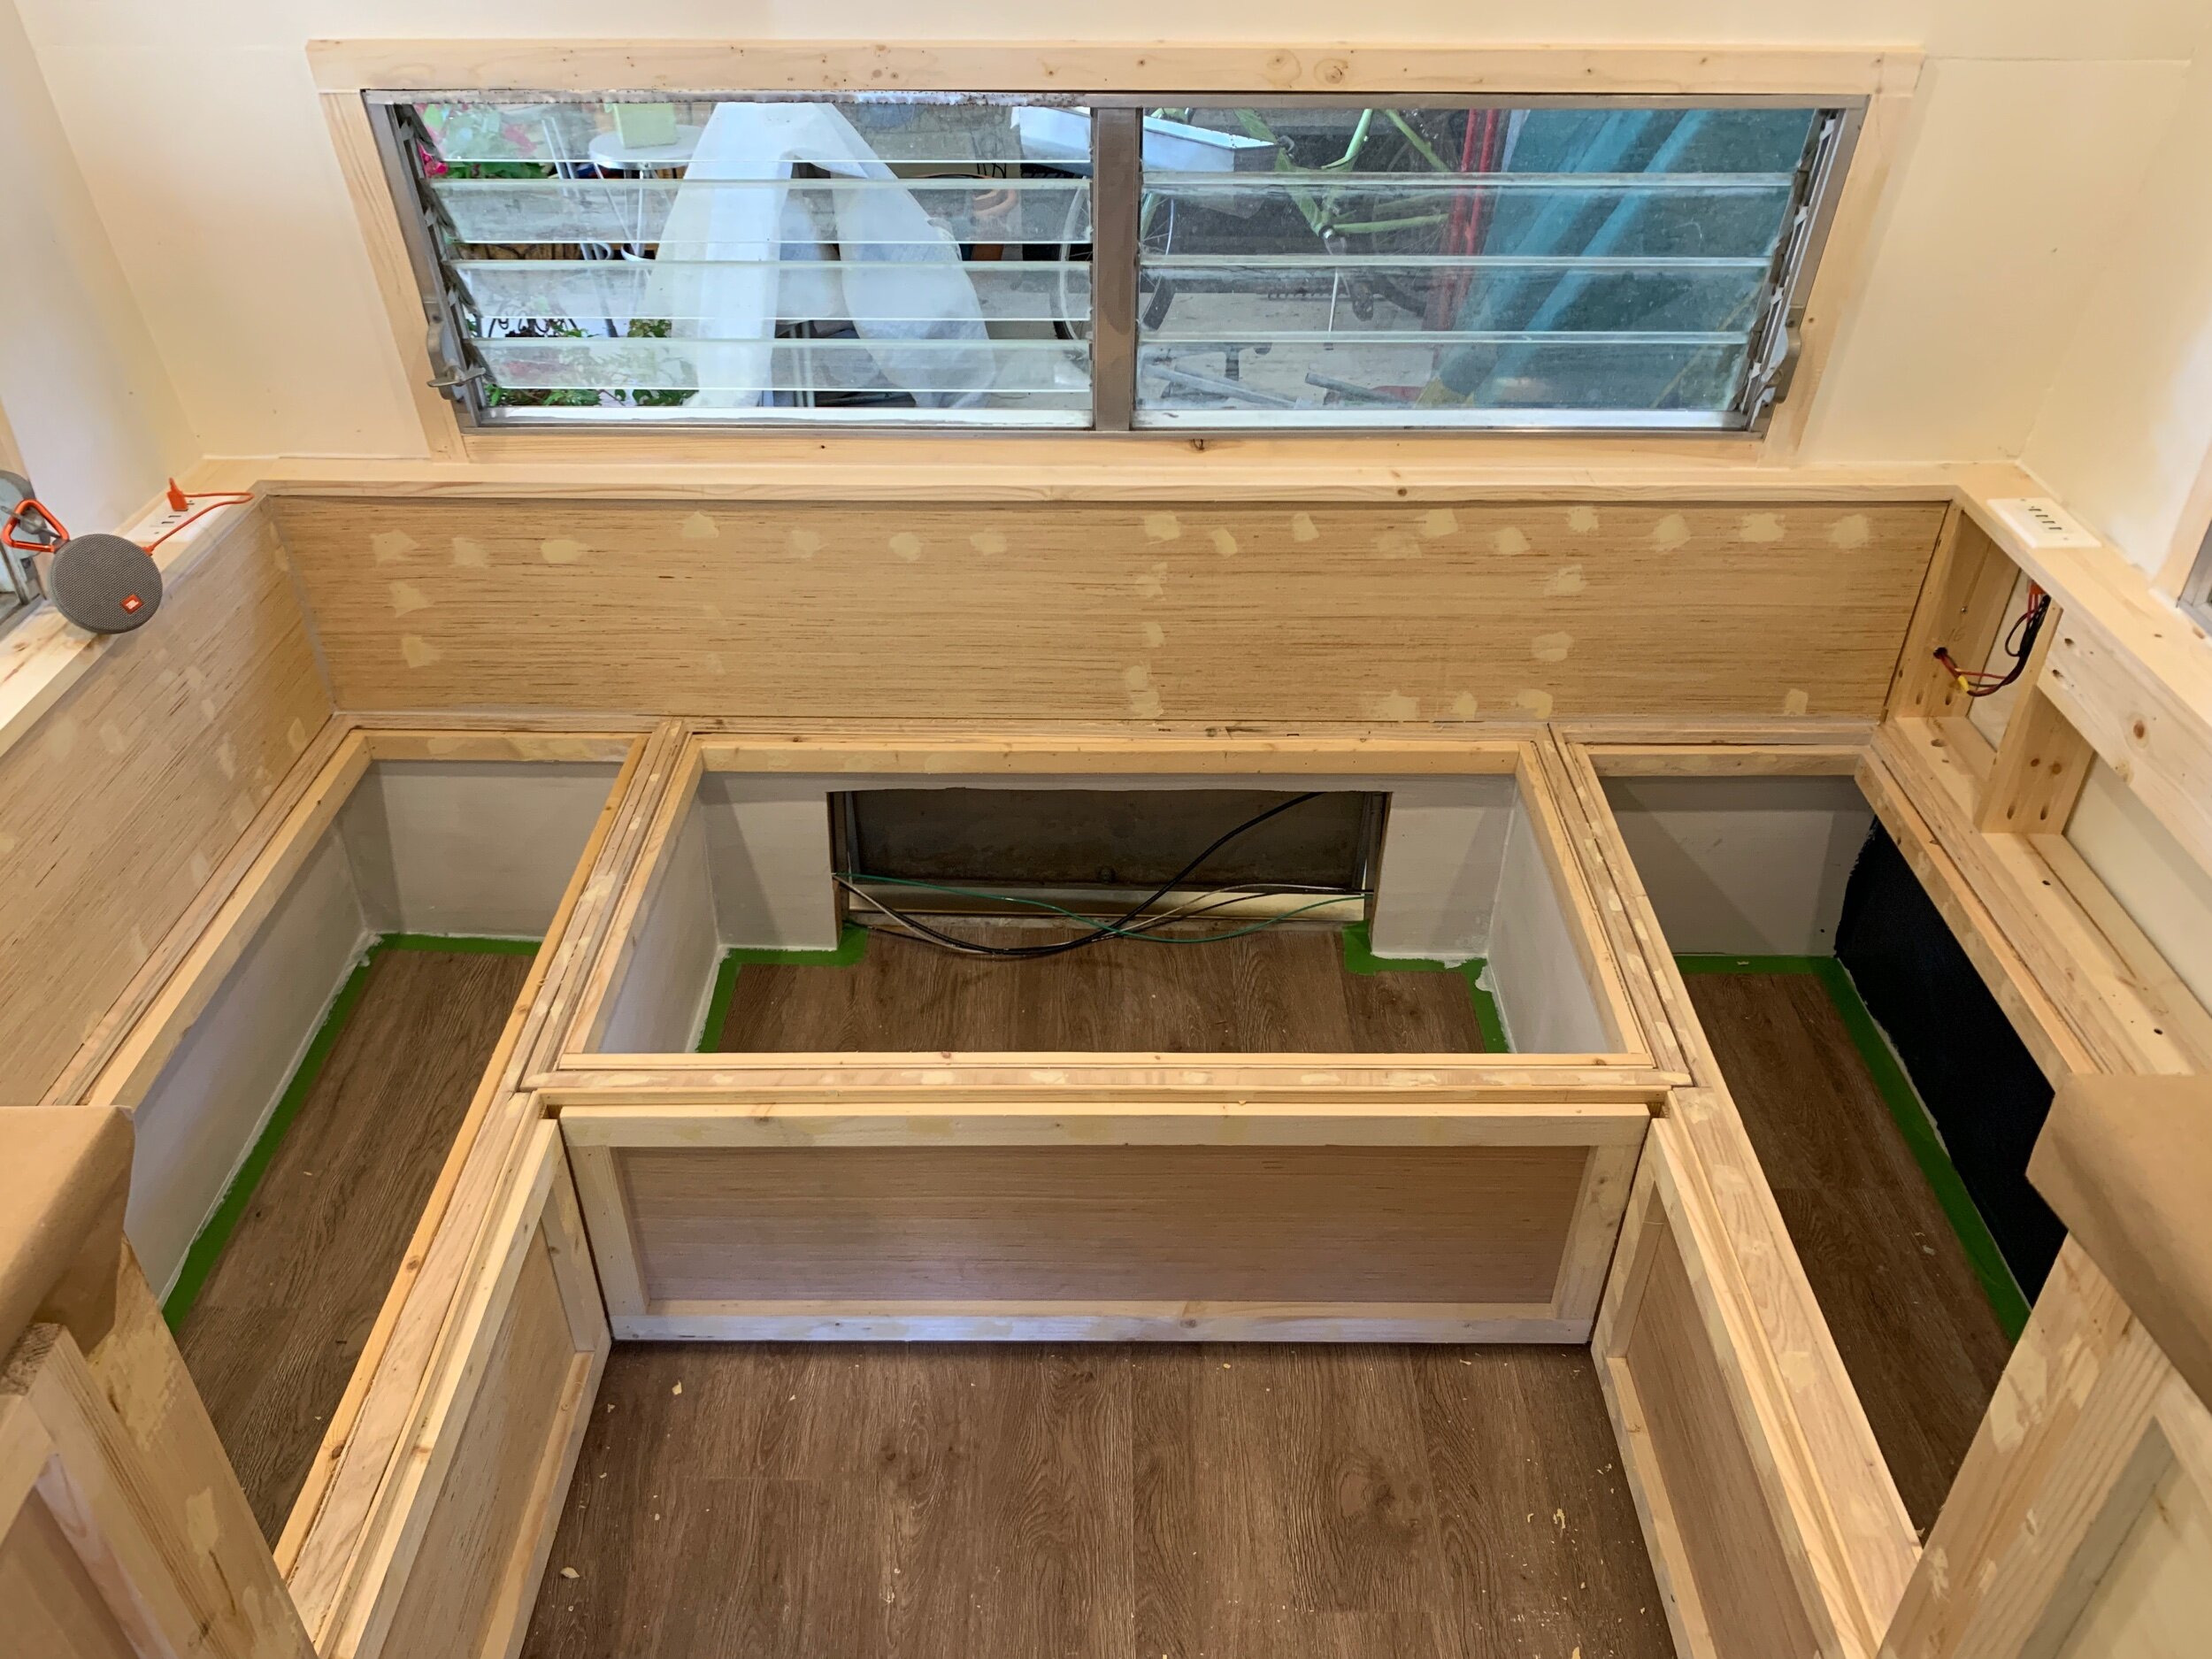
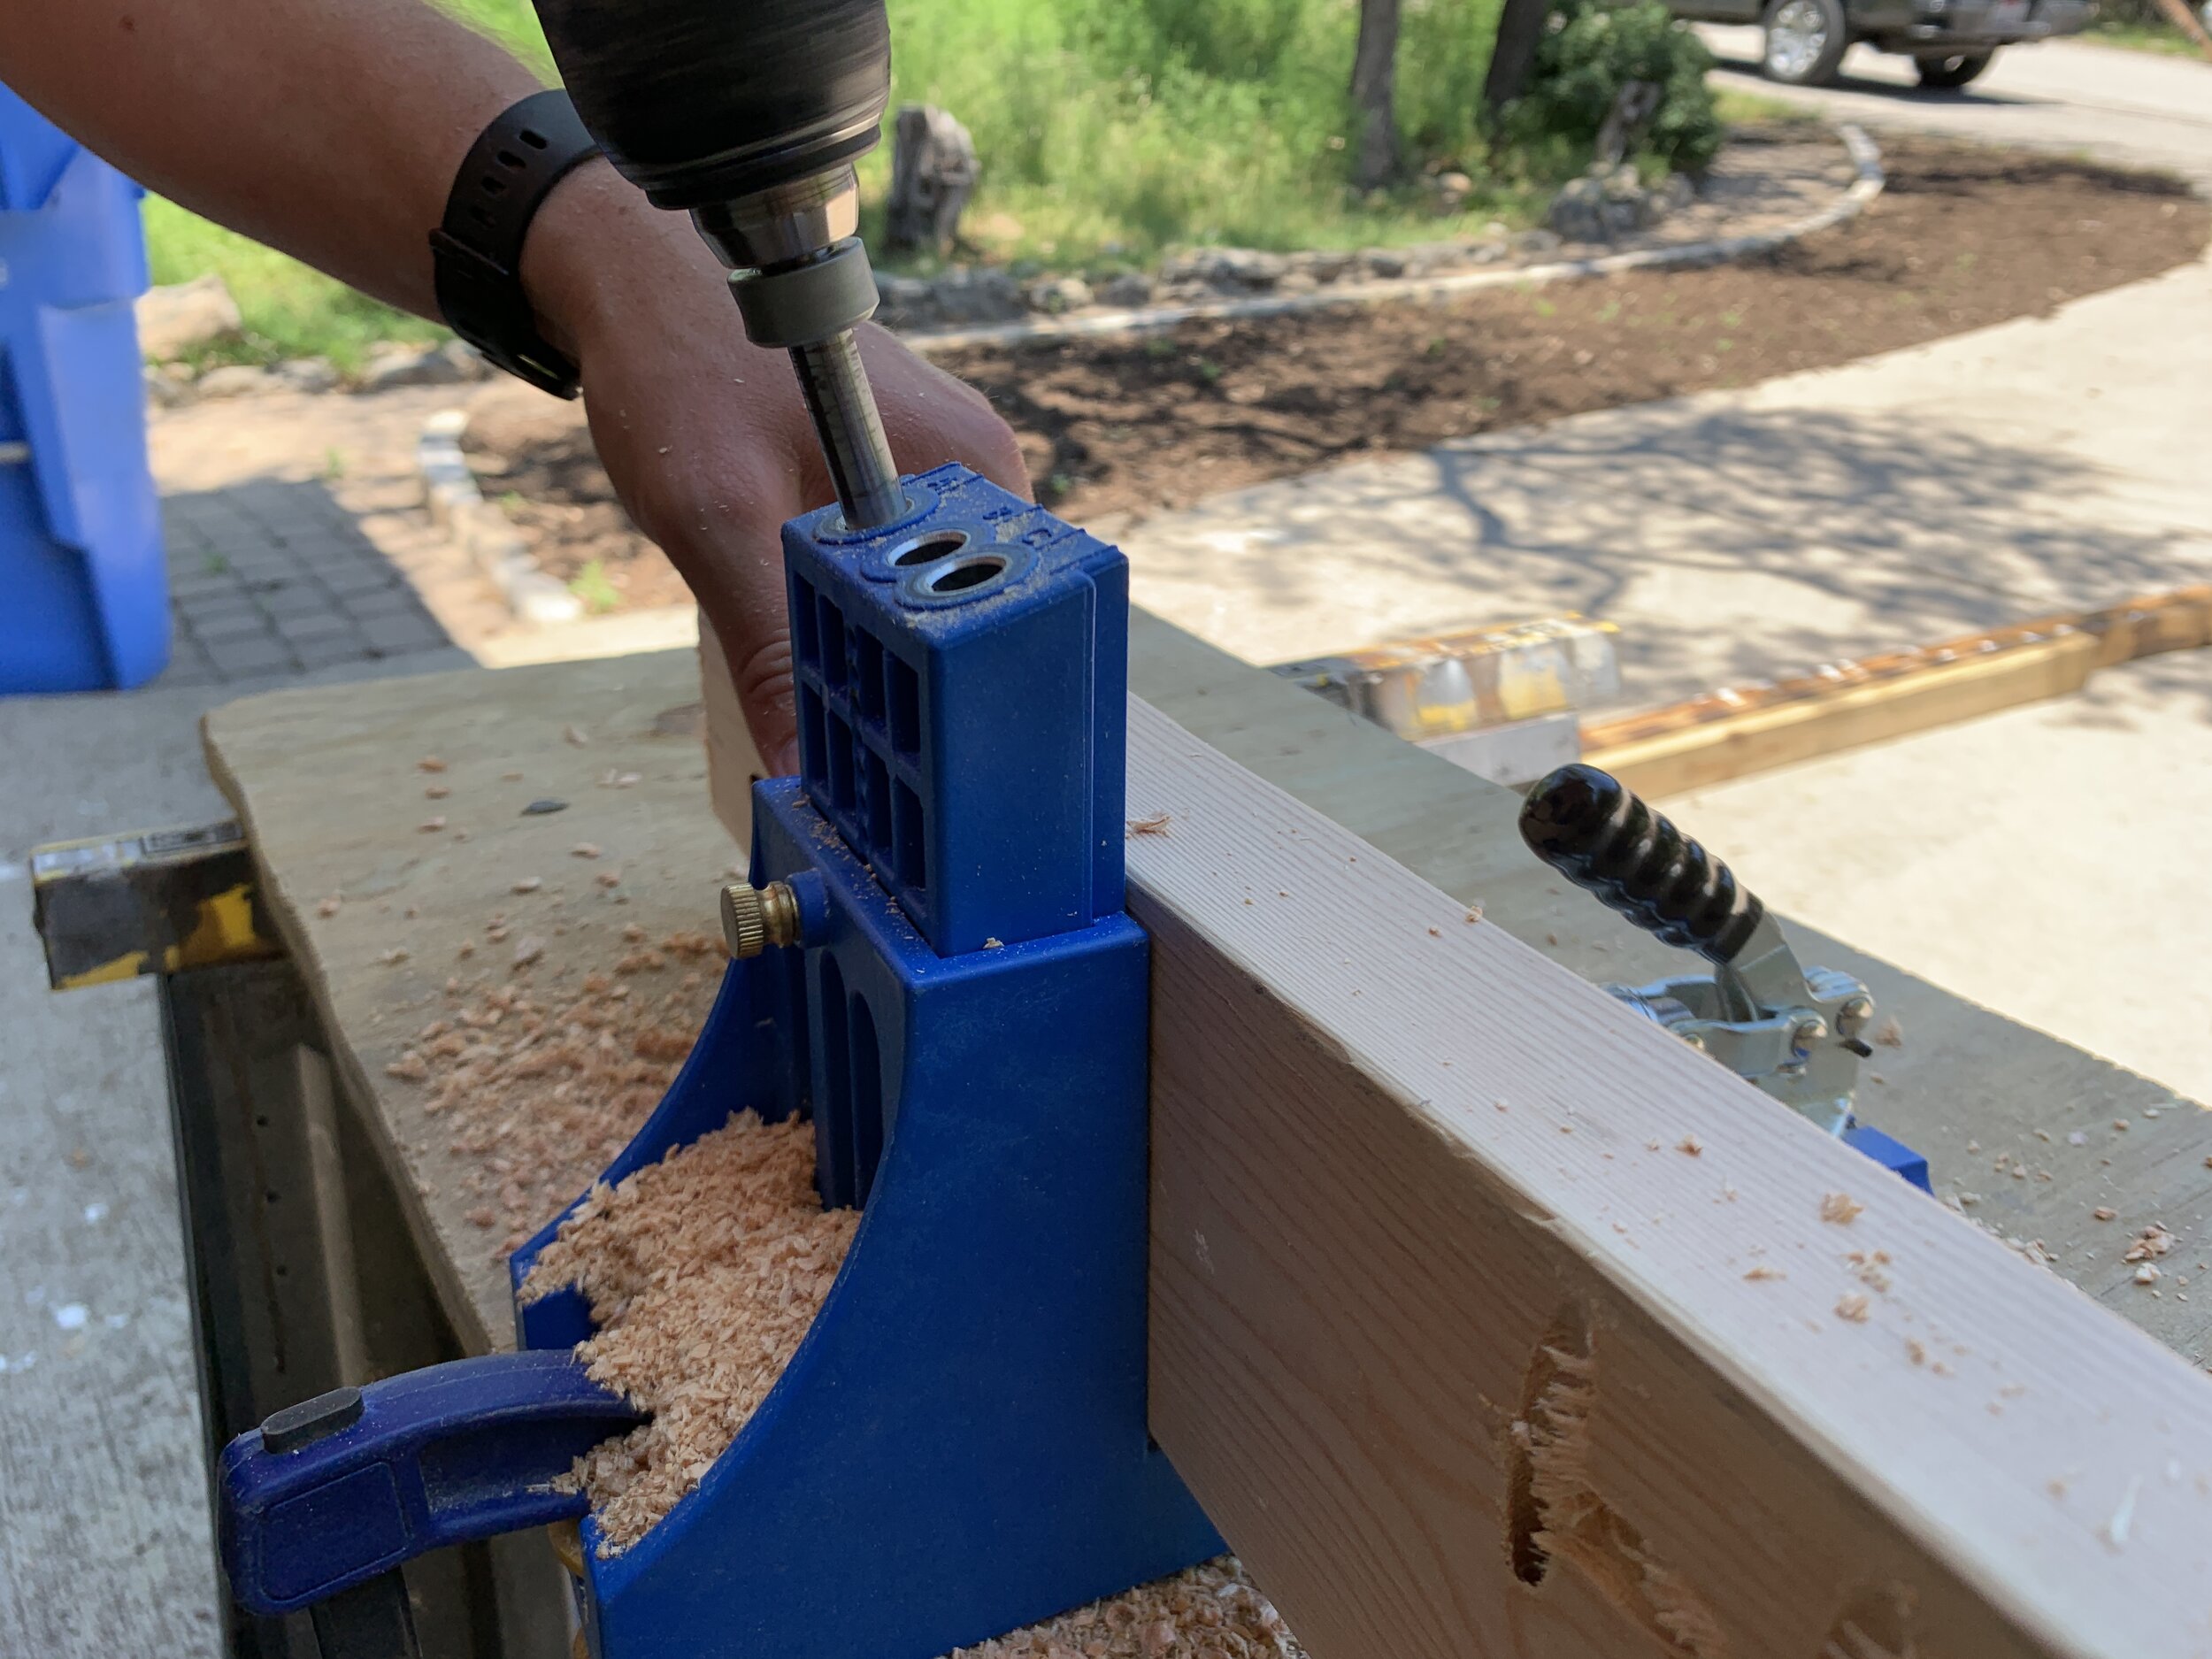
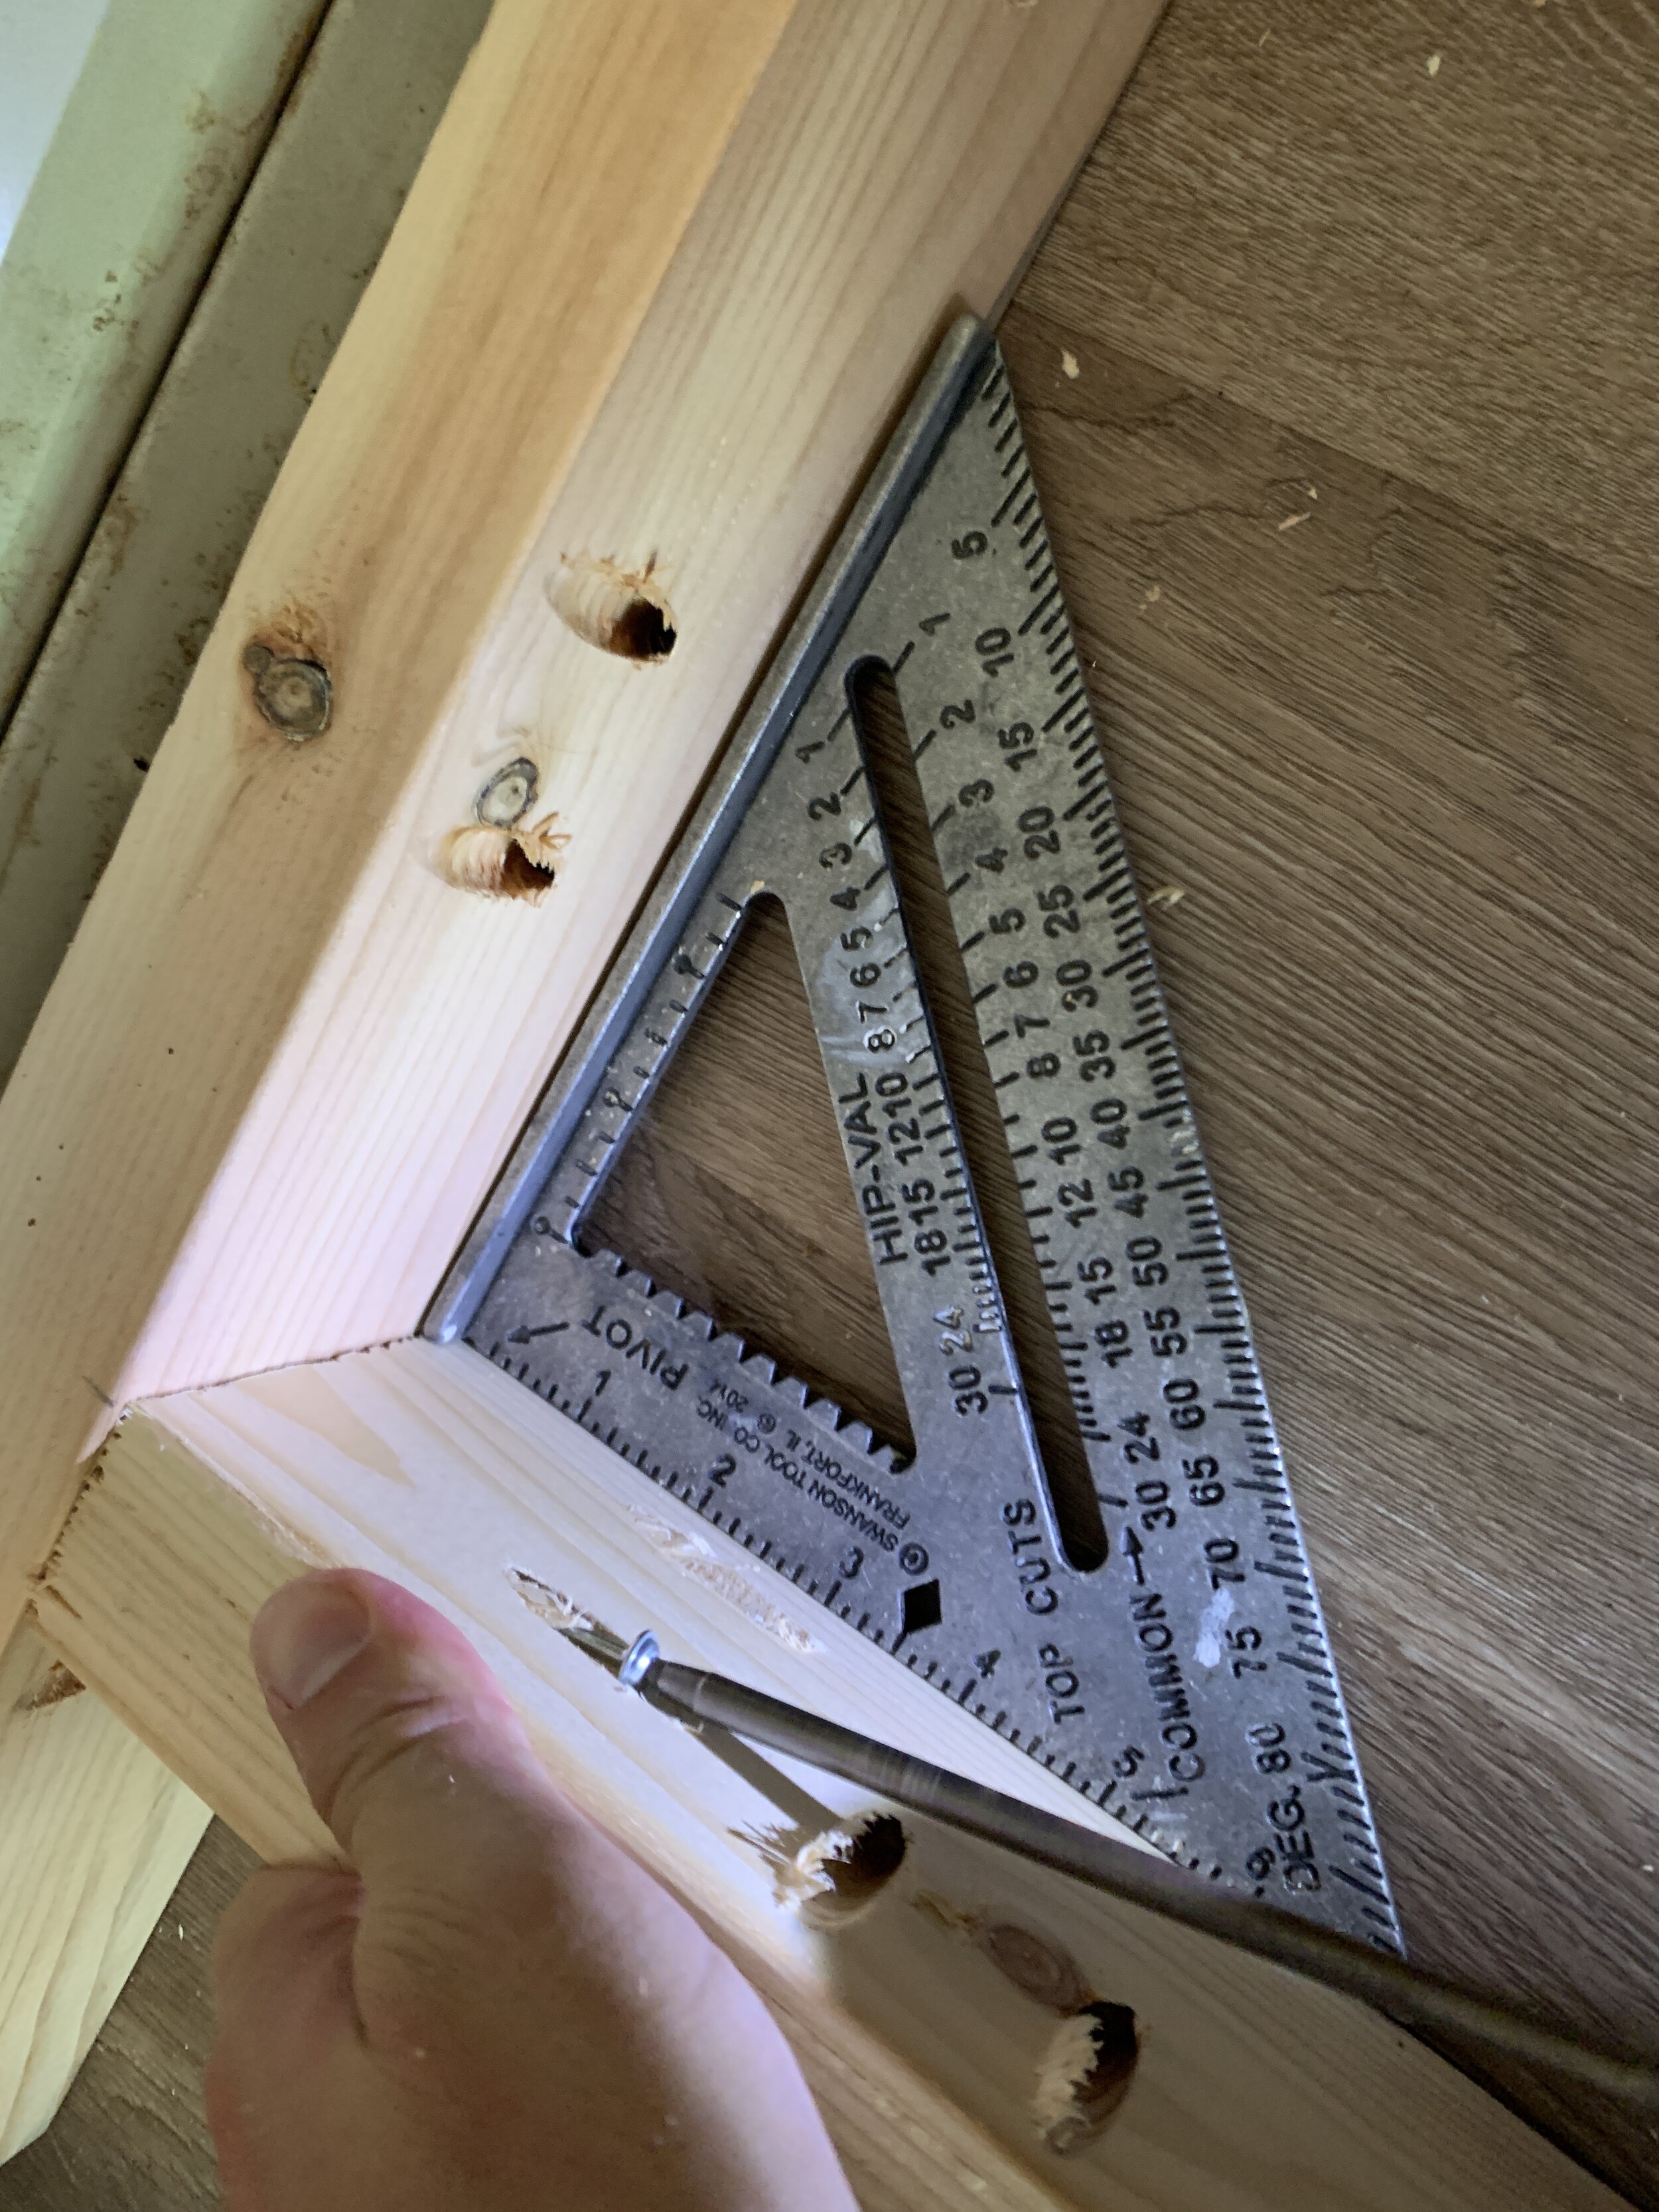
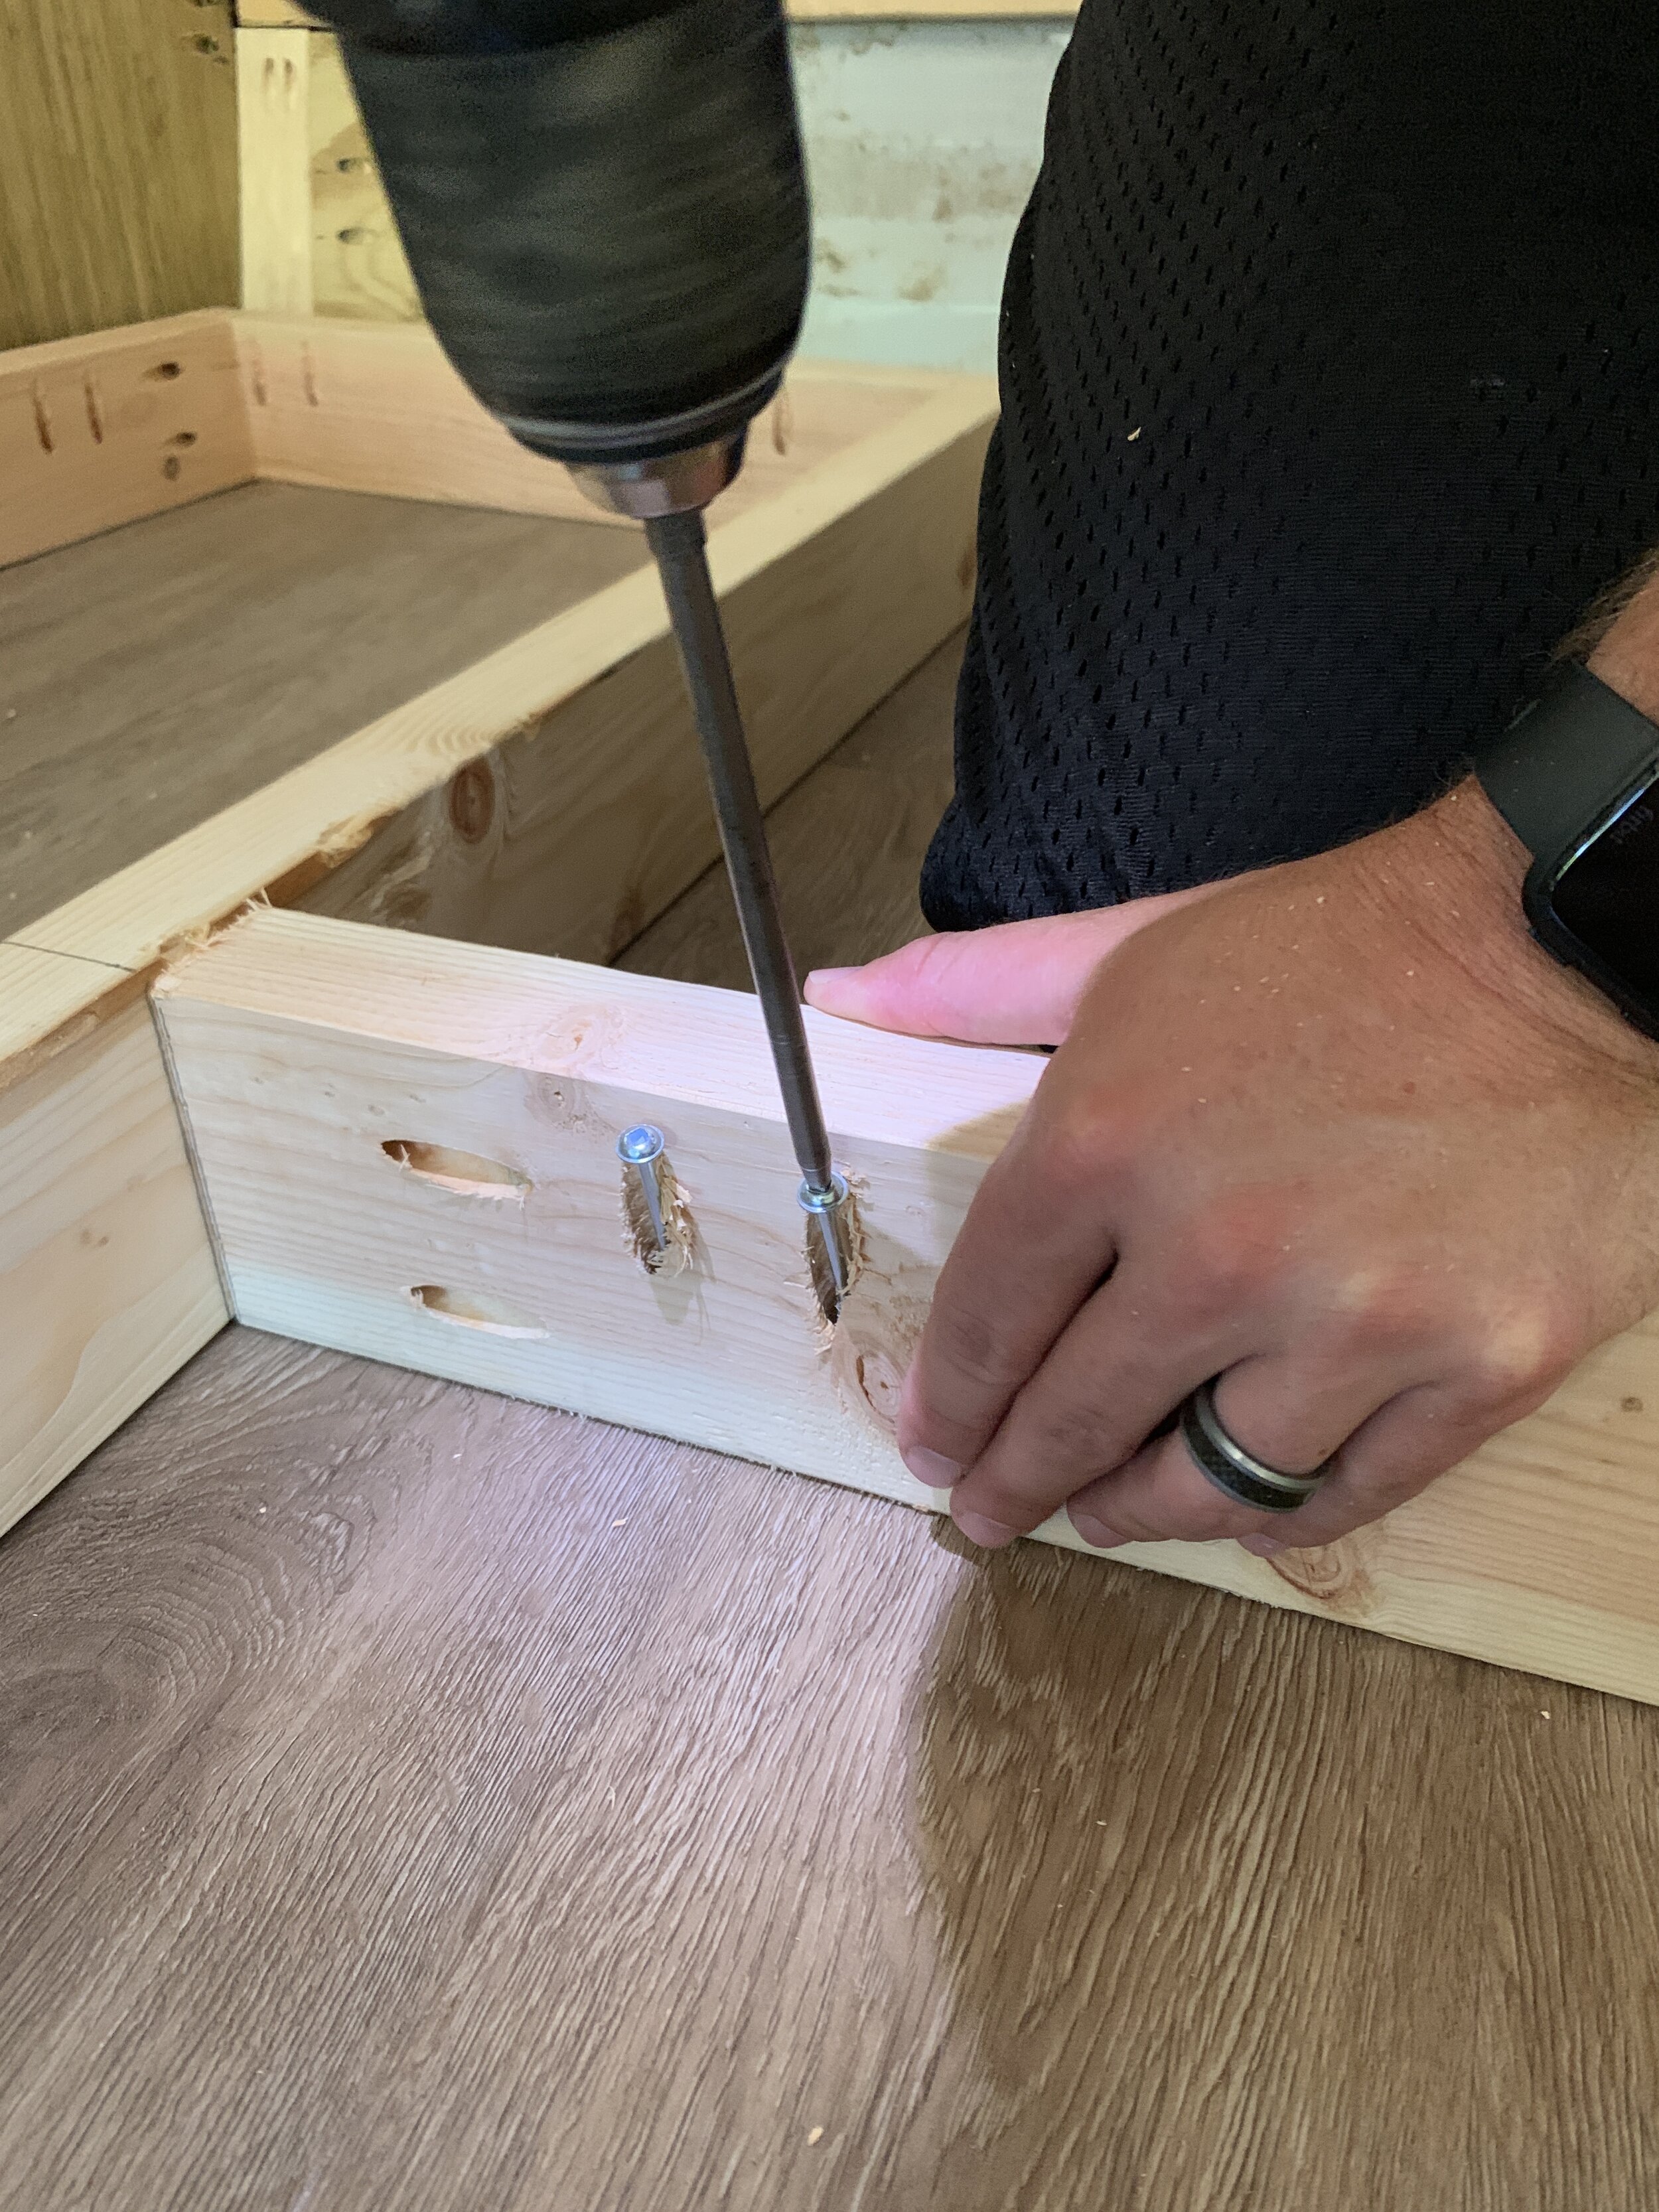
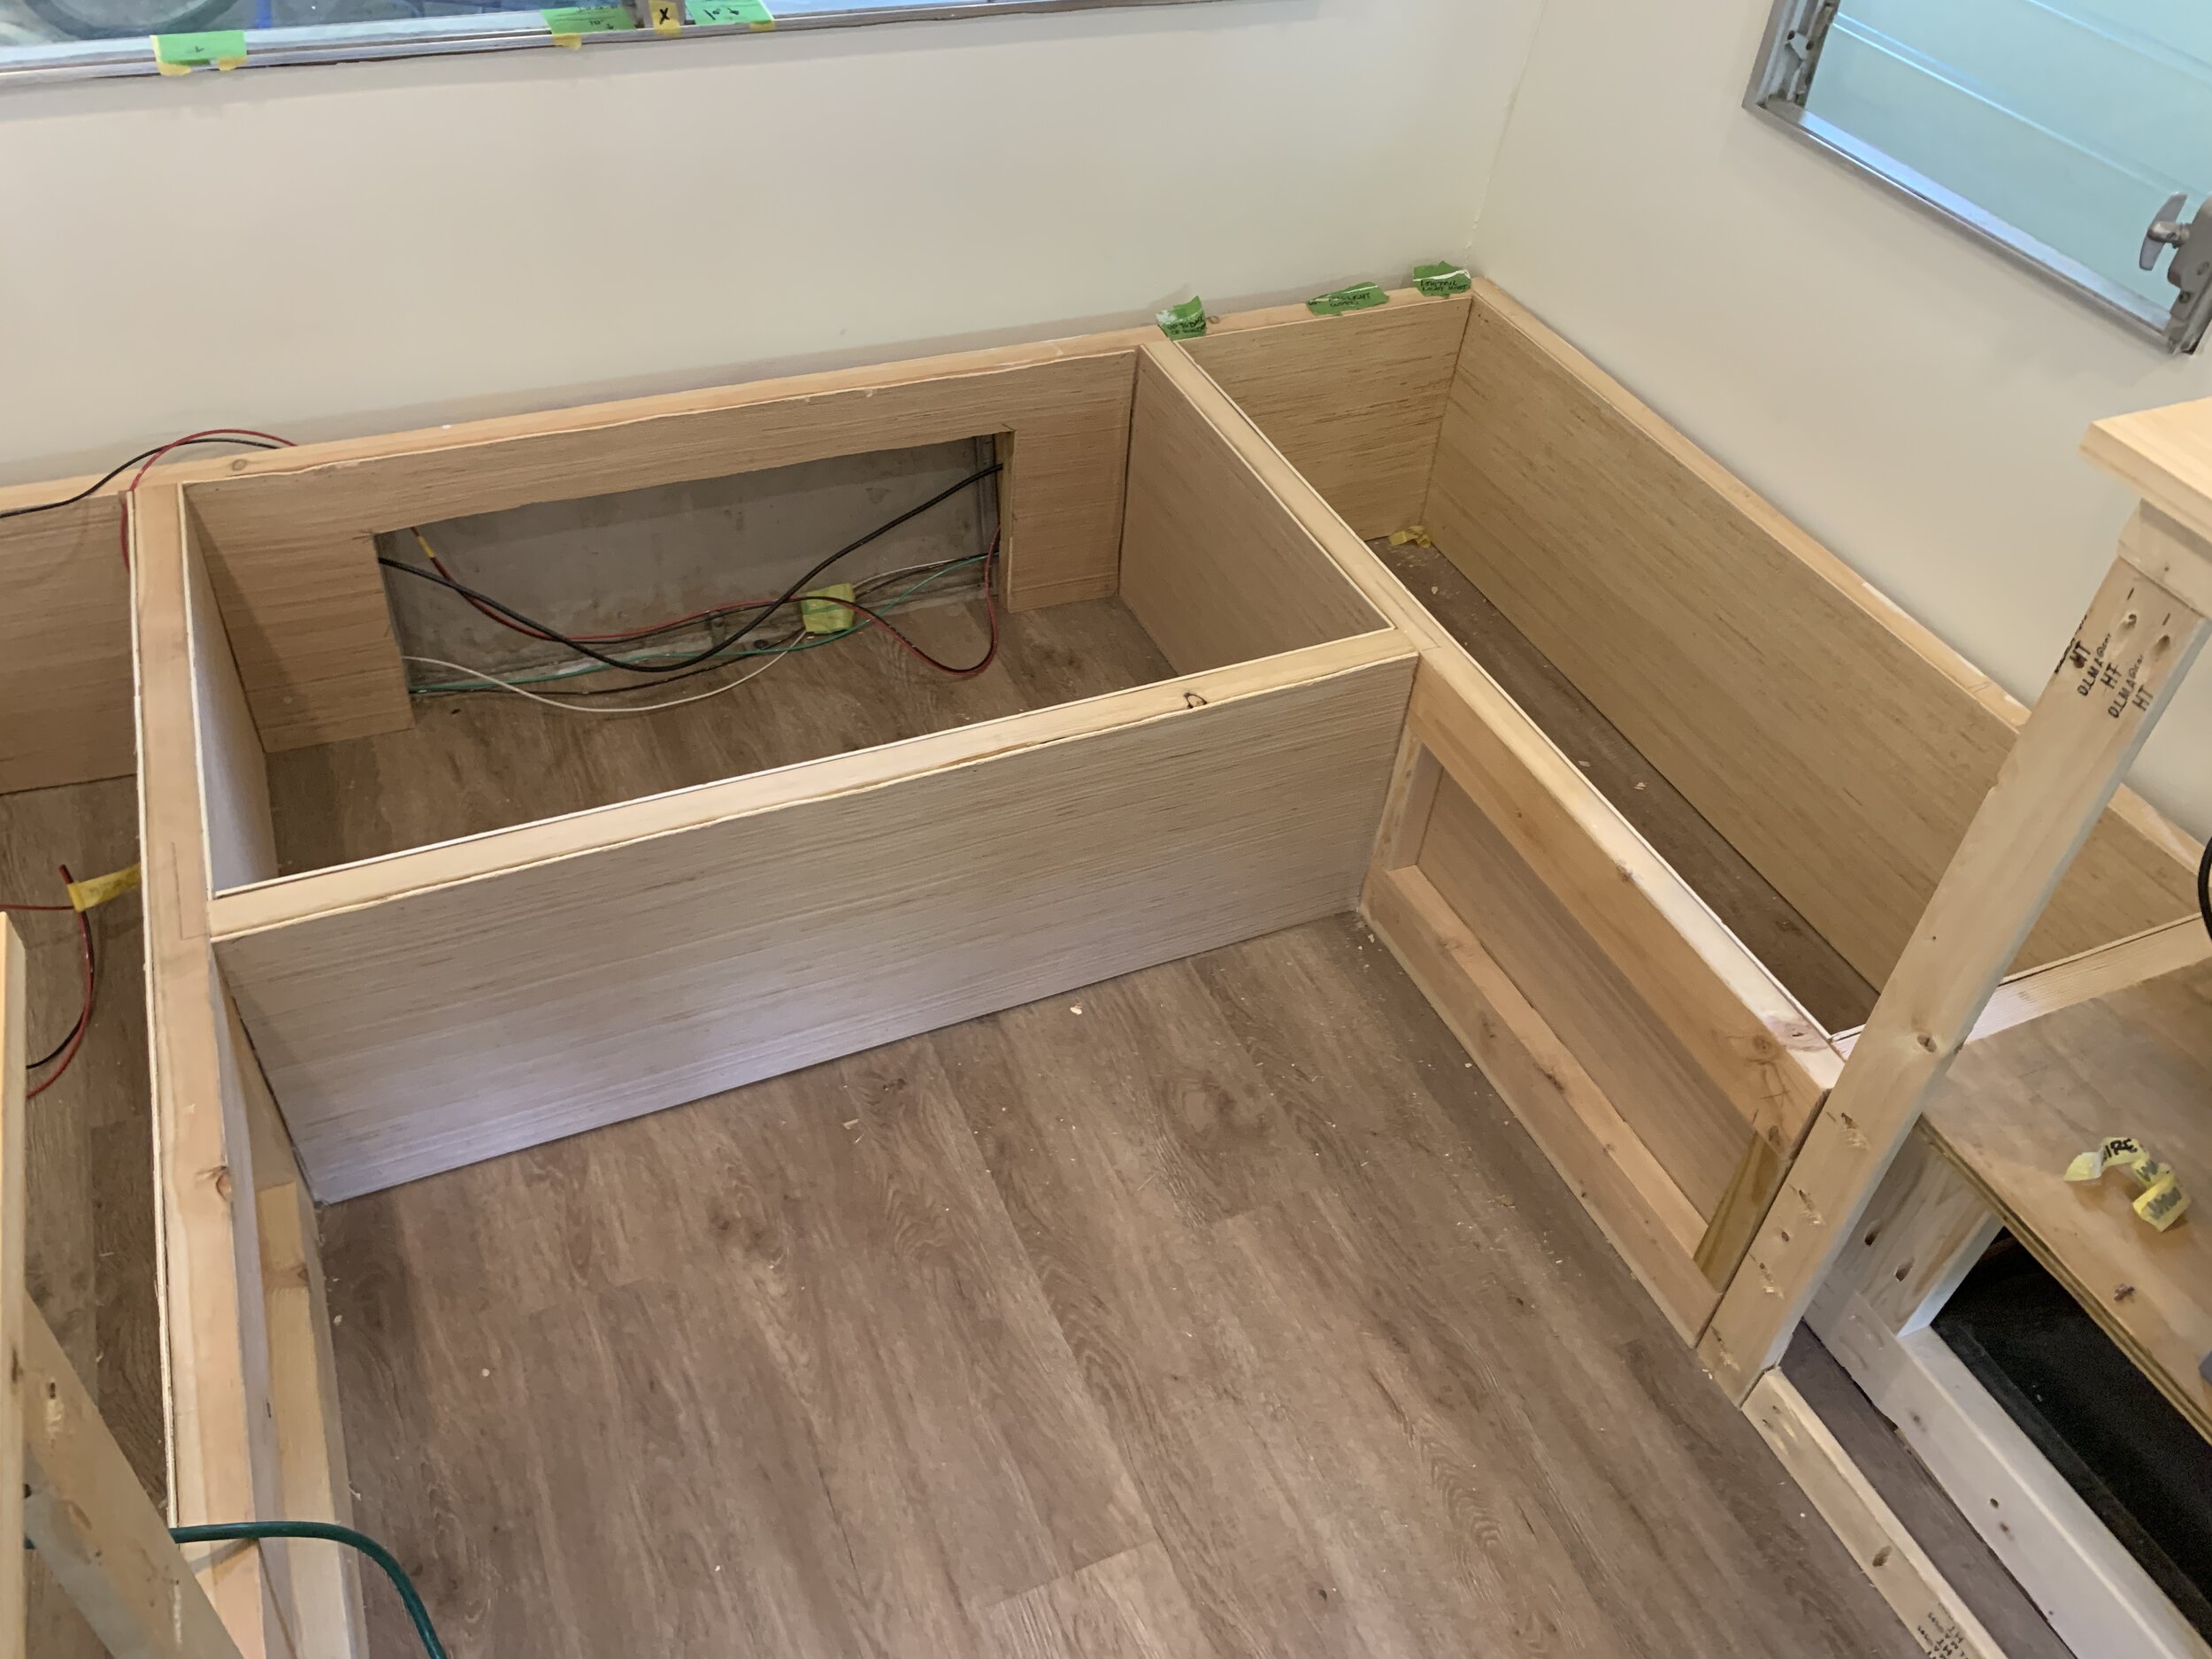
Similarly to how we built the twin bed, we framed the dinette bench with 2x4s and Kreg jig/pocket screws for extra structural support. We know it added some extra weight to the camper (versus, say, using 1x4s), however we wanted our renovation to give The Cameo many more decades of adventures and to make sure whoever sat/laid on it would be fully supported without question.
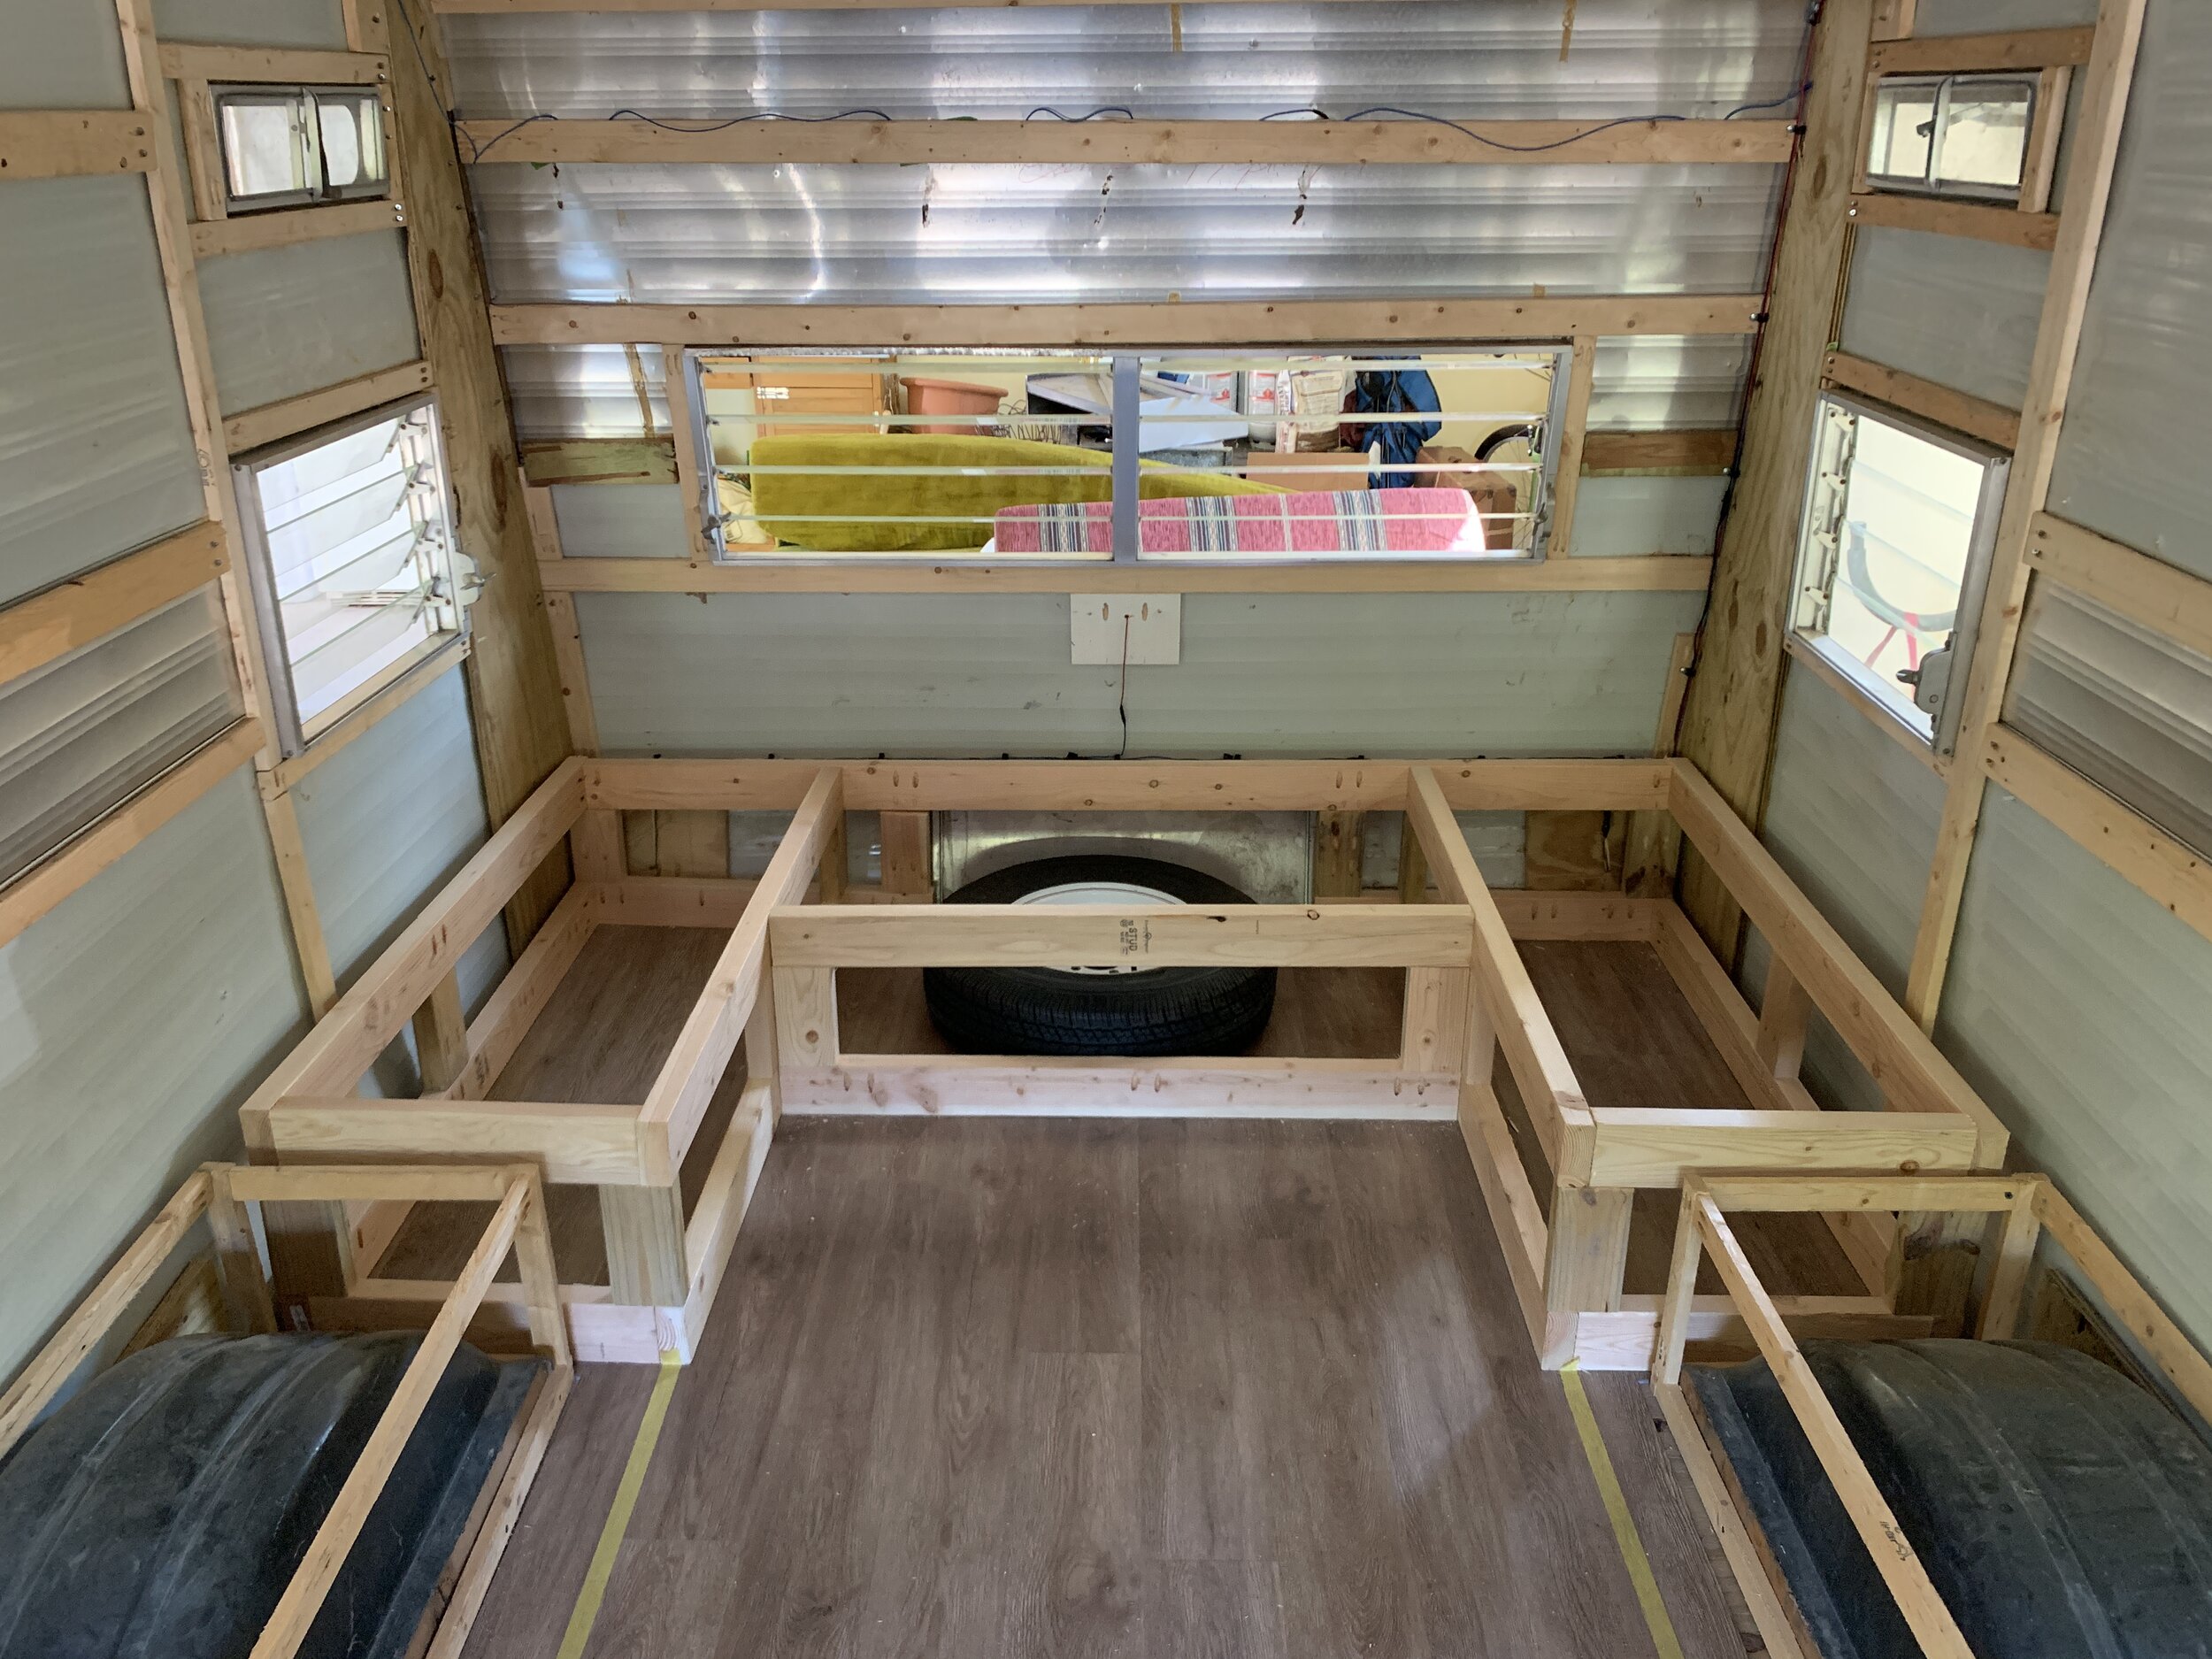
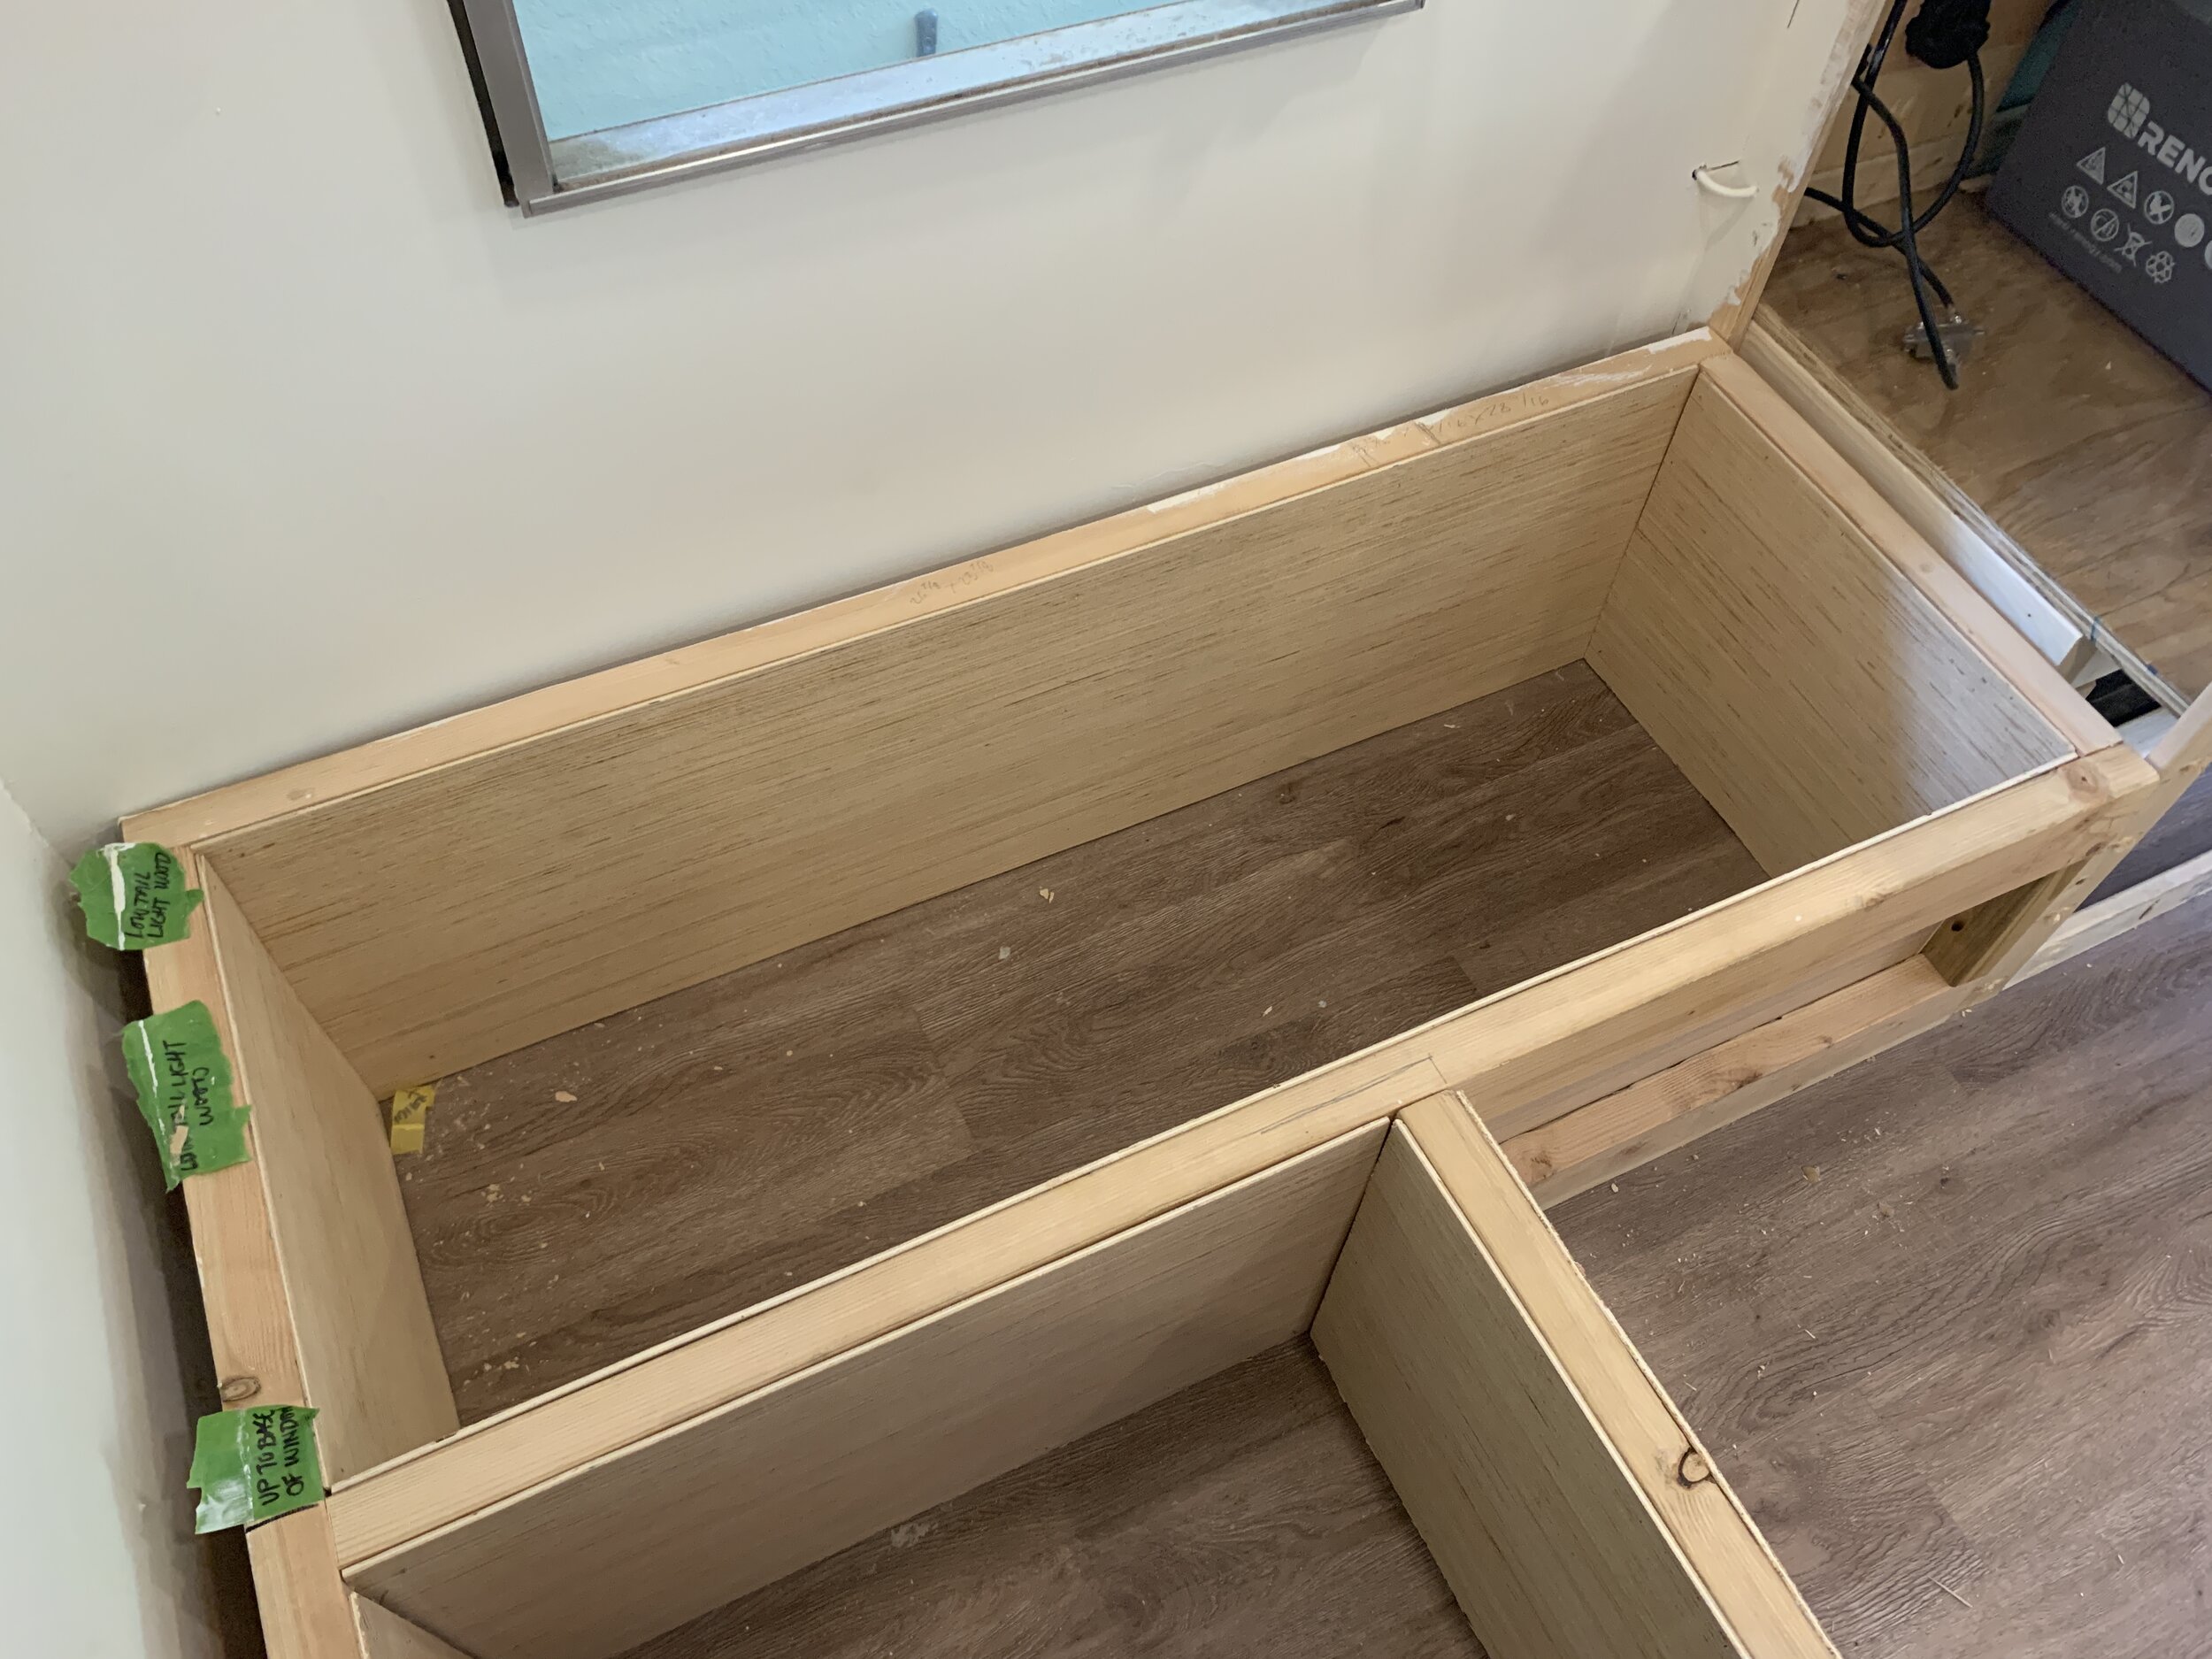
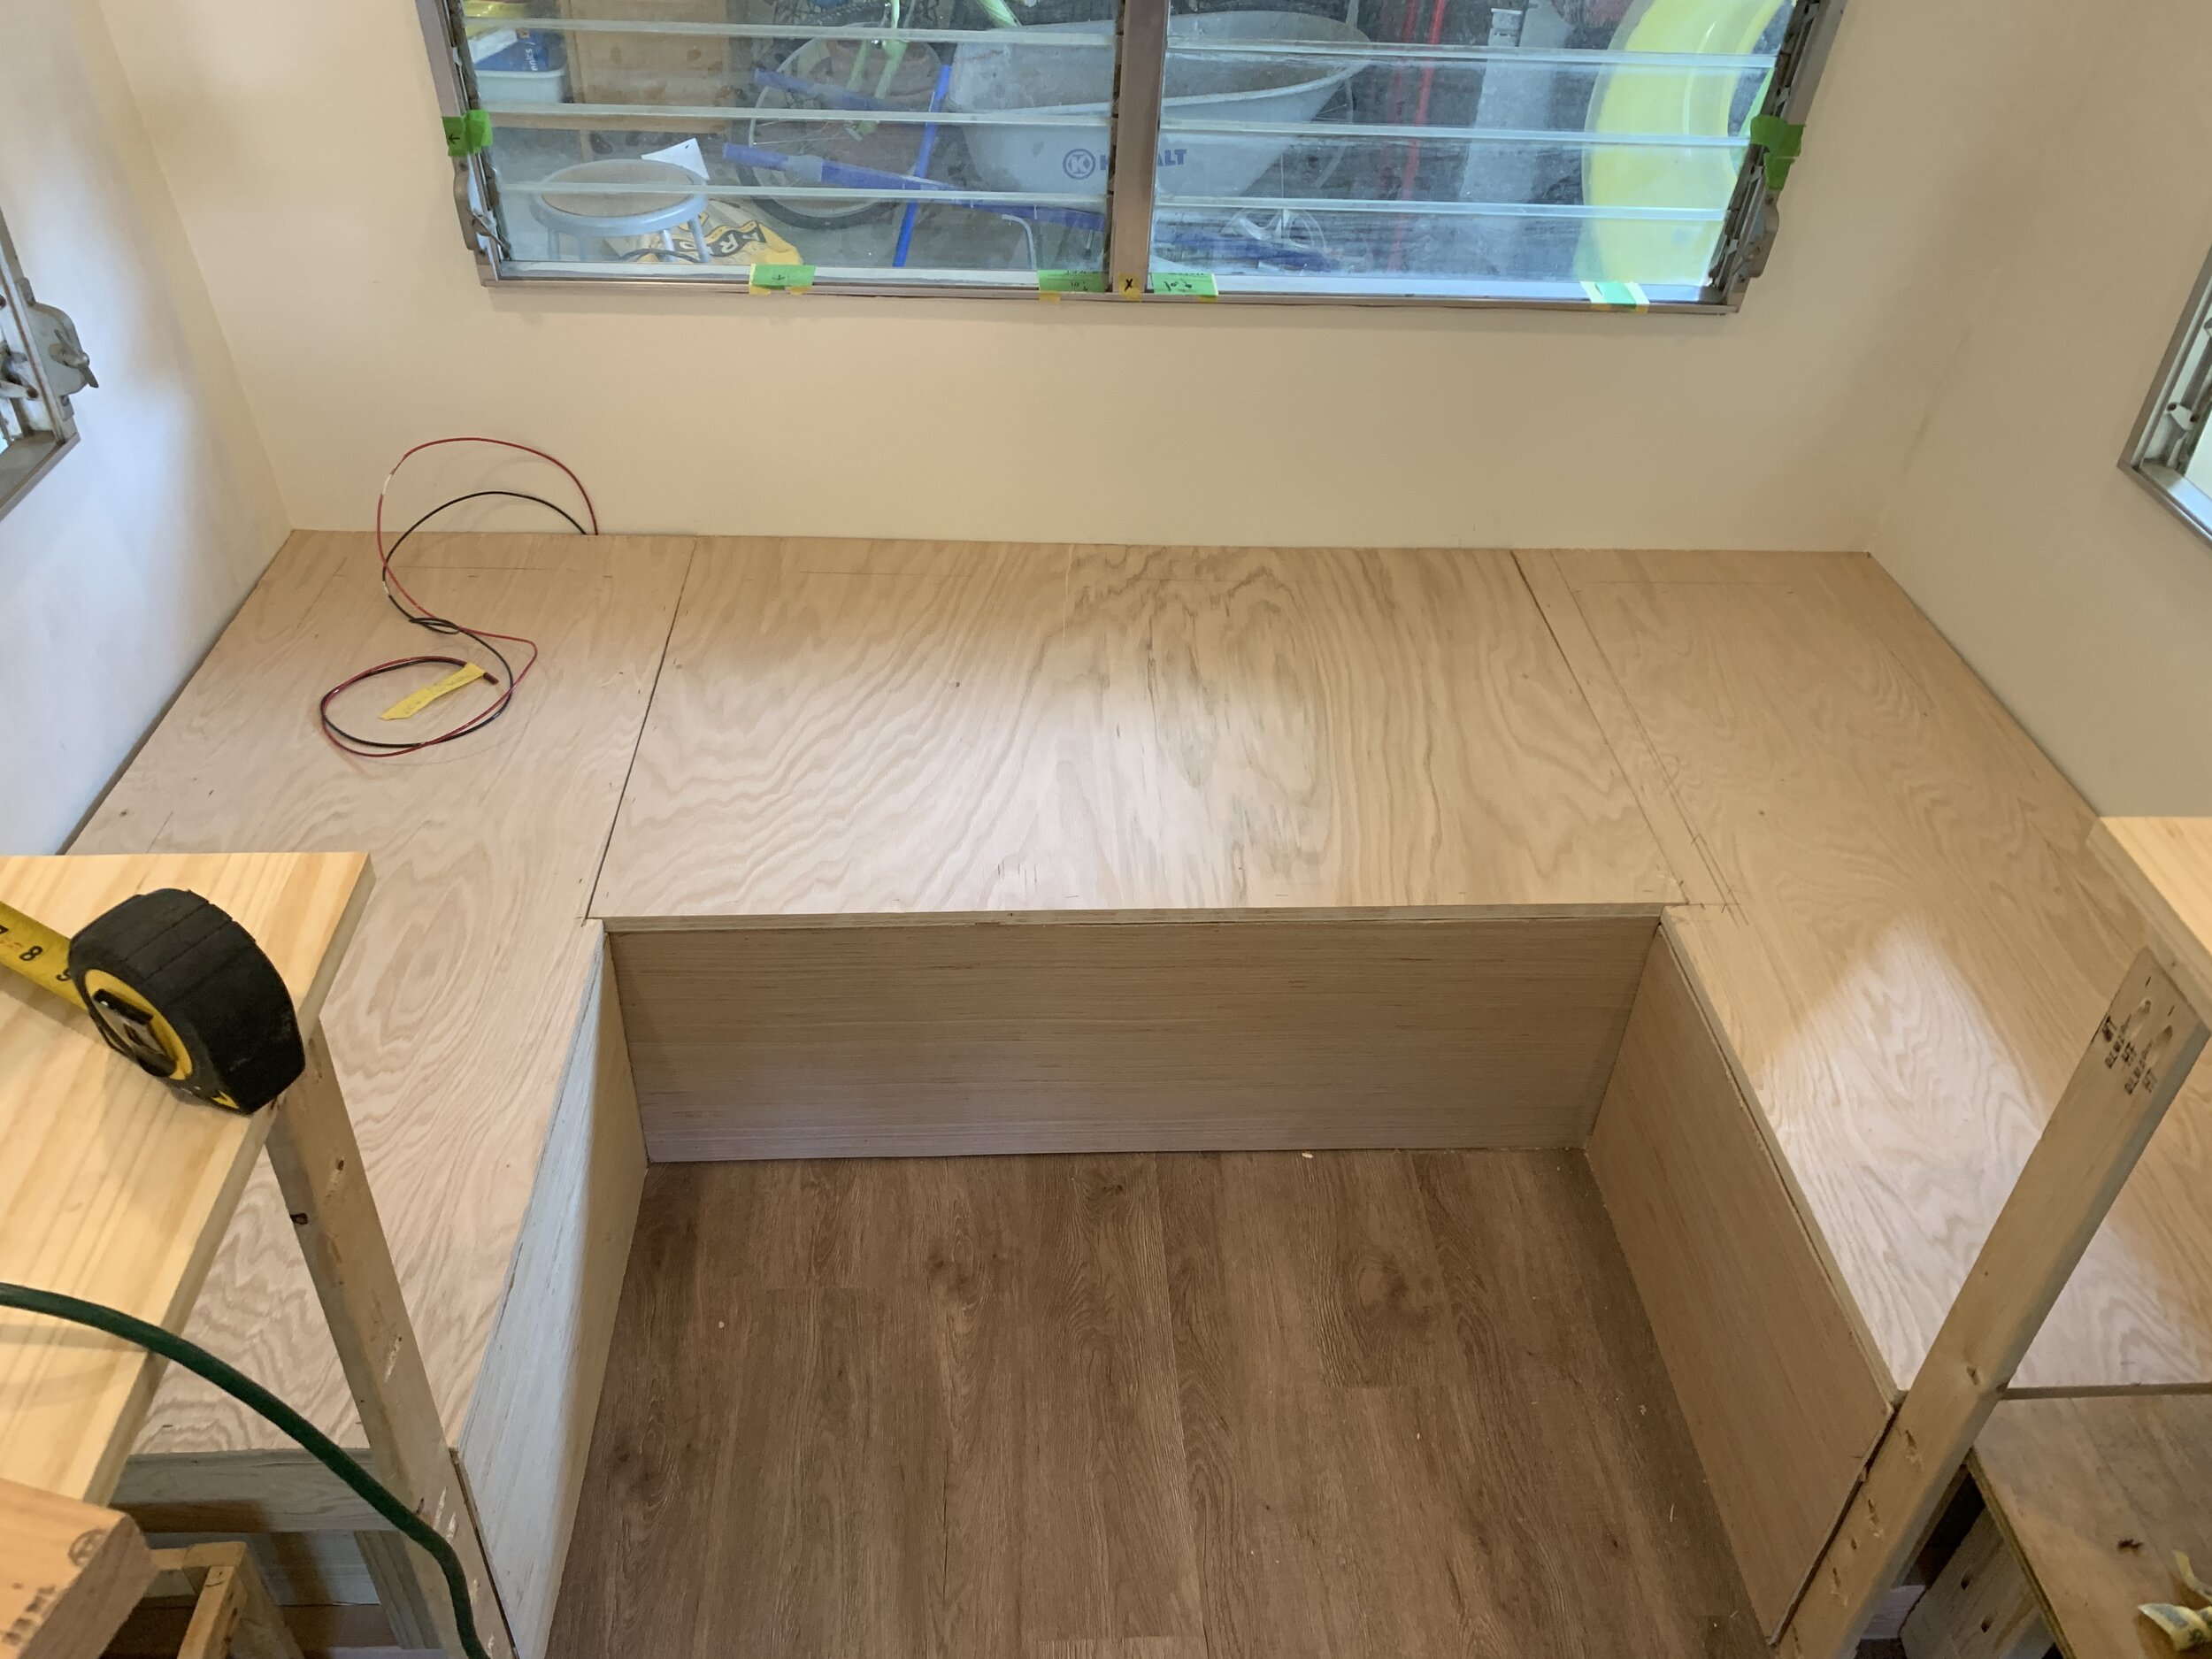
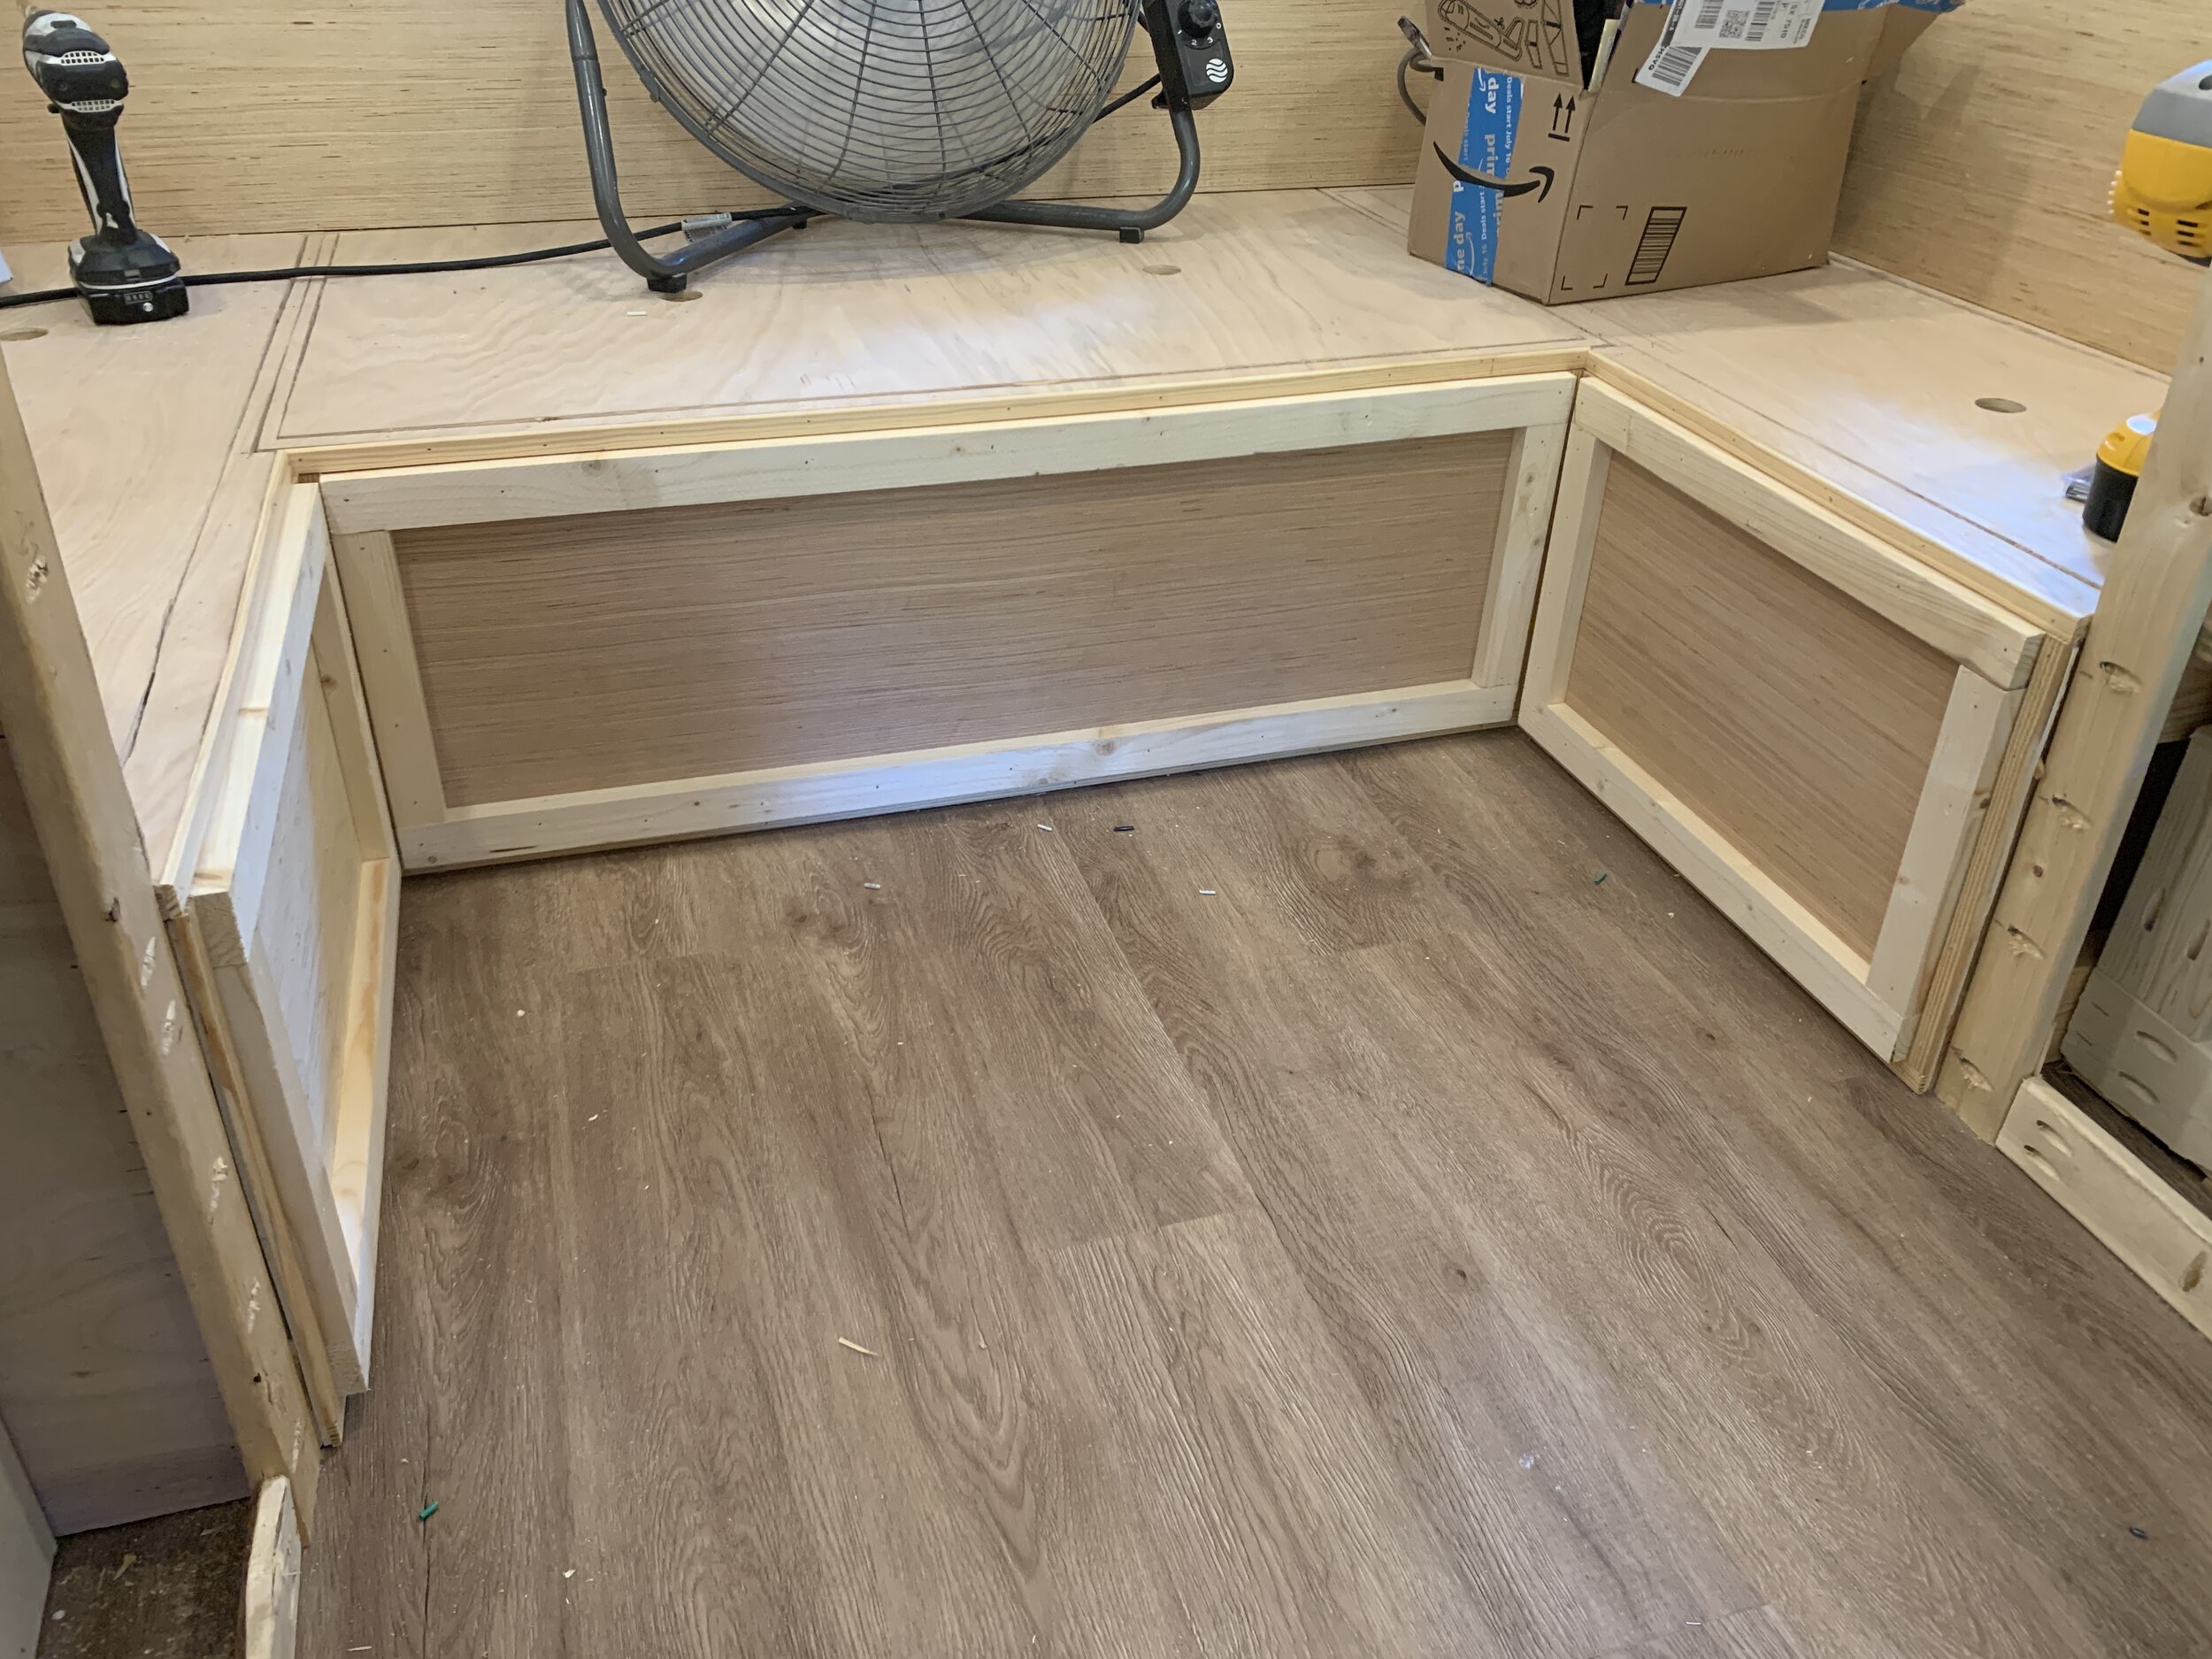
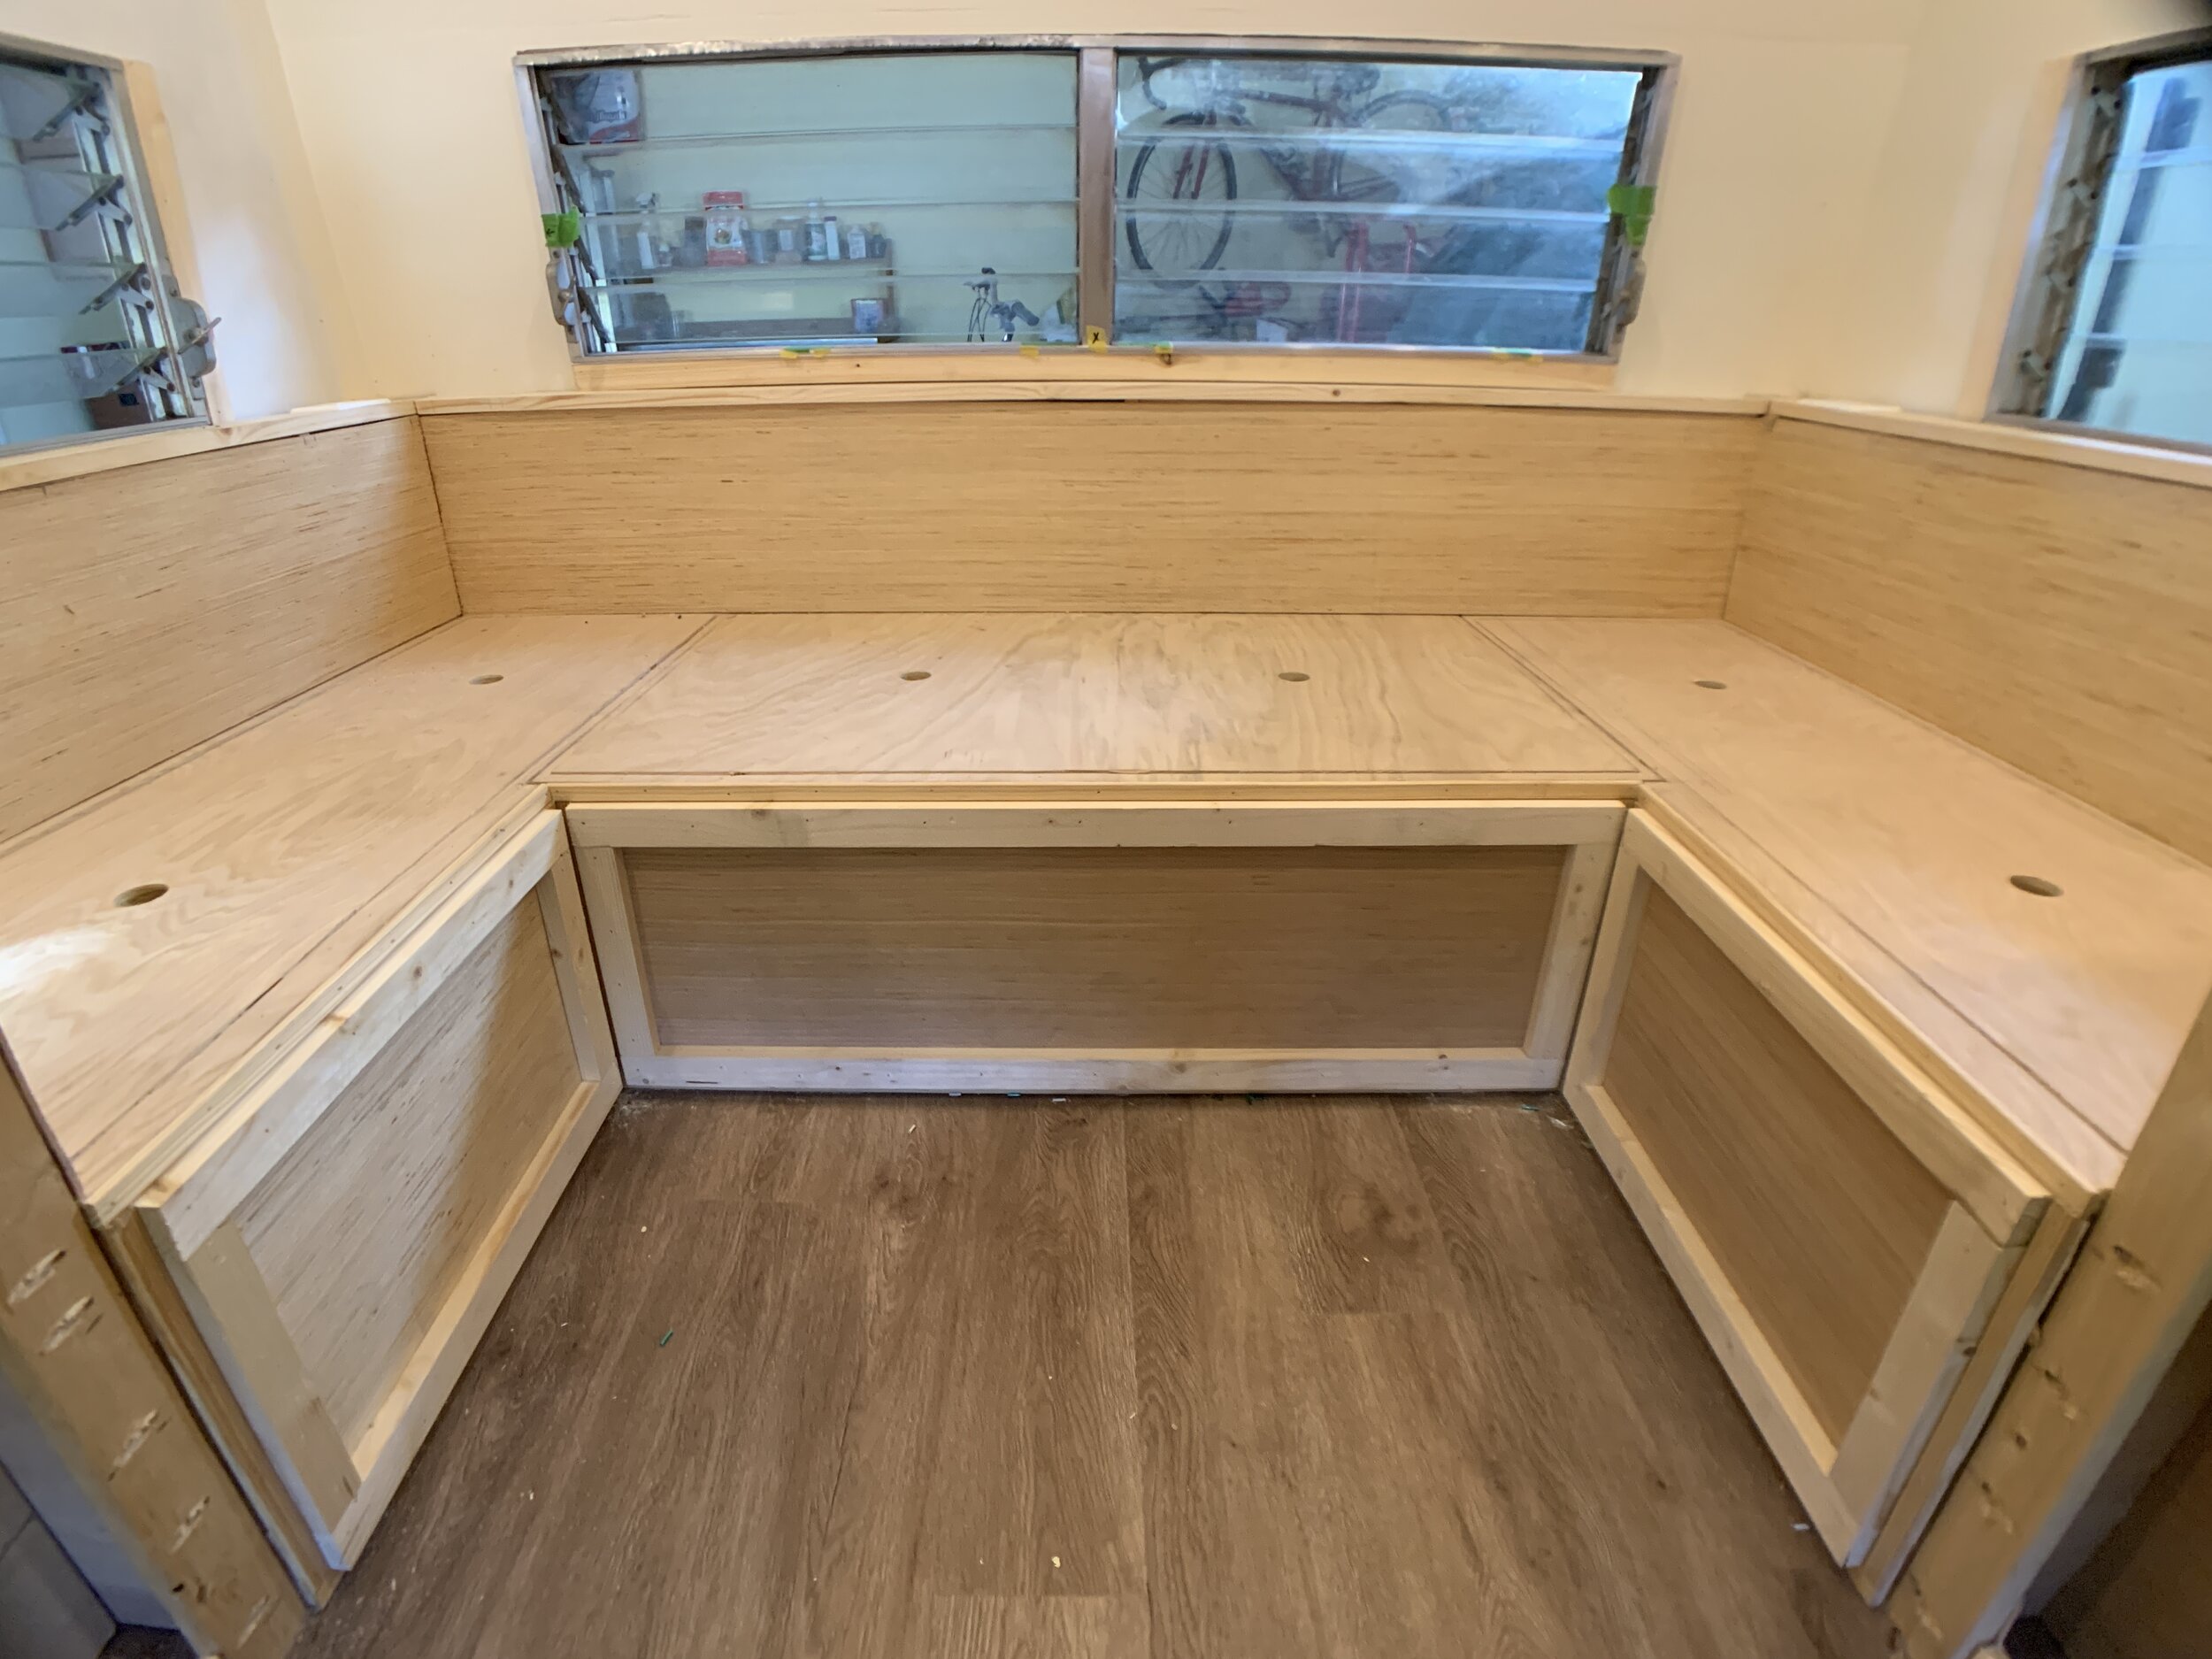
We built the bench in sections – a main center base and two side “wings”. The centered base seat is much deeper than the seat depth of the wings, mostly because we wanted it deep enough to store our spare tire inside (accessible from the little external hatch in the rear of the camper), but also because if we were to make the wings as deep as the center, there’d be practically no leg room when sitting at the table. Not to mention the added seat depth for the centered base/along the rear wall of the camper will allow our convertible seat cushions the extra space they need – but we’ll cover those in a separate post later.
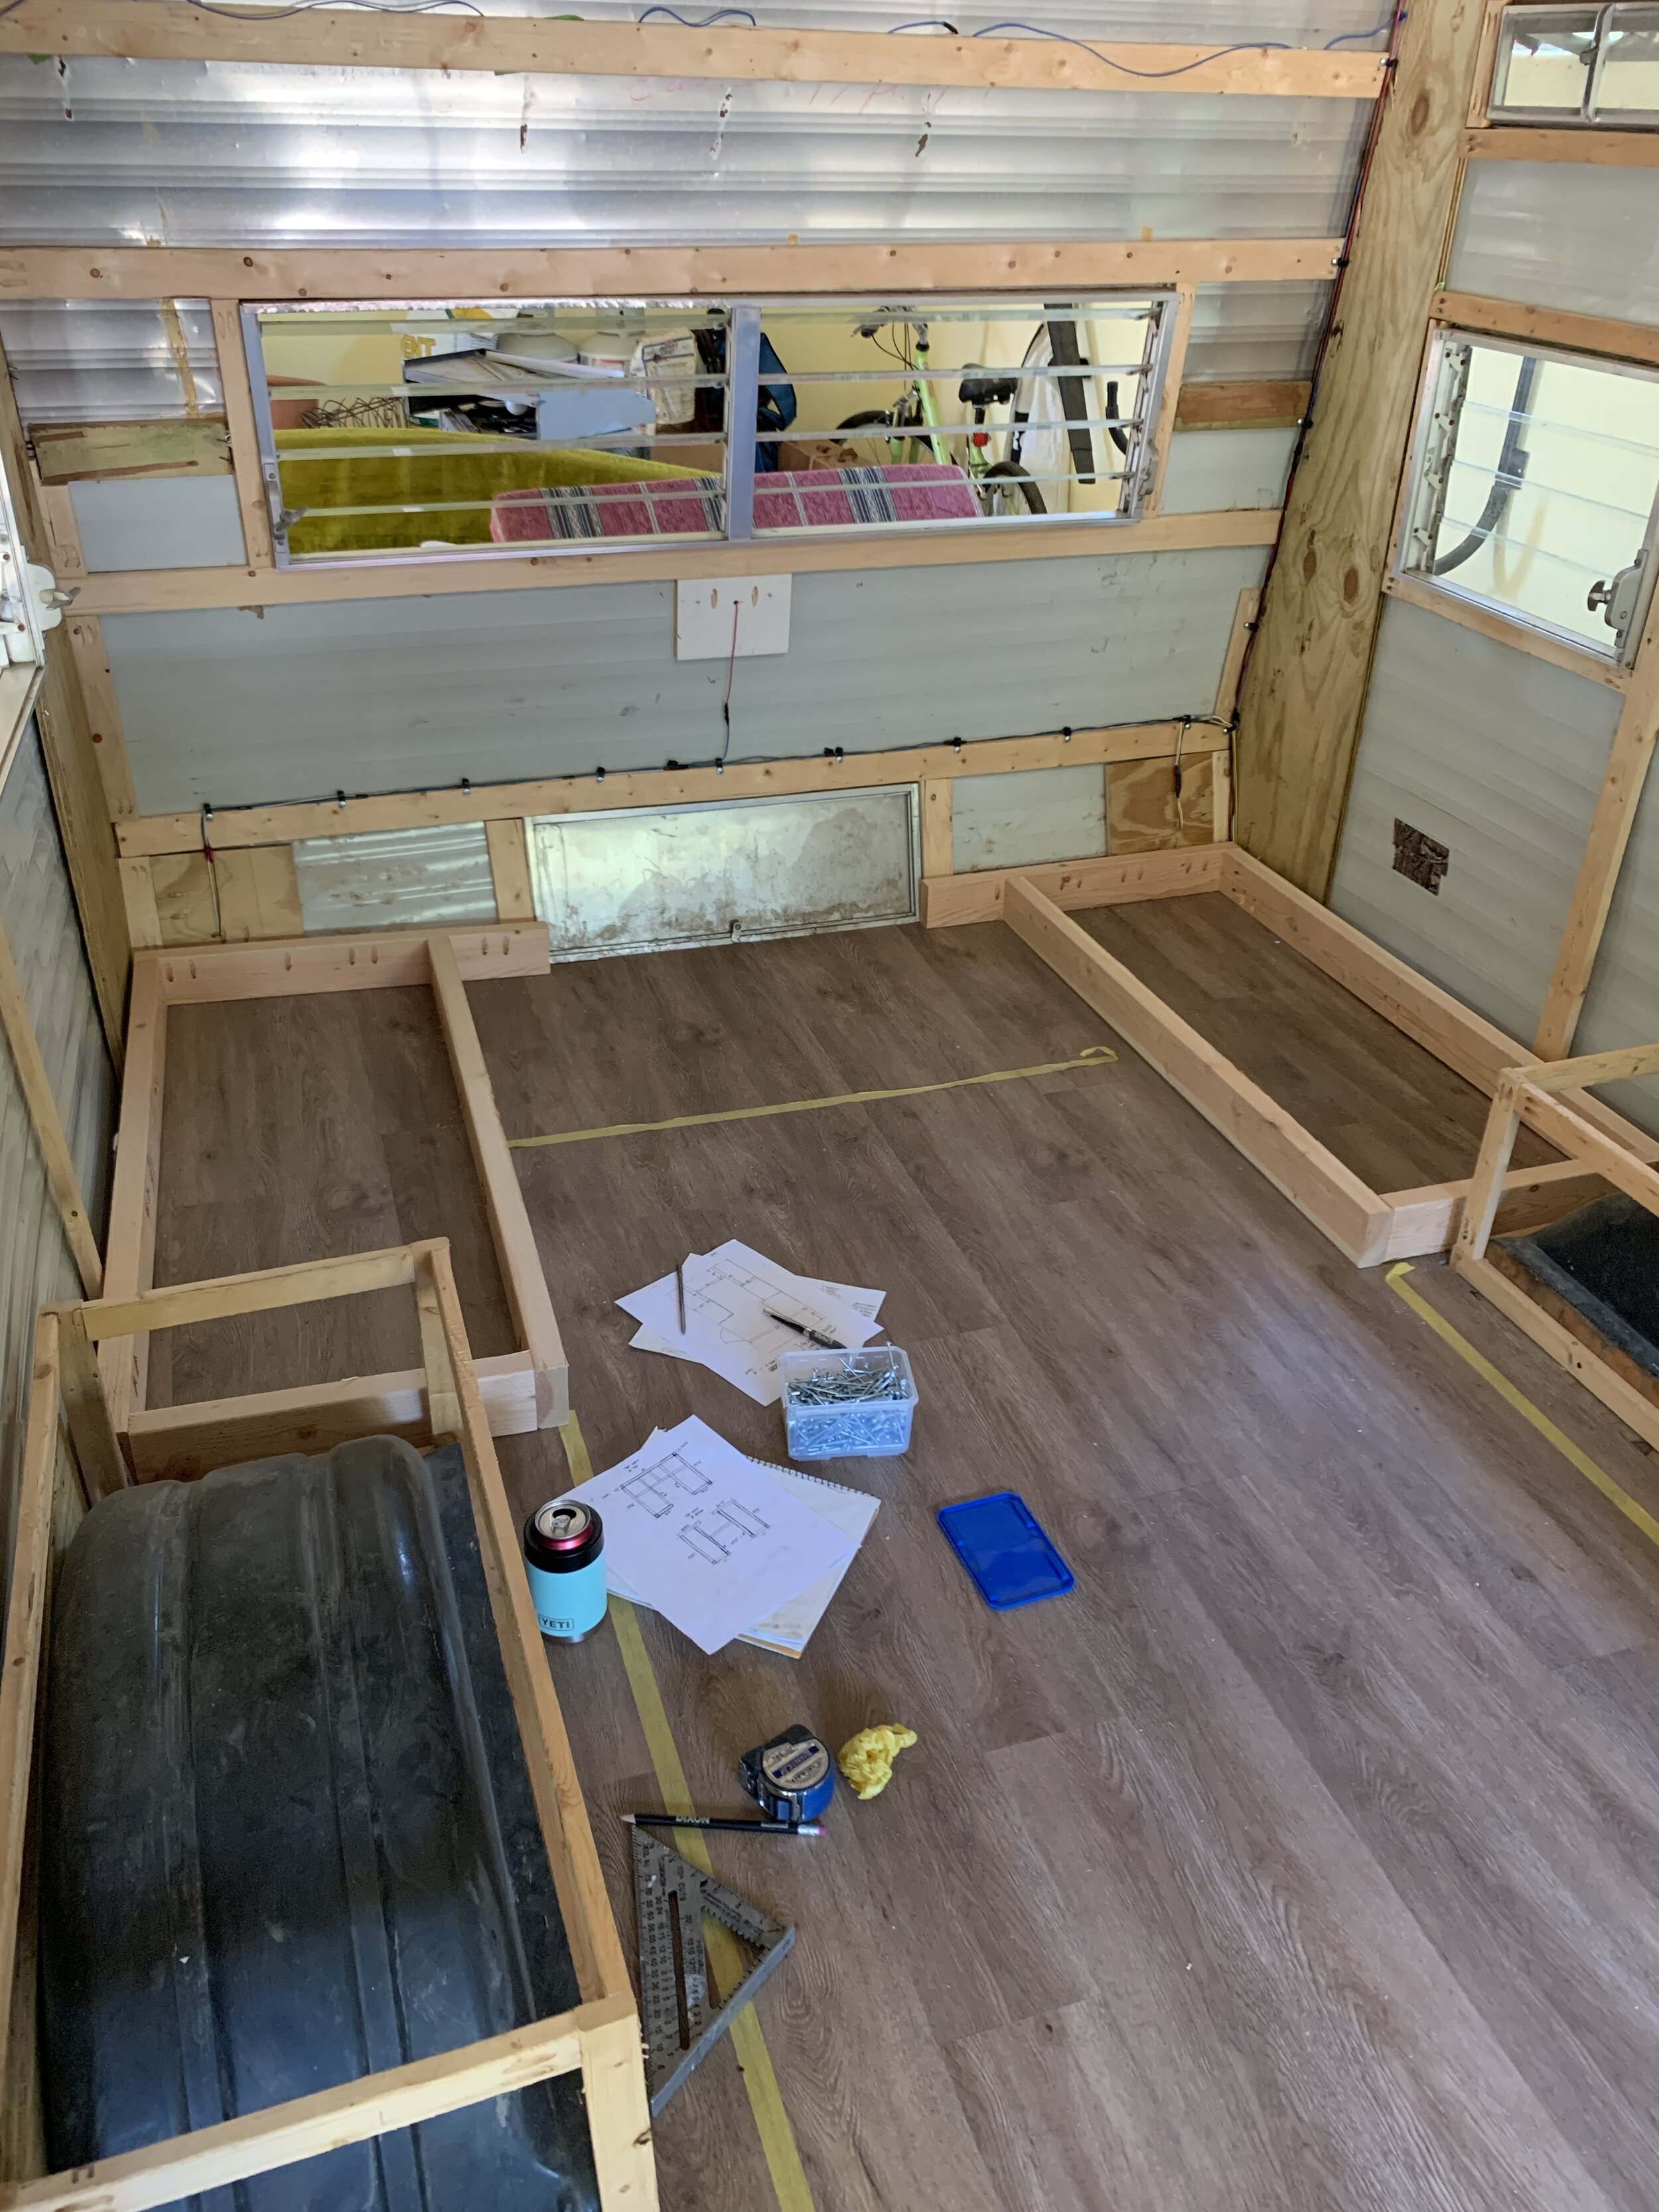
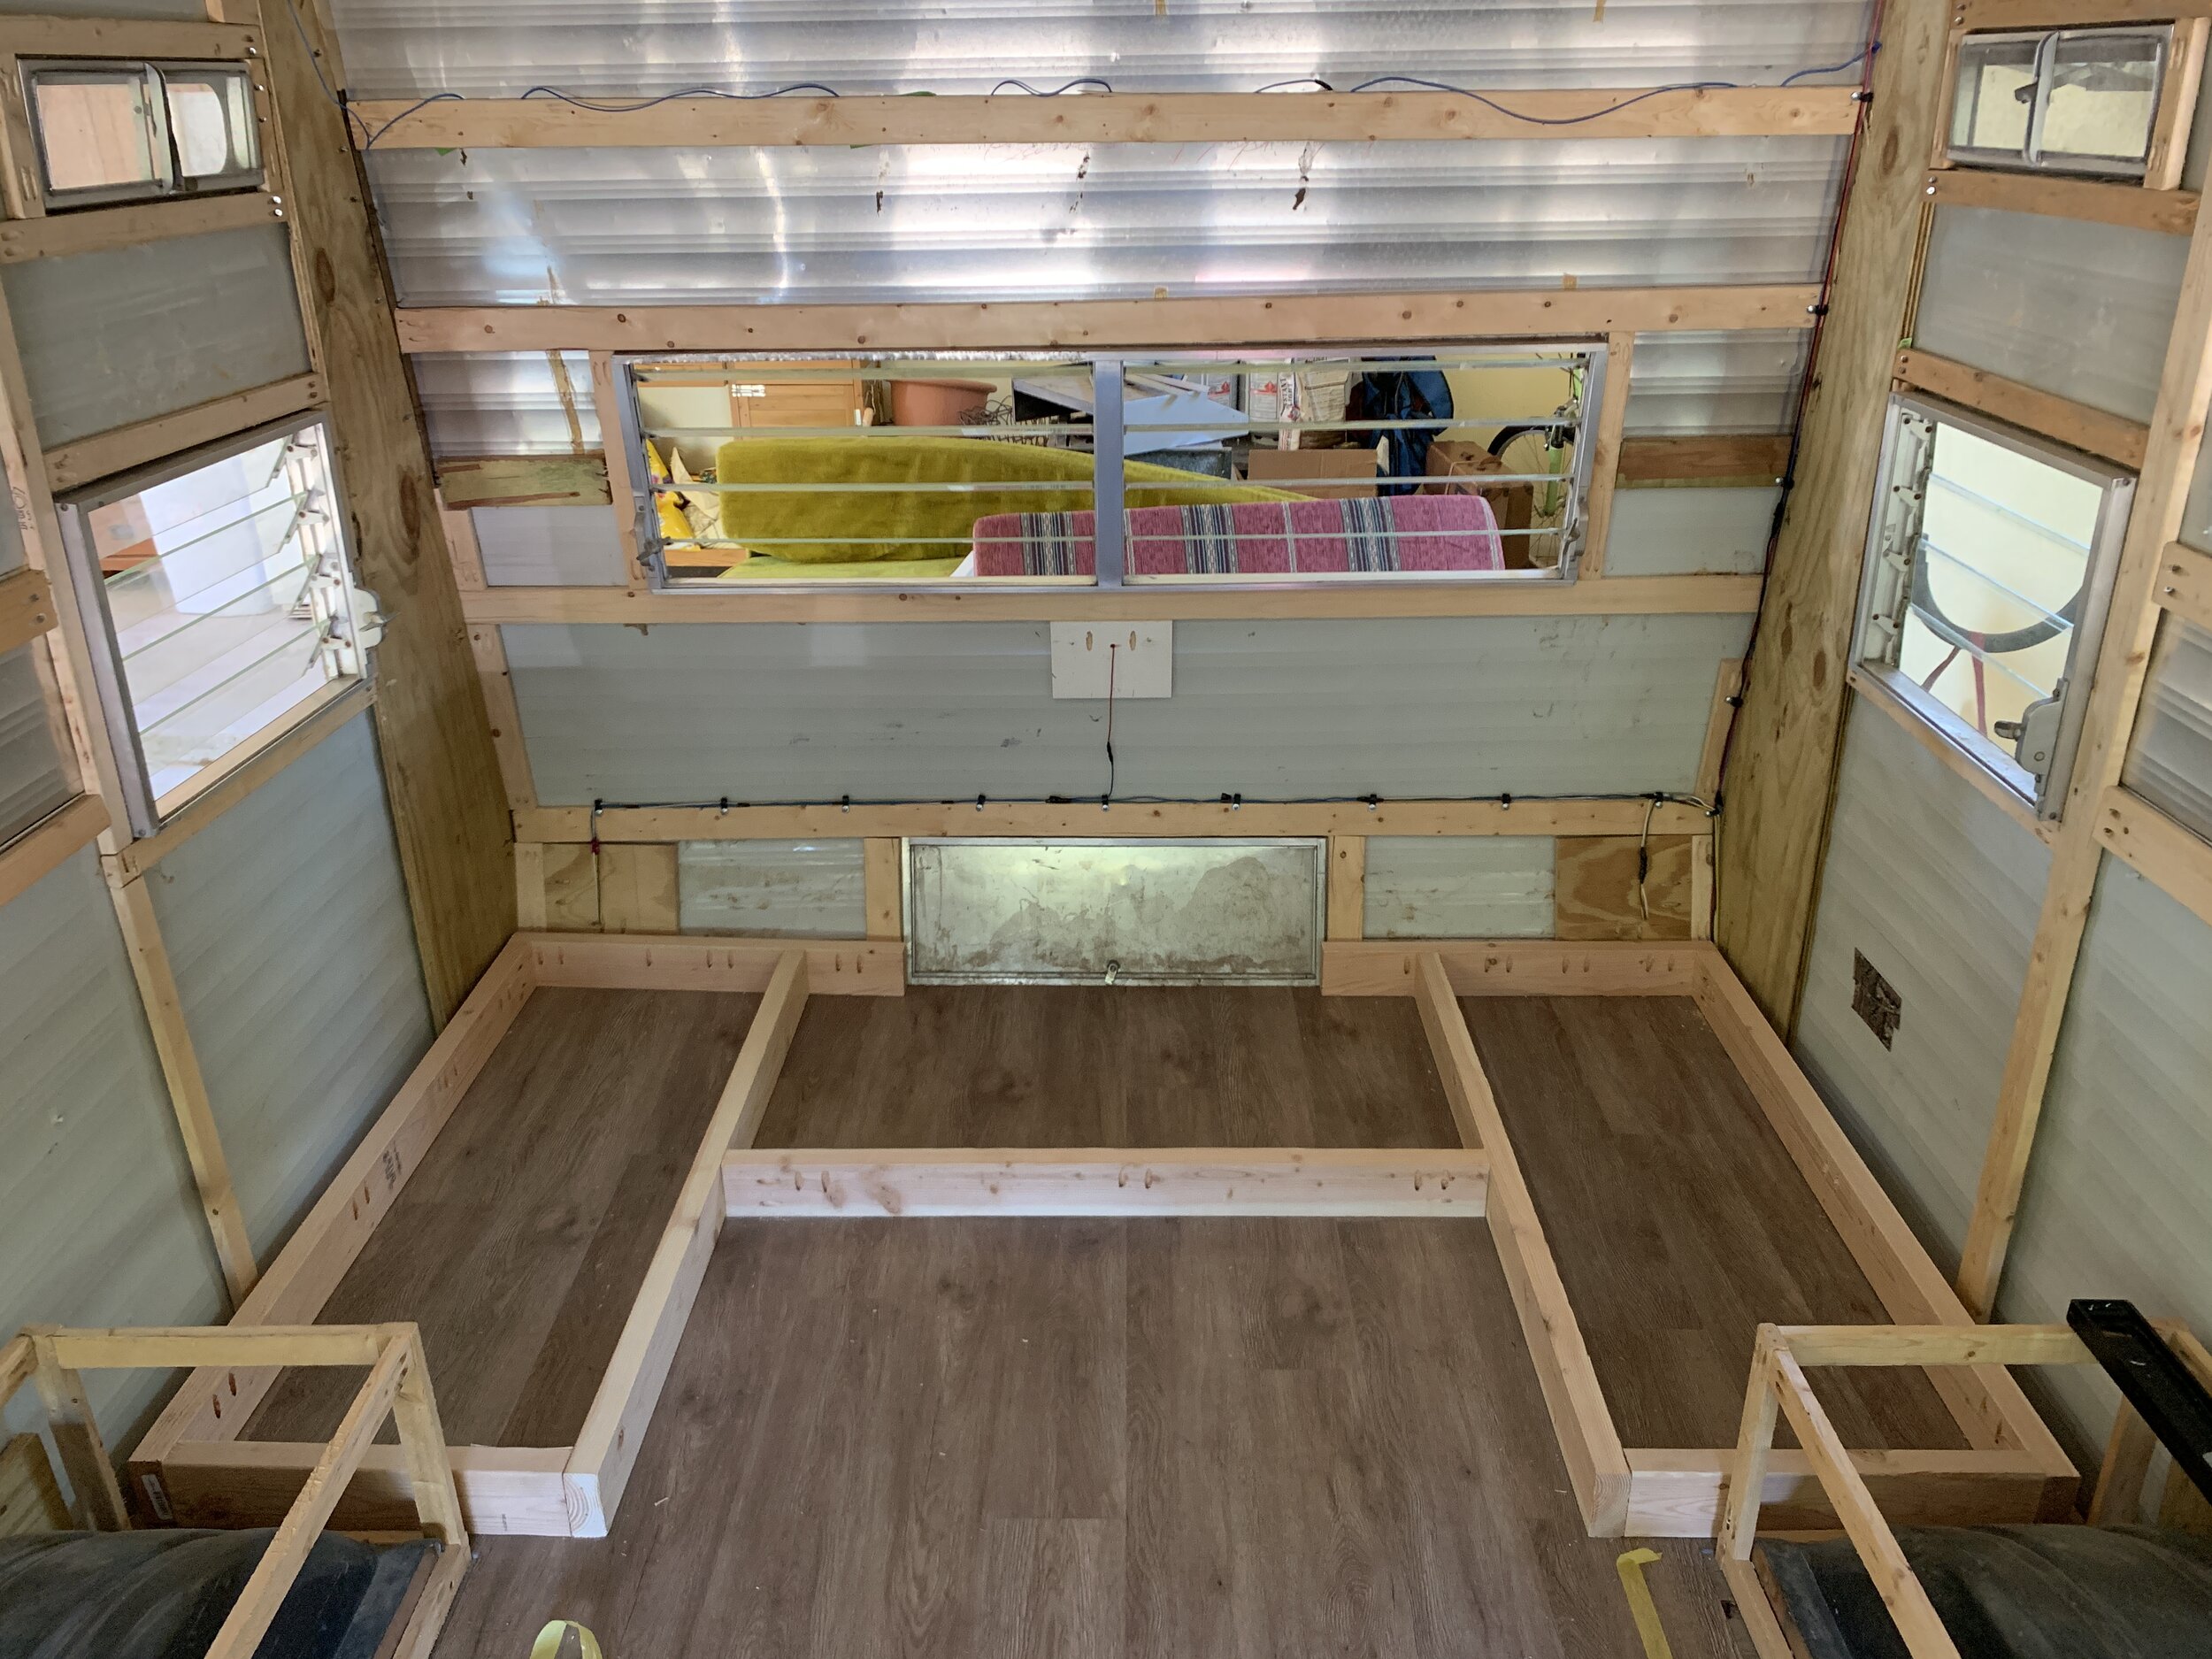
Knowing we wanted to use one of our wings for fresh water tank storage (the one on the right), we started by building the wings as full, uninterrupted cabinets and then filling in the space between with the centered bench. We secured the 2x4s to each other and to the floor. This sucker is going nowhere. You may have noticed instead of running a bottom footer board along 100% of the base, we left a small gap in the center frame on the wall side. This was to give us full access from the external hatch since the bottom of the door already lines up with the floor of the camper and we didn’t need to make the access area any shorter.
Closing in the base
After the main base frame was built, we began closing in the sides using 1/4” plywood. We sandwiched the 2x4s, securing the plywood with finish nails. While it the plywood doesn’t need to be exactly the size of the frame (because of how we planned on trimming it later) we needed to make sure the plywood didn’t stick up any higher than the 2x4 seat because we needed a nice flush top for the next step in the build…

Making top-accessible storage
After lining the inside, we installed 1x2s around the inner perimeter of each area using the nail gun, so that they were flush with the top of the base. These are the lip for the bench/storage lids sit on.

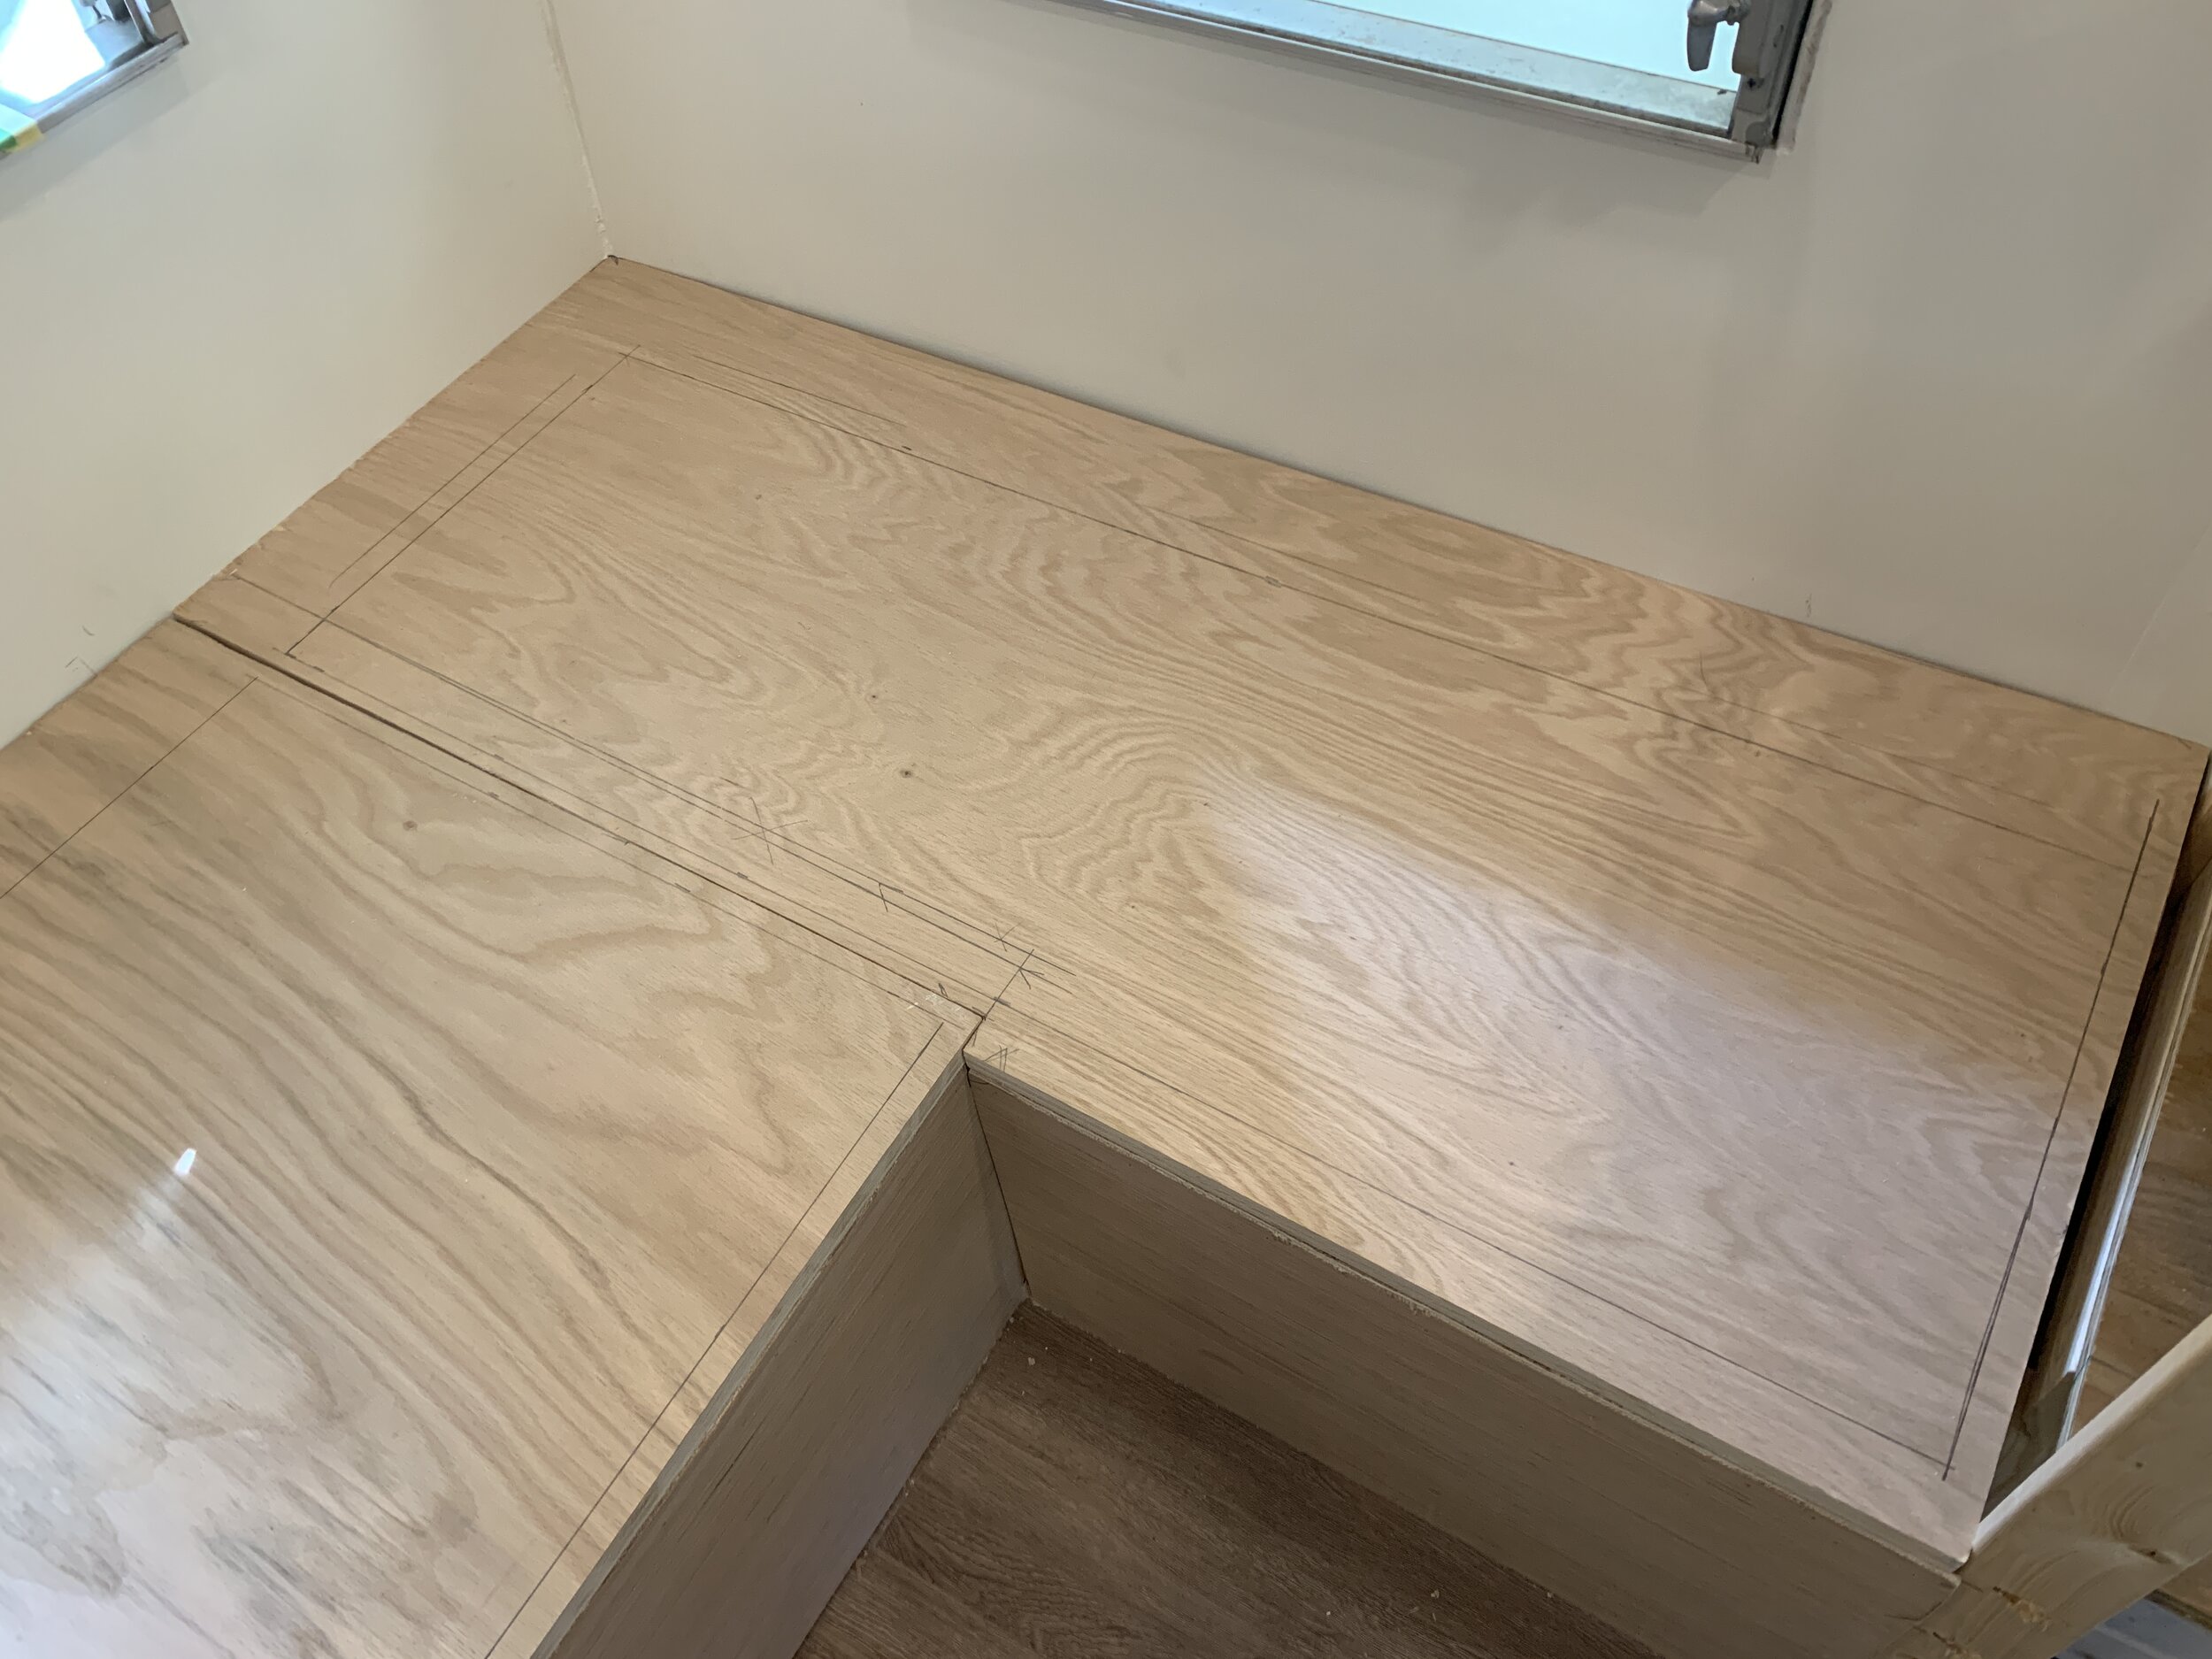
We used 3/4” plywood and cut it to fit the top of each of the three bench sections. You can see in some of the photos that we notched the seats on the wings so the centered seat piece fits inside kind of like puzzle pieces. We did this to make sure we had a lot of support for each of the three seat pieces to rest on.
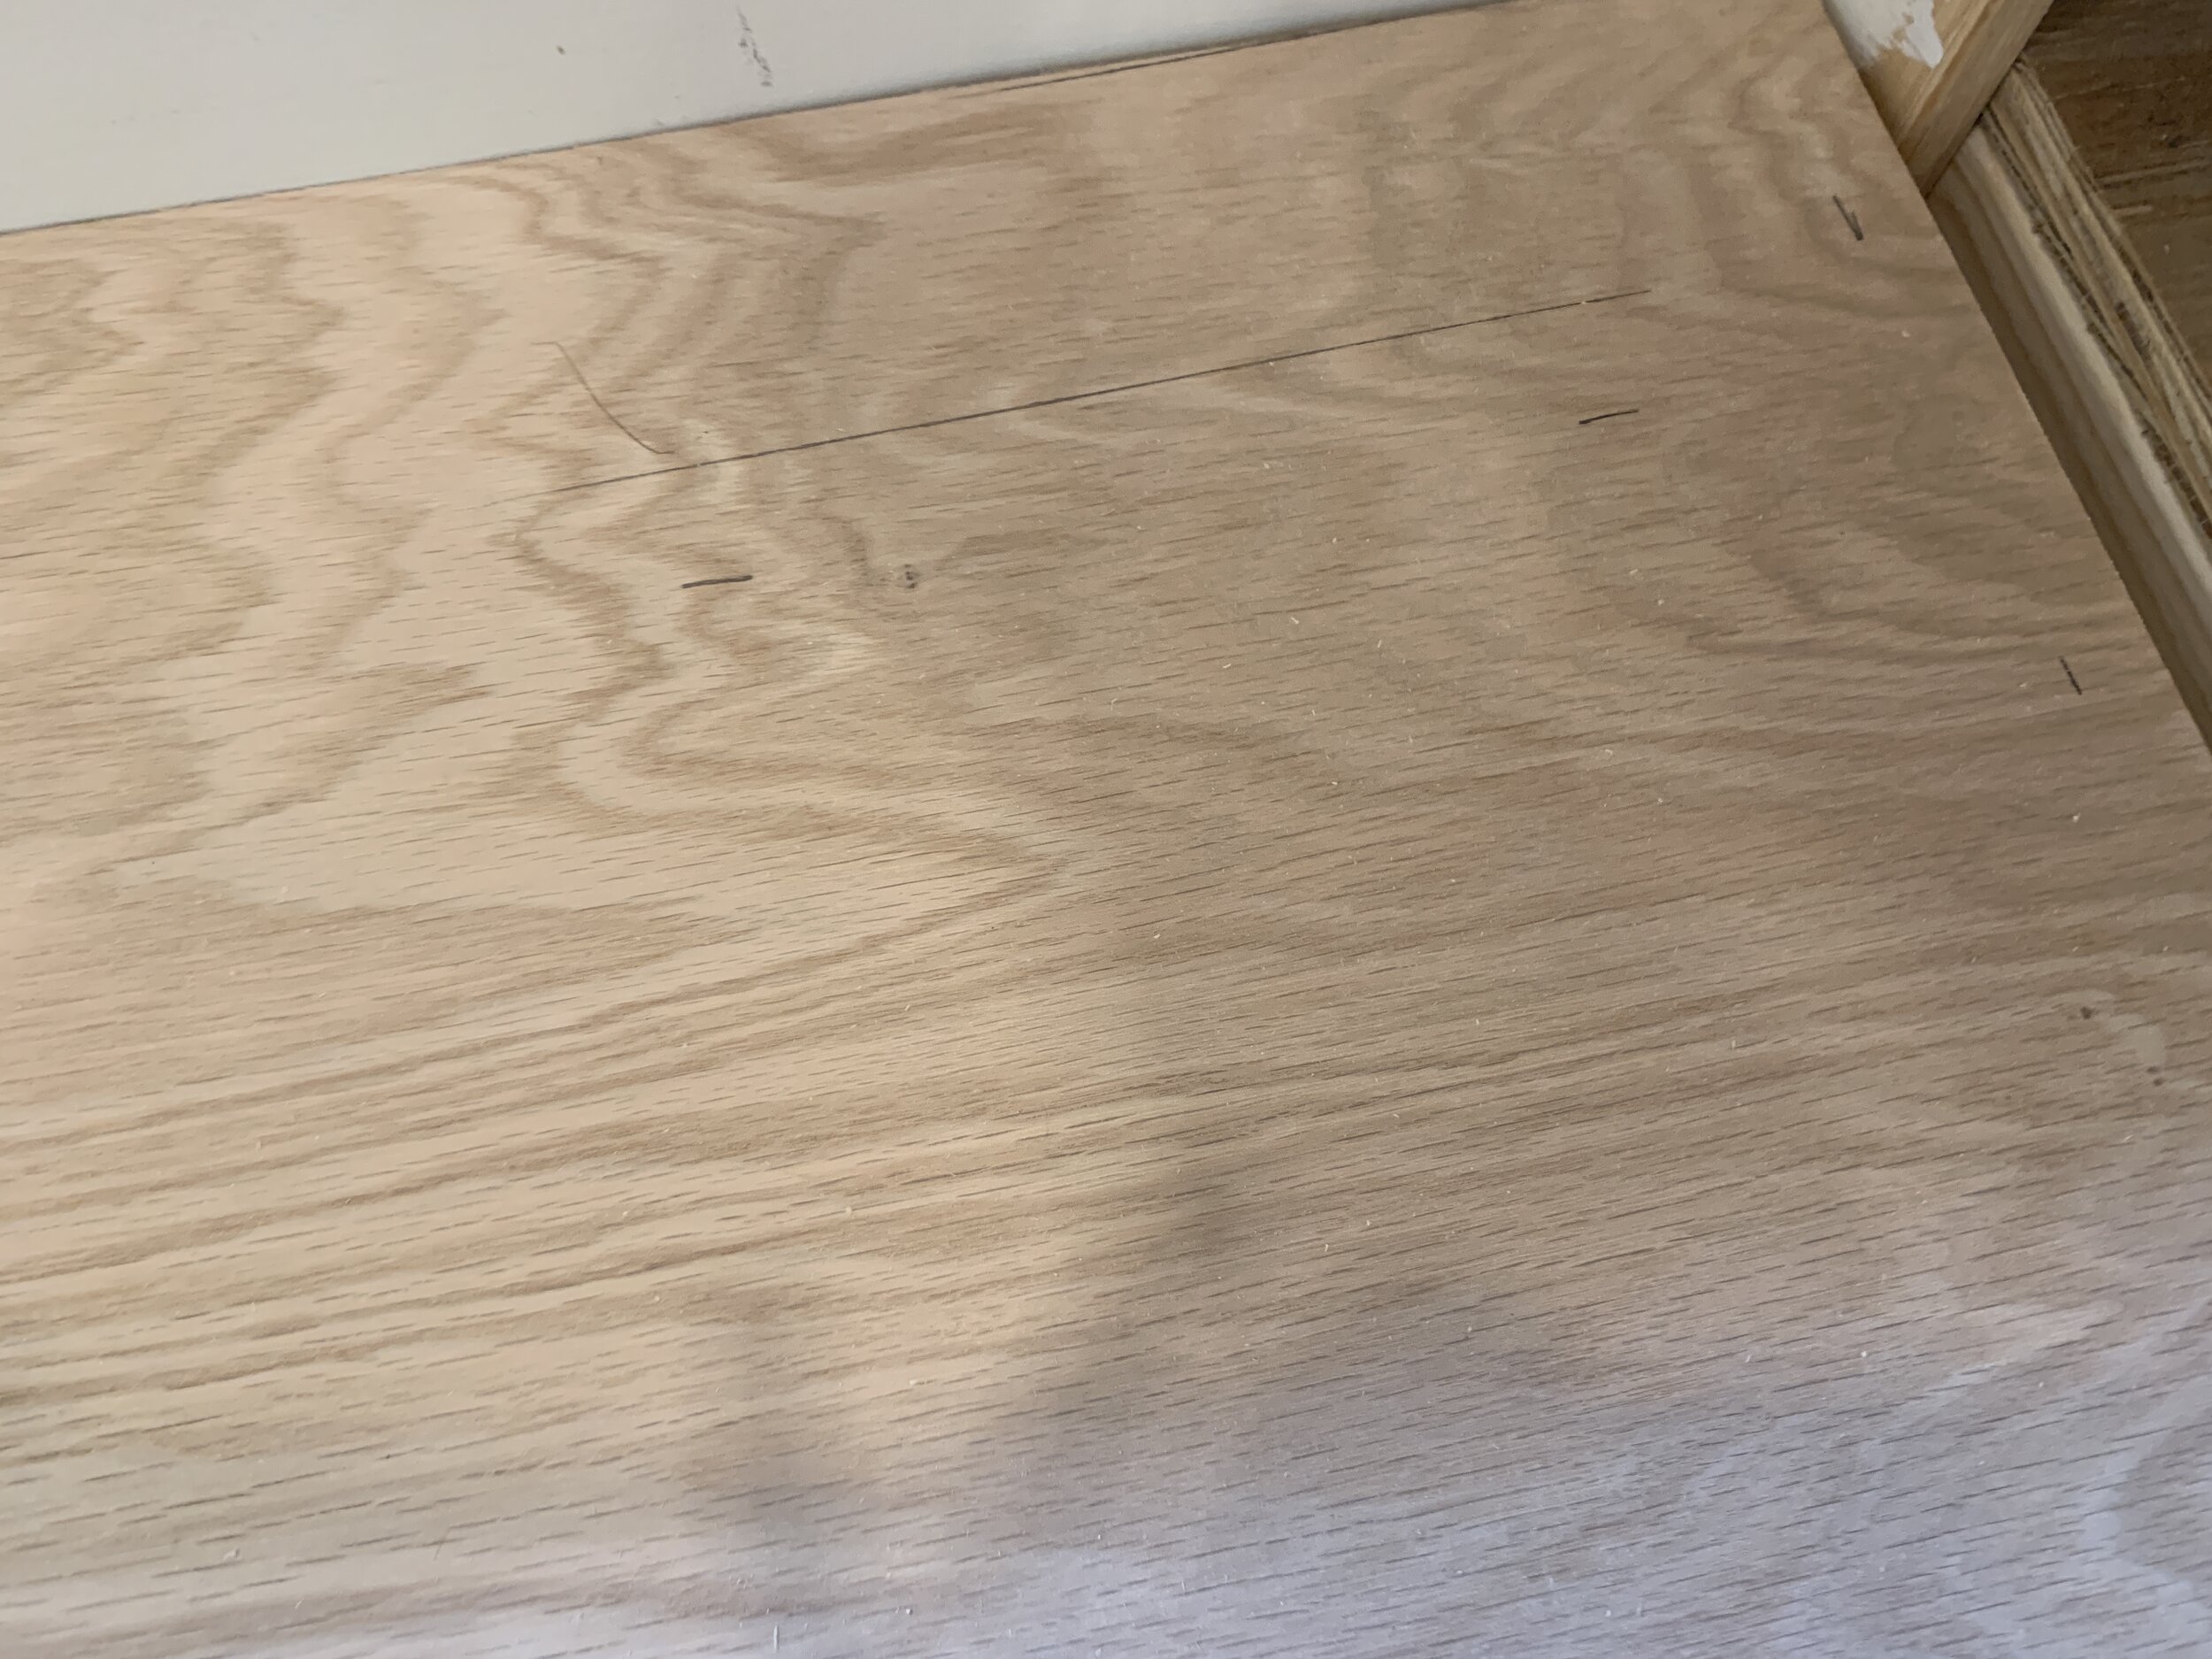
On top of the plywood, we measured and marked out our estimated backrest depth along each wall (using scrap materials layered on one another to simulate the backrest) and the widths of each base support to determine the “safe” areas we needed to avoid. Then we measured the distance from those marks to the inner edge of the 1x2 lip, subtracted 3/4” (the minimum amount we wanted our would-be lids to have to rest on) and marked out our cut lines on the top of the bench seat. These are the lines we plunge cut on to separate the lids from the would-be seat lid’s frames.
We removed the 3/4” pieces of plywood and cut them on our storage bench using a circular saw, finishing the corners with the jigsaw.
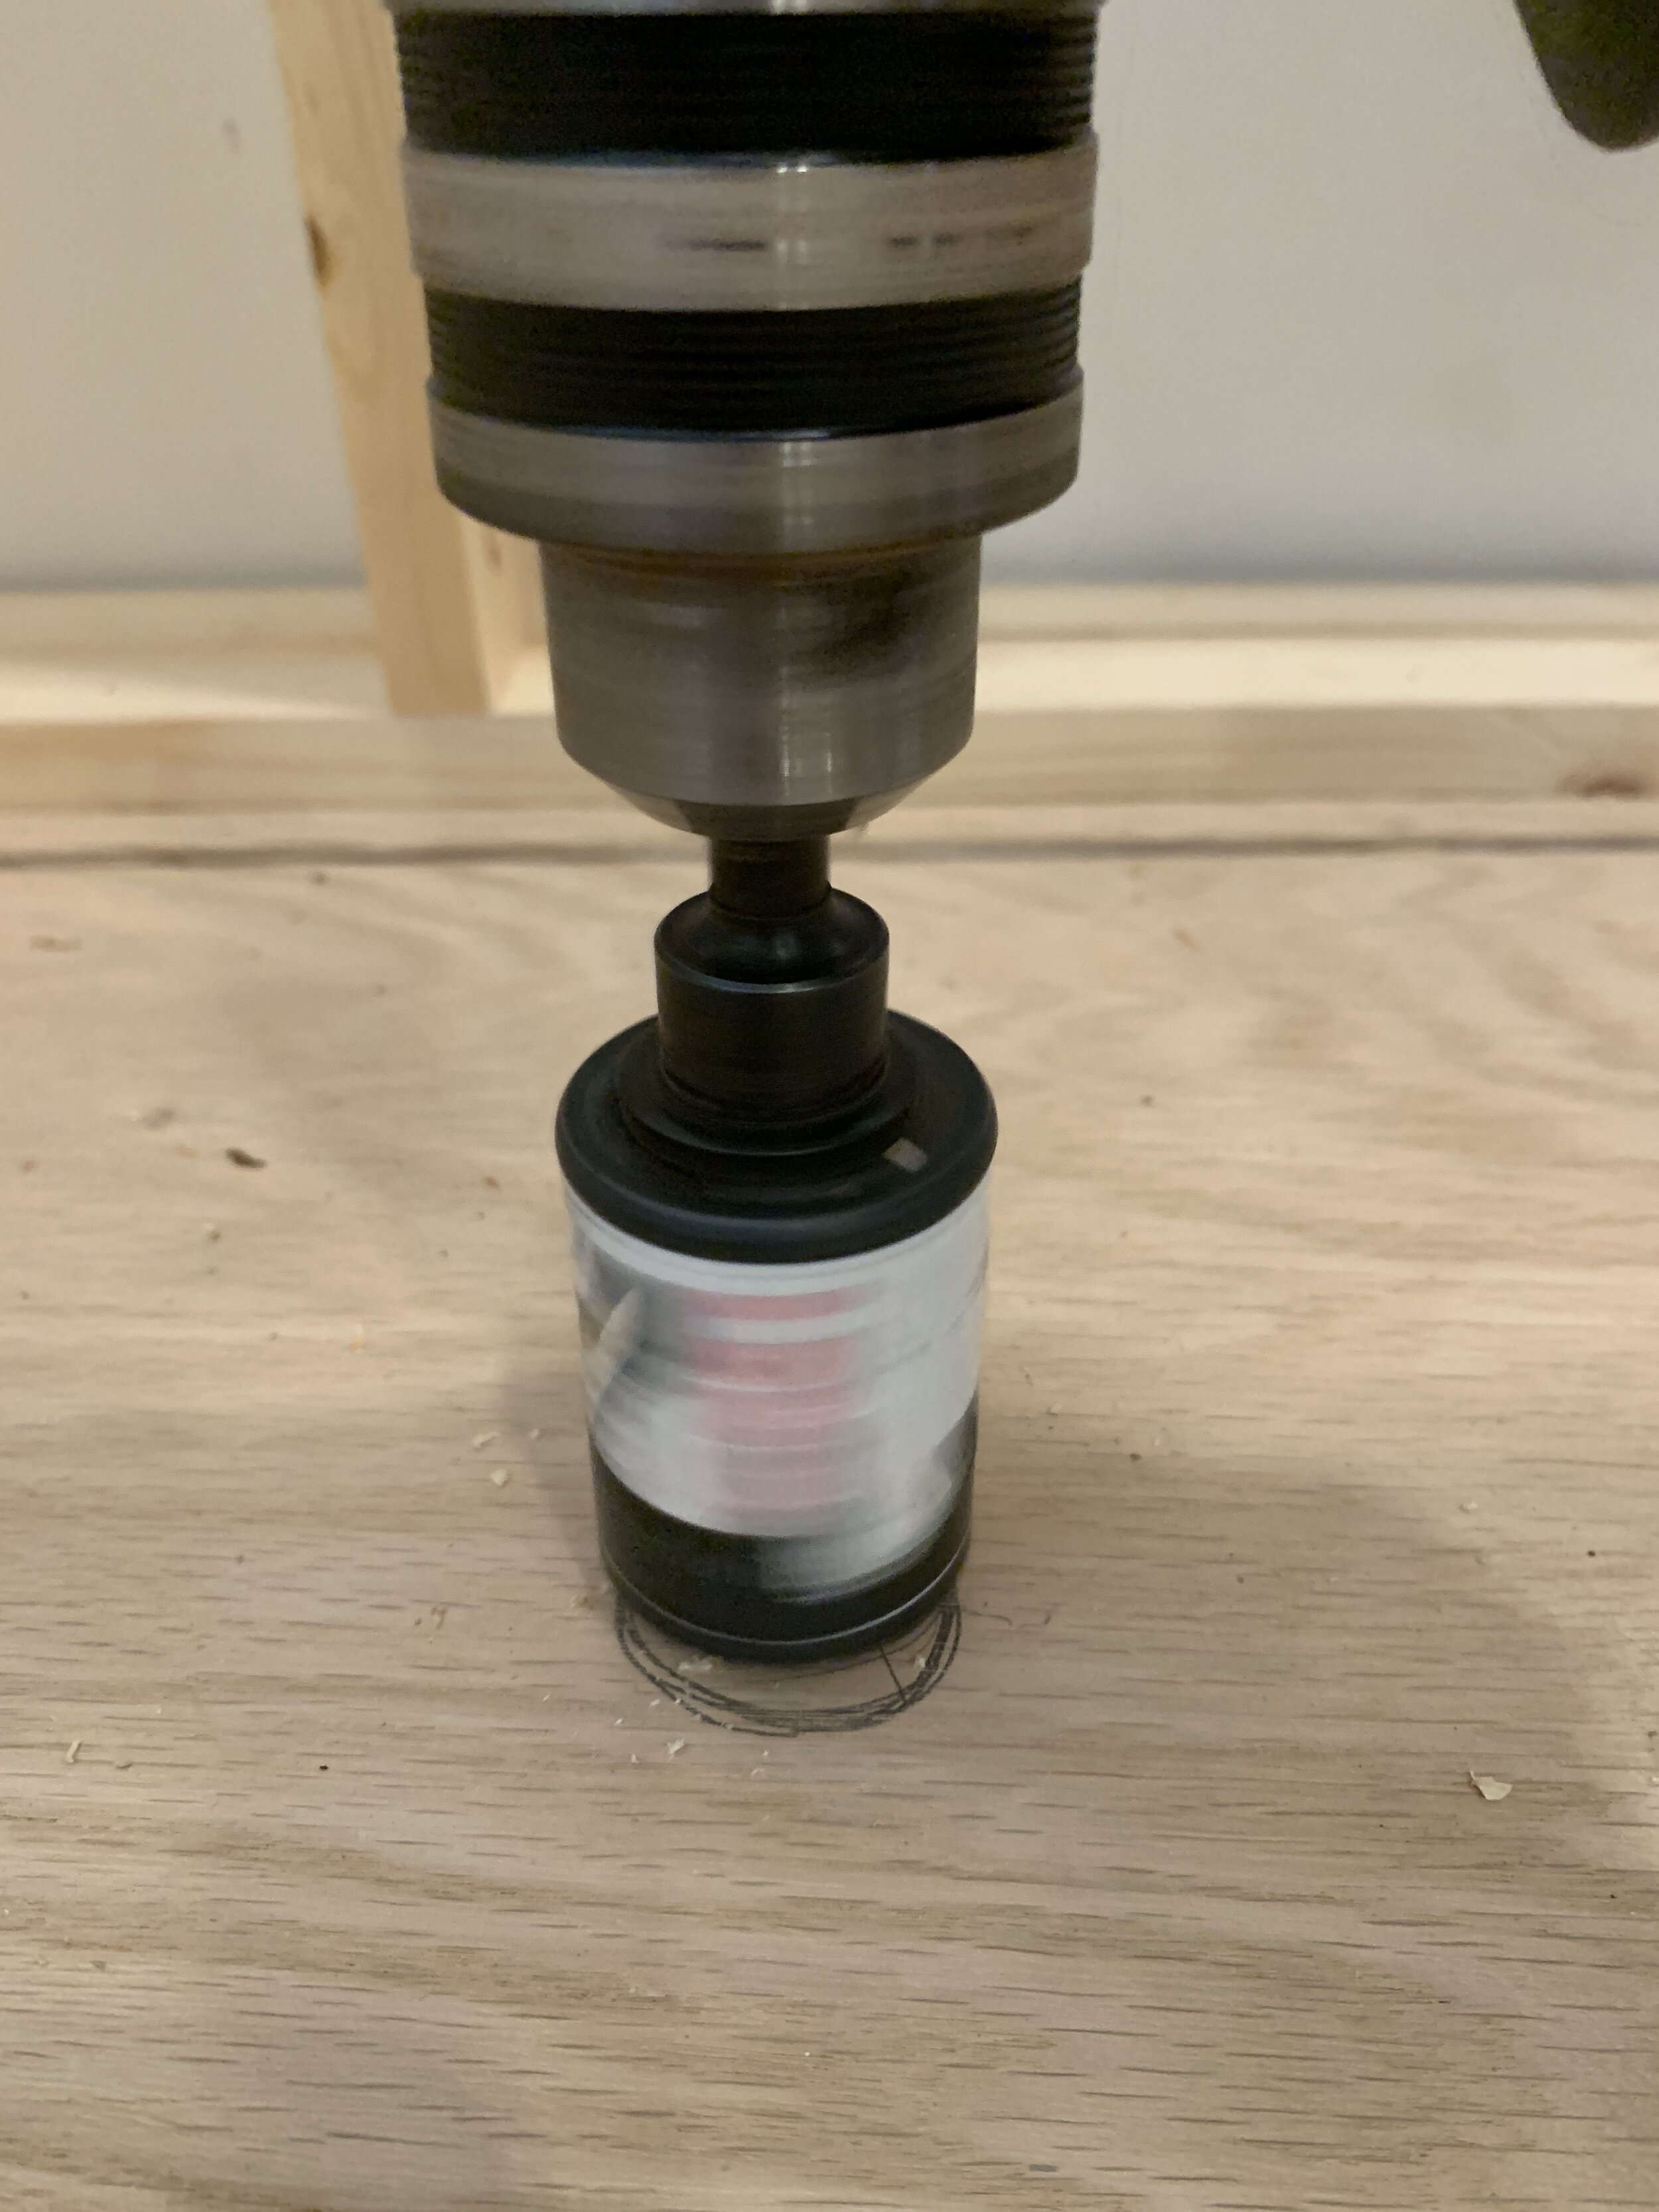
With the seat frames and lids cut and in place, we marked and drilled the finger holes with our 1.25” hole saw. (Full disclosure: This was after we built the backrest, but it seems like a better time in the story to share this info with you.)
After we had a way of easily getting the lids out (finger holes), we nailed the lid frames in place using our finish nailer. We sanded the edges of the frames and lids to rounded edges with our finish sander.
Adding the backrests
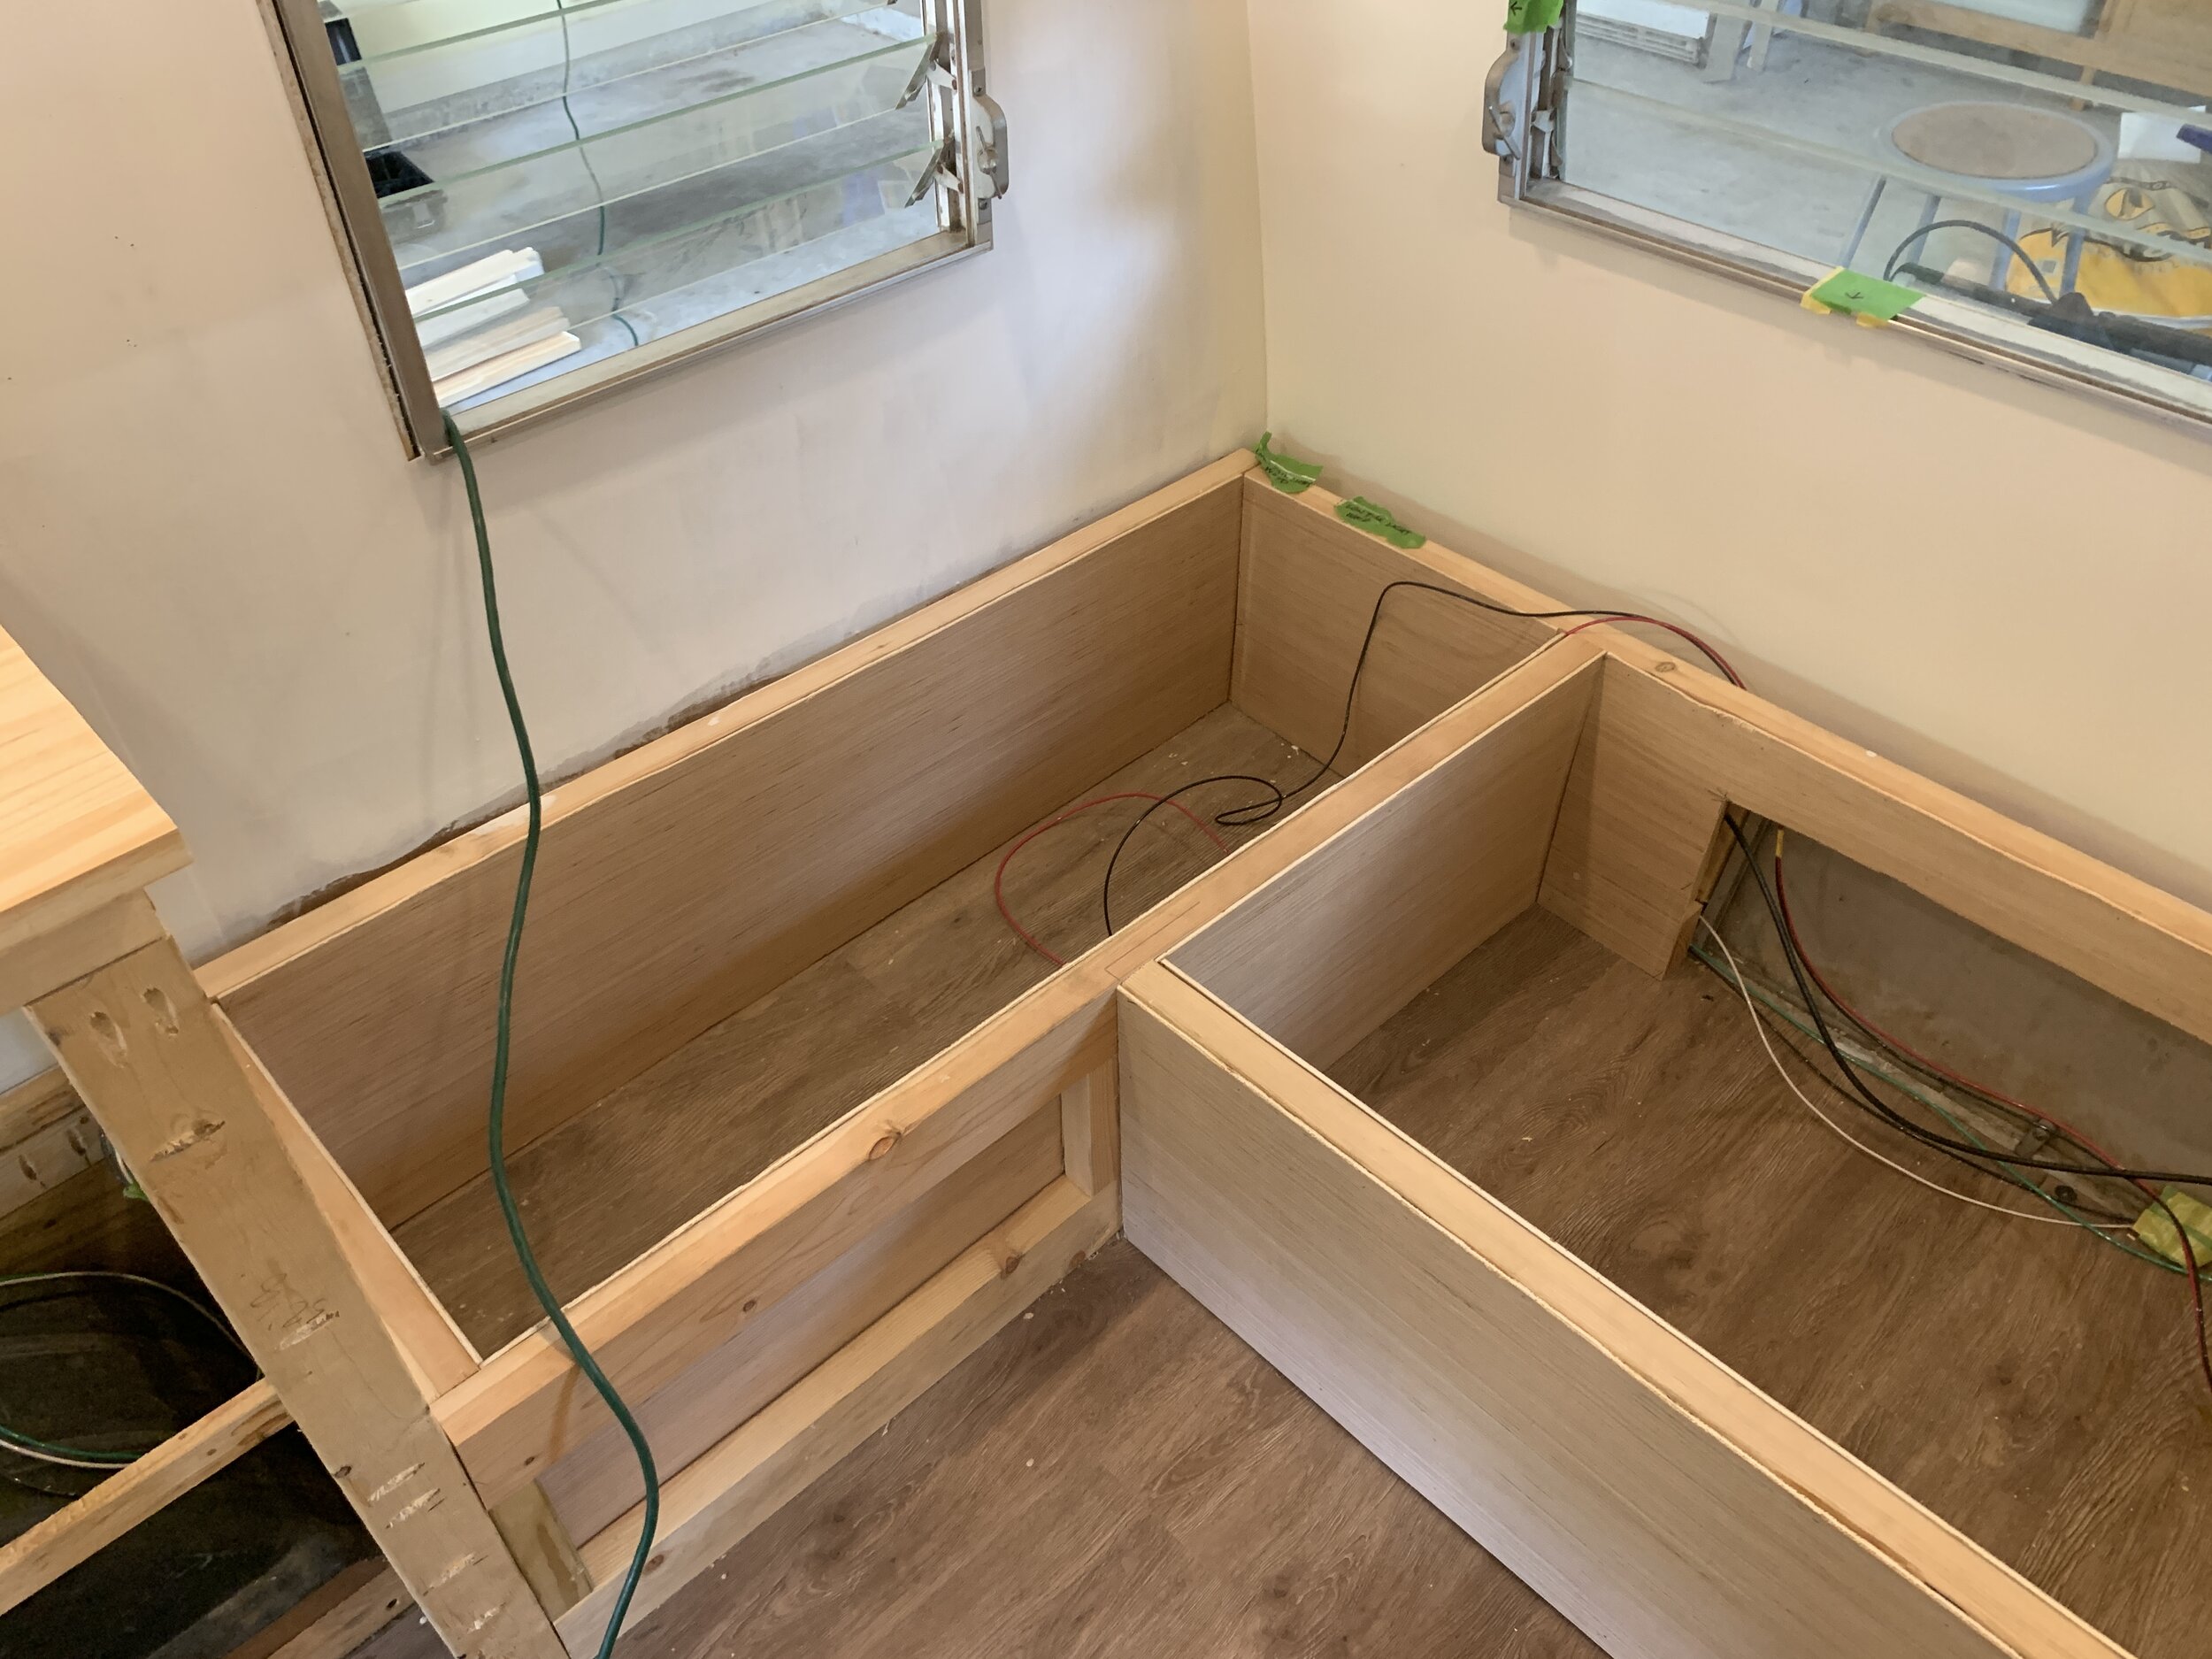
We decided to add backrests for a few reasons – we knew we wanted charging outlets in the dining area of the camper, the backrests were basically just hollow space-wasters, we wanted additional support and protection for the camper walls, and the back wall of the camper curves inward which would be uncomfortable to sit against.

To make the most of our small space (and to make it easier on ourselves), we used 1x4” lumber to set the internal depth of the backrests. It’s the thinnest lumber we could use and still be able to sink an outlet into the top ledge. The backrest for the wings and main back are entirely vertical, making a 90-degree-angle with the seat. The sides are unmodified on the wall-side, while the main backrest on the rear wall of the camper had an angle we had to account for. (Initially we tried 1x2s rotated the other way but we found them to be too flimsy, so we went with 1x4s.) Instead of just cutting them to length and Kregging them in place like we were able to do with the wing backrests, we used our miter saw to cut an angle lengthwise into the angle-wall-1x4s after we cut them to length (height).

Wiring the outlets
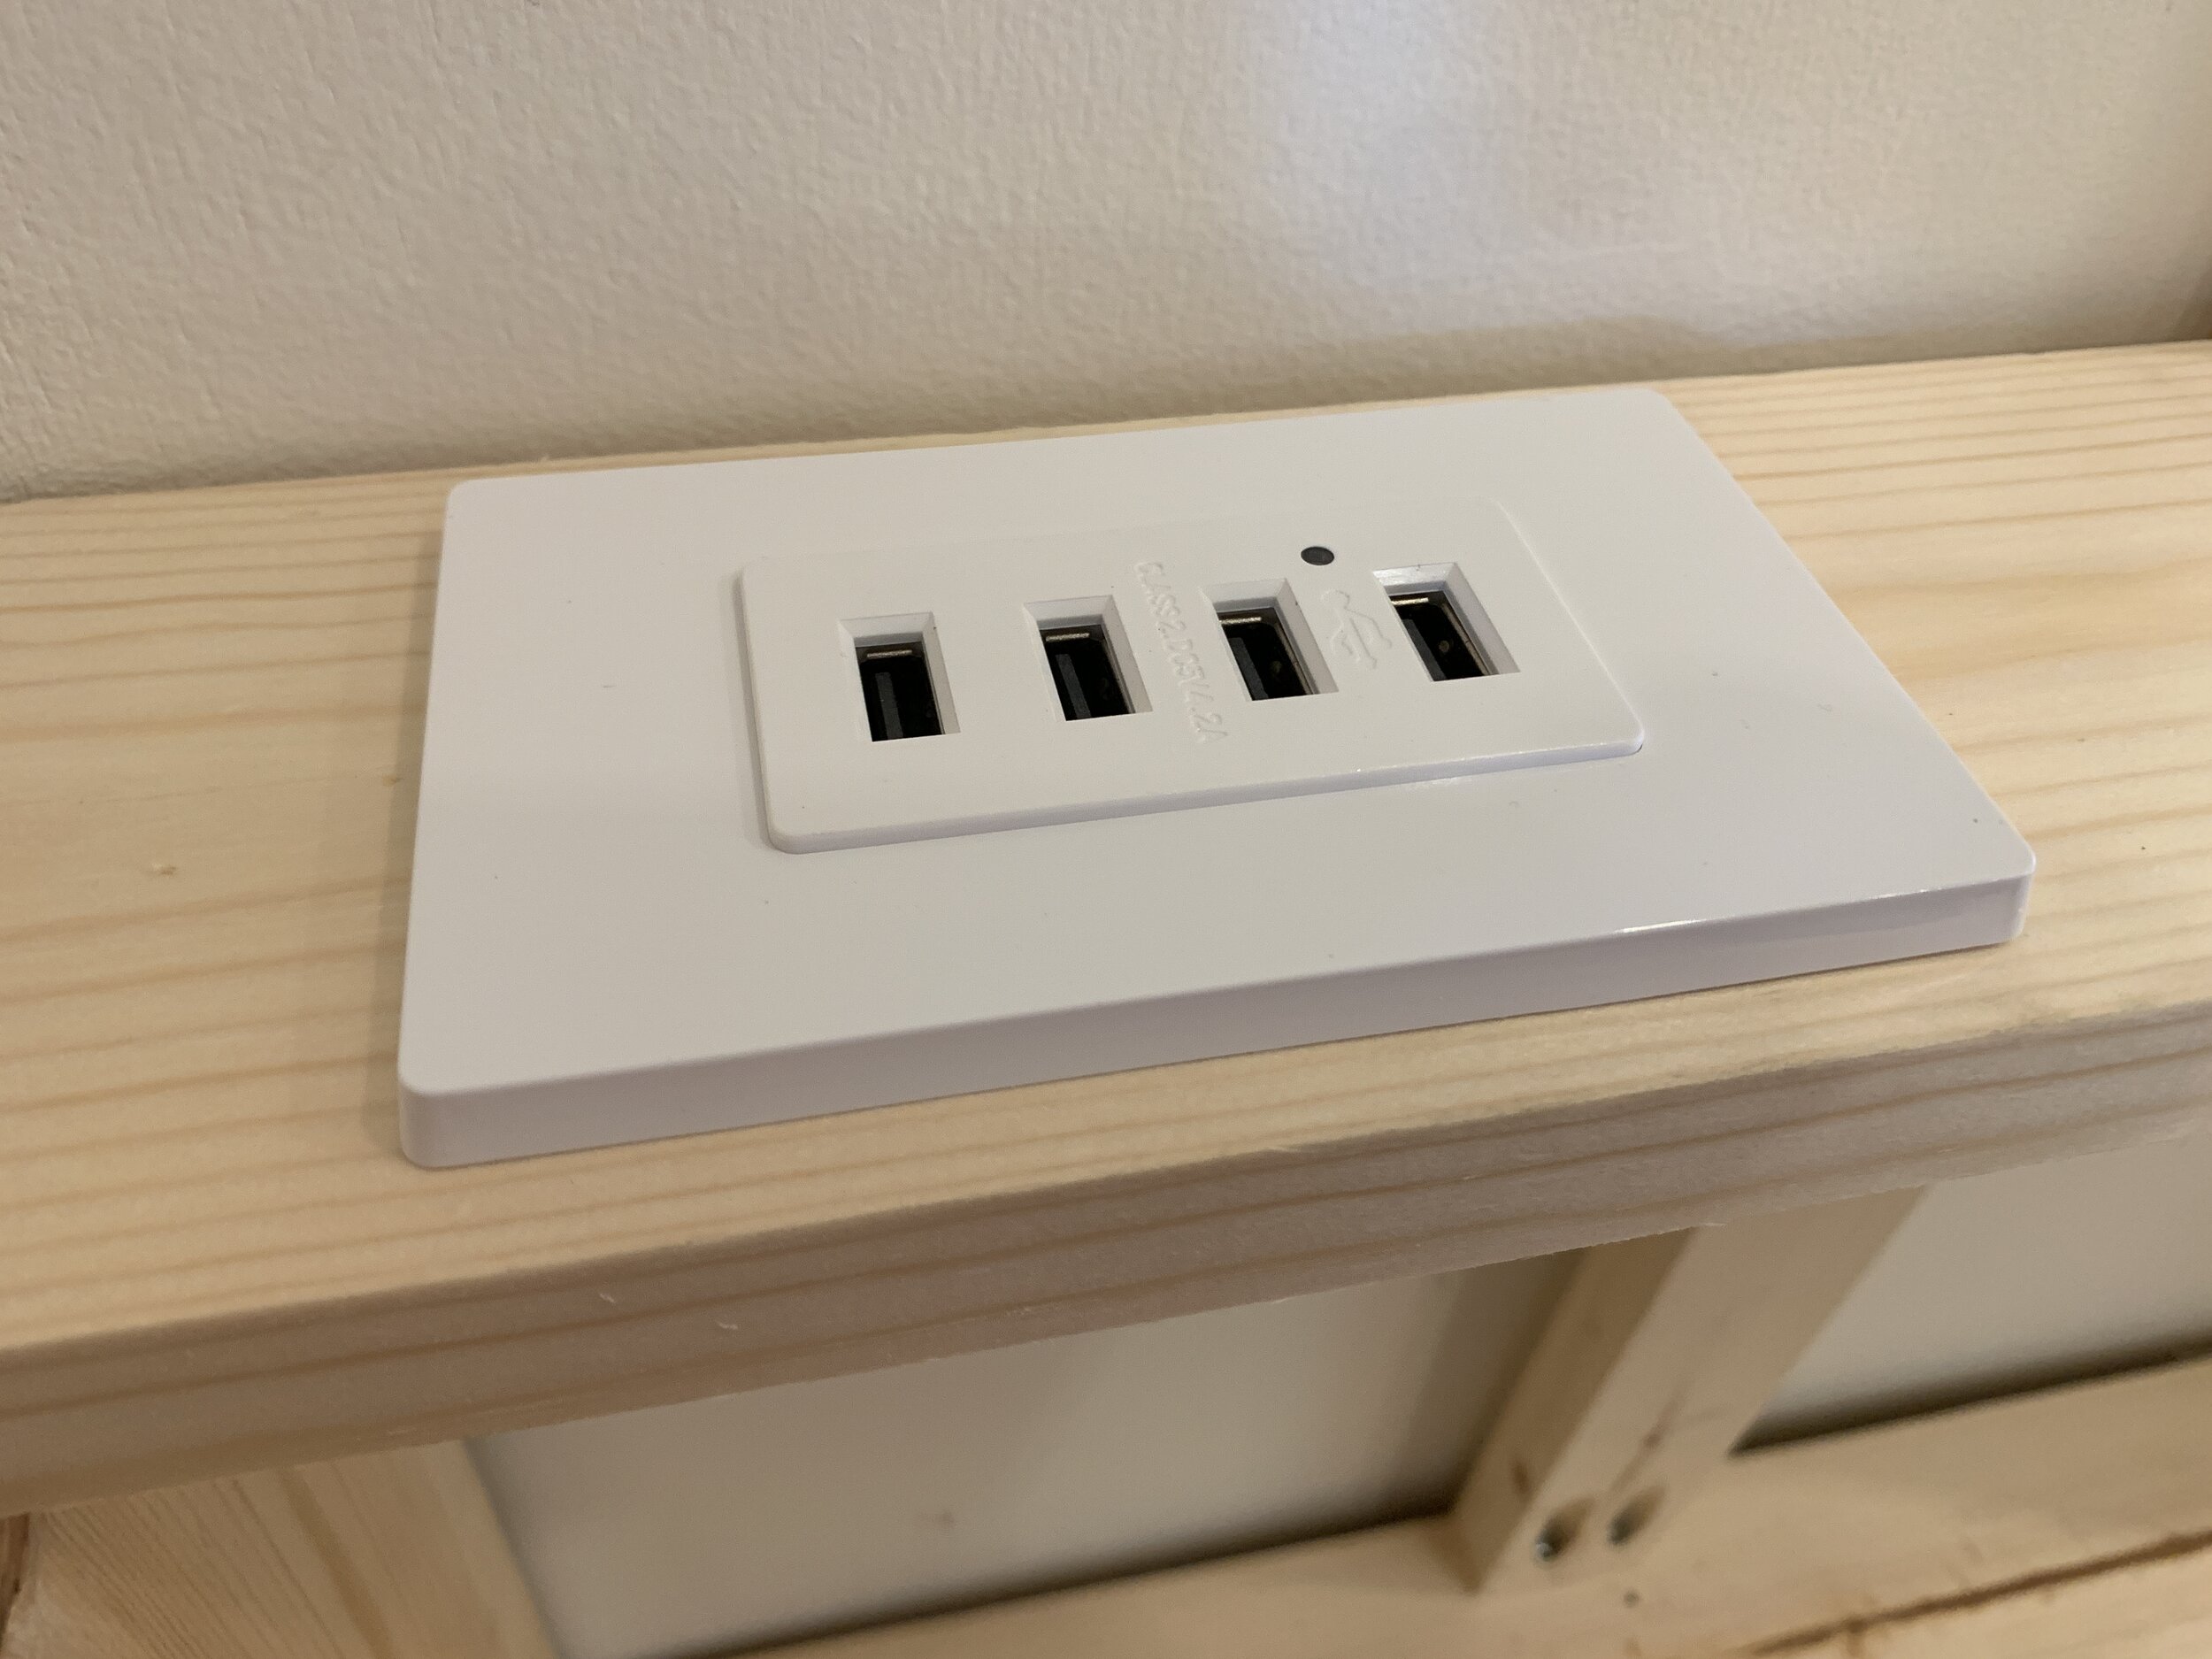
We made sure before we closed in our bench that we pulled our pre-run red and black 12V wiring out with enough slack to run to our outlets (one on each side) when we were ready. After we had the backrest frame built, we drilled holes through the backrest supports and/or ran the wiring through/behind the vertical supports to our two outlet locations in the wings. Using the USB outlets (the boxy part, not the cover!) as templates, we used our drill and jigsaw to cut out where our outlets would go in each of the side ledges.
We dry fit our 1x4 (on the wings) and 1x3 (main/center) top ledges, making sure to nail them in so that when we nailed in our 1/4” plywood backs we’d have a minimal (I’m talking, like, 1/16-1/8” maximum) overhang. Remember, the more the hangs over, the more sitting space it’s going to take up (and the more it’s gonna be jabbin’ you in the back). You can see in the second photo below the overhang that’s going on with the top ledges vs. the would-be internal vertical supports. You may be asking why the main backrest ledge is a 1x3 while the others are 1x4s. It’s that dang pesky wall angle – it’s roomier at the bottom than it is at the top, so our backrest framing had to be adjusted accordingly. Fat on bottom and thin on top. (Queue Queen’s Fat Bottom Girls.)
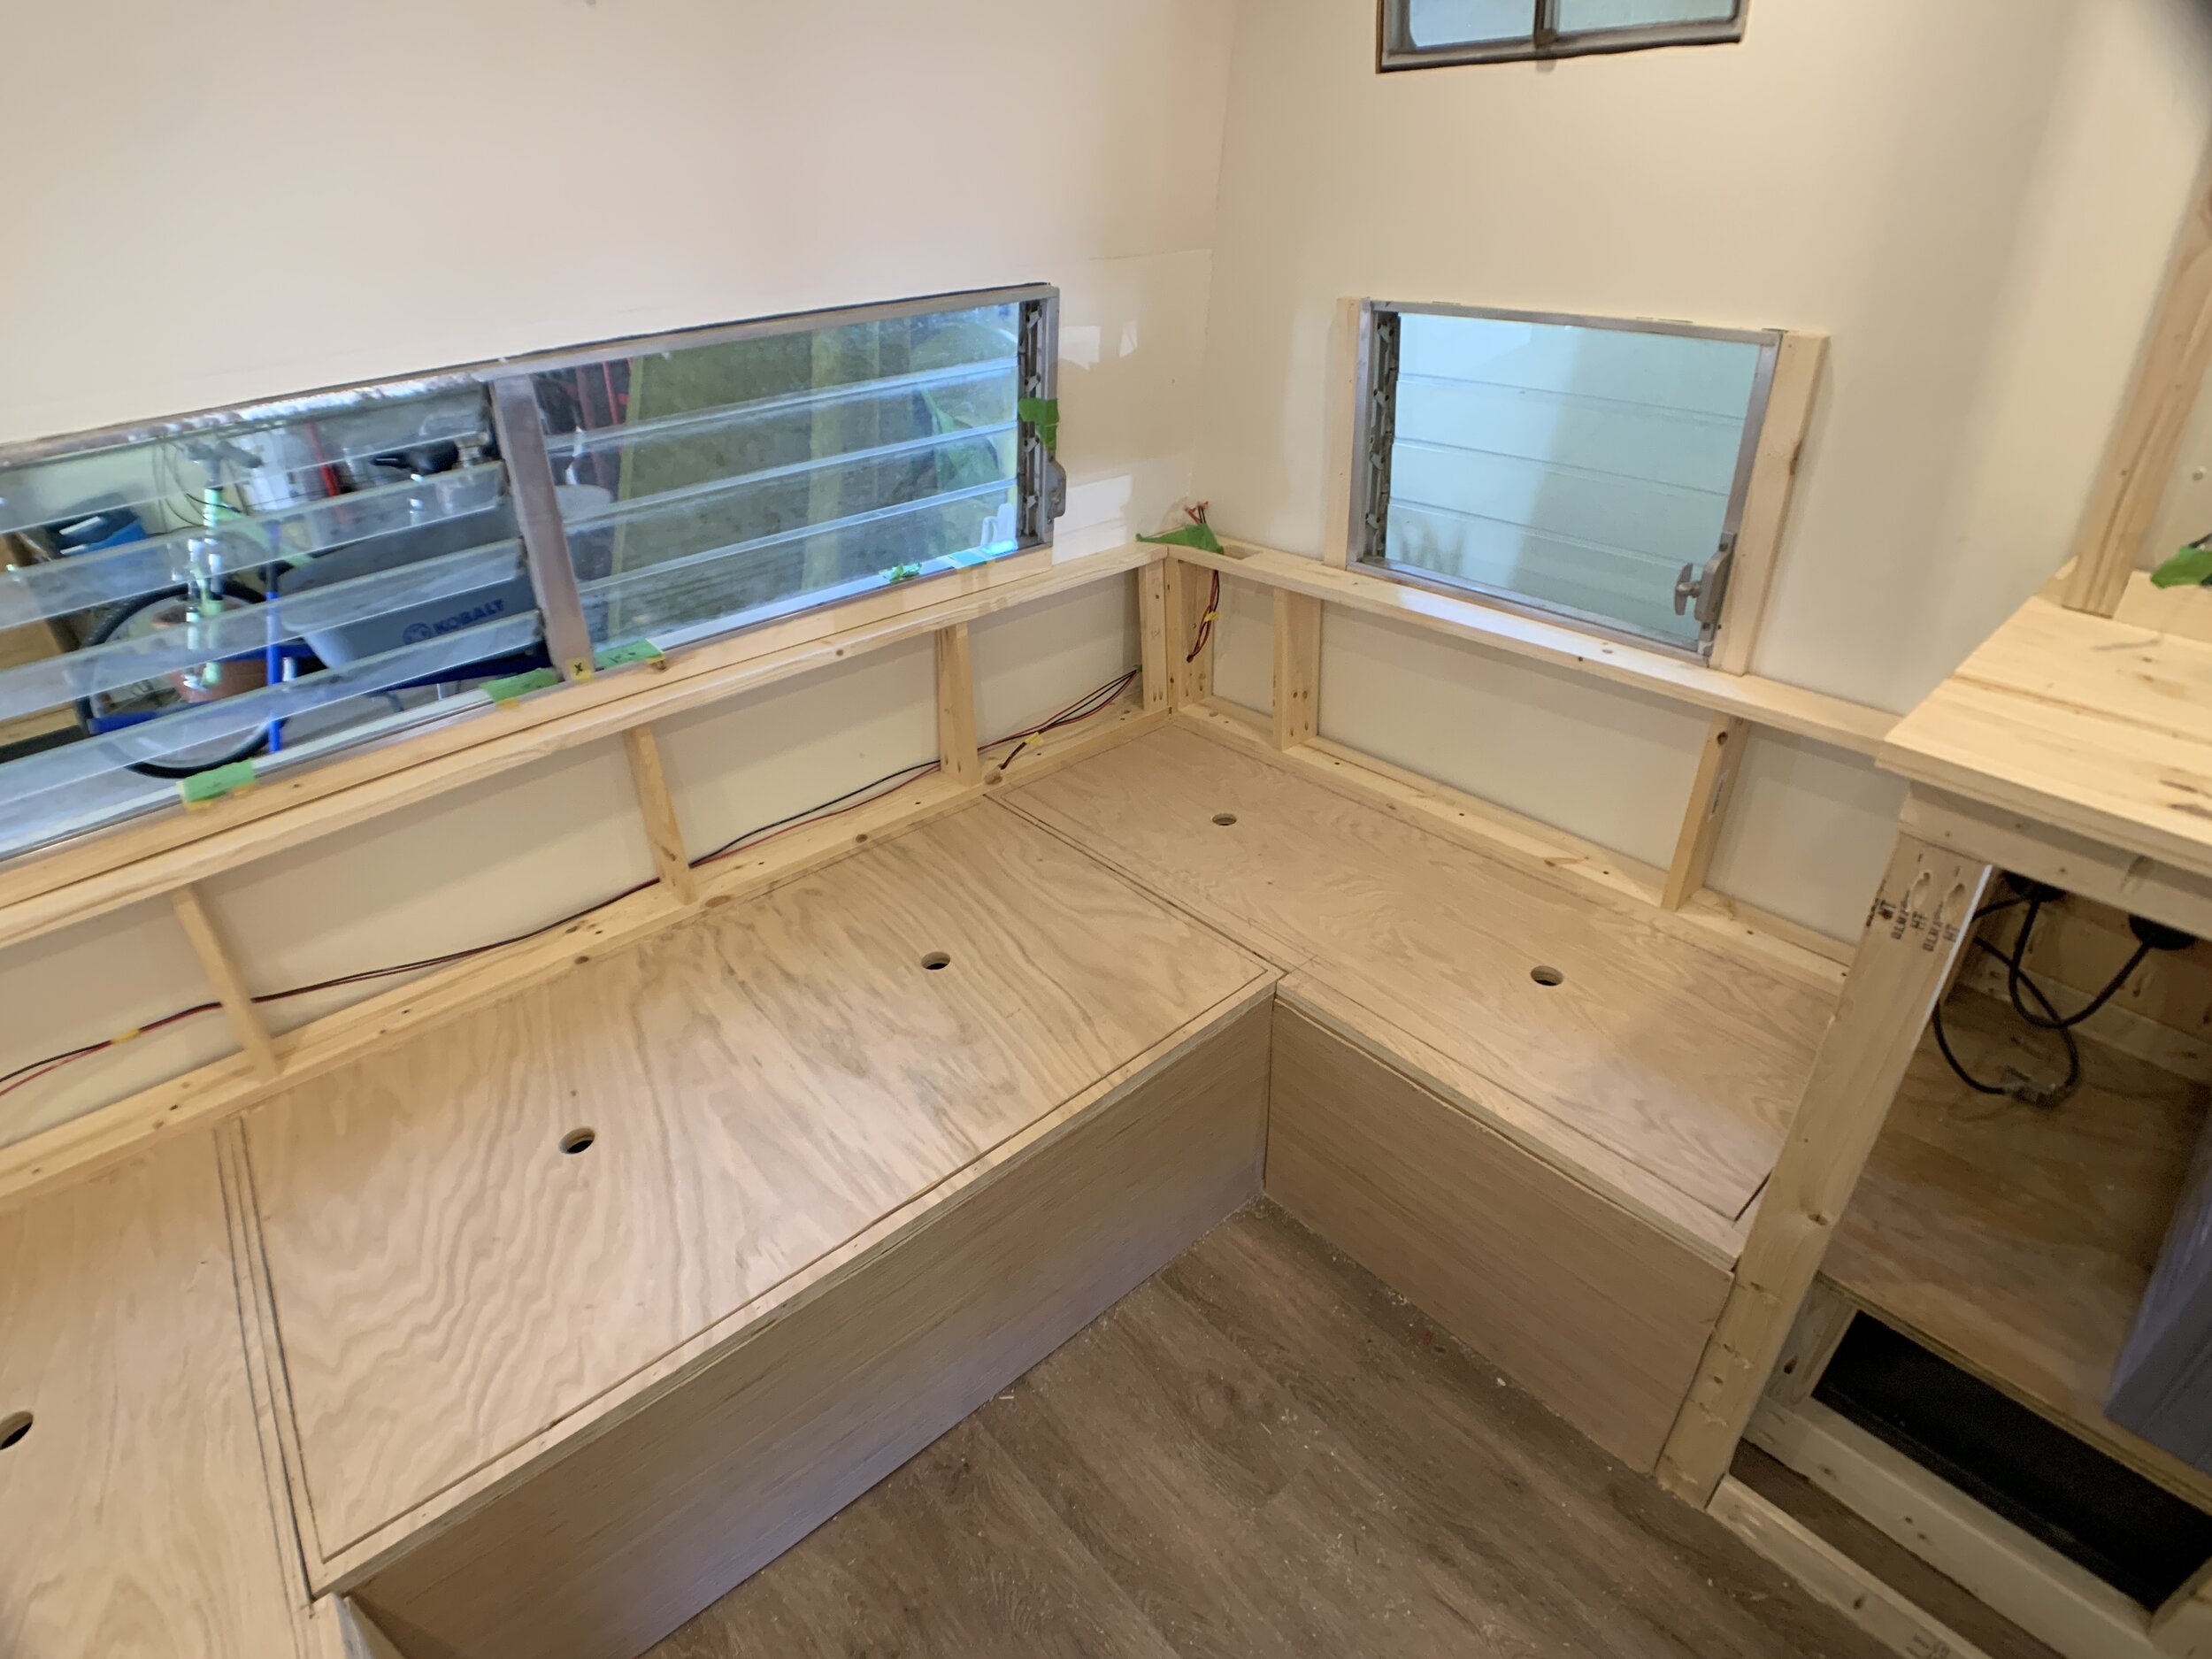
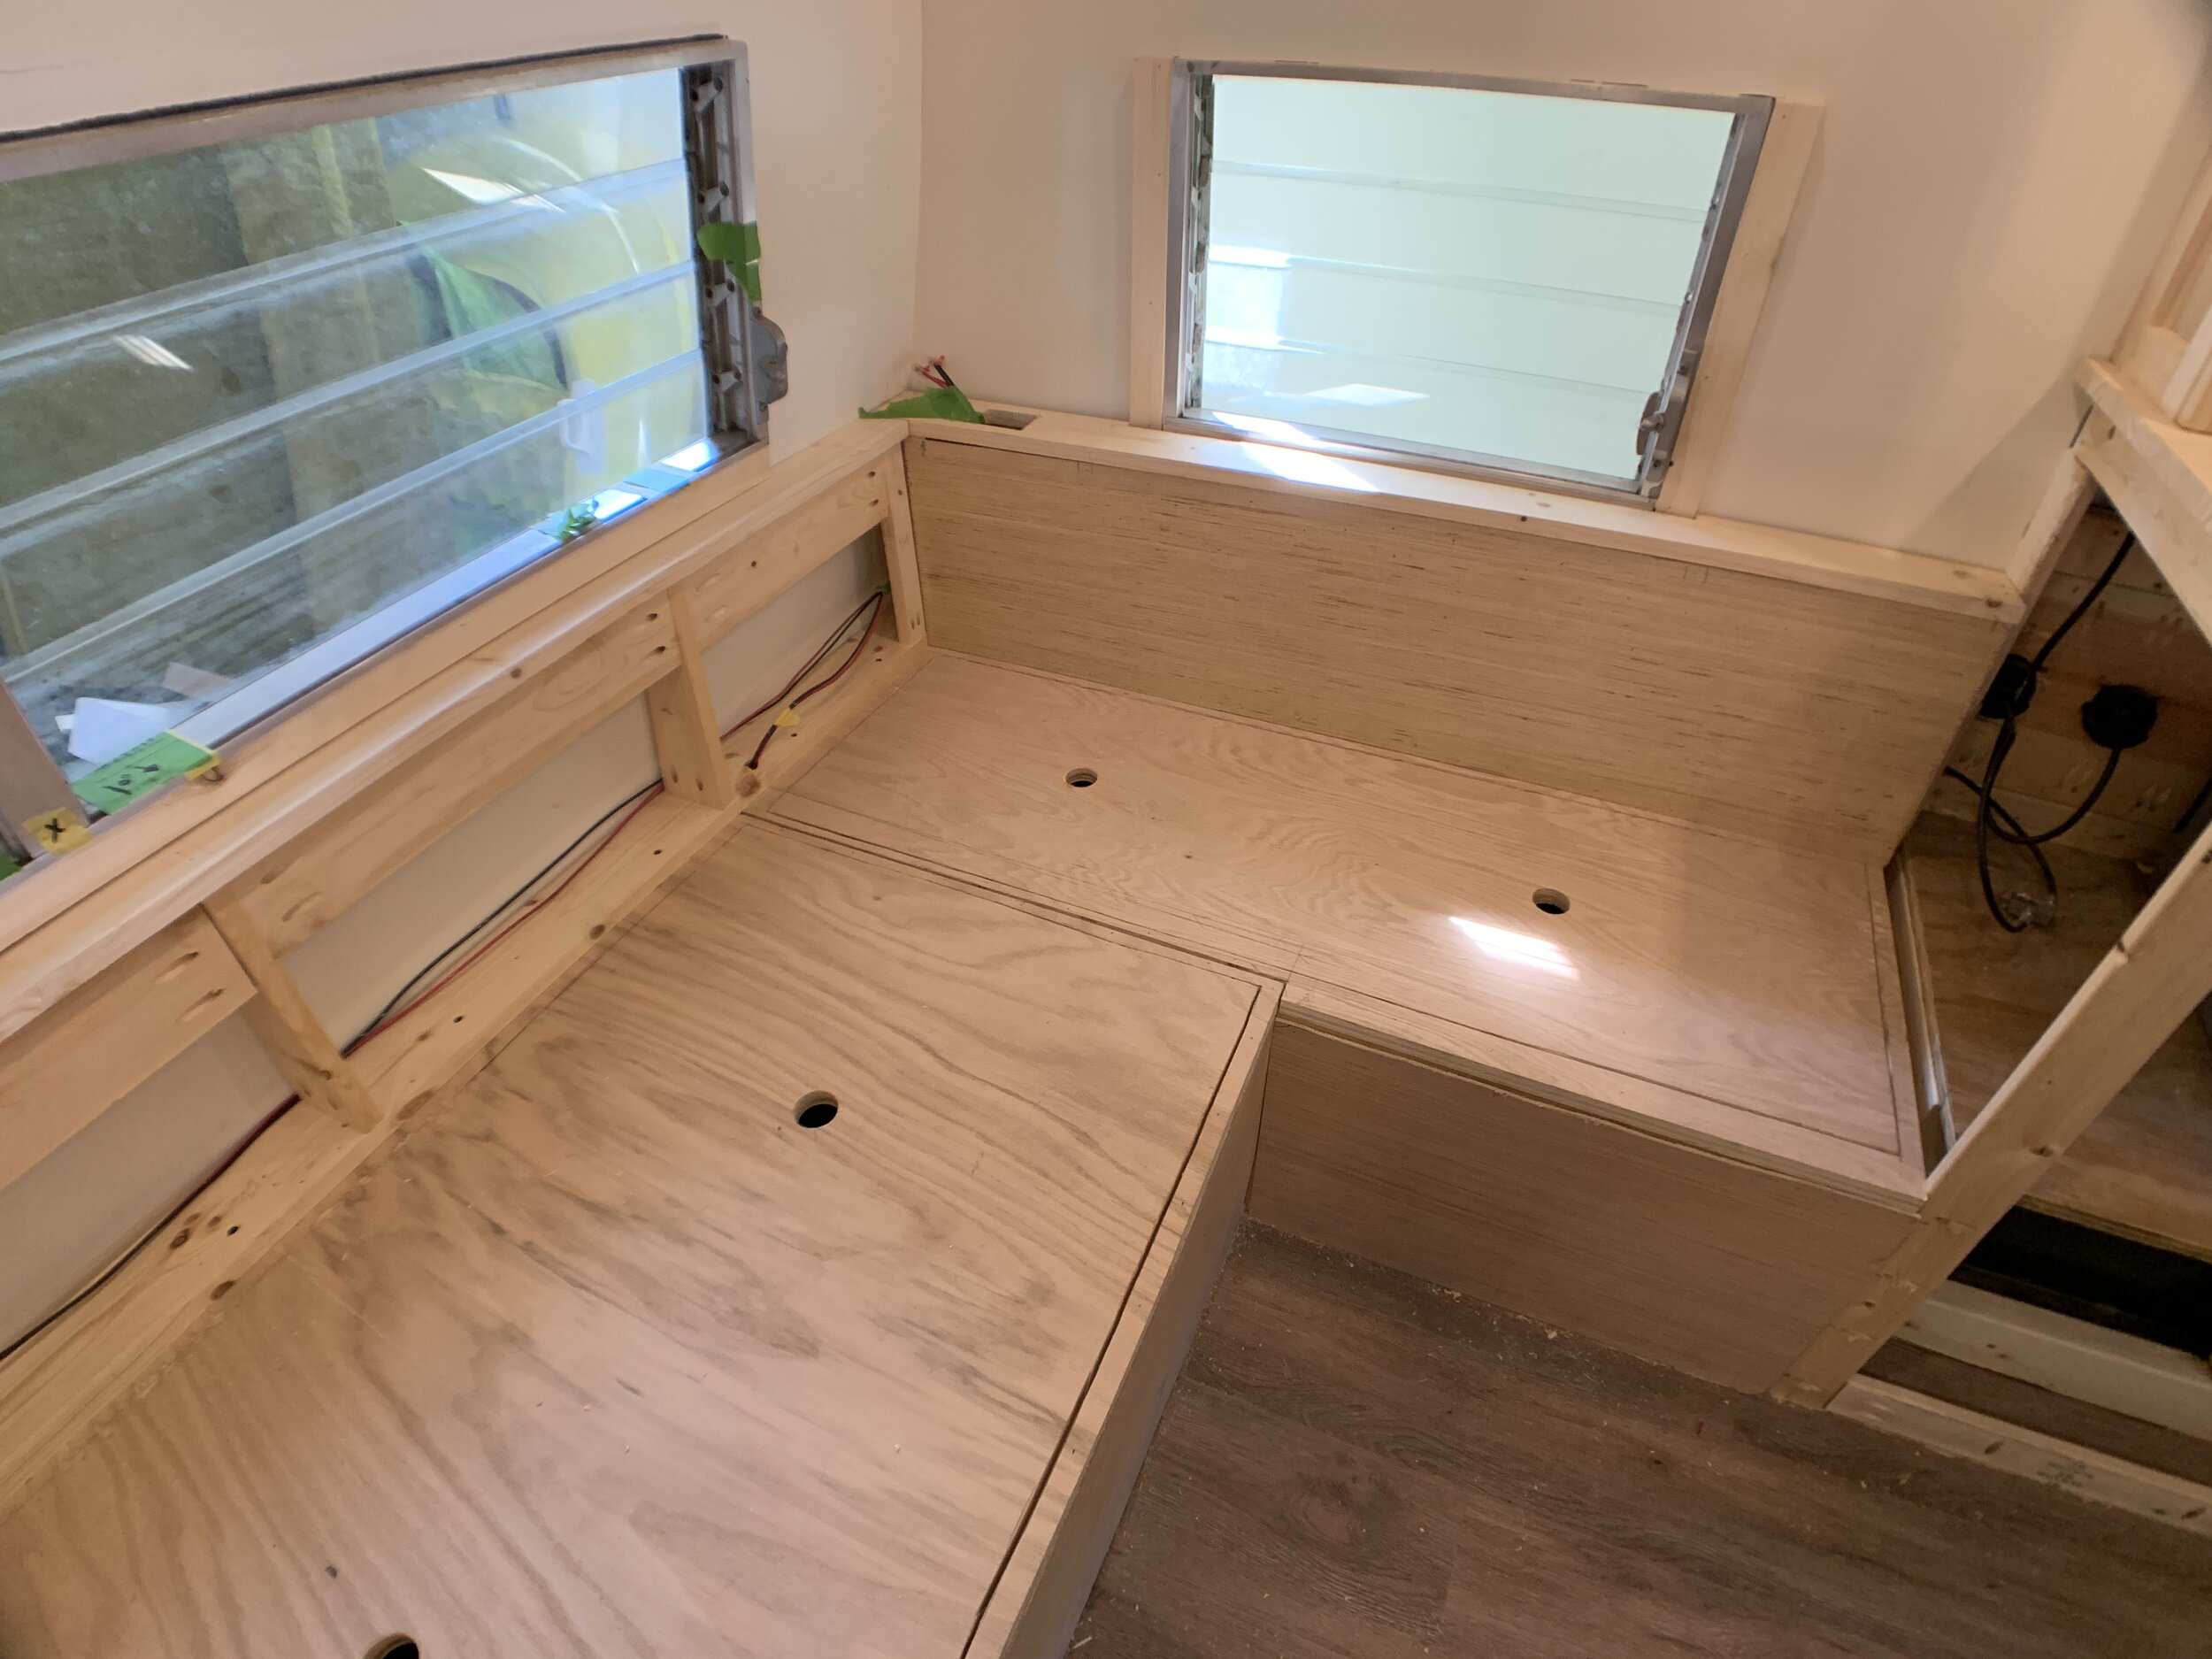
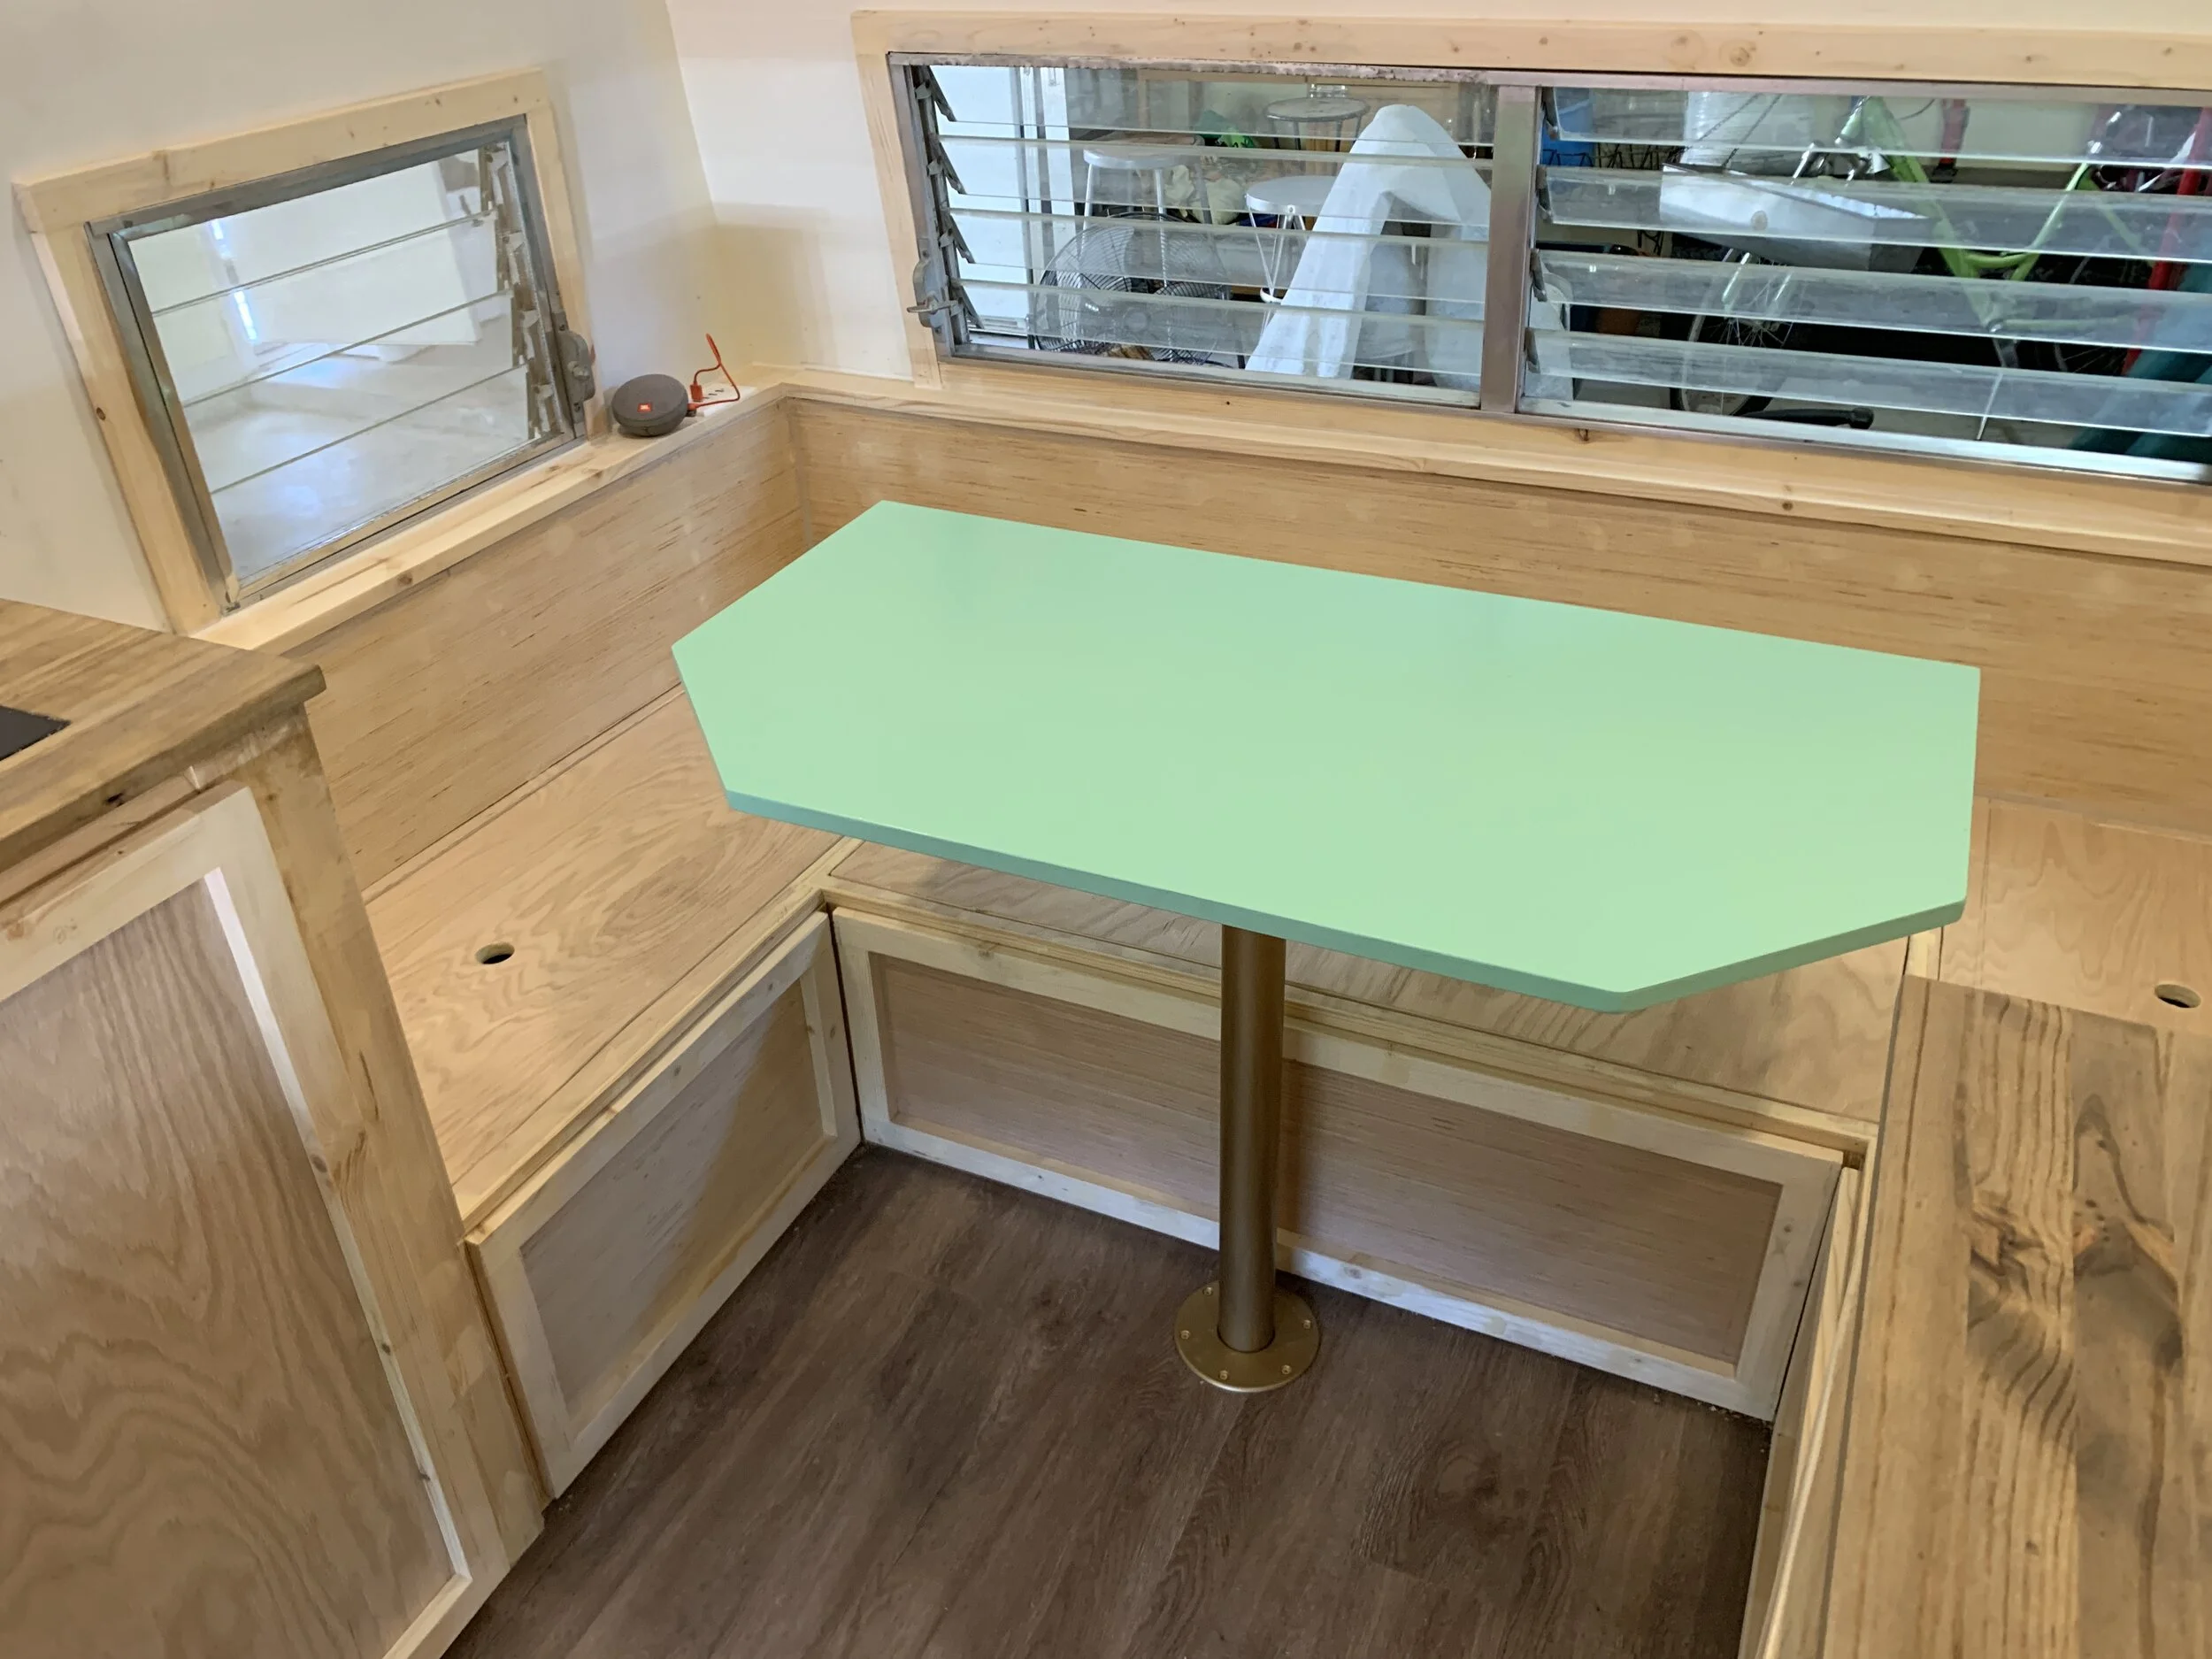
Speaking of things that made us say huh during this build… you might’ve noticed our back/main wall ledge goes to the base of the decorative wooden window frame, while the side ledges go up to the bottom of the actual metal window. This is because the side windows are slightly lower/closer to the floor than the rear window. Weird. After some thought we decided to just have the bench ledge pull double duty (rather than having inconsistent bench back heights) and notched it with the jigsaw so it would fit around the two vertical wooden window frame pieces.
Once we nailed the ledges in place and before we closed in the backrests, we attached our wires to the outlets and tested to make sure our connections were good.
Closing in the backrests

After the backrests were built and we cranked some sweet tunes – thus confirming the USB outlets worked – we used the bench seat and ledge to lightly mark out where our internal studs were located, and measured and cut out each piece of 1/4” plywood. We used our finish nail gun and short nails to nail the plywood backs in place.
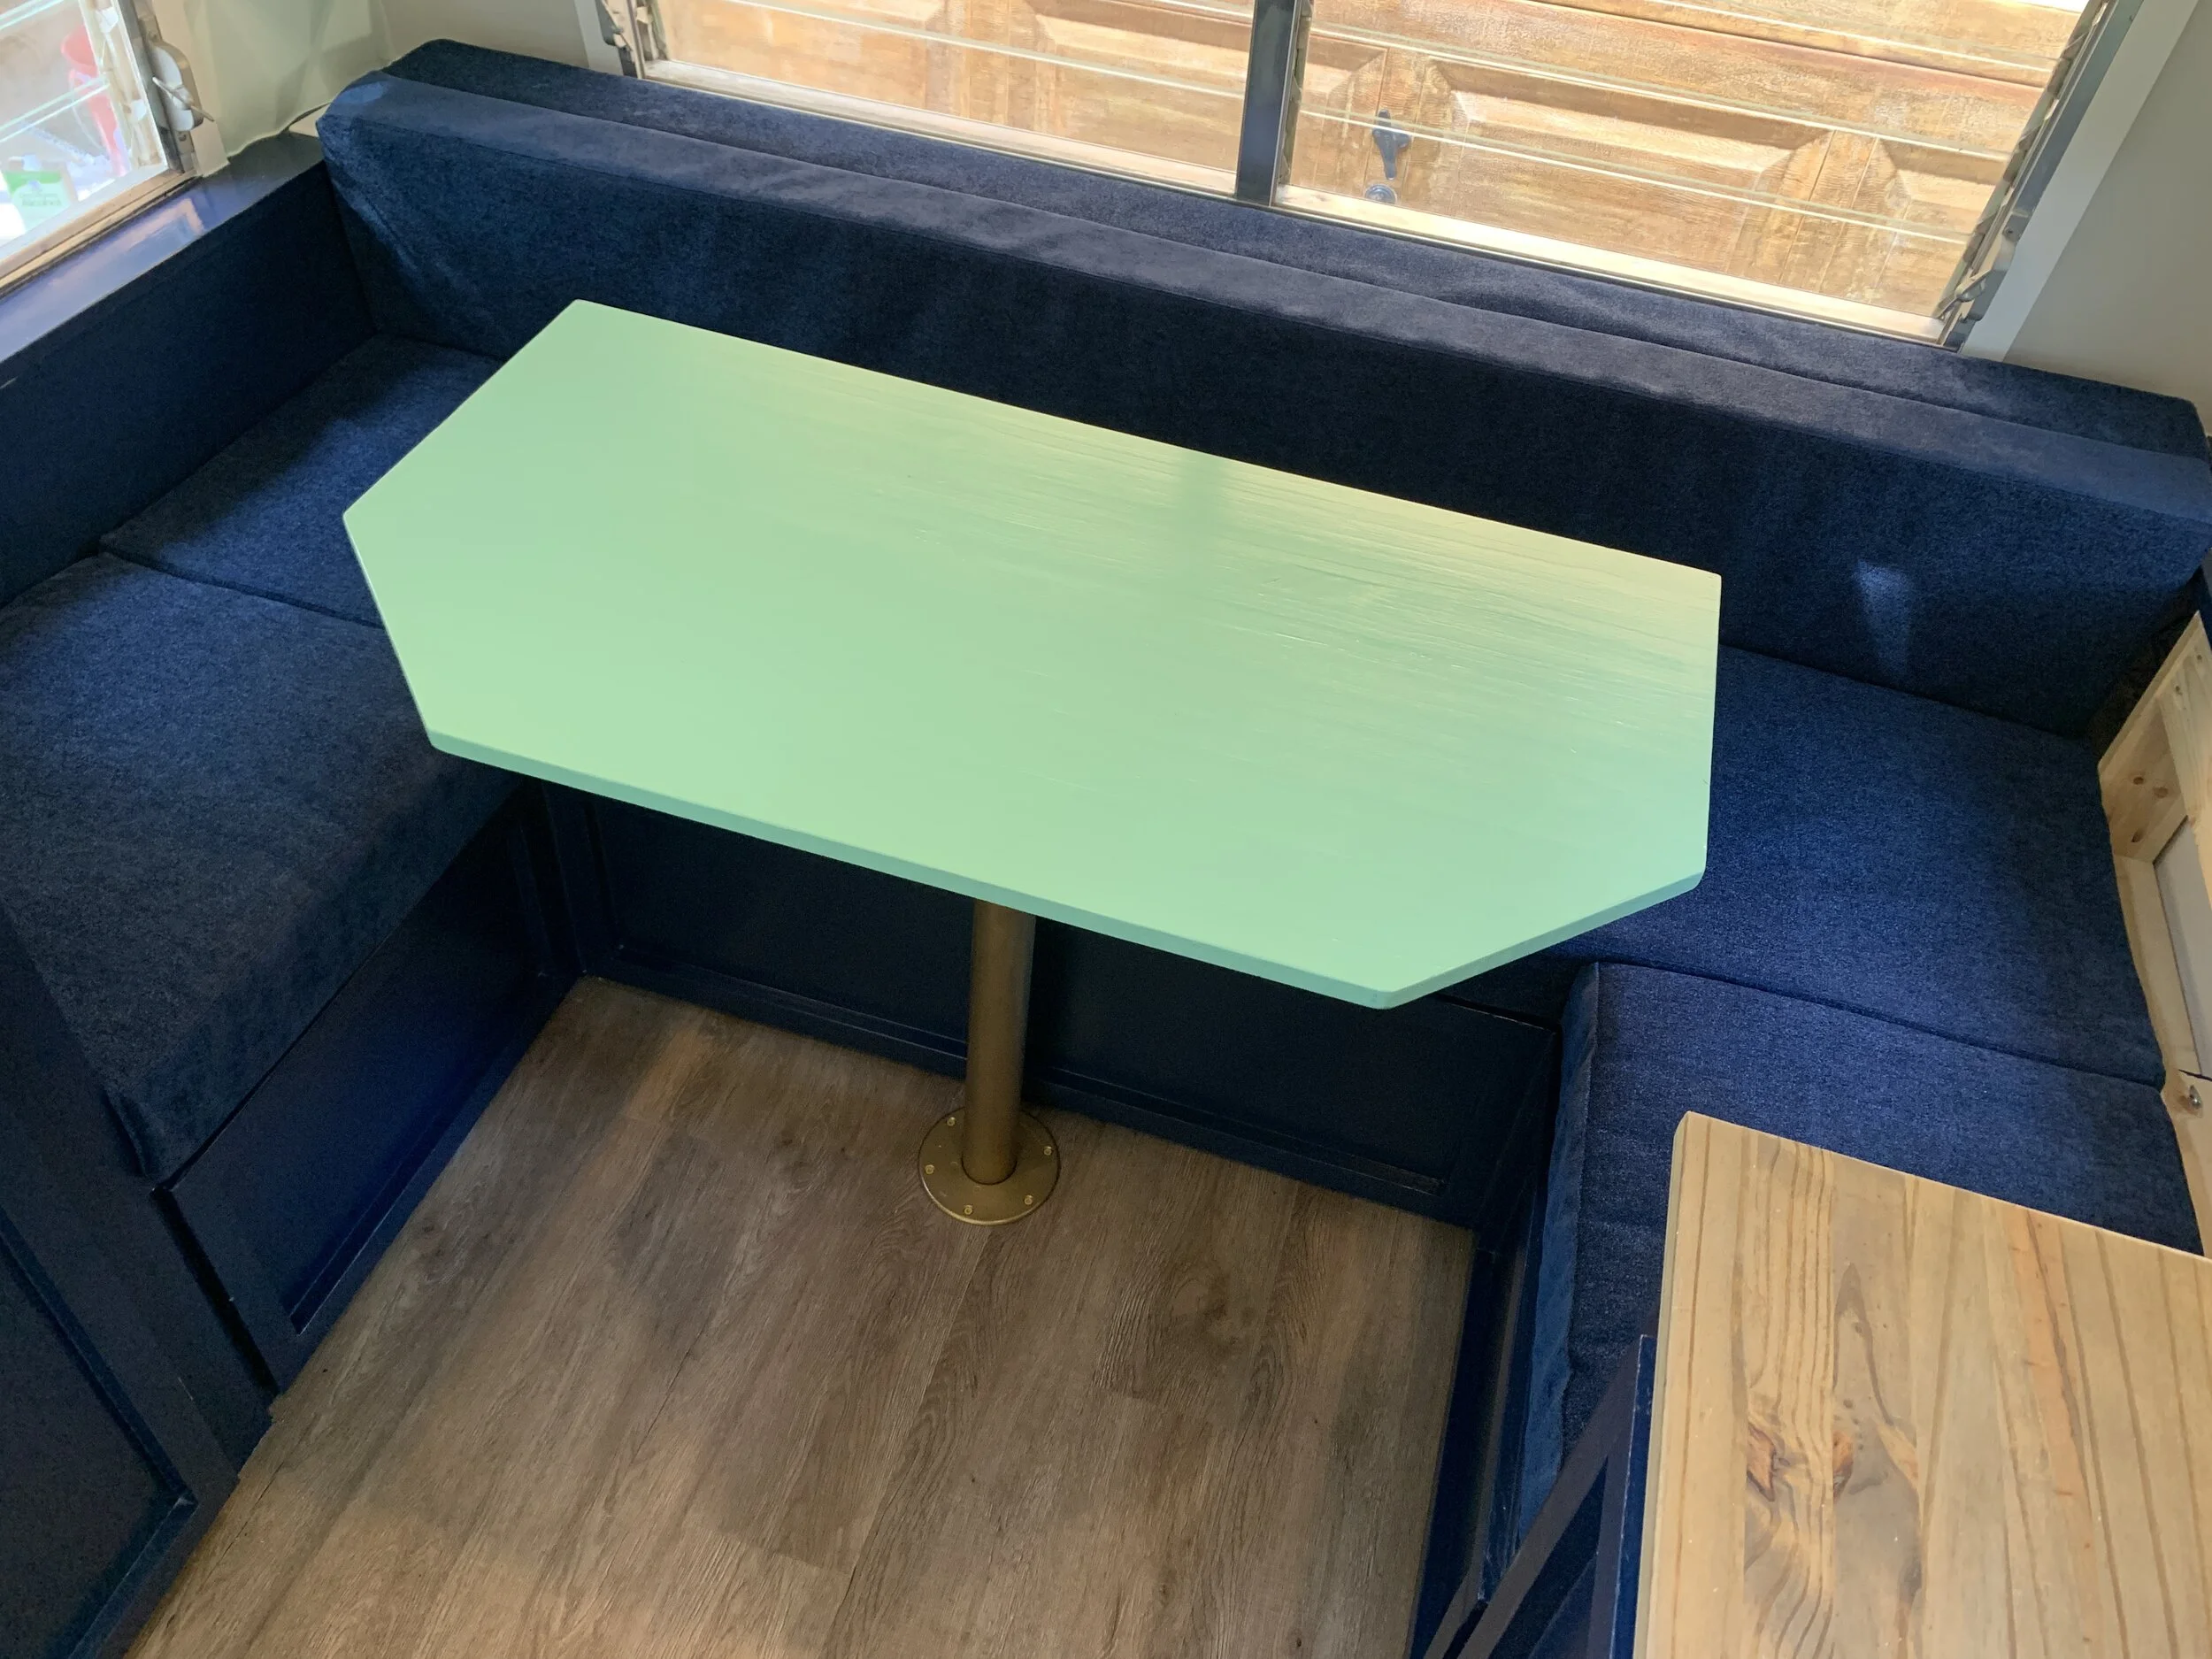
Trimming it all out + adding the dining table ledge
While we were planning the whole rebuild, I knew I wanted to find a way so that we didn’t need to add a random metal (or otherwise) support ledge for the dining table to rest on when it came time to transition the space from a dining area to bed. We opted to let our decorative moulding pull double duty, because form + function = my jam. In order to do this, we figured out the thickness of the table material we planned to use (3/4”) and used thin, rounded 3/4”wide decorative screen trim, installing it flush with the top of the bench seat as a sort of fancy spacer. Then we installed our would-be table ledge (a 1x2) right underneath the other piece of rounded trim – this ensured the ledge trim was 3/4” from the top of the seat and that our table would sit flush with the top of the seat to form the bed.
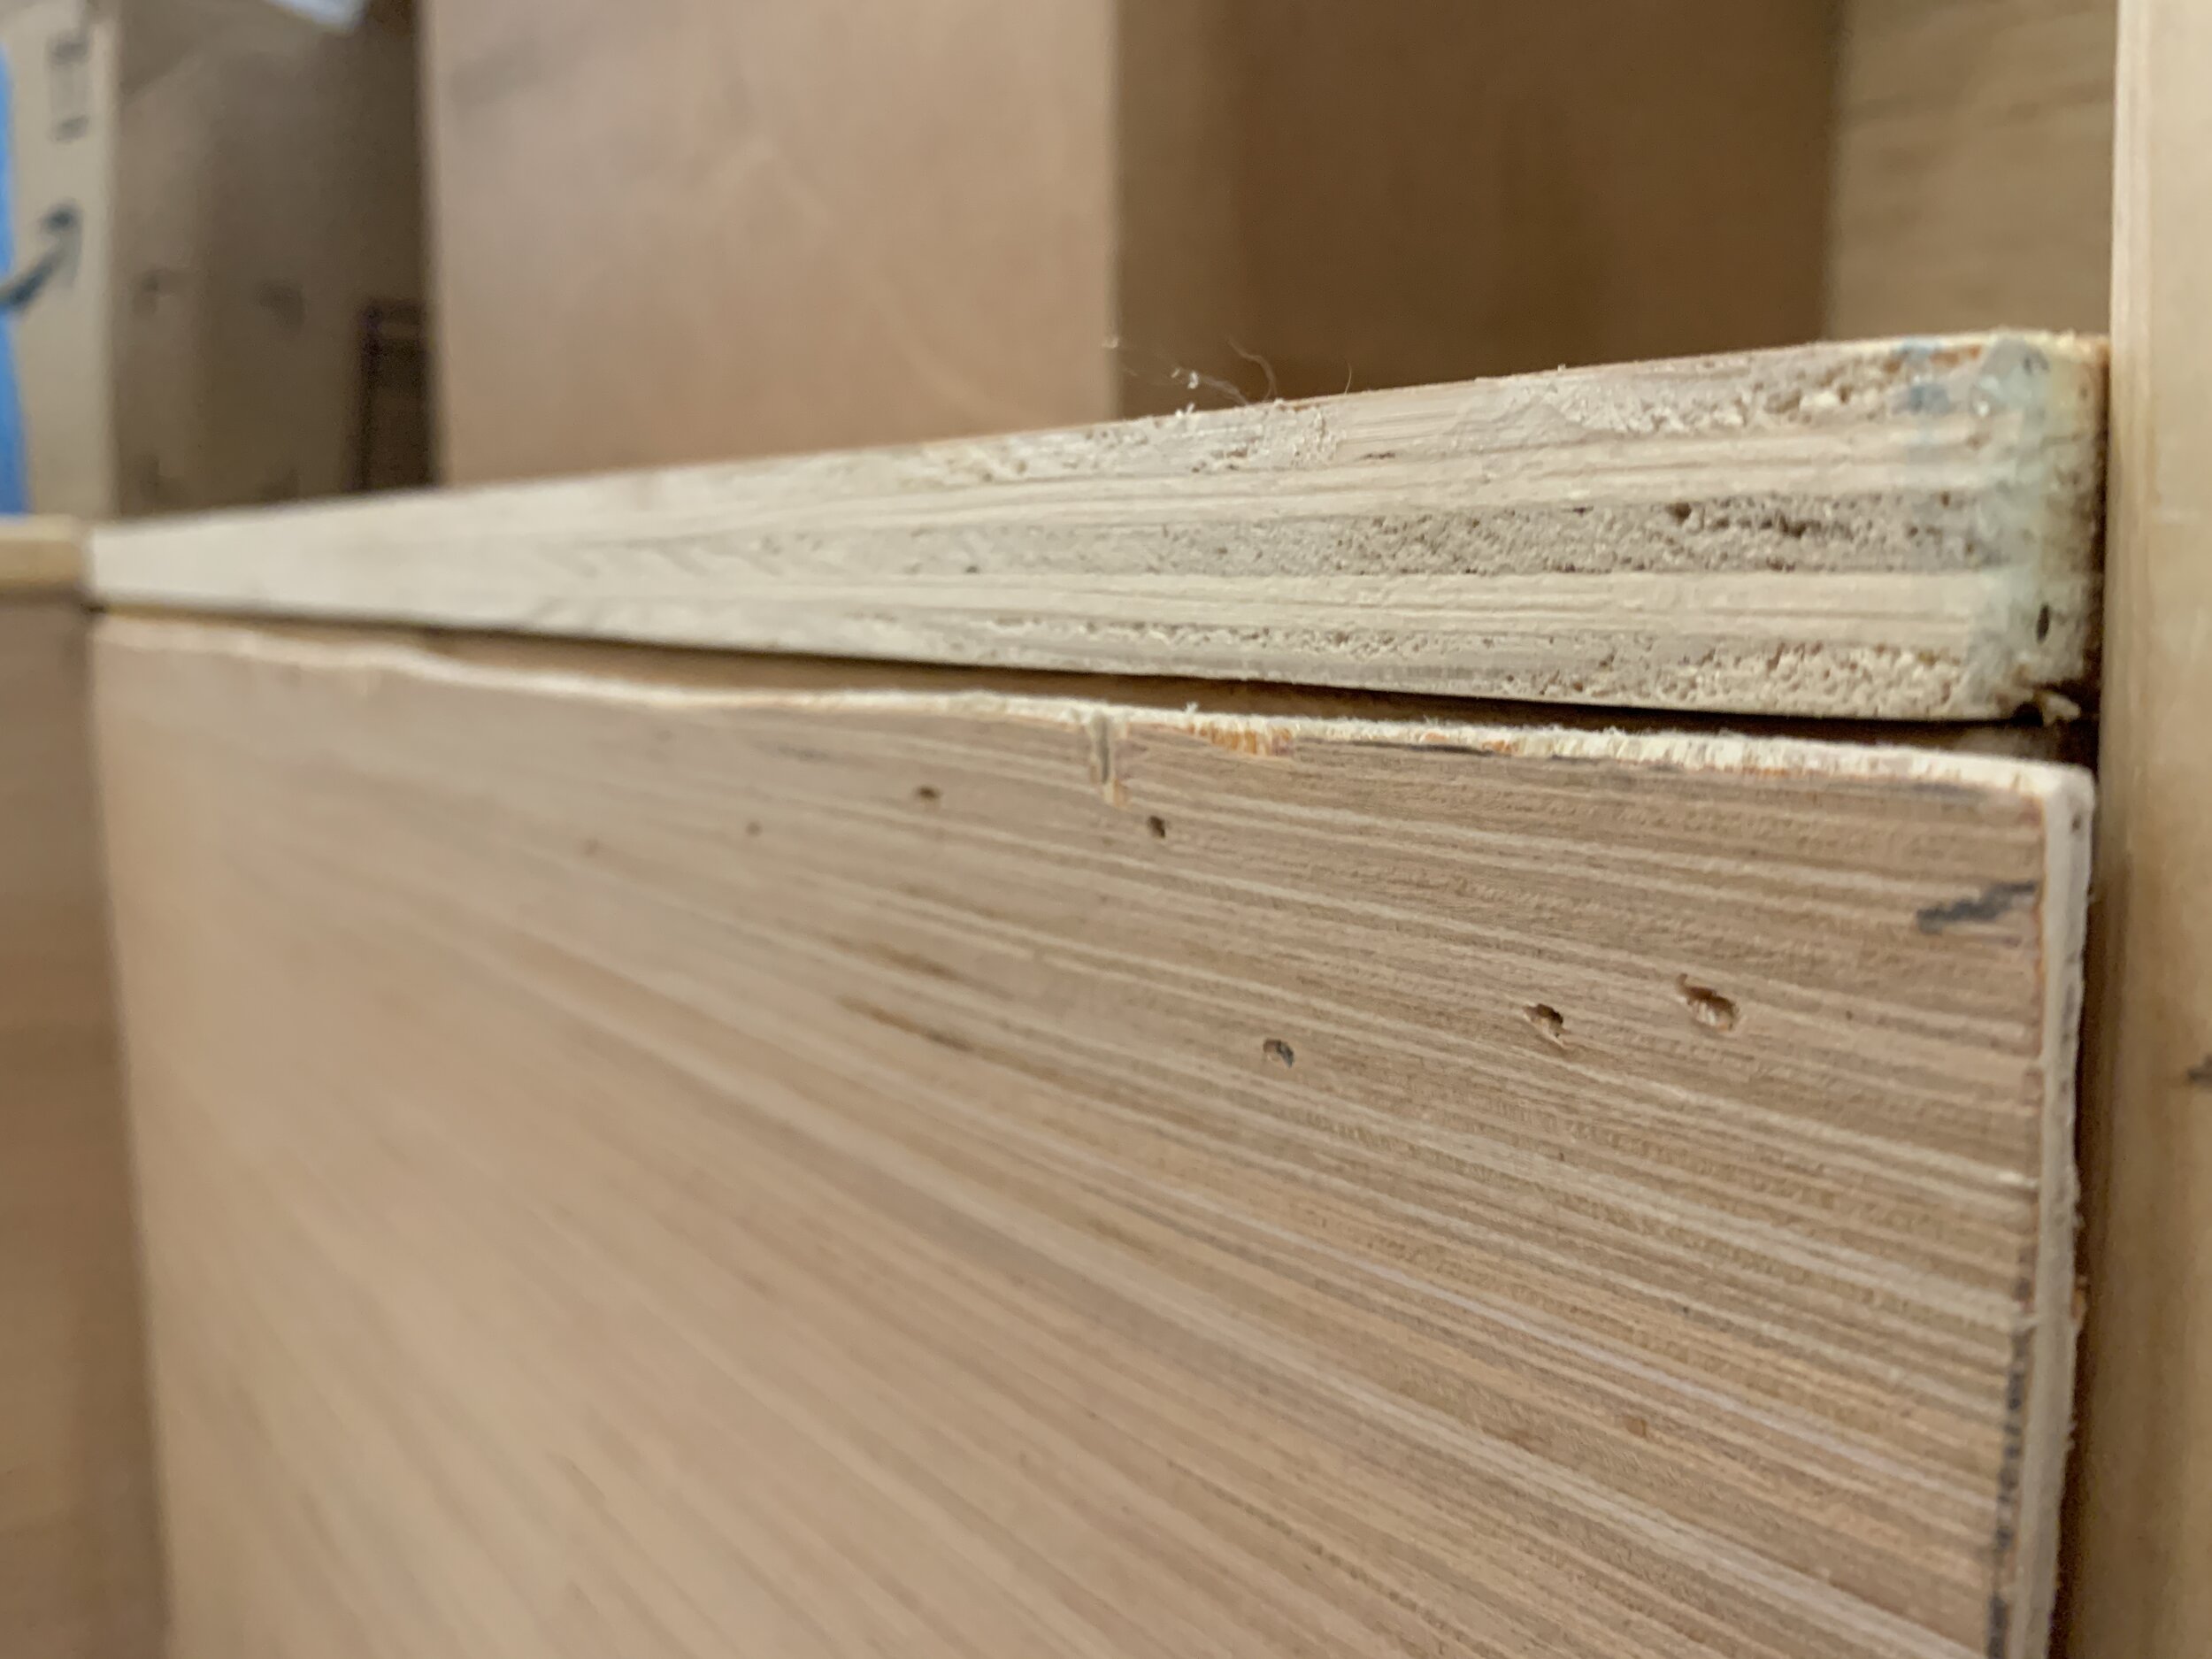
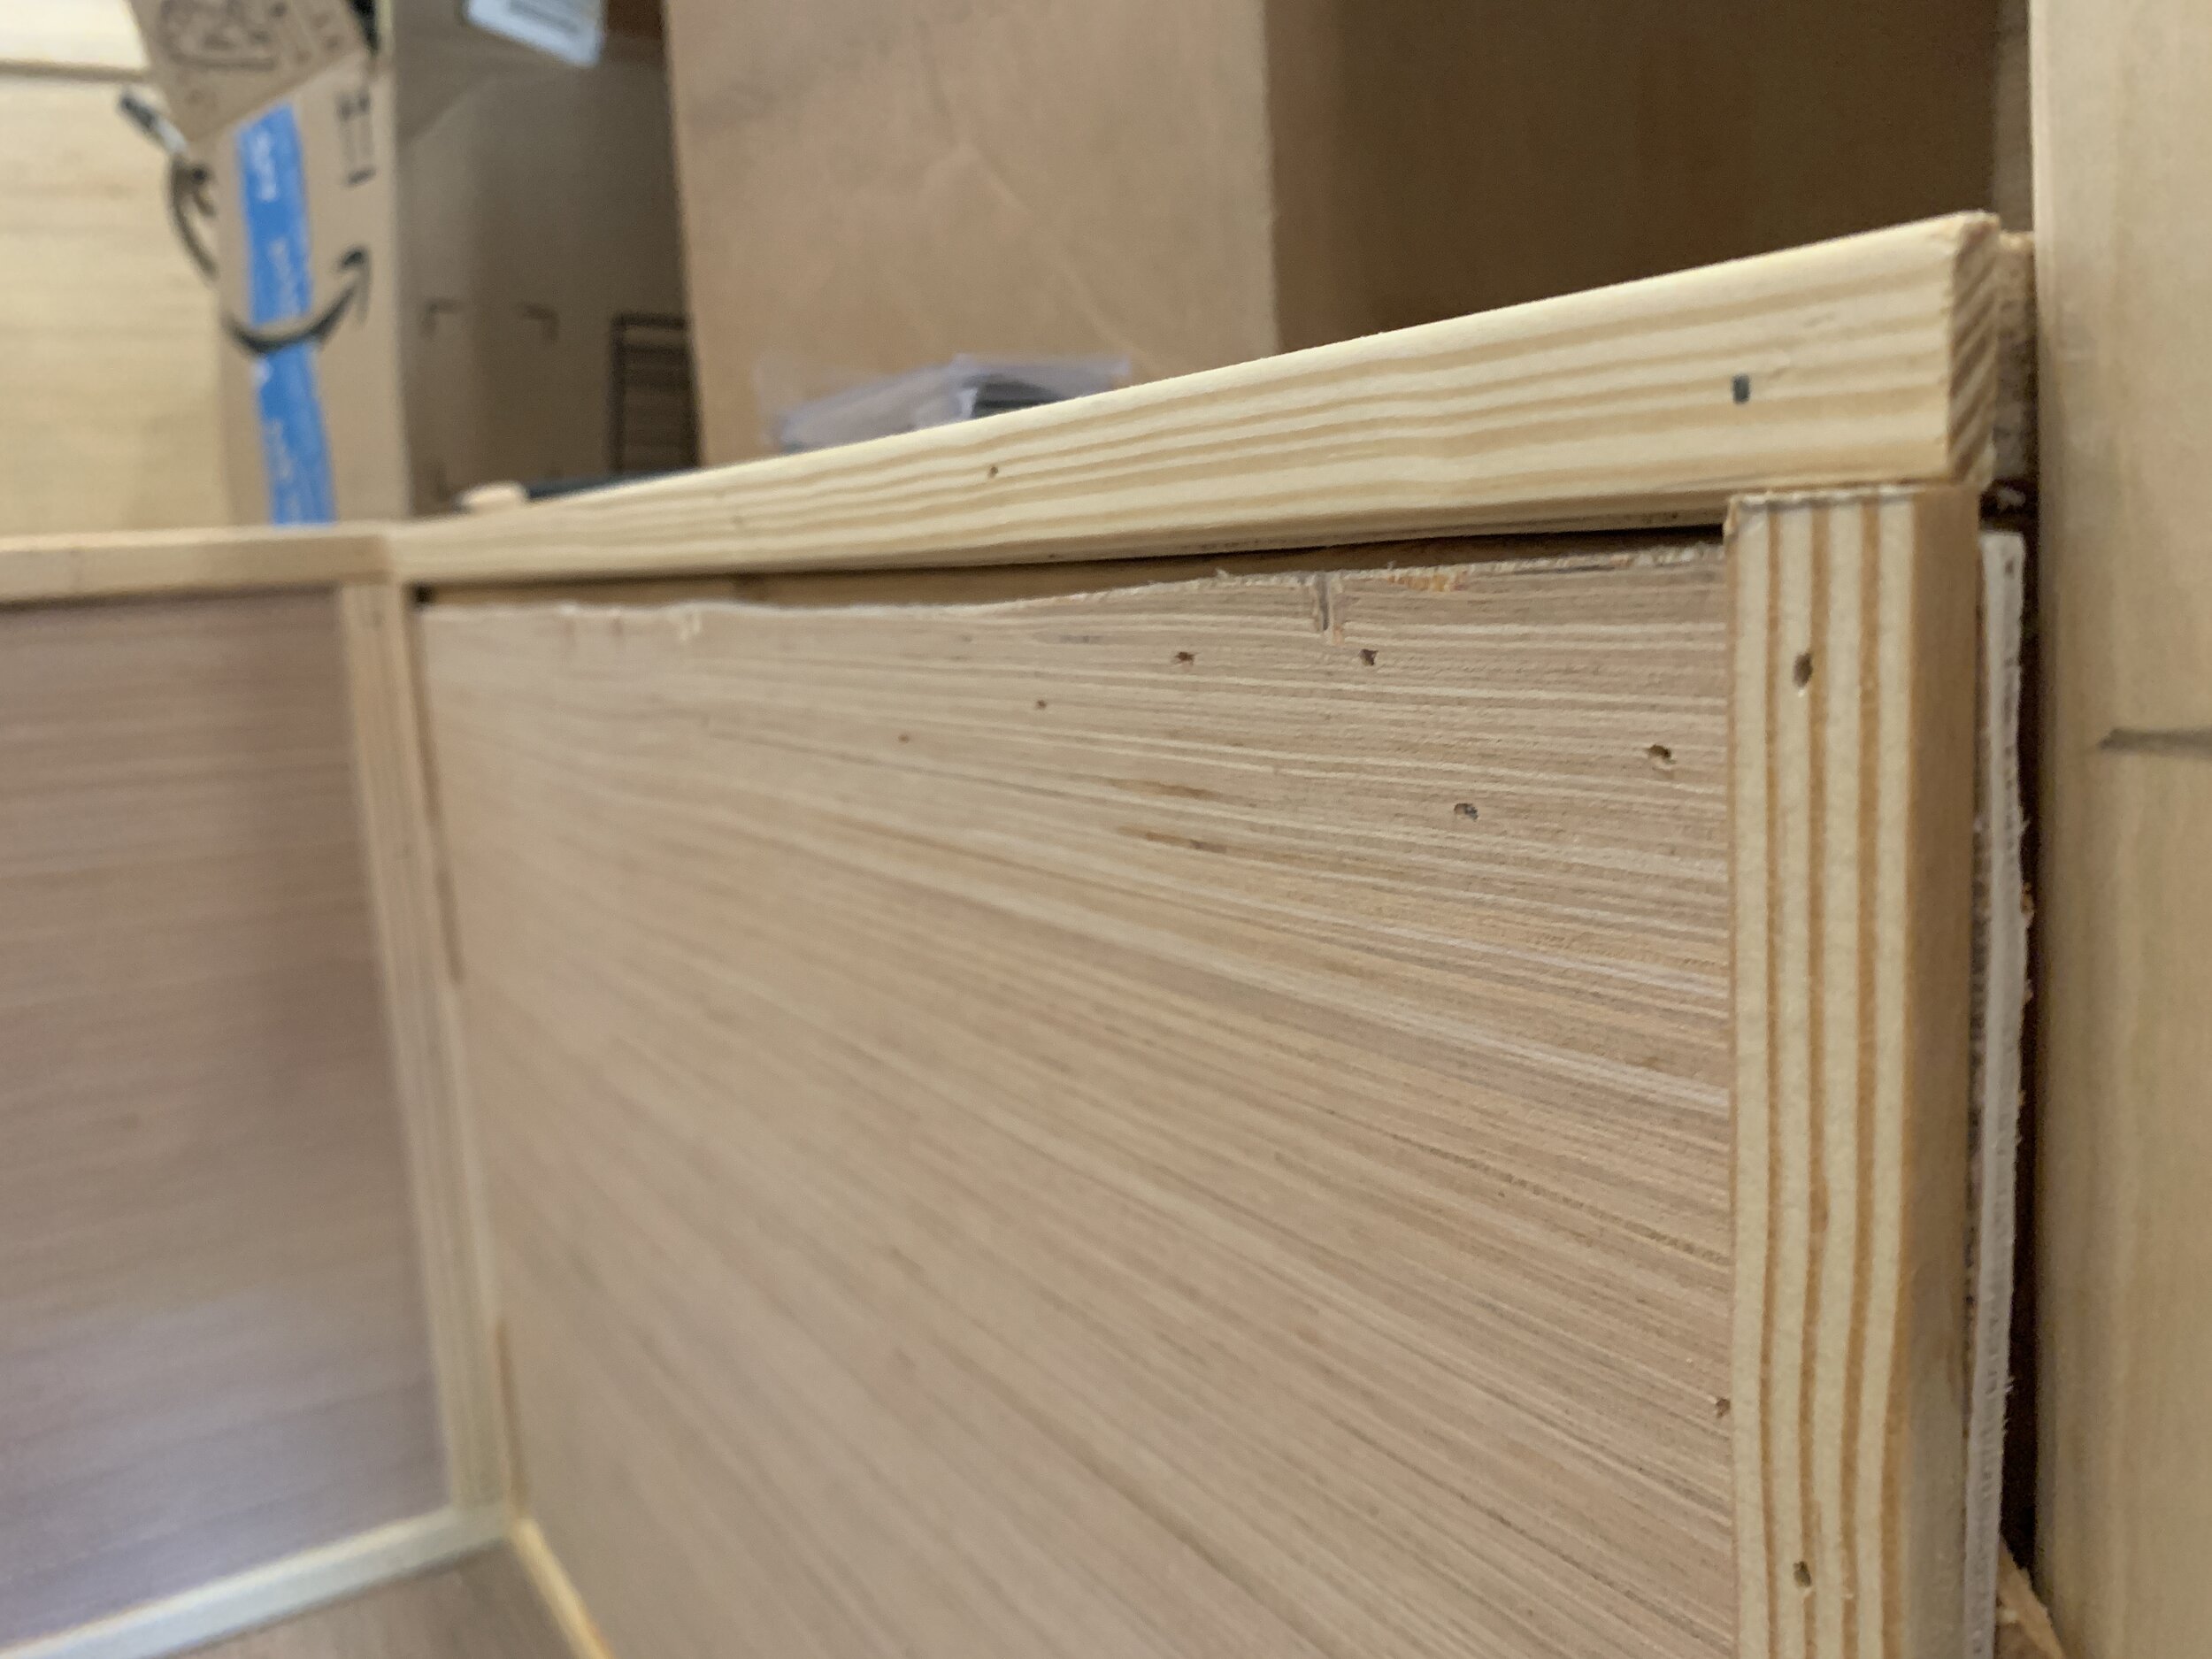
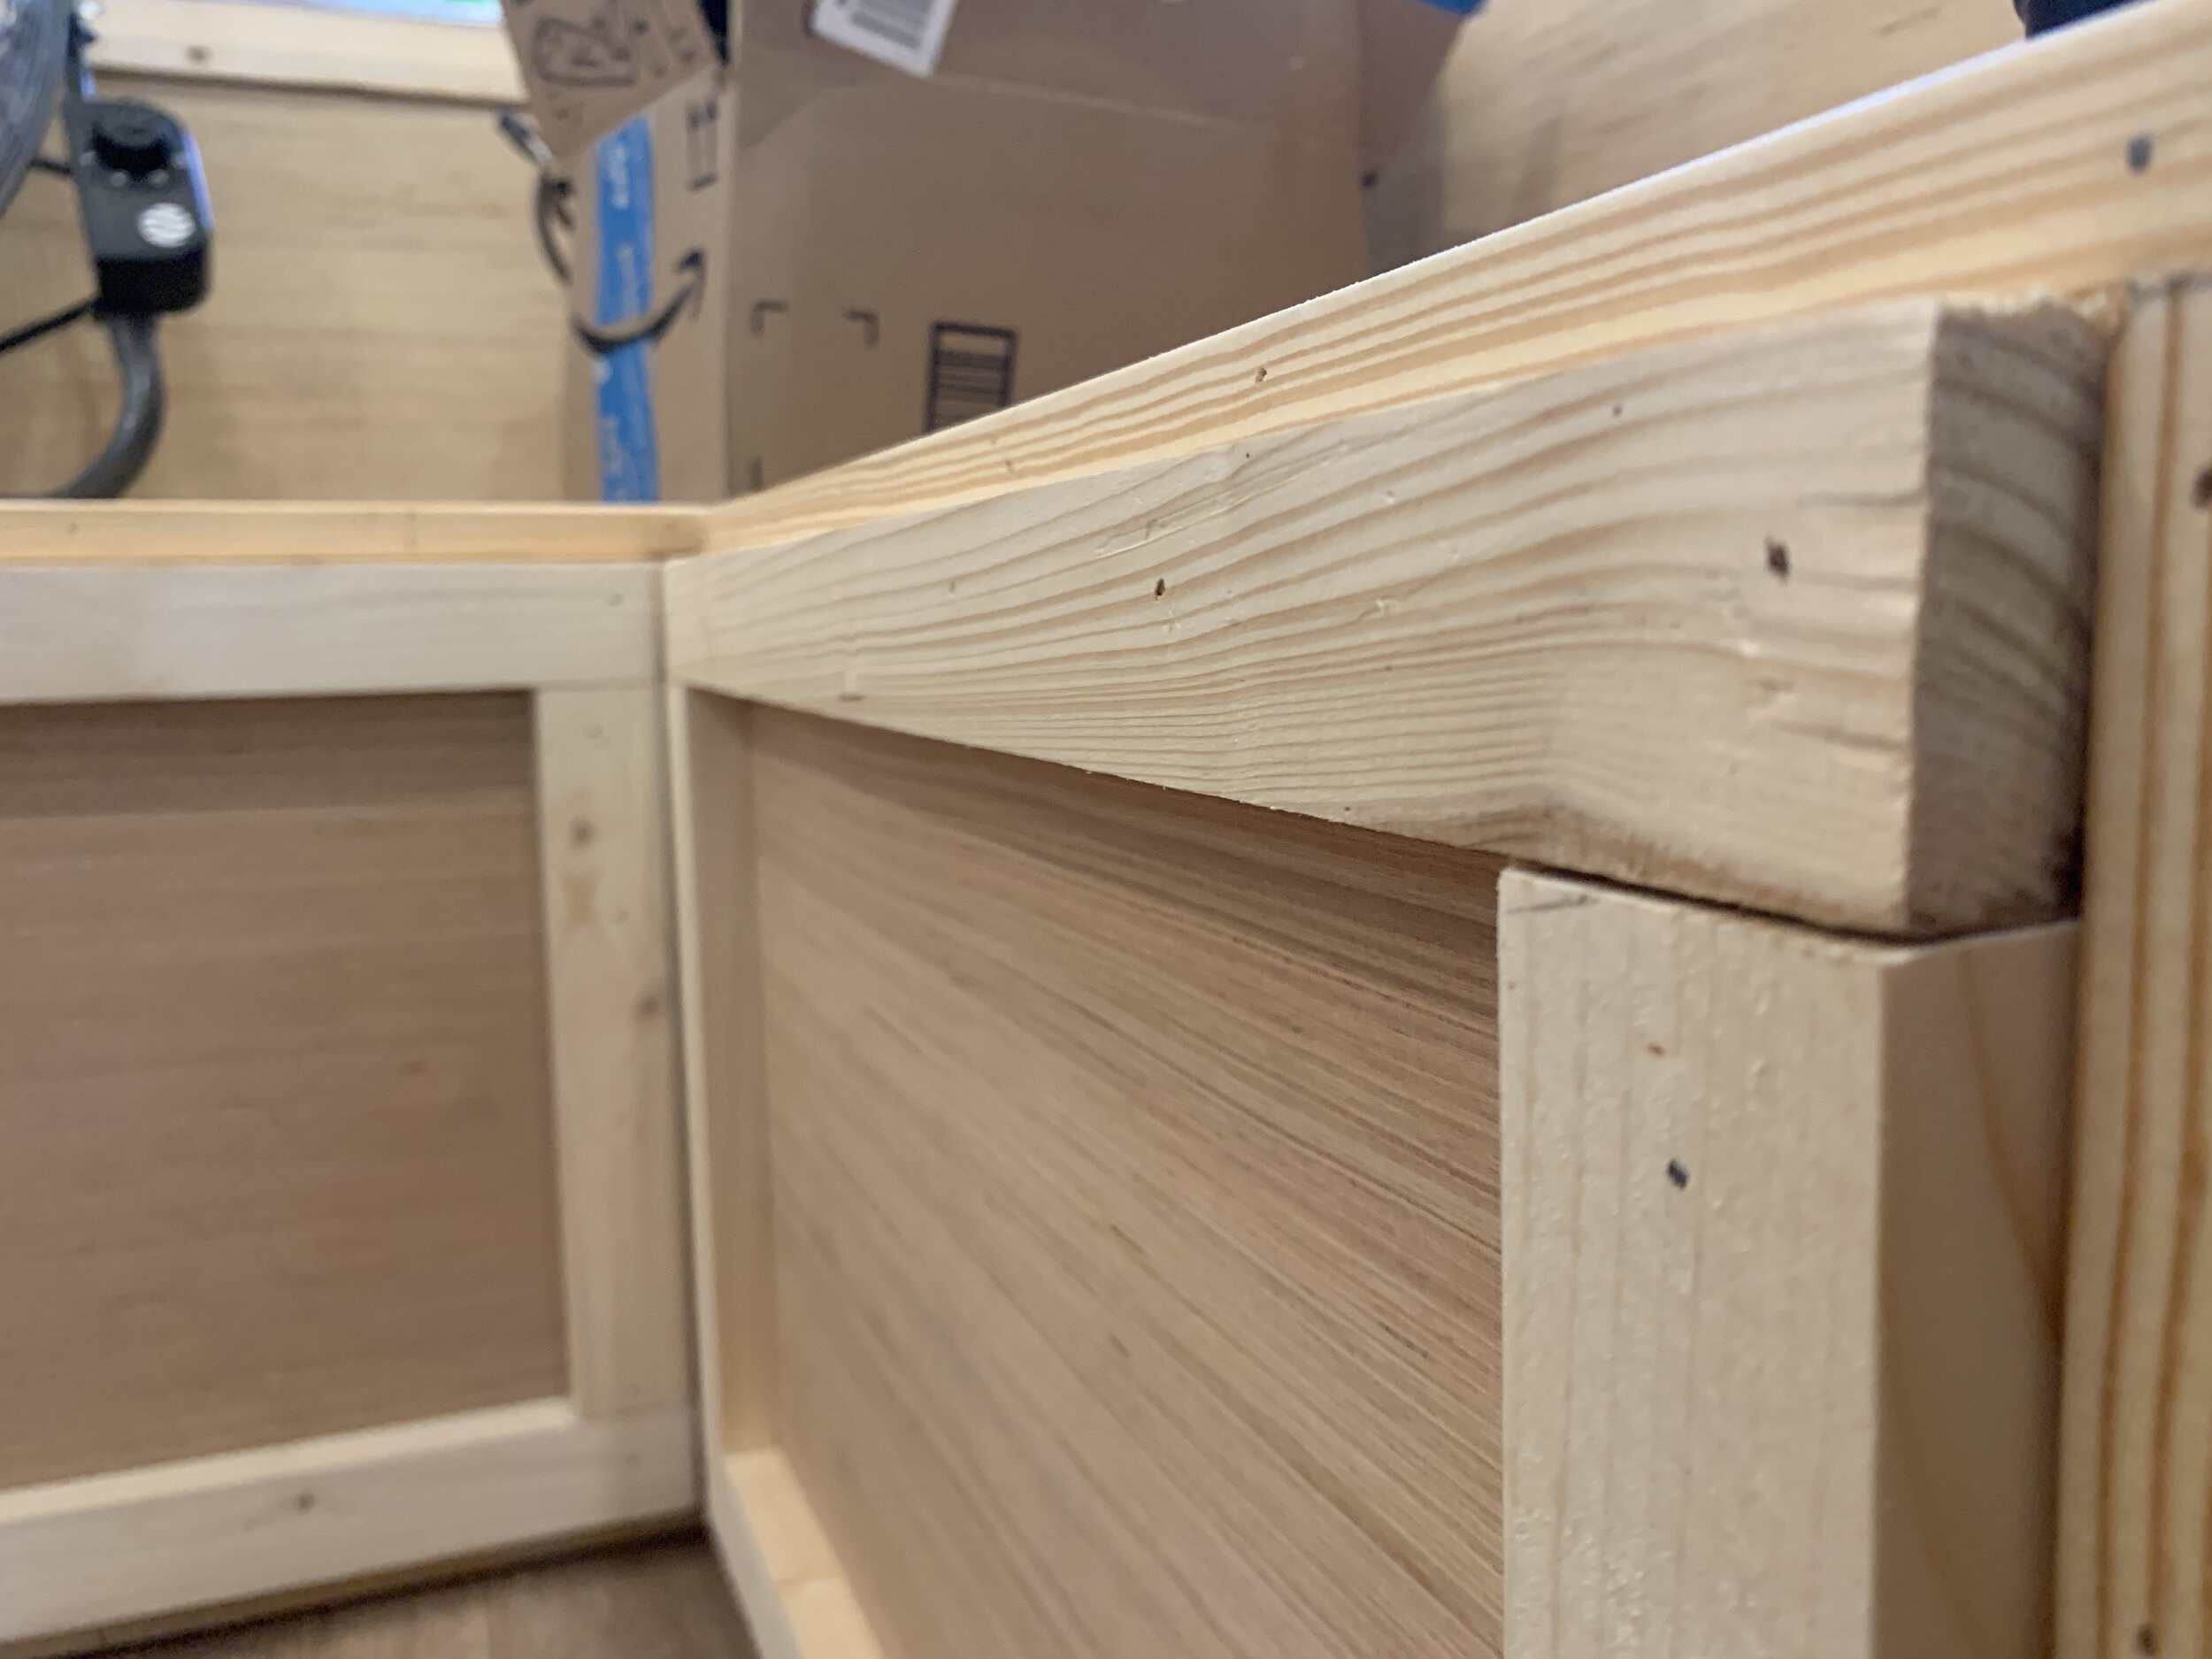
Okay, this is where it’s a little embarrassing to actually show you my sloppy finish work in this particular part of the process, but we’re all friends, right? So as Jack Nicholson would say, we can share the truth, the whole truth and nothing but the truth, because you most definitely can handle it. And hopefully with no judgement. Also, I wanted to show you that just because you got a little sassy one day with the jigsaw (maybe I had some drinks or something, I don’t know, but it sounds like me) you can still totally redeem yourself with trim, and perfect it even further when it comes time to caulk and paint. Case in point: photo 1 vs. photo 3, above.
So, what’s next for the dinette area?
Coming up on the blog – and somewhat yet to do IRL – is the finish work. Wood filling (done) caulking (partially done), priming (partially done) and painting (partially done). It’s a little rough still, metaphorically speaking because we sanded the bejeezus out of it before we went camping that one time) but it’s getting there.
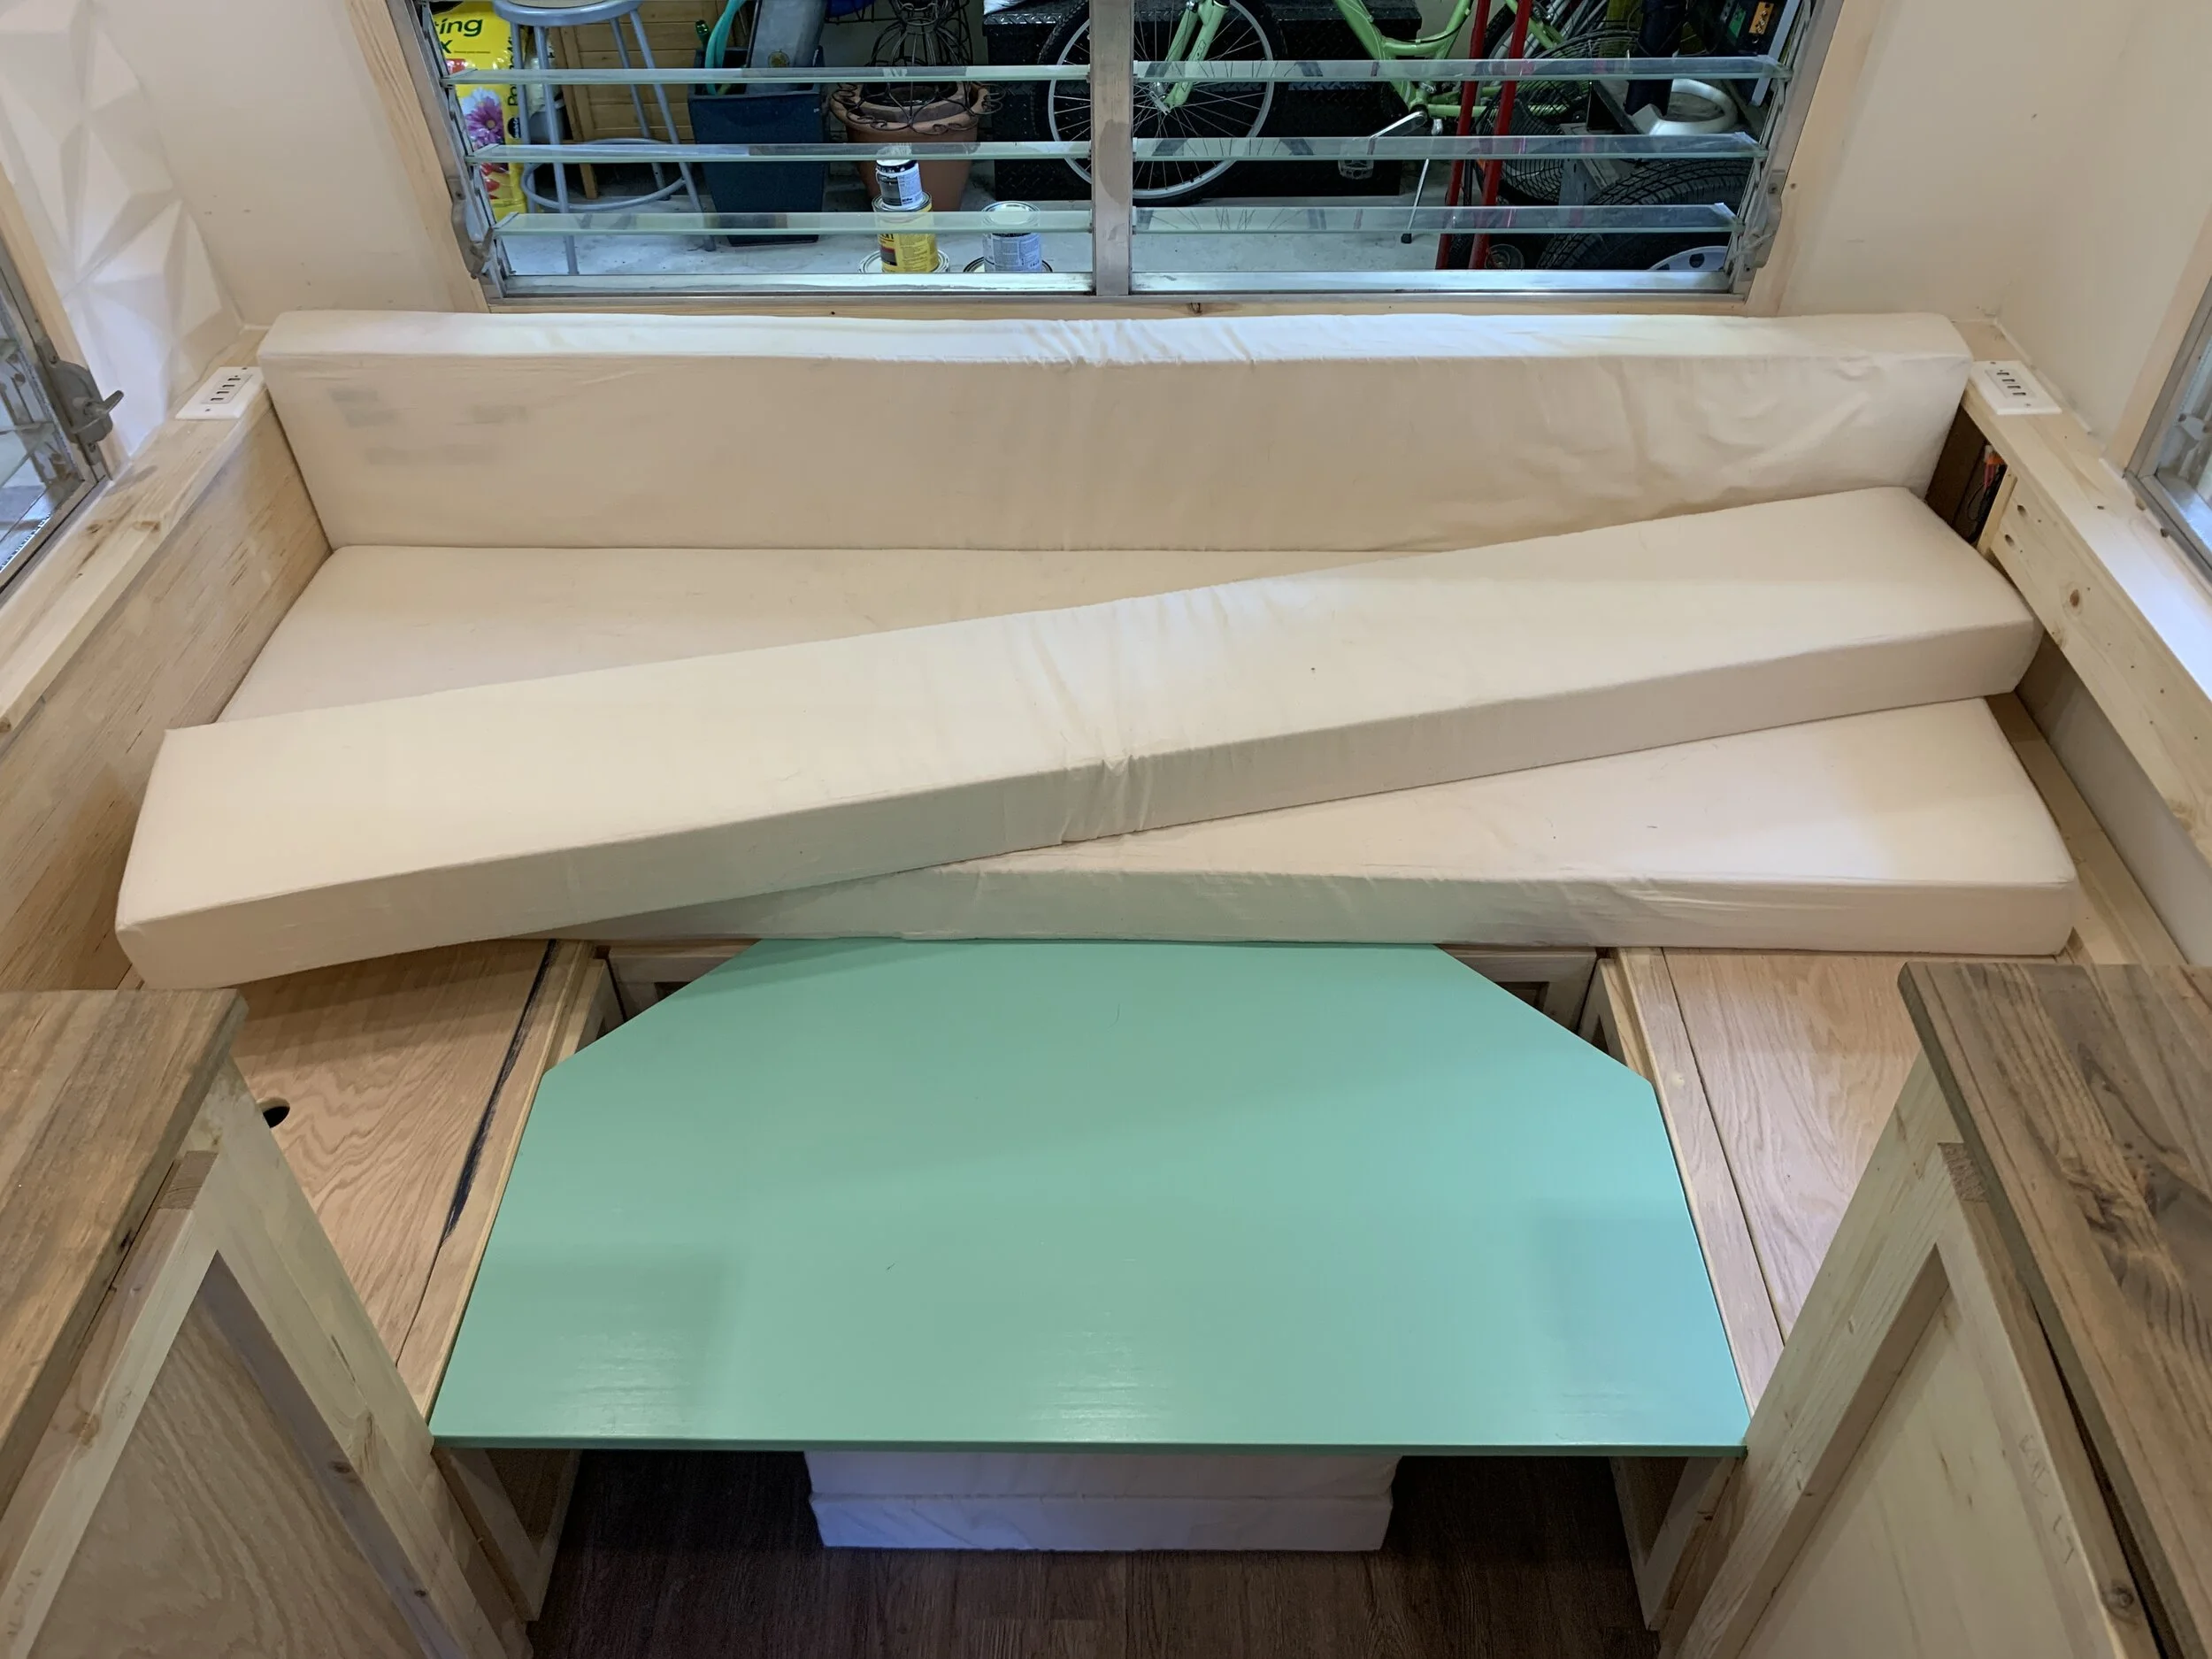
We’ll share the next phase of the dinette “build” when the paint job is complete, because there’s only so much that can (and should) be said about filling cracks. Between now and then we will share the table creation which, if I do say so myself, is pretty stinkin’ cute in all it’s minty glory, and probably maybe the cushions, which are also still quasi-done (made, but not upholstered). Check us out (and follow us) on Instagram if you just can’t wait and need to see what the table looks like. In the meantime here are a few more photos!