The Cameo Camper Renovation: Polishing aluminum window frames + exterior trim
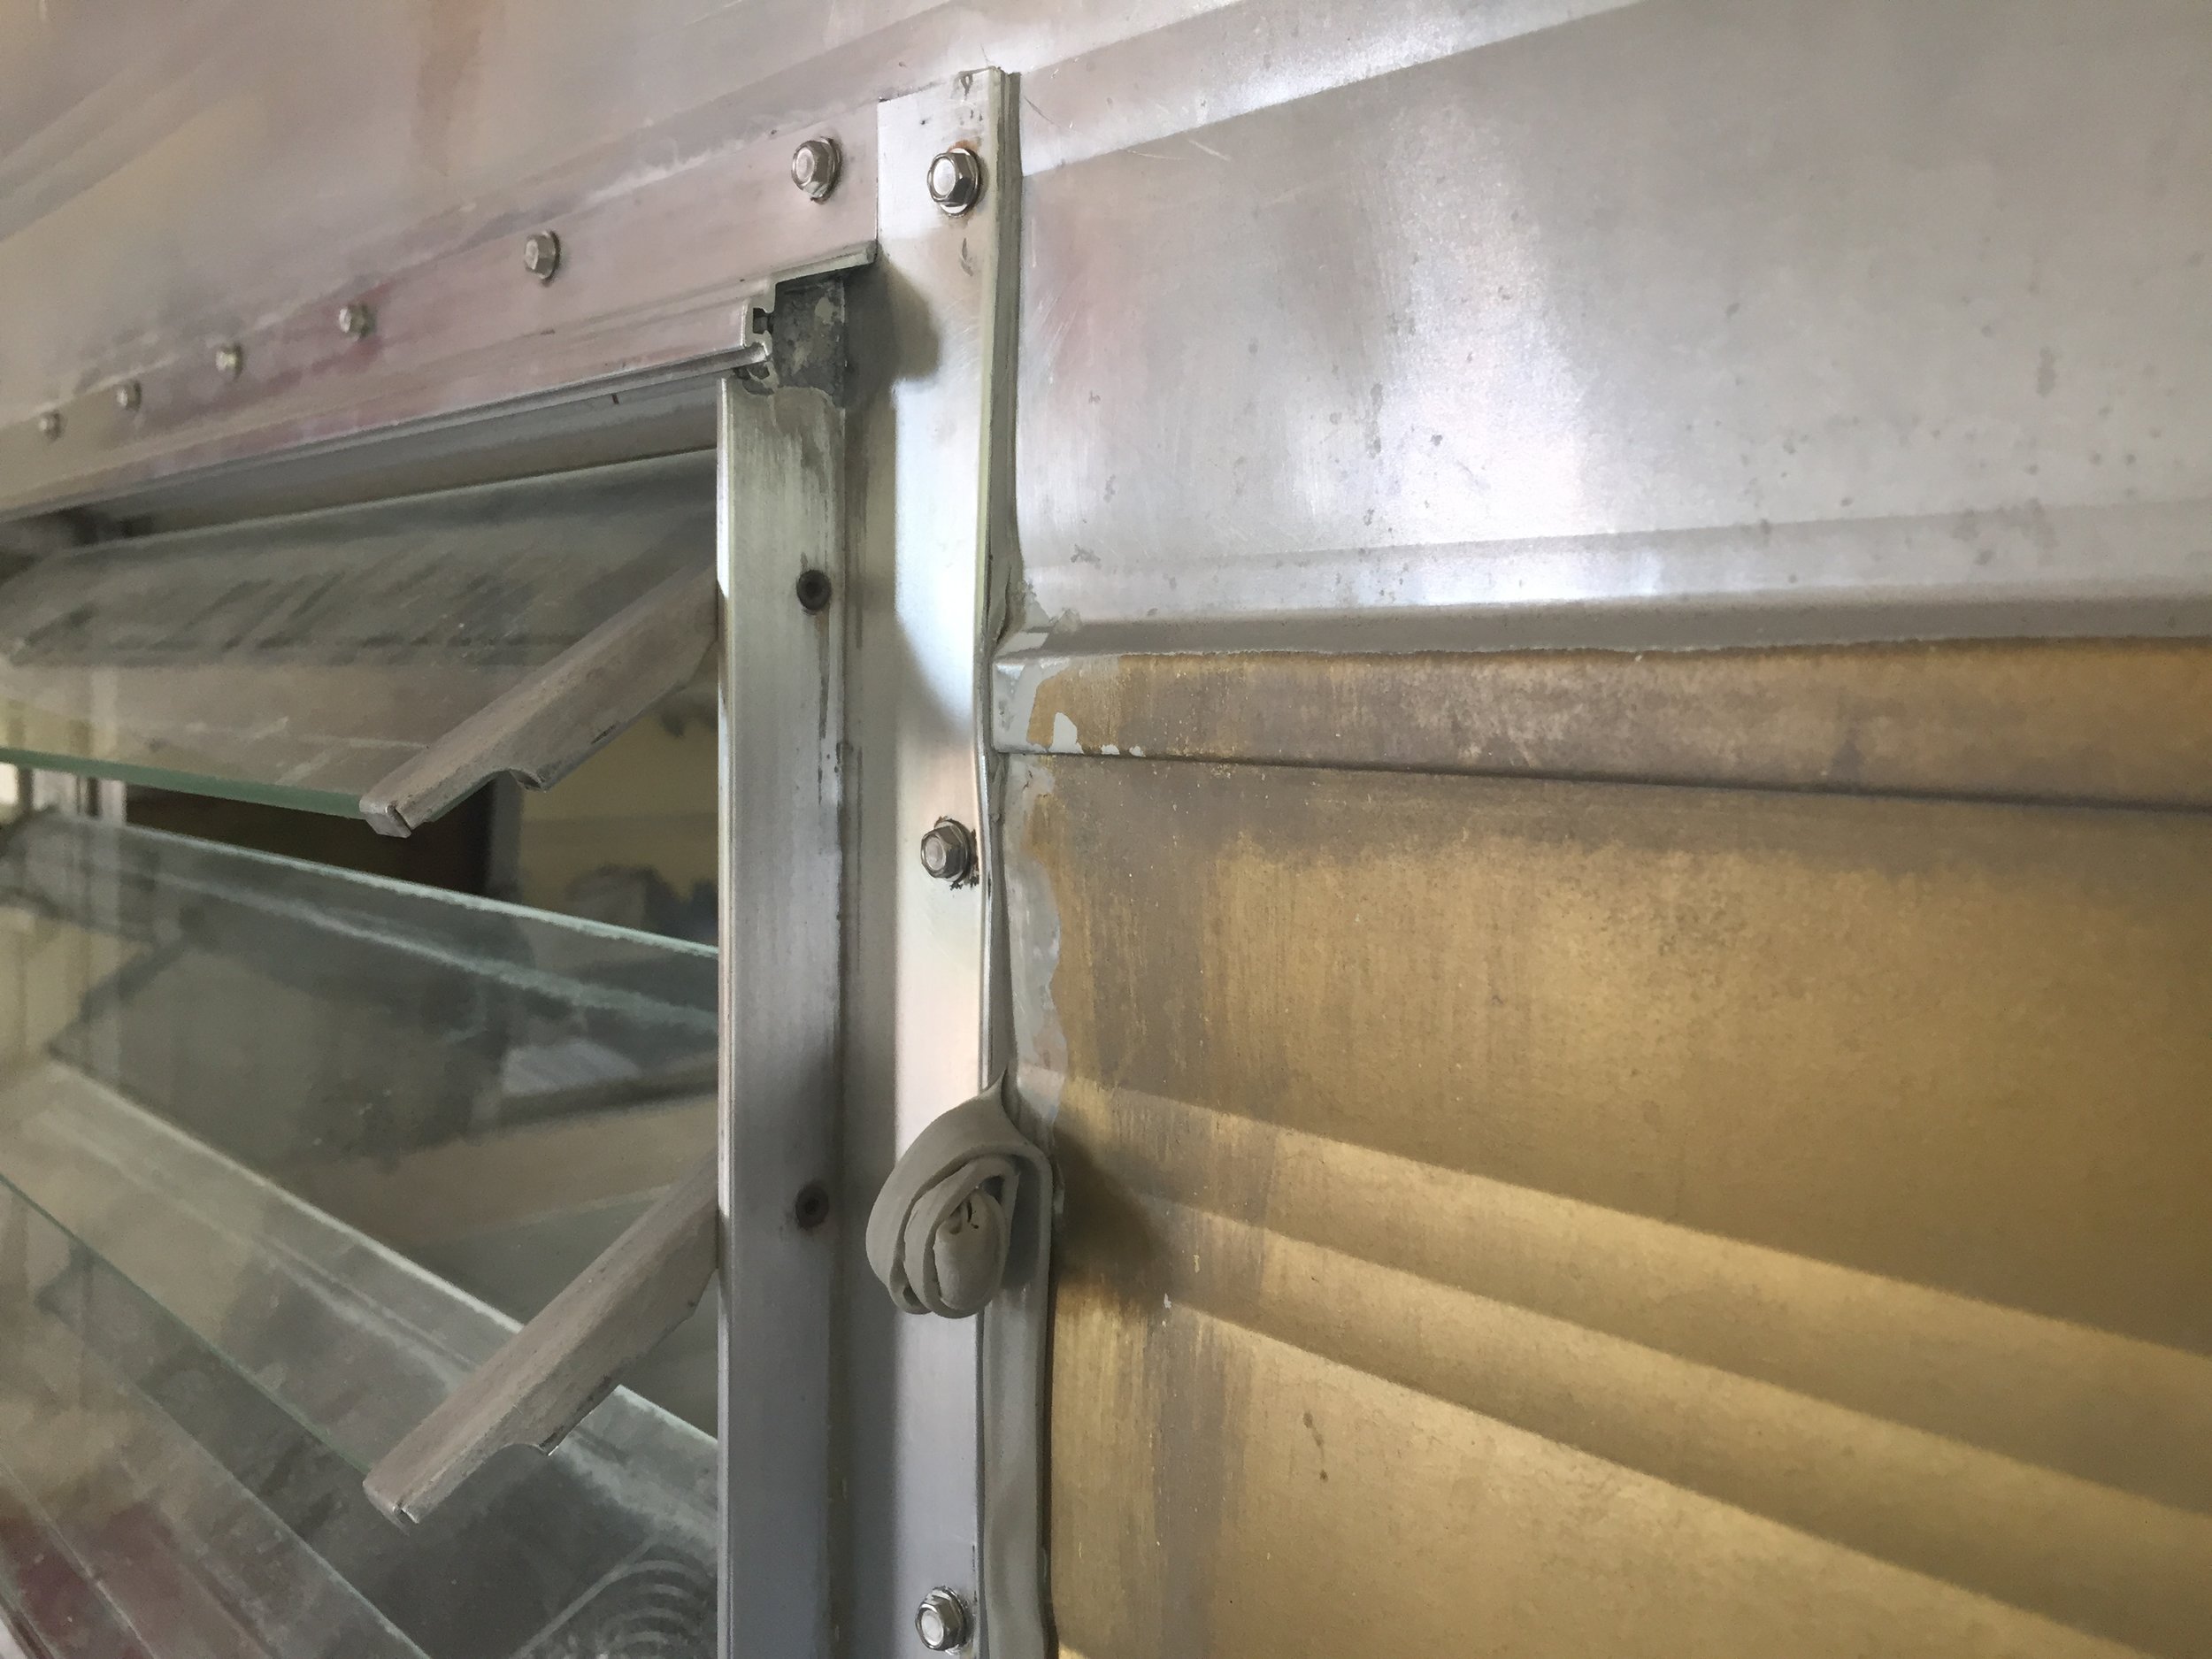
Exterior door frame – the original crusty putty tape, left vs. the new gray stuff underneath the polished frame on the top.
Man, time really flies. Except when you’re hand polishing camper bits. Then it seems to drag a bit. (Our sad chant over the last handful of weeks seems to be to the tune of “it’ll be so nice when we’re finally ready to paint this thing,” and “I bet when we paint, all of a sudden it’s going to look like we just did everything overnight,” and “ouch, my hands hurt”.) But, every laborious and painstaking swipe of steel wool brings us closer to a finished camper, and for that we are truly grateful. So enough jabbering, let’s get to what it takes to get the exterior windows and door trim lookin’ all sorts of dapper. If you’re behind, don’t you fret. You can catch up on our camper renovation here.
Scope creep + Project overview
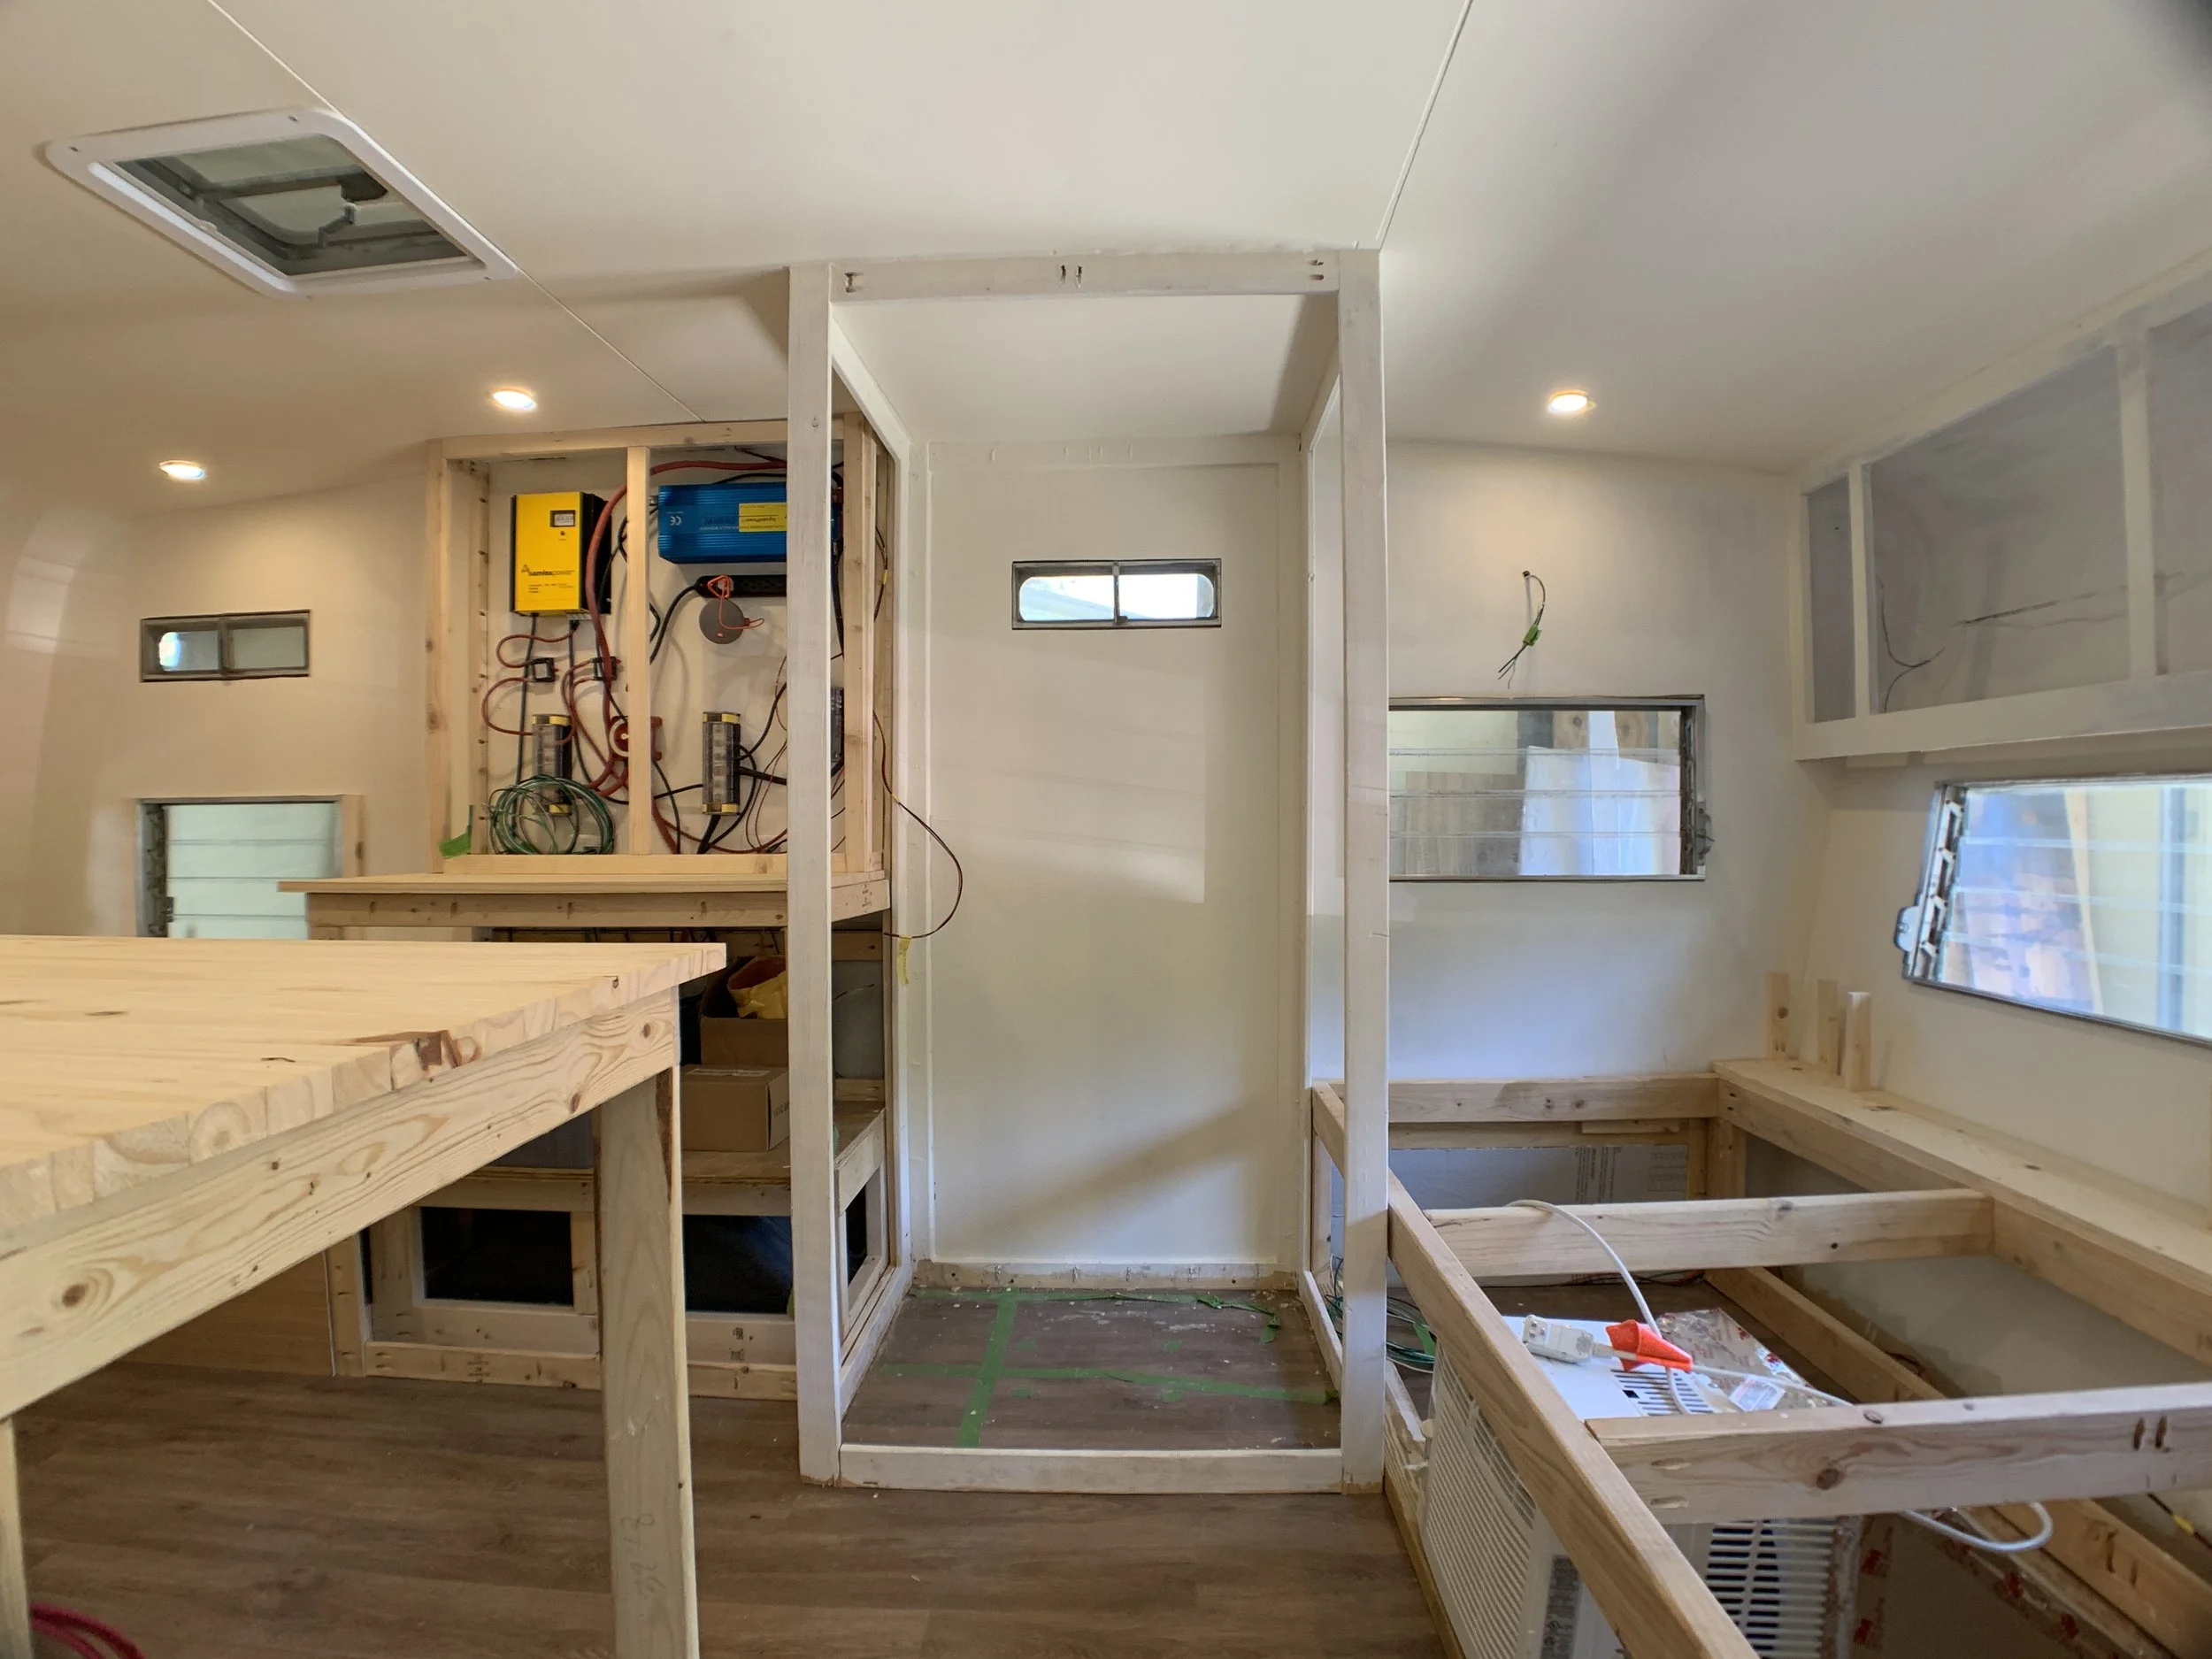
So like everything with this project, I’ve been struggling with what to blog and when, since I like to share neat little packages with y’all so you can get some sense of closure for each “type” of project. However, this is kind of difficult when a seemingly quick to-do, like “how to polish window frames and exterior trim” happens in reality. You see, in the ongoing effort to waterproof the exterior, we decided we needed to replace the butyl putty tape (remember “Satan’s bubblegum” from last time) that helps seal and secure the windows to the camper walls. Replacing that stuff meant we had to remove all 10 windows completely so we could get the surfaces cleaned and prepped for new putty tape. Because we’re planning on keeping the window and door trim bare silver, we took this as an opportunity to clean and polish it while the windows were out and we didn’t have screw heads to worry about. We also replaced the crusty little window dots holding in the glass slats. You with me? I hope you said yes because there’s really no way for me to know. Onward!
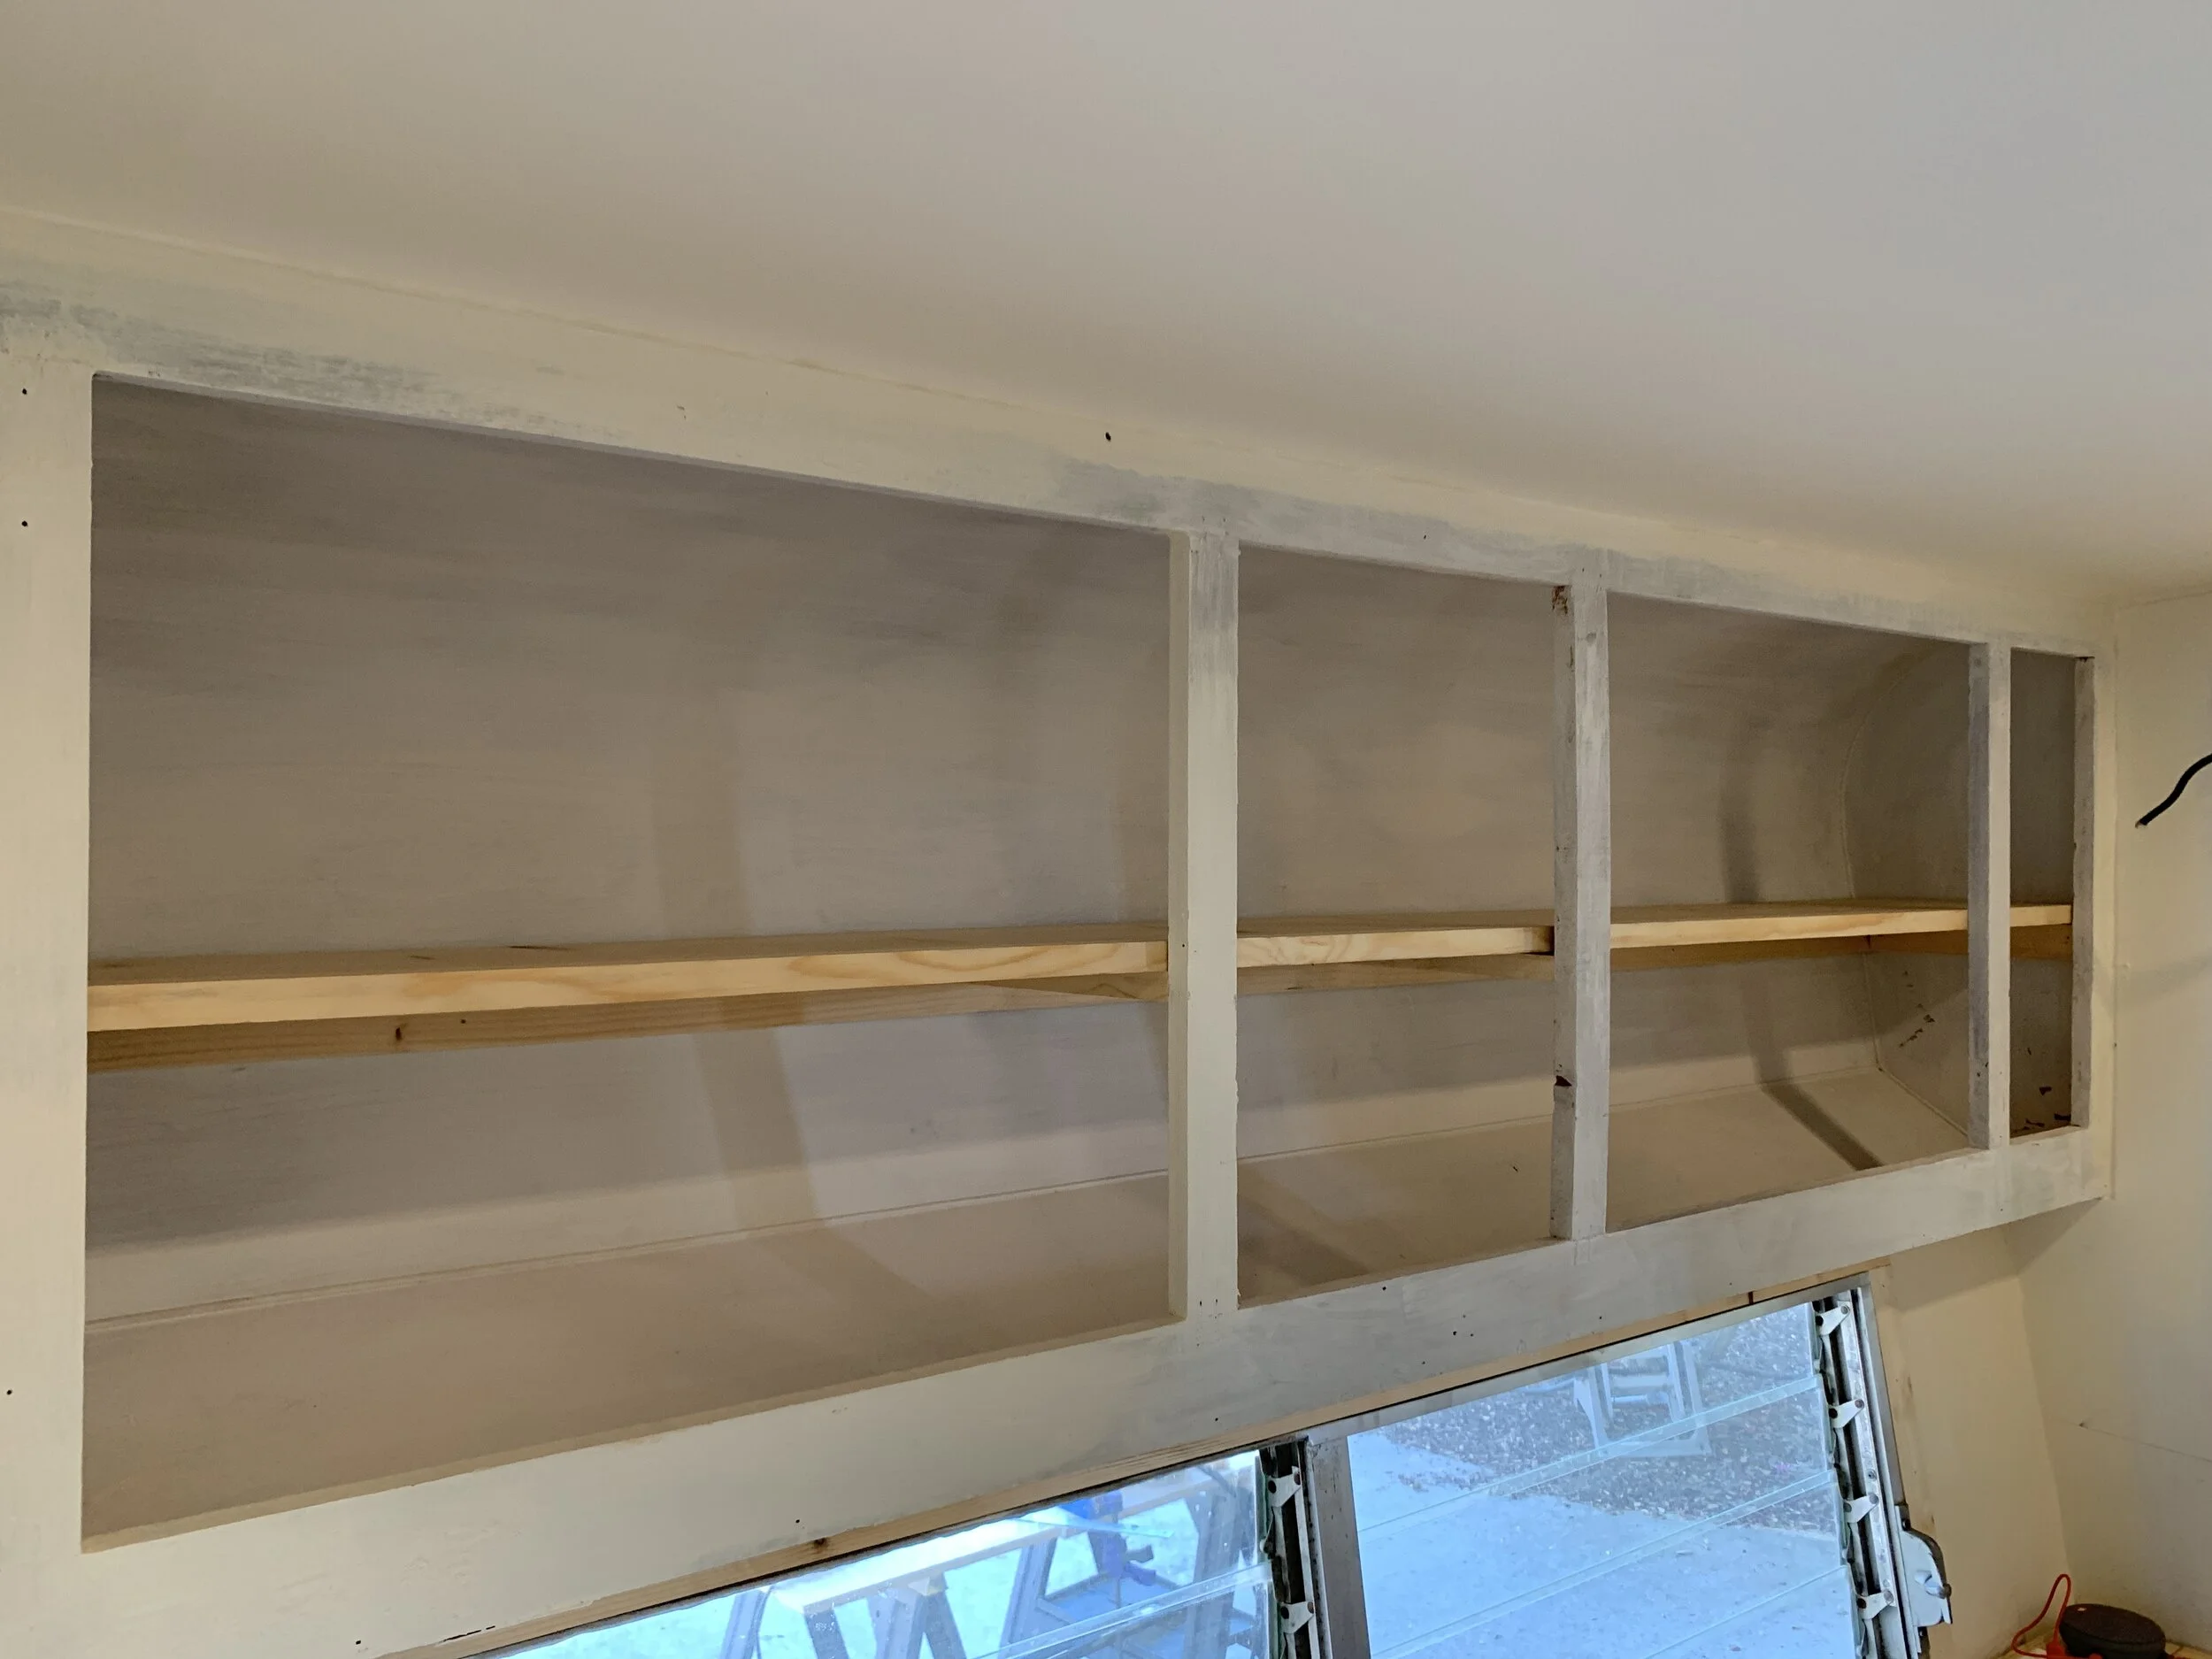
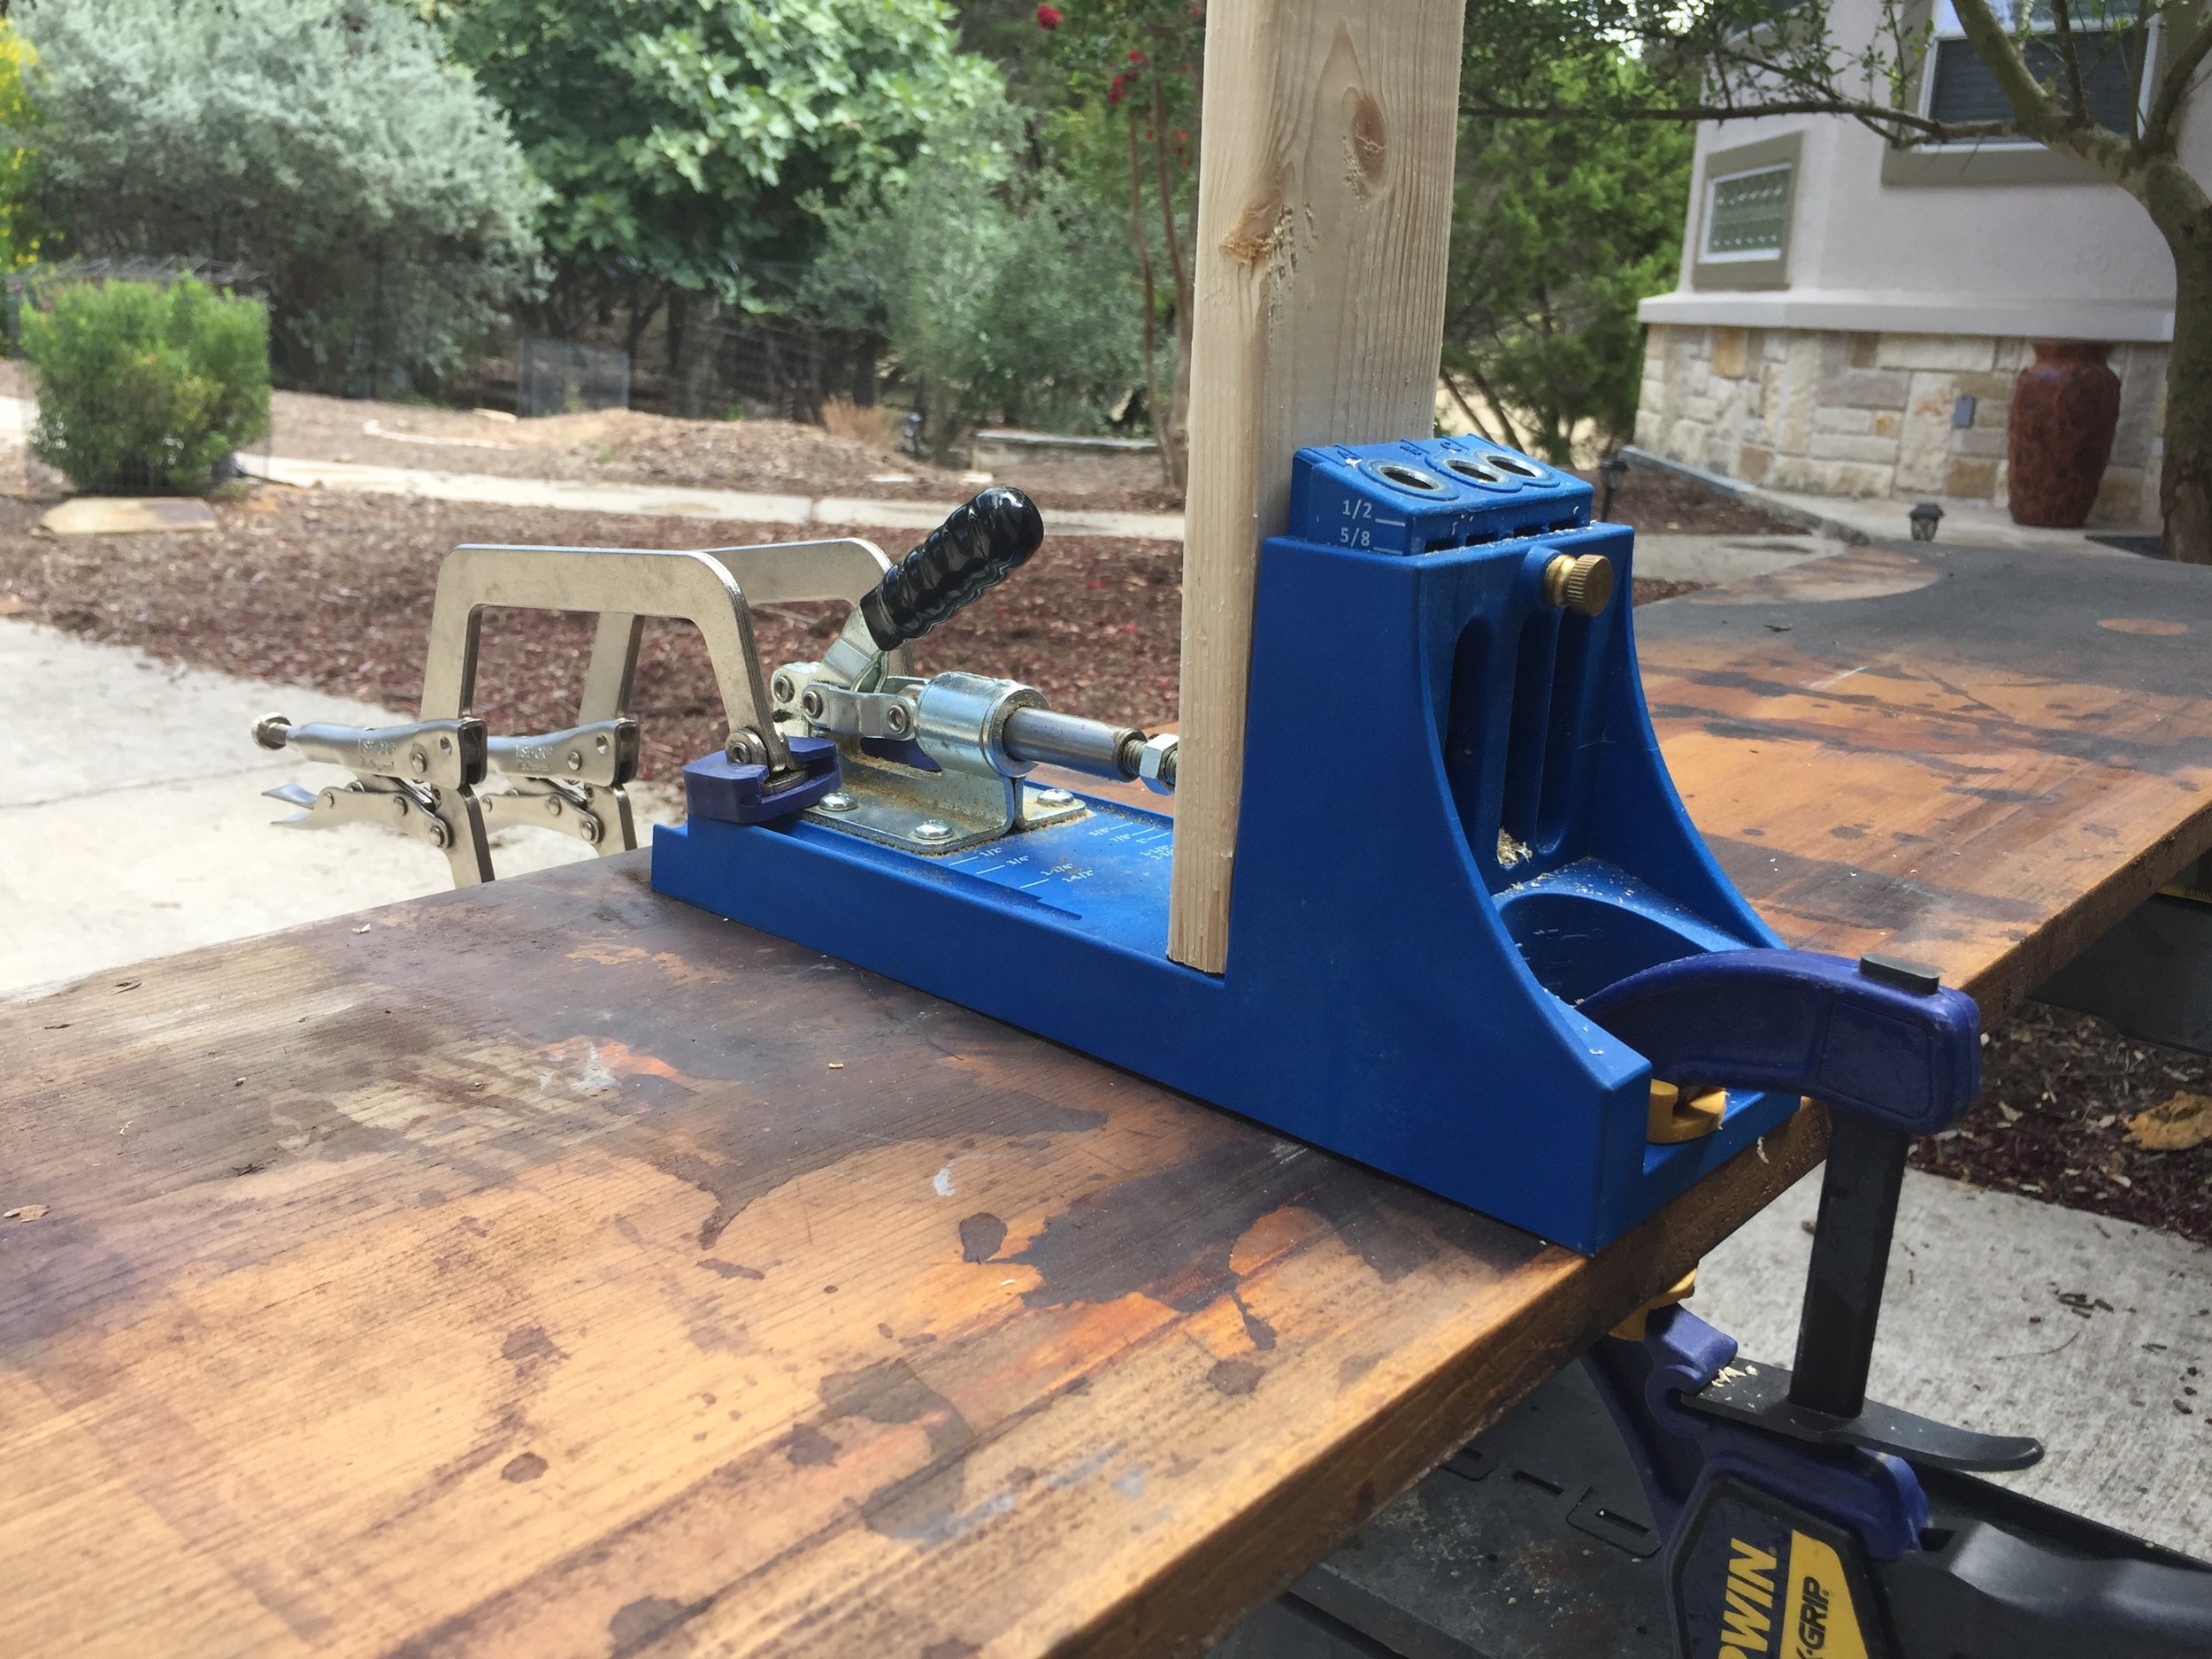
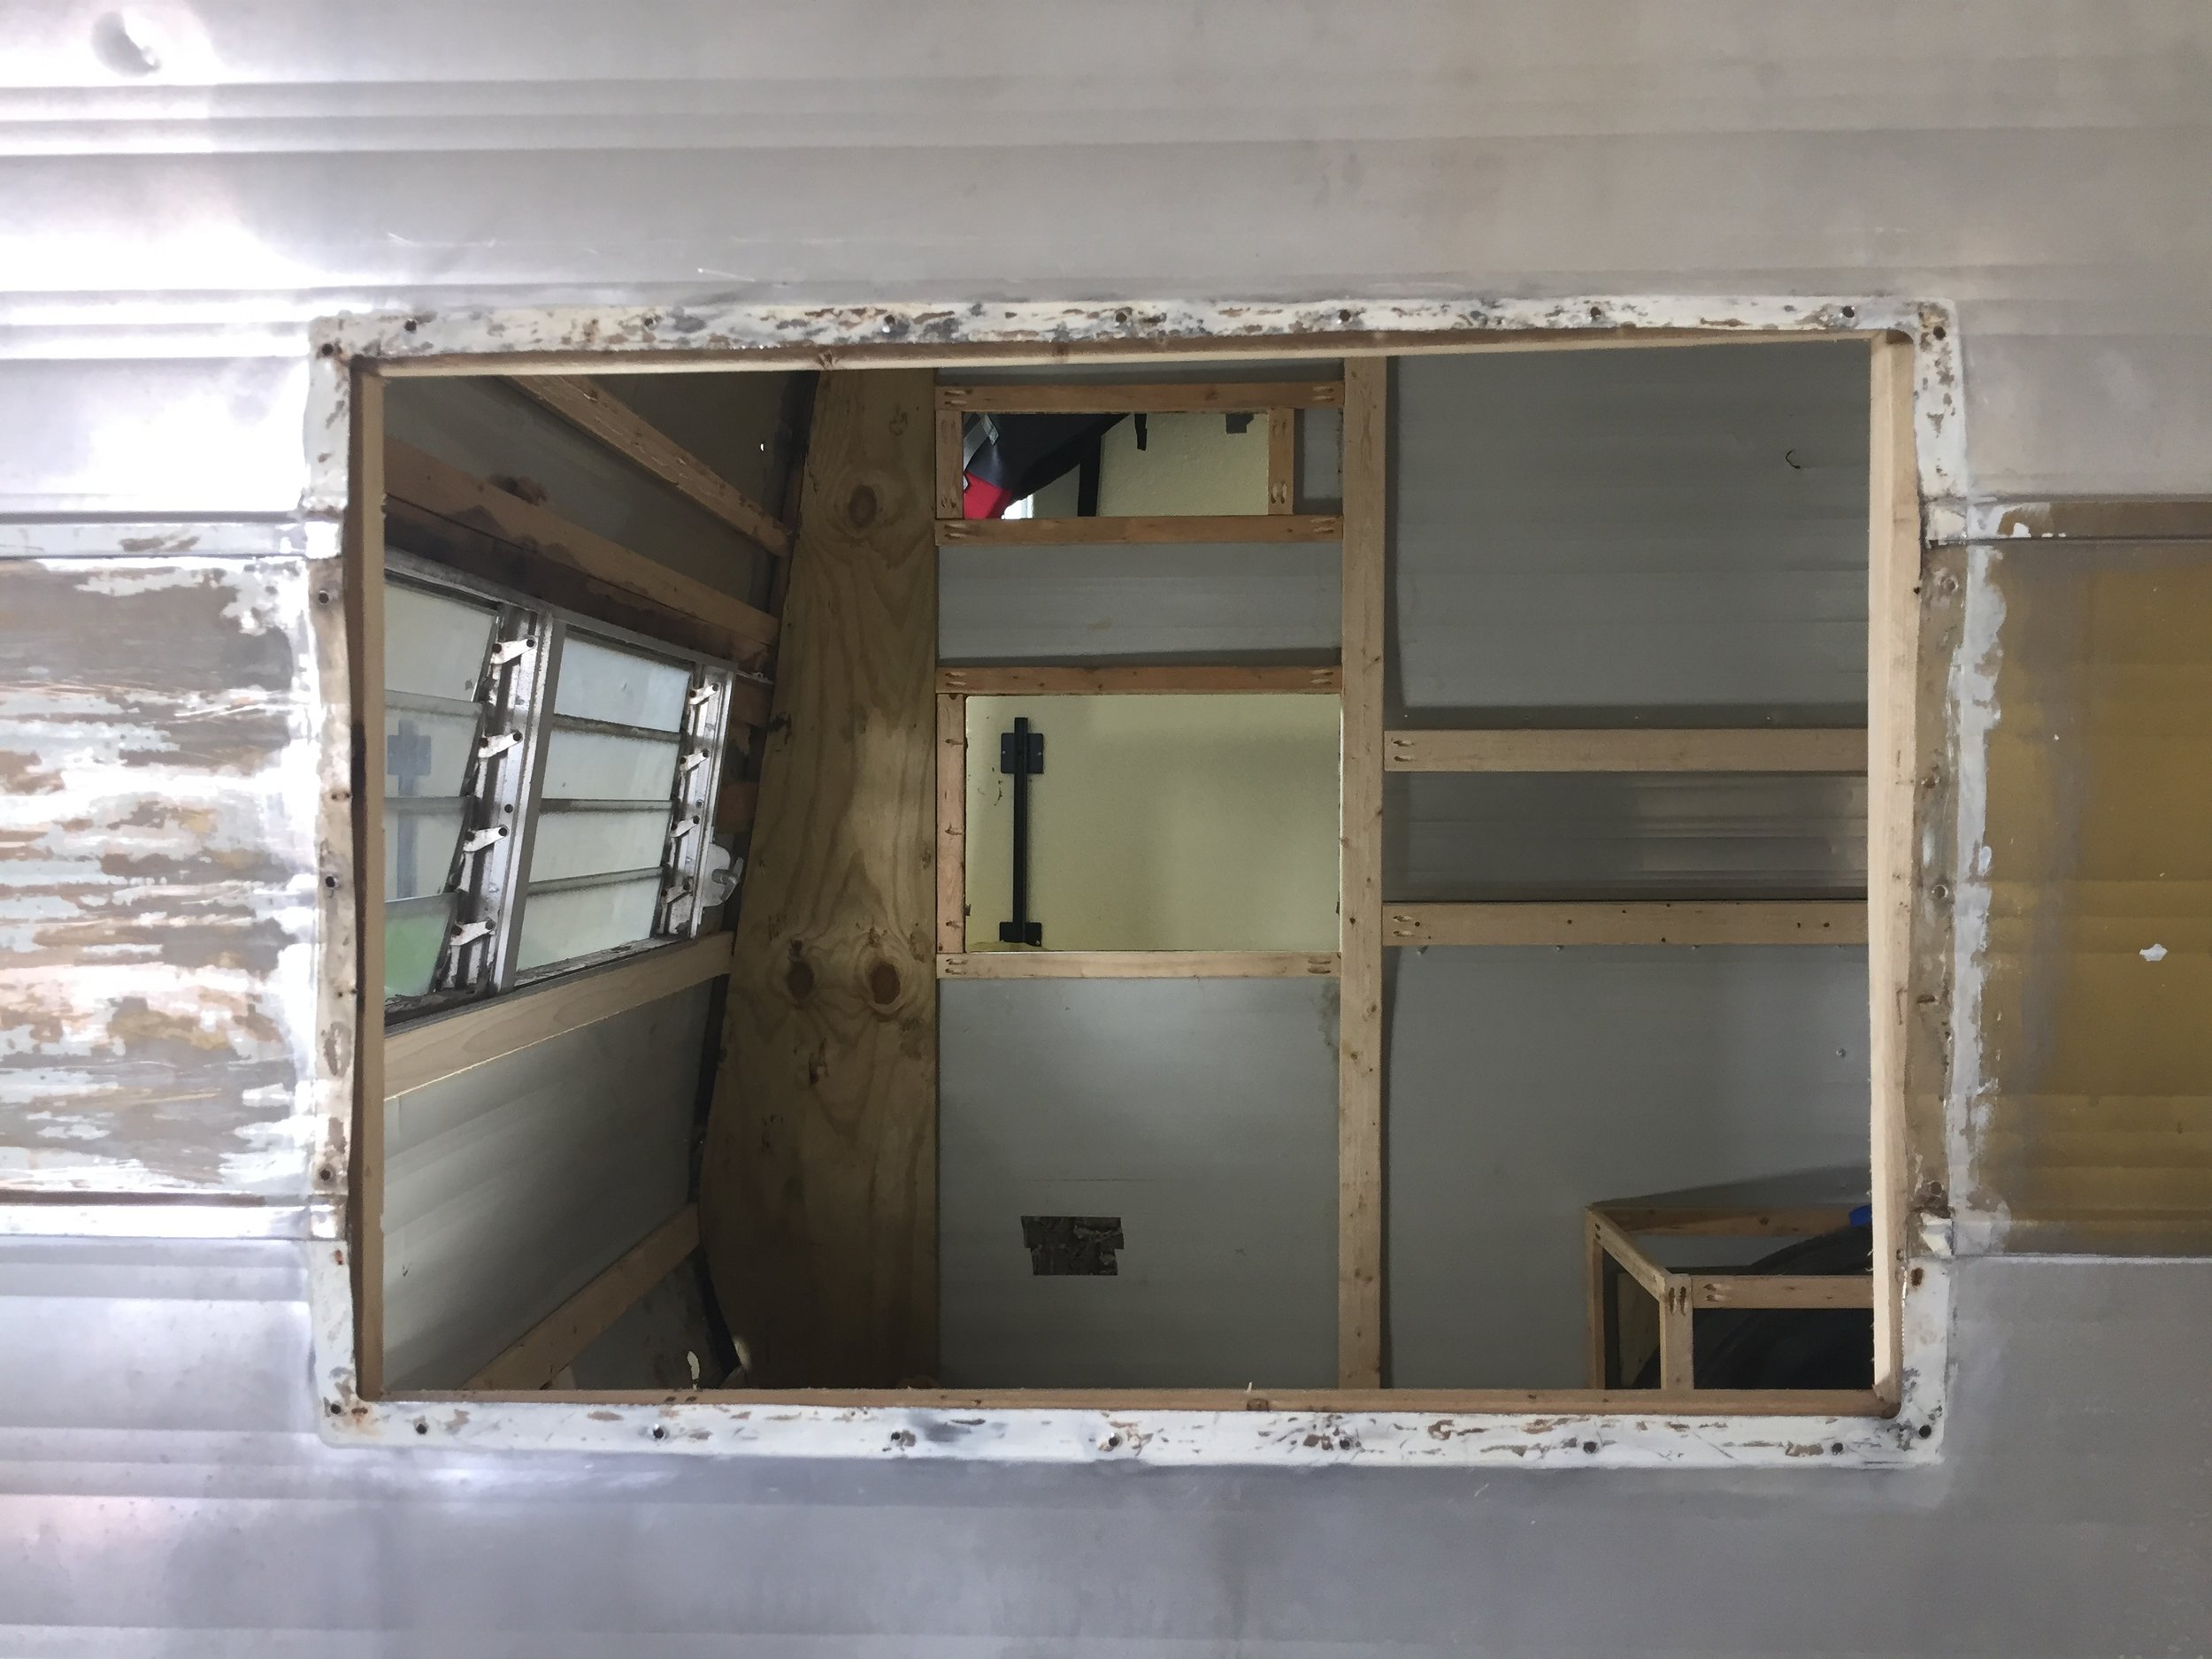
Well, as if that wasn’t enough fun, in addition to all that, removing the windows also meant now would be the best time to replace all of the framing on the interior that the window frames would screw into. (Partly because some wood was rotten and crumbly from previous water damage, and partly because we didn’t want to be doing all this work only to screw shiny new things into not rotten but still old, stripped, Swiss-cheesey wood). And because it’s one of our projects, this of course snowballed into reframing (yes, again) some more walls and stuff. (Pro tip: Just do it with a Kreg jig the first time! We’ve used it for many a project and this one is no different. Trust us – this pocket hole tool will be your new best friend, and when you’re done with your camper you can use it for all sorts of other stuff like making furniture, built-ins, etc.)
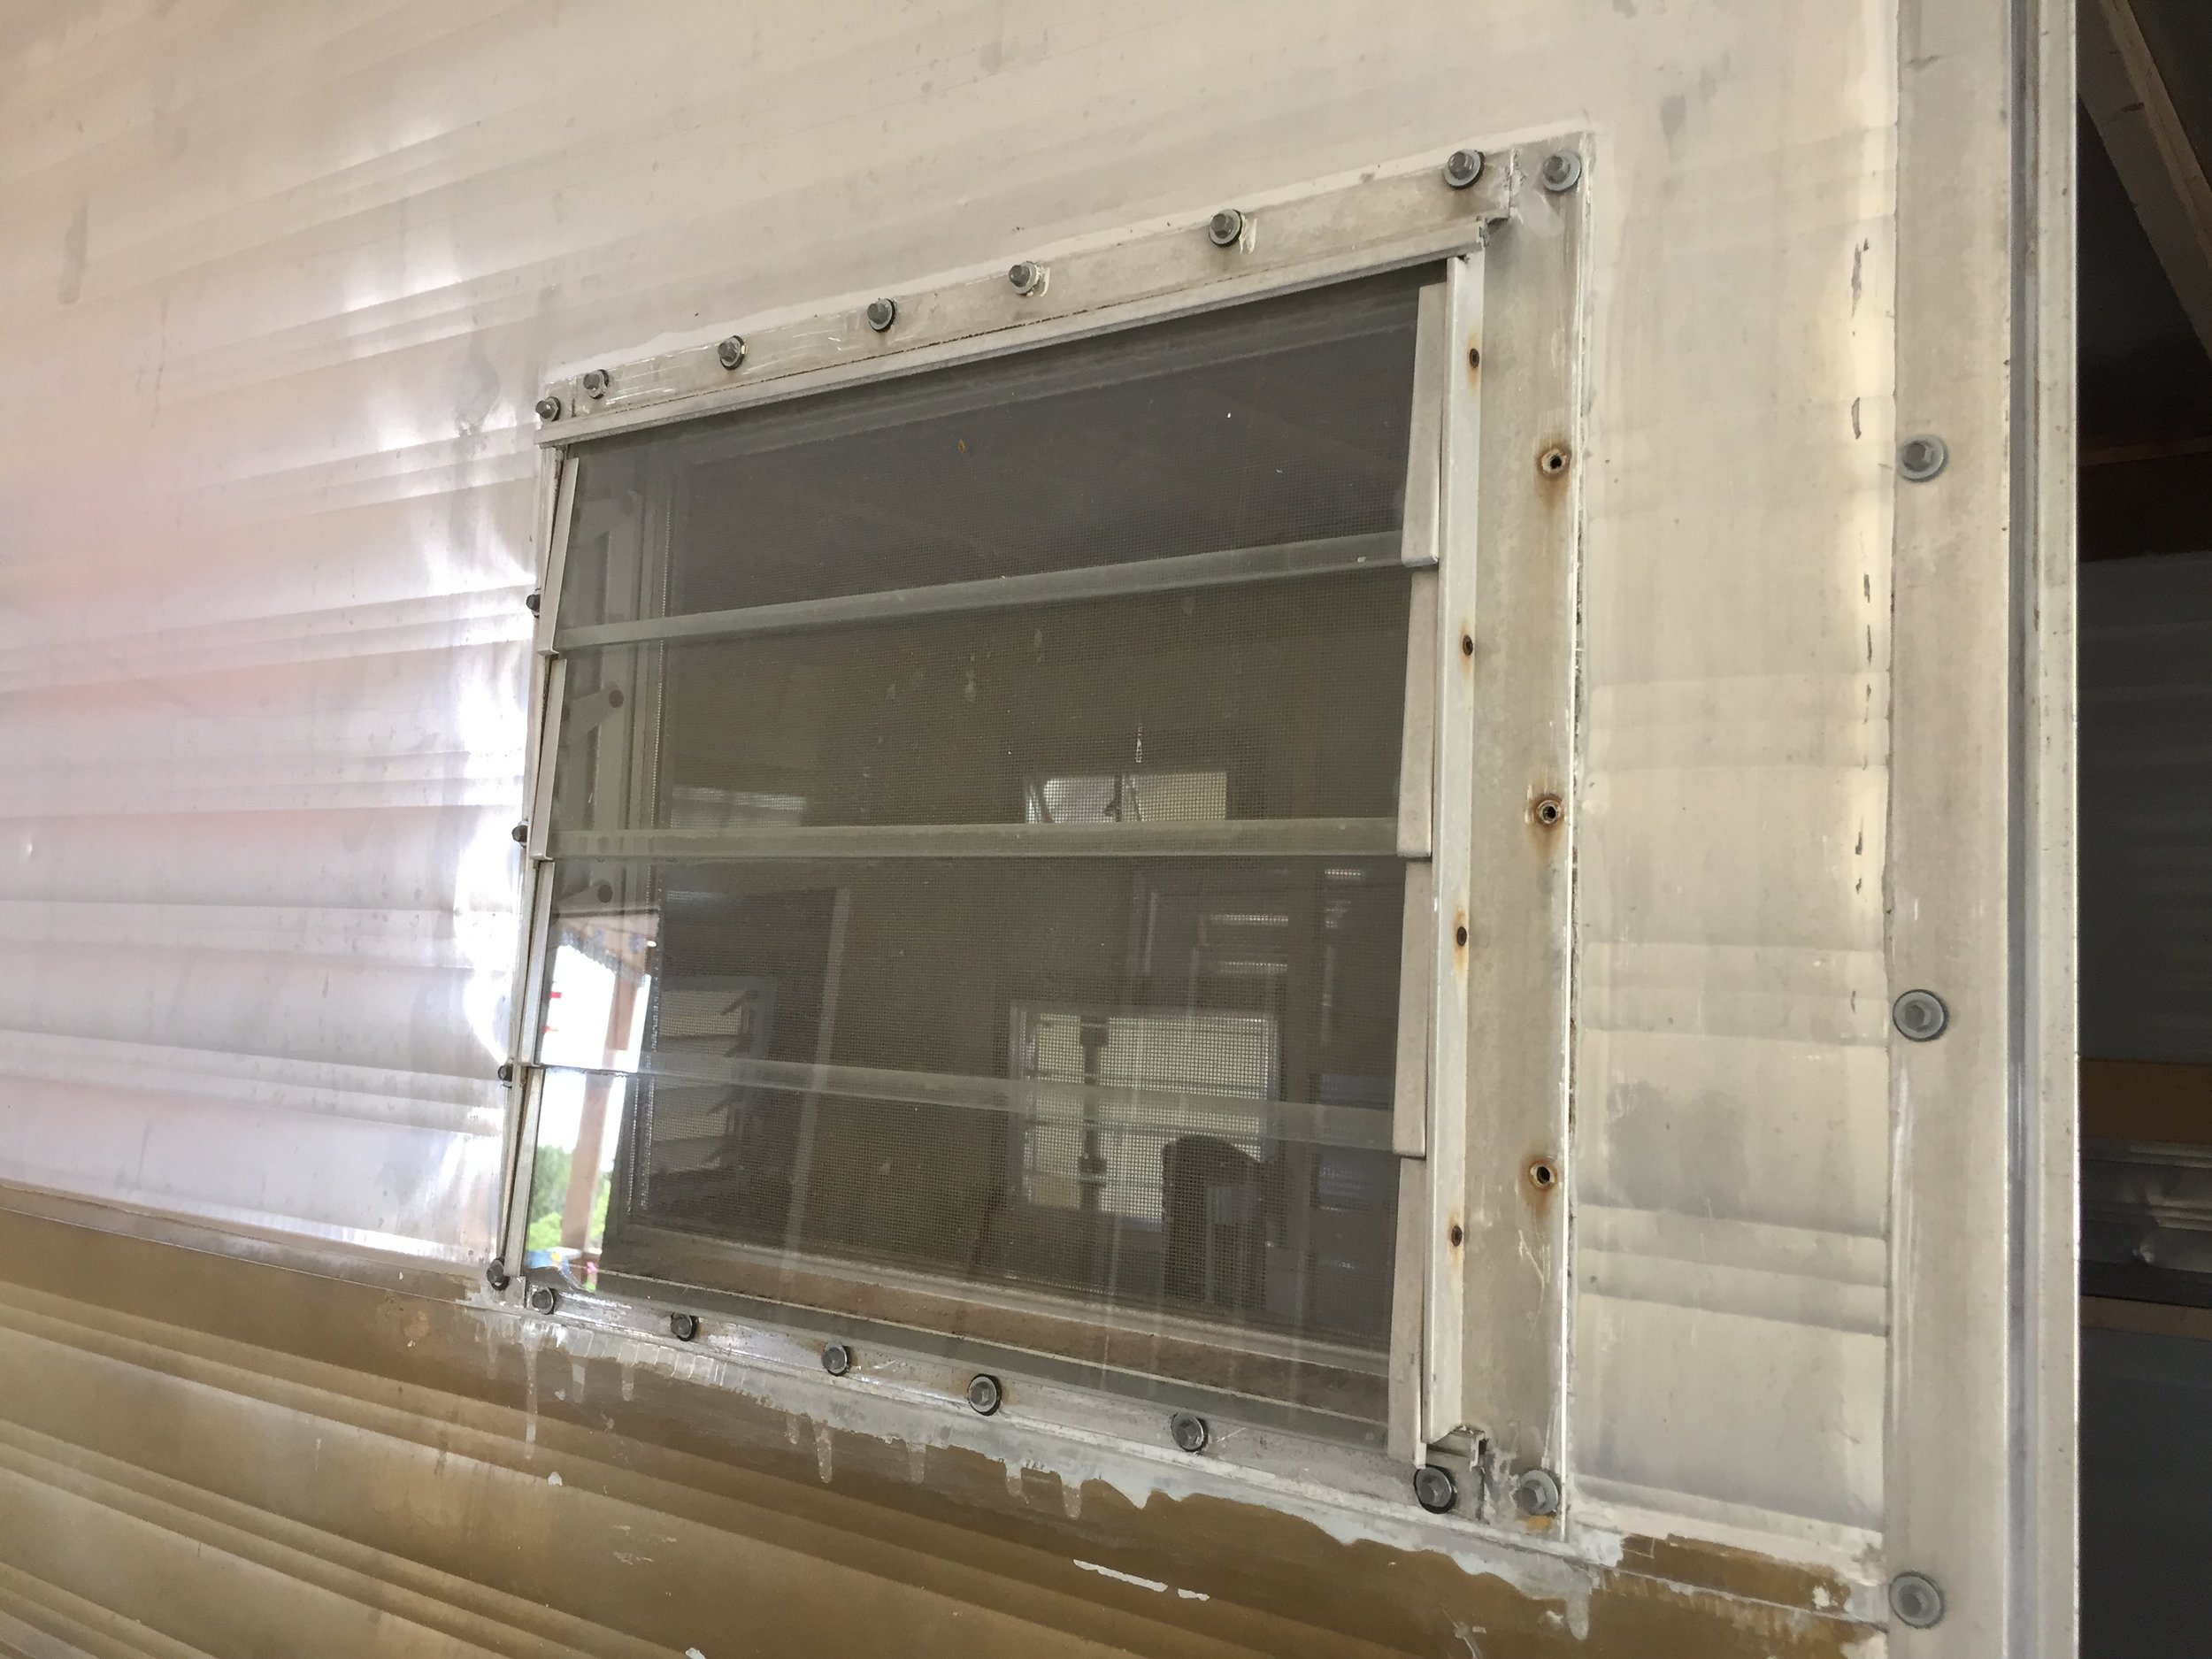
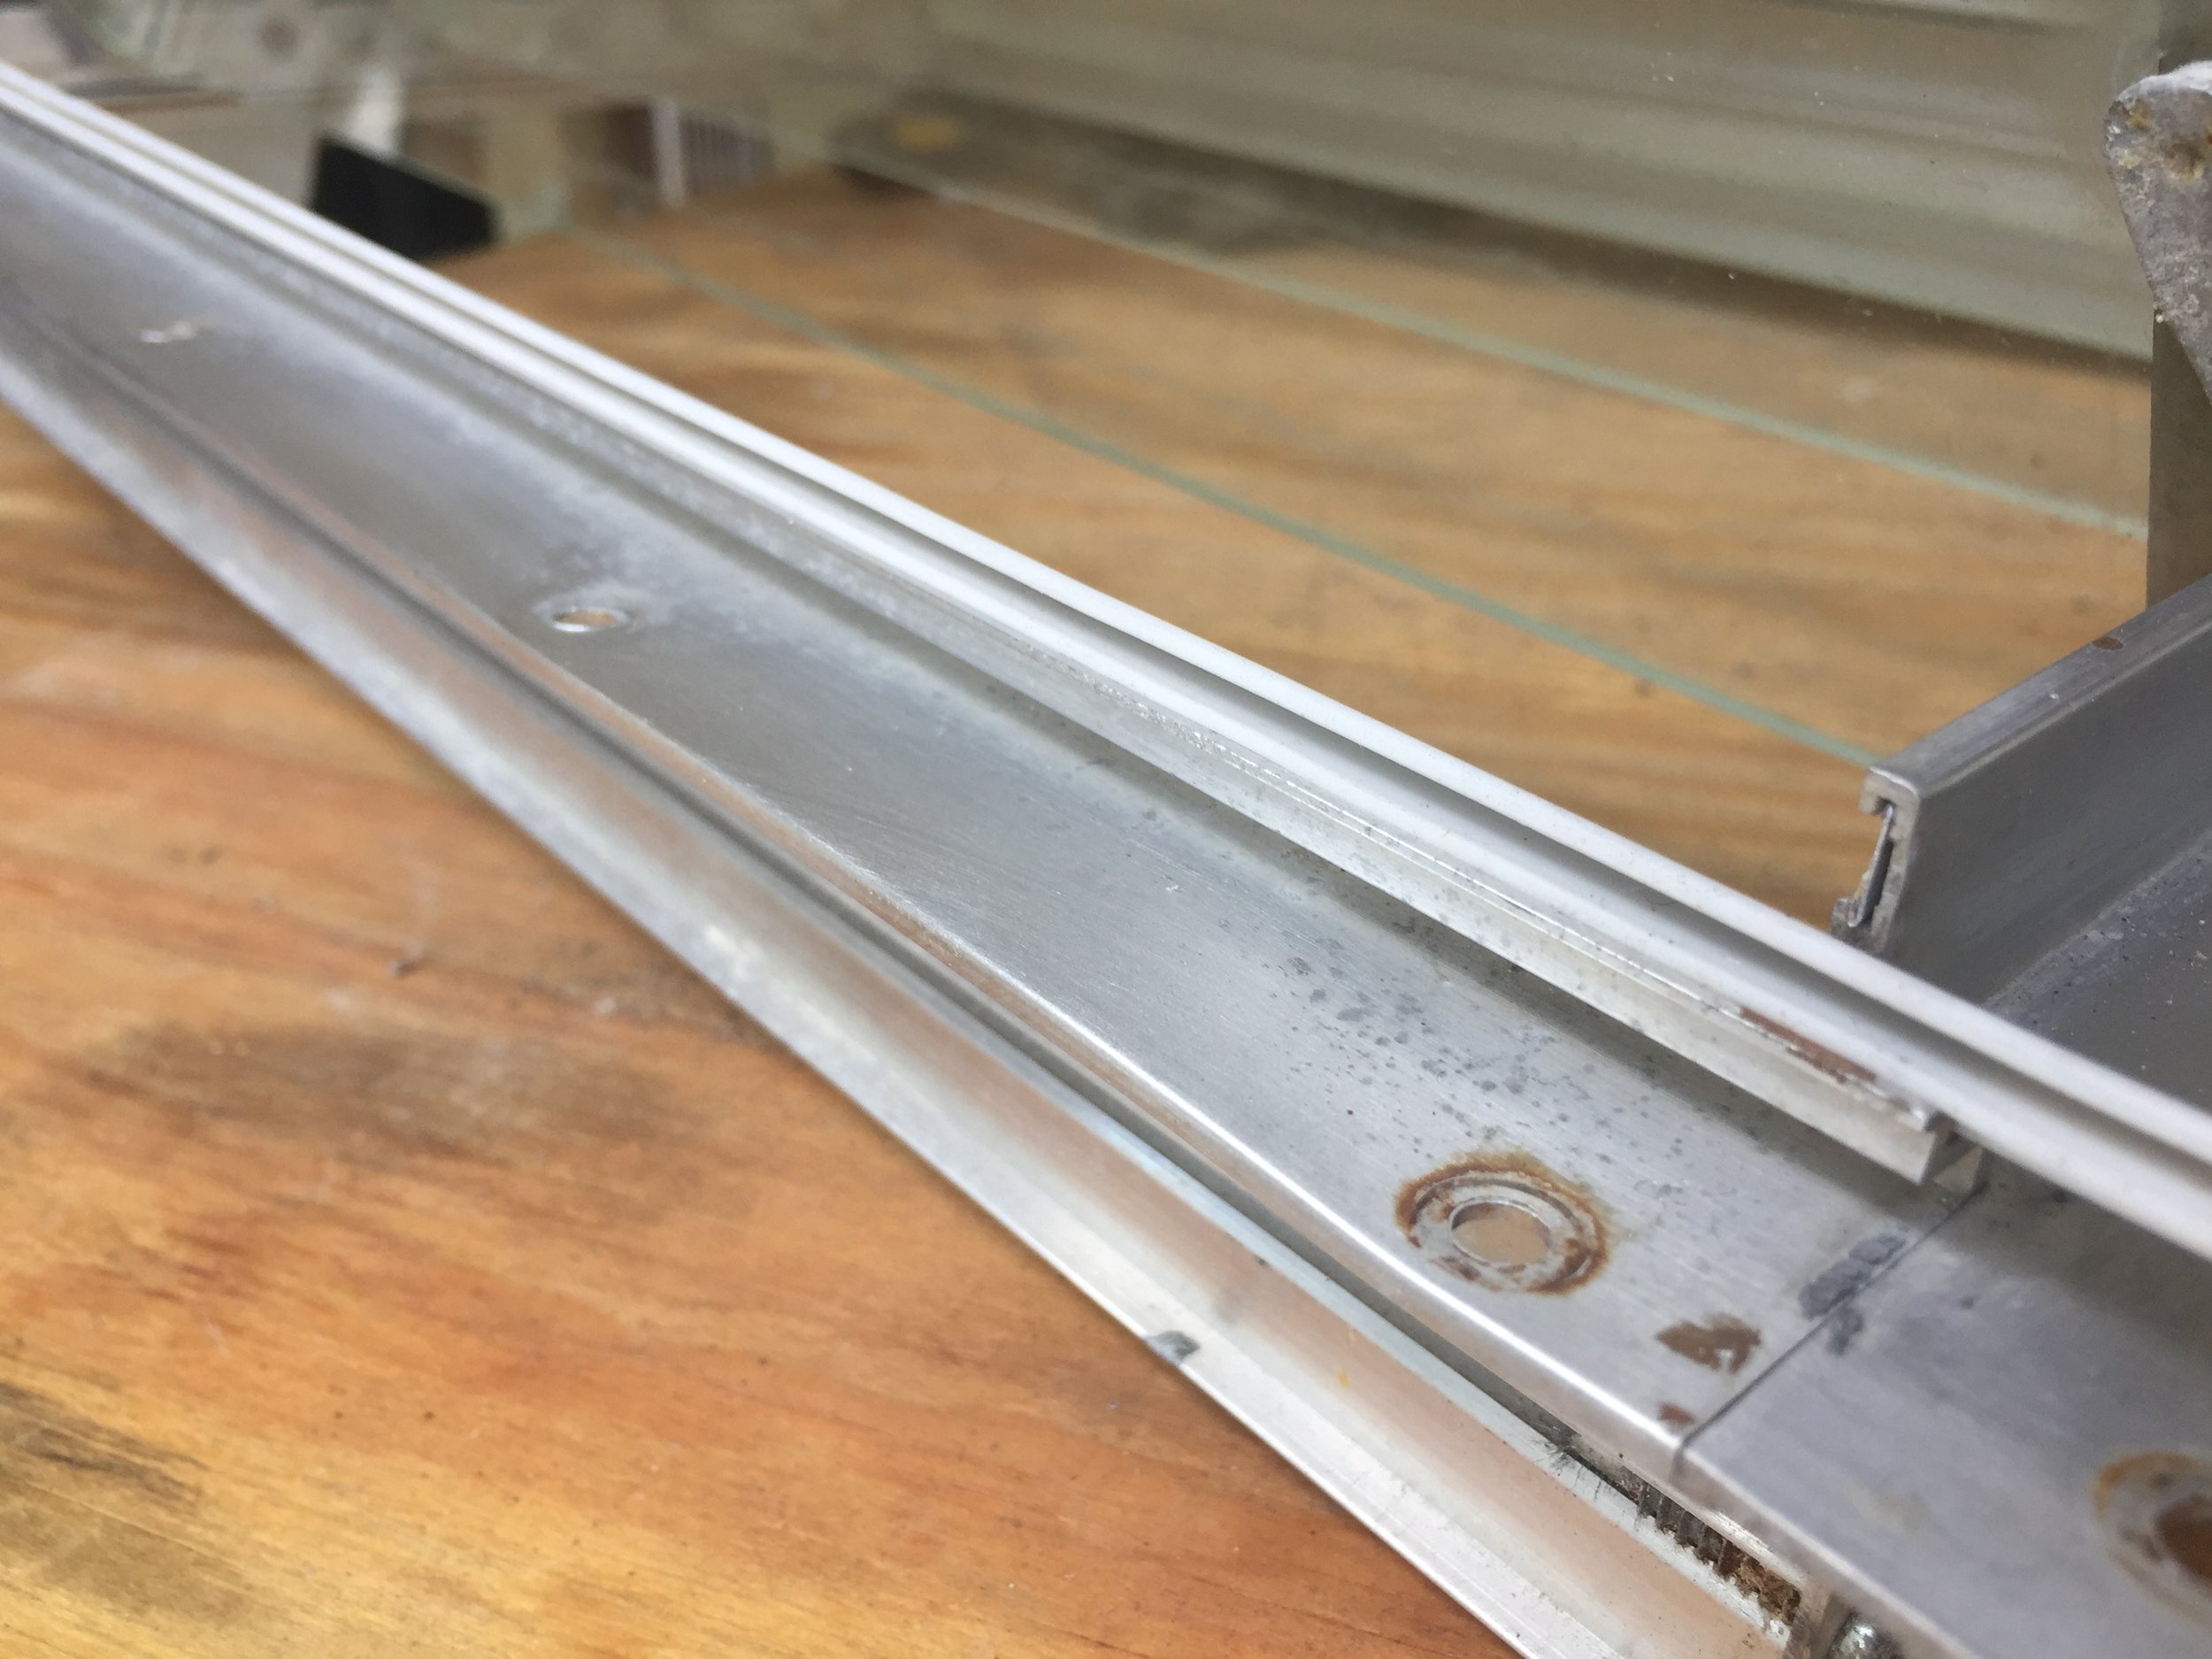
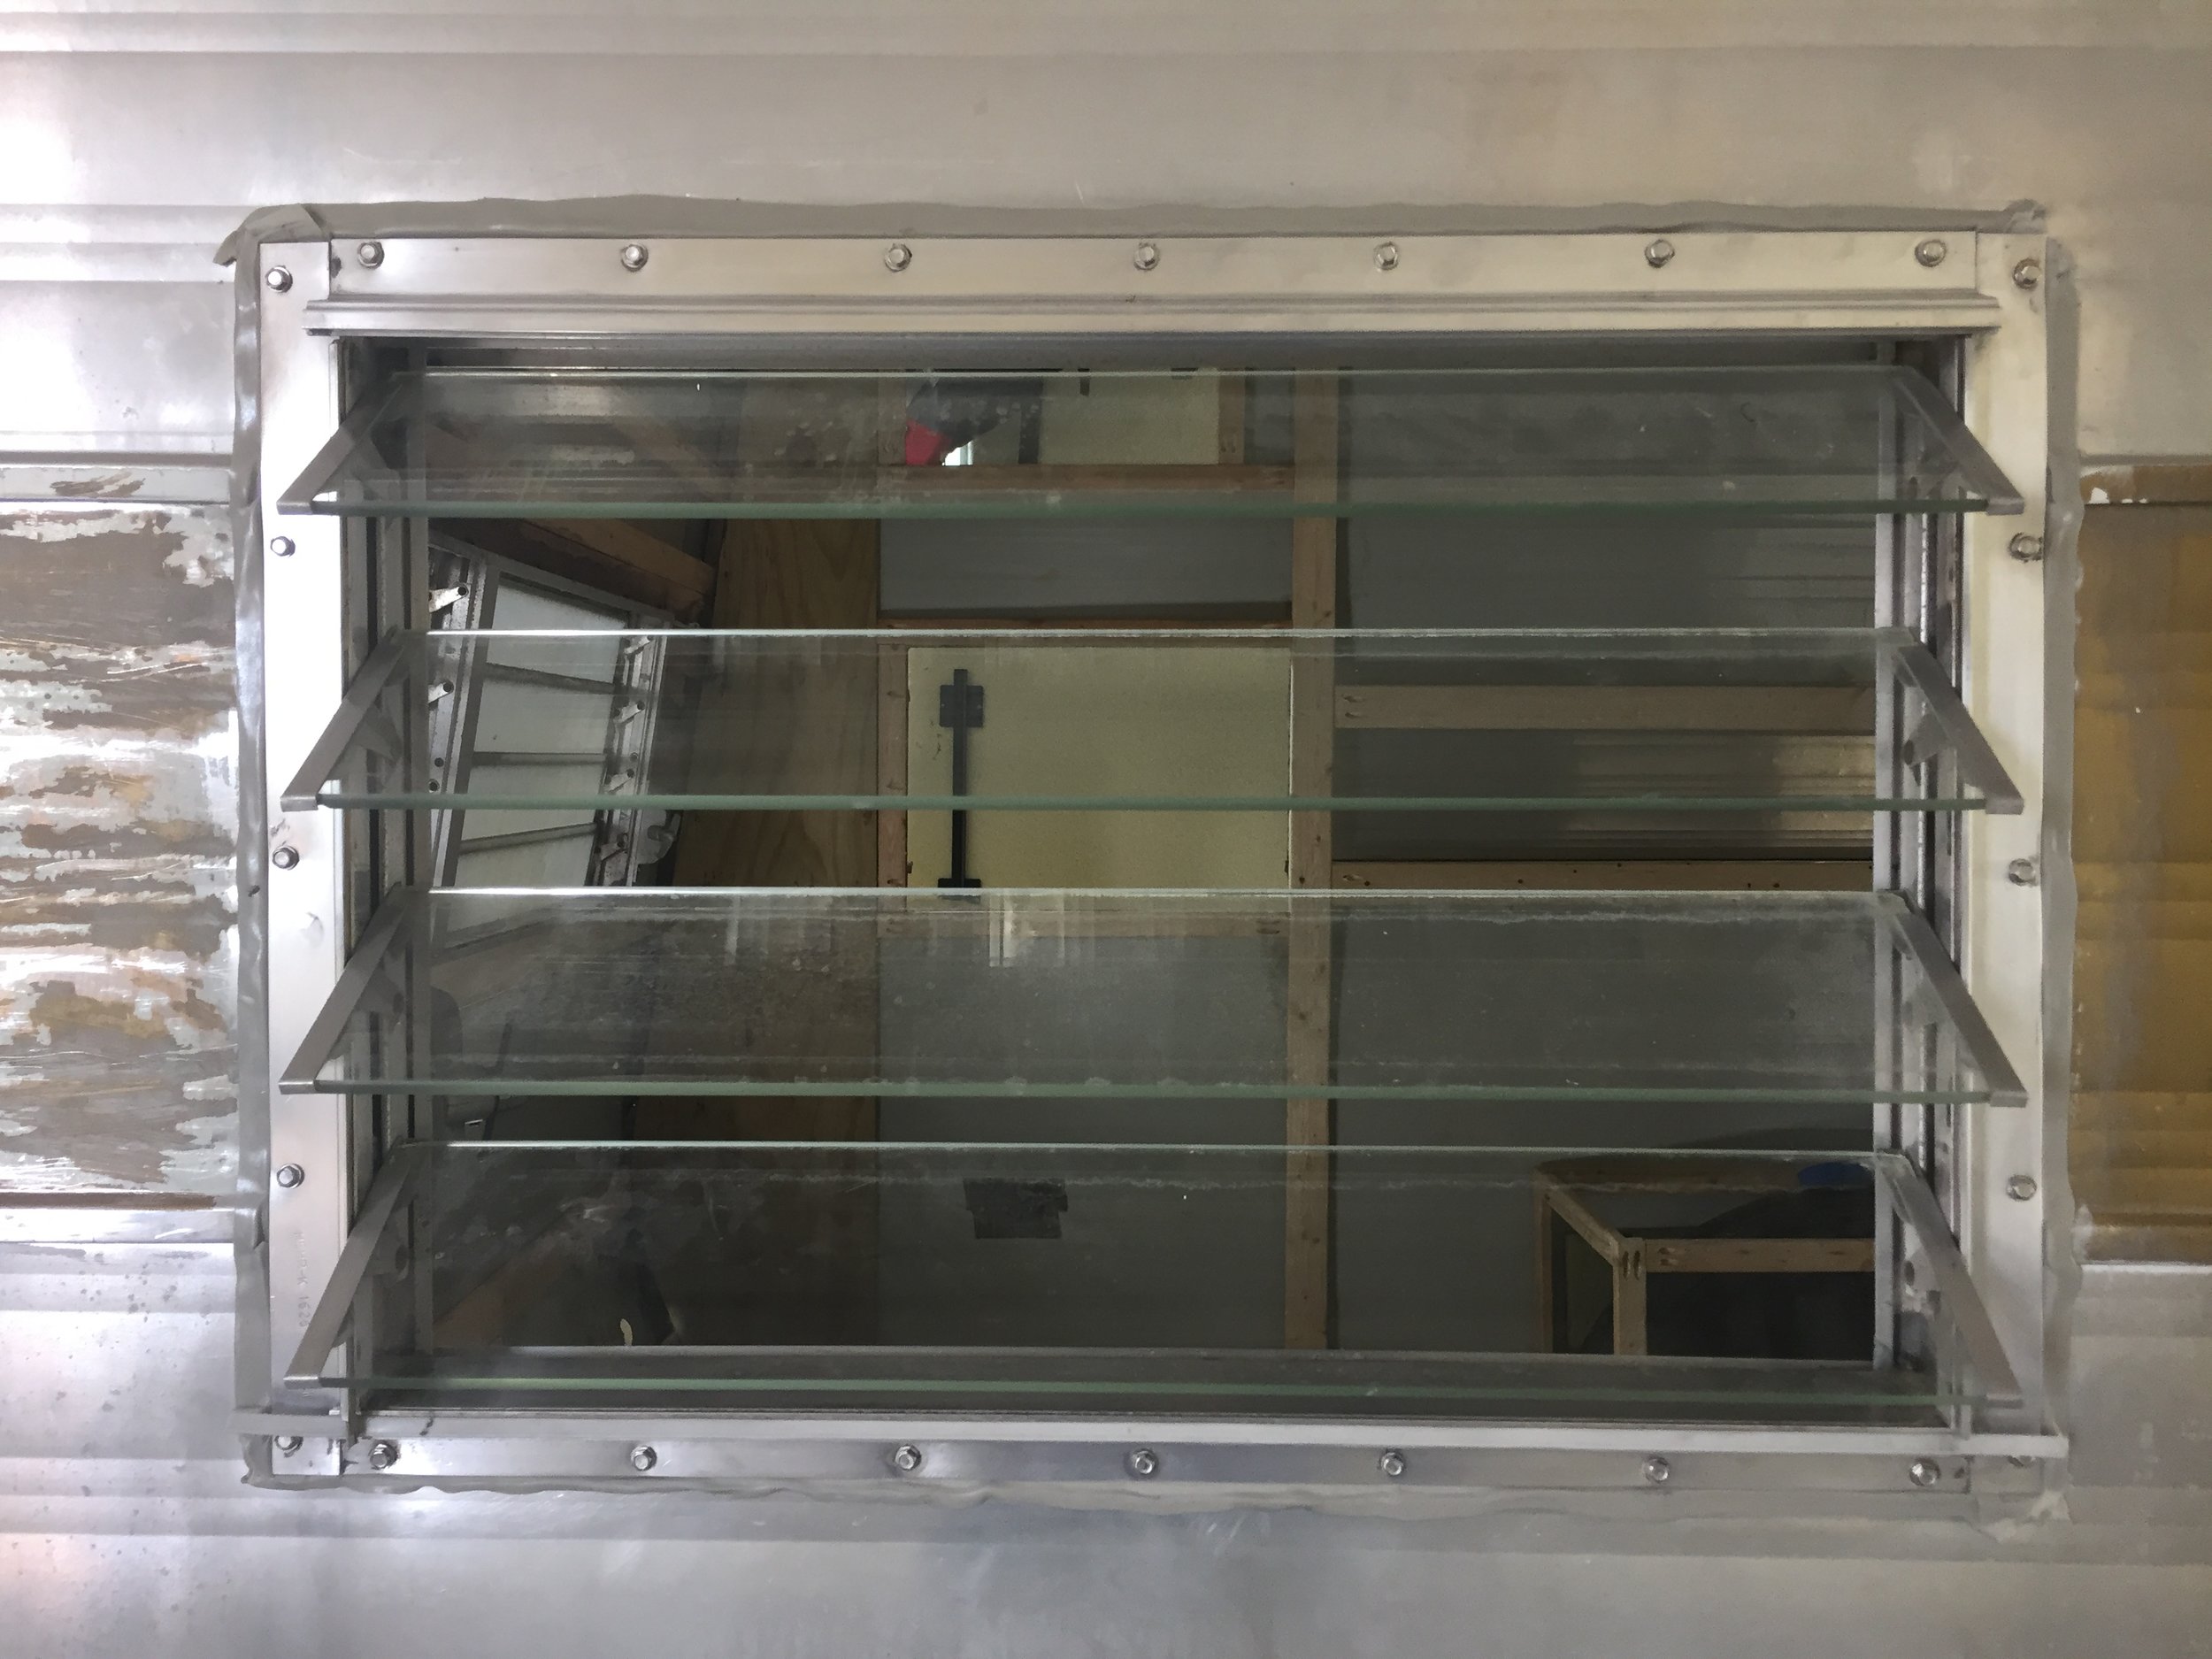
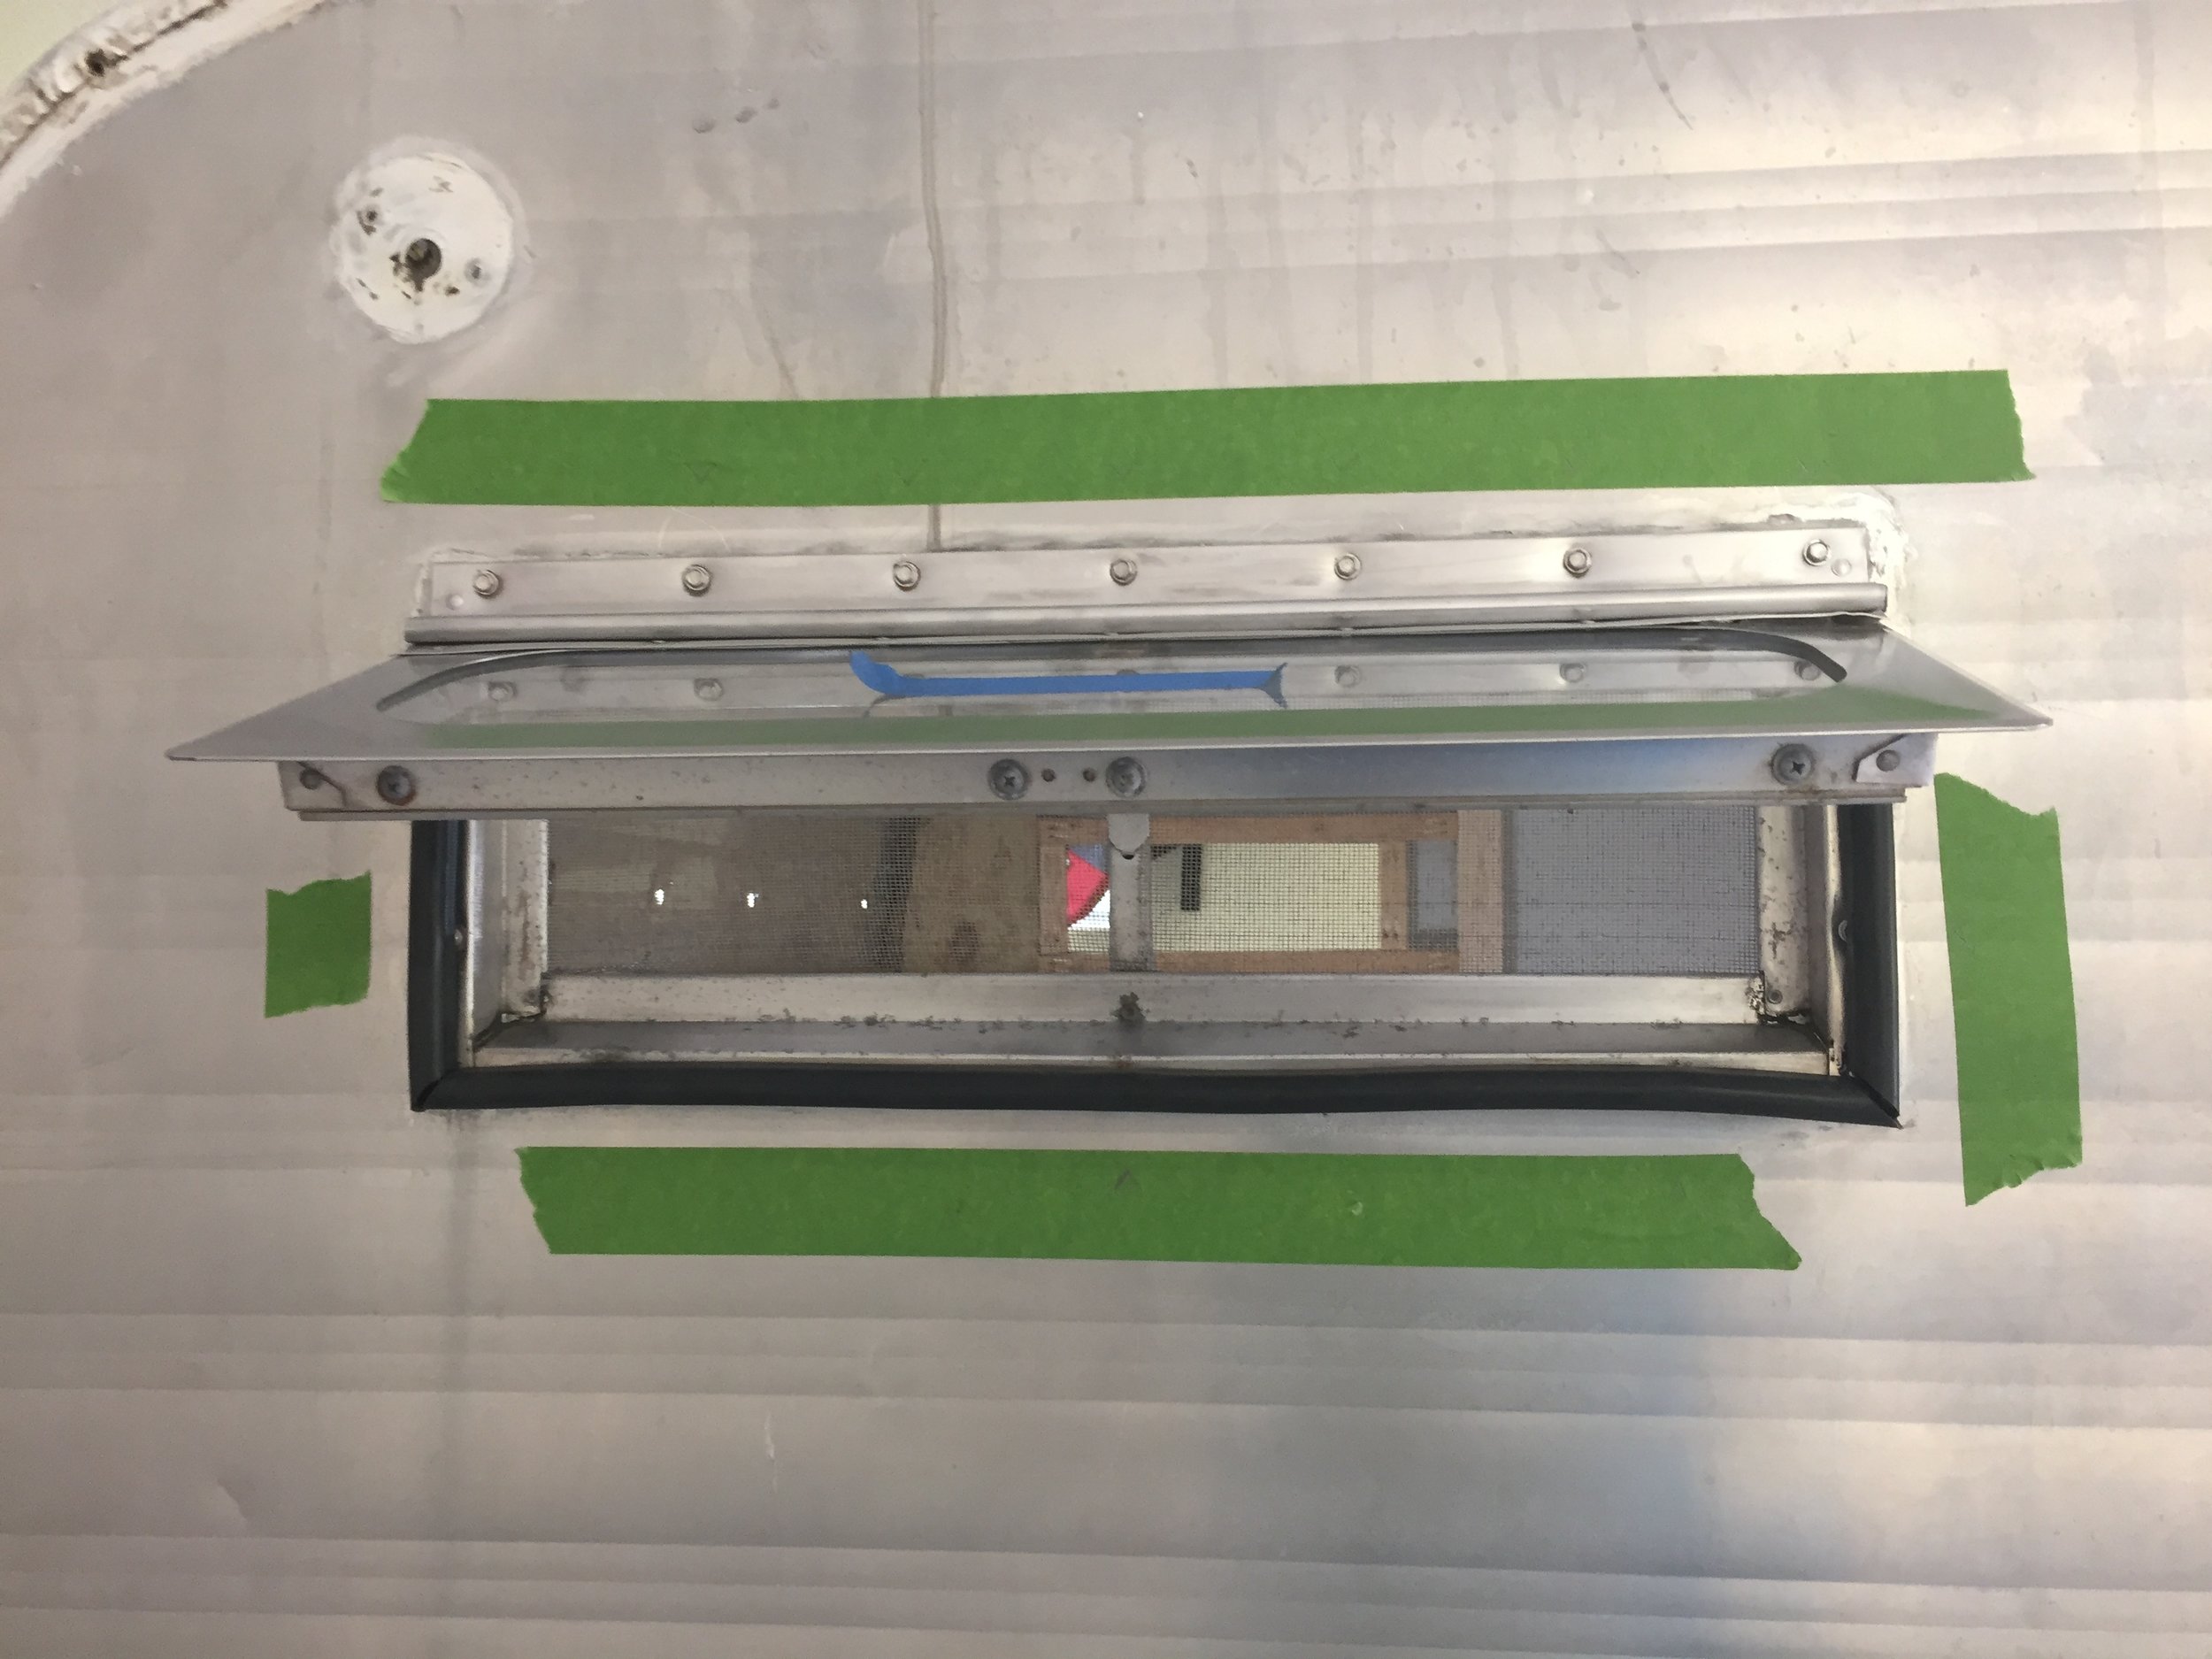
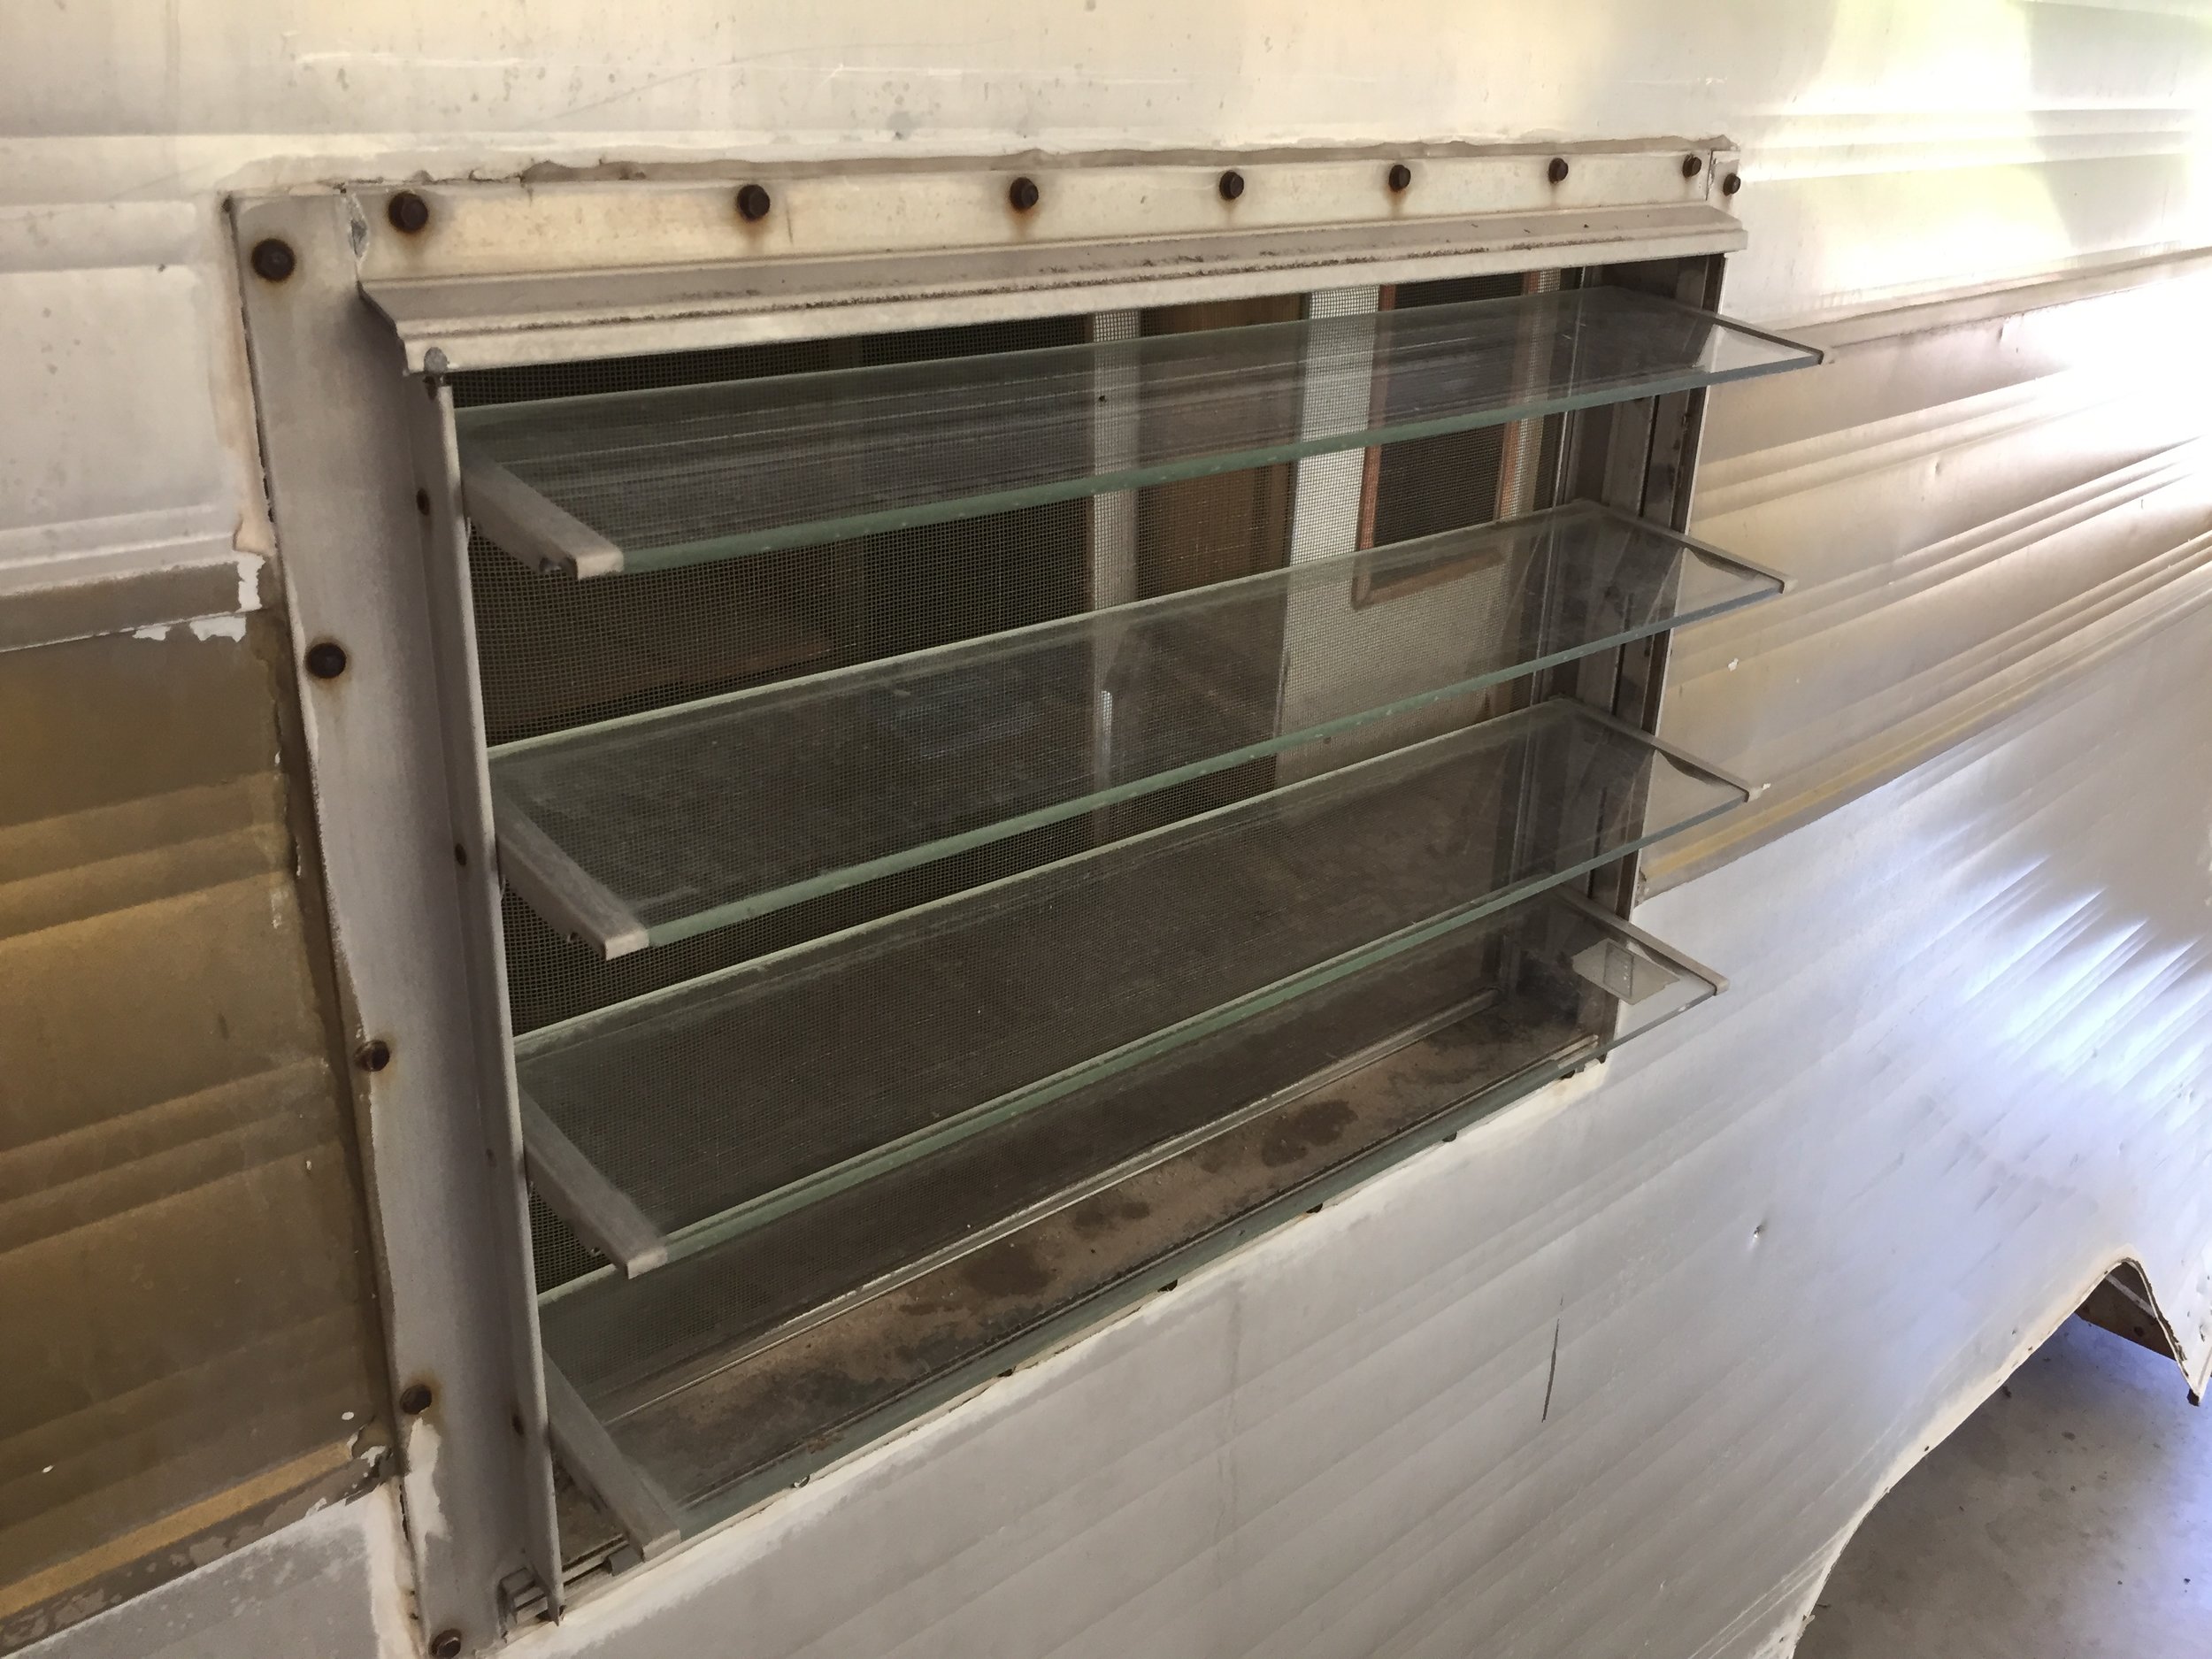
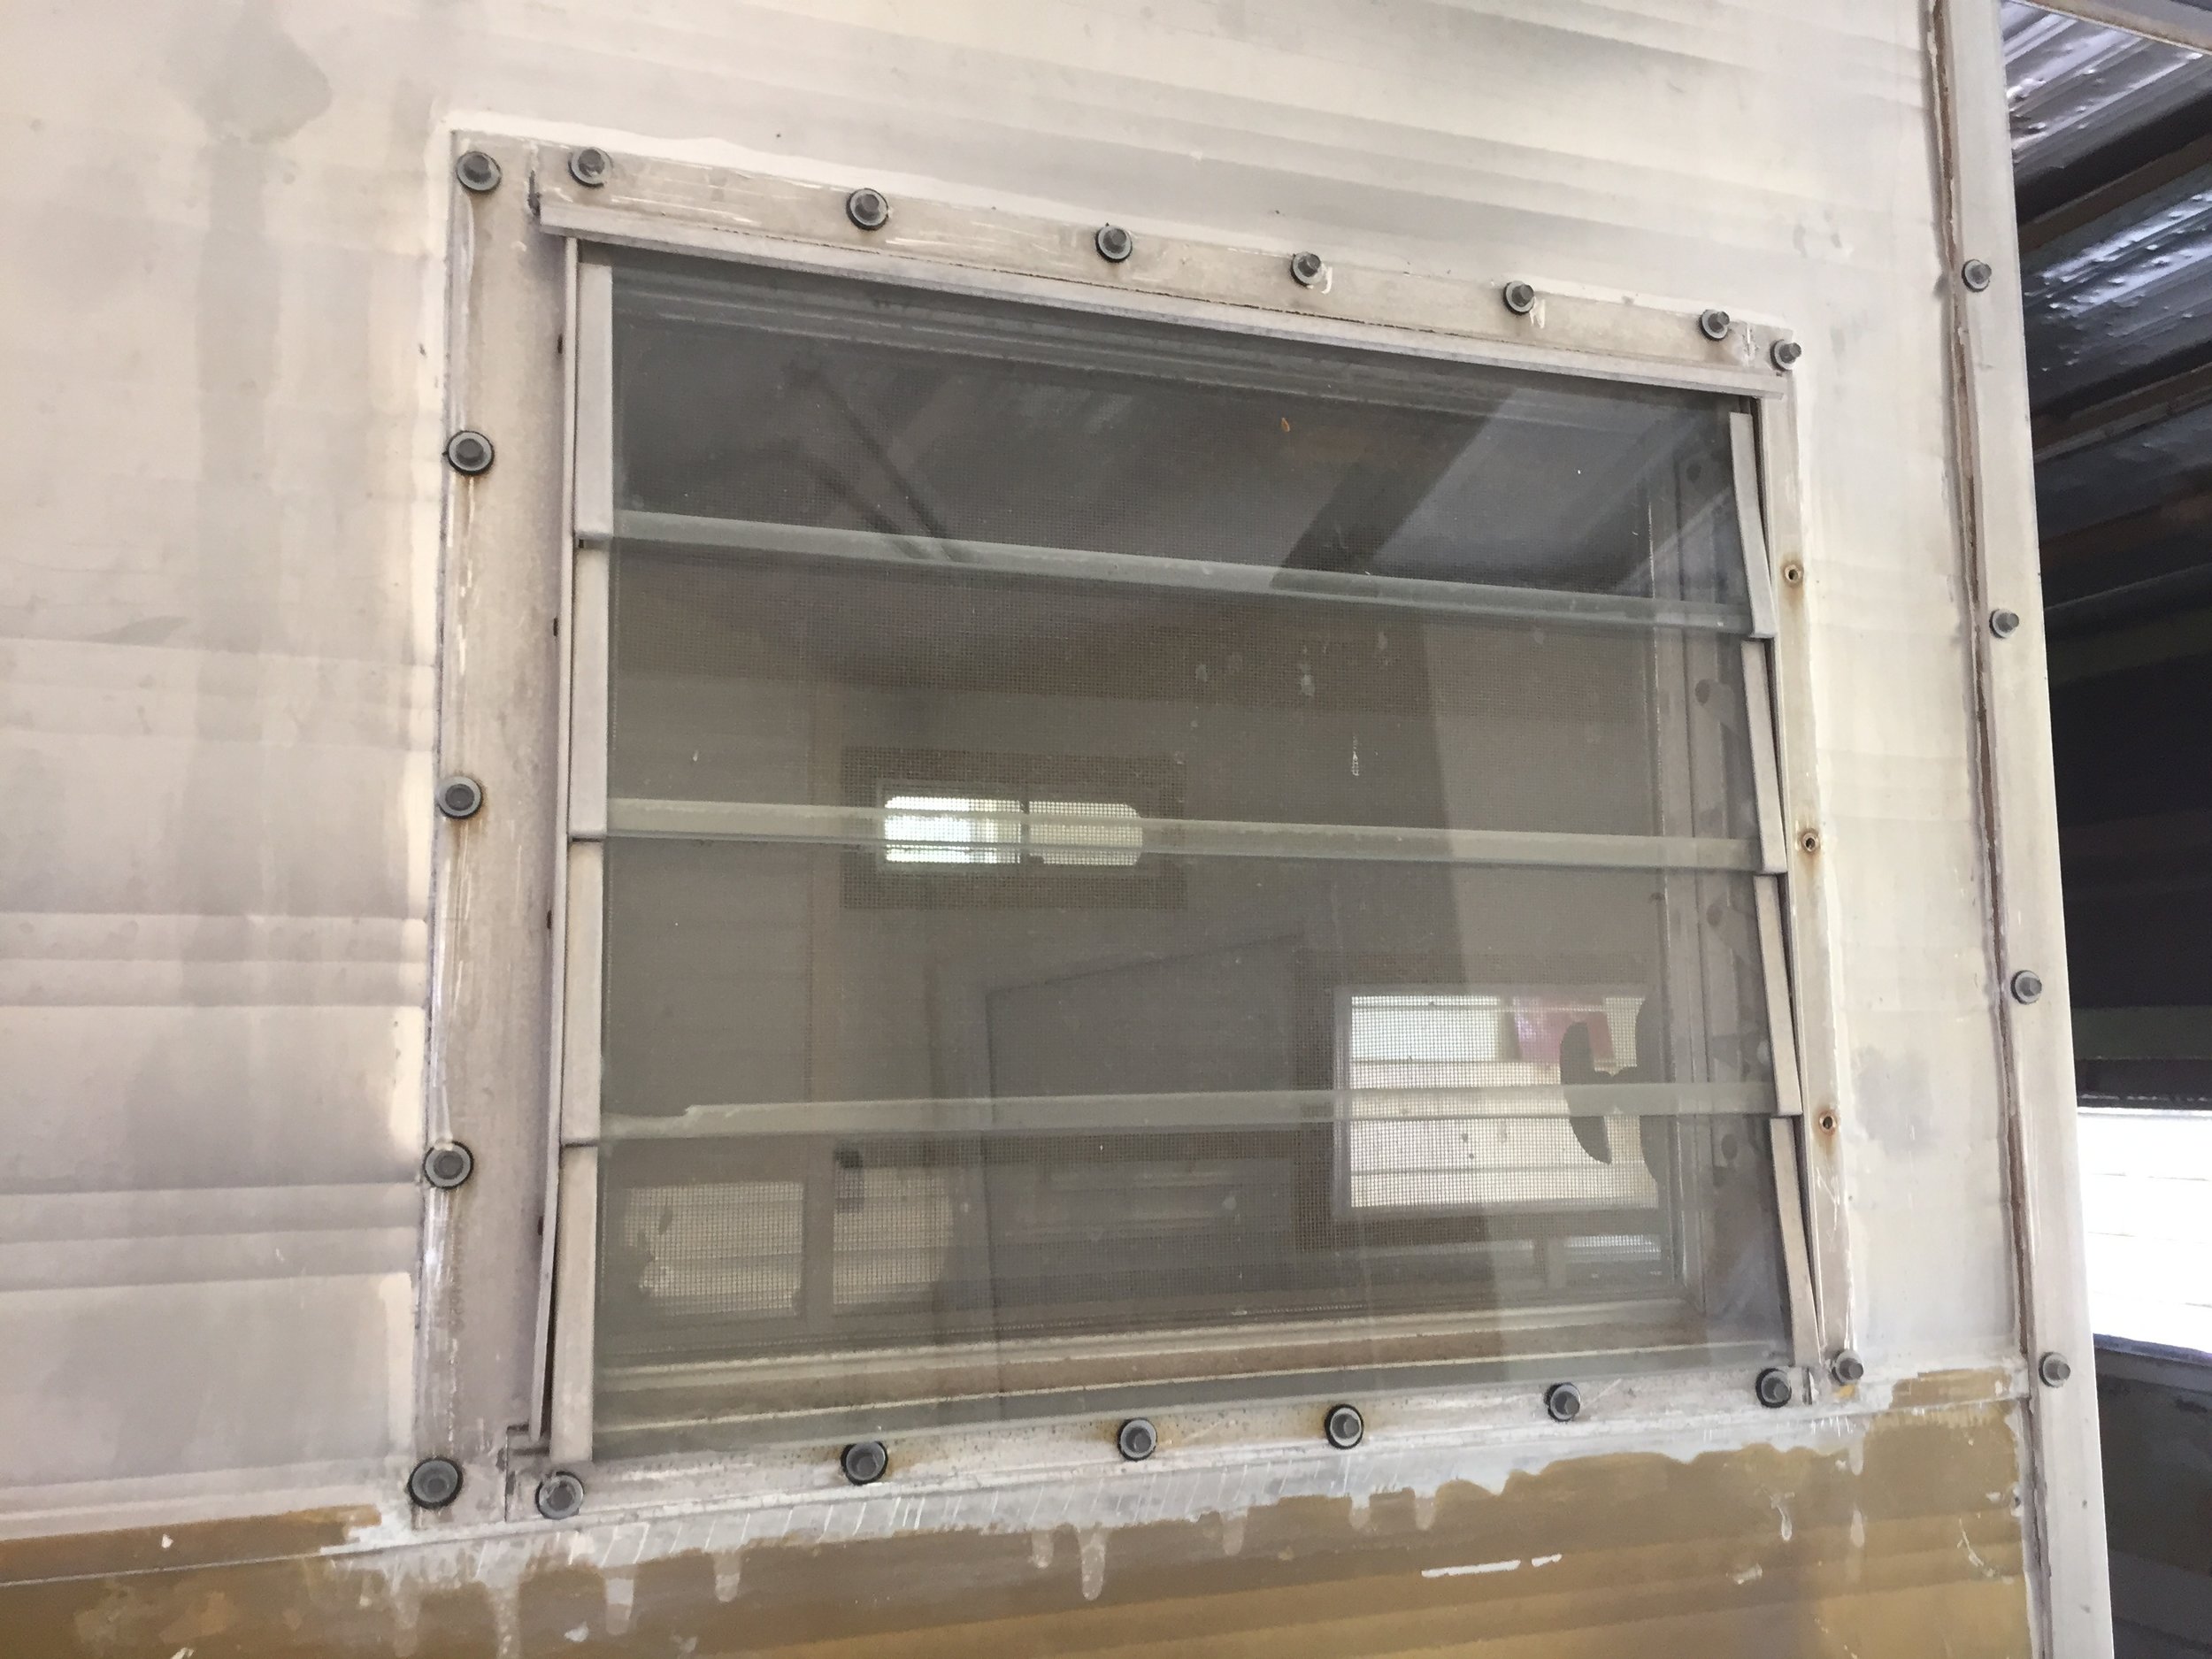
Window to the left of the door before we polished, but after we swapped the old rusty screws for Teks roofing screws + washers. Notice the rust spots around the holes on the right and general “meh”-ness of the dull, aged aluminum framing.
Our step-by-step guide to rehabbing louvered jalousie (& other) windows
Removing the windows
Open the window – It makes it easier to hold onto, which is nice because these things are pretty heavy and fragile what with all the glass and what not, and at this point supported by a relatively flimsy wall. It also makes it much easier to hear one another, especially over the sound of a drill (and music. and maybe my singing).
Use the buddy system – Window removal is a two-person job. Besides getting to make fun faces at your buddy through the window (is that just me?), it helps to have an extra set of hands for your safety and also to help protect the windows. (They can get a little unwieldy!)
One person inside & the other outside – The person inside the camper is the window holder (and in my case, funny face maker), and when the time comes the window-pusher-outer. The person on the outside gets to use the drill to unscrew the screws, and will ultimately be the one holding the window in the end.
(We utilized the steps above for removing the three small non-louvered windows too. In addition to the visible screws above this style of window, there are a few more screws along the sides and bottom, hidden underneath the rubber gasket.)

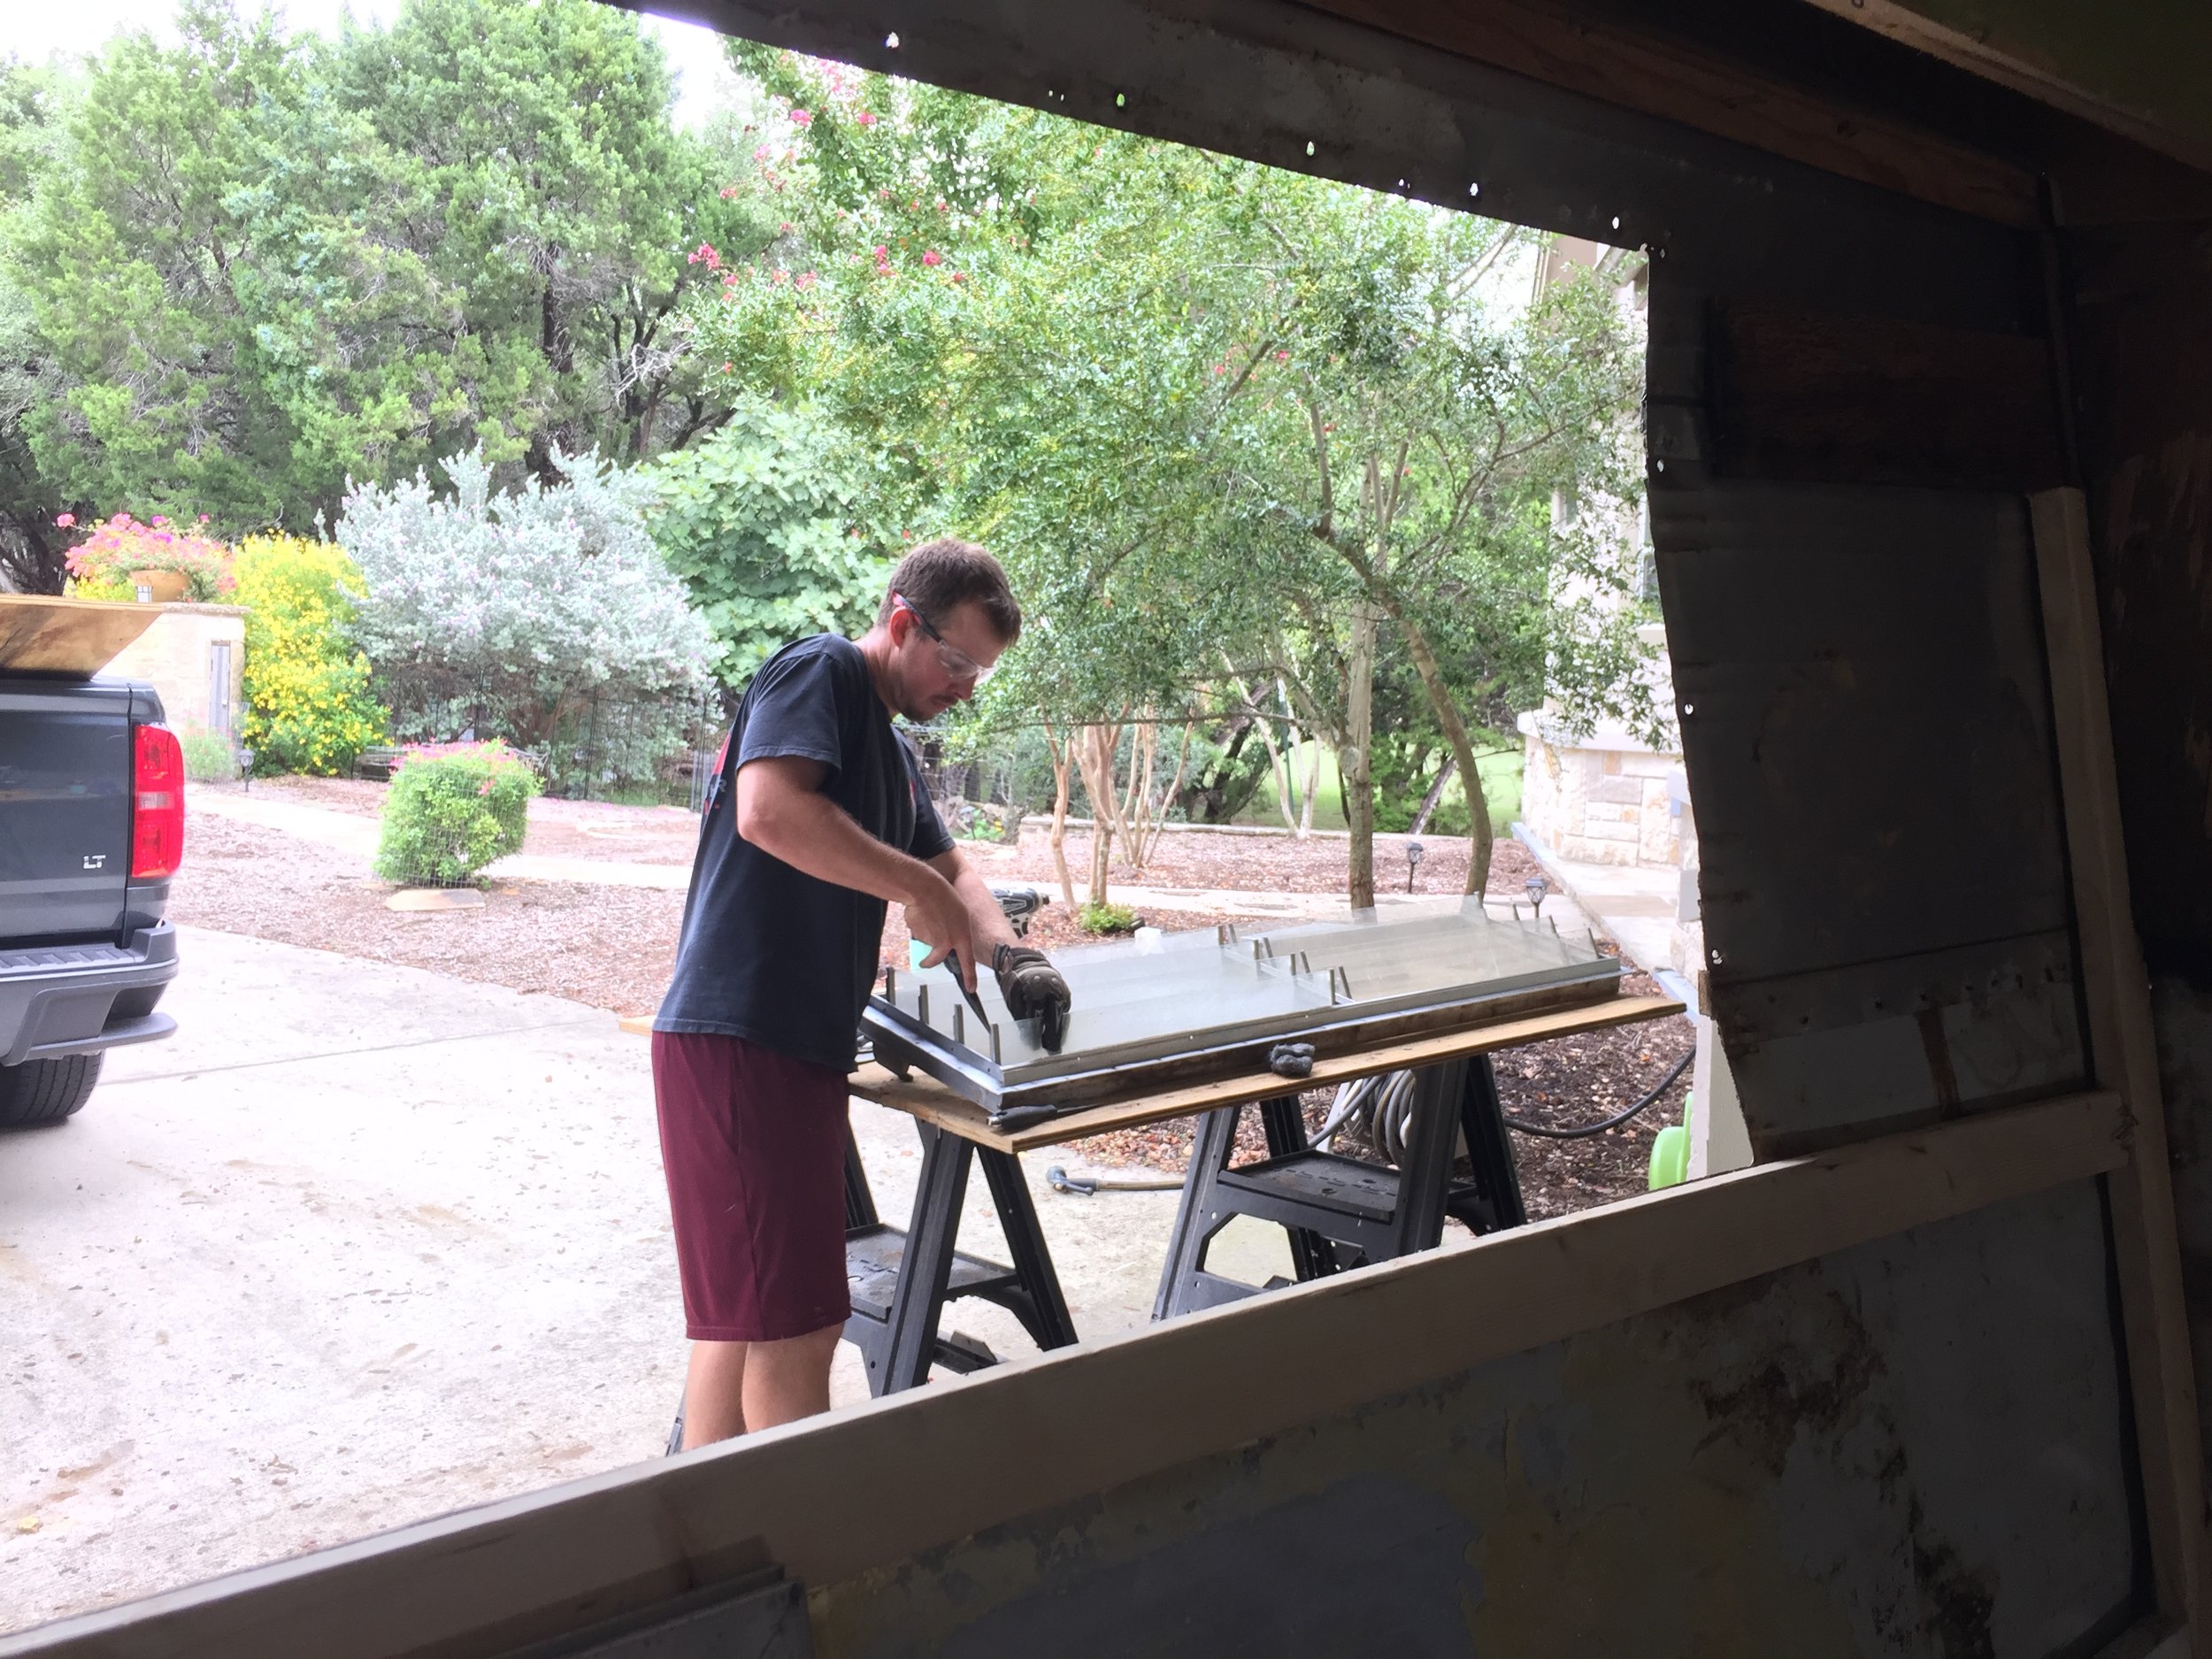
Windows removed – we tried grinding and polishing the windows in place, but decided since we were removing them anyway to replace the putty tape, we’d polish them while they were out.
Gunk removal
Put on work gloves (and safety glasses) – hopefully this is a given and you’re already wearing them, but these metal and glass bits are sharp and pokey! Plus when you’re moving around polishing all the little bits it’s real easy to knock your knuckles and cut your hands. We opened and closed the window slats as needed throughout this process to make safely cleaning the window pieces as easy as possible, and managed to make it through without breaking any of the glass!
Find a putty knife & flat razor – Scrape off the large loose bits. Pretty self-explanatory. Do your best not to gouge the metal (our yourself!), but know you can buff out any small oopsies later…
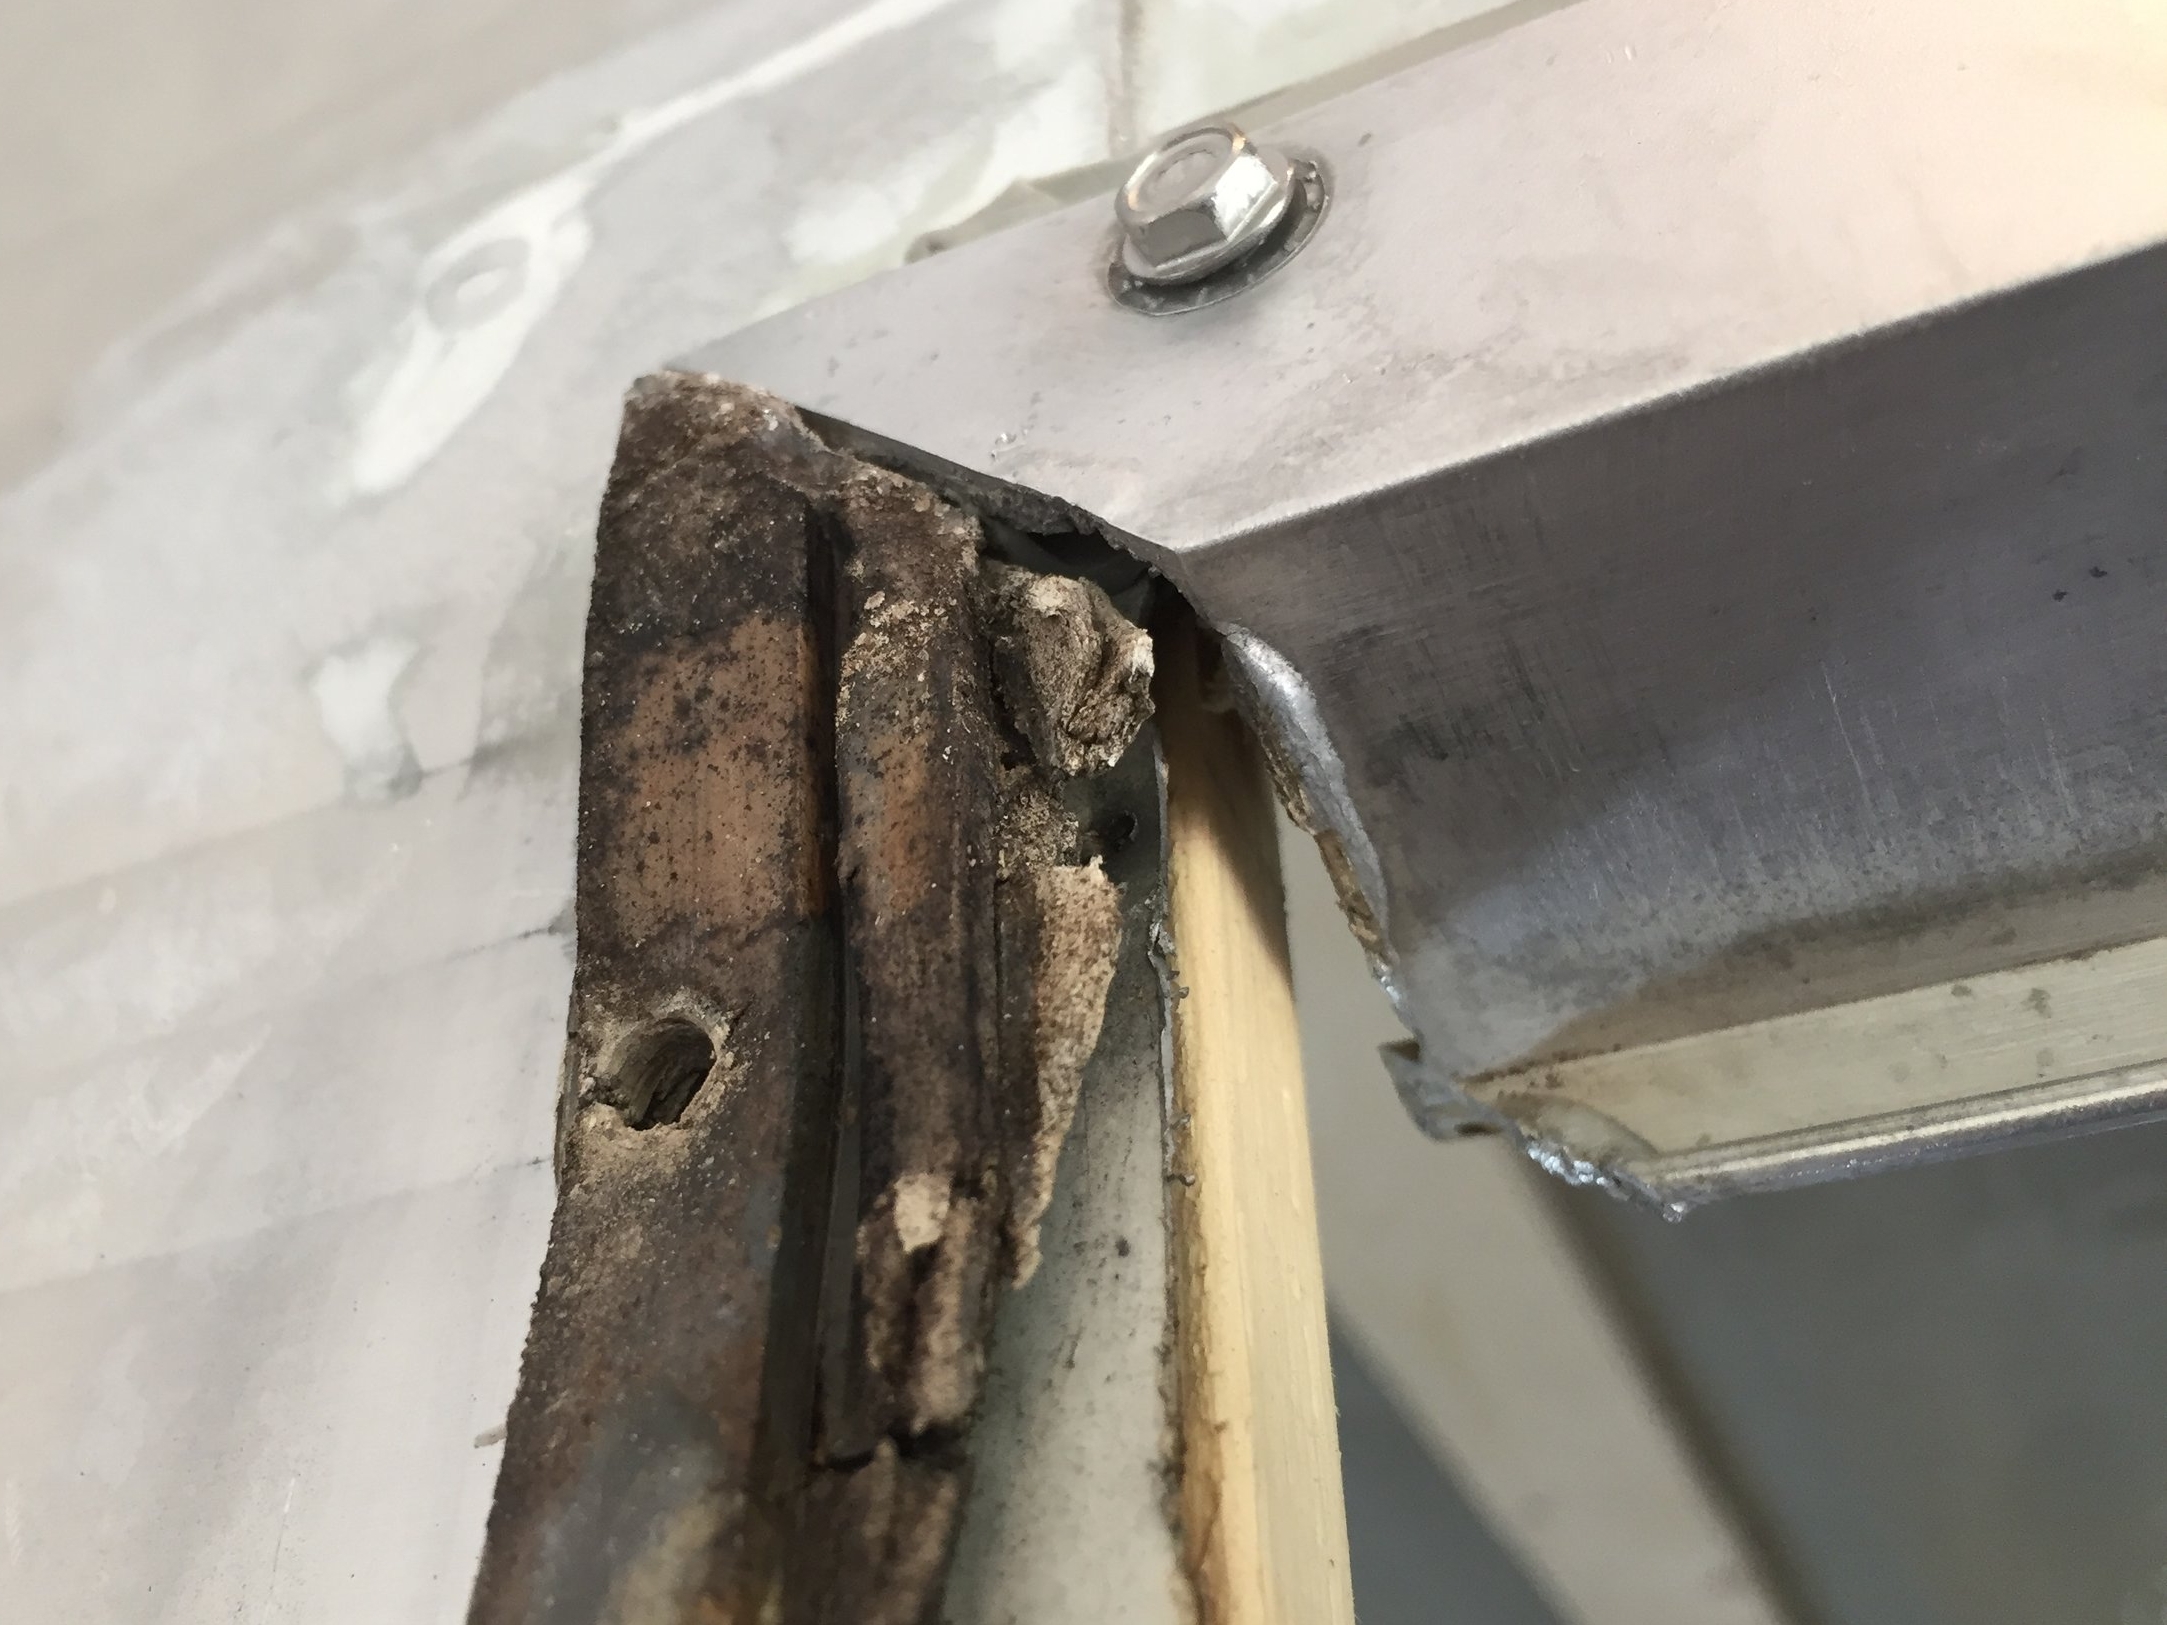
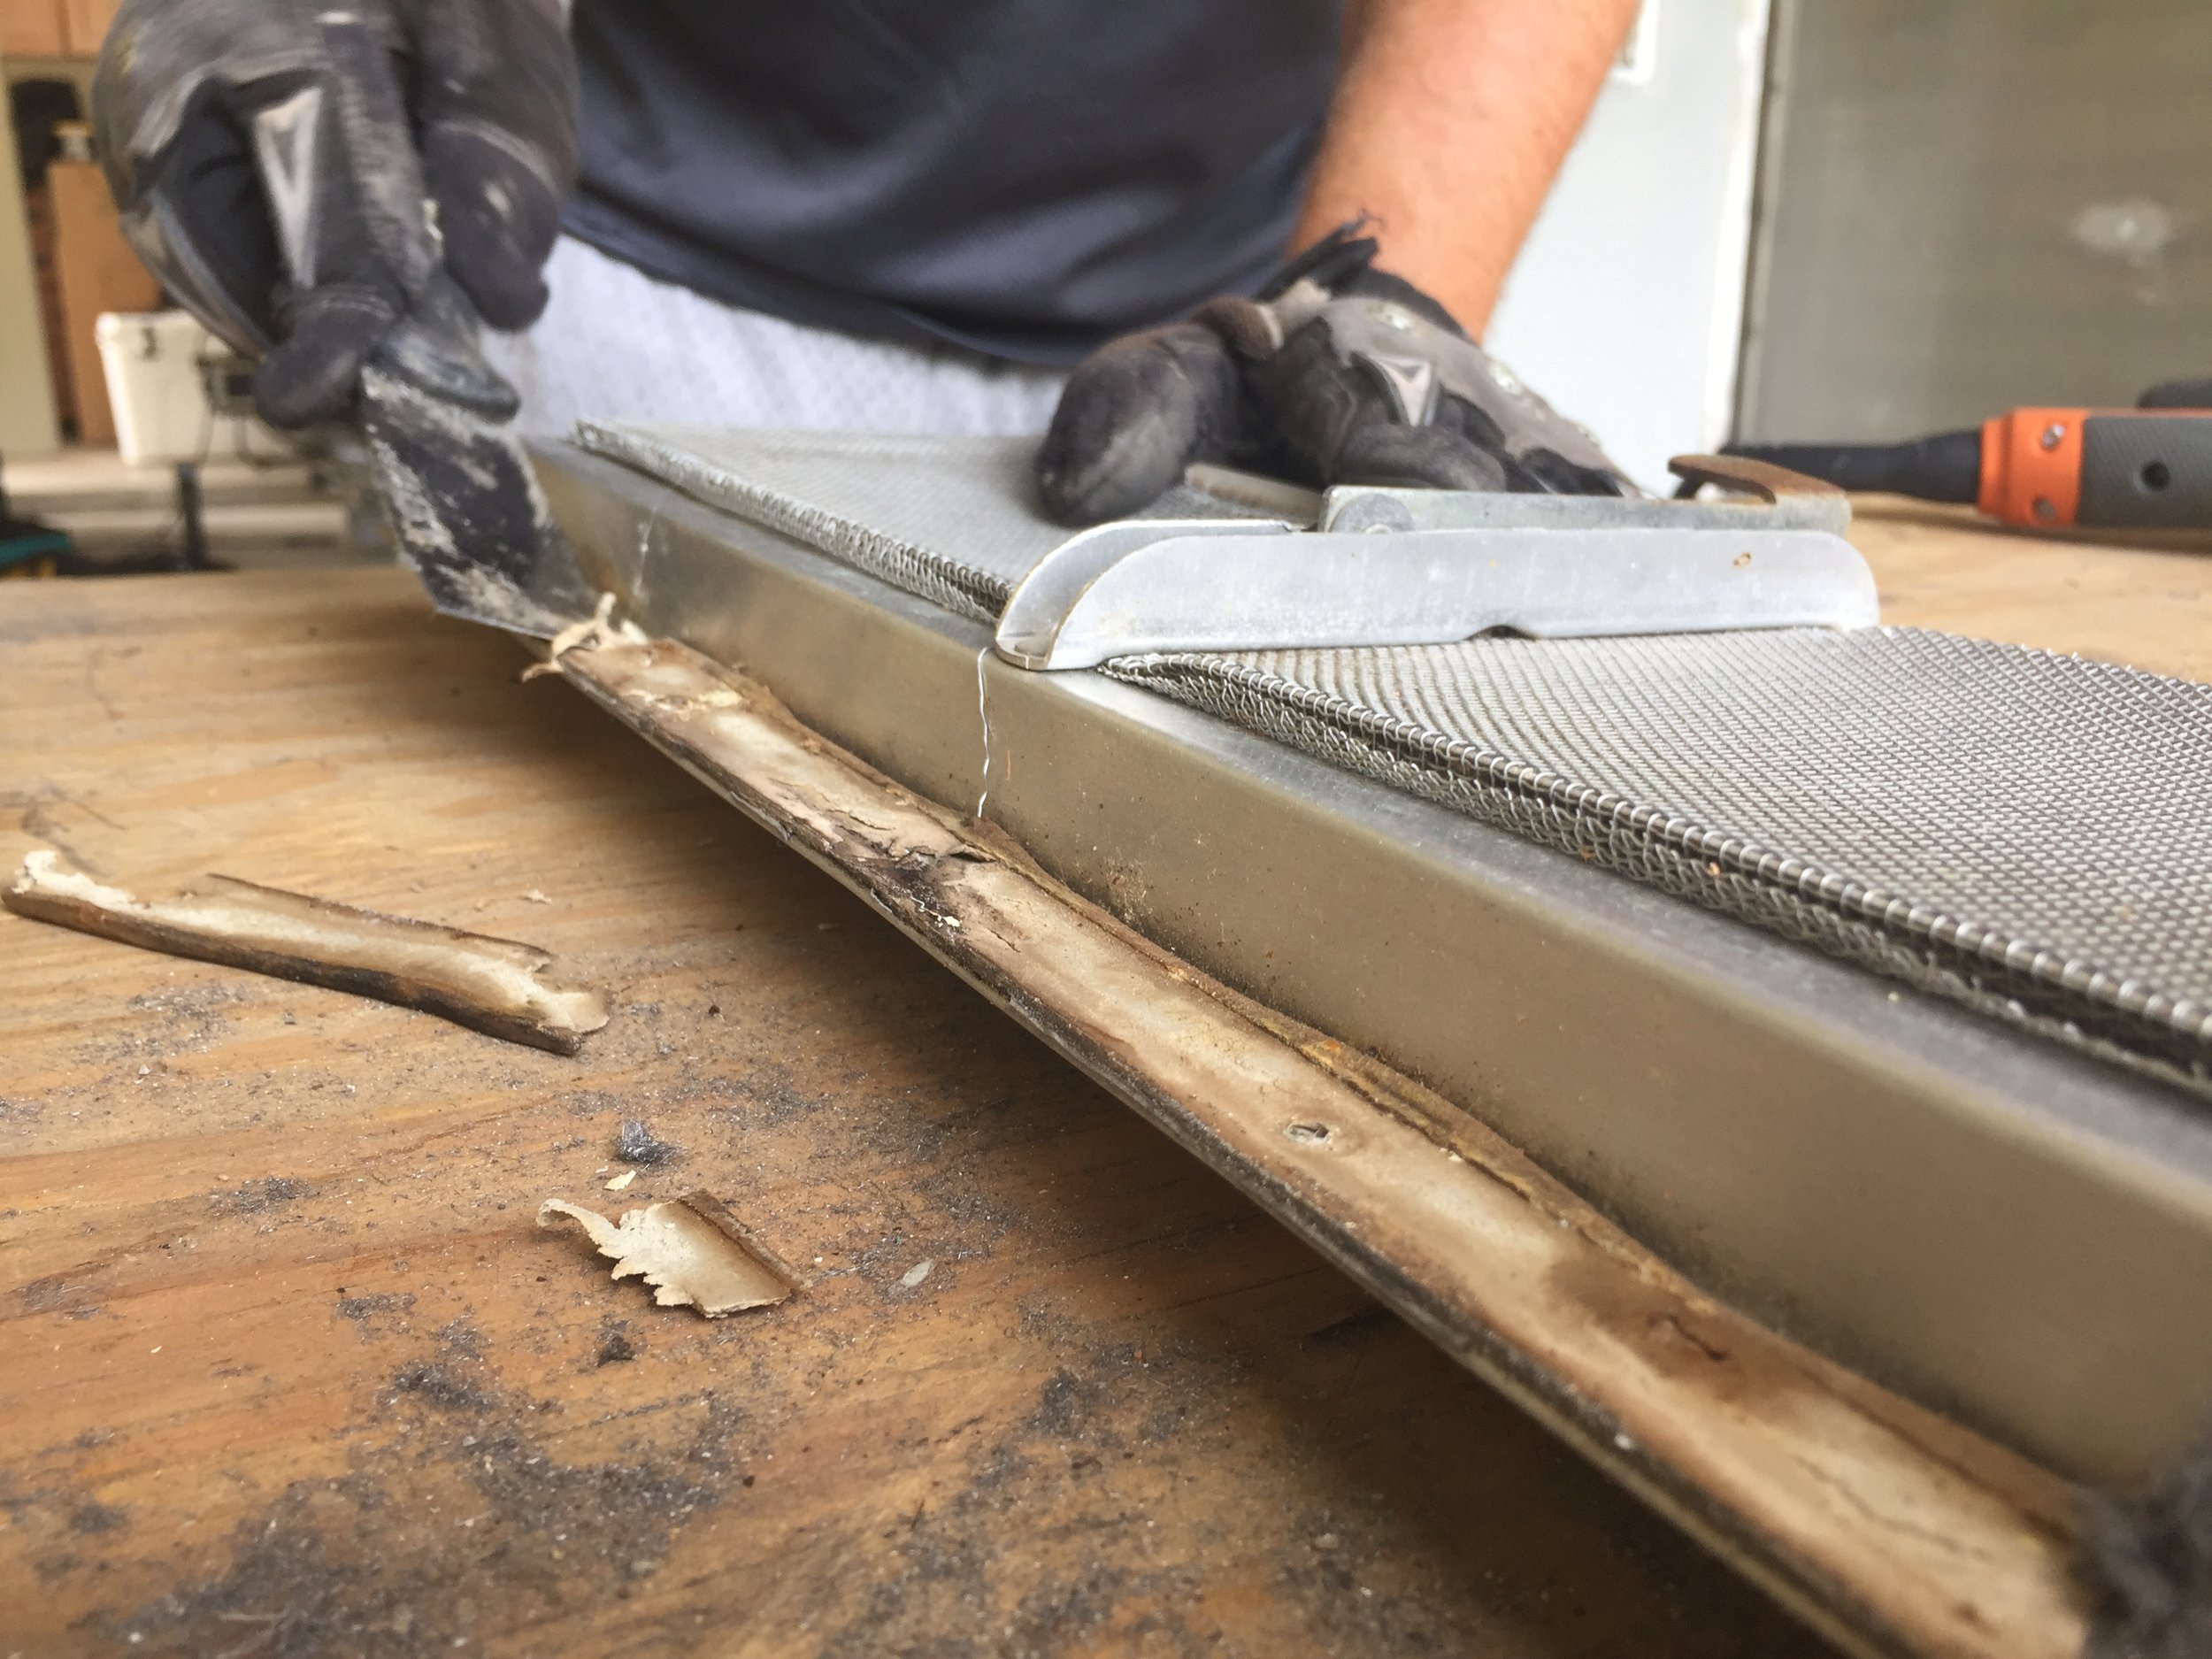
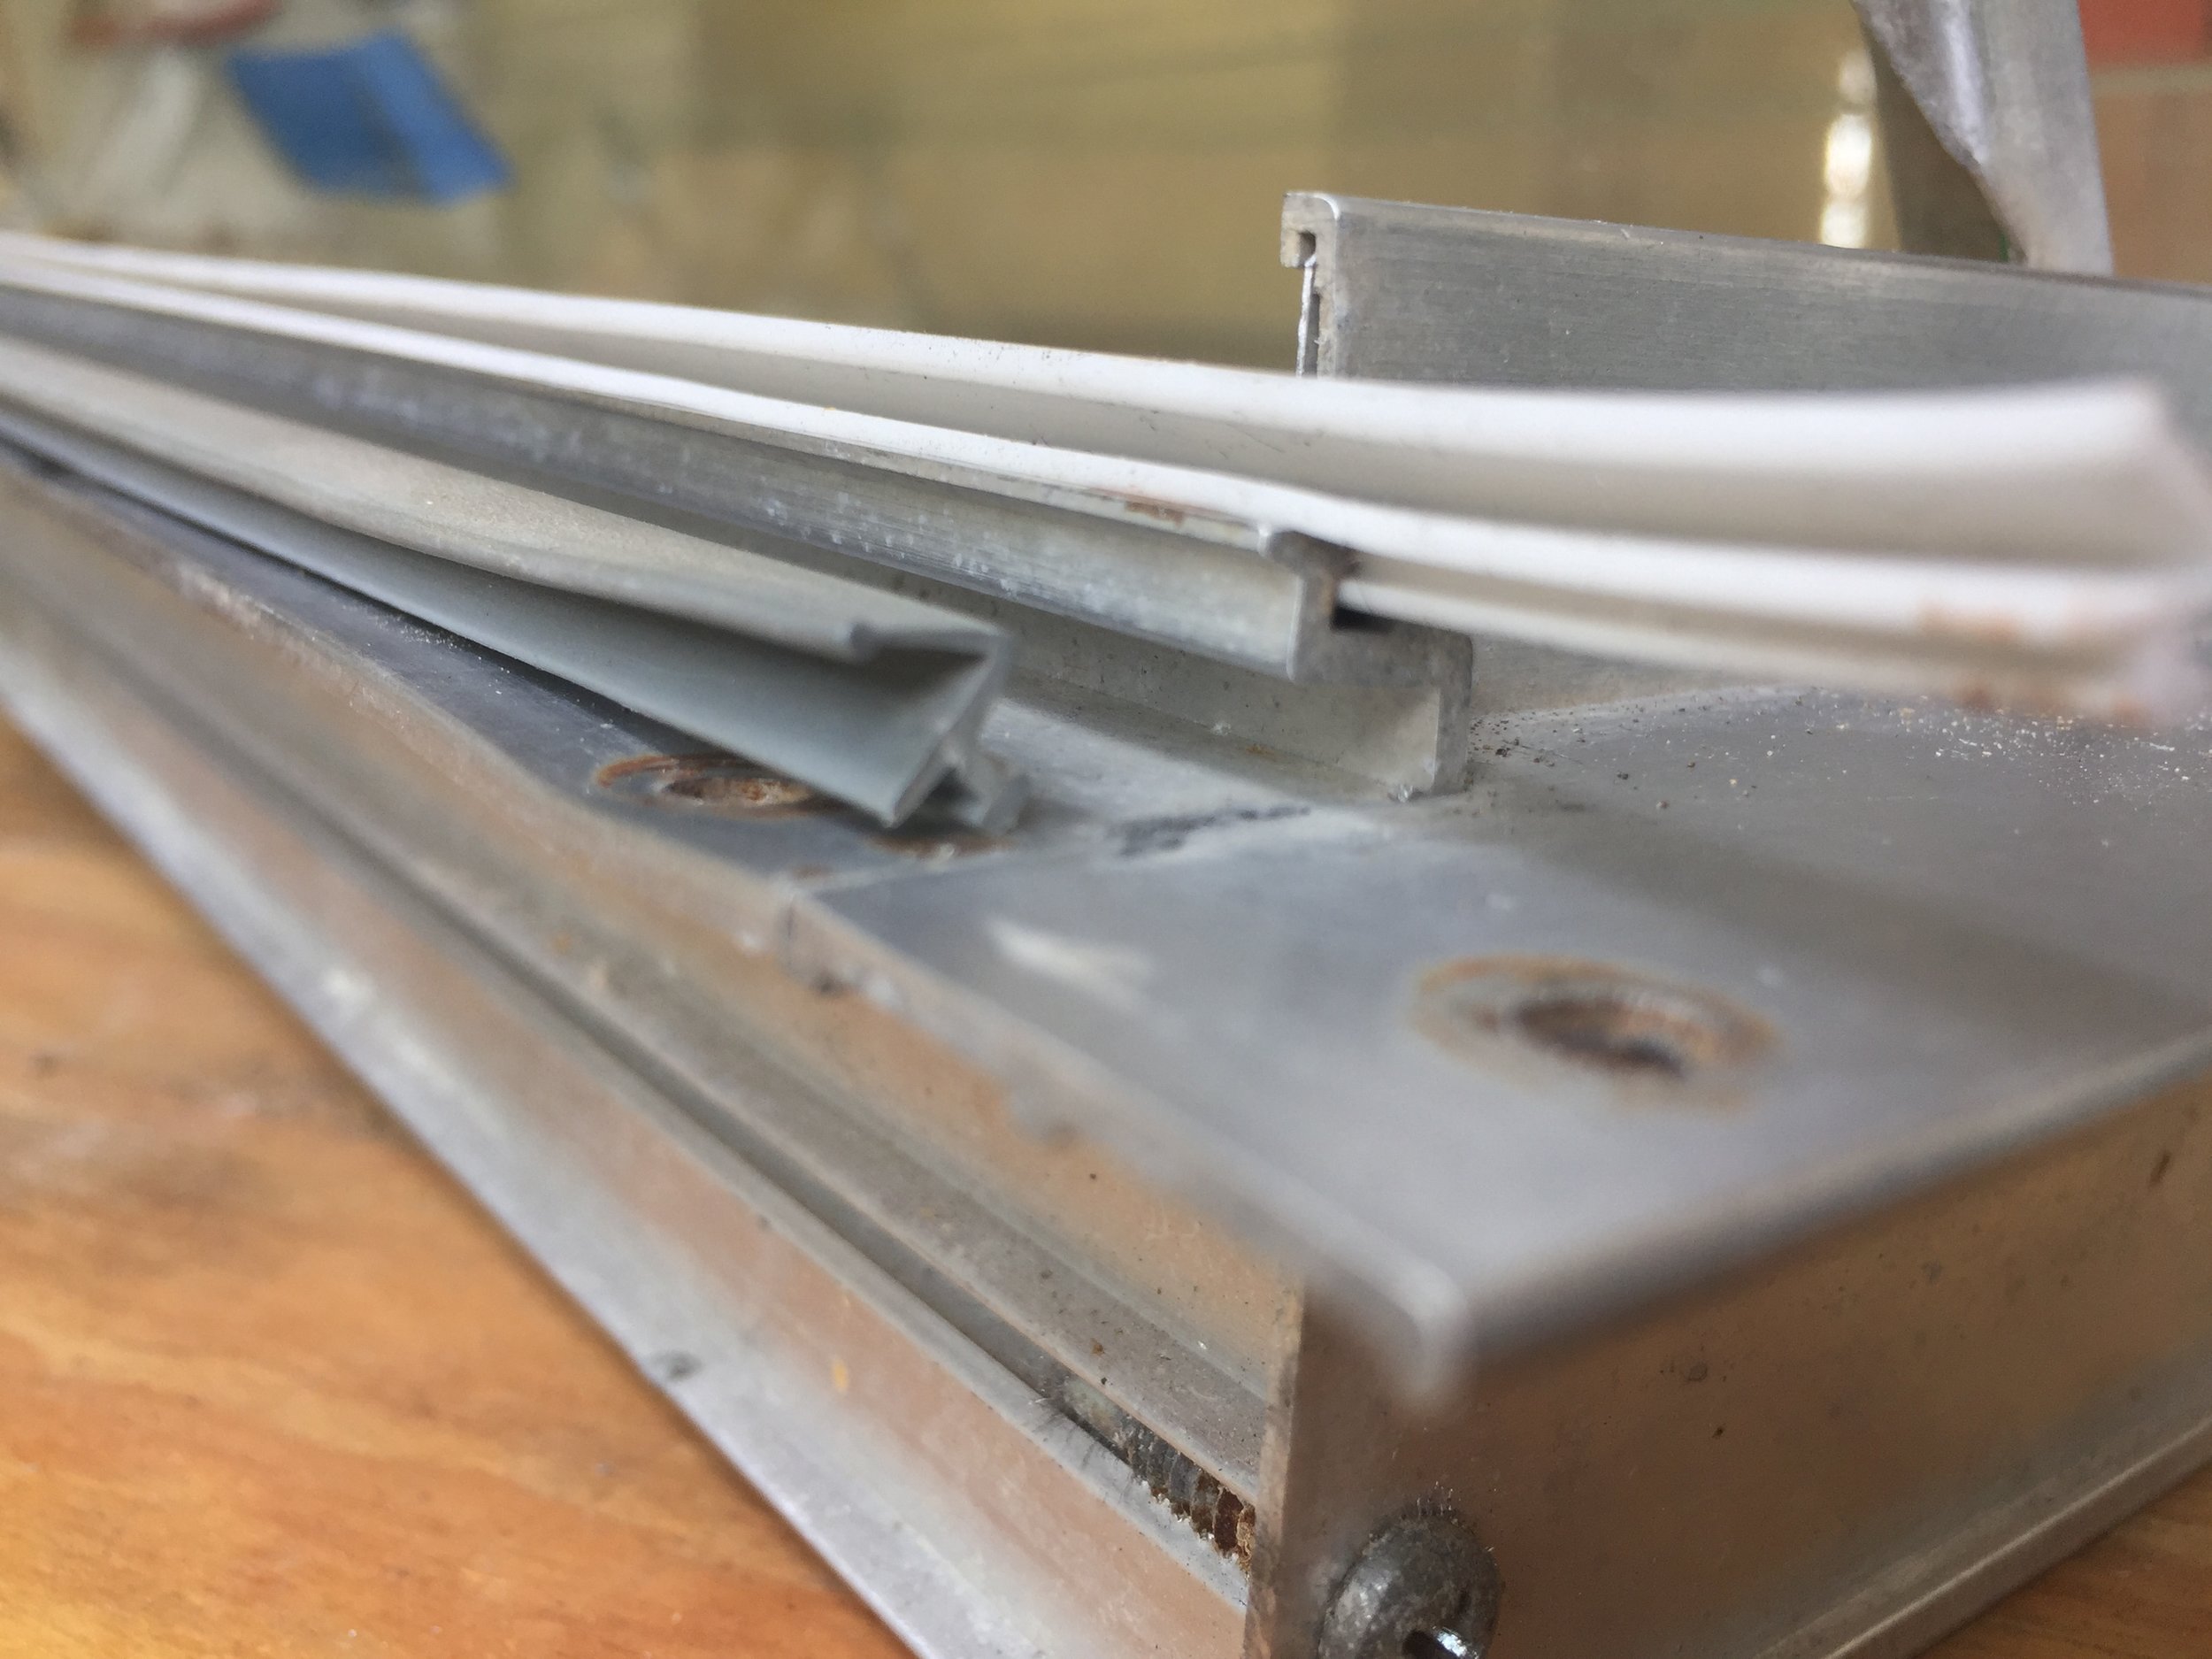
Remove the old seal – Our 50-year-old seals were hard and had shrunk, we’re assuming from decades in the sun and elements. Ours slid out of the channel pretty easily with a little jiggle and tug, but if it doesn’t work by pulling with your fingers, you can loosen it by running a putty knife under to break the seal from any gunk, and then slide out of the channel with needle nose pliers.
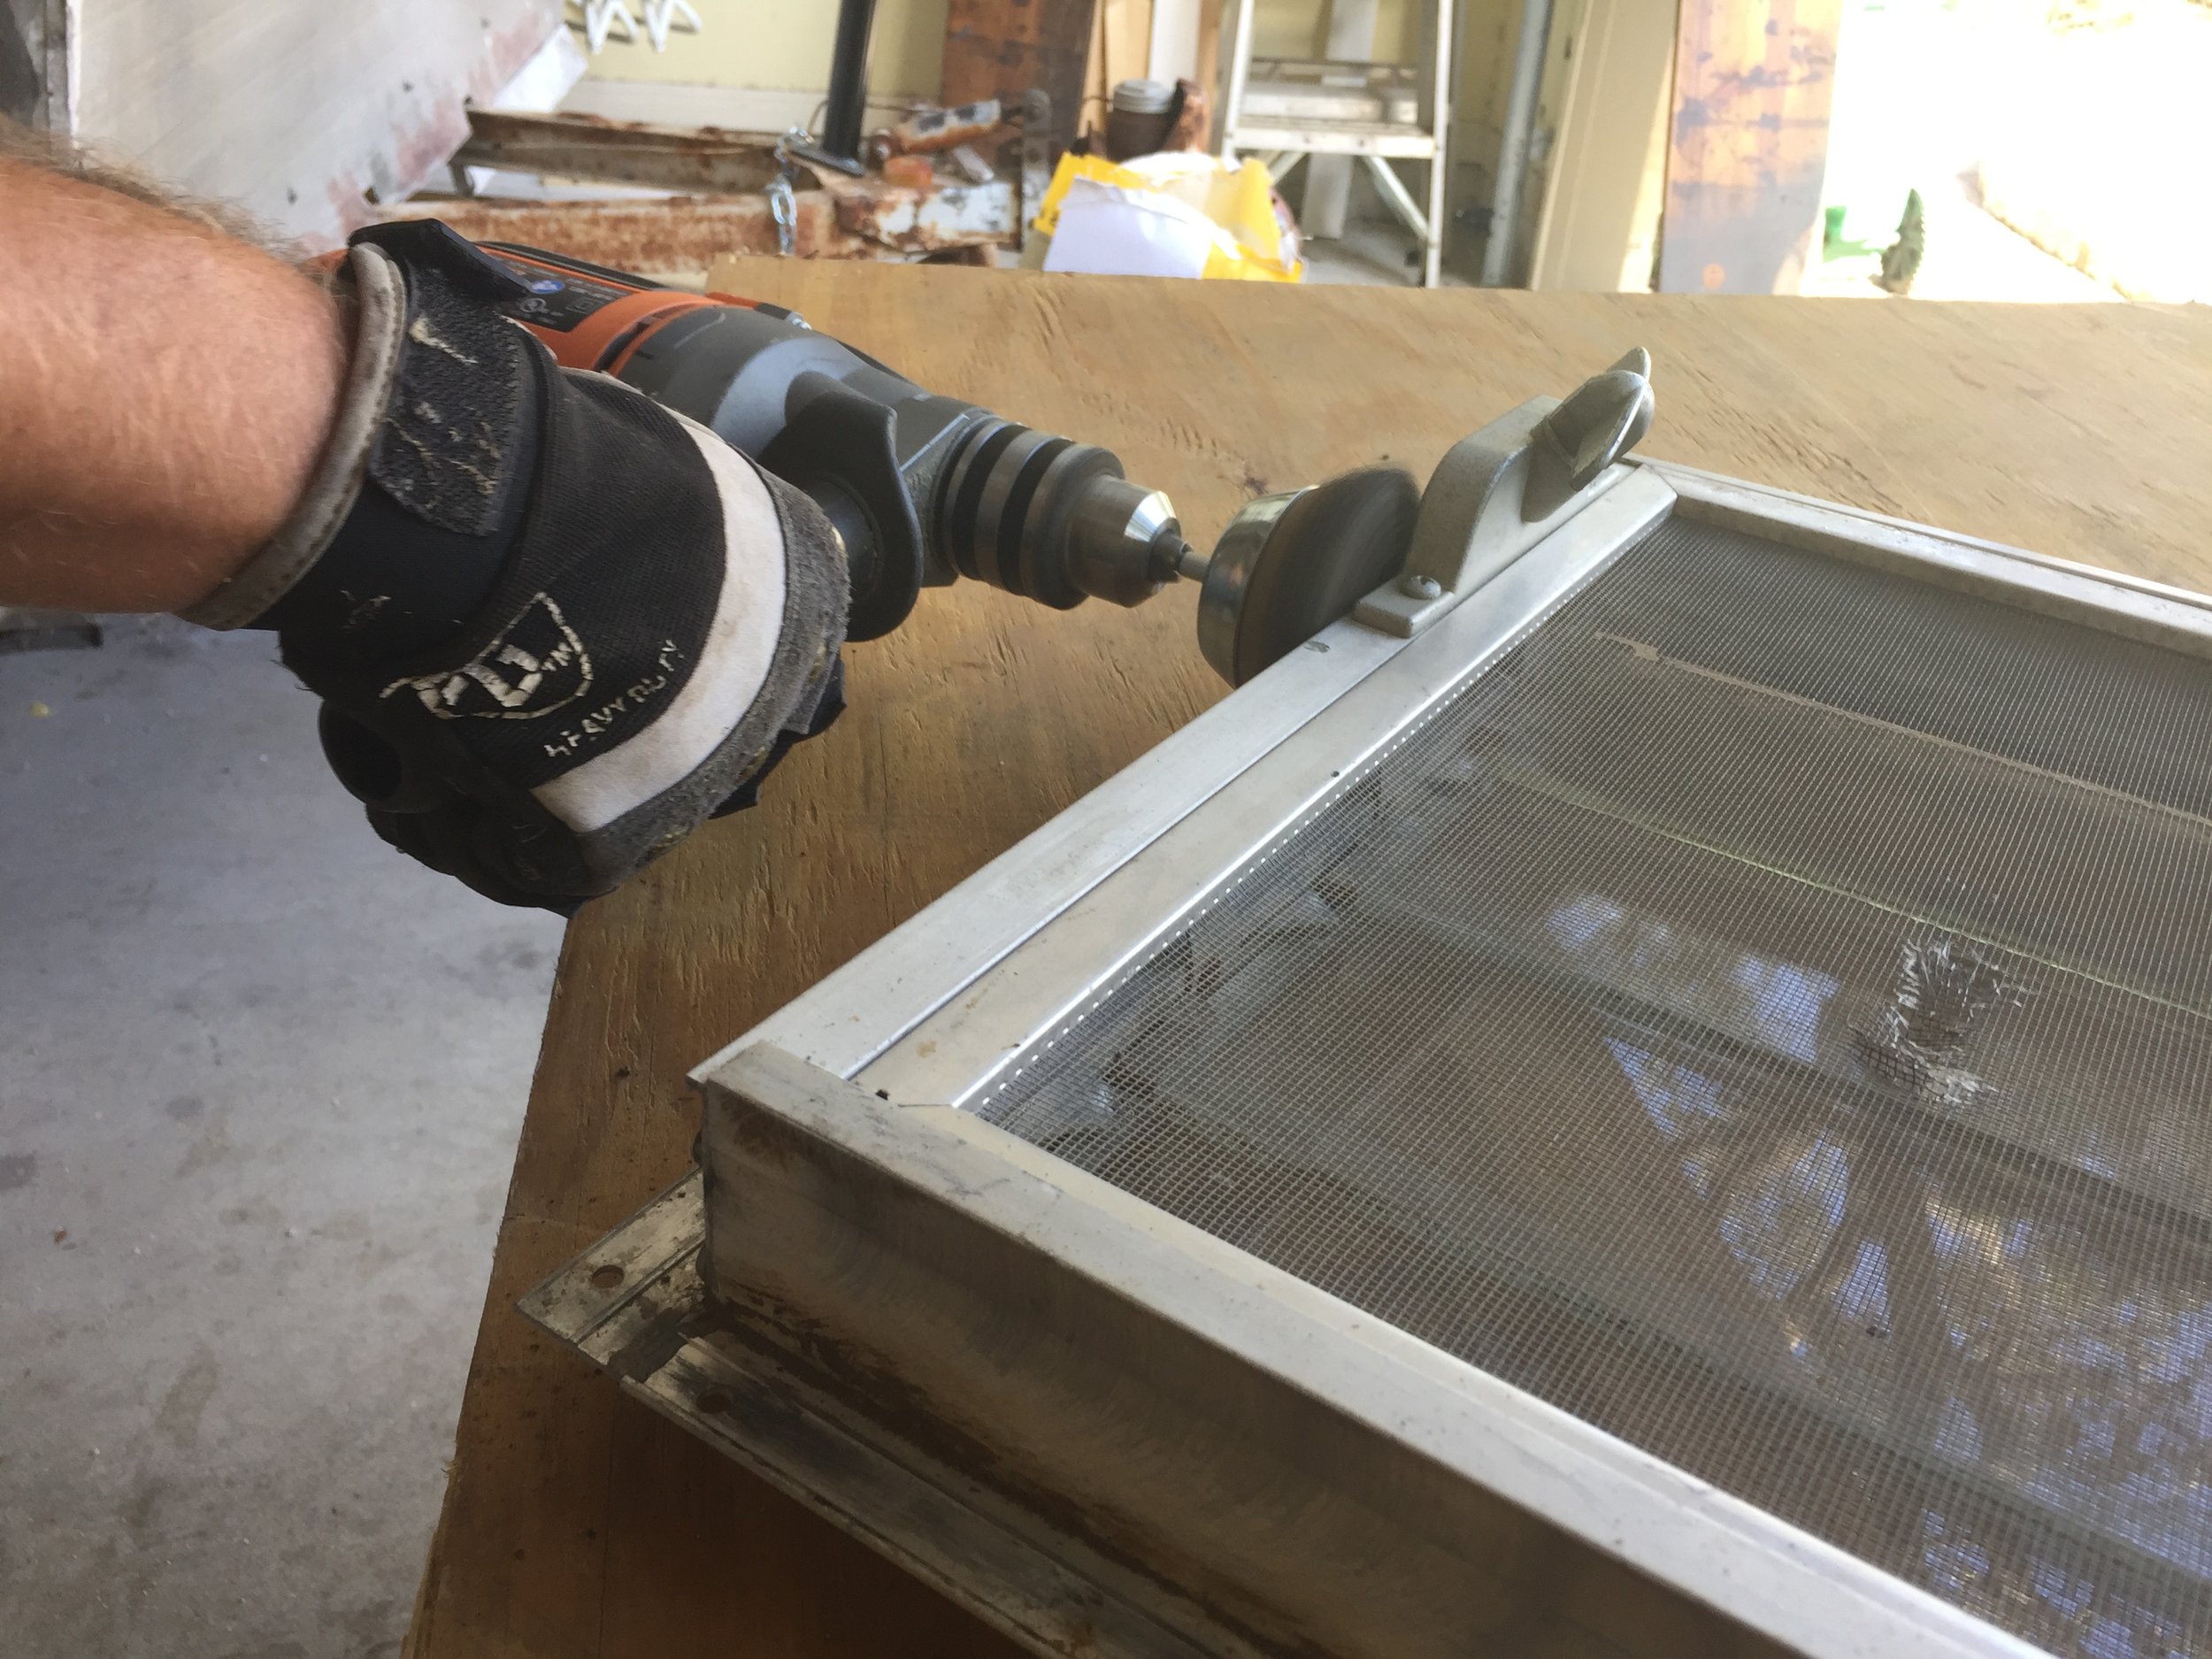
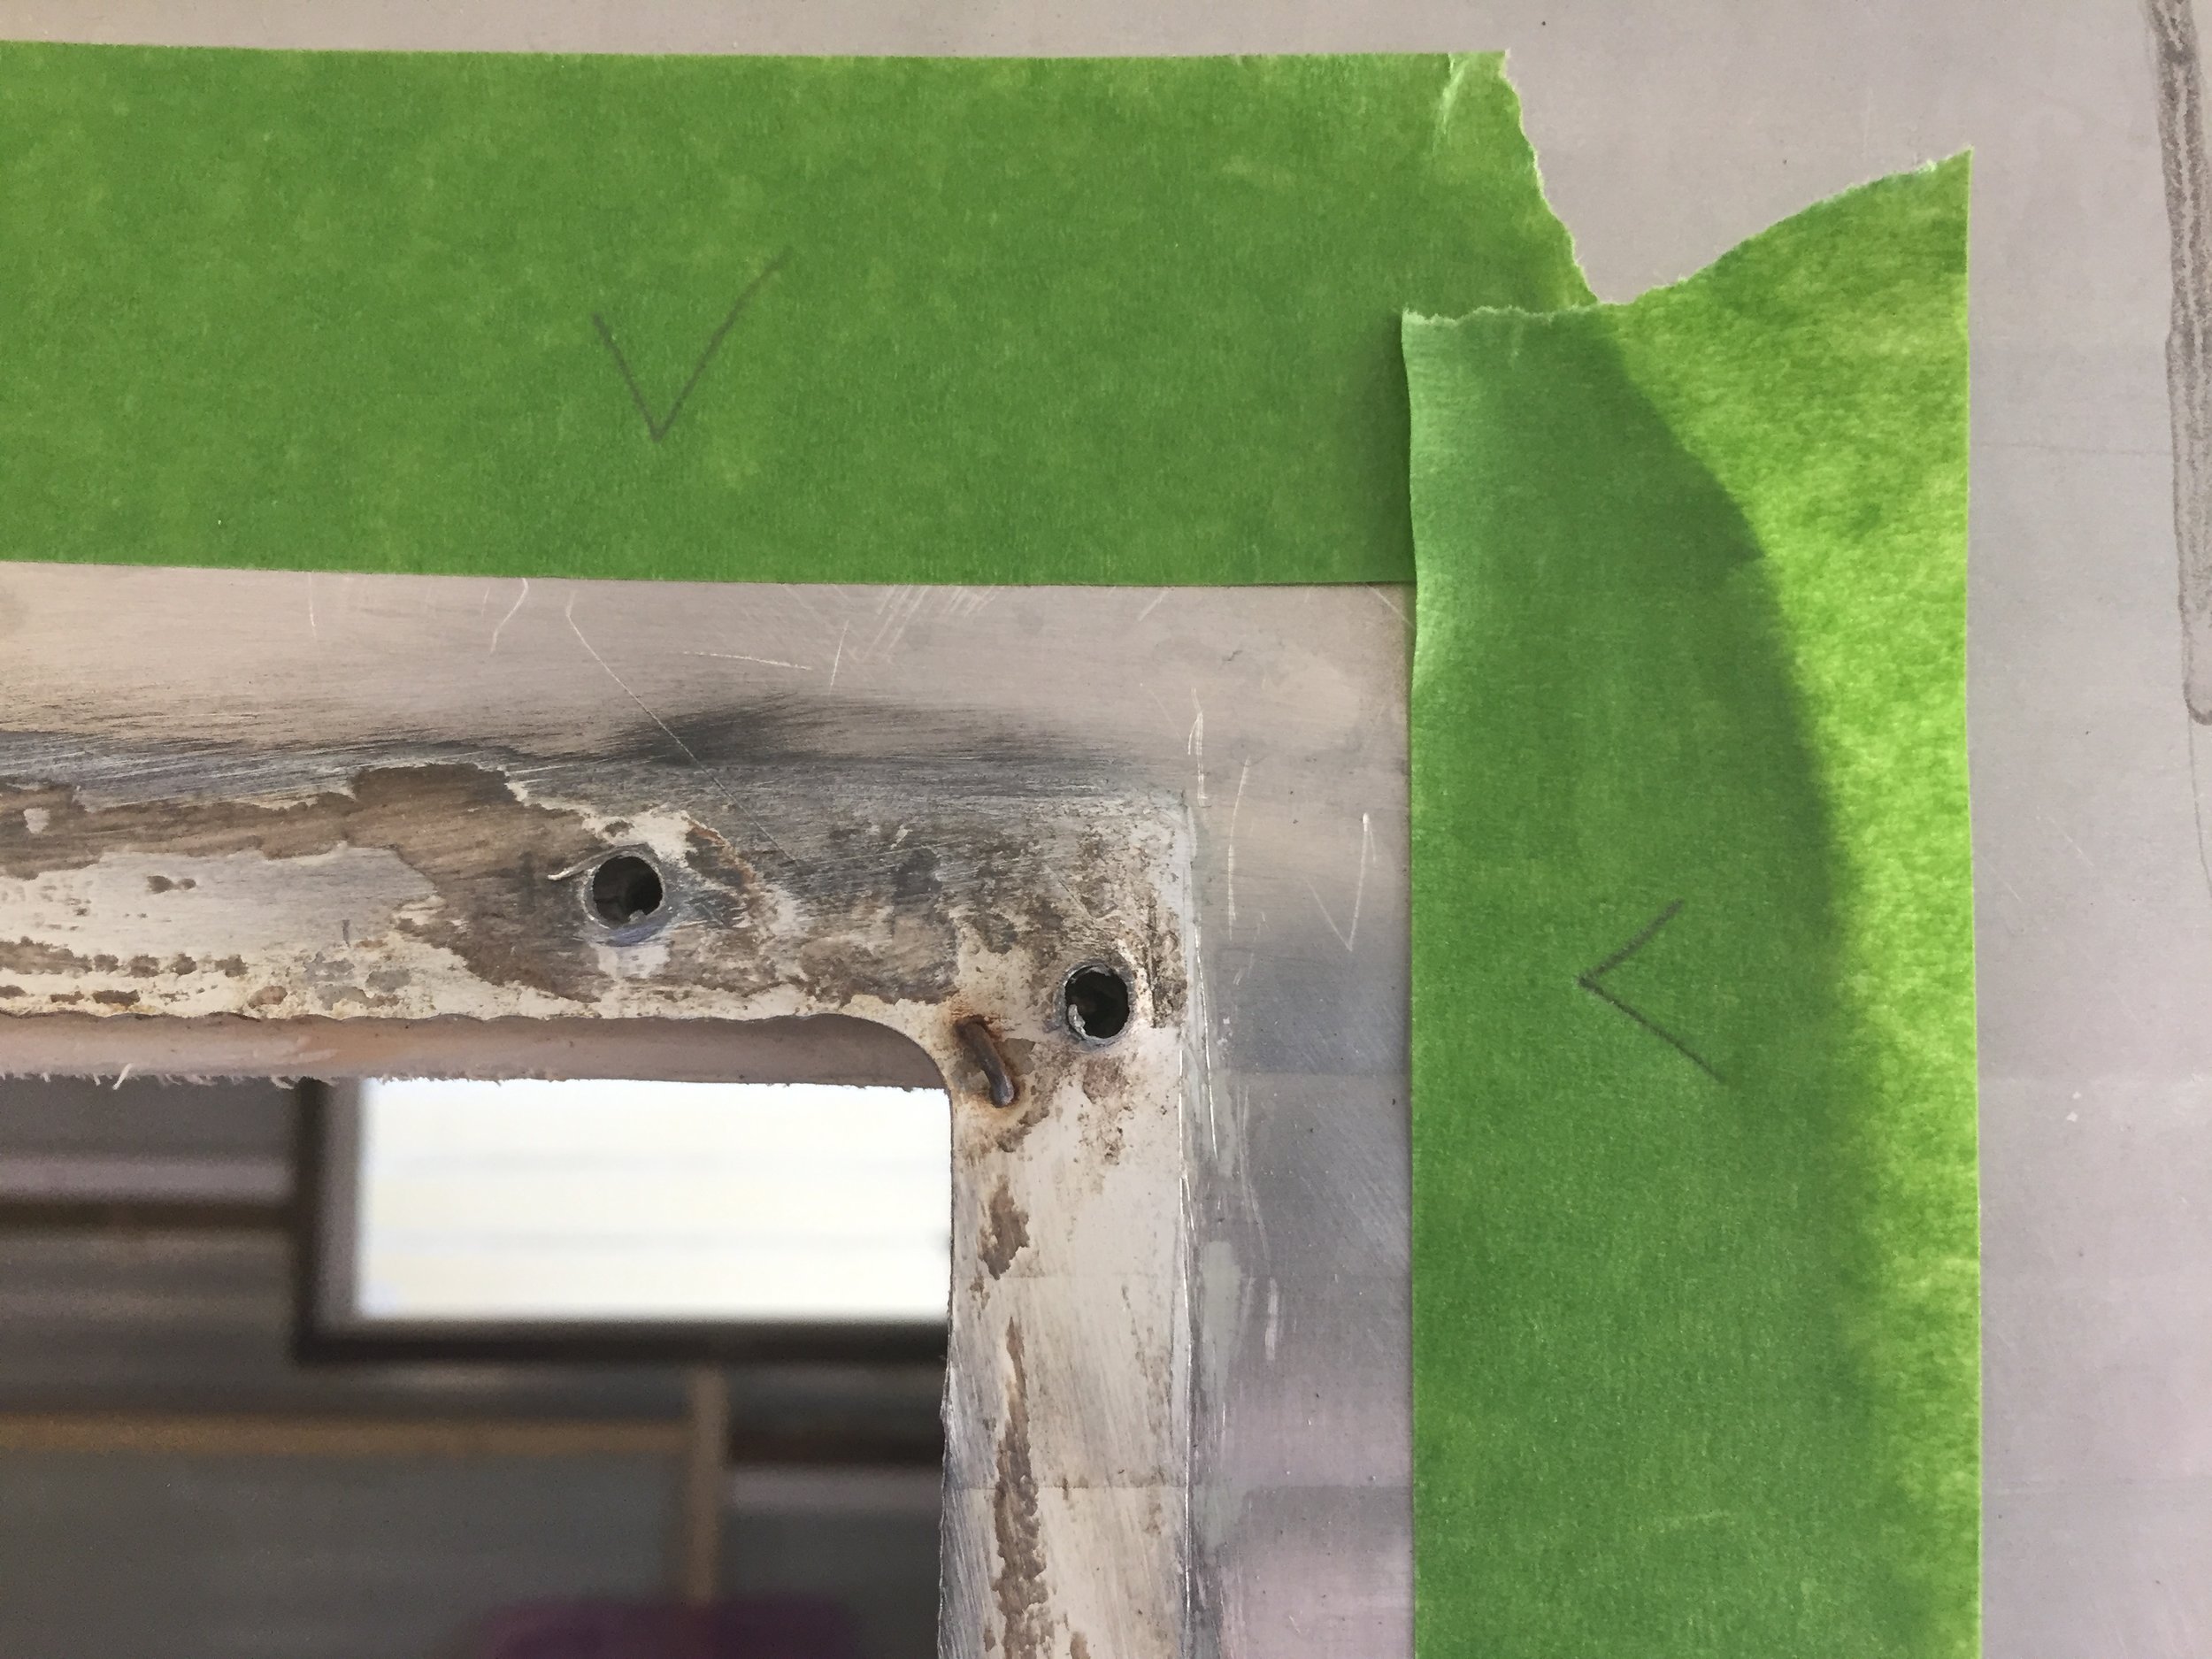
Use a corded drill with a wire wheel – Nick found this amazing wire brush made for drills that worked wonders for this (and many other things). He used it with our Ridgid corded drill which also comes in handy. The brush is fairly coarse, so it’s best to be used first (and carefully) for getting off all the “stuff” that’s on the window frames – the dull gray surface layer of metal oxidization, the dry crusty bits of half-a-century-old putty tape, rust spots, you name it. Nick used this method to clean all the nooks and crannies of the metal frames, including the backs of the windows where the new putty tape goes. This area should be cleaned thoroughly for the new stuff to stick.
(Once you pull of the old rubber gasket, the same de-gunking process goes for the small non-louvered windows.)
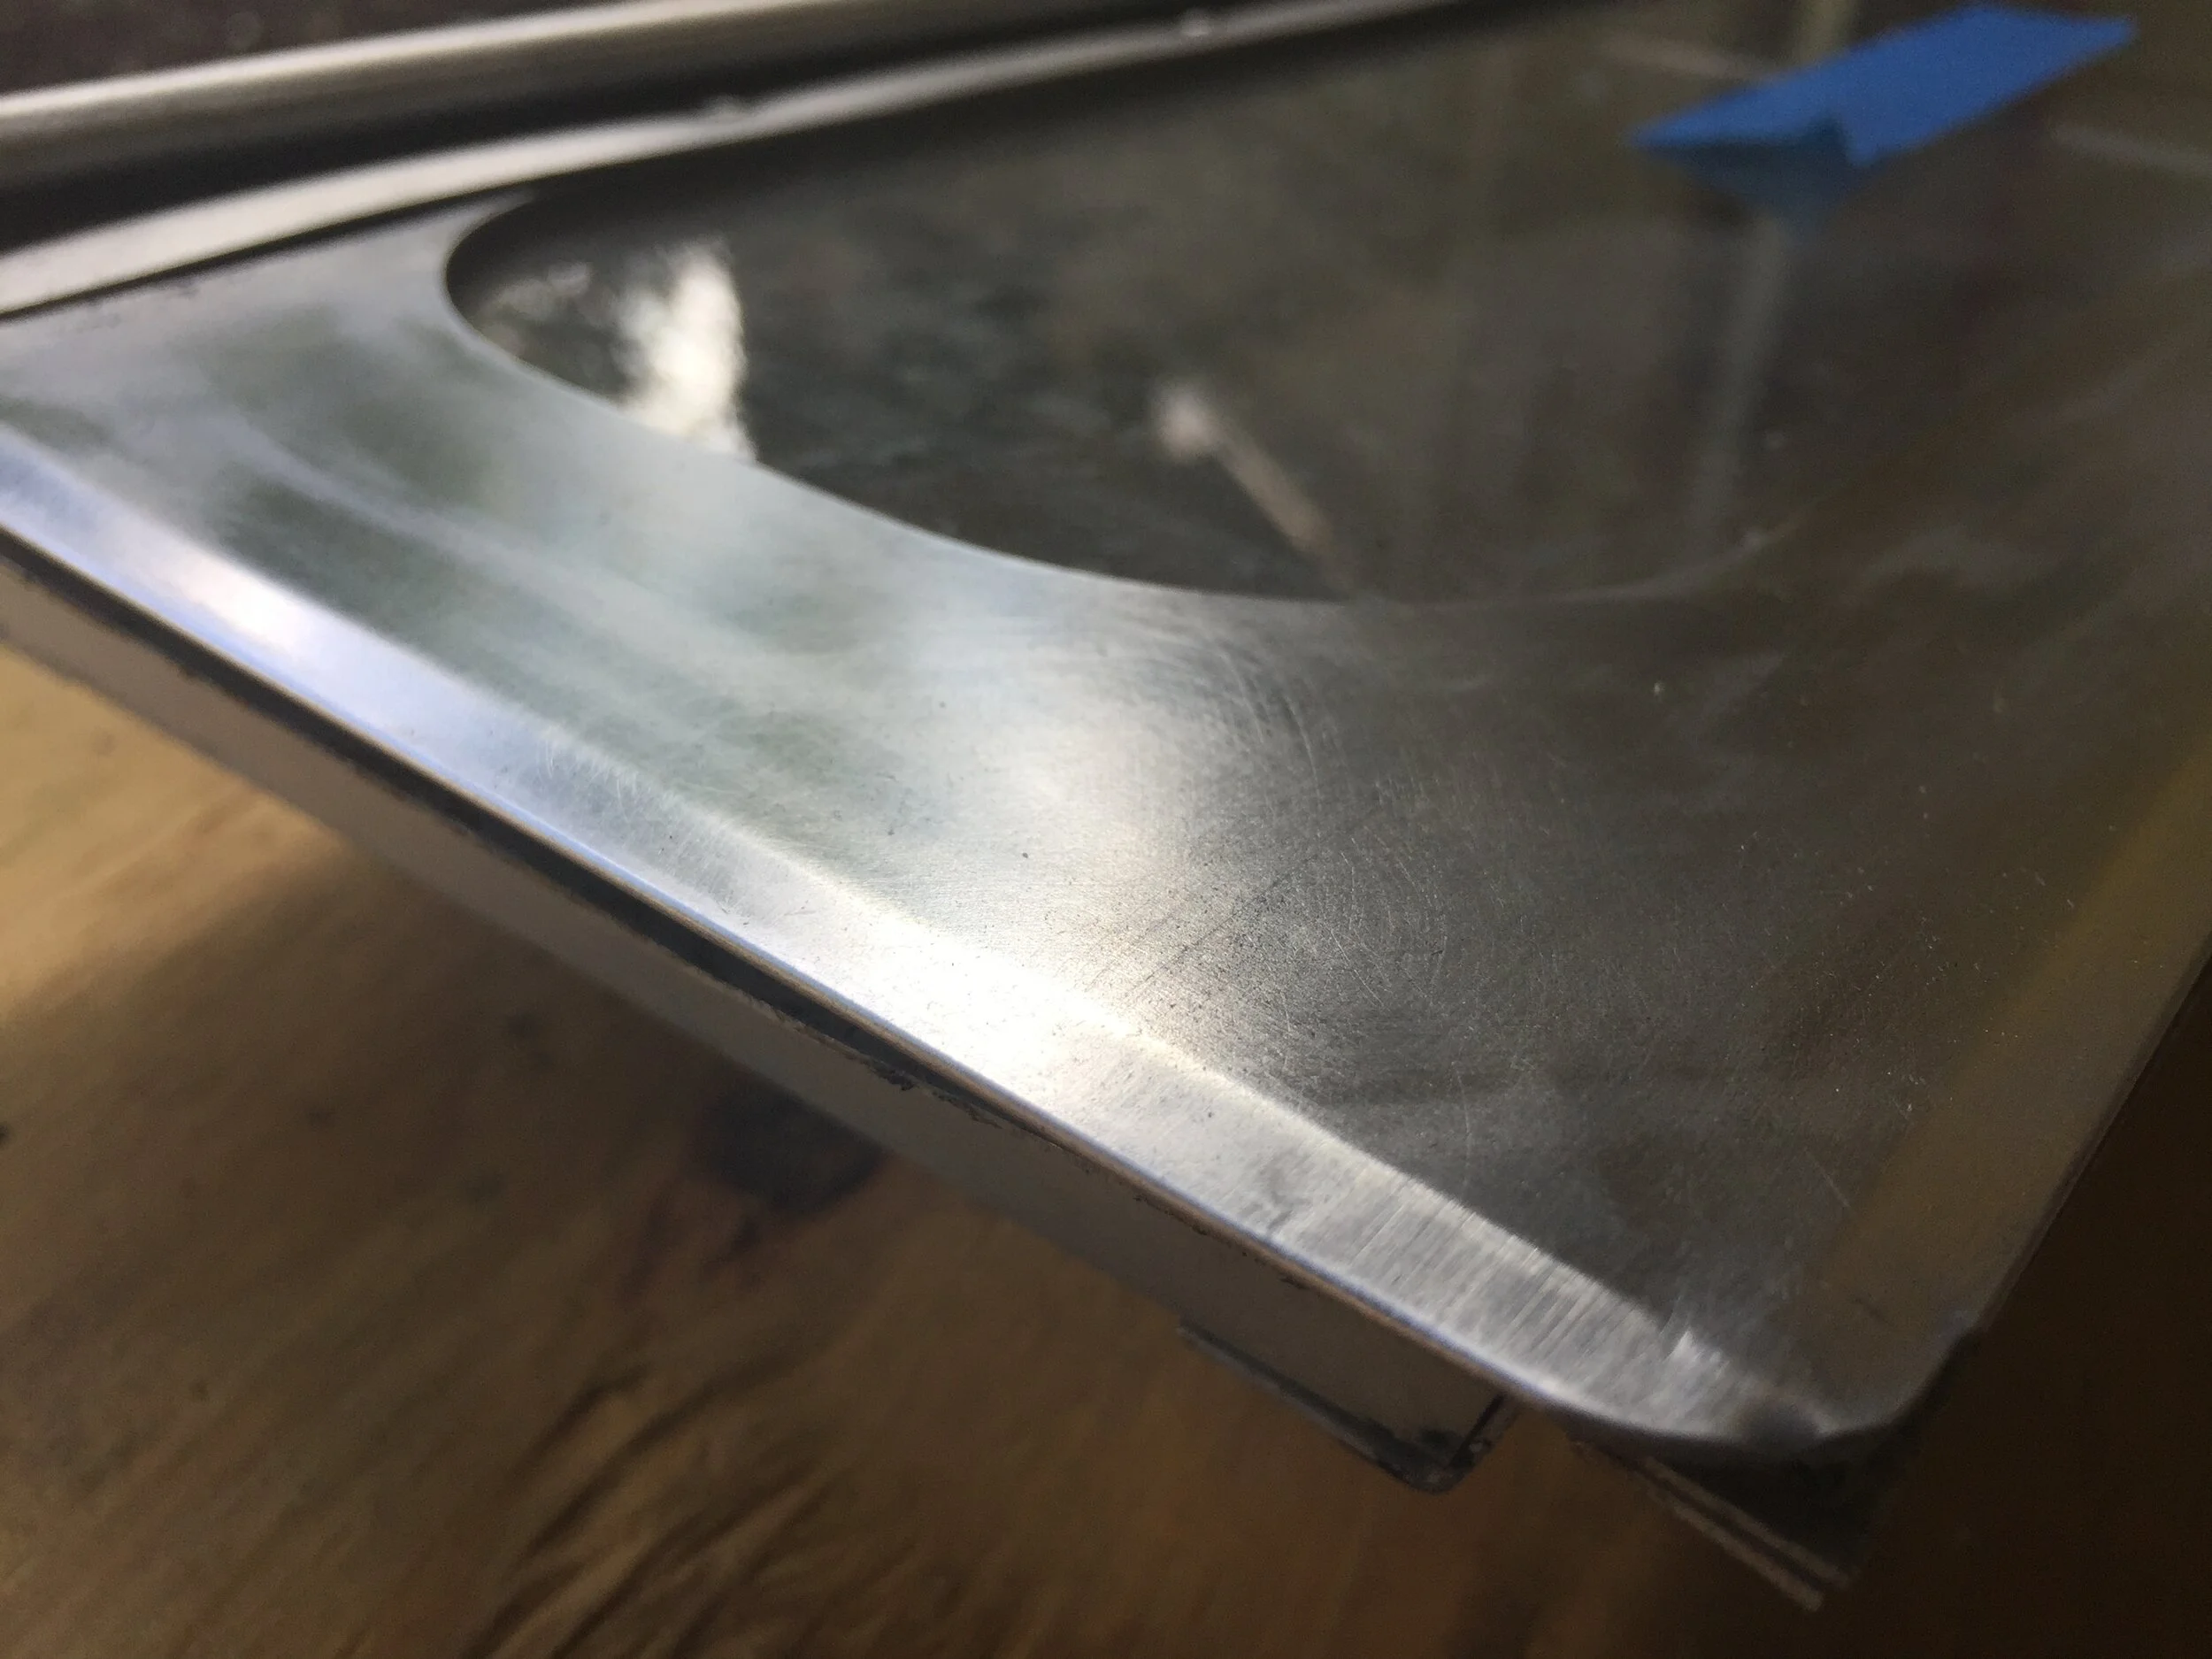
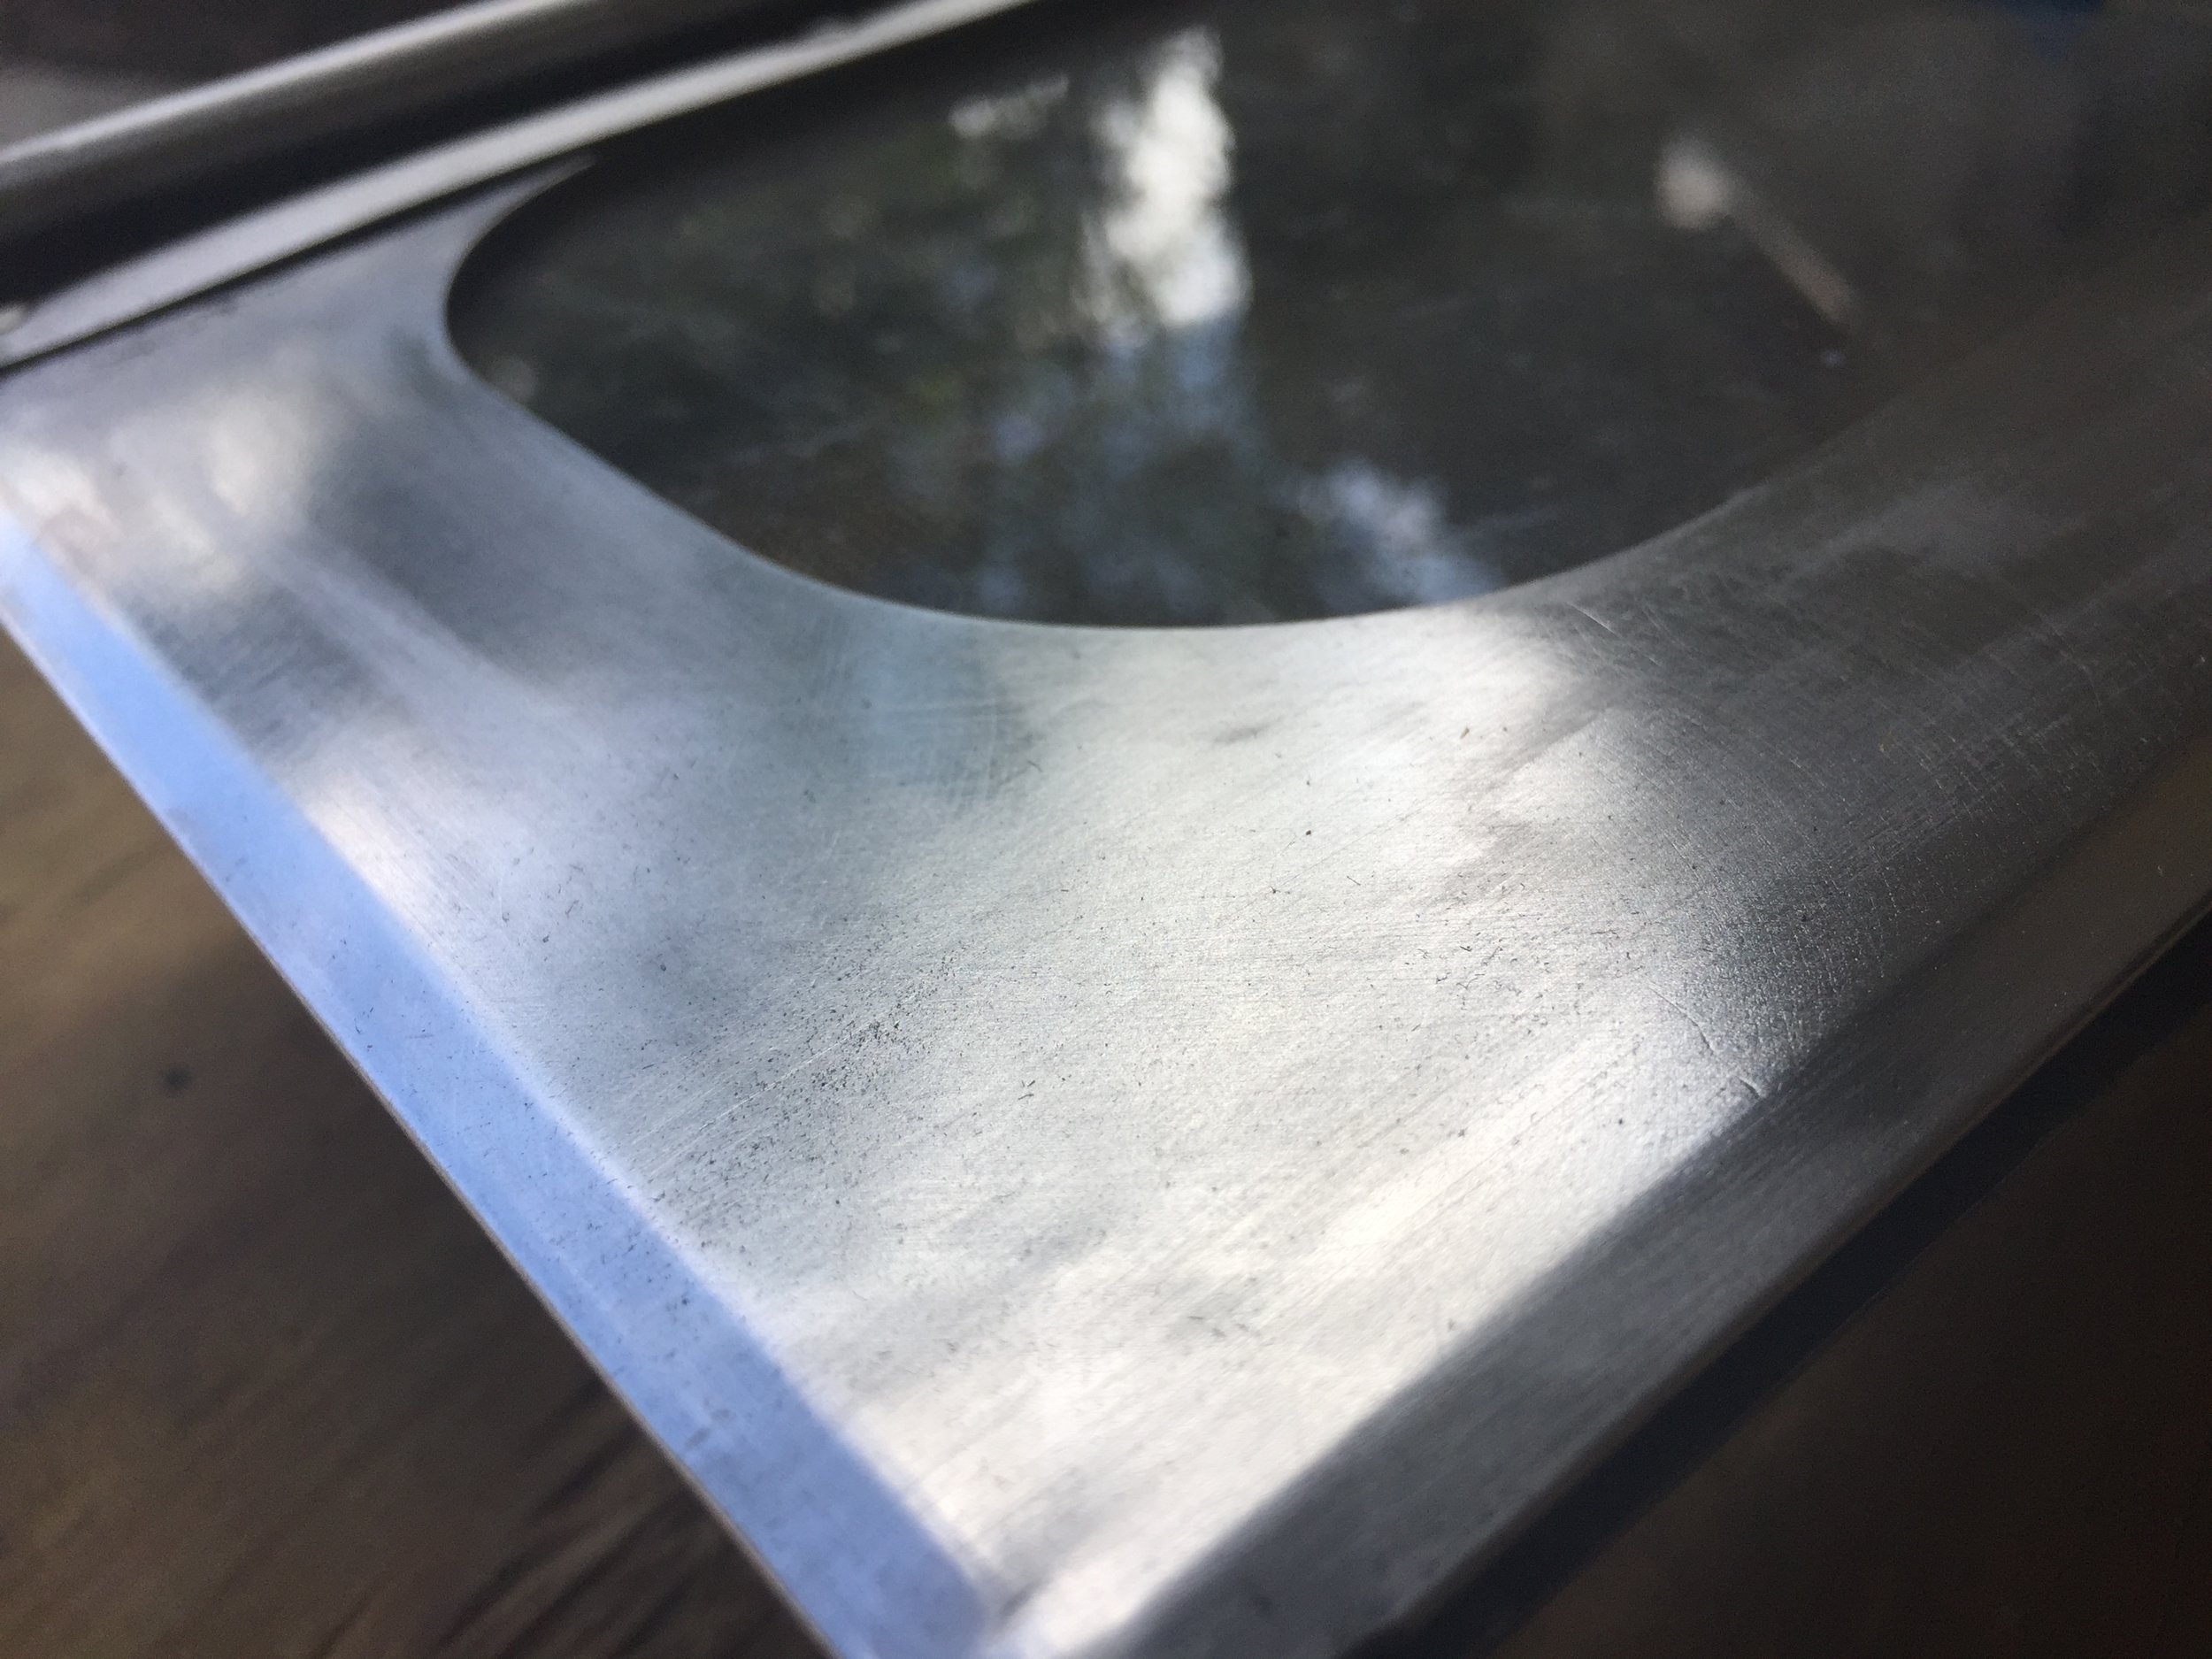
Polishing the aluminum
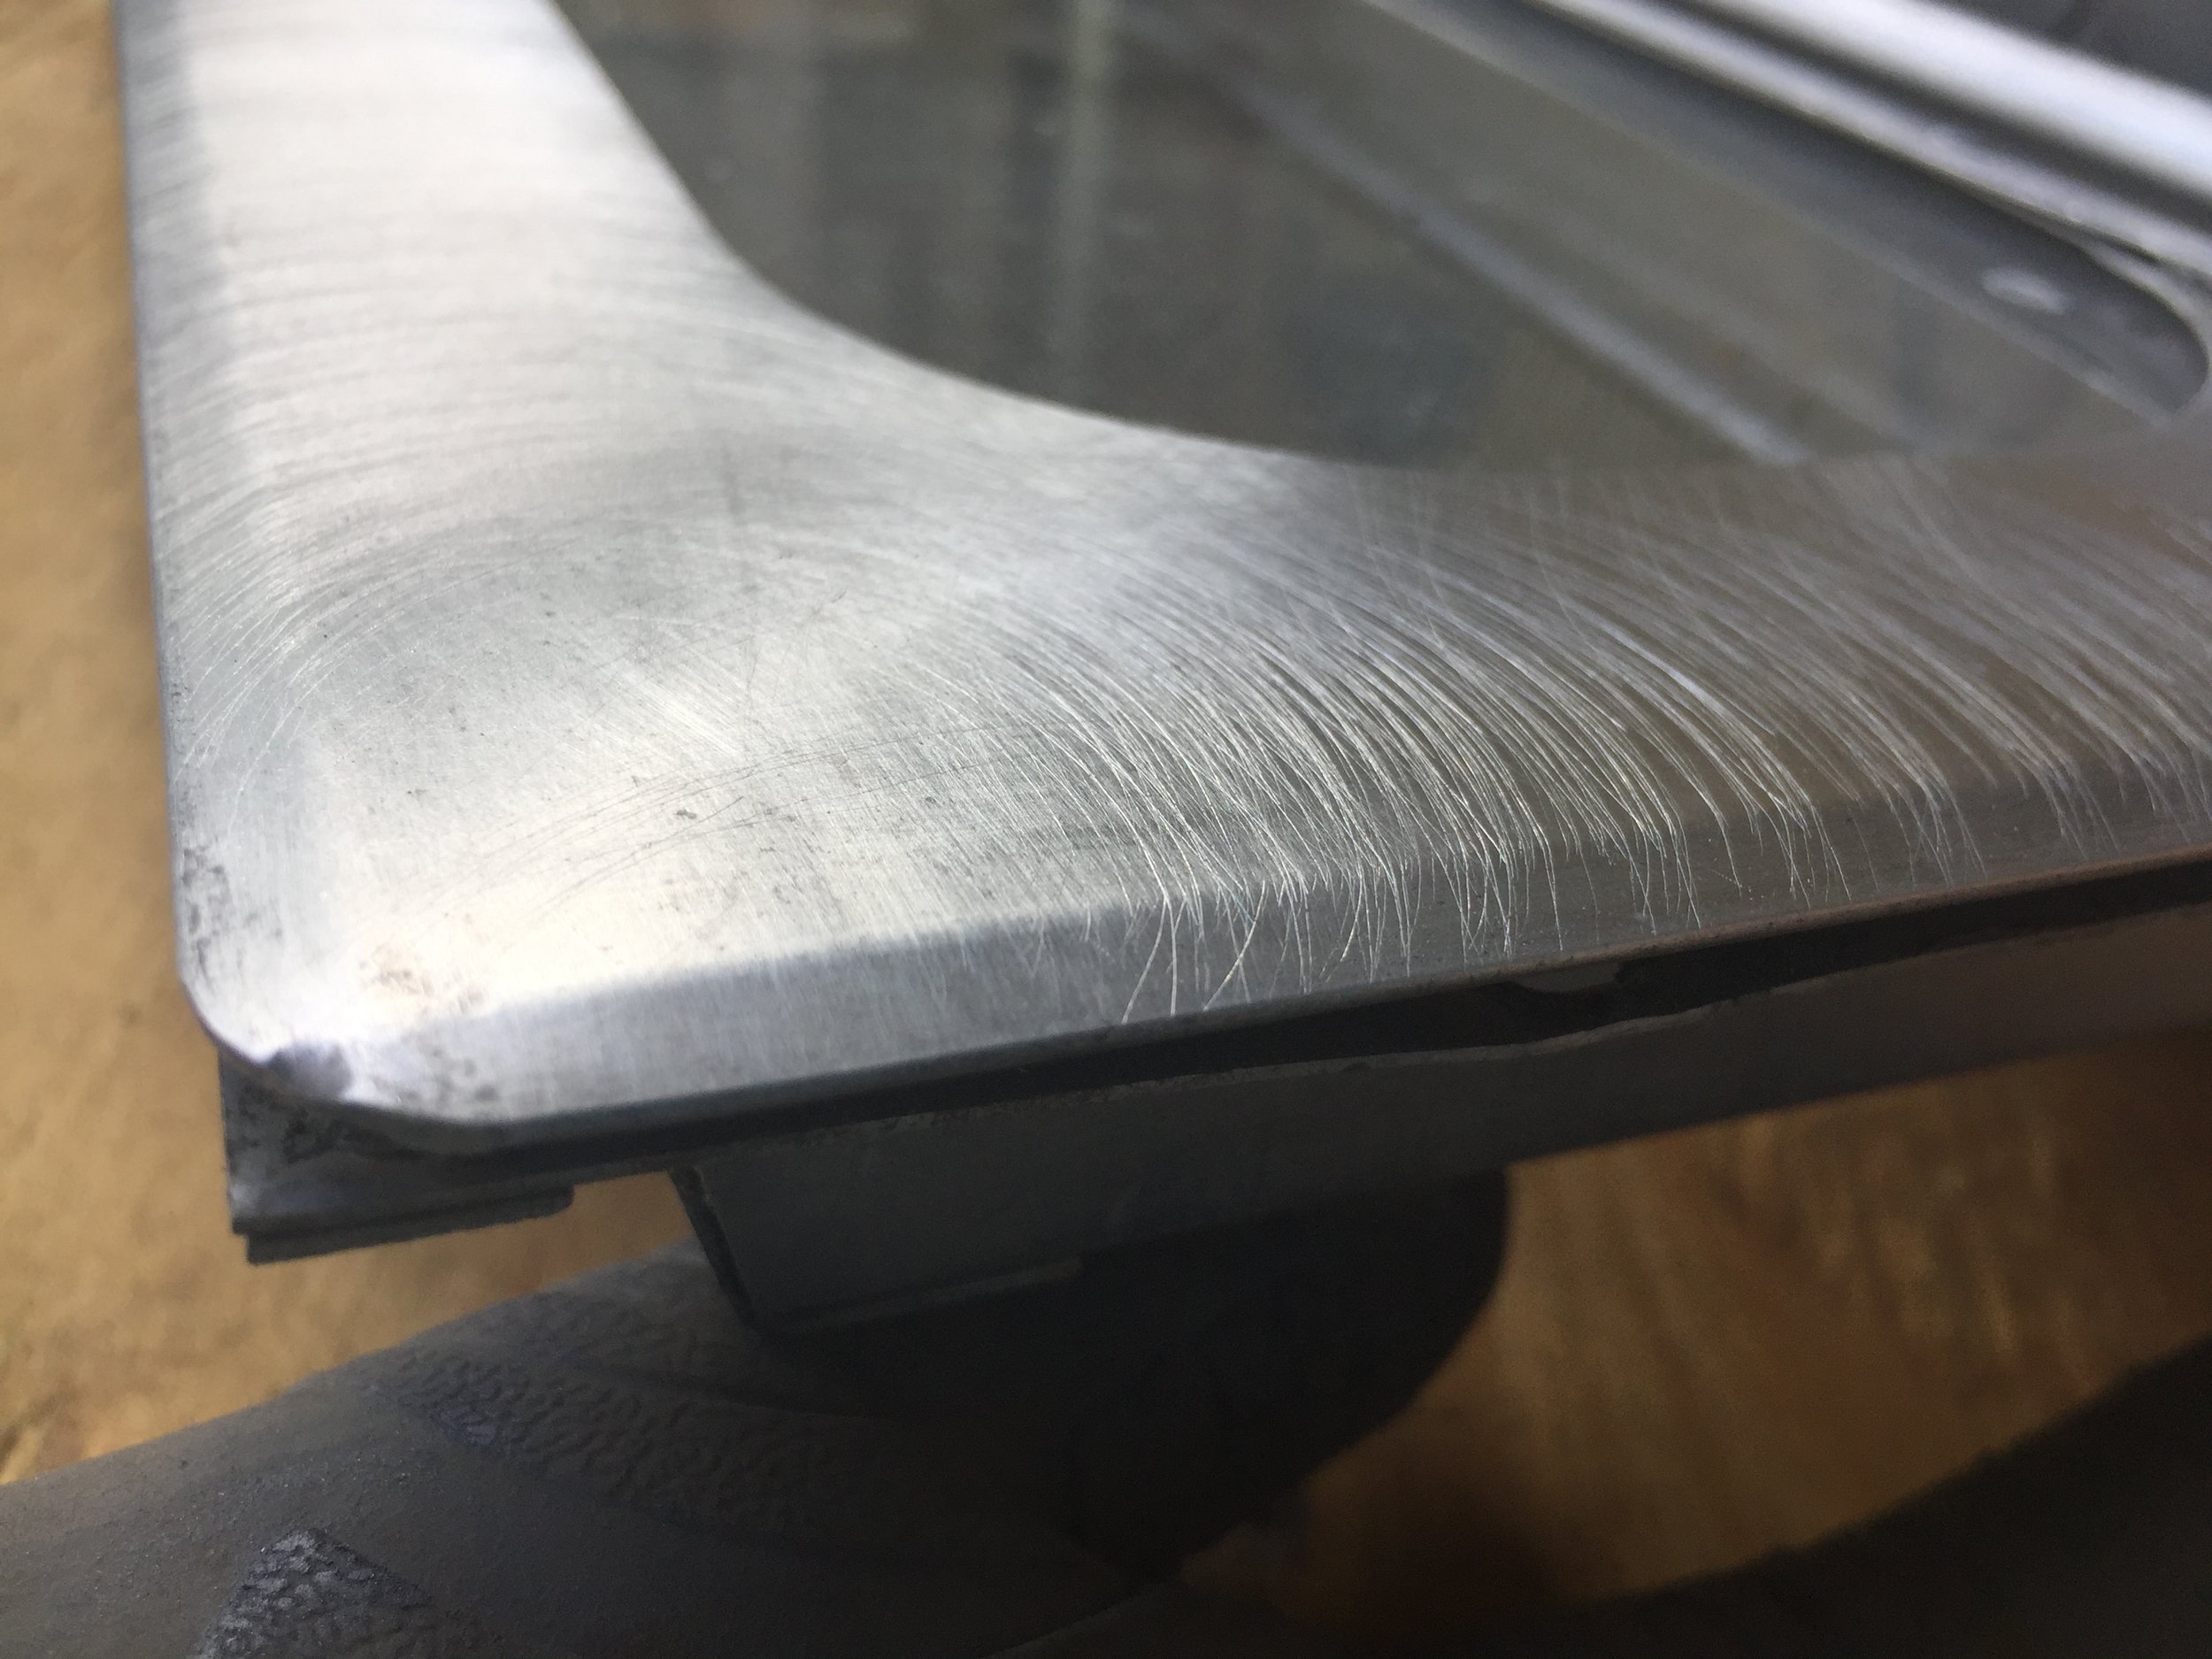
Buy lots of steel wool – We used #00, #000 & #0000 grades. To be honest, I’m not sure you need all of them or that there’s really that big of a difference between them because I’m pretty sure we used them interchangeably (they look the same when they’re next to each other and out of the bag). As with sandpaper, you do want to make sure you don’t ever use a coarser grit (#00) after a finer one (#0000). For our windows, each grade buffed the aluminum nicely and removed the shallow etch marks made by the wire brush.
Skip arm day at the gym – because you’re about to get a workout. Also if you’re anything like me, your fingers and hand muscles might hate you for a couple days after from gripping the steel wool so tight and applying so much controlled pressure.
Just get in there & hand polish those bad boys – Use the steel wool to hand buff everything to a high shine. Sorry, no tricks here – just hard work and sweat. This is where we tell ourselves, “it’s a labor of love, remember?”. Make as many passes as needed to buff out any grooves left from the wire wheel and remove any remaining rust spots. Even though this part is tiring and tedious, it’s also the most rewarding part of this process because the metal does shine up pretty nicely.
We did try polishes, but it seemed to just coat the dull metal without really removing the oxidation and discolorations like we wanted. We haven’t yet, but my guess is we’ll use the liquid polish at the end once we’ve painted the exterior to really make our trim pop!
Replacing the rubber glass retainer discs
Open the windows, or not – This is something you’ll have to play with to see what angles work for you as you flip the windows around to access the undersides of the slats without damaging the mechanisms. While not quite a two person job, it’s helpful to have someone there when you need them for holding and flipping, etc. We opted to work side by side on our own windows, swapping tools as needed for each step.
Use pliers to open the metal tabs – VERY CAREFULLY use needle nose pliers to open the little metal tabs that are keeping the glass slat (and probably a now crusty old retainer disc) in place. This metal is old and thin and can be very brittle and snap off if 1) you’re unlucky and 2) you go at them with Hulk hands. Don’t forget you’re also dealing with glass here so just use your best judgement.
Remove the old “dots” – (that’s what I’ve been calling the glass retainer discs). It’s much quicker and easier and plus that’s basically what they are. We used our trusty putty knives to pop off the old ones.
Straighten the other metal pieces – In addition to crusty dots, we also had some little metal tabs on the bottom sides of each slat that kind of act as a ledge for the glass. A lot of these were bent weird after years of use, so we took this time to bend these back into place.
Replace any broken pieces of glass – We have a couple pieces that have minor imperfections, and we’ll likely replace them a little later, but for now we’re moving forward with our glass as-is. If you’re prepared, this time would make the most sense to replace any glass you need to since you have the tabs open.
Add new “dots” & clamp ‘em down – We got our rubber glass retainer discs from Vintage Trailer Supply. Each slat uses two discs (one per side). For us that meant eight per window. Once you get a new dot in place, use your pliers to carefully bend the metal tab back into place to secure the glass slat.
Nick replacing the jalousie glass retainer discs on the large front double window
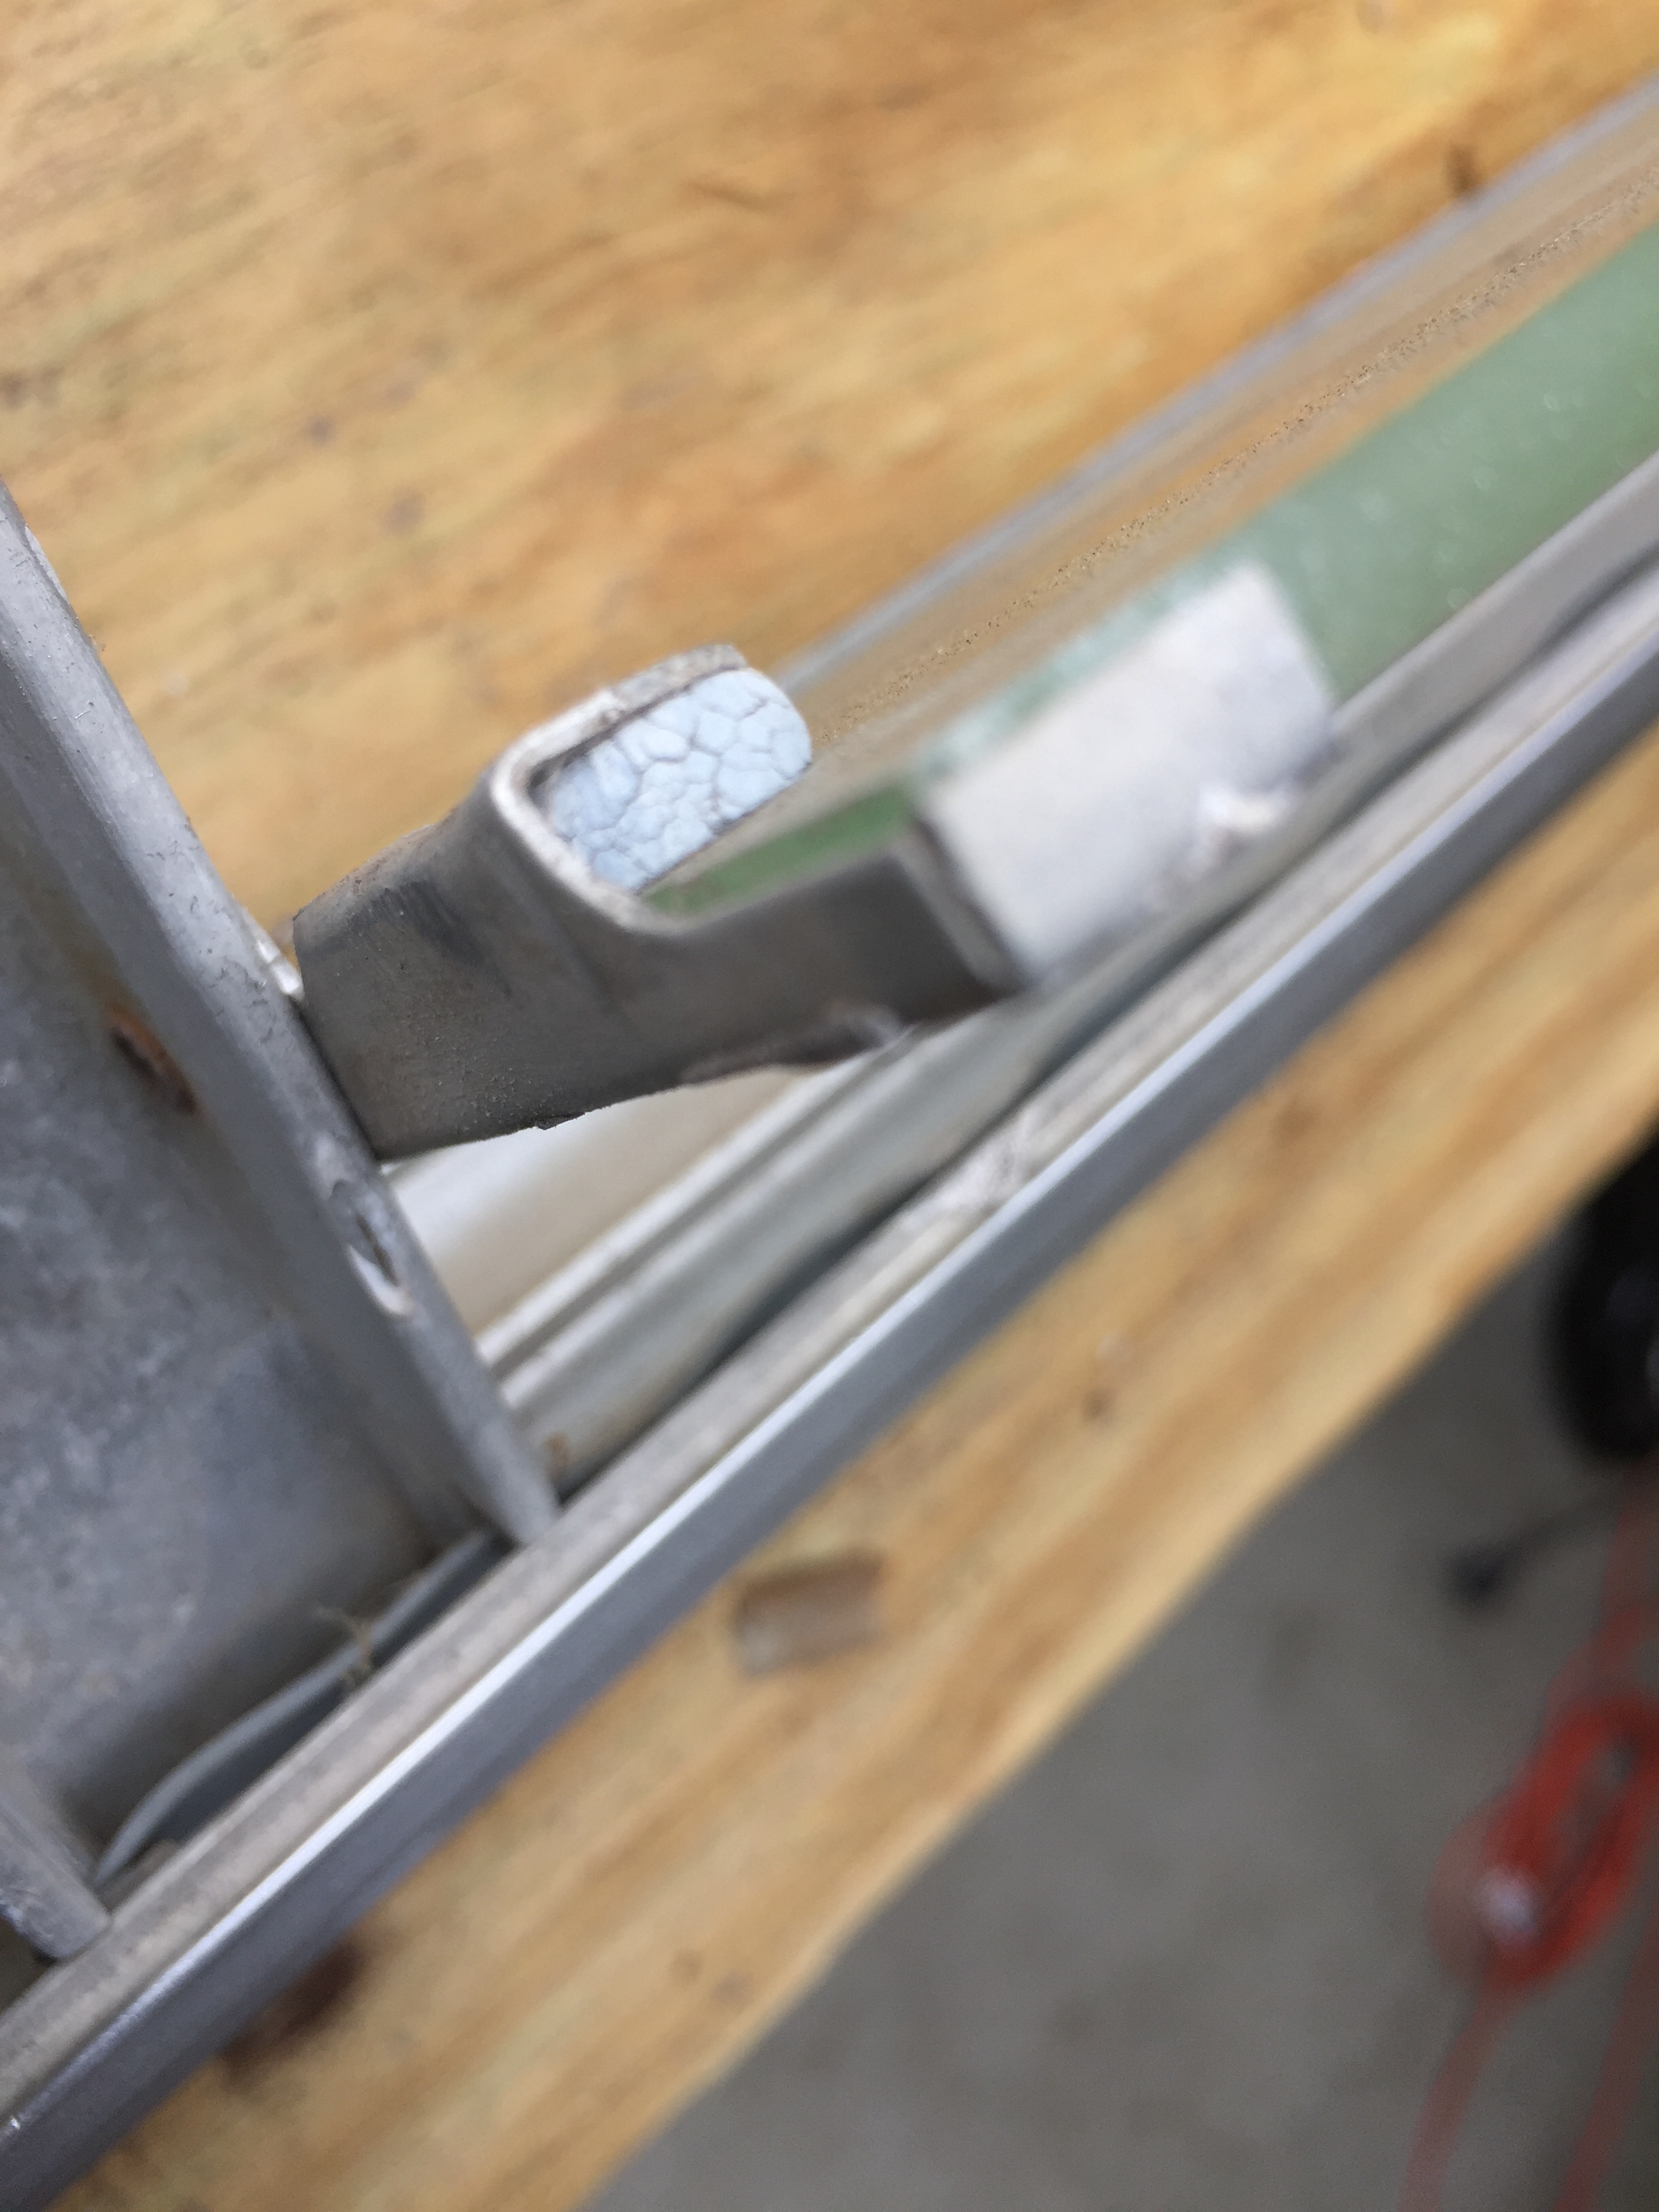
Replacing the rubber seals on louvered jalousie windows
Remove the old seal – If your seal doesn’t slide out easily with a little tug, you can loosen it by running a putty knife under it to break the seal from any gunk, and then slide out of the channel with needle nose pliers.
Clean the track – Make sure the channel is free of debris (for us that basically just meant blowing in it to get the steel wool dust out, since the old rubber seal kept the it from really getting the track grimy). The cleaner it is, the easier the install of the new stuff will be.
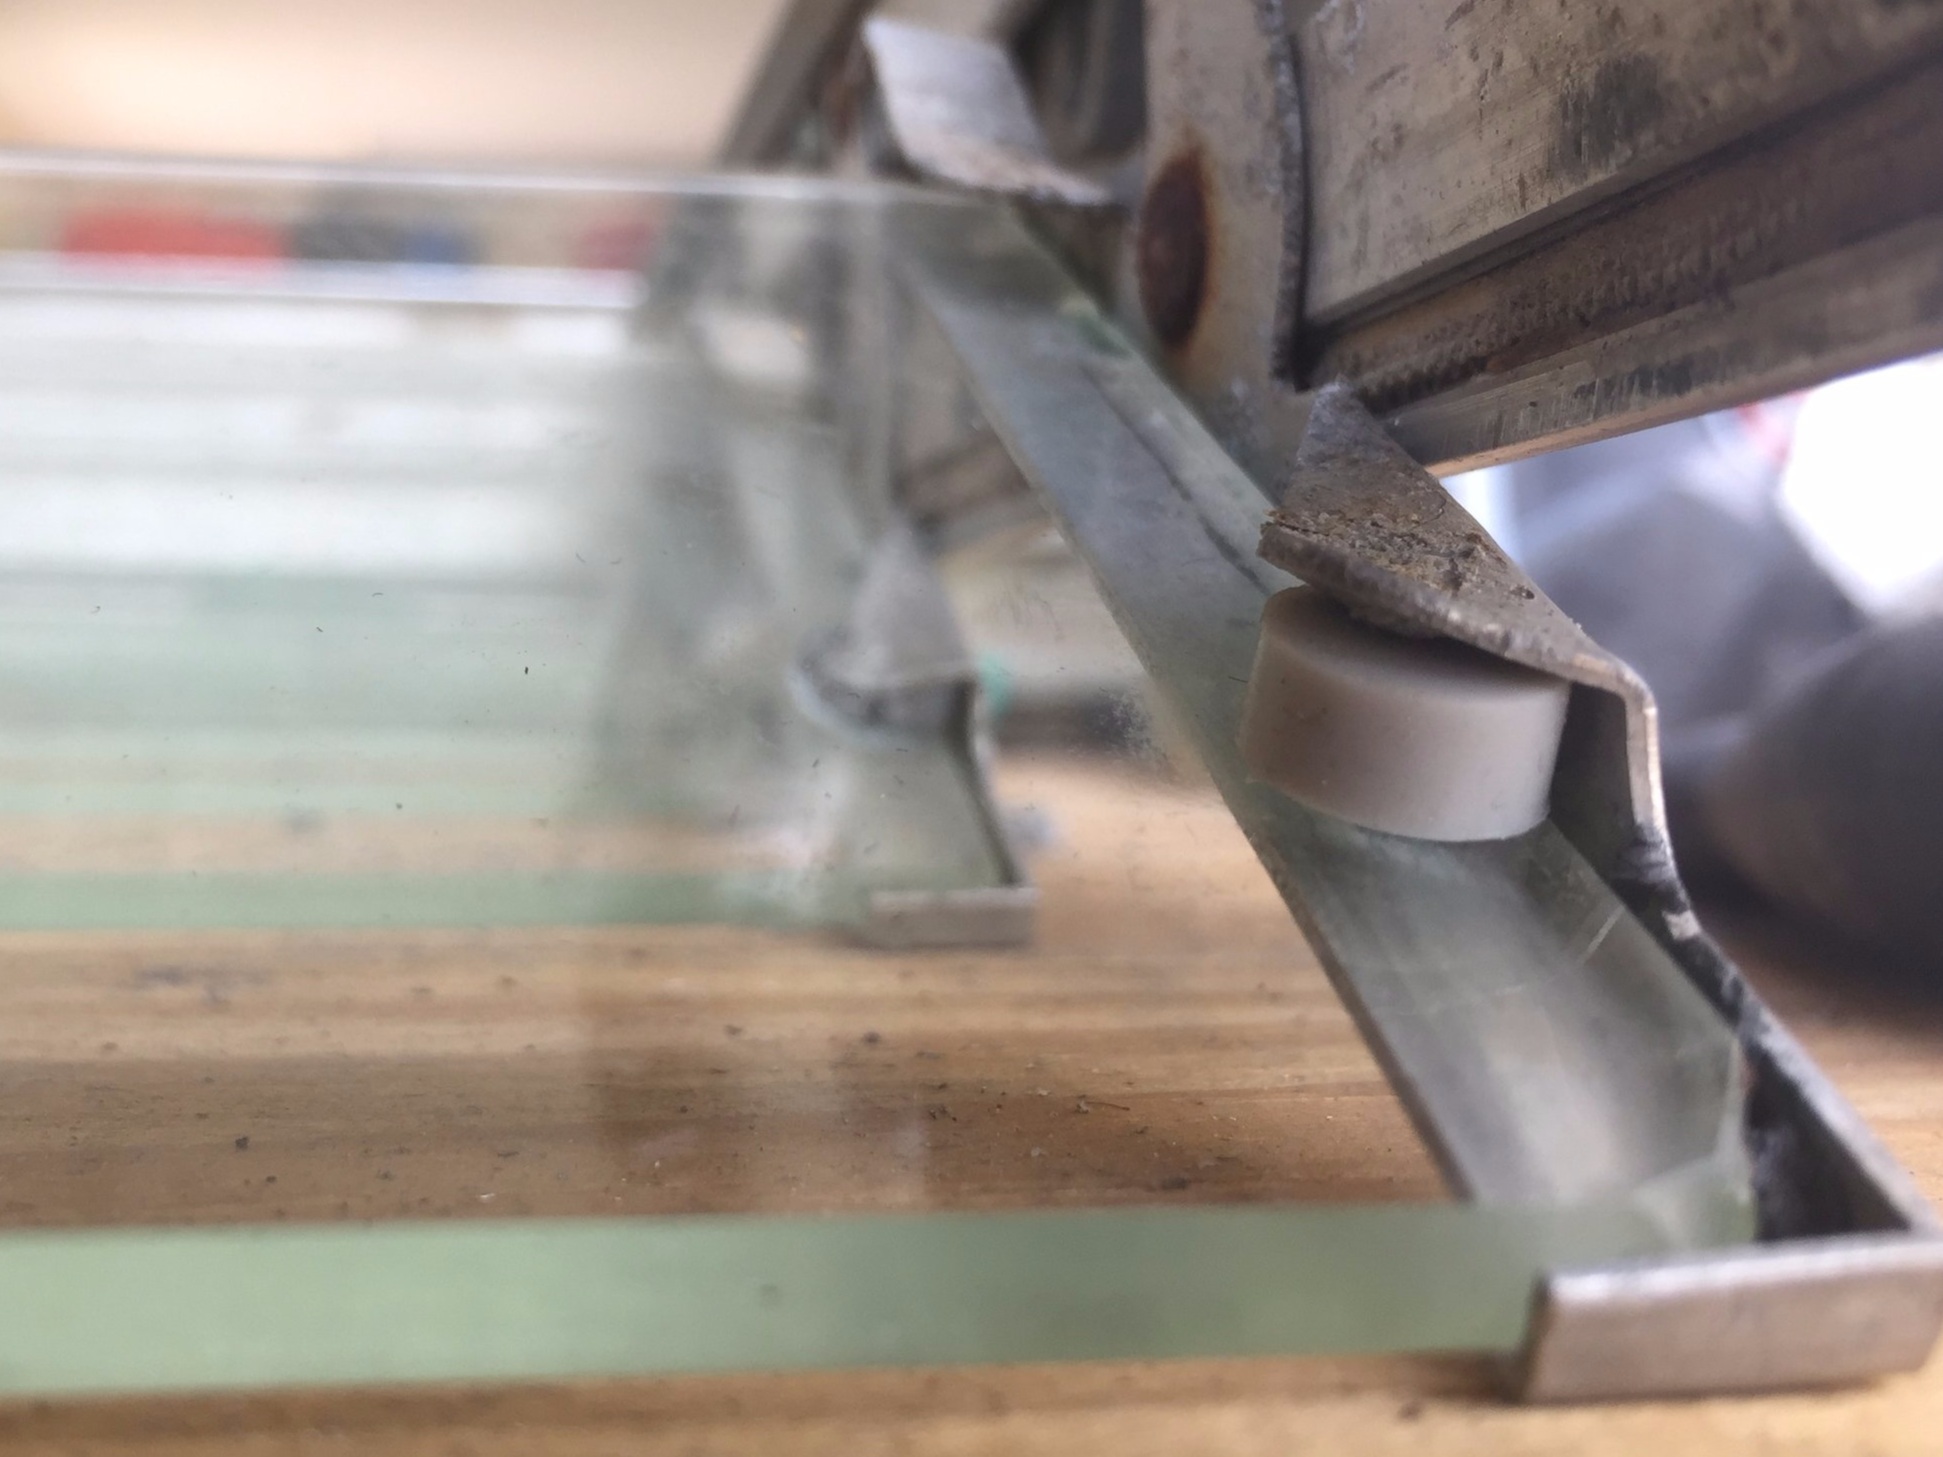
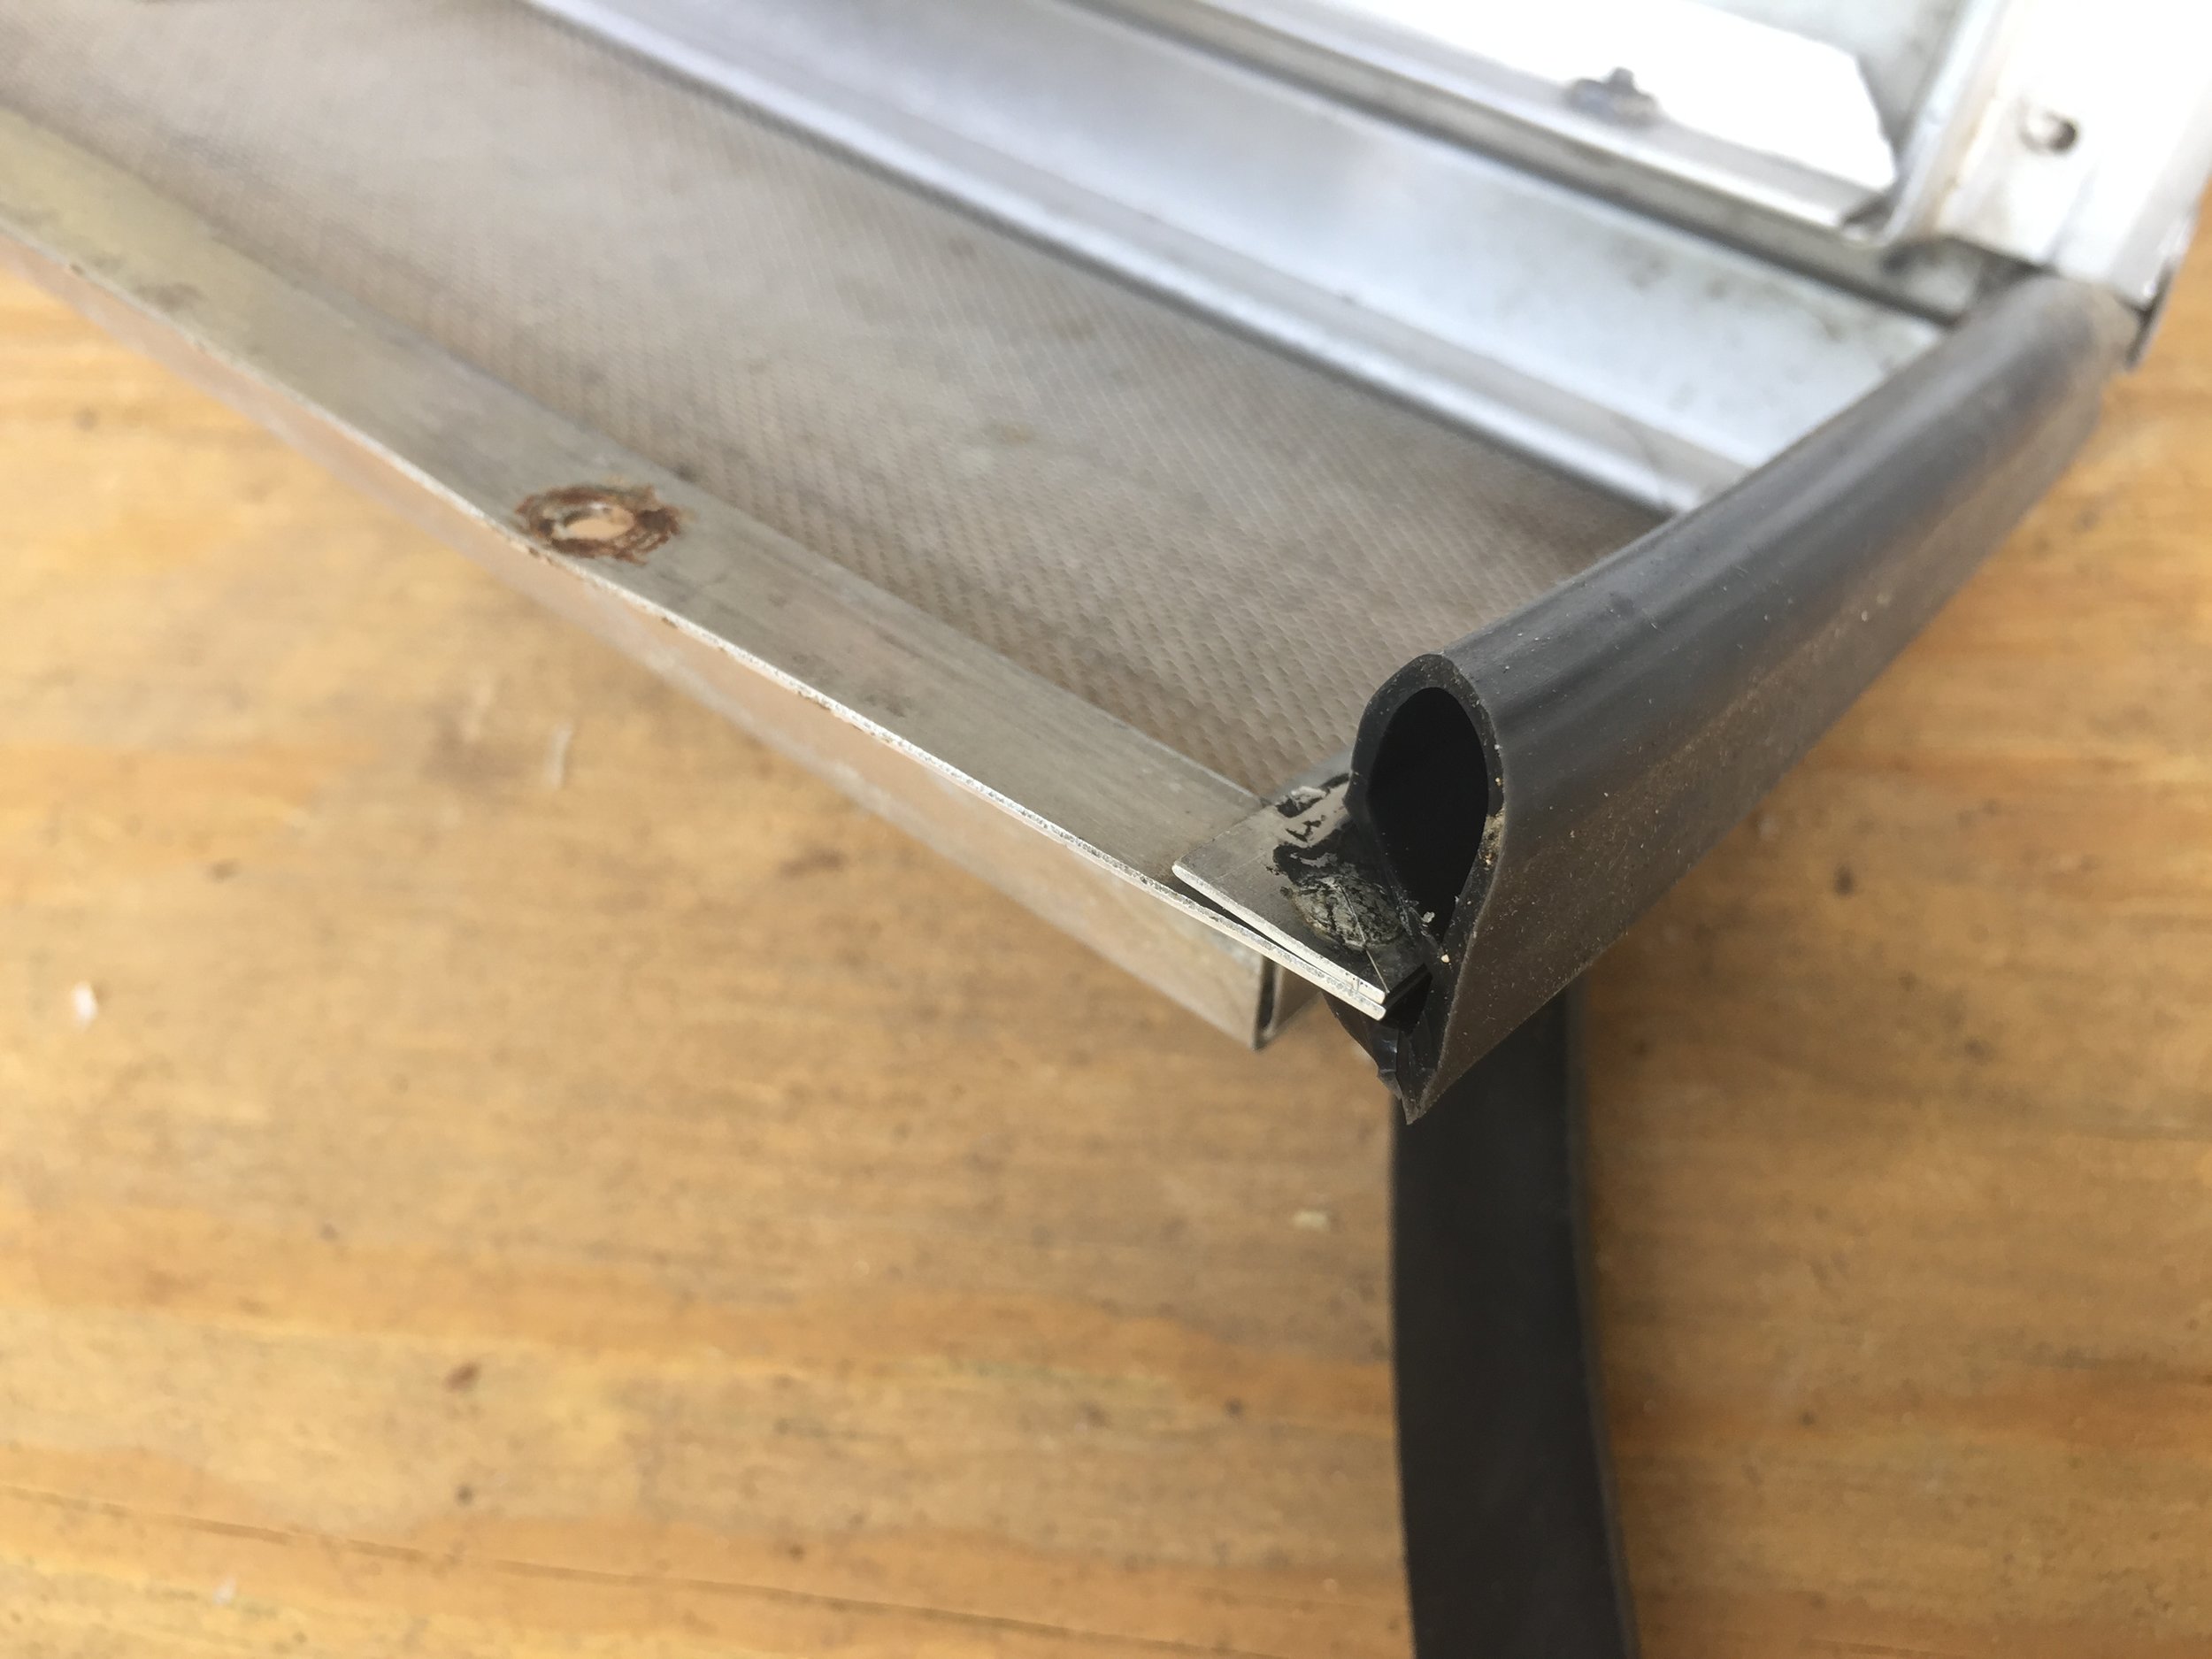
Slide in the new stuff – Another great find from Vintage Trailer Supply, this Jalousie Window Bottom Seal is what you need. This was most definitely a two-person job. (You could probably get away with doing it solo, but it may take longer and you might have more issues with it coming out of the track.) Get it started in the track with the “V” pointing down (see the second photo, below, for how it looks in and out of the track). Have one person carefully pull on the end (making sure to pull forward and not up), while the other person keeps the rubber seal feeding into the track properly. We found it best that the “feeder” also checked to make sure the strip was staying in the track the whole way while the “puller” pulled. Occasionally, we’d see the rubber pulling up out of the track and were able to use our trusty putty knife to gently stuff it back in so we could proceed with the pulling.
Don’t stretch the new stuff too thin – We also pulled on the tail end of the rubber seal as we went to try and keep a little slack in the line where we could so we didn’t overstretch the rubber, causing it to tear or snap back later. As a precaution, once we had the seal threaded through the whole track, we pulled the seal inward from the left and right to make sure it wouldn’t shrink and be too short after we cut off the excess. To take it a step further, we also left about an inch overhang on each side for a couple of days to allow it to settle a bit before we officially cut the ends flush.
Replacing the rubber seals on the other windows
Remove the old seal – The old D bulb-style rubber gasket came right off with just a baby tug. For us at least, this stuff wasn’t glued onto the window frame or anything, so once we removed the window with the screws from the camper the rubber was easy to remove.
Use the old stuff as a template – if you can. Our rubber was super hard and inflexible so it kind of broke apart at the corners when we tried to examine it for templating. This made figuring out the corners a little tricky…
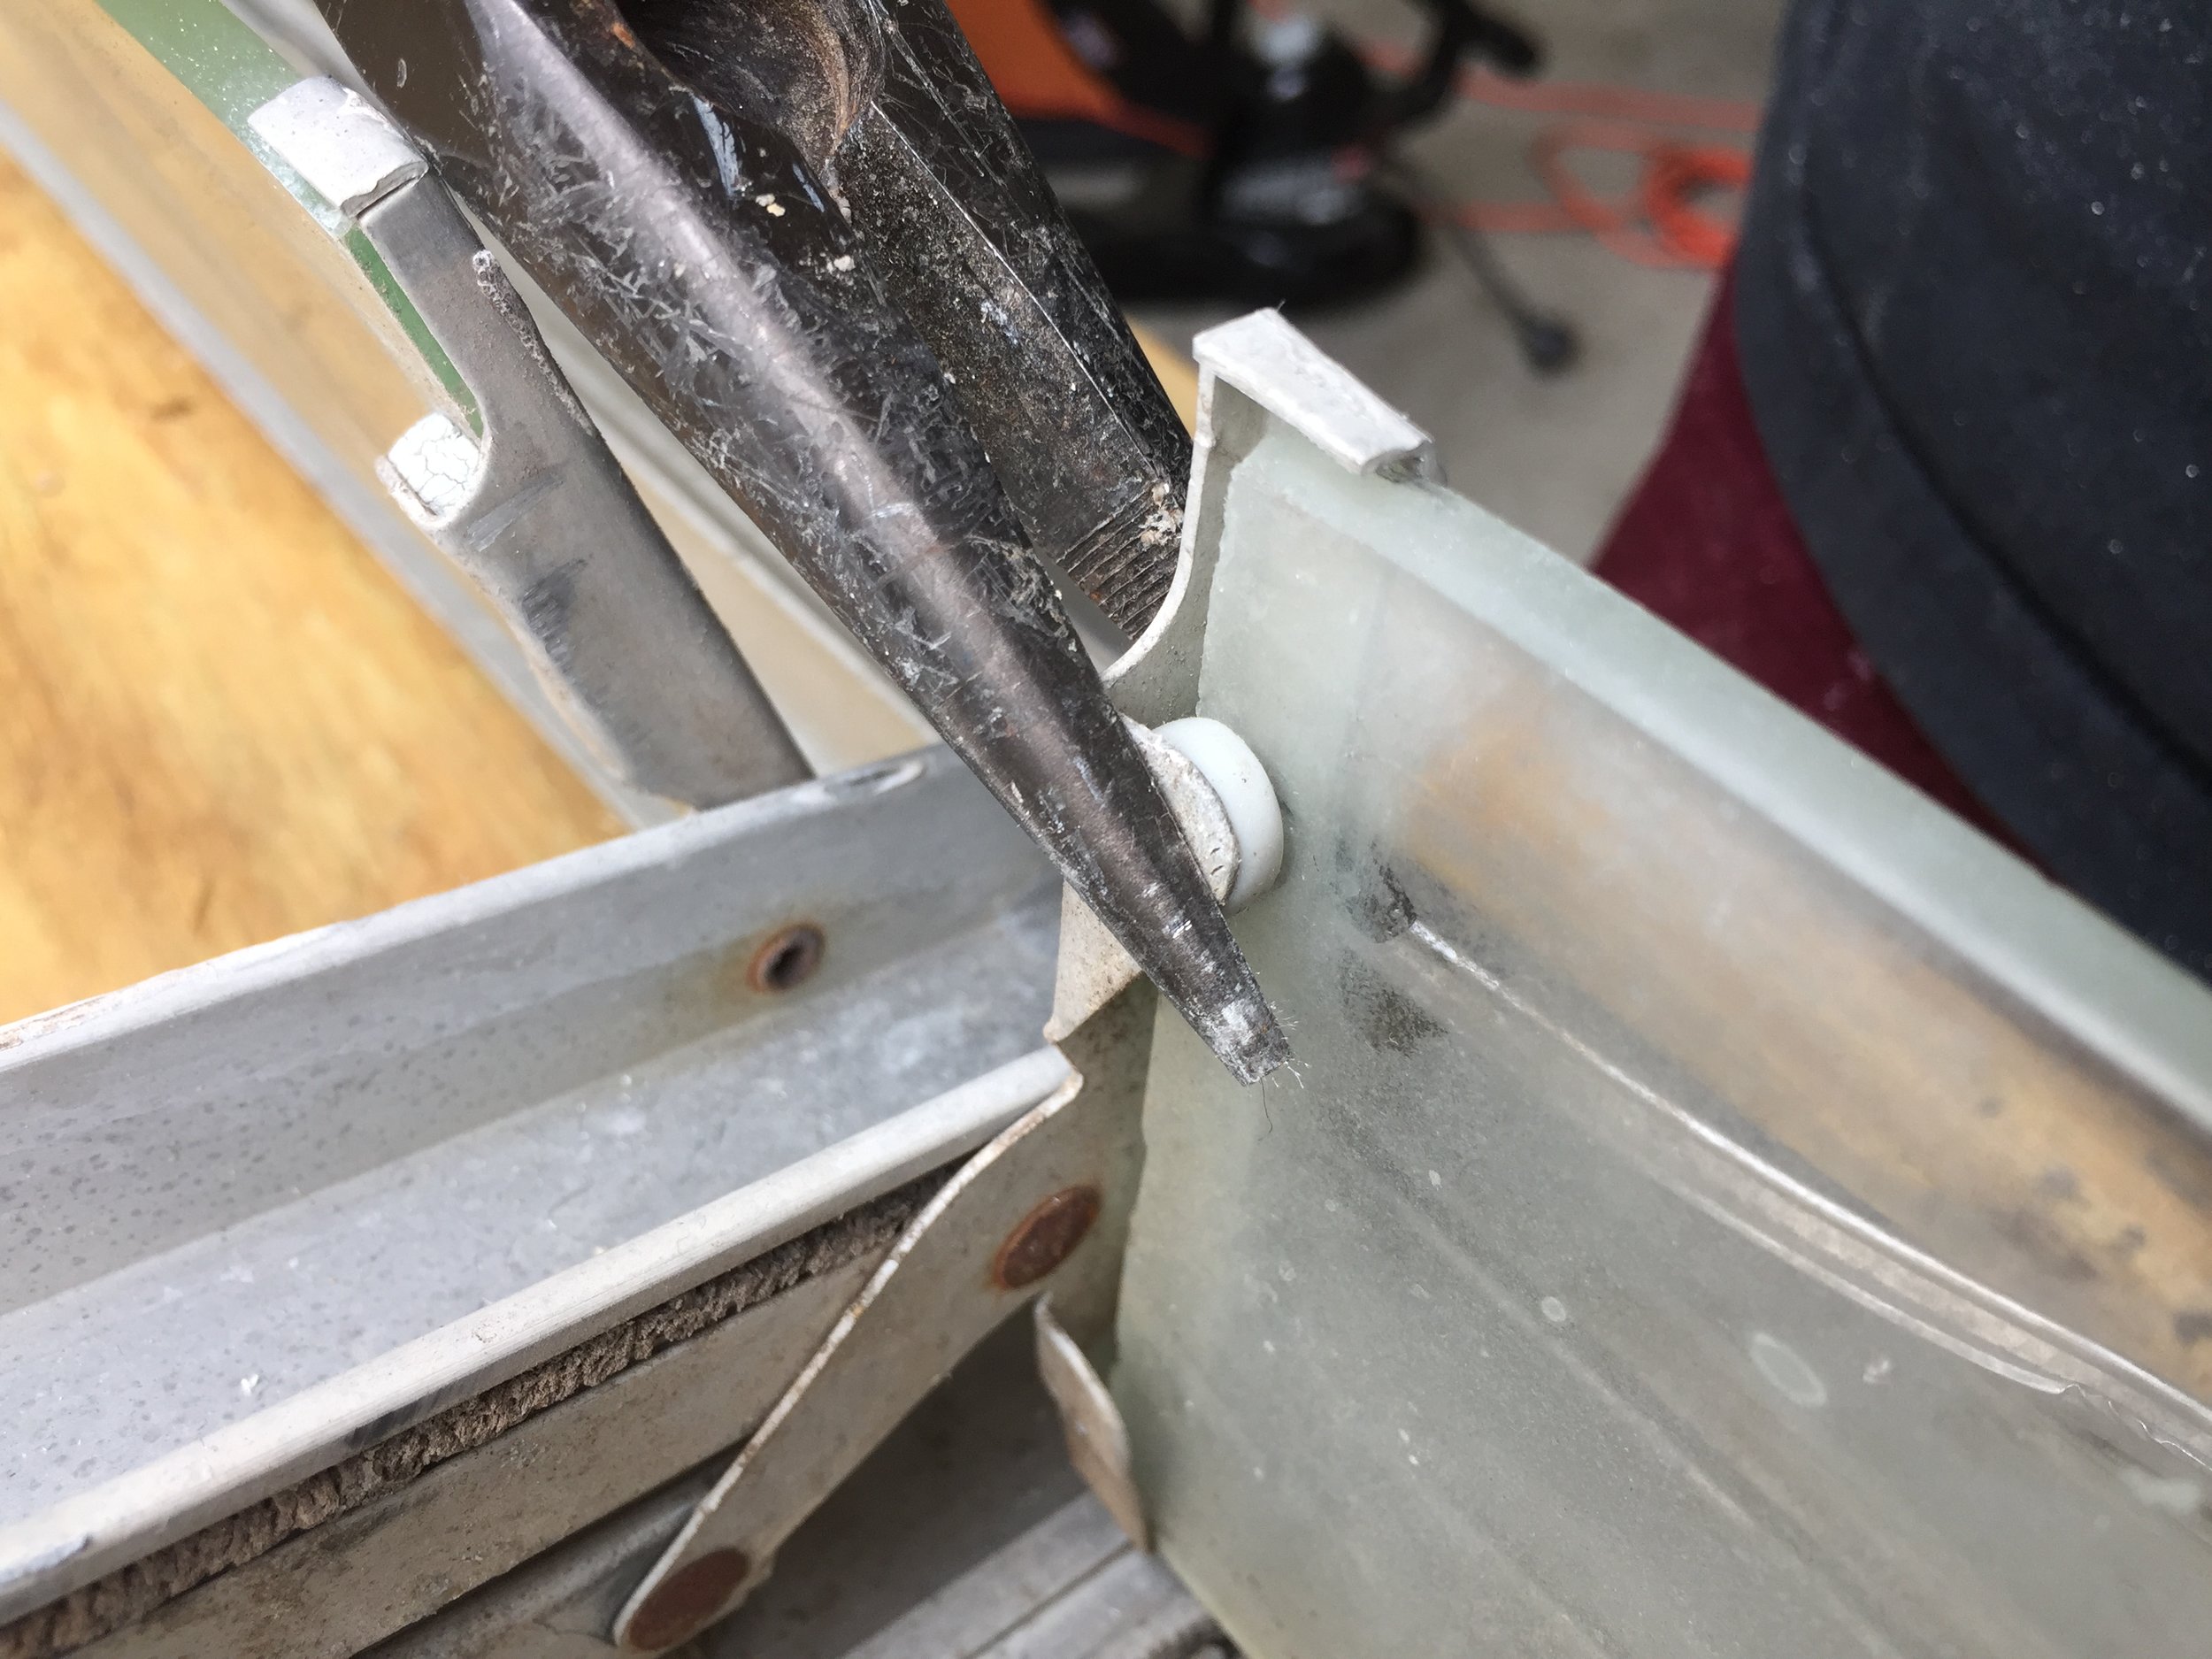
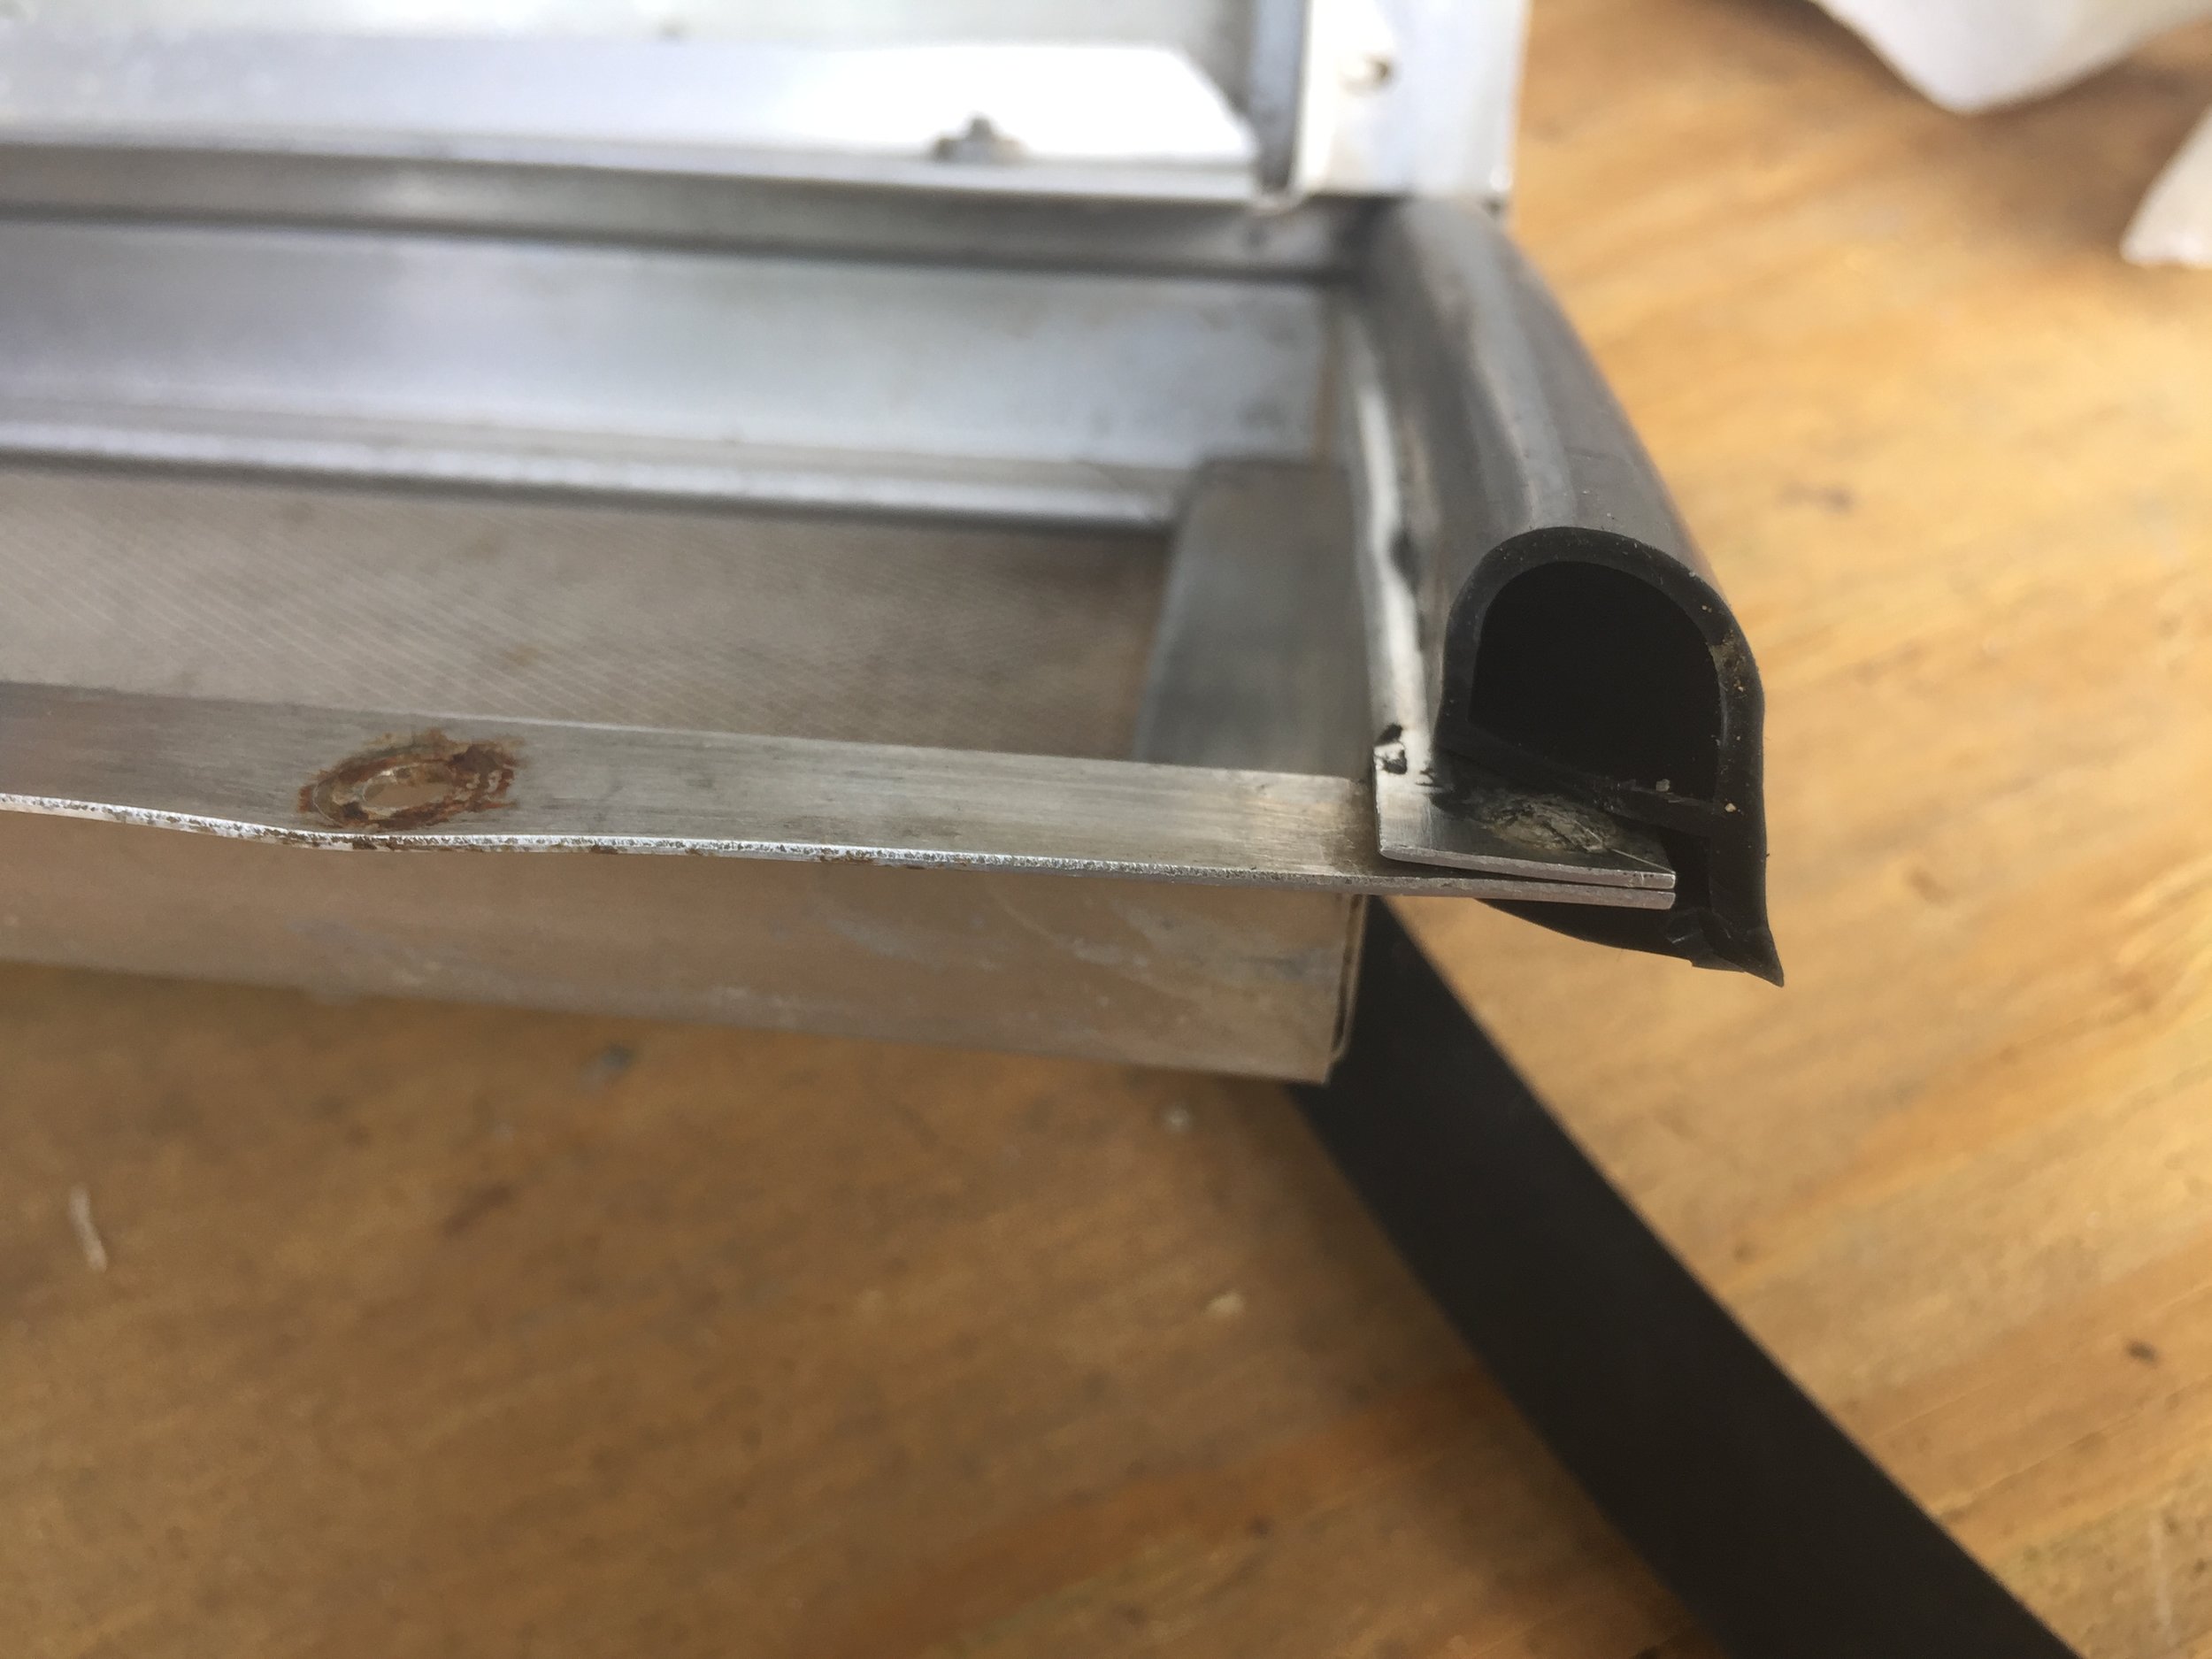
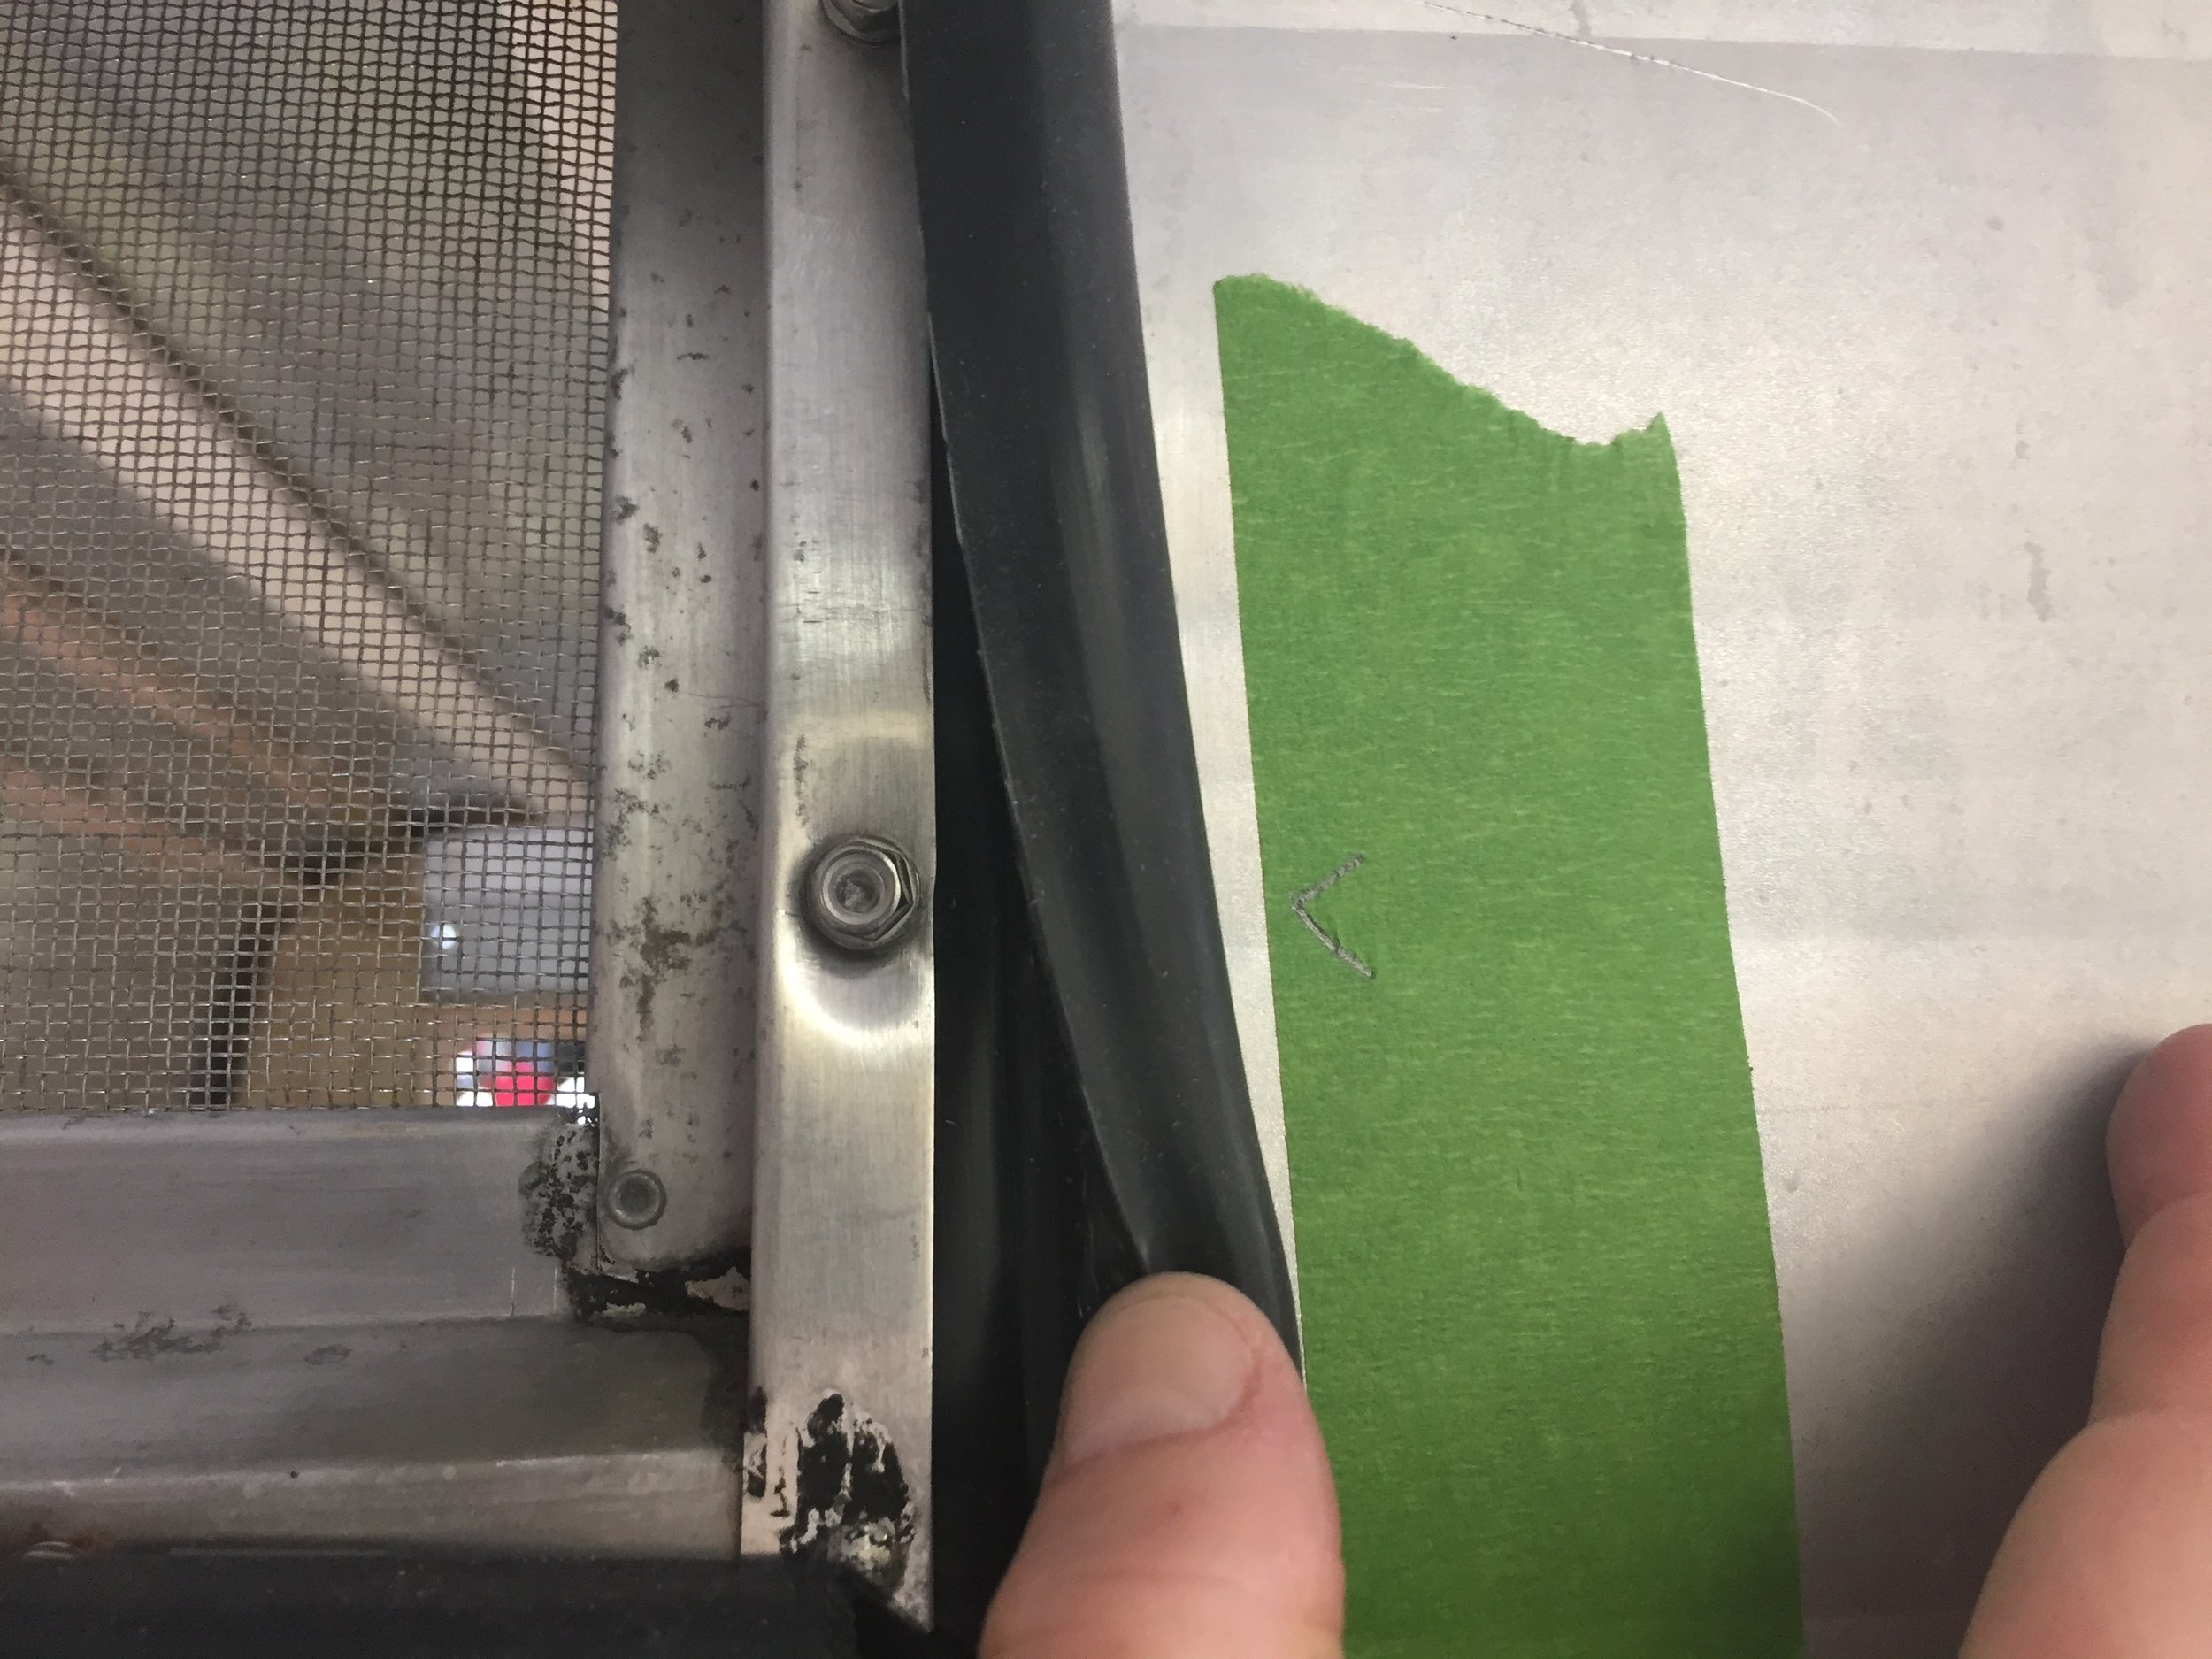
Put the new gasket on – This Palace Window Gasket may or may not be what was on here originally (it was so hard and squished, but seemed like if new it would be this shape and size), but it seems to be the same and doing the trick. It comes in a 25-foot roll, so we had a ton of extra to learn with for our three small windows. This was a little bit trial and error, but we started on the top of one side of the window, then cut a notch into the inside corner so the seal when wrapped around the bottom of the window made a tight 90-degree angle in the corner. We repeated the notch on the inside of the next corner, folded the gasket up and around, and then trimmed the length at the top of that side. (Don’t cut it completely like pictures below show – we did this was while we were trying to figure out how it worked and is just here to give you a cross-section look at how it fits on this style of window.)
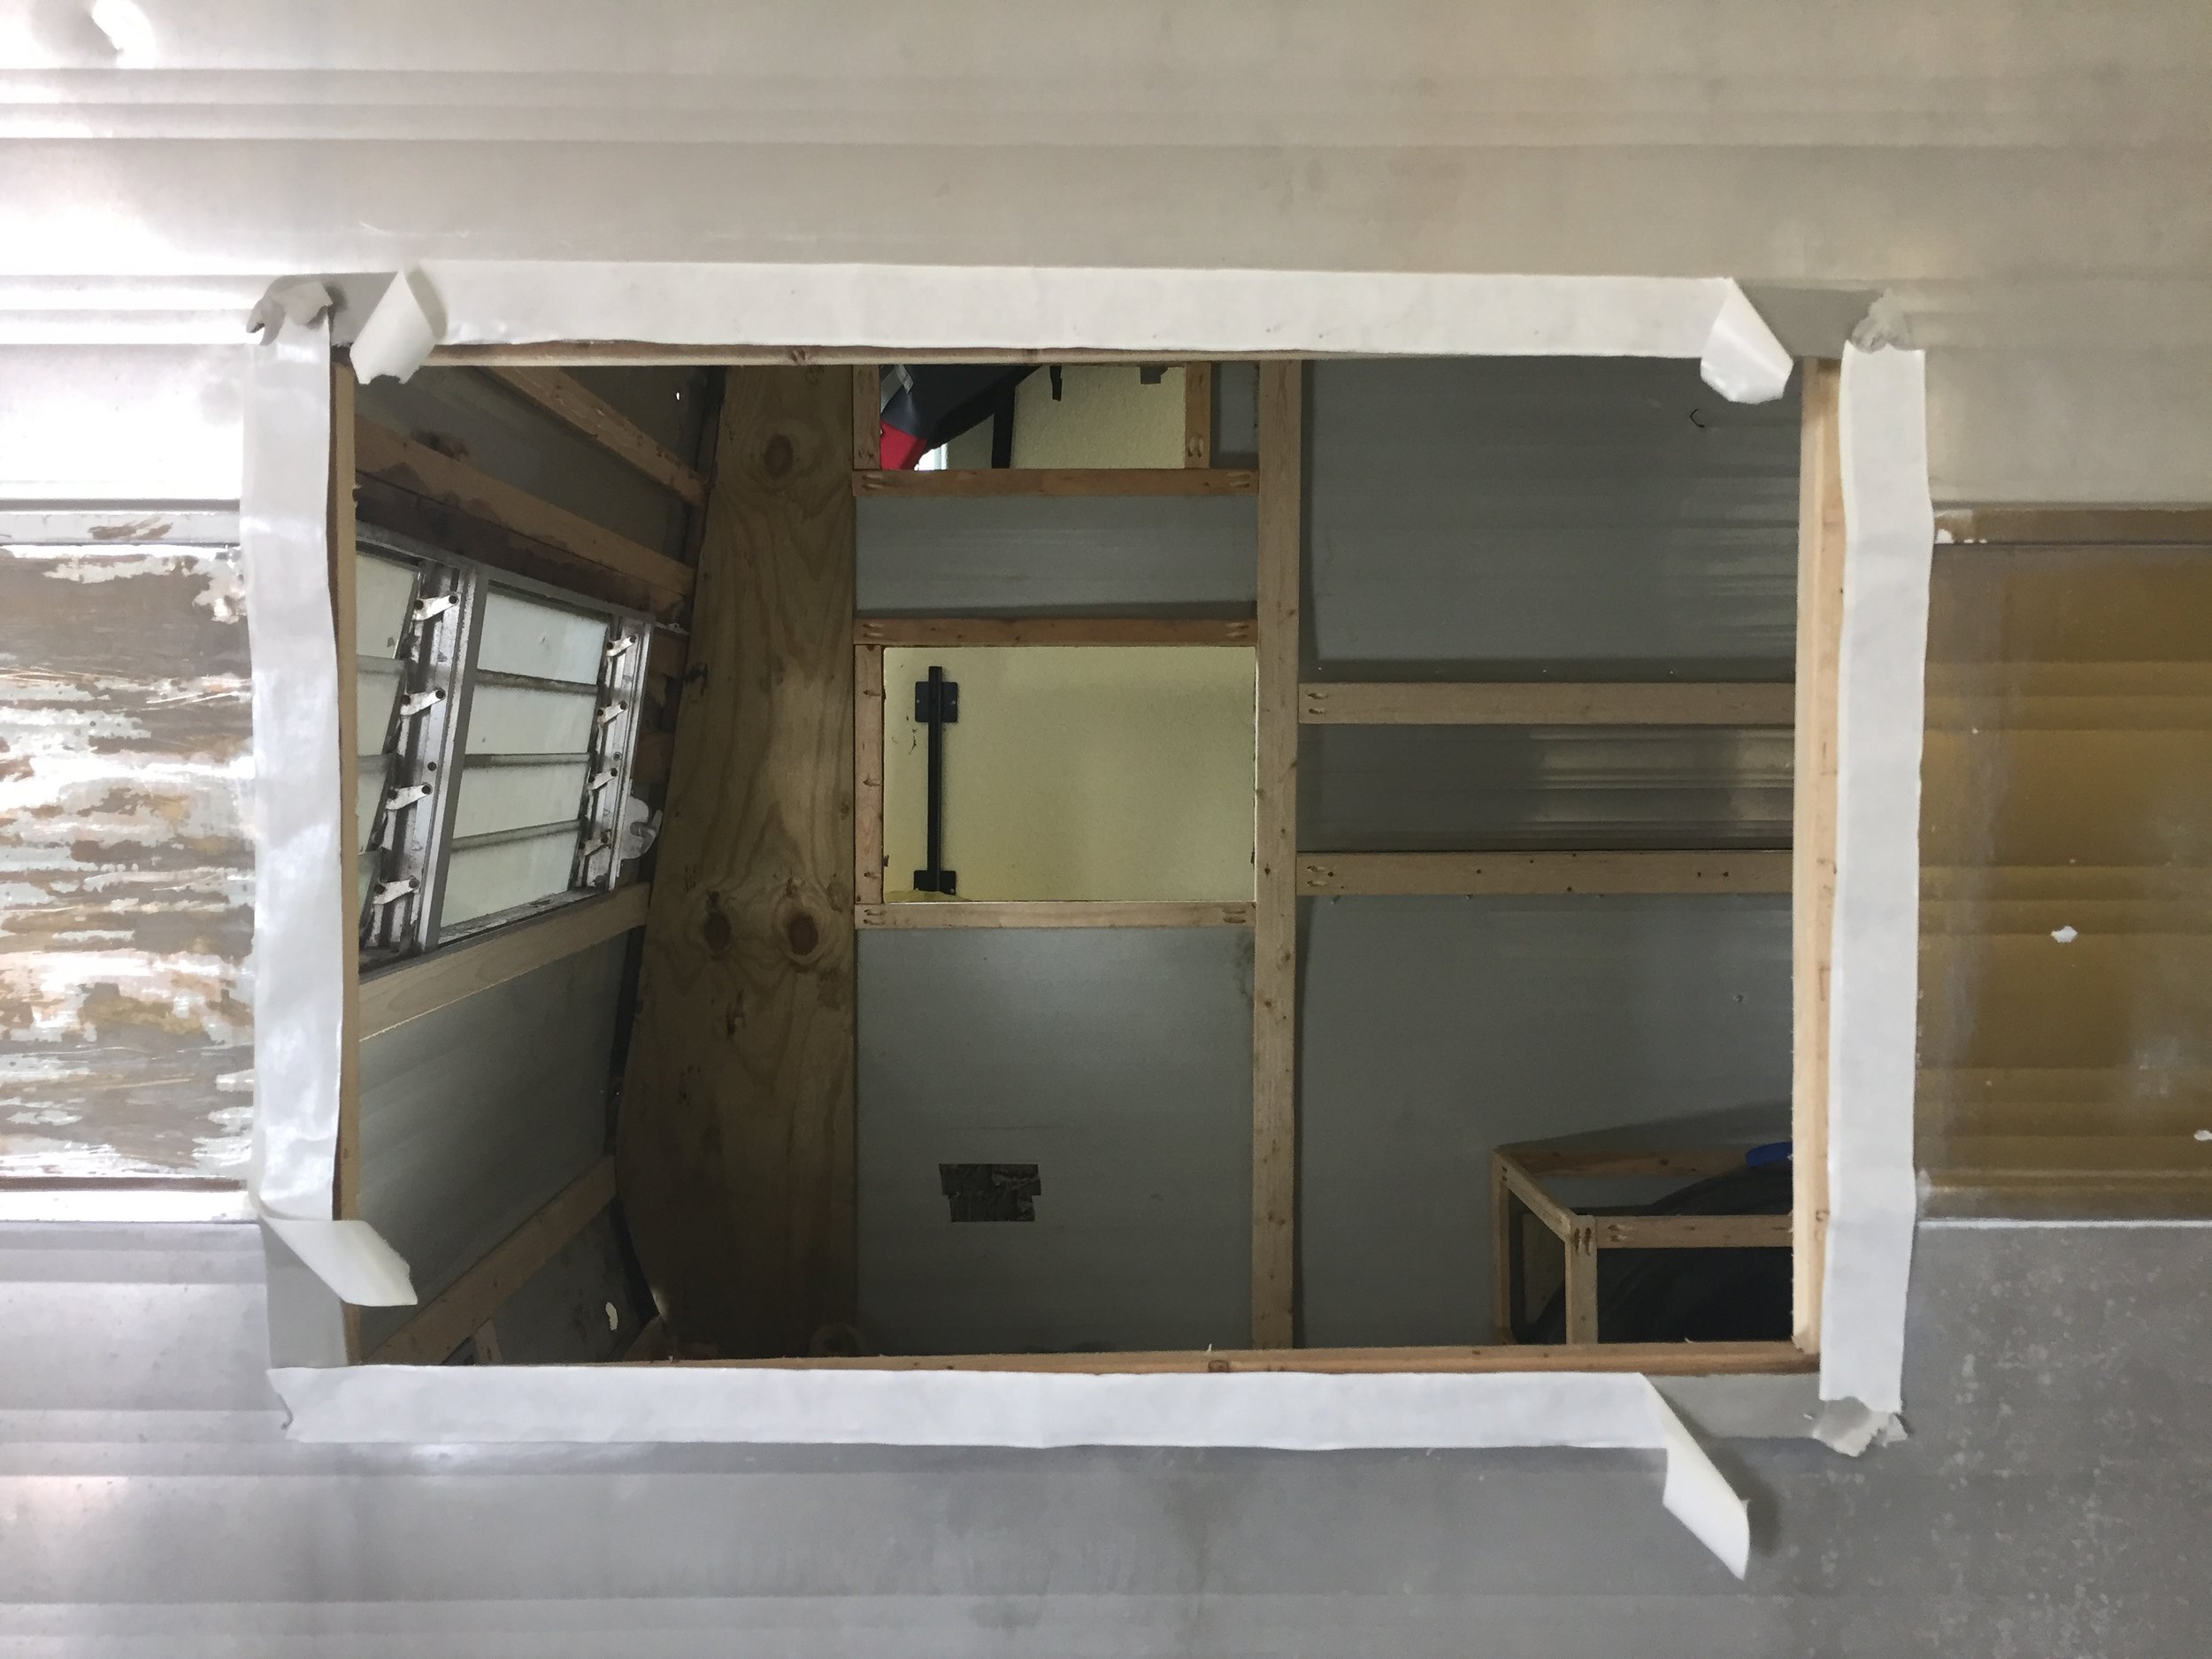
Reframing the windows & walls
Assess the damage – You may decide you don’t want to do this, but even our “good” pieces of wood had screw holes in them and weren’t convincingly attached to the surrounding framing, so to make sure the windows had a tight fit and the framing was extra sturdy we chose to replace them.
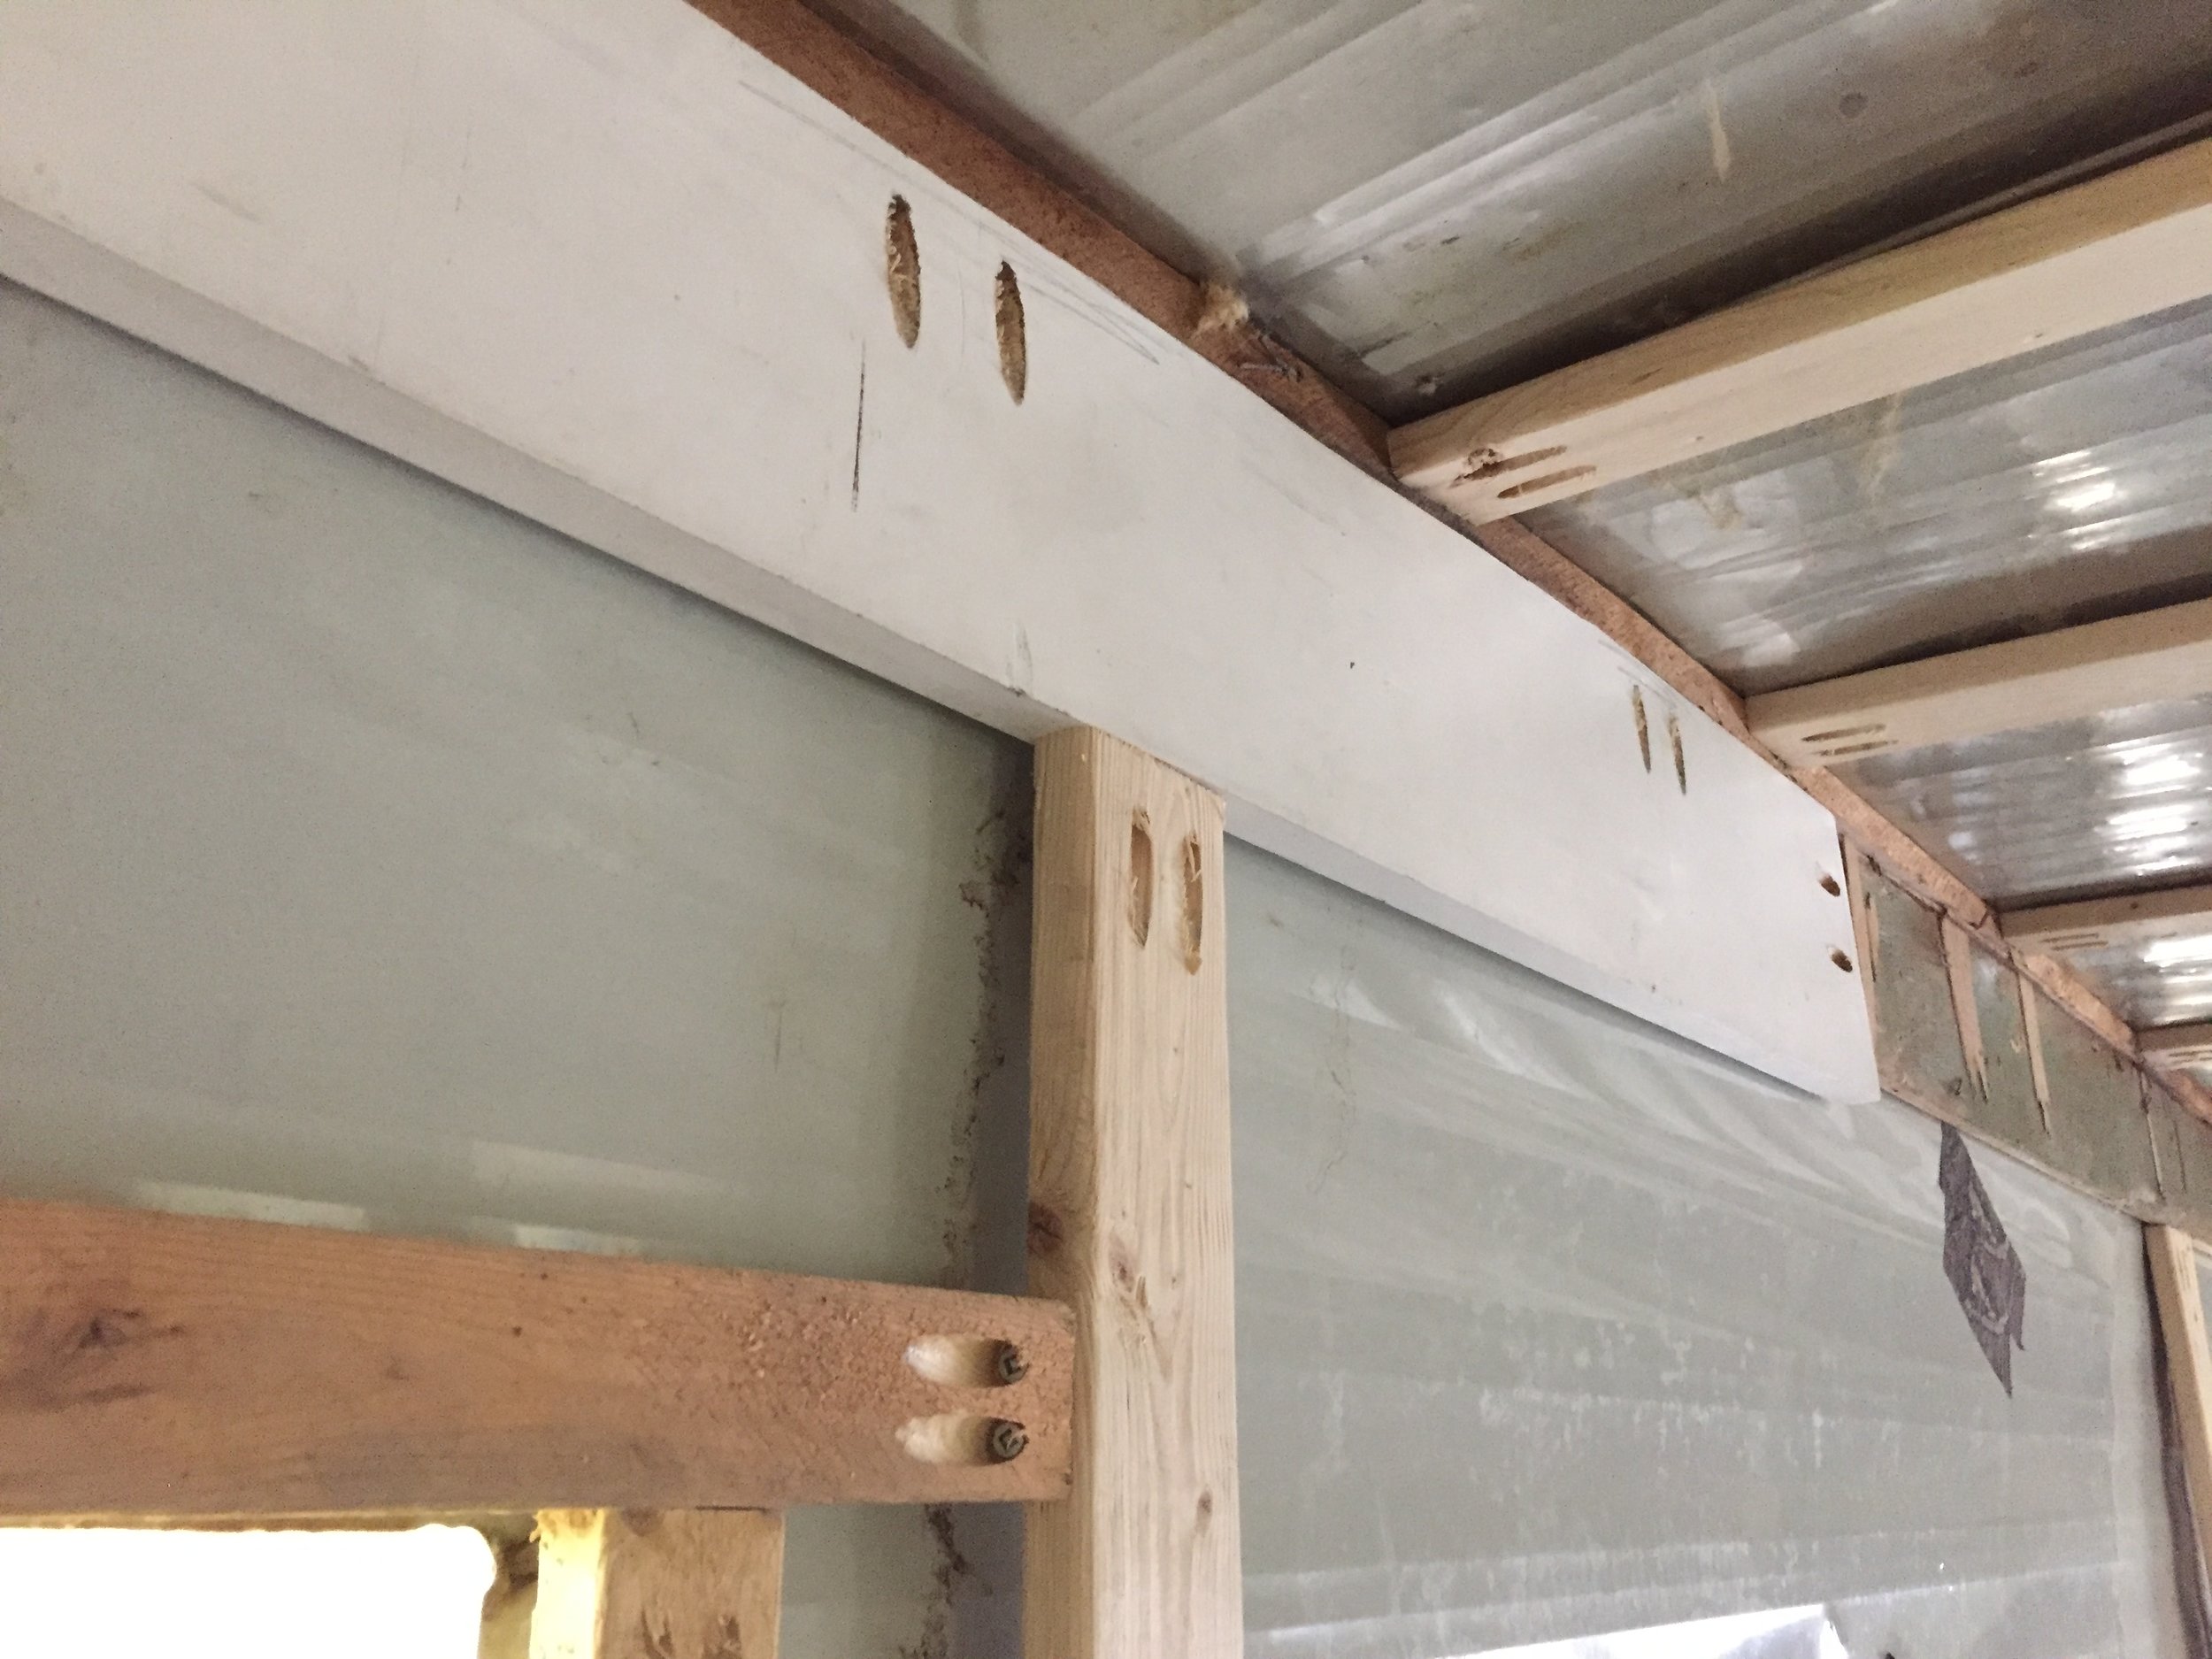
Measure, cut & Kreg – Take your measurements and cut your wood (we do our cuts one at a time to help avoid mistakes in case we need to adjust numbers on the fly). For the windows and much of the wall framing we chose to use 1x3s or 1x2s. Since 1-by-whatevers are really only 3/4” thick, we used these 1-1/4” Kreg pocket hole screws for mega strong joints.

Installing the sparkly clean & newly sealed windows
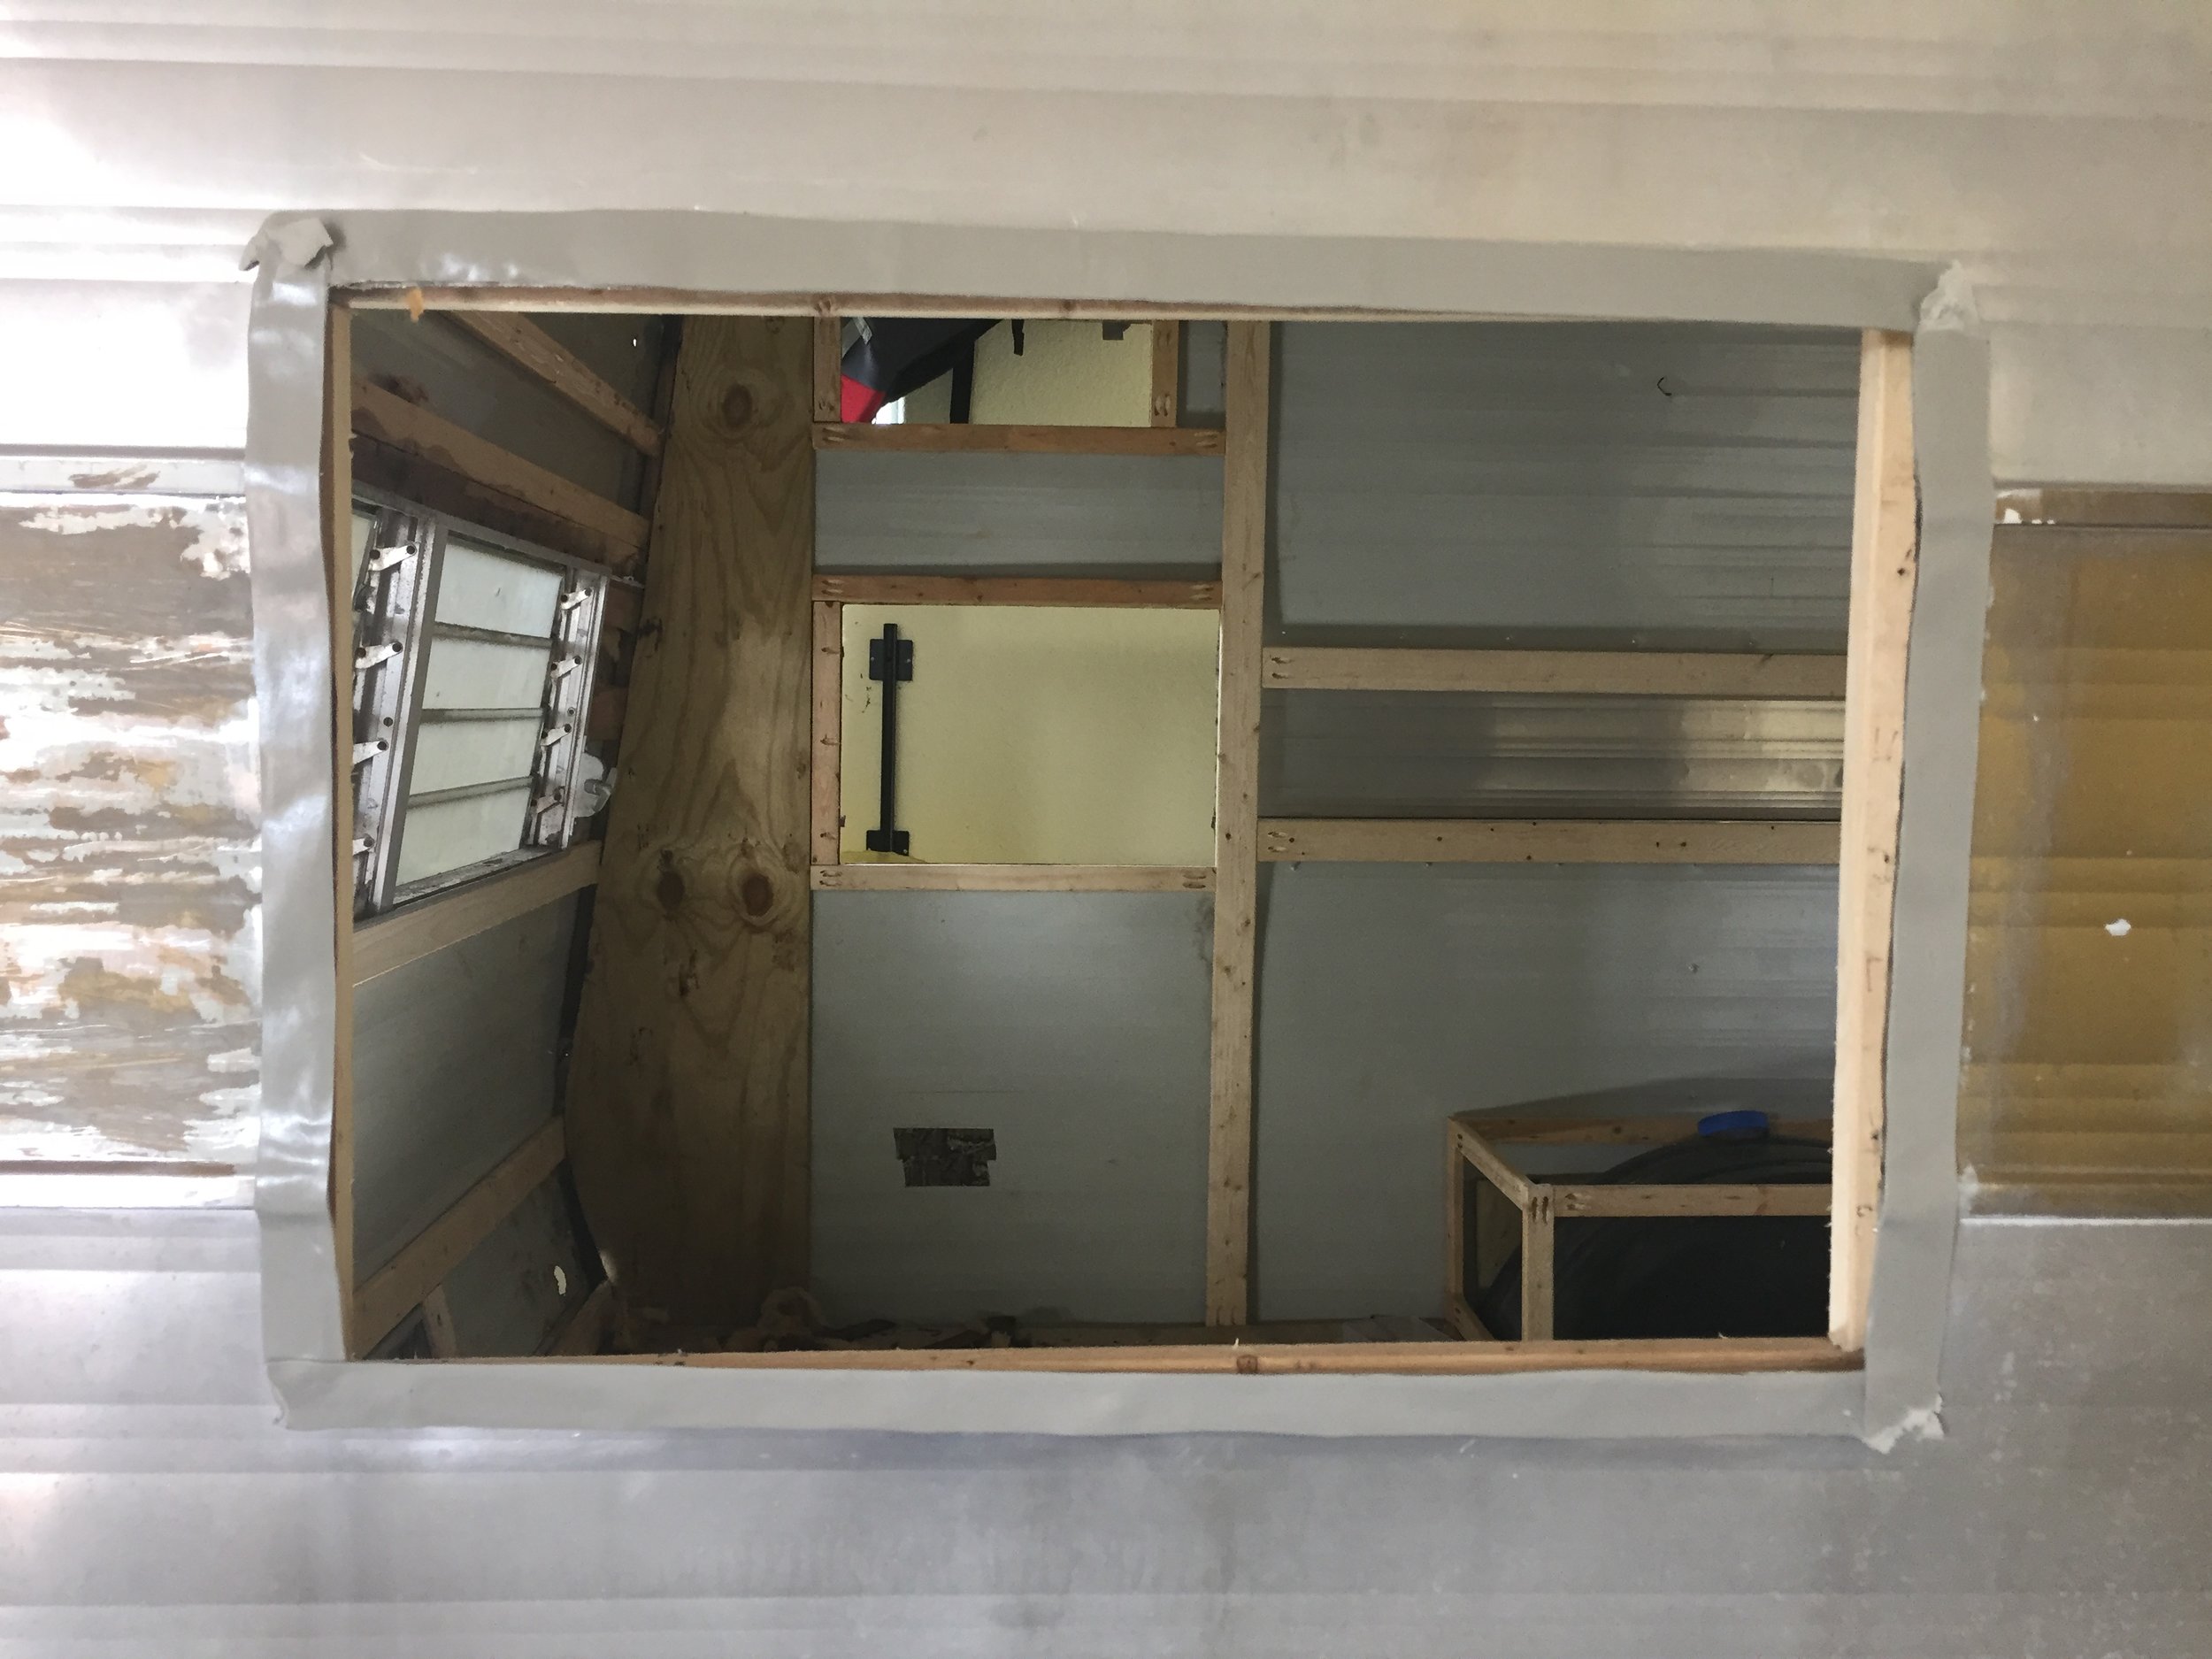
Clean the exterior wall around the window cutouts – use the same wire wheel and drill from before. Just trust us. Like the windows, this also should be clean and gunk-free to get a nice tight seal. You don’t need to go crazy with the finer steel wool here since it will be covered, unless you get outta control with the wire brush and scratch your walls something fierce, but please don’t do that. We’re doing enough work already.
Mark the holes for easier window alignment – The windows fit in their cutouts pretty tightly, but there’s still enough wiggle room to leave you chasing your holes after they’re covered up. We avoided this by planning ahead and marking our holes on a piece of painter’s tape (off to the side a fair amount so we didn’t putty over it). This helped us line up all of the pre-drilled holes and saved us a lot of gooey tape-induced headaches and repositioning nightmares.
Butyl. Putty. Tape. – Get it (here). Lots of it. And then store it all in the fridge until the last second when you need it, and put it back in the fridge the second you don’t. As close as you can to the edges of the window cutout, roll on your putty tape really sticking it down to the camper wall. Expose each corner as you go and overlap the start of the next piece onto the end of last until all four sides are taped up. Run your fingers over the top again (it will have thawed ever so slightly making it stick even better to the wall), then remove the paper backing to expose the sticky putty.
Installing the jalousie windows – Find your buddy, and then tell them to go inside the camper. With the window slats open, carefully thread the window into the window cutout, aligning the holes in the window frame with your painter’s tape markings. Then your inside camper buddy holds the window in place (and pushes back on the wall to counter your pressure) while you screw the window into the new framing. We recommend screwing in each corner first and then filling in the remaining screws, alternating sides to maintain even pressure as you go and not tightening them all the way until they’re all in. The putty tape will squish out the sides of the window which is good. If you’re like me you’ll want to cut it off immediately. Have some self-control and don’t do it. The next day, go back and tighten all of your screws, then cut the putty tape to make the best seal.
Installing the other windows – To be honest with you, for being so small and unassuming these were kind of a pain and are definitely a two-person job. This type of rubber seal is pretty loose and kind of slips over the metal window (versus being slid into a metal track that helps lock it in place), and gravity is not your friend here. We used the same technique and prep in steps 1-3 above, but for this style of window it was easiest to carefully thread the window through the hole, with the outside person holding the new palace window gasket in place on the perimeter of the window. When aligned using your painter’s tape markers, screw in one of the top screws first to help you hold it in place. Then make sure the gasket is pushed as close into the window as possible before asking your buddy to help you pull back one of the flaps on the seal to screw it into place. Like with the other style of window, the putty tape will squish out from behind the gasket. Leave this ‘til the next day, go back and tighten all of your screws, then carefully cut the putty tape to make the best seal, making sure not to cut into the rubber gasket.

Do what we say and not what we do – tips for your vintage camper reno
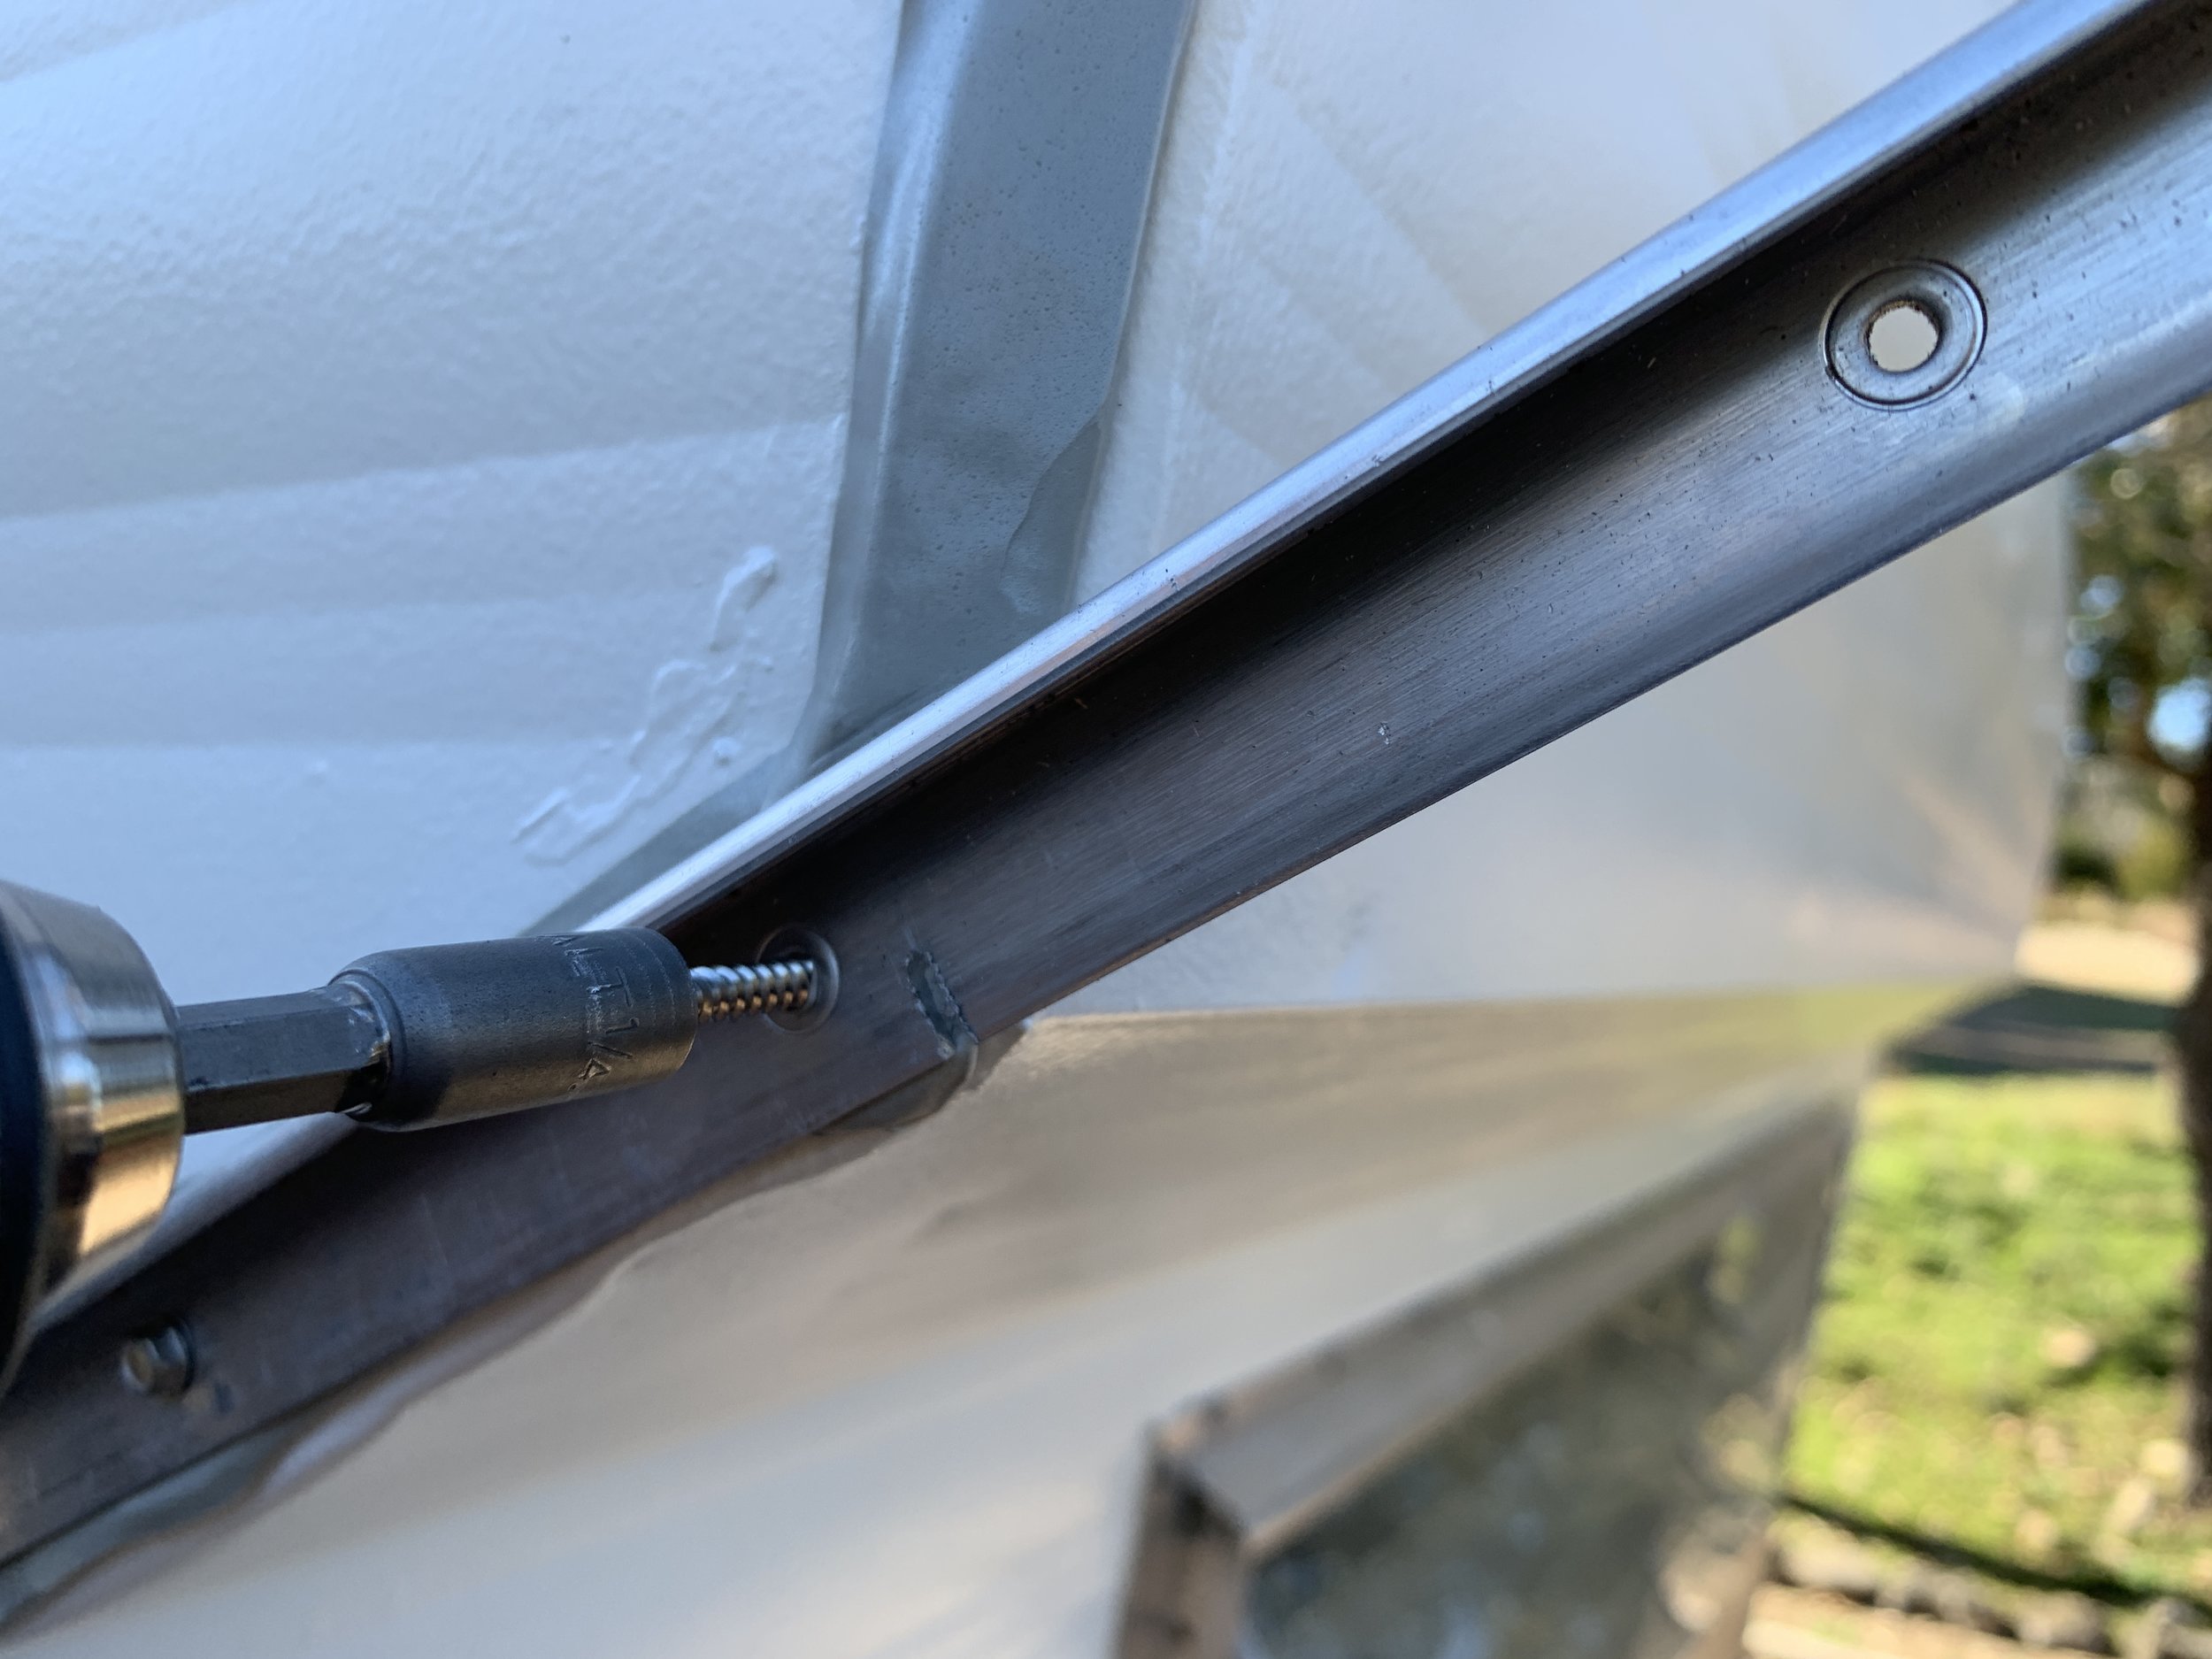
Use these stainless steel screws. (We used the 3/4” length.) They look a heck of a lot better against the aluminum than the bulky zinc-plated Teks roofing screws we used to begin with (that are also amazing and we can’t say enough good things about, but whose coloring and washer just stood out too much for our liking). In addition to nailing the look we were going for, the stainless hexhead screws are supposed to be great long term too. Fingers crossed they’re as waterproof! (But if Vintage Trailer Supply is repping them, we have no doubt they’re legit. And no, we’re not getting paid or encouraged to say this and link to them a bajillion times — the folks at VTS are totally amazing and have great reproductions of vintage trailer parts, plus just about everything else you need to get this job done.)
Save yourself some time and use a drill-ready wire wheel. We tried many things and this hands down worked best.
Invest in a Kreg jig. Your new best friend for framing a camper and making strong, smooth wood joints of all kinds.
Wait 24 hours to trim the putty tape. Fight the urge to trim it immediately for the best seal.
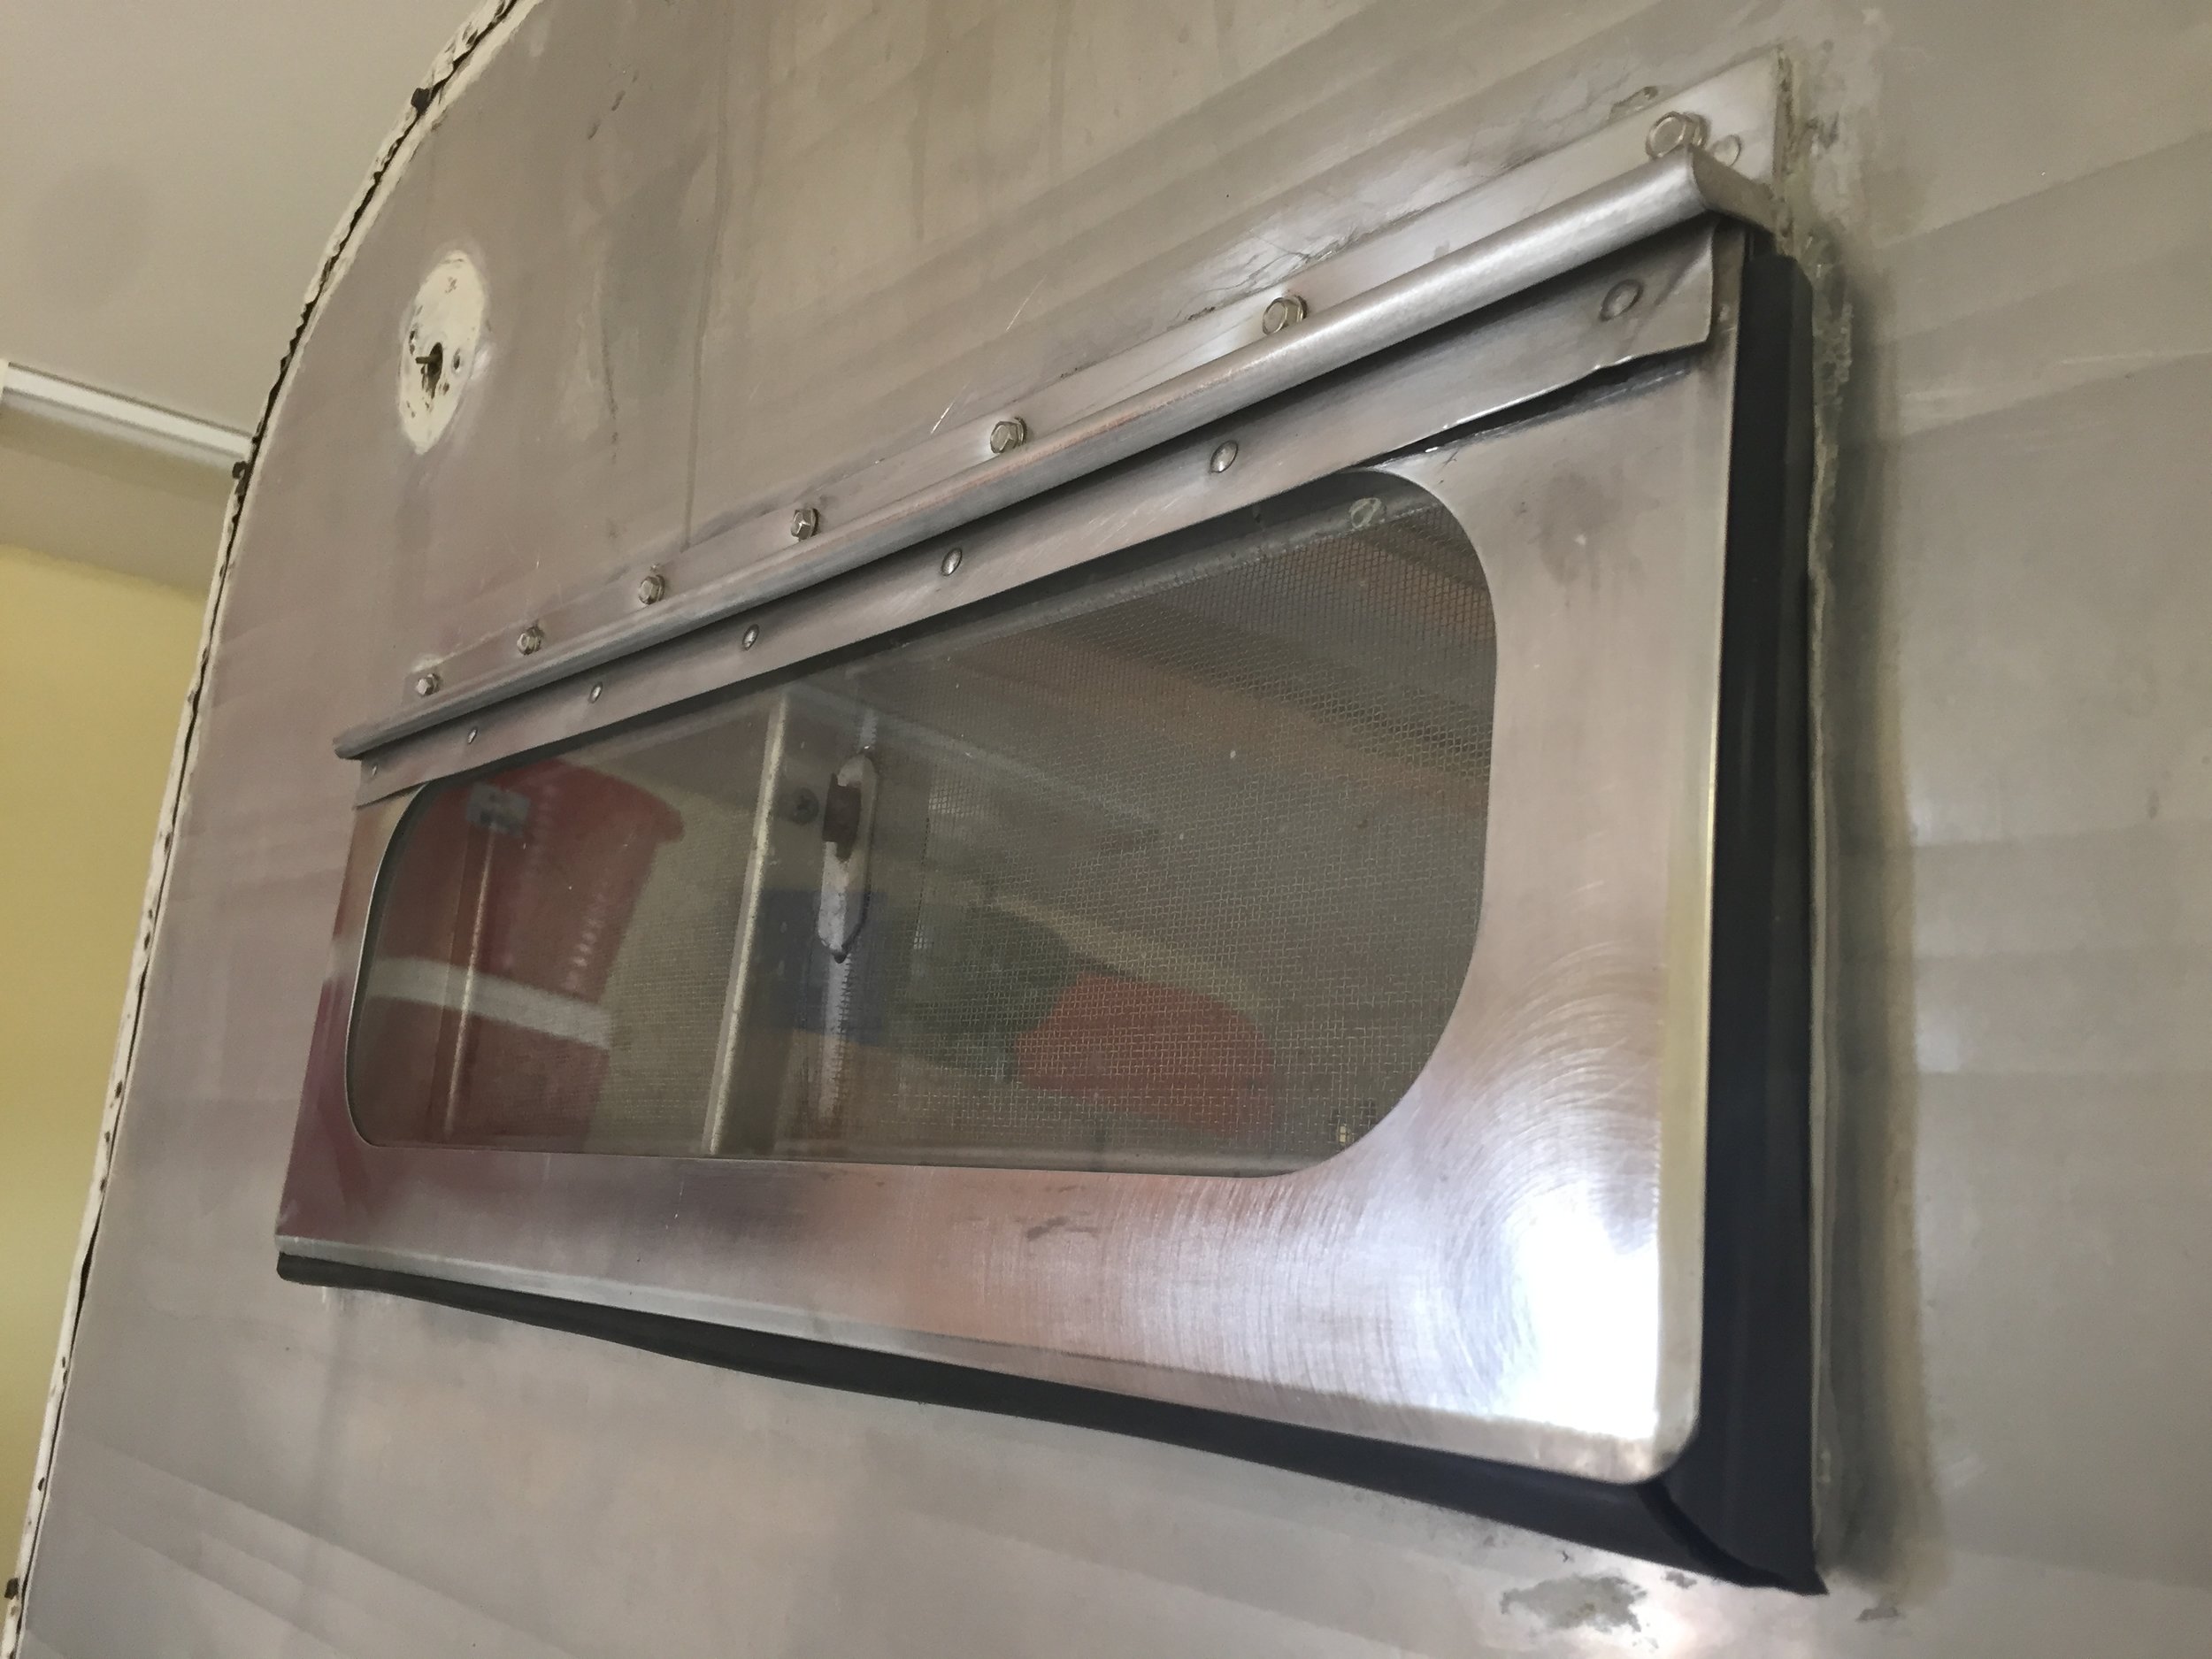
Windows before + after

Not too shabby, if I do say so myself.
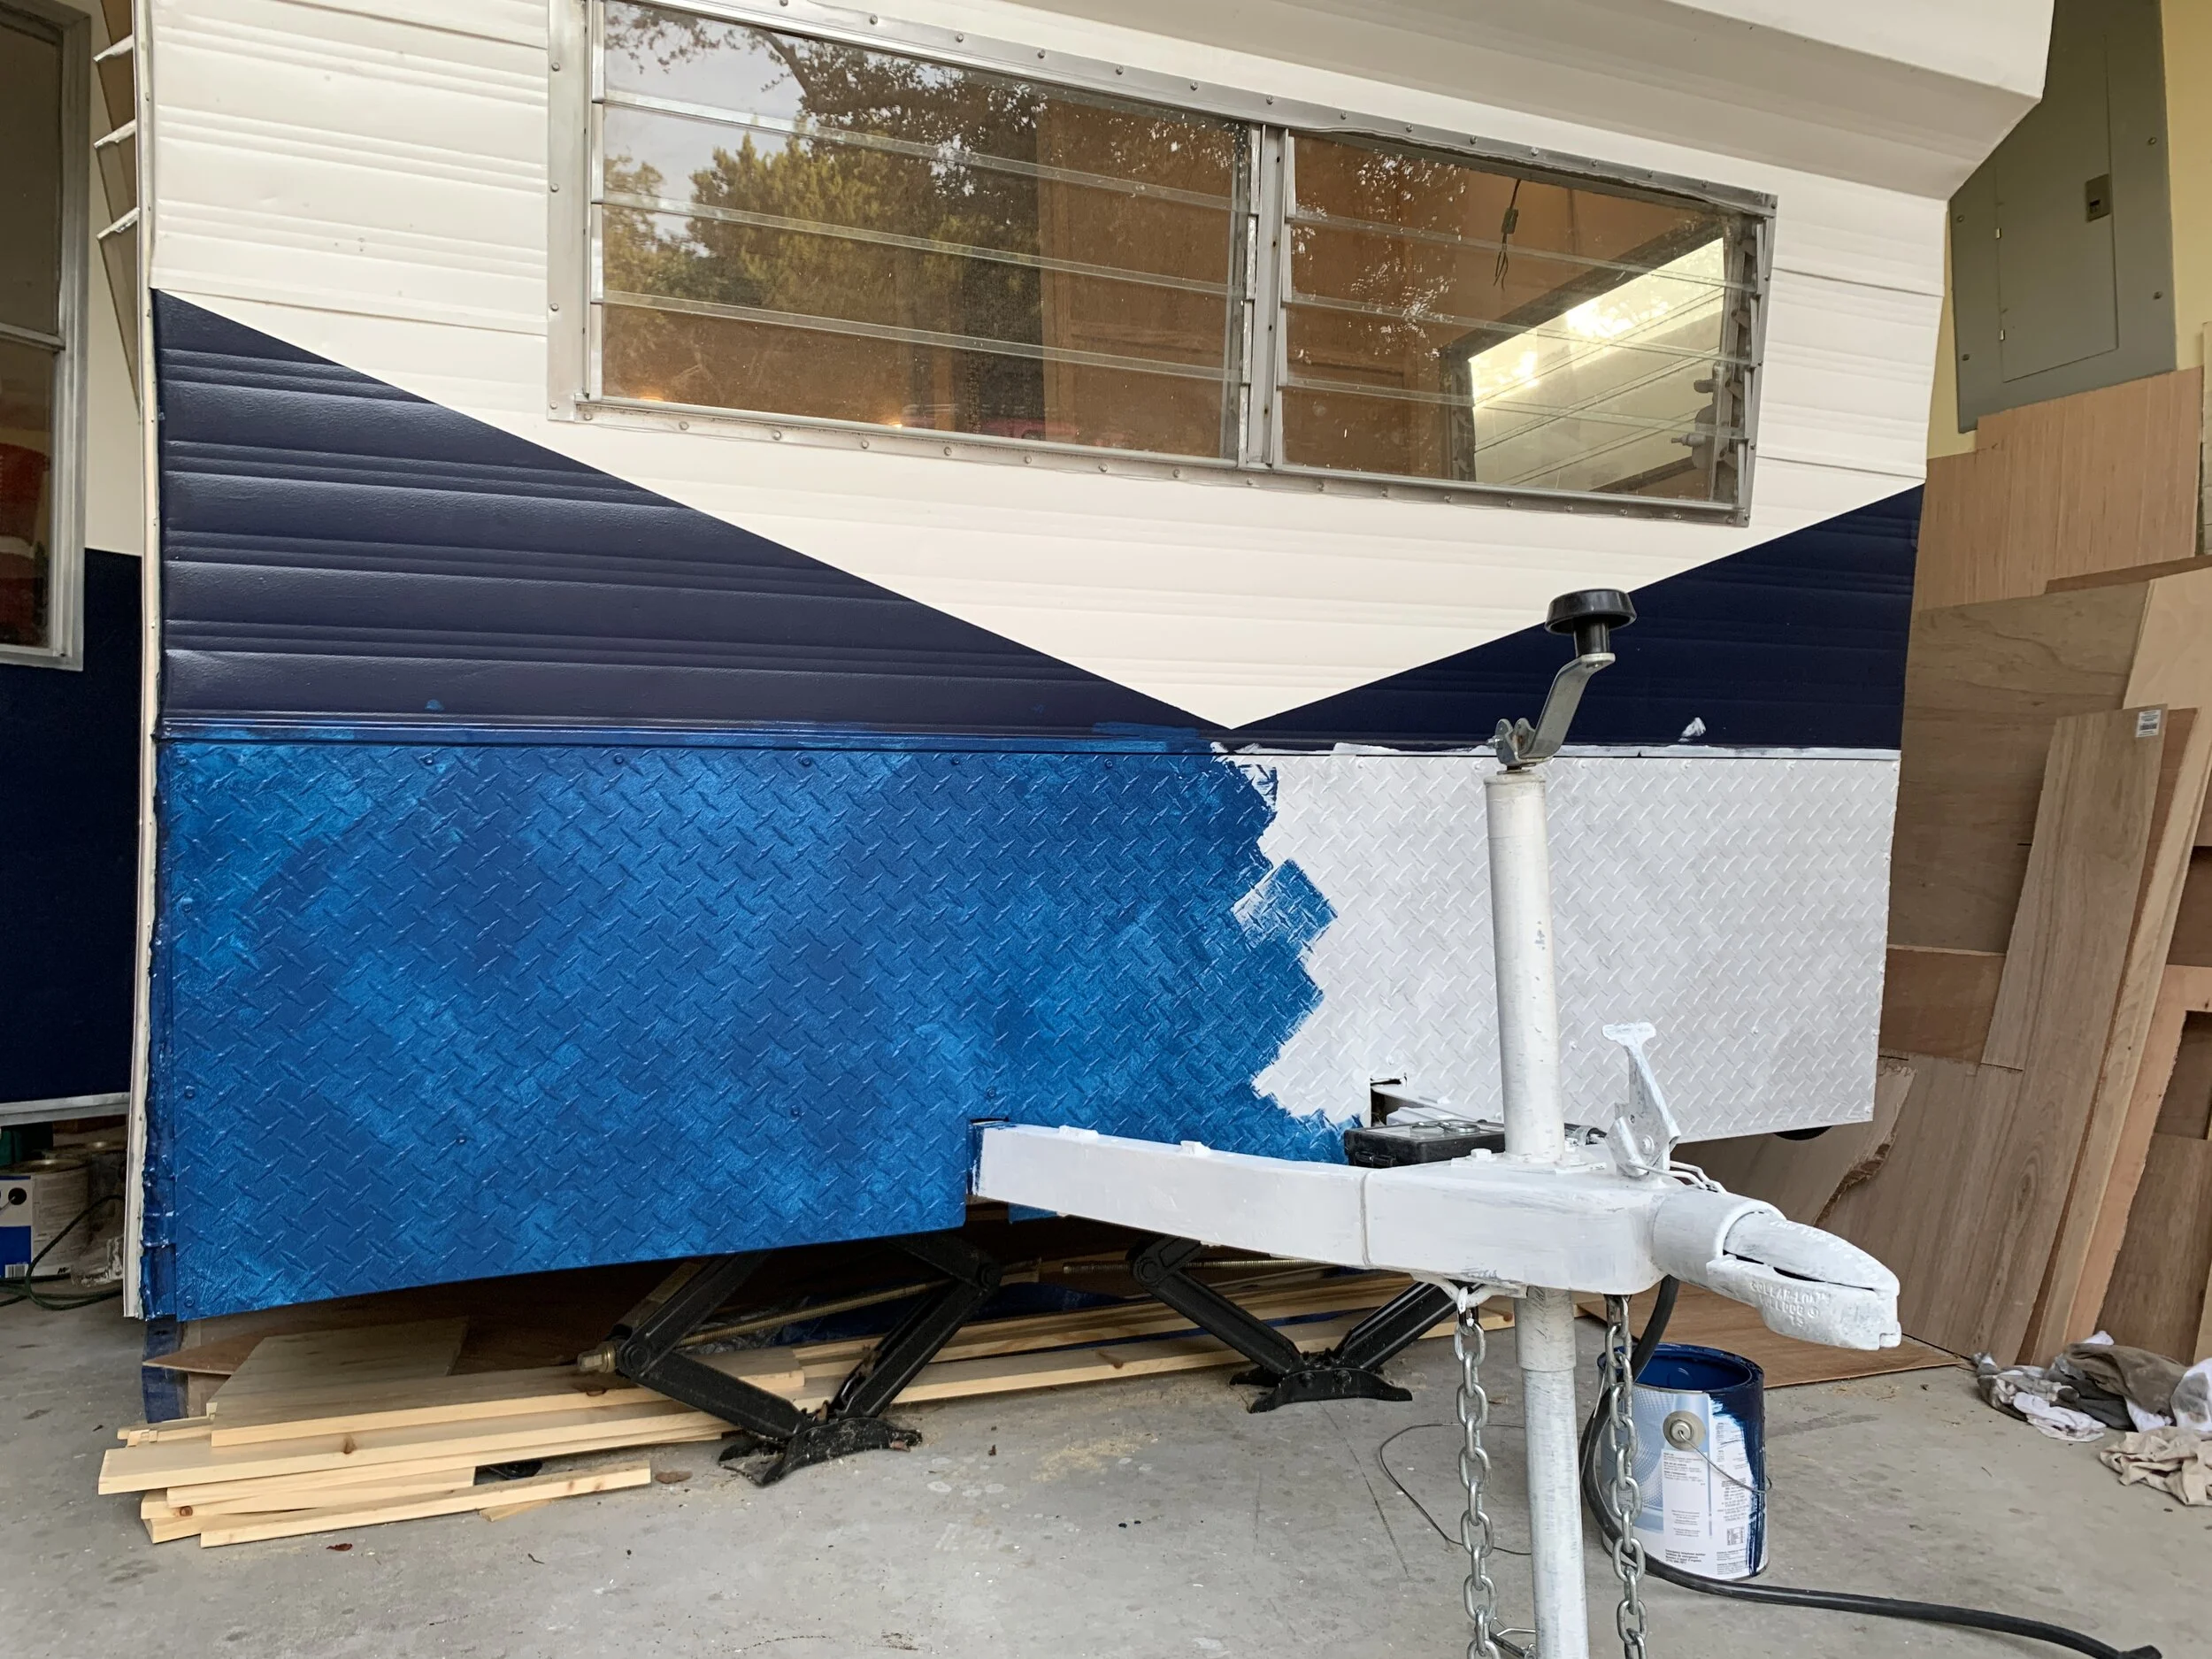
Are you working on a camper of your own? Do you have any tips or tricks you’ve learned along the way? Questions about anything we’ve done so far or plan to do? On the blog horizon: A Kreg Jig how-to & how we further secured our metal walls to the new framing, how we saved some serious moolah on repairing instead of replacing our exterior walls, and drumroll… exterior paint!!
Want to see what we’re up to in real time? Follow us on Instagram for the latest on The Cameo, our pups and our random shenanigans. We’ve got big, attractive campery things planned for the holidays you won’t want to miss!!