The Cameo Camper Renovation: The skylight's the limit – Replacing the leaky roof vent

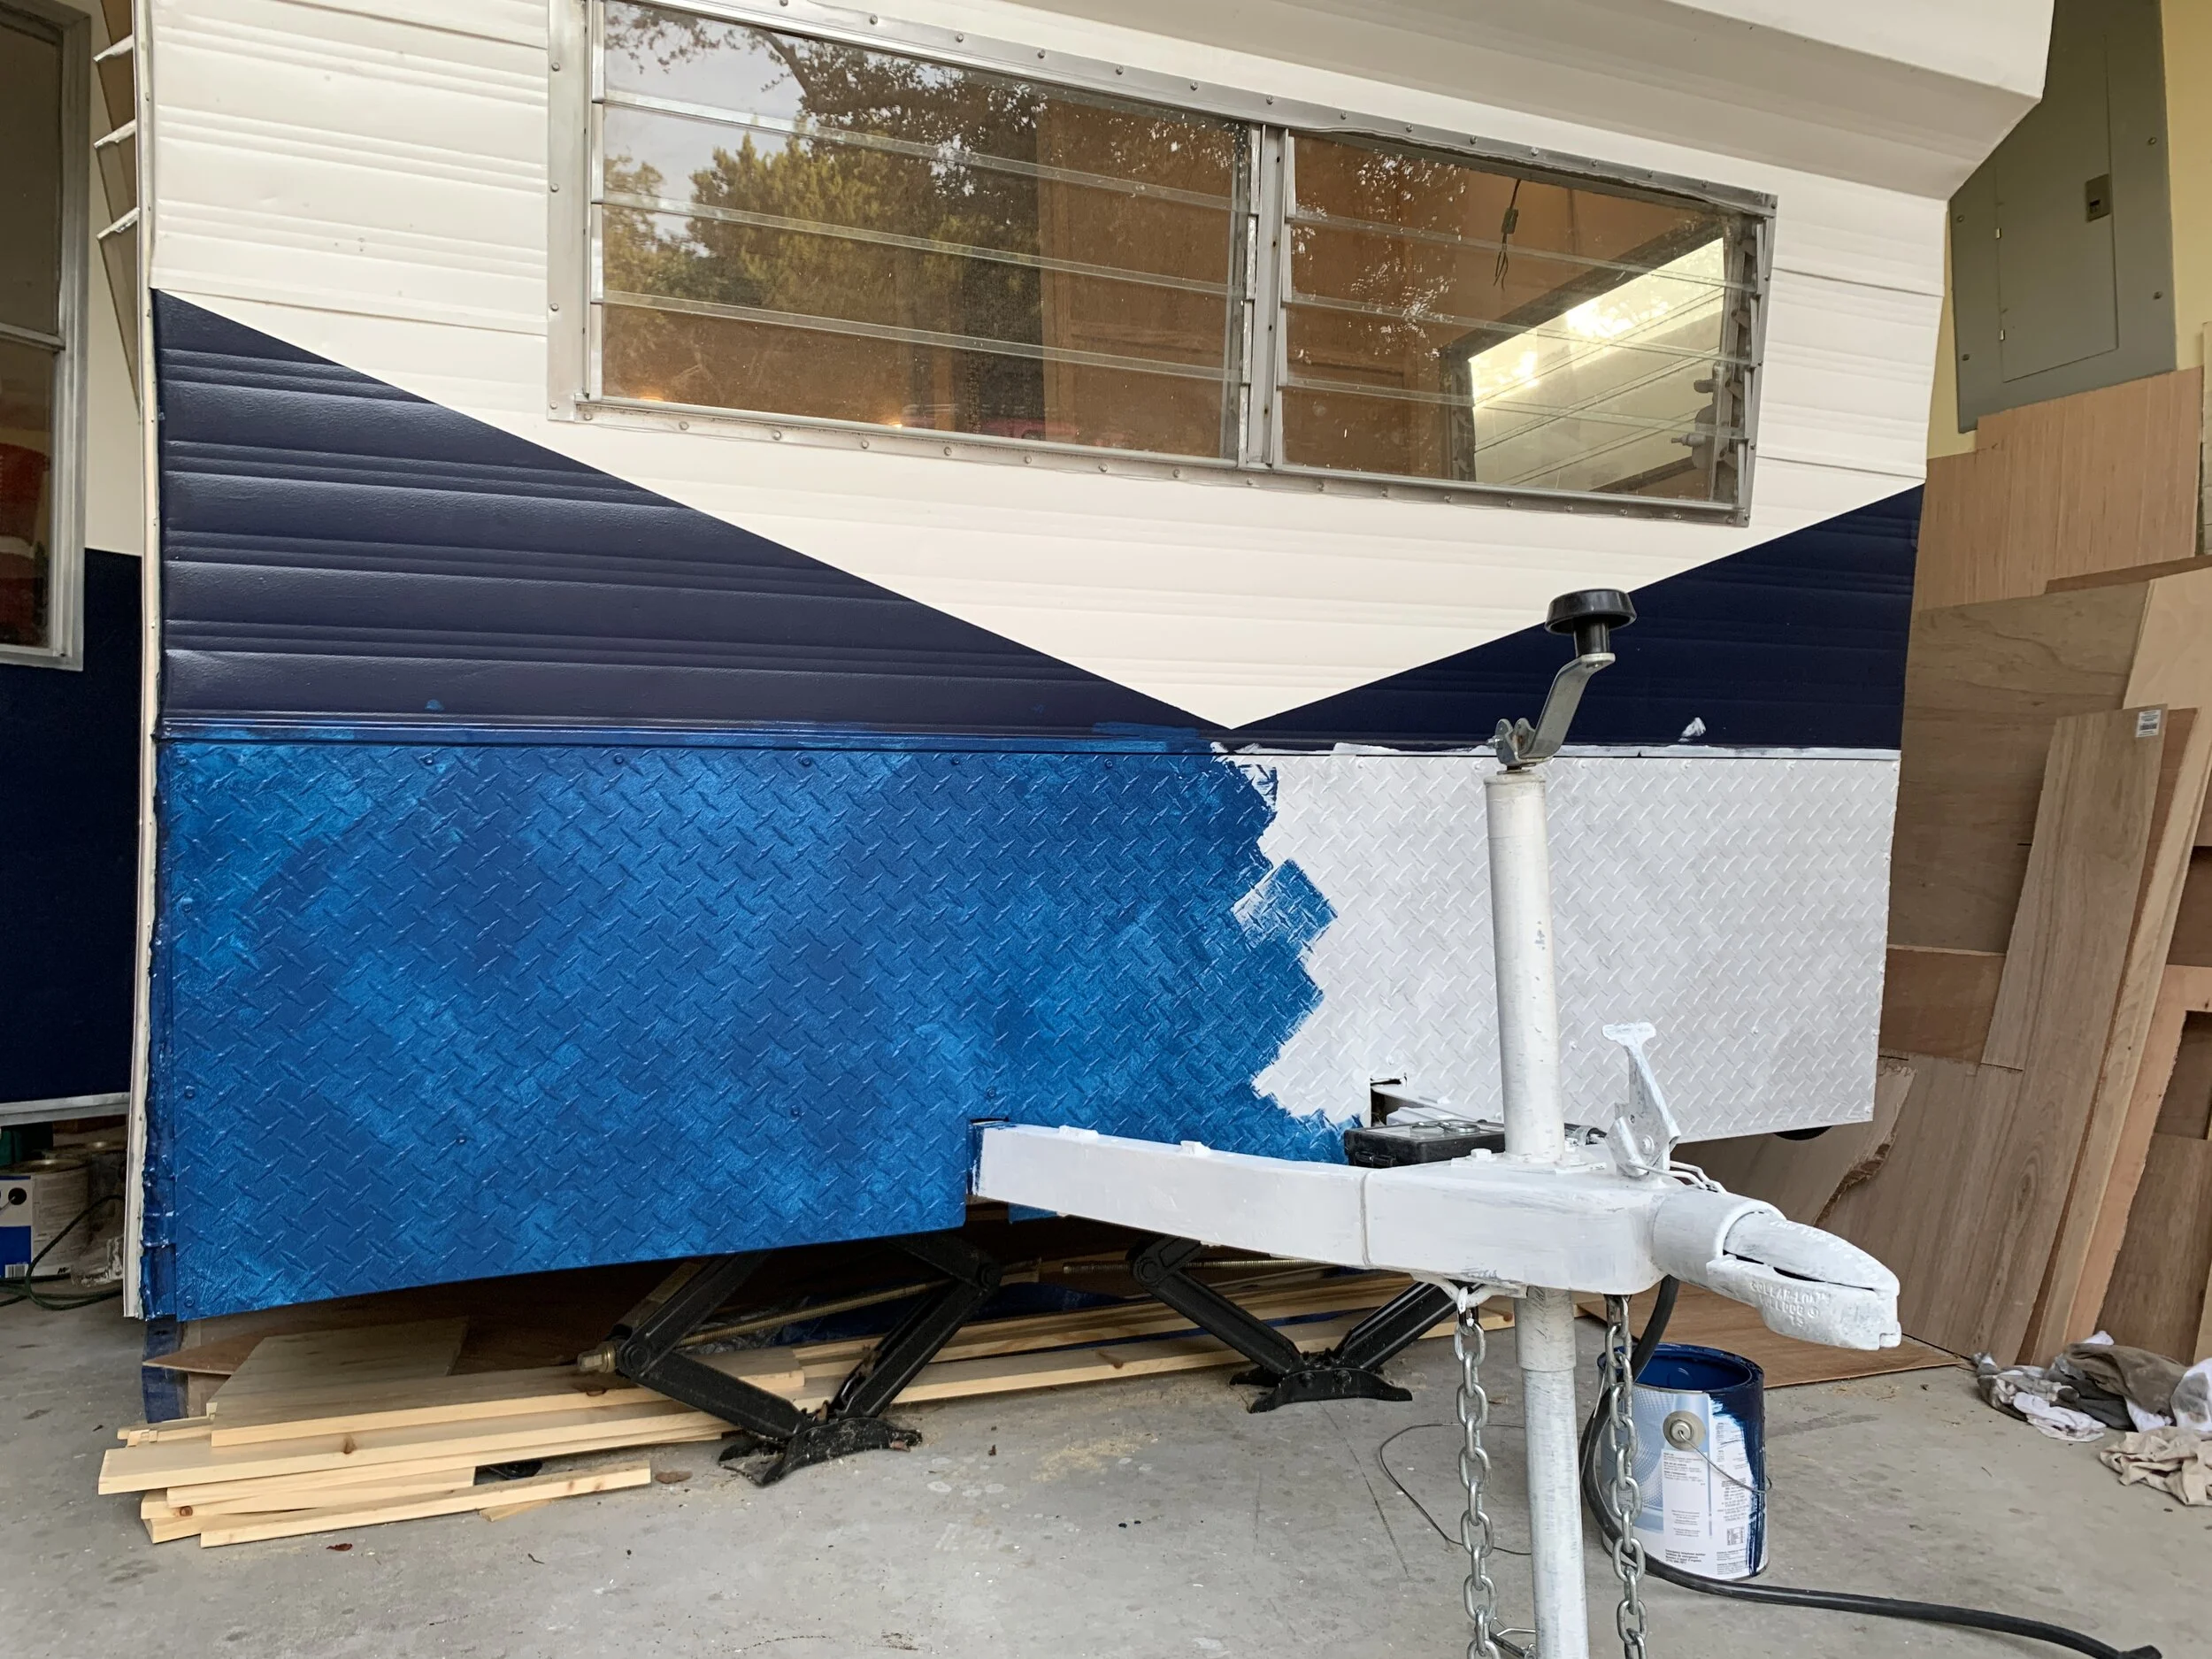
Hello fine people of the interwebs. While you’ve been out interwebbing and doing other cool, normal-people things, we’ve been over here scraping and cleaning. And cleaning. And scrubbing. And cleaning… So far the takeaway from our vintage camper renovation project – and certainly this post in particular – is that things around here often take 3-5 times longer than you think they will, which partly explains the infrequent posts as of late. (The rest can be explained by football season, and well, life.) Case in point: Removing the new, but poorly-installed, leaking roof vent (the square-ish hole/hatch in the roof that’s basically a skylight that has a flap) and replacing it the correct way so it doesn’t leak on us and cause all sorts of (more) water damage. If you’ve been following along from the beginning and have read the last couple of posts you’re probably well aware that the name of the current game is waterproofing – getting the exterior all spiffied up so we can move it to our house where we can really make some progress. So we started by…
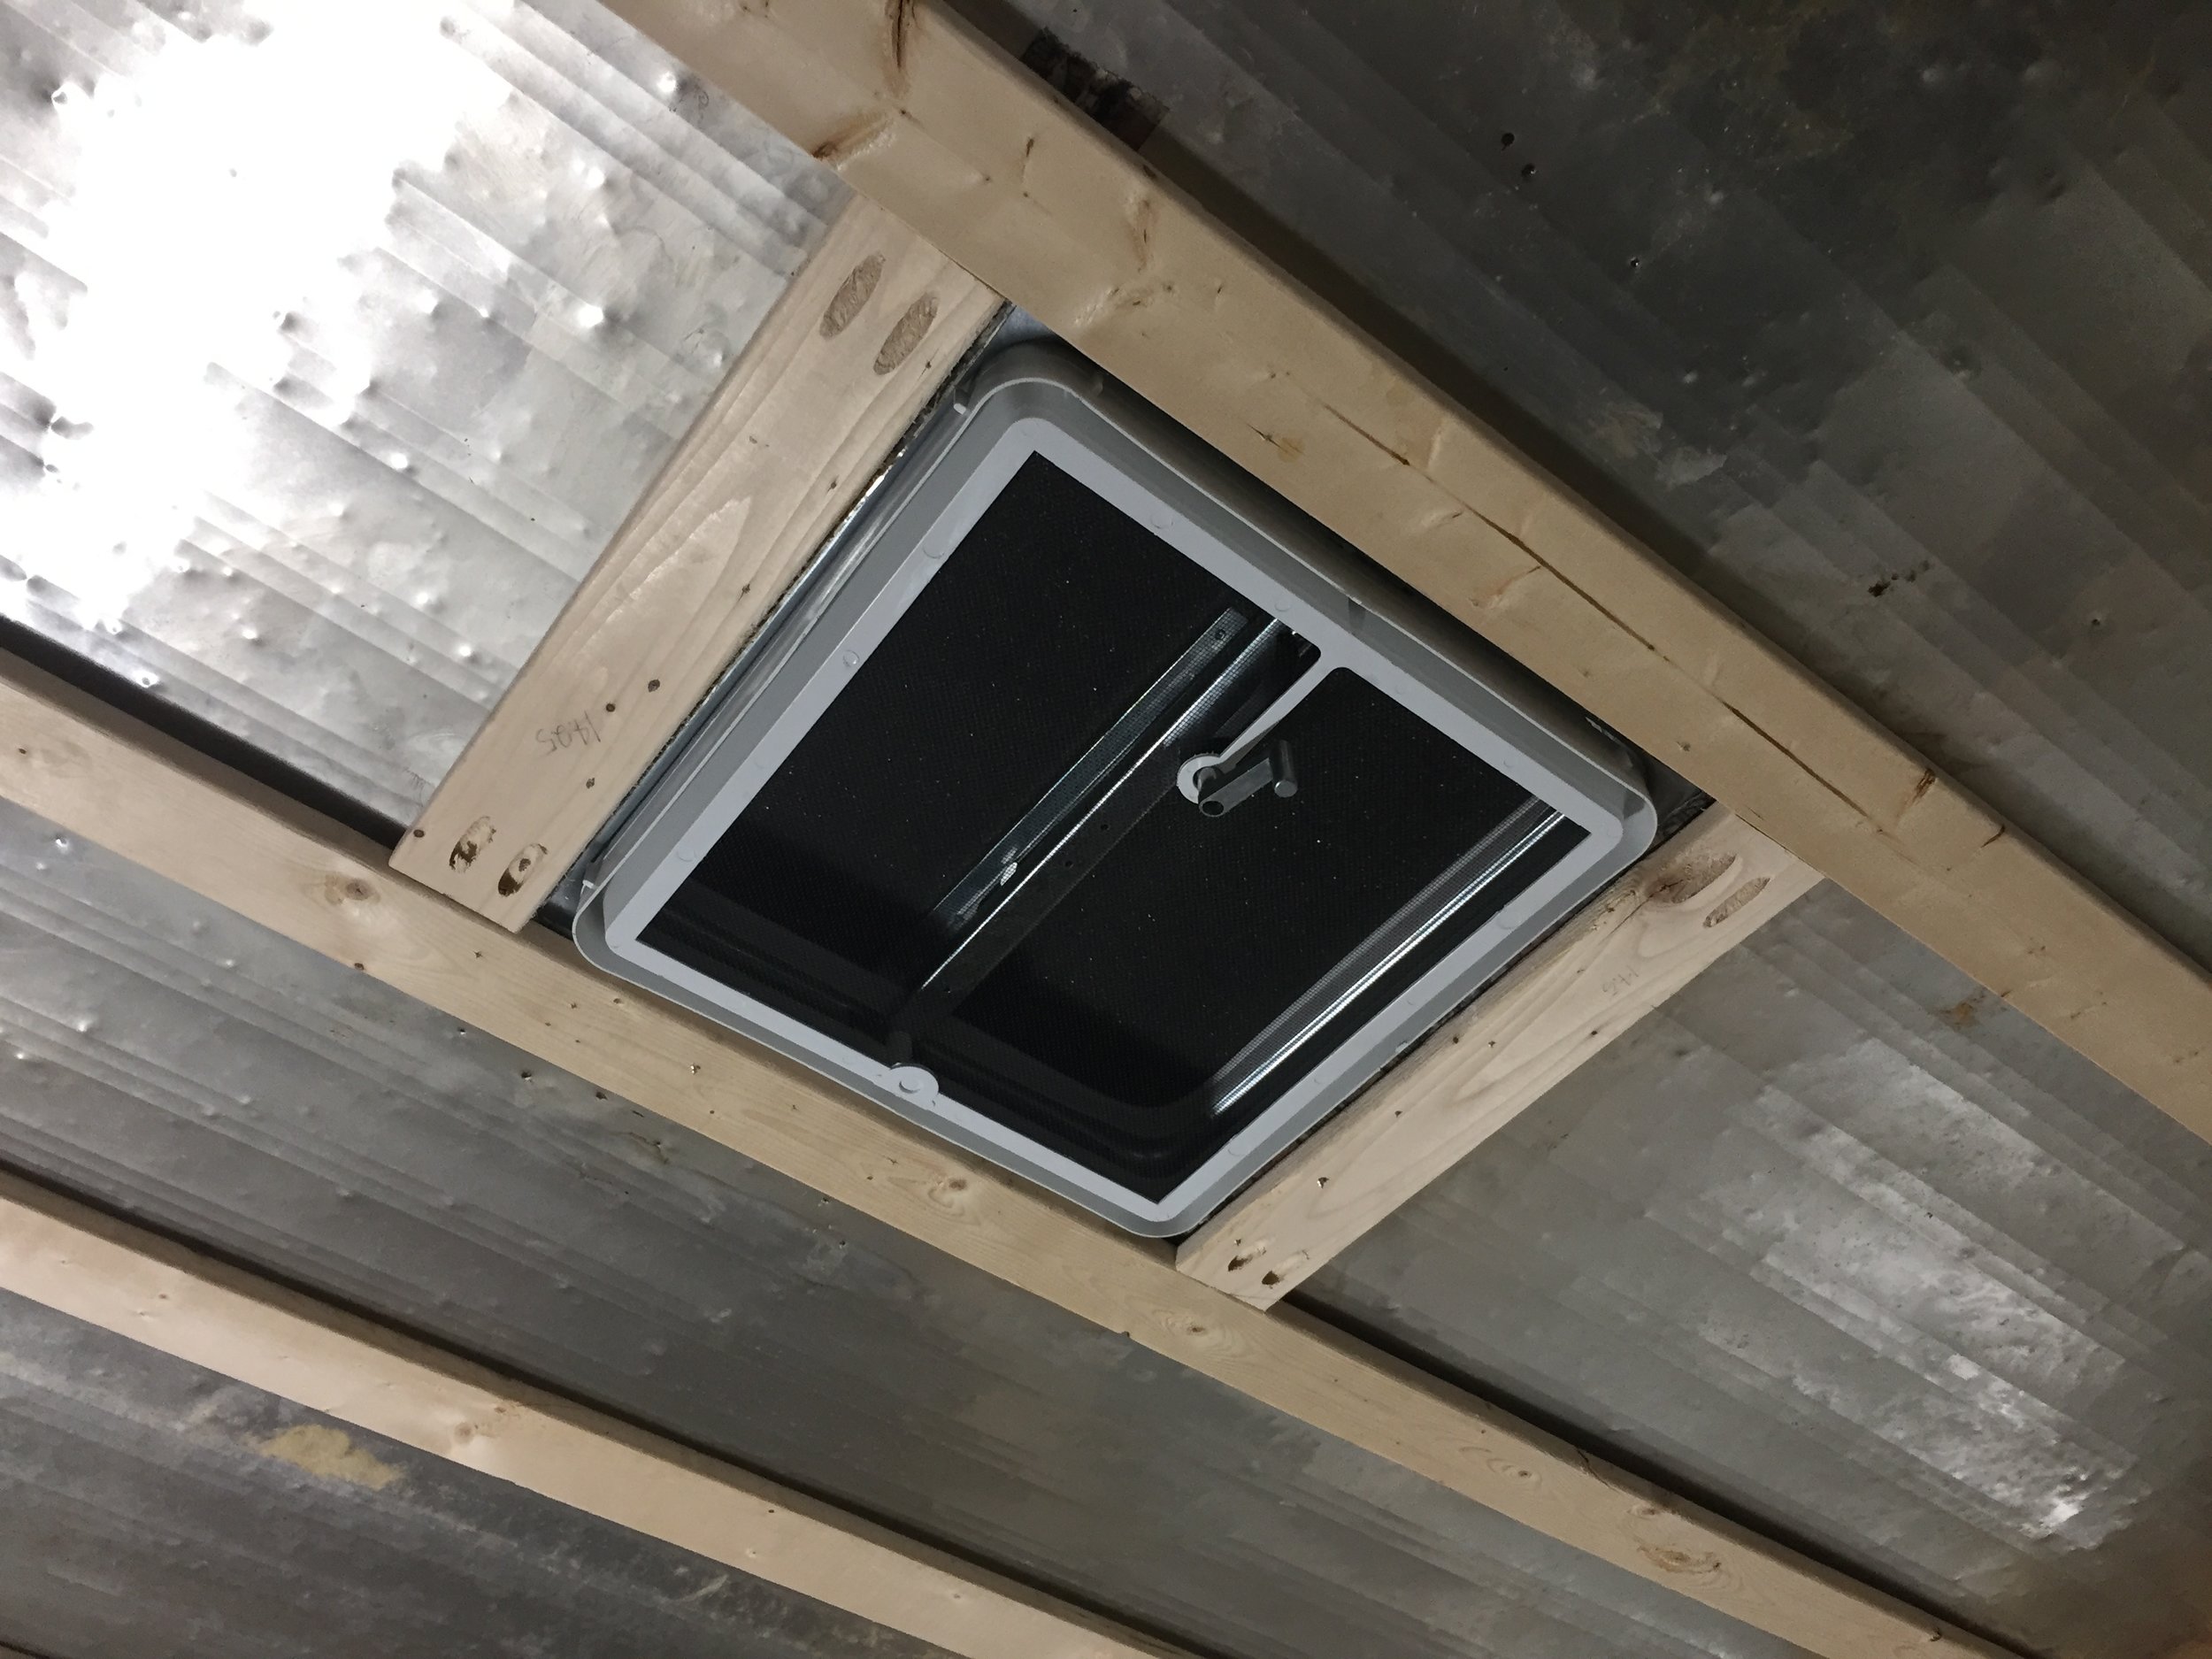
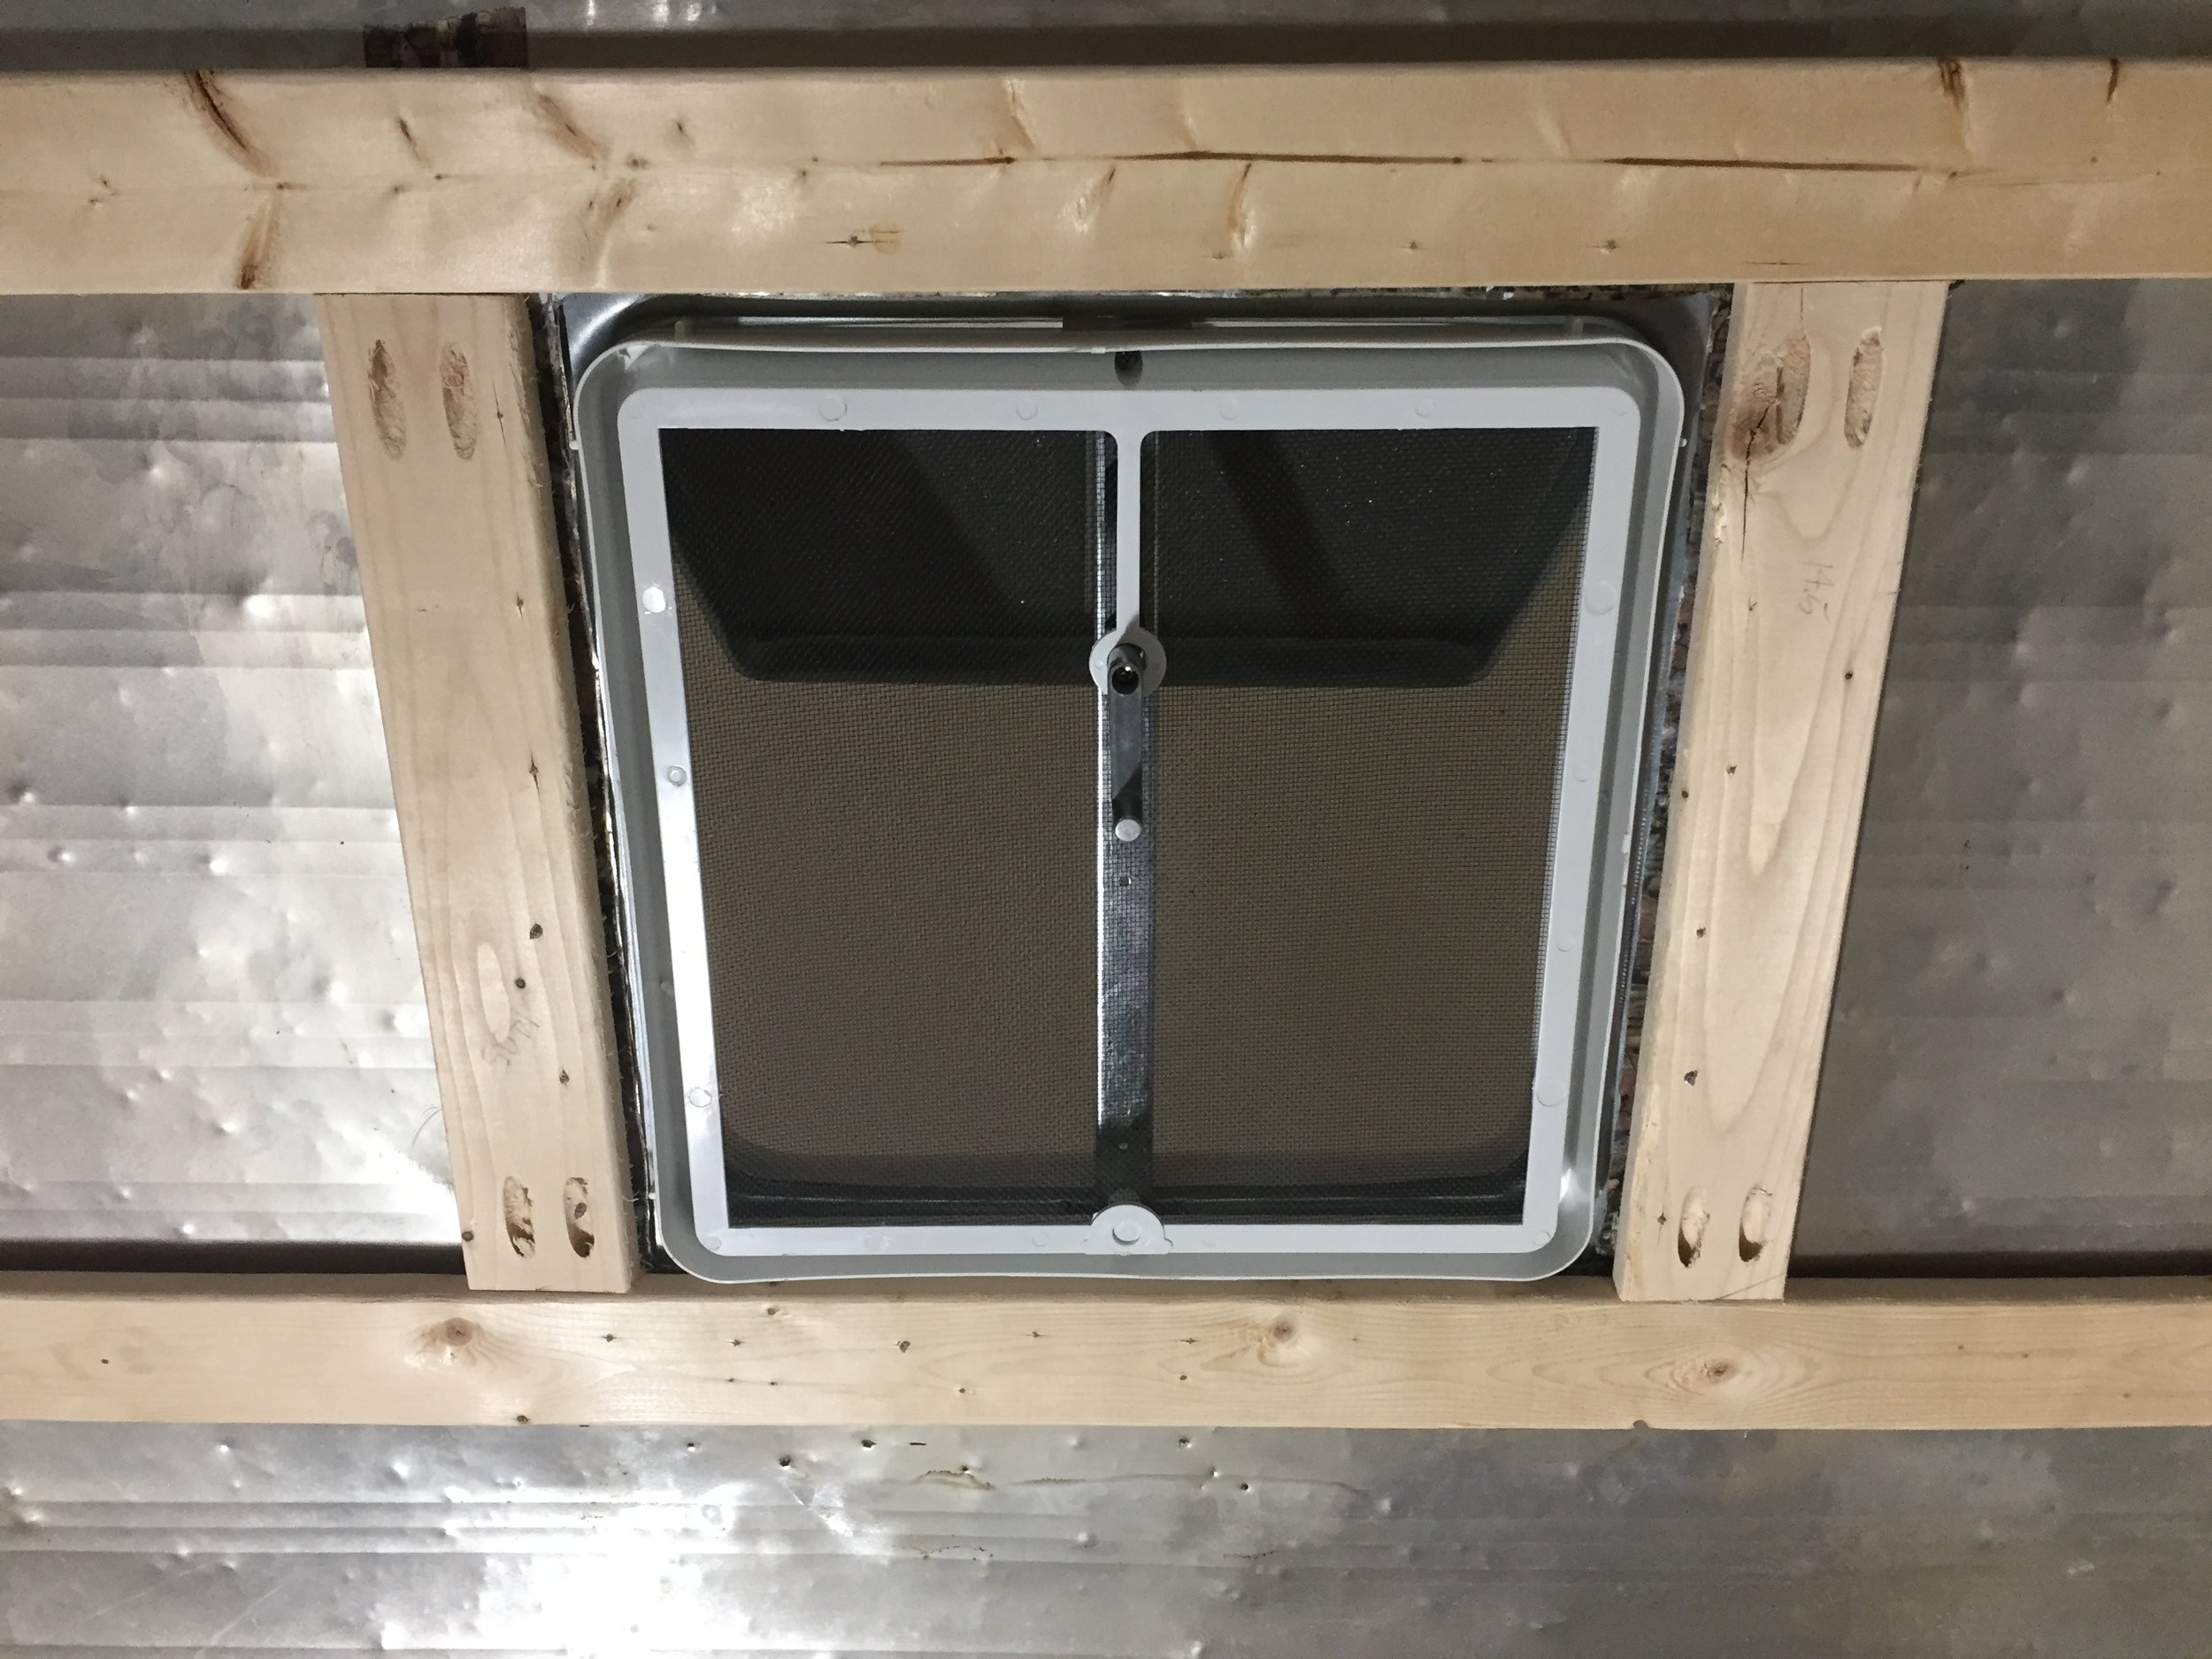
Removing the old roof vent
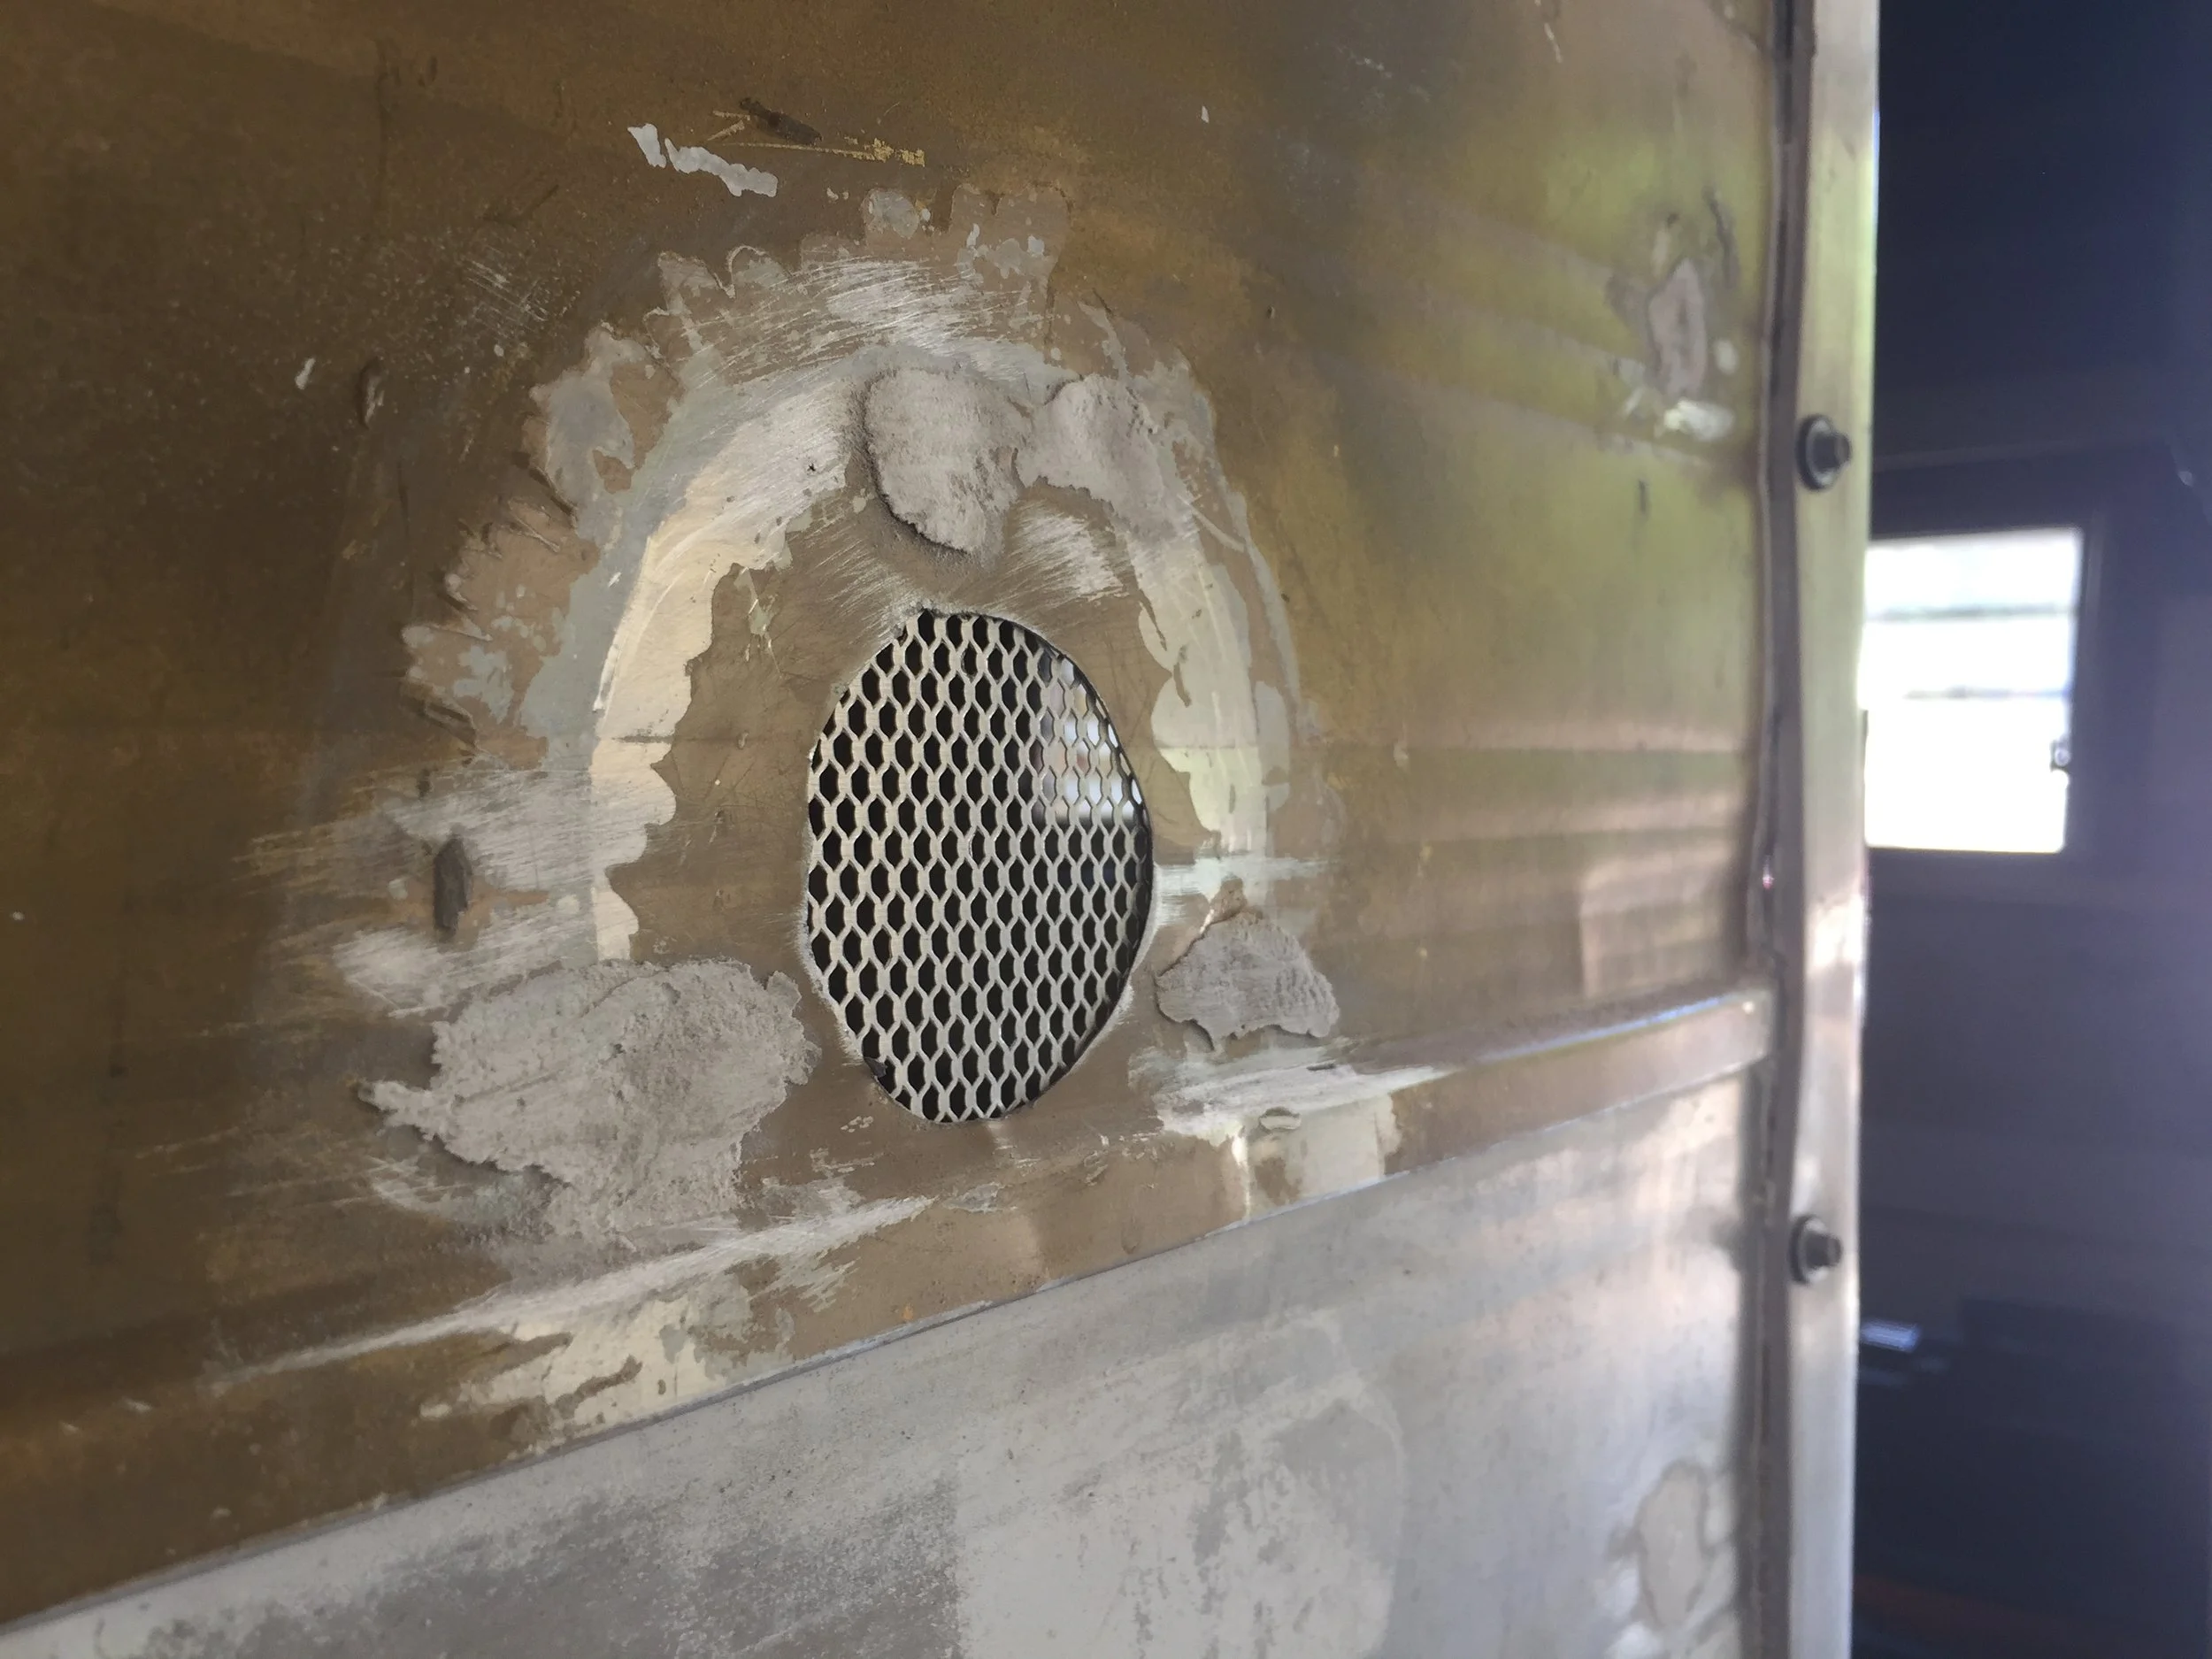
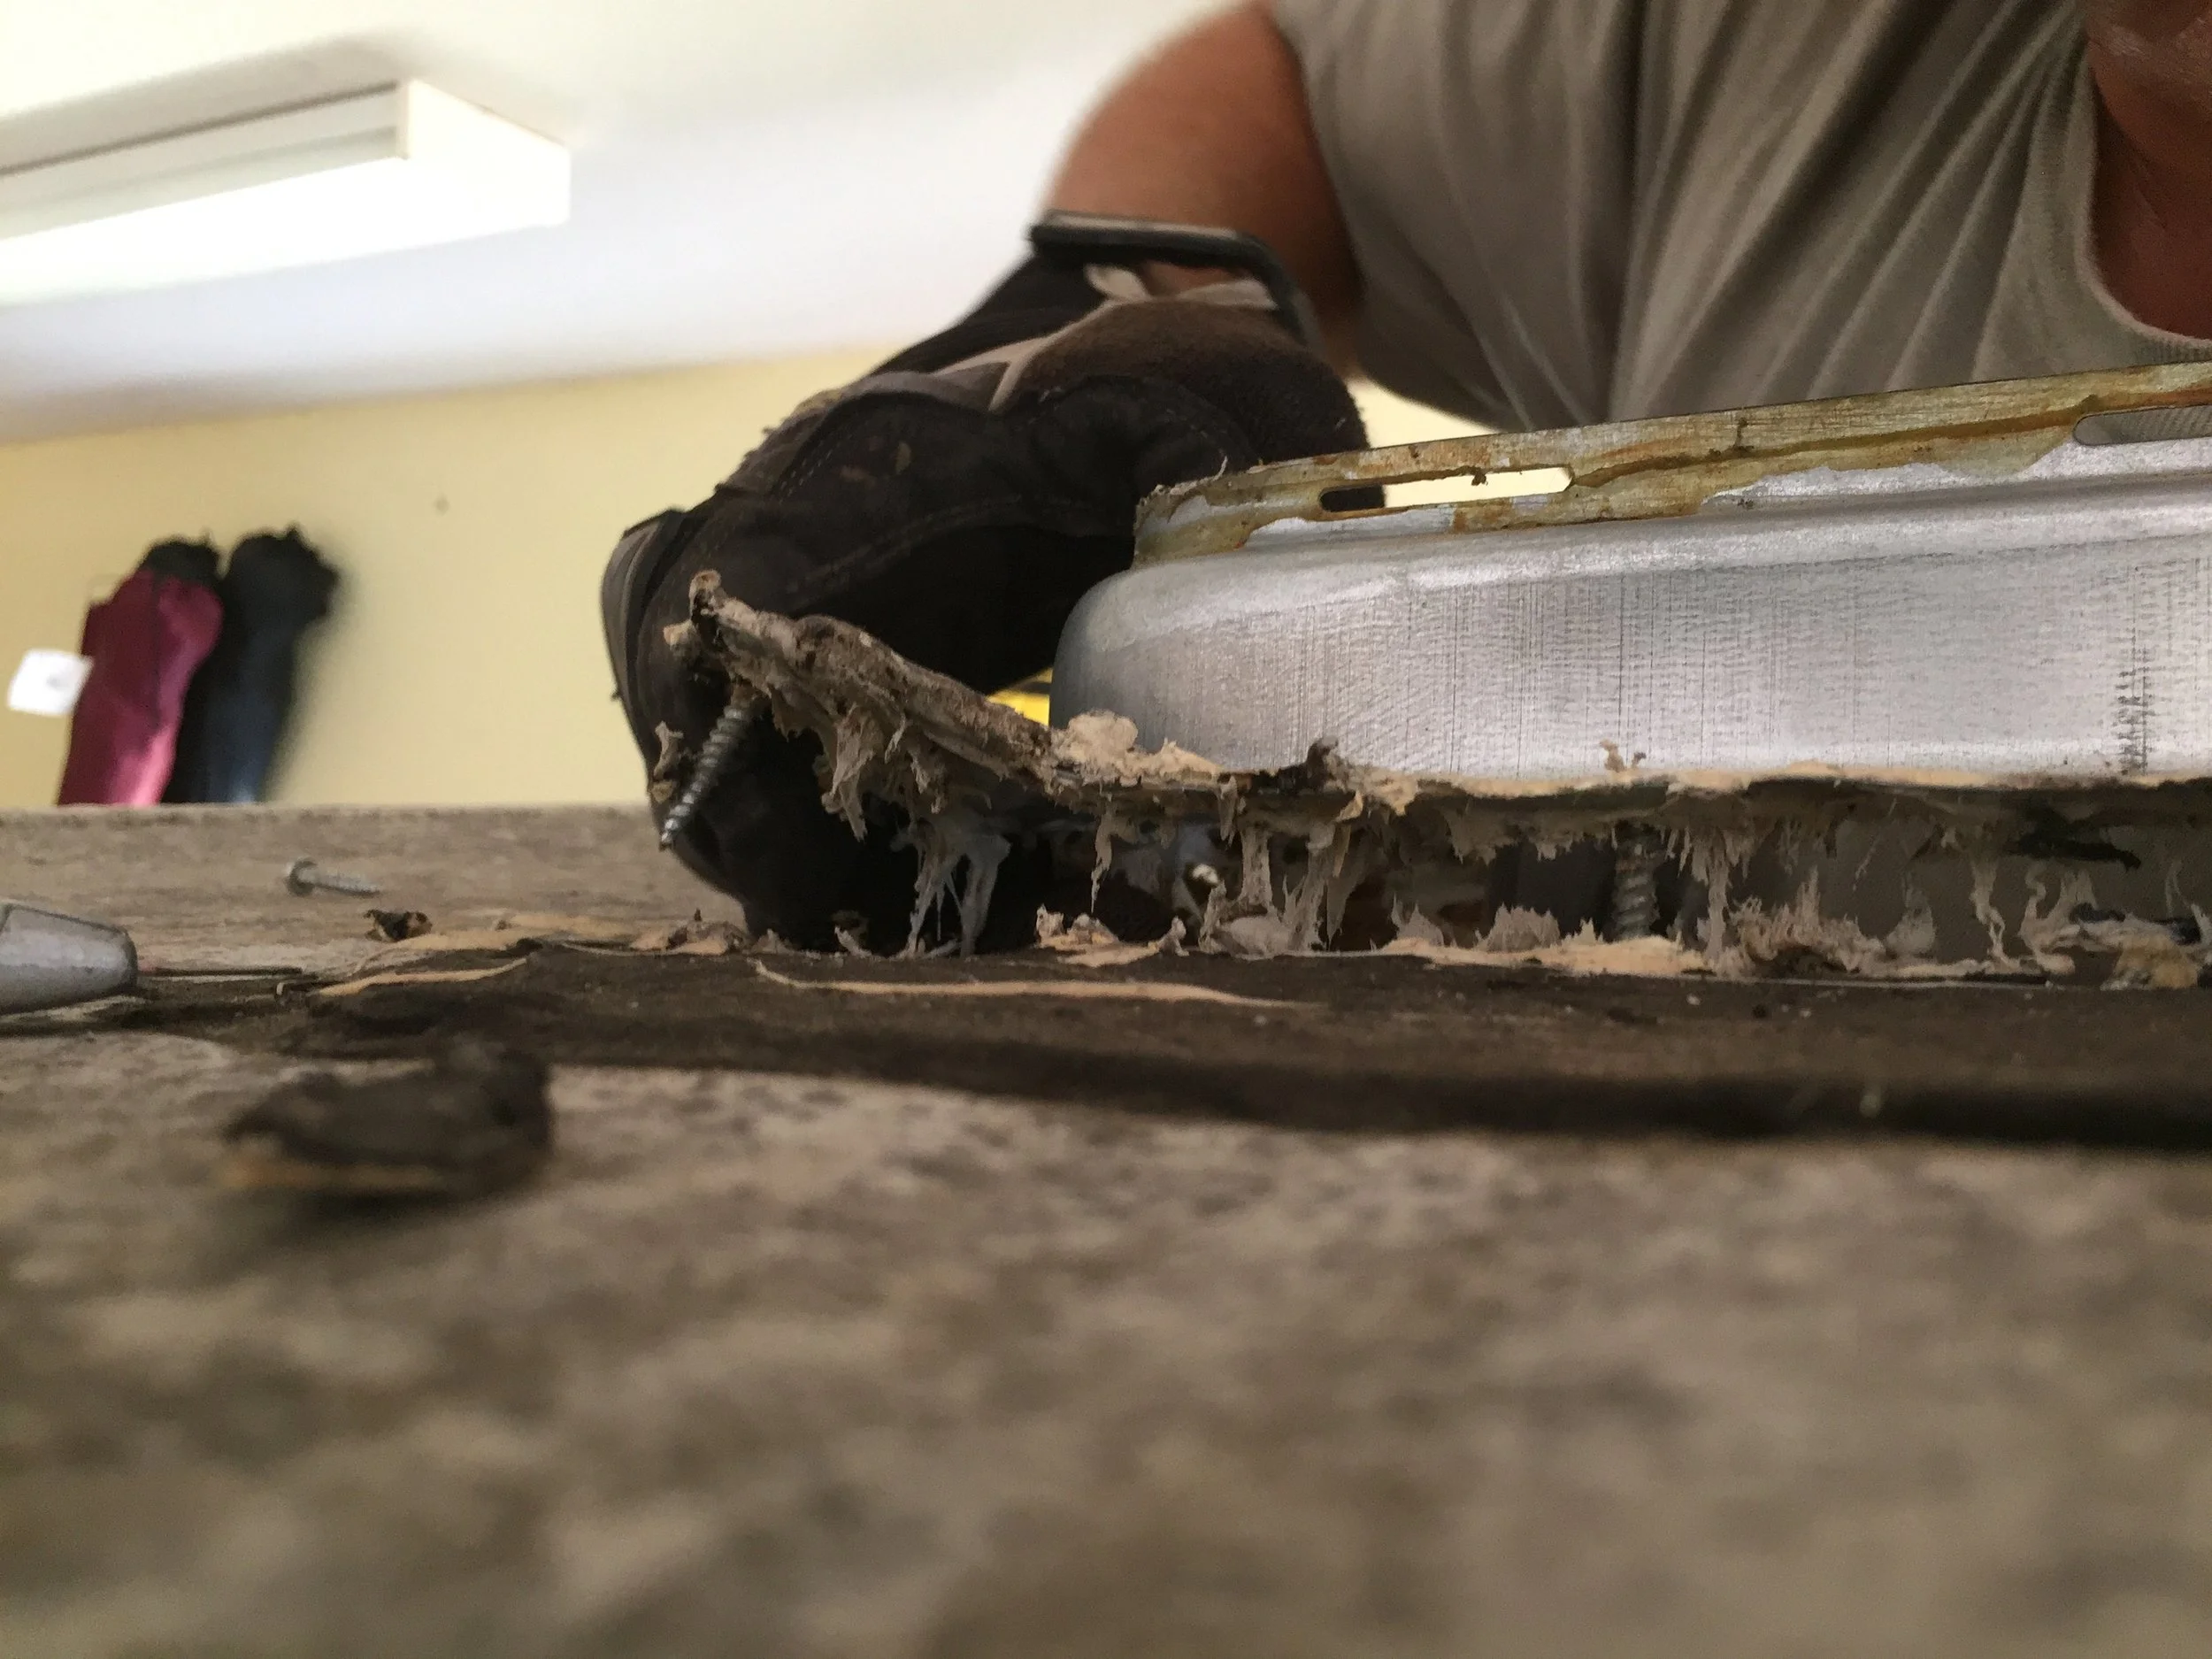
You’ve probably seen the vent in the periphery of some of the photos that have been posted so far, but here are some more specific, detailed shots so you can really get a feel for what we’re dealing with. It’s new(ish) and the cover is made of plastic, but most importantly, the whole thing was installed incorrectly. How do we know? To start, the wood frame is split through and though new wood, we can see where it’s already starting to show signs of water damage which means, ladies and gentlemen, that we have a leak.
: : : Facepalm : : :
Oh, and it was put on backward, which meant if the wind happened to catch it just right while were driving it could flap open and rip off, kind of like the door did when we picked her up that first day.

Well crud. So out it would go (with a little fight), along with the rotting ceiling framing it was attached to. Naturally, while Nick used a plethora of tools to uncover and unscrew the vent frame from the top of the camper (because of course every step so far seems to need every kind of tool ever invented), I took photos, giggled some and helped out where I could. Read: Snagging him miscellaneous tools while he looked like a weird version of the being cut in half magic trick.
Should we go with a metal or plastic vent cover?
After much discussion we decided to replace the white plastic vent cover with a metal one for a few reasons:
LIGHT – It gives us the option to block out full sunlight if we want, which might help keep the inside cooler in the Texas summers (which seem to last about 8 months…). We went back and forth on if we really wanted this – we love sunlight and definitely don’t want a cave, but the space is so small that the windows on all sides of the camper should be more than enough to let light in if we want, and we can always open the vent it if we want the light from above. (They come with an inner screen to keep the bugs out!) Also, on a sad, but realistic note: I suffer from horrible migraines so if I ever get one while we’re out on the road, it would also be nice to be able to block out as much light as possible.
DURABILITY – It’s kind of a “yeah, duh” statement, but metal is more durable than plastic. We’ve read the plastic ones need to be replaced every 5 years or so since they can get brittle from being in the sun, making them break easily. And that’s not even counting if we’re ever in a hail storm, which is entirely likely to happen here in Texas. I don’t know about you but I’m all about doing it right the first time and then hopefully having minimal maintenance down the road.
VINTAGE CHARM – The metal is more in keeping with the vintage 60s style of The Cameo, which is kind of the whole reason we’re doing this in the first place instead of buying a new(er) camper! Vintage character FTW!
(Whether you go with a plastic or metal Heng vent cover, the installation is basically the same.)
Sludge for days
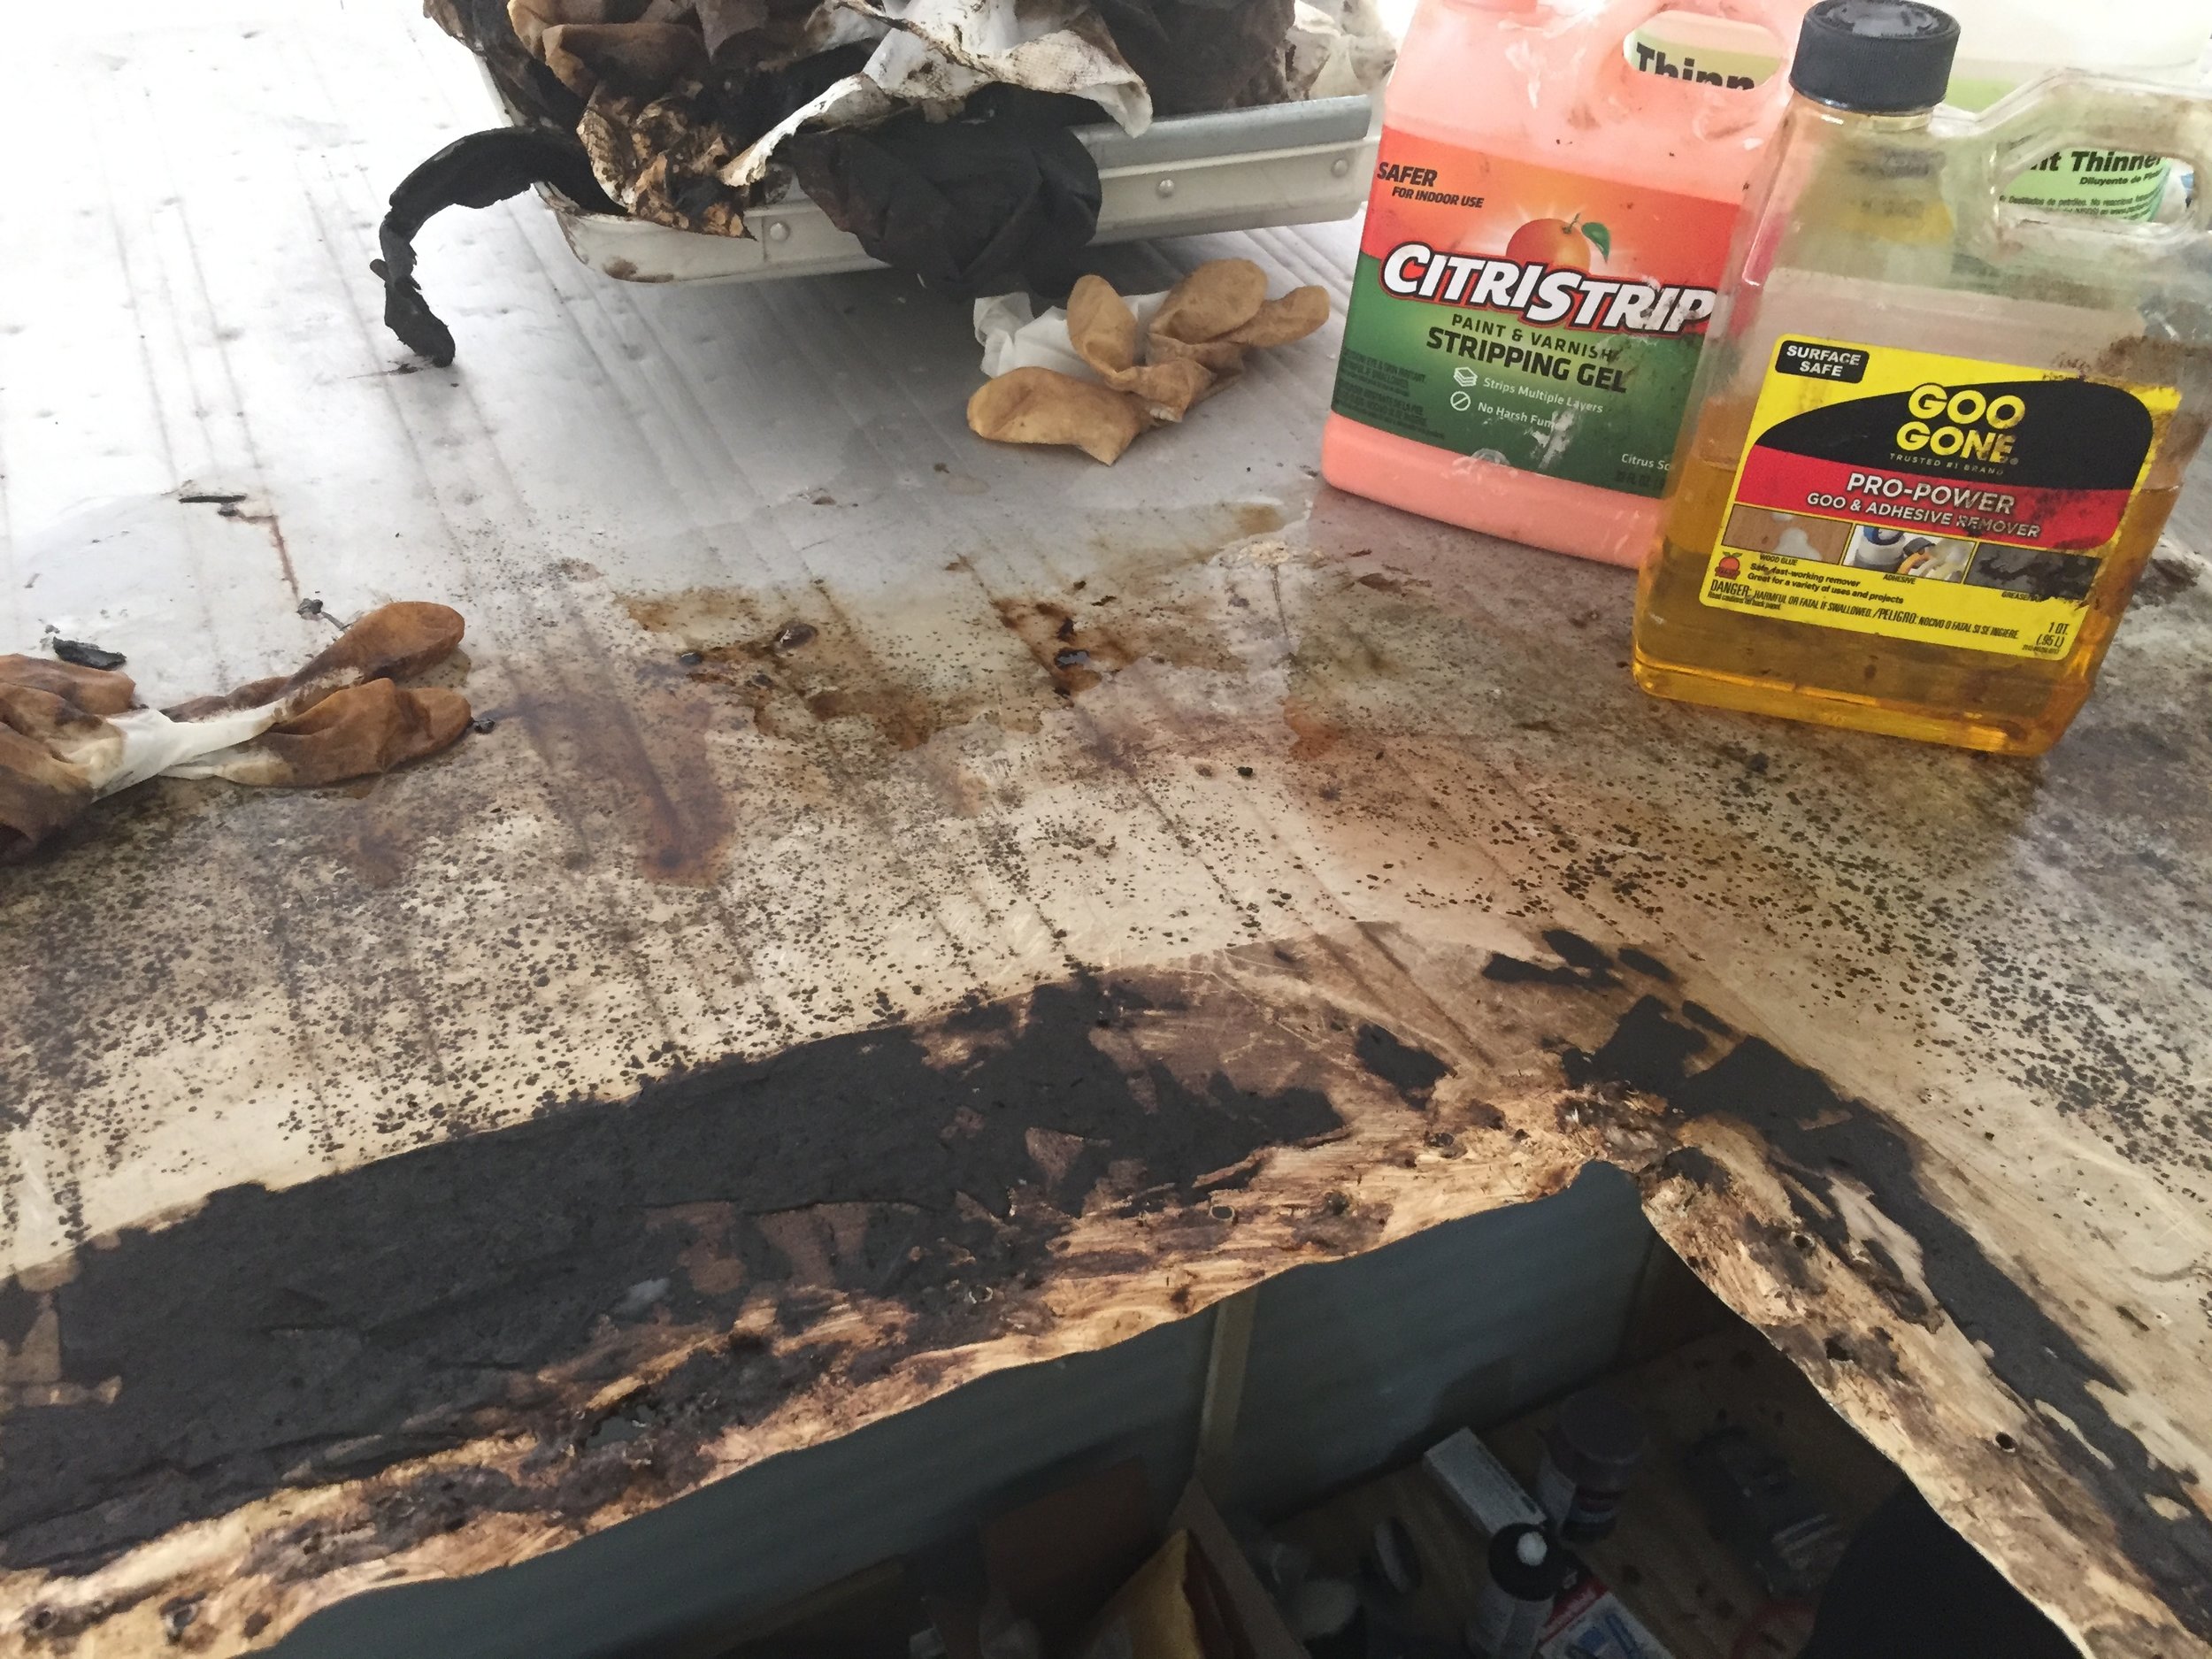
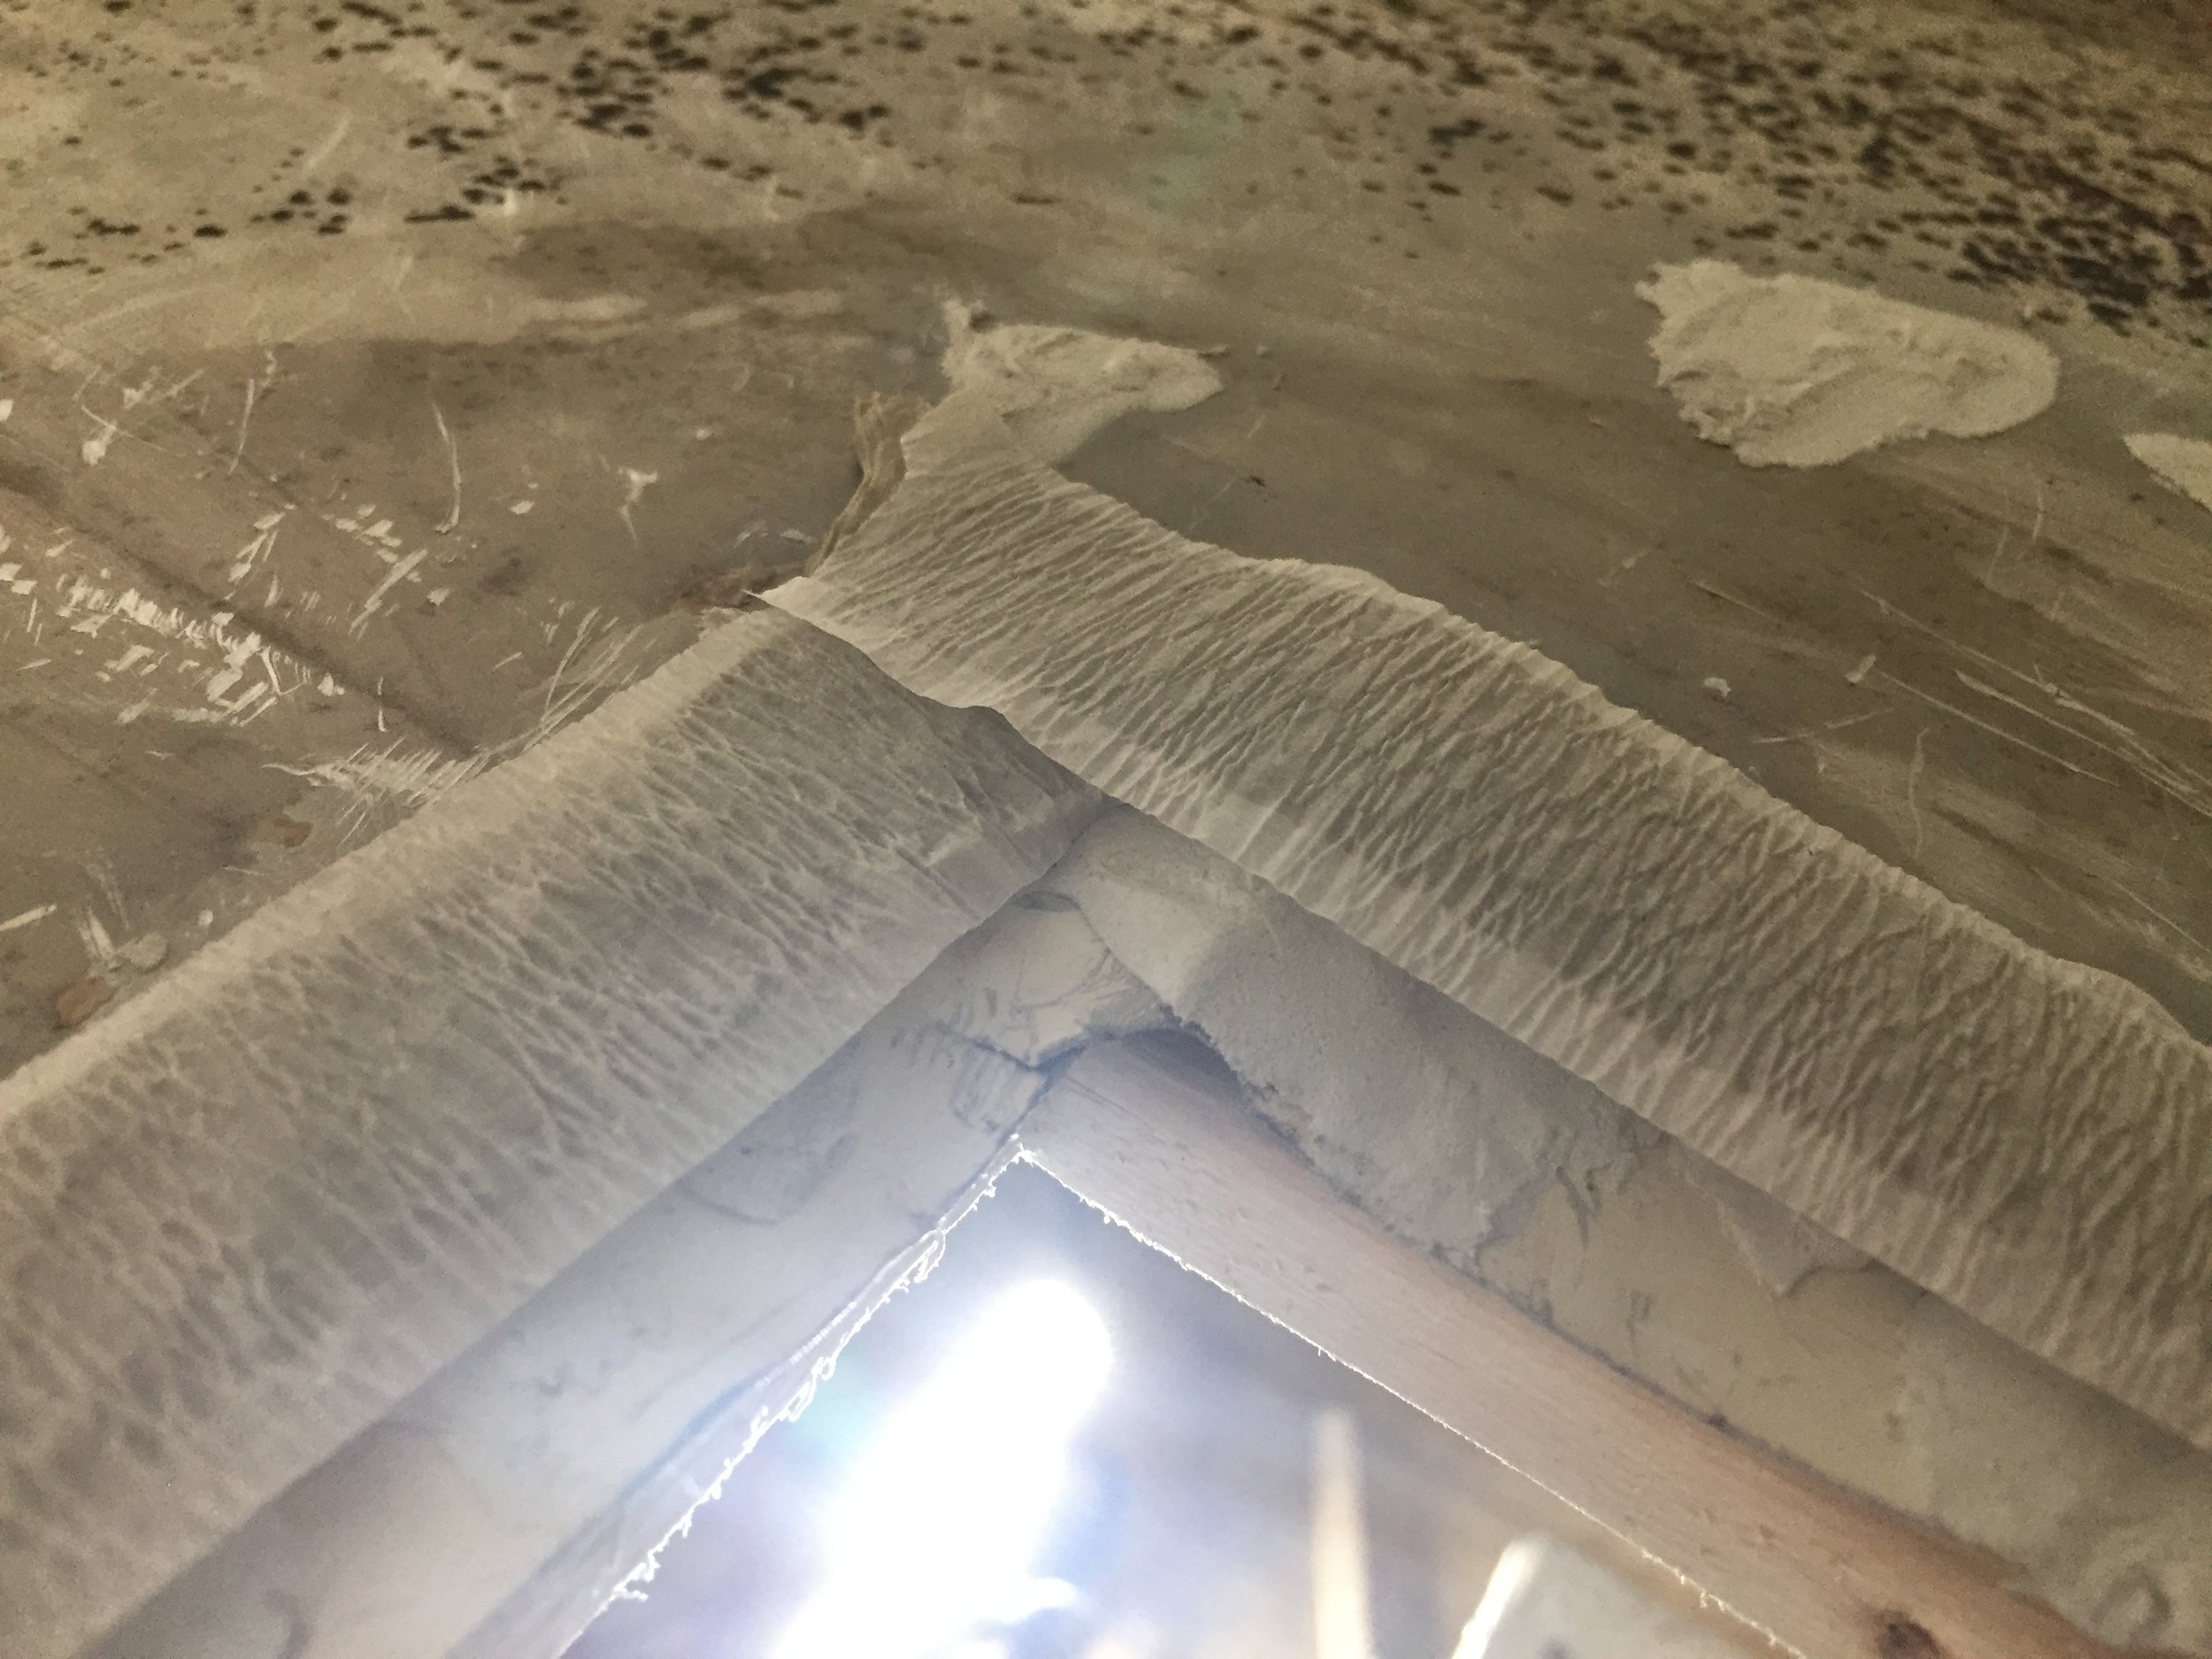
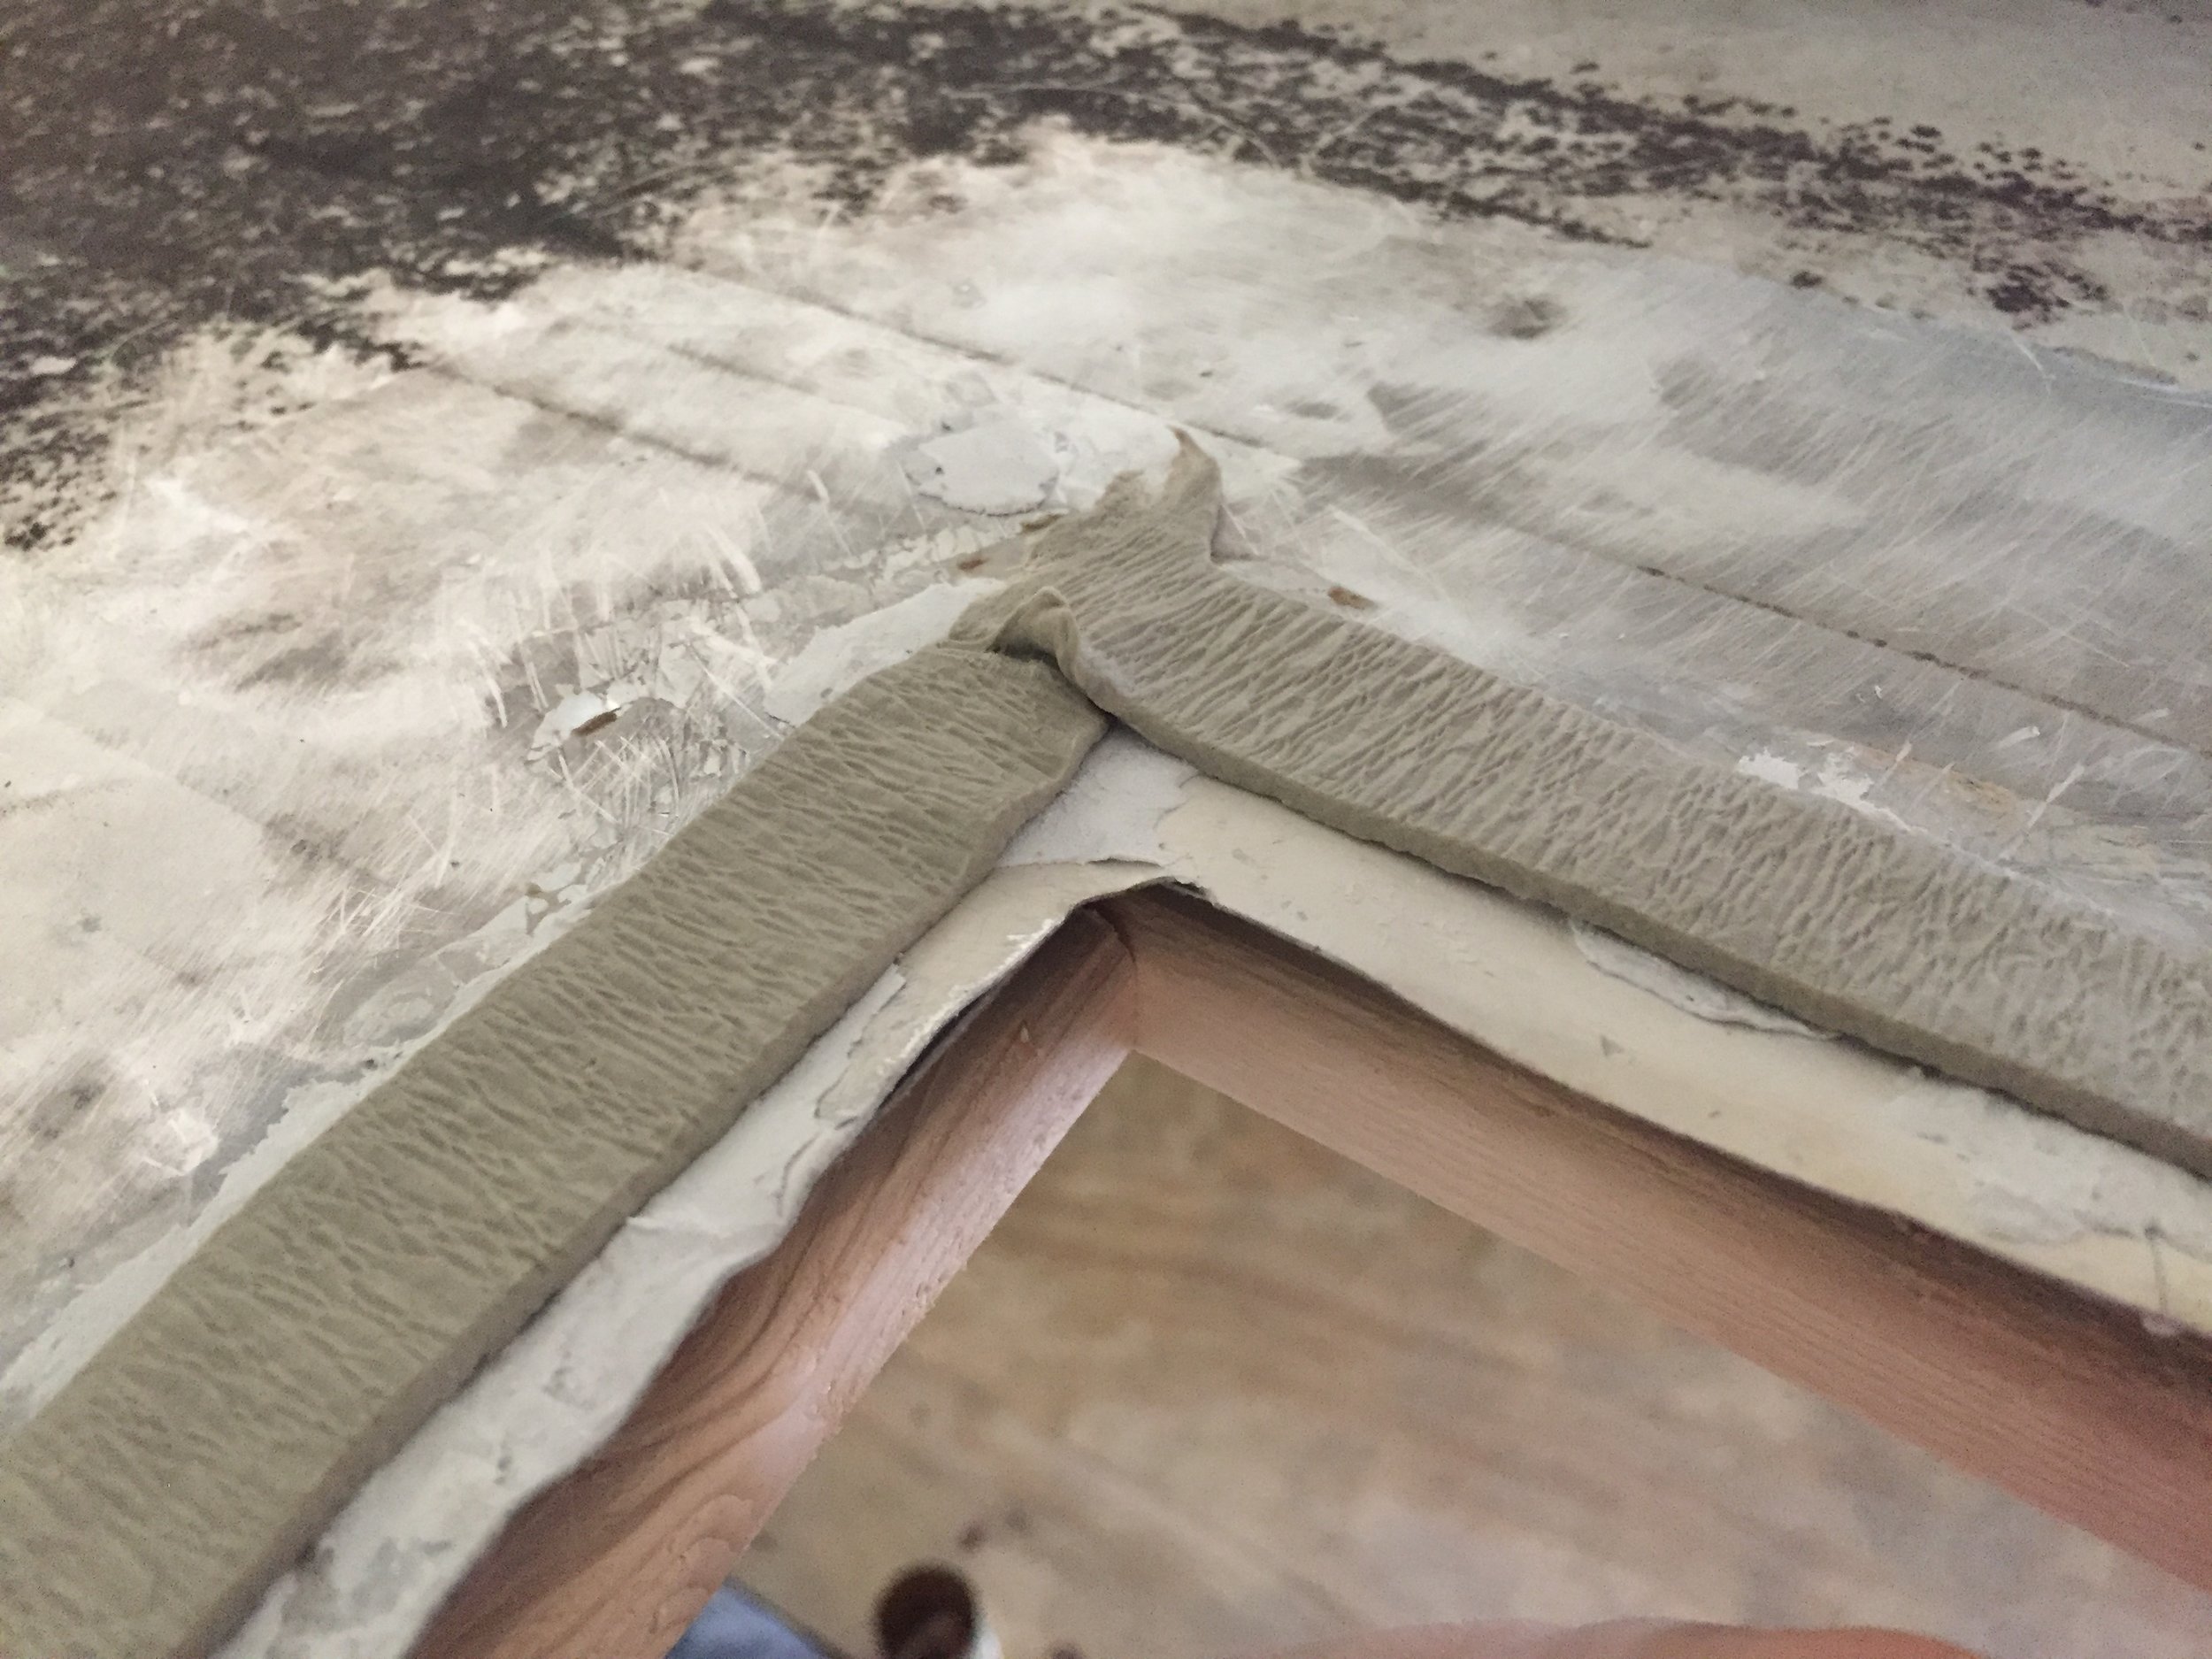
The frame for the cover was glued to the roof using butyl putty tape, otherwise known as Satan’s bubblegum. I’d read about this stuff in vintage camper restoration blogs and forums and how hard it is to work with once it’s warm and tacky, so we went in thinking this was going to be the nastiest stuff we’d run into. It was pretty freakin’ gross (see photos above)… but then we found some other gunk underneath that gunk that made the tacky bubblegum tape from hell scream “hold my beer”.
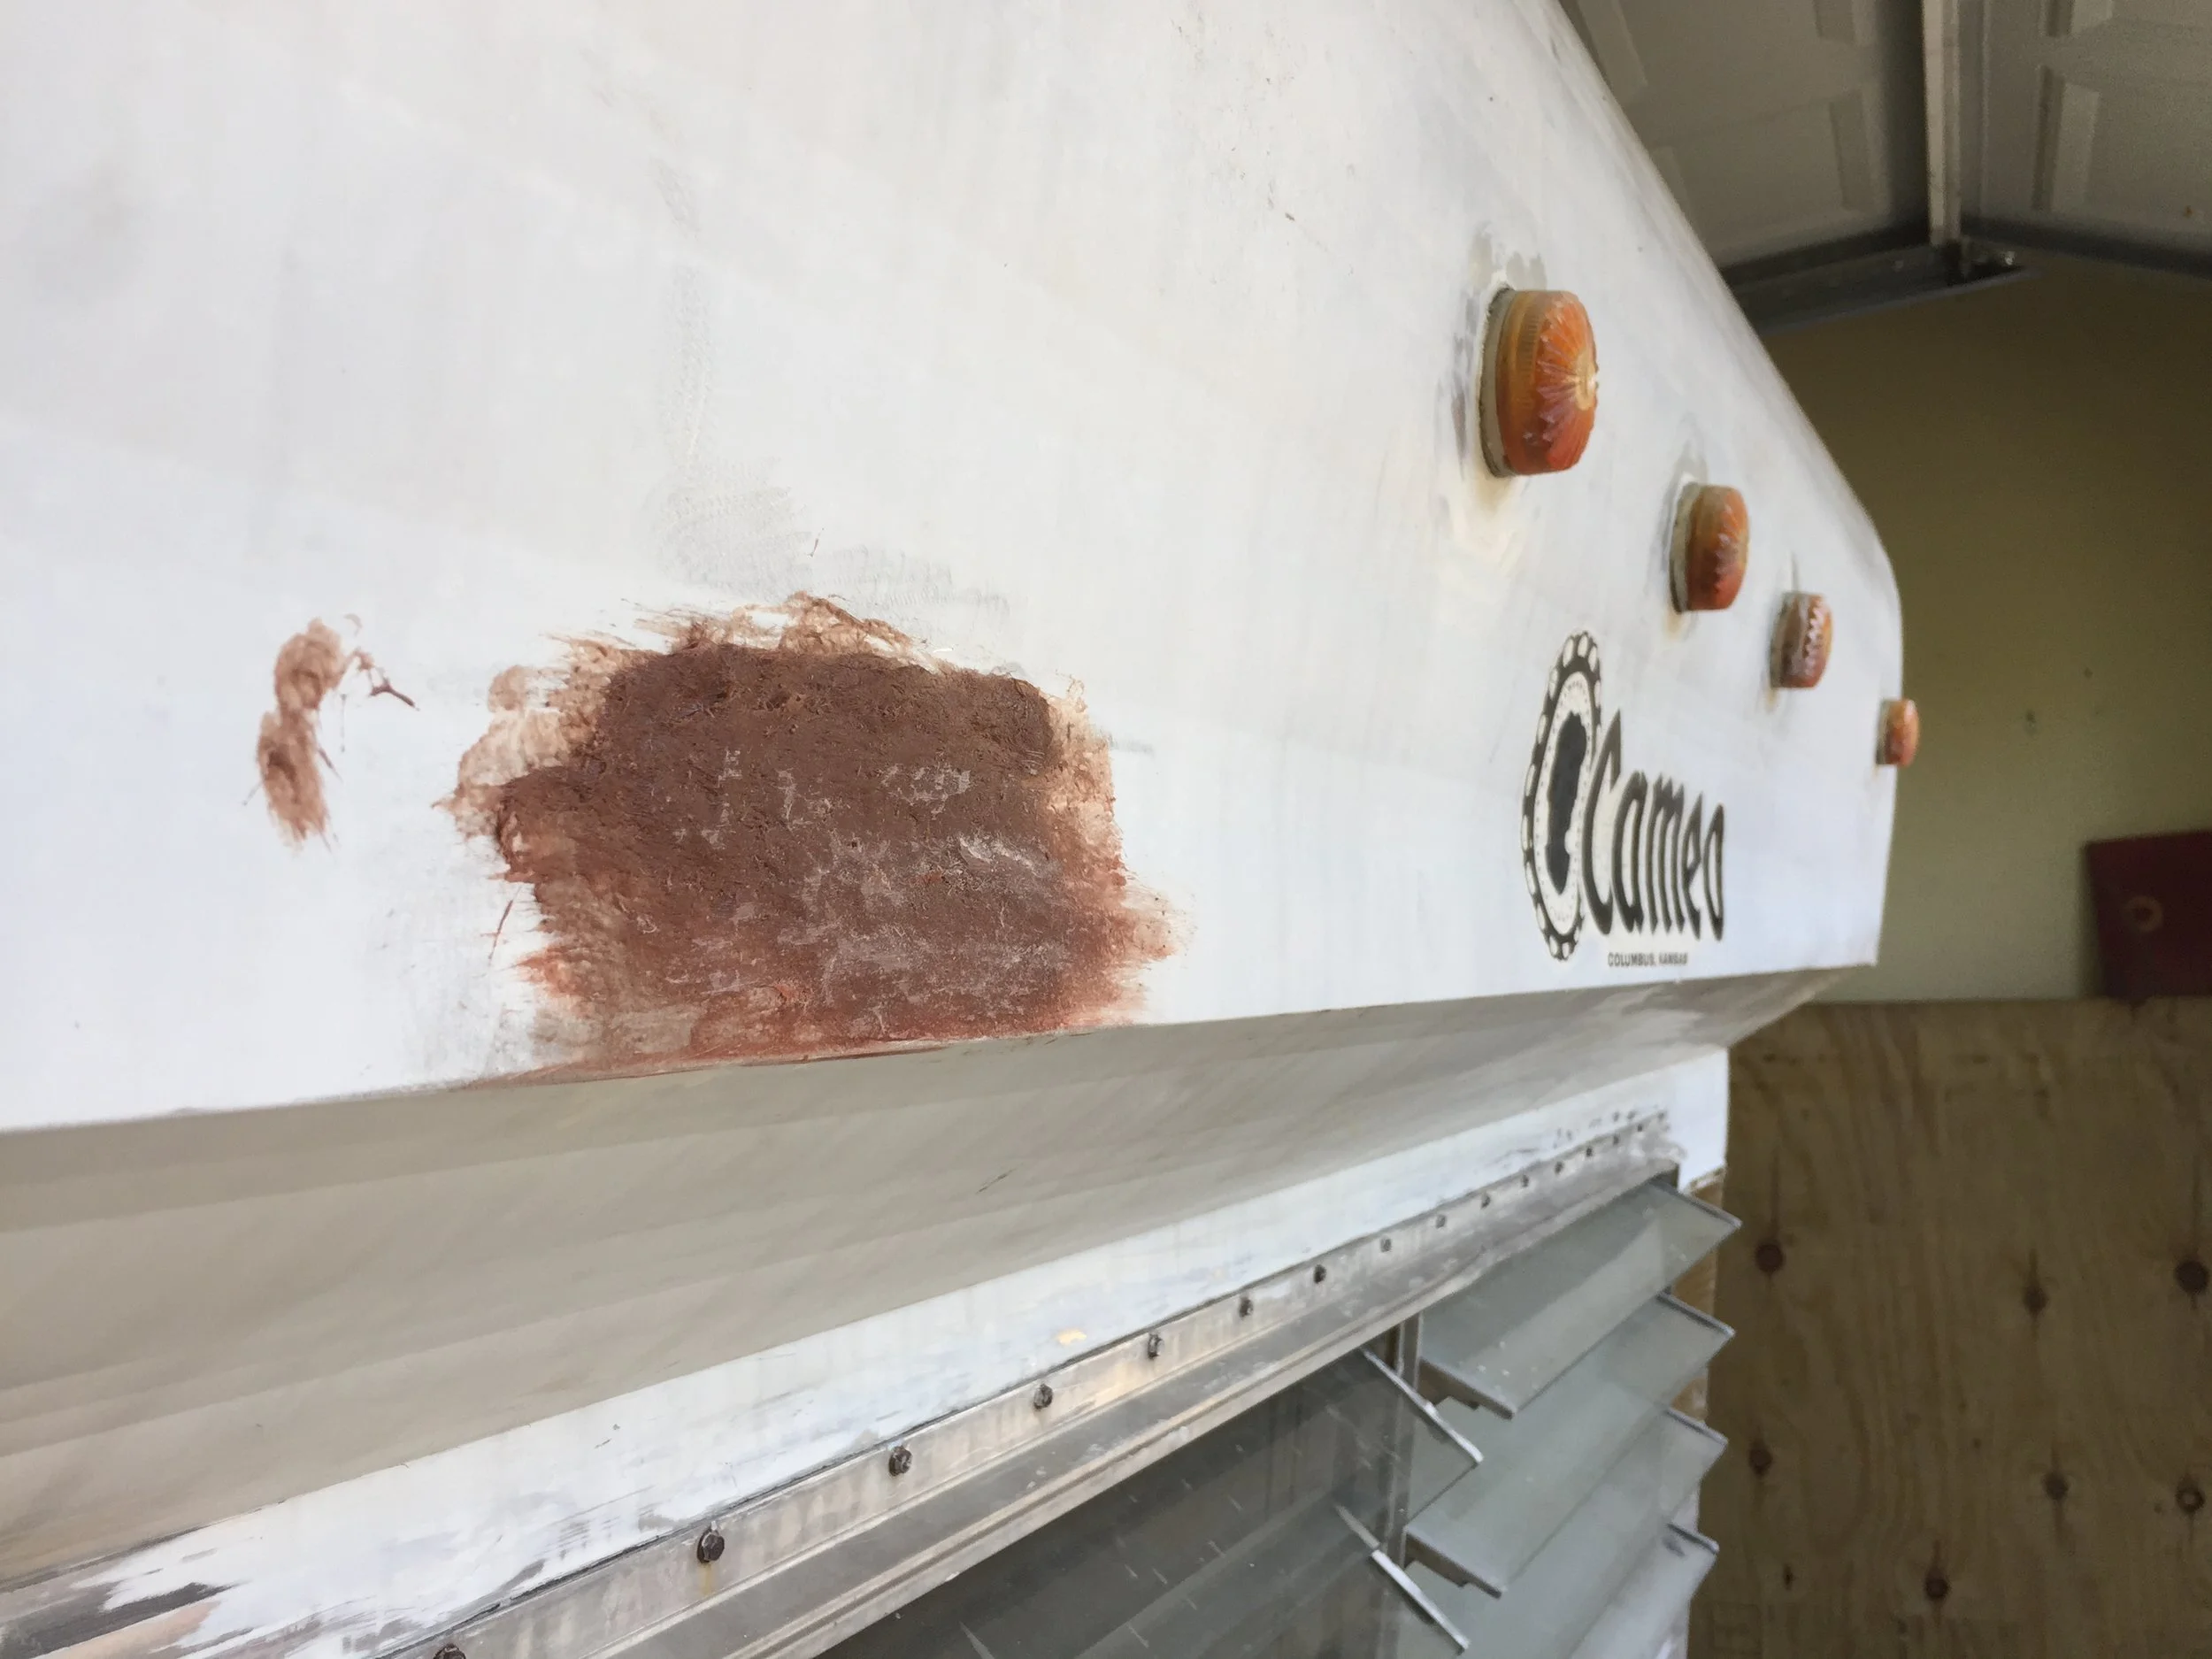
We’re not exactly sure what it was – we’re guessing some kind of roofing tar – that turned a “quick” project into a full on two-day affair. While Nick cleaned the roof around me with soap and a long scrub brush, I spent 5 hours with my body carefully threaded through the 14-inch hole using a putty knife to scrape what looked like brown fruit leather sloppily and thickly caked around the perimeter of the hole. I tried a few products to soften and remove the thick tar – caulk remover, Citristrip, GooGone. Ultimately, GooGone proved to be the best of the options we tried. If you encounter anything like this, I recommend wearing two layers + of disposable gloves and having a box of extras. Not sure if it was the GooGone or tar stuff, but my outermost layer of gloves would quickly stretch and basically disintegrate every 10 minutes or so while on my hands. I went through about a roll and a half of paper towels, almost a full 32 oz. bottle of ProPower GooGone, and so many disposable gloves I lost count (close to a ginormous box though). Not to mention the clothes I probably just need to burn:
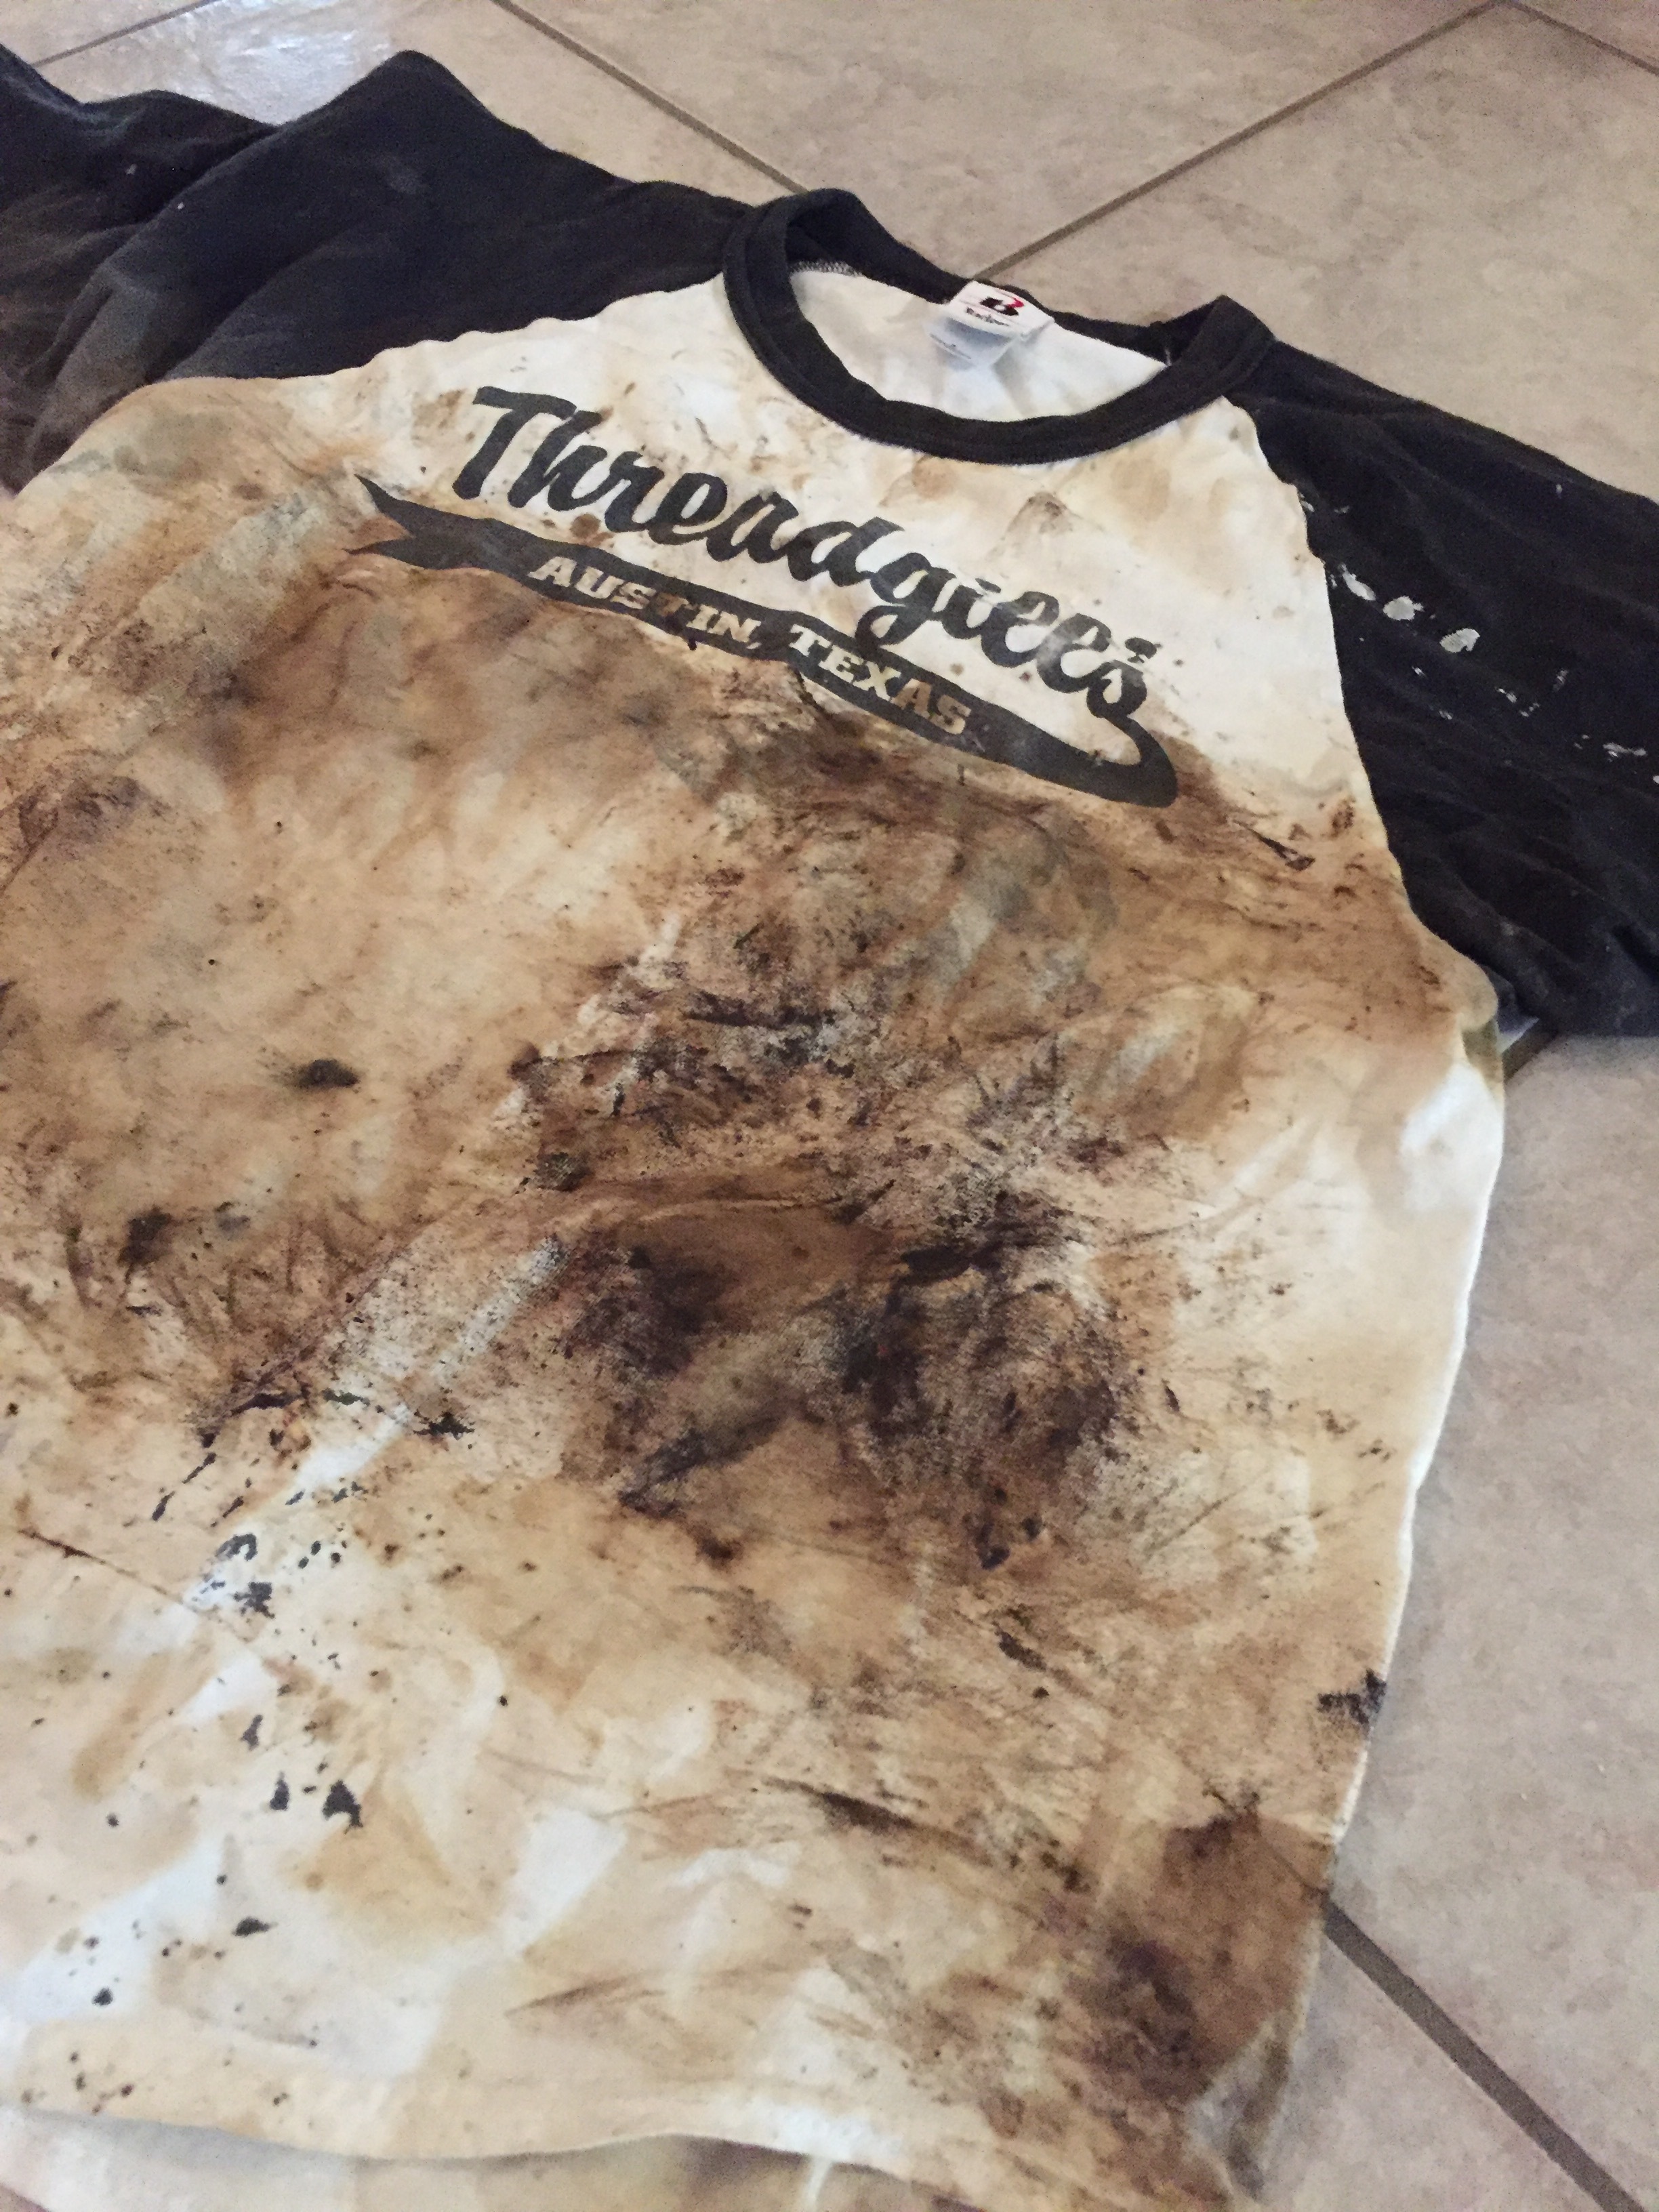

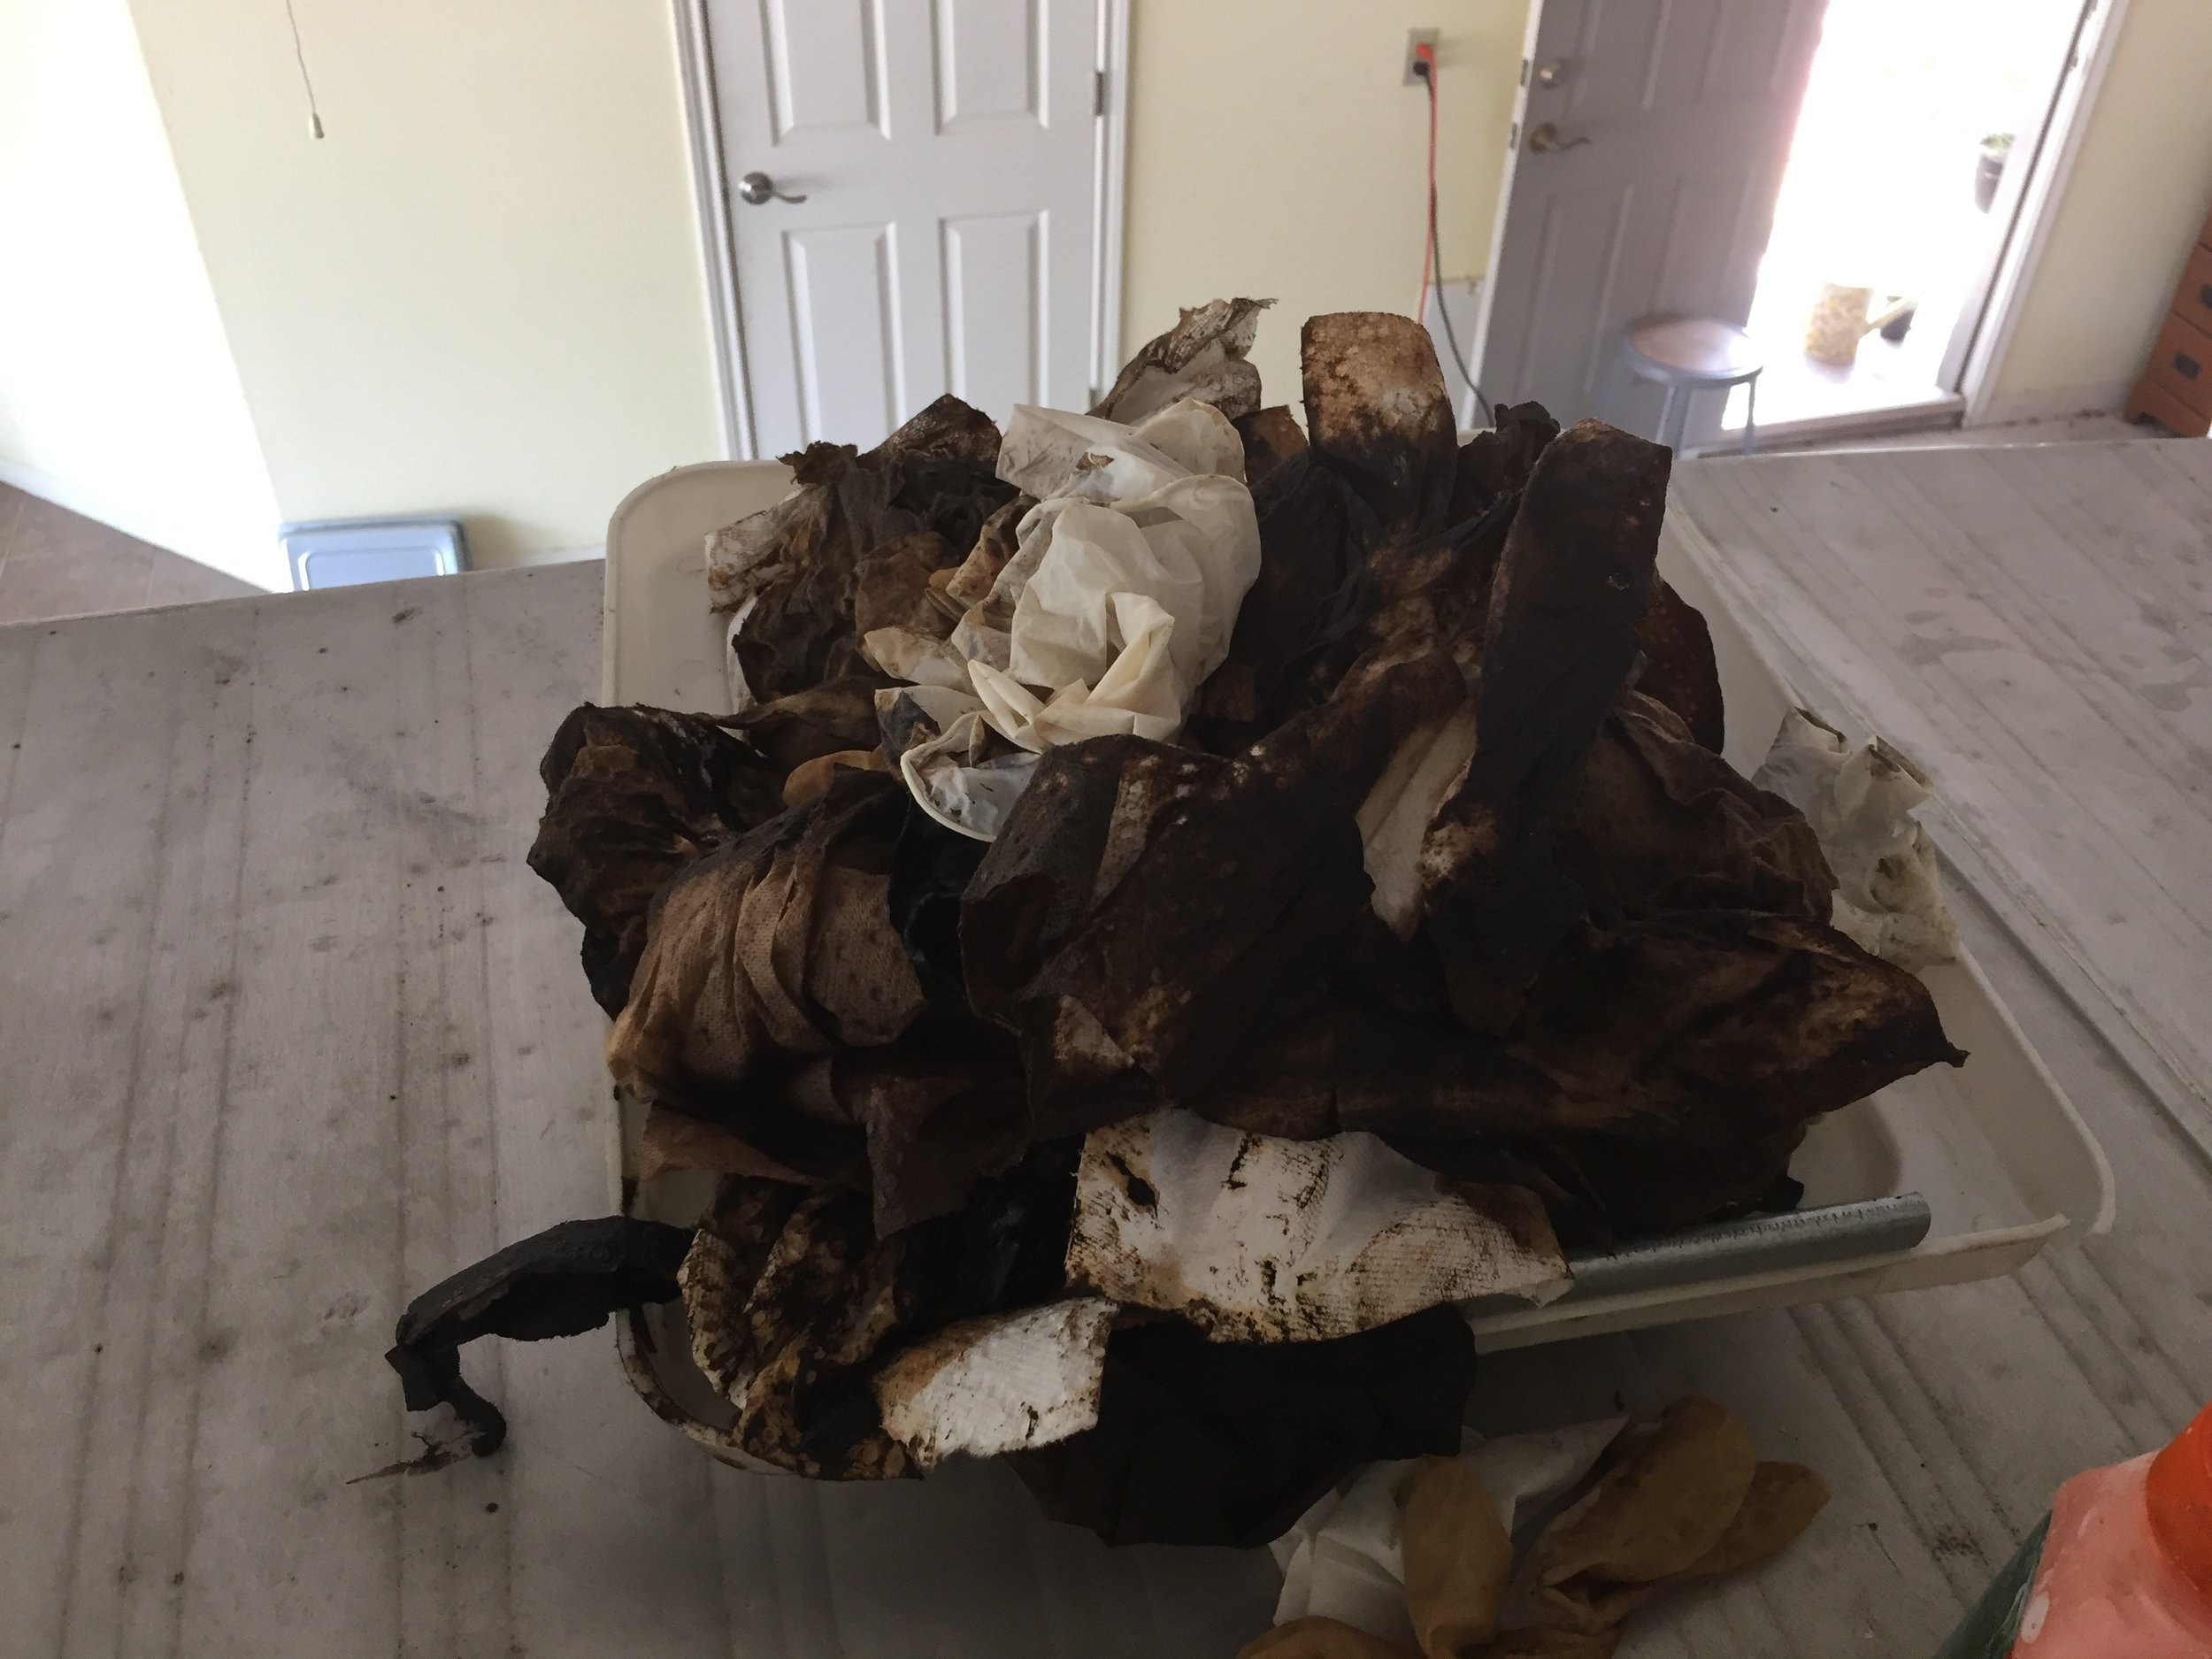
Gross.
Installing the new vent cover
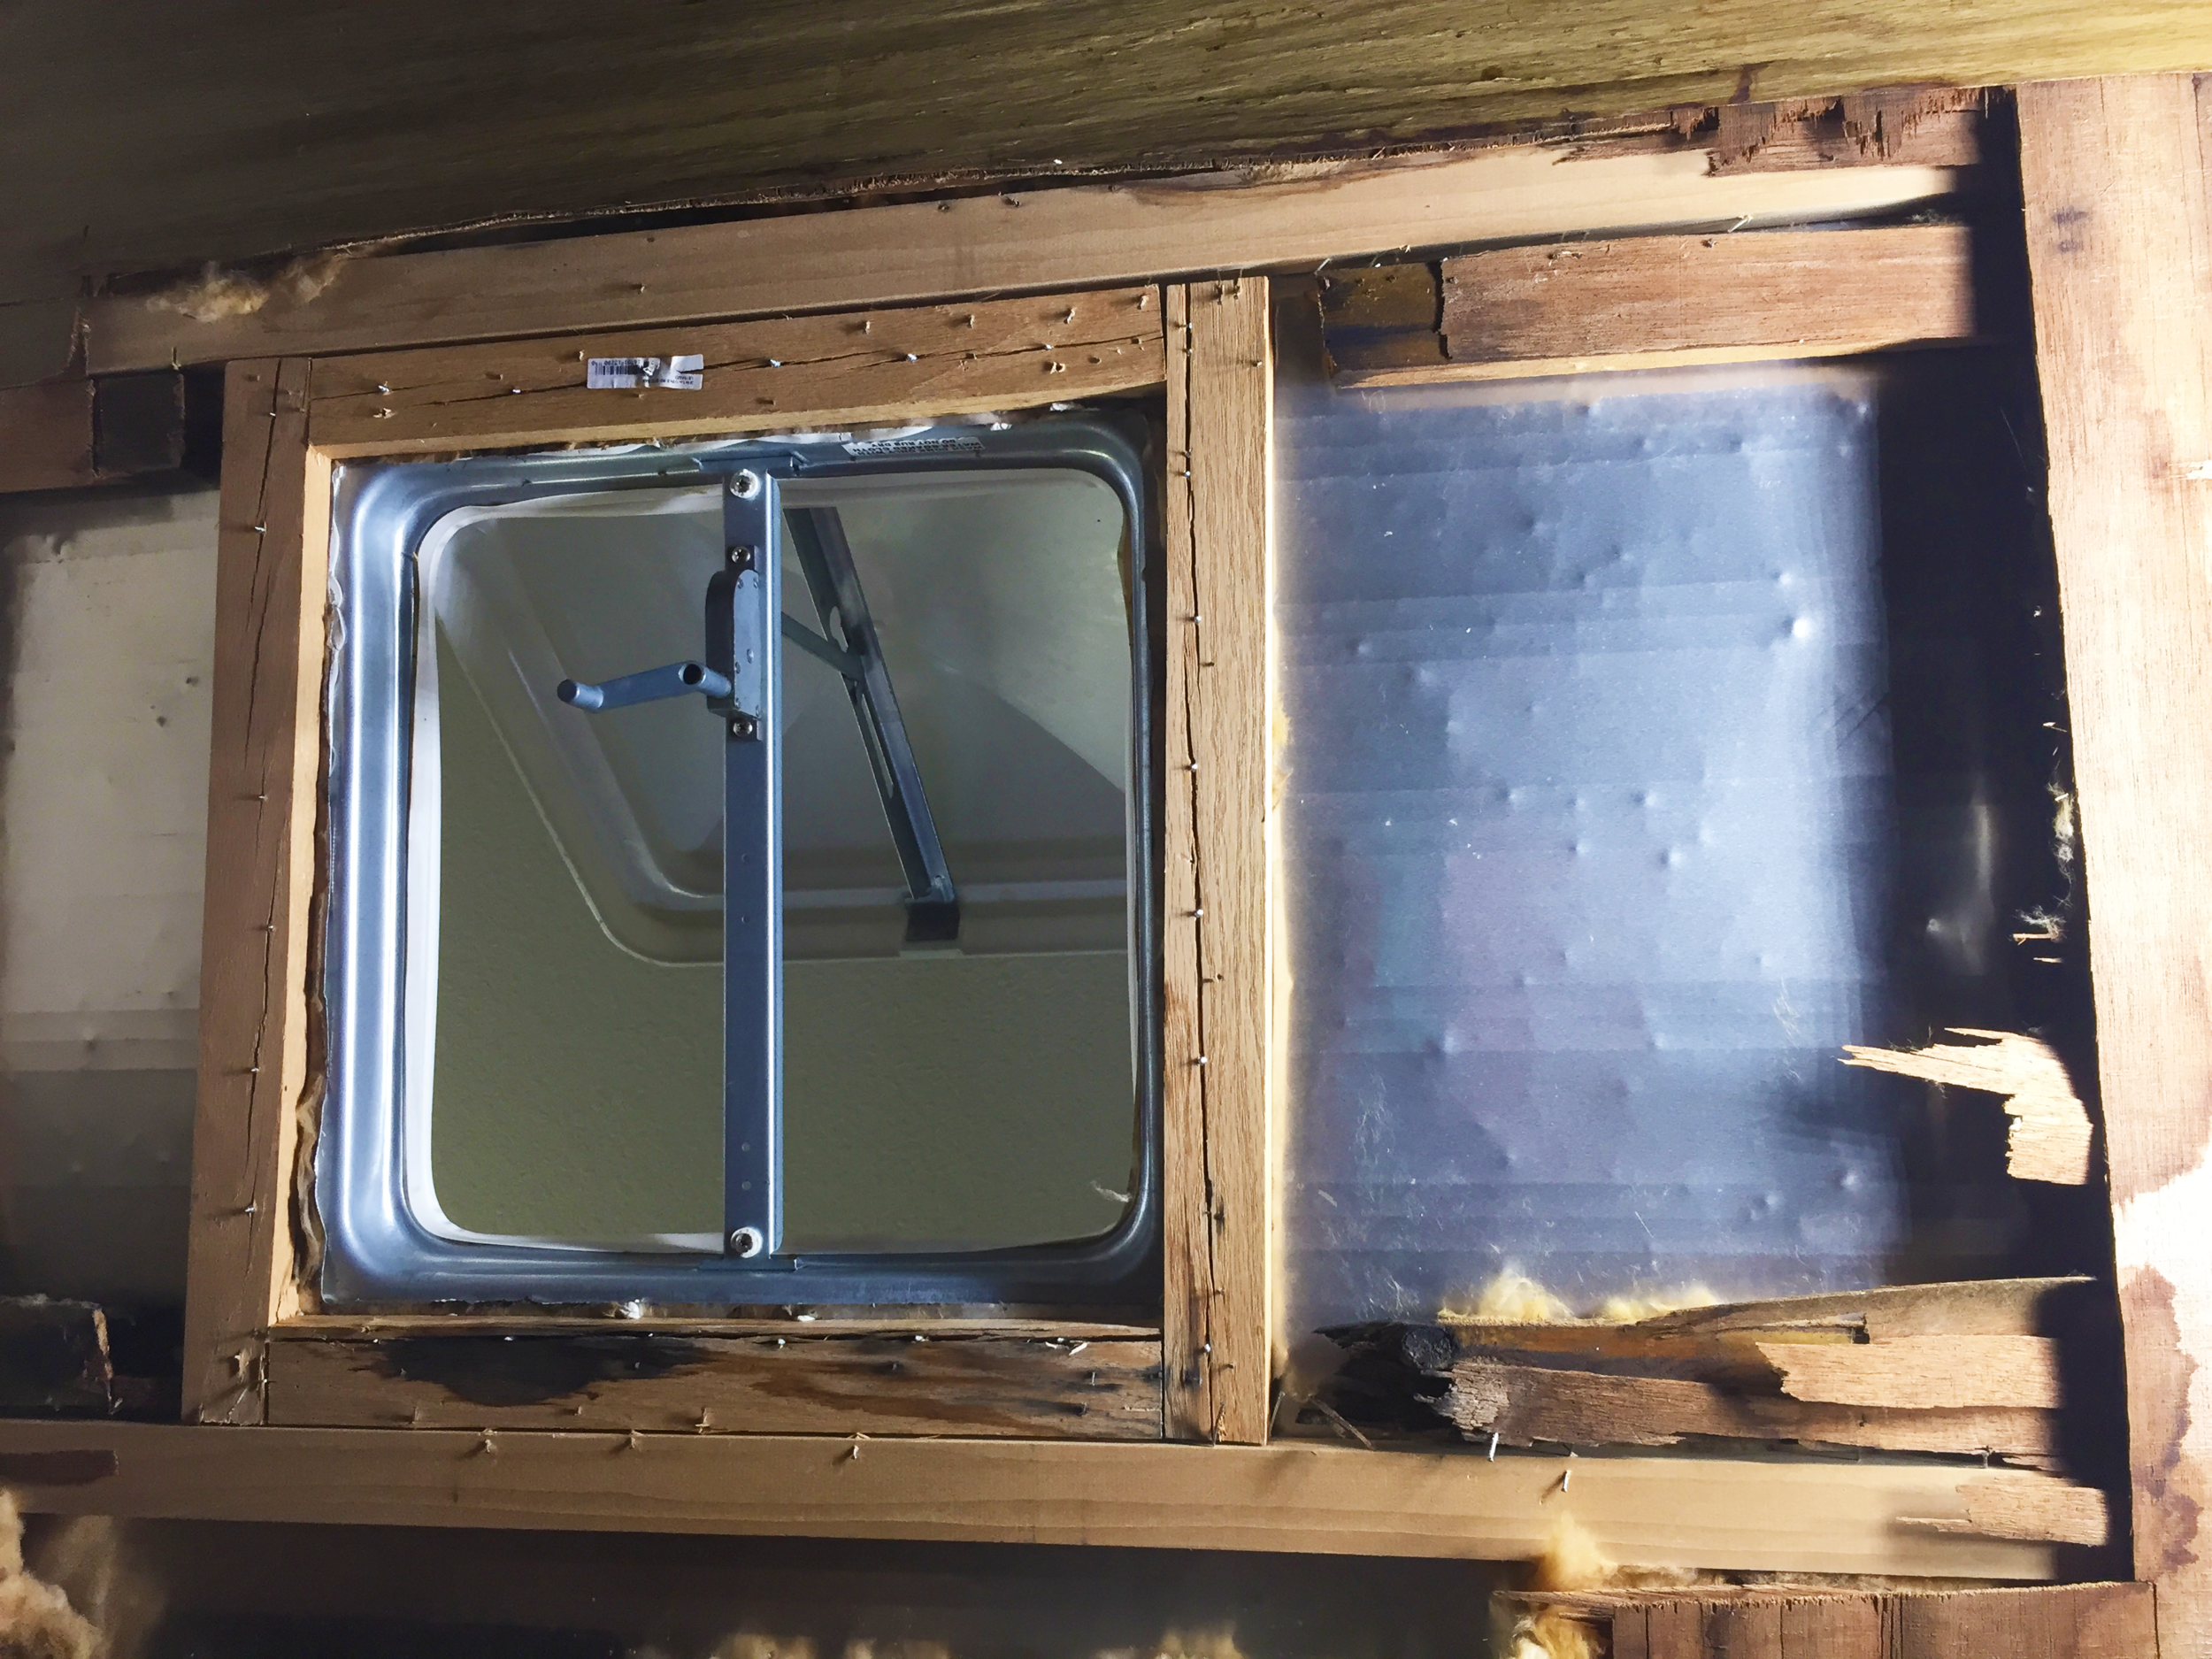
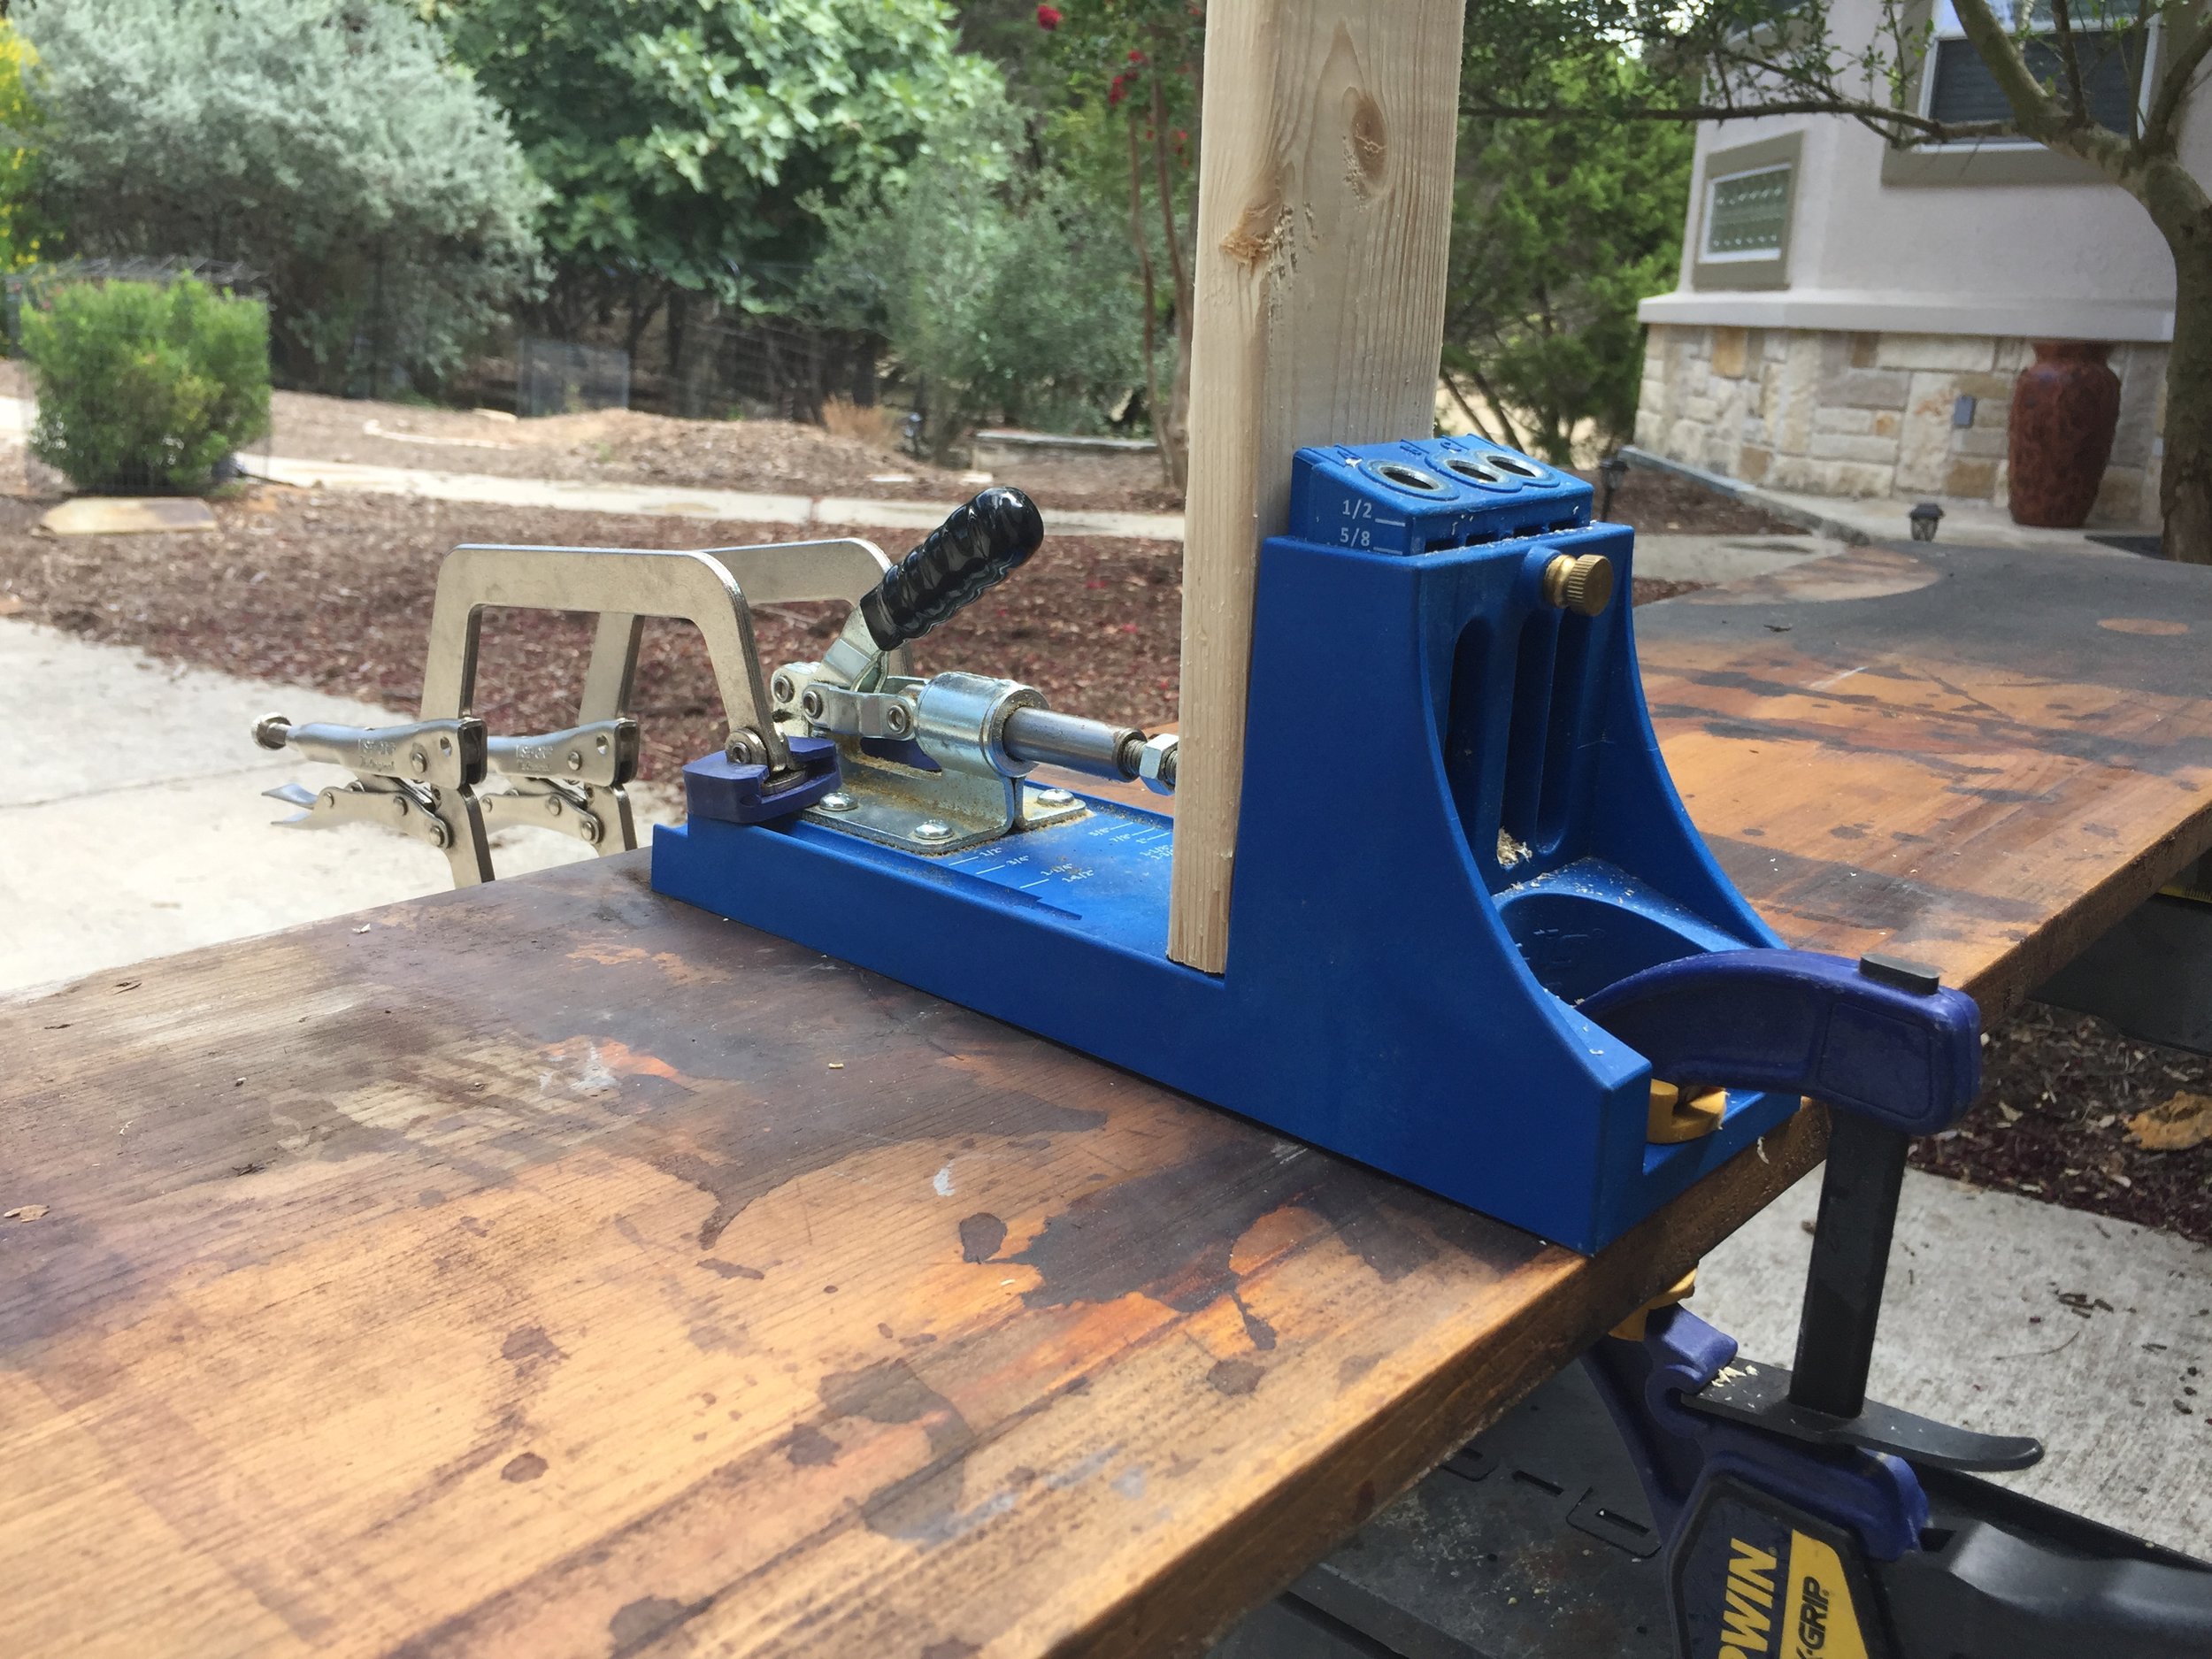
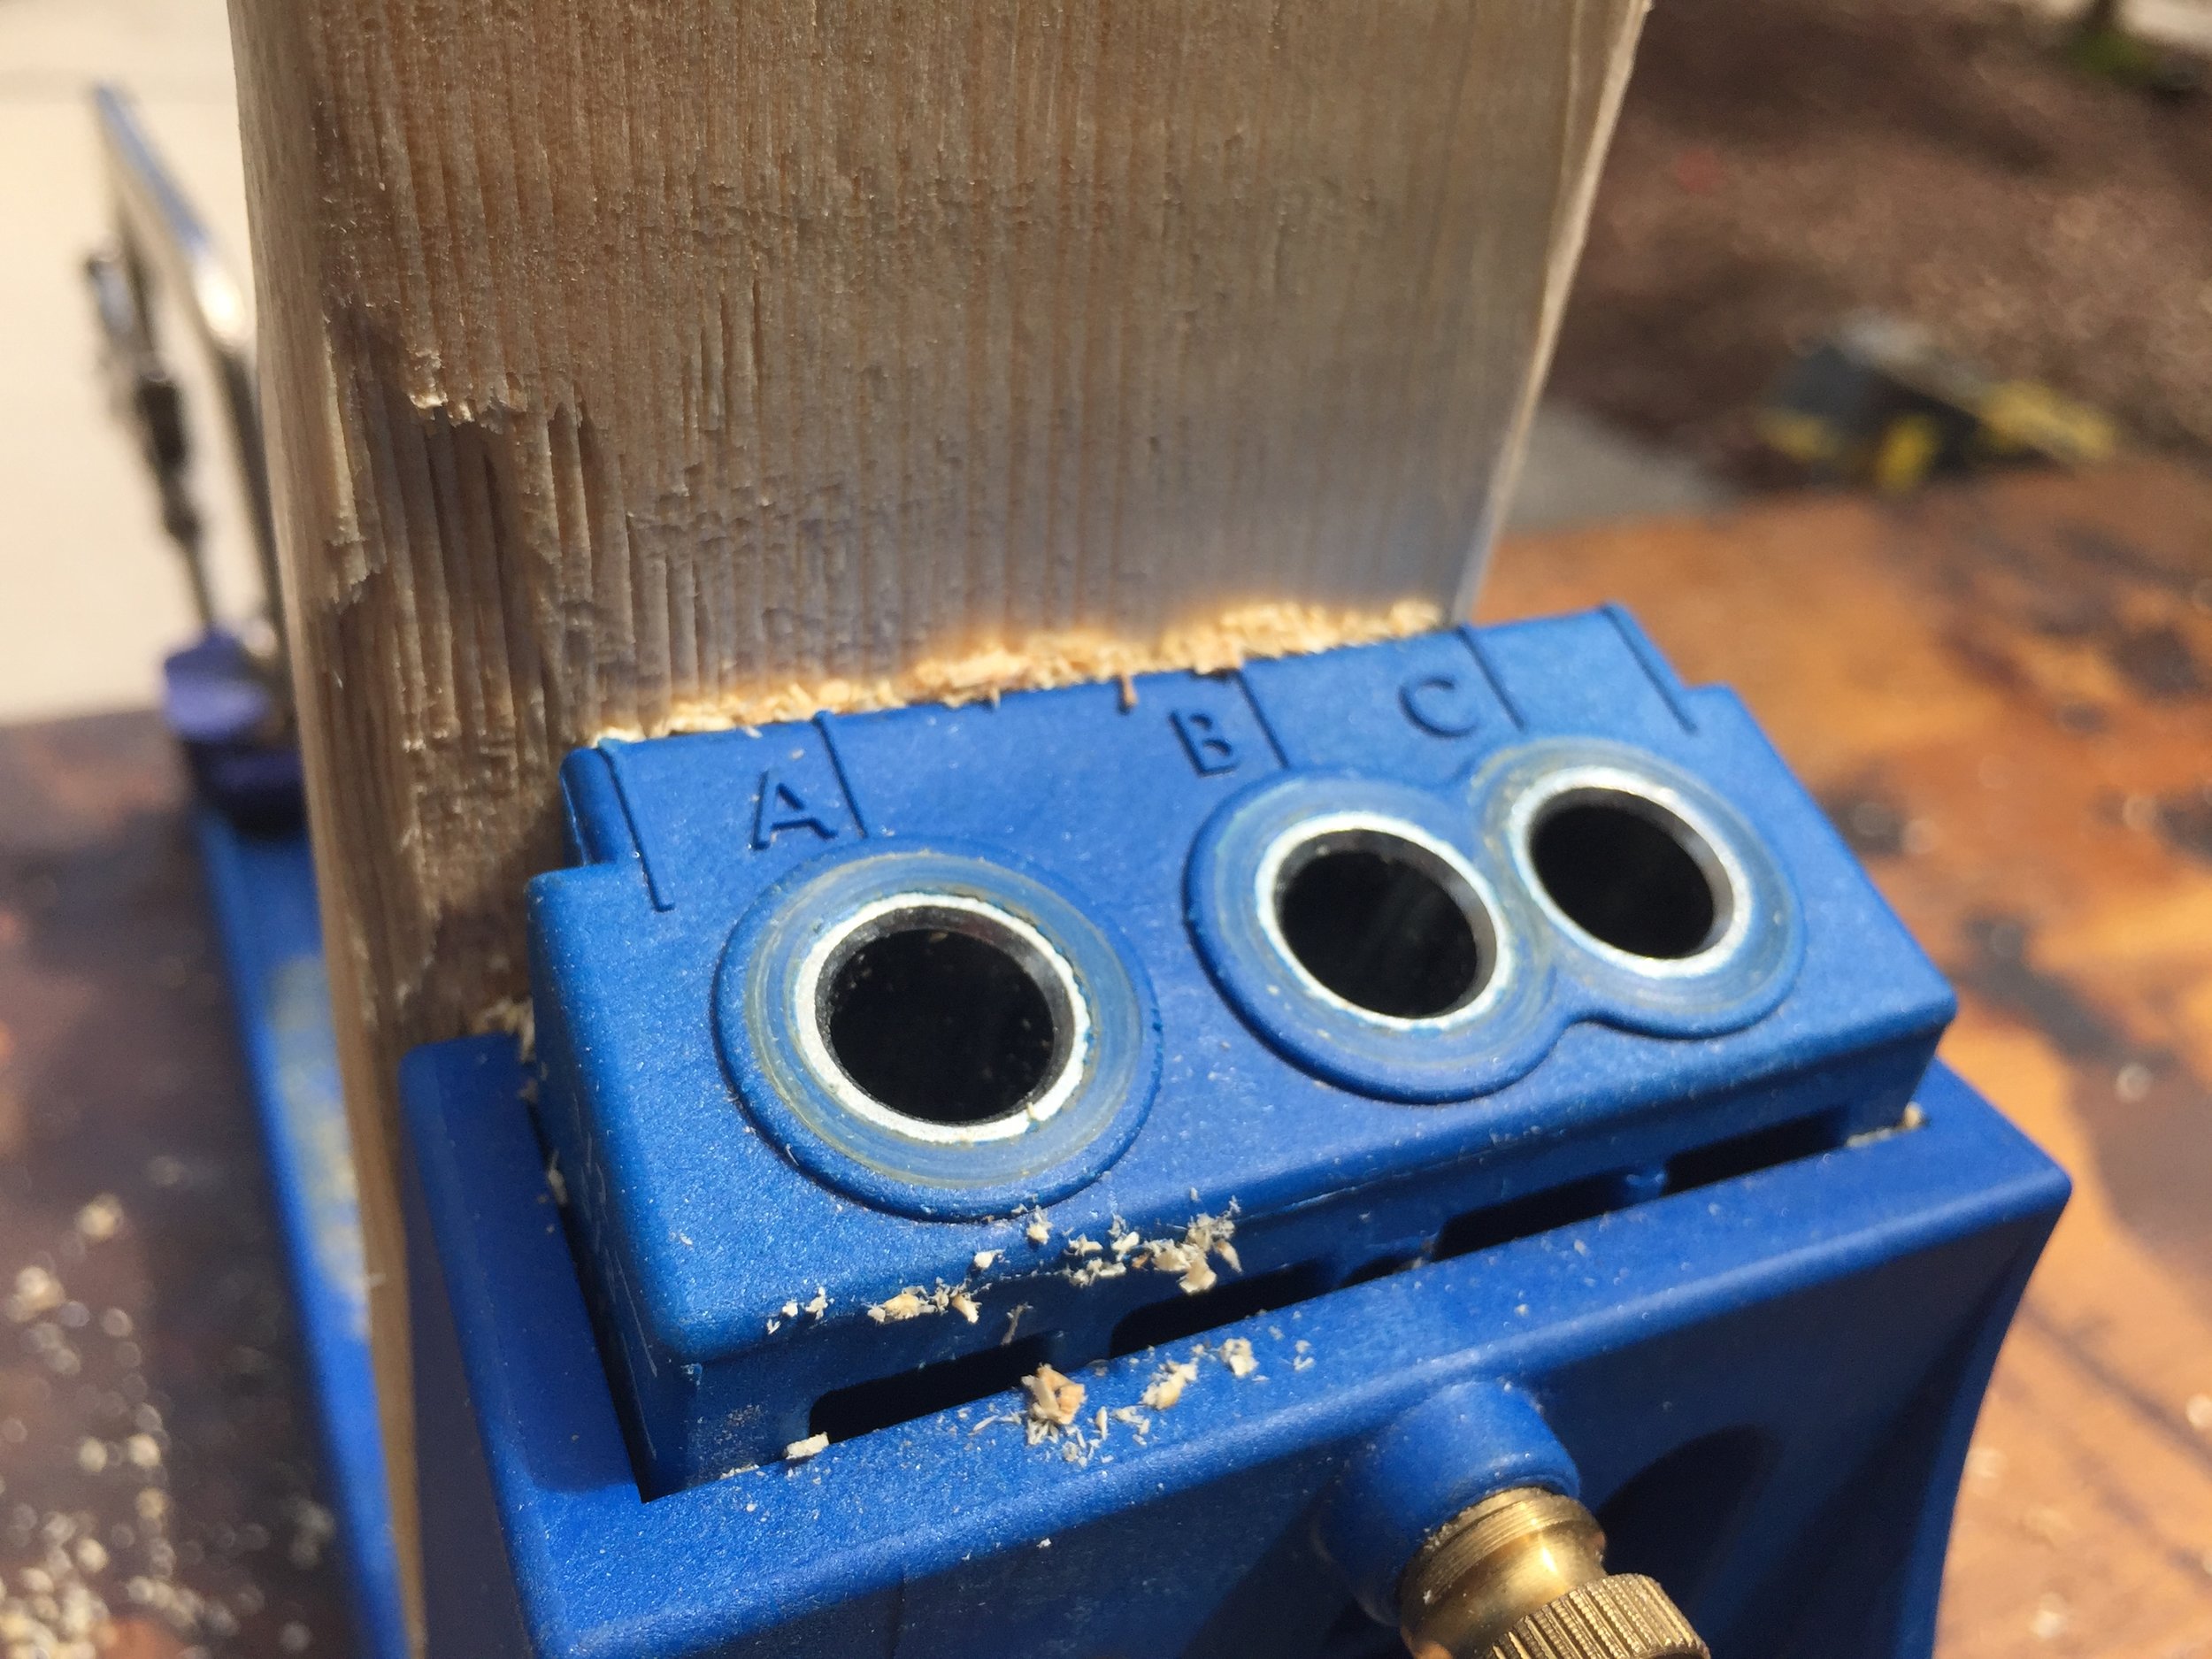
Before we got to the actual install, we did have to make some repairs to the screw and nail holes to the metal that the previous vent install left using JB Weld. While the JB Weld cured, we re-framed the ceiling inside using 1x3's so we had some new non-split wood for the new vent frame to be secured to. If you’re looking to renovate a camper like this, just save yourself the time and headache and go get yourself a Kreg Jig. Like, right now. I’ll wait. Side note: This thing is my best friend and is in a tight foot race with our Dewalt nail gun and sliding compound miter saw for my favorite tool ever. The Kreg Jig is basically a foolproof way to make pocket holes (which gives you a really secure joint that allows you to hide the hardware – without using a biscuit joiner). This type of strong, smooth joint is exactly what you want so when you go to put up the interior walls, the panels will lay flat and we won’t leave little lumps/bumps/irregularities where each screw joint is.
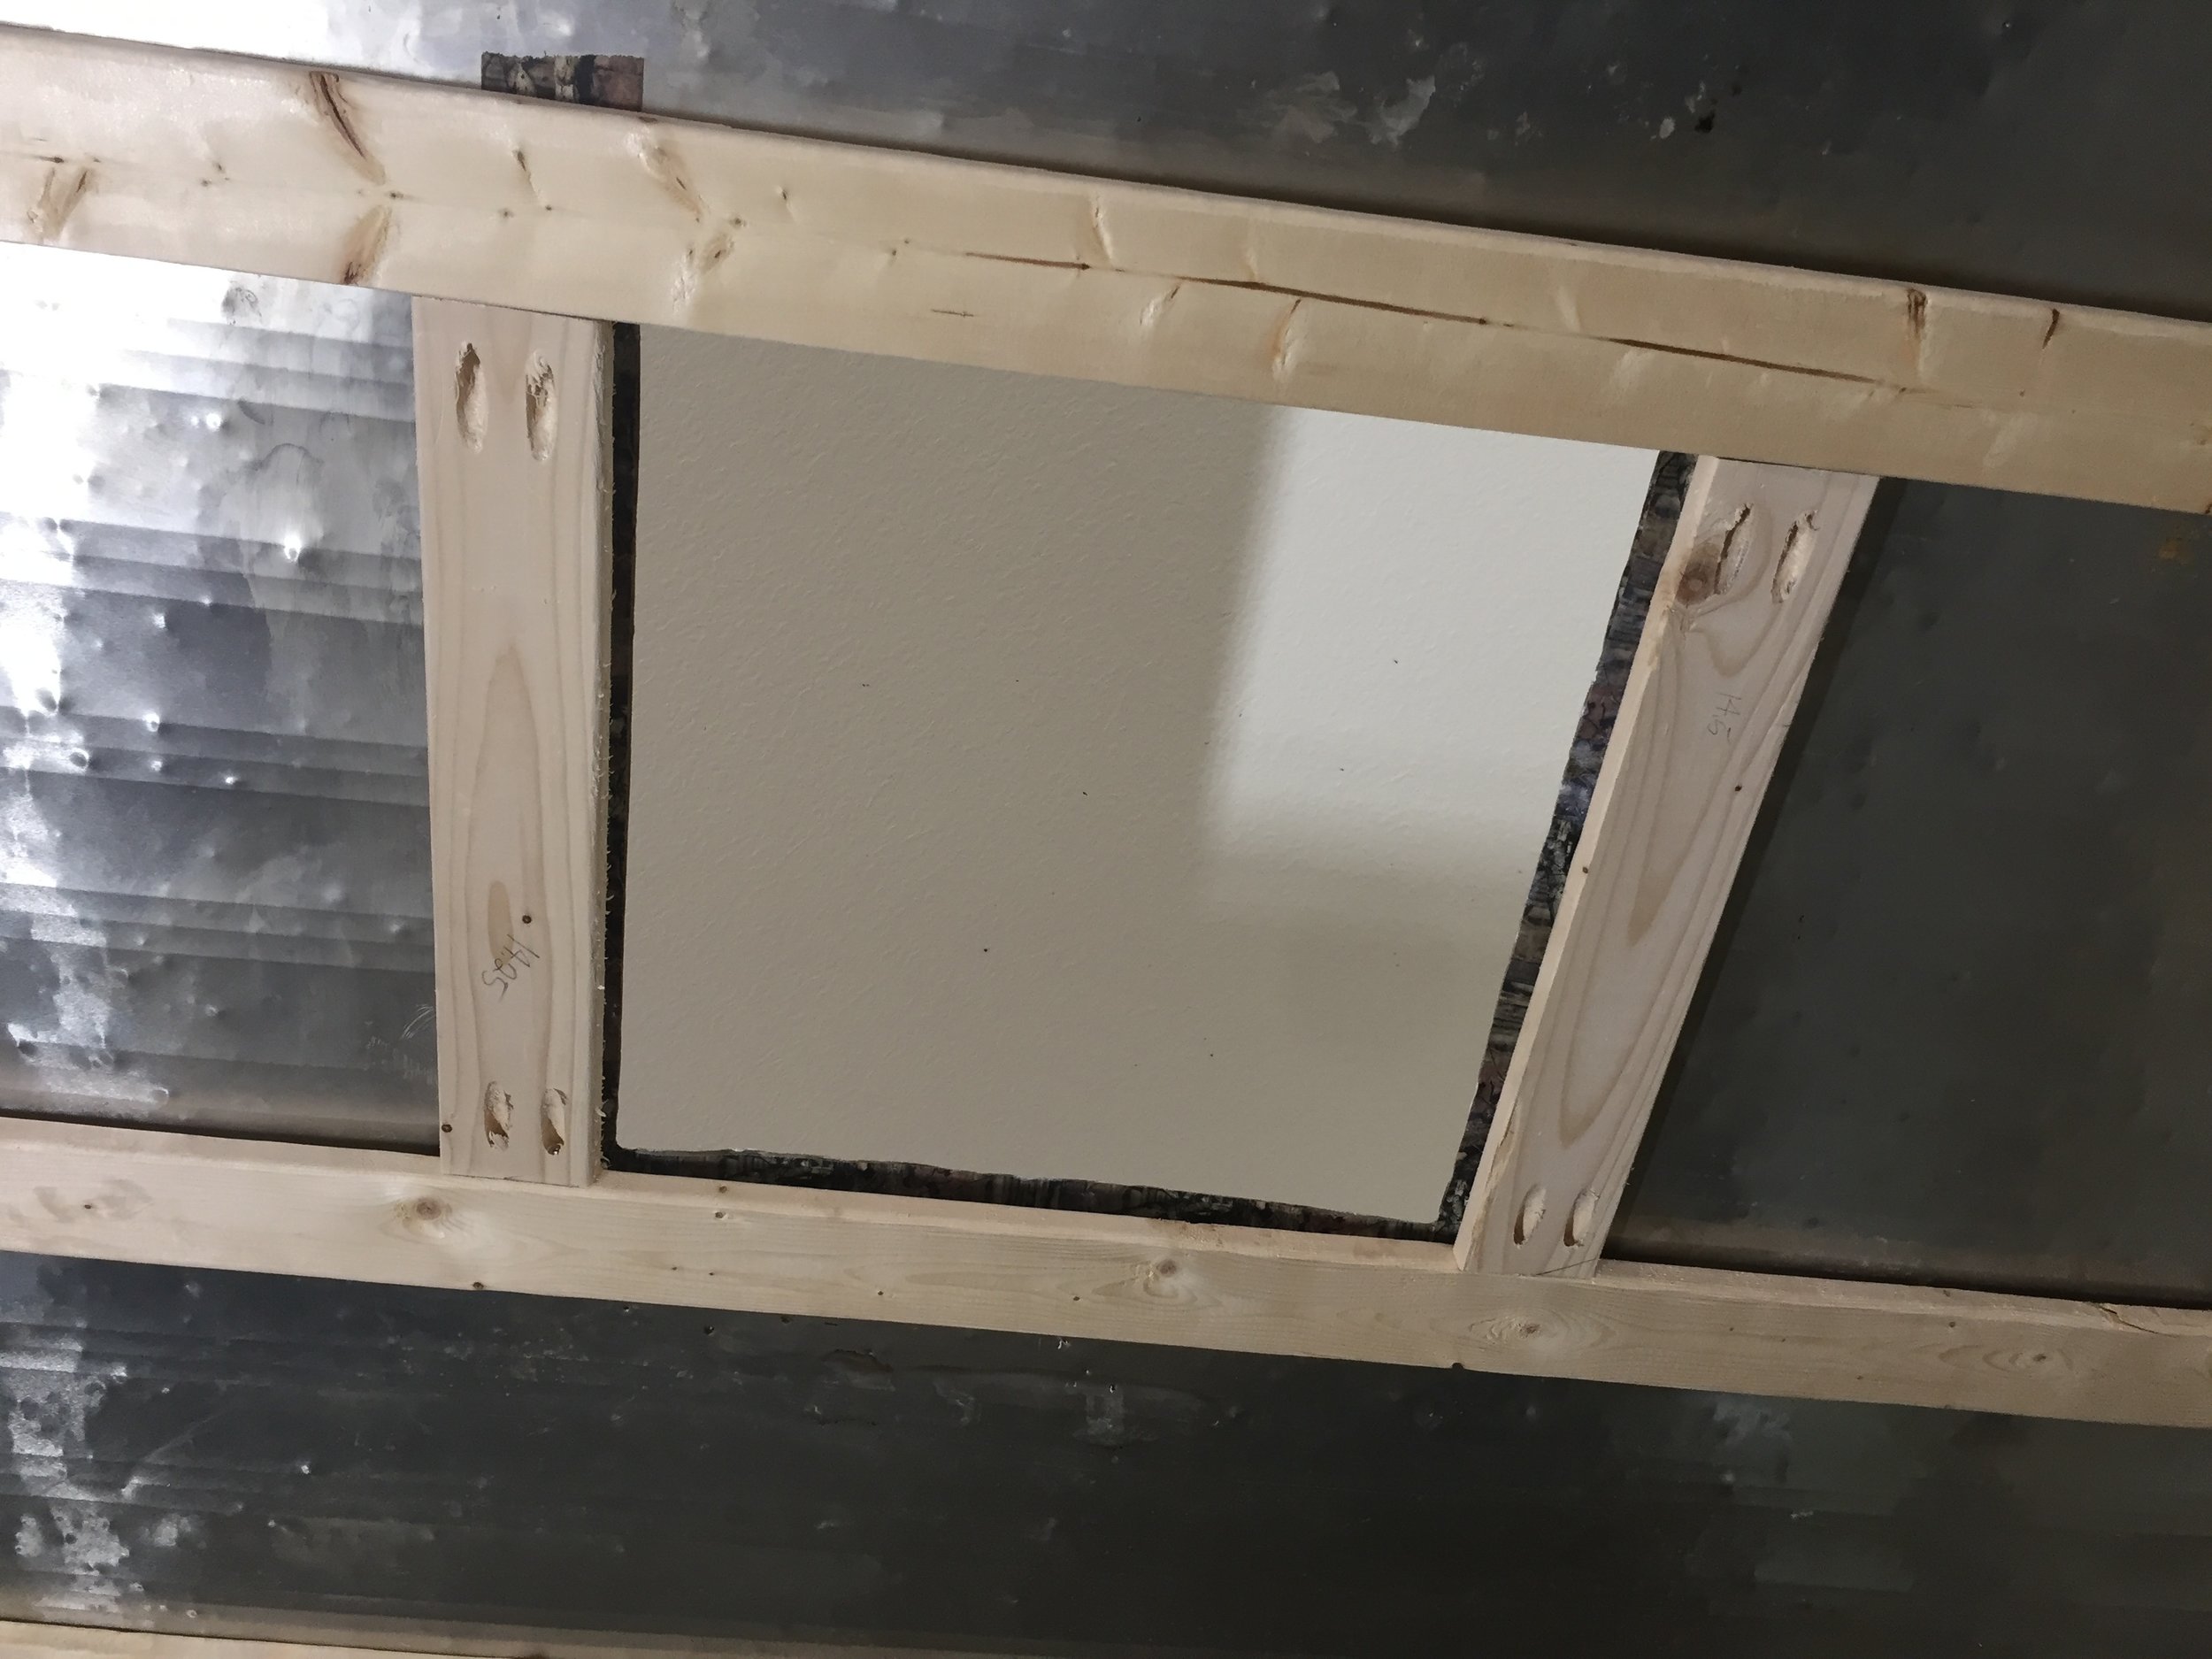
As awful as the butyl putty tape is to use when warm, it’s actually the right stuff to go with for this (the one we bought even came with the stuff, as well as screws) and is pretty easy to use if you follow this tip: Keep the roll in the refrigerator right up until the moment you’re ready to use it, and put it back immediately after. I cannot stress this enough – I pity the fool who tries to mess with this when it’s warm. When cold, it just unrolls easily allowing you to just push it down and stick it onto the camper exterior. It works great, as long as the surface is clean and dry. Once you get a good press on it with your fingers, just remove the paper backing and stick your thing (the vent frame in this case) to it.
Pro tip: Use a razor blade to score the cool putty tape as it oozes out on the edges to get a clean edge, then go back and tighten your screws again the next day after the putty softens up for an even tighter seal. Score and trim putty again in areas where it’s squeezed out more.
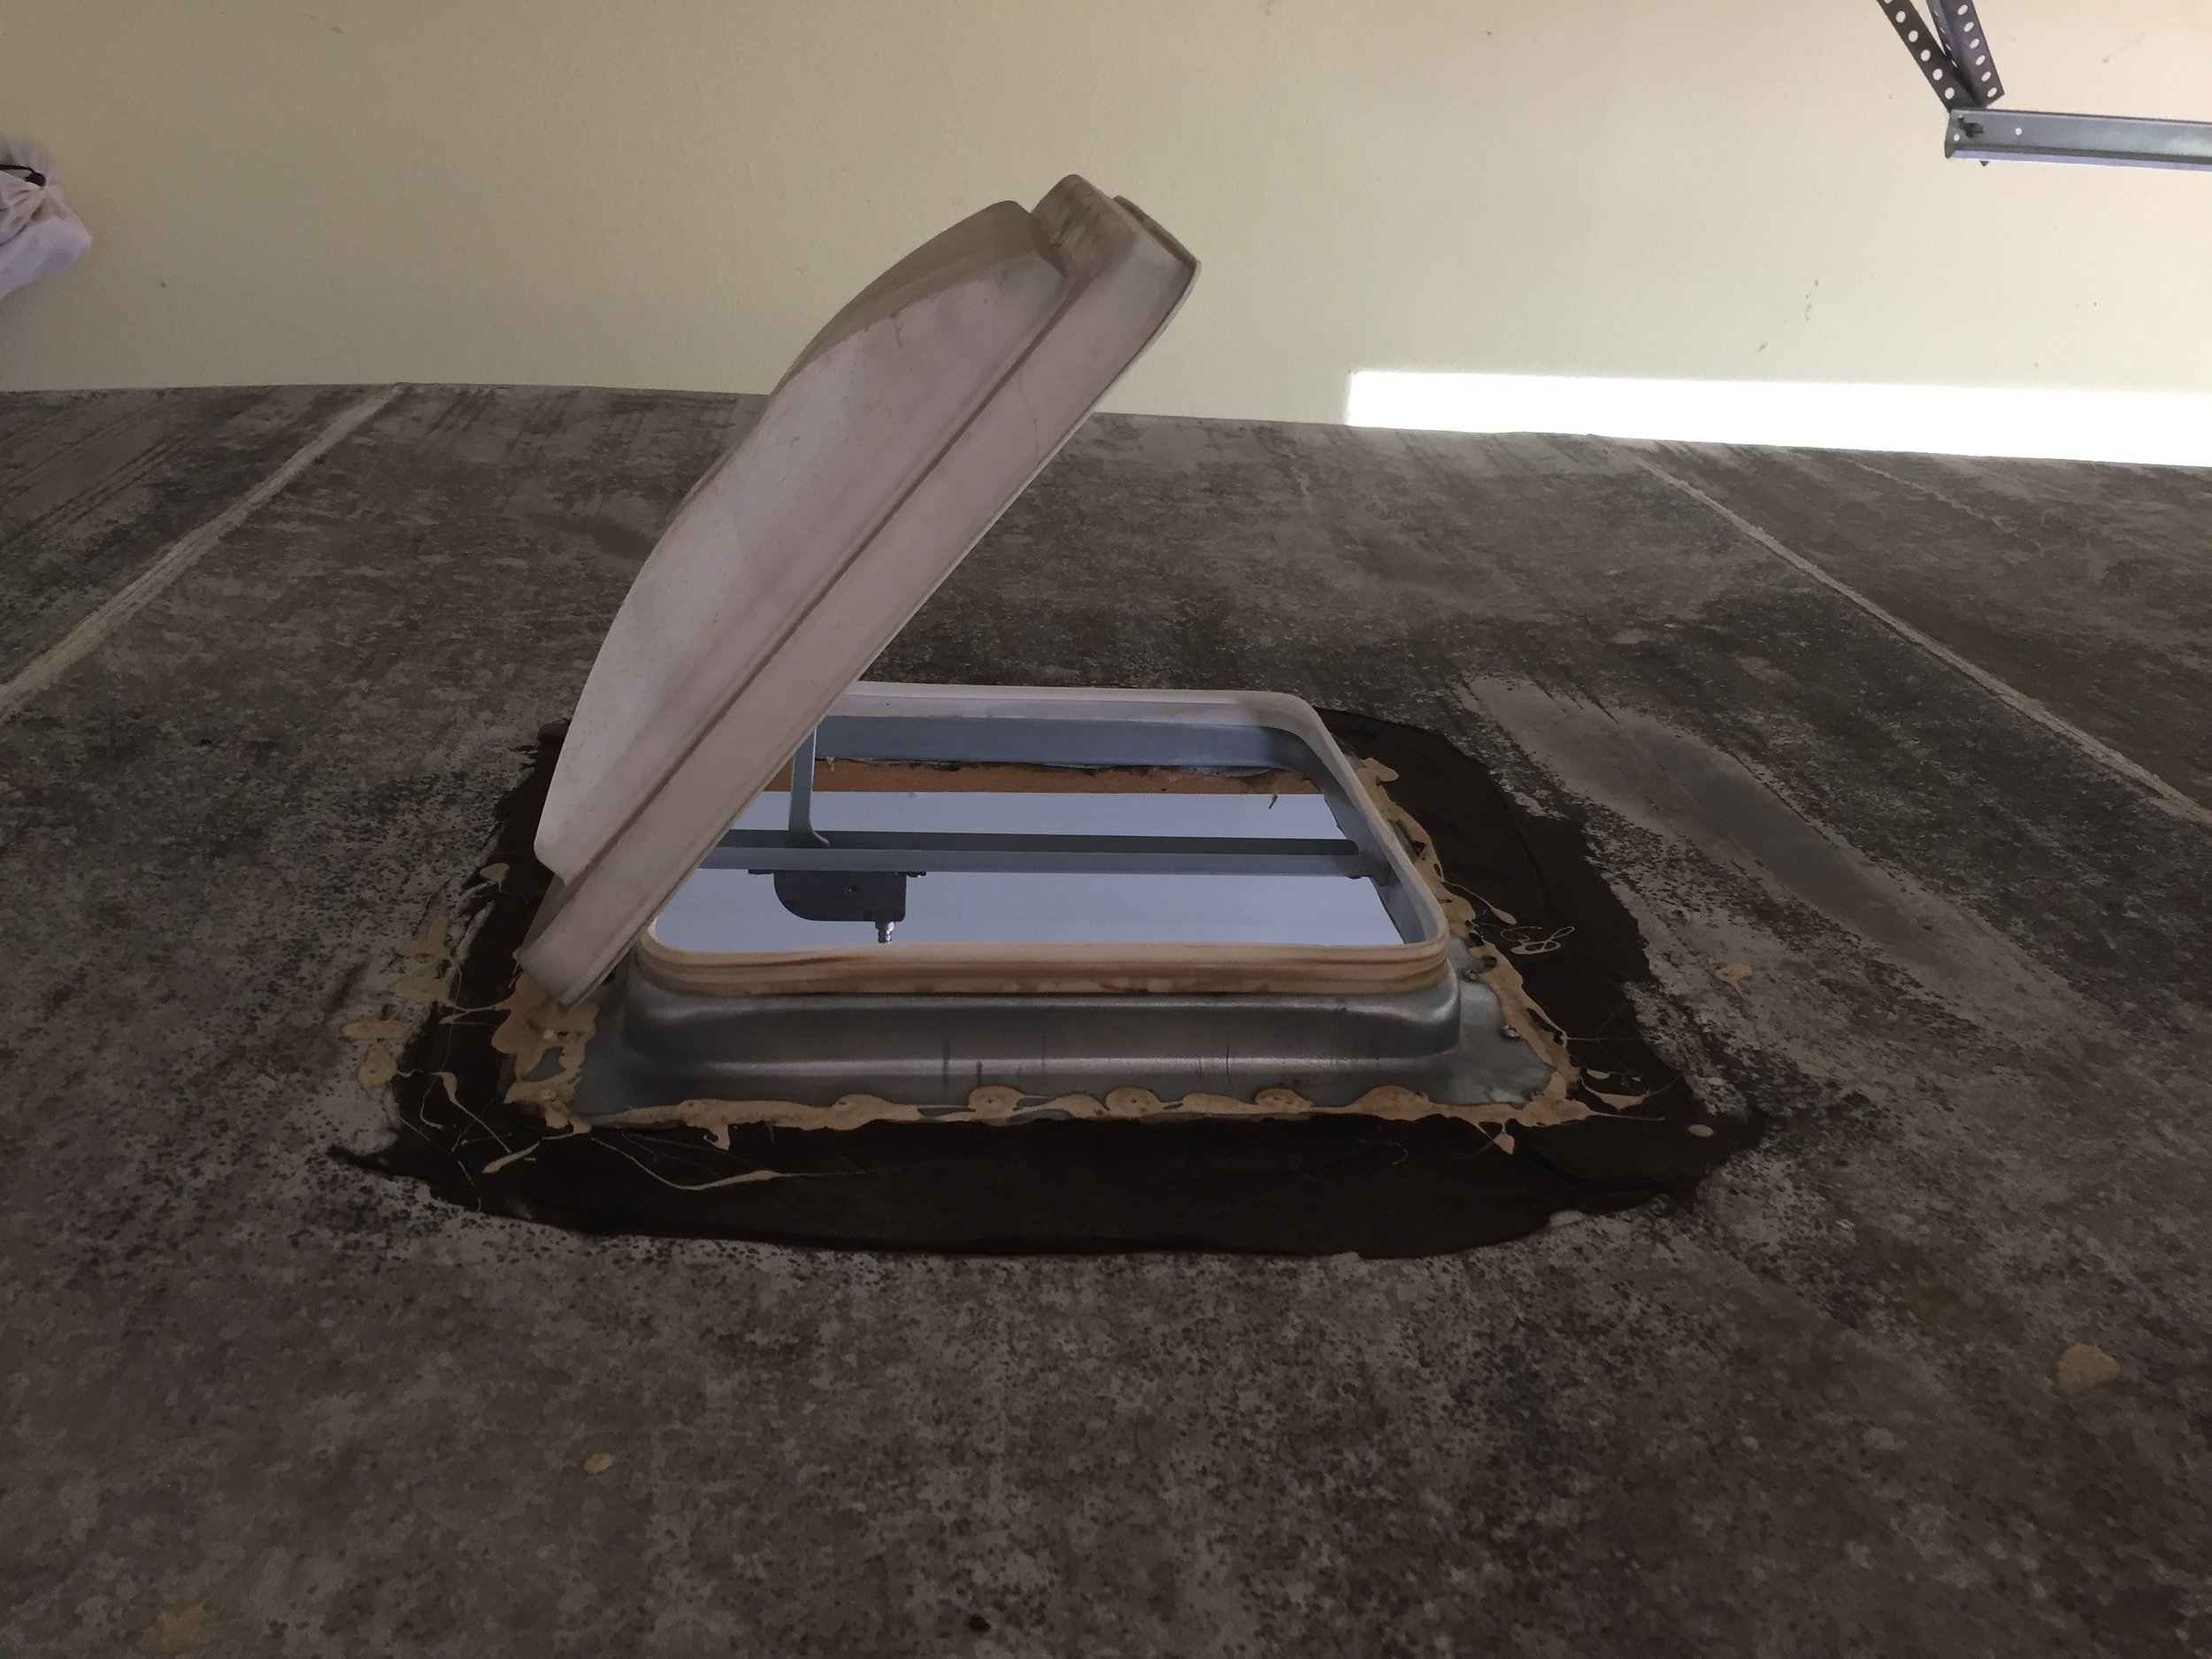
Also, remember to install your roof vent so that the hinge points forward, to the car-side of the camper.
The putty creates a nice tight seal as it warms and softens up (and when used with screws). Unfortunately, I don’t have any photos of us screwing this bad boy in from the top because it took an all hands on deck – er, roof – approach that basically was my father in law + Nick standing inside with arms overhead, pushing up on the roof, with me flattened and sprawled across the roof like some kind of deranged starfish. (It’s times like this where I think it would be beneficial to have cameras mounted for such documentation. But then I can only imagine what unflattering things it might catch. #CrazyPancakeStarfish)
So, what does the roof look like today?
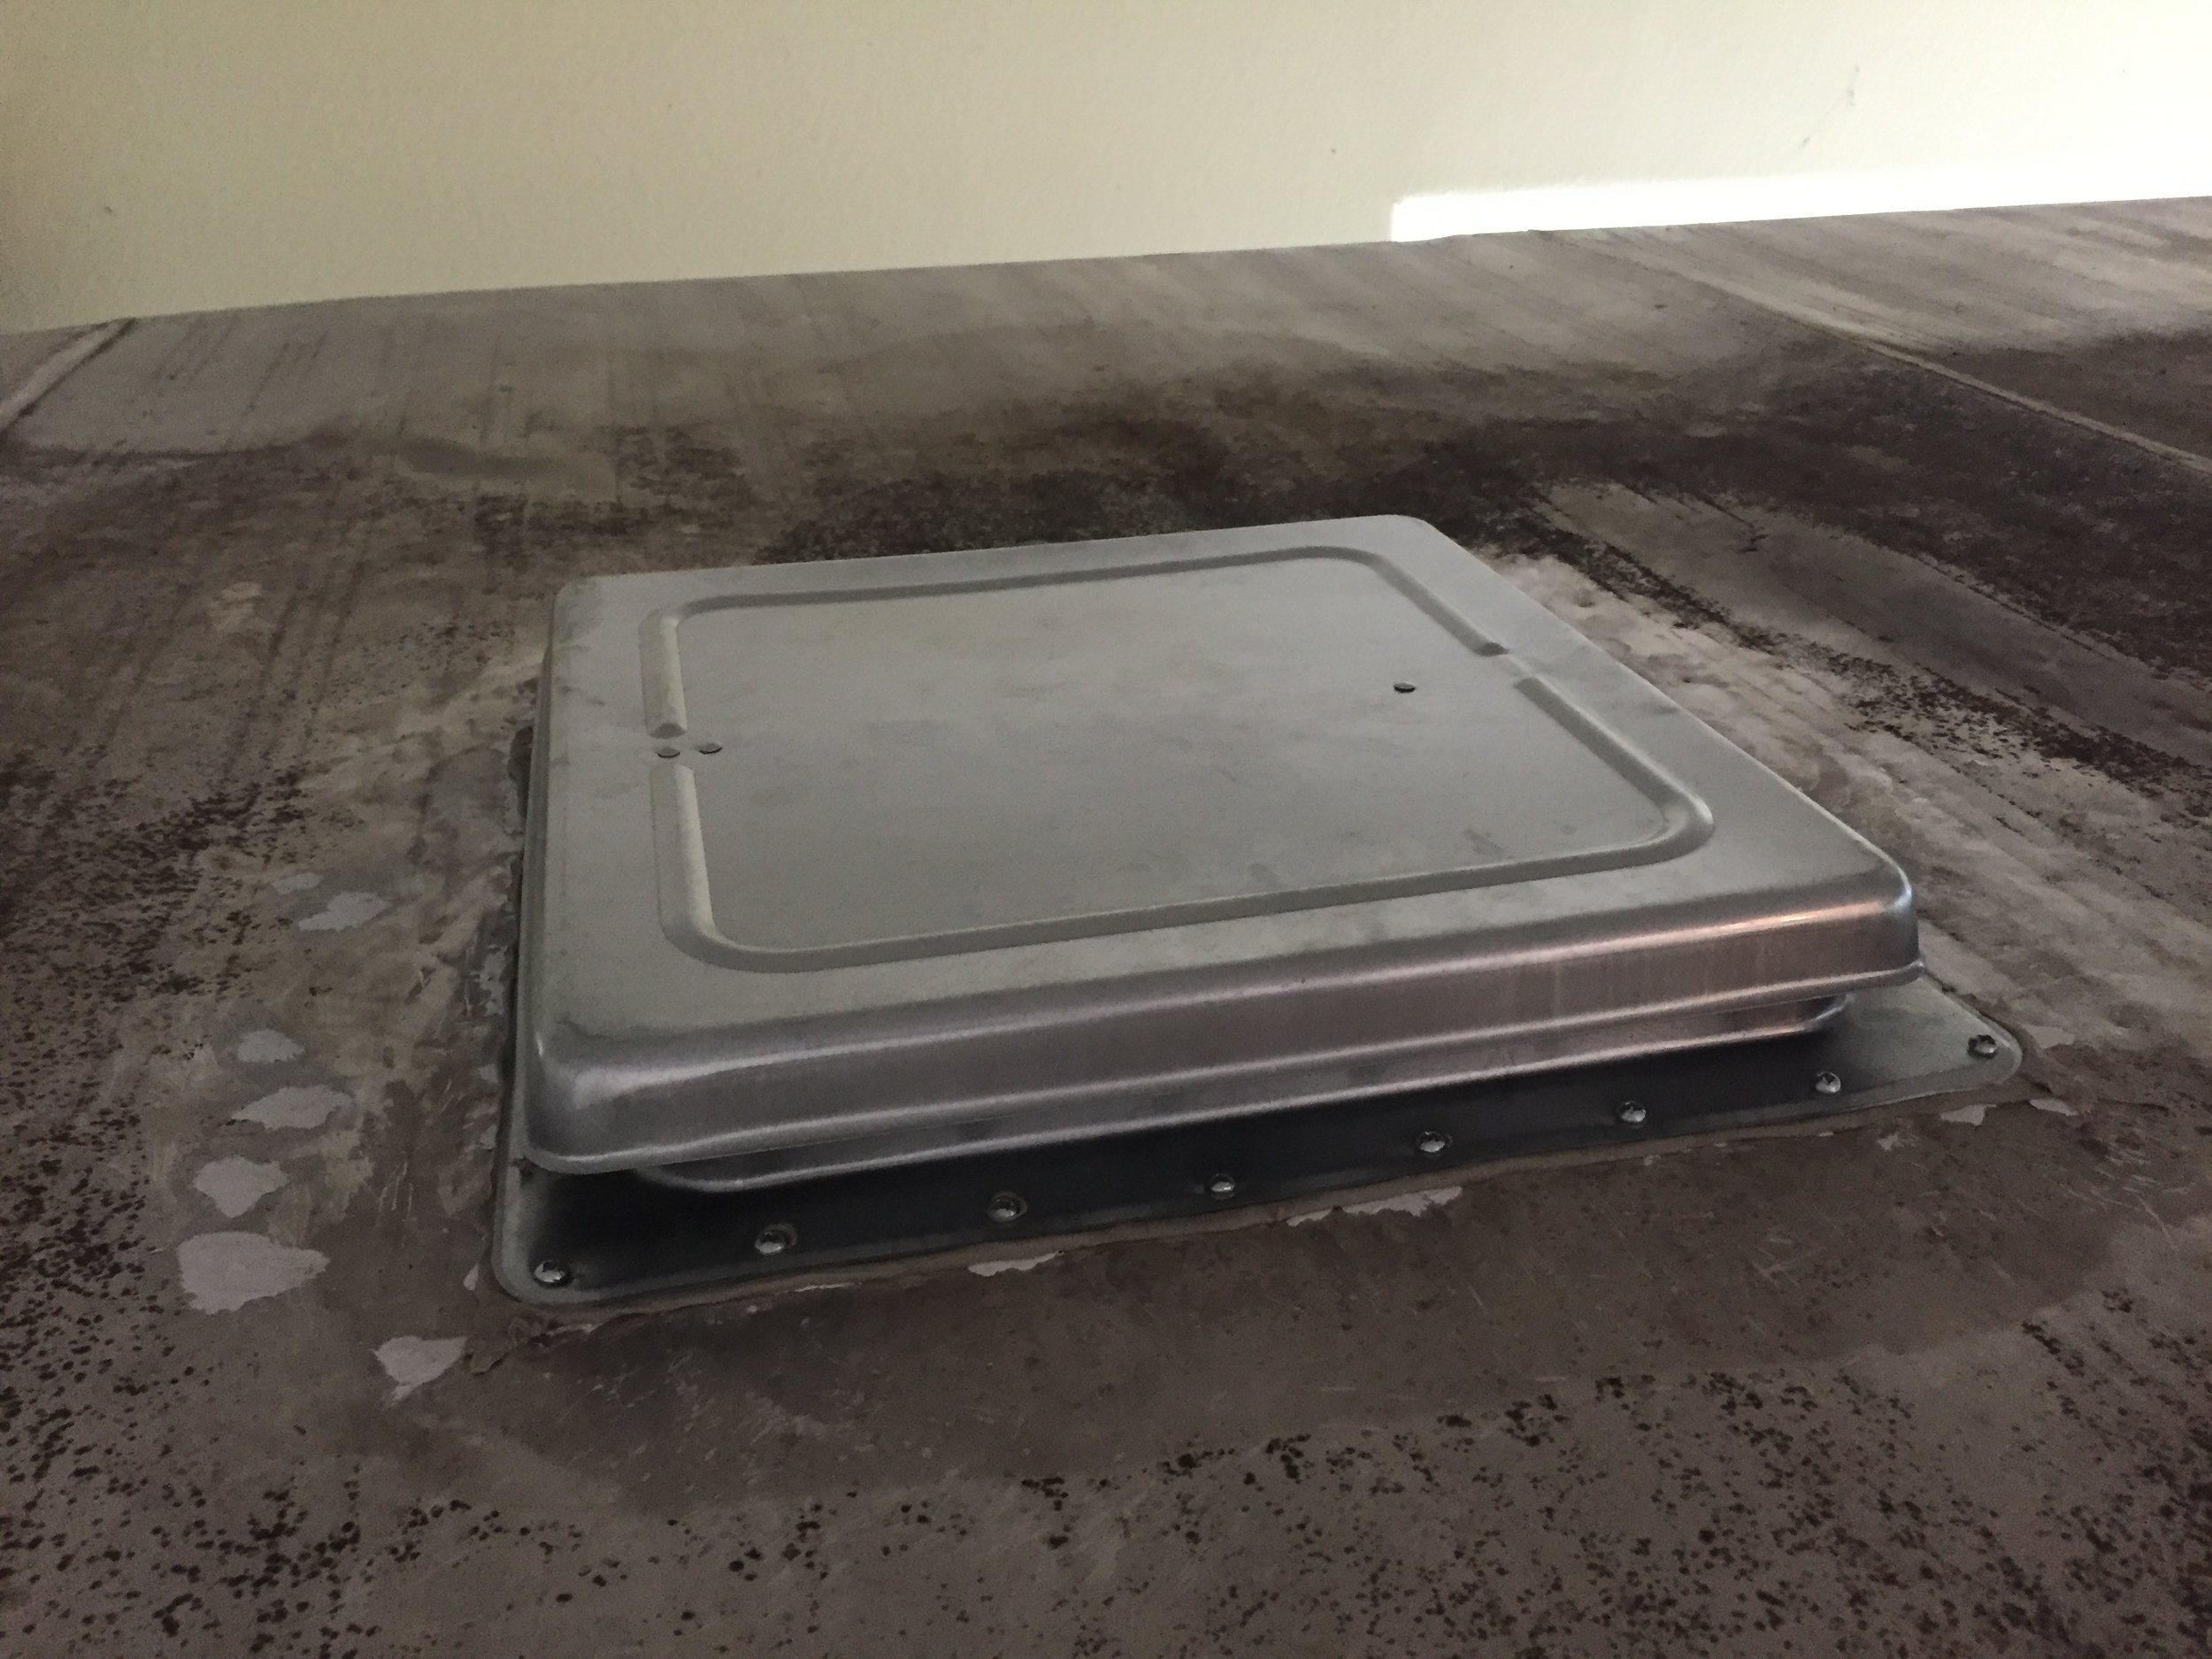
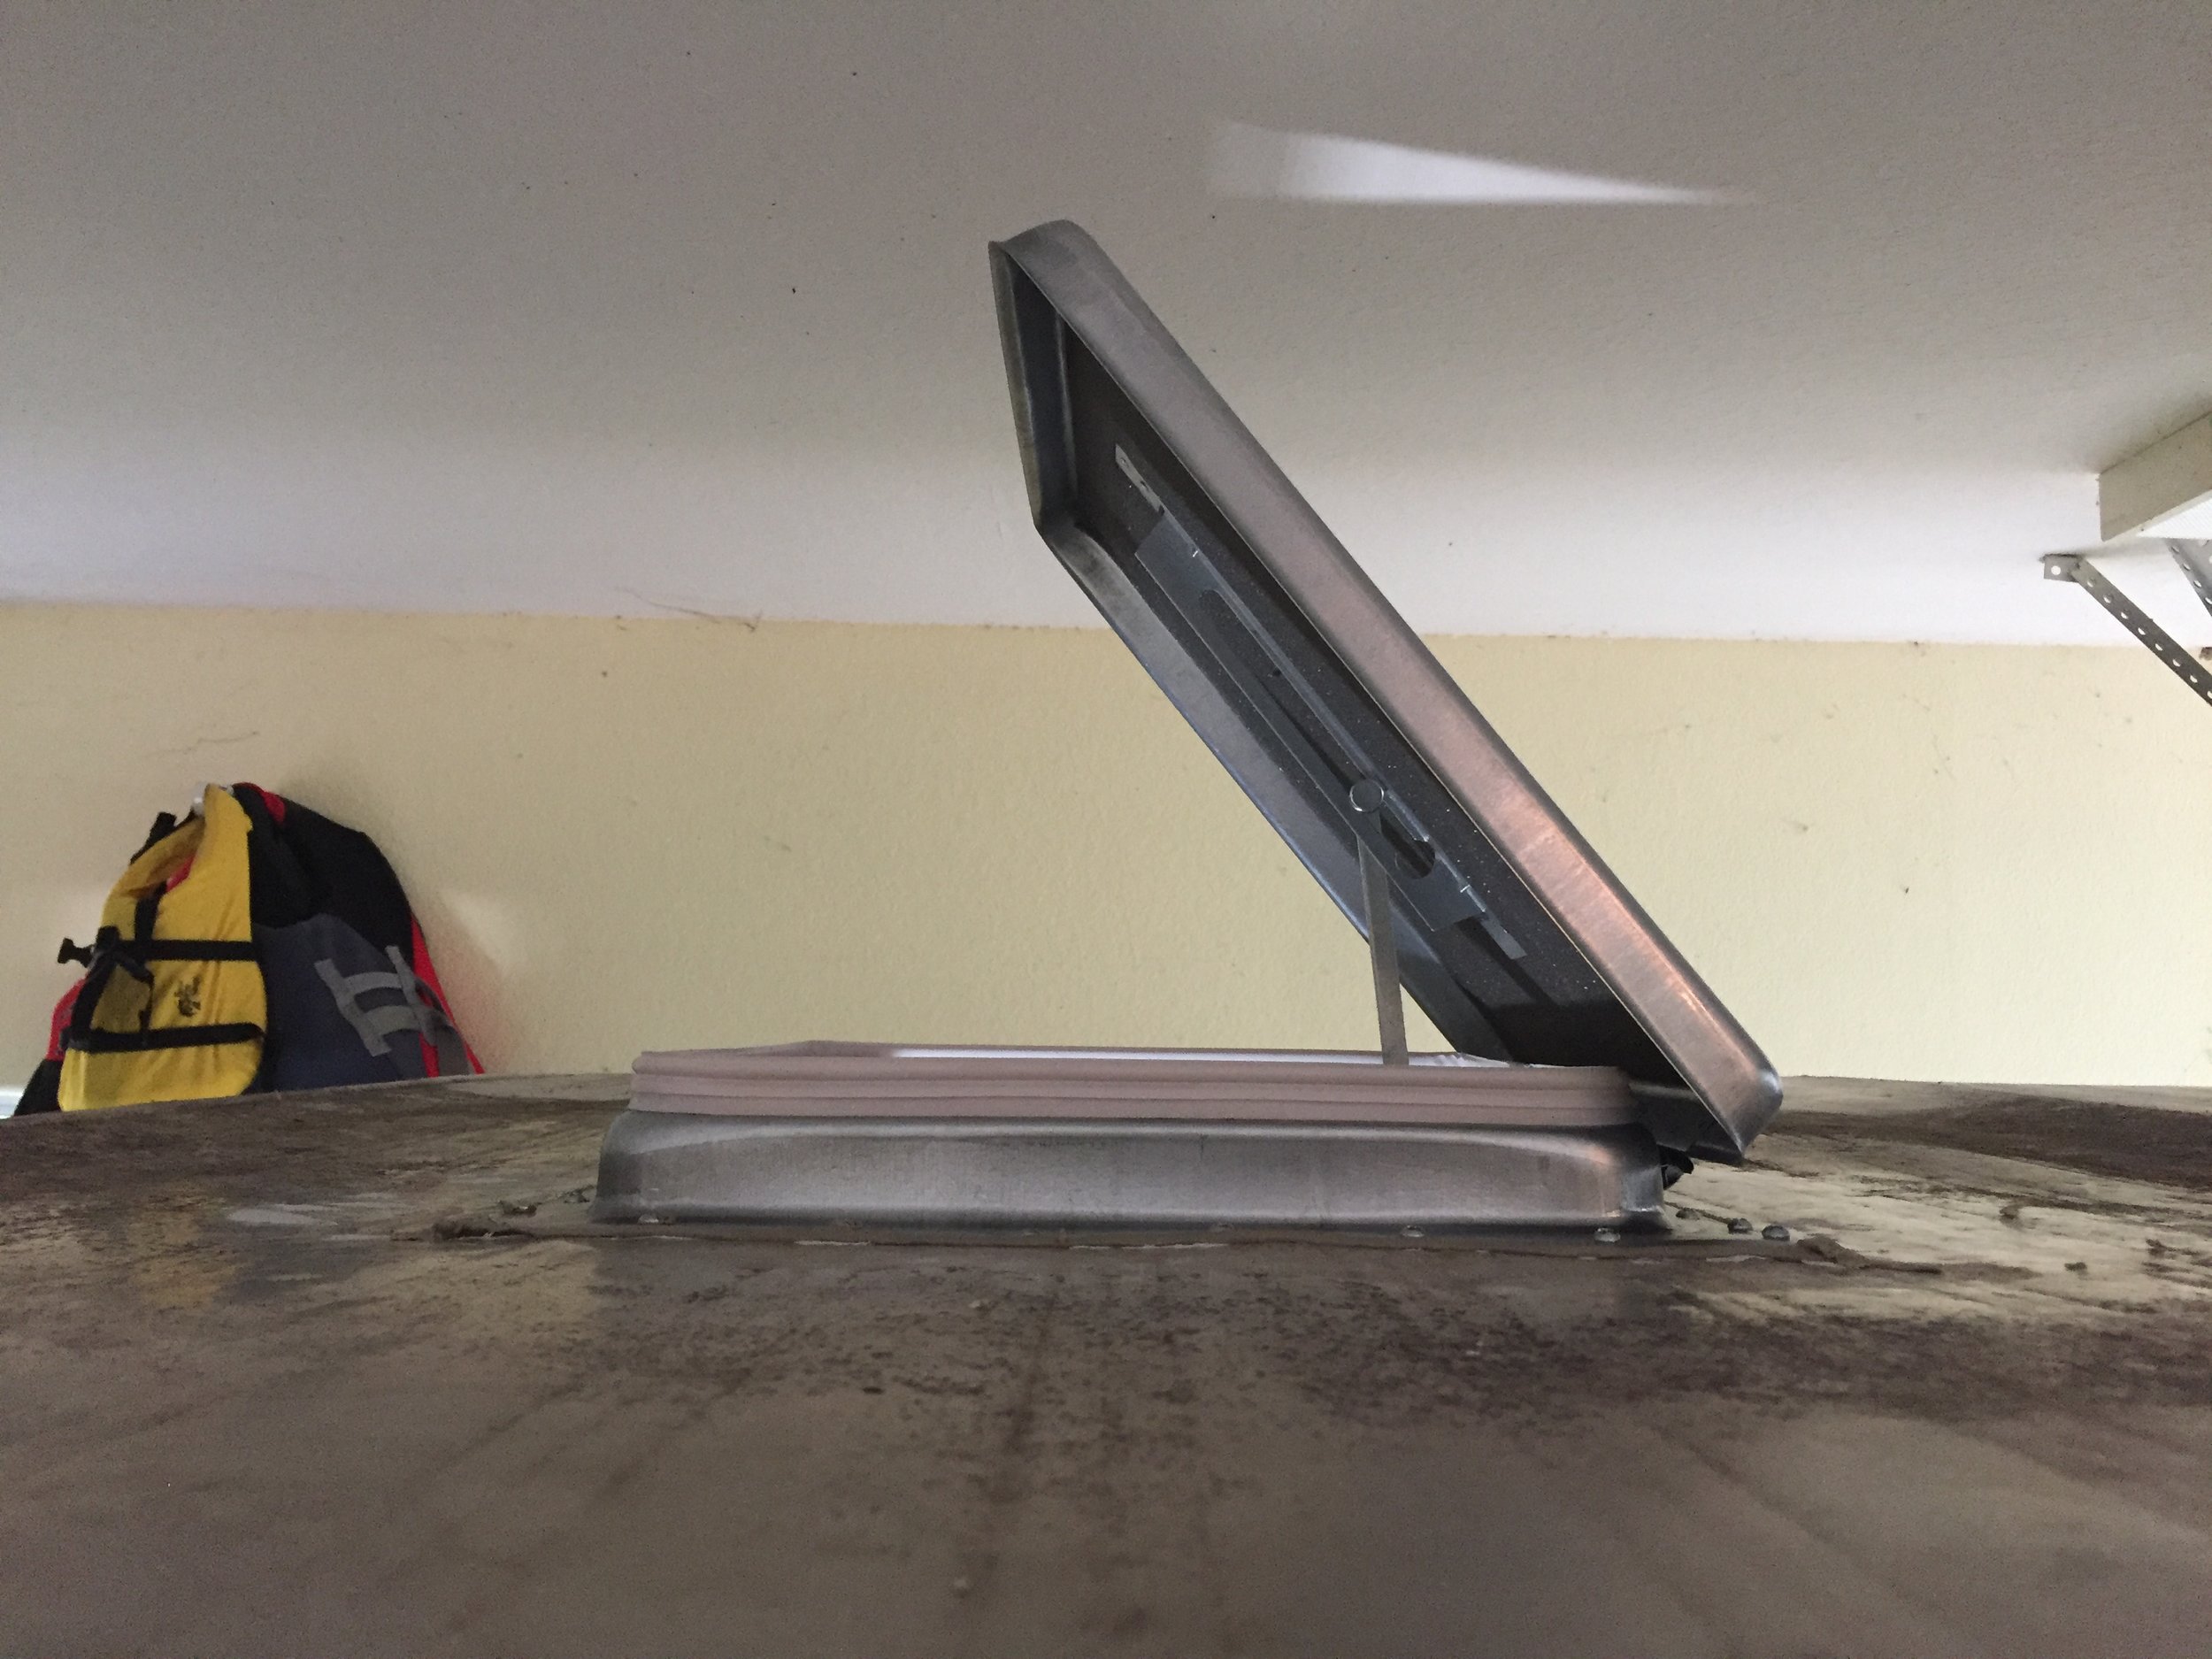
So. Much. Better. And it seems to function great! Fingers crossed it’s waterproof! We still need to scrub more of the mold/algae off of the roof, but we’ll give it all a good scrubbin’ when we get closer to paint.
Well, we survived the vent removal + install without any injury, and more importantly, so did the roof!
We are sooooooo ready to be done with the waterproofing so we can paint it and then move on to the inside. We have so many ideas and I’m more than ready to totally nerd out on some Tetris-style functional space planning! Have you ever messed with any of this nasty roofing tar stuff? I don’t recommend it unless you have to, but my inner OCD came out (as it is want to do) and as grueling as it was, it was a super rewarding process to get it squeaky clean and gives us great peace of mind knowing it’s done right.
And so the waterproofing continues…